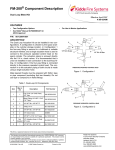
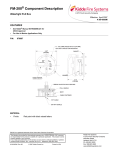
1
P/N 90-FM200M-000 February 2004 FM-200® ECS Series Engineered Fire Suppression Systems Design, Installation, Operation and Maintenance Manual R LISTED UL Listing File No. EX 4674 FM APPROVED FMRC J.I.1Y5A2.AF P/N 90-FM200M-000 February 2004 FM-200® ECS Series Engineered Fire Suppression Systems Design, Installation, Operation and Maintenance Manual THIS PAGE INTENTIONALLY LEFT BLANK. FOREWORD This manual is written for those who are installing an FM-200® ECS Series Engineered Fire Suppression System. IMPORTANT Kidde-Fenwal assumes no responsibility for the application of any systems other than those addressed in this manual. The technical data contained herein is limited strictly for information purposes only. Kidde-Fenwal believes this data to be accurate, but it is published and presented without any guarantee or warranty whatsoever. Kidde-Fenwal disclaims any liability for any use that may be made of the data and information contained herein by any and all other parties. Kidde FM-200 Fire Suppression Systems are to be designed, installed, inspected, maintained, tested and recharged by qualified, trained personnel in accordance with the following: Standard of the National Fire Protection Association No. 2001, titled Clean Agent Fire Extinguishing Systems. All instructions, limitations, etc. contained in this manual, P/N 90-FM200M-000. All information contained on the system container nameplate(s). Storage, handling, transportation, service, maintenance, recharge, and test of agent storage containers shall be performed only by qualified and trained personnel in accordance with the information in this manual and Compressed Gas Association pamphlets C-1, C-6 and P-1: C-1, Methods for Hydrostatic Testing of Compressed Gas Cylinders. C-6, Standards for Visual Inspection of Compressed Gas Cylinders. P-1, Safe Handling of Compressed Gases In Containers. CGA pamphlets are published by the Compressed Gas Association, Crystal Square Two, 1725 Jefferson Davis Highway, Arlington, VA 22202-4102. The new design concentration for Class A and C fires applies to systems designed to meet and comply with UL 2166 and NFPA 2001 guidelines. As such, our Customers are reminded and advised: 1 The applicable best practice that these systems use automatic actuation; Designers should also take note of clause 2-3.5.6.1 in NFPA 20011 with regard to time delays; The designer should also take note of A.3-4.2.4 in NFPA 2001 and confirm that the hazard protected does not include any identifiable fire accelerants2, which would classify the area as a Class B hazard; In addition, the designer should refer to section A.3-6 in NFPA 2001 and confirm that the area does not include a material number of power or energized cables3 in close proximity that would predicate the usage of a different design concentration. Please contact applications engineering for design guidance in this instance. Clause 2-3.5.6.1 in NFPA 2001, 2000 edition states: For clean agent extinguishing systems, a pre-discharge alarm and time delay, sufficient to allow personnel evacuation prior to discharge, shall be provided. For hazard areas subject to fast growth fires, where the provision of a time delay would seriously increase the threat to life and property, a time delay shall be permitted to be eliminated. 2 A.3-4.2.4 in NFPA 2001, 2000 edition states Hazards containing both Class A and Class B fuels should be evaluated on the basis of the fuel requiring the highest design concentration. 3 A.3.6 in NFPA 2001, 2000 edition states in part ...Energized electrical equipment that could provide a prolonged ignition source shall be de-energized prior to or during agent discharge. If electrical equipment cannot be de-energized, consideration should be given to the use of extended agent discharge, higher initial concentration, and the possibility of formation of combustion and decomposition products. Additional testing can be needed on suppression of energized electrical equipment fires to determine these quantities... Any questions concerning the information presented in this manual should be addressed to: Kidde-Fenwal Inc. 400 Main Street Ashland, MA 01721 Phone: (508) 881-2000 Fax: (508) 881-8920 i THIS PAGE INTENTIONALLY LEFT BLANK. ii TABLE OF CONTENTS Foreword .......................................................................................................................................................................... i List of Illustrations ............................................................................................................................................................ vii List of Tables .................................................................................................................................................................... ix List of Appendices ............................................................................................................................................................ x Safety Summary ............................................................................................................................................................... xi PARAGRAPH TITLE PAGE 1 1-1 1-2 1-2.1 1-2.1.1 1-2.2 1-2.2.1 1-2.2.2 1-2.2.3 1-2.2.4 1-2.2.5 GENERAL INFORMATION ........................................................................................................................ 1-1 Introduction ................................................................................................................................................. 1-1 System Description ..................................................................................................................................... 1-1 General ....................................................................................................................................................... 1-1 Operating Temperature Range Limitations ................................................................................................ 1-2 Extinguishing Agent .................................................................................................................................... 1-2 Toxicity ........................................................................................................................................................ 1-2 Decomposition ............................................................................................................................................ 1-2 Cleanliness ................................................................................................................................................. 1-2 Other Safety Considerations ...................................................................................................................... 1-2 Storage ........................................................................................................................................................ 1-2 2 2-1 2-2 2-2.1 2-2.2 2-2.2.1 2-2.2.2 2-2.2.3 2-2.3 2-2.4 2-2.5 2-2.5.1 2-2.5.2 OPERATION ............................................................................................................................................... 2-1 Introduction ................................................................................................................................................. 2-1 System Controls and Indicators ................................................................................................................. 2-1 General ....................................................................................................................................................... 2-1 Operating Procedures ................................................................................................................................ 2-1 Automatic Operation ................................................................................................................................... 2-1 Remote Manual Operation ......................................................................................................................... 2-1 Local Manual Operation ............................................................................................................................. 2-1 Post-Fire Operation .................................................................................................................................... 2-1 Cylinder Recharge ...................................................................................................................................... 2-1 Special System Precautions ....................................................................................................................... 2-2 Systems Actuated with a Master FM-200 Cylinder .................................................................................... 2-2 Systems Actuated with a Pilot Nitrogen Cylinder ....................................................................................... 2-2 3 3-1 3-1.1 3-2 3-3 3-3.1 3-3.2 3-3.3 3-3.4 3-3.4.1 3-3.4.2 FUNCTIONAL DESIGN .............................................................................................................................. 3-1 Introduction ................................................................................................................................................. 3-1 3" Cylinder Valve ........................................................................................................................................ 3-1 Functional Description ................................................................................................................................ 3-1 Component Descriptions ............................................................................................................................ 3-2 FM-200 Cylinder/Valve Assemblies ............................................................................................................ 3-2 Liquid Level Indicator ................................................................................................................................. 3-5 Cylinder Mounting Equipment .................................................................................................................... 3-6 Control Heads ............................................................................................................................................. 3-7 Electric Control Heads, P/N 890181, P/N 890149 and P/N 890165 ......................................................... 3-7 Electric/Cable Operated Control Heads, P/N 895630, P/N 895627, P/N 897494, P/N 897560 and P/N 897628 ..................................................................................................................... 3-8 Cable Operated Control Head, P/N 979469 .............................................................................................. 3-9 Lever Operated Control Head, P/N 870652 ............................................................................................... 3-9 Lever/Pressure Operated Control Head, P/N 878751 ............................................................................... 3-9 Pressure Operated Control Head, P/N 878737 and P/N 878750 ............................................................. 3-9 Remote Pull Stations .................................................................................................................................. 3-10 Electric Remote Pull Box, P/N 893607 and P/N 893608 ........................................................................... 3-10 Cable Manual Pull Station, Surface, P/N 871403 ...................................................................................... 3-10 Actuation Accessories ................................................................................................................................ 3-10 Nitrogen Actuator, Mounting Bracket and Adapter, P/N 877940, P/N 877845 and P/N 69920501 Respectively ................................................................................................................ 3-10 Flexible Actuation Hose, P/N 264986 and P/N 264987 ............................................................................. 3-11 Master Cylinder Adapter Kit, P/N 844895 .................................................................................................. 3-11 Tees, Elbows and Adapters ........................................................................................................................ 3-11 3-3.4.3 3-3.4.4 3-3.4.5 3-3.4.6 3-3.5 3-3.5.1 3-3.5.2 3-3.6 3-3.6.1 3-3.6.2 3-3.6.3 3-3.6.4 iii TABLE OF CONTENTS (cont.) PARAGRAPH TITLE PAGE 3-3.7 3-3.7.1 3-3.7.2 3-3.7.3 3-3.7.4 3-3.7.5 3-3.7.6 3-3.7.7 3-3.7.8 3-3.7.9 3-3.7.10 3-3.7.11 3-3.7.12 3-3.8 3-3.8.1 3-3.8.2 3-3.8.3 3-3.9 3-3.9.1 3-3.9.2 Discharge Accessories ............................................................................................................................... 3-11 Flexible Discharge Hose, P/N 283898, P/N 283899 and P/N 283900 ...................................................... 3-11 Valve Outlet Adapters, P/N 283904, P/N 283905 and P/N 283906 .......................................................... 3-12 Check Valve, 1/4-inch, P/N 264985 ........................................................................................................... 3-12 Manifold EL-Checks, P/N 877690 and P/N 878743 .................................................................................. 3-12 Pressure Operated Switches, P/N 486536 and P/N 981332 .................................................................... 3-13 Pressure Operated Trip, P/N 874290 ......................................................................................................... 3-13 Discharge Indicator, P/N 875553 ............................................................................................................... 3-13 Corner Pulleys, P/N 803808 and P/N 844648 ........................................................................................... 3-13 Cylinder Supervisory Pressure Switch, P/N 06-118262-001 ..................................................................... 3-15 Supervisory Pressure Switch, P/N 06-118263-001 ................................................................................... 3-15 Main-to-Reserve Transfer Switch, P/N 802398 ......................................................................................... 3-16 Discharge Nozzles ...................................................................................................................................... 3-16 Other Accessories ...................................................................................................................................... 3-17 Hydrostatic Test Adapters ........................................................................................................................... 3-17 FM-200 Cylinder Recharge Adapters ......................................................................................................... 3-17 FM-200 Cylinder Seating Adapter, P/N 933537 ......................................................................................... 3-17 Detectors and Control Panels .................................................................................................................... 3-17 Detectors ..................................................................................................................................................... 3-17 Control Panel .............................................................................................................................................. 3-17 4 4-1 4-2 4-2.1 4-2.2 4-2.2.1 4-2.2.2 4-2.2.3 4-2.2.4 4-2.2.5 4-2.2.6 4-2.2.7 4-2.2.8 4-2.3 4-2.3.1 4-2.3.2 4-2.3.2.1 4-2.3.3 4-2.3.4 4-2.3.5 4-2.3.6 4-2.4 4-2.4.1 4-2.4.2 4-2.4.3 4-2.5 4-2.5.1 4-2.5.2 4-2.5.3 4-2.5.4 4-2.5.5 4-2.5.6 4-2.5.7 4-3 4-3.1 4-3.2 4-3.2.1 4-3.2.2 4-3.2.2.1 DESIGN AND INSTALLATION ................................................................................................................... 4-1 Introduction ................................................................................................................................................. 4-1 Design Procedure ....................................................................................................................................... 4-1 General ....................................................................................................................................................... 4-1 Application .................................................................................................................................................. 4-1 Calculate Agent Required ........................................................................................................................... 4-1 Determine What Components are Required ............................................................................................. 4-1 Locate Nozzles ........................................................................................................................................... 4-1 Locate Cylinders ......................................................................................................................................... 4-1 Locate Piping .............................................................................................................................................. 4-1 Pipe Size and Layout .................................................................................................................................. 4-1 Using the FM-200 Concentration Flooding Factors ................................................................................... 4-2 Manifolds ..................................................................................................................................................... 4-2 Design Criteria ............................................................................................................................................ 4-2 First Branch Flow Split ................................................................................................................................ 4-6 Tee Flow Splits ............................................................................................................................................ 4-6 Requirements for Tee Flow Splits ............................................................................................................... 4-6 Duration of Discharge ................................................................................................................................. 4-8 Nozzle Selection and Placement ............................................................................................................... 4-8 Nozzle Placement ....................................................................................................................................... 4-8 Pipe Sizing .................................................................................................................................................. 4-9 Other Conditions ......................................................................................................................................... 4-10 Operating/Storage Temperature Range ..................................................................................................... 4-10 Storage Temperature .................................................................................................................................. 4-10 System Operating Pressure ....................................................................................................................... 4-10 Pressure Actuation Limitations ................................................................................................................... 4-10 Cylinders Close Coupled Using Pressure From A Master ......................................................................... 4-10 Cylinders Not Close Coupled Using Pressure From A Master .................................................................. 4-10 Cylinders Not Close Coupled Using Nitrogen Pressure ............................................................................ 4-10 Cylinders Close Coupled Using Nitrogen Pressure ................................................................................... 4-12 Using Multiple Nitrogen Cylinders .............................................................................................................. 4-13 Corner Pulley and Cable Limitations .......................................................................................................... 4-13 Pressure Trip Limitations ............................................................................................................................ 4-13 Equipment Installation ................................................................................................................................ 4-13 General ....................................................................................................................................................... 4-13 Distribution Piping and Fittings .................................................................................................................. 4-13 Threads ....................................................................................................................................................... 4-13 Pipe ............................................................................................................................................................. 4-13 Ferrous Piping ............................................................................................................................................ 4-14 iv TABLE OF CONTENTS (cont.) PARAGRAPH TITLE PAGE 4-3.2.2.2 4-3.2.2.3 4-3.3 4-3.4 4-3.5 4-3.6 4-3.7 4-3.8 4-3.9 4-3.10 4-3.10.1 4-3.10.2 4-3.10.3 4-3.11 4-3.12 4-3.13 4-3.14 4-3.15 4-3.16 4-3.17 4-3.18 4-3.19 4-3.20 4-3.21 4-3.21.1 4-3.21.2 4-3.22 Piping Joints ............................................................................................................................................... 4-14 Fittings ........................................................................................................................................................ 4-14 Installation of Pipe and Fittings .................................................................................................................. 4-14 Installation of Check Valves ....................................................................................................................... 4-14 Installation of Discharge Nozzles ............................................................................................................... 4-14 Installation of Pressure Actuation Pipe ...................................................................................................... 4-15 Installation of Valve Outlet Adapter ............................................................................................................ 4-15 Installation of Flexible Discharge Hose ...................................................................................................... 4-15 Installation of Master Cylinder Adapter Kit, P/N 844895 ........................................................................... 4-16 Installation of FM-200 Cylinder/Valve Assemblies ..................................................................................... 4-16 Single Cylinder Systems ............................................................................................................................ 4-16 Multiple Cylinder System ............................................................................................................................ 4-18 Main and Reserve System ......................................................................................................................... 4-19 Installation of Electric Control Heads ......................................................................................................... 4-19 Installation of Pressure Operated Control Heads, P/N 878737 ................................................................ 4-20 Installation of Electric/Cable Operated Control Head, P/Ns 895630, 895627 and 895628 ...................... 4-20 Installation of Cable Operated Control Head, P/N 979469 ....................................................................... 4-21 Installation of Lever Operated Control Head, P/N 870652 ........................................................................ 4-21 Installation of Nitrogen Cylinder, P/N 877940, and Mounting Bracket, P/N 877845 ................................. 4-21 Installation of Pressure Switch, P/N 486536 and P/N 981332 .................................................................. 4-21 Installation of Pressure Trip, P/N 874290 .................................................................................................. 4-22 Installation of Manual Pull Station, P/N 871403 ......................................................................................... 4-22 Installation of Discharge Indicator, P/N 875553 ........................................................................................ 4-22 Installation of Supervisory Pressure Switch, P/Ns 06-118262-001 and 06-118263-001 .......................... 4-22 Installation of Pressure Switch 06-118262-001 ......................................................................................... 4-23 Installation of Pressure Switch 06-118263-001 ......................................................................................... 4-23 Post-Installation Checkout ......................................................................................................................... 4-23 5 5-1 5-2 5-2.1 5-3 5-4 5-4.1 5-4.1.1 5-4.1.2 5-4.2 5-4.2.1 5-4.2.2 5-4.2.3 5-4.2.4 5-4.2.5 5-4.2.6 5-4.2.7 5-4.2.8 5-4.2.9 5-4.2.10 5-4.2.11 5-4.2.12 5-4.2.13 5-4.2.14 5-4.3 5-4.3.1 5-4.3.2 5-4.4 5-5 5-5.1 5-5.2 5-5.3 MAINTENANCE .......................................................................................................................................... 5-1 Introduction ................................................................................................................................................. 5-1 Maintenance Procedures ........................................................................................................................... 5-1 General ....................................................................................................................................................... 5-1 Preventive Maintenance ............................................................................................................................. 5-1 Inspection Procedures ................................................................................................................................ 5-1 Daily ............................................................................................................................................................ 5-1 Check FM-200 Cylinder Pressure .............................................................................................................. 5-1 Check Nitrogen Cylinder Pressure ............................................................................................................. 5-1 Monthly ........................................................................................................................................................ 5-2 General Inspection ..................................................................................................................................... 5-2 Hazard Access ............................................................................................................................................ 5-2 Inspect Hoses ............................................................................................................................................. 5-2 Inspect Pressure Control Heads ................................................................................................................ 5-2 Inspect Electric Control Heads ................................................................................................................... 5-2 Inspect Cylinder and Valve Assembly ........................................................................................................ 5-2 Inspect Brackets, Straps, Cradles and Mounting Hardware ...................................................................... 5-2 Inspect Discharge Hoses ........................................................................................................................... 5-2 Inspect Actuation Line ................................................................................................................................ 5-2 Inspect Discharge Nozzles ......................................................................................................................... 5-2 Inspect Pull Stations ................................................................................................................................... 5-2 Inspect Pressure Switches ......................................................................................................................... 5-2 Weighing FM-200 Cylinders ....................................................................................................................... 5-3 Cylinders Equipped with a Flexible Tape Liquid Level Indicator ............................................................... 5-3 Inspection Procedures, Semi-Annual ........................................................................................................ 5-6 Pressure Switch Test .................................................................................................................................. 5-6 Electric Control Head Test .......................................................................................................................... 5-6 Inspection Procedures-2 Year .................................................................................................................... 5-6 Inspection and Retest Procedures for FM-200 Cylinders ......................................................................... 5-6 Cylinders Continuously in Service Without Discharge .............................................................................. 5-7 Discharged Cylinders of Charged Cylinders that are Transported ........................................................... 5-7 Retest .......................................................................................................................................................... 5-7 v TABLE OF CONTENTS (cont.) PARAGRAPH TITLE PAGE 5-5.4 5-6 5-6.1 5-6.2 5-6.3 5-7 5-7.1 5-7.2 5-8 5-8.1 5-8.2 Flexible Hoses ............................................................................................................................................ 5-7 Service ........................................................................................................................................................ 5-7 Cleaning ...................................................................................................................................................... 5-7 Nozzle Service ............................................................................................................................................ 5-7 Repairs ........................................................................................................................................................ 5-7 Removing an FM-200 Cylinder ................................................................................................................... 5-7 Single Cylinder System .............................................................................................................................. 5-8 Multiple Cylinder System ............................................................................................................................ 5-8 Reinstalling an FM-200 Cylinder ................................................................................................................ 5-8 Single Cylinder System .............................................................................................................................. 5-8 Multiple Cylinder System ............................................................................................................................ 5-9 6 6-1 6-2 6-2.1 6-2.2 6-2.3 6-2.4 6-2.5 6-2.6 6-2.7 6-3 6-3.1 6-3.2 6-3.3 6-3.4 6-4 6-4.1 6-4.2 6-4.3 6-4.4 POST-DISCHARGE MAINTENANCE ........................................................................................................ 6-1 Introduction ................................................................................................................................................. 6-1 Post Fire Maintenance ................................................................................................................................ 6-1 FM-200 Valve Inspection and Service ....................................................................................................... 6-1 Valve Disassembly (1½", 2" and 2½") ........................................................................................................ 6-1 Valve Disassembly (3") ............................................................................................................................... 6-2 Valve Assembly (1½", 2", and 2½") ............................................................................................................ 6-2 Valve Assembly (3") .................................................................................................................................... 6-3 Safety Disc Replacement (1½", 2" and 2½") ............................................................................................. 6-3 Safety Disc Replacement (3") .................................................................................................................... 6-4 Recharging FM-200 Cylinders .................................................................................................................... 6-4 Charging Equipment Installation ................................................................................................................ 6-4 Charging FM-200 Cylinder and Valve Assembly ....................................................................................... 6-5 FM-200 Cylinder Leak Test ......................................................................................................................... 6-8 Salvaging FM-200 from a Leaking Cylinder Assembly .............................................................................. 6-9 Nitrogen Pilot Cylinder Service and Maintenance ..................................................................................... 6-9 Nitrogen Pilot Cylinder Hydrostatic Pressure Test ..................................................................................... 6-9 Nitrogen Cylinder Replacement ................................................................................................................. 6-9 Nitrogen Cylinder Recharge ....................................................................................................................... 6-10 Nitrogen Cylinder Installation ..................................................................................................................... 6-10 7 7-1 7-2 7-2.1 7-2.2 7-3 PARTS LIST ............................................................................................................................................... 7-1 Introduction and Parts List ......................................................................................................................... 7-1 Discharge Nozzles ...................................................................................................................................... 7-5 Listed 360 Degree Nozzles ........................................................................................................................ 7-5 Listed 180 Degree Nozzles ........................................................................................................................ 7-7 Limited Warranty Statement ....................................................................................................................... 7-9 vi LIST OF ILLUSTRATIONS FIGURE TITLE PAGE 1-1 FM-200 Pressure/Temperature Curve Isometric Diagram ......................................................................... 1-3 3-1 3-2 3-3 3-4 3-5 3-6 3-7 3-8 3-9 3-10 3-11 3-12 3-13 3-14 3-15 3-16 3-17 3-18 3-19 3-20 3-21 3-22 3-23 3-24 3-25 3-26 3-27 3-28 3-29 3-30 3-31 3-32 3-33 3-34 3-35 3-36 3-37 3-38 Typical FM-200 System with Electric Control Head ................................................................................... 3-1 Typical FM-200 System with Cable Operated Control Head ..................................................................... 3-2 Typical Cylinder Assembly, 10 to 70 lb. ..................................................................................................... 3-2 Typical Cylinder Assembly, 100 to 350 lb. ................................................................................................. 3-2 600 and 900 lb. Cylinder with 3" Valve ...................................................................................................... 3-3 1½", 2" and 2½" Valve General Arrangement ............................................................................................ 3-5 3" Valve General Arrangement ................................................................................................................... 3-5 Liquid Level Indicator ................................................................................................................................. 3-5 Cylinder Mounting Straps ........................................................................................................................... 3-6 Cylinder Wall Brackets ............................................................................................................................... 3-7 Electric Control Head ................................................................................................................................. 3-7 Electric Control Head, Stackable ............................................................................................................... 3-8 Electric/Cable Operated Control Head ...................................................................................................... 3-8 Cable Operated Control Head .................................................................................................................... 3-9 Lever Operated Control Head .................................................................................................................... 3-9 Lever/Pressure Operated Control Head .................................................................................................... 3-9 Pressure Operated Control Head ............................................................................................................... 3-9 Stackable Pressure Operated Control Head .............................................................................................. 3-10 Cable Manual Pull Station .......................................................................................................................... 3-10 Nitrogen Actuator, Mounting Bracket and Adapter ..................................................................................... 3-10 Flexible Actuation Hose .............................................................................................................................. 3-11 Master Cylinder Adapter Kit ........................................................................................................................ 3-11 Tees, Elbows and Adapters ........................................................................................................................ 3-11 Flexible Discharge Hoses ........................................................................................................................... 3-11 Valve Outlet Adapter ................................................................................................................................... 3-12 Check Valve ................................................................................................................................................ 3-12 Manifold El-Checks ..................................................................................................................................... 3-12 Discharge Indicator ..................................................................................................................................... 3-13 Corner Pulleys, Watertight Applications .................................................................................................... 3-13 1/2-Inch E.M.T. Corner Pulley, General Applications ................................................................................. 3-13 Pressure Operated Switch ......................................................................................................................... 3-14 Pressure Operated Switch, Explosion Proof .............................................................................................. 3-14 Cylinder Supervisory Pressure Switch ....................................................................................................... 3-15 Supervisory Pressure Switch ..................................................................................................................... 3-15 Main to Reserve Transfer Switch ............................................................................................................... 3-16 180° Discharge Nozzle ............................................................................................................................... 3-16 360° Discharge Nozzle ............................................................................................................................... 3-16 Cylinder Recharge Adapters ...................................................................................................................... 3-17 4-1 4-3 4-4 4-5 Percent Agent Before First Tee as a Function of Percent Agent in Pipe ................................................... 4-6 Nozzle Placement and Coverage ............................................................................................................... 4-8 Nozzle Limitations ...................................................................................................................................... 4-9 Pressure Actuation Using Pressure from 1 Master FM-200 Cylinder to Actuate a Maximum of 15 FM-200 Cylinders Close Coupled ................................................................................. 4-11 Pressure Actuation Using Pressure from 1 Master FM-200 Cylinder to Actuate a Maximum of 4 FM-200 Cylinders NOT Close Coupled ........................................................................... 4-11 Pressure Actuation Using Pressure from 1 Nitrogen Pilot Cylinder to Actuate a Maximum of 15 FM-200 Cylinders NOT Closed Coupled ...................................................................... 4-11 Pressure Actuation Using Pressure from 1 Nitrogen Pilot Cylinder to Actuate a Maximum of 15 FM-200 Cylinders Close Coupled ................................................................................. 4-12 Multiple Pilot Nitrogen Actuation Cylinders ................................................................................................ 4-13 Installation of the Flexible Hose Directly Into System Piping .................................................................... 4-15 Installation of Master Cylinder Adapter Kit ................................................................................................. 4-16 Single Cylinder Installation, Vertical Mounting ........................................................................................... 4-17 Multiple Cylinder Installation, Vertical Mounting ........................................................................................ 4-18 4-6 4-7 4-8 4-9 4-10 4-11 4-12 4-13 vii LIST OF ILLUSTRATIONS (cont.) FIGURE TITLE PAGE 4-14 4-15 4-16 4-17 4-18 4-19 4-20 Installation of Electric Control Head (Stackable Type), P/N 486500-01 ................................................... 4-19 Electrical Connections for Control Head, P/Ns 890181, 895630 and 890149 .......................................... 4-19 Pressure Operated Control Head ............................................................................................................... 4-20 Electric/Cable Operated Control Head ...................................................................................................... 4-20 Installation of Supervisory Pressure Switch (Up to 2½" Valve) ................................................................. 4-22 Supervisory Pressure SwitchElectrical Connections ................................................................................. 4-22 Supervisory Pressure Switch Connection Diagram and Electrical Rating ................................................ 4-23 5-1 5-2 5-3 5-4 5-5 5-6 5-7 Liquid Level Indicator ................................................................................................................................. 5-3 Calibration Chart 125 lb. Cylinder .............................................................................................................. 5-4 Calibration Chart for Old 200 lb. Cylinder .................................................................................................. 5-4 Calibration Chart for a New 200 lb. Cylinder (New Design Ellipsoidal Head Manufactured After 3/98) .. 5-4 Calibration Chart for 350 lb. Cylinder ......................................................................................................... 5-4 Calibration Chart for 600 lb. Cylinder ......................................................................................................... 5-5 Calibration Chart for 900 lb. Cylinder ......................................................................................................... 5-5 6-1 6-2 6-3 6-4 6-5 6-6 6-7 Valve Assembly (1½", 2" and 2½") ............................................................................................................. 6-1 Piston O-Ring ............................................................................................................................................. 6-1 3" Valve Assembly ...................................................................................................................................... 6-2 Safety Disc Replacement ........................................................................................................................... 6-3 Burst Disc .................................................................................................................................................... 6-4 Typical FM-200 Charging System Schematic ............................................................................................ 6-6 Nitrogen Temperature vs. Pressure Data ................................................................................................... 6-10 viii LIST OF TABLES TABLE TITLE PAGE 1-1 1-2 FM-200 Physical Properties, Imperial Units ............................................................................................... 1-3 FM-200 Physical Properties, Metric Units .................................................................................................. 1-3 3-1 3-2 3-3 3-4 3-5 3-6 3-7 3-8 3-9 3-10 3-11 3-12 3-13 3-14 3-15 3-16 3-17 3-18 3-19 Container Temperature-Pressure Correlation ............................................................................................ 3-3 Cylinder, Equivalent Lengths ...................................................................................................................... 3-3 Dimensions, FM-200 Cylinder/Valve Assemblies for Vertical Installation Only ......................................... 3-4 Fill Range FM-200 Cylinder/Valve Assemblies for Vertical Installation Only ............................................ 3-4 Liquid Level Indicator Part Numbers .......................................................................................................... 3-5 DimensionsCylinder Mounting Straps ...................................................................................................... 3-6 DimensionsCylinder Mounting Straps, Metric .......................................................................................... 3-6 DimensionsCylinder Wall Brackets .......................................................................................................... 3-7 DimensionsCylinder Wall Brackets, Metric .............................................................................................. 3-7 Electric Control Head, Stackable (Explosion Proof) .................................................................................. 3-8 Electric/Cable Operated Control Heads ..................................................................................................... 3-8 Dimensions, Flexible Actuation Hose ......................................................................................................... 3-11 Dimensions, Flexible Discharge Hoses ..................................................................................................... 3-11 Dimensions, Valve Outlet Adapter .............................................................................................................. 3-12 Dimensions, Manifold El-Checks ............................................................................................................... 3-12 Check Valves, Equivalent Lengths ............................................................................................................. 3-13 Dimensions180° Discharge Nozzle .......................................................................................................... 3-16 Dimensions360° Discharge Nozzle .......................................................................................................... 3-16 DimensionsCylinder Recharge Adapters ................................................................................................. 3-17 4-1 4-2 4-3 4-4 4-5 4-6 4-7 4-8 4-9 4-10 4-11 4-12 4-13 4-14 Atmospheric Correction Factors ................................................................................................................ 4-2 Class B Suppression Design Concentrations ............................................................................................ 4-3 FM-200 Total Flooding Concentration Factors (W/V), English Units ........................................................ 4-4 FM-200 Total Flooding Concentration Factors (W/V), Metric .................................................................... 4-5 15 Pipe Diameters ...................................................................................................................................... 4-6 Kidde Pipe Size Estimating Table .............................................................................................................. 4-9 Corner Pulley and Cable Limitations .......................................................................................................... 4-13 Installation of the Flexible Hose Directly into System Piping, Inches ....................................................... 4-15 Installation of the Flexible Hose Directly into System Piping, Millimeters ................................................. 4-15 Single Cylinder Installation Dimensions, Inches ........................................................................................ 4-17 Single Cylinder Installation Dimensions, Millimeters ................................................................................. 4-17 Strap Part Numbers for Cylinder Installation ............................................................................................. 4-17 Multiple Cylinder Installation Dimensions, Inches ..................................................................................... 4-18 Multiple Cylinder Installation Dimensions, Millimeters .............................................................................. 4-18 5-1 5-2 Preventive Maintenance Schedule ............................................................................................................. 5-1 Retest Schedule ......................................................................................................................................... 5-7 6-1 6-2 6-3 6-4 6-5 6-6 6-7 6-8 Valve Components ...................................................................................................................................... 6-1 Other Valve Component Materials ............................................................................................................. 6-2 3" Valve Components ................................................................................................................................. 6-2 Safety Disc Replacement (1½", 2" and 2½") ............................................................................................. 6-3 Safety Disc Replacement (3") .................................................................................................................... 6-4 Typical FM-200 Charging System Schematic ............................................................................................ 6-6 Pressure vs. Temperature .......................................................................................................................... 6-7 Maximum Permitted Leakage Rates .......................................................................................................... 6-8 7-1 Parts List ..................................................................................................................................................... 7-1 ix LIST OF APPENDICES APPENDIX A TITLE PAGE Material Safety Datasheets ........................................................................................................................ A-1 x SAFETY SUMMARY FM-200 fire suppression systems use pressurized equipment; therefore, personnel responsible for fire suppression systems must be aware of the dangers associated with the improper handling, installation or maintenance of this equipment. Fire suppression system service personnel must be thoroughly trained in the proper handling, installation and service of FM-200 equipment and follow the instructions used in this manual and in the Safety Bulletin, on the cylinder nameplate and contained in Appendix A. Kidde has provided warnings and cautions at appropriate locations throughout the text of this manual. These warnings and cautions are to be adhered to at all times. Failure to do so may result in serious injury to personnel. In addition, Material Safety Data Sheets for FM-200 and nitrogen are provided. Personnel must also be familiar with the information contained on these data sheets. SAFETY BULLETIN 1, MARCH 2, 1987 SUBJECT: SAFE CYLINDER HANDLING PROCEDURES ! WARNING Pressurized (charged) cylinders are extremely hazardous and if not handled properly are capable of violent discharge. This may result in serious bodily injury, death and property damage. Before handling Kidde system products, all personnel must be thoroughly trained in the safe handling of the containers as well as in the proper procedures for installation, removal, filling, and connection of other critical devices, such as flex hoses, control heads, discharge heads, and anti-recoil devices. READ, UNDERSTAND and ALWAYS FOLLOW the operation and maintenance manuals, owners manuals, service manuals, etc., that are provided with the individual systems. The following safety procedures must be observed at all times: Moving Container: Containers must be shipped compactly in the upright position, and properly secured in place. Containers must not be rolled, dragged or slid, nor allowed to be slid from tailgates of vehicles. A suitable hand truck, fork truck, roll platform or similar device must be used. Rough Handling: Containers must not be dropped or permitted to strike violently against each other or other surfaces. Storage: Containers must be stored standing upright where they are not likely to be knocked over, or the containers must be secured. For additional information on safe handling of compressed gas cylinders, see CGA Pamphlet PI titled Safe Handling of Compressed Gases in Containers. CGA pamphlets may be purchased from The Compressed Gas Association, Crystal Square Two, 1725 Jefferson Davis Highway, Arlington, VA 22202. SAFETY BULLETIN, MAY 1, 1993 SUBJECT: SAFE CYLINDER HANDLING PROCEDURES FOR 360 PSI FM-200 CYLINDERS ! WARNING Pressurized (charged) cylinders are extremely hazardous and if not handled properly are capable of violent discharge. This will result in serious bodily injury, death and property damage. BEFORE handling Kidde system products, all personnel must be thoroughly trained in the safe handling of the containers as well as in the proper procedures for installation, removal, filling, and connection of other critical devices, such as flexible hoses, control heads, and safety caps. READ, UNDERSTAND and ALWAYS FOLLOW the operation and maintenance manuals, owners manuals, service manuals, and other information that is provided with the individual systems. THESE INSTRUCTIONS MUST BE FOLLOWED IN THE EXACT SEQUENCE AS WRITTEN TO PREVENT SERIOUS INJURY, DEATH OR PROPERTY DAMAGE. SAFETY CAP a. Each FM-200 cylinder is factory equipped with a safety cap installed on the valve outlet, and securely chained to the valve to prevent loss. This device is a safety feature, and will provide controlled safe discharge when installed if the cylinder is actuated accidentally. xi b. The safety cap must be installed in the valve outlet AT ALL TIMES except when the cylinders are connected into the system piping or being filled. c. The safety cap is intentionally chained to the cylinder valve to prevent loss while in service and must not be removed from its chain. Protection Cap. A protection cap is factory installed on the actuation port and securely chained to the valve to prevent loss. The cap is attached to the actuation port to prevent tampering or depression of the actuating pin. No attachments (control head, pressure control head) are to be connected to the actuation port during shipment, storage, or handling. INSTALLATION THIS SEQUENCE FOR CYLINDER INSTALLATION MUST BE FOLLOWED AT ALL TIMES: 1. Install cylinder into bracketing. ! WARNING Discharge hoses or valve outlet adapter must be connected into system piping before attaching to cylinder valve outlet to prevent injury in the event of discharge. 2. Remove safety cap and connect all cylinder valves into system piping using flex hose or valve outlet adapter. 3. Remove protection cap and attach control heads, pressure control heads, pilot loops, etc. as required. ! WARNING Control heads must be in the set position before attaching to the cylinder valve actuation port, in order to prevent accidental discharge. REMOVAL FROM SERVICE 1. Remove all control heads, pressure operated heads, and pilot loops from cylinder valve, and attach protection cap to actuation port. 2. Disconnect cylinders from system piping at the valve outlet. Disconnect valve outlet adapter, if used. 3. Immediately install safety cap on valve outlet. ! WARNING Do not disconnect the cylinder from system piping if the safety cap is missing. Obtain a new safety cap from Kidde. 4. Remove cylinder from bracketing. ! WARNING Failure to follow these instructions, and improper use or handling, may cause serious bodily injury, death, and property damage. FM-200® ECS Series Engineered Fire Suppression Systems CHAPTER 1 GENERAL INFORMATION 1-1 INTRODUCTION Kidde FM-200® ECS Series Engineered Fire Suppression Systems are Listed by Underwriters Laboratories, Inc. (UL) and Approved by Factory Mutual (FM). These systems are designed for total flooding in accordance with NFPA 2001 Standard on Clean Agent Fire Extinguishing Systems. These systems have been tested to the limits established jointly by UL and FM. In any situation not specifically covered by this manual, the application and installation of the system must meet the requirements of the standards as stated. In any case, all installations must meet the requirements of the local Authority Having Jurisdiction (AHJ). SYSTEM DESCRIPTION 1-2.1 General Kidde FM-200 systems are used to suppress fires in specific hazards or equipment located where an electrically nonconductive agent is required, where agent cleanup creates a problem, where extinguishing capability with low weight is a factor and where the hazard is normally occupied by personnel. Kidde FM-200 systems are intended to protect the following: The complexity of two-phase flow does not allow for any simple method of manual FM-200 calculation. For this reason, the flow calculations and design criteria described in this manual have been incorporated into a computer software program. The calculations are based on conserving mass, energy and momentum in the pipe network. The routine calculates the flow in quasi-steady state steps from the initiation of the discharge to the final gas blowdown. This is a significantly more rigorous treatment then the traditional Halon NFPA 12A method. Data processing facilities Telecommunications facilities Process control rooms High value medical facilities High value industrial equipment areas Libraries, museums, art galleries Anechoic chambers Flammable liquid storage areas FM-200 systems are designed for the following classes of fire: The system designer must become thoroughly familiar with the User's Manual for FM-200 Flow Calculation Program (P/N 90-FM200M-100) in order to learn the proper procedures for applying the input parameters to the FM-200 Flow Program. There are a number of limitations to these input parameters which must be observed if accurate results are to be obtained. Class A Surface Type Fires; Wood or other cellulosetype material Class B; Flammable liquids (see Table 4-1) Class C; Energized electrical equipment For hazards beyond the scope described above, the designer must consult with Kidde and NFPA 2001 on the suitability of FM-200 for the protection, necessary design concentration and personnel exposure effects from that concentration. Kidde FM-200 ECS Series Engineered Fire Suppression Systems combine an environmentally safe fire suppression agent, highly effective detection devices and specially developed components for fast agent discharge. The resulting rapid suppression of a fire reduces property damage and products of combustion to the lowest possible level. These systems are electrically, pressure and/or cable operated, with a normal design discharge time of less than ten seconds. Agent storage containers can be strategically located throughout a protected zone, eliminating expensive piping. February 2004 1-2 FM-200 shall not be used on fires involving the following materials, unless they have been tested to the satisfaction of the Authority Having Jurisdiction: 1. Certain chemicals or mixtures of chemicals, such as cellulose nitrate and gunpowder, that are capable of rapid oxidation in the absence of air. 2. Reactive metals such as lithium, sodium, potassium, magnesium, titanium, zirconium, uranium and plutonium. 3. Metal hydrides. 4. Chemicals capable of undergoing autothermal decomposition, such as certain organic peroxides and hydrazine. 1-1 90-FM200M-000 FM-200® ECS Series Engineered Fire Suppression Systems 1-2.1.1 OPERATING TEMPERATURE RANGE LIMITATIONS dance with the guidance of NFPA 2001. In accordance with NFPA 2001, FM-200 halocarbon clean agent systems designed for use with agent vapor concentrations up to nine volume per cent in air are permitted. See NFPA 2001, Sect. 1-6, Safety. Although FM-200 has negligible toxicity in concentrations needed to suppress most fires, certain safety considerations must be observed when applying and handling the agent. The discharge of FM-200 halocarbon clean agent has negligible toxicity in concentrations needed to suppress most fires, certain safety considerations must be observed when applying and handling the agent. For example, HFC-227ea is a liquefied compressed gas. Upon release to atmospheric pressure (e.g., from nozzles) the liquid flash evaporates at a low temperature (2°F/-16°C). Thus, nozzles must be located to avoid direct impingement on personnel. The operating temperature range for all components in Kidde FM-200 engineered systems is 32°F to 130°F (0°C to 54°C). The Kidde ECS Series FM-200 Flow Calculation Program is designed for a temperature of 70°F (21°C). Therefore, the container operating and storage temperature must be in the range of 60°F to 80°F (16°C to 27°C) for a single unbalanced system protecting two or more separate hazards. If the container operating/storage temperature is outside this range, an insufficient quantity of agent may be discharged from one or more discharge nozzles. 1-2.2 Extinguishing Agent FM-200 (1,1,1,2,3,3,3-heptafluoropropane) is a compound of carbon, fluorine and hydrogen (CF3CHFCF3). It is colorless, odorless and electrically non-conductive. It suppresses fire by a combination of chemical and physical mechanisms with minimal affect on the available oxygen. This allows people to see and breathe, permitting them to leave the fire area safely. 1-2.2.2 When FM-200 is exposed to temperatures over approximately 1300°F (700°C), products of decomposition (halogen acids) are formed. If the FM-200 is discharged in 10 seconds or less, flames are rapidly extinguished and the amount of by-products produced is minimal. FM-200 is acceptable for use in occupied spaces when used in accordance with the United States Environmental Protection Agency (EPA) Significant New Alternatives Policy (SNAP) program rules. 1-2.2.3 1-2.2.4 OTHER SAFETY CONSIDERATIONS The high pressure discharge of FM-200 from a system nozzle can create noise loud enough to be startling. The high velocity discharge can be significant enough to dislodge objects located directly in the discharge path. Enough turbulence may be created in the enclosure to move unsecured paper and other light objects. Direct contact with the vaporizing agent discharged from a nozzle will have a chilling effect on objects, and can cause frostbite burns to the skin. The liquid phase vaporizes rapidly when mixed with air and limits the chilling hazard to the immediate vicinity of a nozzle. TOXICITY Unnecessary exposure to clean agents is to be avoided in accordance with the requirements of NFPA-2001. As such, upon operation of a system pre-discharge alarm, all personnel should immediately exit the protected space. In no case shall personnel remain in a room in which there is a fire. In the very unlikely instance where a clean agent system should discharge unexpectedly into an occupied room, all personnel should proceed in a calm and orderly manner to an exit and leave the room. FM-200 itself is colorless. Discharge of FM-200 into a humid atmosphere may cause fog and reduce visibility for a short time. 1-2.2.5 FM-200 halocarbon clean agent has been evaluated for cardiac sensitization in accordance with test protocols approved by the United States Environmental Protection Agency (U.S. EPA). The EPAs SNAP Program classifies FM-200 as acceptable for use as a total flooding agent in occupied spaces with specific limitations. Refer to the SNAP program rules or NFPA 2001 for more information. FM-200 halocarbon clean agent has been judged acceptable by the U.S. EPA for use in occupied spaces when used in accor90-FM200M-000 CLEANLINESS FM-200 is clean and leaves no residue, thereby eliminating costly after-fire clean-up and keeping expensive downtime to a minimum. Most materials such as steel, stainless steel, aluminum, brass and other metals as well as plastics, rubber and electronic components are unaffected by exposure to FM-200. Although FM-200 is considered non-toxic to humans in concentrations necessary to extinguish most fires, certain safety considerations should be observed when applying and handling the agent. The discharge of FM-200 may create a hazard to people from the undecomposed agent itself and from the decomposition products which result when the agent is exposed to fire or other hot surfaces. Exposure to the agent is generally of less concern than is exposure to the decomposition products. Unnecessary exposure to the agent or the decomposition products should be avoided. 1-2.2.1 DECOMPOSITION STORAGE FM-200 is stored in steel containers at 360 PSIG at 70°F (25 bar at 21°C) as a liquid with nitrogen added to improve the discharge characteristics. The pressure of the stored FM-200 varies substantially with temperature changes, as illustrated in Figure 1-1. When discharged, the FM-200 liquid vaporizes at the discharge nozzles and is uniformly distributed as it enters the fire area. 1-2 February 2004 FM-200® ECS Series Engineered Fire Suppression Systems 2200 75 lb./cu ft. 2000 1800 Pressure (PSIG) 1600 72 lb./cu ft. 1400 70 lb./cu ft. 1200 1000 65 lb./cu ft. 800 50 lb./cu ft. 600 400 200 0 0 20 40 60 80 100 120 Temperature (°F) 140 160 180 Figure 1-1. FM-200 Pressure/Temperature Curve Isometric Diagram Table 1-1. FM-200 Physical Properties, Table 1-2. FM-200 Physical Properties, Imperial Units Metric Units Units Measurement Molecular Weight N/A 170.03 Boiling Point at 760 mm Hg °C -16.4 -204 Freezing Point °C -131 °F 214 Critical Temperature °C 101.7 Critical Pressure psia 422 Critical Pressure kPa 2912 Critical Volume ft3/lb 0.0258 Critical Volume cc/mole 274 Critical Density lb/ft3 38.76 Critical Density kg/m3 621 Specific Heat, Liquid at 77°F Btu/lb-°F 0.282 Specific Heat, Liquid at 25°C kJ/kg°C 1.184 Specific Heat, Vapor at Constant Pressure (1 atm) and 77°F Btu/lb-°F 0.185 Specific Heat, Vapor at Constant Pressure (1 atm) and 25°C kJ/kg°C 0.808 Heat of Vaporization at Boiling Point Btu/lb 56.7 Heat of Vaporization at Boiling Point at 25°C kJ/kg°C 132.6 Thermal Conductivity of Liquid at 77°F lb/ft-hr-°F 0.040 Thermal Conductivity of Liquid at 25°C W/m°C 0.069 Viscosity, Liquid at 77°F lb/ft-hr-°F 0.433 Viscosity, Liquid at 25°C centipose 0.184 Relative Dielectric Strength at 1 atm at 734 mm Hg, 77°F (N2 = 1) N/A 2.00 Relative Dielectric Strength at 1 atm at 734 mm Hg, 25°C (N2 = 1.0) N/A 2.00 Solubility, by Weight, of Water in Agent at 70°F ppm 0.06% Solubility, by Weight, of Water in Agent at 21°C ppm 0.06% by weight Description Units Measurement N/A 170.0 Boiling Point at 19.7 psia °F 1.9 Freezing Point °F Critical Temperature Molecular Weight February 2004 Description 1-3 90-FM200M-000 FM-200® ECS Series Engineered Fire Suppression Systems THIS PAGE INTENTIONALLY LEFT BLANK. 90-FM200M-000 1-4 February 2004 FM-200® ECS Series Engineered Fire Suppression Systems CHAPTER 2 OPERATION 2-1 2-2.2.3 INTRODUCTION ! CAUTION This chapter describes the controls and indicators for the Kidde FM-200® ECS Series Engineered Fire Suppression System. 2-2 SYSTEM CONTROLS AND INDICATORS 2-2.1 General Manual control is not part of normal system actuation and should only be used in an emergency as a last resort. 1. Proceed to appropriate FM-200 cylinder for the hazard. 2. Remove the safety pull pin from the cylinder control head. 3. Operate the lever, following the instructions on the lever or control head nameplate. 4. Leave the hazard area immediately. 5. Allow no one to enter the hazard area. Call the fire department immediately. Compressed FM-200 liquid is held in the cylinder by a discharge valve. When the discharge valve is actuated by a control head, the valve piston is displaced and the compressed liquid escapes through the discharge port of the valve and is directed through the distribution piping to the nozzles. The nozzles provide the proper flow rate and distribution of FM-200. 2-2.2 Operating Procedures 2-2.2.1 AUTOMATIC OPERATION 2-2.3 ! WARNING Do not enter a hazard area with an open flame or lighted smoking materials. Flammable vapors may cause reignition or explosion. REMOTE MANUAL OPERATION Ensure the fire is completely extinguished before ventilating the area. Before permitting anyone to enter the hazard area, ventilate the area thoroughly or use a self-contained breathing apparatus. Operate as follows: 1. Proceed to the appropriate remote manual pull station for the hazard. 2. Operate the manual pull station. 3. Leave the hazard area immediately. 4. Allow no one to enter the hazard area. Call the fire department immediately. Note: 2-2.4 Cylinder Recharge Recharge all FM-200 and nitrogen pilot cylinders immediately after use. Return all cylinders to a Kidde Distributor or other qualified refill agency. Refill in accordance with the procedures outlined in Chapter 6 of this manual. The above instructions must be displayed in the protected area. February 2004 Post-Fire Operation After an FM-200 discharge, qualified fire suppression system maintenance personnel must perform post-fire maintenance as directed in Chapter 6 of this manual. Observe all warnings, especially those pertaining to the length of elapsed time before entering the hazard area. When a system is operated automatically by means of a detection and control system, everyone must evacuate the hazard area promptly upon hearing the predischarge alarm. Make sure no one enters the hazard area. Call the fire department immediately. 2-2.2.2 LOCAL MANUAL OPERATION 2-1 90-FM200M-000 FM-200® ECS Series Engineered Fire Suppression Systems 2-2.5 Special System Precautions 2-2.5.1 SYSTEMS ACTUATED WITH A MASTER FM-200 CYLINDER In systems where a master FM-200 cylinder actuates a pressure operated control head on a slave cylinder, the pressure in the flexible actuation hose line is vented into the discharge manifold following the system discharge. The pressure drop in the pilot line allows the pressure operated control head to automatically reset. However, as a precaution before reinstating the system, ensure that the control head actuating pin is in the retracted (SET) position. 2-2.5.2 SYSTEMS ACTUATED WITH A PILOT NITROGEN CYLINDER In systems where a pilot nitrogen cylinder actuates a pressure operated control head on a slave FM-200 cylinder, nitrogen pressure is trapped in the pilot manifold when the system actuates and is not self-venting. Therefore, before reattaching a pressure operated control head to a recharged FM-200 cylinder, the following procedure must be performed to ensure that the pilot manifold is vented and the pressure operated control heads have returned to the SET position. 1. Vent any remaining pressure from the pilot line and remove the master control head from the nitrogen pilot cylinder(s). Reset the master control head and remove the pressure operated control head(s) from the slave cylinder(s). 2. Recharge and reinstall the nitrogen pilot cylinders to the correct charged pressure and reinstall the master control head. 3. Before installing a pressure operated control head on an FM-200 cylinder, ensure that the actuator pin is in the retracted (SET) position. 4. Follow all other procedures and cautions as detailed in Chapter 6 of this manual. 90-FM200M-000 2-2 February 2004 FM-200® ECS Series Engineered Fire Suppression Systems CHAPTER 3 FUNCTIONAL DESIGN 3-1 INTRODUCTION This chapter provides a functional description of the modules and assemblies in the FM-200® ECS Series Engineered Fire Suppression System. 3-1.1 3" Cylinder Valve In 2001, Kidde Fire Systems added a 3" discharge valve to its product line. This valve replaces the 2½" valves previously used on the 600 lb. cylinder and is a standard fitting for the 900 lb. cylinder assemblies (also new for the year 2001). A number of distinct differences between the 1½", 2" and 2½" valves and the new 3" valve are detailed in this manual (see Paragraphs 3-3.1, 3-3.7.2, 3-3.7.10, 4-3.11, 4-3.21, 6-2.3 and 6-2.7). Data relating to the 600 lb. cylinder assembly with a 2½" valve is included in this manual and is indicated by the reference "old style". For information on the availability of obsolete products, including spare parts, please contact the factory or your Kidde Representative. 3-2 Figures 3-1 and 3-2 show the above components in two typical configurations. Fire Suppression Panel FUNCTIONAL DESCRIPTION Electric Control Head Compressed FM-200 liquid is held in the agent storage container by a discharge valve. When the discharge valve is actuated, the compressed liquid agent discharges through the valve outlet and is directed through the distribution piping to the nozzles. The nozzles provide the proper flow rate and distribution of FM-200. PRESSURE OPERATED SWITCH 3P.D.T. UL Valve Pressure Gauge The ECS Series Engineered Fire Suppression System is composed of the following components and assemblies: Discharge indicator Corner pulley Supervisory pressure switch (optional) Hydrostatic test adapter FM-200 cylinder recharge adapter FM-200 cylinder seating adapter Main to reserve transfer switch Manifold El-check Detector Pressure operated switch and trip Control panel Cylinder/valve assembly Liquid level indicator (optional) Control head (electric, cable operated, lever operated, pressure operated and electric and cable operated) Pressure gauge Straps and brackets for mounting the cylinder Cable manual pull station Nitrogen actuator and mounting bracket Actuation hose Flexible discharge hose Master cylinder adapter kit Tees, elbows and adapters Check valve Valve outlet adapter Discharge nozzle February 2004 FM FM-200 Cylinder Liquid Level Indicator Pressure Operated Switch Nozzle Figure 3-1. Typical FM-200 System with Electric Control Head 3-1 90-FM200M-000 FM-200® ECS Series Engineered Fire Suppression Systems Pull Station FOR FIRE BREAK GLASS CYLINDER VALVE PULL HANDLE SAFETY CAP PULL HARD PRESSURE GAUGE 180 APART FROM SYPHON TUBE OPEN END Cable Operated ControlHead Corner Pulley Valve C CYLINDER B Pressure Gauge FM-200 Cylinder Nozzle A Figure 3-3. Typical Cylinder Assembly, 10 to 70 lb. SAFETY CAP Figure 3-2. Typical FM-200 System with Cable Operated Control Head CYLINDER VALVE LIQUID LEVEL INDICATOR LIFTING LUGS 3-3 COMPONENT DESCRIPTIONS 3-3.1 FM-200 Cylinder/Valve Assemblies CYLINDER FM-200 is stored in steel cylinders as a liquid, superpressurized with nitrogen to 360 PSIG at 70°F (25 bar gauge at 21°C). The cylinder valve assembly is equipped with a supervisory pressure switch connection for monitoring cylinder pressure, a pressure gauge and a safety burst disc in compliance with DOT requirements. C B CYLINDER NAMEPLATE In addition, each cylinder/valve assembly is provided with a safety cap and a protection cap which is a safety feature to prevent uncontrolled, accidental discharge. A ! WARNING The safety cap must be installed on the discharge outlet whenever a charged cylinder/ valve assembly is not connected to the system piping. Failure to install the safety cap could result in violent movement of the container in the event of inadvertent actuation. Failure to follow these instructions could cause personal injury and/or property damage. Figure 3-4. Typical Cylinder Assembly, 100 to 350 lb. Figures 3-3 through 3-5 represent typical cylinder assemblies. Table 3-3 on the following pages for cylinder dimensions. 90-FM200M-000 3-2 February 2004 FM-200® ECS Series Engineered Fire Suppression Systems Table 3-1. Container Temperature-Pressure Correlation (Based on a cylinder fill density of 70 lb./ft.3 or 1121 kg/m3) Temperature VALVE ORIENTATION PLAN VIEW °F °C PSIG Bar 32 0 288 19.9 40 4.4 303 20.9 50 10.0 321 22.2 60 15.6 340 23.5 70 21.1 360 24.8 80 26.7 381 26.3 90 32.2 402 27.7 100 37.8 425 29.3 110 43.3 449 31.0 120 48.9 475 32.7 130 54.4 502 34.6 B C SAFETY BURST DISC ASSEMBLY A Figure 3-5. 600 and 900 lb. Cylinder with 3" Valve The Kidde FM-200 ECS Engineered Fire Suppression System equipment listed herein is designed for an operating temperature range of 32°F to 130°F (0°C to 54°C). Table 3-1 shows the container temperature-pressure relationship based on a maximum fill density of 70 lb./ft.3 (1121 kg/m 3). The Kidde ECS Series FM-200 Flow Calculation Program is designed for a 70°F (21°C) container operating/storage temperature. Therefore, the container operating and storage temperature must be in the range of 60°F to 80°F (16°C to 27°C) for a single unbalanced system protecting two or more separate hazards. If the container operating and storage temperature is outside this range, an insufficient quantity of agent may be discharged from one or more discharge nozzles. Nominal Charge, Pressure If desired, the 125, 200, 350, 600 and 900 lb. cylinders can be provided with an integral liquid level indicator (see Paragraph 3-3.2). As a reference guide, Table 3-2 provides the equivalent lengths for all the Kidde FM-200 ECS Engineered System cylinder and valve assemblies. The numbers shown in the table represent the equivalent length through the cylinder valve with the flex hose or without the flex hose, depending on the application. This table can also be found in the Kidde ECS Series FM-200 Flow Calculation Program. Tables 3-3 and 3-4 (on the following pages) show the dimensions and fill range for cylinder/valve assemblies in vertical installations. Table 3-2. Cylinder, Equivalent Lengths Part Number Nomenclature Discharge Outlet Equivalent Length w/o Flex Hose Equivalent Length w/ Flex Hose ft. m ft. m 90-100010-001 10 lb. Cylinder 1½" 61.8 18.84 65.0 19.81 90-100020-001 20 lb. Cylinder 1½" 61.8 18.84 65.0 19.81 90-100040-001 40 lb. Cylinder 1½" 61.8 18.84 65.0 19.81 90-100070-001 70 lb. Cylinder 1½" 61.8 18.84 65.0 19.81 90-10012X-001 125 lb. Cylinder 1½" 61.8 18.84 65.0 19.81 90-10020X-001 200 lb. Cylinder 2" 59.0 17.98 65.0 19.81 90-10035X-001 350 lb. Cylinder 2" 59.0 17.98 65.0 19.81 90-10060X-001 600 lb. Cylinder (old style) 2½" 59.0 17.98 65.0 19.81 90-10060X-100 600 lb. Cylinder (new style) 3" 50.0 15.00 80.0 24.00 90-10090X-001 900 lb. Cylinder 3" 50.0 15.00 80.0 24.00 Note: All equivalent lengths given in schedule 40, black pipe. February 2004 3-3 90-FM200M-000 FM-200® ECS Series Engineered Fire Suppression Systems Table 3-3. Dimensions, FM-200 Cylinder/Valve Assemblies for Vertical Installation Only Part Number Valve Height (C) Diameter (A) C A w/LLI Valve Outlet Height Volume B 3 3 in. m in. m ft. m in. m 90-10001X-001 1½" No 17.30 0.44 7.07 0.18 0.167 0.0047 13.3 0.36 90-10002X-001 1½" No 24.97 0.64 7.07 0.18 0.286 0.0081 21.0 0.53 90-10004X-001 1½" No 26.76 0.68 9.00 0.23 0.572 0.0162 22.8 0.58 90-10007X-001 1½" No 38.83 0.99 9.00 0.23 1.000 0.0283 34.9 0.89 90-100121-001 1½" Yes 35.93 0.92 12.75 0.33 1.788 0.0506 32.0 0.81 90-100125-001 1½" No 35.93 0.92 12.75 0.33 1.788 0.0506 32.0 0.81 90-100200-101 2" No 52.75 1.34 12.75 0.33 2.859 0.0810 47.5 1.21 90-100201-101 2" Yes 52.75 1.34 12.75 0.33 2.859 0.0810 47.5 1.21 90-100350-001 2" No 58.36 1.49 16.00 0.41 5.000 0.1416 53.1 1.35 90-100351-001 2" Yes 58.36 1.49 16.00 0.41 5.000 0.1416 53.1 1.35 90-100600-001 2½" No 56.72 1.45 22.00 0.56 8.572 0.2427 50.5 1.28 90-100601-001 2½" Yes 56.72 1.45 22.00 0.56 8.572 0.2427 50.5 1.28 90-100600-100 3" No 58.00 1.47 22.00 0.56 8.680 0.2460 50.5 1.28 90-100601-100 3" Yes 58.00 1.47 22.00 0.56 8.680 0.2460 50.5 1.28 90-100900-001 3" No 70.00 1.78 24.00 0.61 13.000 0.3680 62.0 1.57 90-100901-001 3" Yes 70.00 1.78 24.00 0.61 13.000 0.3680 62.0 1.57 Table 3-4. Fill Range FM-200 Cylinder/Valve Assemblies for Vertical Installation Only Gross Weight Fill Range Empty Weight Part Number Min. FIll Max. Fill lb. kg lb. kg lb. kg lb. kg 90-10001X-001 6-10 3.0-4.5 25 11 30 14 35 16 90-10002X-001 9-20 4.0-9.0 31 14 40 18 51 23 90-10004X-001 18-40 8.0-18.0 38 17 55 25 78 35 90-10007X-001 30-70 14.0-31.5 52 24 82 38 123 56 90-100121-001 54-125 24.5-56.5 98 45 152 69 223 101 90-100125-001 54-125 24.5-56.5 98 45 152 69 223 101 90-100200-101 86-200 39.0-90.5 133 60 219 100 333 151 90-100201-101 86-200 39.0-90.5 133 60 219 100 333 151 90-100350-001 150-350 68.0-158.5 201 91 351 159 555 250 90-100351-001 150-350 68.0-158.5 203 92 341 160 557 251 90-100600-001 258-600 117.0-272.0 335 152 593 270 935 425 90-100601-001 258-600 117.0-272.0 337 153 595 270 937 426 90-100600-100 258-600 117.0-272.0 362 165 620 281 962 437 90-100601-100 258-600 117.0-272.0 362 165 620 281 962 637 90-100900-001 390-900 177.0-408.0 505 230 895 407 1405 639 90-100901-001 390-900 177.0-408.0 505 230 895 407 1405 639 90-FM200M-000 3-4 February 2004 FM-200® ECS Series Engineered Fire Suppression Systems Figures 3-6 and 3-7 represent the 1½" through 3" valve arrangements. Liquid Level Indicator 3-3.2 The optional liquid level indicator consists of a hollow metal tube inserted into a special fitting in the top of the 125, 200, 350, 600 or 900 lb. FM-200 cylinder. See Table 3-5 for part number information. The indicator is provided with a graduated tape which senses the position of a toroidal magnet encased within an internal float riding on the liquid surface. The graduations on the tape indicate the liquid level within the cylinder (see Figure 3-8). PRO CAP ACTUATION PORT PLUG (PORT ON REAR) MASTER CYLINDER ADAPTER KIT (PORT ON REAR) USE PLUG OR MASTER CYLINDER ADAPTER KIT CAP SAFETY DISC (PORT ON REAR) READING TAKEN AT TOP EDGE OF FITTING OUTLET PROTECTION CAP USE PRESSURE SWITCH OR SAFETY CAP GRADUATED TAPE SHOWN IN MAGNETIC INTERLOCK POSITION READY TO TAKE READING. O-RING BRASS TUBE PRESSURE INDICATOR PRESSURE SWITCH TAPE INSIDE BRASS TUBE SAFETY CAP FM-200 LIQUID LEVEL Figure 3-6. 1½", 2" and 2½" Valve General Arrangement PRO CAP ACTUATION PORT FM-200 CYLINDER MAGNETIC END OF TAPE ENGAGES IN MAGNETIC FIELD OF FLOAT WHEN TAPE IS PULLED UP TO TAKE READING. MAGNET EMBEDDED IN FLOAT. FLOAT - FLOATS ON SURFACE OF LIQUID FM-200. FREE TO MOVE UP OR DOWN OUTSIDE OF BRASS TUBE. PLUG (PORT ON REAR) MASTER CYLINDER ADAPTER KIT (PORT ON REAR) USE PLUG OR MASTER CYLINDER ADAPTER KIT RETAINER - FLOAT RESTS HERE WHEN CYLINER IS EMPTY. Figure 3-8. Liquid Level Indicator PRESSURE SWITCH VICTAULIC FITTING AND PLUG Table 3-5. Liquid Level Indicator Part Numbers USE PRESSURE SWITCH OR SAFETY CAP PRESSURE INDICATOR SAFETY CAP Figure 3-7. 3" Valve General Arrangement February 2004 3-5 Cylinder Liquid Level Tape Part Number 125 235681 200 283894 350 283894 600 283894 900 06-118266-001 90-FM200M-000 FM-200® ECS Series Engineered Fire Suppression Systems 3-3.3 Cylinder Mounting Equipment B Steel straps and brackets are used to mount the cylinders in a vertical position. E Cylinder straps (P/N 283945, 283934, 235317, 292971, 281866, 294651 and 236125) are available for all size cylinders (see Figure 3-9 and Tables 3-6 and 3-7). A F (hole size) C D Figure 3-9. Cylinder Mounting Straps Table 3-6. DimensionsCylinder Mounting Straps Part Number Cylinder Size Dimensions* Cylinder O.D. lb. A B C D E F 283945 10, 20 7.07 6.48 9.62 8.62 1.00 2.78 0.437 283934 40, 70 9.00 8.16 11.69 10.69 1.00 3.50 0.437 292971 125, 200 old style 13.60 13.09 17.06 15.44 1.75 6.06 0.625 235317 125, 200 new style 12.75 12.94 16.18 14.56 1.75 5.59 0.625 281866 350 16.00 15.50 19.50 17.88 1.75 7.25 0.625 294651 600 22.00 21.56 25.75 24.12 1.75 10.25 0.625 236125 900 24.00 24.83 27.75 26.00 1.75 12.13 0.625 *Note: Dimensions are in inches. Table 3-7. DimensionsCylinder Mounting Straps, Metric Part Number Cylinder Size Dimensions* Cylinder O.D. lb. A B C D E F 283945 10, 20 180 165 244 219 25 71 11 283934 40, 70 229 207 297 272 25 89 11 292971 125, 200 345 332 433 392 44 154 16 281866 350 406 394 495 454 44 184 16 294651 600 559 548 654 613 44 260 16 236125 900 610 619 705 660 44 308 16 *Note: Dimensions are in millimeters. 90-FM200M-000 3-6 February 2004 FM-200® ECS Series Engineered Fire Suppression Systems Wall brackets (P/N 486485, 486486, 486487 and 486488) are available for the 10, 20, 40 and 70 lb. size cylinders (see Figure 3-10 and Tables 3-8 and 3-9). 3-3.4 Control Heads A suitable control unit, specifically Listed and Approved for use with the following electric control heads, shall be provided for supervision of the releasing circuits per NFPA requirements. In addition, a 24-hour back-up power source shall be provided per NFPA requirements. D 3-3.4.1 C ELECTRIC CONTROL HEADS, P/N 890181, P/N 890149 AND P/N 890165 .406” DIA. THRU (3) MTG HOLES (TYP) .62” (15.75mm) ! CAUTION 3.00” (76.2 mm) FLEXIBLE STRAP The stackable control head (P/N 486500-01) cannot be used with 3" valve cylinders (P/Ns 90-100600-100, 90-100601-100, 90-100900001 and 90-100901-001). The stackable control head does not have sufficient force to activate the 3" valve (P/N 90-17000-000) and may result in a system failure. The electric/manual control heads (P/Ns 890181, 890149 and 890165) may be used with the 3" valve. 3/8” FASTENING HARDWARE (TO WALL) 3.00”(76.2 mm) A B The Electric Control Head provides for electric actuation of the FM-200 cylinder valve. It is operated electrically from a detection and control system, a remote manual station, or locally with a manual lever on the electric control head (P/N 890181 only). See Figure 3-11. Figure 3-10. Cylinder Wall Brackets CONNECTION FOR FLEXIBLE ELECTRIC CONDUIT 3/4” NPT FEMALE Table 3-8. DimensionsCylinder Wall Brackets Part Number Cylinder Capacity LOCKING PIN Dimensions* SEAL WIRE lb. A B C D 486485 10 8.62 1.56 7.68 5.75 486486 20 14.37 7.31 7.68 5.75 PU 486487 486488 40 70 13.12 19.62 5.94 12.44 9.75 9.75 ELECTRIC CONTROL HEAD 6.18" (157 mm) 6.75 VOLTS AMPS PART NO. INDICATOR AND RESET STEM 6.75 LOCAL MANUAL RELEASE LEVER SWIVEL NUT TO RESET USE SCREWDRIVER SET *Note: Dimensions are in inches. RELEASED MADE IN U. S. A. KIDDE-FENWAL, INC. 400 MAIN STREET ASHLAND, MA 01721 Table 3-9. DimensionsCylinder Wall Brackets, Metric Part Number Cylinder Capacity 4.00" (102 mm) Dimensions* Part Number lb. A B C D 486485 10 218.95 39.62 194.31 146.05 486486 20 264.99 185.67 195.07 146.05 486487 40 333.25 150.88 247.65 146.05 486488 70 498.35 315.98 247.65 146.02 890181 (a) 890149 (a),(b) 890165 Current 24 Vdc 125 Vdc 115 Vac 2.0A 0.3A 1.0A (a) Not FM Approved for use with FM-200 Systems (b) Not UL Listed for use with FM-200 Systems Figure 3-11. Electric Control Head *Note: Dimensions are in millimeters. February 2004 Control Head Voltage 3-7 90-FM200M-000 FM-200® ECS Series Engineered Fire Suppression Systems The Stackable Control Head (P/N 486500-01) is rated for use in hazardous (classified) locations Class 1, Div 1, Groups C, D, and Class II, Div II, Groups E, F and G between -40°F to 130°F (-40°C to 54°C). Use conduit seal within 18 in. (450 mm) of this device. 2.90” (76.33 mm) 3-3.4.2 ELECTRIC/CABLE OPERATED CONTROL HEADS, P/N 895630, P/N 895627, P/N 897494, P/N 897560 AND P/N 897628 The electric/cable operated control head mounts directly on top of the FM-200 cylinder valve and provides for both electric actuation or remote cable operation. The control head is operated remotely by an electrical signal from a detection system or electric manual pull station. The control head can also be operated mechanically from a remote cable operated manual pull station or locally using the manual lever on the control head (see Figure 3-13 and Table 3-11). 1.25-18 UNEF-2A CONNECTION 1/2"-14 NPT CONDUIT CONNECTION CONNECTION FOR FLEXIBLE ELECTRIC CONDUIT 1/2" NPT FEMALE 5.28" (134.11 mm) (3) 18 AWG-LEADS 18” (457.2 mm) LONG OPERATING SOLENOID U.L. LISTED FOR USE IN THE FOLLOWING HAZARDOUS LOCATIONS: CLASS GROUP OP. TEMP. I C -13 TO +150F (-25 TO +65C) I D -40 TO +150F (-40 TO +65C) II E,F,G -40 TO +150F (-40 TO +65C) CONNECTING WIRES 36" (914 mm) LONG LOCKING PIN FOR MAINTENANCE SEE INSTRUCTIONS PART NO. AMPS VOLTS CONNECTION FOR REMOTE PULL BOX PIPE OR CONDUIT 3/8" NPS MALE CABLE PULL HZ TO RESET ELECTRIC CONTROL HEAD RELEASED USE SCREWDRIVER MADE IN U.S.A. SET KIDDE-FENWAL, INC. 400 MAIN STREET ASHLAND, MA 01721 INDICATOR AND RESET STEM SWIVEL NUT 1.25 - 18 UNEF - 2B CONNECTION SEAL WIRE PU 7.375 (187 mm) LOCAL MANUAL RELEASE LEVER Figure 3-12. Electric Control Head, Stackable Table 3-10. Electric Control Head, Stackable (Explosion Proof) Part Number Voltage Amps 486500-01 24 Vdc 0.2 continuous 4.937 (125 mm) SWIVEL NUT 1.500 (38 MM) HEX 1.250-18 NF-3 THREAD CONNECTION FOR CABLE HOUSING TO SECOND CONTROL HEAD IF USED 3/8" NPS FEMALE. USE PNEUMATIC CONTROL HEAD CABLE HOUSINGS PART NUMBER 897494 897560 ! CAUTION Electric Control Head, P/N 486500-01, is designed for installation directly on Kidde FM-200 ECS cylinder valves only. This control head must not be installed on any other type of FM-200 cylinder valve, nitrogen valve or carbon dioxide cylinder valve. Installation of this control head on any other device (for example, a pressure operated control head) will result in failure of the device when the control head is actuated. CONTROL HEAD POWER CONSUMPTION VOLTAGE 24 Vdc 33 WATTS 120 Vac 15.4 WATTS Figure 3-13. Electric/Cable Operated Control Head Table 3-11. Electric/Cable Operated Control Heads Part Number Type Voltage Amps Rating 895630 Standard 24 Vdc 2.0 momentary N/A 895627(a),(b) Standard 115 Vac 1.0 momentary N/A 897494 Explosion Proof 24 Vdc 1.65 continuous 33.0 Watts 897560(a),(b) Explosion Proof 115 Vac 0.13 continuous 15.4 Watts 895628(b) Standard 125 Vdc 0.3 momentary N/A (a) Not FM Approved for use with FM-200 Systems (b) Not UL Listed for use with FM-200 Systems 90-FM200M-000 3-8 February 2004 FM-200® ECS Series Engineered Fire Suppression Systems 3-3.4.3 CABLE OPERATED CONTROL HEAD, P/N 979469 3-3.4.5 The Cable Operated Control Head is used for systems designed for manual operation only. It mounts directly on top of the FM-200 cylinder valve and is operated either remotely from a cable manual pull station or locally using the manual lever on the control head (see Figure 3-14). LEVER/PRESSURE OPERATED CONTROL HEAD, P/N 878751 The Lever/Pressure Operated Control Head allows manual or pressure actuation of several system components, including FM-200 cylinder valves and nitrogen actuators (see Figure 3-16). LOCAL MANUAL RELEASE LEVER SAFETY PIN ALLOW APPROX. 2" (50.8 mm) CLEARANCE FOR OPERATION OF LEVER LEVER SEAL WIRE LOCKING PIN CLOSURE DISC CLOSED SEAL WIRE THREADED NUT 3/8" NPS FOR PIPE OPEN DIRECTION OF PULL 1/16" CABLE TO OPEN 4.25" (108mm) 1/8" NPT PRESSURE INLET 4.50" (114.3 mm) 3/8" PIPE (OR 1/2" EMT WITH ADAPTER P/N 843837) SWIVEL NUT 1.50" (38mm) 5.25" (133mm) PISTON 1-1/4"-18 NF-3 FEMALE SET OPERATED CABLE CLAMP AND WHEEL ASSEMBLY 3.00" (76.2 mm) Figure 3-14. Cable Operated Control Head LEVER OPERATED CONTROL HEAD, P/N 870652 The Lever Operated Control Head is equipped with an operating lever, secured in the closed position by a safety pull pin. By removing the safety pin, the lever can be manually rotated to the open position, thereby activating the cylinder or valve on which it is installed (see Figure 3-15). The Pressure Operated Control Head, P/N 878737, allows for pressure actuation of FM-200 cylinders and is mounted directly on top of the FM-200 cylinder valve (see Figure 3-17). The pressure operated control head, P/N 878750, offers a stackable design and is used where an electric/ mechanical control head actuation is also required on the same cylinder (see Figure 3-18). ALLOW APPROX. 2" (50 mm) CLEARANCE FOR OPERATION OF LEVER CLOSED 1.00" HEX (25.4 mm) BODY SEAL WIRE 1/8"-27 NPT PRESSURE INLET LEVER TO OPEN PISTON 3.17" (81 mm) 2.19" (55.6 mm) SWIVEL NUT 1.50" (38 mm) 1-1/4"-18 NF-3 FEMALE 3.00" (76 mm) 1.250-18 UNEF-3B Figure 3-16. Lever/Pressure Operated Control Head 3-3.4.6 PRESSURE OPERATED CONTROL HEAD, P/N 878737 AND P/N 878750 3-3.4.4 LOCKING PIN BODY SWIVEL NUT SET OPERATED SET OPERATED STEM Figure 3-15. Lever Operated Control Head 1.250-18 UNEF-3B 1.50" HEX (38 mm) Figure 3-17. Pressure Operated Control Head February 2004 3-9 90-FM200M-000 FM-200® ECS Series Engineered Fire Suppression Systems 1.250-18 UNEF-3A 3-3.6 Actuation Accessories 3-3.6.1 NITROGEN ACTUATOR, MOUNTING BRACKET AND ADAPTER, P/N 877940, P/N 877845 AND P/N 69920501 RESPECTIVELY CAP RETAINER Gas pressure from a nitrogen cylinder is routed to the pressure operated control head mounted on each FM-200 cylinder. When the control head on the remote nitrogen cylinder is actuated, the FM-200 cylinder will be activated, causing FM-200 to be discharged from the cylinder. .125-27 NPT PRESSURE INLET 3.480” (88.4 mm) PISTON BODY The nitrogen cylinder is used in multiple cylinder and main/reserve systems. When activated by a control head, gas pressure is routed from the nitrogen cylinder to pressure operated control heads mounted on each FM-200 cylinder, resulting in a complete system discharge (see Figure 3-20). SET OPERATED 1.250-18 UNEF-3B 3-3.5 GAUGE PLUG STEM Figure 3-18. Stackable Pressure Operated Control Head Remote Pull Stations 3-3.5.1 ELECTRIC REMOTE PULL BOX, P/N 893607 AND P/N 893608 The Electric Remote Pull Box is an electrically operated device. To actuate the FM-200 system, pull the handle on the front of the box. SAFETY OUTLET 16" (406 mm) SCREWS 3.56" (90 mm) PULL HANDLE Figure 3-20. Nitrogen Actuator, Mounting Bracket and Adapter R 3/8” PIPE PULL HANDLE 5.87" (149 mm) SPECIFICATIONS Cylinder Capacity: 108 cu. in. (1770 cu. Cm) Safety outlet burst range: 2650 to 300 PSI (183 to 207 bar) at 70°F (21°C) Nitrogen-BB-n-411b, Grade A, Type I 1800 PSI (124 bar) at 70°F (21°C) FOR FIRE BREAK GLASS ADAPTER P/N 69920501 BRACKET P/N 877845 2 - NAMEPLATE BRACKETS (SUPPLIED WITH PULL BOX) 4-COVER 5/16"-TUBING MALE CYLINDER P/N 877940 CABLE MANUAL PULL STATION, SURFACE, P/N 871403 The surface type remote Cable Manual Pull Station is a cable operated device. To actuate the FM-200 system, break the glass plate on the box using the attached hammer and pull the handle (see Figure 3-19). (BY INSTALLER) 1/8" NPT MALE 1-1/4"-18 NF-3 FOR CONTROL HEAD CONNECTION 3-3.5.2 OPTIONAL NAMEPLATE OUTLET PORT-1/8" NPT FEMALE ATTACH ADAPTER HERE PULL HARD 400 Main Street - Ashland, MA 01721-2150 Tel(508)881-3000 FAX(508)881-0020 5.00" BREAK GLASS 2.25" (57 mm) (127 mm) P/N 928103 1/16” CABLE HAMMER P/N 928103 PULL HANDLE CABLE FASTENER FOR 1/16” CABLE 3/8” NPT FEMALE SECTION VIEW 2 - HOLES FOR 1/4” MOUNTING SCREWS (SCREWS NOT SUPPLIED WITH PULL BOX) Figure 3-19. Cable Manual Pull Station 90-FM200M-000 3-10 February 2004 FM-200® ECS Series Engineered Fire Suppression Systems 3-3.6.2 FLEXIBLE ACTUATION HOSE, P/N 264986 AND P/N 264987 3-3.6.4 Tees, elbows and adapters connect actuation hoses to pressure operated control heads in multiple cylinder system installations (see Figure 3-23). The Flexible Actuation Hose is used in multiple cylinder systems. Pilot pressure is directed to a pressure operated control head on each FM-200 cylinder valve using a 1/4-inch actuation hose (see Figure 3-21 and Table 3-12). A 1.375" (34.925 mm) TEES, ELBOWS AND ADAPTERS .625" HEX SWIVEL NUT (BRASS) MALE CONNECTOR 1/8" NPT X 5/16" TUBING P/N 69920501 MALE ELBOW 1/8" NPT X 5/16" TUBING P/N 69920503 HOSE - 1/4" I.D. 5/16" TUBING COUPLING (BOTH ENDS) Figure 3-23. Tees, Elbows and Adapters Figure 3-21. Flexible Actuation Hose Table 3-12. Dimensions, Flexible Actuation Hose 3-3.7 Discharge Accessories 3-3.7.1 FLEXIBLE DISCHARGE HOSE, P/N 283898, P/N 283899 AND P/N 283900 Dimension A Part Number in. mm 264986 30 762 264987 22 558.8 3-3.6.3 MALE BRANCH TEE 1/8" NPT X 5/16" TUBING P/N 69920505 FM-200 agent is routed from the storage cylinders to the discharge piping by a flexible 1½", 2" or 2½" rubber covered hose with wire braided reinforcements. The hose is connected to the discharge outlet of the FM-200 cylinder valve and terminates at the system piping or discharge manifold (see Figure 3-24 and Table 3-13). MASTER CYLINDER ADAPTER KIT, P/N 844895 The 3" discharge hose is a stainless steel braid over convoluted hose, incorporating roll-groove fittings. The Master Cylinder Adapter Kit provides a means of connecting a flexible actuation hose to the master and slave cylinder/valve assemblies. The adapter kit is provided with a cap intentionally chained to the adapter to prevent loss while in service; do not remove the cap from the chain. The kit also contains a pressure sensitive label which is placed on the cylinder valve after adapter installation (see Figure 3-22). A HOSE 1/4" MALE NPT X 5/16" TUBING FM-200 CYLINDER VALVE CONNECTION, SWIVEL NUT PROTECTION CAP SYSTEM PIPE CONNECTION, MALE NPT THREAD Figure 3-24. Flexible Discharge Hoses CAUTION INSTALL CAP WHEN NOT IN USE Table 3-13. Dimensions, Flexible Discharge Hoses LABEL Part Number 1.42" (36.06 mm) Figure 3-22. Master Cylinder Adapter Kit February 2004 3-11 Hose Size Dimension A Min. Bend Radius in. mm in. mm 283898 1½ 24 609.6 10.5 266.7 283899 2 31 787.4 13.5 342.9 283900 2½ 48 1219.2 22.5 571.5 06-118225-001 3 54 1372.0 24 610.0 90-FM200M-000 FM-200® ECS Series Engineered Fire Suppression Systems 3-3.7.2 VALVE OUTLET ADAPTERS, P/N 283904, P/N 283905 AND P/N 283906 3-3.7.4 A valve outlet adapter connects the cylinder valve outlet to the discharge piping when a flexible discharge hose is not used (see Figure 3-25 and Table 3-14). Note: MANIFOLD EL-CHECKS, P/N 877690 AND P/N 878743 Manifold El-Checks are installed at the discharge manifold in a multiple cylinder arrangement to allow removal of any FM-200 cylinder from the manifold while still retaining a closed system. The 2-inch El-check is used on the 10 through 350 lb. size cylinders; the 2½-inch El-check is used with the 600 lb. size cylinder (see Figure 3-27 and Tables 3-15 and 3-16). 3" valve cylinders are equipped with a roll-groove outlet. Use a standard groove-groove connection in lieu of a valve outlet adapter. B (valve outlet connection) ! CAUTION D Manifold El-checks are not intended to be used as check valves in main/reserve systems. Improper use of equipment can cause system malfunction. C A (system pipe connection) A Figure 3-25. Valve Outlet Adapter Table 3-14. Dimensions, Valve Outlet Adapter C Part Number Size 283904 1½" 1½" to 11½ NPT 283905 2" 283906 2½" 3-3.7.3 A VALVE BODY D B in. mm in. mm 1.874" 2.69 68.33 2.50 HEX 63.50 2" to 11½ NPT 2.500" 12 UNJ 3.12 79.25 3.00 HEX 76.20 2½"to 8 NPT 3.00" 12 UNJ 3.00 76.20 3.75 HEX 96.25 B C FOR CONNECTION TO SYSTEM ARROW INDICATES FLOW C CHECK VALVE, 1/4-INCH, P/N 264985 Check Valves are installed in sections of piping in main/ reserve systems to prevent the actuation of the reserve system when the main system is discharged. Table 3-15. Dimensions, Manifold El-Checks 1/4-inch check valves are installed in the pilot manifold to ensure the proper number of cylinders are discharged (see Figure 3-26). DIRECTION OF FLOW 1/4"-18NPT (TYP.) 2.00" (51 mm) CHECK Figure 3-27. Manifold El-Checks P art N u mb er S iz e A B C 877690 2" 3.93" (99.8 mm) 4.88" (123.95 mm) 2"11½ NPT 878743 2½" 4.96" (119 mm) 5.76" (146.3 mm) 2½"8 NPT 0.81" (21 mm) HEX Note: Install the valve with the arrow pointing in the direction of flow. Figure 3-26. Check Valve 90-FM200M-000 3-12 February 2004 FM-200® ECS Series Engineered Fire Suppression Systems Table 3-16. Check Valves, Equivalent Lengths Part Number Nomenclature 3-3.7.7 ft. m 800327 Check Valve, 1/2" NPT 40 T & 40 W 7.0 2.13 800266 Check Valve, 3/4" NPT 40 T & 40 W 17.0 5.18 800443 Check Valve, 1" NPT 40 T & 40 W 12.0 3.66 Check Valve, 1¼" NPT 40 T & 40 W 800444 2.62" (67 mm) 51.0 DISCHARGE INDICATION POSITION 15.54 Check Valve, 1½" NPT 40 T & 40 W 57.0 17.37 870151 Check Valve, 2" NPT 40 T & 40 W 165.0 50.29 870100 Check Valve, 3" NPT 40 T & 40 W 795.0 242.31 06-118213-001 Swing Check, 2" 40T & 40 W 13.4 4.06 06-118058-001 Swing Check, 3" 40 T & 40 W 13.0 3.96 877690 and 283899 2" EI check and Flex Hose 40 T & 40 W 16.0 4.88 878743 and 283900 2½" EI check and Flex Hose 40 T & 40 W 17.5 5.33 ½”NPT MALE STEM-RED Figure 3-28. Discharge Indicator 3-3.7.8 CORNER PULLEYS, P/N 803808 AND P/N 844648 Corner Pulleys change the direction of cable lines without binding to ensure smooth operation. P/N 803808 is used for all watertight applications; P/N 844648 is used for all industrial applications (see Figures 3-29 and 3-30). 1.75" (45 mm) GASKET COVER SCREW BODY 0.62" (16 mm) 2.13" (54 mm) DIA PRESSURE OPERATED SWITCHES, P/N 486536 AND P/N 981332 COVER 3" -18 NPS FEMALE 8 0.81" (21 mm) Figure 3-29. Corner Pulleys, Watertight Applications 0.62" (16 mm) COVER SCREW PRESSURE OPERATED TRIP, P/N 874290 UL Pressure Operated Trips are used to close off the hazard space upon system discharge. The trips, operated by system pressure, are designed to release self-closing units for doors, windows and dampers. The maximum load to be attached to a pressure trip is 100 lb. (45.36 kg). This is based on a minimum pressure of 75 PSIG (50.7 bar gauge) at the pressure trip. February 2004 CAP 0.93"(24 mm) HEX ACROSS FLATS Pressure Switches operate from system pressure upon discharge to energize or de-energize electrically operated equipment. Pressure switches may be used to shut down machinery and ventilation or to annunciate system discharge (see Figures 3-31 and 3-32). 3-3.7.6 NORMAL POSITION BODY 870152 3-3.7.5 The Discharge Indicator may be installed in the discharge piping to visually indicate a system discharge. When in the SET position, the discharge indicator acts as a vent (see Figure 3-28). Equivalent Length Pipe Type DISCHARGE INDICATOR, P/N 875553 2 - ½” E.M.T. CONNECTIONS COMPRESSION TYPE 2.75" (70 mm) approx. Figure 3-30. 1/2-Inch E.M.T. Corner Pulley, General Applications 3-13 90-FM200M-000 FM-200® ECS Series Engineered Fire Suppression Systems OPERATED SET STEM SHOWN IN SET POSITIONPULL UP ON STEM TO MANUALLY OPERATE SWITCH OPERATED SET WIRING SCREW TERMINALS 4.00" (101.6 mm) 0.375" (9.52 mm) 8 COVER SCREWS PRESSURE OPERATED SWITCH 3P.D.T. TO RESET PUSH STEM TO SET POSITION UL FM 4.00" (101.6 mm) 15 AMP 125 VAC 10 AMP 250 VAC 3/4 HP 1-2-3 PH 125-480 VAC FRONT VIEW COVER REMOVED ½” SUPPLY PIPE WITH UNION FRONT VIEW OPERATING PRESSURE = 50 PSI MIN PRESSURE TESTED 1000 PSI SWITCH 3PDT BOX - 3 - ½” CONDUIT KNOCKOUTS EACH SIDE COVER GASKET ½” NPT FEMALE - CONNECT TO SYSTEM PIPING SIDE SECTION Figure 3-31. Pressure Operated Switch 1" NPT FEMALE BOTH ENDS FOR ELECTRIC CONNECTION SWITCH SUPPLIED WITH 2 - 1" NPT PIPE PLUGS STEM IN OPERATED POSITION STEM IN SET POSITION - PULL UP ON STEM TO MANUALLY TO RESET PUSH STEM TO SET POSITION CLUTCH 6.31" (160.27 mm) 3 POLE SINGLE THROW TOGGLE SWITCH 9.00" (228.6 mm) SET POSITION 3 POLE PRESSURE OPERATED EXPLOSION PROOF SWITCH 6 - COVER SCREWS GAS INLET 30 AMP 250 VAC 20 AMP 600 VAC 2 HP 100-600 V 3 PHASE AC 4.37" (111 mm) OPERATING HEAD EXPLOSION PROOF MACHINED JOINT. DO NOT USE GASKET OR MAR SURFACES. 3.50" (88.9 mm) 4.18" (106.17 mm) 2 - 13/32" MOUNTING HOLES UNION CONNECTION PRESSURE INLET 1/2" NPT FEMALE Figure 3-32. Pressure Operated Switch, Explosion Proof 90-FM200M-000 3-14 February 2004 FM-200® ECS Series Engineered Fire Suppression Systems 3-3.7.9 CYLINDER SUPERVISORY PRESSURE SWITCH, P/N 06-118262-001 The Cylinder Supervisory Pressure Switch, P/N 06-118262-001, is intended to detect a fall in pressure in the FM-200 cylinder (see Figure 3-33). The cylinder supervisory pressure switch can be wired for either normally-open or normally-closed operation, depending on installation requirements. The cylinder supervisory pressure switch can be installed on 10 lb. through 350 lb. capacity FM-200 cylinders. If the pressure inside the cylinder falls below 305 PSIG (21 bar gauge), the switch contacts will transfer and invoke a "trouble" signal at the control panel. 3-3.7.10 SUPERVISORY PRESSURE SWITCH, P/N 06-118263-001 The Supervisory Pressure Switch (P/N 06-118263-001) is intended to detect a fall in pressure in the FM-200 cylinder (see Figure 3-34). The cylinder supervisory pressure switch can be wired for either normally-open or normally-closed operation, depending on installation requirements. The cylinder supervisory pressure switch can be installed on 600 lb. through 900 lb. capacity FM-200 cylinders with a 3" discharge valve. If the pressure inside the cylinder falls below 305 PSIG (21 bar gauge), the switch contacts will transfer and invoke a "trouble" signal at the control panel. 1.187” (30.150 mm) 1.187” (30.150 mm) FACTORY SEALED LEADWIRES 36" LONG FACTORY SEALED LEADWIRES 36" LONG ± 1” .500-14 NPT (ALUMINUM) 0.500-14 NPT (ALUMINUM) CAUTION LABEL CAUTION LABEL 4.125” (104.78 mm) 4.000” (101.600 mm) NAMEPLATE LABEL NAMEPLATE LABEL .125-27 NPT(MALE) O-RING 0.327 x 0.094 0.250" SAE 45° FLARE WITH VALVE CORE FEMALE W/VALVE DEFLECTOR Figure 3-34. Supervisory Pressure Switch Figure 3-33. Cylinder Supervisory Pressure Switch February 2004 3-15 90-FM200M-000 FM-200® ECS Series Engineered Fire Suppression Systems 3-3.7.11 MAIN-TO-RESERVE TRANSFER SWITCH, P/N 802398 Table 3-17. Dimensions180° Discharge Nozzle The Main-to-Reserve Switch is installed on systems having main and reserve cylinders. Placing the switch in either the MAIN or RESERVE position provides uninterrupted fire protection during system maintenance or in the event of a system discharge (see Figure 3-35). ¾” NPT FEMALE FOR ELECTRICAL CONNECTION NAMEPLATE MAIN SWITCH DOUBLE POLE 2-COVER SCREWS 5.37" (136 mm) TOGGLE SWITCH 4.62" (117 mm) 6-CONNECTION TOGGLE GUARDS RESERVE CONDULET BOX A B C D ½" (12.20 mm) 1.25" (31.75 mm) 1.25" (31.75 mm) 1.687" (42.84 mm) 2.0" (50.80 mm) ¾" (19.05 mm) 1.5" (38.10 mm) 1.375" (34.92 mm) 1.95" (48.89 mm) 2.296" (58.31 mm) 1" (25.40 mm) 1.75" (44.45 mm) 1.562" (39.67 mm) 2.218" (56.33 mm) 2.671" (67.84 mm) 1¼" (31.75 mm) 2.25" (57.15 mm) 1.75" (44.45 mm) 2.656" (67.46 mm) 3.25" (82.55 mm) 1½" (38.10 mm) 2.5" (63.5 mm) 1.95" (48.89 mm) 2.95" (74.93 mm) 3.625" (92.07 mm) 2" (50.80 mm) 3.0" (76.2 mm) 1.968" (49.98 mm) 2.875" (73.02 mm) 3.656" (92.86 mm) 2.12" (54 mm) 2.75" (70 mm) COMMON L-1 Pipe Size B-1 A-2 B A 2.50" (64 mm) A-1 Switch Rating: 30 amps @ 120 Vac L-2 B-2 WIRING DIAGRAM D Figure 3-35. Main to Reserve Transfer Switch 3-3.7.12 DISCHARGE NOZZLES C The 180° and 360° discharge nozzles are designed to provide the proper flow rate and distribution of FM-200 to flood a hazard area. The 180° nozzle is engineered to provide a 180° discharge pattern for sidewall applications. The 360° nozzle offers a full 360° discharge pattern for installations where nozzles are located in the center of the hazard. See Figures 3-36 and 3-37 and Tables 3-17 and 3-18 for further information. Figure 3-37. 360° Discharge Nozzle Table 3-18. Dimensions360° Discharge Nozzle D C A B 60° 30° Figure 3-36. 180° Discharge Nozzle 90-FM200M-000 3-16 Pipe Size A B C D ½" (12.20 mm) 1.250" (31.75 mm) 1.468" (31.28 mm) 1.937" (49.19 mm) 1.250" (31.75 mm) ¾" (19.05 mm) 1.500" (38.10 mm) 1.578" (40.08 mm) 2.125" (53.97 mm) 1.500" (38.10 mm) 1" (25.40 mm) 1.750" (44.45 mm) 1.718" (43.63 mm) 2.375" (60.32 mm) 1.750" (44.45 mm) 1¼" (31.75 mm) 2.250" (57.15 mm) 1.950" (49.53 mm) 2.751" (69.85 mm) 2.250" (57.15 mm) 1½" (38.10 mm) 2.250" (63.50 mm) 2.000" (50.80 mm) 2.937" (74.59 mm) 2.500" (63.50 mm) 2" (50.80 mm) 3.000" (76.20 mm) 2.062" (52.37 mm) 3.125" (79.37 mm) 3.000" (76.20 mm) February 2004 FM-200® ECS Series Engineered Fire Suppression Systems 3-3.8 Other Accessories 3-3.8.3 3-3.8.1 HYDROSTATIC TEST ADAPTERS The FM-200 Seating Adapter is installed on the cylinder actuation port during the cylinder charging procedure. This adapter is used for seating the valve assembly after charging and super pressurization is complete. The hydrostatic pressure test adapter is installed on the FM-200 cylinder in place of the cylinder valve when the cylinder is to be hydrostatically pressure tested. For cylinder test requirements, see Paragraph 5-5.3 of this manual. 3-3.8.2 FM-200 CYLINDER RECHARGE ADAPTERS The FM-200 recharge adapter is installed in the cylinder discharge outlet during the cylinder charging procedure. This adapter is used for refilling the cylinder with FM-200 agent and super pressurizing the cylinder with nitrogen (see Figure 3-38 and Table 3-19). Note: FM-200 CYLINDER SEATING ADAPTER, P/N 933537 3-3.9 Detectors and Control Panels 3-3.9.1 DETECTORS Detectors (ionization, photoelectric, thermal, ultraviolet, ultraviolet/infrared, etc.) interfacing with Kidde FM-200 systems must be UL Listed and/or FM Approved for the intended application. 3-3.9.2 The 3" valve and associated cylinders (new style 600 lb. and 900 lb.) do not require a recharge adaptor. Recharge of these cylinders is achieved via the 1/2" NPT connection on the grooved fitting plate on the outlet port. CONTROL PANEL The control panel must be UL Listed and/or FM Approved for releasing device service and compatible with Kidde FM-200 equipment. A O-RING SEAL 3/8” - NPT (VENT VALVE CONNECTION) B (HEX) 3/8” - 18 NPT (CHARGE CONNECTION) CYLINDER VALVE OUTLET CONNECTION Figure 3-38. Cylinder Recharge Adapters Table 3-19. DimensionsCylinder Recharge Adapters Part Number Cylinder Size A B lb. in. mm in. mm 878757 10-125 3.22 81.79 2.50 63.50 878758 200, 350 4.06 103.12 3.25 82.55 878759 600 4.00 101.60 3.62 91.95 February 2004 3-17 90-FM200M-000 FM-200® ECS Series Engineered Fire Suppression Systems THIS PAGE INTENTIONALLY LEFT BLANK. 90-FM200M-000 3-18 February 2004 FM-200® ECS Series Engineered Fire Suppression Systems CHAPTER 4 DESIGN AND INSTALLATION 4-1 4-2.2.2 INTRODUCTION This chapter is intended for system designers and installers. It outlines the steps needed to design the system including the limitations imposed on the design by the system hardware. The second part of this chapter explains equipment installation. 4-2 DESIGN PROCEDURE 4-2.1 General Cylinder size, quantity and fill requirements. Refer to Tables 4-2 and 4-3. Cylinder framing, mounting brackets, etc. Detection and control equipment required. Other system requirements, such as reserve supply, pressure switches, etc. 4-2.2.3 LOCATE NOZZLES Locate nozzles based on the following: The system design is based on the requirements of National Fire Protection Association (NFPA) Standard 2001, current edition and the Authority Having Jurisdiction (AHJ). 4-2.2 DETERMINE WHAT COMPONENTS ARE REQUIRED Application Ceiling height (16 ft. [4.87 m] maximum, 1ft. [0.30 m] minimum). Nozzle area coverage. Special hazard area layout considerations. The following steps must be taken to design an FM-200® system: 4-2.2.4 Locate cylinders based on the following: Determine the design concentration required for the hazard. Refer to Table 4-2. Determine the minimum and maximum ambient temperature for the hazard. Determine the volume of the hazard. Determine the integrity of the hazard. Determine if any additional agent will be required to offset leakage of agent from the hazard. 4-2.2.1 CALCULATE AGENT REQUIRED Number of cylinders required. Storage temperature/environmental considerations, such as weather, area classification and corrosive environment. Accessibility. Floor loading. LOCATE PIPING Locate piping based on the following: For systems that protect Class A or Class C hazards, and incorporate a mechanism of automatic actuation, a design concentration of 6.25% can be used. Note: 4-2.2.5 Calculate the quantity of FM-200 required to provide the proper design concentration at the minimum expected hazard temperature. LOCATE CYLINDERS Nozzle location. Structural members for bracing the pipe. 4-2.2.6 PIPE SIZE AND LAYOUT Determine pipe size and layout for the following factors: Refer to Tables 4-1, 4-2, 4-3 and 4-4. The information is given for estimating purposes only. The Kidde ECS Series FM-200 Flow Calculation Program calculates this information for the designer. Refer to the Kidde ECS Series FM-200 Flow Calculation Program User's Manual (P/N 90-FM200M-100) for further information. Draw piping isometric. Dimensions of all pipe sections. Locate all fittings. Note all elevation changes. The preceding information will be entered into the computer program. Table 4-2 gives the minimum use concentrations for FM-200 for various fuels. February 2004 4-1 90-FM200M-000 FM-200® ECS Series Engineered Fire Suppression Systems 4-2.2.7 USING THE FM-200 CONCENTRATION FLOODING FACTORS 4-2.2.8 When multiple cylinders are needed, they may be connected to the same set of distribution piping through a manifold. This is necessary in three circumstances. To find the total quantity of FM-200 required at a specific temperature and concentration, multiply the hazard area volume by the multiplier from Tables 4-3 and 4-4 that correspond to the design temperature and concentration desired. 1. A connected reserve supply of FM-200 is required. 2. The quantity of agent required is greater than the maximum fill of a single cylinder. 3. A single cylinder does not contain enough nitrogen to discharge the required agent through the pipe network. Note: NFPA 2001 and the U.S. Environmental Protection Agency Significant New Alternatives Policy (SNAP) provide specific guidelines for using FM-200. The minimum use concentration for total flooding applications is 6.25% w/v, unless a higher concentration is required for the specific hazard being protected. In accordance with standards set by NFPA 2001: The agent required must be based on the lowest expected ambient temperature in the protected space. Care must be taken that the calculated concentration for normally occupied spaces at the highest expected ambient temperature in the space does not exceed the value of 10.5% per NFPA 2001. Atmo sp h eric C o rrectio n -3,000 ft. 0.92 km 16.25.psi a 84.0 cm Hg 1.11 -2,000 ft. 0.61 km 15.71 psi a 81.2 cm Hg 1.07 -1,000 ft. 0.30 km 15.23 psi a 78.7 cm Hg 1.04 0 ft. 0.00 km 14.71 psi a 76.0 cm Hg 1.00 1,000 ft 0.30 km 14.18 psi a 73.3 cm Hg 0.96 2,000 ft 0.61 km 13.64 psi a 70.5 cm Hg 0.93 3,000 ft 0.92 km 13.12 psi a 67.8 cm Hg 0.89 4,000 ft 1.21 km 12.58 psi a 65.0 cm Hg 0.86 5,000 ft 0.92 km 12.04 psi a 62.2 cm Hg 0.82 6,000 ft 1.52 km 11.53 psi a 59.6 cm Hg 0.78 7,000 ft 1.83 km 11.03 psi a 57.0 cm Hg 0.75 8,000 ft. 2.13 km 10.64 psi a 55.0 cm Hg 0.72 9,000 ft. 2.44 km 10.22 psi a 52.8 cm Hg 0.69 10,000 ft. 3.05 km 9.77 psi a 50.5 cm Hg 0.66 90-FM200M-000 All cylinders are of the same size and quantity. Each cylinder must have an El-check or swingcheck to prevent back flow of agent through the discharge hose in case the system is discharged while a cylinder is removed for maintenance. Multiple cylinders are required, and A connected reserve supply is required, and Multiple cylinder actuation from a master FM-200 cylinder. 4-2.3 Table 4-1. Atmospheric Correction Factors E n clo su re P ressu re Standard check valves MUST be installed and modeled in the calculation software whenever all of the following conditions exist: Per NFPA 2001, 2000 edition FM-200 systems with use concentrations below the NOAEL (9% w/v) are permitted for use in occupied areas. FM-200 can be designed between 9% and 10.5% for a five minute exposure using the PBPK model. E q u ivalen t Altitu d e F a c to r MANIFOLDS Design Criteria The complexity of two-phase flow formulas does not allow for any simple method of manual FM-200 calculation. For this reason, the flow calculations and design criteria described in this manual have been programmed into a computer software program. ! CAUTION Kidde ECS Series FM-200 Flow Calculation Computer Design Software is the only calculation method to be used with Kidde FM-200 equipment. No other calculation method is accepted by Kidde. The system designer must become thoroughly familiar with the User's Manual for Kidde ECS Series FM-200 Flow Calculation Program (P/N 90-FM200M-100) to determine the proper procedures for applying the input parameters to the Kidde computer program. There are a number of limitations to these input parameters which must be observed if accurate results are to be obtained. Most of these limitations are in the program. However, there are certain restrictions that must be addressed by the system designer before applying the input data. The following paragraphs describe the essential design parameters and design limitations which must be considered. 4-2 February 2004 FM-200® ECS Series Engineered Fire Suppression Systems Table 4-2. Class B Suppression Design Concentrations Cup Burner (% v/v) Design Concentration, 30% Safety Factor2 (% v/v) 1-Hexene 5.8 7.6 7.0 Hydraulic Fluid* 6.5 8.5 7.3 9.5 Hydraulic Oil* 5.9 7.7 AV Gas 6.5 8.5 Hydrogen 13.2 17.2 B en z en e 5.5 7.2 Isobutyl Alcohol 7.6 9.9 n-Butane 6.6 8.6 Isopropanol 7.5 9.8 n-Butanol 7.6 9.9 JP 4 6.9 9.0 2-Butoxyethanol* 7.4 9.6 JP 5 6.9 9.0 2-Butoxyethyl Acetate* 6.9 9.0 Kerosene 7.4 9.6 n-Butyl Acetate 7.0 9.1 Methane 5.5 7.2 Carbon Disulfide 11.8 15.4 Methanol 10.4 13.5 Chloroethane 6.3 8.2 2-Methoxyethanol 9.4 12.2 Commercial Grade Heptane 6.7 8.7 Methyl Ethyl Ketone 7.4 9.6 Crude Oil* 6.5 8.5 Methyl Isobutyl Ketone 7.0 9.1 Cyclohexane 7.2 9.4 Mineral Spirits 6.6 8.6 Cyclohexylamine 8.3 8.7 Morpholine 7.9 10.3 Cyclopentanone 7.4 9.6 Nitromethane 9.9 12.9 1,2-Dichloroethane 5.8 7.6 n-Pentane 6.8 8.8 Diesel 6.7 8.7 Propane 6.7 8.7 N,N-Diethylethanolamine* 7.8 10.1 1-Propanol 7.7 10.0 Diethyl Ether 7.5 9.8 Propylene 6.2 8.1 Ethane 6.7 8.7 Propylene Glycol 8.6 11.2 Ethanol 8.3 10.8 Pyrrolidine 7.3 9.5 Ethyl Acetate 6.8 8.9 Tetrahydrofuran 7.4 9.6 Ethyl Benz ene* 6.3 8.2 Tetrahydrothiophene 6.6 8.6 Ethylene 8.4 10.9 Toluene 5.6 7.3 Ethylene Glycol 7.6 9.9 Tolylene-2, 4-Diisocyanate 4.0 7.0 Gasoline-no lead 6.9 9.0 Transformer Oil 7.3 9.5 n-Heptane 6.7 8.7 Turbine Oil** 7.2 9.4 n-Hexane 6.9 9.0 Xylene 6.0 7.8 Cup Burner (% v/v) Design Concentration, 30% Safety Factor2 (% v/v) Acetone 6.9 9.0 Acetonitrile 4.3 t-Amyl Alcohol F u el F u el * General guideline onlyMSDS required to determine proper concentration ** Texaco R+O 32 Note: Cup Burner source data, Great Lakes Chemical Corporation. February 2004 4-3 90-FM200M-000 FM-200® ECS Series Engineered Fire Suppression Systems Table 4-3. FM-200 Total Flooding Concentration Factors (W/V), English Units a Tempa t (°F)c Temp t (°F)c Specific Vapor Volume (ft.3/lb.)d 30 Weight Requirements of Hazard Volume, W/V (lb./ft.3)b Design Concentrations (% by Volume)e 6 6.25 7 8 9 10 11 12 13 14 15 2.0210 0.0316 0.0330 0.0372 0.0430 0.0489 0.0550 0.0612 0.0675 0.0739 0.0805 0.0873 40 2.0678 0.0309 0.0322 0.0364 0.0421 0.0478 0.0537 0.0598 0.0659 0.0723 0.0787 0.0853 50 2.1146 0.0302 0.0315 0.0356 0.0411 0.0468 0.0525 0.0584 0.0645 0.0707 0.0770 0.0835 60 2.1612 0.0295 0.0308 0.0348 0.0402 0.0458 0.0514 0.0572 0.0631 0.0691 0.0753 0.0817 70 2.2075 0.0289 0.0302 0.0341 0.0394 0.0448 0.0503 0.0560 0.0618 0.0677 0.0737 0.0799 80 2.2538 0.0283 0.0296 0.0334 0.0386 0.0439 0.0493 0.0548 0.0605 0.0663 0.0722 0.0783 90 2.2994 0.0278 0.0290 0.0327 0.0378 0.0430 0.0483 0.0538 0.0593 0.0650 0.0708 0.0767 100 2.3452 0.0272 0.0284 0.0321 0.0371 0.0422 0.0474 0.0527 0.0581 0.0637 0.0694 0.0752 110 2.3912 0.0267 0.0279 0.0315 0.0364 0.0414 0.0465 0.0517 0.0570 0.0625 0.0681 0.0738 120 2.4366 0.0262 0.0274 0.0309 0.0357 0.0406 0.0456 0.0507 0.0560 0.0613 0.0668 0.0724 130 2.4820 0.0257 0.0269 0.0303 0.0350 0.0398 0.0448 0.0498 0.0549 0.0602 0.0656 0.0711 140 2.5272 0.0253 0.0264 0.0298 0.0344 0.0391 0.0440 0.0489 0.0540 0.0591 0.0644 0.0698 150 2.5727 0.0248 0.0259 0.0293 0.0338 0.0384 0.0432 0.0480 0.0530 0.0581 0.0633 0.0686 160 2.6171 0.0244 0.0255 0.0288 0.0332 0.0378 0.0425 0.0472 0.0521 0.0571 0.0622 0.0674 170 2.6624 0.0240 0.0250 0.0283 0.0327 0.0371 0.0417 0.0464 0.0512 0.0561 0.0611 0.0663 180 2.7071 0.0236 0.0246 0.0278 0.0321 0.0365 0.0410 0.0457 0.0504 0.0552 0.0601 0.0652 190 2.7518 0.0232 0.0242 0.0274 0.0316 0.0359 0.0404 0.0449 0.0496 0.0543 0.0592 0.0641 200 2.7954 0.0228 0.0238 0.0269 0.0311 0.0354 0.0397 0.0442 0.0488 0.0535 0.0582 0.0631 The manufacturers listing specifies the temperature range for operation. b W/V [agent weight requirements (lb./ft.3)] = pounds of agent required per cubic foot of protected volume to produce indicated concentration at temperature specified. W = (V/s) X [c/(100-c)] c t [temperature (°F)] = the design temperature in the hazard area s [specific volume (ft.3/lb.)] = specific volume of superheated FM-200 vapor can be approximated by the formula: d s = 1.885 + 0.0046 t where t = temperature (°F) e C [concentration (%)] = volumetric concentration of FM-200 in air at the temperature indicated. 90-FM200M-000 4-4 February 2004 FM-200® ECS Series Engineered Fire Suppression Systems Table 4-4. FM-200 Total Flooding Concentration Factors (W/V), Metric a Tempa t (°C)C Specific Vapor Volume s (m3/kg)d 6 6.25 7 8 9 10 11 12 13 14 15 0 0.1268 0.5034 0.5258 0.5936 0.6858 0.7800 0.8763 0.9748 1.0755 1.1785 1.2839 1.3918 5 0.1294 0.4932 0.5152 0.5816 0.6719 0.7642 0.8586 0.9550 1.0537 1.1546 1.2579 1.3636 10 0.1320 0.4834 0.5051 0.5700 0.6585 0.7490 0.8414 0.9360 1.0327 1.1316 1.2328 1.3364 15 0.1347 0.4740 0.4949 0.5589 0.6457 0.7344 0.8251 0.9178 1.0126 1.1096 1.2089 1.3105 20 0.1373 0.4650 0.4856 0.5483 0.6335 0.7205 0.8094 0.9004 0.9934 1.0886 1.1859 1.2856 25 0.1399 0.4564 0.4765 0.5382 0.6217 0.7071 0.7944 0.8837 0.9750 1.0684 1.1640 1.2618 30 0.1425 0.4481 0.4678 0.5284 0.6104 0.6943 0.7800 0.8676 0.9573 1.0490 1.1428 1.2388 35 0.1450 0.4401 0.4598 0.5190 0.5996 0.6819 0.7661 0.8522 0.9402 1.0303 1.1224 1.2168 40 0.1476 0.4324 0.4517 0.5099 0.5891 0.6701 0.7528 0.8374 0.9230 1.0124 1.1029 1.1956 45 0.1502 0.4250 0.4439 0.5012 0.5790 0.6586 0.7399 0.8230 0.9000 0.9950 1.0840 1.1751 50 0.1527 0.4180 0.4366 0.4929 0.5694 0.6476 0.7276 0.8093 0.8929 0.9784 1.0660 1.1555 55 0.1553 0.4111 0.4293 0.4847 0.5600 0.6369 0.7156 0.7960 0.8782 0.9623 1.0484 1.1365 60 0.1578 0.4045 0.4225 0.4770 0.5510 0.6267 0.7041 0.7821 0.8410 0.9469 1.0316 1.1183 65 0.1604 0.3980 0.4156 0.4694 0.5412 0.6167 0.6929 0.7707 0.8504 0.9318 1.0152 1.1005 70 0.1629 0.3919 0.4092 0.4621 0.5338 0.6072 0.6821 0.7588 0.8371 0.9173 0.9994 1.0834 75 0.1654 0.3859 0.4031 0.4550 0.5257 0.5979 0.6717 0.7471 0.8243 0.9033 0.9841 1.0668 80 0.1679 0.3801 0.3971 0.4482 0.5178 0.5890 0.6617 0.7360 0.8120 0.8898 0.9694 1.0509 85 0.1704 0.3745 0.3912 0.4416 0.5102 0.5803 0.6519 0.7251 0.800 0.8767 0.9551 1.0354 90 0.1730 0.3690 0.3854 0.4351 0.5027 0.5717 0.6423 0.7145 0.7883 0.8638 0.9411 1.0202 Weight Requirements of Hazard Volume, W/V (kg/m3)b Design Concentration (% per Volume) e The manufacturers listing specifies the temperature range for operation. W/V [agent weight requirements (kg/m3)] = kilograms of agent per cubic meter of protected volume to produce indicated concentration at temperature specified. b W = (V/s) X [c/(100-c)] c t [temperature (°C)] = the design temperature in the hazard area d s [specific volume (m3/kg)] = specific volume of superheated FM-200 vapor can be approximated by the formula: s = 0.1269 + 0.0005 t where t = temperature (°C) e C [concentration (%)] = volumetric concentration of FM-200 in air at the temperature indicated. February 2004 4-5 90-FM200M-000 FM-200® ECS Series Engineered Fire Suppression Systems 4-2.3.1 FIRST BRANCH FLOW SPLIT 4-2.3.2 To assure accuracy of the flow calculations, there are various agent flow limits. The maximum % agent in pipe for all systems is 80%. There is a limit on the allowable percent of agent prior to the first tee. When these conditions are not met, the computer displays a warning. It is then up to the system designer to correct the piping volume to the first branch split. For example, when reading Figure 4-1, in order to achieve 60% agent in pipe, a minimum of 8.3% agent is required prior to the first tee. When this condition is not met, the computer displays a warning. It is then up to the system designer to correct the piping volume to the first branch split to meet this design requirement (see Figure 4-2). Flow splits at tee junctions are sensitive to gravity. Even though turbulent flow exists, there is a tendency for the vapor phase to migrate to the upper portion of the pipe leaving a more dense medium at the bottom of the pipe. For this reason, the limitations in Figure 4-2 must be observed. 4-2.3.2.1 Requirements for Tee Flow Splits 1. Bull head tees must have both outlets in the horizontal plane. The inlet to a bull head tee may approach in a horizontal, vertically up or vertically down direction. 2. Side tees must have the inlet and both outlets all in the horizontal plane. 3. Elbows either before a tee, or after, which split to a separate hazard must be located a minimum distance of 15 pipe diameters (nominal) before the tee. 4. Tee splits going to separate hazards from a common supply line must be spaced a minimum of 15 pipe diameters (nominal) apart. 5. Pipe reducers must be the concentric reducer type. 6. Minimum flow out of a side tee branch is 10% of total flow at the tee. 7. For flow splits less than 30%, the split shall be done through a side tee with the smaller flow going through the side tee member. The minimum flow through the side tee member is 10%. The maximum flow through the tee is 90%. 8. For flow splits equal to or greater than 30%, the split shall be done through a bull head tee. The maximum flow split through a bull head tee is 70%. % OF AGENT BEFORE FIRST TEE Limits: % of agent in pipe and % of agent before first tee. (As computed by "FLOW", do not use for manual computation.) 35% 30% 33.6% 25% 20% 7.9% 15% 8.3% 10% 5% 0% 0% TEE FLOW SPLITS 10% 20% 30% 40% 50% 60% 70% 80% % OF AGENT IN PIPE Figure 4-1. Percent Agent Before First Tee as a Function of Percent Agent in Pipe Table 4-5. 15 Pipe Diameters 15 Pipe Diameters Pipe Size 90-FM200M-000 4-6 feet feet and inches meters 1/2" 0.63 7½ 0.192 3/4" 0.94 11¼ 0.287 1" 1.25 1'3" 0.381 1¼" 1.56 1'6¾" 0.475 1½" 1.88 1'10½" 0.573 2" 2.50 2'6" 0.762 2½" 3.13 3'1½" 0.954 3" 3.75 3'9" 1.143 4" 5.00 5' 1.524 February 2004 FM-200® ECS Series Engineered Fire Suppression Systems BULL TEE FLOW SPLIT LIMITS BULL TEE OUT OUT OUT - 50% OUT - 50% BULL TEE MINIMUM UNBALANCE IN OUT - 30% BULL TEE MAXIMUM UNBALANCE IN - 100% SIDE TEE FLOW SPLIT LIMITS OUT IN - 100% OUT - 70% SIDE TEE FLOW SPLIT LIMITS IN - 100% OUT - 90% SIDE TEE MAXIMUM UNBALANCE SIDE TEE MINIMUM UNBALANCE OUT OUT - 70% IN - 100% SIDE TEE IN BULL TEE FLOW SPLIT LIMITS OUT - 30% OUT - 10% Figure 4-2. Acceptable Tee Flow Splits for FM-200 February 2004 4-7 90-FM200M-000 FM-200® ECS Series Engineered Fire Suppression Systems 4-2.3.3 DURATION OF DISCHARGE 4-2.3.5 NOZZLE PLACEMENT Per NFPA 2001, the liquid agent discharge shall be completed in a nominal 10 seconds or less. Discharge times shorter than 10 seconds are desirable to minimize production of breakdown products. Discharge times as short as six seconds should be considered when circumstances permit. There are certain coverage and height limitations which must be observed with each nozzle configuration to ensure proper agent distribution. 4-2.3.4 40’ (12 m) NOZZLE SELECTION AND PLACEMENT There are two basic Kidde nozzle configurations: 1. The 360° nozzle, which provides a full 360° discharge pattern designed for placement in the center of the hazard. 2. The 180° nozzle, which provides a 180° discharge pattern designed for placement adjacent to a side wall of the hazard. Maximum orifice area to pipe area ratio: The ratio between the nozzle orifice area for a 360 degree nozzle at the given node and the pipe cross sectional area for the pipe segment preceding that nozzle is 0.72, or 72%, The ratio between the nozzle orifice area for a 180 degree nozzle at the given node and the pipe cross sectional area for the pipe segment preceding that nozzle is 0.66, or 66%. Minimum orifice area to pipe area ratio: The ratio between the nozzle orifice area for a 360 degree nozzle at the given node and the pipe cross sectional area for the pipe segment preceding that nozzle is 0.27, or 27%. The ratio between the nozzle orifice area for a 180 degree nozzle at the given node and the pipe cross sectional area for the pipe segment preceding that nozzle is 0.27, or 27%. Nozzles are available in nominal pipe sizes of 1/2", 3/4, 1", 1¼", 1½" and 2". 90-FM200M-000 d = 29.7´ (9.06 m) 44’ (13.3 m) 44’ (13.3 m) 180° Nozzle 360° Nozzle 40’ (12 m) Figure 4-3. Nozzle Placement and Coverage Use ECS Series software as a tool to determine the selection of the required orifice area and nozzle. d = 48.3´ (14.73 m) 4-8 Orientation-Nozzles must be mounted perpendicular to the ceiling or subfloor surface and oriented with the orifices radiating symmetrically outward from the pipe network. Ceiling Clearance-Nozzles must be installed so that the orifices are located 6 +/- 2 inches (0.15 +/- 0.05 m) below the ceiling. Maximum Height-The maximum protected height for a single row of nozzles is 16 feet (4.87 m). The 16 ft. (4.87 m) coverage height includes the 6 +/- 2 inches (0.15 +/- 0.05 m) below the ceiling. Nozzles may be tiered to accommodate enclosures with ceiling heights greater than 16 ft. (4.87 m). Minimum Ceiling Height-The minimum ceiling height for UL Listed/FM Approved systems is 1 ft. (0.3 m). Systems designed for enclosures 6 to 12 inches (0.15 m to 0.3 m) are acceptable, but not UL Listed or FM Approved. 180° Nozzles-180° nozzles must be located 12 +/- 2 inches (0.3 +/- 0.05 m) from a wall, with the orifices directed away from the wall. The nozzle shall be located as close to the center of the wall as possible, but at least 1/3 of the way along the wall. 180° nozzles have a maximum coverage area defined as any rectangle that can be inscribed in a semicircle of distance 48.3 ft. (14.73 m, diagonal of a rectangle 20' x 44'). Refer to Figure 4-3 for further information. 180° nozzles may be used in a back-to-back configuration. The nozzles should be place 1 to 2 ft. (0.3 m to 0.6 m) apart. 360° Nozzles-360° nozzles must be located as close to the center of the enclosure as possible. 360° nozzles have a maximum coverage area defined as any rectangle that can be inscribed in a circle of radius 29.7 ft. (9.06 m, diagonal of a rectangle 20' x 22'). Refer to Figure 4-3 for further information. Multiple Nozzles-Nozzles whose discharge patterns will intersect must be placed at least 10 ft. (3.3 m) apart to assure adequate agent distribution. February 2004 FM-200® ECS Series Engineered Fire Suppression Systems System With A Single Row of Nozzles Walls and Obstructions-FM-200 discharged from the nozzle requires a certain length from the nozzle to atomize into a gas. If the FM-200 comes into contact with a surface before the agent is fully atomized, frosting can occur. As a result, the concentration throughout the enclosure will be less than required to appropriately protect the space. Therefore, nozzles must be located with at least four to six feet of clearance from walls and/or significant obstructions (ex. high rise racking and columns). If this requirement cannot be met, additional agent may be discharged to compensate for this agent "loss". Reduced Coverage Area-Consideration should be given to reducing nozzle spacing when obstructions that would impede the uniform distribution of FM-200 throughout the area are present. Nozzle coverage area must be reduced to 25 ft. x 25 ft. for enclosure heights six to twelve inches (7.5 m x 7.5 m for heights 0.15 to 0.3 meters). 30’ Max Note: Any system designed for a space less than 12 in. (0.3 m) in height is not a UL Listed or FM Approved design. 4-2.3.6 Minimum average nozzle pressure-The nozzle pressure must be a minimum of 74 PSIG for the nozzle to effectively disperse the agent and mix the agent into the air of the enclosure being protected. Maximum arrival time imbalance-The difference between liquid arrival times at two of the nozzles exceed the 0.8 seconds allowed. Maximum runout time imbalance-The difference between nozzle liquid runout times at two of the nozzles exceed the 2.0 second allowed maximum. PIPE SIZING The following table may be used as an estimating guide for sizing distribution piping. Table 4-6. Kidde Pipe Size Estimating Table Nominal Pipe Size (in.) If nozzles are only located above the container outlet, then the maximum elevation difference between the container outlet and the furthest horizontal pipe run or discharge nozzle (whichever is furthest) shall not exceed 30 ft. (9 m). If nozzles are only located below the container outlet, then the maximum elevation difference between the container outlet and the furthest horizontal pipe run or discharge nozzle (whichever is furthest) shall not exceed 30 ft. (9 m). If nozzles are located both above and below the container outlet, then the maximum elevation difference between the furthest horizontal pipe runs or discharge nozzles (whichever is furthest) shall not exceed 30 ft. (9 m). Note: 30’ Max Figure 4-4. Nozzle Limitations Maximum Elevation Differences in Pipe Runs: System With Ceiling and Subfloor Nozzles 30’ Max Limits on Nozzle Conditions: System With A Multiple Row of Nozzles Flow Rate (lb./sec.) Flow Rate (kg/sec.) Minimun Design Max. Nom. Design Minimum Design Max. Nom. Design 1/2 1.0 3.0 0.5 1.4 3/4 2.0 5.5 0.9 2.5 1 3.5 8.5 1.6 3.9 1¼ 6.0 12.5 2.7 5.7 1½ 9.0 20.0 4.1 9.0 2 14.0 30.0 6.4 13.6 2½ 20.0 55.0 9.0 25.0 3 30.0 90.0 13.6 40.9 4 55.0 125.0 25.0 56.8 5 90.0 200.0 40.9 90.9 6 120.0 300.0 54.5 136.4 This table is intended for use as a guide only. The Kidde ECS Series Flow Calculation Program must be used for the final design. If you have a system design that violates these limits, then you must consult the factory to determine what course of action should be taken (see Figure 4-4 for further clarification). February 2004 4-9 90-FM200M-000 FM-200® ECS Series Engineered Fire Suppression Systems 4-2.4 Other Conditions 4-2.5.2 4-2.4.1 OPERATING/STORAGE TEMPERATURE RANGE Note: Kidde FM-200 ECS Series Engineered Fire Suppression System equipment listed herein is designed to operate within a temperature range of 32°F to 130°F (0°C to 54°C). The Kidde ECS Series FM-200 Flow Calculation Program assumes a temperature of 70°F (21°C). Therefore, the container operating and storage temperature must be in the range of 60°F to 80°F (16°C to 27°C) for a single unbalanced system protecting two or more separate hazards. If the container operating/storage temperature is outside this range, an insufficient quantity of agent may be discharged from one or more discharge nozzles. 4-2.4.2 4-2.5.3 Note: STORAGE TEMPERATURE SYSTEM OPERATING PRESSURE Pressure Actuation Limitations Note: When cylinders are all connected to a common manifold, they shall be at the same size and fill density. Note: CYLINDERS CLOSE COUPLED USING PRESSURE FROM A MASTER Maximum total length of tubing is 320 ft. (97.5 m). Maximum length of tubing between cylinder #1 and the last cylinder is 220 ft. (67 m). The nominal min./max. length of tubing between the nitrogen pilot cylinder and FM-200 cylinder #1 is up to 100 ft. (30.5 m). If required, the nitrogen pilot cylinder can be located at a distance greater than 100 ft. (30.5 m) from FM-200 cylinder #1. In this instance, tubing length can be taken from the line between the slave cylinders and added to the line between the nitrogen cylinder and slave cylinder #1, provided that the maximum total length of tubing does not exceed 320 ft. (97.5 m). The tubing actuation line must be designed for a minimum working pressure of 1800 PSIG (124 bar gauge). See Figure 4-5. For cylinders close coupled (reach of one flex hose, max. 30 in.) using pressure from one master FM-200 cylinder, a maximum of fifteen slave cylinders close coupled can be actuated from that one master cylinder, using pressure operated control heads on the slave cylinders. The slave cylinder operation will be through pilot flexible hoses. 90-FM200M-000 See Figure 4-7. Slave operation will be through a 5/16 O.D. x 0.032" wall stainless steel tubing actuator line having the following limitations: Four modes of pressure actuation of the Kidde FM-200 ECS Series Engineered Fire Suppression Systems cylinders are available. 4-2.5.1 CYLINDERS NOT CLOSE COUPLED USING NITROGEN PRESSURE For cylinders not close coupled using nitrogen pressure from one pilot nitrogen cylinder, from one to fifteen slave FM-200 cylinders can be actuated from the one pilot nitrogen cylinder using pressure operated control heads on the slave cylinders. The normal system operating pressure for Kidde FM-200 ECS Series Engineered Fire Suppression System equipment is 360 PSIG at 70°F (25 bar gauge at 21°C). 4-2.5 See Figure 4-6. For cylinders not close coupled using pressure from one master FM-200 cylinder, a maximum of four slave cylinders (maximum five cylinders in a group) can be actuated by that one master cylinder using pressure operated control heads on the slave cylinders. The slave cylinder operation will be through a 5/16" O.D. x 0.032" wall copper tubing actuator line having a maximum total length of 100 ft. (30.5 m). Kidde FM-200 ECS Series Engineered Fire Suppression System equipment is suitable for storage from 32°F to 130°F (0°C to 54°C). 4-2.4.3 CYLINDERS NOT CLOSE COUPLED USING PRESSURE FROM A MASTER 4-10 February 2004 FM-200® ECS Series Engineered Fire Suppression Systems PRESSURE SWITCH P/N 486536 ACTUATION HOSE (TYP.) P/N 264986 OR 264987 TEE (TYP.) P/N 6992-0505 PRESSURE TRIP P/N 874290 90° ELBOW P/N 6992-0503 MASTER CONTROL HEAD PIPING 2 1 MASTER CYLINDER 3 5 4 SLAVE CYLINDER (TYP.) 6 15 PRESSURE OPERATED CONTROL HEAD (TYP.) P/N 878737 DISCHARGE HOSE OR VALVE OUTLET ADAPTER Figure 4-5. Pressure Actuation Using Pressure from 1 Master FM-200 Cylinder to Actuate a Maximum of 15 FM-200 Cylinders Close Coupled PRESSURE TRIP (TYP) P/N 874290 (IF REQUIRED) PIPING 100 FT. MAX. LENGTH OF TUBING MASTER CONTROL HEAD TEE P/N 6992-0505 5/16” O.D. x .032 WALL COPPER TUBING MASTER CYLINDER ADAPTER KIT P/N 844895 ATTACHED TO SLAVE ACTUATION PORT MASTER CYLINDER PRESSURE SWITCH (TYP.) P/N 486536 90° ELBOW P/N 6992-0503 PRESSURE OPERATED CONTROL HEAD (TYP) P/N 878737 DISCHARGE HOSE OR VALVE OUTLET ADAPTER 1 4 SLAVE CYLINDER SLAVE CYLINDER Figure 4-6. Pressure Actuation Using Pressure from 1 Master FM-200 Cylinder to Actuate a Maximum of 4 FM-200 Cylinders NOT Close Coupled 320 FT. TOTAL MAX. LENGTH OF TUBING 100 FT. NOMINAL LENGTH OF TUBING 220 FT. MAX LENGTH OF TUBING PRESSURE TRIP (TYP) P/N 874290 (IF REQUIRED) PIPING PRESSURE SWITCH (TYP.) P/N 486536 TEE P/N 6992-0505 MASTER CONTROL HEAD PILOT N2 CYLINDER P/N 877940 MALE CONNECTOR 1 P/N 6992-0501 MASTER CYLINDER SLAVE CYLINDER 90° ELBOW P/N 6992-0503 PRESSURE OPERATED CONTROL HEAD (TYP) P/N 878737 5/16” O.D. x .032 WALL STAINLESS STEEL TUBING 2 DISCHARGE HOSE OR VALVE OUTLET ADAPTER SLAVE CYLINDER 15 SLAVE CYLINDER Figure 4-7. Pressure Actuation Using Pressure from 1 Nitrogen Pilot Cylinder to Actuate a Maximum of 15 FM-200 Cylinders NOT Closed Coupled February 2004 4-11 90-FM200M-000 FM-200® ECS Series Engineered Fire Suppression Systems 4-2.5.4 Note: CYLINDERS CLOSE COUPLED USING NITROGEN PRESSURE See Figure 4-8. For cylinders close coupled using nitrogen pressure from one pilot nitrogen cylinder , from one to fifteen slave FM-200 cylinders can be actuated from that one pilot nitrogen cylinder using pressure operated control heads on the slave cylinders. Slave operation will be through a 1/4-inch Schedule 40 steel pipe actuator line having the following limitations: Maximum length between nitrogen cylinder and the first FM-200 cylinder 320 ft. (97.5 m). Maximum quantity of flexible actuation hoses is fifteen (one at the nitrogen cylinder and one at each FM-200 cylinder). All FM-200 cylinders must be located adjacent to one another. ACTUATION HOSE (TYP.) P/N 264986 OR 264987 PRESSURE SWITCH P/N 486536 MALE CONNECTOR P/N 6992-0501 PRESSURE TRIP TEE (TYP.) P/N 874290 P/N 6992-0505 MASTER CONTROL HEAD PILOT N2 CYLINDER P/N 877940 ACTUATION HOSE (TYP.) P/N 264986 OR 264987 90° ELBOW P/N 6992-0503 PIPING MASTER CYLINDER 320’ ¼” SCH. 40 PIPE 1 2 3 4 SLAVE SEE CYLINDER ENLARGED (TYP.) VIEW 5 15 DISCHARGE HOSE OR VALVE 1/4” X 1/8” CONCENTRIC REDUCER (TYP.) ACTUATION HOSE 6 1/4” SCH. 40 PIPE 320 FT. MAX. PIPE LENGTH MALE CONNECTOR (BOTH ENDS) P/N 6992-0501 PRESSURE OPERATED CONTROL HEAD (TYP.) P/N 878737 ACTUATION HOSE Figure 4-8. Pressure Actuation Using Pressure from 1 Nitrogen Pilot Cylinder to Actuate a Maximum of 15 FM-200 Cylinders Close Coupled 90-FM200M-000 4-12 February 2004 FM-200® ECS Series Engineered Fire Suppression Systems 4-2.5.5 USING MULTIPLE NITROGEN CYLINDERS Two or more remotely located pilot nitrogen cylinders can be used to actuate the FM-200 systems described in Paragraphs 4-2.5.3 and 4-2.5.4, provided that: 1/4" check valves (P/N 264985) shall be installed at the intersection of each pilot line to the main actuator line (see Figure 4-9). The total length of actuator line, from each nitrogen pilot cylinder to the FM-200 cylinders shall not exceed the limitation established. 4-3 EQUIPMENT INSTALLATION 4-3.1 General All Kidde FM-200 equipment must be installed to facilitate proper inspection, testing, manual operation, recharging and any other required maintenance as may be necessary. Equipment must not be subject to severe weather conditions or mechanical, chemical or other damage that could render the equipment inoperative. Equipment must be installed in accordance with NFPA Standard 2001, current edition. ! WARNING The FM-200 cylinder/valve assemblies must be handled, installed and serviced in accordance with the instructions contained in this paragraph and Compressed Gas Association (CGA) pamphlets C-1, C-6 and P-1. CGA pamphlets may be obtained from: Compressed Gas Association, 1235 Jefferson Davis Highway, Arlington, VA 22202. Failure to follow these instructions can cause FM-200 cylinders to violently discharge, resulting in severe injury, death and/or property destruction. N2 PILOT CYLINDER ¼” CHECK VALVE P/N WI-264985-000 N2 PILOT CYLINDER FM-200 CYLINDER Figure 4-9. Multiple Pilot Nitrogen Actuation Cylinders 4-2.5.6 CORNER PULLEY AND CABLE LIMITATIONS Table 4-7 lists corner pulley and cable length limitations. Table 4-7. Corner Pulley and Cable Limitations Part Number P/N 803808 P/N 844648 ft. Cable Operated 979469 15 30 100 Electric/Cable 895630 6 30 100 Electric/Cable 895627 6 30 100 Electric/Cable, Explosion-Proof 897494 6 30 100 Electric/Cable, Explosion-Proof 897560 6 30 100 4-2.5.7 Distribution Piping and Fittings 4-3.2.1 THREADS Threads on all pipe and fittings must be tapered threads conforming to ANSI Specification 8-20.1. Joint compound, tape or thread lubricant must be applied only to the male threads of the joint. Max. Cable Length Pulley Control Head Type 4-3.2 4-3.2.2 PIPE Piping must be of noncombustible material having physical and chemical characteristics, such that its integrity under stress can be predicted with reliability. The computer flow program has only been verified for the specific types and schedule of pipe and fittings covered in this manual. There is a risk that the system may not supply the required quantity of agent in unbalanced systems when other pipe types and fittings are used. PRESSURE TRIP LIMITATIONS The maximum load to be attached to pressure trip (P/N 874290) is 100 lb. (45.3 kg, based on a minimum pressure of 75 PSIG [5.17 bar gauge] at the pressure trip). February 2004 4-13 90-FM200M-000 FM-200® ECS Series Engineered Fire Suppression Systems 4-3.2.2.1 Ferrous Piping 4-3.3 Black steel or galvanized pipe must be either ASTM A-53 seamless or electric resistance welded, Grade A or B, or ASTM A-53 furnace weld Class F (up to 1½ diameter) or ASTM A-106, Grade A, B or C. ASTM B-120 and ordinary cast iron pipe must not be used. The thickness of the pipe wall must be calculated in accordance with ANSI B-31.1, Power Piping Code. The internal pressure for this calculation shall not be less than the minimum piping design pressure of 402 PSIG (28 bar gauge) at 70°F (21°C). The minimum piping design pressure of 402 PSIG at 70°F corresponds to eighty percent of the maximum pressure of 502 PSIG (35 bar gauge) in the agent container at the maximum storage temperature at 130°F (54°C), using the maximum allowable fill density at 70 lb./cu.ft. (1121 kg/cu.m). Pipe and fittings must be installed in strict accordance with the system drawings and good commercial practices. The piping between the cylinder and the nozzles must be the shortest route possible, with a minimum of fittings. Any deviations in the routing or number of fittings must be approved by the design engineer before installation. Note: Strict piping rules regarding flow splits to multiple hazards must be adhered to. Please refer to Paragraph 4-2.3.2 of this manual for proper tee installations. Piping must be reamed free of burrs and ridges after cutting, welding or threading. All threaded joints must conform to ANSI B1-20-1. Joint compound or thread tape must be applied only to the male threads of the joint, excluding the first two threads. Welding must be in accordance with Section IX of the ASME Boiler and Pressure Vessel Code. Each pipe section must be swabbed clean, using a non-flammable organic solvent. ! CAUTION Pipe supplied as dual stenciled A-120/A-53 Class F meets the requirements of Class F furnace welded pipe ASTM A-53 as listed above. Ordinary cast-iron pipe, steel pipe conforming to ASTM A-120, or nonmetallic pipe must not be used. 4-3.2.2.2 All piping must be blown clear with dry nitrogen or compressed air before installing the discharge nozzles. The piping must be securely braced to account for discharge reaction forces and thermal expansion/contraction. Care must be taken to ensure the piping is not subjected to vibration, mechanical or chemical damage. All hangers must be UL Listed, must conform to general industry standards for pipe hangers and conform to ANSI B-31.1. Refer to ANSI B-31.1 for additional bracing requirements. Piping Joints The type of piping joint shall be suitable for the design conditions and shall be selected with consideration of joint tightness and mechanical strength. 4-3.2.2.3 Installation of Pipe and Fittings Fittings Fittings shall conform to the requirements of NFPA 2001, Sections 2-2.3 and A-2-2.3.1. Class 150 and cast iron fittings must not be used. Class 300 lb. malleable or ductile iron fittings in sizes 3-inch and smaller, or 1000 lb. ductile iron or forged steel fittings in sizes greater than 3-inch are to be used. Class 300 flanged joints are acceptable for use in all sizes. All grooved couplings and fittings shall be UL Listed and/or FM Approved (as appropriate) and have a minimum rated working pressure equal to or greater than the minimum piping design pressure of 402 PSIG (28 bar gauge) at 70°F (21°C). 4-3.4 Installation of Check Valves Install the check valves as shown on the system drawings. Apply Teflon® tape or pipe compound to all the male threads, except the first two threads. Valves greater than two inches in size are provided with flanged outlets. All valves must be installed with the arrow on the valve body pointing in the proper direction of the flow. 4-3.5 Installation of Discharge Nozzles After the system piping has been blown free of debris, install the discharge nozzles in strict accordance with the system drawings. Orient the nozzles as shown on drawings. Make certain that the correct nozzle type, part number and orifice size are installed in the proper location. See Paragraph 4-2.3.5 for correct nozzle placement and orientation. Concentric bell reducers are the only means for reducing pipe size. Reductions can be made after a tee or after a union. Where reducers are used at tees, the reducers must be downstream of each tee. Reductions made after a union are possible only if the next change in direction (tee split) is located a minimum of 15 nominal pipe diameters downstream of the concentric bell reducer. Gaskets for flanged fittings shall be flat gray asbestos, neoprene impregnated. ! CAUTION The calculation software has only been verified for use with the piping, inside pipe diameter and fittings specified in this manual. When unspecified piping and fittings are used for unbalanced systems, there is a risk that the system will not supply the required quantity of FM-200. 90-FM200M-000 4-14 February 2004 FM-200® ECS Series Engineered Fire Suppression Systems 4-3.6 Installation of Pressure Actuation Pipe Table 4-8. Installation of the Flexible Hose Directly into System Piping, Inches The pressure actuation pipe must be 1/4-inch Schedule 40 or 80 pipe. The pipe or tubing must be routed in the most direct manner with a minimum of fittings. Pipe and fittings must be in accordance with the requirements listed in Paragraph 4-2.5. Fittings can be flared or compression type. The pressure-temperature ratings of the fitting manufacturer must not be exceeded. Dimensions in Inches Cylinder Capacity Piping must be reamed free of burrs and ridges after cutting, threading or flaring. Upon assembly, pipes must be blown out with dry nitrogen or compressed air. Piping should be securely braced and isolated from vibration, mechanical or chemical damage. 4-3.7 Installation of Valve Outlet Adapter ! WARNING Always connect a valve outlet adapter into system piping (union connection) before connecting to an FM-200 cylinder. Install valve outlet adapter (P/Ns 283904, 283905 and 283906) in system piping. Tighten securely. B C* 10 lb. 14 5/8 16 3/4 1 1/2 20 lb. 14 5/8 16 3/4 1 1/2 40 lb. 14 5/8 16 3/4 1 1/2 70 lb. 14 5/8 16 3/4 1 1/2 125 lb. 14 5/8 16 3/4 1 1/2 200 lb. 19 21 3/4 2 350 lb. 19 21 3/4 2 600 lb. (old style) 29 5/8 32 3/4 2 1/2 600 lb. (new style) 33 36 3 900 lb. 33 36 3 Note: Dimensions A and B must be maintained in order to obtain a smooth radius in flexible loop. * Hose may require an adapter to connect to system piping. Note: A groove-groove fitting is used in place of a valve outlet adapter for the 3-inch valve and associated cylinders. 4-3.8 A Table 4-9. Installation of the Flexible Hose Directly into System Piping, Millimeters Installation of Flexible Discharge Hose ! WARNING Dimensions in Millimeters Cylinder Capacity Always connect the flexible discharge hose into system piping before connecting to an FM-200 cylinder. Attach the flexible discharge hose from system piping or El-check in the discharge manifold to the cylinder valve. Tighten securely (see Figure 4-10 and Tables 4-8 and 4-9). B FACE OF PIPE FITTING C (HOSE SIZE) A B C 10 lb. 371 425 38 20 lb. 371 425 38 40 lb. 371 425 38 70 lb. 371 425 38 125 lb. 371 425 38 200 lb. 483 552 51 350 lb. 483 552 51 600 lb. (old style) 752 832 64 600 lb. (new style) 838 914 76 900 lb. 838 914 76 Note: Dimensions A and B must be maintained in order to obtain a smooth radius in flexible loop. *Hose may require an adapter to connect to system piping. A Figure 4-10. Installation of the Flexible Hose Directly Into System Piping February 2004 4-15 90-FM200M-000 FM-200® ECS Series Engineered Fire Suppression Systems 4-3.9 Installation of Master Cylinder Adapter Kit, P/N 844895 Note: Master cylinder adapter installation can be accomplished safely with a pressurized cylinder. 4-3.10.1 SINGLE CYLINDER SYSTEMS ! WARNING Cylinders must be located and mounted where they will not be accidently damaged or moved. If necessary, install suitable protection to prevent the cylinder from damage or movement. 1. Remove the 1/4-inch pipe plug from the slave actuation port on the master cylinder valve (see Figure 4-11). 2. Before assembling the adapter to the cylinder valve, apply Permacel No. 412D Teflon® tape to the male threads on the adapter. 3. Ensure the cap is screwed onto the adapter outlet port before assembling to the cylinder valve. 4. Install the adapter into the slave actuation port on the master cylinder valve. 5. Attach the label to the valve body. 1. Position FM-200 cylinder in designated location and secure in place with cylinder strap and attaching hardware (see Figure 4-12 and Tables 4-10, 4-11 and 4-12). Orient cylinder with valve outlet angled toward system piping. 2. Remove the safety cap from the cylinder valve outlet port. 3. Connect a 1½-, 2-, 2½-, or 3-inch flexible discharge hose or valve outlet adapter to the cylinder outlet port. VALVE Note: If a valve outlet adapter is used, a union must be installed in the discharge piping. ! WARNING LABEL Connect the discharge hose to system piping before attaching it to the cylinder valve. ADAPTER The valve outlet adapter must be connected into system piping (union connection) before attaching it to the cylinder valve. CAP 4. Remove the protection cap from the cylinder valve actuation port. ! WARNING Figure 4-11. Installation of Master Cylinder Adapter Kit 4-3.10 The control head must be in the SET position (that is, the actuating pin must be in the fully retracted or SET position) before attaching it to an FM-200 cylinder in order to prevent accidental discharge. Installation of FM-200 Cylinder/ Valve Assemblies The FM-200 cylinders should be located as close as possible to the protected hazard area. The assemblies should be located in a place which is readily accessible for manual actuation and inspection, service and maintenance. The cylinders shall be located in an environment protected from the weather, and where the ambient temperature does not exceed 80°F (27°C) or fall below 60°F (16°C). External heating or cooling may be required to maintain this temperature range. The following installation instructions must be followed in the exact sequence outlined below to prevent accidental discharge, bodily injury and property damage. 90-FM200M-000 5. Install the control head to the cylinder valve actuation port. 4-16 February 2004 FM-200® ECS Series Engineered Fire Suppression Systems Table 4-11. Single Cylinder Installation Dimensions, Millimeters A B Cylinder Part Number Dimensions* A B C D E F 90-10001X-001 244 183 180 216 187 M10 90-10002X-001 244 183 180 216 318 M10 90-10004X-001 297 232 229 272 270 M10 90-10007X-001 297 232 229 272 699 M10 90-100121-001 411 329 324 370 597 M14 90-100125-001 411 329 324 370 597 M14 90-10020X-001 433 350 345 392 991 M14 Figure 4-12. Single Cylinder Installation, Vertical Mounting 90-10020X-101 411 329 324 370 991 M14 90-10035X-001 495 411 406 454 1118 M14 Table 4-10. Single Cylinder Installation Dimensions, Inches 90-10060X-001 654 565 559 613 978 M14 90-10060X-100 654 565 559 613 978 M14 90-10090X-001 704 635 610 660 1232 M14 STRAP (SEE TABLE 4-8) F (BOLT SIZE) END VIEW E C D Cylinder Part Number Dimensions A B C D E F 90-10001X-001 9.62" 7.19" 7.07" 8.52" 7.38" 3/8" 90-10002X-001 9.62" 7.19" 7.07" 8.52" 12.50" 3/8" 90-10004X-001 11.69" 9.13" 9.00" 10.69" 10.63" 3/8" Strap Part Number Cylinder Size 90-10007X-001 11.69" 9.13" 9.00" 10.69" 27.50" 3/8" 283945 10 and 20 lb. 90-100121-001 16.18" 12.94" 12.75" 14.56" 23.75" 9/16" 283934 40 and 70 lb. 90-100125-001 16.18" 12.94" 12.75" 14.56" 23.75" 9/16" 292971 125 and 200 lb. (old style) 90-10020X-001 17.06" 13.78" 13.60" 15.44" 39.00" 9/16" 235317 125 and 200 lb. (new style) 90-10020X-101 16.18" 12.94" 12.75" 14.56" 39.00" 9/16" 281866 350 lb. 90-10035X-001 19.50" 16.19" 16.00" 17.88" 44.00" 9/16" 294651 600 lb. 90-10060X-001 25.75" 22.25" 22.00" 24.12" 38.50" 9/16" 236125 900 lb 90-10060X-100 25.75" 22.25" 22.00" 24.12" 38.50" 9/16" 90-10090X-001 27.75" 25.00" 24.00" 26.00" 48.50" 9/16" February 2004 *Note: Dimensions are in millimeters. Table 4-12. Strap Part Numbers for Cylinder Installation 4-17 90-FM200M-000 FM-200® ECS Series Engineered Fire Suppression Systems 4-3.10.2 MULTIPLE CYLINDER SYSTEM Table 4-13. Multiple Cylinder Installation Dimensions, Inches ! WARNING Cylinders must be located and mounted where they will not be accidently damaged or moved. If necessary, install suitable protection to prevent the cylinder from damage or movement. Cylinder Part Number 1. Position the cylinders in the designated location and secure them in place with cylinder straps and attaching hardware (see Figure 4-13 and Tables 4-13 and 4-14). Orient the cylinders so that the valve outlets are angled towards the El-check valves in the manifold. ! WARNING The discharge hose must be connected into the system piping before attaching it to the cylinder valve. 2. Remove the safety cap from one cylinder outlet port and connect the flexible discharge hose to the cylinder outlet port. Repeat for each cylinder in the system. 3. Remove the protection caps from the cylinder actuation ports. 4. Install the control heads on the cylinder valve actuation ports. ANCHOR AND STUD (TYP) WALL B B FRAMING CYLINDER SUPPORT CYLINDER (TYP) C (BOLT SIZE) FLOOR LEVEL D B C D 90-10001X-001 8.52" 11.00" 3/8" 7.38" 90-10002X-001 8.52" 11.00" 3/8" 12.50" 90-10004X-001 10.69" 13.00" 3/8" 10.63" 90-10007X-001 10.69" 13.00" 3/8" 20.00" 90-100125-001 14.56" 18.00" 9/16" 20.88" 90-10020X-001 15.44" 18.00" 9/16" 29.63" 90-10020X-101 14.56" 18.00" 9/16" 29.63" 90-10035X-001 17.88" 21.00" 9/16" 37.13" 90-10060X-001 24.12" 27.00" 9/16" 34.00" 90-10060X-100 25.75" 27.00" 9/16" 38.50" 90-10090X-001 25.75" 30.00" 9/16" 48.50" Cylinder Part Number Control heads must be in the SET position (that is, the actuating pin must be in the fully retracted or SET position) before attaching to FM-200 cylinders in order to prevent accidental discharge. Personal injury and/or property damage could occur. B A Table 4-14. Multiple Cylinder Installation Dimensions, Millimeters ! WARNING A (TYP) Dimensions CYLINDER STRAP Dimensions A B C D 90-10001X-001 216 mm 279 mm 10 mm 187 mm 90-10002X-001 216 mm 279 mm 10 mm 318 mm 90-10004X-001 272 mm 330 mm 10 mm 270 mm 90-10007X-001 272 mm 330 mm 10 mm 699 mm 90-100125-001 370 mm 457 mm 14 mm 597 mm 90-10020X-001 392 mm 457 mm 14 mm 991 mm 90-10020X-101 370 mm 457 mm 14 mm 991 mm 90-10035X-001 454 mm 533 mm 14 mm 1118 mm 90-10060X-001 613 mm 686 mm 14 mm 978 mm 90-10060X-100 654 mm 686 mm 14 mm 978 mm 90-10090X-001 704 mm 762 mm 14 mm 1232 mm VERSABAR Figure 4-13. Multiple Cylinder Installation, Vertical Mounting (see Tables 4-13 and 4-14 for dimensions) 90-FM200M-000 4-18 February 2004 FM-200® ECS Series Engineered Fire Suppression Systems 4-3.10.3 MAIN AND RESERVE SYSTEM 2.90” (76.33 mm) Install main and reserve systems as instructed in the previous paragraphs. 4-3.11 1.25-18 UNEF-2A CONNECTION Installation of Electric Control Heads 1/2"-14 NPT CONDUIT CONNECTION ! WARNING Before installing a control head on an FM-200 cylinder valve, ensure the control head is in the SET position (that is, the actuating pin is in the fully retracted or SET position). Failure to position the control head in the SET position will result in accidental FM-200 cylinder discharge when the control head is installed on cylinder valve. Personal injury and/or property damage could occur. 5.28" (134.11 mm) (3) 18 AWG-LEADS 18” (457.2 mm) LONG Electric Control Head, P/N 486500-01 is designed for Kidde 1½", 2" and 2½" FM-200 cylinder valves only. Installing this control head on any other device (for example, pressure operated control head) will cause the device to malfunction when the control head is actuated. SWIVEL NUT 1.25 - 18 UNEF - 2B CONNECTION Figure 4-14. Installation of Electric Control Head (Stackable Type), P/N 486500-01 1. Remove the protection cap from the FM-200 cylinder actuation port. Ensure the control head is in SET position (that is, the actuating pin is in the fully retracted or SET position). 2. Install the electric control head on the cylinder actuation port. Tighten the swivel nut. 0.750 NPT TO FLEXIBLE CONDUIT ADAPTER FLEXIBLE CONDUIT OPTIONAL CONNECTION FOR MICROSWITCH (TERMINAL 2) PLUS OR HOT CONNECTION (TERMINAL 3) MINUS, NEUTRAL OR GROUND CONNECTION (TERMINAL 1) 3. Make all electrical connections. Note: P/N 486500-01 is a polarized control head. Improper wiring will cause the device to malfunction. TERMINAL STRAP 2 MICROSWITCH LEVER ! CAUTION The stackable control head (P/N 48650001) cannot be used with the 3-inch valve cylinder (P/Ns 90-100600-100, 90-100601-100, 90100900-001 and 90-100901-001). The stackable control head does not have sufficient force to activate the 3-inch valve (P/N 90-17000-000) and may result in system failure. Use the electric/manual control heads (P/N[s] 8901XX) with the 3-inch valve. February 2004 3 MICROSWITCH INDICATOR AND RESET STEM CAM SWIVEL NUT Figure 4-15. Electrical Connections for Control Head, P/Ns 890181, 895630 and 890149 4-19 90-FM200M-000 FM-200® ECS Series Engineered Fire Suppression Systems Installation of Pressure Operated Control Heads, P/N 878737 4-3.13 1. Remove the protection cap from the cylinder actuation port (see Figure 4-16). 1.00" HEX (25.4 mm) The following procedures must be performed before attaching a control head to a cylinder valve (see Figure 4-17): 1. Remove the four screws holding the cable housing cover on the control head. Remove the cover. 2. Position the control head in the approximately installed position at the FM-200 cylinder valve control port but do not assemble onto the actuation port of the FM-200 cylinder valve. 3. Check that the control head is in the SET position. 4. Assemble the pull cable conduit to the conduit connection on the control head. 5. Feed the cable into the control head through the hole in the operating lever. 6. Feed the cable through the cable clamp. Pull the cable taut, allowing approximately 1/4" to 1/2" clearance between the cable clamp and the operating lever. Tighten the set screws in the cable clamp to secure the cable to the clamp. 7. Cut off any excess cable. 8. Verify the manual remote cable operation to ensure control head actuates and all cable clamps are tight. 9. Pull the cable back to its normal set (non-operated) position. 10. Reset the control head. 11. Replace the control head cover. 12. Examine the seal wire at the safety pull pin. Make sure it is intact. 13. Make all electrical connections. 14. Assemble the control head to the cylinder valve actuation port. Tighten the swivel nut securely. 1/8"-27 NPT PRESSURE INLET PISTON 2.19" (55.6 mm) SWIVEL NUT SET OPERATED Installation of Electric/Cable Operated Control Head, P/Ns 895630, 895627 and 895628 1.250-18 UNEF-3B 1.50" HEX (38 mm) Figure 4-16. Pressure Operated Control Head 2. Install a pressure operated control head with flexible actuation hose attached to the cylinder actuation port. ! WARNING Ensure that the pilot line is non-pressurized and the actuating pins are in the retracted (SET) position. Failure to follow this procedure will cause the FM-200 cylinder to discharge accidentally when the control head is installed on the cylinder valve. 1/16” CABLE 1/2" E.M.T. DIRECTION OF PULL 4-3.12 FLEXIBLE CONDUIT 3/4” NPT BY FLEXIBLE CONDUIT CONNECTOR PLUS OR HOT CONNECTION MINUS, NEUTRAL OR GROUND CONNECTION THREAD CABLE THRU HOLE IN OPERATING LEVER TERMINAL STRIP POSITION CABLE BLOCK APPROXIMATELY AS SHOWN LEAVING 1/4” - 1/2” GAP OPTIONAL CONNECTION FOR MICROSWITCH MICROSWITCH SWIVEL NUT INDICATOR AND RESET STEM CAM MICROSWITCH LEVER VIEW WITH COVER AND NAMEPLATE REMOVED Figure 4-17. Electric/Cable Operated Control Head 90-FM200M-000 4-20 February 2004 FM-200® ECS Series Engineered Fire Suppression Systems 4-3.14 Installation of Cable Operated Control Head, P/N 979469 4-3.16 1. Locate the nitrogen cylinder mounting bracket in an area where the cylinder valve assembly and control head will be protected from inclement weather by a suitable total or partial enclosure, preferably adjacent to the FM-200 storage cylinders. 2. Install the mounting bracket clamps and hardware. Install the nitrogen cylinder in position in a mounting bracket; tighten sufficiently to hold the cylinder in place while allowing the cylinder enough free play to be rotated. 3. Turn the cylinder until the cylinder valve discharge outlet is in the desired position. The nitrogen cylinder must be positioned so that control head is readily accessible during manual operation. 4. Securely tighten the mounting bracket clamps and hardware. 5. Attach the adapter (P/N 6992-0501) and connect the nitrogen pilot lines. 6. Remove the protective cap from the cylinder valve actuation port. ! WARNING The cable operated control head (P/N 979469) must not be used with the stackable pressure operated control head (P/N 878750). Installing the cable operated control head on the actuation port of the stackable pressure operated control head will cause the device to malfunction. The following procedures must be performed before attaching the control head to the cylinder valve. 1. Remove the protection cap from the cylinder actuation port. 2. Remove the cover from the control head and take out the wheel assembly, cable pipe locknut and closure disc. 3. Make sure the plunger is below the surface of the control head body. Position the control head at the valve control port with the arrow pointing in the direction of pull. 4. Assemble the cable pipe locknut to the cable pipe and place the cable pipe in the control head body. 5. Slide the wheel assembly on the control cable to the SET position. Tighten the set screws securely. Make sure the wheel assembly is at the start of the stroke. 6. Cut off any excess control cable close to the wheel assembly. 7. Insert the closure disc and replace the cover on the control head. The control head is now armed. ! WARNING Ensure the control head is in the SET position (that is, the actuating pin is in the fully retracted or SET position) before attaching it to the cylinder valve. If the control head is not in the SET position, FM-200 will discharge accidentally. 7. Install the control head to the cylinder valve actuation port and tighten securely. ! CAUTION 4-3.17 To ensure the manual lever does not snag or trap the cable, make sure the local manual release lever is in the SET position with the locking pin and seal wire installed before assembling the control head cover to the body. To prevent injury, de-energize all electrical components before installing the pressure switch. Pressure switches must be connected to the discharge manifold or piping in an upright position as shown on the system drawings. Both the standard and explosion-proof switches have 1/2-inch NPT pressure inlets to connect to the system piping. The electrical connections are either 1/2-inch conduit knockouts for the standard pressure switch or 1-inch NPT fittings for the explosion-proof pressure switch. Installation of Lever Operated Control Head, P/N 870652 1. Ensure the control head is in the SET position with the safety pull pin and seal wire intact. 2. Remove the protection cap from the cylinder valve actuation port. 3. Using a suitable wrench, assemble the control head to the cylinder valve actuation port. Tighten the swivel nut securely. February 2004 Installation of Pressure Switch, P/N 486536 and P/N 981332 ! WARNING 8. Assemble control head to cylinder valve actuation port. Tighten swivel nut securely. 4-3.15 Installation of Nitrogen Cylinder, P/N 877940, and Mounting Bracket, P/N 877845 4-21 90-FM200M-000 FM-200® ECS Series Engineered Fire Suppression Systems 4-3.18 Installation of Pressure Trip, P/N 874290 Install the pressure trip on the discharge manifold or piping in the horizontal position as shown on the system drawings. Connect the trip to the piping with 1/2-inch Schedule 40 pipe. The minimum operating pressure required is 75 PSIG (5.17 bar gauge). The maximum allowable load to be attached to the retaining ring is 100 lb. (45.4 kg). 4-3.19 Installation of the supervisory pressure switch can be accomplished safely on a pressurized cylinder. ! WARNING Before installing the pressure switch, de-energize all electrical components to prevent injury. Installation of Manual Pull Station, P/N 871403 1. Locate the remote pull boxes as shown on the system installation drawings. 2. Connect the pull boxes to the control heads using 3/8inch, Schedule 40 pipe. Do not run more than one cable in each pipe run. 3. Install a corner pulley at each change in pipe direction. Do not bend the pipe. A dual-pull equalizer (P/N 840051) should be installed where one pull box operates two controls. A dual pull mechanism (P/N 840058) should be installed where two pull boxes operate one control. 4. Beginning at the pull boxes, remove the covers of the first corner pulley. Feed the cable through the pulley into the 3/8-inch pipe. Connect one end of the cable to the cable fastener in the pull box, allowing the short end to project at least 1/2-inch. Seat the cable in the groove by pulling on the long end. Screw the fastener and cable into the handle. Route the other end to the control heads, taking up as much slack as possible. Attach the end of the cable to the fastener in the control head. 5. Reattach the corner pulley covers. 6. Check that control head is in SET position. Install the control head to the FM-200 cylinder valve. 4-3.20 Installation of Supervisory Pressure Switch, P/Ns 06-118262-001 and 06-118263-001 4-3.21 ! CAUTION When attaching or removing the supervisory pressure switch from the cylinder valve, attach a wrench to the fitting and hold securely while tightening or loosening the pressure switch. VALVE WRENCH FLATS SUPERVISORY PRESSURE SWITCH FITTING PRESSURE SWITCH ELECTRICAL CABLE FOR SWITCH CONNECTION Figure 4-18. Installation of Supervisory Pressure Switch (Up to 2½" Valve) Note: The control panel must be UL Listed and/or FM Approved for releasing device service and compatible with Kidde FM-200 equipment. 2 BLUE: N.O. (N.C. UNDER PRESSURE) BLACK: N.C. (N.O. UNDER PRESSURE) 1 VIOLET: COM. 3 Installation of Discharge Indicator, P/N 875553 The discharge indicator must be installed on the discharge manifold, either in a vertical or horizontal position. The indicator has a 3/4-inch NPT male connection. Make certain the indicator stem is in the normal position. FACTORY SEALED LEADWIRES 36" LONG ± 1” 0.500 -14 NPT CAUTION LABEL 4.125” (10.48 cm) NAMEPLATE LABEL O-RING 0.250" SAE 45° FLARE (CONNECTION FOR 06-118262-001 SHOWN) Figure 4-19. Supervisory Pressure Switch Electrical Connections 90-FM200M-000 4-22 February 2004 FM-200® ECS Series Engineered Fire Suppression Systems P 4-3.21.2 Install the pressure switch as follows: Note: 3 1 2 • 5A 24 Vdc (Resistive) • 5A 240 Vac (Resistive) Figure 4-20. Supervisory Pressure Switch Connection Diagram and Electrical Rating Note: When cylinder supervisory pressure switch (P/N 06-11826X-001) is connected to a supervised control panel circuit, and the switch is wired NC under pressure, it is not possible to distinguish between a wiring fault and a loss of container pressure. This configuration should only be used if accepted by the Authority Having Jurisdiction. 4-3.21.1 INSTALLATION OF PRESSURE SWITCH 06-118262-001 Install the pressure switch as follows: Note: Do not use with 3" valves. 1. Check that the sealing surface of the flare connection of the supervisory switch is not scratched, dented, scored, etc. 2. Remove the end cap from the pressure switch port of the valve. This is a flare fitting and does not require tape dope or any type of sealant. 3. Install the pressure switch onto the pressure port of the valve. Be sure to secure the pressure port with a wrench so that you are not turning the port fitting further into the valve. Tighten the switch hand-tight and then tighten 1/4-turn further using a wrench. 4. Important: Leak test the pressure switch connection with an FM-200 leak detector or a bubbling solution. If the connection leaks, the switch may be tightened further until the leak is eliminated, again, be sure to have a counter wrench on the switch port. February 2004 INSTALLATION OF PRESSURE SWITCH 06-118263-001 For 3" valves only. 1. Hold the pressure switch fitting on the valve with a wrench and remove the 1/8-inch plug with a second wrench. Ensure that the fitting does not rotate in the valve body. The fitting contains a check valve that will prevent the escape of the cylinder contents. 2. Before fitting the switch, apply Permacel® No. 412D Teflon® tape to the male threads of the pressure switch. 3. Install the pressure switch into the port of the valve. Be sure to secure the pressure port fitting with a wrench. Tighten the switch hand-tight and then tighten 1¼-turns further using a wrench. 4. Important: Leak test the pressure switch connection with an FM-200 leak detector or a bubbling solution. If the connection leaks, the switch may be tightened further a 1/4-inch turn at a time until the leak is eliminated, again, be sure to have a counter wrench on the switch port. Do not exceed two turns from hand-tight. Refer to ANSI B1.20.3 for NPT thread engagement details. 4-3.22 Post-Installation Checkout After an FM-200 system installation has been completed, perform the following inspections and tests. 1. Verify that the cylinders of correct weight and pressure are installed in accordance with installation drawings. 2. Verify that the cylinder brackets and straps are properly installed and all fittings are tight. 3. The piping distribution system must be inspected for compliance with the system drawings, NFPA 2001, design limitations within this manual and the computerized hydraulic calculations associated with each independent piping and nozzle configuration. 4. Check that the discharge manifold, discharge piping and actuation piping are securely hung. Ensure all fittings are tight and securely fastened to prevent agent leakage and hazardous movement during discharge. The means of pipe size reduction and installation position of the tees must be checked for conformance to the design requirements. 5. The piping distribution system must be cleaned, blown free of foreign material and inspected internally to ensure that oil or particulate matter will not soil the hazard area or reduce the nozzle orifice area and affect agent distribution. 6. System piping should be pressure tested in accordance with the requirements of NFPA 2001. 4-23 90-FM200M-000 FM-200® ECS Series Engineered Fire Suppression Systems 7. Ensure that the check valves are installed in the proper location as indicated on the installation drawings and that the equipment is installed with the arrow pointing in the direction of flow. 8. Verify the nozzles are installed in the correct locations and have the correct part numbers and orifice sizes as indicated on installation drawings. Discharge nozzles must be oriented such that optimum agent dispersal can be achieved. Check the nozzle orifices for any obstructions. 9. The discharge nozzles, piping and mounting brackets must be installed such that they will not cause injury to personnel. The agent must not be discharged at head height or below where people in a normal work area could be injured by the discharge. The agent must not directly impinge on any loose objects or shelves, cabinet tops or similar surfaces where loose objects could be propelled by the discharge. 10. For systems with a main/reserve capability, the MAIN/ RESERVE switch must be clearly identified and properly installed where it is readily accessible. 11. Manual pull stations must also be clearly identified and properly installed where they are readily accessible. All manual stations that activate FM-200 systems should be properly identified as to their purpose. Particular care should be taken where manual pull stations for more than one system are in close proximity and could be confused and the wrong system actuated. In this case, manual stations should be clearly identified as to which hazard area they affect. 12. Perform the electric control head test outlined in Paragraph 5-4.3.2 on all cylinders equipped with electric control heads. 13. Perform the pressure switch test outlined in Paragraph 5-4.3.1 for all pressure switches installed. 14. All acceptance testing shall be in accordance with NFPA 2001 current edition. 90-FM200M-000 4-24 February 2004 FM-200® ECS Series Engineered Fire Suppression Systems CHAPTER 5 MAINTENANCE 5-1 5-3 INTRODUCTION PREVENTIVE MAINTENANCE Perform preventive maintenance per Table 5-1. This chapter contains maintenance instructions for the Kidde FM-200® ECS Series Engineered Fire Suppression System. These procedures must be performed regularly in accordance with regulations. If problems arise, corrective action must be taken. Table 5-1. Preventive Maintenance Schedule S ch ed u le R eq u iremen t Check FM-200 cylinder pressures D aily 5-2 General 5-4.2 Check FM-200 cylinder weights and pressures S emi-An n u ally Before performing these maintenance procedures, refer to the Material Safety Data Sheets and Safety Bulletins in the appendices of this manual. 5-2.1 Inspect hazard area system components Mo n th ly FM-200 and nitrogen cylinder valve assemblies must be handled, installed, inspected and serviced only by qualified and trained personnel in accordance with the instructions contained in this manual and Compressed Gas Association (CGA) pamphlets C-1, C-6 and P-1. CGA pamphlets my be obtained from Compressed Gas Association, Crystal Square Two, 1725 Jefferson Davis Highway, Arlington, VA 22202-4102. 5-4.1 Check nitrogen cylinder pressures MAINTENANCE PROCEDURES ! WARNING P arag rap h Test pressure switches 5-4.3 Test electric control heads E very 2 Years Blow out distribution piping E very 5 Years FM-200 and nitrogen cylinder and flexible hose hydrostatic pressure test and/or inspection 5-4.4 5-5 and 6-4.1 5-4 INSPECTION PROCEDURES 5-4.1 Daily 5-4.1.1 CHECK FM-200 CYLINDER PRESSURE Check the FM-200 cylinder pressure gauges for proper operating pressure (refer to Table 3-1). If the pressure gauge indicates a pressure loss (adjusted for temperature) of more than 10%, or loss in agent quantity shown on cylinder valve of more than 5%, it shall be refilled. Remove and recharge the cylinder as instructed in Paragraphs 5-7 and 6-3. A regular program of systematic maintenance is essential for continuous, proper operation of all FM-200 systems. A periodic maintenance schedule must be followed and an inspection log maintained for ready reference. As a minimum, the log must record: 1. Inspection interval, 5-4.1.2 2. The inspection procedure performed, CHECK NITROGEN CYLINDER PRESSURE Check the nitrogen cylinder for proper operating pressure. If the pressure loss (adjusted for temperature) exceeds 10%, recharge with nitrogen to 1800 PSIG at 70°F (124 bar gauge at 21°C). 3. Maintenance performed, if any, as a result of inspection, and 4. The name of inspector performing the task. If the inspection indicates areas of rust or corrosion, immediately clean and repaint the area. Perform cylinder hydrostatic pressure testing in accordance with Paragraph 5-5 of this manual. February 2004 5-1 90-FM200M-000 FM-200® ECS Series Engineered Fire Suppression Systems 5-4.2 Monthly 5-4.2.1 GENERAL INSPECTION 5-4.2.7 Inspect the FM-200 cylinder brackets, straps, cradles and mounting hardware for loose, damaged or broken parts. Check the cylinder brackets, straps and associated parts for corrosion, oil, grease and grime. Tighten any loose hardware. Replace damaged parts. If necessary, clean as directed in Paragraph 5-6.1. Make a general inspection survey of all cylinders and equipment for damaged or missing parts. If the equipment requires replacement, refer to Paragraph 5-6.3. 5-4.2.2 HAZARD ACCESS Ensure access to hazard areas, manual pull stations, discharge nozzles, and cylinders are unobstructed and that nothing obstructs the operation of the equipment or distribution of FM-200 agent. 5-4.2.3 5-4.2.8 INSPECT HOSES 5-4.2.9 INSPECT PRESSURE CONTROL HEADS 5-4.2.10 ! CAUTION Nozzles must never be painted. INSPECT ELECTRIC CONTROL HEADS Nozzles must be replaced by nozzles of the same part number. (A part number is located on each nozzle.) Nozzles must never be interchanged since random interchanging of nozzles could adversely affect proper FM-200 distribution and concentration within a hazard area. 5-4.2.11 INSPECT CYLINDER AND VALVE ASSEMBLY INSPECT PULL STATIONS Inspect all manual pull stations for cracks, broken or cracked glass plate, dirt or distortion. Inspect the station for signs of physical damage. Replace damaged glass. Replace the station if damaged. If necessary, clean as directed in Paragraph 5-6.1. Inspect the FM-200 cylinder and valve assembly for leakage and physical damage such as cracks, dents, distortion and worn parts. Check the burst disc and pressure gauges for damage. Replace damaged gauges or burst disc per Paragraph 6-2.4. If the gauge pressure is not normal (360 PSIG at 70°F [25 bar gauge at 21°C]), remove and recharge the cylinder as instructed in Paragraphs 5-7 and 6-3. If damaged parts are found on the FM-200 cylinder or cylinder valve, replace the FM-200 cylinder. If necessary, clean the cylinder and associated parts as directed in Paragraph 5-6.1. 90-FM200M-000 INSPECT DISCHARGE NOZZLES Inspect discharge nozzles for dirt and physical damage. Replace damaged nozzles. If nozzles are dirty or clogged, refer to Paragraph 5-6.1. Inspect the FM-200 cylinder electric control heads for damage, corrosion, and dirt. Check the control heads' flexible electrical line for wear and damage. Check the control head for loose coupling and tighten if necessary. Check that the indicator is in the SET position, the pull pin is installed in the manual lever, and the seal wire is intact. Replace the control head if damaged. If necessary, clean as directed in Paragraph 5-6.1. 5-4.2.6 INSPECT ACTUATION LINE Inspect the nitrogen actuation line (if used) and support brackets for continuity, physical damage, loose fittings, distortion, cracks or cuts. Tighten loose fittings. Replace damaged parts. If necessary, clean as directed in Paragraph 5-6.1. Inspect FM-200 cylinder pressure operated control heads for physical damage, deterioration, corrosion, distortion, cracks, dirt and loose couplings. Tighten loose couplings. Replace damaged caps. Replace the control head if damaged. If necessary, clean as directed in Paragraph 5-6.1. 5-4.2.5 INSPECT DISCHARGE HOSES Inspect he flexible discharge hoses for loose fittings, damaged threads, cracks, rust, kinks, distortion, dirt and frayed wire braid. Tighten loose fittings and replace hoses with stripped threads. If necessary, clean as directed in Paragraph 5-6.1. Inspect 1/4-inch flexible actuation hoses for loose fittings, damaged threads, cracks, distortion, cuts, dirt and frayed wire braid. Tighten loose fittings and replace hoses with stripped threads or other damage. If necessary, clean parts as directed in Paragraph 5-6.1. Inspect the adapters, couplings and tees at the FM-200 cylinder pilot outlets and tighten couplings if necessary. Replace any damaged parts. 5-4.2.4 INSPECT BRACKETS, STRAPS, CRADLES AND MOUNTING HARDWARE 5-4.2.12 INSPECT PRESSURE SWITCHES Inspect pressure switches for deformations, cracks, dirt or other damage. Replace the switch if damaged. If necessary, clean the switch as directed in Paragraph 5-6.1. 5-2 February 2004 FM-200® ECS Series Engineered Fire Suppression Systems 5-4.2.13 WEIGHING FM-200 CYLINDERS CAP Weigh 10 through 900 lb. FM-200 cylinders as follows: ! WARNING READING TAKEN AT TOP EDGE OF FITTING Install a protection cap on the FM-200 cylinder valve actuation port and safety cap on the cylinder valve outlet port. TAPE INSIDE BRASS TUBE FM-200 LIQUID LEVEL 1. Remove the cylinder as instructed in Paragraph 5-7. 2. Place the cylinder on a scale. 3. Record the weight and date on a record card and attach it to the cylinder. The gross weight and tare (empty) weight are metal stamped on the FM-200 cylinder valve label. Therefore, subtract tare weight from the gross weight to determine net weight of the original charge. Then, subtract tare weight from the scale reading to determine net weight of the FM-200 agent remaining in the cylinder. If the recorded agent net weight is less than 95% of original charge net weight, replace the cylinder with a fully charged FM-200 cylinder (recharging the cylinders is explained in Paragraph 6-3). 4. Reinstall the cylinder (see Paragraph 5-8 for reinstallation instructions). FM-200 CYLINDER MAGNETIC END OF TAPE ENGAGES IN MAGNETIC FIELD OF FLOAT WHEN TAPE IS PULLED UP TO TAKE READING. MAGNET EMBEDDED IN FLOAT. FLOAT - FLOATS ON SURFACE OF LIQUID FM-200. FREE TO MOVE UP OR DOWN OUTSIDE OF BRASS TUBE. RETAINER - FLOAT RESTS HERE WHEN CYLINER IS EMPTY. Figure 5-1. Liquid Level Indicator 6. Check the ambient temperature where the FM-200 cylinders are stored and record the temperature. 7. Refer to the appropriate calibration charts (see Figures 5-2 through 5-7) and locate the level reading on the vertical axis (labeled Flexible Tape Reading). Trace horizontally to the right to the appropriate temperature line. Read the weight of FM-200 from the scale at the bottom of the chart. Record the weight and date on the record tag attached to the cylinder. 8. After taking the reading, carefully push the tape down into the liquid level housing. Replace the protective cap. CYLINDERS EQUIPPED WITH A FLEXIBLE TAPE LIQUID LEVEL INDICATOR The following procedure explains how to determine the FM-200 weight of 125, 200, 350, 600 and 900 lb. cylinders equipped with a flexible tape liquid level indicator. This procedure can be performed without removing the FM-200 cylinders from the system. 1. Remove the protective cap to expose the tape. 2. Raise the flexible tape slowly until it latches. 3. Note the reading at the point where the tape emerges from the fitting. Note: ! CAUTION Take care to not pull the flexible tape upwards after it latches to ensure an accurate reading. If the weight measured by the liquid level indicator indicates the cylinder should be recharged, we recommend the cylinder first be removed from service and the weight loss verified using a weigh scale before recharging. All FM-200 cylinders must be filled or recharged by weight using a platform scale or equivalent. If weight loss is more than 5% of the FM-200 charge, the unit must be recharged. 4. To determine the final, more precise reading, repeat the above procedure. About two inches before the tape should latch, raise the tape very slowly until it latches. 5. While supporting the weight of the tape, record the liquid level measurement. February 2004 O-RING BRASS TUBE Disconnect all cylinder control heads, discharge hoses, and flexible pilot hoses to prevent accidental system discharge. 5-4.2.14 GRADUATED TAPE SHOWN IN MAGNETIC INTERLOCK POSITION READY TO TAKE READING. 5-3 90-FM200M-000 FM-200® ECS Series Engineered Fire Suppression Systems 25.0 35.0 130°F 130°F 20.0 30.0 100°F 70°F 70°F 30°F 25.0 30°F Flexible Tape Reading (Inches) Flexible Tape Reading (inches) 100°F 15.0 10.0 20.0 15.0 10.0 5.0 5.0 75 100 125 150 175 200 FM-200 Weight (lb.) 0.0 50 75 100 125 Figure 5-4. Calibration Chart for a New 200# Cylinder (New Design Ellipsoidal Head Manufactured After 3/98) FM-200 Weight (lb.) Figure 5-2. Calibration Chart 125# Cylinder 30.0 130°F 30.0 130°F 100°F 100°F 28.0 70°F 25.0 40°F 24.0 20.0 Flexible Tape Reading (Inches) Flexible Tape Reading (inches) 30°F 70°F 26.0 22.0 20.0 18.0 15.0 10.0 16.0 14.0 5.0 12.0 175 150 FM-200 Weight (lb.) 125 200 0.0 150 Figure 5-3. Calibration Chart for Old 200# Cylinder 175 200 225 250 275 300 325 350 FM-200 Weight (lb.) Figure 5-5. Calibration Chart for 350# Cylinder 90-FM200M-000 5-4 February 2004 FM-200® ECS Series Engineered Fire Suppression Systems 130°F 30.0 100°F 70°F 25.0 Flexible Tape Reading (inches) 30°F 20.0 15.0 10.0 5.0 250 300 350 400 450 500 550 600 FM-200 Weight (lb.) Figure 5-6. Calibration Chart for 600# Cylinder 40 36 130°F (54°C) Flexible Tape Reading (inches) 32 100°F (38°C) 70°F (21°C) 30°F (-1°C) 28 24 20 16 12 8 4 0 380 430 480 530 580 630 680 730 780 830 880 FM-200 Weight (lb.) Figure 5-7. Calibration Chart for 900# Cylinder February 2004 5-5 90-FM200M-000 FM-200® ECS Series Engineered Fire Suppression Systems 5-4.3 Inspection Procedures, Semi-Annual 5-4.3.1 PRESSURE SWITCH TEST 4. Observe the instructions on the caution label attached to each electric control head (P/N 486500-01). Replace any damaged heads which fail to reset properly before reconnecting to cylinders. Reattach all electric control heads to the threaded port on the cylinder valve or pressure operated control head. Tighten the swivel nut securely. Make certain each electric control head is in SET position before reconnecting to cylinders. Failure to follow this procedure will result in accidental FM-200 discharge. 1. Contact the appropriate personnel and obtain authorization for a shutdown. 2. Ensure that the hazard area operations controlled by the pressure switch are operative. 3. Manually operate the switch by pulling up on the plunger and verify that the hazard area operations controlled by the pressure switch shut down. 4. Return the pressure switch to the SET position. 5. Reactivate all systems that were shut down by the pressure switch (such as power, ventilation systems and compressors). 5-4.3.2 5-4.4 Inspection Procedures-2 Year ! WARNING Do not use water or oxygen to blow out pipe lines. Using oxygen is especially dangerous since even a minute quantity of oil may cause an explosion. ELECTRIC CONTROL HEAD TEST Electric control heads must be tested semiannually for proper operation. This test can be performed without discharging the FM-200 cylinders. Test one hazard area at a time before proceeding to the next, as follows: 1. Remove any nozzles from the piping to allow foreign matter to blow clear. 2. Remove all pressure operated control heads from the FM-200 cylinders. ! CAUTION ! WARNING All control heads must be removed from FM-200 cylinders and nitrogen pilot cylinders prior to testing to prevent accidental cylinder discharge. Do not disconnect the flexible hose from the pressure operated control head. If FM-200 accidentally discharges, the unattached flexible hose will whip around and may damage equipment and cause severe bodily injury. 1. Remove all electric control heads from all FM-200 cylinders and nitrogen pilot cylinders serving the hazard area being tested. Let the electric control heads hang freely from the flexible electric conduit connections. Leave all pressure operated control heads and pilot actuation hoses attached to the cylinders. 2. Operate FM-200 system electrically. This can be accomplished by actuation of the FM-200 system at the system control panel or by manual operation of an electric pull station. 3. Ensure all electric control heads have operated, that is, the indicator on the electric control head has moved to the RELEASED position, or in the case of a control head (P/N 486500-01) observe that the actuating pin has moved to the fully actuated position. If any control heads have not operated, check the circuit for electric continuity to these particular heads and repeat the test. Replace all damaged heads. Repeat the test if any control heads have been replaced. 3. Open the distributing valves and keep them open long enough to ensure the pipes are clean. 4. Blow out all distribution piping with air or nitrogen to ensure it is not obstructed. 5. Reconnect all control heads. 5-5 INSPECTION AND RETEST PROCEDURES FOR FM-200 CYLINDERS A cylinder that is damaged or corroded should be emptied, retested and restamped in accordance with DOT CFR Title 49, Section 173.34 (retesting is explained in Paragraph 5-5.3). ! CAUTION These guidelines do not apply to cylinders containing a commodity other than FM-200. ! CAUTION All Kidde FM-200 cylinders are designed, fabricated, and factory tested at 1000 PSIG (68.9 bar gauge) in compliance with DOT CFR 49 4BA-500 or 4BW-500 as stamped on each cylinder. Electric control heads must be reset manually before reconnecting to the cylinder valves. Two sets of regulations will apply to periodic inspection and test procedures depending on the following: 90-FM200M-000 5-6 February 2004 FM-200® ECS Series Engineered Fire Suppression Systems 5-5.1 Cylinders Continuously in Service Without Discharge These cylinders are governed by NFPA 2001 regulations. Cylinders in continuous service without discharge require a complete external visual inspection every five years in accordance with Compressed Gas Association Pamphlet C-6, Section 3 except that the cylinders need not be emptied or stamped while under pressure. Record date of inspection on record tag attached to each cylinder. Where the visual inspection shows damage or corrosion, the cylinder shall be emptied, retested and restamped in accordance with DOT CFR Title 49, Section 173.34. 5-5.2 Cleaning Nozzle Service Service nozzles after use as follows: 1. Clean the outside of the nozzles with a rag or soft brush. 2. Examine the discharge orifices for damage or blockage. If the nozzles appear to be obstructed, unscrew the nozzles and clean by immersing them in cleaning solvent. Dry thoroughly with lint-free cloth. Replace damaged nozzles. Nozzles must be replaced with the same part number in the same location. See Paragraph 4-2.3.5 for the correct nozzle placement and orientation. 5-6.3 Repairs Replace all damaged parts found during inspection. Replacement procedures for FM-200 cylinders are provided below. Since replacement for other system components are similar, refer to the installation drawings and FM-200 system assembly drawings for guidance. Retest DOT 4BA and 4BW cylinders used exclusively in FM-200 services that are commercially free from corroding components are required to be hydrostatically retested and restamped every five years, in accordance with DOT CFR Title 4, Paragraph 173.37(e), prior to recharge and shipment. An alternate option is an external visual inspection performed in lieu of the hydrostatic test at the time the periodic retest becomes due (this option is in accordance with CFR 49, Paragraph 173.34[e] [13]). Table 5-2 highlights the two options for retesting FM-200 cylinders. FM-200 cylinders must be recharged when the cylinder pressure gauge indicates the pressure is below normal (360 PSIG at 70°F [25 bar gauge at 21°C]), immediately after discharge, when a loss in weight is in excess of 5% of the original charged net weight or when there is a loss of pressure (adjusted for temperature) of more than 10%. 5-7 Table 5-2. Retest Schedule Removing an FM-200 Cylinder Remove an FM-200 cylinder as follows: First Retest Due Subsequent Retest Due Special Marking Full hydrostatic test including determination of cylinder expansion 5 years 5 years Retest Date Month/Year External visual inspection per Paragraph 173.34(e) (13) and CGA Pamphlet C-6, Section 3 5 years 5 years Retest Date Followed by "E" 5-5.4 5-6.1 5-6.2 Discharged Cylinders of Charged Cylinders that are Transported Retest Method SERVICE Remove dirt from metallic parts using a lint-free cloth moistened with dry cleaning solvent. Dry parts with a clean, dry, lint-free cloth, or air blow dry. Wipe non-metallic parts with a clean, dry lint-free cloth. Remove corrosion with a crocus cloth. These cylinders may come under NFPA 2001 requirements, or, in the case of shipment of charged cylinders, DOT, federal or state regulations may apply. In either case, the cylinders shall not be charged and shipped if more than five years have elapsed from the date of the last test date stamped on the cylinder. The cylinders shall be retested and restamped in accordance with DOT Code of Federal Regulations (CFR) Title 49, Section 173.34. 5-5.3 5-6 ! WARNING Do not disconnect the flexible discharge hose or valve outlet adapter prior to removing pressure and electric control heads from the FM-200 cylinders. Before replacing an FM-200 cylinder in a hazard area group, ensure that the pilot line is completely vented of all pressure. Flexible Hoses In accordance with NFPA 2001, all system hoses shall be examined annually for damage. If the visual examination shows any deficiencies, the hose shall be replaced or tested. February 2004 5-7 90-FM200M-000 FM-200® ECS Series Engineered Fire Suppression Systems 5-7.1 Single Cylinder System ! WARNING 1. Remove the supervisory pressure switch (where installed) by disconnecting the electrical connection at the switch, then remove the wire lead protection or conduit. Unscrew the switch from the cylinder valve and install the protection cap on the switch connection port. 2. Disconnect the swivel nut on the control head from the cylinder valve actuation port Remove the control head from the FM-200 cylinder. 3. Install a protection cap on the FM-200 cylinder valve actuation port. 4. Remove the valve outlet adapter or loosen the swivel nut and remove the flexible discharge hose from the discharge outlet port adapter. 5. Immediately install a safety cap on the cylinder valve outlet port. 6. Remove the cylinder strap. Remove the FM-200 cylinder from the bracket. Weight the cylinder using a platform scale. 5-7.2 To prevent injury, all cylinders must have safety caps installed immediately on the outlet ports when discharge hoses or the valve outlet adapter is disconnected. 7. Immediately install the safety cap on the cylinder valve outlet port. 8. Remove the attaching hardware or cylinder straps. Remove the FM-200 cylinder from the bracket. Weigh the cylinders using a platform scale. 5-8 REINSTALLING AN FM-200 CYLINDER Install an FM-200 cylinder as follows: 5-8.1 Single Cylinder System 1. Position the FM-200 cylinder in the designated location. Secure it in place with a cylinder strap or wall bracket and mounting hardware. Orient the cylinder with the valve outlet angled toward the cylinder discharge piping (refer to the installation drawings). Multiple Cylinder System ! WARNING ! WARNING Remove all control heads from the FM-200 cylinders. Discharge hoses or valve outlet adapters must be connected into system piping (union connection) before attaching to cylinder valves. 1. Remove the supervisory pressure switches (where installed) by disconnecting the electrical connection at the switch, then remove the wire lead protection or conduit. Unscrew the switch from the cylinder valve and install the protection cap on the switch connection port. 2. Disconnect the swivel nut on the pressure operated control heads from the cylinder valve actuation port. Remove the control heads from all FM-200 cylinder valves, leaving the flexible actuation hose or tubing attached to the pressure operated control heads. 3. Immediately install a protection cap on all FM-200 cylinder valve actuation ports. 4. Remove the tubing from the master cylinder adapter on the master cylinder (if used). 2. Remove the safety cap from the cylinder valve outlet port. 3. Immediately reconnect the valve outlet adapter or flexible discharge hose to the cylinder outlet port. 4. Remove the protection cap from the FM-200 cylinder actuation port. ! WARNING The control head must be in the SET position (that is, the actuating pin must be in the fully retracetd or SET position) before being attached to the cylinder valve. Control heads not in the SET position will cause discharge of FM-200 when installed on the cylinder valve. ! WARNING 5. Install the control head. 6. If required, install the supervisory pressure switch, as instructed in Paragraph 4-3.21. To prevent injury in the event of discharge, the master cylinder adapter cap must be installed on the adapter whenever tubing is not connected to the master cylinder valve. Under no circumstances is the protection cap to be removed from its chain. 5. Immediately install the protection cap on the master cylinder adapter port. 6. Loosen swivel nut and remove flexible discharge hose from discharge outlet port. 90-FM200M-000 5-8 February 2004 FM-200® ECS Series Engineered Fire Suppression Systems 5-8.2 Multiple Cylinder System 1. Position the FM-200 cylinders in the designated locations. Secure it in place with a cylinder strap or wall bracket and mounting hardware. Orient the cylinder with the valve outlet angled toward the cylinder discharge piping (refer to the installation drawings). ! WARNING Discharge hoses or valve outlet adapters must be connected into system piping (union connection) before attaching to cylinder valves. 2. Remove the safety caps from the cylinder valve outlet ports. 3. Immediately reconnect the flexible discharge hoses or valve outlet adapters to the cylinder valve outlet ports. 4. Remove the protection cap from the master cylinder adapter port (if used) and reconnect the tubing to the slave port on the master cylinder. Tighten the swivel nut. 5. Remove the protection caps from the FM-200 cylinder valve actuation ports. ! WARNING The control head must be in the SET position (that is, the actuating pin must be in the fully retracetd or SET position) before being attached to the cylinder valve. Control heads not in the SET position will cause discharge of FM-200 when installed on the cylinder valve. 6. Reinstall electric and pressure operated control heads with flexible actuation hoses or tubing on the cylinder valve actuation ports. Tighten the swivel nuts. 7. If required, install the supervisory pressure switches as explained in Paragraph 4-3.21. February 2004 5-9 90-FM200M-000 FM-200® ECS Series Engineered Fire Suppression Systems THIS PAGE INTENTIONALLY LEFT BLANK. 90-FM200M-000 5-10 February 2004 FM-200® ECS Series Engineered Fire Suppression Systems CHAPTER 6 POST-DISCHARGE MAINTENANCE 6-1 6. Examine the valve core pin for any evidence of bending or other damage. Depress the pin and make certain it snaps back freely. Replace the valve core if necessary using a standard Schraeder core wrench. When reinstalling a new Schraeder core element, torque to 1½ to 3 in. lb. (0.17 to .37 N-m). INTRODUCTION Follow these procedures after the system has been activated and FM-200® has been discharged. 6-2 POST FIRE MAINTENANCE 6-2.1 FM-200 Valve Inspection and Service ! CAUTION After reinstalling a Schraeder core, the distance from the top of the core pin to the control head seating surface must fall between the dimensions of 0.515 in. to 0.565 in. (13 mm to 14 mm) when in the shut or non-actuated position (see Figure 6-1). Inspect and service the FM-200 valve as follows: Note: ImportantBecause FM-200 tends to dissolve and wash out lubricant, certain components in the FM-200 valve assembly will have to be inspected and serviced before recharging the cylinder/valve assembly. Part numbers for items which may require replacement are listed in Table 6-1. 6-2.2 GAGING DIMENSIONS .515/.565 SPRING BACK-UP RING O-RING, PISTON, RING ± BACK-UP (See enlarged view SAFETY CAP ! WARNING in Figure 6-2.) PISTON Before removing the valve, make sure that all pressure has been relieved from the cylinder. To relieve any remaining pressure, depress the pressure switch Schraeder valve until all pressure is relieved. ®O-RING SEAT SEAT RETAINER SUPERVISORY PRESSURE SWITCH CONNECTION ¯ O-RING, NECK SIPHON TUBE 1. Remove the valve with the siphon tube from the cylinder. 2. Remove the O-ring. Examine the O-ring for cuts or nicks and replace if necessary. Before reinstalling the O-ring, apply a lubricant. 3. Remove the valve cap, spring and piston assembly. Figure 6-1. Valve Assembly (1½", 2" and 2½") O-RING, PISTON All internal components of FM-200 valves are removed from the top of the assembly. However, if there is excessive piston O-ring friction, the siphon tube may have to be removed and the piston assembly pressed out from the bottom. TEFLON BACK-UP RING Figure 6-2. Piston O-Ring 4. Remove the O-rings and examine for cuts or nicks; replace if necessary. Examine the O-ring grooves for foreign matter. Before reinstalling the O-rings, apply a lubricant. 5. Examine the exposed surface of the O-ring for nicks and cuts. Also, ensure that the O-ring protrudes a minimum or 0.020 in. (0.5 mm) above the conical seating surface of the piston assembly. Replace this O-ring if necessary by removing the seat retainer. Before reassembly, apply a lubricant to the O-ring. February 2004 VALVE CAP ¬ O-RING CAP Valve Disassembly (1½", 2" and 2½") Refer to Figures 6-1 and 6-2 and Table 6-1. Note: ° VALVE CORE Table 6-1. Valve Components 6-1 F ig u re Item N o. D escrip tio n 10-125 lb . cylin d ers 200-350 lb . cylin d ers 600 lb . cylin d ers 1 O-ri ng, cap 5661-0225 5661-0230 5661-0234 2 O-ri ng, pi ston 5661-0325 5661-0330 5661-0334 3 O-ri ng, seat 5661-0215 5661-0326 5661-0331 4 O-ri ng, neck 5661-0932 5661-0335 5661-0339 5 Schraeder core 220278 220278 220278 6 Back-up ri ng 554003-250 554003-300 554003-340 90-FM200M-000 FM-200® ECS Series Engineered Fire Suppression Systems Table 6-2. Other Valve Component Materials Oth er Materials Man u factu rer an d N o men clatu re Lubri cant Parker Seal Co. Super-O-Lube or equi valent Locti te Sealant Locti te Corp. Sealant, Grade CV or equi valent Locqui c Pri mer Locti te Corp. Pri mer, Grade N or equi valent 6-2.3 Table 6-3. 3" Valve Components Description Valve Disassembly (3") Note: Refer to Figure 6-3 for items. 1. Remove the valve with the siphon tube from the cylinder. 2. Remove the O-ring and examine it for cuts and nicks; replace if necessary. Before reinstalling the O-ring, apply lubricant. 3. Remove the valve cap, spring and piston assembly. Note: 900 lb. Cylinders O-ring, Cap 566102410 566102410 O-ring, Piston 566103370 566103370 O-ring, seat 566103400 566103400 O-ring, Neck 566103470 566103470 Pilot Check Assembly 923066 923066 Back-up Ring 554003400 554003400 6-2.4 Note: Valve Assembly (1½", 2", and 2½") The items refer to Figure 6-1. 1. Install an O-ring in the piston groove. Remove all internal components of the FM-200 valve from the top of the assembly. However, if there is excessive piston O-ring friction, the siphon tube may have to be removed and the piston assembly pressed out from the bottom. ! CAUTION Make certain the Teflon® back-up ring is below this O-ring as shown in Figure 6-2. 2. Press the piston (Item 6) back into the valve body. 3. Install the spring. 4. Install the O-ring (Item 1) onto the groove in the valve cap, screw the cap into the valve body and torque to 250 in. lb. (28.2 N-m). 5. If the siphon tube had to be removed to disassemble the valve, wire brush the siphon tube threads to remove the old Loctite® residue. 6. Apply a film of Loctite® primer to the siphon tube threads and allow three to five minutes to dry. 7. Apply a film of Loctite® sealant to the threads and reinstall the siphon tube. 8. Install the O-ring onto the valve neck groove, screw the valve and siphon tube into the cylinder, and torque to 50 to 55 ft. lb. (68 to 75 N-m). 4. Remove the O-rings and examine them for cuts and nicks; replace if necessary. Examine the O-ring grooves for foreign matter. Before reinstalling the O-rings, apply lubricant. 5. Examine the exposed surface of O-ring for nicks and cuts. Also, ensure that the O-ring protrudes a minimum of 0.020 in. (0.5 mm) above the conical seating surface of the piston assembly. Replace this O-ring if necessary by removing the seat retainer. Before reassembling, apply lubricant to the O-ring. 6. Examine the pilot check for any evidence of bending or other damage. Depress the check and make certain it snaps back freely. Replace pilot check if necessary. Valve Cap Pilot Check WK-923066-000 Pilot Check Spring WF-230640-000 Valve Cap O-Ring WK-566102-410 Spring 600 lb. Cylinders Piston O-Ring WK-566103-370 Back-Up Teflon Ring WK-554003-400 Piston Retainer O-Ring WK-566103-400 Safety Cap Supervisory Pressure Switch Connection Refill Part (½ inch NPT Thread) Neck O-Ring WK-566103-470 Retainer 06-235924-001 Inner Piston O-Ring WK-566101-170 Figure 6-3. 3" Valve Assembly 90-FM200M-000 6-2 February 2004 FM-200® ECS Series Engineered Fire Suppression Systems 6-2.5 Note: Valve Assembly (3") Refer to Figure 6-3. FM-200 VALVE 1. Install the O-ring (Item 2 in Figure 6-3) in the piston groove. ! CAUTION Make certain that the Teflon® back-up ring is below the O-ring as shown in Figure 6-3. SAFETY DISC WASHER 2. Press the piston back into the valve body. 3. Install the spring. 4. Install the O-ring onto the groove in the valve cap. Screw the cap onto the valve body and torque to 360 in. lb. (41 N-m). 5. If the siphon tube had to be removed for valve disassembly, wire brush the siphon tube threads to remove the old Loctite residue. 6. Apply a film of Loctite® primer to the siphon tube threads and allow three to five minutes to dry. 7. Apply a film of Loctite® sealant to the threads and reinstall the siphon tube. SAFETY DISC SAFETY DISC RETAINER Figure 6-4. Safety Disc Replacement Table 6-4. Safety Disc Replacement Table (1½", 2" and 2½") Install the O-ring onto the valve neck groove, screw the valve and siphon tube onto the cylinder, and torque to 600 to 660 in. lb. (68 to 75 N-m). 6-2.6 Note: Safety Disc Replacement (1½", 2" and 2½") Refer to Figure 6-4. 1. Remove the safety disc retainer with safety disc and safety disc washer from the valve body. Discard the safety disc and washer. 2. Assemble the safety disc retainer with new safety disc and safety disc washer to the valve body. Torque to the appropriate value listed in Table 6-4. Cylinder Size Safety Disc P/N Safety Disc Washer P/N Torque Value PSIG @ 70°F 10-125 lb. 242461 294500 33 ft. lb. 750-900 200-350 lb. 264925 220360 38 ft. lb. 800-975 600 lb. (old) 264929 220362 48 ft. lb. 800-975 ! WARNING Never install any type disc other than specified above for the appropriate cylinder. Installing the incorrect disc could result in violent rupture of the cylinder and serious injury. Never reinstall a used safety disc and/or washer. Once the retainer has been removed, the disc and washer must be replaced with new components. February 2004 6-3 90-FM200M-000 FM-200® ECS Series Engineered Fire Suppression Systems 6-2.7 Safety Disc Replacement (3") 6-3 The safety disc for the 3" valve is located on the cylinder head, not on the cylinder valve. ! CAUTION 1. Remove the safety disc retainer (see Figure 6-5) including safety disc and safety disc washer from the cylinder body. Discard the safety disc and washer. 2. Reassemble the safety disc retainer with a new safety disc and safety disc washer to the valve body. Torque to the appropriate value listed in Table 6-5. FM-200 cylinders may require retest before recharging (see Paragraph 5-5 for details on cylinder retest). FM Approval is based upon the usage of factory filled FM-200 cylinders. ! WARNING Under no circumstances while performing either cylinder recharge or leak test, should a charged cylinder be allowed to stand freely without either the charging apparatus attached or the safety cap installed. Whenever these devices are not installed, a charged cylinder must be securely clamped to a rigid structure capable of sustaining the full thrust that would result should the valve inadvertently open. The clamping device and supports must be capable of withstanding a thrust force of 1800 lb. (816.5 kg). This approximates the thrust force generated out of the FM-200 cylinder valve outlet on a full, wide-open discharge. ! WARNING Never install any type of disc other than specified in Table 6-5 for the corresponding cylinder. Installing the incorrect disc could result in a violent rupture of the cylinder and serious injury. Safety Disk Retainer 06-235926-001 Safety Disk Washer 06-118185-001 RECHARGING FM-200 CYLINDERS FM-200 charging equipment consists of an FM-200 storage container, piping adapter, control valves, strainer, pressure gauge, flexible hoses, seating adapter, recharge adapter, pump, regulated nitrogen supply, scale and interconnecting plumbing. Recharge equipment must be suitable for the purpose intended and must be compatible with FM-200. A typical FM-200 charging system schematic is shown in Figure 6-6. Safety Disk 06-118184-001 Burst Disk 06-235926-001 Note: Locate the charging equipment in a clean, well-ventilated area near the FM-200 supply and cylinder storage. There should be sufficient room for moving the cylinders to and from the charging equipment. Burst Disk Holder 06-236063-001 Figure 6-5. Burst Disc Table 6-5. Safety Disc Replacement Table (3") 6-3.1 Cylinder Size Safety Disc P/N Torque Value PSIG @ 70° F 600 lb. 06-118184-001 90 ft. lb. 800-975 900 lb. 06-118184-001 90 ft. lb. 800-975 90-FM200M-000 During recharge, cylinder pressure gauge is not to be used to determine charging pressure. Charging Equipment Installation Before assembling the charging equipment, apply Permacel No. 412D Teflon® tape to all pipe threads. 6-4 February 2004 FM-200® ECS Series Engineered Fire Suppression Systems 6-3.2 4. Connect the FM-200 supply and return lines to the FM-200 shipping container valves (Items 19 and 22). Close all valves in the charging system. 5. Open the FM-200 supply valves (Items 8, 9, 10, 11, 19, 21 and 27). DO NOT open valve (Item 22) at this time. The pressure gauge (Item 28) should indicate the supply pressure. Crack the vent valve (Item 30) until FM-200 liquid is present. Close valve (Item 30). 6. Turn the 3-way valve (Item 9) to the return line position. Open valve (Item 24). Crack vent valve (Item 23) until FM-200 liquid is present. Close valve (Item 23). Open valve (Item 22). The charging system is now ready for use. 7. Position the FM-200 cylinder/valve assembly (Item 26) (with safety cap and pilot actuation port protection cap in place and properly connected) on a weigh scale (Item 3). Record the weight from the scale. The empty weight of cylinder assembly must be stamped on the cylinder valve nameplate. 8. Remove the safety cap and immediately connect the cylinder assembly into the charging system by assembling the recharge adapter with O-ring packing (Item 1) to the cylinder assembly outlet port. Charging FM-200 Cylinder and Valve Assembly Recharge FM-200 cylinder and valve assembly as follows (see Figure 6-6 and Table 6-6): ! WARNING Only qualified, designated personnel should operate the charging equipment. Exercise extreme care when working with pressure equipment to prevent injury to people and damage to property, resulting from careless handling or possible equipment failure. Perform all operations in an assigned area cleared of all unauthorized personnel. Make sure all equipment is properly secured. Never attempt to adjust or disassemble pressurized equipment. 1. Check the cylinder for the last hydrostatic test date prior to charging. Perform any required DOT hydrostatic tests (see Paragraph 5-5). 2. Check the cylinder valve assembly for any unacceptable physical defects (for example, cracks of any kind, elongated pits of any length, inclusions of any size, pitting, bulging, dents, corrosion, fire damage, mechanical defects, scratches, nicks or gouges if more than superficial in nature). These defects shall be cause for rejection. Note: ! WARNING Dangerously high pressures may be generated if FM-200 is introduced into a cylinder containing nitrogen at a pressure above 10 PSIG (0.7 bar gauge). 3. Weigh the cylinder/valve assembly to verify the quantity of agent in the cylinder. Ensure that no more than 10 PSIG (0.7 bar gauge) of nitrogen is in cylinder before beginning the fill procedures. 9. Monitor the scale, record the empty cylinder assembly weight as A. Determine the charge weight with the equation C=A+B+N2, where B is weight of FM-200 agent indicated on valve nameplate. 10. Open valve (Item 29) and start the pump (Item 14). Monitor the weigh scale (Item 3). When the scale indicates a charge weight C, shut off the pump and close the FM-200 supply valves (Items 29 and 8). ! CAUTION FM-200 is a colorless, odorless gas, low in toxicity, and is an extremely effective fire suppression agent. FM-200 can be liquefied by compression, and is normally shipped and stored in this condition. Being a liquefied and compressed gas, FM-200 is stored and handled under saturated conditions (that is, the liquid and vapor coexist in equilibrium). Reducing the pressure without reducing the temperature causes the liquid to flash into vapor with accompanying refrigeration effects. By understanding the physical properties of FM-200 and safe handling techniques, the agent may be transferred from shipping cylinders to the desired end-use container safely. February 2004 The main piston in the cylinder valve assembly will unseat, permitting flow into the assembly when a 10 PSIG (0.7 bar gauge) differential (approximate) exists at the outlet port. Initial valve assembly seating occurs with pressure equalization. Final valve assembly seating occurs with removal of pressure from valve assembly outlet port and subsequent momentary application of 450 to 600 PSIG (31 to 41 bar gauge) of nitrogen discussed below. Note: 6-5 The 360 PSIG (25 bar gauge) pressure applies to the filling procedure with nitrogen and FM-200 at 70°F ± 10°F (21°C ± -12°C). When the temperature is other than 70°F (21°C), refer to Table 6-5 for required total pressure. Do not fill FM-200 cylinders at temperatures below 60°F (16°C) or above 90°F (27°C). 90-FM200M-000 FM-200® ECS Series Engineered Fire Suppression Systems nitrogen line R 17 16 N2 FM-2OO return line 18 optional salvage connection 15 15 23 22 19 24 28 P 20 21 27 29 2 1 8 15 29 30 5 4 flex hose 4 15 15 1 FM-200 Agent cylinder 13 Strainer 10 25 7 6 flex hose 14 11 9 26 12 FM-200 liquid supply line scale 3 Figure 6-6. Typical FM-200 Charging System Schematic Table 6-6. Typical FM-200 Charging System Schematic 90-FM200M-000 1 Recharge Adapter 16 Ball Valve 2 Seating Adapter 17 Regulator 3 Scale 18 Nitrogen Cylinder 4 Vent Valve - Recharge 19 FM-200 Shipping Container, Liquid 5 Vent Valve - Seating 20 Vent Valve 6 Ball Valve 21 Ball Valve 7 Ball Valve 22 FM-200 Shipping Container, Vapor 8 Ball Valve 23 Vent Valve 9 3- Way Valve 24 Ball Valve 10 Ball Valve 25 FM-200 Shipping Container, Vapor 11 Ball Valve 26 FM-200 Agent Storage Container 12 Safety Relief, Liquid 27 Ball Valve, Gauge 13 Safety Relief, Vapor 28 Master Pressure Gauge 14 Pump 29 Ball Valve 15 Check Valve 30 Vent Valve 6-6 February 2004 FM-200® ECS Series Engineered Fire Suppression Systems Table 6-7. Pressure vs. Temperature 15. Leave vent valve (Item 4) open. Close valve (Item 6) and open valve (Item 5) to vent nitrogen from the seating adapter. Pressure versus Temperature Temperature o F (oC) Pressure PSIG (bar gauge) 60 (15.6) 340 (23.5) 70 (21.1) 360 (24.8) 80 (26.7) 381 (26.3) 90 (32.2) 402 (27.7) ! CAUTION Any hissing or discharge coming from vent valve (Item 4) indicates that the piston is not seated properly or has opened. If this occurs, repeat Step 16. Verify that the cylinder valve piston remains closed. 16. Keep vent valve (Item 4) open. Close valve (Item 5), and once again open valve (Item 6) to reapply nitrogen pressure to the actuation port. While momentarily maintaining pressure on the actuation port, remove the recharge adapter (Item 1) from the cylinder valve outlet port and immediately install the safety cap. Close the vent valve (Item 4). 360 PSIG + 25, - 0 PSIG, at 70°F (25 bar gauge +1.7, -0 bar gauge at 21°C) is the final pressure required after the charged container has had sufficient time to stabilize. Nitrogen topping may be required to attain the 360 PSIG (25 bar gauge) after the stabilization period has elapsed. ! WARNING Nitrogen charge weight for Kidde FM-200 ECS Series Engineered Fire Suppression cylinders at 70 lb./ft. 3 (1121 kg/m3) fill density is based on 1.88 lb. (0.85 kg) of nitrogen per 100 lb. (45.3 kg) of FM-200. Nitrogen pressure must be maintained on the actuation port while removing the charging adapter and installing the safety cap to ensure that the cylinder valve does not inadvertently actuate while the valve outlet port is wide open. Failure to follow this could result in injury and damage to property. 11. If nitrogen is required, open the handwheel valve on the nitrogen supply valve (Item 16) and nitrogen valve (Item 7). Adjust the regulator (Item 17) until the master gauge shows a pressure indication of 360 PSIG + 25, 0 PSIG (25 bar gauge + 1.7, -0 bar gauge). 12. Open the hose control valve (Item 29) and let the nitrogen flow into the cylinder until the master gauge indicates 360 PSIG (25 bar gauge). Cylinder agitation will assist with the equilibrium of nitrogen and FM-200. Additional nitrogen may be necessary as the cylinder equilibrates. 13. Close the hose control valve (Item 29). Remove the pilot actuation port protection cap and assemble the seating adapter (Item 2) with the flexible hose to the cylinder valve actuation port. Open valve (Item 6), then adjust the regulator to momentarily apply 450 to 600 PSIG (31 to 41 bar gauge) nitrogen pressure to the actuation port to firmly seat the cylinder valve piston . 14. While momentarily maintaining pressure on the actuation port, open vent valve (Item 4) on the recharge adapter (Item 1) to rapidly vent FM-200 from the valve assembly outlet port. The sudden pressure decrease at the valve outlet will ensure the valve seat stays in the closed position. February 2004 17. Close the nitrogen supply valve (Item 16) and open vent valve (Item 5) to vent nitrogen from the supply line. 18. Remove the seating adapter (Item 2) from the cylinder valve and reinstall the actuation port protection cap. Close valves (Items 5 and 6). 19. Weigh the fully charged cylinder. The weight must agree with the weight stamped on the cylinder valve nameplate. Record the date of recharge on the cylinder record tag. 20. Monitor the cylinder valve gauge. The gauge indicator must read 360 PSIG + 25 -0 PSIG at 70°F (25 bar +1.7, -0 bar gauge at 21°C) after the stabilization period. 21. The cylinder is now ready for the leak test (refer to Paragraph 6-3.3). ! CAUTION The Kidde FM-200 series agent containers have been designed for a maximum fill density of 70 lb./cu. ft. (1121 kg/m3) and super pressurized with nitrogen to 360 PSIG + 25 PSIG at 70°F (25 bar gauge +1.7, -0 bar gauge at 21°C). It is important that these values not be exceeded. 6-7 90-FM200M-000 FM-200® ECS Series Engineered Fire Suppression Systems The pressure in the agent container is significantly affected by fill density and temperature. At elevated temperatures, the rate of increase in pressure is very sensitive to fill density (see Figure 1-1). If the maximum fill density is exceeded, the pressure will increase rapidly with temperature increase so as to present a hazard to personnel and property. Adherence to the limits on fill density and pressurization levels will prevent excessively high pressures from occurring if the agent container is exposed to elevated temperature, minimizing the possibility of an inadvertent discharge of agent through the pressure relief device. Note: 2. Calibrate the detector against the LS-20 leak standard by holding the probe about 1/8 in. (3 mm) away, and noting the meter deflection for the leakage allowance of the standard. Maximum allowable leak rates are shown in Table 6-8. 3. Remove the safety cap from the discharge outlet. Blow nitrogen on the surface where the plug was removed. 4. Move the probe back and forth slowly about 1/8 in. (3 mm) away from all potential leak points (such as the discharge outlet area, pilot check, valve bonnet, supervisory pressure switch connection, safety outlet, liquid level indicator, valve-to-cylinder connections, gauge and container welds). 5. Meter deflections greater than indicated during calibration are considered excessive and will be cause for rejection. 6. Replace the safety cap immediately after the test. When charging more than one FM-200 cylinder, it may be advantageous to leave the pump (Item 14) running. In this case, when a cylinder is full, rotate the 3-way valve (Item 9) to direct the flow back to the supply tank through the FM-200 return line. To resume charging operations, return the 3-way valve (Item 9) back to the Filling position. To change the FM-200 shipping container (Item 25) close cylinder valves (Items 19 and 22) close valves (Items 21 and 24). Carefully open vent valves (Items 20 and 23) to bleed pressure. Disconnect charging lines from FM-200 supply cylinder. Position new FM-200 supply cylinder in place. Connect charging lines to new FM-200 supply cylinder, ensuring vapor and liquid lines are connected to proper valves. Close vent valves (Items 20 and 23). Open valves (Items 21 and 24). 6-3.3 7. If excess leakage is detected, salvage the FM-200 agent, perform the required maintenance on the container and recharge. 8. After the leak test is complete, reassemble the protection cap to the actuation port of the valve assembly. Unclamp the cylinder. Table 6-8. Maximum Permitted Leakage Rates Cylinder Size Cylinder Fill Weight Maximum Allowable Leakage lb. lb. oz./yr. 90-100010-001 10 6-11 0.11 90-100020-001 20 9-23 0.20 90-100040-001 40 17 - 40 0.37 90-100070-001 70 30 - 70 0.67 90-100125-001 125 54 - 125 1.20 90-100200-001 200 86 - 200 1.81 90-100201-001 * 200 86 - 200 1.81 90-100200-101 200 86 - 200 1.81 90-100201-101* 200 86 - 200 1.81 90-100350-001 350 150 - 350 3.34 90-100351-001* 350 150 - 350 3.34 90-100600-001 600 258 - 600 5.74 90-100601-001* 600 258 - 600 5.74 90-10090X-001 900 390-900 8.68 Part Number FM-200 Cylinder Leak Test ! WARNING Clamp FM-200 cylinder securely in place. The clamping device and supports must be capable of withstanding a thrust force of 1800 lb. (816.5 kg). This approximates the thrust force generated out of the FM-200 cylinder valve outlet on a full, wide open discharge. ! CAUTION FM-200 cylinder leak tests must be conducted in a well-ventilated area, away from the charging station so as not to be influenced by extraneous FM-200 vapors released during the filling operations. Kidde recommends the Yokogawa Type H25C leak detector for FM-200, with the Yokogawa Type LS-20 leak standard for FM-200 for calibrating the leak detector. 1. Warm up the leak detector for 30 minutes before proceeding with Step 2. *Note: Includes liquid level indicator 90-FM200M-000 6-8 February 2004 FM-200® ECS Series Engineered Fire Suppression Systems 6-3.4 Salvaging FM-200 from a Leaking Cylinder Assembly 6-4 NITROGEN PILOT CYLINDER SERVICE AND MAINTENANCE ! WARNING ! WARNING Target container must be significantly larger than the source container to prevent dangerous pressure buildup. Any area in which nitrogen is used or stored must be properly ventilated. A person working in an area where air has become enriched with nitrogen can become unconscious without sensing the lack of oxygen. Remove the victim to fresh air. Administer artificial respiration if necessary and summon a physician. Never dispose of liquefied nitrogen in an indoor work or storage area. 1. Close the FM-200 supply valve (Item 19) and close valve (Item 21). Open valve (Item 20) to vent pressure. Disconnect the charging flexible hose from the FM-200 supply valve (Item 19). 2. Connect the salvage discharge assembly to the flexible hose coupling. Then assemble the discharge assembly to the outlet port of the leaking cylinder assembly (not shown). 3. Position an empty cylinder assembly of suitable size for FM-200 storage on the scale. Record the empty weight. 4. Connect the recharge adapter (Item 1) to the empty cylinder outlet port. 5. Assemble a manually operated control head onto the cylinder valve actuation port of the leaking cylinder assembly. 6. Check that all charging system valves are closed. Open valves (Items 8, 9, 10, 11, 21 and 27). Set the manually operated control head to the OPEN position. The pressure gauge (Item 28) should indicate the supply pressure. Crack vent valve (Item 30) until FM-200 liquid is present. Shut valve (Item 30). 7. If the cylinder assembly on the scale is of sufficient size and is being used to store FM-200, monitor the scale, open the valve (Item 29) and start the pump. Continue pumping until a maximum of FM-200 is transferred from the leaking cylinder assembly as indicated by a pressure drop on the pressure gauge. 8. If the cylinder assembly on the scale is being charged, fill with the required weight of FM-200 by adding the required pounds to the empty cylinder weight. Follow the charging procedure outlined in steps 9 through 21 of Paragraph 6-3.2. Conduct a cylinder leak test as described in Paragraph 6-3.3. 9. Continue to transfer the FM-200 agent until the leaking cylinder assembly is empty as indicated by pressure drop as measured by the pressure gauge. Shut off the pump and close the hose control valve (Item 29) and valve (Item 21). 10. Open valve (Item 20) to vent pressure, then disassemble the adapter from the outlet port of the leaking cylinder assembly and from the flexible hose hookup. Reassemble the flexible hose to the FM-200 supply valve (Item 19). 11. If the cylinder assembly being recharged, is not charged sufficiently, continue the charging procedure as indicated in Paragraph 6-3.2 using the FM-200 supply. February 2004 6-4.1 Nitrogen Pilot Cylinder Hydrostatic Pressure Test A hydrostatic test must be performed in accordance with DOT regulations CFR Title 49, Section 173.34. Nitrogen cylinders shall not be recharged and shipped without hydrostatic test if more than five years has elapsed from the date of the last test. Nitrogen cylinders continuously in service without discharging can be retained in service for a maximum of five years from the date of the last hydrostatic test. At the end of five years the cylinder shall be visually inspected per CGA pamphlet C-6. Cylinders must also be hydrostatic pressure tested immediately if the cylinder shows evidence of distortion, cracking, corrosion or mechanical or fire damage. 6-4.2 Nitrogen Cylinder Replacement ! WARNING When removing a pressurized cylinder due to pressure loss, the control head must be in the SET position with the safety pull pin installed. A control head in the released position will cause the remaining contents of cylinder to discharge resulting in a system activation which may damage property and cause bodily injury. Replace the nitrogen cylinder when expended or when loss of pressure occurs, as follows: 1. Remove the control head from the nitrogen cylinder valve. 2. Immediately install the protection cap on the nitrogen cylinder actuation port. 3. Remove the flexible actuation hose or tubing and adapter (P/N 6992-0501) from the cylinder valve outlet. 4. Remove the clamps and hardware that secure the nitrogen cylinder to the mounting bracket. 6-9 90-FM200M-000 FM-200® ECS Series Engineered Fire Suppression Systems 6-4.3 Nitrogen Cylinder Recharge Nitrogen Cylinder Installation 6-4.4 1. Install the nitrogen cylinder in position in the mounting bracket. 2. Tighten sufficiently to hold cylinder in place while allowing cylinder enough free play to be manually rotated. 3. Turn the cylinder until the cylinder valve discharge outlet is in the desired position. Nitrogen cylinders must be recharged when the cylinder pressure gauge indicates pressure is below normal (1800 PSIG at 70°F [124 bar gauge at 21°C] or as adjusted for temperature) or immediately after discharge. Nitrogen used for charging must comply with Federal Specification BB-N-411C, Grade A, Type 1. Copies of this specification may be obtained from: Global Engineering Documents, 2625 S. Hickory St., Santa Ana, CA 92707. ! CAUTION The nitrogen cylinder must be positioned so that the control head, when installed, is readily accessible and cannot be obstructed during manual operation. ! WARNING Before recharging, the cylinder must be firmly secured by chains, clamps or other devices to an immovable object such as a wall, structural I-beam or permanently mounted holding rack. 4. Securely tighten the mounting bracket clamps and hardware. 5. Remove the pipe plug, reconnect the adapter (P/N 6992-0501) and flexible actuation hose or tubing to the cylinder valve outlet port. 6. Remove the protective cap from the cylinder valve actuation port. Recharge the nitrogen cylinders as follows: 1. Remove the protection cap from the cylinder valve actuation port. 2. Install the nitrogen cylinder recharge adapter (P/N 933537) to the cylinder valve actuation port and plug valve outlet port with 1/8" NPT pipe plug. 3. Connect the nitrogen recharging supply hose to the adapter. Tighten securely. 4. Open the nitrogen recharging control valve slowly until full nitrogen flow is obtained. 5. Monitor the recharging supply pressure gauge. Close the charging control valve when the gauge indicates the proper cylinder pressure (1800 PSIG at 70°F [124 bar gauge at 21°C]). 6. Allow the cylinder to cool to ambient temperature and recheck the nitrogen cylinder pressure. 7. Open the valve and add additional nitrogen as necessary to obtain a full cylinder charge at ambient temperature (1800 PSIG at 70°F [124 bar gauge at 21°C]). Refer to Figure 6-5. 8. Close the valve and remove the supply hose and charging adapter from the nitrogen cylinder. 9. Using a soap solution, thoroughly check the nitrogen cylinder valve for leakage. Bubbles in the soap solution indicate leakage and shall be cause for rejection of the cylinder. 10. At the completion of the leak test, thoroughly clean and dry the cylinder valve. 11. Ensure the cylinder valve control head port is clean and dry. 12. Immediately install the protective cap to the actuation port of the cylinder valve. 13. Install the charged cylinder as described below. ! WARNING Ensure the control head is in the SET position (that is, the actuating pin is in the fully retracted or SET position). Failure to do so will cause the nitrogen cylinder to discharge when the control head is installed. 7. Install the control head to the cylinder valve and tighten securely. N2 PRESSURE - TEMPERATURE CHART 2100 2000 PRESSURE PSIG 1900 1800 1700 M NO 1600 1500 IN A R LP M MU S ES UR E E UR R EP L AB W O S ES L AL NI MI 1400 RECHARGE 1300 1200 -40° -20° 0° -20° 40° 60° 80° 100° 120° 140° TEMPERATURE °F Figure 6-7. Nitrogen Temperature vs. Pressure Data 90-FM200M-000 6-10 February 2004 FM-200® ECS Series Engineered Fire Suppression Systems CHAPTER 7 PARTS LIST 7-1 plete assemblies or as individual items. In most situations, when ordering a system, it will be easier and more cost effective to order by assembly part numbers. INTRODUCTION AND PARTS LIST The table below, and on the following pages, provides a complete list of FM-200® parts and associated system equipment. FM-200 equipment can be ordered as com- Table 7-1.Parts List NOMENCLATURE PART NUMBER CYLINDER/VALVE ASSEMBLIES Vertical Mount Only 10 lb. STD 90-100010-001 20 lb. STD 90-100020-001 40 lb. STD 90-100040-001 70 lb. STD 90-100070-001 125 lb. STD 90-100125-001 125 lb. W/LLI 90-100121-001 200 lb. STD Old Style Hemispherical Head before 3/98 90-100200-001 200 lb. W/LLI Old Style Hemispherical Head before 3/98 90-100201-001 200 lb. STD New Style Ellipsoidal Head after 3/98 90-100200-101 200 lb. W/LLI New Style Ellipsoidal Head after 3/98 90-100201-101 350 lb. STD 90-100350-001 350 lb. W/LLI 90-100351-001 600 lb. STD (old style supplied before 9/01) 90-100600-001 600 lb. W/LLI (old style supplied before 9/01) 90-100601-001 600 lb. STD (new style supplied after 9/01) 90-100600-100 600 lb. W/LLI (new style supplied after 9/01) 90-100601-100 900 lb. STD 90-100900-001 900 lb. W/LLI 90-100901-001 (STD = Standard Cylinder Assembly, W/LLI = Cylinder with liquid level indicator) FLEXIBLE DISCHARGE HOSES 10-125 lb. Cylinders 283898 200-350 lb. Cylinders 283899 600 lb. Cylinders (old style supplied before 9/01) 283900 600 lb. Cylinders (new style after 9/01) 06-118225-001 900 lb. Cylinders 06-118225-001 February 2004 7-1 90-FM200M-000 FM-200® ECS Series Engineered Fire Suppression Systems Table 7-1. Parts List (continued) NOMENCLATURE PART NUMBER VALVE OUTLET ADAPTERS 10-125 lb. Cylinders 283904 200-350 lb. Cylinders 283905 600 lb. Cylinders 283906 CYLINDER STRAPS 10-20 lb. 283945 40-70 lb. 283934 125-200 lb. (old style cylinder, before 3/98) 292971 125-200 lb. (new style cylinder, after 3/98) 235317 200 lb. 292971 350 lb. 281866 600 lb. (old and new style) 294651 900 lb. 236125 BRACKETS, WALL MOUNTING 10 lb. 486485 20 lb. 486486 40 lb. 486487 70 lb. 486488 CRADLES 125 lb. and 200 lb. 235431 200 lb. 292938 350 lb. 281867 600 lb. 294652 FRONT CLAMPS 125 lb. and 200 lb. 235432 200 lb. 293457 350 lb. 281868 600 lb. 294653 CONTROL HEADS Electric, Stackable (Explosion Proof) 24 Vdc 486500-01 Electric, Standard 24 Vdc 890181* Electric, Standard 115 Vac 890165* Electric, Standard 125 Vdc 890149* Electric/Cable, Standard 24 Vdc 895630 Electric Cable, Standard 115 Vac 895627* Electric/Cable (Explosion Proof) 24 Vdc 897494 Lever Operated 870652 90-FM200M-000 7-2 February 2004 FM-200® ECS Series Engineered Fire Suppression Systems Table 7-1. Parts List (continued) NOMENCLATURE PART NUMBER Pressure Operated 878737 Pressure Operated, Stackable 878750 Lever/Pressure Operated 878751 Cable Operated 979469 Electric/Cable (Explosion Proof) 115 Vac 897560* *Note: UL Listed but not FM Approved for use with FM-200 systems. PRESSURE CONTROL EQUIPMENT Master Cylinder Adapter Kit 844895 Male Branch Tee, 5/16" Flare x 1/8" NPT 6992-0505 Male Elbow, 5/16" Flare x 1/8" NPT 6992-0503 Male Connector, 5/16" Flare x 1/8" NPT 6992-0501 Actuation Hose, 22" (10-200 lb. cylinder) 264987 Actuation Hose, 30" (350-600 lb. cylinder) 264986 Nitrogen Pilot Cylinder 877940 Mounting Bracket, N2 Pilot Cylinder 877845 ¼" Check Valve 264985 Safety Outlet, FM-200 844346 Safety Outlet, N2/CO2 803242 REMOTE CONTROL EQUIPMENT, ELECTRIC OPERATED Pull Box, Electric Remote 24 Vdc 893607 Pull Box, Electric Remote 125 Vac 893608 REMOTE CONTROL EQUIPMENT, CABLE OPERATED Pull Box, Break Glass 871403 Corner Pulley, Watertight 803808 Corner Pulley, 1/2 EMT 844648 1/16" Cable 1593-0002 Z-Bracket 60532 Cable Housing, 125, 200 260702 Cable Housing, 350 260951 Cable Housing, 600 263602 Adapter, 1/2 EMT 843837 Dual Pull Equalizer 840051 Dual Pull Mechanism 840058 AUXILIARY EQUIPMENT Supervisory Pressure Switch (10-350 lb. cylinders) 06-118262-001 Supervisory Pressure Switch (600-900 lb. cylinder) 06-118263-001 February 2004 7-3 90-FM200M-000 FM-200® ECS Series Engineered Fire Suppression Systems Table 7-1. Parts List (continued) NOMENCLATURE PART NUMBER Pressure Operated Switch, Standard 486536 Pressure Operated Switch, Ex Proof 981332 Pressure Trip 874290 Transfer Switch, Main to Reserve 802398 Discharge Indicator ½" (Al) 845553 Discharge Indicator ¾" (Brass) 967082 CHECK VALVES Check Valve, 3/8" NPT 261193 Check Valve, 1/2 NPT 800327 Check Valve, 3/4 NPT 800266 Check Valve, 1 NPT 800443 Check Valve, 1¼ NPT 800444 Check Valve, 1½ NPT 870152 Check Valve, 2 NPT 870151 Check Valve, 2½" NPT 263716 Check Valve, 3 NPT 870100 Swing Check Valve, 2" NPT 06-118213-001 Swing Check Valve, 3" NPT 06-118058-001 Manifold El-Check Valve, 2 NPT 877690 Manifold El-Check Valve, 2½ NPT 878743 CYLINDER RECHARGE ADAPTERS Cylinder Size, 10-125 878757 Cylinder Size, 200, 350 878758 Cylinder Size, 600 (old style) 878759 NAME PLATE "Main" 31033 "Reserve" 31034 "Warning FM-200" 90-FM200M-000 06-231865-739 7-4 February 2004 FM-200® ECS Series Engineered Fire Suppression Systems 7-2 DISCHARGE NOZZLES ! WARNING Only listed Kidde FM-200 nozzles are to be used on Kidde ECS Series Engineered Fire Suppression Systems. Failure to comply with this WARNING can result in unpredictable agent distribution. 7-2.1 Note: Listed 360 Degree Nozzles An additional nozzle finish has been added for a special application. This is a nickel plated nozzle designed to the specifications of the brass version which is FM Approved. The part numbers are exact to that above except for the sixth digit which is a 3 instead of a 0. Area (in2) 1/2" NPT 3/4" NPT 0.0774 90-194023-111 0.0802 90-194023-113 0.0845 90-194023-116 0.0905 90-194023-120 0.0982 90-194023-125 0.1037 90-194023-129 0.1162 90-194023-136 0.1240 90-194023-141 0.1303 90-194023-144 0.1358 90-194023-147 90-194024-147 0.1404 90-194023-150 90-194024-150 0.1534 90-194023-156 90-194024-156 0.1629 90-194023-161 90-194024-161 0.1731 90-194023-166 90-194024-166 0.1856 90-194023-172 90-194024-172 0.1968 90-194023-177 90-194024-177 0.2035 90-194023-180 90-194024-180 0.2080 90-194023-182 90-194024-182 0.2150 90-194023-185 90-194024-185 1" NPT 0.2244 90-194024-189 90-194025-189 0.2353 90-194024-194 90-194025-194 0.2488 90-194024-199 90-194025-199 0.2653 90-194024-206 90-194025-206 0.2851 90-194024-213 90-194025-213 0.3007 90-194024-219 90-194025-219 0.3069 90-194024-221 90-194025-221 0.3266 90-194024-228 90-194025-228 0.3440 90-194024-234 90-194025-234 0.3559 90-194024-238 90-194025-238 1-1/4" NPT 0.3802 90-194025-246 90-194026-246 0.3927 90-194025-250 90-194026-250 0.4150 90-194025-257 90-194026-257 0.4280 90-194025-261 90-194026-261 0.4433 90-194025-266 90-194026-266 February 2004 7-5 1-1/2" NPT 2" NPT 90-FM200M-000 FM-200® ECS Series Engineered Fire Suppression Systems Area (in2) 1/2" NPT 3/4" NPT 1" NPT 1-1/4" NPT 1-1/2" NPT 2" NPT 0.4649 90-194025-272 90-194026-272 0.4821 90-194025-277 90-194026-277 0.5284 90-194025-290 90-194026-290 90-194027-290 0.5468 90-194025-295 90-194026-295 90-194027-295 0.5731 90-194025-302 90-194026-302 90-194027-302 0.6136 90-194025-313 90-194026-313 90-194027-313 0.6274 90-194026-316 90-194027-316 0.6555 90-194026-323 90-194027-323 0.6765 90-194026-328 90-194027-328 0.6926 90-194026-332 90-194027-332 0.7221 90-194026-339 90-194027-339 0.7424 90-194026-344 90-194027-344 0.8053 90-194026-358 90-194027-358 0.8115 90-194026-359 90-194027-359 0.8509 90-194026-368 90-194027-368 90-194028-368 0.8836 90-194026-375 90-194027-375 90-194028-375 0.8930 90-194026-377 90-194027-377 90-194028-377 0.9362 90-194026-386 90-194027-386 90-194028-386 0.9587 90-194026-391 90-194027-391 90-194028-391 0.9903 90-194026-397 90-194027-397 90-194028-397 1.0255 90-194026-404 90-194027-404 90-194028-404 1.0717 90-194027-413 90-194028-413 1.1183 90-194027-422 90-194028-422 1.2026 90-194027-438 90-194028-438 1.2901 90-194027-453 90-194028-453 1.3806 90-194027-469 90-194028-469 1.4742 90-194028-484 1.5708 90-194028-500 1.6705 90-194028-516 1.7733 90-194028-531 1.8791 90-194028-547 1.9880 90-194028-563 2.1000 90-194028-578 2.2151 90-194028-594 2.3332 90-194028-609 90-FM200M-000 7-6 February 2004 FM-200® ECS Series Engineered Fire Suppression Systems 7-2.2 Note: Listed 180 Degree Nozzles An additional nozzle finish has been added for a special application. This is a nickel plated nozzle designed to the specifications of the brass version which is FM Approved. The part numbers are exact to that above except for the sixth digit which is a 3 instead of a 0. Area (in2) 1/2" NPT 3/4" NPT 0.0770 90-194013-109 0.0810 90-194013-111 0.0820 90-194013-113 0.0875 90-194013-116 0.0931 90-194013-120 0.1030 90-194013-125 0.1072 90-194013-129 0.1190 90-194013-136 0.1289 90-194013-141 0.1342 90-194013-144 90-194014-144 0.1384 90-194013-147 90-194014-147 0.1428 90-194013-150 90-194014-150 0.1605 90-194013-156 90-194014-156 0.1694 90-194013-161 90-194014-161 0.1779 90-194013-166 90-194014-166 0.1909 90-194013-172 90-194014-172 1" NPT 0.2049 90-194014-177 0.2113 90-194014-180 0.2177 90-194014-182 90-194015-182 0.2215 90-194014-185 90-194015-185 0.2313 90-194014-189 90-194015-189 0.2405 90-194014-194 90-194015-194 0.2597 90-194014-199 90-194015-199 0.2744 90-194014-206 90-194015-206 0.3005 90-194014-213 90-194015-213 0.3080 90-194014-219 90-194015-219 0.3128 90-194014-221 90-194015-221 0.3364 90-194014-228 90-194015-228 1-1/4" NPT 1-1/2" NPT 0.3504 90-194015-234 0.3623 90-194015-238 0.4039 90-194015-246 90-194016-246 0.4056 90-194015-250 90-194016-250 0.4233 90-194015-257 90-194016-257 0.4400 90-194015-261 90-194016-261 0.4485 90-194015-266 90-194016-266 0.4734 90-194015-272 90-194016-272 0.4954 90-194015-277 90-194016-277 0.5379 90-194015-290 90-194016-290 90-194017-290 90-194016-295 90-194017-295 0.5636 February 2004 7-7 2" NPT 90-FM200M-000 FM-200® ECS Series Engineered Fire Suppression Systems Area (in2) 1/2" NPT 3/4" NPT 1" NPT 1-1/4" NPT 1-1/2" NPT 2" NPT 0.5967 90-194016-302 90-194017-302 0.6382 90-194016-313 90-194017-313 0.6439 90-194016-316 90-194017-316 0.6787 90-194016-323 90-194017-323 0.6875 90-194016-328 90-194017-328 0.7254 90-194016-332 90-194017-332 0.7401 90-194016-339 90-194017-339 0.7884 90-194016-344 90-194017-344 0.8439 90-194016-358 90-194017-358 90-194018-358 0.8439 90-194016-359 90-194017-359 90-194018-359 0.8767 90-194016-368 90-194017-368 90-194018-368 0.9047 90-194016-375 90-194017-375 90-194018-375 0.9311 90-194016-377 90-194017-377 90-194018-377 0.9588 90-194016-386 90-194017-386 90-194018-386 0.9896 90-194017-391 90-194018-391 1.0140 90-194017-397 90-194018-397 1.0498 90-194017-404 90-194018-404 1.1081 90-194017-413 90-194018-413 1.1699 90-194017-422 90-194018-422 1.2368 90-194017-438 90-194018-438 1.3374 90-194018-453 1.4146 90-194018-469 1.5114 90-194018-484 1.6264 90-194018-500 1.7045 90-194018-516 1.8205 90-194018-531 1.9075 90-194018-547 2.0304 90-194018-563 2.1566 90-194018-578 90-FM200M-000 7-8 February 2004 FM-200® ECS Series Engineered Fire Suppression Systems 7-3 LIMITED WARRANTY STATEMENT Kidde represents that this product is free from defects in material and workmanship, and it will repair or replace any product or part thereof which proves to be defective in workmanship or material for a period of twelve (12) months after shipment to the Seller. For a full description of Kiddes LIMITED WARRANTY, which, among other things, limits the duration of warranties of MERCHANTABILITY and FITNESS FOR A PARTICULAR PURPOSE and EXCLUDES liability for CONSEQUENTIAL DAMAGES, please read the entire LIMITED WARRANTY on the Kidde Quotation., Acceptance of Order and/or Original Invoice which will become a part of your sale agreement. Defective units should be returned to the factory, Ashland, Massachusetts, shipment prepaid. Kidde will repair or replace and ship prepaid. February 2004 7-9 90-FM200M-000 FM-200® ECS Series Engineered Fire Suppression Systems THIS PAGE INTENTIONALLY LEFT BLANK. 90-FM200M-000 7-10 February 2004 FM-200® ECS Series Engineered Fire Suppression Systems APPENDIX A MATERIAL SAFETY DATA SHEETS February 2004 A-1 90-FM200M-000 FM-200® ECS Series Engineered Fire Suppression Systems THIS PAGE INTENTIONALLY LEFT BLANK. 90-FM200M-000 A-2 February 2004 MATERIAL SAFETY DATA SHEET MSDS Number: 00057 Product Name: FM-200 Effective Date: 04/20/2001 Page: 1 of 7 SECTION I - CHEMICAL PRODUCT AND COMPANY IDENTIFICATION Product Name: FM-200 Manufacturer: Great Lakes Chemical Corporation Address: P.O. Box 2200 City: West Lafayette State: Indiana Zip: 47996-2200 Emergency Telephone Number: 1-800-949-5167 Information Telephone Number: 1-765-497-6100 Fax: 1-765-497-6123 Chemtrec Phone: 1-800-424-9300 Effective Date: 04/20/2001 Supercede Date: 4/7/98 MSDS Prepared By: Regulatory Affairs Department/Great Lakes Chemical Corporation Synonyms: 1,1,1,2,3,3,3-Heptafluoropropane, 2H-Heptafluoropropane Product Use: Fire extinguishing, fire suppression, explosion suppression and inerting agent Chemical Name: 1,1,1,2,3,3,3-Heptafluoropropane Chemical Family: Halogenated alkane Additional Information No information available SECTION II - COMPOSITION/INFORMATION ON INGREDIENTS INGREDIENT NAME 1,1,1,2,3,3,3-Heptafluoropropane CAS NO. 431890 % > or = 99.9 EXPOSURE LIMITS Y (Hazardous) Not established (OSHA PEL TWA) Not established (OSHA PEL STEL) Not established (OSHA PEL CEIL) Not established (ACGIH TLV TWA) Not established (ACGIH TLV STEL) Not established (ACGIH TLV CEIL) *Indented chemicals are components of previous ingredient. Additional Information No information available SECTION III - HAZARDS IDENTIFICATION Emergency Overview: Relevant Routes of Exposure: Signs and Symptoms of Overexposure: Colorless gas Odorless Direct eye or skin contact with the liquid or cold gas can cause chilling or possibly frostbite of exposed tissues. May cause central nervous system effects. Inhalation of high concentrations can be harmful or fatal due to oxygen deprivation and/or heart irregularities. Inhalation Symptoms similar to oxygen deprivation (headache, nausea, dizziness or loss of consciousness) may result from overexposure by inhalation. Heart irregularities such as irregular pulse or heart palpitations may indicate cardiac sensitivity. Cold, white or discolored skin or in severe cases blistering, can be a sign of frostbite caused by cold liquids or gases. MATERIAL SAFETY DATA SHEET MSDS Number: 00057 Product Name: FM-200 Effective Date: 04/20/2001 Page: 2 of 7 SECTION III - HAZARDS IDENTIFICATION Medical Conditions Generally Aggravated By Exposure: Persons with preexisting cardiac, respiratory, or central nervous system disorders may be more susceptible to effects of an overexposure. The use of epinephrine or similar compounds can increase susceptibility to heart irregularities caused by excessive exposure to these types of compounds. Potential Health Effects: See Section XI for additional information. Eyes: Direct eye contact with the liquid or cold gas can cause chilling or possibly frostbite of exposed tissues. Skin: Direct skin contact with the liquid or cold gas can cause chilling or possibly frostbite of exposed tissues. Ingestion: Not expected to be a hazard in normal industrial use. Inhalation: Inhalation of high concentrations can be harmful or fatal due to oxygen deprivation and/or heart irregularities (arrhythmias). Misuse of the product by deliberately inhaling high concentrations of this gas could cause death without warning. Chronic Health Effects: None known Carcinogenicity: NTP: No ACGIH: No IARC: No OTHER: No OSHA: No Additional Information No information available SECTION IV - FIRST AID MEASURES Eyes: Skin: Ingestion: Inhalation: Antidotes: Notes to Physicians and/or Protection for First-Aiders: No information available Flush with water. Get medical attention. Flush with water; if frostbite occurs get medical attention. No information available Remove person to fresh air; if not breathing, give artificial respiration. If breathing is difficult, give oxygen. Get medical attention. No information available The use of epinephrine or similar compounds can increase susceptibility to heart irregularities caused by excessive exposure to these types of compounds. Additional Information SECTION V - FIRE FIGHTING MEASURES Flammable Limits in Air (% by Volume): Flash Point: Autoignition Temperature: Extinguishing Media: Fire Fighting Instructions: Not applicable Nonflammable gas Not available All conventional media are suitable. Keep cylinders cool with a water spray applied from a safe distance. Use a self-contained breathing apparatus if containers rupture or release under fire conditions. Do not allow reentry into areas where this material has been released without first ventilating to remove products of combustion/decomposition. MATERIAL SAFETY DATA SHEET MSDS Number: 00057 Product Name: FM-200 Effective Date: 04/20/2001 Page: 3 of 7 SECTION V - FIRE FIGHTING MEASURES Unusual Fire and Explosion Hazards: Flammability Classification: Known or Anticipated Hazardous Products of Combustion: No information available Although containers of our product are provided with pressure and temperature relief devices, containers can rupture if exposed to localized heat. Thermal decomposition will generate toxic and corrosive gases. Nonflammable gas Decomposition by elevated temperatures (fire conditions, glowing metal surfaces) may generate hazardous decomposition products common to other CFCs, HCFCs or HBFCs. These can include hydrogen fluoride (ACGIH TLV = 3 ppm), carbon monoxide, carbon dioxide and others. Additional Information SECTION VI - ACCIDENTAL RELEASE MEASURES Accidental Release Measures: Personal Precautions: Environmental Precautions: No information available Evacuate the area and ventilate. Do not enter areas where high concentrations may exist (especially confined or poorly ventilated areas) without appropriate protective equipment including a selfcontained breathing apparatus. See Section VIII. No information available Additional Information SECTION VII - HANDLING AND STORAGE Handling: Storage: Other Precautions: No information available Use the same type of precautions as would be used in handling any cryogenic gas. Protect container from damage. Handle in wellventilated areas. When this material is used as a firefighting agent in fixed or portable extinguishing systems, follow manufacturer's instructions for operation, inspection, maintenance and repair of the system. Store in a cool, dry, well-ventilated area away from incompatible materials. Keep container tightly closed. No information available Additional Information SECTION VIII - EXPOSURE CONTROLS /PERSONAL PROTECTION Engineering Controls: Ventilation Requirements: Personal Protective Equipment: Eye/Face Protection: Skin Protection: Respiratory Protection: No information available Use local ventilation to minimize exposure to gas. Use mechanical ventilation for general area control. Chemical splash goggles when handling liquid Use lined neoprene gloves if handling liquid. Clothing designed to minimize skin contact Wear a NIOSH/MSHA approved self-contained breathing apparatus in emergency situations. MATERIAL SAFETY DATA SHEET MSDS Number: 00057 Product Name: FM-200 Effective Date: 04/20/2001 Page: 4 of 7 SECTION VIII - EXPOSURE CONTROLS /PERSONAL PROTECTION Other Protective Clothing or Equipment: Exposure Guidelines: Work Hygienic Practices: No information available Consult the OSHA respiratory protection information located at 29CFR 1910.134 and the American National Standard Institute's Practices of Respiratory Protection Z88.2. No information available See Section II. Wash thoroughly after handling. Wash contaminated clothing before reuse. Make sure piping is empty before doing maintenance work. Additional Information SECTION IX - PHYSICAL & CHEMICAL PROPERTIES Appearance: Boiling Point: Bulk Density: Color: Decomposition Temperature: Evaporation Rate: Freezing Point: Heat Value: Melting Point: Colorless gas -16.4 degrees C (3 degrees F) Not available Colorless Not available Not available Molecular/Chemical Formula: Molecular Weight: Not available Not available -131 degrees C (-204 degrees F) C3HF7 170 Octanol/Water Partition Coefficient: Odor: Not available Odorless Odor Threshold: Not available Particle Size: Not available No information available Percent Volatile: pH Value: Not available Not available pH Concentration: Physical State: Reactivity in Water: Saturated Vapor Concentration: Softening Point: Solubility in Water: Specific Gravity or Density (Water=1): Vapor Density: Vapor Pressure: Not available Gas Not water reactive Viscosity: Volatile Organic Compounds: Water/Oil Distribution Coefficient: Weight Per Gallon: Not available Not available 260 mg/L 1.46 6.04 58.8 psia at 70 degrees F (21 degrees C) Not available Not available Not available Not available Additional Information SECTION X - STABILITY AND REACTIVITY Stability: Conditions to Avoid: Incompatibility With Other Materials: Hazardous Decomposition Products: Hazardous Polymerization: Conditions to Avoid: Stable under normal conditions of handling and use. None Powdered metals (ex. Al, Mg, or Zn) and strong alkalis, oxidizers or reducing agents are not compatible with this and most other halogenated organic compounds. Thermal decomposition may produce the following: Hydrogen fluoride Carbon monoxide and carbon dioxide Will not occur None MATERIAL SAFETY DATA SHEET MSDS Number: 00057 Product Name: FM-200 Effective Date: 04/20/2001 Page: 5 of 7 SECTION X - STABILITY AND REACTIVITY Additional Information No information available SECTION XI - T OXICOLOGICAL INFORMATION VALUE (LD50 OR LC50) >788,696 ppm/4H ANIMAL Rat R OUTES Acute Inhalation COMPONENTS 1,1,1,2,3,3,3-Heptafluoropropane Toxicological Information: The human health hazards of this product are expected to be similar to other liquefied gases including N2, CO2, CFCs, HCFCs, and HBFCs. Therefore, direct eye or skin contact with the liquid or cold gas can cause chilling or possibly frostbite of exposed tissues. Inhalation of high concentrations can be harmful or fatal due to oxygen deprivation and/or heart irregularities (arrhythmias). Misuse of the product by deliberately inhaling high concentrations of this gas could cause death without warning. Persons with preexisting cardiac or central nervous system disorders may be more susceptible to effects of an overexposure. When tested with and without metabolic activation over a concentration range of 43.9-93.5%, heptafluoropropane was not mutagenic in S. typhimurium. Neither toxicity nor mutagenicity was observed in a mouse lymphoma assay when heptafluoropropane was tested to a concentration of 56.8%. Neither toxicity nor an increase in micronuclei was observed in mice exposed to 10.5% heptafluoropropane. Therefore, there is no evidence that heptafluoropropane is capable of inducing gene or chromosomal mutations in vitro or chromosomal effects in vivo. In other studies, heptafluoropropane did not show genotoxicity or cytotoxicity. Animal studies have found the rat 4 hour LC50 to be >788,696 ppm (~80%), the highest level tested. A cardiac sensitization study in dogs found the No Observable Adverse Effect Level (NOAEL) to be 9.0%. The Lowest Observable Adverse Effect Level (LOAEL) for this study was reported to be 10.5%. A 90 day inhalation study did not find any exposure related effects at 105,000 ppm (10.5% vol./vol.), the highest level tested. Inhalation studies looking for developmental effects on pregnant rabbits and rats or their offspring did not show any exposure related effects at the highest concentrations tested (105,000 ppm). Additional Information No information available SECTION XII - ECOLOGICAL INFORMATION Ecological Information: No information available No information available Additional Information SECTION XIII - D ISPOSAL CONSIDERATIONS Disposal Considerations: No information available Non-contaminated product is reclaimable. Contact Great Lakes Chemical Corporation for information. Otherwise, dispose of waste in an approved chemical incinerator equipped with a scrubber as allowed by current Local, State/Province, Federal/Canadian laws and regulations. Additional Information MATERIAL SAFETY DATA SHEET MSDS Number: 00057 Product Name: FM-200 Effective Date: 04/20/2001 Page: 6 of 7 SECTION XIV - T RANSPORT INFORMATION Proper Shipping Name: Hazard Class: Packing Group: Special Provisions: Non-Bulk Packaging: Passenger Air/Rail Limit: Vessel Stowage: Reportable Quantity: Proper Shipping Name: Hazard Class: Subsidiary Risk: Hazard Labels: Air Passenger Limit Per Package: Air Cargo Limit Per Package: Proper Shipping Name: Hazard Class: Packing Group: Medical First Aid Guide Code: U.S. DOT Heptafluoropropane 2.2 ID Number: N/A Labels: N/A Packaging Exceptions: 304 Bulk Packaging: 75 kg Air Cargo Limit: A Other Stowage: N/A AIR - ICAO OR IATA Heptafluoropropane 2.2 ID Number: N/A Packing Group: Nonflammable gas Packing Instructions: Packing Instruction 75 kg Cargo: Special Provisions 150 kg Code: WATER - IMDG Heptafluoropropane 2.2 ID Number: N/A Subsidiary Risk: UN3296 Nonflammable gas 306 314, 315 150 kg N/A UN3296 N/A 200 200 N/A UN3296 N/A 350 Additional Information EmS No. 2-09 SECTION XV - REGULATORY INFORMATION U.S. Federal Regulations: The components of this product are either on the TSCA Inventory or exempt (i.e. impurities, a polymer complying with the exemption rule at 40 CFR 723.250) from the Inventory. State Regulations: None known International Regulations: This material (or each component) is listed on the following inventories: Canada - NDSL EU - EINECS Australia - AICS Japan - ENCS Korea - ECL China - List I Canadian WHMIS Hazard Class and Division = A. SARA Hazards: Acute: Yes Chronic: No Reactive: No Fire: No Pressure: No Additional Information The above regulatory information represents only selected regulations and is not meant to be a complete list. MATERIAL SAFETY DATA SHEET MSDS Number: 00057 Product Name: FM-200 Effective Date: 04/20/2001 Page: 7 of 7 SECTION XVI - O THER INFORMATION NFPA Codes: Health: Reactivity: HMIS Codes: Health: Reactivity: Label Statements: Other Information: 1 Flammability: 0 Other: 0 * indicates chronic health hazard. 1 Flammability: 0 0 Protection: X Not available Abbreviations: (L) = Loose bulk density in g/ml LOEC = Lowest observed effect concentration MATC = Maximum acceptable toxicant concentration NA = Not available N/A = Not applicable NL = Not limited NOAEL = No observable adverse effect level NOEC = No observed effect concentration NOEL = No observable effect level NR = Not rated (P) = Packed bulk density in g/ml PNOC = Particulates Not Otherwise Classified PNOR = Particulates Not Otherwise Regulated REL = Recommended exposure limit TS = Trade secret Additional Information Information on this form is furnished solely for the purpose of compliance with OSHA's Hazard Communication Standard, 29CFR 1910.1200 and The Canadian Environmental Protection Act, Canada Gazette Part II, Vol. 122, No. 2 and shall not be used for any other purpose. 0 Revision Information: Section II - Purity Section XV - International inventories THIS PAGE INTENTIONALLLY LEFT BLANK. Product: Nitrogen P-4631-F Date: October 2001 Praxair Material Safety Data Sheet 1. Chemical Product and Company Identification Product Name: Nitrogen, compressed (MSDS No. P-4631-F) Trade Name: Nitrogen Chemical Name: Nitrogen Synonyms: Dinitrogen Formula: N2 Chemical Family: Permanent gas 1-800-645-4633* Company Name: Praxair, Inc. Emergencies: 39 Old Ridgebury Road CHEMTREC: 1-800-424-9300* 1-800-PRAXAIR Danbury, CT 06810-5113 Routine: * Call emergency numbers 24 hours a day only for spills, leaks, fire, exposure, or accidents involving this product. For routine information, contact your supplier, Praxair sales representative, or call 1-800-PRAXAIR (1-800-772-9247). Telephone: 2. Composition/Information on Ingredients See section 16 for important information about mixtures. CAS INGREDIENT NUMBER CONCENTRATION OSHA PEL Nitrogen 7727-37-9 >99%* None currently established * The symbol > means “greater than”; the symbol <, “less than.” ACGIH TLV-TWA (2001) Simple asphyxiant 3. Hazards Identification EMERGENCY OVERVIEW CAUTION! High-pressure gas. Can cause rapid suffocation. May cause dizziness and drowsiness. Self-contained breathing apparatus may be required by rescue workers. Odor: None THRESHOLD LIMIT VALUE: TLV-TWA, simple asphyxiant (ACGIH, 2001). TLV-TWAs should be used as a guide in the control of health hazards and not as fine lines between safe and dangerous concentrations. Copyright © 1980, 1983, 1985, 1992, 1997, 2001, Praxair Technology, Inc. All rights reserved. Revised Page 1 of 8 Product: Nitrogen P-4631-F Date: October 2001 EFFECTS OF A SINGLE (ACUTE) OVEREXPOSURE: INHALATION–Asphyxiant. Effects are due to lack of oxygen. Moderate concentrations may cause headache, drowsiness, dizziness, excitation, excess salivation, vomiting, and unconsciousness. Lack of oxygen can kill. SKIN CONTACT–No harm expected. SWALLOWING–An unlikely route of exposure. This product is a gas at normal temperature and pressure. EYE CONTACT–No harm expected. EFFECTS OF REPEATED (CHRONIC) OVEREXPOSURE: No harm expected. OTHER EFFECTS OF OVEREXPOSURE: Asphyxiant. Lack of oxygen can kill. MEDICAL CONDITIONS AGGRAVATED BY OVEREXPOSURE: The toxicology and the physical and chemical properties of nitrogen suggest that overexposure is unlikely to aggravate existing medical conditions. SIGNIFICANT LABORATORY DATA WITH POSSIBLE RELEVANCE TO HUMAN HEALTH HAZARD EVALUATION: None known. CARCINOGENICITY: Nitrogen is not listed by NTP, OSHA, or IARC. 4. First Aid Measures INHALATION: Remove to fresh air. If not breathing, give artificial respiration. If breathing is difficult, qualified personnel may give oxygen. Call a physician. SKIN CONTACT: Flush with water. If discomfort persists, seek medical attention. SWALLOWING: An unlikely route of exposure. This product is a gas at normal temperature and pressure. EYE CONTACT: Flush eyes thoroughly with water. Hold the eyelids open and away from the eyeballs to ensure that all surfaces are flushed thoroughly. If discomfort persists, seek medical attention. NOTES TO PHYSICIAN: There is no specific antidote. Treatment of overexposure should be directed at the control of symptoms and the clinical condition of the patient. 5. Fire Fighting Measures FLASH POINT (test method): Not applicable AUTOIGNITION TEMPERATURE: Not applicable FLAMMABLE LIMITS IN AIR, % by volume: LOWER: Not applicable UPPER: Not applicable EXTINGUISHING MEDIA: Nitrogen cannot catch fire. Use media appropriate for surrounding fire. SPECIAL FIRE FIGHTING PROCEDURES: CAUTION! High-pressure gas. Asphyxiant. Lack of oxygen can kill. Evacuate all personnel from danger area. Immediately deluge cylinders with water from maximum distance until cool; then move them away from fire area if without risk. Shut off flow if you can do so without risk. Self-contained breathing apparatus may be required by rescue workers. (See section 16.) On-site fire brigades must comply with OSHA 29 CFR 1910.156. Page 2 of 8 Product: Nitrogen P-4631-F Date: October 2001 UNUSUAL FIRE AND EXPLOSION HAZARDS: Heat of fire can build pressure in cylinder and cause it to rupture. No part of cylinder should be subjected to a temperature higher than 125°F (52°C). Nitrogen cylinders are equipped with a pressure relief device. (Exceptions may exist where authorized by DOT.) HAZARDOUS COMBUSTION PRODUCTS: None known. 6. Accidental Release Measures STEPS TO BE TAKEN IF MATERIAL IS RELEASED OR SPILLED: CAUTION! High-pressure gas. Asphyxiant. Lack of oxygen can kill. Evacuate all personnel from danger area. Use self-contained breathing apparatus where needed. Shut off flow if you can do so without risk. Ventilate area or move cylinder to a well-ventilated area. Test for sufficient oxygen, especially in confined spaces, before allowing reentry. WASTE DISPOSAL METHOD: Prevent waste from contaminating the surrounding environment. Keep personnel away. Discard any product, residue, disposable container, or liner in an environmentally acceptable manner, in full compliance with federal, state, and local regulations. If necessary, call your local supplier for assistance. 7. Handling and Storage PRECAUTIONS TO BE TAKEN IN STORAGE: Store and use with adequate ventilation. Firmly secure cylinders upright to keep them from falling or being knocked over. Screw valve protection cap firmly in place by hand. Store only where temperature will not exceed 125° F (52° C). Store full and empty cylinders separately. Use a first-in, first-out inventory system to prevent storing full cylinders for long periods. PRECAUTIONS TO BE TAKEN IN HANDLING: Protect cylinders from damage. Use a suitable hand truck to move cylinders; do not drag, roll, slide, or drop. Never attempt to lift a cylinder by its cap; the cap is intended solely to protect the valve. Never insert an object (e.g., wrench, screwdriver, pry bar) into cap openings; doing so may damage the valve and cause a leak. Use an adjustable strap wrench to remove over-tight or rusted caps. Open valve slowly. If valve is hard to open, discontinue use and contact your supplier. For other precautions in using nitrogen, see section 16. For additional information on storage and handling, refer to Compressed Gas Association (CGA) pamphlet P-1, Safe Handling of Compressed Gases in Containers, available from the CGA. Refer to section 16 for the address and phone number along with a list of other available publications. 8. Exposure Controls/Personal Protection VENTILATION/ENGINEERING CONTROLS: LOCAL EXHAUST–Use a local exhaust system, if necessary, to prevent oxygen deficiency. MECHANICAL (general)–General exhaust ventilation may be acceptable if it can maintain an adequate supply of air. SPECIAL–None OTHER–None RESPIRATORY PROTECTION: None required under normal use. Air-supplied respirators must be used in confined spaces or in an oxygen-deficient atmosphere. Respiratory protection must conform to OSHA rules as specified in 29 CFR 1910.134. SKIN PROTECTION: Wear work gloves when handling cylinders. Page 3 of 8 Product: Nitrogen P-4631-F Date: October 2001 EYE PROTECTION: Wear safety glasses when handling cylinders. Select in accordance with OSHA 29 CFR 1910.133. OTHER PROTECTIVE EQUIPMENT: Metatarsal shoes for cylinder handling. Select in accordance with OSHA 29 CFR 1910.132 and 1910.133. Regardless of protective equipment, never touch live electrical parts. 9. Physical and Chemical Properties MOLECULAR WEIGHT: 28.01 SPECIFIC GRAVITY (air = 1) at 70°F (21.1°C) and 1 atm: 0.967 GAS DENSITY at 70°F (21.1°C) and 1 atm: 0.072 lb/ft3 (1.153 kg/m3) SOLUBILITY IN WATER, vol/vol at 32°F (0°C) and 1 atm: 0.023 PERCENT VOLATILES BY VOLUME: 100 BOILING POINT at 1 atm: -320.44°F (-195.80°C) MELTING POINT at 1 atm: -345.8°F (-209.9°C) APPEARANCE, ODOR, AND STATE: Colorless, odorless, tasteless gas at normal temperature and pressure. 10. Stability and Reactivity STABILITY: Unstable Stable INCOMPATIBILITY (materials to avoid): None known. HAZARDOUS DECOMPOSITION PRODUCTS: None known. HAZARDOUS POLYMERIZATION: May Occur Will Not Occur CONDITIONS TO AVOID: Under certain conditions, nitrogen can react violently with lithium, neodymium, titanium, and magnesium to form nitrides. At high temperature it can also combine with oxygen and hydrogen. 11. Toxicological Information Nitrogen is a simple asphyxiant. 12. Ecological Information No adverse ecological effects expected. Nitrogen does not contain any Class I or Class II ozone-depleting chemicals. Nitrogen is not listed as a marine pollutant by DOT. 13. Disposal Considerations WASTE DISPOSAL METHOD: Do not attempt to dispose of residual or unused quantities. Return cylinder to supplier. For emergency disposal, secure cylinder in a well-ventilated area or outdoors, and then slowly discharge gas to the atmosphere. Page 4 of 8 Product: Nitrogen P-4631-F Date: October 2001 14. Transport Information DOT/IMO SHIPPING NAME: HAZARD 2.2 CLASS: SHIPPING LABEL(s): Nitrogen, compressed PLACARD (when required): NONFLAMMABLE GAS IDENTIFICATION PRODUCT UN 1066 RQ: NUMBER: NONFLAMMABLE GAS None SPECIAL SHIPPING INFORMATION: Cylinders should be transported in a secure position, in a well-ventilated vehicle. Cylinders transported in an enclosed, nonventilated compartment of a vehicle can present serious safety hazards. Shipment of compressed gas cylinders that have been filled without the owner's consent is a violation of federal law [49 CFR 173.301(b)]. 15. Regulatory Information The following selected regulatory requirements may apply to this product. Not all such requirements are identified. Users of this product are solely responsible for compliance with all applicable federal, state, and local regulations. U.S. FEDERAL REGULATIONS: EPA (ENVIRONMENTAL PROTECTION AGENCY) CERCLA: COMPREHENSIVE ENVIRONMENTAL RESPONSE, COMPENSATION, AND LIABILITY ACT OF 1980 (40 CFR Parts 117 and 302): Reportable Quantity (RQ): None SARA: SUPERFUND AMENDMENT AND REAUTHORIZATION ACT: SECTIONS 302/304: Require emergency planning based on Threshold Planning Quantity (TPQ) and release reporting based on Reportable Quantities (RQ) of Extremely Hazardous Substances (EHS) (40 CFR Part 355): Threshold Planning Quantity (TPQ): None EHS RQ (40 CFR 355): None SECTIONS 311/312: Require submission of MSDSs and reporting of chemical inventories with identification of EPA hazard categories. The hazard categories for this product are as follows: IMMEDIATE: No PRESSURE: Yes DELAYED: No REACTIVITY: No FIRE: No SECTION 313: Requires submission of annual reports of release of toxic chemicals that appear in 40 CFR Part 372. Nitrogen does not require reporting under Section 313. Page 5 of 8 Product: Nitrogen P-4631-F Date: October 2001 40 CFR 68: RISK MANAGEMENT PROGRAM FOR CHEMICAL ACCIDENTAL RELEASE PREVENTION: Requires development and implementation of risk management programs at facilities that manufacture, use, store, or otherwise handle regulated substances in quantities that exceed specified thresholds. Nitrogen is not listed as a regulated substance. TSCA: TOXIC SUBSTANCES CONTROL ACT: Nitrogen is listed on the TSCA inventory. OSHA: OCCUPATIONAL SAFETY AND HEALTH ADMINISTRATION: 29 CFR 1910.119: PROCESS SAFETY MANAGEMENT OF HIGHLY HAZARDOUS CHEMICALS: Requires facilities to develop a process safety management program based on Threshold Quantities (TQ) of highly hazardous chemicals. Nitrogen is not listed in Appendix A as a highly hazardous chemical. STATE REGULATIONS: CALIFORNIA: Nitrogen is not listed by California under the SAFE DRINKING WATER AND TOXIC ENFORCEMENT ACT OF 1986 (Proposition 65). PENNSYLVANIA: Nitrogen is subject to the PENNSYLVANIA WORKER AND COMMUNITY RIGHT-TO-KNOW ACT (35 P.S. Sections 7301-7320). 16. Other Information Be sure to read and understand all labels and instructions supplied with all containers of this product. NOTE: The suitability of nitrogen as a component in underwater breathing gas mixtures is to be determined by or under the supervision of personnel experienced in the use of underwater breathing gas mixtures and familiar with the physiological effects, methods employed, frequency and duration of use, hazards, side effects, and precautions to be taken. OTHER HAZARDOUS CONDITIONS OF HANDLING, STORAGE, AND USE: High-pressure gas. Use piping and equipment adequately designed to withstand pressures to be encountered. Gas can cause rapid suffocation due to oxygen deficiency. Store and use with adequate ventilation. Close valve after each use; keep closed even when empty. Never work on a pressurized system. If there is a leak, close the cylinder valve. Blow the system down in a safe and environmentally sound manner in compliance with all federal, state, and local laws; then repair the leak. Never place a compressed gas cylinder where it may become part of an electrical circuit. MIXTURES: When you mix two or more gases or liquefied gases, you can create additional, unexpected hazards. Obtain and evaluate the safety information for each component before you produce the mixture. Consult an industrial hygienist or other trained person when you evaluate the end product. Remember, gases and liquids have properties that can cause serious injury or death. HAZARD RATING SYSTEMS: NFPA RATINGS: HEALTH FLAMMABILITY REACTIVITY SPECIAL HMIS RATINGS: =0 =0 HEALTH =0 FLAMMABILITY = 0 =0 =0 REACTIVITY = SA (CGA recommends this to designate Simple Asphyxiant.) Page 6 of 8 Product: Nitrogen P-4631-F STANDARD VALVE CONNECTIONS FOR U.S. AND CANADA: 0-3000 psig THREADED: 3001-5500 psig 5001-7500 psig 0-3000 psig PIN-INDEXED YOKE: ULTRA-HIGH-INTEGRITY CONNECTION: 0-3000 psig Date: October 2001 CGA-580 CGA-680 CGA-677 CGA-960 (medical use) CGA-718 Use the proper CGA connections. DO NOT USE ADAPTERS. Additional limited-standard connections may apply. See CGA pamphlet V-1 listed below. Ask your supplier about free Praxair safety literature as referred to in this MSDS and on the label for this product. Further information about this product can be found in the following pamphlets published by the Compressed Gas Association, Inc. (CGA), 4221 Walney Road, 5th Floor, Chantilly, VA 20151-2923, Telephone (703) 788-2700. AV-1 G-10.1 P-1 P-9 P-14 SB-2 V-1 — Safe Handling and Storage of Compressed Gases Commodity Specification for Nitrogen Safe Handling of Compressed Gases in Containers Inert Gases – Argon, Nitrogen, and Helium Accident Prevention in Oxygen-Rich, Oxygen-Deficient Atmospheres Oxygen-Deficient Atmospheres Compressed Gas Cylinder Valve Inlet and Outlet Connections Handbook of Compressed Gases, Third Edition Page 7 of 8 Product: Nitrogen P-4631-F Date: October 2001 Praxair asks users of this product to study this MSDS and become aware of product hazards and safety information. To promote safe use of this product, a user should (1) notify employees, agents, and contractors of the information in this MSDS and of any other known product hazards and safety information, (2) furnish this information to each purchaser of the product, and (3) ask each purchaser to notify its employees and customers of the product hazards and safety information. The opinions expressed herein are those of qualified experts within Praxair, Inc. We believe that the information contained herein is current as of the date of this Material Safety Data Sheet. Since the use of this information and the conditions of use of the product are not within the control of Praxair, Inc., it is the user’s obligation to determine the conditions of safe use of the product. Praxair MSDSs are furnished on sale or delivery by Praxair or the independent distributors and suppliers who package and sell our products. To obtain current Praxair MSDSs for these products, contact your Praxair sales representative or local distributor or supplier. If you have questions regarding Praxair MSDSs, would like the form number and date of the latest MSDS, or would like the names of the Praxair suppliers in your area, phone or write the Praxair Call Center (Phone: 1-800-PRAXAIR; Address: Praxair Call Center, Praxair, Inc., PO Box 44, Tonawanda, NY 14151-0044). Praxair and the Flowing Airstream design are trademarks or registered trademarks of Praxair Technology, Inc. in the United States and other countries. Praxair, Inc. 39 Old Ridgebury Road Danbury, CT 06810-5113 Printed in USA Page 8 of 8 TECHNICAL MANUAL USER FEEDBACK FORM (Use this report to indicate deficiencies, user remarks and recommendations relating to the publication. Fold on dotted line, tape and mail to KIDDE-FENWAL, Inc., 400 Main Street, Ashland, MA 01721, Attn. Documentation Manager or FAX to 508-881-8920) DATE: 1. PART NUMBER 2. VOLUME NO. 3. TITLE (NOMENCLATURE) 4. CHANGE NO. OR REV. DATE 5. SYSTEM/EQUIPMENT 6. PRIORITY OF COMMENT 7. USER EVALUATION MANUAL IS: 8. q EXCELLENT q PROBLEM q GOOD q QUESTION q FAIR q POOR q COMPLETE q SUGGESTION q COMMENT: (check one) 9. RECOMMENDED CHANGE TO PUBLICATION PAGE PARAGRAPH LINE FIGURE TABLE NO. NO. NO. NO. NO. 10. ORIGINATOR RECOMMENDED CHANGES AND REASON (Use Blank Continuation Sheets as Required) 11. COMPANY NAME 12. ADDRESS 13. KIDDE-FENWAL USE ONLY a. Received b. Action Necessity 220423 c. Priority d. Comments q INCOMPLETE FOLD Place Stamp Here KIDDE-FENWAL, Inc. 400 Main Street Ashland, MA 01721 Attn. Documentation Manager FOLD 220423 LIMITED WARRANTY STATEMENT Kidde-Fenwal, Inc. represents that this product is free from defects in material and workmanship, and it will repair or replace any product or part thereof which proves to be defective in workmanship or material for a period of twelve (12) months from the date of purchase but not to exceed eighteen (18) months after shipment by Kidde-Fenwal Inc. For a full description of Kidde-Fenwals LIMITED WARRANTY, which, among other things, EXCLUDES warranties of MERCHANTABILITY and FITNESS FOR A PARTICULAR PURPOSE and liability for CONSEQUENTIAL DAMAGES, please read the entire LIMITED WARRANTY on the Kidde-Fenwal Quotation, Acceptance of Order and/or Original Invoice which will become part of your sales agreement. Please contact Kidde-Fenwal directly for a return material authorization (RMA) number before returning material to the factory at Ashland, Massachusetts, shipment prepaid. Kidde-Fenwal will repair or replace and ship prepaid. Kidde is a registered trademark of Kidde-Fenwal, Inc. FM-200 is a registered trademark of Great Lakes Chemical Corporation. Teflon is a registered trademark of E.I. du Pont de Nemours and Company. Loctite is a registered trademark of the Loctite Corporation. These instructions do not purport to cover all the details or variations in the equipment described, nor do they provide for every possible contingency to be met in connection with installation, operation and maintenance. All specifications subject to change without notice. Should further information be desired or should particular problems arise which are not covered sufficiently for the purchasers purposes, the matter should be referred to KIDDE-FENWAL INC., Ashland, Masssachusetts 06-236115-001 Rev. AD ©2004 Kidde-Fenwal, Inc. Printed in USA