1
Trail Cameras
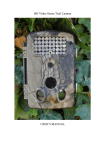
VSD8210A and VSD8210B
USER’S MANUAL
TABLE OF CONTENTS
General Information ............................................................. 2
1.1 Introduction ............................................................. 2
1.2 Application............................................................... 3
1.3 Illustration................................................................ 4
Quick Start ............................................................................ 6
2.1 Load Batteries .......................................................... 6
2.2 Insert SD Card ......................................................... 6
2.3 Enter Test Mode ....................................................... 6
2.4 Enter On Mode ........................................................ 8
2.5 Shortcut Key ……………………………………….9
Advanced Settings ................................................................. 10
3.1 Parameter Settings ................................................... 10
3.2 Replay ...................................................................... 14
Warranty Information .......................................................... 15
Appendix I Technical Specifications .................................... 16
Appendix II Package Contents ............................................ 18
1
GENERAL INFORMATION
1.1 Introduction
The VSD8210A & B trail camera (also called game camera/
hunting camera) is a scouting device. It can be triggered by sudden
change of ambient temperature caused by moving game in a
region of interest, which is detected by a highly sensitive Passive
Infra-Red (PIR) sensor, and then take pictures or video clips
automatically.
The Feature:
12/10/8/5 Mega Pixels CMOS sensor.
Built-in 2.5" TFT color display to review images and
videos
Unique side Prep Sensor design provides wider
sensing angle and enhances camera's response speed
Saves the day photos and videos in color, record with
sounds
Optical filter can filter away the glare during daytime
Zoom in/out picture when you check it
Impressively quick trigger time (1 second)
Date, time, temperature and moon phase can be
imprinted in every photo
Programmable to work as Time-Lapse camera taking
pictures/video in long range day and night
When Timer setting on, programmable to only work in
specified period every day. This feature can be used
together with Time Lapse feature to meet your
2
timetable
Laser light makes the camera focus to the optimal
point
Ultra low standby power consumption .Extremely long
in- field life(in standby mode ,up to more than 4
months
with 4 x AA batteries and 8 Months with 8 x AA
batteries)
Multi-shot of Single, Camera+Video, 3 pictures, 5
pictures
Sharp and bright color photos in daytime and clear
black/white photos at night
Unique side Prep Sensor design provides wider
sensing angle and enhances camera’s response speed
Compact size. Well designed to deploy covertly
Serial Number function enables you to code locations
in the photo. This helps multi-camera users identify
The location when reviewing the photos
Password protected
1.2 Application
. Trail camera for hunting
. Animal or event observations
. Motion-Triggered security camera, for home, office and
community
. All other indoor/outdoor surveillance where invasion evidence
needed
3
1.3 Illustration
The laser button can help users to confirm the fixed angle of the
camera.You should only put the laser key in front of the camera(as
shown), the direction indicated by the red light beam is the front
of the lens.
4
The camera provides the following connections for external
devices: USB port, SD card slot, TV out jack, and external DC
power in jack .The 3-way Power/Mode Switch is used to select the
main operation modes : OFF , ON and TEST.
To supply power, it is recommended to use four new
high-performance alkaline AA batteries or low self-discharge
Ni-MH chargeable AA batteries. To achieve longer in- field time,
install the additional battery box which contains four more AA
batteries.
5
Quick Start
2.1 Load Batteries
Install 4 AA batteries or 8 AA batteries.
2.2 Insert SD Card
The camera comes with 32M internal memory.
Before inserting the SD card into the card slot, please make sure
the write-protect switch on the side of the SD card is “off”(NOT in
the “Lock ” position).The supported memory capacity is up to
32GB . If you use a card capable of above 32GB, make sure you
test it before putting the camera in use.
CAUTION: ALWAYS SWITCH THE CAMERA TO OFF MODE
BEFORE YOU INSTALL OR REMOVE THE BATTERIES OR
THE SD CARD.
Function Switch
There are three positions for the switch: OFF, ON and TEST. They
each correspond to three different modes of the camera. When
batteries need to be changed or when the device is not in used, it
should be at the OFF mode.
2.3 Enter Test Mode
Moving the switch to the TEST position would set camera to the
preview testing mode. When the device is in this mode, you can
manually take pictures, videotape, view existing photos and videos,
6
and adjust the parameters just like using an ordinary camera.
There are three scenarios in the testing mode, and they are: 1) the
preview mode, where you can see the scenes directly in front of
the camera lens from the TFT LCD screen or the TV, 2) the setting
mode, where the menu is shown, and 3) the playback mode, where
you can view existing photos and videos that are stored in SD card
from the TFT LCD screen or the TV. The camera automatically
enters into the preview mode when it is first set in the preview
testing mode.
Switch to the TEST position to enter the TEST mode. In this mod
you can take pictures or video clips like a regular digital camera,
or enter the Menu to set up parameters. On the keypad there are
four “Shortcut ” function keys working as below :
key to manually trigger the shutter.
Press the
A photo or video (depending on the camera setting) will be taken
and saved to the SD card. If the display shows “CARD
PROTECTED” when you press the SHOT key , switch the power
OFF , remove the SD card and slide its write-protect switch to off
Press the
key to review/ playback photos / videos on the
LCD screen, or a connected TV monitor. Use
and
key to navigate.
There is another key, MENU, on the keypad that allows you to
program the camera to work the way you want. Please make
reference to 3.1 Parameter Settings in the Advanced Operation
section.
7
2.4 Enter ON Mode (Automatic Infrared Shooting Mode)
Moving the switch to the ON position would set the device in the
Automatic Infrared Shooting Mode. There is a waiting time of
about 30 seconds before the system adjusts to this mode, and
during this period the red LED indicator light will keep flashing.
After that the light extinguishes and the camera can start taking
pictures by infrared inducement. Once the device is in this mode,
there would be no need for any manual operations, and the camera
will function automatically by taking pictures or videotaping the
subjects such as animals, persons that enters a certain range.
The time interval, the record time can be set before the camera is
put to work. The camera will automatically turn on when subjects
(animals, persons) enters the area covered by the
PIR on the
left and right sides. Then it will take pictures or start videotaping
once the subjects are in the range of the PIR . If the subjects
enter the range of the
PIR directly, the camera will be in
operation immediately. If the subjects leave the range of the
PIR , the camera would automatically shut down after a while.
PIR the advantages: General infrared camera to save power,
usually only PIR part is working, photographic part is closed,
when PIR detect the animals, it begin opens photographic parts
supply, Then from the start photographic parts power to start take
photo needs certain time, Our camera need 1 second. When an
animal is fast across, will pass over the camera‘s shoot range,
which will have to take a photograph of no animal.
Our preparation PIR can solve the problem. Our camera have
8
prepared PIR, its scope of induction is 100-120° Angle, a very
wide range of induction, far outweigh 50° Angle of the camera
lens, when the animals into the PIR is detecting range,
photographic parts began power on and ready to shoot after 1
second, if animals go in
PIR
range (less the camera lens
Angle), will soon, this time is almost negligible, rapidly across the
animal able to photograph.
2.5 shortcut key
SHOT : Under the TEST mode, press SHOT can take photo or
video
MENU : Under the TEST mode, Press MENU, can set menu
OK: Under the TEST mode, Press OK can reply
The 7 keys from left to right are: “MENU” , “LEFT”, “UP”,
“DOWN”, “Right”, “OK” and “SHOT”. The key “SHOT”
symbolize “SHOT”, and they are shortcut keys. when the key
“SHOT” is pressed, a photo or video is take, and “OK” is
pressed, photos and videos can be reviewed.
9
Advanced Operations
Compared with ordinary cameras, our camera has more
professional functions. The user can change the settings according
to specific needs under the preview test mode.
3.1 Parameter Setting
Parameter
Mode
Format
Settings
(Bold= default)
Camera
Video
Enter
Capture
Mode
Single
Camera +video
3
pictures
5
pictures
Photo size
5MP,8MP,12MP
Description
Select whether still photos or
video are taken.
All files will be deleted after
formatting the SD card. Highly
recommend you format the SD
card if it has been used
previously in other devices.
Caution: make sure wanted
files on the SD card have been
backed up first!
In Camera+Video mode, it can
first take photo and then shoot
video afterward. Select the
number of photos taken in
sequence per trigger in camera
mode.
Please also refer to the Interval
parameter.
Select desired resolutions for
10
still photos from 5 to 12 mega
pixels.
Higher resolution produces
better quality photos, but
creates larger files that take
more of the SD
card capacity.
Select video resolution (pixels
per frame). Higher resolution
produces better quality videos,
but creates larger files that take
more of the SD card capacity.
Select desired video time for
AVI format from 15S to 120S
(affects
still photos
only)
Video Size
(affects
video clips
only)
Video
Time
PIR
Sensitivity
Timer
HD 1280*720
15 sec
30 sec
60 sec
120 sec
High
Middle
Low
Select the sensitivity of the PIR
sensor. The High setting suits
indoors and environments with
little interference, while the
Normal/Low suits outdoors and
environments with more
interference. Temperature also
affects the sensitivity. The High
setting is suitable when the
ambient temperature is warm,
and the Low setting is helpful
in cold weather.
Select On if you only want the
OFF
11
ON
Serial No.
OFF
ON
Time lapse
OFF
ON
camera to work within a
specified time period every day.
For instance, if the starting time
is set at 18:35 and the ending
time at 8:25, the camera will
function from 18:35 the current
day to 8:25 the next day.
Outside the time period the
camera will not be triggered or
take photos/videos.
Select ON to assign a serial
number to each camera you
have. You can use the
combination of 4 digits and/or
alphabets to record the location
in the photos (e.g. WT1 for
Park).This helps multi-camera
users identify the location when
reviewing the photos.
If set On, the camera will
automatically
take
photos/videos according to the
set interval, regardless of
whether the PIR sensor has
detected any game. This is
helpful
when
observing
cold-blooded
animals like
snakes, or the process of
flowering, etc.
12
Side PIR
OFF
ON
Delay time
1s,
optional from 1s
to 1H59M59S
The default setting is On. The
two side prep PIR sensors
provide wider sensing angle
and detect more potential
triggers. In some situations, you
only want to monitor a narrow
spot. Too many irrelevant
triggers by the side sensors
outside of that spot will keep
the camera on and off, which
drains the battery power
rapidly. Or in some other
situations you have difficulty
removing
the
interfering
branches, or avoiding the
sunlight. If so, you have the
option to turn off the side
sensors.
Select the shortest length of
time that the camera will wait
until it responds to any
subsequent triggers from the
PIR sensor after a game is first
detected. During the selected
interval, the camera will not
take
pictures/videos.
This
prevents the SD card from
filling up with too many
redundant images.
13
IR-LED
TV OUT
Date
Stamp
Language
Date
&
Time
Password
Set
Day
Night
24H
NTSC
PAL
OFF
Date &Time
You can choose IR-LED work
time.
You can choose TV system
NTSC or PAL .
Select ON if you want the date
& time ,temperature and moon
phase can be imprinted in every
photo .
You can choose language
which you need. We can add
more languages.
English
Deutsch
Suomen
Francais
Svenska
MM/DD/YYYY
Set up date and time
OFF,
On
Set up a password to protect
your camera from unauthorized
users.
3.2 Replay
Under the TEST mode, pressing “OK” will display the
last photos or videos. Use
and
to playback the
photos or video . If it is a video clip, you can press
14
to
play, then press
to stop playing.
When in 12MP camera, Photos can 16 times zoom
playback, press
press
zoom in and press
view right photo and press
zoom out,
view left photo;
In this playback mode, pressing “MENU” will enter into
the deletion menu, in which you have the options to
delete the current picture/video or to delete all.
Select “OK” and then “Yes” to confirm deletes the file,
or select “No” to keep it.
LIMITED WARRANTY
We take great pride in our products. We always stand behind our
promises. We provide a leading warranty term and service. Buying
a our product, you are covered under a limited warranty.
We guarantee our products to be free of defects in materials and
workmanship for a limited warranty of the original purchase date.
This warranty does not cover consumer caused damages such as
misuse, abuse, improper handling or installation, or repairs
attempted by someone other than our authorized technicians.
15
We will, at our option during the warranty period, repair your
camera or replace it with the same or comparable model free of
charge. This warranty only extends to the original retail buyer
from our authorized dealer. Purchase receipt or other proof of the
date of the original purchase is required to receive warranty
benefits. The warranty on any replacement product provided under
the original warranty shall be for the remaining portion of the
warranty period applicable to the original product.
This warranty extends solely to failures due to defects in materials
or workmanship under normal use. It does not cover normal wear
of the product.
If you need to return a product under this warranty,
please contact your dealer or our distributor.
Appendix I. TECHNICAL SPECIFICATION
Model
Image Sensor
Max. Pixel Size
Lens
IR Flash
LCD Screen
Operation Keypad
Picture Size
Parameters
12Mega Pixels color CMOS
3000*4000
F=3.1;OFV=52°;Auto IR-Cut
65 Feet/20 Meters
2.5 inch
7 Keys
3000*4000 12M
3264*2448 8M ‘
2592*1944 5M
16
Memory
Laser light
Video Size
PIR
Sensing
Distance
Prep PIR Sensing
Angle
Main PIR sensing
Angle
Trigger Time
Time lapse
Delay time
IR-LED mode
Capture Mode
Video time
Timer
Serial NO.
32M , SD card (32M to 32G)
Laser light makes the camera focus to
the shooting range .Just put Magnet Key
on front of camera
HD 1280*720
20fps
D1
720*480
20fps
640
640*480
20fps
320
320*240
20fps
15M
Left and right light beams form an angle
of 110°;
35°
0.8-1 Second
1 sec—23H59M59S ;Programmable
1 sec—23H59M59S ;Programmable
Day/Night/24H
Single
Camera +video
3
pictures
5
pictures
15 sec
30 sec
60 sec
120 sec
ON/OFF ; Timer set
4 Digit NO.
17
Password
Power Supply
Stand-By Time
Stand-by Current
Auto Power off
Power Consumption
Low Battery Alarm
Interface
Waterproof
Operation
Temperature
Operation Humidity
4 Digit NO.
4*AA; Expandable to 8*AA
4-8 Months(4*AA –8*AA)
0.2mA
2 minutes while no keypad controlling
150mA(+500mA when IR LED lights
up)
4.3V
TV out ; USB; SD card slot; 6V DC
External
IP54
-20 to +158℉/-30 to +70℃
5%
-- 95%
Appendix II PACKAGE CONTENTS
Part name
Digital camera
USB cable
TV AV IN cable
Strap
External DC cable (Optional)
Instruction Manual
Quantity
1
1
1
1
1
1
18