1
February 9, 2009
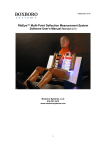
USER’S MANUAL
RibEye™ Multi-Point Deflection Measurement System
2-Axis Version for the Polar ATD
Boxboro Systems, LLC
978-257-2219
www.boxborosystems.com
1
February 9, 2009
Table of Contents
Page
1.0
Polar RibEye Description .................................................................................. 4
1.1
2.0
RibEye Mounting................................................................................................ 6
2.1
3.0
RibEye Measurement Range ...................................................................... 5
LED Mounting to Ribs................................................................................. 7
RibEye Software................................................................................................. 9
3.1
RibEye Control Software Installation........................................................... 9
3.2
RibEye Control Software Operation ............................................................ 9
3.3
Connecting to the RibEye .......................................................................... 10
3.4
Text Field Under “RibEye Installed in ATD”................................................ 12
3.5
ISO Code Settings ..................................................................................... 13
3.6
“Show Current XY’s” Button....................................................................... 13
3.7
Data Collection Setup, Arm, and Download Controls ................................. 14
3.7.1 Data Buffer Operation...................................................................... 14
3.7.2 Flash Memory Data Storage............................................................ 14
3.7.3 “Erase Memory” Button ................................................................... 15
3.7.4 “Arm/Disarm” and “Trigger” Buttons................................................. 15
3.7.5 “Download Data” Button .................................................................. 16
3.7.6 Error Codes in Data File .................................................................. 17
3.8
“Plot” Tab................................................................................................... 17
3.8.1 “Plot Data” Selection ....................................................................... 17
3.8.2 “Filter Class” Selection .................................................................... 18
3.8.3 “Select File” Button.......................................................................... 18
3.8.4 Zooming and Modifying a Plot Style ................................................ 19
3.9
“Live Display” Tab...................................................................................... 19
Appendixes
A.
Setting the RibEye’s IP address.................................................................. 22
B.
Setting Up a Windows HyperTerminal......................................................... 24
C.
Configuring Windows XP for a Fixed IP Address......................................... 27
D.
Micro-D Connector...................................................................................... 29
E.
RibEye specifications.................................................................................. 30
2
February 9, 2009
List of Figures and Tables
Figure No.
Page
1
Polar RibEye (front view) ............................................................................. 4
2
Polar RibEye (back view) ............................................................................. 5
3
RibEye measurement range in Polar ATD.................................................... 5
4
Mounting RibEye to Spine............................................................................ 6
5
Mounting RibEye to spine (back side) .......................................................... 7
6
Mounting outer LEDs on ribs........................................................................ 7
7
Mounting LEDs on sternum end of ribs ........................................................ 8
8
LED connections to RibEye ......................................................................... 8
9
RibEye control software main screen upon start-up .................................... 10
10
“Find RibEyes” screen ................................................................................ 11
11
RibEye control software main screen after connecting to RibEye................ 12
12
Confirmation of updated data under “RibEye Installed in ATD” ................... 13
13
ISO code settings........................................................................................ 13
14
Data collection setup, arm, and download controls ..................................... 14
15
“Disarm” and “Trigger” buttons that appear after arming ............................. 15
16
Message pop-up after arming ..................................................................... 16
17
Plot tab ....................................................................................................... 18
18
Changing plot styles by right-clicking on a trace in the “Legend” box .......... 19
19
“Live Display” tab with data shown in the RibEye coordinate system .......... 20
20
“Live Display” tab with data shown in the dummy coordinate system .......... 21
A1
HyperTerminal screen................................................................................. 23
B1
HyperTerminal connection screen 1............................................................ 24
B2
HyperTerminal connection screen 2............................................................ 24
B3
HyperTerminal connection screen 3............................................................ 25
B4
HyperTerminal connection screen 4............................................................ 25
B5
HyperTerminal connection screen 5............................................................ 26
B6
Saving the HyperTerminal connection......................................................... 26
C1
Windows XP configuration screen 1............................................................ 27
C2
Windows XP configuration screen 2............................................................ 27
C3
Windows XP configuration screen 3............................................................ 28
E1
RibEye measurement range in X-Y plane ................................................... 30
Table No.
1
2
3
D1
E1
E2
Page
LED connections.......................................................................................... 9
Linear buffer operation examples................................................................ 14
Data file (*.CSV) format............................................................................... 17
Existing connector pin configuration............................................................ 29
RibEye error limits versus Z deflection ........................................................ 30
RibEye power requirements........................................................................ 31
3
February 9, 2009
USER’S MANUAL
RibEye™ Multi-Point Deflection Measurement System
2-Axis Version for the Polar ATD
1.0
Polar RibEye Description
The Polar RibEye mounts to the lower spine of the Polar dummy. The RibEye can be positioned
to face either the left or right side of the dummy. Six light-emitting diodes (LEDs) are mounted
on the Polar ribs – two each on Ribs 4, 5, and 6. For each rib, one LED is mounted on the outer
part of the rib on the side of the dummy, and one LED is mounted at the sternum end of the rib
close to the middle of the dummy chest. The RibEye records and reports the X and Y positions of
each LED at a sample rate of 10 kHz. The RibEye records up to 30 seconds of data in dynamic
random access memory (D-RAM). After the test, the RibEye copies 2 seconds of data in flash
memory. Figure 1 shows a front view of the Polar RibEye. The connector for the LEDs is in the
center of the front cover.
1
2 3 4 5 6
Figure 1. Polar RibEye (front view)
The RibEye receives Ethernet connectivity, power, and a trigger signal from the DTS-G5DB.
Please refer to the DTS documentation for configuring the DTS system. All of the signals from
the G5DB are connected to a 25-pin Micro-D connector on the back of the RibEye as shown in
Figure 2. In the current configuration, the DTS software does not control the RibEye; however,
DTS control could be an option in the future. Currently, the RibEye is operated by the RibEye
control application, which runs on a PC. The RibEye control software configures the RibEye,
shows its current LED positions, and downloads data from the RibEye. Data from the RibEye is
stored in Comma-Separated-Variable files. The control software also provides a quick plot of
the data.
4
February 9, 2009
Figure 2. Polar RibEye (back view)
1.1
RibEye Measurement Range
The RibEye measurement range is shown in Figure 3, superimposed on a view looking down the
Polar ATD chest. Ribs 4, 5, and 6 are shown with the LEDs attached. In this view, the RibEye is
facing the ATD’s left side. The RibEye X-Y plane is rotated 41 degrees with respect to the ATD
X-Y plane. When the RibEye saves and displays the LED positions, its control software
automatically converts the RibEye data to the ATD’s coordinate system.
Figure 3. RibEye measurement range in Polar ATD
5
February 9, 2009
2.0
RibEye Mounting
Before mounting the RibEye, the cable from the G5DB should be attached to the 25-pin Micro-D
connector on the back of the RibEye, and the jack screws on the connector should be fully
tightened. The RibEye is mounted to the spine using two 6-32 x 1.25 inch countersunk hex
screws as shown in Figure 4.
6-32 x 1.25
Figure 4. Mounting RibEye to Spine
Use two 6-32 x 5/16 screws to attach the RibEye to the angle bracket on the back side as shown
in Figure 5.
6
February 9, 2009
6-32 x 5/16
Figure 5. Mounting RibEye to spine (back side)
2.1
LED Mounting to Ribs
The three LEDs mounted on the outer part of the ribs on the side of the dummy are each attached
with two nylon zip-ties. The three LEDs mounted at the sternum end of the ribs close to the
middle of the dummy chest are attached to the bolts that connect the ribs and sternum. Figure 6
illustrates how the three outer LEDs are mounted. Figure 7 shows how the LEDs at the sternum
end of the ribs are mounted.
Figure 6. Mounting outer LEDs on ribs
7
February 9, 2009
Figure 7. Mounting LEDs on sternum end of ribs
The LED cables are routed along the inside of the ribs. Make sure that the LED cables cannot
move into the field of view during the test. The connectors on the ends of the LED cables are
plugged into the socket on the front cover of the RibEye as shown in Figure 8.
Figure 8. LED connections to RibEye
The LEDs must be plugged into the connector in the order listed in Table 1.
8
February 9, 2009
Table 1. LED connections
LED number Rib number Location on rib
1
4
Outer
2
5
Outer
3
6
Outer
4
4
Middle
5
5
Middle
6
6
Middle
3.0
RibEye Software
The RibEye is configured using PC-based software that communicates over the local area
network (LAN) through the DTS-G5DB. The RibEye control software allows you to configure
how much data to collect using either a circular or linear buffer. The control software is also used
to download the data and generate Comma-Separated-Variable data files (.CSV format). Channel
names are configured using standard ISO channel codes. The RibEye control software also
provides a quick plot of the data channels, as well as an ambient light reading which is taken
during every sample. The software also includes a live mode that displays the positions of the
LEDs at a 3 sample/second update rate.
The RibEye receives its power from the DTS G5DB, so you must turn on the G5 system in order
to turn on the RibEye. When the RibEye is powered on, it will flash each of the LEDs for about 1
second. The LEDs will flash in the following order:
1. Rib 4 Outer
2. Rib 5 Outer
3. Rib 6 Outer
4. Rib 4 Middle
5. Rib 5 Middle
6. Rib 6 Middle
3.1
RibEye Control Software Installation
First, insert the Polar RibEye CD into your CD drive. Using Windows Explorer, open the
“RibEye Installer” directory and run the “setup.exe” program. Then follow the instructions on
the screen. This program will install the RibEye control software and the LabWindows/CVI RunTime Engine.
3.2
RibEye Control Software Operation
The main screen upon start-up of the RibEye control software is shown in Figure 9. Note that
most of the controls are grayed out, and only the “Connect/Setup” and “Plot” tabs are visible. At
this point, the software can be used only to re-plot existing datasets. The “Status” box shows the
current state of the RibEye (disconnected).
9
February 9, 2009
Figure 9. RibEye control software main screen upon start-up
3.3
Connecting to the RibEye
The Polar RibEye communicates via Ethernet over the LAN. The “Connect to RibEye via”
drop-down menu has the option for connecting via RS232 Serial and USB for other RibEye
models, but you should ignore these and select the Ethernet connection.
Next, select the IP address for your RibEye in the “IP Address” box. If your RibEye is not listed
on the drop-down menu, you can type your RibEye’s IP address into the box. Alternatively, you
can click on the “Find RibEyes” button, which will search for all RibEyes currently connected to
the LAN and powered up. If you click on the “Find RibEyes” button, a message will pop up
asking you to wait for 15 seconds. After the RibEyes have been found, they will be displayed and
added to the IP Address drop-down menu as shown in Figure 10.
10
February 9, 2009
Figure 10. “Find RibEyes” screen
After you have selected the correct IP address, click on the “Connect” button to connect to the
RibEye. When the software connects to the RibEye, it will retrieve the following data and fill it
in on the screen: RibEye Type, Serial Number, Calibration Date, and Firmware Version. The
software will also retrieve and fill in the ATD Number. Figure 11 shows the main screen after
the software has connected to the RibEye. Note that “Live Display” tab is now visible, and the
various control buttons are activated.
11
February 9, 2009
Figure 11. RibEye control software main screen after connecting to RibEye
3.4
Text Field Under “RibEye Installed in ATD”
This text field can be changed by the user, and software will store the data RibEye’s flash
memory. The text field can be used for any purpose, but it is typically used for the dummy
identification, so that if multiple RibEyes are being used, you can verify that you are connected to
the correct one.
After you change the text in this field, either press the “Enter” key on your keyboard or click
outside the text box on the screen. Then the software will write the updated information to the
RibEye. A confirmation box will pop up as shown in Figure 12. Click on “OK” to close
the box.
12
February 9, 2009
Figure 12. Confirmation of updated data
under “RibEye Installed in ATD”
3.5
ISO Code Settings
The drop-down boxes for “ISO Test Object”, “ISO Position”, “ISO Filter Code for Processing
Program”, and “RibEye Pointed Toward Dummy” (Figure 13) are used to generate the standard
ISO channel naming codes as shown in the table. When you change any of the values in the
drop-down boxes, you will see the changes reflected in the ISO codes in the table. The ISO codes
are used as channel headers in the CSV data files. The channel codes are not stored in the
RibEye. The “Rib” and “Position” entries for each LED in the table cannot be changed by the
user.
Figure 13. ISO code settings
Note that the “Filter Code” setting is just used to tell the final processing program what filter to
use when processing the data. Typically, RibEye data is best processed using a CFC 180 filter.
The RibEye and the control software do not filter the RibEye data stored in a CSV file.
The “RibEye Pointed Toward Dummy” Left or Right side selection is used to convert data from
the RibEye coordinate system to the dummy coordinate system. Make sure that this setting is
correct, or the coordinate system conversions will generate bad data. The RibEye coordinate
system is rotated about the Z axis of the dummy by plus or minus 41 degrees. When you click on
the “Show Current XY’s” button, downloaded data will be converted so that it is aligned with the
dummy’s X and Y coordinates based on the setting of the “RibEye Pointed Toward Dummy”
field.
3.6
“Show Current XY’s” Button
The “Show Current XY’s” button will turn on the LEDS briefly and report the current positions
in the dummy coordinate system based on the Left or Right setting in the “RibEye Pointed
Toward Dummy” selection box.
13
February 9, 2009
3.7
Data Collection Setup, Arm, and Download Controls
Figure 14 illustrates these controls, which are described in the following sections.
Figure 14. Data collection setup, arm, and download controls
3.7.1 Data Buffer Operation
The RibEye has a 30-second D-RAM data buffer, which can be configured as a circular or linear
buffer. If the data buffer is set to “Circular”, only the “Data to collect after Trigger” box will be
shown. In this mode, when the RibEye is armed, it will begin collecting data to a circular buffer.
It will continue to collect data to the circular buffer until it receives a trigger signal (see section
3.7.3 “Disarm” and “Trigger” Buttons). After a trigger is received, RibEye will continue to
collect data for the number of milliseconds entered in the “Data to Collect after Trigger” box.
You can set this value from 1 to 30,000 milliseconds (ms).
When the data buffer is set to “Linear”, the RibEye collects up to 30 seconds of data, starting
from when it is armed. If a trigger is received, it will continue to collect data until it has either
collected the amount of data set in the “Data to Collect after Trigger” box, or until the “Time (ms)
to collect after ARM” is reached, whichever happens first. If no trigger is received, the RibEye
will stop collecting data after the time period specified in “Time (ms) to collect after ARM”. If a
trigger is detected, the time the trigger occurs is set to 0 ms. Table 2 shows some examples.
Data to collect
after Trigger
(ms)
2,000
2,000
2,000
Table 2. Linear buffer operation examples
Time (ms) to
Trigger occurs
Data Stored in RAM Buffer
(ms after
collect after
ARM)
Start Time
Stop Time
ARM
30,000
10,000
-10,000
2,000
30,000
29,000
-29,000
1,000
30,000
No Trigger
0
30,000
3.7.2 Flash Memory Data Storage
Immediately after data collection stops, data is copied from the RAM buffer to flash memory.
The flash memory holds 2 seconds of data. If the RibEye is powered down after it writes to flash
memory, only 2 seconds of data will be available to download. If a trigger occurred during the
test, the flash will hold data from –500 to 1500 ms, where Time 0 is the time the trigger occurred.
If no trigger occurred, the RibEye will store the last 2 seconds of data acquired in flash memory.
If the linear buffer was set to 30,000 ms to collect after arm, the flash will hold
28,000–30,000 ms.
14
February 9, 2009
Note that if power is interrupted while the RibEye is writing data to flash memory, when RibEye
is rebooted, it will report the data in flash as –
Start Time = –29, 999 ms
Stop Time = 27,9999 ms
There may or may not be any good data in flash, but the data can be downloaded and inspected.
3.7.3 “Erase Memory” Button
The “Erase Memory” button will erase the RibEye RAM and flash memory. This typically takes
about 14 seconds, but the memory specifications say that it can take longer. The RibEye “Status”
box will display “Erasing RibEye Flash Memory”, and a progress bar will appear.
3.7.4 “Arm/Disarm” and “Trigger” Buttons
Clicking on the “Arm” button (see Figure 14 above) will start the RibEye collecting data. Note
that if memory is not erased as described above, the arm action will be aborted, and a message
will pop up telling you to erase the memory.
When you click the “Arm” button, the button label will change to “Disarm”, and a “Trigger”
button will appear as shown in Figure 15.
Figure 15. “Disarm” and “Trigger” buttons that appear after arming
The RibEye Status box will display “Collecting Pre-Trigger Data”, and a message will pop up,
asking if you plan to disconnect the communications cable to the dummy (Figure 16). If you do
plan to disconnect the cable, you must click on the “Disconnect Now” button. This will close
communications to the RibEye so that disconnecting the cable will not lock up communications.
If you do not plan to disconnect the dummy communications cable, you can click the “Stay
Connected” button. After the test is completed and the communications cable is plugged back in
to the dummy, you can click on the “Connect” button to re-establish communications with the
RibEye.
The “Disarm” button will cause the RibEye to stop collecting data, and no data will be stored.
The “Trigger” button will mark a trigger event, and the RibEye will treat it as if a hardware
trigger occurred.
During data acquisition, the RibEye Status will display either “Collecting Pre-Trigger Data” or
“Collecting Post-Trigger Data and Storing to Flash”. Once the data is stored to flash memory, the
RibEye Status will change to “Connected-Idle”. At this time, you can download the data
collected.
15
February 9, 2009
Figure 16. Message pop-up after arming
3.7.5 “Download Data” Button
The “Download Data” button will download data from the RibEye based on the “Data to
Download”, “Start Time”, and “Stop Time” settings. You can set the start and stop times within
your expected region of interest. However, the start and stop times must be within the range of
data stored in the RibEye, or an error message will appear. When you click on the “Download
Data” button, a progress bar will appear showing the percent completion of the download. After
the download is complete, a file storage window will appear. Navigate to the location where you
want to store the file, and enter a file name. The file extension will always be .CSV.
After the data is downloaded, you will be taken to the plot tab for a quick view of the data. The
format of the .CSV file is shown in Table 3, where –
• The first line shows the RibEye type
• The second line shows how the RibEye is oriented in the dummy
• The third line shows the ATD number or whatever text you entered in the field
• The ISO codes for the channel headers are shown in the columns to the right of “Time“.
16
February 9, 2009
Table 3. Data file (*.CSV) format
3.7.6 Error Codes in Data File
If the RibEye cannot accurately calculate a LED position, it will generate error codes in the data
file, causing a drop-out in the plots. The RibEye will force both the X and Y data to the same
error code. The error codes are generated when light from a LED is blocked between the LED
and one of the sensors, or if there is too much ambient light to accurately resolve the LED
position. Both X and Y will be forced to:
1. If the right sensor (when facing the RibEye) is blocked or sees too much ambient light
2. If the left sensor (when facing the RibEye) is blocked or sees too much ambient light
3. If both sensors are blocked or see too much ambient light.
If an error code occurs, discount the data a few milliseconds before and after the drop-out,
because the LED brightness control loops must stabilize. Most often , the cause of a drop-out is a
loose cable that swings between the LED and the sensors, blocking the light.
3.8
“Plot” Tab
The “Plot” tab (Figure 17) shows a plot of the data file. The file name and path is shown in the
“Current File” box.
3.8.1 “Plot Data” Selection
The “Plot Data” selection allows you to generate the following plots:
• X and Y versus time – all of the data collected
• X vs. time
• Y vs. time
• Ambient light vs. time.
The ambient light data is useful to review if you see drop-outs in the data (please refer to section
3.7.6 Error Codes in Data File).
17
February 9, 2009
Figure 17. Plot tab
3.8.2 “Filter Class” Selection
The NHTSA standard phaseless Butterworth filter is used for filtering. You can view the data
with the following filter classes:
• No filter
• CFC 1000
• CFC 600
• CFC 180
• CFC 60.
3.8.3 “Select File” Button
The “Select File” button will bring up a file browser to allow you to select a RibEye data file to
plot. This button will also allow you to re-plot a test when you are not connected to a RibEye.
18
February 9, 2009
3.8.4 Zooming and Modifying a Plot Style
To analyze and modify a plot, perform the following steps:
• Zoom in on the plot by holding the “Ctrl” key and Left mouse button and draw a box around
the area of interest.
• Pan the plot by holding the “Ctrl” and “Shift” keys and left mouse button and moving the
mouse.
• Undo zoom and pan operations by pressing “Ctrl” and the space bar. You can undo as many
as the last 25 operations.
• Zoom out by holding the “Ctrl” key and clicking the right mouse button.
• Right-click on a trace name in the “Legend” box to change colors, line thickness, and plot
style (Figure 18).
Figure 18. Changing plot styles by right-clicking on a trace in the “Legend” box
3.9
“Live Display” Tab
The “Live Display” tab shows the current positions of the LEDs, which are updated
approximately 3 times per second. You can use this display to verify that everything is working
correctly. You can zoom the plots around the LEDs so you can see the effect of someone pushing
on the ribs. You can select to see the data either in the RibEye coordinate system or in the
dummy coordinate system.
Figure 19 shows the “Live Display” screen with LEDs in the approximate positions when the
RibEye is mounted facing the dummy’s left side. The display shows the LED positions in the
RibEye coordinate system. Figure 20 shows the “Live Display” screen with the LED positions
shown in the dummy coordinate system. This plot uses the same data as Figure 19, but with the
coordinate transforms applied to convert RibEye data to the dummy coordinates.
19
February 9, 2009
Figure 19. “Live Display” tab with data shown in the RibEye coordinate system
20
February 9, 2009
Figure 20. “Live Display” tab with data shown in the dummy coordinate system
21
February 9, 2009
Appendix A. Setting the RibEye’s IP address
When the RibEye ships from the factory, its IP address is set to 192.168.1.240. You can change
the RibEye’s IP address by sending commands to the RibEye over the LAN connection to port 23
using a Telnet terminal program.
The following example uses Windows HyperTerminal. Refer to Appendix B for instructions on
configuring Windows HyperTerminal to communicate with the RibEye. If you are using an
operating system other than Windows, refer to your documentation for the Telnet program
installed on your system.
To change the RibEye’s IP address using Windows HyperTerminal, follow these steps.
1. Start Windows HyperTerminal
2. Hit the “Enter” key until the command prompt appears (pound/number sign, #)
3. At the command prompt, type the following, but replace the “x”s with your new IP address—
set ip eth0 ip-address xxx.xxx.x.xxx
4. Press the “Enter” key again.
The IP address of the RibEye is now changed temporarily. It is not permanently stored in the
RibEye flash memory, so if the RibEye is powered down, it will not remember the change.
Because the IP address has been changed, HyperTerminal will no longer communicate with the
RibEye, so you must change the HyperTerminal host address:
1. Go to “File/Properties” and change “Host Address”
2. Click on “Call/Disconnect”
3. Click on “Call/Call”
4. If you don’t immediately get a command prompt, press the “Enter” key until you do
5. Finally, type “Save”.
You should see the message “Saving Configuration and Exiting”, which indicates that the change
of IP address is permanent. You may wish to re-save your HyperTerminal session with the new
IP address so that it will connect immediately the next time. Figure A1 shows the
HyperTerminal screen after saving.
IMPORTANT: If you change the RibEye IP address, you should write the new IP address on a
sticker and attach the sticker to the RibEye so that the number is readily available for the next
time you are using the RibEye.
NOTE: If you change the RibEye IP address to a different subnet (that is, if you change more
than the last three digits), you might have to change the IP address of your PC to the new subnet
also, depending on your LAN configuration.
For example, if you change the RibEye IP from—
192.168.0.240
to—
192.168.2.240
you might have to change your PC to an IP address on the 192.168.2 subnet.
22
February 9, 2009
Figure A1. HyperTerminal screen
23
February 9, 2009
Appendix B. Setting Up a Windows HyperTerminal
Follow these steps for setting up a Windows HyperTerminal.
1. Go to “Start Programs Accessories
2. Set up the HyperTerminal Connection
Communications
HyperTerminal”
At the first screen (Figure B1), enter a name for the connection and choose an icon to represent
it. Then click on the “OK” button.
Figure B1. HyperTerminal connection screen 1
At the next screen (Figure B2), ignore the first three lines and click on the drop-down menu for
the last line (“Connect using:”). Select “TCP/IP (Winsock).”
Figure B2. HyperTerminal connection screen 2
24
February 9, 2009
Selecting this option, even without clicking “OK”, causes the following screen to appear
(Figure B3):
Figure B3. HyperTerminal connection screen 3
Enter an IP address for the RibEye connection. Make sure that the port number is set to 23 as
shown. Click on the “OK” button. The HyperTerminal window will appear (Figure B4) with the
name you have chosen for the connection at the top of the screen. The bottom left-hand side of
the screen shows that there is no connection yet between the computer and the RibEye.
Figure B4. HyperTerminal connection screen 4
25
February 9, 2009
To connect to the RibEye, press the “Enter” key until the command prompt (pound/number
sign = #) appears. When the connection is successful, the word “Connected” will appear at the
bottom left-hand corner of the HyperTerminal screen (Figure B5).
Figure B5. HyperTerminal connection screen 5
Saving the HyperTerminal Setup for Future Connections
Go to the top of the screen and select “File Save As”. Type a name for the HyperTerminal
connection as shown in Figure B6. After the initial setup, you need only click on the file name in
order to set up a communication connection to the RibEye.
Figure B6. Saving the HyperTerminal connection
26
February 9, 2009
Appendix C. Configuring Windows XP for a Fixed IP Address
If you want to connect a PC directly to the RibEye instead of through your LAN, you must set up
your IP with a fixed address on the same subnet as the RibEye. For example, if the RibEye IP
address is 192.168.0.240, you must set up your PC IP address to be 192.168.0.xxx, where “xxx”
is any number between 1 and 254, except 240. If you are running an operating system other than
Windows XP, refer to your operating system documentation for setting a fixed IP address.
On Windows XP, follow these steps:
On the desktop, right-click on “My Network Places”, then click on “Properties”. You will get a
screen like Figure C1.
Figure C1. Windows XP configuration screen 1
Right-click on your Local Area Connection and click on “Properties”. You will get a screen like
Figure C2.
Figure C2. Windows XP configuration screen 2
27
February 9, 2009
Click on “Internet Protocol (TCP/IP)” to highlight it, and then click on “Properties”. You will get
a screen like Figure C3.
Figure C3. Windows XP configuration screen 3
Select “Use the following IP address”.
Set the IP address to your desired address, and make sure that the subnet mask is set to
255.255.255.0 as shown in Figure C3. You don’t have to fill in the default gateway or DNS
server addresses.
Then click on the “OK” button until all windows are closed. You might get a message saying
that you have to re-boot for the changes to take effect.
You are now set to a fixed IP address.
28
February 9, 2009
Appendix D. Micro-D Connector
The connector on the back of the Polar RibEye is a Glenair Micro-D MWDL 25 SSP. The
mating connector basic part number is MWDL 25 PSS. See www.glenair.com for more
information on the connectors and related hardware. The connector is currently configured to
receive power, Ethernet, and trigger from the DTS G5DB. The connector pins currently used are
shown in Table D-1.
Table D1. Existing connector pin configuration
Pin #
Signal
Pin #
Signal
1
no connect
14
+Power (Note 3)
2
Shield (Note 1)
15
+Power (Note 3)
3
Ethernet +Rx
16
no connect
4
Ethernet –Rx
17
no connect
5
Ethernet +Tx
18
+Power (Note 3)
6
Ethernet –Tx
19
Trigger (Note 4)
7
no connect
20
no connect
8
Power On (Note 2)
21
Ground
9
no connect
22
Ground
10
no connect
23
Ground
11
no connect
24
Ground
12
Shield (Note 1)
25
Ground
13
Ground
Notes:
1. Shield is internally tied to ground pins.
2. Power On must be tied to ground for RibEye to power up. Connect to
+Power to turn off RibEye.
3. +Power can be +10 to +15 VDC with respect to ground.
4. Trigger should be held at ground for no trigger. A positive pulse to
greater than 6 volts DC will cause a trigger. The trigger occurs on the
rising edge of the trigger pulse.
29
February 9, 2009
Appendix E. RibEye specifications
Measurement accuracy and range
The RibEye meets the requirements of SAE J211/1 (July 2007) as both a sensor and a data
acquisition system. Figure E1 shows the RibEye measurement range in the RibEye X-Y plane.
The overall accuracy of the RibEye depends on the amount of Z deflection of each rib. The Polar
RibEye does not measure Z, so it cannot correct for errors induced by Z motions. However, the
Polar RibEye was tested at rib Z deflections of +/–10 mm and +/–25 mm. Refer to the calibration
report for your unit to see the measurement errors over the X-Y plane at the Z deflections. The
largest errors tend to be at the edges of the range. Table E1 gives the accuracy ranges at Z
deflections tested. Note that Z is positive downward.
180
160
RibEye X (mm)
140
120
100
80
60
40
20
0
-160
-120
-80
-40
0
40
80
RibEye Y (mm)
Figure E1. RibEye measurement range in X-Y plane
Table E1. RibEye error limits versus Z deflection
(Z is positive downward)
Maximum Error (mm)
Z offset (mm)
X
Y
0
1
1
+10
1
1
–10
1
1
+25
1.5
1.5
–25
2
2
30
120
160
February 9, 2009
Power requirements
The RibEye can be powered by any DC voltage source from 10 to 15 Volts, and it is intended to
be powered by the DTS G5DB. The power draw depends on the RibEye’s operating conditions,
as shown in Table E2. The power draw data was taken at an operating voltage of 15.0 volts.
Table E2. RibEye power requirements
Condition
Power (Watts)
On/idling
5.2
Collecting data (typical)
8.4
Maximum*
13
* When all LEDs are out of view of both sensors
and are driven to full power.
Data acquisition and storage
Sample rate: 10,000 samples per second per LED
Modes: Linear or circular buffer
Acquisition time: 30 seconds
Data Storage: 30 seconds in RAM, 2 seconds in flash (non-volatile)
Data is collected to RAM memory and stored post-test in flash memory.
Control signals
See Table D1 in Appendix D for connector pinouts.
Trigger: Positive going pulse greater than 6 volts. Trigger occurs on rising edge
Communication: 10/100 MBS Ethernet
31