1
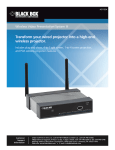
AVX-VGA-WI Micro Wireless VGA Presentation Tool Transform your wired projector into a high-end BLACK BOX wireless projector. ® Includes plug-and-show, and 4-to-1 split screen. Customer Support Information AVX-VGA-WI Order toll-free in the U.S.: Call 877-877-BBOX (outside U.S. call 724-746-5500) FREE technical support 24 hours a day, 7 days a week: Call 724-746-5500 or fax 724-746-0746 Mailing address: Black Box Corporation, 1000 Park Drive, Lawrence, PA 15055-1018 Web site: www.blackbox.com • E-mail: [email protected] Trademarks Used in this Manual Trademarks Used in this Manual Black Box and the Double Diamond logo are registered trademarks of BB Technologies, Inc. Mac and Macintosh are registered trademarks of Apple Computer, Inc. Internet Explorer, PowerPoint, Windows, and Windows Vista are registered trademarks of Microsoft Corporation. Any other trademarks mentioned in this manual are acknowledged to be the property of the trademark owners. We‘re here to help! If you have any questions about your application or our products, contact Black Box Tech Support at 724-746-5500 or go to blackbox.com and click on “Talk to Black Box.” You’ll be live with one of our technical experts in less than 30 seconds. Page 2 724-746-5500 | blackbox.com AVX-VGA-WI FCC and IC RFI Statements Federal Communications Commission and Industry Canada Radio Frequency Interference Statements This equipment generates, uses, and can radiate radio-frequency energy, and if not installed and used properly, that is, in strict accordance with the manufacturer’s instructions, may cause interference to radio communication. It has been tested and found to comply with the limits for a Class A computing device in accordance with the specifications in Subpart B of Part 15 of FCC rules, which are designed to provide reasonable protection against such interference when the equipment is operated in a commercial environment. Operation of this equipment in a residential area is likely to cause interference, in which case the user at his own expense will be required to take whatever measures may be necessary to correct the interference. Changes or modifications not expressly approved by the party responsible for compliance could void the user’s authority to operate the equipment. This digital apparatus does not exceed the Class A limits for radio noise emission from digital apparatus set out in the Radio Interference Regulation of Industry Canada. Le présent appareil numérique n’émet pas de bruits radioélectriques dépassant les limites applicables aux appareils numériques de la classe A prescrites dans le Règlement sur le brouillage radioélectrique publié par Industrie Canada. AVX-VGA-WI 724-746-5500 | blackbox.com Page 3 NOM Statement Instrucciones de Seguridad (Normas Oficiales Mexicanas Electrical Safety Statement) 1. T odas las instrucciones de seguridad y operación deberán ser leídas antes de que el aparato eléctrico sea operado. 2. Las instrucciones de seguridad y operación deberán ser guardadas para referencia futura. 3. Todas las advertencias en el aparato eléctrico y en sus instrucciones de operación deben ser respetadas. 4. T odas las instrucciones de operación y uso deben ser seguidas. 5. E l aparato eléctrico no deberá ser usado cerca del agua—por ejemplo, cerca de la tina de baño, lavabo, sótano mojado o cerca de una alberca, etc. 6. E l aparato eléctrico debe ser usado únicamente con carritos o pedestales que sean recomendados por el fabricante. 7. El aparato eléctrico debe ser montado a la pared o al techo sólo como sea recomendado por el fabricante. 8. S ervicio—El usuario no debe intentar dar servicio al equipo eléctrico más allá a lo descrito en las instrucciones de operación. Todo otro servicio deberá ser referido a personal de servicio calificado. 9. El aparato eléctrico debe ser situado de tal manera que su posición no interfiera su uso. La colocación del aparato eléctrico sobre una cama, sofá, alfombra o superficie similar puede bloquea la ventilación, no se debe colocar en libreros o gabinetes que impidan el flujo de aire por los orificios de ventilación. 10. E l equipo eléctrico deber ser situado fuera del alcance de fuentes de calor como radiadores, registros de calor, estufas u otros aparatos (incluyendo amplificadores) que producen calor. 11. E l aparato eléctrico deberá ser connectado a una fuente de poder sólo del tipo descrito en el instructivo de operación, o como se indique en el aparato. 12. P recaución debe ser tomada de tal manera que la tierra fisica y la polarización del equipo no sea eliminada. 13. L os cables de la fuente de poder deben ser guiados de tal manera que no sean pisados ni pellizcados por objetos colocados sobre o contra ellos, poniendo particular atención a los contactos y receptáculos donde salen del aparato. 14. El equipo eléctrico debe ser limpiado únicamente de acuerdo a las recomendaciones del fabricante. 15. E n caso de existir, una antena externa deberá ser localizada lejos de las lineas de energia. 16. El cable de corriente deberá ser desconectado del cuando el equipo no sea usado por un largo periodo de tiempo. 17. Cuidado debe ser tomado de tal manera que objectos liquidos no sean derramados sobre la cubierta u orificios de ventilación. 18. S ervicio por personal calificado deberá ser provisto cuando: A: El cable de poder o el contacto ha sido dañado; u B: Objectos han caído o líquido ha sido derramado dentro del aparato; o C: El aparato ha sido expuesto a la lluvia; o D: El aparato parece no operar normalmente o muestra un cambio en su desempeño; o E: El aparato ha sido tirado o su cubierta ha sido dañada. Page 4 724-746-5500 | blackbox.com AVX-VGA-WI Table of Contents Table of Contents AC1132A vs. AVX-VGA-WI Comparison Chart........................................................................................................................... 6 Quick Start Guide .......................................................................................................................................................... 7 1. Specifications ........................................................................................................................................................ 11 2. Overview ........................................................................................................................................................ 12 2.1 Introduction.................................................................................................................................................. 12 2.2 Features........................................................................................................................................................ 12 2.3 What’s Included........................................................................................................................................... 13 2.4 Hardware Description................................................................................................................................... 14 3. Windows Client Utility................................................................................................................................................ 15 3.1 Starting Program.......................................................................................................................................... 15 3.2 Login ........................................................................................................................................................ 15 3.3 Main User Interface...................................................................................................................................... 16 3.4 Screen Projection.......................................................................................................................................... 16 3.5 Menu Description......................................................................................................................................... 17 3.5.1 Show Login Code............................................................................................................................ 18 3.5.2 Open Admin Web Page.................................................................................................................. 18 3.5.3 Wi-Fi AP-Client Configuration......................................................................................................... 19 3.5.4 Searching Server.............................................................................................................................. 19 3.5.5 Projection Source............................................................................................................................. 20 3.5.6 Auto Wi-Fi Connect........................................................................................................................ 20 3.5.7 Auto Power Manager...................................................................................................................... 20 3.5.8 Hide UI............................................................................................................................................ 21 3.5.9 Advanced Screen Capture............................................................................................................... 21 3.5.10 Make WPS Token............................................................................................................................22 3.5.11 Copy Application to Desktop.......................................................................................................... 24 3.5.12Hotkeys...........................................................................................................................................23 3.5.13 About.............................................................................................................................................. 25 3.5.14Exit.................................................................................................................................................. 26 4. Mac Client Utility........................................................................................................................................................ 27 4.1 Launch Application....................................................................................................................................... 27 4.2 Main User Interface...................................................................................................................................... 28 4.3 Screen Projection.......................................................................................................................................... 29 5. Web Management......................................................................................................................................................30 5.1 Home Page...................................................................................................................................................30 5.2 Download Software.....................................................................................................................................30 5.3 Login Web Admin........................................................................................................................................ 32 5.3.1 System Status...........................................................................................................................32 5.3.2 Network Setup........................................................................................................................ 34 5.3.3 OSD Setup...............................................................................................................................35 5.3.4 Projection Setup...................................................................................................................... 36 5.3.5 Change Passwords.......................................................................................................................... 37 5.3.6 Reset to Default............................................................................................................................... 37 AVX-VGA-WI 724-746-5500 | blackbox.com Page 5 Table of Contents/AC1132A vs. AVX-VGA-WI Comparison Chart Table of Contents (Continued) 6. 5.3.7 Firmware Upgrade...........................................................................................................................38 5.3.8 Reboot System................................................................................................................................40 5.3.9 Logout.............................................................................................................................................40 Screen Image Background Maker............................................................................................................................... 41 NOTE: The AVX-VGA-WI is similar to the AC1132A, Wireless Presentation System (another Black Box product). The chart below compares the two products. AC1132A vs. AVX-VGA-WI Comparison Chart. Image Product Code AC1132A AVX-VGA-WI Web Interface Yes Yes Active Connections 256 256 Streaming HD Video (buffered) Yes No 4-to-1 Projection (quad screen) Yes Yes 1-to-4 Projection (1 laptop to 4 WPS units) Yes No Conference Control Yes No Audio Support Yes (Windows only) No Mobishow Download for PDA/Win Module 5.0 Yes No DHCP Server Options Yes Yes Gatekeeper Options Yes No Set Background Yes Yes Screen Resolutions 800 x 600 1024 x 768 1280 x 768 1280 x 800 800 x 600 1024 x 768 1280 x 768 1280 x 800 Connect to Existing AP Yes Yes Wireless Standard 802.11b/g/n 802.11b/g/n RJ-45 Network Connection Yes No Projection Quality Controls Yes No Product Size 4.6"H x 5.5"W x 1.06"D (11.7 x 14 x 2.7 cm) 3.75"H x 1.53"W x 0.88"D (9.52 x 3.89 x 2.24 cm) Product Weight 0.62 lb. (0.28 g) 0.12 lb. (0.05 kg) Antennas (2) -2 dBi dipole antennas (external) None Page 6 724-746-5500 | blackbox.com AVX-VGA-WI Quick Start Guide Quick Start Guide 1. Plug the AVX-VGA-WI into a projector’s VGA port and power up the projector. See Figures QS-1 and QS-2. VGA connector Power LED Figure QS-1. AVX-VGA-WI. Projector AVX-VGA-WI Figure QS-2. Connect the AVX-VGA-WI to the projector. AVX-VGA-WI 724-746-5500 | blackbox.com Page 7 Quick Start Guide 2. Power on the AVX-VGA-WI box. When the projector shows the default menu on the screen as below, it indicates the AVX-VGA-WI unit is ready. Figure QS-3. Default menu. 3. Make sure your PC WLAN is already enabled, and connect your PC with the AVX-VGA-WI unit. 4. O pen your browser and it will redirect to the WPS home page automatically, or you can enter the IP address to access the Micro Wireless VGA Presentation Tool’s Web home page. The default IP address of the AVX-VGA-WI is 192.168.100.10, or refer to the IP address shown on the left corner of the projector screen. Figure QS-4. Home page. Page 8 724-746-5500 | blackbox.com AVX-VGA-WI Quick Start Guide 5. D ownload the client software (Figure QS-5). Then select the “Win7/Windows Vista/ XP/2000” or “Mac Utility“ and execute the installation program (Figure QS-6). After installing the program, you will see the Micro Wireless VGA Presentation Tool shortcut on the PC screen (Figure QS-6). Figure QS-5. Download. Figure QS-6. Run or Save dialog box and WPS shortcut icon. 6. Make sure your personal firewall allows the AVX-VGA-WI software to pass through. 7. Select the projection device. AVX-VGA-WI 724-746-5500 | blackbox.com Page 9 Quick Start Guide 8. Enter the Login Code that is found on the projector screen (if required) (Figure QS-7). Figure QS-7. Login code on projector screen. 9. Click the “Play” button to start projection (Figure QS-8). Figure QS-8. Start projection screen. Page 10 724-746-5500 | blackbox.com AVX-VGA-WI Chapter 1: Specifications 1. Specifications Compliance — FCC, UL® E199780 IP Configuration — Automatic or manual (static) LAN Type — AP mode LAN Protocol — TCP/IP Network Connection — Uses IEEE 802.11b/g/n 2.4 GHz, IEEE 802.3 (10BASE-T), IEEE 802.3u (100BASE-TX) OS Compatibility — Windows® 2000/XP/7, Windows Vista®, Windows Mobile 5 and later, Mac® OS X 10.5 or later Screen Resolutions — 800 X 600, 1024 X 768, 1280 X 768 and 1280 x 900 Wireless Channels — 11 Wireless Encryption — IEEE standard 64/128 bit WEP/WPA/WPA2-PSK Wireless Frequency — 2.4 GHz Wireless Range — Up to 328 ft. Wireless Speed — 11 Mbps, 54 Mbps, 300 Mbps User Controls — (1) Reset button Connectors — (1) HD15 VGA, (1) power connector Power — Source: Interface PoVGA (Power over VGA); Input Voltage: 100–240 V, 0.3 A, 50/60 Hz; Secondary Power: 5 VDC, 1.2 A Size — 3.75"H x 1.53"W x 0.88"D (9.52 x 3.89 x 2.24 cm) Weight — 0.12 lb. (0.05 kg) AVX-VGA-WI 724-746-5500 | blackbox.com Page 11 Chapter 2: Overview 2. Overview 2.1 Introduction The Micro Wireless VGA Presentation Tool (AVX-VGA-WI) turns your existing “wired” projector into a “high-end wireless” projector. The unit’s plug-and-show wireless projection features provide efficient and successful presentation. High-Performance Wireless Projection and Audio Projection This high-performance wireless projection tool with audio enables you to share a multimedia display with several users without using cables. Plug and Show With the accompanying plug-and-show USB token, wireless presentation becomes easy. Just link your PC/laptop to the AVX-VGA-WI using Wi-Fi, plug the token into a USB port, and in seconds, your screen will project to the connected projector. 4-to-1 Split-Screen Projection With this 4-to-1 split-screen feature, up to four PC screens can be projected to one projector at the same time. You can easily do side-by-side comparisons from four computers/laptops. Macintosh® (Mac®) Wireless Projection The Micro Wireless VGA Presentation Tool can connect to a Mac client. The Mac client software is stored in the accompanying USB token or CD-ROM. It enables wireless projection from a Mac. SNMP Manager The AVX-VGA-WI features SNMP management. Enable Simple Network Management Protocol (SNMP) protocol (Version 2c) to manage and configure one or more devices through a network. Changeable Splash Screen You can use the application “Screen Image Background Maker” to change the Splash Screen. Design the image with the message you would like to present, upload it through a Web control page, and you will have a customized starting page. AP-Client Mode You can enable the AP-Client Mode function to let the AVX-VGA-WI join the existing access point through Wi-Fi. This feature provides the flexibility of wireless network deployment in an enterprise environment. 2.2 Features • Supports Windows 7, Windows Vista, XP, 2000, and Mobile 5/6. • Supports Macintosh (Mac) versions 10.5 and above. • Plug and Show. No installation required. Just plug the included token into a USB port, and start wireless projection in seconds. • Features 4-to-1 split screen projection. One projector functions as four projectors. • Provides session security login, wireless WEP/WPA key and gatekeeper functions to protect presentation contents and keep them secure. • You can change the splash screen image. • SNMP Manager enables you to easily manage the devices. • AP-ClientMode enables you to easily deploy wireless in a network enterprise. Page 12 724-746-5500 | blackbox.com AVX-VGA-WI Chapter 2: Overview 2.3 What’s Included Your package should include the following items. If anything is missing or damaged, contact Black Box Technical Support at 724-746-5500 or [email protected]. • (1) Micro Wireless VGA Presentation unit • (1) power supply with US, EU, and UK adapters • (1) quick installation guide • (1) HD15 M/F gender changer • (1) CD-ROM containing software and this user’s manual USB Token Contents The USB token consists of the following software: Client Folder: • Software for Windows® and Mac® OS, MobiShow software for Windows Mobile 5/6 Applications Folder: • VDD (for virtual extended screen) • IB Maker (for changing startup screen) • PtG Converter (for MobiShow PtG function) • SNMP Manager (for Wireless Presentation System device management) AVX-VGA-WI 724-746-5500 | blackbox.com Page 13 Chapter 2: Overview 2.4 Hardware Description Figure 2-1 shows the AVX-VGA-WI. Table 2-1 describes its components. 1 2 4 3 Figure 2-1. AVX-VGA-WI. Table 2-1. Micro Wireless VGA Presentation unit components. Page 14 Number Component Description 1 VGA connector Connects to projector input 2 5-VDC power connector Links to power 3 Power LED Lights when power to the unit is on 4 Reset button Resets to factory defaults 724-746-5500 | blackbox.com AVX-VGA-WI Chapter 3: Windows Client Utility 3. Windows Client Utility 3.1 Starting Program After you download the Micro Wireless VGA Presentation Tool Windows program via the Web page successfully, follow the steps below. 1. Click on the Micro Wireless VGA Presentation Tool icon to execute the program (Figure 3-1). Figure 3-1. Micro Wireless VGA Presentation Tool icon. 2. The program starts to search for AVX-VGA-WI automatically. 3. W hen it finds the Micro Wireless VGA Presentation Tool, a “Login Code” dialog box pops up on the PC screen (Figure 3-2) if a login code is needed. Figure 3-2. Enter login code screen. 3.2 Login When the “Login Code” dialog box appears, enter the login code to start your presentation (Figure 3-3). The login code appears on the projector screen. AVX-VGA-WI 724-746-5500 | blackbox.com Page 15 Chapter 3: Windows Client Utility Figure 3-3. Login screen. 3.3 Main User Interface Figures 3-4 and 3-5 show the main user interface. Menu Area Status indicator Control Area for Screen Projection Feature Speedy mode Figure 3-4. Start projection. 3.4 Screen Projection Click on the “Play” button to have the full or split screen immediately project to the main screen on the display (Figure 3-7). Click on the “Pause” button to freeze the projection screen. Click on the “Stop” button to stop projecting your screen. Figure 3-5. Buttons on the unit. NOTE: The buttons are located on the main control panel. Only the color is different. Page 16 724-746-5500 | blackbox.com AVX-VGA-WI Chapter 3: Windows Client Utility Table 3-1. Buttons and descriptions. Button Description Full screen projection Project to Split #1 Project to Split #2 Project to Split #3 Project to Split #4 Stop projecting Pause projecting 3.5 Menu Description Login code Menu Exit Minimize Figure 3-6. Menu description. AVX-VGA-WI 724-746-5500 | blackbox.com Page 17 Chapter 3: Windows Client Utility 3.5.1 Show Login Code Click “Show Login Code.” It will display the login code on the right-upper corner of the desktop and close it automatically after 10 seconds. You can also click on the area to close this window manually. Figure 3-7. Show login code screen. 3.5.2 Open Admin Web Page Click to open the function menu and select “Web Admin” management Web page. The Web page’s detailed functions will be described in the next chapter. Figure 3-8. Web admin management Web page. Page 18 724-746-5500 | blackbox.com AVX-VGA-WI Chapter 3: Windows Client Utility 3.5.3 WiFi AP-Client Configuration Click “WiFi AP-Client Configuration” to set AP client mode to join other access points via wireless. The other users’ clients can also login to the WPS for presentation and join other access points in the network. Figure 3-9. Wi-Fi AP-client configuration screen. 3.5.4 Searching Server Click “Search Server” to search the WPS again. Figure 3-10. Search Server menu. AVX-VGA-WI 724-746-5500 | blackbox.com Page 19 Chapter 3: Windows Client Utility 3.5.5 Projection Source When you click on the “Projection Source,” you can project the main screen of the desktop or the virtual extended screen. Figure 3-11. Select projection source. P.S: Virtual Extended Screen option You need to install the “VDD.exe” driver first. It is stored on the USB token/CD-ROM. 3.5.6 Auto WiFi Connect Click “Auto WiFi Connect” to enable the auto Wi-Fi discovery and connection function for quick wireless setup. Figure 3-12. Auto Wi-Fi connect. 3.5.7 Auto Power Manager For the highest projection performance, the application will turn the PC’s windows power scheme from current settings to “highest performance.” However, you can click the “Auto Power Manage” to enable or disable this function and restore your power scheme. Page 20 724-746-5500 | blackbox.com AVX-VGA-WI Chapter 3: Windows Client Utility Figure 3-13. Auto power manager screen. 3.5.8 Hide UI Click on “Hide UI” to hide or display the application control panel on the projection screen. Figure 3-14. Hide UI screen. 3.5.9 Advanced Screen Capture Click on “Advanced Screen Capture” and you will be able to see tip windows and other layered windows (including the main UI) on the connected display. However, the mouse cursor may blink from time to time when you are projecting your PC screen. Disable “Advanced Screen Capture.” AVX-VGA-WI 724-746-5500 | blackbox.com Page 21 Chapter 3: Windows Client Utility Tip window is not shown in projector. Figure 3-15. Disable advanced screen capture. Enable Advanced Screen Capture. Tip window is shown in projector. Figure 3-16. Enable advanced screen capture. Page 22 724-746-5500 | blackbox.com AVX-VGA-WI Chapter 3: Windows Client Utility 3.5.10 Make WPS Token Click “Make WPS Token” to make a USB WPS Token. You can insert a USB thumb drive and follow the wizard to make the Token. Figure 3-17. Make WPS Token screen. Figure 3-18. Install flash drive. AVX-VGA-WI 724-746-5500 | blackbox.com Page 23 Chapter 3: Windows Client Utility Figure 3-19. Wizard Completed screen. 3.5.11 Copy Application to Desktop Click “Copy Application to desktop.” It will immediately copy the application to your desktop even if you don’t have the system privileges. Figure 3-20. Copy application to desktop screen. Page 24 724-746-5500 | blackbox.com AVX-VGA-WI Chapter 3: Windows Client Utility 3.5.12 Hotkeys Click “Hotkey” to show the hotkey guide. You can use hotkeys to control the projection with the keyboard. Figure 3-21. Hotkey screen. 3.5.13 About Click “About” to show system information, including product model name, client version, IP address, and other information. Figure 3-22. About screen. AVX-VGA-WI 724-746-5500 | blackbox.com Page 25 Chapter 3: Windows Client Utility 3.5.14 Exit Click “Exit” to exit this application. It will stop current playing status and close the application immediately. Figure 3-23. Exit menu option selected. Page 26 724-746-5500 | blackbox.com AVX-VGA-WI Chapter 4: Mac Client Utility 4. Mac Client Utility 4.1 Launch Application 1. Enable your Wi-Fi and connect to the Micro Wireless VGA Presentation Tool device (Figure 4-1). 2. Execute the Micro Wireless VGA Presentation Tool client software for Mac. Figure 4-1. Software launching. 3. Launch the Micro Wireless VGA Presentation Tool software and enter the login code (Figure 4-2). Figure 4-2. Login code. AVX-VGA-WI 724-746-5500 | blackbox.com Page 27 Chapter 4: Mac Client Utility 4. Start Projection (Figure 4-3). Figure 4-3. Start projection. 4.2 Main User Interface Menu Area Control Area for Screen Projection Feature Status Indicator Figure 4-4. Front panel view, screen projection. Page 28 724-746-5500 | blackbox.com AVX-VGA-WI Chapter 4: Mac Client Utility 4.3 Screen Projection Click the “Play” button to have the full or split screen immediately project the main screen to the display. Click the “Pause” button to freeze the projection screen. Click the “Stop” button to stop projecting your screen. Figure 4-5. Buttons on the unit. Table 4-1. Buttons and descriptions. Button Description Full screen projection Project to Split #1 Project to Split #2 Project to Split #3 Project to Split #4 Stop projecting Pause projecting Refresh screen AVX-VGA-WI 724-746-5500 | blackbox.com Page 29 Chapter 5: Web Management 5. Web Management 5.1 Home Page 1. Make sure your PC connects to the Micro Wireless VGA Presentation Tool box successfully. 2. Open your browser, and it will open the Micro Wireless VGA Presentation Tool home page (Figure 5-1) automatically. 3. If not, enter your IP address in the browser, and you will see the IP on the projector screen. 4. The default IP is 192.168.100.10. Figure 5-1. Home page. 5.2 Download Software 1. Select “Download software” function. 2. Select the “Win 7/Windows Vista/XP/2000” or “Mac Utility” and execute the installation program. 3. Follow Installation Wizard instructions to proceed until the installation process is complete. 4. If you see a “Windows Security Alert” popup, then Windows firewall has blocked this program. Press the “Unblock” button to continue installation. 5. Once installation is complete, a utility shortcut appears on the screen (Figure 5-2). Page 30 724-746-5500 | blackbox.com AVX-VGA-WI Chapter 5: Web Management Figure 5-2. Main page. Figure 5-3. Run or Save dialog box and WPS shortcut icon. AVX-VGA-WI 724-746-5500 | blackbox.com Page 31 Chapter 5: Web Management 5.3 Login Web Admin Figure 5-4. Web Admin login screen. 1. Click on “Admin” and then enter the password to login to the Web page (Figure 5-4). 2. The default password is “admin.” 5.3.1 System Status Figure 5-5. System Status screen. Click on “System Status” to show the current system status (Figure 5-5). See Table 5-1 for a list of options. Page 32 724-746-5500 | blackbox.com AVX-VGA-WI Chapter 5: Web Management Table 5-1. System status screen options. Option Description Model name Product model name Versions Firmware version 4.0.0.1 Network Status IP address IP address of WPS device Subnet mask Subnet mask Default gateway Default gateway Wireless MAC address Wireless MAC address Wired MAC address Wired MAC address Connection Status Projecting status Displays “Waiting for projecting” or “Projecting” Total users Shows how many users are logged into the WPS . AVX-VGA-WI 724-746-5500 | blackbox.com Page 33 Chapter 5: Web Management 5.3.2 Network Setup There are several configuration options as shown below. Figure 5-6. Network Setup screen. The default setting of the Micro Wireless VGA Presentation Tool box is DHCP client. IP Setup: • Select “Obtain an IP address automatically” or “Use the following IP address.” • IP Address: The default value is 192.168.100.10. • Subnet Mask: The default value is 255.255.255.0. • Default Gateway: The default value is 192.168.100.10. • DNS Server: The default value is 192.168.100.10. Page 34 724-746-5500 | blackbox.com AVX-VGA-WI Chapter 5: Web Management DHCP Server Setup: • You can select “Auto Enable/Disable DHCP Server” or “Disable.” • Start IP: The start IP address of DHCP Server. • End IP: The end IP address of DHCP Server. • Subnet Mask: The default value is 255.255.255.0. • Default Gateway: The default value is 192.168.100.10. • DNS Server: The default value is 192.168.100.10. Wireless Setup: • Wireless LAN: The default value is “Enable.” • Connect to Existing AP: Input the SSID of the Wi-Fi AP you want to connect to. • Region: The default value is “Worldwide.” • SSID: SSID string, max. length is 32 bytes. • SSID Broadcast: The default value is “Enable.” •C hannel: Use to set fixed channel or Auto. “Auto” means, after powering on the Micro Wireless VGA Presentation Tool, it will scan all wireless channels and select one channel automatically. • Encryption: Select “Disable” or one of WEP/WPA/WPA2 64 bit or 128 bit in ASCII or HEX string. • Key: If Encryption is enabled, you have to set the key value according to the encryption mode you selected. Apply: Press button to select this mode. Cancel: Press button to abort action. 5.3.3 OSD Setup Figure 5-7. OSD Setup screen. AVX-VGA-WI 724-746-5500 | blackbox.com Page 35 Chapter 5: Web Management Click on the “OSD Setup” button to change the OSD wallpaper (Figure 5-7). • Restore Initial: Restore to default OSD wallpaper. • Image File Upload: Upload the customized OSD wallpaper. (You need to convert the image to a system-defined format first using the provided IB Maker utility which is stored on the USB token.) 5.3.4 Projection Setup Figure 5-8. Projection Setup screen. Click on the “Projection Setup” link (Figure 5-8). • Resolution: XGA (1024 x 768), WXGA (1280 x 768, 1280 x 800) and SVGA (800 x 600). The default value is XGA. • Screen Refresh Rate: This is the VGA output refresh rate. It provides 60 Hz and 75 Hz rates for different kinds of projectors. • Login Code: Select “Disable,” “Random,” or “Use the following code” to set a specified 4-character number. • Apply: Confirm and save modifications. • Cancel: Cancel all the modifications. Page 36 724-746-5500 | blackbox.com AVX-VGA-WI Chapter 5: Web Management 5.3.5 Change Passwords Figure 5-9. Change passwords screen. Click on the “Change Passwords” button, to change the password value. The length of the password is up to eight characters (Figure 5-9). • Enter New Password: Enter a new password you want to change for each category. • Confirm New Password: Confirm new password. • Apply: Confirm and save modifications. 5.3.6 Reset to Default Figure 5-10. Reset to default screen. AVX-VGA-WI 724-746-5500 | blackbox.com Page 37 Chapter 5: Web Management Click on the “Reset to Default” button to restore factory default settings (Figure 5-10). Apply: Confirm and continue. 5.3.7 Firmware Upgrade Figure 5-11. Firmware Upgrade screen. Click on the “Firmware Upgrade” button to upgrade firmware (Figure 5-11). 1. First, get the latest firmware image file from the Black Box Web site (if available). 2. Click on the “Browse” button to specify the file name you want to upgrade. 3. Click on the “Upgrade” button to start. 4. A warning message is shown and a countdown counter will appear on the screen. 5. After a few minutes, a complete message will be shown on the screen. 6. Restart the Micro Wireless VGA Presentation Tool box for the changes to take effect (Figure 5-13). Page 38 724-746-5500 | blackbox.com AVX-VGA-WI Chapter 6: Screen Image Background Maker Figure 5-12. Firmware upload. Figure 5-13. Reboot system screen. WARNING: D on’t power off the Micro Wireless VGA Presentation Tool while firmware upgrade in progress. It might cause the box to malfunction. AVX-VGA-WI 724-746-5500 | blackbox.com Page 39 Chapter 5: Web Management 5.3.8 Reboot System Figure 5-14. Reboot system button. Click on the “Reboot System” button to restart the system (Figure 5-14). • Reboot: Reboot the system automatically. 5.3.9 Logout Figure 5-15. System Status screen. Page 40 724-746-5500 | blackbox.com AVX-VGA-WI Chapter 6: Screen Image Background Maker 6. Screen Image Background Maker 1. Run the “Screen Image Background Maker” and follow the wizard to convert the image file. Figure 6-1. Welcome screen. 2. Press “Open” to select a file to convert. Figure 6-2. Select open. Figure 6-3. Select file to open. AVX-VGA-WI 724-746-5500 | blackbox.com Page 41 Chapter 6: Screen Image Background Maker 3. Press “Save” to save this file. Figure 6-4. Save file. 4. Connect to the Micro Wireless VGA Presentation Tool Web page, and then select the “OSD setup” page. Figure 6-5. OSD Setup screen. 5. Press “Browse” to choose the *.ib file. Page 42 724-746-5500 | blackbox.com AVX-VGA-WI Chapter 6: Screen Image Background Maker Figure 6-6. Browse backgrounds button. 6. Press “Image File Upload” to upload your background image. It will then show the popup dialog box. Figure 6-7. Available backgrounds. NOTE: You may also find “Screen Image Background Maker” on the USB token. AVX-VGA-WI 724-746-5500 | blackbox.com Page 43 Black Box Tech Support: FREE! Live. 24/7. Tech support the way it should be. Great tech support is just 30 seconds away at 724-746-5500 or blackbox.com. About Black Box Black Box provides an extensive range of networking and infrastructure products. You’ll find everything from cabinets and racks and power and surge protection products to media converters and Ethernet switches all supported by free, live 24/7 Tech support available in 30 seconds or less. © Copyright 2012. Black Box Corporation. All rights reserved. AVX-VGA-WI, version 2 724-746-5500 | blackbox.com