1
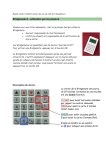
Solutions for non-functioning Bridgemate Pro Terminal(s) Page 1 Bridgemate.US 110101 The Bridgemate Pro may not always operate as expected. These problems can occur for a number of reasons, but are typically straightforward in nature and easy to rectify. Below are a number of scenarios and solutions. Potential problems include: 1. The Bridgemate is producing a rattling noise 2. The screen or keyboard is sunk into the casing 3. The Bridgemate has rejected the board number 4. Strange characters appear on the screen, and Bridgemate automatically switches off immediately after being switched on 5. A black screen appears when the Bridgemate is switched on 6. A blank screen appears when the Bridgemate is switched on 7. The Bridgemate fails to log into the server. 8. A Bridgemate has stopped working during a session. 9. The Bridgemate does not seem to recognize that a new game has started. 10. The game has been started but 1-or-more Bridgemates show “SYSTEM NOT ACTIVATED YET.” 11. Scores cannot be retrieved (posted) into ACBLscore. If the problem persists after trying all the options, please contact Bridgemate.US. 1. The Bridgemate is producing a rattling noise The rattling noise can simply be eradicated by opening the Bridgemate and removing any loose elements. The noise is usually caused by loose glue, which is used to provide extra internal strength. Removing this element will not cause any damage to the Bridgemate. 1. Remove the four rubber caps on the bottom of the Bridgemate. 2. Remove the underlying screws. 3. Disengage the top half from the bottom half of the casing. Proceed carefully to prevent damage to the internal wiring. 4. Remove the loose material. 5. Reassemble the two halves. 6. Tighten the screws and replace the rubber caps. Please ensure the screws are tightened securely so that they remain in place. 2. The screen or keyboard is sunk into the casing (Excessive) keyboard pressure can cause the keyboard to sink into the casing. This problem can be easily rectified: 1. Remove the four rubber caps on the bottom of the Bridgemate. 2. Remove the underlying screws. 3. Disengage the top half from the bottom half of the casing. Proceed carefully to prevent damage to the internal wiring. 4. Press the green plate back into place using the clips provided. 5. Reassemble the two halves. 6. Tighten the screws and replace the rubber caps. Please ensure the screws are tightened securely so that they remain in place. 3. The Bridgemate has rejected the board number There are a number of reasons why the entered board number is rejected: • The entered board number is incorrect and does not correspond with the movement. The round or table information is incorrect. If this is the case, a “BOARD NUMBER INCORRECT” error message will appear. • The board has already been played in that round. In this case, a “BOARD ALREADY PLAYED” error message will appear. • If all the boards were not entered in the previous round, the Bridgemate is still set to that round. The unplayed board must be entered, or can be bypassed by selecting the “Not played” option (see Chapter 5 of the Bridgemate manual). The “Rx” text specifies the current Bridgemate round (x is the round number). In all cases, remember to check the “status” of the Bridgemate using the TD menu (option 4). The “Rx” text (x is the round number) specifies the current Bridgemate round. Select the “Missing boards” option (option 5) for a quick overview of all the boards that have not yet been entered in the Bridgemate’s “current” round. 4. Strange characters appear on the screen; Bridgemate switches off immediately after being switched on If the Bridgemate Pro start-up screen displays unusual characters, and the Bridgemate immediately switches itself off (within 1 second of being switched on), the internal firmware of the Bridgemate contains faults. It will be necessary to reprogram the Bridgemate. Firmware reprogramming is also necessary if the Bridgemate automatically switches itself off, even if no unusual characters appear on the screen. Reprogramming the Bridgemate The Bridgemate is reprogrammed from Bridgemate Control Software (BCS). A firmware file is required for this purpose. This file can be downloaded from www.bridgemate.us. To reprogram the Bridgemate firmware, see the Bridgemate User Manual, Chapter 6, System Functions, page 32. Also, step-by-step instructions and the latest firmware may be downloaded from the www.bridgemate.us website. Solutions for non-functioning Bridgemate Pro Terminal(s) Page 2 Bridgemate.US 110101 5. A black screen appears when the Bridgemate is switched on If the Bridgemate screen displays black blocks of equal size (both in the top and bottom lines), the screen contrast is set too high. This problem may occur after new batteries have been installed. To reduce the screen contrast, make sure the Bridgemate is set to the “Bridgemate Pro” initial state or the “TD-menu” mode (the TDkey must be inserted). To reduce the contrast, press the minus (-) key a number of times. It may be necessary to repeat this process several times (up to 64 times). By pressing the minus (-) key repeatedly, the text will gradually become visible. The contrast can only be reset in the above two situations. Unfortunately, it is not always easy to establish the status of the Bridgemate if the screen is black. To identify the status of the Bridgemate, proceed as follows: • • • View the screen at an angle (preferably from above) to establish whether text is visible in the black blocks. Select Tools Bridgemate Bridgemate Pro analysis to view the status of the Bridgemate. Follow the on-screen instructions to retrieve the relevant information. If a number is displayed, reprogram the Bridgemate. Otherwise, see item 6, Step 3 on the next page. See the Bridgemate User Manual, Chapter 7, System Functions, page 32, on reprograming the Bridgemate. The Bridgemate will always return to its initial state after being reprogrammed. This method will always suffice and is recommended if the above suggestions fail. Once you have reset the Bridgemate to its initial state, or have been able to display the TD menu (this is possible if the Bridgemate is in input mode), the contrast may be reduced using the minus (-) key. 6. A blank screen appears when the Bridgemate is switched on There are a number of reasons why the screen remains blank after you have switched on the Bridgemate and pressed the OK button. 1. The batteries are dead 2. The screen contrast is too low 3. The Bridgemate must be reprogrammed 4. There is a technical fault In some cases, there may be multiple causes for the fault, making it more difficult to rectify the problem. If the Bridgemate malfunctions after being switched on, proceed as follows: Step 1. Check the batteries Select a properly functioning Bridgemate. Ensure that this Bridgemate is set to its initial state and that the screen contrast is correctly set. Remove the batteries from this Bridgemate and insert the batteries in the malfunctioning Bridgemate. Press the OK button to switch on the Bridgemate. If the Bridgemate starts up normally, the batteries are good. If the screen remains blank, there are two likely causes: • The power level of the batteries has dropped – or – the contrast needs resetting. Try pressing the plus (+) key several times to reset the contrast. If the “Bridgemate Pro” on-screen message appears, the batteries are working properly, but the power level has dropped. This may explain why the screen of the non-functioning Bridgemate is blank; however, other causes are possible. • The batteries are dead and are unable to power the Bridgemate. To check the power level of your batteries, press the plus (+) key several times. Verify the Bridgemate’s current status as described in SStep 3 on the next page, so as to know when the plus (+) and/or minus (-) keys will work to increase or decrease the Bridgemate’s contrast. If the screen remains blank, battery power is low. The batteries need to be replaced. If possible, test the new batteries in a fully operational Bridgemate first. Note: A black screen may appear after the original batteries have been replaced and the screen contrast has been increased by pressing the plus (+) key. Press the minus key (-) several times to reset the screen contrast. Step 2: Replace the batteries and check whether they are functioning properly. Insert new batteries (if the previous step revealed that the batteries are dead). If the Bridgemate is functioning properly again, the cause has been identified and rectified. However, if the Bridgemate continues to malfunction after the (new) batteries have been inserted, it will be necessary to check the technical operation of the Bridgemate. When carrying out this test, it is assumed that the Bridgemate communication cable is functioning correctly. 1. Open Bridgemate Control Software 2. Select and open a random result file (.bws file) 3. Connect the Bridgemate communications cable to the serial port. 4. Go to the Session Read Bridgemate locally menu. 5. Connect the Bridgemate to the communications cable and press the OK button. 6. If a message appears on the screen indicating that data has been read from the Bridgemate, the Bridgemate is functioning properly. Proceed to step 3 (see over). If the screen remains blank, it is likely that the Bridgemate has suffered a technical fault. Contact Bridgemate.US. It is, however, recommended that you try a second test using new batteries.. Solutions for non-functioning Bridgemate Pro Terminal(s) Page 3 Bridgemate.US 110101 Step 3: Check the current status of the Bridgemate Pro If the previous step verified that the batteries are functioning properly (after replacing the old batteries, if required) and that the Bridgemate is operating properly. Step 3 involves checking the status of the Bridgemate. 1. Go to the Tools Bridgemate Bridgemate Pro analysis menu. 2. Connect the communications cable and click OK on the screen message. 3. Press the OK button on the Bridgemate Pro and press OK on the second screen message. 4. The analysis report will now be displayed. The following results are possible: Depending on the current status of the Bridgemate, the following steps may be necessary: • “The Bridgemate contains incorrect firmware.…” see A • “Current status: Screen switched off” see A • “Current status:” + number see B • “Current status: Bridgemate Pro main screen” see C • “Current status: Board / contract / (lead card) entry” or “Result entry” see D • If Current Status is a different, disconnect the Bridgemate, press the OK or CANCEL keys one or more times and repeat this process – until either the “main screen,” “Board…” or “Result entry” are current and then follow “C” or “D” as appropriate. Situation A: Reprogram the Bridgemate. Once you have reprogrammed the Bridgemate Pro, it will be reset to its initial state. Repeat the same procedure to verify that this is the case. Proceed to C below. Situation B: If the number is 2 or 3: disconnect the Bridgemate from the PC, press CANCEL several times to return the Bridgemate to its initial state, then press the plus (+) or minus (-) key 50-60 times. If any other number, proceed to A above. Situation C: The Bridgemate is reset to its initial state. Disconnect the Bridgemate from the PC, wait about a minute, then press the OK button and press the plus (+) key several times to increase the screen contrast – or the minus (-) key to reduce the screen contrast. The “Bridgemate Pro” text will automatically appear. In some cases, it may be necessary to press the plus (+) or minus (-) key 50-60 times. Stop the process as soon as text is visible. The Bridgemate is fully operational again. Situation D: Disconnect the Bridgemate, press the OK key and insert the TD-key. Press the plus (+) key several times to increase the screen contrast – or the minus (-) key to reduce the screen contrast. The “TD-MENU” text will automatically appear. In some cases, it may be necessary to press the plus (+) or minus (-) key 50-60 times. As soon as text is visible, remove the TD-key. The Bridgemate is operational again. If required, press the zero key (0) in the TD menu to reset the Bridgemate, before removing the TD-key. 7. The Bridgemate fails to log into the server. The Bridgemate terminal will not log into the Bridgemate server in the following instances: • Another Bridgemate with the same section/table number setting has already logged into the server. It is not possible for a Bridgemate to log in with the same section/table number as another Bridgemate that is already logged in. To check whether another Bridgemate is logged in, go to the Server Show tables menu in Bridgemate Control Software and check whether the table has a green status. If so, a Bridgemate set for that Section/Table is logged into the server. You can the log off the “errant” Bridgemate manually by selecting the table and pressing “Log off table(s).” • The Bridgemate Pro is set for a table that has not yet been added to the server. Go to the Server Show tables menu to check if the table has been added to the server. If the table does not appear in the list, the Bridgemate cannot log into the server. • The session has finished and all the scores have been registered for this table. In that case, the “End of session” message will be displayed, and the Bridgemate will automatically log off. • The server is outside the range of the Bridgemate. Move the Bridgemate closer to the server. • The server and the Bridgemate are not communicating over the same channel. The channel number on the Bridgemate and server must be identical. The channel number of the server can be set using the Server Channel selection menu in Bridgemate Control Software. To set the channel on the Bridgemate, insert the TD-key in the Bridgemate once the “Bridgemate Pro” screen + version number appears. For further information about channel settings, see Chapter 2 of the Bridgemate Pro Control Manual. • The regional setting of the server does not correspond with the regional setting of the Bridgemate. The regional server settings for Bridgemate firmware versions ending in US must be set to North America. To set the regional settings in Bridgemate Control Software , go to the Server Region selection menu. For further information about regional settings, see Chapter 2 of the Bridgemate Pro Control Manual. • The firmware version of the server does not correspond with the firmware version of the Bridgemate. The Bridgemate and server cannot communicate if incompatible firmware versions are used. Compatible firmware versions are: Server firmware Bridgemate firmware 1.2.6 2.3.2 US Solutions for non-functioning Bridgemate Pro Terminal(s) Page 4 Bridgemate.US 110101 8. A Bridgemate has stopped working during a session. Using the TD Key, checking the status (section, table, round, pair numbers, etc.) and missing boards (boards not scored for the current round) and something is not right with a Bridgemate. • This is most rare. If you are sure it has nothing to do with trying to enter an incorrect boared number, take the Bridgemate out of service and assign a spare Bridgemate for the table. • Use the “Log off a Bridgemate” command in Server Show tables to log the malfunctioning Bridgemate off – or – with the TD Menu visible, key “0” and OK to reset the unit. • Use the TD Key to (i) “0” reset the spare Bridgemate and then, (ii) reprogram the unit to the relevant Section, Table and Channel. Remove the TD Key and press OK. The Bridgemate logs on and the Server synchronizes it to the current round. 9. The Bridgemate does not seem to recognize that a new game has started. There are times when a game is stopped before beng fully completed, i.e., plan for 13 rounds but actually stop a game/session after 12 rounds because of time. Subsequently, when a new game is started, the Bridgemate displays something other than the normal newgame information. This happens becuause the Bridgemate terminal is still “programmed” for the previous game/session which was not fully completed. To avoid non-normal Bridgemate startup, Bridgemates should be “reset” for a new game by using the TD key. Without the reset, each Bridgemate will display the next expected action from the previous game (e.g., Round information, BOARD/CONTR, etc.). The user must key in a board number and OK at which time the Bridgemate communicates with the Server and receives the new game information – and the display switches to member number input – or Round info – or BOARD/CONTR. 10. The game has been started but one-or-more Bridgemates show “SYSTEM NOT ACTIVATED YET.” • This condition is generally encountered when a Bridgemate is not configured for the correct Section and Table – or another Bridgemate has already logged on using the same Section/Table (see the 1st item under 7. above). When the Bridgemate is activated, the user is prompted for Section/Table or the pre-programmed Section and Table number are displayed. o If the Bridgemate is configured for a different Section and/or Table, use the TD key and make the necessary correction. o Other conditions which might exist are described in “7. The Bridgemate fails to log into the server” above. • Another possible condition is that the Bridgemate Control Software (BCS) has been unable to “connect” to the server. See “Connecting the server to the PC” in Chapter 2, page 11, of the Bridgemate User Guide. o If the BCS screen shows “not connected” in the upper left corner – and the server has power and is physically connected to the PC – it may be that the port is configured as COM 11 or higher. BCS will only recognize the server if its serial port is configured as COM-1 through COM-10. * If different USB devices have been connected to different USB ports on the computer, at one time or another, Windows® may have assigned “new” ports (for each device on each different USB port). For serial devices this can result in assignments as COM 11 or higher. * Use the Windows® Device Manager – in XP it may be accessed through Control Panel System Hardware Device Manager – to see if there are any COM ports assigned as COM 11 or higher. If there are, it will be necessary to deactivate these higher ports by forcing reassignment as a “lower” port. It is okay to disregard, i.e., bypass, any error notice of possible conflict when changing to lower COM port numbers. Changing COM port assignments is accessed via Properties Port Settings (tab) Advanced (tab). o It is also possibe that there may be a Windows error notice, but it is “hidden” behind the BCS and ACBLscore screens. Close BCS and both the “working” and the “welcome” ACBLscore screens. If there is an error notice, correct any obvious error and close/cancel the error screen. Restart ACBLscore and go to the current session/game. Then: * If none of the Bridgemates have worked, start BCS using F11 – BMS. This activates BCS as a new session/game erasing any results stored in the server and Bridgemates. * If some Bridgemates are (or were) working, restart BCS using F11 – BMR. This preserves active data. Note: If the BMS and BMR commands are not visible, select the BME (remote score enable) and click OK;do this for each section.. BMS & BMR should now be visible and available for use as noted above. If neither BMS, BMR nor BME are visible, first – verify that BCS is not running – then close and restart ACBLscore. 11. Scores cannot be retrieved (posted) into ACBLscore. • Go to the BCS program screen. If there is an apparent problem, close BCS; in ACBLscore – restart BCS using F11–BMR. Do not use the BMS command since this will erase any results already stored in the server and Bridgemates. • If Bridgemates are still working normally and recording results into the server, verify that the BCS program shows “Bridgemate Server: Connected” (at the upper left) and “Status: retrieving data from server” (at the bottom center); these two indicators confirm communication with the server. If these conditions are displayed, something must have happened that is not apparent. Try a restart of BCS as described above. • Should the status be either “Not connected” or “Idle,” refer to item 10 above. • As a last resort: (i) close all programs; (ii) shut down Windows and restart the computer; (iii) open ACBLscore and the current session/game; (iv) restart BCS using F11–BMR. If the problem still persists, review item 10 above.