1
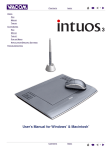
iLiad User Manual
For software version 2.9
1
Copyright © 2007 iRex Technologies. All rights reserved.
Table of contents
1.
PREFACE
2.
SAFETY AND CLEANING INFORMATION
8
10
2.1 IMPORTANT SAFETY INSTRUCTIONS
GUIDELINES
PRECAUTIONS
DISCLAIMER
2.2 CLEANING INSTRUCTIONS
10
10
11
11
12
3.
COMPONENTS LIST
13
4.
THE ILIAD
14
4.1 INDICATION LED
4.2 ON/OFF SWITCH
4.3 FLIPBAR
4.4 UP KEY
4.5 DEVICE MANAGER KEY
4.6 PREVIOUS KEY
4.7 CONFIRM KEY
4.8 NEXT KEY
4.9 ARCHIVE KEY
4.10 CONNECT KEY
4.11 TRAVEL HUB CONNECTOR
Copyright © 2007 iRex Technologies. All rights reserved.
16
16
16
16
17
17
17
17
17
17
18
2
4.12 STYLUS
4.13 RESET SWITCH
18
18
5.
19
5.1
5.2
5.3
TRAVEL HUB
POWER CABLE CONNECTION
NETWORK CONNECTION
USB CONNECTION
19
19
19
6.
POWER ADAPTOR
20
7.
THE STYLUS
21
8.
THE USER INTERFACE
23
8.1 READING/WRITING AREA
8.2 ON-SCREEN FEATURE FINDER.
8.2.1 PAGE INDICATOR
8.2.1.1
Busy Indicator
8.2.2 TOOLBAR
24
24
25
26
26
8.2.2.1
27
Rename File
8.2.2.2
Activate Keyboard
8.2.2.2.1 Keyboard
8.2.2.2.2 Writepad
8.2.2.2.3 Settings
28
29
30
31
3
Copyright © 2007 iRex Technologies. All rights reserved.
8.2.2.3
Key Lock
31
8.2.2.4
Lock Screen
31
8.2.2.5
Background Connect
32
8.2.2.6
New content
32
8.2.2.7
Battery Status Indicator
32
8.2.2.8
Delete File
33
8.2.2.9
Pen Tool
33
8.2.2.9.1
Pen Thickness
34
8.2.2.9.2
Pen Colour
35
8.2.2.10
Eraser
35
8.2.2.11
New Page
36
8.2.2.12
Landscape view
36
8.2.2.13
Continuous Mode
36
8.2.2.14
Fit to Screen
37
8.2.2.15
Zoom
37
8.2.2.16
Previous Zoom
37
8.2.2.17
Pan
38
8.2.2.18
Search file
39
8.2.2.19
Sort files
41
8.2.2.20
Share file
42
4
Copyright © 2007 iRex Technologies. All rights reserved.
9.
THE DEVICE MANAGER.
43
9.1
9.2
9.3
9.4
9.5
9.6
9.7
9.8
ILIAD SETTINGS
NETWORK PROFILES
REFERENCE MATERIALS
RECENT DOCUMENTS
COMPACT FLASH CARD
MULTI MEDIA CARD
USB (PAGE/SCREEN 2)
MAIN MEMORY
43
44
44
44
44
44
44
45
10.
ILIAD SETTINGS
46
10.1 NAME
10.2 EMAIL
10.3 PASSWORD
10.4 SOUND
10.5 KEY BUFFERING
10.6 KEYS
10.7 FLIPBAR PAGE FORWARD
10.8 LANGUAGES
10.9 SETTINGS FOR COMPUTER CONNECTION
10.10 BACKGROUND CONNECT
10.11 PIN CODE
10.12 SELECT PIN CODE
47
47
47
47
48
49
49
49
49
52
53
55
5
Copyright © 2007 iRex Technologies. All rights reserved.
11.
ILIAD NETWORK PROFILES
56
11.1 NETWORK REQUIREMENTS
11.1.1 WIRED NETWORK REQUIREMENTS
11.1.2 WIRELESS NETWORK REQUIREMENTS
11.2 NETWORK PROFILE CONFIGURATION
11.2.1 CREATING A WIRED NETWORK PROFILE
11.2.2 CREATING A WIRELESS NETWORK PROFILE
11.2.3 DELETING A NETWORK PROFILE
11.2.4 SETTING A PROFILE AS PREFERRED
56
56
56
57
58
65
74
74
12.
75
12.1
12.2
12.3
12.4
12.5
THE SCRIBBLE FUNCTION
SUPPORTED FORMATS
USING THE SCRIBBLE FUNCTION
MAKING NOTES OR DRAWINGS
ANNOTATIONS IN PDF
IREX MYSCRIPT NOTES®
75
75
75
76
76
13
ILIAD COMPANION SOFTWARE
77
14
UPGRADING SOFTWARE VIA IDS
78
14.1
14.2
14.3
WHY THE IREX DELIVERY SERVICE (IDS)?
CREATING AN ACCOUNT
UPGRADING SOFTWARE
78
78
80
6
Copyright © 2007 iRex Technologies. All rights reserved.
15
15.1
15.2
15.3
16
MYIREX
USER DETAILS
CHANGE PASSWORD
RESET PIN CODE
ELECTRONIC PAPER DISPLAY TECHNOLOGY
87
87
87
88
89
7
Copyright © 2007 iRex Technologies. All rights reserved.
1. Preface
Welcome to the world of electronic reading and digital writing!
Read and writing on an electronic medium is a young and
growing technology, with new features and opportunities for new
applications arriving in the months to come.
For iRex to provide this additional service, you will need to create
a user account.
Once it has been set up, you can use your iLiad to:
• Get software upgrades
• Download the latest User Manual and Quick Reference
Guide
• Store content in your personal secure library (planned).
• Share content with other Iliad’s or accounts (planned).
• And many more to follow …
After you have acquainted yourself with your iLiad it is
important to create an account to download free new
software upgrades directly to your iLiad.
Please go to www.iRexTechnologies.com and click the link
‘Create account here’ and follow the steps described.
By creating this account on the iRex Technologies website, you
will have created your own secure place in the world of
interactive reading and digital writing. Your iLiad will then be able
8
Copyright © 2007 iRex Technologies. All rights reserved.
to connect to your account for software upgrades once you have
created a network profile.
For more information about the network configuration please
consult the manual. You can also follow the network
configuration wizard under the menu key (second key on the top
left corner). or for more information please go to
http://www.irextechnologies.com/ .
Combined with new applications and features your iLiad
becomes an even more powerful and convenient tool that will
enhance your electronic reading and digital writing experience.
9
Copyright © 2007 iRex Technologies. All rights reserved.
2. Safety and Cleaning information
2.1 Important Safety Instructions
Guidelines
• Please read this manual carefully before using the iLiad.
• The product should only be connected and used in the way
described in this manual.
• The most recent downloads and information are available at
our website: www.irextechnologies.com
• The outer layer of the display is a hard PET layer and is
scratch resistant, but if handled roughly it can still be
damaged.
• The operation and function can be either viewer or content
dependant:
⇒ The speed of the device is content dependant.
The content is processed on your device to
optimize screen performance.
⇒ If the content or the viewer does not support a
feature, the device cannot provide that feature.
Some providers/viewers will deliver more features
then others.
• Operating temperature is 0°C to 50°C (32F to 122F)
• Storage temperature is –20°C to 70°C (-4F to 158F)
10
Copyright © 2007 iRex Technologies. All rights reserved.
Precautions
• AVOID APPLYING EXCESSIVE FORCE TO THE DISPLAY.
The device uses a Glass based display and is thus liable to
break if mistreated.
• NEVER OPEN THE DEVICE AS THIS WILL INVALIDATE
ANY WARRANTY OR MANUFACTURER’S
RESPONSIBILITY. Please Contact your iRex Technologies
retailer if you have any technical difficulties, we are always
glad to help.
• Do not expose the system to excessive moisture, rain or heat
sources caused by heating equipment.
.
Disclaimer
• While every effort has been made to ensure that the
information contained in this guide is accurate and complete,
no liability can be accepted for any errors or omissions. iRex
Technologies reserves the right to change the specifications
of the hardware and software described herein at any time
without prior notice.
• No part of this guide may be reproduced, transmitted,
transcribed, stored in a retrieval system, or translated into
any language in any form, by any means, without the prior
written permission of iRex technologies.
• iRex technologies does not accept any liability for damages
resulting from corrupted or lost data due to erroneous
operation or malfunction of the e-reader, the software, the
Compact Flash™ cards (CF cards), personal computers,
peripheral devices USB or MMC cards
11
Copyright © 2007 iRex Technologies. All rights reserved.
2.2 Cleaning Instructions
Follow these general rules when cleaning the outside of your
iLiad and its components:
•
•
•
•
Make sure your iLiad is unplugged
Use a damp, soft, lint-free cloth
Avoid getting moisture in openings
Don’t use aerosol sprays, solvents, detergents, alcohol or
abrasives
12
Copyright © 2007 iRex Technologies. All rights reserved.
3. Components list
iLiad (includes CF- and SD protection cover, stylus)
Travel hub
International Power adaptor + 3 plugs
USB-cable
13
Copyright © 2007 iRex Technologies. All rights reserved.
4. The iLiad
Connect key
4.10
Indication led
4.1
Electronic Paper
Display
Up key
4.4
Device Manager
4.5
Archive keys
4.9
Flipbar
4.3
Previous key
4.6
Confirm key
4.7
Next key
4.8
Safety cord holes
Headphone
On/Off switch
4.2
Travel hub connector
4.11
Copyright © 2007 iRex Technologies. All rights reserved.
14
USB-stick slot (Note:
Not for USB cable!)
MMC slot
CF Card slot
Stylus
4.12
Reset switch
4.13
15
Copyright © 2007 iRex Technologies. All rights reserved.
4.1 Indication LED
• Green LED: the iLiad is processing.
• Red LED: the battery of the iLiad is charging
• The LED will burn orange if both the red and green colour is
activated.
4.2 On/Off Switch
• Slide switch to left and hold for 2 seconds to turn device on
• Slide switch to left and let go to turn device off.
Note: Power management is being developed and will greatly
enhance the performance of the device. But for now it is best to
turn your device off after use.
4.3 Flipbar
• Turn Flipbar to the left to turn a page/screen to reach next
content.
• Turn Flipbar to the right to turn a page/screen to reach
previous content.
• Hold Flipbar to the left or right for 2 seconds to skip 5
pages/screens.
Tip: You can configure the flipbar direction for turning
pages/screens in the iLiad Settings.
4.4 Up Key
• This key functions as a back function and allows you to go
back through the content or hyperlinks and close an opened
document. Hold the Up-key to jump to the first link.
16
Copyright © 2007 iRex Technologies. All rights reserved.
4.5 Device Manager Key
• Press this key to open the device manager which contains
the iLiad Settings, iLiad Profiles, Reference Material, Recent
Documents, CF Card, MMC Card, USB and Main Memory.
4.6 Previous Key
• Press this key to jump to previous hyperlink or section.
• Press the Previous key for 2 seconds to jump to the first
hyperlink of the content.
4.7 Confirm Key
• Press this key to open your selected hyperlink or section.
• Hold this key for 2 seconds to change the way the content is
displayed on the screen. (This is a content dependant
function: e.g. Newspapers)
4.8 Next Key
• Press this key to jump to the next hyperlink or section.
• Hold the Next-key for 2 seconds to jump to the last hyperlink
or section of the content.
4.9 Archive Key
• Pressing on one of these keys, retrieves the list of items
stored in the corresponding archive.
• Pressing it again will open and display the last viewed file.
4.10 Connect Key
• Press this key to display the Download History on the screen.
17
Copyright © 2007 iRex Technologies. All rights reserved.
•
Press this key for 2 seconds to make connection to the iRex
Delivery Service (iDS).
4.11 Travel Hub Connector
• Connect the travel hub cable to the iLiad with the arrow
pointing to the back of the iLiad.
4.12 Stylus
• With the stylus you can select entry fields and click on softbuttons.
• Via the toolbar functions you can convert the stylus into the
appropriate tool.
For Example: you can convert the stylus into a pen tool or an
eraser by clicking on the appropriate icon in the toolbar.
4.13 Reset Switch
• If the device no longer responds anymore this switch turns
the iLiad off. Afterwards you can turn the iLiad back ‘on’ by
using the ‘on/off switch’.
CAUTION: Please make sure the iLiad is NOT reset while new
software is being installed. If the installation is interrupted the
iLiad may be programmed with incomplete software rendering it
unusable.
18
Copyright © 2007 iRex Technologies. All rights reserved.
5. Travel Hub
The travel hub can be connected with the attached cable to the
travel hub connecter (4.11) of the iLiad.
The travel hub is used to make different type of connections with
the iLiad: power, network and USB.
5.1 Power Cable Connection
• To recharge the iLiad connect the power cable to the travel
hub (and the travel hub to the iLiad).
• The led on the iLiad will turn red to indicate that the battery is
recharging.
• A complete empty battery will take +/- 2 hours to recharge.
5.2 Network Connection
• To make a wired network connection, connect an Ethernet
cable to the travel hub (and the travel hub to the iLiad).
• The green led on the Ethernet cable connector will turn on to
indicate there is a physical network connection.
• The orange led on the Ethernet cable connector will blink
orange when there is data traffic.
5.3 USB Connection
• To make a connection to your PC, connect the USB cable to
the travel hub (and the travel to the iLiad).
• Your iLiad will lock and the screen will show the message:
Connected to PC.
• Disconnected your iLiad by stopping the USB device on your
PC first and wait for the iLiad to unlock.
19
Copyright © 2007 iRex Technologies. All rights reserved.
Note: Make sure the iLiad has completed the start up process
before making an USB connection with the PC, otherwise the
iLiad might not be properly recognized by the PC.
6. Power Adaptor
•
•
Input: 100-240V/ 400m/A
Output: 12.0V. 1.2A max
Note: Any DC adaptor with an output voltage range between 10
and 18 V can be used. Observe the polarity requirements for
proper operation (centre pin is positive). The adaptor must
provide a minimum of 12 Watts.
20
Copyright © 2007 iRex Technologies. All rights reserved.
7. The Stylus
The iLiad is equipped with a stylus and digitizer developed by
Wacom and utilizes Penabled®. This technology is based on the
EMR technology (Electro-Magnetic Resonance) send and
position sensing method.
The stylus slot on the back of the iLiad (4.12) has a sensor inside
and upon removal of the stylus the digitizer will be activated. This
digitizer is a sensor board behind the Electronic Paper Display
that will communicate with the stylus to track the position;
therefore it will not detect a passive stylus or a touch of your
finger.
Stylus
Digitizer
21
Copyright © 2007 iRex Technologies. All rights reserved.
If the stylus is not being used for more than 3 minutes the
digitizer will shut itself off. To turn the digitizer back on: insert the
stylus into the slot and remove it again.
Note: If you put the stylus on top of the screen, the digitizer will
consume power because the pen point is near the digitizer. It is
best to always put the stylus into the iLiad after each use to save
battery life.
22
Copyright © 2007 iRex Technologies. All rights reserved.
8. The User Interface
The display area is divided into two sections. The main and
larger part of the screen is for reading and writing, on the lower
part of the screen is where the feature finder is situated.
8.1 Reading/writing area
8.2 Feature Finder
Picture may differ from current software version.
23
Copyright © 2007 iRex Technologies. All rights reserved.
8.1 Reading/writing Area
The main part of the screen is for reading and writing and
interactivity in this area is content related.
8.2 On-screen Feature Finder.
The feature finder is the area below the reading area and is
divided into two sections; the content indicator and the toolbar.
The feature finder displays information and enables user
interactivity with the stylus to operate the extra features of the
device.
Page/screen number
8.2.1 Page indicator
Picture may differ from current software version.
8.2.2 Toolbar
24
Copyright © 2007 iRex Technologies. All rights reserved.
8.2.1 Page Indicator
• The page indicator will show the amount of pages a
document is composed off and indicates the current page
number slightly larger.
• If a document cannot provide page breaks to the iLiad (like
an HTML file). A black bar will be displayed under the current
page number. This bar will indicate the progress in this type
of document.
• The page indicator has two modes. One mode showing all
pages and one mode showing the 20 nearest pages. To
switch between these modes click the page indicator with the
stylus.
• To navigate through a document you can use the stylus to
jump immediately to the desired position in accordance with
the page indicator or you can use the flipbar to turn the
pages.
25
Copyright © 2007 iRex Technologies. All rights reserved.
8.2.1.1 Busy Indicator
When opening a document the page indicator will be shown as
the busy indicator which will indicate the iLiad is processing the
operation.
Busy indicator
Picture may differ from current software version
8.2.2 Toolbar
The toolbar is divided into two types of tools.
• The icons displayed in the toolbar on the left side of the
screen are viewer dependent tools; this means these icons
may be available in some viewers and not in others.
• The icons displayed in the toolbar on the right are system
tools.
• To activate a function of the toolbar, click on the icon to
convert the stylus into the chosen tool.
• Click on the icon again to convert the stylus back to its
original function.
26
Copyright © 2007 iRex Technologies. All rights reserved.
•
•
While a function is active the image of the icon will be
inverted.
When a function is not available, the icon will be greyed out.
8.2.2.1
Rename File
• To rename a file click on the rename file icon, than select a
file by clicking on it with the stylus.
Picture may differ from current software version.
•
•
•
In the first field enter the new name you want to use for the
file using the keyboard.
In the second field enter a description of the file.
When done click on the rename file icon again to close the
dialog box.
Copyright © 2007 iRex Technologies. All rights reserved.
27
Note: The rename function is only possible on files formatted to
the iLiad structure. To reformat files to iLiad structure, open them
first before renaming.
Note: It is not possible to rename single files (like the notes
templates)
8.2.2.2
Activate Keyboard
• To activate the keyboard click on the activate keyboard icon
• An onscreen keyboard will appear in the lower area of the
screen. With the Move up soft key on the keyboard you can
move the keyboard to the top area of the screen.
• With the stylus you can click on the soft keys of the keyboard
to enter data on the iLiad.
• To deactivate click on the inverted active keyboard icon
• The keyboard has 2 different modes: Keyboard, Writepad.
28
Copyright © 2007 iRex Technologies. All rights reserved.
8.2.2.2.1 Keyboard
• This is the default mode and method to enter data into text
fields on the iLiad.
• With the Move up / Down soft key you position the keyboard
at the lower or upper area of the screen.
• With the Language soft key you can change the language of
the keyboard.
Note: Currently only English (UK) and Simplified Chinese is
supported.
Move Up / Down
Picture may differ from current software version
Language key
29
Copyright © 2007 iRex Technologies. All rights reserved.
8.2.2.2.2 Writepad
• The writepad is an alternative way to enter data into a text
field on the iLiad.
• To activate the writepad click on the writepad soft key on the
keyboard.
• In the writing area you can write the text you want to enter
into the entry field. The handwriting will automatically be
recognised and entered into the entry field.
• With the character selections keys you can change the type if
characters you want to input.
Writing area
Picture may differ from current software version
Character selection keys
30
Copyright © 2007 iRex Technologies. All rights reserved.
8.2.2.2.3 Settings
• To change the settings of the writepad click on the Settings
soft key on the keyboard.
• In the settings you can change the settings of the writepad
for handwriting recognition.
• To return to the keyboard or writepad click on the
corresponding soft key.
Picture may differ from current software version
8.2.2.3
Key Lock
• To lock the keys of the iLiad, click on the key lock icon, to
indicate the keys are locked the icon will be inverted.
• To unlock the keys of the iLiad, click again on the key lock
icon.
8.2.2.4
Lock Screen
• To use the lock screen function you need to have PIN code
protection enabled.
31
Copyright © 2007 iRex Technologies. All rights reserved.
•
•
•
•
You can enable PIN code protection in the iLiad settings
(See Chapter 10.10)
The lock screen icon will be gray if the PIN code protection is
not enabled.
Click on the lock screen icon to lock your iLiad.
To unlock the iLiad enter your PIN code with the Stylus.
8.2.2.5
Background Connect
• To make a manual background connection to the iDS or a
Computer press the background connect icon.
• The icon will be inverted to indicate the iLiad is making a
background connection, and will remain inverted while the
background connection is active.
8.2.2.6
New content
• If any content was downloaded during a connection with iDS
or your PC it will be indicated with the new content icon.
• To see the downloaded content, press on the new content
icon.
Battery Status Indicator
8.2.2.7
• The battery status indicator will show the current status of the
battery.
• A warning will be displayed when the battery is low
• The iLiad will auto-shutdown when the battery is almost
empty.
32
Copyright © 2007 iRex Technologies. All rights reserved.
8.2.2.8
Delete File
• To erase a file click on the delete file icon, than select a file
by clicking on it with the stylus.
• To indicate you have selected the file the cursor will blink
from left to right.
• Click on the delete file icon again to confirm your selection
and to delete the file.
8.2.2.9
Pen Tool
• Click on the pen tool icon to convert your stylus into a pen
with which you can write or draw.
• To deactivate the pen click on the inverted pen tool icon.
• When you make notes or drawing, the original document and
the annotations will be saved in a new document.
• New documents created by annotations will have the same
name as the original followed by the date and time.
• When you make annotations in PDF the annotations will be
saved along with the original document.
• The pen tool has 2 submenu’s
•
Pen thickness
•
Pen colour
33
Copyright © 2007 iRex Technologies. All rights reserved.
Pen Thickness
Add new page
Picture may differ from current software version.
Pen Colour
Eraser
8.2.2.9.1
Pen Thickness
• Click on the pen thickness icon to access the pen thickness
submenu.
• The pen thickness submenu will display 4 different pen
thickness:
o
1 Pixel
o
3 Pixels
o
5 Pixels
o
7 Pixels
34
Copyright © 2007 iRex Technologies. All rights reserved.
•
•
The selected pen thickness icon will be inverted to indicate
the current thickness of the Pen.
The submenu will close automatically after a selection is
made.
8.2.2.9.2
Pen Colour
• Click on the pen colour icon to access the pen colour
submenu
• The pen colour submenu will display 4 different pen colours:
•
•
o
Black
o
Dark Grey
o
Light Grey
o
White
The selected pen colour icon will be inverted to indicate the
current colour of the pen.
The submenu will close automatically after a selection is
made.
8.2.2.10
Eraser
• Click on the Eraser icon to convert your stylus into an eraser.
• Use the stylus to erase your notes or drawings (the drawing
will only be erased partially, press on the eraser icon again to
completely erase the drawing).
• The eraser icon will be inverted to indicate the eraser has
been selected
35
Copyright © 2007 iRex Technologies. All rights reserved.
8.2.2.11
New Page
• Click on the New Page icon to add an additional page to the
current document
• The new page will be a copy of the original page.
• You will see an additional page being displayed in the Page
content indicator and the new page will be opened
automatically.
8.2.2.12
Landscape view
• Click on the Landscape view icon to switch to landscape
view. The page will be turned counter clockwise.
• To change back to portrait view click on the inverted
landscape view icon.
8.2.2.13
Continuous Mode
• Click on the continuous mode icon to activate the continuous
mode, the icon will be inverted to indicate that continuous
mode is active.
• Continuous mode will display pages end to end in a
continuous vertical reading order.
• To deactivate continuous mode click on the inverted
continuous mode icon.
Tip: Enable continuous mode to easily read documents you have
zoomed into or when reading in landscape mode.
36
Copyright © 2007 iRex Technologies. All rights reserved.
8.2.2.14
Fit to Screen
• Click on the Fit to Screen icon to fit the complete page of the
document on the screen.
• All documents will automatically fit to screen when opened
for the first time.
Note: When you have zoomed in to a certain area you can easily
zoom out again with the Fit to Screen icon.
8.2.2.15
Zoom
• Click on the Zoom icon to active the zoom function. The icon
will be inverted to indicate the zoom is selected
• After selecting the zoom icon, draw a, rectangle, straight or
diagonal line with the stylus over the area you want to zoom
in to.
Note: The zoom function will draw a rectangle around the
coordinates that have been indicated with the stylus to decide
the zoom area, so you can draw any type of figure like a circle,
square or diagonal line.
8.2.2.16
Previous Zoom
• Click on Previous Zoom icon to go back to the previous zoom
selection.
• The icon will be inverted to indicate that the previous zoom
selection is displayed.
37
Copyright © 2007 iRex Technologies. All rights reserved.
•
With this icon you can toggle back and forward between
current and previous zoom selection.
8.2.2.17
Pan
• Click on the Pan icon to activate the panning function, the
icon will be inverted to indicate the pan function is selected.
• After selecting the pan icon, you can use the stylus to pan
the zoom area over the document. To do this click with the
stylus on the area you want to pan and draw a line in the
direction you want to pan to.
• To deactivate the pan function click on the inverted pan icon
Tip: To easily pan in horizontal or vertical direction use the stylus
to draw a line along the top or left border of the display.
38
Copyright © 2007 iRex Technologies. All rights reserved.
8.2.2.18
Search file
• To start a search for a file or files while in the content lister
click on the search file icon. The search icon will be inverted
while the search function is active.
Picture may differ from current software version
39
Copyright © 2007 iRex Technologies. All rights reserved.
•
•
•
In the search field you enter the string you want to use to
perform the search for a file or files. To use multiple strings
separate them with a space.
Click on Search to start the search, a list of search results will
be displayed.
To perform another search within the search result click on
the Search file icon again.
Note: The search is limited to the location where the search is
initiated. You can see the location you are searching in, in the
title bar.
40
Copyright © 2007 iRex Technologies. All rights reserved.
8.2.2.19
Sort files
• Click on the Sort Files icon in the content lister to access the
sort files configuration.
Picture may differ from current software version
41
Copyright © 2007 iRex Technologies. All rights reserved.
•
•
•
•
In step 1 you can select your preferred sort criteria based on
system attributes: File name, File extension, File size, File
date or information tags: Title, Description.
In step 2 you can select ascending or descending sort order
by using the arrows.
To confirm, click on the sort icon again.
Your files will now be sorted based on your selected criteria.
Note: The sort is limited to the location where it is initiated. You
can see the location in the title bar.
8.2.2.20
Share file
• To share a file, click on the share file icon, than select a
file by clicking on it with the stylus.
• To indicate you have selected the file the cursor will blink
from left to right.
• Click on the share file icon again to confirm your
selection.
• Shared files will be copied to the outbox folder on your
iLiad. All files in the outbox will transferred to your
Computer during the next connection.
Note: To use this feature you need to install the iLiad
Companion Software – See the iLiad Companion Software
manual for more information on how to install and setup this
software.
42
Copyright © 2007 iRex Technologies. All rights reserved.
9. The Device manager.
Picture may differ from current software version.
9.1 iLiad Settings
The iLiad settings contain the different settings for configuring
and personalizing your iLiad to your preference. (see chapter 10)
43
Copyright © 2007 iRex Technologies. All rights reserved.
9.2 Network Profiles
In this section you will find a list of network profiles. You can
create or edit a profile in this list (See chapter 11)
9.3 Reference Materials
Here you will find the user manual and quick reference guide.
With each software release you will also receive the latest user
manual and quick reference guide.
9.4 Recent Documents
Use this link to view your recently opened documents.
9.5 Compact Flash Card
Use this link to access the external memory provided in a
Compact Flash Card.
9.6 Multi Media Card
Use this link to access the external memory provided in a Multi
Media Card.
Note: In many cases SD cards can be used since they are
compatible with MMC. However the maximum size of an MMC is
1GB. SD cards can be bigger but these can not be used in the
iLiad since the addressing method is different than MMC in that
case.
9.7 USB (page/screen 2)
Use this link to access the external memory supplied in an USBstick.
44
Copyright © 2007 iRex Technologies. All rights reserved.
Note: This USB connector is only suitable for a USB stick. It is
not suitable for connecting to your computer via a USB cable.
9.8 Main Memory
The main memory contains the four archives (Newspapers,
Books, Documents and Notes) and any other documents or
folders that were created on the iLiad. This memory is used for
easy file management from your PC.
45
Copyright © 2007 iRex Technologies. All rights reserved.
10. iLiad Settings
In the iLiad settings you can personalize your reader by setting
your name, account information, language, volume and the like.
In the upper left area of the title bar you can see your current
software version and the MAC address of the iLiad.
Software Version
MAC Address
Picture may differ from current software version
46
Copyright © 2007 iRex Technologies. All rights reserved.
10.1 Name
In this field you can enter any name you would like.
10.2 Email
In this field you need to enter the email address you have used
to create your account. (See chapter 12 for more info on account
creation).
Note: Your email functions as your username of your account.
This account info is used to connect to iDS to download software
updates and content from your inbox.
10.3 Password
In this field you need to enter the password you have received in
your email inbox when you created your account.
Note: If you have changed your password on MyiRex make sure
you also change your password here.
10.4 Sound
Here you can enable or disable the sound of your iLiad
If you have your sound turned on you will hear a soft click sound
when pressing a button or using the stylus.
When the sound is turned off you will not hear these soft clicks.
Note: Disabling the sound will increase the average battery life.
47
Copyright © 2007 iRex Technologies. All rights reserved.
Picture may differ from current software version
10.5 Key Buffering
Key Buffering is by default disabled. With Key Buffering off the
iLiad will first process the requested operation before accepting
any additional requests from key presses. We recommend this
setting for new iLiad users.
If you enable key buffering, the iLiad will remember the keys
pressed and process them when the device is ready
48
Copyright © 2007 iRex Technologies. All rights reserved.
10.6 Keys
Here you can select the minimum duration for a long key press.
Tip: If you often perform a long press by mistake we recommend
to increase the minimum duration for a long key press.
10.7 Flipbar page forward
Here you can configure the direction of the flipbar to turn a page.
Select ‘Left’ to advance in content the way you flip pages in a
book. To turn a page click the flipbar to the left.
Select ‘Right’ to advance in content the way you do in documents
on a computer. To turn a page click the flipbar to the right.
10.8 Languages
Here you can set your preferred language of the iLiad.
Note: Additional language options will become available in the
near future.
10.9 Settings for computer connection
In order to connect the iLiad with your Computer you need to
configure the following settings.
Step 1: In this field you have to enter the name of the computer
you want to connect to.
49
Copyright © 2007 iRex Technologies. All rights reserved.
Step 2: Enter the name of the shared destination folder into this
field. This is a shared folder on your computer from which the
iLiad will download and upload content from and to.
Picture may differ from current software version
Step 3: In this field, enter the name of the domain or workgroup
of which your computer is part.
50
Copyright © 2007 iRex Technologies. All rights reserved.
Tip: You can find out the name of your computer and/or network,
by clicking on the settings icon of the iLiad Companion Software
on your Computer and selecting the Device Settings.
Step 4: In these fields you need to enter the username and
password of the computer you want to log on.
51
Copyright © 2007 iRex Technologies. All rights reserved.
10.10 Background connect
With the background connect enabled the iLiad will connect to
the iDS or a computer at a fixed interval to check for new
content. Select whether to download content from the iDS or a
Computer.
Picture may differ from current software version
52
Copyright © 2007 iRex Technologies. All rights reserved.
If you select ‘on’ you will need to select the time interval for the
‘Background connect’. The time selected is expressed in minutes
and should be between 5 and 99.
(e.g. If you enable ‘Background connect’ and select 15 as
interval, the iLiad will connect to the iDS every 15 minutes to
check for new content to download.)
During the ‘Background connection’ you can continue to operate
the iLiad as usual.
Warning: Enabling ‘Background connection’ will empty your
battery faster.
10.11 PIN Code
With this function you can enable to protect your iLiad with a PIN
code against unauthorized use.
When PIN code protection is enabled you will need to enter the
PIN code each time:
• the iLiad is switched on.
• you enter the iLiad settings.
• to unlock the device after locking it with the
Lock Screen
icon.
If you wish to enable PIN code protection select ‘On’, to disable
PIN code protection select ‘Off’
Note: Factory Default PIN Code is 0000.
Copyright © 2007 iRex Technologies. All rights reserved.
53
Note: In case you forget or loose your PIN Code you can reset
your PIN Code via MyIRex (see Chapter 14 for more info).
Warning: Before you enable PIN Code protection make sure you
have successfully configured an iLiad network profile or you will
not be able to reset your PIN Code when needed.
Picture may differ from current software version
54
Copyright © 2007 iRex Technologies. All rights reserved.
10.12 Select PIN Code
If you have enabled PIN code protection you will need to enter a
4 digit PIN code in both fields and Click on ‘Confirm’ to confirm
your new PIN code.
If you set a PIN code for the first time, the current PIN code will
be the factory default PIN code which is 0000.
Warning: You can only enter the PIN code with the stylus. Make
sure you always have the stylus available after enabling the PIN
code protection.
55
Copyright © 2007 iRex Technologies. All rights reserved.
11. iLiad Network Profiles
The iLiad network profiles contain the configuration and settings
for each separate network connection. You can configure a
network profile for each different network that you wish your iLiad
to use in order for easy access to the iRex Delivery Service (iDS)
at all time.
One profile will be used as your preferred profile and will always
be tried first by the iLiad when you wish to connect to the iRex
Delivery Service (iDS) or a Computer. Once a profile is created
it can be edited or deleted.
11.1 Network Requirements
In order to make a connection to the iRex Delivery Service (iDS)
or to a computer the iLiad requires an active internet connection.
The iLiad is equipped with a WIFI 802.11g wireless LAN and a
10/100 MB wired LAN built-in the travel hub.
11.1.1 Wired Network Requirements
• Connect the travel hub to your network with an Ethernet
cable. (See 5.2)
• To connect the iLiad to the network it is important that a
router device is being used as the iLiad will not support a
direct connection to your ADSL or Cable modem.
11.1.2 Wireless Network Requirements
Copyright © 2007 iRex Technologies. All rights reserved.
56
•
Your wireless router device needs to have DHCP enabled to
provide the iLiad automatically with an IP address. It is not
possible at this stage to set a static IP address into the iLiad
for a wireless connection. Most router devices will have
DHCP enabled by default.
11.2
Network Profile Configuration
There are two ways to create or edit a network profile, via the
wizard or via the edit button. The wizard is the easiest way to
configure a network connection and it will guide you through the
configuration step by step. We recommend using this option to
create your network profiles.
57
Copyright © 2007 iRex Technologies. All rights reserved.
11.2.1 Creating a Wired Network Profile
In the iLiad profiles menu select the wizard of the preferred
profile if you want to create a preferred profile or a listed profile.
Picture may differ from current software version.
58
Copyright © 2007 iRex Technologies. All rights reserved.
After you opened the wizard you will see the following screen:
Picture may differ from current software version.
Step 1: Here you can enter the name you wish to give to the
profile, using the stylus and the onscreen keyboard and click on
Proceed.
59
Copyright © 2007 iRex Technologies. All rights reserved.
Step 2: Here you have to select if you want to connect to a wired
or wireless network. Select Wired and click on Proceed.
Step 3: Here you have to select how your iLiad gets an IP
address. If your router device or network has DHCP you have to
select automatic. If you want to set a fixed IP address click on
Static and Proceed.
Picture may differ from current software version
Hint: if you are not sure, select 'Automatic'.
60
Copyright © 2007 iRex Technologies. All rights reserved.
If you have selected Static, you will be asked to enter an IP
address for the iLiad.
In addition you also need to enter a subnet mask, the default
gateway and the DNS.
Picture may differ from current software version
If you do not know the IP addresses of your subnet mask, default
gateway and the DNS, contact your network administrator.
61
Copyright © 2007 iRex Technologies. All rights reserved.
Step 4: If the network you wish to connect to is protected by a
proxy server you need to click on Proxy otherwise select No
Proxy (default) and click on Proceed.
Picture may differ from current software version
A proxy server regulates internet traffic and is usually installed in
company networks. Hint: if you are not sure, select 'No Proxy'
and click 'Test' to try this profile.
62
Copyright © 2007 iRex Technologies. All rights reserved.
If you have selected Proxy you will see the following screen:
Picture may differ from current software version
Here you can enter the address or name of the Proxy server and
click on Proceed.
Note: Do not include the protocol (e.g. http://) when you enter the
proxy address.
63
Copyright © 2007 iRex Technologies. All rights reserved.
Now enter the port number for your Proxy server and click on
Proceed (default port is 8080).
For more information about the proxy configuration of your
network contact your internet service provider or your network
administrator.
Test: To test the created profile. The iLiad will try to connect to
the iDS server and will give a message if the test was successful.
This way you can test a profile before saving it to your Network
profiles list.
Ok: To save the profile and go back to the iLiad network profiles
list.
Cancel: To cancel the configurations you have created. The
profile will not be saved and you will go back to the iLiad network
profiles list.
64
Copyright © 2007 iRex Technologies. All rights reserved.
11.2.2 Creating a Wireless Network Profile
Select the wizard of the preferred profile if you want to create a
preferred profile or a listed profile
Picture may differ from current software version.
65
Copyright © 2007 iRex Technologies. All rights reserved.
After you opened the wizard you will see the following screen:
\
Picture may differ from current software version.
Step 1: Here you can enter the name you wish to give to the
profile, using the stylus and the onscreen keyboard and click on
Proceed.
66
Copyright © 2007 iRex Technologies. All rights reserved.
Step 2: Here you have to select if you want to create a Wired or
a Wireless connection. Select Wireless and click on Proceed.
Step 3: The SSID is the name of the wireless network. If you do
not know the name of the network, you can click on search to
scan for an available wireless network otherwise enter the SSID
and click on Proceed.
Picture may differ from current software version
Copyright © 2007 iRex Technologies. All rights reserved.
67
If you click on search, the iLiad will scan for available networks.
Note: Only broadcasted networks will appear in the scanned list.
Picture may differ from current software version.
Select the network you want to connect to from the list of
available networks.
68
Copyright © 2007 iRex Technologies. All rights reserved.
Step 4: Next you will able to select the security type of the
wireless network. WEP is the only security type supported by the
iLiad at this stage. WEP requires settings for the encryption key.
The key can be entered after a wireless network has been
chosen.
If the network is not protected please choose ‘Off’.
Picture may differ from current software version.
Copyright © 2007 iRex Technologies. All rights reserved.
69
If you have selected WEP you need to enter a Hexa decimal
security key (using values 0-9 and a-f) to encrypt your network
traffic
Picture may differ from current software version
Please set your local wireless router device to a Hexadecimal
security key using values 0-9 and a-f. For more information on
WEP security please consult the User Manual of your wireless
network router or contact your network administrator.
70
Copyright © 2007 iRex Technologies. All rights reserved.
Step 5: If the network you wish to connect to is protected by a
proxy server you need to click on Proxy otherwise select No
Proxy (default) and click on Proceed.
Picture may differ from current software version
A proxy server regulates internet traffic and is usually installed in
company networks. Hint: if you are not sure, select 'No Proxy'
and click 'Test' to try this profile
71
Copyright © 2007 iRex Technologies. All rights reserved.
If you have selected Proxy you will see the following screen:
Picture may differ from current software version
Here you can enter the address or name of the Proxy server and
click on Proceed.
Note: Do not include the protocol (e.g. http://) when you enter the
proxy address.
72
Copyright © 2007 iRex Technologies. All rights reserved.
Now enter the port number for your Proxy server and click on
Proceed (default port is 8080).
For more information about the proxy configuration of your
network contact your internet service provider or your network
administrator.
Test: To test the created profile. The iLiad will try to connect to
the iDS server and will give a message if the test was successful.
This way you can test a profile before saving it to your Network
profiles list.
Ok: To save the profile and go back to the iLiad network profiles
list.
Cancel: To cancel the configurations you have created. The
profile will not be saved and you will go back to the iLiad network
profiles list.
73
Copyright © 2007 iRex Technologies. All rights reserved.
11.2.3 Deleting a Network Profile
Select the Wizard or Edit option of the profile you want to delete.
Select the field with the name of the profile, and remove the
profile name using the Backspace key (Bksp) on the keyboard.
Now click on OK to delete this profile. This will bring you back to
the iLiad network profiles and the profile you deleted will be
removed from the list.
11.2.4 Setting a Profile as Preferred
You can set any profile as preferred by selecting the Wizard or
Edit option of the profile you want to set as preferred.
Next to the field with the name of the profile you have the option
‘Set as preferred’, click on this soft button and than click on
Proceed to confirm.
Now click on OK to close and safe the changes to this profile.
This will bring you back to the iLiad network profiles and the
profile you have set as preferred will now be on top of the list.
74
Copyright © 2007 iRex Technologies. All rights reserved.
12. The Scribble Function
The scribble function allows you to write notes, make drawings
and create annotations in documents.
12.1 Supported Formats
The current software version supports the scribble function in the
following file formats: PDF, JPG, BMP and PNG.
12.2 Using the Scribble Function
• When you open a file of the supported file format the toolbar
will show the pen tools.
• You can write and draw using the pen tools as described in
chapter 8.2.2.6.
• When you are done you can close the document by pressing
the Up key.
12.3 Making Notes or Drawings
• When you make notes or drawings, the original JPG, PNG or
PNG document and the annotations will automatically be
saved in a new document
• The document will have the same name as the original
document followed by the date and time. (e.g.
Notes_2006_08_10_09-25-39)
• The notes or drawing are saved in two different formats: a
picture (PNG file) and digitized form (IRX file) to use with
MyScript Notes software.
75
Copyright © 2007 iRex Technologies. All rights reserved.
12.4 Annotations in PDF
• When you make annotations in a PDF document, the
annotations will be saved along with the original PDF
document in an IRX file.
• The annotations you make in PDF document are only visible
when the PDF document is viewed on the iLiad.
• The IRX file can be used with the Myscript Notes software.
Note: In the future it will become possible to merge the
annotation in the PDF document so that the annotations will also
be visible when viewed on other devices.
12.5 iRex MyScript Notes®
The iRex MyScript Notes® is an additional software package for
your PC to use with the iLiad.
The iRex MyScripts Notes® will allow you to convert handwritten
notes with the scribble function into a powerful digital text on your
PC. This software package is available on our website. You can
download a 30 day free trial to try out this new software.
For more information on MyScript Notes® please visit:
www.iRexTechnologies.com.
76
Copyright © 2007 iRex Technologies. All rights reserved.
13 iLiad Companion Software
The iLiad Companion Software is a free software package for
your PC to use with the iLiad
The iLiad Companion Software will allow you to:
•
•
•
•
•
Automatically create a backup of your iLiad
Exchange files between a your iLiad and Computer
Merge annotations together with the original PDF into a
new PDF.
Merge scribbles, notes or a series of images into a PDF
document
Print content from your Windows Clipboard in optimized
iLiad format.
This software package is available for dowload on our website:
www.iRexTechnologies.com.
See the iLiad Companion Software Manual for more information
on how to install and configure the iLiad Companion Software.
77
Copyright © 2007 iRex Technologies. All rights reserved.
14 Upgrading Software Via iDS
14.1 Why the iRex Delivery Service (iDS)?
iRex: iRex stands for Interactive Reading experience.
Delivery: The iDS delivers your content with one touch of a
button.
Service: New content can be delivered automatically to your
iLiad.
Over the next months more functionalities will become available
through software releases. With one push on the button you can
connect to the iDS and download the latest software release on
your iLiad.
In order to benefit from these software releases you need to
create an account.
14.2 Creating an Account
To connect to the iRex Delivery Service (iDS) you first need to
create an account. This can be done easily by following the
steps:
•
Visit https://myirex.irexnet.com/user.php/createuser and fill in
your e-mail address in the box and press send.
78
Copyright © 2007 iRex Technologies. All rights reserved.
•
•
You will receive an automatic e-mail with the password in
your e-mail inbox.
Configure the iLiad Settings in your iLiad and insert your email address and the password you received.
Press the Device Manager Key (4.5) and select the iLiad
Settings in the Device Manager.
Picture may differ from current software version.
In the first entry field you can enter any name you want.
79
Copyright © 2007 iRex Technologies. All rights reserved.
In the second entry field you have to enter the email address that
you have used to create your account. This email address is your
username.
In the third field you have to enter the password that you have
received in your email inbox upon creating your account.
Note: This password can be changed (for more information on
this see chapter: 14.2.)
Once you have set up a network profile (See 11.2 Network
profile configuration) you will be ready to connect to iDS
14.3 Upgrading Software
Upgrading the software of your iLiad is as easy as clicking one
button. The device downloads and installs the newest release
automatically. This ensures your device will always run on the
latest software available.
Step 1: Click on the ‘Connect’ key for 2 seconds and select iDS.
•
When a new software version is downloading the following
messages will be displayed on the download screen.
‘Downloading new software upgrade’.
80
Copyright © 2007 iRex Technologies. All rights reserved.
Picture may differ from current software version.
•
When a new software version is downloaded the following
message will be displayed on the download screen for 5
seconds: ‘--- Download complete ---‘
81
Copyright © 2007 iRex Technologies. All rights reserved.
Picture may differ from current software version.
Note: Other content items may well be downloaded at the same
time.
82
Copyright © 2007 iRex Technologies. All rights reserved.
•
The device will shut itself down after the new software
download, which takes up to 15 seconds. The message will
be displayed, then the display will turn to white and then the
LED will fade. This process takes up to 15 seconds.
Picture may differ from current software version.
83
Copyright © 2007 iRex Technologies. All rights reserved.
Note: With any other download the device will return to display a
list of downloaded items.
Step 2: The iLiad will now restart itself and will start installing the
new software release automatically.
CAUTION: Please make sure the iLiad is NOT reset while the
new software is being installed. If the installation is interrupted
Copyright © 2007 iRex Technologies. All rights reserved.
84
at this stage it will program the iLiad with incomplete software,
rendering it unusable and you will not be able to reinstall it.
Your iLiad will then need to be repaired. After the new software
has been installed you will need to restart your iLiad.
Note: ‘Please push the power on switch to the left to start up
the device’ –message will stay displayed on the device even
though the iLiad is off. This is the benefit of Electronic Paper
Displays and contributes to the low power usage.
85
Copyright © 2007 iRex Technologies. All rights reserved.
When the device has started up again you can use your iLiad
and will be able to try out the new features. Starting up the iLiad
following an installation of a new software version, will take
longer than a normal start-up.
Note: Download and installation instructions may differ from
version to version. For detailed installation instructions per
version please check the release notes on our website:
http://www.irextechnologies.com/downloads/docs
86
Copyright © 2007 iRex Technologies. All rights reserved.
15 MyiRex
MyiRex will allow you to manage your content and user details.
To use the MyiRex services you need a user account, this free
account will also allow you to connect to the iDS to download
software upgrades and content for your iLiad
In the future additional functionalities will be made available on
myirex.
To visit myirex go to: https://MyiRex.iRexNet.com
To log on to MyiRex you need to enter your username (email
address) and password, these are the same as those configured
into your iLiad settings to connect to iDS (See Chapter 13.2 How
to create an account).
At the moment there are two functionalities available in myirex:
User details and Change password.
15.1 User details
Here you can enter or change your user details.
15.2 Change Password
This function allows you to change the password you have
received in your email inbox when you created your account.
Note: Do not forget to change the password in your iLiad settings
as well when you change it here (see chapter 13.2).
87
Copyright © 2007 iRex Technologies. All rights reserved.
15.3 Reset PIN Code
In case you have forgotten or lost your PIN code, you can reset
your PIN code here.
Step 1: select the MAC address of your iLiad and click on Reset
PIN code.
Step 2: Connect to iDS by pressing the connect button for 2
seconds. The iLiad will make a connection to the iDS server and
download a package that will reset your PIN code.
Step 3: After the download, you will return to the PIN Code
screen. Press on confirm to close the screen and continue to
work. You can set a new PIN Code via the Pin Code menu in the
iLiad settings, for more information on how to set a new PIN
code see Chapter 10.11.
88
Copyright © 2007 iRex Technologies. All rights reserved.
16 Electronic Paper Display technology
Basic principle
Brightly coloured, charged particles can be moved forward and
backward in a dyed solution by applying an external electrical
field. If particles are moved forward, the viewer "sees" the bright
particles. If particles are moved backward, the viewer "sees" only
the dye colour.
Advanced principle
oppositely charged bright and dark particles move through a
clear solution.
If bright particles are moved forward, the perceived image is
bright. If dark particles are moved forward, the perceived image
is dark.
89
Copyright © 2007 iRex Technologies. All rights reserved.
The benefits of electrophoretic technology come to the fore
with mobile and reading applications:
Mobile:
- Low power usage
- Light weight
- Rugged
- Thin
Reading:
- Close to paper readability
- Reading under all circumstances (outdoor)
- No screen flicker
Electrophoretic technology is not suitable for video applications.
90
Copyright © 2007 iRex Technologies. All rights reserved.