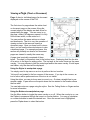
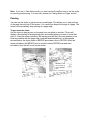
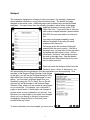
1
Aviation Information System FX8 OWNER’S MANUAL FXVIEW release 2.0 © Copyright 2010 SOLIDFX, LLC SOLIDFX LLC Foxboro, Massachusetts 02035 All rights reserved. Information in this document is subject to change without notice. SOLIDFX reserves the right to change or improve its products (hardware and software) and to make changes in the content without obligation to notify any person or organization of such changes or improvements. While every effort has been made to ensure that the information contained in this guide is accurate and complete, no liability can be accepted for any errors or omissions. Visit the SOLIDFX Web site (www.solidfx.com) for current updates and supplemental information concerning the use and operation of this and other SOLIDFX products. SOLIDFX is a registered trademark of SOLIDFX, LLC and may not be used without the express permission of SOLIDFX, LLC. Jeppesen is a trademark of Jeppesen Sanderson Inc. AC-U-KWIK is a registered trademark of Penton Business Media, Inc. Charts reproduced with permission of Jeppesen Sanderson, Inc. Charts reduced for illustrative purposes only. NOT FOR NAVIGATIONAL USE. ©Jeppesen Sanderson, Inc. 2010 2 Introduction Thank you for choosing the SOLIDFX FX8 as your aviation information system. With this unit and the included FXVIEW application, you can access and view your entire set of Jeppesen terminal charts and chart change notices (Chart NOTAMs) as well as other documents including AC-U-KWIK information. You can use the FX8 as your primary source for charts on FAR Part 91 flights or as a back-up to charts displayed by avionics integrated into your instrument panel. The FX8 may also be used in Part 135 and Part 121 flight operations. The unit meets RTCA/DO-160 rapid compression requirements to FL510 and has successfully passed RTCA/DO-160 conducted and radiated EMI (electromagnetic interference) tests. Please contact SOLIDFX for more information. There are two products in the FX8 series….the FX8 and the FX8-3G. Both versions run the FXVIEW software that enables you to easily find and view Jeppesen terminal charts and other documents/information. Both use the Digital Reader 800 electronic book reader platform from IRX Innovations BV. More specifically, the FX8 uses the DR800S and the FX8-3G uses the DR800SG. This manual uses the name FX8 to reference both products. It specifically calls out FX8-3G for the wireless connectivity features found only in the FX8-3G. You may use the FX8 not only as an aviation information system, but also as an electronic book, newspaper, and business document reader. This means that when you fly with the FX8, you can bring along your entire Jeppesen terminal chart subscription as well as your own personal library of books and documents---all in a unit weighing well under a pound. Take a moment now to compare the contents of this package with the packing list on the outside of the box. If any pieces are missing, contact SOLIDFX immediately. SOLIDFX will preload a worldwide subscription, so that the FX8 is ready to go when you receive it. If you have any questions, please contact SOLIDFX for assistance. 3 SOLIDFX FX8 System Components: FX8 FXVIEW software (pre-installed) Stylus 2GB Micro SD card (pre-installed in MicroSD card slot – a higher capacity SD card may be delivered as an optional upgrade) Micro USB cable Protective sleeve AC adapter Owner’s Manual (electronic file pre-loaded on FX8, also available for download at www.solidfx.com/support.htm) Reference Literature Jeppesen eChart Reader subscription services (purchased separately) 4 About This Manual This manual details the operation and use of the SOLIDFX FX8 and the FXVIEW terminal chart software as a portable aviation information system. To get the most out of your new system, read this manual and learn the operating procedures for your unit before utilizing it in the aircraft. If you have questions not covered in the manual, please contact SOLIDFX at [email protected]. If you wish to use the unit as an eReader, refer to the User Manual for iRex Digital Reader 800 series. That document contains detailed instructions on how to load and read electronic books and documents. You can find the User Manual for iRex Digital Reader 800 series stored on the FX8 under the Help folder. Though SOLIDFX does not provide direct support for using the FX8 as a book reader, we do want our customers to get as much out of the device as possible. If you would like step-by-step instructions for using the book reading capabilities, and recommendations on how to use the FX8 as a book reader, please contact SOLIDFX. This manual uses the name FX8 to describe functions available in both the FX8 and FX8-3G products. Functions available only in the FX8-3G product (i.e. 3G wireless connectivity) are specified by using the FX8-3G name. The FX8 Owner’s Manual has several sections to help you quickly learn about and use the FX8. The Introduction section contains the Table of Contents as well as safety warnings and other important information. The Getting Started with the FX8 section provides general information including an overview of hardware and system features and directions on how to start the unit. The FXVIEW Operation section provides you with information about using the FXVIEW software for accessing and viewing Jeppesen Terminal Charts and other documents. The FXVIEW Advanced Operation section provides details on performing more sophisticated searches and displaying views of chart update and airport information. The Appendix contains product specifications, optional accessories, maintenance information, and other helpful product information. Most operations can be performed by using either the stylus or the buttons. As you read this manual, you will often see a function followed by two bullets: the first bullet labeled ―Stylus Method‖ and a second bullet labeled ―Button Method‖. Each bullet describes a different way to perform the same function. Choose which input method you want to use. You only need to perform the steps described under one method to successfully complete the function. Manual Conventions This manual uses the term Warning to indicate a potentially hazardous situation which, if not avoided, could result in death or serious injury. 5 Table of Contents INTRODUCTION .................................................................................................. 3 ABOUT THIS MANUAL ....................................................................................................................... 5 SAFETY PRECAUTIONS ....................................................................................................................... 8 GETTING STARTED WITH THE FX8 ..................................................................... 11 UNIT OVERVIEW ............................................................................................................................ 11 CHARGING THE FX8........................................................................................................................ 12 CHECKING THE BATTERY STATUS ........................................................................................................ 13 TURNING THE FX8 ON AND OFF ........................................................................................................ 15 DATA STORAGE AND UPDATES ........................................................................................................... 17 MicroSD card information ..................................................................................................................................17 Connecting the FX8 to your PC: ..........................................................................................................................18 Updating your Jeppesen chart data ...................................................................................................................19 Updating the FXVIEW software ...........................................................................................................................22 USING THE FX8 ............................................................................................................................. 24 Learning about the Stylus...................................................................................................................................25 Stylus Calibration ...............................................................................................................................................26 Learning about the Buttons................................................................................................................................26 Lost Stylus Procedure .........................................................................................................................................26 The Display .........................................................................................................................................................27 Resetting the System ..........................................................................................................................................28 Using the e-Reader Capabilities .........................................................................................................................28 FXVIEW OPERATION ......................................................................................... 30 START FXVIEW .............................................................................................................................. 30 FIND AN AIRPORT OR DOCUMENT ..................................................................................................... 33 THE NOTEBOOK VIEW ..................................................................................................................... 34 VIEWING A PAGE (CHART OR DOCUMENT) .......................................................................................... 37 Zooming .............................................................................................................................................................38 Panning ..............................................................................................................................................................39 Icon Function Overview ......................................................................................................................................40 Taking Notes on Pages (Charts and Document Pages) ......................................................................................44 FXVIEW SETTINGS .......................................................................................................................... 46 ADVANCED OPERATION .................................................................................... 48 FAVORITE AIRPORTS ....................................................................................................................... 48 FXVU CHART CLIPBOARD ................................................................................................................. 49 BEYOND CHARTS ............................................................................................................................ 50 Chart NOTAMs ...................................................................................................................................................50 FXGUIDE .............................................................................................................................................................50 Jeppesen ....................................................................................................................................................................... 51 AC-U-KWIK® ................................................................................................................................................................ 51 Custom Pages .....................................................................................................................................................52 Notepad .............................................................................................................................................................53 6 FXVIEW FOR WINDOWS .................................................................................................................. 55 Overview ............................................................................................................................................................55 Using FXVIEW for Windows to set up the FX8 ....................................................................................................57 Import and Organize PDF Documents ................................................................................................................57 Printing ...............................................................................................................................................................58 Custom Airports .................................................................................................................................................59 APPENDIX ......................................................................................................... 60 TECHNICAL SUPPORT ...................................................................................................................... 60 TECHNICAL SPECIFICATION ............................................................................................................... 61 REPAIRS AND RETURNS.................................................................................................................... 62 OPTIONAL ACCESSORIES .................................................................................................................. 63 LICENSE AGREEMENT AND WARRANTY ............................................................................................... 63 PRODUCT REGISTRATION ................................................................................................................. 65 7 Safety Precautions Please read this manual carefully and make sure you understand it before using the FX8. Practice using the unit on the ground and become proficient in using it before attempting to operate it in flight. The product should only be used in the way described in this manual. The most recent software downloads and other information are available at our website: www.solidfx.com on the support page. IT IS HIGHLY RECOMMENDED THAT YOU DO NOT EVER REMOVE THE MICRO SD CARD FROM THE FX8. The MicroSD card contains critical data that must be present for the unit to operate properly. Removing the card increases the chance of data loss or corruption. AVOID APPLYING EXCESSIVE FORCE TO THE DISPLAY. The FX8 uses a glassbased display screen and is thus liable to break or become scratched if mistreated. The outer layer of the display is a hard PET layer and is scratch resistant, but if handled roughly, it can still be damaged. You should also avoid using any type of clip to hold the FX8 if the clip clamps down on the display as this pressure may cause damage to the display. DAMAGE AND DEFECTS THAT ARE NOT THE DIRECT RESULT OF SHIPPING OR MANUFACTURING WILL NOT BE COVERED BY THE WARRANTY. Any damage caused by fire, accident, misuse, or unauthorized alterations to the unit is not covered by the warranty. NEVER OPEN THE UNIT AS THIS WILL VOID ANY WARRANTY OR MANUFACTURER’S RESPONSIBILITY. If you have any technical difficulties, please contact SOLIDFX. DO NOT EXPOSE THE SYSTEM TO WATER, EXTREME HUMIDITY, OR LIQUIDS OF ANY KIND. Damage caused by moisture is not covered by the warranty. If the device does get wet, turn the device off, wait for it to dry, and then turn it on again. If the device does not work properly after drying, you may contact customer service to arrange for it to be repaired at your expense. Avoid exposure to dust and sand as much as possible. Excess dust and sand may damage the unit. Use a protective cover to keep dust and sand away from unit. DO NOT LEAVE THE DISPLAY EXPOSED TO DIRECT SUNLIGHT FOR EXTENDED PERIODS OF TIME. Use the protective cover to help shield the unit from the sun. AVOID USING THE FX8 IN TEMPERATURES BELOW 5°C/ 41°F OR ABOVE 45°C/113°F. The unit can be safely stored in environments with temperatures ranging from –10°C/14°F to 45°C/113°F. MAKE BACK-UPS. It is always a good idea to make a back-up of your personal information on a regular basis. Like any other portable device, it is possible that this unit may be lost or the information on the memory card accidentally erased. As stated 8 earlier, it is best to leave the original Micro SD card in the FX8 – your Jeppesen data will only work from the card it was originally loaded on. Warnings Failure to avoid the following potentially hazardous situations could result in an accident or collision resulting in death or serious injury: When using the unit, ensure that it does not obstruct the pilot’s view or situational awareness. It should not interfere with operating controls, such as the yoke, foot pedals, or other controls. Prior to flight, verify that the charts are properly installed and current. It is the pilot’s responsibility to ensure that the unit’s battery is fully charged. Do not become distracted by the unit while operating the aircraft, and always be fully aware of all flying conditions. Minimize the amount of time spent viewing the unit’s screen while operating the aircraft. Do not input airports, change settings, or access any functions requiring prolonged use of the unit’s controls while flying. Plan ahead and preload departure, destination, and alternate airports in FXVIEW using the tab functionality (See the Find an Airport section for more information.) during preflight preparations. Organize important charts using the FXvu functionality (See the FXvu Chart Clipboard section for more information.) The FX8 is designed to aid in viewing chart information provided by other sources. Please be advised that data error and computer malfunctions are possible. The pilot in command is the final authority on the accuracy and sufficiency of FX8 information on each flight. Do not use a single FX8 as the sole source of terminal chart information, and make sure your aircraft is equipped with approved IFR navigation equipment if flying under instrument flight rules. Exercise extreme vigilance when operating any potentially distracting devices in the aircraft. Battery Warning The FX8 uses a rechargeable lithium ion polymer battery as its power source. The battery is charged by connecting the FX8 to a power source using the included Micro USB cable. If the following guidelines are not observed, the internal lithium ion polymer battery may experience a shortened life span or may present a risk of fire, chemical burn, electrolyte leak, damage to the unit, and/or injury. Do not expose the unit to fire or other heat source. Do not puncture or incinerate the battery. Do not attempt to open or alter the battery. 9 Do not expose the unit to a high temperature location, such as in the sun in an unattended vehicle on a hot day. To prevent damage, remove the unit from the vehicle or store it out of direct sunlight. When storing the unit for any length of time, store within the following temperature range: 14º to 113ºF (-10º to 45ºC). Do not operate the unit outside of the following temperature range: 41° to 95°F (5° to 35°C). Dispose of the used battery and/or unit properly. Do not dispose of the battery with household waste. Contact your local waste disposal department for information on properly disposing of the unit/battery. Keep the unit out of reach of children to avoid damage to unit and/or child. This unit contains a user-replaceable, rechargeable lithium-ion polymer battery. Please contact SOLIDFX for more information on replacing the battery. 10 Getting Started with the FX8 Unit Overview The FX8 is a lightweight and portable aviation information system that enables pilots to easily access, view, transport, and maintain their Jeppesen electronic terminal chart subscriptions and other documents. The FX8 features a display that is readable in a wide variety of lighting conditions—including bright sunlight. With a subscription to Jeppesen’s eChart Reader Services, the FX8 provides pilots with ready access to terminal charts. Information is available with a few taps of the stylus. The FX8 weighs less than a pound and battery life is extra long—more than 24 hours under typical conditions. The unit only draws significant power when the screen is refreshed. When you are not flying, you can use the unit as an eReader. Bring along your favorite books to read in between flights or download the current newspaper. Getting to Know the FX8 Power Switch & Key Lock: Turn the unit on and off by sliding to the Lock the buttons on the FX8 by sliding to the right position. Unlock the keys by returning the power switch to the center position. When the key lock is on, use of the stylus is also disabled. During normal operation, the switch should be in the center position. left. USB Port: Used to charge the device and for updating Jeppesen data and loading documents. Flipbar: Moves the on-screen cursor up, down, and side-to-side. Opens items, pushes buttons, and confirms Menu choices. Changes charts when in Chart View. Menu (button): Contains tools for changing views, sorting, deleting files, or other actions. Menu options change depending on your location within the unit. Stylus: Chooses items on the screen. Zooms and pans chart views. Writes notes on notepad or chart. 11 Indicator LED Light: Indicates what your FX8 is currently doing as follows: LED Color & Activity Meaning Steady Red The battery is very low. You must charge it. Steady Orange Battery is receiving power. Fast Blinking Green FX8 is busy Steady Green FX8 is fully charged. You can unplug the unit, the charge is complete. No LED The FX8 is not charging. It may be turned on or off. Steady Blue (FX8-3G only) 3G connection is active. Micro SD Card: Stores all content including Jeppesen data, the FXVIEW program, your personal documents, and books, etc. SIM Card (FX8-3G only): Connects the device to the network. Not all networks require a SIM card. If your device does not come with a pre-installed SIM card, your network operator does not require one. To eject the card, gently push the card and release. You can now pull it free from the device. To insert a new card, place it in the slot and gently push it until it clicks into place. If you disconnected the battery cable during the process of exchanging cards, be sure to reconnect the cable and reset the time and date on your device. Charging the FX8 Before using the unit, you need to fully charge the battery. You can use the unit while it is charging. The first time you charge the FX8, it should be charged longer than necessary to help extend the overall lifetime of the battery. It will take about 7 hours to reach a full charge from a dead battery when the unit is turned off. It will take longer to charge if you use the unit while it is charging. If the unit is on, the Indicator LED will turn green when the unit is fully charged. Note: Take care to avoid breaking the micro USB connection hardware when you have the micro USB cable plugged in. Do not allow the unit to ―stand‖ on the micro USB 12 connection such that it bears any weight. This could cause internal damage to the FX8. If you break the micro USB connection port, the repair is not covered by the warranty. To charge the unit’s battery: Connect the FX8 to a power source using the included micro USB cable. You may use the power adapter and plug it into an electrical outlet. Or you may charge the unit by plugging the cable into your computer. Additional USB charger accessories are available at www.solidfx.com. If the unit is turned off, it will start up when you connect the micro USB cable to the FX8 and a power source. If you are using a computer to charge, be sure that the computer is turned on. Otherwise, no power will get to the FX8. When the FX8 is connected to a computer, it will behave like a USB storage device and the screen will be blocked. If you want to use the device while it is charging via a computer, you need to eject the unit (and leave it plugged in). Note: if you are using Microsoft Vista or Windows 7, you need to eject the device using ―My Computer‖. If you use the icon on the bottom taskbar, the device will eject, but the screen will still be blocked until you manually unplug the cable. If you use your computer to charge the FX8, make sure you use the eject function on your computer before disconnecting the cable. If the battery is dead or in a very low power state, the FX8 may not have enough power to turn itself on. In this case, you must connect the unit to a power source to restart it. After connecting the power, it may take several minutes (up to an hour) before the unit gets enough power to restart. If after an hour, the unit still does not start, reset it by holding the power switch to the left for 809 seconds and then release it. The unit should restart. While it is not advisable to let the battery drain so low, do not be alarmed if it takes some time for the unit to restart under such conditions. Checking the battery status When you first turn on the FX8, you will see the battery status indicator in the lower right hand corner of the screen. It will show you about how much power remains. If the FX8 is very low on power, you should charge the unit. When the FX8 is connected to a power source, the battery indicator will display a charging symbol so you know it is receiving power. When you are in the FXVIEW program, you can monitor the battery status via the battery icon in the lower right hand corner of the Notebook View or the left hand column of the Page View screen. To get more detail on the battery status, use the stylus to tap on the Battery icon. A pop-up window will appear and tell you if the battery is charging or discharging and how full it is. The pop-up is a static window. If you leave this window 13 open, it will not update the battery status automatically. You need to close and reopen the window to see the message change. Important: The battery icon is not updated automatically. The screen must refresh for the icon to update. If you are actively using the FX8, the battery icon will always show the actual battery status. However, if you do not use the FX8 for a while, the FX8 will go to sleep (even though the display is still on) and the battery icon will not update. Once you use the FX8 again (and the screen refreshes), the battery icon will show the current status. So if you haven’t used the FX8 for a while (more than 10 minutes), tap somewhere to wake up the unit and refresh the screen to ensure the battery icon is updated. The FX8 draws more power to refresh/change the screen than it does to keep an existing screen. Therefore, the battery doesn’t last as long if you are continuously changing the screen. Under typical use conditions, the battery can last 24 hours or more. Still, it’s always a good idea to have a back-up power source available. The internal battery of the FX8 is replaceable by the user. Please contact SOLIDFX for more information prior to trying to replace the battery. 14 Turning the FX8 on and off Start the unit: Slide the power switch to the left and release. The screen will turn on and the FX8 will start up. You will see the screen flash (go from white to black) and then it will display whatever was being viewed prior to shut off. The unit is ready to use. Start the FXVIEW application: Important note for FX8-3G users: You should verify that the Airplane mode is on (the airplane icon at the bottom of the Home screen indicates wireless is off) before using the FX8-3G unit in the cockpit. The FXVIEW application is located in the Personal Documents folder and looks like this: o Stylus Method: Tap the FXVIEW icon to start the application. o Button Method: Push the Flipbar right or left to select the icon. Then start the FXVIEW application by pressing the Flipbar down. The application will initialize and display information regarding the currency of the installed Jeppesen data. A scroll window will display a legal disclaimer as well as the SOLIDFX software license agreement. Verify the validity of the Jeppesen data, ensure that the FX8 system clock is correct, and review the FX8 license and usage terms. If everything looks OK: o Stylus Method: Tap the YES icon to accept the terms. o Button Method: Push the Flipbar right or left to select the YES icon and then press it to accept the terms. The application will complete loading and display the Notebook. If you do not accept the terms or wish to exit the program, select NO in the same manner as described above. If you select NO, you will not be able to access the FXVIEW software. If you do not agree to the terms, please review the Repairs and Returns section located in the Appendix to learn more about returning the unit. 15 Note: If you lose the stylus, you may put FXVIEW in ―No Stylus‖ Mode by checking the box on the FXVIEW startup page. See the Lost Stylus Procedure section for more information. Suspend/Hibernate the unit: You may put the unit into sleep mode when you are inside FXVIEW by sliding the switch to the left and releasing it when the unit is on. The unit will turn off the display and go to sleep. To resume where you left off, simply slide the switch to the left and immediately release it. The screen will immediately display the view where you last were. Putting the unit into hibernation mode will provide better battery life than leaving the unit on. However, it is not recommended to use this mode as a substitute for turning off the FX8. For best battery performance and proper data revision checking, you should shut down the FX8 using the procedure described in the Turning off the FX8 section below. If the unit is stored in this mode with a fully charged battery, the battery will drain itself completely in 2-3 weeks. If you will not be using the FX8 for an extended period of time, it is best to power off the unit as described in the next section. Powering off the FX8: From FXVIEW , use the Exit icon on the bottom of the Notebook View or in the left column of the Page View to properly shut down your FX8. Note: Powering off the FX8 from FXVIEW means that the FX8 will fully boot-up when you restart it. This may take up to a minute. Whereas, using the slide switch to hibernate the unit gives you instant on performance. Stylus Method: Tap the Exit icon. A pop-up menu will appear. You can exit FXVIEW only or exit FXVIEW and power down the system. Tap "Power off" to power down the system completely. Tap ―Exit‖ to close FXVIEW and continue using the unit as an eReader. Button Method: Push the Flipbar right or left to highlight the Exit icon. Then select it by pressing the Flipbar. A pop-up menu will appear. Use the Flipbar to highlight the next action that you wish to take. Then press the Flipbar to select it. Best practice: Use the Exit icon and power off the FX8 after each flight. Start the FX8 up during preflight preparations before the next flight, and then suspend/hibernate the unit as needed until that flight is complete. 16 If you are not running FXVIEW and wish to turn off the system: Slide the switch to the left and then release immediately. The unit will turn itself off. Note: If you are not in FXVIEW , the FX8 will automatically shut itself off if there is no activity for 30 minutes. The unit will not automatically shutdown when running the FXVIEW program. If you plan to store the FX8 and not use it for many weeks, it is a good idea to ensure you have powered the unit down via the "Power off " selection in the FXVIEW software. This will allow you to store the unit much longer without having the battery run out completely. Recommended Power Down Procedure Expected battery life from a full charge Turn on time Best for…. Hibernate using power slide switch 2-3 weeks 1-2 seconds Extending battery life on flying days Power off using Exit icon in FXVIEW 8-10 weeks 60 seconds + FXVIEW startup time = 90-120 seconds total Storage Data storage and updates When you connect the FX8 to your computer with the included micro USB cable, Windows recognizes the unit as a removable mass storage device. The FX8 then functions directly as the storage media for downloading the terminal chart data or other documents. MicroSD card information The FX8 uses the microSD card to store all content including Jeppesen data, the FXVIEW program, your personal documents, books, etc. The system comes with the microSD card preinstalled. The card is found behind the door on the back of the unit. SOLIDFX strongly recommends that you do not remove the microSD card and always leave it installed in your unit. This will reduce the chance of loss, damage, or data corruption. The FXVIEW program will not run and you will not be able to view Jeppesen terminal charts without this microSD card installed in the FX8. You should perform all the data updates by connecting the USB cable. You can also load other data and files onto your microSD card, such as electronic books, electronic newspapers, or pdf files by using the USB cable. 17 Important: Do not place your personal data in the SOLIDFX, Chart or Font directories on the FX8. If you change the SOLIDFX, Chart or Font directories in any way, even by copying them, you will violate the microSD card security and will not be able to view the Jeppesen data. If you do take out the microSD card, it is good practice to install or remove it only when the unit is off. Data cards are not waterproof, should not be exposed to moisture or excessive static charges, and should be stored in a dry environment. Warning: Do not erase or reformat your FX8 microSD card. Replacement MicroSD Cards If the microSD card becomes lost or damaged, or you would like more storage capacity, purchase replacement cards directly from SOLIDFX (www.solidfx.com). Check the SOLIDFX website’s Frequently Asked Questions (FAQ) section, or contact SOLIDFX ([email protected]) directly for more information. Connecting the FX8 to your PC: You need to connect your FX8 to a PC to update the Jeppesen database, update the FXVIEW software, or to transfer other documents on or off the FX8 with the micro USB cable. To make a USB connection to your PC, connect the micro USB cable to the FX8 and to your PC. The FX8 will lock and the screen will be blocked. The FX8 will now look like a storage drive to your PC and you can copy files from your PC to the FX8 or vice versa. When you are finished, always disconnect the FX8 by stopping the USB device on your PC first and wait for the FX8 to unlock (see next section below). It is important not to delete, move, or alter system files on the micro SD card. The following folders and files in the Documents folder must remain unchanged: the SOLIDFX, Charts, Fonts, and System directories and the charts.jsc file. Changes to these folders and/or files may inhibit normal operation. You should create new folders to store, organize, and manage your personal documents. 18 Safely disconnecting the FX8 from your PC Even though USB devices are available as soon as they are plugged in, you must follow the correct process when disconnecting them to avoid data corruption. You can prevent such problems by: 1. Clicking Safely Remove Hardware in the system tray (lower right corner). 2. A list of all the active USB devices appears. 3. Select the FX8 and click Stop. 4. When the USB data connection shuts off, Windows displays a message that it is safe to remove the device. 5. The FX8 screen will unlock and you will see the folder directory. It is now safe to disconnect the cable. Please note: If you are using Microsoft Vista or Windows 7, the FX8 screen may not automatically unlock. As long as you see the ―Safe to Remove Hardware‖ message on your PC, it is safe to disconnect the cable. Updating your Jeppesen chart data The FX8 comes pre-loaded with a Jeppesen eChart Reader database. This database, although current when shipped, may not be current when you receive your FX8. You should update your Jeppesen database to use the most current data on every update cycle published by Jeppesen. The FX8 requires that you purchase a Jeppesen eChart Reader service for your desired geographic area. The Jeppesen eChart Reader service includes your annual Jeppesen Terminal Chart subscription coverage, updated online every 14 days. The FX8 uses the Jeppesen Services Update Manager (JSUM) to perform a data updates. You may have other aviation systems (such as a GPS or MFD) that also use JSUM to download data. If so, you may already have JSUM on your computer. JSUM release 2.1.4 or later supports the eChart Reader service. Please verify that you are using a current release of JSUM. Once Jeppesen gives you access to your eChart Reader Subscription, it will automatically appear in JSUM when you log in. If you do not already have JSUM, you will need to download the program and then install it on your computer. You can download the executable at 19 www.jeppesen.com/jsum/download. If you have further questions about JSUM or downloading data, there is additional support at the above Jeppesen website. Feel free to contact SOLIDFX or Jeppesen for additional help. Jeppesen will provide you your login information when they set up your account. Download the Jeppesen data directly onto the FX8 using JSUM. JSUM will usually find the FX8 automatically if it is connected to your PC. The chart data will be copied directly onto the microSD card that is in the FX8. It is highly recommended that you do not ever remove the microSD card from the FX8 so it is not lost or damaged. Note: If you have previously made airports active on the FXVIEW tabs or selected them as Favorites, you should verify that these airports are all still available after you complete the Jeppesen data update. If your subscription coverage has changed, the airports may no longer be available. JSUM Instructions 1. If you plan to program the FX8 as part of the data update: Close FXVIEW . 2. Connect the FX8 to your PC using the micro USB cable that came with the unit. 3. If any pop-up dialog box appears on your PC regarding the FX8, note the Drive id and select Cancel to close the dialog box. To update your data in JSUM: 1. On your PC, connect to the Internet and log in to JSUM. 2. Select your SOLIDFX eChart Reader service from the JSUM service list and click Start. JSUM opens a dialog with two options and a Browse button: a. Download and Program Now downloads the data and updates your card in one step. To proceed with this option, click Browse and navigate to your FX8 removable drive. This may be the letter you noted above from the Windows dialog, or the drive may be automatically selected in the Browse dialog. b. Select Download and Save To Hard Drive Only if you wish only to save the new data to the local workstation and not update the data in the FX8 unit. If you update multiple FX8 or FX10 units, all of the units must be programmed from the same computer used to download the service. 3. Click Continue in JSUM and proceed with the following steps that pertains to your selection: Download and Program Now Warning: Do not disconnect the FX8 until the programming cycle is complete! Otherwise your data may be incomplete or corrupt. The media programming cycle automatically performs a sequence of actions to download the information 20 and write it to the unit. JSUM downloads the data from the server (if the information was not previously downloaded to your hard drive), erases the old data, writes to the media and verifies the information. As the programming steps are successfully completed, the status bars in the Download and Program Progress columns display the progress of each operation as a percentage (Erasing, Programming, Verifying). If an error occurs, a status message appears notifying you of the error, and the programming operation stops. For a list of programming errors, see Programming Error Messages in the JSUM Help section. When the programming cycle is complete, JSUM verifies that the data successfully programmed to the unit and displays 100 percent in the Program Progress column. Programming is complete when the Program Progress column reaches 100%, and a dialog appears with the message that your "service has been programmed successfully". You can also manually verify that the data successfully transferred by right-clicking the service and selecting Verify. Be sure to safely disconnect the FX8 from your PC to avoid data corruption. Note: It is not uncommon for the last 5-10% of the Download Progress to be much slower than the beginning portion of the Download Progress. This portion has to do with the computer's capabilities, thus this time may vary from computer to computer. Important: Before flying, verify that the terminal chart data cycle in your FX8 system is current in the start-up splash screen or About FXVIEW dialog box. Download and Save To Hard Drive In this case, the selected data downloads to your local workstation hard drive. The status bar in the Download Progress column displays the download progress as a percentage. When it reaches 100 percent, the download is complete. Once the data has successfully downloaded to the workstation, you can disconnect from the Internet, and close JSUM until you want to update the data in your FX8 unit. 21 Warning: Do not manually move the JSUM cache folder or the data files out of the cache folder. Doing so will corrupt the data. To program the data to the FX8, follow the steps outlined in the Download and Program Now section, starting with the first step. After the data has been copied to the unit, the data files in the hard drive cache folder automatically delete. Clicking Cancel When you click Cancel during the download phase while JSUM is retrieving data from the Jeppesen server, a Resume Download Message dialog box appears. One of the following actions is required: Click Do not reschedule if you do not want JSUM to automatically download the data at a later date. Click Reschedule for later if you want JSUM to automatically download the data after a delay. Fill in the number of minutes you want JSUM to wait before it restarts the download. Error Messages If you see a "Wait" dialog while updating or loading data, be sure to allow FXVIEW to complete the process. If you see this error when starting up FXVIEW : "The Jeppesen data being accessed does not appear to have been placed directly on the device using the Jeppesen Update Manager (JSUM). Please update the data using JSUM or contact SOLIDFX support ([email protected]) if problems persist." 1. Close FXVIEW 2. Reprogram the data with JSUM following the programming steps in the Download and Program Now section. FXVIEW rebuilds the database when you restart the program. If the airport tabs and favorite selections disappear, FXVIEW software has detected an error and rebuilt the data. After FXVIEW completes its initialization, re-enter your airport tabs and favorite selections. If the FXVIEW program does not open, contact SOLIDFX technical support (email [email protected]). Updating the FXVIEW software Your FX8 was shipped with the most current version of the FXVIEW software. From time to time, additional features will be added and issues will be fixed. If you register your FX8 with us, we will notify you of any updates and provide a web address / URL from which to download a file. Updates can be downloaded from the SOLIDFX website at www.solidfx.com/support.htm. When updates are available, SOLIDFX will provide an installer program that you can run on a PC with your FX8 connected. Instructions will be available with each update outlining the simple procedure. 22 Note: If you purchase your FX8 directly from SOLIDFX, you will automatically be registered. The email address you provided during checkout will be the one we use to contact you about updates or other SOLIDFX news. Please contact us if you would like us to use another email address or if you want to add additional email addresses to the database. 23 Using the FX8 This section explains how to enter and display information on the FX8. The unit’s user interface is designed to allow quick, convenient selection of options and data entry. Most functions can be performed using either the buttons or the stylus. You can switch between using the buttons and using the stylus at any time. For best results, we recommend that you use the stylus as your primary method of interacting with the FX8. Some functions can be performed only by using the stylus in the FXVIEW application. Specifically, you must use the stylus to perform advanced zoom and pan operations. In addition, typing text using the keyboard is much easier using the stylus. However, text may be entered with the buttons in a situation where the stylus is not available. If only using the buttons, you cannot write information on the notepad or charts. You must use the stylus to write on the notepad or to write notes on the charts. If, prior to flight, you preload the airports that you will use in the Notebook or FXvu clipboard, you can easily get by with only using buttons during flight. This will enable you to continue to use the FX8 if the stylus is misplaced during flight. However, since you cannot do everything with the buttons, it is highly recommended that you secure the stylus in some way. With a tethered stylus, you will always have it at hand. To use the full capability of the FX8, you should become familiar with the stylus interface as well as the buttons. The FX8 is a very simple device to use. The following terms are used frequently in this manual to describe how to maneuver around the FX8. Icon: An icon is an icon, button, word, or row of text that can be selected. Highlight: An icon is highlighted when a black rectangle surrounds the element. You can change the highlighted area by using the Flipbar to move around the screen. Select: Once you have highlighted the desired icon, pressing the Flipbar down will select the icon. This means that the unit will open the selected chart/file/folder, choose the selected menu function, or click a button. A single tap of the stylus on an icon will highlight and select that icon in one motion. It is only necessary to use a single tap when using the stylus. A double tap may be interpreted by FXVIEW as two separate actions and caused unintended actions. Note: If you are displaying a page which you do not want to change for a long period of time, you can lock the buttons/stylus out so that you don’t accidentally cause an unintended action. To lock the buttons/stylus, slide the power switch to the right position. This locks the buttons/stylus out. To re-enable the buttons/stylus, slide the 24 power switch back to the center position. (Be careful not to slide the power switch to the left position as this will hibernate the unit. However, if this happens, simply slide the switch to the left again, to bring the unit out of hibernation.) The FX8 may be used for flight operations under Part 91 as defined by the FAA. If you wish to use the FX8 for Part 135 or Part 121 flight operations, please contact SOLIDFX and your local FSDO. The pilot in command is the final authority for determining the usability and sufficiency of the FX8 and its information. Data error and computer malfunctions are possible. Do not use a single FX8 as the sole source of terminal chart information, and make sure your aircraft is equipped with approved IFR navigation equipment if flying under instrument flight rules. Exercise extreme vigilance when operating any potentially distracting devices in the aircraft. Contact the FAA if you would like more information regarding using portable electronic devices in the cockpit when flying under Part 91, Part 135, or Part 121. Learning about the Stylus Included with the FX8 is a pen-like stylus that may be used to select icons. You can also use the stylus to ―draw‖ on the screen. The stylus is a very powerful part of the FX8 interface. We recommend that you become comfortable with using the stylus in the cockpit. The stylus is a special device that is able to communicate with the FX8. The FX8 can communicate only with an approved stylus. It cannot detect other types of pointing devices such as a pencil, a pen, or your finger. When not in use, you should find a way to secure the stylus so that you don’t misplace it. Additional stylus accessories are available at the SOLIDFX website. The screen has a protective top layer and is scratch resistant, but if handled roughly, the screen can still be damaged. Do not press the stylus down hard on the screen or you will risk damaging the display. The system responds well to a light, but firm, tap by the stylus. Hold the stylus as you would a pencil. For best results, the angle formed by the stylus and the display surface should be between 45 and 90 degrees. Holding the stylus at an angle smaller than 45 degrees may cause tracking errors while writing. Note: If the tip of your stylus does not match with the position on the screen, you can improve the precision by using the Stylus Calibration function. For more details on how to calibrate the stylus, see Stylus Calibration section in this manual. You may find that, over time, it becomes necessary to repeat the simple calibration process. Highlighting and selecting icons with the stylus The stylus is an easy way to move about the FX8. A single tap on the screen with the point of the stylus will highlight and select the corresponding icon. Double taps are not used. A single tap is the best way to select an icon. 25 Stylus Calibration If you find that lines you draw do not track well with your stylus, you may need to recalibrate the stylus. Go to the HOME screen (outside of the FXVIEW Application) and open the Settings folder. Inside this folder you will see a file named Stylus Calibration. Open this file and follow the on-screen instructions to set your stylus. Learning about the Buttons The FX8 has only two buttons: 1) Flipbar and 2) Menu. Flipbar: The Flipbar can move in three directions. You can press it right or left to move the highlight around the screen or flip to the next chart in sequence. Press down on the Flipbar to select an icon. Menu: Pressing the Menu button while in FXVIEW highlights an icon. A black outline will appear around the currently highlighted icon. If you are not in FXVIEW , the Menu button opens a pop-up menu containing tools for managing the files on the system. You can perform most actions in FXVIEW with the buttons. However, it may not be as easy as with the stylus. You cannot take notes on any charts or notepad without the stylus. However, you can still view (and hide) notes previously taken. Some pilots use the stylus only. Others prefer to utilize both the stylus and buttons in their flying. If you decide to use the buttons only, please be aware that you should start FXVIEW in ―No Stylus‖ mode to enable optimal button-only operation. Please see the Lost Stylus Procedure for more information on button-only operation. Lost Stylus Procedure If you lose your stylus while operating the FX8, you can still use the system. If you are already in FXVIEW , you need to exit FXVIEW and re-enter the program in ―No Stylus‖ mode. 1. Reset the FX8 by gently sliding the power switch to the left, hold for 9 seconds before releasing the switch back to the middle position for normal operation. Once you have released the slide switch, confirm the switch is in the middle position so that the buttons are unlocked. 2. Start FXVIEW: Use the Flipbar to select the Personal Documents folder and then start FXVIEW . 26 3. Check the lost stylus box on the startup splash screen. The first screen after startup asks you to accept the terms of the program (unless you have just done a data update, in which case you must complete the data import. You can use the Flipbar to select the OK icon to begin the import. Once the import is done, you will be brought to the splash screen). In the lower left corner is a small checkbox labeled ―No Stylus‖. Use the Flipbar to place a checkmark in the box. The checkmark will tell the system to operate in a mode tuned for buttons-only operation. Once the checkmark is in the box, use the Flipbar to highlight and select Yes on the bottom right of the startup screen. You will enter the FXVIEW program in ―No-Stylus‖ mode. Once you start the FXVIEW program in ―No Stylus‖ mode, the operation of the FX8 will be slightly different than usual. For instance, you will not be able to add charts to or remove charts from the FXvu clipboard. Other features that are disabled include writing on charts and zooming/panning with the stylus. These subtle differences are outlined throughout the manual. It is important to note that if you enter FXVIEW in ―No Stylus‖ mode and then find your stylus, you will need to exit the program and restart FXVIEW in order to re-enable these features and resume normal operation of the FX8. You can use the Flipbar to select the chart you want to view. If you want to go to another tab in the Notebook, double click the Menu button. You can navigate from tab to tab with each double click of the Menu button. Then use the Flipbar to highlight and select the desired icon on the screen. Note: If the stylus is found, it is best to exit FXVIEW and re-enter the program. Continuing in "No Stylus" mode when using the stylus will cause some actions not to work as expected. The Display The FX8’s display is an electrophoretic display---a display technology often referred to as electronic paper. The screen exhibits many of the same qualities as paper. Most notably is its easy viewing in many lighting conditions. The more light that hits the screen, the easier it is to read. Viewing the FX8 display in bright sunlight is not a problem. An electronic paper screen is not backlit like an LCD screen. This makes it easier on the eyes to read for long periods. It also means that in poor lighting conditions you may need a flashlight or other source of light to read the screen. The electronic paper display needs light, just like paper charts need light, to be read in the dark. Another feature of an electronic paper display is its extremely low power consumption. This display technology is the key to the long battery life of the FX8. The screen draws power mainly when the screen changes. If the screen is not changing, the power load is very low. One side effect of the technology is that the screen takes a bit of time to refresh. The technology is not (yet) capable of a video rate refresh due to the mobility of the materials. It is normal for the screen to flash when the screen is being completely 27 refreshed. At times the screen is only partially refreshed and you may see some ghosting of the previous image. The ghosting should disappear upon the next full refresh. Please be patient and remember the important benefit of long battery life. The FX8 will buffer your inputs on the keyboard, so you don’t have to wait for a screen refresh to perform your next action. Go ahead and spell the desired name as fast as you like. The FX8 will catch up with you on its next screen refresh. Please refer to the technical specifications in the Appendix of this manual for more display details. Resetting the System If your FX8 does not turn on or has frozen, reset it by sliding the power switch to the left and holding it for nine seconds. The system will restart and display the Home screen. Go to Personal Documents to find the FXVIEW program. Using the e-Reader Capabilities In addition to using the FX8 as an aviation information manager, you may use it as an electronic book reader. The FX8 is a fully functioning DR800 series by IRX Innovations BV. There are over 1,000,000 downloadable books and 1000 worldwide newspaper subscriptions that you can choose from and store on your unit. For more details on how to use this unit as an ebook reader, please reference the User Manual for iRex Digital Reader 800 series. This document can be found on your unit in the Help folder on the Home screen. If you have additional questions about using the FX8 as an eReader, please call SOLIDFX support. The FX8-3G unit can download books and other content wirelessly via the Verizon 3G network in the US. The 3G capability is not used for Jeppesen data downloads. The FX8-3G unit has an airplane mode that turns the wireless off. You can turn the Airplane mode ON or OFF in the FX8 Settings section. First, select the Settings icon on the FX8 Home Screen. Once in the Settings section, you can select the Airplane Mode icon and confirm the Airplane Mode is ON or OFF as appropriate. You will need to turn off the Airplane mode (i.e. enable wireless) to use the 3G capability. Turn on the Airplane mode to disable wireless. Important for FX8-3G users: You should verify that the Airplane mode is on (airplane icon at the bottom of the Home screen) before using the FX8-3G unit in the cockpit. 28 For more information on how to use 3G for ebook downloads, consult the User Manual for the iRex Digital Reader 800SG found in the Help folder on the unit. Though SOLIDFX does not provide direct support for using the FX8 as a book reader we do want our customers to get as much out of the device as possible. If you would like step-by-step instructions for using the book reading capabilities and recommendations on how to use the FX8 as a book reader, please contact SOLIDFX support . 29 FXVIEW Operation Now that you have a basic understanding of how to operate the FX8 system, let’s take a closer look at how to use the unit to view Jeppesen Terminal Charts. Viewing Jeppesen charts is the most basic function of the FX8. To learn about viewing other types of documents or information, please refer to the Advanced Operation section. Unless otherwise specified, you may use either the stylus or the buttons to highlight and select any icon on the screen. Two of the most useful features of the stylus are its zoom and pan capabilities. The buttons cannot access the advanced panning or zooming functions like the stylus. You may find using the stylus to be a more intuitive interface. You should learn how to use both the buttons and stylus for optimal operation. If you need help selecting and highlighting elements, please review the earlier Learning about the Buttons and Learning about the Stylus sections of this manual. Start FXVIEW Stylus Method: Tap on the FXVIEW icon in the Personal Documents folder to start the application. Button Method: Use the Flipbar to select the icon in the Personal Documents folder. Then start the FXVIEW application by pressing the Flipbar. The application will initialize and, after several seconds, display information regarding the currency of the installed Jeppesen data. A scroll window will display a legal disclaimer as well as the SOLIDFX software license agreement. Verify the validity of the Jeppesen data, ensure that the FX8 system clock is correct, and review the FX8 license and usage terms. Important Notes about Dates and Data Currency: You must ensure that the correct date/time is set on the FX8 and the Jeppesen data is current. It cannot be overemphasized how important it is to keep the date and time on the FX8 set to the current ZULU values and to keep the chart database current. Charts and chart change notices (Chart NOTAMs) are often replaced, added, modified, or eliminated in the middle of a chart cycle. In such cases, there will be two different charts for the same procedure in the database. If you do not keep the Jeppesen data current and additionally ensure the FX8 has the correct date and time set, you will be potentially using an incorrect chart. Always check chart change notices online at www.jeppesen.com before flying and verify all chart effective dates. 30 If everything looks OK: Stylus Method: Tap the YES button to accept the terms. Button Method: Use the Flipbar to select the YES icon and then press the Flipbar down to accept the terms. If you do not accept the terms or wish to exit the program, select NO in the same manner as described above. If you select NO, you will not be allowed access to the FXVIEW software. If you do not agree to the terms, please review the Repairs and Return section located in the Appendix to learn more about returning the unit. If you lose the stylus, you will need to check the No Stylus box on the startup screen to put the unit into ―No Stylus mode‖. See Lost Stylus Procedure section for more details. The application will complete loading and display the Notebook View. Notebook Overview FXVIEW is organized like a notebook. It has tabs across the top that can be loaded to display the ICAO names of airports or the identifiers for user-imported documents. A tab loaded with an airport ICAO will contain a list of the terminal charts and chart notams for that airport organized by category. The tab may also contain a category called FXGUIDE where Jeppesen-provided airport information and ACU-KWIK data (available through an optional subscription) can be found. If desired, you may also attach custom documents to the airport tab. These will appear in the Custom Pages category following FXGUIDE. If there are no charts or documents for a particular category, that category will not be listed. A tab can also be loaded with a document, so you can find and read other aviationrelated information quickly within FXVIEW . If a tab holds a document, the document identifier will appear on the tab and the tab will contain the table of contents from the document. You can then select a line from the table of contents to open the document to that location. If the document does not have a table of contents, then a list of page numbers will appear. This enables you to jump to a particular page if desired. If the document has only one page, the single page document will automatically open when the tab becomes active. There is also a special tab called FXvu for creating a chart clipboard. This tab is the right most tab in the notebook. The FXvu function is described in detail in the Advanced Operation section of this manual. 31 The first time you open the FXVIEW application all the tab labels will be blank except for the FXvu tab. One tab is always displayed with a white background; that is the active tab. The nonactive tabs are displayed with grey backgrounds. Only one tab may be active at a time. You select which tab is active by tapping it with the stylus or double clicking the menu button to sequence through the tabs. 32 Find an Airport or Document When all the tabs are blank (not including the FXvu tab), the first thing you need to do is choose an empty tab and find an airport or document to populate it with. The first step is to determine the tab where you want the airport or document to be located and select it to be the active tab (i.e. tab is white). Then select the FIND button in the upper right portion of the active tab. FXVIEW will then display the Search screen. At the top of the screen is a box which will fill in as you use the keyboard to enter the name, identifier, or location of an airport, or the title of a document. Below the text box is the Search Results area which is divided into three categories: FAVORITES, AIRPORTS, and DOCUMENTS. You can find an airport by searching on the ICAO identifier, name or location of the desired airport. You can find a document by searching on the document identifier or title. To perform a search, use the keyboard to add a letter or number into the text box at the top of the screen. To select a character, simply tap it with the stylus. Alternately, you may use the Flipbar to highlight and select a letter. You do not have to wait for the screen to refresh before entering the next character. Enter the text as fast as you please. FXVIEW will catch up with you. If you make an error when entering the text, you can use the BACK key in the bottom right corner to go back one space. If you decide it would be easier to start over, you can use the CLEAR key in the bottom left corner to clear all of the text you have entered. To help you with your search, there is also a wildcard character located to the left of the BACK key. If you know the beginning of the name of the airport and the end, but you are not sure of the middle spelling you could use the wildcard key to help with your search. For example if you were searching for Wichita, Kansas, but you were not sure of the spelling you could enter W*ita. In this case FXVIEW would match any airport (and document) which had a "w" in the name (or location) and then "ita" later in the name, location, or title (if for a document). As you enter characters into the keyboard, the FX8 will display a list of all the matches for the text you have entered so far. It will find all the matches in every category— 33 FAVORITES, AIRPORTS, & DOCUMENTS---at the same time. Next to the title of each search category, you will see the number of matches for the text you have entered. The first category with a match will be expanded. Once you see the item that you are looking for, simply use the stylus to select the name of the item. The airport or document will then be loaded on to the tab. It will replace any item that was previously on that tab. If you have marked an airport as a favorite, that airport will appear in the FAVORITE category at the top of the list. In this case, there is no need to use the keyboard. Simply tap on the airport name and it will be loaded into the tab. To learn how to mark an airport as a favorite, see the section Airport Favorites. FXVIEW will take you to the Notebook with the requested airport now active in the selected tab. For the next steps, please proceed to the Notebook section below. It is important to note that only documents which you import into FXVIEW with the FXVIEW for Windows program will be shown in the DOCUMENTS category. For instructions on importing documents please see the section: FXVIEW for Windows Program. The Notebook View Once you have found the desired airport or document and made it active (its ICAO identifier or Document Identifier appears on a tab in the Notebook View), you can view that airport’s terminal charts or the contents of the document. If an airport fills the tab, the airport name and location of the active airport will appear under the tabs area at the top of the screen. If you have selected a document to fill the tab, then the title of the document (which was created during document import), will appear under the tabs at the top of the screen. To the right of the name/title are two buttons—CLEAR TAB and FIND. Selecting the CLEAR TAB button will remove whatever is currently loaded into the tab and leave an empty tab. Selecting the FIND button will take you to the Search screen (described in the Find section of the manual.) Once an airport or document is entered onto a tab, it is automatically saved and will always remain on that tab---even if you turn off the FX8 and turn it back on later. There are four ways to remove an airport or document from a tab: 1) You can erase the tab by selecting the CLEAR TAB button in the upper right corner of the Notebook view, 2) An airport on a tab will be automatically cleared if your Jeppesen subscription coverage changes and no longer includes that particular airport, 3) A document in a tab will be automatically cleared if the document is deleted using FXVIEW for Windows or 4) you can clear the all of the tabs from the FXVIEW Settings menu. You will also notice that there is a heart symbol and a small checkbox to the left of the airport name and location (for documents, the checkbox and heart symbol are omitted). This is where you can mark an airport as a favorite. Please refer to the Favorites section of this manual for more information on this function. 34 If you have filled the tab with an airport, then below the header you will find the charts for the active airport. The charts are organized into the following categories: AIRSPACE ARRIVAL PROCEDURES DEPARTURE PROCEDURES NOISE ABATEMENT AIRPORT PAGES APPROACH CHARTS TEXT Following the charts are two categories containing additional information: CHART NOTAMS FXGUIDE (for more info, see the FXGUIDE section) CUSTOM PAGES Not all airports have charts or information in every category. If there are no charts available in a category, the category will not be listed for that airport. For example, many airports do not have published Noise Abatement Procedures. If the active airport does not have Noise Abatement Procedures, the category NOISE ABATEMENT will not appear in the list. The categories and the charts within the categories are listed in the Jeppesen-defined order. Therefore, for a given airport, the charts will appear in the same order from top to bottom as they would in a Jeppesen binder. Each category name is preceded by an expander symbol. An expander is a triangle that looks like this when the category is not expanded (collapsed), and like this when the category is expanded. A list of the charts for that category (including chart index number and name) will appear under the category name when the category is expanded. In the picture to the right, the APPROACH CHARTS list is expanded. The ARRIVAL PROCEDURES list (and all other categories) is not. A small box appears before the chart index number of each chart. This checkbox is used to place the chart on the chart clipboard. Please see the FXvu Chart Clipboard section of the manual for more information on using this feature. You can tap on the expander symbol or the category header name to expand or collapse each category. Alternately, you can use the Flipbar to highlight and select the category expansion or collapse. Only one category can be expanded at a time – when you open one category expander, the previous one is automatically closed. This helps minimize the scrolling required to browse charts. 35 If there are a large number of charts in a particular category, a scroll bar will automatically appear to the right of the chart names to enable you to access all the charts in the category. Tap on the top or bottom of the scroll bar to page through the charts. When you find the chart you want, tap on the chart name with the stylus or highlight and select the chart name using the Flipbar. The entire chart will then be displayed. Chart Change Mid-Cycle Occasionally a chart will be added, removed, deleted, or changed in the middle of a data cycle. In this case, the chart title in the Notebook will have a note below it indicating that the chart has changed since the last data update, the chart is going to be changed mid-cycle, the chart has been added mid-cycle, or the chart will be deleted mid-cycle. These notes are to call pilot's attention to changes which may be critical in using the Jeppesen charts. In this example the 10-3F TURBO 6 DEP and the 10-3OB1 TAKEOFF OBSTACLE NOTES at the Hong St. Louis Downtown Airport were added and revised, respectively, as part of the most recent chart cycle revision or at some point during the current chart cycle. The note is designed to tell you that the new chart was added or a current chart was updated and became effective immediately or on a specific date (such as Sept. 23, 2010 in the example to the right). This should serve as a reminder to be vigilant in looking for any changes which may impact your operations. 36 Viewing a Page (Chart or Document) Page: A chart or individual page of a document displayed on the screen of the FX8. The first view of a page shows the entire chart or document page on the screen. Along the unused edges of the display are dark icons for manipulating the page. You can zoom in on the page, rotate it 90 degrees, expand it to fully fit the screen width, or take notes on it. You can perform the same actions on charts and documents. That is to say, the operation of viewing a chart is the same as viewing a document page. Once you learn how to view a chart, you can use the same techniques to view a document page. For example purposes, this section will primarily use charts, but document pages are viewed in exactly the same way. A page view is actually comprised of three layers. The chart (or document view) is the bottom layer. Overlaying that, like the skin of an onion, is the layer for writing notes. The top layer is the icons; known as the menu overlay. You may choose to hide the notes layer and/or the menu overlay. If both layers are hidden, only the chart will be displayed. Using the Stylus to manipulate a page You simply need to tap once on an icon to perform the icon’s action. ―Hot spots‖ are located in the four corners of the screen. If you tap in the corners, an icon’s action will be performed even if the icon is not visible. Using the stylus, you can circle an area to zoom in on. Or draw a straight line to pan around a page. A pan will move the point where the line started to the location where the line ends. You can take notes on a page using the stylus. See the Taking Notes on Pages section for more information. Using the Buttons to manipulate a page Use the Menu button to toggle the menu overlay on or off. When the overlay is on, use the Flipbar to sequence through the icons in a circular fashion. You may go clockwise or counterclockwise to reach the desired icon. Once the correct icon is highlighted, press the Flipbar down to select that action. 37 Please note: When operating the FX8 in ―no stylus‖ mode, the note-taking mode is disabled. You can still view (or hide) notes previously taken on a page, but you will need to restart FXVIEW normally (and have a stylus) to add more. Zooming There are situations when you will want to further zoom in on a specific area of a page. In these cases, you must use the stylus. To zoom in on a page area, simply circle the area of the page that you want to enlarge. The stylus will draw the circle on the page. FXVIEW will then zoom in and fill the screen with the page region enclosed by your circle’s contents. You can zoom with the stylus at any time in a page view--even directly from the full screen view. The circle zoom will work whether you are in Portrait or Landscape mode. If needed, you can zoom in further on a zoomed area by circling another area to zoom into. When the maximum zoom limit is reached, a dialog box will inform you that no more magnification is supported. If you want to back up to the previous view size of the page, just tap the stylus anywhere on the screen (except on an icon or, if the menu overlay is hidden, on one of the hot spots. Multiple taps will back you out of the page view altogether, one zoom level at a time. Or you can use the Fit icon to immediately see the complete page. See the Icons section below for more information. Hint: Zooming in does not require drawing a full circle around the page region of interest. It is often more accurate to bracket the area of interest using an ―L‖ shape that defines the extents of the region. An algorithm is used by FXVIEW to ascertain if you intend to request a pan operation or the extent of a zoom operation so the gesture made with the pen is not restricted to a closed circle for zooming and precisely straight lines for panning. 38 Note: If you are in Take Notes mode, you must tap the Zoom/Pan icon to use the stylus for zooming and panning. For more info, please see Taking Notes on Pages section. Panning You can use the stylus to pan around a zoomed page. This allows you to view portions of the page that are just off the screen. You cannot pan beyond the edge of a page. The screen will automatically stop panning at a page edge. To pan around a chart: Use the stylus to drag a point on the page from one place to another. FXVIEW will display a line starting at the beginning point and ending where you want to move that point to. After the screen refreshes, the starting point will be in the new position (or as close as possible with the page edge constraint described above). In the example pictured below, the stylus starts on MERCE and draws a line to DECOR. When the screen refreshes, the MERCE point is moved to where DECOR was and more information from the left is now on the screen. MERCE Fix has now moved to where DECOR was. 39 Icon Function Overview Hide Menu - Select to hide the menu. Selecting this corner with the menu hidden will display the menu. Close - Select to exit the page view and return to the Notebook. Selecting this corner with the menu hidden will still close the page. Notepad - Select to go to the Notepad. Rotate - Select to rotate the screen 90 degrees. Hint: This is good for 2-page charts. Battery - Select to open the Battery Status Box. At 10% power remaining a low battery warning will appear on the battery icon. Exit - Select to either Exit FXVIEW but keep the FX8 running and return to the Home Screen, or Power Off the FX8 completely. Previous - Select to go to the previous page in the order listed in the Notebook, or if you are viewing a document, the previous page in the document. If there is no page prior to the page currently displayed, this icon will not exist. Next - Select to go to the next page in order listed in the Notebook or if you are viewing a document, the next page in the document. If there is no chart/page after the chart/page currently displayed, this icon will not exist. Fill/Pan - Select to fill the FX8 screen with the page. After Fill/pan is selected (or any Zoom has been done) the Fit icon will appear above the Fill/Pan-Top/Bottom icon. If selected this will fit the page to the screen. After Fill/Pan is selected, the icon will change to Top/Bottom or Left/Right so that you can toggle to view the portion of the page not shown once the fill operation has occurred. 40 Take Notes - Select to leave zoom/pan mode and enter note-taking mode on the page. In this mode, stylus input will be interpreted as a note rather than as a zoom or pan. After Take Notes is selected, the Take Notes icon is replaced by the Zoom/Pan icon, which if selected, switches the FX8 back to zoom/pan mode. After Take Notes is selected, the Delete Notes icon will be displayed. If selected, this will permanently clear any notes taken on the current page. After Take Notes is selected, the Hide Notes icon will be displayed right below Delete Notes icon. If selected, all of the notes on the page will be hidden. After Hide Notes is selected, the Show Notes icon will replace the Hide Notes icon. If selected, this will redisplay any user notes hidden on the page. Detailed Explanation of Icon Functions Display and Hide the Menu When you first display a page that was selected from the Notebook, it will always also display the menu overlay. You can choose to hide the menu overlay by tapping on the HIDE MENU icon in the lower right corner. If you want to see the menu again, just tap once in the ―hot spot‖ in the lower right corner where the HIDE MENU icon once was. Tapping in this corner will toggle the menu on and off. You can also turn the menu overlay back on by using the Menu button. Simply press the Menu button to bring up the menu. To hide the menu, use the Flipbar to highlight and select the HIDE MENU icon. Close Page and Return to the Notebook View If you want to return to the Notebook View, you may do so by simply tapping the CLOSE icon on the lower left corner of the screen. A tap by the stylus in this ―hot spot‖ area will always close the chart and return you to the Notebook. HINT: If the TAKE NOTES icon is showing (located directly above the HIDE MENU icon) and you are viewing the entire chart, you can also return to the Notebook by a single tap anywhere on the display (except on the hot spots in the corners). 41 You may also return to the Notebook using the buttons by turning on the menu (Menu button) and using the Flipbar to highlight and select the CLOSE icon. Go to Notepad Tap this icon with the stylus to go to the Notepad. Or use the Flipbar to highlight and select it. For information on using the Notepad, see the Notepad section in Advanced Operations. Rotating a page Select the ROTATE icon and the screen will rotate the page from portrait to landscape mode. Follow the same sequence to rotate it back to portrait mode. The FX8 will continue to use the same mode on all screens until you do another rotate. When you rotate a page, the ‖hot spots‖ will rotate as well and remain in the same corner location (i.e. bottom left corner) with respect to the orientation of the page. Hint: It is recommended to view the Notebook in portrait mode only. This will make it easier to find the required page. Once you have found the needed page, you can then rotate it to landscape mode if you like. Battery status This icon shows the current battery status. If you are actively using the FX8, this icon will automatically update itself as the battery life changes. If you do not use the FX8 for an extended period, the unit will go to sleep and the battery status icon will no longer automatically update. Therefore, always make sure you refresh the screen prior to noting the battery status. Activating the icon opens a pop-up menu displaying the percentage battery left. If less than 10% of the battery remains, the icon will show a warning. Exit You can exit FXVIEW directly from the Page View screen. Selecting the icon will open up a pop-up menu. You have three choices: 1) cancel and return to the program, 2) exit FXVIEW application and go the HOME screen, or 3) shut down and power off the FX8. Previous This icon will take you directly to the previous chart as ordered in the Notebook or the previous page of the document which you are currently viewing. This icon is located in the top left hand corner of the display. This corner is a ―hot spot‖ and a tap 42 with the stylus in this location will perform this function (assuming a previous chart is available), even if the icon is not showing. If there is no chart or document page prior in the order, then the icon will not appear and the hot spot will not be active. Below the icon is some information about the previous page, so you know what page will be display if you select the icon. For example, if you are viewing the ILS 22L approach chart at KBOS, the previous chart in the Notebook order is an ILS approach for runway 15R. Therefore you would see the following information under the Previous icon: KBOS 11-2 ILS RWY 15R The order for the previous page is determined by how you first viewed the current page. Here are some examples: If you selected a chart from a tab loaded with an airport, then the charts are ordered by chart number. This icon will display the chart with the next lowest chart number in sequence. If there is no chart with a lower chart number on the tab, this icon will not be displayed. If you selected a chart from the FXvu clipboard initially, then the charts are ordered as listed on the clipboard. This icon will take you to the chart listed directly above the current chart on your FXvu clipboard. If the current chart is at the top of your FXvu list, this icon will not be displayed. If you are viewing a document that was loaded on a tab, then selecting this icon will display the previous page of the document. If you are viewing the first page, this icon will not be displayed. Next This icon will take you directly to the next chart as ordered in the Notebook or the next page of the document which you are currently viewing. This icon is located in the top right hand corner of the display. This corner is a ―hot spot‖ and a tap with the stylus in this location will perform the function (assuming there is a next page) even if the icon is not showing. If there is no next page, the icon will not appear and the hot spot will not be active. The designation under the NEXT icon works the same way as the designation which appears under the PREVIOUS icon except it is for the next chart in the order. The order is determined by how you first viewed the current page. Here are some examples: If you selected a chart from a tab loaded with an airport, then the charts are ordered by chart number. This icon will display the chart with the next highest chart number in sequence. If there is no chart with a higher chart number on the tab, this icon will not be displayed. 43 If you selected a chart from the FXvu clipboard initially, then the charts are ordered as listed on the clipboard. This icon will take you to the chart listed directly below the current chart on your FXvu clipboard. If the current chart is at the bottom of your FXvu list, this icon will not be displayed. If you are viewing a document that was loaded on a tab, then selecting this icon will display the next page of the document. If you are viewing the last page, this icon will not be displayed. Fill/Pan This icon makes the page larger and fits the shorter dimension to the screen. For one-page charts, it zooms the chart in to about 100% magnification when compared to a paper chart, i.e. the on-screen chart is about the same size as a paper approach chart. When increased to maximum width of the shorter dimension, some of the chart will not be on the screen. When you are in the Fill Mode, a new icon will appear on the screen: For one-page charts, the Top/Bottom icon toggles the chart view up and down, so that you can see all sections of the chart when it is fitted to the screen width. For two-page charts, the Left/Right icon toggles the chart view left and right, so that you can see all sections of the chart when it is fitted to the screen height. Whenever the chart or document page has been enlarged (so that it is doesn’t all fit on the screen), the Fit icon will appear. This icon will fit the entire chart or document page to the screen (However, some icons may cover portions of certain charts.). Taking Notes on Pages (Charts and Document Pages) Using the stylus, you can take notes directly on a page. This feature is not available if you are only using the buttons to operate the FX8. When you first view a page, the FX8 will be in zoom/pan mode and you can immediately use those functions. If you want to take notes on the page, you need to put the FX8 into note-taking mode. To do this, simply select the Take Notes icon. Now the lines and letters you draw with the stylus will remain on the page. Stylus input will be interpreted as a note rather than a zoom or pan function. These notes will remain on the notes layer unless you choose to hide or delete them. If you switch back to zoom, the notes will scale along with the zooms that you do. To manage note-taking, some additional icons appear on the screen when you are in note-taking mode: When you are done writing notes, tapping Zoom/Pan switches the FX8 back to zoom/pan mode. Subsequent stylus inputs will be interpreted as zooming and 44 panning functions, not notes. Clear Notes clears all notes taken on the current page. Hide Notes will hide all of the notes on the page. The notes are not deleted and can be re-displayed by tapping Show Notes. If notes are hidden, Show Notes will appear. If selected, this will display any user notes hidden on the page. Please note: When operating the FX8 in ―no stylus‖ mode, the note-taking mode is disabled. You can still view (or hide) notes previously taken on a page, but you will need to restart FXVIEW normally (and have a stylus) to add more notes. 45 FXVIEW Settings At the bottom of the Notebook is an icon for managing your FXVIEW settings. When you select this icon, a pop-up menu will appear showing your current settings. With this menu, you can select your preferred direction for screen rotation, select to lock the flipbar and menu buttons, and set the current date and time. The top portion of the pop-up menu allows you to set the preferred direction of rotation. This usually varies for users who are left handed versus right handed. In general, it is easier to operate the device in the landscape mode while holding the stylus with your writing hand and the unit with your non-writing hand. Thus someone who is left handed would most likely use clockwise rotation where as someone who is right-handed would use counterclockwise rotation. The next section allows you to select to lock out the flipbar and menu buttons while in the FXVIEW program. If you select to lock out the flipbar and menu button they will always be locked out while you are in the FXVIEW program until you change the setting. When you are not in the FXVIEW program the flipbar and menu button are not disabled even if you have selected this setting as it only locks the buttons while in the FXVIEW program. The next section shows you the current date and time set in the FX8. If it is incorrect, you can change it here. The next section is the Clear tabs, favorites, etc… icon. This allows you to clear userinputted information from the unit. You can choose to clear any combination of the following choices: notebook tabs, FXvu tab, favorite airports, all notepad pages, all chart notes, all document/custom page notes, all FXGUIDE notes. 46 Information about the FXVIEW application and Jeppesen and FXGUIDE (AC-U-KWIK) Data Validity can be found by selecting the About icon located at the bottom (left corner) of the Settings pop-up menu. This menu contains much of the same info that appears in the FXVIEW startup splash screen such as the FXVIEW release version number and the dates that the Jeppesen data is valid. In addition, you can find out more about the software license and the license key for your unit. 47 Advanced Operation Favorite Airports You may find that there are a number of airports that you frequently visit and you may wish to set them in the four Notebook tabs. Or perhaps you are travelling cross country—the first tab could be your departure airport; the second tab your destination airport; the third tab an alternate airport; and so on. If your journey takes you on several legs or you visit a number of airports frequently, you may run out of tabs in which to hold airports and any documents you wish to have quick access to. The FX8 handles this situation with its Favorite Airport functionality. To mark an airport as a favorite, simply tap the stylus on the box under the light grey heart icon to the left of the full airport name. Alternately, you can highlight and select the box with the Flipbar. A check mark will appear in the box and the heart symbol will become dark grey. If you tap the box again, you will unselect the airport as a favorite; the checkmark will disappear and the heart shading will become much lighter. Airports that are marked as favorites will appear alphabetically by ICAO name in the FAVORITES category of the Search View. These airports will remain marked as favorites until you uncheck the box. You can shut the FX8 off and restart it; the system will remember that you have marked an airport as a favorite. If you select an airport from the FAVORITES list, it will become active and appear on the tab from which the FIND request was made. You won’t have to search for it again, it will always be nearby. There is no limit to the number of airports that you may designate as favorites. A scroll bar will appear if your list of favorite airports exceeds the available screen area for the list. This will allow you to access all your favorite airports easily. You can use your favorites list to quickly fill a tab with a desired airport. Simply select the airport from the Favorites list. The airport will fill the tab and become active. You can remove an airport from the Favorites list by unchecking the box preceding the airport’s name. You can clear your entire favorites list by using the Setting option to clear all favorite airports. Please note: If you started FXVIEW in ―No Stylus‖ mode, you will not be able to add to or remove Airports from the Favorites list. You will need to restart FXVIEW in the normal way to use these features. Hint: Some pilots like to organize the flight plan for the day by putting all the airports on the favorites list during their flight preparation. Then before each flight, they assign airports to each tab and order them to correspond with the originating airport, destination airport and alternates for that leg. This way they are well organized and have ready access to the information they need. 48 FXvu Chart Clipboard The chart clipboard function is similar to Airport Favorites except that you manage things at the chart level instead of at the airport level. When you are accessing the charts for a particular airport, you will notice a checkbox prior to every chart’s name and index number. Using the stylus you can select the box and place a checkmark in it. The checkmark marks the chart for inclusion in the FXvu clipboard. (If you are operating the FX8 in ―No Stylus‖ mode these boxes will be grey to indicate they are not selectable.) The FXvu clipboard is the rightmost tab across the top of the Notebook. If you access this tab, you will see a list of all the charts you have checked. The charts will be listed in the order in which you add them to the clipboard. You can add any chart from any airport to the clipboard. There is no limit to the number of charts that you may place on your FXvu clipboard. If the screen becomes full, a scroll bar will appear to allow you to access all the charts on your clipboard. If you select and enter a chart name from the clipboard list using the stylus or buttons, you will go directly to that chart. Using the clipboard is the fastest way to view charts from different airports because it enables you to go directly from a chart at one airport to a chart at another airport. When you leave a chart view, you will be returned back to the clipboard, where you may immediately select another chart from your FXvu list. You can reorder the clipboard by placing the stylus on the chart name that you wish to move. Then drag the name to a new location and hold it there for half a second before releasing it. The chart name will be inserted in the new position. If the charts are listed in the order that you expect to use them, you can go directly from one chart view to another using the NEXT and PREVIOUS icons in the chart view. You can remove a chart from the clipboard by unchecking the box preceding the chart index number. You can clear the entire clipboard by activating the CLEAR CLIPBOARD icon in the upper right hand corner of the FXvu clipboard. A pop-up window will appear to confirm that you want to completely clear the FXvu list of charts. If you select YES, the clipboard will be cleared entirely. If you select NO, you will return to the clipboard and all your selected charts will remain on the clipboard. 49 Please note: When operating in ―No Stylus‖ mode you cannot access the checkboxes to remove a chart from the clipboard. You can only clear the entire clipboard by activating the CLEAR CLIPBOARD button in the upper right hand corner of the FXvu clipboard. Beyond Charts Chart NOTAMs Your Jeppesen database contains information regarding important changes not represented on the actual chart. This information is readily available from the CHART NOTAMs expander on every airport tab where NOTAMs are present. To view the NOTAMS, simply use the stylus or the flipbar to select the CHART NOTAMs category and it will expand with the NOTAMs listed below. If the NOTAMS information extends beyond the Notebook View, then a scroll bar will appear to enable you to scroll down to see the rest of the NOTAM information and any additional categories. Each NOTAM includes the date the NOTAM becomes effective, the type of NOTAM, the end date, and whether the NOTAM is temporary in nature. The full text of the NOTAM follows the header information. To hide the chart NOTAMs, simply use the stylus or flipbar to select the CHART NOTAMs category or any other category. Note: It is important to review the chart NOTAMs for each airport in your flight plan prior to flight. FXGUIDE This category in the Notebook is for all of the information related to a given airport. FXVIEW 2.0 supports two airport information sources: Jeppesen and AC-UKWIK®. You can maneuver around the pages displayed in FXGUIDE in the same way that you do for charts or documents. FXGUIDE uses the same menu overlay as other page views. For detailed operation of the icons displayed in FXGUIDE, please refer to the Viewing a 50 Page section of this manual. Jeppesen Your Jeppesen database contains useful airport information for every airport in your subscription coverage area that has an instrument approach. This information is readily available if you select the JEPPESEN AIRPORT DATA title under FXGUIDE. A page will display the airport information which comes as part of your Jeppesen service. Information about fuel availability, elevation, exact latitude/longitude, longest runway, time zone, maintenance availability, customs availability, and more is displayed on the Jeppesen Airport page. This information screen is closed by a single tap on the screen or using the CLOSE icon. AC-U-KWIK® AC-U-KWIK is business aviation’s most respected flight planning resource. SOLIDFX has partnered with AC-U-KWIK to bring the comprehensive information found in their famous books as well as additional information from their premium service onto the FX8. This is an optional data subscription service with quarterly updates that you may purchase from SOLIDFX. The AC-U-KWIK data subscription may include airports outside of your Jeppesen coverage area as well as some VFR-only airports. If you subscribe to AC-U-KWIK though SOLIDFX, you will see three AC-U-KWIK lines in FXGUIDE: AIRPORT DATA, SERVICES, and HOTELS The first selection is AIRPORT DATA. Included in the AC-U-KWIK airport data are field elevation and location, airport radio frequencies, tower hours and phone number, customs hours and phone numbers, runway information, etc. The next AC-U-KWIK selection is SERVICES, this selection lists any airport businesses which may be handy for you as a pilot. This section provides detailed descriptions of FBOs including hours, phone numbers, rental cars, dining availability, Taxi/Limo companies, Catering companies, Charters, Avionics shops, etc... The last selection from AC-U-KWIK is HOTELS. The HOTELS section gives you basic information about hotels close to the airport as well as contact information for planning purposes. AC-U-KWIK data is updated quarterly. Subscribers will be notified via email when the updated data is available. Updates are performed in the manner as FXVIEW updates. Updates can be downloaded from the SOLIDFX website at www.solidfx.com/support.htm. Only FX8s with active subscriptions will be able to view the AC-U-KWIK data. 51 Custom Pages This category on the Notebook is only shown if you have used FXVIEW for Windows to add a custom page to a specific airport. For information on FXVIEW for Windows and specifically on how to add a custom page, please see the FXVIEW for Windows section of this manual. When you select any of the pages in the CUSTOM PAGES category you will see the page displayed with the same menu you see in the Page View. You can maneuver around the custom pages in the same way that you do for charts or documents. The same menu overlay as other page views is used. For detailed operation of the icons displayed in FXGUIDE, please refer to the Viewing a Page section of this manual. 52 Notepad The notepad is designed for storage of quick user inputs—for example, clearances, airport weather information, or any other shorthand notes. The default first page template is the arrival notes. Additional pages can be added using several provided templates. You can choose from the following templates: arrival notes, blank page, departure clearance, enroute notes, FAA Flight Plan form. If you would like to add your own custom notepad template, please contact SOLIDFX for more information on how to do this. You may a multi-page notepad by using different templates or by using the same template more than once. This image at the left shows the flight plan template with the menu overlay. Just like in the page view, you can hide or show the menu by tapping the right bottom corner. All four corners are ―hot spots‖ with similar functions as used in the page view. See the shaded Notepad Button Descriptions below for more info on these functions. When you enter the Notepad (either from the Notebook view, a chart, or document ), you will automatically be brought back to the last page where you wrote anything. As a reminder of the Notepad Page Selection View (image to the right), you will see the Notepad Selection View flash before you arrive at the notepad page for notetaking. You can select a different page from your Notepad by using the "Go To Page" icon on the left side and you will be brought to the Notepad Page Selection View, where you can create as many pages as you would like. For example, you could have 2 pages of arrival notes, 1 blank page, and 4 pages of enroute notes, or any combination you choose. Just like when you view a chart or document, the Notepad allows you to go directly to the next (or previous) notepage by using the Next (or Previous) icons located at the top corner. To enter information onto the notepad, you must use a 53 stylus; the buttons cannot be used to write onto the pad. Your notes will remain in the notepad until you manually clear them. If you navigate to another page or even turn off the FX8, your notes will not be erased. You can erase them three ways. 1) To erase the notes on the notepage you are currently viewing, tap the Clear Notes button and confirm that you want to erase the notes. The notes will be erased and you will see a blank template page. 2) You can also delete the page you are currently viewing. This will, of course, also delete your notes. The page will be removed from your notepad, but the template will remain. You cannot delete the template. 3) To erase all the pages (and notes) in your notepad, go into the FXVIEW Settings menu. Select the Clear tabs, favorites, etc... icon near the bottom of the pop-up menu. In the Clear Items menu, check the box for all notepad pages and then select Clear Items. This will delete all the pages (and notes) from your notepad. The templates will remain, and you can use them again to create a new notepad. Notepad Button Descriptions (Left Column) Previous - Select to go to the previous page in the Notepad order. If there is no page prior to the page currently displayed this icon will not exist. Go To Page - Select to go to a specific page in the Notepad order. The Notepad Page Selection View will be displayed. You can select a different existing page or add a new one. Exit - Select to either Exit FXVIEW (but keep the FX8 running and return to the Home Screen) or Power Off the FX8 completely. Battery - Select to launch the Battery Status Box. At 10% power remaining a low battery warning will appear along with the battery icon. (Icon not shown in FXVIEW for Windows.) Rotate – Select to rotate the screen 90 degrees. (Icon not shown in FXVIEW for Windows.) Delete - Select to delete the current page from your notepad. There will always be at least one page for each template in your notepad. You cannot delete the template. Close - Select to exit the Notepad and return to Notebook or Chart View. Selecting this corner with the menu hidden will still close the Notepad. Notepad Button Descriptions (Right Column) Next - Select to go to the next page in the Notepad order. If there is no page after the page currently displayed, this icon will not exist. Fill - Select to fill the FX8 screen with the notepad page. Fit - After Fill is selected (or any Zoom has been done) the Fit icon will appear above the Fill (or Left/Right or Top/Bottom icons). If selected, this will fit the page to the screen. 54 Top/Bottom or Left/Right - After Fill is selected, the icon will change to Top/Bottom or Left/Right so that you can toggle to view the portion of the page not shown once the fill operation has occurred. Clear Notes - Select to clear the notes on the current page. Note: The blank template will remain in your notepad. Zoom/Pan – The notepad is automatically in note-taking mode. Select this icon if you wish to zoom or pan on the Notepad. Take Notes - After Zoom/Pan is selected, the Zoom/Pan icon is replaced by the Take Notes icon, which if selected, switches the notepad back to notetaking mode. Hide Menu - Select to hide the menu. Selecting this corner with the menu hidden will display the menu. FXVIEW for Windows Overview New features enabled by FXVIEW for Windows: Perform preflight preparation and FX8 set-up on a PC Import and organize PDF documents Print charts and documents including any notes you may have taken Create custom airports FXVIEW 2.0 is now really two programs in one! You can run FXVIEW on the FX8 or FXVIEW for Windows on any Windows PC. FXVIEW for Windows is a Windows application that resides on the FX8. It operates just like FXVIEW on the FX8, but with some additional capabilities. FXVIEW for WIndows uses the same data set as the FX8, so if you set up for a flight with FXVIEW for Windows, the FX8 will be ready too. When the FX8 is connected to a PC, it looks like a mass storage drive and you can view the FX8 file system using ―My Computer‖ on your PC. If you run the FXVIEW for Windows application (located in the main directory of the FX8/DR800 drive), a window will open on your PC that looks almost exactly like your FX8 display. In this window, you can view and manage your Jeppesen charts and notepad just like on the FX8, but FXVIEW for Windows also enables you to import your own pdf documents into the FXVIEW environment. You can then load a pdf document onto a tab, not just airports. The pdf document can be anything you choose…..your flight manual, operations manual, service manual, flight manifest, checklist, etc…..or all of these. Once you’ve 55 imported the documents with FXVIEW for Windows, they are searchable and can be opened and manipulated with the same techniques as charts. Another important feature enabled by FXVIEW for Windows is printing. You can print a chart or document including any notes you may have taken. FXVIEW for Windows uses the resources of the PC it is connected to. So if the PC you are using has a printer, FXVIEW for Windows can print to it. It is important to note that FXVIEW for Windows does not install anything on the PC, so if you can use any PC, and not worry about installation or changing the PC setup/firewall. FXVIEW for Windows gives you added flexibility. You can even create your own airport and link pdf documents of charts, procedures, or whatever you want/need. Starting FXVIEW for Windows To use FXVIEW for Windows, you will need to connect your FX8 to a Windows based computer. Connect the FX8 the same way you would as if you were going to update the Jeppesen data. The FX8 display should be blocked and the FX8 will look like a mass storage drive to your PC. Go to "My Computer" (or, on some PC's running newer versions of Windows, the "Computer" screen on your PC.). Note: You can usually find the icon for (My) Computer in the Start menu. and locate the "FX8 / DR800" drive, usually in the "Removable Storage Devices" section. Double click with the mouse on the FX8 drive to see the contents of your FX8. (Note: Be careful not to delete or disturb any of the files, folders, or directories on the FX8). In the main directory on the FX8, you will see the familiar FXVIEW airplane/localizer icon labeled ―Start FXVIEW‖. This is the FXVIEW for Windows application. Use the mouse to doubleclick this icon and launch FXVIEW for Windows. Your PC monitor will display the initial splash screen, just like on your FX8. Click Yes with the mouse to accept the terms and enter the program. It is helpful to think of your computer mouse on the PC as the stylus for the FX8.. A single click with the mouse in FXVIEW for Windows works just like a single tap with the stylus on the FX8. There is no need to doubleclick. You can use the mouse to select an icon with a single click, to draw on a chart, or to reorder charts on the clipboard. Once you are in the program, you will immediately notice that the FXVIEW for Windows window is different than what is displayed on the FX8. In FXVIEW for Windows, there are two panels that make up the program window. The right panel of the program window has the familiar set up of the FX8, and the left panel is the FXVIEW for Windows menu. 56 Using FXVIEW for Windows to set up the FX8 As noted in the Overview section, the right panel of the windows has the same look and feel as the FX8 display. In fact, the right panel has all of the same functionality of the FX8---the only difference is that instead of using a stylus to navigate and manipulate the program, on the PC you use the mouse and cursor. This is a convenient capability and is very useful during preflight preparation. In your PC session, you can do a data update, then launch FXVIEW for Windows for the data import, and then while the FX8 is still connected to the computer, you can configure your Notebook tabs with the desired airports and/or documents. You can also set up your chart clipboard using the mouse to easily reorder the charts with a drag and drop. When you are finished, safely eject the FX8 and you are ready to go. Import and Organize PDF Documents The left panel of FXVIEW for Windows allows you to import PDF documents into the FXVIEW software. Only documents in PDF format are supported for importing into FXVIEW . Once a document is imported, it is available to use in FXVIEW and FXVIEW for Windows. You can search for the document and load it onto a tab. Additionally, you can use FXVIEW for Windows.to create a custom page by attaching a single page to an airport. It’s easy to manage your documents with FXVIEW for Windows. There are four actions available to use: Import Document... Brings a document into FXVIEW . Click this icon and then browse to the document. The document could be on your FX8 already, it could be on your computer, or it could be on another removable storage device connected to your computer. Note: you must use FXVIEW for Windows to import a document into FXVIEW even if the document is already on your FX8. 57 Add Custom Page... Enables you to select a page of an imported document and attach it to an airport. You must import a document before you can attach it as a custom page. Once a custom page is added to an airport, you can access the page in the CUSTOM PAGES category on the tab for the specified airport. The page will remain attached to the airport unless you remove it or delete the entire document from FXVIEW . If you have information (such as telephone numbers, radio frequencies, or parking procedures, etc) that you always need when flying into a particular airport, this is where to keep it. You can also add documents that are specific to your current flight (such as output from a flight planning program or a weight and balance calculator) that you want to have available, but not necessarily on a tab. Remove Custom Page... Removes the active custom page from an airport. Delete Document... Deletes a document which you previously imported into the FXVIEW . Note: this action only deletes the document from FXVIEW . It does not delete it from any other location. Printing The Printing section of the FXVIEW for Windows menu panel is a powerful tool. It allows you to print any chart so you have a backup, if needed. You can also print any document, notepad page, FXGUIDE page, or custom from FXVIEW including any notes you may have taken. If you have a pdf printer available on your PC, you can even save your notes to the document/chart, so you have everything electronically. Print Page... Print whatever page (chart, notepad page, FXGUIDE page, custom page, or page from a document) is displayed in the right panel of the window. (Note: The software icons will not print.) If you are viewing a chart, the chart will print and if you have notes on the chart, the notes will print too. You are able to use this functionality to print charts, notepad pages, FXGUIDE pages, custom pages, or a page from a document. This icon is only available when a chart, notepad page, FXGUIDE page, custom page, or a page from a document is displayed in the right panel of the FXVIEW for Windows Application. Print Tab... - If the Notebook is displayed in the right panel, this action will print the entire contents of the active/open tab. For example, if you were at 1B9 (Mansfield Municipal Airport) and you selected the Print Tab icon you would print out: the one arrival procedure, the one airport page, the two approach charts, the FXGUIDE pages (Jeppesen airport data page, the AC-U-KWIK pages for airport data, airport services, and hotels, if you have a current AC-U-KWIK subscription) and also any custom pages you have attached to the Mansfield, MA airport. If you have document loaded into a tab, for example a checklist, and you select Print Tab, the entire document will print. 58 The Notebook must be displayed to use this function. Note: Chart NOTAMs do not print. Thus, if you are printing out an entire tab, be sure to remember to take note of any Chart NOTAMs for the airport. Custom Airports The bottom section in the right panel of FXVIEW for Windows enables you to add a new airport to FXVIEW . This feature is aimed at pilots who fly into airports without published instrument approach procedures (IAPs). Since an airport without an IAP will not be in the Jeppesen database, you can use the custom airport function to create an airport and add information about it. Add Custom Airport... Adds a new airport to the FXVIEW database. Fill in the pop-up menu with details about the airport. This information will be included in the search to find the airport. Once the airport is created, you can add custom pages to add pdf files of charts and documents that contain information on this airport. This could include private charts if you own a private airport, a sheet of procedures for a specific airport, or a PDF of the airport diagram from an outside source. Edit Custom Airport... Allows you to change any of the basic airport information that was previously entered for the custom airport. Delete Custom Airport... Removes the custom airport from the database. Custom pages will no longer be associated with that airport, but will still be available as documents in FXVIEW . Note: If you have not created a custom airport, the Edit and Delete Custom Airport icons will not be available for use. 59 Appendix Technical Support If at any point you have any questions, comments, or concerns regarding your FX8, FXVIEW software, or any accessories you purchased from SOLIDFX, please do not hesitate to contact our Technical Support Team. Telephone: Email: (508) 316-8078 x2 [email protected] 60 Technical Specification Specifications subject to change without notice Software Specifications Terminal chart module: Supported chart source: Optional airport data source: Pre-loaded books & documents: Complete ebook functionality Supported media formats: Image formats: FXVIEW, release 2 Jeppesen eChart Reader annual service AC-U-KWIK® FX8 Owner’s Manual Reflowable PDF, ePub (both DRM and unprotected) JPG, BMP, PNG, GIF and TIFF Physical & Performance Specifications Hardware: Unit dimensions (H x W x D): Display size: Display resolution (H x W): Display type: Weight: Battery: Battery life: Battery charging time: Processor: Internal memory: Storage capacity: Input and output: Connectivity: Operating temperature: Storage temperature: System requirements (for updating charts): Digital Reader 800 Series from IRX Innovations 7.6” x 5.9” x 0.4” (193 x 149 x 10.7 mm) 8.1” diagonal 768 x 1024 pixel resolution at 160 DPI Electronic paper with 16-level grey scale 12.6 ounce (360 grams) Rechargeable lithium ion polymer battery (replaceable) 24+ hours About 7 hours with powered coputer or wall charger Freescale i.MX31L processor 128 MB RAM 2 GB removable MicroSD card (replaceable with higher capacity cards) Wacom®penabled® touch sensor input with Stylus Micro USB connector USB 2.0, 3G with Verizon network (FX8-3G only) 5° to 35° C (41° to 95° F) -10° to 45° C (14° to 113° F) Windows® XP, Vista, or 7 1024x768 or greater resolution display 800 MHz processor or greater 128 MB RAM minimum 140 MB up to 1GB available hard drive space, depending on subscription coverage USB Port (optimal USB 2.0) Jeppesen Service Update Manager (JSUM) 2.1.4 or later Internet access (broadband recommended) Included in the Box FX8-3G FX8 FX8 system preloaded with FXVIEW Protective gel sleeve Standard stylus Micro USB cable AC wall charger Reference literature FX8 system preloaded with FXVIEW Protective sleeve Advanced stylus Micro USB cable AC wall charger with International set of plugs Reference literature 61 Care and Storage Information Cleaning the FX8 The FX8 is constructed of high quality materials and does not require maintenance other than cleaning. Follow these general rules when cleaning the outside of your FX8 and its components: Before cleaning, make sure your FX8 is unplugged. Use a damp, soft, lint-free cloth. Avoid getting moisture in openings. Do not immerse the unit in water. Don’t use aerosol sprays, solvents, detergents, alcohol or abrasives that may damage the screen or plastic components. Storing the Unit Do not store the FX8 where prolonged exposure to temperature extremes can occur (such as in the trunk of a car) as permanent damage may result. It is always good practice to back up important user data by manually recording it, copying it onto storage media, or downloading it to a PC. Repairs and Returns Repairs Never open the FX8 or attempt to repair it. Opening the device will void any warranty and release the manufacturer from all responsibilities. If you feel your device is defective, please review our warranty information and contact customer support to arrange for it to be repaired. SOLIDFX Return Policy All SOLIDFX products are covered by a 14-day money back guarantee. If you need to return a product for any reason, please follow the instructions outlined below to ensure that your credit or refund is handled promptly and efficiently. Products may be returned within fourteen (14) days from the shipping date shown on your sales receipt for a credit or refund of the purchase price paid, less shipping and handling fees. If a product fails to meet your expectations during this period, please call SOLIDFX at (508) 316-8078 and press 1 for sales and customer service. Alternately, you may email us at [email protected]. We will verify your purchase, provide de-installation instructions, if appropriate, provide you a shipping address, and issue a return authorization number (RA number). You must: Ship back all products you are seeking to return to SOLIDFX. At SOLIDFX’s discretion, credit from partial returns may be less than invoice or individual component prices due to bundled or promotional pricing and any unadvertised discounts on accessories. Return the products in their original packaging, in as-new and undamaged condition along with any media, documentation, and all other items that were included in the original shipments. Software/electronic data is returnable only if it is unopened and still in its sealed package or, if delivered electronically, has not been downloaded. Package the product securely, enclose a copy of your purchase invoice, write your RA number on both the invoice and on the outside of the package, and mail it the address provided. Ship the product(s) at your own expense, and insure the shipment or accept the risk of loss or damage during shipment. Within 30 days upon receipt of the returned purchase, SOLIDFX will issue a credit or a refund of the purchase price paid, less shipping and handling fees. NOTE: SOLIDFX recommends that you (1) use a carrier that offers shipment tracking for all returns and (2) either insure your package for safe return to SOLIDFX or declare the full value of the shipment so that you are completely protected if the shipment is lost or damaged in transit. If you choose not to (1) use a carrier that offers tracking and (2) insure or declare the full value of the product, you will be responsible for any loss or damage to the product during shipping. 62 Optional Accessories In addition to the standard accessories included with your FX8 system, optional accessories are available. They have been designed to enhance the FX8’s operation. Protective case Professional stylus Advanced stylus Replacement stylus (with or without tether hole) Neck Lanyard Stylus tether Various power accessories (a/c and d/c adapters, micro USB cable, spare external battery) To obtain replacement parts and optional accessories, contact SOLIDFX at +1 (508) 316-8078 or www.solidfx.com Warning: SOLIDFX accessories have been designed and specifically tested for use with SOLIDFX products. Accessories offered for sale by other manufacturers have not been tested or approved for use with SOLIDFX products. Use of such accessories could cause damage to the FX8 and void the warranty. License Agreement and Warranty This section of the Appendix contains information about your license agreement for the FXVIEW software and warranty for the FX8. Software License Agreement Your use of the FXVIEW software and AC-U-KWIK data subscription (optional) included with the FX8 is subject to our Software License Agreement, which is provided with the device. LIMITED WARRANTY SOLIDFX, LLC ("SOLIDFX") warrants the enclosed hardware product against defects in material and workmanship under normal use for a period of one (1) year from the date of original purchase by the original end-user purchaser ("Warranty Period"). If a defect arises and a valid claim is received by SOLIDFX within the Warranty Period, at its option and to the extent permitted by law, SOLIDFX will (1) repair the product at no charge, using new or refurbished replacement parts, (2) replace the product with a comparable product that is new or which has been manufactured from new or serviceable used parts and is at least functionally equivalent to the original product. SOLIDFX warrants replacement products or parts provided under this warranty against defects in materials and workmanship from the date of the replacement or repair for ninety (90) days or for the remaining portion of the original product's warranty, whichever provides longer coverage for you. When a product or part is exchanged, any replacement item becomes your property and the replaced item becomes SOLIDFX's property. Exclusions and Limitations This Limited Warranty applies only to the hardware products manufactured by or for SOLIDFX that can be identified by the "SOLIDFX" trademark, trade name or logo affixed to it. This Limited Warranty does not apply to any nonSOLIDFX hardware product or any software or data, even if packaged or sold with SOLIDFX hardware. Suppliers other than SOLIDFX may provide their own warranties to the end user purchaser, but SOLIDFX, in so far as permitted by law, provides the product "as is". SOLIDFX’s proprietary software products are warranted under the SOLIDFX Software License Agreement included with the software, not under this warranty. SOLIDFX is not liable for any damage to or loss of any programs, data, or other information stored on any media contained within the device, or any non-SOLIDFX product or part not covered by this warranty. Recovery or reinstallation of the software, applications, data or other information is not covered under this Limited Warranty. This warranty does not apply: (a) to damage caused by accidents, abuse, misuse, misapplication, or non-SOLIDFX products; (b) to damage caused by servicing not authorized by SOLIDFX; (c) to damage due to usage that is not in accordance with the product instructions; (d) to damage due to failure to perform preventive maintenance; (e) to a product or a part that has been modified without the written permission of SOLIDFX; (f) to products with missing or altered Product numbers or Serial numbers; or (g) screen breakages. 63 THE WARRANTIES AND REMEDIES CONTAINED HEREIN ARE EXCLUSIVE AND IN LIEU OF ALL OTHER WARRANTIES, WHETHER EXPRESS, IMPLIED OR STATUTORY, INCLUDING ANY LIABILITY ARISING UNDER ANY WARRANTY OF MERCHANTABILITY OR FITNESS FOR A PARTICULAR PURPOSE, STATUTORY OR OTHERWISE. THIS WARRANTY GIVES YOU SPECIFIC LEGAL RIGHTS, WHICH MAY VARY FROM STATE TO STATE. IF SOLIDFX CANNOT LAWFULLY DISCLAIM OR EXCLUDE IMPLIED WARRANTIES UNDER APPLICABLE LAW, THEN TO THE EXTENT POSSIBLE ANY SUCH WARRANTIES ARE GIVEN ONLY FOR THE WARRANTY PERIOD ABOVE. IN NO EVENT SHALL SOLIDFX BE LIABLE FOR ANY INCIDENTAL, SPECIAL, INDIRECT, PUNITIVE OR CONSEQUENTIAL DAMAGES, WHETHER RESULTING FROM THE USE, MISUSE OR INABILITY TO USE THE PRODUCT OR FROM DEFECTS IN THE PRODUCT. IN NO EVENT SHALL SOLIDFX BE LIABLE FOR ANY DAMAGES IN EXCESS OF THE AMOUNT YOU PAID FOR THE PRODUCT, WHETHER SUCH DAMAGES ARISE IN CONTRACT, TORT, STRICT LIABILITY OR OTHERWISE. SOME STATES DO NOT ALLOW THE EXCLUSION OF INCIDENTAL OR CONSEQUENTIAL DAMAGES, SO THE ABOVE LIMITATIONS MAY NOT APPLY TO YOU. SOLIDFX retains the exclusive right to repair or replace the product or offer a full refund of the purchase price at its sole discretion. SUCH REMEDY SHALL BE YOUR SOLE AND EXCLUSIVE REMEDY FOR ANY BREACH OF WARRANTY. SOLIDFX, or any of its agents or third parties, cannot be held liable for the accuracy and sufficiency of information provided by THE FX8. SOLIDFX does not accept any liability for damages resulting from THE CHARTS OR INFORMATION THAT YOU CHOOSE TO DISPLAY ON THE FX8, NOR FOR ANY corrupted or lost data due to erroneous operation or malfunction of the e-reader, the software, the micro SD or SD cards, personal computers, peripheral devices, or USB. The SOLIDFX FX8 is designed to aid in viewing chart information provided by other sources. Please be advised that data error and computer malfunctions are possible. As pilot in command, you are the final authority on the accuracy and sufficiency of information. Do not use A SINGLE FX8 as a sole source of navigation information, and make sure your aircraft is equipped with approved IFR navigation equipment if flying in instrument meteorological conditions. You should also exercise extreme vigilance when operating any potentially distracting devices in the aircraft Before you ship the product(s) for warranty service it is your responsibility to back up the data on the internal memory of the device. Remove any confidential, proprietary, or personal information and removable media such as micro SD cards, SD cards, USB sticks, MMC or CF-cards. It is possible that the content on the device will be lost or reformatted in the course of warranty service and SOLIDFX and its agents are not responsible for any of your confidential, proprietary, or personal information; lost or corrupted data; or damaged or lost removable media. Your product will be returned to you configured as originally purchased, subject to applicable updates. You will be responsible for reinstalling all other software and data. Recovery and reinstallation of software and user data are not covered under this Limited Warranty. Procedure for Claims Under Limited Warranty Please review the online help resources referred to in the accompanying documentation before seeking warranty service. If the product is still not functioning properly after making use of these resources, please contact our customer service team at [email protected] Service options, parts availability and response times may vary according to the country in which service is requested. Service options are subject to change at any time. If you seek service in a country that is not the country of purchase, you will comply with all applicable export laws and regulations and be responsible for all custom duties, V.A.T. and other associated taxes and charges if the product cannot be serviced in the country in which service is requested. For international service, SOLIDFX may repair or exchange defective products and parts with comparable products and parts that comply with local standards. In accordance with applicable law, SOLIDFX may require that you furnish proof of purchase details and/or comply with registration requirements before receiving warranty service. SOLIDFX will maintain and use customer information in accordance with the SOLIDFX Privacy Policy. To obtain warranty service, an original or copy of the sales receipt from SOLIDFX or an authorized SOLIDFX distributor is required. Online auction confirmations are not accepted for warranty verification, and SOLIDFX will not replace missing components from any package purchased through an online auction. 64 Please complete these two easy steps to return a SOLIDFX product under warranty: Step 1 Contact SOLIDFX Customer Service to receive an RMA number. E-mail or call our Customer Service team to describe the problem you are experiencing and request a Return Material Authorization (RMA) tracking number. You will need to provide the unit's serial number (if applicable), your return shipping address, and a daytime telephone number. E-mail: [email protected] Phone: 508-316-8078, ext. 1 for Sales & Customer Service Fax: 508-543-7979 Step 2 Ship the unit, along with the RMA number and an original or copy of the sales receipt, to SOLIDFX. Once you have received the RMA number, ship the unit (insured) along with a copy of the original sales receipt to the following address: SOLIDFX, LLC RMA Number: (insert your RMA number here) 100 Foxboro Blvd, Suite 220 Foxboro, MA 02035 If you purchased your product directly from SOLIDFX, then you do not need to include the sales receipt with your shipment. Product Registration Help us better support you by completing our online registration today! Have the serial number of your FX8 handy and go to our website (www.solidfx.com). Look for the Product Registration link on our Support page. If you purchased your FX8 directly from SOLIDFX, the product will be automatically registered. In this case, you do not need to register your product. Use the area below to record the serial number (located on the back of your FX8) in case your FX8 is lost, stolen, or needs service. Keep your original sales receipt in a safe place or attach a copy inside this manual. FX8 Serial Number: ___________________________ Contact SOLIDFX If you should encounter any difficulty while using your FX8, or if you have any questions, contact us by email at [email protected]. 65