1
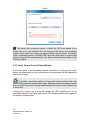
 Ground control can be edited after initial entry. Users may find that they have to
add or delete ground control points or need to select the ground control marker
location(s) more accurately. This can be performed by clicking on the edit ground
control button
window.
or by double-clicking on a ground control point in the main
By clicking “save project” in the
project menu, the number of actually
indicated GCPs (which may differ from the total number of GCPs in the added
file) will be added to the database in the Stretchout opening screen (visible after
closing and re-opening the opening screen). When generating a PhotoScan .psz
file from the
export list, the identifiers and the location of these GCPs on the
images will also be stored in the generated project file.
5.4 Image Processing In the processing screen, you can optionally import ground control points and
indicate ground marker positions. You can then choose to process your flight
locally using the
using the
button or submit it to the Pix4D cloud server for processing
button.
5.4.1 Local Processing
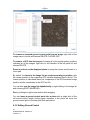
Click the local processing button
to start the processing on your machine.
This will add the following pane to the bottom of the processing window:
The desired steps can be selected, before clicking the Start button. You have the
choice to carry out the steps one by one or by selecting all the steps at once.
When launching the local processing from Stretchout, no changes can be
made to the processing parameters (i.e., rapid initial processing, four times
reduced resolution) and step 2 (dense matching) is not available.
22
Software Manual: Stretchout
Version 1.2