1
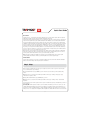
Quick Start Guide
Step 1. Install
You should first charge your unit for 3 hours using the wall charger.
Make sure the battery is installed and use the USB cable to connect
the unit to the charger then press the power button for 2 seconds.
When charging the power light will remain on solid until finished.
Tip: The battery cover will not close if the battery clip is not
fastened properly.
Inserting the SIM card
After charging the unit you need a SIM card so you can communicate with your T22. Before inserting or removing the card,
remember to power off the T22 by pressing the power button for
2 seconds.
Ensure that the SIM card is not protected by a PIN number
– this can be done by inserting the SIM into a suitable mobile
telephone and then following your mobile telephone instruction
booklet to remove the PIN lock. Your SIM account must be setup to
allow SMS (text) messaging.
Remove the battery cover and remove the SIM holder as shown in
the photograph. You can use a pen to push the yellow button then
pull out the SIM holder. Place your SIM in the holder and push back
into the unit.
Removing the SIM holder.
After the SIM is installed then make sure the battery is installed and
turn on the power to the unit. The Power light should flash every
5 seconds. The GSM light will be red for a minute and will turn off
when connected to the GSM network. If the light remains red then
check the troubleshooting section.
Mounting T22
You have 3 main options for installation, portable install using the
built-in battery, quick install using the cigarette lighter adapter or
full install that connects to vehicle power and ignition.
T22 Cigarette Lighter Adapter and USB cable.
Portable Install
Turn the power on – check that the power light is flashing every 5 seconds. If the power light is off the unit may
be sleeping to conserve the battery – just tap the unit to wake it up. Ensure the unit is placed facing the sky following the guidelines in the quick install. Check that the GPS light goes off when outside. For backpacks or bags
try to place the unit at the top of the pack facing up. For vehicles the unit can be placed in a tissue box, glove
box or in a pillow in the back window. For motorcycles or scooters place in a storage compartment – the unit can
also be placed in a sock to prevent damage.
The battery should last several days depending on usage, so turn on Power reporting (send P to unit) to notify you
when the battery needs charging.
2
Quick Start Guide
Quick Install
Turn the power on – check that the power light is flashing every 5 seconds. Plug the power cable into a cigarette
lighter plug, preferably one that is also powered when the ignition is turned off.
Your T22 must be placed with the Tramigo Logo on top facing to the sky. This is to allow your T22 to determine its
location from the signal made by GPS satellites orbiting the earth. Materials such as metal, metallic window tinting, and rear window defoggers must be avoided because they can block these signals. If you are parked inside
a building or under any structure you will not get a location until you have a clear view of the sky. T22 is designed
to be used outdoors only, since GPS signals inside a building are weak. In case of no GPS signal Tramigo T22 reports the last position. The message will indicate it as “old position”. Please check User Manual for more details.
In general, you can expect that a mounting situation on or near the dashboard of your vehicle will be satisfactory.
You can use the Velcro fasteners to secure your T22 to the dashboard. In many vehicles your T22 will work in the
glove box, center console or even under the passenger seat.
When you have selected a location leave the T22 there for a minute and check the red GPS light – it will turn off
when your T22 knows its location. If the light remains red then check the troubleshooting section. You can also
use the optional external GPS antenna to reach a good location inside your vehicle.
Tip: Several types of tinting are available from companies such as 3M film, Madico CharcOOl, Huper Optik
Ceramic (Stark), and FormulaOne Pinnacle (ceramic film) that allow electronic signals through.
Full Installation
If you decide to mount the T22 covertly e.g. under the dashboard, have an auto mechanic follow the Installation
Guide located on the Tramigo CD or ask your dealer for instructions.
Step 2. Setup
After T22 has been installed into the vehicle you are ready to become the ‘Owner’ of your T22. Owner has full
access to all the features of your Tramigo.
1) Send a SMS with the message OWNER to your T22. If the T22 does not answer go to the troubleshooting
section.
2) After about 5-10 seconds the T22 unit will respond with a text message: “Tramigo: Owner, please reply
“Owner,YES” to register as owner”
3) Reply with a SMS with the message OWNER,YES to your T22
4) After about 5-10 seconds the T22 unit will respond with a text message: “Tramigo: Owner, +5551234578
registered”
This means that you are now the registered Owner of your T22 and it will accept any commands that you send to it
from your phone.
5) Tramigo M1 software provides a simple to use menu interface that makes your T22 even easier to use. This
software will work with any Nokia S60 phone. M1 is included in your Tramigo CD and requires a Nokia Series 60
model phone. The M1 User Manual provides complete installation instructions. Also included is a PC version that
allows you to use a PC USB port for charging the unit and update the software with new versions from our web site.
3
Quick Start Guide
Step 3. Connect
Now your T22 is ready to use. From your mobile phone try sending the FIND command to your unit – just send
a SMS with the text F in the message – upper or lower case. To allow other users to find you add their phone
numbers using the ADDUSER command. Note that you should only give other users FRIEND or GUEST authority to
prevent them from changing your T22 settings.
Try some of the commands in the summary below and connect with your car.
T22 Commands
This is a list of the most common commands that you will use. For a full list see the T22 User Manual located on
your Tramigo CD. Each user must set their own reporting options so you give them access by using the ADDUSER
(AU) command listed below.
Upper or lower case can be used in the commands. Most commands also have a short form to save typing. Commands with an ON or OFF parameter can also omit the parameter to change the report setting, example T will turn
trip reporting on or off.
SMS Command
Example Command/Report (Short form use if available)
LOCATION REPORTING
FIND – Shows the location of your car. You can also send a blank
SMS message
FIND,NEAR shows the 3 nearest locations
FIND,time turns on periodic reporting. You will receive a FIND
report every x minutes specified between 1 and 1440 minutes or
daily or weekly
FIND,off turns off periodic reporting.
F
F,DAILY will send a FIND report once per day
Tramigo: parked, 0.58 km E of Makati Sport Club/Salcedo Village,
Makati, NCR, RP, old position, 20:38 Nov 5
Unit will show as parked until a trip has started.
The text old position means that the unit has not had an updated
position in over 5 minutes
TRIP,ON – Sends a trip report when your car starts a trip and after
the car has been stopped for 15 minutes.
T,ON (you can also just send T)
TRIP,OFF – Turns off trip reporting
SET,P_TRIP_START_REPORT,0 turns off the trip start reporting
T,OFF Turns trip reporting off
Tramigo: trip report, start 0.19 km S of Pasong Tamo-Dela Rosa Street, end 0.02 km N of Tramigo Office, trip time 0:27,
distance 1.61 km, max speed 33 km/h, avg speed 3.5 km/h, idle time 0:07, 11:44 Nov 6
Z,1
Z,3,Home
T22: zone crossing detected, moving 0.17 km NW from
Caltex, San Lorenzo, Makati City, PH, E with speed 34 km/h,
19:21 Jan 27
ZONE,distance/on/off,placeName – Will send a report when
the car entering or leaving an area defined by a circle with a radius
defined by the distance from the place name. Distance can be 0.1
km to 999. You can use partial place names and the system will
select the closest one that matches
ZONE,OFF - Turns off reporting
SAFETY AND SECURITY REPORTING
A,ON
ALARM,ON – Reports when there is movement of the unit or the
vehicle moves 100m. You must turn on the monitor again after
each alarm.
ALARM,OFF – Turns off the monitor.
Note to shut off the motion detector see the User’s Manual
Tramigo: motion alarm detected, parked at Glorietta Mall,
Makati City, PH, 17:07 Sep 15
4