1
MICROSAMPLING DEVICE
GENERAL USE
PROTOCOLS
96-WELL PLATE
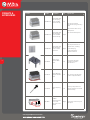
Materials
¥ Mitra (RUO) 10 µL Microsampling Device
¥ Mitra Drying Rack (recommended for sample organization)
¥ Mitra Sampling Tool (recommended for sampler handling)
¥ Mitra SBS Deck Adapter (recommended for automation)
¥ 96-Well Collection Plate (recommended for extractions)
Collection
1. Label sampler bodies and outer box according to your needs/protocol.
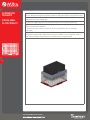
2. Remove rack of 96 samplers from outer box by pinching the two raised tabs on the
rack, rocking gently to release, and lifting out (gripping samplers also aids in removal).
3. Remove individual sampler from rack with Mitra Sampling Tool.
¥ See page 7 of manual to see Sampling Tool use instructions
4. Apply tip of sampler to surface of blood sample.
Ensure ~15 µL of blood is available per sample to
avoid under sampling.
¥ Try to sample from a 45¡ angle for best results,
not perpendicularly
¥ Do NOT fully immerse tip
¥ Do NOT make contact with skin surface
¥ Do NOT drip blood onto the tip if sampling from
a cannula
5
To view protocol demonstration
videos visit:
www.phenomenex.com/mitra
5. Once the sampler tip is applied, look for it to go
fully red. This will happen VERY fast. Do not get
surprised and yank the sampler tip away. Once you
see the sampler tip go fully red count an additional
2 seconds and then SLOWLY and SMOOTHLY
remove sampler tip from the blood.
¥ Total contact time for the sampler tip to blood
will typically not be longer than 6 seconds (unless
hematocrit of the blood is > 60 %)
¥ You will not over sample if sampler tip is left in
blood longer than 2 additional seconds as long as
it is not immersed. 3 or more seconds is better
than stopping too early to ensure sampler tip is
full
6. Transfer full tip to drying rack. Be careful not to touch it to the sides of the rack. A
simple way to do this is to place the sampler almost vertical to the hole you want to
place it in and guide straight down.
7. Repeat steps 3-6 for the remainder of the sampler tips.
Drying, Storage, & Transportation
1. Allow tips to dry in 96-sampler dry rack at ambient temperate for ~2 hours.
¥ Air should freely circulate around tips to aid in drying
2. Once tips are fully dry (~ 2 hours), the 96-sampler rack can be inserted back into
outer box and stored for future use or can be processed for analysis.
¥ See page 9 for extraction recommendations
3. Fully dried tips are not a biohazard and can be shipped without dry ice, hazardous
considerations, or special couriers.
[email protected]