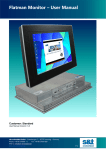
1
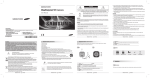
System Diagram
Controller Button Layout
Tx1+
Tx1Tx2+
Tx2Tx3+
Tx3TRx+
TRx-
1. Wiring Diagram
RS-485/422 Signal Wire
Package Contents
2. Connecting RS-485/422 Signal Wires
· RS485 Communications
Power Adapter (DC 12V)
Terminal Block
Camera
Controller
RXD+
RXD-
Tx1+
Tx1-
· RS485 Communications
SPC-1010
User’s Manual
PTZ CONTROLLER
6
User Guide
Camera
Controller
RXD+
RXDTXD+
TXD-
Tx1+
Tx1TRx+
TRx-
• You may use the Tx2 or Tx3 terminal instead of Tx1.
PTZ CONTROLLER
7
User Guide
Controlling PTZ Camera
Names and Functions
①
②
⑤
1. Power
① To turn on the power, press the PWR button.
② To turn off the power, hold down the PWR button.
2. Initial Screen Display
SAMSUNG-T
③
④
⑥
①
ESC / POWER
Cancels a command or turns power on/off.
②
LCD DISPLAY
16 X 2 LCD
③
Number Pad
Enables changing channels or opening and closing the camera OSD.
④
1. LOCK
2. FN
3. AUX
4. SET
5. OPEN
6. CLOSE
Locks out the system.
Function keys: Perform special functions in combination with other buttons.
Controls the camera’s AUX output.
Enters the controller settings menu.
IRIS OPEN
IRIS CLOSE
1. P-SET
2. SWING
4. A/F
5. OSD
Sets up and moves to preset locations.
Commands the camera to move between 2 selected locations while
panning or tilting.
Commands the camera to monitor preset locations at a selected speed
and standby time in an orderly manner.
Performs the One-Shot AF function.
Indicates the camera’s OSD menu.
1. FOCUS -/+
2. ZOOM W/T
Manually focuses the camera.
Zooms the camera in or out.
⑤
⑥
3. GROUP
PTZ CONTROLLER
8
User Guide
① ID : Indicates the current channel number.
② SAMSUNG-T : Indicates the current channel camera protocol.
③ 9.6k : Indicates the current channel camera baud-rate.
3. Camera ID Setup
① Using the number pad, enter a number.
② Press the ENT button to confirm the Camera ID.
• Camera IDs are between 1 to 255.
PTZ CONTROLLER
9
User Guide
Controlling PTZ Camera
Controlling PTZ Camera
4. Pan / Tilt / Zoom Using Joystick
5. Iris / Focus / Zoom Buttons
■ You can use the joystick to control the camera's Pan and Tilt operations.
■ The farther you move the joystick from the center, the faster the camera moves.
① Screen Brightness
■ To adjust the camera's screen brightness, use the OPEN and CLOSE buttons.
- OPEN : Brighter (Iris Open)
- CLOSE : Darker (Iris Close)
② Camera Focus
■ To adjust the focus of the camera, use the FOCUS - / + button.
- FOCUS - : Closer
- FOCUS + : Farther
③ Camera Zoom
■ To control the camera’s Zoom operation, use the ZOOM W / T button.
- ZOOM W : Zoom Wide
- ZOOM T : Zoom Tele
6. Preset
6-1. Setting Up Preset Location
① Using the joystick and controller buttons, move the camera to a desired location.
② Enter a preset number.
③ Hold down the P-SET button for 2 seconds to save the preset location.
6-2. Moving to Preset Location
■ You can also use the joystick to control the camera’s Zoom operation.
① Enter the number of a preset location.
② Press the P-SET button to move the camera to the preset location.
Notes
[ Zoom Wide Action ]
PTZ CONTROLLER
[ Zoom Tele Action ]
10 User Guide
• You can select preset numbers from 1 to 255 using the controller. The maximum preset location
number varies depending on the camera model. (For more information, please refer to your
camera’s user manual.)
• You can set up preset locations in the OSD menu of the camera.
PTZ CONTROLLER
11 User Guide
SALES NETWORK
•
AMSUNG TECHWIN CO., LTD.
S
Samsungtechwin R&D Center, 701, Sampyeong-dong, Bundang-gu, Seongnam-si, Gyeonggi-do, Korea, 463-400
TEL: +82-70-7147-8740~60, FAX: +82-31-8018-3745
•
AMSUNG TECHWIN AMERICA Inc.
S
1480 Charles Willard St, Carson, CA 90746, UNITED STATES
Tol Free : +1-877-213-1222 FAX : +1-310-632-2195
www.samsungcctvusa.com
•
AMSUNG TECHWIN EUROPE LTD.
S
Samsung House, 1000 Hillswood Drive, Hillswood Business
Park Chertsey, Surrey, UNITED KINGDOM KT16 OPS
TEL : +44-1932-45-5300 FAX : +44-1932-45-5325
www.samsungtechwin.com
www.samsungsecurity.com
VAN 10. 05