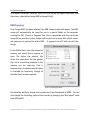
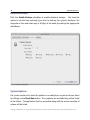
1
2009
R1
User Manual
Copyright ©2009 e-fense, Inc. No part of this document may be copied or reproduced without the written permission of e-fense, Inc.
H3E 2009R1 User Manual
Copyright ©2008 - 2009
The content of this document is wholly owned by e-fense, Inc. and should not be
copied either in part or in entirety without license or expressed written permission
of the copyright holder.
Trademarks
“H3E”, “Helix3 Enterprise”, “Helix3” are registered trademarks of e-fense, Inc. All
other brand and product names are trademarks or registered trademarks of their
respective holders.
Version
This manual covers version 2009R1 of the H3E software for Mac OS X, Linux and
Windows.
Conventions in this Manual
A number of conventions have been used during the writing of this manual.
Reference to H3E Features
You will find elements of the application are referred to in Capital letters and
‘Single-Quoted’. Text from buttons is in bold.
Copyright ©2009 e-fense, Inc. No part of this document may be copied or reproduced without the written permission of e-fense, Inc.
Quick Tips
Also included are what are referred to as “Quick Tips” in black bordered boxes with
grey header boxes and emboldened titles.
Chapters & Titles
A “section page” breaks each chapter and core headings are again in red + bold,
whilst sub headings are always in purple + bold, with further subtitles in bold.
Menu Shortcut References
In this manual we refer to shortcuts in the following format:
[button name] + [button name] + [button name]
with as many bracketed button names as is required.
Copyright ©2009 e-fense, Inc. No part of this document may be copied or reproduced without the written permission of e-fense, Inc.
Table of Contents
1: Introduction .........................................................................................7
What is H3E? .........................................................................................8
2: Getting Started ...................................................................................11
2.1 Key Features ...................................................................................12
2.2 How To Obtain the Latest Version........................................................12
From the CD........................................................................................................12
Downloading From the Web Site.........................................................................12
2.3 System Requirements .......................................................................13
2.4 Installation ...................................................................................14
Selecting a System for Installation.......................................................................14
Installing the Server on Windows........................................................................14
Installing the CAT on Windows............................................................................17
Registering the Server.........................................................................................21
Installing Agents...................................................................................................23
Manual Installation...............................................................................................24
Software Management Installation......................................................................25
Installing the Server/CAT on Mac OS X...............................................................26
3: System Architecture .............................................................................31
Server Overview ...................................................................................32
Server Database..................................................................................................32
Server Settings....................................................................................................32
Console Administration Tool (CAT) Overview ..............................................33
Copyright ©2009 e-fense, Inc. No part of this document may be copied or reproduced without the written permission of e-fense, Inc.
CAT Graphical User Interface (GUI)....................................................................33
The Agents ..........................................................................................34
4: User Interface .....................................................................................37
Interface Design ..................................................................................38
Tool Bar................................................................................................................39
Host (Agent) Pane...............................................................................................39
Content Pane.......................................................................................................40
Status Bar............................................................................................................41
5: User Interface II ..................................................................................45
System Menu .......................................................................................46
Agent menu options.............................................................................................46
Mission Assurance Criticality (MAC) Level..........................................................51
Auditing (Incident Response)...............................................................................52
Imaging .............................................................................................55
RAM Imaging.......................................................................................................56
Disk Imaging........................................................................................................57
File System Imaging............................................................................................58
Device Monitoring ................................................................................59
Screen Capture....................................................................................................60
Keyboard Capture...............................................................................................60
Electronic Discovery (Search) .................................................................61
6: User Interface III .................................................................................63
Content Pane .......................................................................................64
Copyright ©2009 e-fense, Inc. No part of this document may be copied or reproduced without the written permission of e-fense, Inc.
DashBoard...........................................................................................................64
User Communication...........................................................................................65
Incident Response Audit Results.........................................................................67
Forensics.............................................................................................................72
Electronic Discovery............................................................................................77
Reporting.............................................................................................................78
Adding/Managing Cases......................................................................................83
7: System Preferences ..............................................................................85
System Preferences ...............................................................................86
Admin Tool Preferences.......................................................................................86
General H3E Server Configuration......................................................................87
User Configuration...............................................................................................88
Mission Assurance Categories.............................................................................89
Network Access...................................................................................................90
Private Information Access..................................................................................90
Database Backup................................................................................................91
System Updates..................................................................................................91
8: Additional Information.........................................................................93
Customer Support.................................................................................94
Legal Notification .................................................................................94
Export Exemption .................................................................................95
Copyright ©2009 e-fense, Inc. No part of this document may be copied or reproduced without the written permission of e-fense, Inc.
1: Introduction
About H3E - Helix3 Enterprise
Introduction
8
What is H3E?
Helix3 Enterprise was developed as a strong, rapid defense against the forces at
work to transfer and destroy data, technology and organizational survivability by
attacking our increasingly global computer networks. Unlike layered defense
systems that have proven to be effective only against external threats, H3E focuses
on addressing the problems of compromised systems caused by malicious insiders or
the unsafe network practices of employees.
Using digital surveillance, the H3E system can reveal insider activities such as
permission elevation, data exfiltration or the creation of covert data tunnels, and
makes remote incident response possible within a matter of minutes.
The Helix3 Enterprise system consists of three main components: the Server, the
Console Administration Tool (CAT), and the Agents. In simple terms, the Server acts
as the system’s headquarters and warehouse facility, the CAT as the command center
and the Agents as the skilled employees. You may also choose to utilize an optional
Supervisor Server to consolidate views from multiple H3E servers in an enterprise
network.
Most interactions between the CAT and Agents on the system are conducted through
the Server. On command from the CAT, the Server dispatches a designated number of
Agents to monitor, collect and analyze activities on the network and to alert H3E
users to suspicious findings. Information is both reported back to the CAT and stored
within the Server.
All network communication is encrypted using 256-bit Advanced Encryption
Standard (AES), which specifies the cryptographic algorithm for use in protecting
electronic data that has been approved by the Federal Information Processing
Standards (FIPS). Encryption converts data to an unintelligible form called ciphertext, which is converted back to its original plaintext form during decryption.
Information stored within the H3E CAT database also is protected using the 256-bit
Copyright ©2009 e-fense, Inc. No part of this document may be copied or reproduced without the written permission of e-fense, Inc.
9
Introduction
AES, as are database passwords. The encryption key is randomized between
connections and never is the same twice.
Data retrieval takes place via custom Application Program Interface (API) calls,
which means no native operating system commands are executed. Such commands
at times are corrupted via malicious logic but hide the corruption to appear valid.
H3E uses its own code to audit operating systems and devices and provides highly
reliable results.
H3E Server
Agent(s)
CAT
Copyright ©2009 e-fense, Inc. No part of this document may be copied or reproduced without the written permission of e-fense, Inc.
Introduction
10
Page intentionally left blank
Copyright ©2009 e-fense, Inc. No part of this document may be copied or reproduced without the written permission of e-fense, Inc.
2: Getting Started
Basics of Helix3 Enterprise
Copyright ©2009 e-fense, Inc. No part of this document may be copied or reproduced without the written permission of e-fense, Inc.
Getting Started
12
2.1 Key Features
Among the unique features of the H3E system are the abilities to:
Acquire live data from across the network
Image a system’s RAM for forensic analysis
Image a system’s physical drives for forensic analysis
Make screen captures
Log key strokes for any user on the network
Search Internet use history
Search for files based on hash values
Search Enterprise based on time/date stamps and keywords
Define mission critical systems
Preview and copy files from systems
E-Discovery searching for litigation hold matters
H3E also requires minimal training and provides incident responders with a secure,
virtually undetectable system that allows for rapid data collection, analysis and
reaction.
2.2 How To Obtain the Latest Version
From the CD
The CD contains versions for Windows, Mac, and Linux. Choose your appropriate
platform and install the Server, CAT, agent. Windows installation files are in the
form of MSI files. Mac files are packages and Linux files are deb packages.
Downloading From the Web Site
One can also install the latest version of H3E by visiting the official web site at:
http://h3e.e-fense.com
Copyright ©2009 e-fense, Inc. No part of this document may be copied or reproduced without the written permission of e-fense, Inc.
13
Getting Started
A download link, along with version information, is accessible on the product page
of the site. Simply click the respective link and the file will automatically begin to
download to the workstation’s desktop, or specified download location.
H3E versions are distributed in a ZIP archive format and can be decompressed with a
simple double-click of the file. This will place the decompressed application file in
the same location as the original ZIP archive, in this case the desktop.
Having decompressed the application H3E will now be ready for installation.
2.3 System Requirements
Minimum Requirements
Server
CAT
Agent(s)
Recommended Requirements
• Microsoft Windows 2003 Server or later
• Mac OS X 10.4 or later
• Linux Kernel 2.6.15 or later
• Dual Core Intel® Xeon® E5205, 6MB
Cache, 1.86GHz, 1066MHz FSB
• 1 GB 667MHz RAM • 500 GB disk space (SAS or SATA)
• Intel PRO 1000PT 1GbE Dual Port NIC
• Microsoft Windows 2003 Server or later
• Mac OS X 10.4 or later
• Linux Kernel 2.6.15 or later
• Quad Core Intel® Xeon®X5460, 2x6MB
Cache, 3.16GHz, 1333MHz FSB
• 8GB 667MHz RAM • RAID 5 SAS or SATA 750GB
• Intel PRO 1000PT 1GbE Dual Port NIC
• Microsoft Windows XP or later
• Mac OS X 10.4 or later
• Linux Kernel 2.6.15 or later
• 2.2GHz Intel Core 2 Duo processor • 1 GB 667MHz RAM • 20 MB free disk space (extra space
required for image transfers)
• Microsoft Windows XP or later
• Mac OS X 10.4 or later
• Linux Kernel 2.6.15 or later
• 2.4GHz Intel Core 2 Duo processor • 2 GB 667MHz RAM • 20 MB free disk space (extra space required
for image transfers)
• Microsoft Windows 2000 or later • 400 MHz Celeron or equivalent
• 256 MB RAM • 10 MB free disk space • Microsoft Windows XP or later
• 400 MHz Celeron or equivalent • 256 MB RAM • 40 MB free disk space Figure 2.1: System Requirements Table
Copyright ©2009 e-fense, Inc. No part of this document may be copied or reproduced without the written permission of e-fense, Inc.
Getting Started
14
Providing the system with more resources and faster equipment such as faster
Processor and Hard Drive can of course improve the performance of H3E where data
reading and calculation & verification functions are taking place. For network
purposes it is best to ensure that the workstation is enabled with the fastest
possible network interface.
2.4 Installation
Selecting a System for Installation
Key questions to consider when selecting a system for installation of H3E include:
• Is the system secure?
• Are you using a protected section of the network with an appropriate
number of security features enabled?
• Does the system you are using have sufficient network connectivity?
• With your existing firewall configuration between console and servers, can
you establish a TCP connection from the console to the servers on the TCP
ports? (that have been configured)
• How many Agents do you want to access and what is the scope of the
audits you wish to conduct?
Installing the Server on Windows
Depending on your installation media (CD or Web download) you will need to install
the H3E server first. This can be accomplished by locating the SERVER.MSI file from
the installation source. Double click the SERVER.MSI file on windows to run the
installation. The Install wizard will guide you through the following series of
screens:
Copyright ©2009 e-fense, Inc. No part of this document may be copied or reproduced without the written permission of e-fense, Inc.
15
Getting Started
1. The Initial screen. Click Next to continue the installation.
Figure 2.2: Initial Server Install
2. You must accept the End-User License Agreement to continue installation. Click I
accept the terms in the License Agreement, then Next, to do so.
Figure 2.3: Server Install: End-User License Agreement
Copyright ©2009 e-fense, Inc. No part of this document may be copied or reproduced without the written permission of e-fense, Inc.
Getting Started
16
3. Click Install to proceed.
Figure 2.4: Server Installation
4. Click Finish to complete the installation.
Figure 2.5: Server Installation Complete
Copyright ©2009 e-fense, Inc. No part of this document may be copied or reproduced without the written permission of e-fense, Inc.
17
Getting Started
Quick Tip: Server Installation Location on Windows
The server has been installed into the following directory:
“C:\Program Files\H3Enterprise.”
The server will start automatically after install and whenever
the computer reboots.
At this point, the Server will operate only in demo mode and will accept only a single
connection from an Agent on the local system. To make the Server fully functional,
you must next install the CAT.
Installing the CAT on Windows
The CAT is the main interface a user has to the H3E system. In order to take full
advantage of the CAT you will need a system as outlined in the system requirements
in section 2.3. It is highly recommend that these CAT system(s) be secure.
You may run as many CAT systems as you would like as they are not limited by the
license.
Like the server, the CAT is installed by launching the MSI file. Select the computer
you would like to host the CAT and run the CAT.MSI file. The Install wizard will guide
you through the following screens:
Copyright ©2009 e-fense, Inc. No part of this document may be copied or reproduced without the written permission of e-fense, Inc.
Getting Started
18
1. The Initial screen. Click Next to start the installation.
Figure 2.6: Initial CAT Install
2. You must accept the End-User License Agreement to continue installation. Click I
accept the terms in the License Agreement, then Next, to do so.
Figure 2.7: CAT Install: End-User License Agreement
Copyright ©2009 e-fense, Inc. No part of this document may be copied or reproduced without the written permission of e-fense, Inc.
19
Getting Started
3. Select your desired shortcut locations by clicking on the appropriate boxes. The
system allows up to four shortcuts. When you have made all your selections, click
Next.
Figure 2.8: CAT Shortcut Configuration
4. Click Install to proceed.
\
Figure 2.9: CAT Installation
Copyright ©2009 e-fense, Inc. No part of this document may be copied or reproduced without the written permission of e-fense, Inc.
Getting Started
20
5. Click Finish to complete the installation.
Figure 2.10: CAT Installation Complete
At this point, both the Server and the CAT will operate only in demo mode. Agent
connections are accepted only from the same systems as the Server (local host) and
time out after two hours. To make the system fully operational you must next
register the Server.
Quick Tip: CAT Installation Location on Windows
The CAT has been installed into the following directory:
“C:\Program Files\H3Enterprise.”
Copyright ©2009 e-fense, Inc. No part of this document may be copied or reproduced without the written permission of e-fense, Inc.
21
Getting Started
Registering the Server
Once you have registered your Server, it will accept Agents from throughout the
network and no longer will time out after two hours.
To register the Server you must:
1. Install the Server as directed in section 2.4.
2. Install the CAT as directed in section 2.4.
3. Start up the CAT by double clicking the CAT icon and log in using “Admin” (case
sensitive) as the default username and the default password. Change from the
defaults to your own account name and password as soon as possible to eliminate
the risk of unauthorized use (see 4.1).
You will initially see the H3E splash which will show you the current version.
Figure 2.11: H3E Splash & Login
Copyright ©2009 e-fense, Inc. No part of this document may be copied or reproduced without the written permission of e-fense, Inc.
Getting Started
22
Quick Tip: Default Username/Password
In order to access the CAT for the first time you will need to
login in with the username of “Admin” and the password of
“Admin”. *
*These are case sensitive.
4. Once you have successfully logged in, select ‘Help’ from the menu bar, then
choose ‘Enter License Key’ from the drop menu.
Figure 2.12: Enter License Key...
5. The license key window will appear. Paste or type in the username and license key
that arrived in your H3E CD-ROM packet, a key can be emailed to you upon request,
then choose Register.
Figure 2.13: Enter License Key from Help Menu
Once a valid username and license key have been entered, a dialog box will appear
thanking you for registering.
Copyright ©2009 e-fense, Inc. No part of this document may be copied or reproduced without the written permission of e-fense, Inc.
23
Getting Started
Figure 2.14: Register License Key
6. Registration is complete. You may now begin installing Agents.
Quick Tip: License Limitations
Up to 250 Agents can be installed on a single Server using a
single license key. If you wish to use more than one Server to
host your Agents, of if your network is large enough that you
wish to install more than 250 Agents, you must request a
second license key via e-mail and repeat the registration
process using that license key as well.
Installing Agents
Agents must be installed before an incident in order for the H3E system to function
as intended, most importantly because doing so significantly reduces the risk of
losing crucial information from the RAM or hard drive during incident response.
Installing Agents before they are needed guarantees the system is ready to harvest
critical, time-sensitive information without contaminating potential evidence.
Agents can be installed on any or all system workstations simultaneously via an
existing software distribution tool. A second option is to install Agents manually on
any or all system workstations, one at a time.
Copyright ©2009 e-fense, Inc. No part of this document may be copied or reproduced without the written permission of e-fense, Inc.
Getting Started
24
Manual Installation
Manual installation requires that the user run the AGENT.MSI file on each computer
or workstation.
The following components are necessary for successful manual installation of
Agents:
• Physical access to the target system
• Login ability (admin permissions) to the target system to carry out the
actual installation
• A target system that meets the system requirements (see section 2.1)
• Ports not already in use on the target system and thus available for Agents
• A local firewall that, if enabled, does not block the Agents from operating.
Microsoft Windows firewall will block certain packets required by H3E, so it
is best to configure the firewall to allow H3E.
Manual installation requires that the user proceed through similar installation steps
outlined for the Server and the CAT. When deploying MSI installation packages
through GPO or SMS or simply to your clients, you may want to make them silent. The
AGENT.MSI file has been created to facilitate a silent install.
You can also choose to push the msi file out using Microsoft’s ‘psexec’ command line
utility and then run the ‘msiexec’ command.
Copyright ©2009 e-fense, Inc. No part of this document may be copied or reproduced without the written permission of e-fense, Inc.
25
Getting Started
Quick Tip: MSIEXEC Command line options
Parameters which affect the user interface for msiexec:
• full UI: /qf (default parameter used by the package)
• reduced UI: /qr (UI does not show any wizard dialogs)
• basic UI: /qb, /passive (only a progress bar will be shown)
• no UI: /qn, /quiet (no UI will be shown)
If you choose to manually install the agent on each machine then a very simple
dialog box will appear while the install takes place:
Figure 2.15: Initial Agent Install
Quick Tip: Agent Installation Location on Windows
The agent has been installed into the following directory:
“C:\Program Files\H3Enterprise.”
The agent is called h3e-sma and runs as a windows service. The
service is displayed as “Service Monitor Agent.”
Software Management Installation
Copyright ©2009 e-fense, Inc. No part of this document may be copied or reproduced without the written permission of e-fense, Inc.
Getting Started
26
A software distribution tool allows a user to install Agents from a single source on
the network. The tool, when run, pushes the Agents to workstations throughout the
system. Examples of software distribution tools include SMS (for Windows), Tivoli,
HP Open View or Hercules. Each type of software management carries its own
instructions, but most should be compatible with H3E.
Agents operate as routine system processes
and do not degrade system
performance once installed. Please refer to the users’ guides for your particular
software management system for further guidance.
Key considerations for use with any management system include:
• Will you be using one or multiple software packages?
• Security configurations for all Agents must be identical.
• Agent configuration differs depending on the network and number of
Servers.
• When multiple software packages are used so that varied configurations
are possible, a method for associating Agents with Servers must be
established.
Installing the Server/CAT on Mac OS X
The CAT is the main interface a user has to the H3E system. In order to take full
advantage of the CAT you will need a system as outlined in the system requirements
in section 2.3. It is highly recommend that these CAT system(s) be secure.
You may run as many CAT systems as you would like as they are not limited by the
license.
Copyright ©2009 e-fense, Inc. No part of this document may be copied or reproduced without the written permission of e-fense, Inc.
27
Getting Started
The server and the CAT are installed by launching the Mac OS X package files. In
order to install them simply double click on the SERVER.PKG file or the CAT.PKG file
and you will be presented with the following dialogs:
1. The initial installer screen will be the same for the CAT as well as the H3E server.
You will see the introduction page letting you know that you are about to install
H3E.
Figure 2.16: Mac OS X CAT Installation
Copyright ©2009 e-fense, Inc. No part of this document may be copied or reproduced without the written permission of e-fense, Inc.
Getting Started
28
2. Read and accept the EULA and click on Continue.
Figure 2.17: Mac OS X CAT Installation EULA Agreement
3. Select Install to proceed. This will install in the default location of /Applications.
Figure 2.18: Mac OS X CAT Installation location
Copyright ©2009 e-fense, Inc. No part of this document may be copied or reproduced without the written permission of e-fense, Inc.
29
Getting Started
4. You have to enter the user password to install the package.
Figure 2.19: Mac OS X CAT Installation Admin Password entry
5. Installation progress.
Figure 2.20: Mac OS X CAT Installation Process
Copyright ©2009 e-fense, Inc. No part of this document may be copied or reproduced without the written permission of e-fense, Inc.
Getting Started
30
6. Installation Success.
Figure 2.21: Mac OS X CAT Installation success
Currently agents for the H3E system do not exist for the Mac OS X or Linux platforms.
So there are no installation files for them.
Quick Tip: Standard File Locations (Mac OS X)
H3E installs all of its files in standard default locations:
• Application stored in /Applications/H3E
• User preferences are stored in /~Library/Preferences/
• Files are stored in /~Library/Application Support/
Copyright ©2009 e-fense, Inc. No part of this document may be copied or reproduced without the written permission of e-fense, Inc.
3: System Architecture
H3E Basics
Copyright ©2008 e-fense, Inc. No part of this document may be copied or reproduced without the written permission of e-fense, Inc.
System Architecture
32
Server Overview
All data exchanged between the CATs and the Agents passes through the
Server, except during the transfer of large image files, such as a RAM,
when the CAT and Agents communicate directly. The Server also acts
as the central repository for all data collected by the system’s
Agents. The Server authenticates and routes commands from the CAT
to the Agents on a network, then simultaneously forwards data responses back to
the CAT and stores them in the internal SQL database.
Server Database
Once the Server has been installed successfully, the system automatically knows the
H3E database is running. No separate installation or configuration is necessary,
even after a system crash or power failure. Unlike SQL database engines that require
programs to interact with the Server in requesting and receiving information, H3E
allows programs to read and write directly from the database files on disk.
Server Settings
The Server is a running service listed in the process list as H3E-Server. The Server is
linked by TCP connection to the CAT and to the Agents. Default settings have the
Server listening for CAT communications on TCP port 59345 and for Agent
communications on TCP port 9010. All ports are user configurable.
Copyright ©2009 e-fense, Inc. No part of this document may be copied or reproduced without the written permission of e-fense, Inc.
33
System Architecture
Console Administration Tool (CAT) Overview
The CAT initiates all connections involved in a network-based audit.
Communicating through the H3E Server, the CAT manages any Agent
groups approved by the Server administrator, whether they are located
on the internal network or elsewhere. This function allows the user to
view operations on network workstations hosting Agents and also
ensures analysts can access only those Agents within their areas of
responsibility.
The size and amount of data sent from CAT to Agent via the Server is small, but audit
results returned vary in size based on the scope of the request and the amount of
data available on the target system. Typical audits have ranges of around 500KB.
The CAT is a stand-alone device and does not interfere with the administration,
distribution or installation of software patch management solutions.
CAT Graphical User Interface (GUI)
The CAT appears as two panes on the monitor screen, the Host or Agent pane and the
Content pane. Both use a simple point and click process for configuration and
operation.
The Host pane appears on the left side of the main CAT screen and contains a list of
all network nodes (agents). The agents will be listed by Internet Protocol (IP)
address by default. These IP addresses represent both a Host and an Agent. A Host
is a computer that is turned on and available for use on the network, while an Agent
is a component of the H3E system that resides on the associated Host and gathers
information about that Host when directed to do so.
The Content pane appears on the right side of the main CAT screen and contains the
DashBoard, Chat window, Case window, Incident Response, Forensics Results,
Copyright ©2009 e-fense, Inc. No part of this document may be copied or reproduced without the written permission of e-fense, Inc.
System Architecture
34
Reporting window, and E-Discovery window. This CAT screen is the starting point for
requesting and reviewing information from Agents on the network.
Figure 3.4: CAT Graphical User Interface
The Agents
The H3E Agents are called into action whenever a system user
suspects malicious activity on the network or must respond to an
incident that already has occurred. The CAT establishes an encrypted
link with the Agent and commands that the Agent return, such
information as Internet use history, user keystrokes or screen captures
from the target.
Copyright ©2009 e-fense, Inc. No part of this document may be copied or reproduced without the written permission of e-fense, Inc.
35
System Architecture
Agents remain invisible to the user by masquerading as routine processes on the
workstation; no icons appear in the system tray or tool areas. Agents can respond
only to commands from a designated CAT via encrypted TCP/UDP communication and
do not interfere with the operation of anti-virus engines or other detection
applications.
The amount of network traffic generated by Agents is minimal and highly
configurable by the user. A user may set the system to return data by the minute,
hour, upon system start-up or only upon demand. Data is returned by the Agents in
XML-formatted text files averaging about 3KB in size, with screen captures requiring
about 47KB.
Agent configurations, which establish critical communication settings, can be
determined or adjusted on the main CAT screen.
Copyright ©2009 e-fense, Inc. No part of this document may be copied or reproduced without the written permission of e-fense, Inc.
System Architecture
36
Page intentionally left blank
Copyright ©2009 e-fense, Inc. No part of this document may be copied or reproduced without the written permission of e-fense, Inc.
4: User Interface
Understanding the H3E UI
Copyright ©2009 e-fense, Inc. No part of this document may be copied or reproduced without the written permission of e-fense, Inc.
Putting the System into Action
38
Interface Design
All activity on the H3E system begins on the main CAT screen. Essentially, a user
visits the Host pane to initiate requests and the Content pane to view the results
returned from those requests.
The CAT is broken down into 4 areas:
•
•
•
•
The Toolbar (Area 1.)
The Host (Agent) Pane (Area 2.)
The Content Pane (Area 3.)
The Status Bar (Area 4.)
Figure 4.1: Four areas of the CAT Graphical User Interface
Copyright ©2009 e-fense, Inc. No part of this document may be copied or reproduced without the written permission of e-fense, Inc.
39
Putting the System into Action
Tool Bar
The tool bar is the means to navigate the different windows within the CAT. There are
8 options on the menu bar by default. They are in order:
•
•
•
•
•
•
•
•
Dashboard
Chat/Log
Incident Response
Forensics
E-Discovery
Reports
List Cases
Add Case
Figure 4.2: CAT Menu Bar
Clicking on one of the options in the toolbar will take you to that particular option
within the content pane (area 3 on figure X.) Each option will be discussed in detail
later in this manual.
Host (Agent) Pane
The Host pane offers a hierarchical list of all agents in existence on the network. The
system users can group agents, or Internet Protocol (IP) addresses, into an order
that reflects the organizational structures of their particular networks. A user can
move any IP address to another location in the list simply by grabbing and dragging
it.
Agents initially appear in the host pane as their numerical IP address, however the
IP address can be changed to something more meaningful by holding down the
SHIFT key and double clicking the left mouse button. The name field will change to
an edit field whereby the new name can be entered.
Copyright ©2009 e-fense, Inc. No part of this document may be copied or reproduced without the written permission of e-fense, Inc.
Putting the System into Action
40
Figure 4.3: Host Pane
The Host pane is the starting point for conducting audits, imaging RAM or disks,
monitoring devices or conducting searches on your network. Before initiating any of
these activities, you may want to set some preferences and configurations using the
Preferences menu.
Content Pane
The Content pane, located on the right side of the main CAT screen, is where all the
recovered data is displayed for analysis. The Content pane has many areas which are
all accessible from the tool bar.
In fact six of the eight items on the toolbar directly effect the view of the content
pane. In order to view the different areas of content simply left click the mouse on
one of the icon buttons in the toolbar and that area will become available in the
content pane.
The default view of the content pane is the dashboard. The dashboard, like the
dashboard of a car, provides a quick overview of activity on the Server to which the
CAT is connected. Consider this the home screen.
Copyright ©2009 e-fense, Inc. No part of this document may be copied or reproduced without the written permission of e-fense, Inc.
41
Putting the System into Action
Figure 4.4: Content pane displaying the dashboard
Status Bar
The status bar contains status information as well as notification and system
buttons. There are three (3) buttons on the status bar which enable you to conduct
certain activity.
Figure 4.5: CAT Status Bar
Copyright ©2009 e-fense, Inc. No part of this document may be copied or reproduced without the written permission of e-fense, Inc.
Putting the System into Action
42
First is the ‘+’ button. This button allows you to create a new network folder on the
host pane.
When you click on the ‘+’ button the ‘Add Network’ window will appear. This window
allows network folders (named folders) to be created on the host pane or even
parent networks to be created.
Figure 4.6: Add network folder window
The gear button allows for quick action items such as renaming a agent, or
clearing the activity viewer. By clicking on gear button a menu will appear which
will allow you to either rename a selected agent, configure a selected agent or to
clear the activity viewer.
Figure 4.7: status Bar Menu
The arrow button will either show or hide the activity window within the host
pane. When the activity window is visible any activity that is conducted will be
visible in this window. You can also pause certain actions and restart them at will.
Copyright ©2009 e-fense, Inc. No part of this document may be copied or reproduced without the written permission of e-fense, Inc.
43
Putting the System into Action
When an activity is finished you will be notified that
that activity is completed and you can click on the
magnifying glass icon which is called the revealer
and be taken to the results of that audit.
You can stop running audits by clicking on the ‘stop’
icon. If you click on the ‘stop’ icon on a finished
audit you will clear it from the list.
Figure 4.8: CAT Activity Window
Copyright ©2009 e-fense, Inc. No part of this document may be copied or reproduced without the written permission of e-fense, Inc.
Putting the System into Action
44
Page intentionally left blank
Copyright ©2009 e-fense, Inc. No part of this document may be copied or reproduced without the written permission of e-fense, Inc.
5: User Interface II
H3E Contextual Menu options
Copyright ©2009 e-fense, Inc. No part of this document may be copied or reproduced without the written permission of e-fense, Inc.
Contextual Menu Options
46
System Menu
The System menu launches such key features of H3E as conducting audits, imaging
RAM or disks, monitoring devices or conducting searches.
Figure 5.1: Agent Menu
To access the System menu, select an Agent from the Host pane with a left click or a
mark in the check box beside the entry. Then right click on the selected Agent and
the contextual menu will appear.
Agent menu options
The first option on the contextual menu is Agent. This option has a submenu that
contains many options.
The options in this submenu allow you to start or stop an Agent, or wake an agent.
When you stop an agent using the Stop Agent menu item, the agent will suspend
itself and the agent icon in the agent pane will turn red signifying it has stopped.
You can restart the agent using the Start Agent menu item. The Wake Agent forces
the agent to beacon in immediately.
Copyright ©2009 e-fense, Inc. No part of this document may be copied or reproduced without the written permission of e-fense, Inc.
47
User Interface II
Figure 5.2: Agent Start/Stop and Configuration
To configure an agent first select an Agent and right click to bring up the System
menu. Then select Configure... from the drop menu to bring up the Agent
Configuration window:
Figure 5.3: Agent Configuration Window
Once Agents have been installed successfully, the IP addresses should appear
automatically in the box on the left side of the Agent Configuration window. The +
and - buttons below the agent list box allow you to add or delete Agents from this
list.
Copyright ©2009 e-fense, Inc. No part of this document may be copied or reproduced without the written permission of e-fense, Inc.
Contextual Menu Options
48
The options listed in the middle of the Agent Configuration screen are similar to
those available through the Preferences menu but include some additional key
communication settings.
Here you can select the following:
Console Address (CA/DNS Name or IP Address)
Console TCP Port
Console FTP Port
Agent TCP Port (not set through the Options menu)
Beacon Interval (Agent Idle Time on the Options menu)
The port settings relate to asynchronous communication between the CAT and
Agents, while the CAT FTP Port is dedicated for the transfer of files. You may choose
to load the values set by the system by clicking on the Load From Agent button.
Agents are configured to beacon the CAT upon workstation start. The beacon
updates the DashBoard display to reflect active status on the network. Users can
change the configuration to direct Agents to beacon on demand or at any desired
interval. The beacon automatically restarts in the event of a system crash.
The Auto Discover checkbox allows the agents to discover H3E server automatically.
The first server that is auto discovered will be used by the agent(s) unless otherwise
directed.
If you would like to view all of the audits ever conducted on an agent then simply
select the ‘Retrieve Agent Audit Log’ item and a new window will appear showing
every audit along with details of the audit:
Copyright ©2009 e-fense, Inc. No part of this document may be copied or reproduced without the written permission of e-fense, Inc.
49
User Interface II
Figure 5.4: Agent Audit Log Window
You can export the highlighted audit log by clicking on the Export button. The
exported file is a simple txt file of the selected audit.
The host options (Delete, Ping, Traceroute) features relate to the physical location,
or computer workstation, where the Agent resides and to its functioning. Here the
user can delete an Agent from the Host pane, or remove a computer workstation that
no longer is available on the network.
Copyright ©2009 e-fense, Inc. No part of this document may be copied or reproduced without the written permission of e-fense, Inc.
Contextual Menu Options
50
Figure 5.5: Traceroute Window
Other options on this menu allow the user to ping an Agent when there appears to
be a network communications problem or conduct a traceroute to an Agent.
Figure 5.6: Ping Window
Copyright ©2009 e-fense, Inc. No part of this document may be copied or reproduced without the written permission of e-fense, Inc.
51
User Interface II
Mission Assurance Criticality (MAC) Level
Each Agent listed on the Host pane can appear with a flag to the right of its name.
This flag represents the Mission Assurance Criticality or the Information Assurance
Methodology (MAC/IAM) level described in chapter seven under “Mission Assurance
Categories.”
You may assign a MAC/IAM level using this option on the Agent Menu. To do so,
select the Agent from the list with a right click, select Mission Assurance Level from
the drop menu, then select the appropriate level for that host.
Figure 5.7: Mission Assurance Level
The flags that appear beside the IP addresses in the host pane represent the
corresponding levels:
Level 1 – Red
Level 2 – Yellow
Level 3 – Green
Levels are defined in section chapter seven of this manual.
By default agents are not assigned a MAC/IAM level and they will not display a flag
next to their name or IP address in the host pane.
Copyright ©2009 e-fense, Inc. No part of this document may be copied or reproduced without the written permission of e-fense, Inc.
Contextual Menu Options
52
Auditing (Incident Response)
The primary feature of H3E is auditing of any activity on a network. To begin an
audit, select an Agent or Agents from the Host pane. If the audit is to include a
single Agent, simply highlight that Agent with a left click. If the audit is to include
multiple Agents, select each by checking the box next to its identifying information.
Once you have finished selecting Agents for inclusion in an audit, use a right click to
call up the System drop menu, and from that menu select Retrieve “Live” Data.
Three options will appear: Fast Capture, Normal Capture or Custom Capture. Both
fast and normal captures begin immediately once either is selected. A Fast Capture
takes about 5 seconds to complete, and a Normal Capture takes about one minute.
Figure 5.8: Auditing: Retrieve Live Data Options
The following table shows the information retrieved by either a Normal or a Fast
Capture:
Data Element
Determine System Hostname
List Network Configurations
List Routing Table
List ARP Table
List Current Network Connections
Category
network
network
network
network
network
Normal Capture Fast Capture
X
X
X
X
X
Copyright ©2009 e-fense, Inc. No part of this document may be copied or reproduced without the written permission of e-fense, Inc.
53
User Interface II
Data Element
List All Processes
List All Services
Extract Windows Clipboard (Text Input Only)
List Installed Drivers
List Installed Applications
Show Volume Info
Get Environment Variables
Collect Server Uptime
Show User Current Identity
Generate Desktop Screen Capture
Obtain Application Event Log
Obtain Security Event Log
Obtain System Event Log
Show Network SMB Data
Grabs the Recent Folders/Files Listing
Grabs the Setupapi Log File from the System
Grabs all of the Internet History for Each User
Grabs the Office Recent Folder
Dump Startup Run Registry
Dump Startup RunOnce Registry
Dump Startup RunOnceEx Registry
Dump Startup RunServices Registry
Dump Startup RunServiceOnce Registry
Dump Startup Current User Run Registry
Dump Startup Current User RunOnce Registry
Dump Startup Current User RunOnceEx Registry
Dump Startup Current User RunServices Registry
Dump SharedDLLs Registry
Dump KnownDLLs Registry
Dump Startup Scripts
Dump Startup Explorer Run
Dump Typed URLs
Dump Run MRU
Dump Last Save
Dump Memory Settings
Dump Hotfix Information
Dump Mounted Devices
Dump USB Key
Dump USB Storage Key
Category
process
services
memory
process
process
misc
memory
misc
users
misc
log
log
log
file
file
file
file
file
file
registry
registry
registry
registry
registry
registry
registry
registry
registry
registry
registry
registry
registry
registry
registry
registry
registry
registry
registry
registry
Normal Capture Fast Capture
X
X
X
X
X
X
X
X
X
X
X
X
X
X
X
X
X
X
X
X
X
X
X
X
x
X
X
X
X
X
X
X
X
X
X
X
X
X
X
Copyright ©2009 e-fense, Inc. No part of this document may be copied or reproduced without the written permission of e-fense, Inc.
Contextual Menu Options
54
If you are unsure which type of audit best suits your needs, select Custom Capture.
This will open a new window that displays each of the data elements contained in
the above table. Here you can select which elements you would like to include in
your audit. To add items, left click on the checkboxes next to the desired items. To
remove items, left click on the checkboxes that already are marked.
The Custom Capture screen also allows you to select Network, Registry, File or Logs
as your Audit Type. This narrows your audit to data elements that fit the selected
category. For example, if you selected Registry, all the data elements that fit the
registry category, and only those data elements, will be included in the audit.
The custom capture window displays all the elements in a hierarchal fashion. They
are also color coded for simple reference. Blue elements are ‘fast capture’ elements,
green are ‘normal capture’ and red are actual files.
Figure 5.9: Auditing: Retrieve Live Data Options
Copyright ©2009 e-fense, Inc. No part of this document may be copied or reproduced without the written permission of e-fense, Inc.
55
User Interface II
A contextual menu is available by right clicking with the mouse in the window. A
drop down menu will appear allowing you to select specific elements. In addition
you can select/deselect elements using the checkboxes next to the names. If you
select a parent element, all the children will be selected as well.
Completed audits can be found in the Incident Response Window of the CAT,
described in detail in chapter six of this manual.
Imaging
The next two options on the Agent drop menu are related to imaging, which can be
done of either RAM or disks. All imaging is done between the Agent and the CAT over
a pseudo peer-to-peer network on port 9090. Establishing a peer-to-peer
connection between the host (Agent) and CAT diverts a large volume/stream of
network traffic from the H3E Server and leaves critical Server resources available for
other audits.
To begin imaging, highlight the Agent(s) whose information you wish to image. If a
single Agent is to be involved, use a left click to select. If the image involves
multiple Agents, mark the appropriate checkboxes.
Quick Tip: Multiple Agent Imaging
While you can forensically image multiple agents at a time it is
not recommended as you can very quickly over exceed your
network bandwidth. It is highly recommended to just image
one system at a time and during time when the systems are
not in use.
Copyright ©2009 e-fense, Inc. No part of this document may be copied or reproduced without the written permission of e-fense, Inc.
Contextual Menu Options
56
Once Agents have been selected, right click to bring up the Agent drop menu. From
that menu, select either Image RAM or Image Disk(s).
RAM Imaging
Once ‘Image RAM’ has been selected, the RAM Image window will appear. The RAM
image will automatically be saved for you in a special folder on the computer
running the CAT. Choose a ‘Segment Size’ that is compatible with the size of the
image file on your files system; images will be split into as many files of that size as
are necessary to capture the entire RAM. A segment size of 0 will not split the
image.
In the ‘Buffer Size’, enter the amount of
memory you would like to capture at
once. The higher the amount, the
faster the acquisition but the greater
the risk of overwriting evidence in the
memory you are acquiring. That is
because only a limited amount of space
is available for temporary storage of
the data that has been acquired.
Figure 5.10: RAM Imaging Window
You have the ability to change the transfer port from the default of 9090. You can
also change the throttling speed of the transfer by changing the ‘Max Speed” value
from 300 to 600.
Copyright ©2009 e-fense, Inc. No part of this document may be copied or reproduced without the written permission of e-fense, Inc.
57
User Interface II
Quick Tip: RAM & Disk Image file storage location
H3E stores RAM and Disk images into standard default locations.
Mac OS X: /~Library/Application Support/H3E
Windows: C:\Documents and Settings\ ~\Application Data\H3E
Linux:
/home/ ~/H3E
Tests have shown that H3E can acquire 1 GB of RAM in as little as three minutes.
Disk Imaging
Once Image Disk(s) has been selected, the Disk Image window will appear. Like the
RAM image a disk image name and location will be automatically defined for you.
The disk image window will show you all of the available disks that can be imaged.
This includes the physical as well as logical disks. Check the disk you would like to
image and choose the options you would like to set for that image.
There are 5 options that can be set for disk imaging. Choose a segment size that is
compatible with the size limitation of your filesystem; images will be split into as
many files of that size as are necessary to capture the entire disk. The ‘Sector Size
(flow)’, enter the amount of disk sectors you would like to acquire at once. The
higher the amount, the faster the acquisition but the greater the chance of missing
data you are acquiring from potential bad sectors.
Copyright ©2009 e-fense, Inc. No part of this document may be copied or reproduced without the written permission of e-fense, Inc.
Contextual Menu Options
58
Figure 5.11: Disk Imaging Window
File System Imaging
H3E allows the forensic copying of the filesystem from any agent. This allows a
snapshot of what’s on the system at the time of imaging. Once the File System,
whether MFT (Master File Table) or FAT (File Allocation Table), has been copied it can
be viewed within the content pane in the CAT.
The filesystem is imaged by clicking on the Filesystem View menu option. The file
system view window will be presented allowing you to see the agent you want to
acquire and the ability to change the acquisition port.
Copyright ©2009 e-fense, Inc. No part of this document may be copied or reproduced without the written permission of e-fense, Inc.
59
User Interface II
Figure 5.12: File System Viewer Acquisition Window
Like the RAM and Disk imaging the progress of the acquisition will be displayed in
the activity monitor within the host pane. Initially the progress will show the
number of filesystem entries it has copied and when all the entries have been
determined the activity view will display the full progress of items copied to items
left.
When the filesystem copy has finished, the activity window will display a reveal icon
(magnifying glass) which when clicked will display the filesystem in the content
pane.
Device Monitoring
The next feature on the Agent drop menu is device monitoring. This allows the user
to capture and review selected activities of an individual. The two available methods
of active device monitoring are the screen capture and the keyboard capture, or keylogger.
To access the device monitoring option, highlight the Agent whose information you
wish to retrieve using a left click, then right click to bring up the Agent menu. From
that menu, select device monitoring.
Copyright ©2009 e-fense, Inc. No part of this document may be copied or reproduced without the written permission of e-fense, Inc.
Contextual Menu Options
60
Screen Capture
To conduct a screen capture, which allows you to see what appears on any
individual’s screen at any given time, simply click on that option and the process
begins immediately. Results will appear in the audit history list in the Content Pane
of the CAT, described in detail in chapter 6 of this manual.
The screen captures can also be captured during normal scans from the ‘Retrieve
Live Data’ menu. The screenshot will be captured in seconds but that screenshot is
only a snapshot in time from when the screenshot was made. Every screenshot
made for a particular agent will be stored and can be viewed as thumbnails within
the content pane.
Keyboard Capture
To conduct a keyboard capture, click on that option after selecting device
monitoring from the System drop menu. This will open another drop menu. You must
select Start KeyLogger to begin the process of capturing keystrokes.
Figure 5.13: Device Monitoring: Keyboard Capture
You may return to this menu and select Stop KeyLogger for keystrokes to be returned
to the CAT for viewing in the Audit Results tab of the Content Pane on the CAT,
described in detail in chapter 6 of this manual. You can also click on the stop sign
icon in the activity viewer window in the host pane.
Copyright ©2009 e-fense, Inc. No part of this document may be copied or reproduced without the written permission of e-fense, Inc.
61
User Interface II
Electronic Discovery (Search)
The final option on the Agent drop menu is to Search. To access the search option,
highlight the Agent whose information you wish to retrieve using a left click, then
right click to bring up the Agent menu. From that menu, select Search.
Figure 5.14: E-discovery Search
There are three search methods:
1. Date & Time stamps for start and end dates
2. Keywords in filenames, file content, and regular expressions
3. Hash values
The option to de-duplicate all the search results and hash all files also exists.
Using a Hash Search allows you to search every machine on your network for files
matching a unique digital signature (hash). The digital signature is to a file what a
DNA marker is to a person; it matches only the file to which it belongs. The hash
changes as the file itself changes. A hash search thus allows you to determine who
has access to files that are proprietary in nature.
Copyright ©2009 e-fense, Inc. No part of this document may be copied or reproduced without the written permission of e-fense, Inc.
Contextual Menu Options
62
If you know the 32-character MD5 hash you are seeking, enter it (one entry per line)
in the Hash Expressions box by clicking on the ‘+’ button. If you do not, simply drag
and drop file(s) to be searched from your Desktop into the Hash Expressions box.
The speed of a hash search is dependent on several host variables such as CPU
speed, current processor workload, memory and the size of the device being
searched. Tests have shown that H3E can find a single hash on a 40 GB hard drive in
about 30 minutes. Results can be found in the E-discovery Results window in the
Content Pane of the CAT, described in section 6 of this manual.
Copyright ©2009 e-fense, Inc. No part of this document may be copied or reproduced without the written permission of e-fense, Inc.
6: User Interface III
H3E Content Pane
Understanding Content
64
Content Pane
Now that you have requested information and your Agents have retrieved and
returned it to the CAT, it’s time to take a look at what they found. That’s where the
Content pane, located on the right side of the main CAT screen, comes into play. The
Content pane has many areas accessible from the menu bar.
DashBoard
The dashboard, like the dashboard of a car, provides a quick overview of activity on
the Server to which the CAT is connected. Information on the dashboard is organized
into four main sections.
Figure 6.1: The DashBoard
Copyright ©2009 e-fense, Inc. No part of this document may be copied or reproduced without the written permission of e-fense, Inc.
65
Understanding Content
The four sections are simply:
1.
2.
3.
4.
Server Status
Database Status
Agent Information
Last 30 events
The Server and Database Status sections contain information about the network
database and operating system, including the versions of each, number of records
and users in the database, and last backup on the database; and the CPU and RAM
utilization, free disk space and uptime on the OS. The number of total agents and
active agents are also represented. In addition the last thirty commands sent to any
Agents on the network are displayed and updated in real time.
If the H3E system has not been registered the dashboard on the CAT will notify you
that the system is not registered by displaying a label at the bottom of the screen:
Figure 6.2: Unlicensed Banner
You can click on the red tag to enter a H3E license and the tag will disappear if the
registration is valid.
User Communication
The Users section identifies the user by name and ID, displays the last login and last
event, shows any other users also online and provides space for notes and for live
messages. The list of users online represents the number of individuals logged into
the same server and thus available to respond to requests.
Copyright ©2009 e-fense, Inc. No part of this document may be copied or reproduced without the written permission of e-fense, Inc.
Understanding Content
66
Communication between CAT users using the Live Messages window is an encrypted
live chat. The User Notes window allows users to leave information for offline users
for viewing at a later time.
The page also shows the currently logged in users last login time to the H3E system
as well as the last event that was conducted. The user ID and name is also supplied
for reference.
Figure 6.3: User Communication
Copyright ©2009 e-fense, Inc. No part of this document may be copied or reproduced without the written permission of e-fense, Inc.
67
Understanding Content
To leave a note simply click the Add New
Note button, in the command bar, and add
your note. Click the Delete Note button
while the note to be deleted is highlighted.
When you click on the Add New Note
button a window will open in which you can
enter notes.
To chat with other users simply type your
message in the box with the label <type
msg here> and your message will be sent
out across the H3E system for all logged in
users.
Figure 6.4: New note
The communication is encrypted via a AES 256 bit encryption key. When a user
communicates with other users logged into the CAT the status bar will update with a
chat icon notifying that a message has arrived. Simply click on the icon to take you
to the message.
Figure 6.5: New Chat notification message
Incident Response Audit Results
The Incident Response toolbar item allows you to view the outcome of the requests
to your Agents. Once you have selected this option, the Content pane will appear as
four major separate sections:
The audit banner which has the name of the system. You can see the IP address of
the selected system, in the status bar, by hovering the mouse over the agent name
in the agent pane.
Copyright ©2009 e-fense, Inc. No part of this document may be copied or reproduced without the written permission of e-fense, Inc.
Understanding Content
68
Figure 6.6: The audit banner
The command bar allows you to refresh the audit lists, set a view filter and view all
the thumbnail screenshots taken from the selected agent:
Figure 6.7: The command bar
The filter allows the audit history list to
be filtered between no filter and up to 30
days. Click on Set to apply the filter.
The default is set to no filter. The filter
will set the display for all audits.
Figure 6.8: Filter Window
The screen icon will display thumbnail pictures of all the screenshots ever taken
from the selected agent. You can double click on the thumbnail pictures to open the
full screenshot within the content pane.
When you first click on the ‘Show Screencapture Thumbnails’ you will see a dialog
box telling you the thumbnails are being loaded. If any of the thumbnails are all
black than that indicates no users were currently logged into the system when the
screenshot was made.
Copyright ©2009 e-fense, Inc. No part of this document may be copied or reproduced without the written permission of e-fense, Inc.
69
Understanding Content
Figure 6.9: Display for all thumbnails on a particular agent
The Audit History tree view has a list of all the audits the selected Agent has ever
had run. Information displayed here will only show returned results in a tree view
with the audits listed in chronological order.
This list is controlled by the filter options in the command bar.
Copyright ©2009 e-fense, Inc. No part of this document may be copied or reproduced without the written permission of e-fense, Inc.
Understanding Content
70
The audits are automatically displayed by the GMT date and
Time when the audit was run. However you can change this
display behavior by holding down the SHIFT key and double
clicking on the audit date. You will then be able to rename
the audit to something more meaningful. The original date/
time will still be associated to the audit and can be seen in
the status bar when you hover the mouse over the audit.
The audits can be expanded by simply clicking on the
disclosure triangle. Then click on the audit type that you
want to view in the results window(s).
The Results Window is the final area of the content pane.
This part of the window is where all the resultant data is
displayed when you click on any area from the audit tree
view.
Figure 6.10: Audit History list
The complete content pane has a lot of information on it but is very easy to navigate
once you understand the options.
Copyright ©2009 e-fense, Inc. No part of this document may be copied or reproduced without the written permission of e-fense, Inc.
71
Understanding Content
Figure 6.11: Audit Results
Quick Tip: Result Information
Note: All recovered results reflect system information at the
time the audit was run, not at the time the results are being
reviewed, except as indicated otherwise. Information relates
to the target computer, not a specific user on that computer,
except as indicated otherwise.
Copyright ©2009 e-fense, Inc. No part of this document may be copied or reproduced without the written permission of e-fense, Inc.
Understanding Content
72
Forensics
Forensics analysis is important when you need to understand the who, what, where
and when. The ability to view Windows filesystems is built into H3E so you can view
the native filesystem tree without harming or altering the files or their metadata.
In order to get the filesystem view you need to select the ‘Filesystem View’ option in
the system menu as outlined in chapter 5.
Figure 6.12: Forensics Window
When you view the filesystem you will see the filesystem tree view on the left and
the content on the right.
Copyright ©2009 e-fense, Inc. No part of this document may be copied or reproduced without the written permission of e-fense, Inc.
73
Understanding Content
Every filesystem image will be displayed in a drop down menu for the highlighted
agent. Simply choose the date/time for which you want to view and the results will
be displayed.
Figure 6.13: FileSystem View Drop down (highlighted by red box)
Quick Tip: Supported Filesystems
Currently only Windows NTFS and FAT filesystems are
supported but all the other major filesystems from EXT2 and
EXT3, HFS will be supported in a future update.
As you view into the filesystem tree on the left side of the screen you can view the
contents on the right. This is accomplished by clicking on a file or folder in the tree
view. The folder and its contents will be displayed in a listbox on the right.
For each file listed you can view the date it was created, modified and last accessed.
You can also see the size of the file and the size it takes up on the hard drive.
Figure 6.14: File view with partial metadata
Copyright ©2009 e-fense, Inc. No part of this document may be copied or reproduced without the written permission of e-fense, Inc.
Understanding Content
74
At any time you can copy a file from the listbox to the local CAT system by right
clicking on the file and choosing Download File... from the menu.
Figure 6.15: Downloading a file from the File System view.
By selecting the Download File... option you will be presented with the download
window.
This window will show you the file you are
downloading as well as it’s size.
You have options just like when you make
a forensics image of RAM or disk. You also
have a choice to encrypt the transfer.
Click on the Start button to begin the
copying process.
Figure 6.16: Downloading a file window
When the file has finished copying, the listbox will indicate the file has been copied
to the local system by coloring the file list:
Figure 6.17: Downloaded files
Copyright ©2009 e-fense, Inc. No part of this document may be copied or reproduced without the written permission of e-fense, Inc.
75
Understanding Content
Once a file has been downloaded, you can show where it is located by clicking on the
Show on Disk menu item, or you can choose to view the file which will bring up the
forensics viewer.
Quick Tip: Streaming Files
You can also view the file by streaming it’s contents to the CAT
without having to download it. Simply double click the file.
Figure 6.18: Forensics Viewer
Copyright ©2009 e-fense, Inc. No part of this document may be copied or reproduced without the written permission of e-fense, Inc.
Understanding Content
76
The viewer can open any file for analysis but works very well for memory analysis.
You can search for keywords and they will be highlighted if found. Highlighted text
can be copied out of the viewer if needed.
To see a list of all the disk and RAM images made, click on the hard drive icon in the
tool panel and the list window will appear which shows a list of all the images based
upon the selected agent. Each audit date can contain images. Clicking on the audit
will display the actual files and two options exist; copy the files out for additional
analysis or open the file in the built in forensics viewer.
Figure 6.19: Image list window
Copyright ©2009 e-fense, Inc. No part of this document may be copied or reproduced without the written permission of e-fense, Inc.
77
Understanding Content
Electronic Discovery
H3E allows for very simple yet efficient electronic discovery. You can search all the
agents for specific files, using keywords between specific dates. The files can be deduplicated both on the agent level and on the enterprise level. Only the deduplicated files will be sent to the H3E servers. Complete logging will will saved
which shows why a particular file was responsive and why another was not.
The search is conducted on the logical file system and does not search slack or free
space. However deleted files that have not been overwritten will be searched.
The search date and time will appear in the left hand results column as a date/time
stamp. Simply click on an agent and then on an item in the results column. The
returned results will be listed in the right hand listbox. Simply clicking on an item
will reveal more information on that item in the lower window.
Figure 6.20: E-Discovery Window
Copyright ©2009 e-fense, Inc. No part of this document may be copied or reproduced without the written permission of e-fense, Inc.
Understanding Content
78
However, you will want to see what the search options were that returned this
particular results. You can view that information by clicking on the Show Search
Criteria option in the command bar.
All of the search criteria for the highlighted search will be displayed in the search
criteria window.
Figure 6.21: E-Discovery Search Criteria Window
Reporting
The final window in the Content pane allows you to create reports in the PDF format.
The first report page is based on the agent that is selected in the host pane. When
Copyright ©2009 e-fense, Inc. No part of this document may be copied or reproduced without the written permission of e-fense, Inc.
79
Understanding Content
you click on an agent the Audit Date drop down list will be populated for the data
corresponding the the selected agent.
When the audit from the Audit Date drop down is chosen, the individual audits
counts will be displayed which allows you to see what data is associated to that
particular audit. You can select any report task in order to create the report. Once
you have checked which option you want click on the Create Report button to
generate the PDF.
Figure 6.22: Report Window
Copyright ©2009 e-fense, Inc. No part of this document may be copied or reproduced without the written permission of e-fense, Inc.
Understanding Content
80
When the report has finished a dialog box will be displayed which asks if you would
like to view the PDF report. Click View in the dialog box to view the file.
Figure 6.23: View created report option
The second page to Report generation are the adhoc reports which allow you to view
the history of all the audits as well as the login history to the H3E system.
Copyright ©2009 e-fense, Inc. No part of this document may be copied or reproduced without the written permission of e-fense, Inc.
81
Understanding Content
Figure 6.24: View ad-hoc reports
The following is an example of an Analyst Audit Activity Report in PDF format.
Copyright ©2009 e-fense, Inc. No part of this document may be copied or reproduced without the written permission of e-fense, Inc.
Understanding Content
Figure 6.25: Samplar of a Report
Copyright ©2009 e-fense, Inc. No part of this document may be copied or reproduced without the written permission of e-fense, Inc.
82
83
Understanding Content
Adding/Managing Cases
The H3E system allows you to set up cases to manage work flow. New cases can be
created from the man menu bar on the CAT. Simply click on the Add new case button
and you will be presented with the case editor window.
The case editor window has two tabs: “Details” and “Tags.” The “Details” tag
contains all the case information such as the case number, the date of the case
opening, the status, priority, and any comments.
The date opened, closed, and updated are all set for you automatically by the
system. Simply fill out the case number, status and priority. The investigator name
is set to the login name of the H3E user. Fill in any comments for the case as well.
Figure 6.26: Case editor window
Copyright ©2009 e-fense, Inc. No part of this document may be copied or reproduced without the written permission of e-fense, Inc.
Understanding Content
84
Once you have filled in the case details, click on the New Tag button to create a case
tag. This is similar to a bookmark. However, tags work differently than bookmarks.
Simply drag and drop content from the ‘Content Pane’ onto the tag window and a
new tag will be created for you.
Figure 6.27: Case editor tag window
Copyright ©2009 e-fense, Inc. No part of this document may be copied or reproduced without the written permission of e-fense, Inc.
7: System Preferences
Setting user and server preferences for H3E
System Preferences
86
System Preferences
The local CAT Preferences are accessed through the Preferences... menu option.
Specific options can be assigned for the local CAT. To access the Preferences menu:
Figure 7.1: Preferences Menu
On Mac OS X, click on the CAT menu item in the Apple toolbar and select
Preferences.... On Windows and Linux select Edit in the top left corner of the
toolbar screen, then select Preferences...
Admin Tool Preferences
Here you can select different where downloaded file items will be saved by default.
You can also choose the Greenwich Mean Time display options. By default all times
in H3E are displayed and stored in GMT time. However, you can change the display
(only) to show the local time.
Copyright ©2009 e-fense, Inc. No part of this document may be copied or reproduced without the written permission of e-fense, Inc.
87
System Preferences
Figure 7.2: CAT Preferences
General H3E Server Configuration
The server settings can be accessed by clicking on the Server then Settings... menu
option on the CAT toolbar.
Figure 7.3: Server Settings Menu
The first screen to appear is the Network Settings. Here you can accept default
communication settings or select your own for the following:
Console TCP Listen Port (default 9010)
Console UDP Listen Port (default 64000)
Console FTP Listen Port (default 9090)
Console Admin Port (default 59345)
Agent Idle Time (default 300 seconds)
Direct Transfer Port (default 9090)
Copyright ©2009 e-fense, Inc. No part of this document may be copied or reproduced without the written permission of e-fense, Inc.
System Preferences
88
Figure 7.4: General Configuration
User Configuration
Click on the Users Admin tab to bring up the User Configuration screen. Here you
will see a list of current users, or those allowed access to the Server. Below that list,
click on New User to add or Delete to eliminate users with log-in privileges.
The right side of screen contains User Information. To create settings for any user,
first enter the user name and password at the top. Below that, mark the Has
Administrator Access checkbox if you would like that user to have such access.
Copyright ©2009 e-fense, Inc. No part of this document may be copied or reproduced without the written permission of e-fense, Inc.
89
System Preferences
Figure 7.5: User Configuration
Mission Assurance Categories
Next, select the appropriate Mission Assurance Category for the Host (the computer
or devices) to which the user has access. Available MAC levels are:
Level 0 - Not defined or set (guest)
Level 1 - Critically Important
Level 2 - Moderately Important
Level 3 - Least Important
Users must determine which components fit which categories for their particular
systems. Generally speaking, however, Level 1 encompasses those features on which
Copyright ©2009 e-fense, Inc. No part of this document may be copied or reproduced without the written permission of e-fense, Inc.
System Preferences
90
your entire enterprise depends for productivity. Without them, your entire system
grinds to a halt. Examples might include a database or an e-mail server. Level 2
might include such features as a back-up server, while Level 3 might be assigned to
printers or individual workstations.
Network Access
Click the Network Access button to bring up this box, where you can select the
appropriate access level for the user.
Figure 7.6: Network Access
Private Information Access
Finally, mark the appropriate checkboxes in the Private Information Access section
to determine whether the user can access ScreenShots, Disk Imaging, RAM Imaging
or KeyLogger. These features are described in greater detail in chapter 5.
Copyright ©2009 e-fense, Inc. No part of this document may be copied or reproduced without the written permission of e-fense, Inc.
91
System Preferences
Database Backup
Click the Enable Backups checkbox to enable database backups. You have the
option to set the time and day(s) you wish to back up the system’s database. You
may enter a time and select any or all days of the week by marking the appropriate
checkboxes.
Figure 7.7: Database Configuration
System Updates
The system can be set to check for updates on a weekly basis or you can force a check
by clicking on the Check Now button. If any updates are available they will be listed
in the listbox. The application that has an update along with the version and date of
release will be listed.
Copyright ©2009 e-fense, Inc. No part of this document may be copied or reproduced without the written permission of e-fense, Inc.
System Preferences
92
Figure 7.8: System Updates
In order to update an element of the H3E system simply check the box next to the
Application name and click on the Install Updates button. The updates will be
downloaded to the H3E server and will be install in this order:
1. Server will automatically install updates first after download
2. Updates on agents will be installed when they first beacon in after a download
3. CAT updates will happen upon login after a download
If the Check Weekly checkbox is checked and an update is discovered the dashboard
on the CAT will display the following banner:
Figure 7.9: System Updates Banner
Copyright ©2009 e-fense, Inc. No part of this document may be copied or reproduced without the written permission of e-fense, Inc.
8: Additional Information
Everything Else
System Help
94
Customer Support
Please first refer to the instructions included in this users’ manual if you encounter
problems using H3E. If you are unable to find the solution you need, please contact
Customer Support at http://fogbugz.e-fense.com with a detailed explanation of the
issue or request.
Please also contact us about features you would like to see in a future Helix3
Enterprise release. We are committed to continually improving our product to ensure
it meets your needs in the future as well as the present.
Legal Notification
H3E, Helix3 Enterprise, Helix3 are registered trademarks or trademarks owned by efense, Inc. in the United States and other jurisdictions and may not be used without
prior written permission. All other marks and brands may be claimed as the property
of their respective owners. Products and corporate names appearing in this manual
may or may not be registered trademarks or copyrights of their respective
companies, and are used only for identification or explanation into the owners'
benefit, without intent to infringe.
Any use and duplication of this material is subject to the terms of the license
agreement between you and e-fense, Inc. Except as stated in the license agreement
or as otherwise permitted under Sections 107 or 108 of the 1976 United States
Copyright Act, no part of this publication may be reproduced, stored in a retrieval
system or transmitted in any form or by any means, electronic, mechanical,
photocopying, recording, scanning or otherwise.
Product Manuals and Documentation are specific to the software versions for which
they are written. Specifications and information contained in this manual are
furnished for informational use only, and are subject to change at any time without
notice.
Copyright ©2009 e-fense, Inc. No part of this document may be copied or reproduced without the written permission of e-fense, Inc.
95
System Preferences
Export Exemption
COMMODITY CLASSIFICATION
COMMERCE
UNITED STATES DEPARTMENT OF
BUREAU OF INDUSTRY AND SECURITY
WASHINGTON, D.C. 20230
CASE NUMBER: Z727203
E-FENSE, INC.
ATTN: ROWLAND KIRKS
120 NORTH SAINT ASAPH STREET
ALEXANDRIA, VA 22314
APRIL 01, 2008
CCATS #: G061201
THE FOLLOWING INFORMATION IS IN RESPONSE TO YOUR INQUIRY OF JANUARY 30, 2008
REQUESTING LICENSE INFORMATION FOR:
LVS
DOLLAR
IVL REQUIRED
COMMODITY
ECCN
LVS
FOR
COUNTRY GROUPS
LIMIT
----------------------------------------------------------------------------ITEM #1:
1) COMPUTER NETWORK SECURITY SOFTWARE
5D002C.1 ENC
$0
HELIX ENTERPRISE (H3E)
----------------------------------------------------------------------------COMMENTS FROM LICENSING OFFICER(S):
ITEM #1: THIS ENCRYPTION ITEM IS AUTHORIZED FOR LICENSE EXCEPTION ENC UNDER
SECTIONS 740.17(A) AND (B)(3) OF THE EXPORT ADMINISTRATION
REGULATIONS.
ITEM #2: THIS ENCRYPTION ITEM IS AUTHORIZED FOR LICENSE EXCEPTION ENC UNDER
SECTIONS 740.17(A) AND (B)(3) OF THE EXPORT ADMINISTRATION
REGULATIONS.
ITEMS OTHERWISE ELIGIBLE FOR EXPORT OR REEXPORT UNDER A LICENSE EXCEPTION OR
NLR (NO LICENSE REQUIRED) AND USED IN THE DESIGN, DEVELOPMENT, PRODUCTION OR
USE OF NUCLEAR, CHEMICAL OR BIOLOGICAL WEAPONS OR MISSILES REQUIRE
A LICENSE FOR EXPORT OR REEXPORT AS PROVIDED IN PART 744 OF THE EXPORT
ADMINISTRATION REGULATIONS (EAR)
DESTINATIONS REQUIRING A LICENSE
-------------------------------SEE THE COMMERCE COUNTRY CHART (SUPPLEMENT NO. 1 TO PART 738 OF THE EAR) TO
DETERMINE WHICH COUNTRIES REQUIRE A LICENSE. USE THE COUNTRY CHART COLUMN
Copyright ©2009 e-fense, Inc. No part of this document may be copied or reproduced without the written permission of e-fense, Inc.
System Help
96
INFORMATION GIVEN ON THIS FORM IN CONJUNCTION WITH THE COUNTRY
CHART TO DETERMINE THE LICENSING REQUIREMENTS FOR YOUR PARTICULAR ITEMS.
FOR ITEMS CLASSIFIED EAR99, SEE PART 746 OF THE EAR TO DETERMINE THE
LICENSING REQUIREMENTS.
APPLICATIONS FOR EXPORT MUST BE SUBMITTED ON FORM BIS-748P MULTIPURPOSE
APPLICATION. THESE FORMS MAY BE OBTAINED BY CALLING (202) 482-3332 OR
REQUESTING DIRECTLY ON THE BIS INTERNET WEB SITE. ASSISTANCE IN FILLING OUT
THE FORM, OR ANY ASPECT OF EXPORTING, IS PROVIDED BY THE EXPORT COUNSELING
DIVISION IN WASHINGTON, D.C. AT (202) 482-4811 OR THE WESTERN REGIONAL OFFICE
IN NEWPORT BEACH, CALIFORNIA AT (714) 660-0144.
LICENSE EXCEPTIONS
-----------------BE AWARE THAT THE LICENSING REQUIREMENTS FOR SOME DESTINATIONS MAY BE
OVERCOME BY ANY LICENSE EXCEPTION FOR WHICH YOUR ITEMS QUALIFY. SEE PART 740
OF EAR FOR INFORMATION ON LICENSE EXCEPTIONS. THE LICENSE AVAILABLE COLUMN
ON THIS FORM LISTS ONLY THOSE LICENSE EXCEPTIONS OF THE SET GBS, CIV, APP,
TSR WHICH ARE APPLICABLE TO YOUR ITEMS. OTHER LICENSE EXCEPTIONS MAY APPLY,
DEPENDING UPON THE CIRCUMSTANCES OF YOUR INTENDED TRANSACTION.
EXPORT CONTROL CLASSIFICATION NUMBERING SYSTEM (ECCN)
----------------------------------------------------THE ECCN NUMBERING SYSTEM IS FOUND IN THE COMMERCE CONTROL LIST (CCL) PART
774 OF THE EAR. THE CCL IS A COMPREHENSIVE LIST THAT IDENTIFIES ALL ITEMS
CONTROLLED AND LICENSED BY COMMERCE. WITHIN THE CCL, ENTRIES ARE IDENTIFIED
BY AN ECCN. EACH ENTRY SPECIFIES THE LICENSE REQUIREMENTS FOR THE ITEM AND
THE REASON(S) FOR CONTROL. PLEASE CONSULT PARTS 738 AND 774 OF THE EAR FOR
SPECIFIC INFORMATION ON ECCNS.
SHIPPERS EXPORT DECLARATION (SED)
---------------------------------WHEN AN EXPORT IS MADE, IT IS NECESSARY FOR THE EXPORTER TO SHOW ON THE
SHIPPERS EXPORT DECLARATION (FORM 7525-V) IN BLOCK 27 EITHER THE LICENSE
NUMBER, THE APPLICABLE LICENSE EXCEPTION SYMBOL OR THE SYMBOL NLR. FORM
7525-V IS AVAILABLE FROM THE SUPERINTENDENT OF DOCUMENTS, U.S. GOVERNMENT
PRINTING OFFICE OF WASHINGTON, D.C. 20402, AND FROM EXPORT ADMINISTRATION
DISTRICT OFFICES (U.S. DEPT. OF COMMERCE).
CATHERINE PRATT
DIVISION DIRECTOR
FOR INFORMATION CONCERNING
THIS CLASSIFICATION CONTACT
AARON AMUNDSON
PHONE #: (202) 482-5299
BIS/STC/IT
Copyright ©2009 e-fense, Inc. No part of this document may be copied or reproduced without the written permission of e-fense, Inc.