1
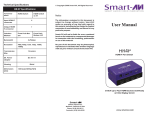
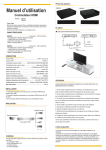
SWITCH USING THE FRONT CONTROL PANEL To navigate different inputs manually and display them on the main screen simply press the left and right buttons. The “Channel Selected” light will indicate exactly what input channel is selected. SWITCH USING REMOTE CONTROL The HDNet4P can be controlled by remote control. Use the channel up and down keys to select the next input. The number keys can be used to select channels 1 through 4. The channel selection will be disabled when the HDNet-4P is in automatic mode. SWITCH USING RS232 A standard serial data program such as HyperTerminal can be used to issue commands to the HDNet4P. The settings are 9600 bits per second, 8 data bits, no parity, 1 stop bit, and no flow control. TECHNICAL SPECIFICATIONS VIDEO Video Amplifier Bandwidth 1.65 Gbps Input Video Signal 1.2 volts Input DDC Signal 5 volts Single Link Range 1080p HDMI Connector HDMI Type A 19 pin female CONTROL Front Panel 2 Tactile Switches RS-232 Female DB9 @ 9600bps IR 3.5mm connector with 38khz HDNET-4P FOUR PORT HDMI AUTOMATIC SWITCH OTHER Power 5V DC Dimensions 9.1” W x 1.75” H x 2.5“ D Weight 2.5 lbs. (As shown at left) FUNCTION COMMAND Switch to channel 1 //M1 Switch to channel 2 //M2 Switch to channel 3 //M3 Switch to channel 4 //M4 Hotplug channel 1 //h1 Hotplug channel 2 //h2 Hotplug channel 3 //h3 Hotplug channel 4 //h4 Check EDID //d The “Check EDID” command will compare the current EDID from the monitor with the EDID it has programmed inside, this is to ensure the correct audio and High definition display signals are being sent through the device properly. Automatically Switch Between up to Four HDMI Devices on One HDMI Display Designed and Manufactured in the USA 800.AVI.2131 Tel: (818) 503-6200 Fax: (818) 503-6208 11651 Vanowen St. North Hollywood, CA 91605 SmartAVI.com USER MANUAL INTRODUCTION INSTALLATION DIAGRAM With SmartAVI’s HDNET-4P it is now possible to connect up to four HDMI devices to one display screen for easy switching between sources. Transmit high definition sources such as BluRay players, gaming consoles, computers or cable receivers effortlessly while viewing on a single HDTV monitor. The HDNet-4P offers an automatic switching mode, and when configured as an automatic switcher, it has the ability to switch to a selectable secondary input upon powering off of the primary input. HDNet4P will automatically switch to the next device when the higher input is powered off. This allows the user to control multiple devices with the HDNet-4P. FEATURES RS232 switching control IR switching control Front panel switching control EDID learning of any monitor Maintains 480p, 720p, 1080i and 1080p video formats Supports HDMI 1.3 digital audio format, LPCM/ Dolby-AC3/ DTS7.1/DSD ATC & HDCP compliant Connect four HDMI components to one HDTV monitor Supports DVI-D WHAT’S IN THE BOX PART NO. QTY DESCRIPTION HDNET-4PS 1 HDMI 4x1 Automatic Switch Power Supply 1 PS5VDC-2A User Manual 1 CONNECTING THE HDNET-4P AUTOMATIC MODE 1. Ensure that power is disconnected from HDNET4Pro. 2. Connect up to four HDMI cables from the source devices to the respective HDMI IN ports on the HDNET-4P. 3. Optionally connect RS-232 for control functions. 4. Connect the display monitor to the HDMI OUT on the HDNET-4P. 5. Power on the HDNET-4P. 1. Locate the Phoenix Connector at the rear of the unit. 2. Plug in the Phoenix Connector jumper. 3. When the device is in automatic mode and at least one input is plugged in, the monitor LED will blink. *Note: The pushbuttons will be disabled in Automatic Mode. EDID programming is also disabled in this mode. LEARNING EDID 1. Unplug all of the inputs to the HDNet4P, make sure the HDNet4P is in manual mode (Not automatic mode, so remove the phoenix connector jumper.) 2. Plug the display monitor that you will be using into the HDNet4P 3. Turn on the HDNet4P 4. Turn on the display monitor 5. After a moment simply press and hold both buttons on the front control panel for about a second and then let go. 6. Notice the lights on the front control panel will begin flashing for about 10 seconds (if this isn’t the case then try again.)