1
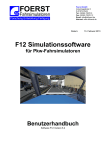
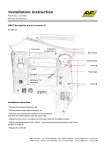
FOERST Driving Simulators Research Development Production Foerst GmbH Industriegelände 5 D-51674 Wiehl Tel.: 0049-2262-72970 0 Fax: 0049-2262-72970 12 Email: [email protected] Internet: www.drfoerst.de Date: 25. June 2013 F12 Simulation Software for Truck/Bus Driving Simulators User’s Manual Software F12 Version 5.2 2 Contents 1. 2. 3. Description of the Menu Control of Truck Simulators F12H Educational Program Software Update Procedure Foerst GmbH Industriegelände 5 D-51674 Wiehl Telefon: 0049-2262 / 72970-0 Telefax: 0049-2262 / 72970-12 Email: [email protected] Internet: http://www.DrFoerst.de/ © 1976-2013 Foerst GmbH. All rights reserved. Information in this document is subject to change without notice. Without limiting the rights under copyright, no part of this document may be reproduced, stored in or introduced into a retrieval system, or transmitted in any form or by any means (electronic, mechanical, photocopying, recording, or otherwise), or for any purpose, without express written permission of Foerst GmbH. FOERST Driving Simulators Research Development Production Foerst GmbH Industriegelände 5 D-51674 Wiehl Tel.: 0049-2262-72970-0 Fax: 0049-2262-72970-12 Email: [email protected] Internet: www.drfoerst.de 07.07.2009 Description of the Menu Control of Truck Simulators F12H The driving simulator software F12H allows many settings and adjustments and the choice between a multitude of driving tasks/settings. The necessary choices can be made using a small control unit with two buttons: “Line” and “Mode”. All adjustments are made via a menu. This menu can be called up, when the simulator is in rest mode, that means if no drive is currently running. It is usually displayed automatically, and can be opened by pushing either “Line” or “Mode” if currently invisible. The menu is structured line by line and shows a cursor in the form of a red bar. In general, the button “Line” moves the cursor, while the button “Mode” activates or modifies a menu text. The first menu line, shown in yellow, describes the “Program”, which is the highest level mode of the simulator. Further lines of the menu comprise adjustable options for this program. When a drive is started, the current settings in the menu determine the simulator’s behaviour1. There are driving programs like “Driving School” and menus for special adjustments like “Options”, “Service“, or „Replay“, which are not meant to start a ride. While driving programs are described in corresponding chapters, this document focuses on the non-drive menus below (the last one is not a menu, but rather an operation mode): 1. 2. 3. 4. 5. 1 Options Service Driver’s Data Replay Replay Playback This may seem obvious, but you can start a ride while the corresponding menu page is not visible (e.g. in the diagnosis page). 2 1. Options The options menu allows the adjustment of global parameters, which influence all driving programs. In addition to the options described here, the menu for your simulator could contain configuration entries for special hardware used in your simulator. 1.1. Printing Options Driving programs can generate a printed evaluation, which contains a list of the driving faults made during the ride as well as the driver’s personal data (if entered using the corresponding menu). You can choose between “None” and “Standard”2. 2. Service The service menu offers some service functions as well as a diagnosis display. The latter is used by service technicians in order to quickly solve issues with your simulator in case they arise. 2.1. Diagnosis The diagnosis display allows an assessment of the interface hardware as well as the connected sensors and switches. Thus, it is a valuable tool, if something should not function as expected. The diagnosis display can also be activated at any time using the pc keyboard and the key combination <Ctrl>+<F1>. You can also start a ride (although you cannot see the settings for the newly started ride) while the diagnosis display is active. Turn the ignition key to start the ride selected in last shown driving program menu. 2 For the latter to work, a printer must be connected to the system and be configured as Windows standard printer. Attention: Installing some printers may lead to subsequent performance problems of the simulator due to driver issues. Such issues are not covered by the warranty. 3 Before the ride, the diagnosis display can be switched off using either “Line” or “Mode”, which returns you to the main menu. The values in the diagnosis display are structured as follows: a. b. c. d. Raw analogue inputs Processed analogue Inputs Active digital inputs Active digital outputs a. Raw Analogue Inputs These values are input measurements from the hardware installed in your simulator. The values are interpreted by the software and then used as input values for the simulation. The actual values may be different from simulator to simulator, but you may be asked for them by a service technician. b. Processed Analogue Inputs The above described raw analogue inputs are processed to yield the simulation input values. This translation may need to be changed if the simulator is moved or in reaction to larger environmental changes. This is done in the Calibration process (see section 2.2). We now assume, a calibration has already been performed. Then, the processed values vary from 0 to 100 per cent. The first step for error diagnosis is to observe these values and compare them to actual hardware input. Accelerator pedal released: 0 % Accelerator pedal fully activated: 100% Brake pedal released: 0% Brake pedal fully activated: 100% Clutch pedal released: 100% (transmission) Clutch pedal fully activated: 0% (declutched). After steering wheel initialization, the steering wheel angle, relative to straight motion position, is indicated in degrees. c. Active Digital Inputs Digital inputs are e.g. ignition key, starter, blinker, light switch, safety belt lock, wiper switch and other digital inputs. They are shown both in raw form as a hexadecimal number and in interpreted form as textual descriptions of the currently activated inputs. d. Active Outputs The steering wheel torque is the feedback in per cent. It always vanishes when not driving, so don’t expect other values unless you start a ride, when problems with the steering wheel motor can be diagnosed. The values in the last line refer to digital output values such as vibration motor activation state. You will only need to pay attention to these values if a problem arises and you are asked for them by a service technician. 4 2.2. Calibration During the calibration process, the raw input range for the various analogue sensor inputs is measured and stored. These measurements are subsequently used to translate the raw sensor inputs into percentage values used by the simulation. A calibration becomes necessary, whenever the simulator is moved or e.g. the environmental temperature changes. It is also advisable to perform a calibration process from time to time to compensate the effects of wear and tear on the sensor and/or interface hardware. During the calibration process, the computer asks you to press, hold and release the pedals, i.e. accelerator, brake and clutch. During the measurement, the current raw values are displayed, which may be interesting for a technician in case of problems. The calibration process may be cancelled by pressing the horn button. 2.3 Finish without Shutdown Activating this entry quits the simulation program without shutting down the computer. After approx. 20 seconds, the program quits and you are left with the Windows desktop. This option is e.g. needed in order to perform a software update. 2.4 Shutdown Activating this entry completely shuts down the computer. This process take about 30 seconds, after which the simulator may be physically powered off. 5 Driver Data The driver’s data menu allows to enter user data for the personalized use in e.g. driving schools. This menu is only available, if your software license comprises the driving school program. It offers entering the following data items: 2.3. Driver Id Here, a short identification is entered, which is later used to load the driver data. Usually, a shortened form of the driver’s name or an identification number is used. Please note, that not all letters are allowed for this id. 2.4. Name This allows the input of the full user’s name. 2.5. Gender This allows the input of the user’s gender (mainly for salutation purposes). Please use abbreviations “m” = male and “w” = female. 2.6. Date of Birth Allows to input the user’s date of birth. 2.7. Comment 1 A line of free text for the use of e.g. the driving school. 2.8. Comment 2 Another line of free text. 2.9. Load Data Activating this line using the „Mode“ button causes the driver data identified by the currently entered driver Id to be loaded. Both success and failure of the load process are acknowledged by a corresponding audio signal. 2.10. Save Data Activating this line using the „Mode“ button causes the currently entered user data to be saved under the given driver Id. A successful save process is acoustically acknowledged. 6 3. Replay The replay menu allows to play back a “replay” of the last 10 rides. A “replay” is a recording of the ride, which can be played back either from the driver’s perspective or as seen from outside the vehicle. Optionally, you can display additional diagrams showing various physical data items as they vary over time (e.g. position of the brake pedal,…) 3.1. Show Replay Activating this entry with the “Mode” button starts the replay selected below with display of the selected additional data items. 3.2. Display Data Here, you can select the additional data items to be displayed. You can choose between “None”, “Economical” and “Safety”. 3.3. Choice of ride Here, you can select the ride, for which you want to show a replay. You can choose between the last 10 rides performed on the simulator, presented in reverse order: The last ride appears first, the second last second and so on. The entries are labeled similar to the selections made in the menu to start the ride. If there is still no replay data present, then “-not available!” is displayed. 7 4. Replay Playback Replays may be started either at the end of a ride or through use of the Replay menu. The simulator then switches to “Replay mode”, the recorded data is played back and data is displayed. A small control window shows the playback state and the time position. The following interactive controls are possible: The Button “Enter” allows to change perspective between the driver’s perspective and views from outside the vehicle. You can use the “Mode” button to fast forward the playback. You can use the “Line” button to stop or rewind the playback. Pressing and releasing both “Mode” and “Line” quits the replay mode and brings you back to the previous menu (i.e. either evaluation after the ride or main menu). In addition, the replay playback can be influenced using the steering wheel: In neutral position, the replay runs with original speed. Turning the wheel to the right makes playback faster (fast forward). Turning the wheel to the left makes playback run slower (slow motion) or even backwards (rewind). FOERST Driving Simulators Research Development Production Foerst GmbH Industriegelände 5 D-51674 Wiehl Tel.: 0049-2262-72970-0 Fax: 0049-2262-72970-12 Email: [email protected] Internet: www.drfoerst.de Rev. 2013-02-28 Educational Program The Educational Program comprises a number of “Scenarios” organized into “Blocks”. Each “Block” is a collection of “Scenarios” with similar or interrelated educational aims. Using the menu, the driving teacher chooses scenarios adequate for the educational level of his student. Thus, he has total control over the course of the education and can always choose the exercise, which benefits his student most. Of course, choosing an adequate scenario demands an in-depth knowledge of the available scenarios on the part of the teacher. This manual is meant as a guide to the available scenarios. The teacher is advised to have a look at the scenarios himself before posing them as tasks to his students. 2 1. Menu The Educational Program’s menu page allows to select the current student and to select the next exercise. 1. 2. 3. 4. Choice of “Training Block” Choice of “Scenario” Settings Driver Identification 1.1. Program Title Using the first (yellow) line, you can choose the Training Blocks or to various settings pages. Refer to the “Description of the Menu Control” chapter for details. 1.2. Training Blocks You can choose between five training blocks, which in turn determines the scenarios you can select in the line below. The following blocks can be selected: 1. 2. 3. 4. 5. Economic Driving Driver Safety Training Manoeuvring Critical Situations Free Driving 1.3. Choice of Scenario Here, you can choose between the different scenarios belonging to the selected block. You will find an overview about the available scenarios for each block in section 2 “Scenarios”. 1.4. Settings Depending on the selected scenarios, you can make various adjustments. For a description of the available settings, refer to section 2 “Scenarios”. 3 2. Scenarios This section contains short descriptions of the available scenarios. The focus is not on an indepth description of the scenario timeline, but rather on the main educational content and the available variants (i.e. settings). It has to be considered that not all scenarios can be driven by all available vehicles. Especially both EuroCombi types may be critical due to their length. 2.1. Economic Driving The block “Economic Driving” offers five Scenarios for different environments, which are described at the end of this section: City Suburban area Rural Road Motorway Mountains All of these Scenarios offer similar variants/settings. The standard choice for each setting is underlined. Choice of vehicle o Semitrailer truck o Tanker truck o Truck o Drawbar trailer combination o Tandem truck o Coach o Urban bus o Small truck o Fire truck o EuroCombi type A 4 o EuroCombi type B Choice of total weight (depends on the chosen vehicle) Semitrailer Tanker Truck truck truck 25t 13t 13t 35t 18t 18t 15t 8t 8t Coach / Urban bus 14t 18t 10t Traffic Density o reproducible o random o none Small truck Fire truck 6,1t 7,5t 4,7t 11t 14t 8t Drawbar combination 24t 35t 12,5t EuroCombi type A / B 30t 40t 20t (for Mountain: Sparse) (for Mountain: Normal) Diagram Type o Eco o Off o Safety 2.1.1. City The driver drives through city traffic. His route leads across several crossroads, in part with traffic lights. His objective is to keep fuel consumption down – mainly through an anticipatory driving style. 2.1.2. Suburban area The student starts on a rural road. The route leads him through a village and on a rural road. Again, the objective is to keep fuel consumption down by means of an anticipatory driving style. Tandem truck 18t 26t 11t 5 2.1.3. Rural Road The student drives on a rural road. The route features e.g. road works with speed limits and a junction with traffic lights. Again, the objective is to keep fuel consumption down by means of an anticipatory driving style. 2.1.4. Motorway The driver enters a motorway and later leaves it again. In addition to an anticipatory driving style, fuel consumption can be reduced by keeping braking manoeuvres and acceleration to a minimum. 2.1.5. Mountains The driver enters a mountain range with a steep rise and leaves it on a steep descent. The objective is again to keep fuel consumption as low as possible. 6 2.2. Driver Safety Training The block “Driver Safety Training” offers eight scenarios described at the end of this section: Braking Distance Avoiding Shoulder Lane Change Test Braking in front of Obstacle Driving in Mountain Area Emergency Braking Tipping point In addition to the choice of scenario, additional parameters can be adjusted. The standard setting is underlined. Road Surface (not for Emergency Braking) o Dry o Wet o Snow Choice of speed (only available for: Braking Distance, Avoiding and Shoulder) o 45 km/h o 60 km/h o 30 km/h Choice of Vehicle o Semitrailer truck o Tanker truck 7 o o o o o o o o o Truck Drawbar trailer combination Tandem truck Coach Urban bus Small truck Fire truck EuroCombi type A EuroCombi type B Choice of total weight (depends on the chosen vehicle, not for Tanker truck) Semitrailer Truck Drawbar Tandem truck combination truck 25t 13t 24t 18t 35t 18t 35t 26t 15t 8t 12,5t 11t Coach / Urban bus 14t 18t 10t Small truck Fire truck 6,1t 7,5t 4,7t 11t EuroCombi type A / B 30t 40t 20t The total weight of the tanker truck can be calculated by: - Kerb weight of the Tanker truck (8t) - Weight of the tank load of the 20m³ tank. Centre of mass position (not for Tanker truck) o Middle o High o Low Choice of fill level (only Tanker truck) o 50 % o 75% o 25% Number of compartments (only Tanker truck) o 3 o 5 o 2 Choice of tank load (only Tanker truck) o Kerosine o Glycerine o Water 8 o Ethanol Safety systems o None o ABS o ABS + ESC1 Choice of diagram type: o Safety o Eco o Off 2.2.1. Braking Distance In reaction to a (virtual) Stop sign flash, the driver is supposed to slam on the brakes. The braking distance, the reaction time and the stopping distance are measured and displayed after the ride. 2.2.2. Avoiding The driver follows a small truck with a crate on its load floor. This crate suddenly cuts loose and falls onto the road. The driver must avoid the crate without loosing control over his vehicle. 2.2.3. Shoulder An oncoming vehicle drives too far to the middle of the road, which forces the driver to escape to the road shoulder. The objective is to safely re-enter the road. 1 ”Electronic Stability Control”, similar to ESP (Daimler), DSC (BMW) or VSC (Toyota). 9 2.2.4. Lane Change Test Using traffic cones, a slalom route is prepared on a wide road. The driver’s task is to accelerate to constant velocity and then manoeuvre through this course. Of course, he should keep control over his vehicle. 2.2.5. Braking in front of Obstacle The driver in direction of an obstacle, where he is supposed to perform a target braking. 2.2.6. Driving in Mountain Area This scenario comes in three variants: Driving Uphill Driving Downhill Driving through a Depression The driver is supposed to train coping with rather steep roads under various weather conditions. Please note, that mountain driving on slippery roads is very difficult and, depending on vehicle type and load, even impossible. In order to allow the driver to make this experience, such combinations are selectable in the menu. 2.2.7. Emergency Braking During a ride on a rural road, the driver must cope with suddenly emerging deer. In addition to the obvious task of not having an accident, the driver’s reaction time is measured. 10 2.2.8. Tipping point The driver drives towards a semi circle marked by traffic cones. In this scenario it is possible to test at which speed and at which height of the centre of mass the vehicle turns over and which influence the ESC has on cornering. 2.3. Manoeuvring The block “Manoeuvring” offers eight scenarios, which are described at the end of this section: Junction Slalom around Pylons Following the Road Turning with Side Road Circle Drive Backwards Parking Backwards Turning in Obstacle Course Loading platform The scenarios have different numbers of variants. Thus, the common options described below do not always appear on the same menu line. Default settings are again underlined. Choice of vehicle o Semitrailer truck o Tanker truck o Truck 11 o o o o o o o o Drawbar trailer combination Tandem truck Coach Urban bus Small truck Fire truck EuroCombi type A EuroCombi type B Choice of length of drawbar o Medium o Long o Short (only for Drawbar trailer combination) Choice of diagram type o Off o Safety o Eco 2.3.1. Junction This scenario comes in three variants: Turning without Traffic Turning with oncoming Traffic Turning with Obstacle The driver is ordered to turn right at a junction. The objective is to optimally use the available space. 2.3.2. Slalom around Pylons This scenario comes in two variants: Direction: forwards Direction: backwards This is the virtual variant of a real-world exercise: The driver is supposed to drive through a traffic cone course without hitting the cones. 12 2.3.3. Following the Road This scenario comes in two variants: Route: winding Route: straight The driver is to train driving backwards. Selectively he should keep to his own lane or to the whole road. 2.3.4. Turning with Side Road This scenario presents the two standard techniques for turning with aid of a side road: Procedure: Backwards - Forwards Procedure: Forwards - Backwards The driver should train the two different procedures. 2.3.5. Circle Drive Backwards The student should drive a semicircle in backwards direction. After the manoeuvre, the vehicle should stand in straight position. This scenario comes in two variants: Direction: left Direction: right 2.3.6. Parking Backwards The driver is ordered to reverse into a gate. This scenario has two difficulty levels: Target Width: 7m Target Width: 4.5m 13 2.3.7. Turning in Obstacle Course An obstacle course made from road cones should be adhered to while turning one’s vehicle. 2.3.8. Loading platform The driver is ordered to reverse before a loading platform. This scenario has two difficulty levels: Difficulty: easy Difficulty: hard 2.4. Critical Situations The block “Critical Situations” offers five sub blocks with several scenarios in different environments: City Suburb 14 Rural Road Motorway Mountains Each sub block consists of a number of scenarios each comprising several subsequent critical situations. In addition, each sub block is completed by a scenario, which allows the choice between single critical situations. The exception from this rule is the sub block “Suburb”, which does not give access to the individual critical situations. For the scenarios with subsequent critical situations an additional scoring is performed. This scoring takes into account the errors2 committed by the trainee during the scenario. The following common parameters can be chosen for all scenarios (the default is underlined): Choice of vehicle o Semitrailer truck o Tanker truck o Truck o Drawbar trailer combination o Tandem truck o Coach o Urban bus o Small truck o Fire truck o EuroCombi type A o EuroCombi type B Choice of total weight (depends on the chosen vehicle, not for Tanker truck in single situations) Semitrailer Tanker Truck Drawbar Tandem truck truck combination truck 25t 13t 13t 24t 18t 35t 18t 18t 35t 26t 15t 8t 8t 12,5t 11t Coach / Urban bus 14t 18t 10t Small truck Fire truck 6,1t 7,5t 4,7t 11t 14t 8t EuroCombi type A / B 30t 40t 20t If he total weight of the tanker truck cannot be chosen directly, it can be calculated by: - Kerb weight of the Tanker truck (8t) - Weight of the tank load (kerosine) of the 20m³ tank. 2 For this reason additional errors are activated. These errors comprise lane choice and lane change. Especially the error “Indicator not activated for lane change” is of interest. This error is triggered, if the driving lane was changed without the proper use of the indicator. Near or on junctions and roundabouts this error will not be triggered. The error is also disabled, if the trainee is driving under the influence of alcohol or if a critical situation is running. 15 Centre of Mass Location (only for single situations, not for Tanker truck) o Middle o Back o Front Choice of fill level (only for Tanker truck in single situations) o 50 % o 75% o 25% Number of compartments (only for Tanker truck in single situations) o 3 o 5 o 2 Choice of Weather (not for rural road variant 4) o Nice o Rain o Fog o Night o Twilight Safety systems o none o ABS o ABS + ESC3 Error Messages (only for longer rides) o On o Off Choice of diagram type o Aus o Safety o Eco 2.4.1. City You can choose between three rides of approximately three minutes each: 1. After starting at a bus stop, the driver passes several parked cars and another bus stop. Finally, he has to cross a busy roundabout. 2. The driver has to cross several sets of traffic lights. Between the crossings, he is repeatedly forced to change lane by roadworks. 3. The driver has to pass through several busy roundabouts. 3 “Electronic Stability Control”, similar to ESP (Daimler), DSC (BMW) or VSC (Toyota). 16 Finally, the following nine individual situations can be selected: 1. junction with hidden vehicles, 2. parking car entering the road, 3. child crossing the street at a parking car, 4. lane change, 5. child crossing the street at a bus stop, 6. bus entering the road at a bus stop, 7. junction with bicycle, 8. child crossing the street after the trainee has turned into that street, 9. one-way road with parked vehicles at both sides of the road. 2.4.2. Suburb Three rides of approximately three minutes each can be chosen: 1. The driver finds himself in a suburb with very narrow roads4. Several turns have to be taken. He has to pay attention to neither leave the road nor have an accident with oncoming traffic or parked vehicles. 2. Several crossings with different right-of-way regulations have to be passed. 3. The driver is guided across several sets of traffic lights. At the crossings, pedestrians wait for an opportunity to cross the road. 2.4.3. Rural Road You can choose between four rides. Where not stated differently, the rides take three minutes each. 1. The driver takes a ride over rural roads passing a small town. He passes cars parked at the roadside and wooded areas. He has to overtake a bicyclist. Due to the rather narrow roads, attention must be paid not to collide with oncoming traffic. This ride is longer and takes approximately eight minutes. 2. After starting at a parking lot, the ride leads over a hilly road, through a village and further on through a wooded area. 3. A ride on a desert road with a small village. 4. The ride starts in an industrial area, where the road has two lanes per direction. After the road has narrowed down to a single lane per direction, the ride continues on a long straight rural road, where the driver is surprised by a sand storm. The following three individual situations can be selected: 1. cyclist to be overtaken, 2. deer jumping on the road 3. parking car opening the driver’s door shortly after entering a village. 4 By reason of the very narrow roads in this scenario, the error “Indicator not activated for lane change” is disabled. 17 2.4.4. Motorway You can choose between three rides with different durations: 1. The driver starts at a motorway entry. He has to enter the running traffic and overtake a slow truck. The focus is on sufficient security distances to the car in front. The ride ends, when the driver leaves the motorway. It has a total duration of approximately seven minutes. 2. This ride begins at a motorway service station. Again, sufficient security distances must be observed. Shortly after the service station, the motorway extends to three lanes. This ride takes approximately five minutes. 3. This ride is very similar to variant (2). The only difference is a longer passage with three lanes. Accordingly, this ride takes approximately eight minutes. In addition, four individual situations can be selected:: 1. entering the motorway and overtaking of a slow vehicle, 2. vehicle in front of the driver, which loses its load, 3. burst tyre at the driver’s vehicle, 4. tail end of a traffic jam behind a curve. 2.4.5. Mountains You can choose between four rides with approximately four to five minutes length: 1. A ride over a mountain road with tunnels, a bridge, a long decline and a serpentine passage. 2. Over a serpentine road, the driver hast o climb a mountain. From up there, the ride continues through a tunnel and over a bridge. 3. The ride starts in front of a tunnel. It continues through serpentines and finishes with a long straight incline. 4. This ride leads through hilly terrain with two hollows. Additionally, three individual situations can be selected: 1. failure of the braking system at the driver’s vehicle, 2. uneven road at a tunnel exit and behind a blind summit, 3. oncoming vehicle avoiding to the middle of the road shortly ahead of the driver. 18 2.5. Free Driving The block “Free Driving” offers driving scenarios in different environments without any special situations, but with a lot of options. This should give the driving teacher the opportunity to find a setting for most any task he wants to set his student. The available environments are: Rural Road (1) Rural Road (2) Suburban Area Urban Area (1) Urban Area (2) Motorway Mountains The following Settings can be adjusted (the defaults are again underlined): Choice of Starting Point o Each environment provides six different starting points Choice of Vehicle o Semitrailer truck o Tanker truck o Truck o Drawbar trailer combination o Tandem truck o Coach o Urban bus o Small truck 19 o Fire truck o EuroCombi type A o EuroCombi type B Choice of total weight (depends on the chosen vehicle) Semitrailer Tanker Truck truck truck 25t 13t 13t 35t 18t 18t 15t 8t 8t Coach / Urban bus 14t 18t 10t Small truck Fire truck 6,1t 7,5t 4,7t 11t 14t 8t Drawbar combination 24t 35t 12,5t EuroCombi type A / B 30t 40t 20t Traffic Density o Sparse o Normal o None Simulation of Blood Alcohol Content o 0 per cent o 0.03 per cent o 0.05 per cent o 0.08 per cent o 0.11 per cent Choice of Weather o Nice o Rain o Fog o Snow (not for Urban Area (1)) o Night o Twilight Safety systems o none o ABS o ABS + ESC5 Driving time6 o Unlimited o 3 minutes o 5 minutes o 10 minutes o 15 minutes 5 6 “Electronic Stability Control”, similar to ESP (Daimler), DSC (BMW) or VSC (Toyota). There may also be a „Driving Time“ setting in the Options menu. Tandem truck 18t 26t 11t 20 Choice of diagram type o Off o Safety o Eco 2.5.1. Rural Road (1) The course begins with 2km of curvy highway and 600m city drive. Inside the city and at its end there are traffic lights with random traffic. The course closes along a curvy highway to a circuit of 6.2 km length. The road leads along a lake with sailboats and through landscapes with forests and green. The round may be driven as often as you want. 2.5.2. Rural Road (2) Another rural road with city transit. The course differs in kind and grouping of houses, trees and other virtual objects. In particular, the road wider than in Rural Road (1). The road begins as a flat, curvy rural road, then leads through a depression and into a small city. Inside the city, there is a junction allowing a route back to the city entrance. If one chooses to drive straight on, the road leads over a bridge and along a lake to a curvy, beautiful highway. 2.5.3. Suburban Area A suburban area with apartment buildings. It features many junctions, one-way roads, stops and a roundabout. This course is well suited for right-of-way exercises. At some places, the roads are very narrow, posing a challenge to the truck driver. 21 2.5.4. Urban Area (1) Situated in an urban area, this map features traffic with two lanes per direction. It contains several traffic light junctions and a roundabout. 2.5.5. Urban Area (2) Here you will find urban roads with a very high junction density. You will find roads with both one and two lanes per direction. If you choose starting point 4, the rides starts at the beginning of a long straight rural road. 2.5.6. Motorway The mildly curved motorway runs through woody landscape. There is typical traffic with passenger cars, trucks and barriers. Entrance and exit behaviour and correct threading from the acceleration lane can be trained. The motorway closes to an infinite loop, which is only ended when one leaves the motorway via the exit. . 2.5.7. Mountains In addition to a desert-like road this map in particular offers a mountain road with steep bevels, serpentine roads, a bridge and a tunnel. The drive begins in front of the serpentine rise. FOERST Driving Simulators Research Development Production Foerst GmbH Industriegelände 5 D-51674 Wiehl Tel.: 0049-2262-72970-0 Fax: 0049-2262-72970-12 Email: [email protected] Internet: www.drfoerst.de 09.07.2009 Driving Simulator F12 Software Update Procedure To install a software update, please follow these steps: 1.) Start up the simulator and wait, until the start-up procedure has completed. Please take the keyboard and the mouse connected to the simulation pc and sit down in front of the monitor(s) or projection screen(s). 2.) Now exit the simulation program: Use the control unit, enter the “Service” menu and select “Finish without Shutdown”. Please wait, until the Windows desktop is visible on all screens. 3.) Exit the “Virtpanel” program (dashboard). To this end, select the icon “Virtpanel” in the Windows task bar and press <Alt>+<F4>. 4.) Insert the Update CD in the CD rom drive of the simulation computer and start the setup program. Usually, the setup program starts automatically after inserting the CD and closing the drive lid. If the setup process does not start automatically, you have to start it manually: Open “My Computer” on the desktop, navigate to the CD rom drive and start “Install.exe” with a double click on the corresponding icon. 5.) The following dialog appears: 6.) After the integrity self test, the setup program starts with the following dialog. Click “Next”, accept the license agreement and again click “Next”. 2 7.) In the following wizard page, deactivate all items except “Main Program” and proceed with “Next”. . 8.) Now choose the target folder. Usually, you should not have to modify the default “C:\Pkw\”. Start the update process by selecting “Install”. 3 9.) After the installation process, click “Finish” to exit the setup program and restart the pc. If you have any questions, please don’t hesitate to ring us up.