1
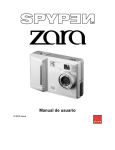
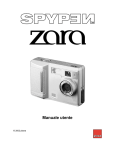
User's Manual
© 2002 plawa
Description
Your ZARA is a digital still camera (DSC), designed for PC that have a universal
serial bus (USB) port. You can use the camera to take up to about 130 Economicresolution pictures or about 26 high-resolution pictures (8MB CompactFlash™), then
upload them to your PC. You can also capture still images, make a video clip, and
post pictures to the World Wide Web. With the supplied fun-to-use application
software, your camera is a powerful addition to your PC. You can even use your
camera to connect to your friends online for video conferencing!
Features
● Superb high-quality images from the 1.3-mega pixel
● Capable of recording images at resolutions up to 1280 x 1024 pixels (SXGA)
● Translucent Compact & Slim Design — Thickness 29mm, Weight about 82g
(without Batteries and Memory Card)
● CompactFlash™ Slot Built in & Easy Operation
● 2x Digital zoom for photography
● Automatic built-in flash
● Macro function
● Worldwide Video Out (NTSC/PAL)
● USB connection allows simple, high-speed image data transfer (using the
enclosed interface).
● Convenient and easy to use camera with a wide variety of functions, such as,
Movie Recording, Movie/Self-Timer Recording, Flash, Close-up mode, self-timer
function and others
● Included S/Ws-The World’s Best Selling Photo Software MGI PhotoSuite III SE,
PhotoBank Video Capture, QuickTime Player, NetMeeting
2
System Requirements
●
IBM ® PC
or compatible with Pentium ® MMX 200 MHz
● One available USB port
● CD-ROM drive (4X or better)
● 800X600/16-bit monitor
● 32MB or more of available internal memory (RAM)
● Microsoft Windows ® 98 / 98SE / 2000 / Me / XP
Application Software
Your camera comes with a CD-ROM that includes the drivers and applications
needed to operate the camera. You can install the desired applications when you
install the drivers.
● MGI PhotoSuite III SE — Lets you capture,transfer, and edit images from the
camera.
● PhotoBank Video Capture — Lets you capture and manage video clips.
● QuickTime Player — Lets you handle videos.
● NetMeeting — Lets you communicate with both audio and video and much more.
3
Contents
1
Safety Notes
● General Maintenance and Safety
● Notes
● Your SPYPEN ZARA Camera
2
Getting Started
● SPYPEN ZARA Camera & Accessories
● Attaching the Strap
● Installing Batteries
● Inserting a Memory Card
● Removing a Memory Card
● About CompactFlash™ Card
● Turning the Camera On and Off
3
Taking Pictures
● Checking the Batteries
● Checking the Available memory
● Normal Shooting
● Macro Shooting
● Setting the Picture Quality
● Flash Shooting
● Self-Timer Shooting
● Digital Zoom
● Movie recording mode
● Movie recording-Self Timer mode
● Viewing Your Pictures on Your Television
● Deleting One Picture or All Pictures
7
7
8
9
10
10
12
13
13
14
15
15
16
17
18
19
20
21
22
23
23
25
4
4
Reviewing Your
Pictures
● Storing the image in the computer
5
Installing Your
Software
● Installation of the Software and Driver
● Connecting the Camera to the Computer
● MGI PhotoSuite III SE
● PhotoBank Video Capture
● QuickTime Player
● NetMeeting
25
26
27
28
32
34
35
6
Troubleshooting
36
7
Specifications
39
5
General Maintenance and Safety
● Do not pick up the camera by the USB cable or any other attachments.
● To keep from damaging your ZARA, avoid exposing it to moisture and extreme
temperatures. (below 0ºC or above 40ºC)
● Keep the camera away from direct sunshine or in a closed car in the summer.
If you leave the lens facing direct sunlight, this will cause discoloration in your
pictures(image sensor) and may cause a fire.
● Do not use the optical viewfinder to look directly at the sun or any source of bright light.
● Do not use or store your ZARA in a place where strong electrostatic or electrical
noise may be generated.
● Do not drop or give excessive shock to the ZARA.
● Do not disassemble or touch the inside of the ZARA. This may result in
malfunctions of the camera.
● Do not use organic solvents, such as thinner or benzene, on to the ZARA.
● Do not point the flash towards people at a short distance. Shooting the flash close
to the eyes may cause retinal damage. Operate the camera at least 1 meter away
from subjects.
● If the battery liquid gets on your hands or clothes, wash it off with water. If the
battery liquid gets into your eyes, it may cause blindness.
Notes
● Pictures taken under fluorescent light might show yellow stripes.
● If the battery power is low, images may appear distorted.
● When taking pictures of bright objects, the bright parts might look white.
● Use the flash to take pictures if the background or subject is too dark, and use in
as bright an area as possible (Luminous intensity of 50 Lux or more).
● When pressing the shutter button, do not move or shake the camera until the
beeping sound switches off. If the camera is shaken during operation, images
may come out distorted.
6
Getting Started
Your ZARA Camera
Shutter Button
Camera Front
Flash (p.19)
Power Indicator (p.14)/
Self-Timer Indicator (p.20)
Focus Adjustment Lever
Lens
Digital (USB) Socket (p.26)
Camera Back
Viewfinder
LCD Panel
Flash Indicator
(CHARGE) (p.19)
Macro Indicator (p.17)
Strap mount
CompactFlash™
Slot cover (p.12)
SELECT button
Battery Cover
MODE button
Serial No. label
Power Button (p.14)
7
LCD Panel
Deleting All Pictures
Deleting 1 cut
(the last image)
Battery power
level
Free Space on
Memory Card
Movie
2x Digital Zoom
ALL
x2
E
H
Image quality (Hi mode)
Image quality (Economic mode)
MEM
No. of shots shooted
Self-Timer Shooting
Flash Shooting
SPYPEN ZARA Camera & Accessories
● SPYPEN ZARA camera(1)
● User’s Manual (this manual) (1)
● S/W CD-ROM (1)
● AAA-size alkaline batteries (2)
● USB Cable (1)
● Video Cable (1)
● Hand Strap (1)
● CompactFlash™ Card (Optional)
8
Attaching the Strap
�
�
Pass the loop of this cord on the end of the strap through the strap mount.
Then pass the other end of the strap through the loop of the thin cord and pull
the strap tight.
Installing Batteries
● Your camera comes with two AAA batteries so you can start taking pictures
immediately.
● Before you start taking pictures, you need to install the batteries and insert a
CompactFlash™ Card (memory card) into the Camera.
9
1. Press OPEN and slide the battery compartment cover in the direction of the
arrow, then lift the cover.
2. Place the batteries in the compartment as indicated by the polarity symbols
3.
marked inside.
Replace the cover.
● Use only fresh batteries of the required size and recommended type.
● Do not mix old and new batteries, different types of batteries (standard,
alkaline, or rechargeable), or rechargeable batteries of different capacities.
● If you do not plan to use the camera for a long time, remove the batteries.
Batteries can leak chemicals that can destroy electronic parts.
● Battery life is about one week in standby and 2 hours in continuous shooting
mode (using alkaline batteries). When batteries become weak, the power
indicator blinks. Wait until the camera automatically shuts off in 30 seconds,
then replace the batteries.
● We do not recommend using Ni-Cd rechargeable batteries. They discharge
power quickly and might result in unexpected loss of the pictures.
● When you use the USB cable to connect the camera to a computer and the
computer is turned on, the computer supplies power to the camera and the
batteries are disconnected.
● In low temperatures (below 32ºF), battery efficiency lowers and camera
operation time is reduced. When using the camera in cold environments, keep
it warm by covering it while not in use.
● Dispose of old batteries promptly and properly. Do not burn or bury them.
10
Inserting a Memory Card
● The CompactFlash™ Card (memory card) is removable and reusable for easy
storage and transfer of your pictures.
● You must insert a memory card into the camera before you take pictures.
● Use only certified cards that carry the CompactFlash™ logo.
1. Check that the camera is swiched off. Then open the slot cover.
2. Hold the memory card by the lip so the connection end is pointed at the
camera, and the lip is facing the back of the camera.
◎ The memory card will not slide fully into the slot if it is
inserted facing the wrong way. Forcing the card may damage
your camera.
3. Slide the memory card all the way into the card slot and close the door.
11
◎ If the camera turns on while not inserting the memory card,
the icon below is dispayed on the LCD panel.
Insert the memory card before the camera turns on.
No a CompactFlash™ Card is loaded.
Removing a Memory Card
1. Always switch the camera off before opening the slot cover.
2. Open the slot cover.
3. Remove the memory card and close the door.
◎ Opening the slot cover while the camera is on can corrupt
the image data on the memory card or damage the card
itself.
About CompactFlash™ Card
● Data stored on the memory card can be seen in the internal PC (My Computer)>
SPYPEN ZARA digital camera folder. Use after installing application software and
drivers (see page 27).
● The CompactFlash™ Card (memory card) is removable and reusable for easy
storage and transfer of your pictures like using another medium (Floppy disk,
external hard disk, etc.).
12
● You can easily transfer data on the The CompactFlash™ Card to your computer
using the USB Port Card Reader.
● The Table below lists the seperately available CompactFlash™ cards with the
SPYPEN ZARA. Before using CompactFlash™ card (sold seperately), check the
following :
Manufacturer
SanDisk
Ritek
Pretec
U-CONN
Lexar
Kingston
Size (MB)
2, 4, 8, 16, 64, 128
8, 16, 32, 64, 128
8, 16, 32, 64, 128
4, 8, 16, 24, 32
4, 8, 32, 64, 80, 128
32, 64
Manufacturer
M-Systems
Hitachi
SST
Simple
IBM
Micron Technology
Size (MB)
4, 8
8, 16, 32
8
4, 8, 16, 24, 48
32
10
Taking Pictures
Turning the Camera On and Off
● To turn the camera on, press the power button.
● To turn the camera off, press the power button again.
◎ When the Power Indicator (green light) is on, the camera is
ready.
H
MEM
13
Auto Power Off Function
If there is no operation for about 2 minutes while the mode is displayed on the
LCD panel, the signal sound rings and the power is automatically turned off.
Checking the Batteries
A battery symbol indicating the battery power level appears on the LCD.
Full — fully charged.
H
low — not fully charged.
soon needs to be replaced.
Exhausted (blinking) — The Camera stop
working. Replace the batteries.
Checking the Available memory
●A
symbol indicates 1/4 of the whole available memory space.
● A memory shortage
will automatically turn off the camera and the power
indication lamp will blink (self-timer indication light). Delete pictures on the card,
or insert a memory card with available memory.
◎ Number of frames recorded (Quality Mode:
H
)
8MB: Approx. 26 / 16MB: Approx. 52 / 32MB: Approx. 104 /
64MB: Approx. 208
◎ The number of available shots increases for CompactFlash™
with a higher capacity.
14
Normal Shooting
H
MEM
1. Once the battery is installed, turn on the camera by sliding the
power switch to take the picture.
�With the change of resolution setting, the resolution of the picture and the
effective number of photography can be changed. Please refer to “Setting the
Picture Quality” on page 18.
�Turn the focus adjustment lever to
on page 17 for close-up shooting.
or
.
Refer to “Macro Shooting”
�The flash set is needed when taking pictures on a dark night or in heavy
shade. Please refer to “Flash Shooting” on page 19.
2. Make sure that your fingers do not obscure the lens and use the
View Finder to determine the shooting.
Check the subject to be photographed by looking through the view finder with
the naked eye, and adjust so you can see the object being photographed
in the center of the frame.
3. Press the Shutter Button to take the picture.
Do not move until the sound of the beep is heard after
pressing it. This may result in a blurred. Once the
screen record is completed, there is a beeping
noise. The visual count increases one by one.
�ZARA digital camera shooting mode is set to rapidfire mode. Please see Chapter 6 Troubleshooting
(page 38).
15
�Depending on the resolution, photo storage may take a maximum of 15
seconds in High Quality Mode, and a maximum of 7 seconds in Low Quality
Mode.
Macro Shooting
● Normal/Macro Shooting
The focus adjustment lever must be set to
ZARA focus distance to
or
to take a picture. Set your
when the subject is located in 100cm ~ ∞ range.
When the subject is within 30cm ~35cm (Macro) range, set the camera
focus distance to
for close up picture.
● Macro (Close-up) Shooting
(30cm to 35cm)
Use the Macro function to take close-up shots.
● Normal Shooting
(100cm to infinity)
Macro
Shooting
30 ~ 35cm
Normal
Shooting
100cm ~ ∞
Macro Indicator (Green light)
◎ Shooting with a flash in macro shooting may impair the sight
of the shooter, and shots do not come out. In macro
shooting mode, shoot with a suppressed flash.
◎ Macro shooting mode is available only in DSC standard.
16
Setting the Picture Quality
H
● Hi Quality Mode If the quality of your pictures is most important, use
the Hi Quality setting.
It is set for the size of SXGA (1280x1024), and the maximum picture of
about 26 cuts can be taken. (Capacity : The CompactFlash™ 8MB)
E
● Economic Quality Mode If space on your memory card is most important,
use the Economic quality setting.
It is set for the size of VGA (640x512), and the maximum picture of
about 130 cuts can be taken. (Capacity : The CompactFlash™ 8MB)
H
MEM
1.
E
MEM
Turn on the camera power.
2. Press the [MODE] button once from the basic screen. Depending on the
desired picture quality setting, repeatedly press the [SELECT] button when
there is the H or E indicator on the LCD panel.
3.
When the H or E indicator is blinking, press the shutter button once, to
select
H or
E . Or, wait five seconds, and it will automatically select
E .
H or
Resume Function
Picture resolution settings are saved when you turn off the power.
17
Flash Shooting
The flash set is needed when taking pictures on a dark night or in heavy shade.
The effective range for the flash is 1.5~2.5m and the optimal distance is 2.0m.
In macro shooting, set the flash at off.
1.
2.
Turn on the camera power.
Press the [SELECT] button once.
A
● Auto Flash The camera flash operates
automatically if the subject or the background
H
MEM
is dark. (Auto Flash)
In Auto Flash, the battery runs out quickly.
● Suppressed Flash In this mode, the flash
never fires. Press once on the [SELECT]
H
MEM
button in the flash setting condition.
Use this mode for ordinary photography.
3.
4.
Wait until the flash has finished charging. (When the flash Indicator is blinking
red and then off.)
Press the shutter button to take the picture.
Setting of Auto Flash mode returns to the Suppressed Flash set display when
the power is turned off and then turned on.
◎ Please take the photograph within the effective flash area
(1.5 ~ 2.5 m). The image does not show clearly if the picture is
taken too close to the subject.
◎ When taking a picture under indoor lighting where the
18
distance is too far for the flash to be effective, such as a
theatrical performance or an indoor sports game, the flash
control mode shall be allowed to show the natural light.
◎ Because slow shutter speeds are used when the flash is
turned off in low light conditions, take care to avoid camera
shake. Use a tripod or place the camera on a steady surface.
◎ Do not use the flash toward a person at a very close
distance. Taking a picture too close may cause irreversible
damages to the eye. In particular, make sure not to take a
picture of an infant within 1M of distance.
Self-Timer Shooting
The Self-Timer setting
creates a 10-second delay between the time you press
the Shutter button and the time the picture is taken.
1.
2.
Turn on the camera power.
Press the [MODE] button twice from
H
MEM
SELECT
H
MEM
the basic screen. Press the [SELECT]
button once when the
icon is
blinking. Or wait five seconds, and the self-timer mode will automatically start.
3.
4.
Press the shutter button to take the picture.
The filming is made in approximately 10 seconds. (Picture taking is made after
the signal sound of short and repeated beep sounds changes into a long
signal beep sound.)
19
Self-Timer Lamp (Green)
◎ The self timer mode is automatically released after the
picture is taken.
Digital Zoom
● The Digital Zoom setting provides two-times(X2) magnification.
● When using The Digital Zoom setting, quality is automatically set to Economic.
1. Press the [MODE] button once.
2. Repeatedly press the [SELECT] button
until
x2
x2
appears from the LCD panel.
3.
MEM
When the
x2
icon is blinking, press the shutter
button once, to select
x2
. Or, wait five seconds,
and it will automatically select
4.
x2
.
Press the shutter button again to take the picture.
◎ Select H quality mode, E quality mode, or
to remove the Digital Zoom feature.
mode
20
Resume Function
Digital Zoom setting is saved even if the power is turned off and then turned on.
Movie recording mode
1. Press the [MODE] button once.
2. Repeatedly press the [SELECT] button
until
appears from the LCD panel.
3.
MEM
When the
icon is blinking, press the shutter
button once, to select
. Or, wait five seconds,
and it will automatically select
4.
.
Press and hold the shutter button all the way down to record the movie.
◎ The camera beeps, then starts recording movie until release
the shutter button, or until the Movie recording is complete.
Max. 60~90sec.(6,635KB)
◎ Flash photography and Movie recording mode cannot be
used together.
◎ In Movie recording mode, the battery runs out quickly.
Resume Function
Movie recording mode is saved even if the power is turned off and then turned
on.
21
Movie recording-Self Timer mode
1.
Set your camera to the Movie recording mode. Refer to “Movie recording
mode” on p.22.
2. Press the [MODE] button twice.
3. When the
icon is blinking, press the [SELECT] button once, to select
Or, wait five seconds, and it will automatically select
4.
5.
.
.
Press the shutter button to take the picture.
The filming is made in approximately 10 seconds.
Viewing Your Pictues on Your Television
You can show your pictures or movies to a large audience by connecting your
camera to a television (NTSC/PAL) and scrolling through the pictures stored on the
memory card.
1.
Turn on the camera power.
2.
Insert the video cable into the video-out port on the side of your camera.
3.
Connect the other end of the video cable to the video-in port on the television.
4.
The pictures appear on the television.
Press [SELECT] button or [MODE] button on the camera to scroll through your
pictures.
22
[SELECT] button: Previous shots view function
[MODE] button: Next shots view function
MEM
MEM
◆ Select Transmission Method ◆
● NTSC Method is used for Korea, US, Japan, and Canada. (Default)
● Set PAL Method for European countries and Australia.
1.
Press the [MODE] button three times.
2.
Press the [SELECT] button once when the [NSC] icon is blinking.
3.
Press the [Shutter] button when the [PAL] icon is blinking.
23
Deleting One Picture or All Pictures
Deleting 1 cut (the last image)
1.
Repeatedly press the [MODE] button until
appears from
MEM
the basic screen.
2.
3.
Press the [SELECT] button once .
The 1 cut of image stored in the last is deleted.
H
MEM
Deleting All pictures
1.
Repeatedly press the [MODE] button until
ALL
appears from
ALL
MEM
the basic screen.
2.
3.
Press the [SELECT] button for about 2 seconds .
All pictures are deleted.
H
MEM
Reviewing Your Pictures
Storing the image in the computer
● Connect the USB cable to transfer the stored image on the camera to enjoy the
video communication and others.
● First, install application S/W and driver in the S/W CD-ROM and restart the
24
system. Refer to “Installation of the Software and Driver” on p.21.
● Utilize the installed S/W to enjoy the video suspension, storing of moving picture,
processing, editing, screen conference and others.
Connecting the Camera to the Computer
USB Cable
H
MEM
USB Socket
1.
Open the digital (USB) socket.
2.
Connect the cable to the camera and USB port of the computer main body.
3.
Turn on the camera power.
◎ The picture transmission to the computer and the detailed
utilization shall refer to MGI PhotoSuite III image uploading
and correcting (p.28), PhotoBank Video Capture video
uploading and mail transmission (p.32), QuickTime Player
viewing Movie (p.34), and NetMeeting video communication
(p.35).
25
Installation of the Software and Driver
�Install the Installation CD according to the following
Instructions.
�After installing the S/W and the driver, restart your computer
and connect the camera to the USB port on your computer.
1.
Place the Installation CD into your CD-ROM drive.
2.
First, install MGI PhotoSuite III SE from the Auto Run
screen.
① After choosing the language you want to install,
click the“OK”
,“Next”
, or“Yes”button following
the instructions.
② If you do not want to register now, click the“Register Later”button.
③ Click the“Finish”button on the Setup Complete screen.
3.
Click“PhotoBank Video Capture”on the Auto Run screen. Click the“Next”or
“OK”button following the instructions.
4.
5.
6.
Click“QuickTime™ Player”on the Auto Run screen to install.
Click“NetMeeting ® ”on the Auto Run screen to install.
At last, click“Driver Installation”on the Auto Run screen.
① Choose the language you want to install from the Select Language screen.
② If a message of Digital signature appears, click“Yes”button and continue to
installation.
③ Restart your computer by clicking on the“OK”button from the Installation
screen.
7.
When using the USB cable, connect the camera to the USB port of the
computer, and press the camera power button.
26
8.
Confirm whether the “driver information database update” window and “find new
hardware” window (USB Device -> SPYPEN ZARA Digital Camera) is displayed.
Confirm whether the “USB” is displayed in the camera LCD screen, then run the
application program.
9.
Using MGI PhotoSuite III SE or PhotoBank Video Capture shown in the next
chapter, you can store and edit still images, store animated images, and
transmit mail. (See “Connecting the Camera to the Computer” on page 26)
�Provided that the camera is connected to the PC, you may check the image device.
�If Auto Run screen does not appear, click
“setup.exe”in the CD-ROM.
MGI PhotoSuite III (Image Uploading and Editing)
MGI PhotoSuite III is the ideal S/W for editing, enhancing,
organizing, and sharing your pictures. MGI PhotoSuite III contains
over 1,500 Templates and backgrounds as well as image libraries
for variety of applications, such as collages, cards (i.e.,
bookmarks, gift messages, postcards, and etc.), photo layouts
(i.e., comics, group photos, posters, photo albums, and etc.),
calendars, magazine covers, business uses (i.e., business cards,
certificates, labels, advertisements, letterhead, and etc.). You can
easily create fun slide shows or digital greeting cards and send
them to your on-line friends!
◎ For more information on further applications, go to Help >
Welcome > Introduction.
27
Quick Start:
Choose Start > Program > MGI PhotoSuite III SE
①
⑥
⑦
⑤
③
④
1.
Click the“Get”tab on the navigation bar.
2.
Click the“Digital Camera(TWAIN)”button.
3.
Select“SPYPEN ZARA Digital Camera”from the“Select your camera”menu.
Check“the Albums...”box and then create an album. Type a name for the new
album and click the“OK”button.
4. Click the“Download”button, and then the SPYPEN ZARA TWAIN...
window appears.
5.
Click the“Connect to Camera”button and then The acquired pictures as
thumbnails will be displayed on the Inventory of Camera Images... WIndow.
6.
Select a thumbnail image, and then click the“Open Selection”button. To
select multiple pictures, hold down the Control key or Shift key and click the
pictures.)
28
◎ No images will appear if you did not take any picture. Take a
picture by clicking the “Take Pictures” button on the window.
⑩ ⑪
⑫ ⑬
⑧
⑨
Library area
Work area
7.
Click the“Organize”tab on the navigation bar.
8.
Click“Photos”on the right side of your screen, and then captured images will
appear. To move an image to the work area, click on a thumbnail image with
right mouse button and select“Add”button from the pull-down menu. Or you
can simply drag an image to the work area.
Images will be saved in C:\My Documents\My Pictures. You may view them in
a newly created album folder.
9.
Point the cursor to an image in the work area and press the right button.
Shortcut menu, such as“Open”,“Cut”, and“Copy”will appear.
29
10.
If you double-click an image, you will be connected to“Prepare”menu in which
you can edit the picture by rotating, cutting, changing size, or transforming using
special effects.
11.
Click the“Compose”tab on the navigation bar, and you can make fun and
creative collages, cards, calendars, and many more using edited pictures.
12.
Click the“Share”tab on the navigation bar, and then click the“Send E-mail”
button to automatically attach selected images.
13.
Click the“Print”tab on the navigation bar to print out your work.
Note
�You can obtain detailed information about functions and applications by clicking
on the“Help”button on the Navigation bar located at the top of your screen.
◎ If you need help, hit the“F1”key on your keyboard at any
time, and the Online Help system will pop up.
�Online Help system gives explanations of major parts of MGI PhotoSuite III and
provides information about tools, templates, functions, and the self-learning
program.
�File Formats
JPEG is an excellent choice if you plan to upload photos onto the Internet. For
editing purposes, save the image in a format like TIFF or BMP as you work, and
then save the final image in JPG format. If you need more information about file
formats, please refer MGI PhotoSuite III Help > Supported File Formats > File
Formats.
�Image capture and save functions are also available in Imaging, which is a default
Windows image application program.
30
PhotoBank Video Capture
(Video Uploading and Video Mail)
PhotoBank Video Capture is a program used for saving video clip
files, creating and sending video emails, capturing still image, and
making stickers. Send messages to your friends and relatives with
attached video clips or image files!
Quick Start:
Choose Start > Program > PhotoBank Video Capture.
Delete captured images
Delete all the images
Edit a captured image and
print out a sticker photo
Search captured images
④ Video capture
Save File
⑥ Send Mail
Open/Play Video Clip Files
① Option
1.
Still image capture
Replay∙Rec Pause
Replay∙Rec Stop
Pull down the“Option”menu and select“Setup Device”, select click “ZARA
Digital Camera”.
2.
Click the“Option”icon to select“Video Format”from the
pull-down menu. It is recommended to display images in
QCIF(low-resolution).
31
3.
Pull down the“Option”menu and Select“Capture Audio”(For video-audio
record). To use this function, you need to have a built-in soundcard installed in
your computer and an external microphone.
4
The“Capture”icon will activate the File Saving (AVI format) function and
the Video Recording function.
5.
6.
Click the“Stop”icon to stop recording.
Click“Send Mail”in the“Email”icon. Type in the
Sender Mail field (sender’
s address) in“Setup”box on the
Send Mail screen, and then click the“OK”button.
Type email address in the“Receiver”box on the Send Mail screen and write a
message. Click the“Send”button to send an email.
7.
You can capture a video and send an email in MPEG or ZIP file at the same
time by using the“Capture & Mail”function in the“Option”dialog box.
Note
�
To capture still images by single frame, click the“Still Capture”button.
�
Manipulate and edit a captured image and print it out as a sticker.
�Click on a captured still image with right mouse button. The pop-up menu such as
“Save”will appear.
�You can play any video clip file (AVI format) using your default media application.
32
�
NetMeeting (Video and Audio Conferencing)
You can enjoy the web conferencing by using a
Windows default application, NetMeeting.
N e t M e e t i n g ’s a u d i o a n d v i d e o c o n f e r e n c i n g
features let you communicate with your business
partners or enjoy chatting with your friends and
relatives on the Internet all over the world without
extra cost. Also, you can work with as many
people as you like by conducting real-time
conversation and sharing information via text or
sending files.
�For more detailed information about NetMeeting, select
“Help”from the menu bar and click the“Help Topics”or
“Read Me”.
�NetMeeting is included in Microsoft Windows 98/ 2000.
�To obtain the most recent version and information, visit http://
www.microsoft.com / windows / netmeeting.
�You may enjoy various web conferencing features using other
web conferencing programs and on-line chatting sites.
33
QuickTime™ Player
QuickTime Player enables your computer
to handle video.
Save movies from CompactFlash Card
onto your computer for playback anytime.
Edit movies with the simplicity of cut,
copy, and paste.
34
Troubleshooting
Problem
Power does not turn on.
Solution
Check whether batteries are inserted properly
according to polarity. Check whether batteries are
charged or have power.
The camera does not work in USB mode.
No errors during the driver installation? Is the USB
cable connected to the PC from the camera? Is the
camera LCD screen displaying “USB”? If not, remove
the USB cable f rom the camera and reboot the PC.
Turn off, then turn the camera power on. Reconnect
the USB cable with the camera. And, confirm that
“USB” appears in the LCD screen properly.
Sometimes, “Err” appears in the LCD screen. “Err” (Error) appears when you remove the compact
flash card from the camera during data storage after
What does this mean?
taking a picture. If “Err” appears, shots are not stored
on the compact flash card. Do not remove the
compact flash card from the camera until your shots
are stored on the card.
Sometimes, “bSy” appears in the LCD
screen. What does this mean?
35
“bSy”(BUSY) means pictures are being stored. During
“bSy”, shooting is not possible. When four shots or
more are made in succession, “bSy” blinks in the LCD
screen and shooting is not possible for about 15
seconds.
Solution
Problem
After taking four shots in a row, “bSy” blinks “bSy” indicates the storage of one picture. Four shots
in a row require about 60 seconds for storage. Until
and only one picture is taken. And, “bSy”
“bSy” stops blinking, no shots are possible. You have
appears again.
to wait 60 seconds to take another four shots in a row,
45 seconds for another three shots in a row, 30
seconds for another two shots in a row, and 15
seconds for another shot.
Even after turning off the power after
shooting, the LCD screen and macro
shooting LED do not turn off.
When shots are not stored on the compact flash card,
the power does not turn off, but when storage is
completed, it automatically turns off. When you turn
off the power after four shots in a row, the camera
turns off automatically after 60 seconds. One shot
takes 15 seconds to store.
“Deleting the last image” and “Deleting all
pictures” icons (wastebasket icon) do not
appear.
When no shots are taken, no wastebasket icon
appears. The wastebasket icon will not appear until
picture storage is completed. The icon appears about
60 seconds after four shots in a row, 45 seconds after
three shots in a row, 30 seconds after two shots in a
row, and 15 seconds after one shot.
Animated images appear in two divided
screens in PhotoBank Video Capture.
When the animated images appear in the two divided
screens, end the application, remove the USB cable
from the camera and then reconnect it. Restart the
application, PhotoBank Video Capture. Animated
images will then appear properly.
Shots come out blurred or not clear.
Confirm that macro shooting mode and
standard shooting mode are set properly
when taking pictures.
Did you not take pictures in low luminance? With
ZARA Digital Camera, shots taken under 50
S
lux will not come out clearly.
Take pictures with the flash when in a dark place, or
take pictures in bright areas.
36
Problem
Animated images are not clear.
Solution
Did you not take pictures in low luminance? With
S
ZARA Digital Camera, shots taken under 50
lux will not come out clearly. Shoot in bright areas.
Rapid-fire mode?
To enhance efficiency in shooting, image treatment
and storage time, S
ZARA Digital Camera uses
a rapid-fire mode. In rapid-fire mode, pictures are
simultaneously taken, compressed, color treated, and
stored, etc.
In rapid-fire mode, during image treatment of pictures,
“Delete picture” does not appear. In order to efficiently
use rapid-fire mode, shoot at an interval of 7 to 10
seconds. This interval makes it easy to treat even 1.3
mega-pixel images and does not cause delays in
shooting (“bSy”).
37
Camera Specifications
Sensor(CMOS)
Lens
View finder
Storage Media(Option)
Still Image
Live Video
Movie
Focal range
Zoom
Flash
Flash: Effective range
Self-Timer
Shutter speeds
Exposure control Auto
White Balance
Deleting Pictures
Still Image format
Movie File format
Input/Output Terminals
Connector(USB)
Video
Power Supply
Camera mass (weight)
Dimensions
Condition for use
1.3 - megapixel SXGA Digital Image Sensor
F 3.0, f=10mm
Optical View finder
CompactFlashTM Card
High : 1280x1024 Economy : 2XZoom 640X512
320X240, 160X120
160X120 / 60~90 sec (1 shot (6,635KB)), 10Frame
Normal : Approx. 30-35cm
Macro : Approx. 1m to infinity
2X Digital Zoom
Auto/Forced Flash (400Lux humidity or less)
1.5m~2.5m
10 sec. timer clock
1/7~ 1/1500 sec.
Auto
Auto
Deleting 1 cut (the last image) / Deleting All Pictures
JPEG
MOV(QuickTimeTM Player )
PC USB
USB1.1 Interface
NTSC/PAL
Use one of the following:
Digital Still Camera : 2AAA-size alkaline batteries / Web Cam: USB Power
82g without batteries
89(W)×58(H)×29(D) mm
Temperature : 0℃ to +40℃(+32 ℉to +104 ℉ )
80% humidity or less (no condensation)
※This specification may be changed without notice for quality improvement.
System Specifications
Windows�
Windows�
Windows�
Windows�
98/SE
ME
2000
XP
∙Pentium� MMX 200MHz or better
∙32MB RAM or better
∙Available USB Port
∙800x600/16-bit display
∙4x CD-ROM drive or better
USB Cable