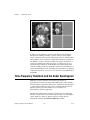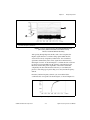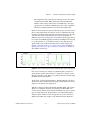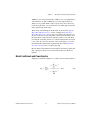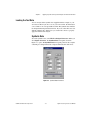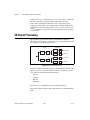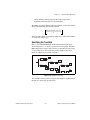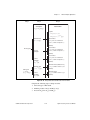
1
LabVIEW and LabWindows /CVI TM TM TM Signal Processing Toolset User Manual Signal Processing Toolset User Manual December 2002 Edition Part Number 322142C-01 Support Worldwide Technical Support and Product Information ni.com National Instruments Corporate Headquarters 11500 North Mopac Expressway Austin, Texas 78759-3504 USA Tel: 512 683 0100 Worldwide Offices Australia 03 9879 5166, Austria 0662 45 79 90 0, Belgium 02 757 00 20, Brazil 55 11 3262 3599, Canada (Calgary) 403 274 9391, Canada (Montreal) 514 288 5722, Canada (Ottawa) 613 233 5949, Canada (Québec) 514 694 8521, Canada (Toronto) 905 785 0085, China 86 21 6555 7838, Czech Republic 02 2423 5774, Denmark 45 76 26 00, Finland 09 725 725 11, France 01 48 14 24 24, Germany 089 741 31 30, Greece 01 42 96 427, Hong Kong 2645 3186, India 91 80 4190000, Israel 03 6393737, Italy 02 413091, Japan 03 5472 2970, Korea 02 3451 3400, Malaysia 603 9596711, Mexico 001 800 010 0793, Netherlands 0348 433466, New Zealand 09 914 0488, Norway 32 27 73 00, Poland 22 3390 150, Portugal 210 311 210, Russia 095 238 7139, Singapore 65 6 226 5886, Slovenia 3 425 4200, South Africa 11 805 8197, Spain 91 640 0085, Sweden 08 587 895 00, Switzerland 056 200 51 51, Taiwan 02 2528 7227, United Kingdom 01635 523545 For further support information, refer to the Technical Support and Professional Services appendix. To comment on the documentation, send email to [email protected]. © 1999–2002 National Instruments Corporation. All rights reserved. Important Information Warranty The media on which you receive National Instruments software are warranted not to fail to execute programming instructions, due to defects in materials and workmanship, for a period of 90 days from date of shipment, as evidenced by receipts or other documentation. National Instruments will, at its option, repair or replace software media that do not execute programming instructions if National Instruments receives notice of such defects during the warranty period. National Instruments does not warrant that the operation of the software shall be uninterrupted or error free. A Return Material Authorization (RMA) number must be obtained from the factory and clearly marked on the outside of the package before any equipment will be accepted for warranty work. National Instruments will pay the shipping costs of returning to the owner parts which are covered by warranty. National Instruments believes that the information in this document is accurate. The document has been carefully reviewed for technical accuracy. In the event that technical or typographical errors exist, National Instruments reserves the right to make changes to subsequent editions of this document without prior notice to holders of this edition. The reader should consult National Instruments if errors are suspected. In no event shall National Instruments be liable for any damages arising out of or related to this document or the information contained in it. EXCEPT AS SPECIFIED HEREIN, NATIONAL INSTRUMENTS MAKES NO WARRANTIES , EXPRESS OR IMPLIED, AND SPECIFICALLY DISCLAIMS ANY WARRANTY OF MERCHANTABILITY OR FITNESS FOR A PARTICULAR PURPOSE . C USTOMER’S RIGHT TO RECOVER DAMAGES CAUSED BY FAULT OR NEGLIGENCE ON THE PART OF NATIONAL INSTRUMENTS SHALL BE LIMITED TO THE AMOUNT THERETOFORE PAID BY THE CUSTOMER. NATIONAL INSTRUMENTS WILL NOT BE LIABLE FOR DAMAGES RESULTING FROM LOSS OF DATA, PROFITS, USE OF PRODUCTS, OR INCIDENTAL OR CONSEQUENTIAL DAMAGES, EVEN IF ADVISED OF THE POSSIBILITY THEREOF. This limitation of the liability of National Instruments will apply regardless of the form of action, whether in contract or tort, including negligence. Any action against National Instruments must be brought within one year after the cause of action accrues. National Instruments shall not be liable for any delay in performance due to causes beyond its reasonable control. The warranty provided herein does not cover damages, defects, malfunctions, or service failures caused by owner’s failure to follow the National Instruments installation, operation, or maintenance instructions; owner’s modification of the product; owner’s abuse, misuse, or negligent acts; and power failure or surges, fire, flood, accident, actions of third parties, or other events outside reasonable control. Copyright Under the copyright laws, this publication may not be reproduced or transmitted in any form, electronic or mechanical, including photocopying, recording, storing in an information retrieval system, or translating, in whole or in part, without the prior written consent of National Instruments Corporation. Trademarks CVI™, LabVIEW™ , National Instruments™, NI™ , ni.com™ , and NI-DAQ™ are trademarks of National Instruments Corporation. Product and company names mentioned herein are trademarks or trade names of their respective companies. Patents For patents covering National Instruments products, refer to the appropriate location: Help»Patents in your software, the patents.txt file on your CD, or ni.com/patents. WARNING REGARDING USE OF NATIONAL INSTRUMENTS PRODUCTS (1) NATIONAL INSTRUMENTS PRODUCTS ARE NOT DESIGNED WITH COMPONENTS AND TESTING FOR A LEVEL OF RELIABILITY SUITABLE FOR USE IN OR IN CONNECTION WITH SURGICAL IMPLANTS OR AS CRITICAL COMPONENTS IN ANY LIFE SUPPORT SYSTEMS WHOSE FAILURE TO PERFORM CAN REASONABLY BE EXPECTED TO CAUSE SIGNIFICANT INJURY TO A HUMAN. (2) IN ANY APPLICATION, INCLUDING THE ABOVE, RELIABILITY OF OPERATION OF THE SOFTWARE PRODUCTS CAN BE IMPAIRED BY ADVERSE FACTORS, INCLUDING BUT NOT LIMITED TO FLUCTUATIONS IN ELECTRICAL POWER SUPPLY, COMPUTER HARDWARE MALFUNCTIONS, COMPUTER OPERATING SYSTEM SOFTWARE FITNESS, FITNESS OF COMPILERS AND DEVELOPMENT SOFTWARE USED TO DEVELOP AN APPLICATION, INSTALLATION ERRORS, SOFTWARE AND HARDWARE COMPATIBILITY PROBLEMS, MALFUNCTIONS OR FAILURES OF ELECTRONIC MONITORING OR CONTROL DEVICES, TRANSIENT FAILURES OF ELECTRONIC SYSTEMS (HARDWARE AND/OR SOFTWARE), UNANTICIPATED USES OR MISUSES, OR ERRORS ON THE PART OF THE USER OR APPLICATIONS DESIGNER (ADVERSE FACTORS SUCH AS THESE ARE HEREAFTER COLLECTIVELY TERMED “SYSTEM FAILURES”). ANY APPLICATION WHERE A SYSTEM FAILURE WOULD CREATE A RISK OF HARM TO PROPERTY OR PERSONS (INCLUDING THE RISK OF BODILY INJURY AND DEATH) SHOULD NOT BE RELIANT SOLELY UPON ONE FORM OF ELECTRONIC SYSTEM DUE TO THE RISK OF SYSTEM FAILURE. TO AVOID DAMAGE, INJURY, OR DEATH, THE USER OR APPLICATION DESIGNER MUST TAKE REASONABLY PRUDENT STEPS TO PROTECT AGAINST SYSTEM FAILURES, INCLUDING BUT NOT LIMITED TO BACK-UP OR SHUT DOWN MECHANISMS. BECAUSE EACH END-USER SYSTEM IS CUSTOMIZED AND DIFFERS FROM NATIONAL INSTRUMENTS' TESTING PLATFORMS AND BECAUSE A USER OR APPLICATION DESIGNER MAY USE NATIONAL INSTRUMENTS PRODUCTS IN COMBINATION WITH OTHER PRODUCTS IN A MANNER NOT EVALUATED OR CONTEMPLATED BY NATIONAL INSTRUMENTS, THE USER OR APPLICATION DESIGNER IS ULTIMATELY RESPONSIBLE FOR VERIFYING AND VALIDATING THE SUITABILITY OF NATIONAL INSTRUMENTS PRODUCTS WHENEVER NATIONAL INSTRUMENTS PRODUCTS ARE INCORPORATED IN A SYSTEM OR APPLICATION, INCLUDING, WITHOUT LIMITATION, THE APPROPRIATE DESIGN, PROCESS AND SAFETY LEVEL OF SUCH SYSTEM OR APPLICATION. Contents About This Manual Organization of this Manual ..........................................................................................xiii Part I—Introduction.........................................................................................xiii Part II—Joint Time-Frequency Analysis.........................................................xiii Part III—Super-Resolution Spectral Analysis.................................................xiii Part IV—Wavelet Analysis .............................................................................xiv Part V—Digital Filter Design Application......................................................xiv Conventions ...................................................................................................................xiv Related Documentation..................................................................................................xv PART I Introduction Chapter 1 Signal Processing Toolset Overview Analysis Areas ...............................................................................................................1-1 Toolset Components ......................................................................................................1-1 Joint Time-Frequency Analysis.......................................................................1-2 Super-Resolution Spectral Analysis ................................................................1-2 Wavelet Analysis.............................................................................................1-3 Accessing Example Application Source Code ................................................1-4 Digital Filter Design Application ....................................................................1-4 System Requirements ....................................................................................................1-5 Installation .....................................................................................................................1-5 Chapter 2 Analysis Beyond FFT Background ....................................................................................................................2-1 Fourier Transform..........................................................................................................2-2 Gabor Expansion and Wigner-Ville Distribution ..........................................................2-5 Wavelet Transform ........................................................................................................2-6 Time-Frequency Transform and the Gabor Spectrogram..............................................2-8 Role of the Signal Processing Toolset ...........................................................................2-15 © National Instruments Corporation v Signal Processing Toolset User Manual Contents PART II Joint Time-Frequency Analysis Chapter 3 Joint Time-Frequency Analysis The Need for JTFA........................................................................................................ 3-1 Basic Approaches to JTFA............................................................................................ 3-3 Chapter 4 Joint Time-Frequency Analysis Algorithms Linear JTFA Algorithms ............................................................................................... 4-1 Gabor Expansion and STFT............................................................................ 4-1 Adaptive Representation and Adaptive Transform......................................... 4-2 Quadratic JTFA Algorithms .......................................................................................... 4-3 STFT Spectrogram .......................................................................................... 4-3 Wigner-Ville Distribution and Pseudo Wigner-Ville Distribution ................. 4-5 Cohen’s Class.................................................................................................. 4-8 Choi-Williams Distribution............................................................................. 4-9 Cone-Shaped Distribution............................................................................... 4-10 Gabor Spectrogram ......................................................................................... 4-11 Adaptive Spectrogram..................................................................................... 4-12 Chapter 5 Joint Time-Frequency Analysis Applications Opening the JTFA Example .......................................................................................... 5-1 Off-line JTFA ................................................................................................................ 5-2 Loading the Test Data ..................................................................................... 5-2 Setting the Sampling Rate............................................................................... 5-3 Detrending....................................................................................................... 5-3 Selecting a JTFA Method ............................................................................... 5-3 STFT Spectrogram ........................................................................... 5-4 Gabor Spectrogram........................................................................... 5-5 Adaptive Spectrogram ...................................................................... 5-5 Wigner-Ville Distribution................................................................. 5-6 Choi-Williams Distribution .............................................................. 5-6 Cone-Shaped Distribution ................................................................ 5-7 Displaying Data............................................................................................... 5-7 Changing the Spectrogram Display .................................................. 5-7 Signal Processing Toolset User Manual vi ni.com Contents Frequency Zooming ..........................................................................5-8 Mean Instantaneous Frequency.........................................................5-8 Saving Results .................................................................................................5-9 PART III Super-Resolution Spectral Analysis Chapter 6 Introduction to Model-Based Frequency Analysis The Need for Model-Based Frequency Analysis...........................................................6-1 Applying Model-Based Methods Properly ....................................................................6-6 The Toolset and Model-Based Methods ........................................................................6-8 Chapter 7 Model-Based Frequency Analysis Algorithms Models, Power Spectra, and Damped Sinusoids ...........................................................7-1 ARMA, MA, and AR Models .........................................................................7-1 Model Coefficients and Power Spectra ...........................................................7-3 AR Model and Damped Sinusoids ..................................................................7-5 Algorithms for Super-Resolution Spectral Analysis and Parameter Estimation ...........7-6 Covariance Method .........................................................................................7-6 Principle Component Auto-Regressive (PCAR) Method................................7-7 Prony’s Method ...............................................................................................7-9 Matrix Pencil Method......................................................................................7-9 Minimum Description Length .........................................................................7-9 Chapter 8 Applying Super-Resolution Spectral Analysis and Parameter Estimation Opening the SRSA Example..........................................................................................8-1 Performing Super-Resolution Spectral Analysis ...........................................................8-2 Loading the Test Data .....................................................................................8-3 Synthetic Data ...................................................................................8-3 Data Stored as Text Files ..................................................................8-5 Setting the Sampling Frequency......................................................................8-5 Setting the Number of Complex Sinusoids .....................................................8-5 Automatic..........................................................................................8-5 Manual ..............................................................................................8-6 Selecting the Window Type ............................................................................8-6 Selecting the Super-Resolution Spectrum Method..........................................8-6 Selecting the Damped Sinusoid Estimation Method .......................................8-6 © National Instruments Corporation vii Signal Processing Toolset User Manual Contents PART IV Wavelet Analysis Chapter 9 The Fundamentals of Wavelet Analysis Conventional Fourier Transform ................................................................................... 9-1 Innovative Wavelet Analysis......................................................................................... 9-3 Wavelet Analysis Versus Fourier Analysis................................................................... 9-6 Applications of Wavelet Analysis ................................................................................. 9-9 Discontinuity Detection .................................................................................. 9-9 Multiscale Analysis......................................................................................... 9-10 Detrending....................................................................................................... 9-11 Denoise............................................................................................................ 9-12 Performance Issues ........................................................................................................ 9-13 Chapter 10 Wavelet Analysis by Discrete Filter Banks Two-Channel Perfect Reconstruction Filter Banks....................................................... 10-1 Biorthogonal Filter Banks ............................................................................... 10-4 Orthogonal Filter Banks.................................................................................. 10-10 2D Signal Processing..................................................................................................... 10-12 Wavelet Packets............................................................................................................. 10-14 Chapter 11 Wavelet Analysis Applications Opening the Wavelet Analysis Examples ..................................................................... 11-1 1D Wavelet Transform .................................................................................................. 11-2 Using the 1D Wavelet Transform Example.................................................... 11-4 Loading the Test Data....................................................................... 11-5 Selecting the Wavelet ....................................................................... 11-5 Specifying the Extension Type......................................................... 11-6 Specifying the Tree Path................................................................... 11-7 Specifying the Display Method ........................................................ 11-9 Saving the Wavelet Transform Result.............................................. 11-9 2D Wavelet Transform .................................................................................................. 11-9 Using the 2D Wavelet Transform Example.................................................... 11-10 Loading the Image ............................................................................ 11-11 Selecting a Wavelet .......................................................................... 11-11 Specifying the Extension Type......................................................... 11-11 Specifying the Data Percentage Used for Reconstruction................ 11-11 Signal Processing Toolset User Manual viii ni.com Contents Using the Zoom Control..................................................................................11-11 Wavelet Packet ..............................................................................................................11-12 Using the Wavelet Packet Example ................................................................11-13 Loading the Test Data .......................................................................11-13 Selecting the Wavelet........................................................................11-13 Specifying the Extension Type .........................................................11-13 Specifying the Method to Compute Entropy ....................................11-13 Specifying the Number of Levels .....................................................11-14 Operating On a Tree Node ................................................................11-14 Specifying the Display Mode............................................................11-14 Drawing the Best Tree ......................................................................11-14 Wavelets Designer .........................................................................................................11-15 Opening the Wavelets Designer Front Panel...................................................11-15 Wavelets Designer Front Panel Displays ........................................................11-15 Designing Wavelets.........................................................................................11-16 Selecting the Type of Filter Bank .....................................................11-18 Finding the Product P0(z) ..................................................................11-18 Factorizing P0(z) into G0(z) and H0(z)...............................................11-20 PART V Digital Filter Design Chapter 12 Digital Filter Design Application Main Menu.....................................................................................................................12-2 Opening the Filter Design Front Panels ..........................................................12-3 Directly Loading a Filter Specification File....................................................12-3 Editing the DFD Preferences...........................................................................12-3 Getting Information about the DFD Application ............................................12-3 Quitting the DFD Application .........................................................................12-3 Digital Filter Design Front Panels .................................................................................12-4 Common Controls and Features ......................................................................12-4 Saving Filter Specifications ..............................................................12-5 Loading Filter Specifications ............................................................12-5 Saving Filter Coefficients .................................................................12-5 Analyzing Filter Designs ..................................................................12-6 Testing Filter Designs .......................................................................12-6 Transferring Filter Designs ...............................................................12-7 Returning to the Main Menu .............................................................12-7 Panning and Zooming Options .........................................................12-7 Graph Cursors ...................................................................................12-10 © National Instruments Corporation ix Signal Processing Toolset User Manual Contents Classical IIR Filter Design .............................................................................. 12-11 Classical IIR Design Front Panel Controls and Displays ................. 12-14 Classical FIR Design....................................................................................... 12-16 Classical FIR Design Front Panel Controls and Displays ................ 12-19 Pole-Zero Placement Filter Design ................................................................. 12-19 Pole-Zero Placement Front Panel Controls and Displays ................ 12-21 Arbitrary FIR Design ...................................................................................... 12-23 Arbitrary FIR Filter Design Front Panel Controls and Displays ...... 12-25 Analysis of Filter Design Front Panel............................................................. 12-28 File Menu.......................................................................................... 12-29 Design Analyzed Control ................................................................. 12-30 Analysis Displays ............................................................................. 12-30 DAQ and Filter Front Panel ............................................................................ 12-31 File Menu.......................................................................................... 12-32 Filter Design Control ........................................................................ 12-33 Off/On Switch................................................................................... 12-33 Function Generator Button ............................................................... 12-33 Time Waveform/Spectrum Control .................................................. 12-33 Sampling Rate Indicator ................................................................... 12-33 DAQ Setup Button and DAQ Setup Front Panel ............................. 12-33 Chapter 13 IIR and FIR Implementation Infinite Impulse Response Filters.................................................................................. 13-1 Cascade-Form IIR Filtering ............................................................................ 13-2 Finite Impulse Response Filters .................................................................................... 13-4 Format of the Filter-Coefficient Text Files ................................................................... 13-5 FIR-Coefficient File Format ........................................................................... 13-5 IIR Coefficient File Format............................................................................. 13-6 Appendix A Frequently Asked Questions Appendix B References Appendix C Technical Support and Professional Services Signal Processing Toolset User Manual x ni.com Contents Glossary Index © National Instruments Corporation xi Signal Processing Toolset User Manual About This Manual This manual provides information about the Signal Processing Toolset, the different types of signal processing analyses you can perform with the toolset, the theoretical basis for each type of analysis, and the analysis examples provided with the Signal Processing Toolset. Organization of this Manual The Signal Processing Toolset User Manual is divided into five sections and is organized as follows: Part I—Introduction • Chapter 1, Signal Processing Toolset Overview, provides an overview of the Signal Processing Toolset, its components, and installation instructions. • Chapter 2, Analysis Beyond FFT, provides basic information about signal processing, Fourier transform, Gabor expansion, Wigner-Ville distribution, wavelet transform, time-frequency transform, and the role of the Signal Processing Toolset in signal analysis. Part II—Joint Time-Frequency Analysis • Chapter 3, Joint Time-Frequency Analysis, explains the need for and approaches to joint time-frequency analysis (JTFA). • Chapter 4, Joint Time-Frequency Analysis Algorithms, describes the algorithms the JTFA virtual instruments (VIs) use. The JTFA algorithms implemented in this toolset fall into the following two categories: • – Linear – Quadratic Chapter 5, Joint Time-Frequency Analysis Applications, describes the Off-line JTFA example included with the Signal Processing Toolset. This example is designed to help you learn more about JTFA. Part III—Super-Resolution Spectral Analysis • © National Instruments Corporation Chapter 6, Introduction to Model-Based Frequency Analysis, introduces the basic concepts of model-based frequency analysis. xiii Signal Processing Toolset User Manual About This Manual • Chapter 7, Model-Based Frequency Analysis Algorithms, outlines the theoretical background of model-based frequency analysis and describes the relationship among the model coefficients, power spectra, and parameters of damped sinusoids. • Chapter 8, Applying Super-Resolution Spectral Analysis and Parameter Estimation, describes a super-resolution spectral analysis example application included with the Signal Processing Toolset. This example is designed to help you learn about model-based analysis. Part IV—Wavelet Analysis • Chapter 9, The Fundamentals of Wavelet Analysis, describes the history of wavelet analysis, compares Fourier transform and wavelet analysis, and describes some applications of wavelet analysis. • Chapter 10, Wavelet Analysis by Discrete Filter Banks, describes the design of two-channel perfect reconstruction filter banks, defines the types of filter banks used with wavelet analysis, and discusses wavelet packets. • Chapter 11, Wavelet Analysis Applications, describes the 1D and 2D Wavelet Transform examples and the Wavelet Packet example included with the Signal Processing Toolset. These examples are designed to help you learn about wavelet analysis. Part V—Digital Filter Design Application • Chapter 12, Digital Filter Design Application, describes the digital filter design (DFD) application used to design infinite impulse response (IIR) and finite impulse response (FIR) digital filters. • Chapter 13, IIR and FIR Implementation, describes the filter implementation equations for IIR and FIR filtering and the format of the IIR and FIR filter coefficient files. Conventions The following conventions appear in this manual: <> Angle brackets enclose the name of a key on the keyboard—for example, <Shift>. Angle brackets that contain numbers separated by an ellipsis represent a range of values associated with a bit or signal name—for example, DBIO<3..0>. Signal Processing Toolset User Manual xiv ni.com About This Manual [] Numbers enclosed by brackets denote references in Appendix B, References, of this manual—for example, [27] refers to entry number 27 in Appendix B. Empty brackets that follow a parameter type indicate that the parameter is an array. » The » symbol leads you through nested menu items and dialog box options to a final action. The sequence File»Page Setup»Options directs you to pull down the File menu, select the Page Setup item, and select Options from the last dialog box. This icon denotes a note, which alerts you to important information. bold Bold text denotes items that you must select or click in the software, such as menu items and dialog box options. Bold text also denotes parameter names. italic Italic text denotes variables, emphasis, a cross reference, or an introduction to a key concept. This font also denotes text that is a placeholder for a word or value that you must supply. monospace Text in this font denotes text or characters that you should enter from the keyboard, sections of code, programming examples, and syntax examples. This font is also used for the proper names of disk drives, paths, directories, programs, subprograms, subroutines, device names, functions, operations, variables, filenames and extensions, and code excerpts. monospace bold Bold text in this font denotes the messages and responses that the computer automatically prints to the screen. This font also emphasizes lines of code that are different from the other examples. monospace italic Italic text in this font denotes text that is a placeholder for a word or value that you must supply. Related Documentation The following documents contain information that you might find helpful as you read this manual: • Signal Processing Toolset Help, available in LabVIEW 6.1 by selecting Help»Signal Processing Toolset; available in LabVIEW 7.0 and later by selecting Help»VI, Function, & How-To Help and then selecting VI and Function Reference»Signal Processing Toolset in the table of contents • LabVIEW Help, available by selecting Help»VI, Function, & How-To Help © National Instruments Corporation xv Signal Processing Toolset User Manual About This Manual • Signal Processing Toolset for LabWindows™/CVI ™ Help, available by selecting Start»Programs»National Instruments»Signal Processing Toolset»SPT for LabWindows/CVI Help • LabVIEW User Manual • LabWindows/CVI User Manual Signal Processing Toolset User Manual xvi ni.com Part I Introduction This section of the manual introduces the Signal Processing Toolset and presents background information about signal processing. • Chapter 1, Signal Processing Toolset Overview, provides an overview of the Signal Processing Toolset, its components, and installation instructions. • Chapter 2, Analysis Beyond FFT, provides basic information about signal processing, Fourier transform, Gabor expansion, Wigner-Ville distribution, wavelet transform, time-frequency transform, and the role of the Signal Processing Toolset in signal analysis. © National Instruments Corporation I-1 Signal Processing Toolset User Manual 1 Signal Processing Toolset Overview This chapter provides information on the analysis areas where you can use the Signal Processing Toolset, an overview of the toolset and its components, and installation instructions. Analysis Areas The Signal Processing Toolset is primarily intended for the analysis of signals whose frequency contents change over time. Examples of such signals include the sound or vibration created by engines, most biomedical signals, and seismological data records. Time-frequency and wavelet transforms are widely used in modern signal analysis. The Signal Processing Toolset provides tools to process those signals for which the classical Fourier transform is not suitable, such as transient signals and signals whose frequency contents change over time. The Signal Processing Toolset is divided into the following three major analysis areas: • Joint time-frequency analysis (JTFA) • Super-resolution spectral analysis (SRSA) • Wavelet analysis JTFA is suitable for signals with narrowband instantaneous frequencies. Super-resolution spectral analysis, a model-based frequency analysis method, is mainly applicable when there is a small number of data samples. The wavelet transform is suitable for signals with short time durations. Toolset Components This section describes the Signal Processing Toolset components for JTFA, SRSA, wavelet analysis, and digital filter design. © National Instruments Corporation 1-1 Signal Processing Toolset User Manual Chapter 1 Signal Processing Toolset Overview Joint Time-Frequency Analysis The Signal Processing Toolset provides several algorithms for applications with nonstationary signals, signals where the frequency content varies with time. These algorithms include the award-winning and patented Gabor spectrogram, as well as the Wigner-Ville distribution, Choi-Williams distribution, short-time Fourier transform, cone-shaped distribution, and adaptive spectrogram. Applications for JTFA include speech processing, sound analysis, sonar, radar, machine testing, vibration analysis, and dynamic signal monitoring. The Signal Processing Toolset includes a stand-alone application you can use to test JTFA algorithms. Refer to Chapter 5, Joint Time-Frequency Analysis Applications, for information about the JTFA application. Refer to Part II, Joint Time-Frequency Analysis, for more information about joint time-frequency analysis. The Signal Processing Toolset has easy, advanced, and refnum JTFA VIs and functions. LabVIEW users can find the JTFA VIs on the Functions»Adv Sig Processing»Easy Level JTFA palette, the Functions»Adv Sig Processing»Advanced JTFA palette, and the Functions»Adv Sig Processing»Refnum JTFA palette. Refer to the Signal Processing Toolset Help for information about individual VIs. LabWindows/CVI users can find the JTFA functions by selecting Library»SPT»JTFA. Refer to the Signal Processing Toolset for LabWindows/CVI Help for information about individual JTFA functions for LabWindows/CVI. Super-Resolution Spectral Analysis SRSA is a model-based analysis method and is especially powerful when the number of data samples is limited. The relationship of the number of samples to the frequency resolution is quantified by Equation 1-1. sampling frequency ∆f = ----------------------------------------------------number of samples (1-1) where ∆f denotes the frequency resolution. The frequency resolution characterizes the minimum difference that can be distinguished between two sinusoids. This analysis method is effective when you have a small number of data samples. Refer to Chapter 6, Introduction to Model-Based Frequency Analysis, for more information about model-based frequency analysis and its role in super-resolution spectral analysis. Signal Processing Toolset User Manual 1-2 ni.com Chapter 1 Signal Processing Toolset Overview The Signal Processing Toolset contains a stand-alone application you can use to test algorithms such as covariance, Prony’s method, principle component auto-regression (PCAR), and the matrix pencil method for model-based analysis. Refer to Chapter 8, Applying Super-Resolution Spectral Analysis and Parameter Estimation, for information about the SRSA application. Use the super-resolution spectral analysis VIs and functions to perform high-resolution spectral analysis and parameter estimation. The parameters include amplitude, phase, damping factor, and frequency of damped sinusoids. You can use the VIs and functions for other applications such as linear prediction, signal synthesis, data compression, and system identification. These tools have a diverse range of applications in areas such as biomedicine, economics, geophysics, noise and vibration, and speech analysis. Refer to Part III, Super-Resolution Spectral Analysis, for more information about super-resolution spectral analysis. The Signal Processing Toolset has both easy and advanced SRSA VIs and functions. LabVIEW users can find the SRSA VIs on the Functions»Adv Sig Processing»Easy Level SRSA palette and the Functions»Adv Sig Processing»Advanced SRSA palette. Refer to the Signal Processing Toolset Help for more information about individual VIs. LabWindows/CVI users can find the SRSA functions by selecting Library»SPT»SRSA. Refer to the Signal Processing Toolset for LabWindows/CVI Help for information about individual SRSA functions for LabWindows/CVI. Wavelet Analysis You can use wavelets for feature extraction and data compression. By interactively selecting a wavelet prototype, such as equiripple or maxflat, and different finite impulse response combinations, you can easily find the best wavelet or filter bank for your application. As you design the wavelets, you can apply them to 1D and 2D signals, or images, and immediately see the effect of the design on your signal. The Wavelet Analysis functions are especially powerful for signals that have short time duration and wide frequency bandwidth. The Signal Processing Toolset provides an intuitive and interactive interface for designing filter banks, 1D and 2D wavelet transforms, and computing the wavelet packet for 1D test data. Refer to Chapter 11, © National Instruments Corporation 1-3 Signal Processing Toolset User Manual Chapter 1 Signal Processing Toolset Overview Wavelet Analysis Applications, for information about the wavelet analysis applications. Refer to Part IV, Wavelet Analysis, for more information about wavelet analysis and filter bank design. The Signal Processing Toolset has both easy and advanced Wavelet VIs and functions. The toolset also has wavelet packet VIs and functions. LabVIEW users can find the wavelet analysis VIs on the Functions»Adv Sig Processing»Easy Level Wavelet palette, the Functions»Adv Sig Processing»Advanced Wavelet palette, and the Functions»Adv Sig Processing»Advanced Wavelet»Wavelet Packet palette. Refer to the Signal Processing Toolset Help for more information about individual VIs. LabWindows/CVI users can find the Wavelet functions by selecting Library»SPT»Wavelet, and Library»SPT»Wavelet»Wavelet Packet. Refer to the Signal Processing Toolset for LabWindows/CVI Help for information about individual wavelet analysis functions for LabWindows/CVI. Accessing Example Application Source Code If you have LabVIEW 6.1 or later installed, you can access the source code for the JTFA, SRSA, and wavelet analysis example applications. Complete the following steps to access the source code for an example application. 1. Select Start»Programs»National Instruments»Signal Processing Toolset»NI SPT Start-Up Source to open the SPT palette. 2. Click the icon of the application you want to see to open the application front panel. 3. Select Window»Show Diagram or press <Ctrl-E>. Refer to Chapter 5, Joint Time-Frequency Analysis Applications; Chapter 8, Applying Super-Resolution Spectral Analysis and Parameter Estimation; and Chapter 11, Wavelet Analysis Applications, for information about the individual example applications. Digital Filter Design Application The Signal Processing Toolset contains a Digital Filter Design (DFD) application. The DFD application provides a general-purpose design tool for signal conditioning, control systems, digital signal processing, and Signal Processing Toolset User Manual 1-4 ni.com Chapter 1 Signal Processing Toolset Overview virtual instrument applications. You can use the DFD application to accomplish the following tasks: • Design bandpass, bandstop, lowpass, and highpass filters. • Design filters with an arbitrary magnitude response. • Design infinite impulse response (IIR) and finite impulse response (FIR) filters using the graphical user interface. • Design filters by interactively editing the magnitude response graph or the pole-zero plot in the z-plane. • Test your design online with a built-in function generator. • Analyze the filter using the step and impulse responses, magnitude and phase responses, and pole-zero plot. • Save the filter coefficients of your completed design to a file for use in other applications. Refer to Chapter 12, Digital Filter Design Application, for more information about the DFD application. System Requirements To install the Signal Processing Toolset 7.0 for LabVIEW, your system must have the Full Development or Professional Development System of LabVIEW 6.1 or later. To install the Signal Processing Toolset 7.0 for LabWindows/CVI, your system must have LabWindows/CVI 6.0 or later. Installation Complete the following steps to install the Signal Processing Toolset. 1. Insert the Signal Processing Toolset CD into your CD-ROM drive and double-click setup.exe. 2. Follow the instructions on your screen. After you have completed the on-screen installation instructions, you are ready to run the Signal Processing Toolset. © National Instruments Corporation 1-5 Signal Processing Toolset User Manual Analysis Beyond FFT 2 Often, it is neither possible nor desirable to physically open up a system and study it. In many such instances, you can gain knowledge about a system by measuring and analyzing signals associated with the system. For example, physicists and chemists use the spectrum dispersed by a prism to distinguish between different types of matter. Astronomers determine distances between planets by examining spectra modified by Doppler Shifts. Physicians use the electrocardiograph (ECG), which traces the electrical activity of the heart, as a nonsurgical means of diagnosing heart problems. Analyzing signals can be an ideal way to examine closed systems. This chapter provides basic information about signal processing, the Fourier transform, the Gabor expansion, the Wigner-Ville distribution, the wavelet transform, the time-frequency transform, and the role of the Signal Processing Toolset in signal analysis. Background Prior to World War II, signal processing was primarily a part of physics, and scientists and engineers mainly dealt with analog signals. Then the sampling theorem, proved by the mathematician J. Whittaker [35] and applied to communication by Claude Shannon [29], led to a new era of signal processing. Think of modern signal processing as the combination of physics and statistics. With the discovery of the sampling theorem and the advance of the digital computer, scientists are able to employ elegant mathematical approaches to process signals that our ancestors would never have been able to imagine. One such approach is the virtual prism, or Fourier transform. Applications of modern signal processing range from the control of the Mars Pathfinder spacecraft more than twenty million miles away from earth to the discovery of abnormal cells inside the human body. One fundamental mathematical tool employed in signal processing is a transform. When asked to multiply the Roman numerals LXIV and XXXII, only a few of us can immediately give the correct answer. However, after you translate the Roman numerals into the Arabic numerals 64 and 32, you © National Instruments Corporation 2-1 Signal Processing Toolset User Manual Chapter 2 Analysis Beyond FFT can solve to get 2,048. The process of converting the unfamiliar Roman numerals into common Arabic numerals is a typical example of transforms [12]. Properly applying transforms can simplify calculations or make certain attributes of a signal explicit. Fourier Transform One of the most popular transforms known to scientists and engineers is the Fourier transform, which converts a signal from the time domain to the frequency domain. The Fourier transform is extremely useful when applied correctly. Two hundred years ago, during the study of heat propagation and diffusion, Jean Baptiste Joseph Fourier found a series of harmonically related sinusoids useful to represent the temperature distribution throughout a body. That method of computing the weight of each sinusoidal function is now known as the Fourier transform. The Fourier transform not only benefits the study of heat distribution, but it also is useful in many other mathematical operations, such as solving differential equations. The example that scientists and engineers are most familiar with is the convolution theory. You can apply the Fourier transform to convert time-consuming convolutions into more efficient multiplications. The Fourier transform acts as a mathematical prism to break down a signal into a group of waveforms, or different frequencies, as a prism breaks up light into a color spectrum. With the help of the Fourier transform, scientists can interpret radiation from distant galaxies, diagnose illness in a developing fetus, and make inexpensive cellular phone calls. With the establishment of quantum mechanics, the significance of Fourier’s discovery is even more obvious. For example, with the Fourier transform, scientists can quantitatively describe the Heisenberg uncertainty principle, a fundamental and inescapable property of the world. The Heisenberg uncertainty principle states that certain pairs of quantities, such as the position and velocity of a particle, cannot both be predicted with complete accuracy. The Fourier transform is so powerful that people tend to apply it everywhere without noticing one fundamental difference between the mathematical prism and a real prism. A real prism produces instantaneous spectra. Spectra produced in the evening are different than spectra produced that morning. When using a real prism to examine spectra of light, you need no previous knowledge about the light to produce the spectra. However, to compute the Fourier transform, you need to examine information over time. The spectrum computed by the Fourier transform is Signal Processing Toolset User Manual 2-2 ni.com Chapter 2 Analysis Beyond FFT the spectrum averaged over an infinitely long period of time before the present to an infinitely long period of time after the present. Figure 2-1 illustrates two linear chirp signals. Each is a time-reversed version of the other. Whereas frequencies of the signal on the left increase with time, frequencies of the signal on the right decrease with time. Although the frequency behavior of the two signals is obviously different, their frequency spectra computed by the Fourier transform, as shown in Figure 2-2, are identical. The Fourier transform preserves all information about the time waveform. Otherwise, the signal could not be reconstructed from the transform. 1.0 Linear Chirp 1.0 0.5 0.5 0.0 0.0 –0.5 –0.5 Reversed Linear Chirp –1.0 –1.0 0.0 0.1 0.2 0.3 0.4 0.5 0.6 0.7 0.8 0.9 1.0 0.0 0.1 0.2 0.3 0.4 0.5 0.6 0.7 0.8 0.9 1.0 Figure 2-1. Time-Reversed Linear Chirp Signals 6.0 Spectrum 5.5 5.0 4.5 4.0 0.0 0.1 0.2 0.3 0.4 0.5 Figure 2-2. Frequency Spectra Computed by the Fourier Transform for Time-Reversed Linear Chirp Signals © National Instruments Corporation 2-3 Signal Processing Toolset User Manual Chapter 2 Analysis Beyond FFT Figure 2-3 depicts the spectrum of an engine sound, and the top plot of Figure 2-4 depicts the corresponding time waveform. Spectrum 3.0E+2 2.5E+2 2.0E+2 1.5E+2 1.0E+2 5.0E+1 1000 0 2000 3000 4000 5000 5512 Hz Figure 2-3. Engine Sound Spectrum 2 Engine Sound 2.0E–1 0.0E+0 –2.0E–1 0.0E+0 2.5E+3 5.0E+3 7.5E+3 1.0E+4 1.3E+4 1.5E+4 1 Tree Path 1 1 2.3E–3 0.0E+0 –2.2E–2 0.0E+0 2.0E+3 4.0E+3 6.0E+3 Tree Path 2 3.6E–3 7.5E+3 10 3 0.0E+0 –2.5E–3 –3.9E–3 0.0E+0 1.0E+3 2.0E+3 3.0E+3 Tree Path 3 3.8E+3 00 1.2E–1 0.0E+0 –1.2E–1 0.0E+0 1 2 1.0E+3 2.0E+3 Engine Knocks Original Engine Sound Time Waveform 3 3.0E+3 3.8E+3 Wavelet Transform Figure 2-4. Engine Sound Time Waveform and Wavelet Transform If you could hear the signal depicted in Figures 2-3 and 2-4, you could clearly identify several knocking sounds caused by out-phase firing inside the engine. As indicated by the wavelet transform, the second plot in Figure 2-4, the knocking sound is actually quite strong. To compute the Fourier transform, you have to include the signal before the knocking takes place and the signal after the knocking ends. The spectrum computed with Signal Processing Toolset User Manual 2-4 ni.com Chapter 2 Analysis Beyond FFT the Fourier transform indicates that the frequencies contained in the entire time waveform, not the frequencies in a particular time instant. The Fourier transform provides the average signal characteristics. Although the amplitude of engine knock sounds can be large in a very short time period, the energy of the sound, compared to the total background noise, is negligible. Because the sound energy of engine knocking is relatively small, the presence of engine knocks is completely overwhelmed in the averaged spectra computed by the Fourier transform. Consequently, there are no obvious signatures in the spectrum to show the presence of engine knock. The Fourier transform smears the signal’s local behavior globally. As Hubbard observed, “the Fourier transform is poorly suited to very brief signals, or signals that change suddenly and unpredictably; yet in signal processing, brief changes often carry the most interesting information” [11]. Although most natural spectra are time dependent, for example, morning and evening light, the Fourier transform makes “changing frequency” unthinkable. As Gabor once wrote, “even experts could not at times conceal an uneasy feeling when it came to the physical interpretation of results obtained by the Fourier method” [12]. The set of basic functions employed by Fourier, sine and cosine functions, is the mathematical model of the most fundamental natural phenomena, the wave, and a solution of differential equations. Unfortunately, this is not the case for time-frequency and wavelet transforms. Neither time-frequency nor wavelet transforms are likely to have the revolutionary impact upon science and engineering that the Fourier transform has had. However, the time-frequency and wavelet transforms do offer many interesting features that the Fourier transform does not possess. Gabor Expansion and Wigner-Ville Distribution The development of Fourier’s alternatives started at least a half century ago and has involved many people. The first two important articles dealing with the limitation of the Fourier transform appeared right after World War II, one written by Dennis Gabor [12] and the other by J. Ville [33]. Because Ville’s conclusion was similar to a process introduced by Eugene Wigner in quantum mechanics in 1932 [36], traditionally Ville’s method is known as the Wigner-Ville distribution. However, initial reactions to Gabor’s and Ville’s work was not enthusiastic. The difficulty with the Gabor expansion is that a set of elementary functions suitable for general time-frequency analysis does not form an orthogonal basis. The problem with the Wigner-Ville distribution is the crossterm interference that makes the resulting presentation difficult to © National Instruments Corporation 2-5 Signal Processing Toolset User Manual Chapter 2 Analysis Beyond FFT interpret. However, two sets of papers in the early 1980s triggered great interest in revisiting Gabor’s and Ville’s pioneering work [1] [3]. Since the early 1980s, scientists have made many developments, some of which are now mature applications. Wavelet Transform The recognition of the wavelet transform is much more recent, though a similar methodology can be traced to the early twentieth century [9]. Wavelets are not a new idea, and the concept has existed in other forms in many different fields. For example, the numerical implementation of the wavelet transform is nothing more than the well-established method of filter banks. In addition to detecting engine knocks, the wavelet transform is also successfully used for train wheel diagnosis. Two of the main causes of train accidents are defective wheels and bearings. Hence, on-line train wheel and bearing diagnoses are an important part of avoiding potential catastrophes. The parameter that engineers believe can be used to effectively detect hidden flaws in wheels and bearings is the variation in railroad track vibration. The defective wheels and bearings usually generate impulse-like noise as the train moves on the track, making abnormal track vibrations. The wavelet transform can effectively filter out such noise. Figure 2-5 illustrates a typical train wheel on-line testing result. Vibration due to Wheel 5 Figure 2-5. Train Wheel On-Line Testing Result Signal Processing Toolset User Manual 2-6 ni.com Chapter 2 Analysis Beyond FFT When a wheel is far away from the accelerometer mounted beneath the track, the corresponding track vibration is weak. Track vibration increases as the train wheel approaches the accelerometer. The vibration reaches a maximum when a wheel is right above the accelerometer. The plot on the top of Figure 2-5 shows the vibration history during the time that eight wheels pass the accelerometer. The x-axis describes the time index, and the y-axis indicates the magnitude of track vibration. Each bump corresponds to one wheel passing over the accelerometer. Obviously, there is no clear signature between the normal and abnormal wheels in the time waveform. However, in the wavelet transform domain, the plot on the bottom of Figure 2-5, you can identify a potential problem at the fifth wheel, between x = 500 and x = 550. The wavelet-transform-based on-line diagnosis system is expected to substantially reduce potential train accidents caused by defective wheels and bearings. The Fourier transform compares a signal with a set of sine and cosine functions. Each sine and cosine function has a different oscillating frequency. Hence, the result of Fourier transform indicates magnitudes of the signal at each individual frequency. The wavelet transform compares a signal with a set of short waveforms called wavelets. Each wavelet has a different time duration, or scale. As the time duration becomes shorter, the frequency bandwidth becomes wider, and vice versa. In mathematical terms, the process of stretching or compressing the fundamental wavelet, usually called the mother wavelet, is called dilating. As wavelets get narrower and narrower, they eventually become impulse-like functions, equivalent to wide frequency bands. Consequently, the wavelet transform can process impulse-like signals, such as engine knocks and noise created by defective train wheels and bearings. In those examples, the wavelet transform is superior to the Fourier transform. Besides wideband, or short time duration, signal detection, the wavelet transform is also widely used for 2D image processing. Figure 2-6 is the 2D wavelet transform of the picture of an iris. © National Instruments Corporation 2-7 Signal Processing Toolset User Manual Chapter 2 Analysis Beyond FFT Figure 2-6. 2D Wavelet Transform of the Picture of an Iris In Figure 2-6, the full image on the left is broken into four subimages. The upper-left subimage, which is a quarter of the size of the original image, contains the major features of the picture of the iris. The remaining three subimages have relatively less important information, and thus have less influence on the reconstruction. Figure 2-6 suggests, that instead of storing or transferring the entire large image, you only need to store or transfer the upper-left image and the number of prominent pixels in the other three subimages. Because the number of pixels in each subimage is a quarter of the number of pixels contained in the original image, by applying a 2D wavelet transform, you can save a lot of memory and communication bandwidth. Time-Frequency Transform and the Gabor Spectrogram While the wavelet transform is well-suited for the analysis of predominately nonstationary signals with sudden peaks or discontinuity, the time-frequency transform is effective for analyzing narrowband signals or signals whose frequency changes slowly with time. The detection of impulse signals by low-orbit satellites is a good example of a time-frequency transform application. The detection and estimation of impulse signals has been an important national security issue because nuclear weapon testing can cause impulse signals. Figure 2-7 depicts an impulse signal received by the U.S. Department of Energy ALEXIS/BLACKBEARD satellite. Signal Processing Toolset User Manual 2-8 ni.com Chapter 2 Analysis Beyond FFT 2 1 1 2 3 Power Spectrum Joint Time-Frequency Transform 3 Time Waveform Figure 2-7. Impulse Signal Received by ALEXIS/BLACKBEARD Satellite (Data courtesy of Non-Proliferation & International Security Division, Los Alamos National Laboratory) After passing through dispersive media, such as the ionosphere, the impulse signal turns into a non-linear chirp signal. While the time waveform is severely corrupted by random noise, the conventional spectrum is dominated by radio carrier signals that remain basically unchanged over time. As shown in Figure 2-7, neither the time waveform nor the power spectrum indicates the existence of the impulse signal. However, when looking at the amplitudes of the Gabor coefficients, computed by the short-time Fourier transform, you can identify the presence of the chirp-type signal arching across the joint time-frequency domain. From the joint time-frequency domain, you can mask the Gabor coefficients that correspond to the desired signal, as shown in Figure 2-8. Figure 2-8. Signal Masked from Noisy Background © National Instruments Corporation 2-9 Signal Processing Toolset User Manual Chapter 2 Analysis Beyond FFT After the masking operation, apply the Gabor expansion to recover the original time waveform. Figure 2-9 compares the noisy and reconstructed signals. Figure 2-9. Reconstructed Signal As shown in Figure 2-7, the interesting signal in this example cannot be detected from either the time waveform or the conventional spectrum. When the signal-to-noise rate (SNR) is very low, as with many satellite signals, the short-time Fourier transform and Gabor expansion could be the only choices for detection and estimation. The time-frequency transform describes how the spectrum of a signal changes with time, and that is its major advantage. Such an instantaneous spectrum is very useful in many applications. One such application is aneurysm research. An aneurysm is a bulge or sac formed by the ballooning of the wall of an artery or a vein. It can become the site of a blood clot that breaks away and lodges in vital organs, such as the heart or the brain, causing potentially fatal heart failure or brain damage. Except for Computer Tomography (CT) and Magnetic Resonance Imaging (MRI), at present, there is no simple and economical method to screen for aneurysms. The results obtained from the Gabor spectrogram could eventually lead to an economical aneurysm screening test. Some aneurysms emit specific resonant sounds of varying frequencies. So, the frequency of the sound created by blood flow is a potential feature for diagnosing an aneurysm. However, the sound associated with an aneurysm is generated by a complicated, dynamic fluid system involving the arterial wall, heart chamber, surrounding blood vessels, and moving blood, all under varying pressure. The sound recorded from an aneurysm is caused by vibration stimulated by the blood flow inside the aneurysm and nearby blood vessels. This vibrational system is non-linear and time-varying. In addition, the sound emitted by an aneurysm is non-stationary and is usually combined with the biological noises generated by the heart, respiratory system, and eye movements. Signal Processing Toolset User Manual 2-10 ni.com Chapter 2 Analysis Beyond FFT Figure 2-10 shows an aneurysm signal recorded directly from an antercranial aneurysm during surgery. Figure 2-10. Gabor Spectrogram of Blood Flow Sound (Data courtesy of the Medical School at the University of Pittsburgh) The record represented by Figure 2-10 has 512 data samples, corresponding to 300 milliseconds in time. The spectrum of the signal is illustrated on the left. It shows the range of resonant frequencies, 450 to 550 Hz, but provides no other useful information. The center plot depicts the corresponding Gabor spectrogram that describes the instantaneous spectrum of the signal.With the help of the Gabor spectrogram, the physical system that produces this signal could hypothetically be described as follows: • The main arc is produced by the variation of blood pressure which changes the physical parameters of the resonant system. More specifically, at the very beginning of the vibration, in the vicinity of 0.05 seconds, the spectral component is relatively wide, corresponding to a low Q, center frequency versus frequency bandwidth, value of the vibrational system due to the existence of a large damping effect. • As the stimulation increases, the pressure-induced vibration becomes stronger, and the spectral component narrows, which indicates an increasing Q value. As a result, between 0.1 to 0.15 seconds, the vibration tends to concentrate on a single frequency, yielding a sinusoidal-like waveform. • As the vibration continues, another interesting phenomenon occurs. Between 0.15 to 0.25 seconds, when the vibrational magnitude increases considerably, you can observe several branches with © National Instruments Corporation 2-11 Signal Processing Toolset User Manual Chapter 2 Analysis Beyond FFT harmonic-like patterns deviating from the main arc. However, after a short period of time, these branches merge back into the main arc again. This interesting behavior could indicate that, at the branching points, the vibrational system has reached the upper limit of its linear range. However, the stimulation is still present, which provides the system with additional energy. • This over-stimulation causes the vibration to enter a nonlinear stage. • Conversely, as the stimulation decreases, the vibrational system loses energy. • Finally, the system ceases vibration when the damping effect becomes dominant again. In this example, researchers use the Gabor spectrogram as an X-ray, to get a better understanding of the mechanism of an aneurysm system. As shown in Figure 2-10, information provided by the Gabor spectrogram is not available in either the time waveform or the conventional frequency spectrum. The resulting observation could eventually lead to an efficient means of diagnosing aneurysms that will not only be less expensive than CT and MRI, but also pain-free. The Gabor spectrogram also has been successfully applied in earthquake engineering, with developments like the detection of soil liquefaction conducted at the University of Tokyo. Soil liquefaction is an earthquake-related phenomenon that takes place in saturated soils from the sub-surface soft layer. The cause of liquefaction is the rise of the water pore pressure under undrained conditions when the ground shakes. The increase of the pore pressure reduces the soil shear resistance to almost zero, causing the soil to behave as a liquid. Consequently, the energy of horizontal vibrations, seismic shear waves from depth, transferred by the soil is substantially reduced, particularly, the high frequency contents. Researchers recognize soil liquefaction as the main cause of the collapse of earth dams and slopes, failure of foundations, superstructures, and lifelines, such as gas and electrical power supplies. Since the 1964 Niigata earthquake, scientists have obtained and studied a number of seismic records from liquefied-soil sites. The records show that the horizontal ground acceleration alternates uniquely after the onset of liquefaction. The frequency of the acceleration abruptly drops off toward the 0.3 to 1 Hz range, and amplitudes decrease, whereas the vertical acceleration remains fairly stable. The decrease of the soil shear modulus, as a consequence of the water pore-pressure build up, triggers the alternation of the horizontal ground acceleration. Signal Processing Toolset User Manual 2-12 ni.com Chapter 2 Analysis Beyond FFT Researchers developed methods for liquefaction detection based on these seismic records. Recently, researchers from the International Center for Disaster-Mitigation Engineering at the University of Tokyo employed the seismic-signal instantaneous spectrum to quantify the alternation of the horizontal ground acceleration. Figure 2-11 shows the seismic-signal instantaneous spectrum from a site where extensive liquefaction occurred. Figure 2-11. East-West Component of the Ground Acceleration Record at Higashi-Kobe Bridge from the 1995 Hyogoken-Nanbu Earthquake (Data courtesy of the International Center for Disaster-Mitigation Engineering at the Institute of Industrial Science, University of Tokyo) © National Instruments Corporation 2-13 Signal Processing Toolset User Manual Chapter 2 Analysis Beyond FFT Figure 2-12 shows the seismic-signal instantaneous spectrum from a site where no liquefaction occurred. Figure 2-12. East-West Component of the Ground Acceleration Record at JMA Kobe Station from the 1995 Hyogoken-Nanbu Earthquake. (Data courtesy of the International Center for Disaster-Mitigation Engineering at the Institute of Industrial Science, University of Tokyo) The mean instantaneous frequency computed from the seismic-signal instantaneous spectrum can characterize the frequency changes, as shown in Figures 2-13 and 2-14. Figure 2-13. Mean Instantaneous Frequencies at the Figure 2-11 Site The mean instantaneous frequency for East-West component, computed from Figure 2-11, is obviously lower than that for non-liquefaction case in Figure 2-14. (Data courtesy of the International Center for Disaster-Mitigation Engineering at the Institute of Industrial Science, University of Tokyo) Signal Processing Toolset User Manual 2-14 ni.com Chapter 2 Analysis Beyond FFT Figure 2-14. Mean Instantaneous Frequencies at the Figure 2-12 Site The mean instantaneous frequency for East-West component is computed from Figure 2-12. (Data courtesy of the International Center for Disaster-Mitigation Engineering at the Institute of Industrial Science, University of Tokyo) Occurrence of liquefaction is judged on the relative difference in the mean instantaneous frequency of the horizontal and vertical acceleration. Now, researchers from the University of Tokyo are able to remotely detect the occurrence of soil liquefaction. Figure 2-13 represents a typical liquefaction record, whereas Figure 2-14 indicates no liquefaction occurring. Refer to Qian and Chen’s March 1999 article in the IEEE Signal Processing Magazine to learn about other successful signal processing applications [28]. Role of the Signal Processing Toolset There is no doubt that time-frequency and wavelet transforms have begun to pervade modern technology, as well as our everyday life. The Signal Processing Toolset provides you with the tools to process signals for which the classical Fourier transform is not suitable, such as the transient signal and the signal whose frequency contents evolve over time. The remainder of this manual discusses the main areas of signal analysis, specifically joint time-frequency analysis (JTFA), super-resolution spectral analysis (SRSA), and wavelet analysis, and how you can use the Signal Processing Toolset to perform these analyses. The manual also contains information about digital filter design. © National Instruments Corporation 2-15 Signal Processing Toolset User Manual Part II Joint Time-Frequency Analysis This section of the manual provides information on joint time-frequency analysis (JTFA) and the JTFA applications in the Signal Processing Toolset. • Chapter 3, Joint Time-Frequency Analysis, explains the need for and approaches to JTFA. • Chapter 4, Joint Time-Frequency Analysis Algorithms, describes the algorithms that the JTFA VIs and functions use. • Chapter 5, Joint Time-Frequency Analysis Applications, introduces Signal Processing Toolset JTFA applications. © National Instruments Corporation II-1 Signal Processing Toolset User Manual Joint Time-Frequency Analysis 3 This chapter explains the need for and approaches to joint time-frequency analysis (JTFA). The Need for JTFA Unlike traditional analysis in which you analyze a signal only in the time domain or frequency domain, JTFA allows you to analyze a signal in the time and frequency domains simultaneously. This enables you to better understand and process a particular signal. JTFA is used primarily to observe how the power spectrum of a signal changes over time. Whereas classical algorithms, such as the square of the Fourier transform, indicate only the average power spectrum of a signal, JTFA algorithms allow you to examine the instantaneous spectrum. The upper-left plot in Figure 3-1 is a time-dependent spectrum which plots the energy of the signal as a function of both time and frequency. Figure 3-1. Speech Signal © National Instruments Corporation 3-1 Signal Processing Toolset User Manual Chapter 3 Joint Time-Frequency Analysis As shown in Figure 3-1, the time-dependent spectrum clearly reveals the pattern of the formants. From the formants, you can see how the frequency changes. The relative brightness levels of the plot show the intensity of the frequencies. In this example, the JTFA helps illustrate the mechanism of human speech. Another important application with JTFA is the detection of noise-corrupted signals. In general, random noise tends to spread evenly across the time and frequency domains. However, the signal usually concentrates in a relatively short time period or a narrow frequency band. If you convert the noise-corrupted signal to the joint time-frequency domain, you can substantially improve the local or regional Signal-to-Noise Ratio (SNR). Figure 3-2 depicts an impulse signal received by the U.S. Department of Energy ALEXIS/BLACKBEARD satellite. Figure 3-2. Ionized Impulse Signal (Data courtesy of Non-Proliferation and International Security Division, Los Alamos National Laboratory) After passing through dispersive media, such as the ionosphere, the impulse signal becomes the nonlinear chirp signal. As shown in Figure 3-2, random noise dominates both the time waveform and the power spectrum. Neither indicates the existence of the impulse signal. However, from the time-dependent spectrum, you can immediately identify the presence of the chirp-type signal that arches across the joint time-frequency domain. Signal Processing Toolset User Manual 3-2 ni.com Chapter 3 Joint Time-Frequency Analysis The horizontal lines correspond to radio carrier signals that remain basically unchanged over time. Based on the joint time-frequency representation, you can further mask the desired signal, as shown in the top plot in Figure 3-3. Figure 3-3. Reconstructed Signal You can then apply the inverse transformation to recover the noiseless time waveform. The lower plot in Figure 3-3 illustrates the noisy and reconstructed signals. When the SNR is very low, as with many satellite signals, JTFA might offer the only opportunity to detect the signal of interest. Basic Approaches to JTFA The development of JTFA began more than a half century ago. The most straightforward approach to characterizing the frequency of a signal as a function of time is to divide the signal into several blocks that can be overlapped. Then the Fourier transform is applied to each data block to indicate the frequency contents of each data block. This process is known as the short-time Fourier transform (STFT) and roughly reflects how frequency contents change over time. The size of the blocks determines the time accuracy—the smaller the block, the better the time resolution. However, frequency resolution is inversely proportional to the size of a block. When the small block yields good time resolution, it also © National Instruments Corporation 3-3 Signal Processing Toolset User Manual Chapter 3 Joint Time-Frequency Analysis deteriorates the frequency resolution and vice versa. This phenomenon is known as the window effect. From the concept of expansion and series, physicist Dennis Gabor suggested expanding a signal into a set of weighted frequency-modulated Gaussian functions. Because the Gaussian function is concentrated in both the time and frequency domains, the weights describe signal behavior in local time and frequency. The resulting presentation is known as the Gabor expansion. In fact, you can consider the Gabor expansion as the inverse of the STFT. However, this inverse relationship was not clear during Gabor’s lifetime and not well understood until the 1980s. At present, both the theory and implementation of the Gabor expansion and STFT are mature enough to apply to real application problems. As the linear JTFA develops, the quadratic JTFA, or time-dependent spectrum, is attracting attention. The simplest time-dependent spectrum is the square of the STFT, which is known as the STFT-based spectrogram, or the STFT spectrogram. However, the STFT spectrogram suffers from the window effect. A more elegant method than the STFT spectrogram is the Wigner-Ville distribution (WVD), which physicist Eugene P. Wigner originally developed in the context of quantum mechanics. The WVD gives high resolution and many other useful properties for signal analysis, but it suffers from crossterm interference. To reduce crossterm interference, you can use two proven algorithms, Cohen’s class and the Gabor expansion-based spectrogram, also known as the Gabor spectrogram. Scientists at National Instruments developed the Gabor spectrogram in the early 1990s. Based on the conventional Gabor expansion and the WVD, scientists at National Instruments also introduced the adaptive representation-based spectrogram, or the adaptive spectrogram. Unlike the linear JTFA method, the quadratic JTFA method is not unique. This toolset contains the following quadratic algorithms: • Adaptive spectrogram • Cohen’s class • Signal Processing Toolset User Manual – Choi-Williams distribution – Cone-shaped distribution – STFT spectrogram – WVD Gabor spectrogram 3-4 ni.com Chapter 3 Joint Time-Frequency Analysis Which method should you use? Often, the choice is application dependent. With these methods, you can process signals the conventional Fourier transform cannot handle. © National Instruments Corporation 3-5 Signal Processing Toolset User Manual 4 Joint Time-Frequency Analysis Algorithms This chapter describes the algorithms the joint time-frequency analysis (JTFA) VIs and functions use. The JTFA algorithms implemented in this toolset fall into two categories—linear and quadratic. Refer to the works of Qian and Chen [27] and Cohen [6] for more information about a particular algorithm. Linear JTFA Algorithms Linear JTFA includes the following methods: • Gabor expansion, considered the inverse short-time Fourier transform (STFT) • STFT, used for computing the Gabor coefficients • Adaptive representation, considered the inverse adaptive transform • Adaptive transform Gabor Expansion and STFT In Equation 4-1, the Gabor expansion represents a signal s[i] as the weighted sum of the frequency-modulated and time-shifted function h[i]: N–1 s[i] = ∑∑C m, n h [ i – m∆M ]e j2πni ⁄ N (4-1) m n=0 where the Gabor coefficients Cm,n are computed by the STFT in the following equation. C m, n = STFT [ m∆M, n ] = ∑ s [ i ]γ∗ [ i – m∆M ]e – j 2πni ⁄ N i=0 © National Instruments Corporation 4-1 Signal Processing Toolset User Manual Chapter 4 Joint Time-Frequency Analysis Algorithms where N denotes the number of frequency bins and ∆M denotes the time sampling interval. You can use any function as γ[i], as long as its dual function h[i] exists. For the perfect reconstruction, the oversampling rate N/∆M, must be greater than or equal to one. For a given h[i] or γ[i], LabVIEW users can use the Fast Dual VI to compute the corresponding dual function, and LabWindows/CVI users can use the SPTFastDualFunction. Refer to the Signal Processing Toolset Help for more information about the Fast Dual VI. Refer to the Signal Processing Toolset for LabWindows/CVI Help for more information about the SPTFastDualFunction. If the STFT is not used for computing the Gabor coefficient Cm,n, there are no restrictions for γ[i] or the ratio N/∆M. Adaptive Representation and Adaptive Transform In the Gabor expansion in Equation 4-1, the elementary functions h[i – m∆M]e j2πni/N are time-shifted and frequency-modulated versions of the single prototype function h[i]. To better match the analyzed signal, the adaptive representation, shown in Equation 4-2, was developed to decompose the signal s[i] as a sum of weighted linear adaptive modulated Gaussian functions: D–1 s[ i] = ∑ A h [i] k k (4-2) k=0 where the adaptive Gaussian function hk[i] is defined by 2 hk[ i ] = ( αk π ) – 0.25 [ i – ik ] exp – ----------------- + j ( 2πθ k [ i – i k ] ) 2α k which has three parameters: αk , ik , fk . Therefore, the adaptive representation is more flexible than the elementary function used in the Gabor expansion. The parameter D in Equation 4-2 denotes the total number of elementary functions used by hk[i]. Ak is the weight of each individual hk[i], as computed by the adaptive transform. Scientists at National Instruments [25] and Mallat and Zhang [16] independently developed the adaptive representation, also known as the matching pursuit. Signal Processing Toolset User Manual 4-2 ni.com Chapter 4 Joint Time-Frequency Analysis Algorithms Quadratic JTFA Algorithms The quadratic JTFA algorithms include the following methods: • STFT spectrogram • Wigner-Ville distribution (WVD) • Pseudo Wigner-Ville distribution (PWVD) • Cohen’s class • Choi-Williams distribution (CWD) • Cone-shaped distribution • Gabor spectrogram • Adaptive spectrogram STFT Spectrogram The STFT-based spectrogram is defined as the square of the STFT, as shown in the following equation: SP [ m∆M, n ] = ∑ s [ i ]γ [ i – m∆M ]e – j 2πni ⁄ N 2 i=0 where N denotes the number of frequency bins and ∆M denotes the time sampling interval. The STFT-based spectrogram is simple and fast but suffers from the window effect. Figures 4-1 and 4-2 illustrate the window effect of the STFT spectrogram. © National Instruments Corporation 4-3 Signal Processing Toolset User Manual Chapter 4 Joint Time-Frequency Analysis Algorithms Figure 4-1. STFT-Based Spectrogram with a Narrowband Hanning Window for the Three-Tone Test Signal Figure 4-2. STFT-Based Spectrogram with a Wideband Hanning Window for the Three-Tone Test Signal In Figure 4-1, with a narrowband window, the time-dependent spectrum has high frequency resolution but poor time resolution. In Figure 4-2, with a wideband window, the time-dependent spectrum has poor frequency resolution but high time resolution. Signal Processing Toolset User Manual 4-4 ni.com Chapter 4 Joint Time-Frequency Analysis Algorithms Wigner-Ville Distribution and Pseudo Wigner-Ville Distribution For a signal s[i], the Wigner-Ville distribution (WVD) is L⁄2 WVD [ i, k ] = ∑ R [ i, m ]e – j2πkm ⁄ L m = –L ⁄ 2 where the function R[i,m] is the instantaneous correlation given by R[i,m] = z[i + m]z*{i – m] and z[i] is the analytical, or interpolated, form of s[i]; refer to reference [27]. The WVD also can be computed by L⁄2 WVD [ i, k ] = ∑ ℜ [ i, m ]e j2πkm ⁄ L m = –L ⁄ 2 where ℜ [ i, m ] = Z [ i + m ]Z ∗ [ i – m ] and Z[k] denotes the Fourier transform of z[i]. The Wigner-Ville distribution is simple and fast. It has the best joint time-frequency resolution of all known quadratic JTFA algorithms. However, if the analyzed signal contains more than one component, the WVD method suffers from crossterm interference. Figure 4-3 depicts the WVD of the three-tone test signal. © National Instruments Corporation 4-5 Signal Processing Toolset User Manual Chapter 4 Joint Time-Frequency Analysis Algorithms 1 2 3 1 Crossterm 1 2 Crossterm 2 3 Crossterm 3 Figure 4-3. Wigner-Ville Distribution for the Three-Tone Test Signal In Figure 4-3, three real signal terms are centered at (0.03 s, 400 Hz), (0.09 s, 100 Hz), and (0.09 s, 400 Hz). Three crossterms exist and are labeled as 1, 2, and 3 in Figure 4-3. A crossterm reflects the correlation between a pair of corresponding autoterms, always sits halfway between two corresponding autoterms, and oscillates frequently. Although the magnitude of a crossterm can be large, the average of a crossterm is usually limited. Autoterms at (0.03 s, 400 Hz) and (0.09 s, 400 Hz), which have different time centers, cause crossterm 1. Autoterms at (0.09 s, 100 Hz) and (0.09 s, 400 Hz), which have different frequency centers, cause crossterm 3. Autoterms at (0.03 s, 400 Hz) and (0.09 s, 100 Hz) create crossterm 2. To alleviate the crossterm interference, you can assign different weights to the instantaneous correlation R[i,m]. Assigning different weights to R[i,m] suppresses the less important parts and enhances the fundamental parts of the signal. Signal Processing Toolset User Manual 4-6 ni.com Chapter 4 Joint Time-Frequency Analysis Algorithms Two traditional methods exist for applying the weighting function to the instantaneous correlation R[i,m]. The first is in the time domain and known as the Pseudo Wigner-Ville distribution (PWVD). Equation 4-3 represents the PWVD. L⁄2 PWVD [ i, k ] = ∑ w [ m ]R [ i, m ]e – j2πkm ⁄ L (4-3) m = –L ⁄ 2 The PWVD effectively suppresses crossterms that correspond to a pair of autoterms with different time centers, such as crossterms 1 and 2 in Figure 4-3. Figure 4-4 illustrates the PWVD with the Gaussian window function w[m]. When compared with the WVD in Figure 4-3, the PWVD successfully eliminates crossterms 1 and 2. Figure 4-4. Pseudo Wigner-Ville Distribution with Gaussian Window w[m] for the Three-Tone Test Signal In the second method for applying the weighting function to the instantaneous correlation R[i,m], you assign weights to R[i,m] in the frequency domain. This method is represented by Equation 4-4. L⁄2 WVD [ i, k ] = ∑ H [ m ]ℜ [ i, m ]e j2πkm ⁄ L (4-4) m = –L ⁄ 2 © National Instruments Corporation 4-7 Signal Processing Toolset User Manual Chapter 4 Joint Time-Frequency Analysis Algorithms This weighting function effectively suppresses crossterms that correspond to a pair of autoterms with different frequencies, such as crossterms 2 and 3 in Figure 4-3. Figure 4-5 illustrates the PWVD with the Gaussian window function H[m]. Compared with the WVD in Figure 4-3, the PWVD successfully eliminates crossterms 2 and 3. Figure 4-5. Pseudo Wigner-Ville Distribution for the Three-Tone Test Signal Notice that Equation 4-4 is equivalent to L⁄2 ∑ ∑ h[ n ]R [ i – n, m ] e PWVD [ i, k ] = m = –L ⁄ 2 – j2πkm ⁄ L (4-5) n where h[n] is the inverse Fourier transform of H[m] in Equation 4-4. Cohen’s Class Because the crossterm often oscillates in the joint time-frequency domain, another intuitive way of reducing the crossterm interference is to perform 2D filtering to the Wigner-Ville distribution. The result is described in Equation 4-6. L⁄2 C [ i, k ] = ∑ ∑ Φ [ n, m ]R[ i – n, m ]e – j2πkm ⁄ L (4-6) m = –L ⁄ 2 n Signal Processing Toolset User Manual 4-8 ni.com Chapter 4 Joint Time-Frequency Analysis Algorithms where Φ[i,m] denotes the kernel function. Notice that the window functions w[m] in Equation 4-3 and h[m] in Equation 4-5 are special cases of Φ[i,m] in Equation 4-6. In 1966, Leon Cohen developed the representation C[i,k] in Equation 4-6, so it is traditionally known as Cohen’s class [4]. Compared with the PWVD in Equation 4-3 or 4-5, the Cohen’s class method is more general and flexible. Most quadratic equations known so far, such as the STFT spectrogram, WVD, PWVD, Choi-Williams distribution, and the cone-shaped distribution, belong to Cohen’s class. Choi-Williams Distribution When the kernel function in Equation 4-6 is defined by Φ [ i, m ] = α –αi 2 ⁄ ( 4m 2 ) -------------e 4πm 2 (4-7) the yield is the Choi-Williams distribution (CWD). By adjusting the parameter α in Equation 4-7, you balance crossterm interference and time-frequency resolution; as α increases, the smoothing decreases. Figure 4-6 illustrates the CWD for the three-tone test signal where α = 1. The CWD can effectively suppress the crossterm caused by two autoterms with different time and frequency centers, such as crossterm 2 in Figure 4-3. However, the CWD method cannot reduce crossterms that correspond to autoterms with the same time center or the same frequency center, such as crossterms 3 and 1, respectively, in Figure 4-3. Furthermore, the computation speed of the CWD is very slow. © National Instruments Corporation 4-9 Signal Processing Toolset User Manual Chapter 4 Joint Time-Frequency Analysis Algorithms Figure 4-6. Choi-Williams Distribution (α = 1) for the Three-Tone Test Signal Cone-Shaped Distribution When the kernel function in Equation 4-6 is defined by 2 αm – ---------Φ [ i, m ] = e c for i < m otherwise 0 (4-8) the yield is the cone-shaped distribution. In the Signal Processing Toolset, the constant c is set to 500. By adjusting the parameter α in Equation 4-8, you can balance crossterm interference and time-frequency resolution; as α increases, the smoothing decreases. Figure 4-7 illustrates the cone-shaped distribution for the three-tone test signal where α = 1. The cone-shaped distribution effectively suppresses crossterms 2 and 3 from Figure 4-3, but it cannot reduce the crossterms that correspond to autoterms with the same frequency center, such as crossterm 1 in Figure 4-3. The cone-shaped distribution is faster than the CWD method. Signal Processing Toolset User Manual 4-10 ni.com Chapter 4 Joint Time-Frequency Analysis Algorithms Figure 4-7. Cone-Shaped Distribution (α = 1) for the Three-Tone Test Signal Gabor Spectrogram In addition to applying the Pseudo Wigner-Ville distribution window method, you can apply the Gabor expansion to a signal to identify the significance of each term to the energy of the signal at point [i, k]. You can then preserve those terms that have major contributions at point [i, k] and remove those terms that have a negligible influence on the energy of the signal. Because this method is a Gabor expansion-based spectrogram, the resulting method is the Gabor spectrogram. The Gabor spectrogram is defined by the following equation: GS D [ i, k ] = ∑ C m, n C m′, n′ WVD h, h′ [ i, k ] m – m′ + n – n′ ≤ D where WVD h, h′ [ i, k ] denotes the cross-WVD of frequency-modulated Gaussian functions. The order of the Gabor spectrogram, D, controls the degree of smoothing. For D = 0, GS0[i, k] is non-negative and similar to the STFT spectrogram. As D moves toward infinity, the Gabor spectrogram converges to the WVD. A lower order Gabor spectrogram has less crossterm interference but lower resolution. A higher order Gabor spectrogram has better resolution but more crossterms and a longer computation time. For best results, choose an order of three to five. The Gabor spectrogram has better © National Instruments Corporation 4-11 Signal Processing Toolset User Manual Chapter 4 Joint Time-Frequency Analysis Algorithms resolution than the STFT spectrogram and much less crossterm interference than the cone-shaped, Choi-Williams, or Wigner-Ville distributions. Figure 4-8 illustrates the fourth-order Gabor spectrogram for the three-tone test signal. This Gabor spectrogram possesses high time-frequency resolution and does not have the crossterm interference that appears in the cone-shaped, Choi-Williams, and Wigner-Ville distributions. The computational speed of the fourth-order Gabor spectrogram is slower than the STFT spectrogram and WVD but faster than the CWD and cone-shaped distribution. Figure 4-8. Gabor Spectrogram (Order Four) for the Three-Tone Test Signal Adaptive Spectrogram The adaptive spectrogram method is an adaptive representation-based spectrogram computed by Equation 4-9. AS [ i, n ] = 2 D–1 ∑ k=0 2 [ i – ik ] 2 A k exp – ----------------- – α k [ n – θ k ] α k (4-9) Refer to Equation 4-2 for the adaptive representation equation. Signal Processing Toolset User Manual 4-12 ni.com Chapter 4 Joint Time-Frequency Analysis Algorithms The adaptive spectrogram achieves the best joint time-frequency resolution if the analyzed signal is a sum of Gaussian functions. For example, Figure 4-9 shows that the adaptive spectrogram effectively describes the three-tone test signal. Unfortunately, the computation speed of the adaptive spectrogram increases exponentially with the analyzed data size. Figure 4-9. Adaptive Spectrogram for the Three-Tone Test Signal Scientists at National Instruments [25] and Mallat and Zhang [16] independently developed the adaptive representation, also known as the matching pursuit. The adaptive methods in this toolset were implemented with the adaptive oriented orthogonal projective decomposition algorithm. © National Instruments Corporation 4-13 Signal Processing Toolset User Manual Joint Time-Frequency Analysis Applications 5 This chapter describes the Off-line JTFA application, a comprehensive JTFA example. With this example, you can perform rather sophisticated, time-dependent spectrum analysis without needing to use any programming. Because each of the JTFA algorithms has advantages and disadvantages, select an algorithm that fits your application. The Off-line JTFA example is designed for demonstration purposes only. For actual applications, use the VIs included in the Signal Processing Toolset to build your own JTFA instrument. Opening the JTFA Example The Off-line JTFA example resides on the SPT palette, shown in Figure 5-1. Select Start»Programs»National Instruments»Signal Processing Toolset»NI SPT Start-Up to open the SPT palette. On the SPT palette, click the Off-line JTFA icon. 1 1 Off-line JTFA Figure 5-1. SPT Palette Refer to the Accessing Example Application Source Code section of Chapter 1, Signal Processing Toolset Overview, for information about accessing the source code for the Off-line JTFA example. © National Instruments Corporation 5-1 Signal Processing Toolset User Manual Chapter 5 Joint Time-Frequency Analysis Applications Off-line JTFA With the Off-line JTFA example, you can test all the quadratic JTFA algorithms included in the Signal Processing Toolset and find the one which best fits your application. When you click the Off-line JTFA icon on the SPT palette, the Off-line JTFA front panel, shown in Figure 5-2, opens. The following sections describe the Off-line JTFA front panel controls and indicators. You also can select Help»Show Context Help or press <Ctrl-H> for information about controls and indicators. Figure 5-2. Off-line JTFA Front Panel Loading the Test Data You can use the Off-line JTFA example to analyze either one of the data files supplied with the Signal Processing Toolset or your own data file. Your data file must be a one-column or one-row spreadsheet text file. If your data file contains an x-index, use a word processor to remove the x-index before you analyze the data file. Signal Processing Toolset User Manual 5-2 ni.com Chapter 5 Joint Time-Frequency Analysis Applications Complete the following steps to load your test data. 1. Select File»Open to open the Choose spreadsheet file to read dialog box. 2. Navigate to the location of the data file you want to analyze. 3. Select the data file you want to analyze and click the Open button or double-click the data file name. Setting the Sampling Rate Use the Samp Freq control on the Off-line JTFA front panel, shown in Figure 5-2, to specify the sampling frequency. While the sampling frequency does not affect the computation results, it does affect the Power Spectrum display. The y-scale of the Power Spectrum display is the frequency. For the conventional power spectrum, as shown in Figure 5-2, the frequency ranges from DC to the Nyquist frequency, or half of the sampling frequency. When the power spectrum is displayed as the instantaneous spectrum, the frequency range of the y-scale is determined by the zoom factor and the amount of area of the Spectrogram being analyzed. Refer to Figure 5-3 and refer to the Changing the Spectrogram Display section for more information about displaying the instantaneous spectrum. Detrending Use the Trend Level control or the slider immediately below it to set the trend level. Detrending allows you to better analyze signals that contain DC offset or slow trend, for example, the stock index. The higher you set the trend level, the more similar the trend of your analyzed signal is to the original signal. Selecting a JTFA Method Use the JTFA Method control on the Off-line JTFA front panel, shown in Figure 5-2, to select the algorithm you want to use. With the Off-line JTFA example, you can choose one of the following quadratic algorithms as your data analysis method: • STFT spectrogram • Gabor spectrogram • Adaptive spectrogram • Wigner-Ville distribution © National Instruments Corporation 5-3 Signal Processing Toolset User Manual Chapter 5 Joint Time-Frequency Analysis Applications • Choi-Williams distribution • Cone-shaped distribution If your signal processing experience is limited, start with the STFT spectrogram because it is fast and simple. After choosing your analysis method, click the Go button to compute the spectrogram. The following sections provide more information about each of the JTFA algorithms in the Signal Processing Toolset. STFT Spectrogram When you choose the STFT spectrogram, adjust the Analysis Window and Length controls so that the resulting STFT spectrogram achieves the best balance between time and frequency resolution. You can choose one of the following window types with the Analysis Window control: • Hanning (default) • Rectangular • Blackman • Hamming Use the Length control to specify the length of the window used to compute the STFT spectrogram. The default value for Length is 128. As the window length increases, the frequency resolution improves, but the time resolution becomes poorer and vice versa. Consider a long window as narrowband and a short window as wideband. You can use the window length that gives you the best balance between time and frequency resolution as a reference for the Gabor spectrogram. Use the Freq Bins control to specify the number of frequency lines in the Spectrogram display. Increasing the value of Freq Bins increases the amount of detail shown in the spectrogram but lengthens computation time. The Freq Bins value must be a power of 2. Use the Reassigned control to specify whether reassignment is performed for the spectrogram by moving the dispersive energy to its local center of gravity in the joint time-frequency domain. The reassignment improves the readability of the spectrogram for some signals. If you cannot achieve satisfactory resolution with the STFT spectrogram, try the Gabor spectrogram or one of the other JTFA methods included with the Off-line JTFA example. Signal Processing Toolset User Manual 5-4 ni.com Chapter 5 Joint Time-Frequency Analysis Applications Gabor Spectrogram If the time-frequency resolution of the STFT spectrogram is not satisfactory, try the Gabor spectrogram next. The Gabor spectrogram method requires more computation time than the STFT spectrogram but achieves better time-frequency resolution. When you choose the Gabor spectrogram method, you need to specify values for the Length, Var, and Order controls. The analysis window for the Gabor spectrogram is an optimal Gaussian window specified by length and variance. The Length control specifies the window length, and the Var control specifies the variance of the window. The value you specify for the Order control determines resolution and crossterm interference. The higher the order, the better the time-frequency resolution becomes. As the order goes to infinity, the Gabor spectrogram converges to the Wigner-Ville distribution. As the order increases, crossterms become more obvious. Also, computation time is proportional to the order selected. Set Order to a value between three and five to achieve the best compromise between resolution and crossterm interference. Decrease the value of the Var control to reduce Gaussian window variance. Reducing Gaussian window variance eliminates the crossterm caused by a pair of autoterms separated in time but deteriorates the time-frequency resolution. Refer to the STFT Spectrogram section for information about the Freq Bins control. Adaptive Spectrogram If you can consider a signal as the sum of complex sinusoidal functions with different Gaussian envelopes, which is a Gaussian pulse, or the sum of complex chirp functions with different Gaussian envelopes, which is a chirplet, use the adaptive spectrogram to achieve the best time-frequency resolution. Use the mode control to specify the type of the elementary function used to decompose the signal. You can choose from the chirplet or the Gaussian pulse elementary functions. The chirplet is a linear frequency-modulated complex sinusoid with Gaussian envelope. Gaussian pulse is a complex sinusoid with Gaussian envelope. Use the # of Terms control to specify the number of chirplets or Gaussian pulses used to approximate the analyzed signal. The higher you set the © National Instruments Corporation 5-5 Signal Processing Toolset User Manual Chapter 5 Joint Time-Frequency Analysis Applications value of # of Terms, the more accurate the approximation becomes, and the smaller the residual becomes. However, increasing the value for # of Terms lengthens computation time. It is a good idea to start with a small number of terms and increase the value of # of Terms until the Residual (%) indicator returns a satisfactory reading. The residual is computed by the following equation: ∑ s[ n ] – a[ n] 2 n residual = ----------------------------------------2 s[ n] ∑ n where a[n] denotes the approximation. If the approximation is equal to the original signal s[n], the residual goes to zero. Refer to the STFT Spectrogram section for information about the Freq Bins control. Wigner-Ville Distribution The Wigner-Ville distribution provides high time-frequency resolution at a rapid computation rate. However, the Wigner-Ville distribution can suffer from severe crossterm interference if the analyzed signal consists of multiple components. In order to lessen crossterm interference, place a checkmark in the Analytic Signal? checkbox. When you place a checkmark in the Analytic Signal? checkbox, the Off-line JTFA example converts the data samples into the corresponding analytic signal. Converting the data samples into the analytic signal reduces the cross interference due to components from negative frequencies. However, the conversion can introduce distortion in the low frequency portion of the time-dependent spectrum of the signal, especially in the vicinity of DC. Refer to the STFT Spectrogram section for information about the Freq Bins control. Choi-Williams Distribution The Choi-Williams distribution offers you a reduction in crossterm interference while preserving as many useful Wigner-Ville distribution properties as possible. Like the Wigner-Ville distribution, placing a checkmark in the Analytic Signal? checkbox causes the Off-line JTFA Signal Processing Toolset User Manual 5-6 ni.com Chapter 5 Joint Time-Frequency Analysis Applications example to convert the data samples into the corresponding analytic signal. Converting the data samples into the analytic signal reduces the cross interference due to components from negative frequencies but introduces distortion in the low frequency portion of the time-dependent spectrum. You also can lessen crossterm interference by specifying a value for the Alpha control. In general, the smaller the Alpha value, the less crossterm interference you get, but the time-frequency resolution becomes poorer. The Alpha default value is 1.0E-6. Refer to the STFT Spectrogram section for information about the Freq Bins control. Cone-Shaped Distribution The cone-shaped distribution is another time-dependent spectrum designed to reduce crossterm interference. Like the Wigner-Ville distribution and the Choi-Williams distribution, place a checkmark in the Analytic Signal? checkbox to lessen crossterm interference. Refer to the Choi-Williams Distribution section for information about the Alpha control. Refer to the STFT Spectrogram section for information about the Freq Bins control. Displaying Data The Off-line JTFA example uses the following data displays: • The Power Spectrum/Instantaneous Spectrum display shows either the classical power spectrum or the instantaneous spectrum, depending on the settings you have chosen. Refer to the Changing the Spectrogram Display section for more information about the Instantaneous display. • The Spectrogram display shows the time-dependent spectrum for the chosen analysis method. • The Time Waveform display shows the time waveform of the analyzed signal. Changing the Spectrogram Display You can change the Spectrogram data display by moving the Linear/dB switch and/or clicking the Cursor button. With the Linear/dB switch, you can choose to display your data in the Spectrogram as either a linear or decibel (dB) display. © National Instruments Corporation 5-7 Signal Processing Toolset User Manual Chapter 5 Joint Time-Frequency Analysis Applications Clicking the Cursor button turns the cursor on and off. When the cursor is on, as shown in Figure 5-3, the Power Spectrum display changes to the Instantaneous Spectrum. The Instantaneous Spectrum shows the instantaneous spectrum at the time indicated by the x-value of the cursor. Frequency Zooming With the cursor turned on, you can click the Zoom button to zoom in on the Spectrogram display in the frequency scale. The frequency range displayed equals fs / (2 × zoom factor), where fs is the sampling frequency. The central frequency is determined by the y-value of the cursor. The zoom factor doubles every time you click the Zoom button. The maximum zoom factor is limited to 16, so the smallest frequency range is fs/32. Figure 5-3. Instantaneous Spectrum Mean Instantaneous Frequency After computing the spectrogram of your test data, click the Mean Inst. Freq. button to calculate the mean instantaneous frequency. The Spectrogram display shows the profile of the mean instantaneous frequency, as shown in Figure 5-4. Signal Processing Toolset User Manual 5-8 ni.com Chapter 5 Joint Time-Frequency Analysis Applications Figure 5-4. Mean Instantaneous Frequency Saving Results When you select File»Save, you can choose any of the following options from the pull-down menu and save your results as a text file: • Detrend saves the detrended time waveform. • Spectrum saves the power spectrum. • Spectrogram saves the real spectrogram without truncating or normalizing it. © National Instruments Corporation 5-9 Signal Processing Toolset User Manual Part III Super-Resolution Spectral Analysis This section of the manual discusses model-based frequency analysis and the model-based frequency analysis algorithms used by the Signal Processing Toolset. Model-based frequency analysis enables you to obtain super-resolution spectra of the signals you are studying. This section of the manual also describes a super-resolution spectral analysis example included with the Signal Processing Toolset. • Chapter 6, Introduction to Model-Based Frequency Analysis, introduces the basic concepts of model-based frequency analysis. • Chapter 7, Model-Based Frequency Analysis Algorithms, outlines the theoretical background of model-based frequency analysis and describes the relationship among the model coefficients, power spectra, and parameters of damped sinusoids. • Chapter 8, Applying Super-Resolution Spectral Analysis and Parameter Estimation, describes a comprehensive super-resolution spectral analysis example application included with the Signal Processing Toolset. This example is designed to help you learn about model-based analysis. © National Instruments Corporation III-1 Signal Processing Toolset User Manual 6 Introduction to Model-Based Frequency Analysis This chapter introduces the basic concepts of model-based frequency analysis. Two methods are usually employed to perform spectral analysis, non-model-based methods, such as the fast Fourier transform (FFT)-based methods, and model-based methods. Model-based methods need fewer data samples and are more accurate than the FFT-based methods if the model fits the analyzed data samples. When you employ model-based methods, you not only obtain super-resolution power spectra with a small data set, but you also can estimate the parameters of damped sinusoids. The model-based methods are an important alternative to classical FFT-based methods in many frequency analysis applications. The Need for Model-Based Frequency Analysis The term spectrum has been generalized for arbitrary signals and characterizes the frequency behavior of a signal. Examples of questions that spectral analysis can answer include whether most of the power of the signal resides at low or high frequencies, and whether there are resonances. Spectral analysis is used widely in such diverse fields as biomedicine, economics, geophysics, noise and vibration, radar, sonar, speech, and other areas in which signals of unknown or questionable origin are of interest. By performing spectral analysis, you can often discover some important features of signals that are not obvious in the time waveform of the signal. Over the last 30 years, a primary tool for spectral analysis has been the FFT. However, the frequency resolution of the FFT-based methods is bounded by the number of data samples. The relationship of the number of samples and frequency resolution can be quantified by Equation 6-1. sampling frequency ∆f = ----------------------------------------------------number of samples © National Instruments Corporation 6-1 (6-1) Signal Processing Toolset User Manual Chapter 6 Introduction to Model-Based Frequency Analysis where ∆f denotes the frequency resolution. The frequency resolution characterizes the distinguishable minimum difference between two sinusoids. For a given sampling frequency, the more samples you have, the higher the frequency resolution becomes. Figure 6-1 illustrates a sum of two sinusoids. Figure 6-1. 50 Samples for a Sum of Two Sinusoids The frequencies of the two sinusoids in Figure 6-1 are 0.11 Hz and 0.13 Hz, respectively. To separate the two sinusoids, the frequency resolution ∆f has to be less than or equal to 0.02 Hz. Assume that the sampling frequency is 1 Hz. Based on Equation 6-1, you need at least 50 samples in order to separate the two sinusoids. Figure 6-2 uses the rectangular window and the Hamming window to depict the FFT-based power spectra. As long as you have enough samples, you can use either window to separate the two sinusoids. Figure 6-2. FFT-Based Power Spectra Based on 50 Samples However, in many applications, the number of data samples is limited. The limited number of samples might be the result of a genuine lack of data, as in the seismic patterns of an erupting volcano. In other instances, it might be necessary to impose restrictions on the sample size to ensure that the spectral characteristics of a signal do not change over the duration of the data record, as in speech processing. When the data record is small, scientists often think that the frequency resolution of FFT-based power spectra is not adequate. For example, reduce the number of data samples for Signal Processing Toolset User Manual 6-2 ni.com Chapter 6 Introduction to Model-Based Frequency Analysis the two sinusoids in the example above to 15. Figure 6-3 shows the 15-sample data record. The resulting FFT-based power spectra are plotted in Figure 6-4. In this case, neither window yields a frequency resolution high enough to resolve the two close sinusoids. Figure 6-3. Two Sinusoids with 15 Samples Figure 6-4. FFT-Based Power Spectra Based on 15 Samples An alternative is the model-based method. By employing model-based analysis techniques, you can obtain super-resolution spectra. Once you assume a suitable signal model and determine its coefficients, you can predict the missing data based on the given finite data set. When you use the model-based method, it is as if you have an infinite number of data samples. Thus, you can substantially improve the frequency resolution. Figure 6-5 depicts two model-based super-resolution power spectra for the sinusoids in Figure 6-3. © National Instruments Corporation 6-3 Signal Processing Toolset User Manual Chapter 6 Introduction to Model-Based Frequency Analysis Figure 6-5. Super-Resolution Power Spectra Based on 15 Samples Although the FFT-based methods need at least 50 samples, the model-based super-resolution power spectra detect two sinusoids satisfactorily with only 15 samples. Another important application of model-based methods is the parameter estimation of damped sinusoids. The estimated parameters include amplitude, phase, damping factor, and frequency. You can compute the signal frequency and phase by applying the FFT, if the number of data samples is large enough. However, there is no indication of the signal damping behavior. In nature, the signal amplitude often changes with time, gradually decreasing or increasing until blowing out. The damping behavior is an important aspect of the signal that indicates whether the corresponding system is stable. Figure 6-6 depicts a sum of two damped sinusoids in which the sampling frequency is 1 Hz. Figure 6-6. Damped Sinusoids Table 6-1 lists the corresponding parameters for the two damped sinusoids whose sum is depicted in Figure 6-6. Figure 6-7 plots the resulting FFT-based power spectra. Applying FFT-based methods provides no way to tell the complete information about the two damped sinusoids. Signal Processing Toolset User Manual 6-4 ni.com Chapter 6 Introduction to Model-Based Frequency Analysis Table 6-1. Damped Sinusoids Signal Amplitude Phase (rad) Damping Factor Frequency (Hz) Signal 1 1.0 0.20 –0.10 0.13 Signal 2 1.0 0.10 –0.20 0.11 Figure 6-7. FFT-Based Power Spectra for Damped Sinusoids Figure 6-8 illustrates the estimated result obtained by a model-based algorithm known as the matrix pencil. Notice that a real signal produces two imaginary, symmetrical complex sinusoids. The complex sinusoids indicator in the lower left corner of Figure 6-8 shows that there are a total of four complex sinusoids for the samples shown in Figure 6-6. Figure 6-8 also lists the parameters of the components with positive frequencies. Since the amplitude of the complex sinusoids is half that of the corresponding real sinusoids, the values in Figure 6-8 match those in Table 6-1 exactly. Figure 6-8. Parameter Estimation by Matrix Pencil Method © National Instruments Corporation 6-5 Signal Processing Toolset User Manual Chapter 6 Introduction to Model-Based Frequency Analysis The precision of the FFT-based methods is accurate only at frequencies that are integer multiples of the frequency increment1: sampling frequency ----------------------------------------------------------number of FFT points (6-2) There is no such limitation for the model-based methods. Therefore, the model-based methods are much more accurate than the FFT-based techniques. Aside from the super-resolution power spectra, model-based analyses are also fundamental in many other signal processing applications. Although the focus of this part of the manual is on frequency analysis, you easily can tailor the model-based applications in the Signal Processing Toolset for many other applications, including the following applications: • Linear prediction, such as linear predict code • Signal synthesis • Data compression, such as speech compression • System identification Applying Model-Based Methods Properly Model-based methods can obtain super-resolution power spectra with a limited number of data samples or estimate the parameters of damped sinusoids. However, for best results, you need to consider the following three factors: • The signal has to be a certain type of time series, and the following equation should be able to generate the signal. Equation 6-3 is known as the recursive difference equation. p x[n] = – ∑ a x[n – k ] + w[n] k (6-3) k=1 where w[n] denotes the error. • 1 You need to select the order of the model correctly. Otherwise, you might obtain an incorrect spectrum or parameter estimate. The number of samples in Equation 6-1 and the number of FFT points in Equation 6-2 might not be equal. For a given number of data samples, you always are able to increase the number of FFT points simply by zero-padding. Increasing the number of FFT points reduces the frequency increment but does not improve the ability to resolve two close sinusoids. Signal Processing Toolset User Manual 6-6 ni.com Chapter 6 • Introduction to Model-Based Frequency Analysis The computation time of the super-resolution power spectra is much longer than that of FFT, JTFA, and wavelet transform. When the number of data samples is more than a few hundred, it is no longer appropriate to use model-based methods because of the computation time involved and the numerical inaccuracies that might result. Figure 6-9 shows the plot of super-resolution power spectra for the sum of the two sinusoids in Figure 6-3. The spectra were computed by the same model-based methods as that in Figure 6-5. However, instead of choosing order four, the order is artificially increased to 10. Consequently, in addition to the four real components, several spurious peaks appear that do not actually exist. Blindly applying model-based techniques does not lead to a good estimation. A good estimation relies on selecting the proper signal model as well as the model order. The rest of this chapter and Chapter 7, Model-Based Frequency Analysis Algorithms, and Chapter 8, Applying Super-Resolution Spectral Analysis and Parameter Estimation, deal with this central topic. Figure 6-9. Super-Resolution Power Spectra with Order 10 for Sum of Two Sinusoids One reason for using a few samples to perform frequency analysis is to ensure that the spectral characteristics of a signal do not change over the duration of the data record. This is also a primary motivation of developing the JTFA and wavelet transform. At this point, a natural question might be, “Which technique is the best?” The answer is that each method has advantages and disadvantages. None is superior to all others in every application. Table 6-2 compares model-based methods with FFT, JTFA, and wavelets. There is no assumption about the analyzed signal for FFT, JTFA, and wavelet analysis, whereas the model-based methods work only for certain types of signals. Moreover, the performance of model-based frequency analysis is quite sensitive to noise, though there are some variations for different algorithms. For example, of the methods shown in Figure 6-5, © National Instruments Corporation 6-7 Signal Processing Toolset User Manual Chapter 6 Introduction to Model-Based Frequency Analysis the principle component auto-regressive (PCAR) method has better noise immunization than the covariance method. Table 6-2. FFT, JTFA, Wavelets, and Model-Based Methods Method Signal Model Stationary Data Length Frequency Resolution Noise Sensitivity Speed FFT arbitrary yes long low moderate fast JTFA arbitrary no long low low moderate Wavelets arbitrary no long constant Q low fast Model-based not arbitrary no short high high slow The Toolset and Model-Based Methods The Signal Processing Toolset contains VIs and functions for several effective model-based analysis methods. Using these VIs and functions, you can build your own applications to perform super-resolution spectral analysis and parameter estimation. In addition, there is an example to assist users who are not familiar with model-based frequency analysis. Signal Processing Toolset User Manual 6-8 ni.com 7 Model-Based Frequency Analysis Algorithms This chapter outlines the theoretical background of model-based frequency analysis and describes the relationship among the model coefficients, power spectra, and parameters of damped sinusoids. In most cases, the conclusions are presented without justification. Refer to the works of Kay [14] and Marple [18] for more detailed background information about model-based frequency analysis. Models, Power Spectra, and Damped Sinusoids This section introduces the signal models used for model-based frequency analysis and explains the relationship among the model coefficients, power spectra, and parameters of damped sinusoids. ARMA, MA, and AR Models As discussed in the Applying Model-Based Methods Properly section of Chapter 6, Introduction to Model-Based Frequency Analysis, model-based frequency analysis is suitable only for certain types of data. In general, the data has to be generated by exciting a linear shift-invariant causal pole-zero filter, or rational transfer function, with white noise. In other words, the data sample x[n] has to fit the following model: p x[n] = – q ∑ a x[n – k ] + ∑ b k k=1 mw[n – m] for 0 ≤ n < N (7-1) m=0 where b0 = 1 and w[n] is the white noise with zero mean and variance σ2. Equation 7-1 is traditionally called the auto-regressive and moving average (ARMA) model. © National Instruments Corporation 7-1 Signal Processing Toolset User Manual Chapter 7 Model-Based Frequency Analysis Algorithms Two special cases of Equation 7-1 exist. The first special is ak = 0 for all k. Consequently, the equation reduces to q ∑b x[n] = mw[ n – m] for 0 ≤ n < N (7-2) m=0 which is called a moving average (MA) model. The second special case is bm = 0 for m > 0. In this case, the ARMA model in Equation 7-1 becomes p x[ n] = – ∑ a x[n – k ] + w[ n] for 0 ≤ n < N k (7-3) k=1 which is called an auto-regressive (AR) model. According to Equation 7-3, you can use currently known data samples to predict the future data with error w[n]. Let the predicted data be x̂ [ n ] , then p x̂ [ n ] = – ∑ a x[n – k ] k for p ≤ n < N (7-4) k=1 or x[p – 1] x[p – 2] … x[ p ] x[ p – 1 ] … . : . : . : x[0] x[1] . : a1 a2 . : x [ N – 2 ] x [ N – 1 ] … x [ N – p + 1 ] ap x̂ [ p ] x̂ [ p + 1 ] = – . : (7-5) x̂ [ N – 1 ] which is named a forward prediction. Alternatively, there is a backward prediction, which is explained later in this chapter. The AR, MA, and ARMA models cover a wide range of signals in nature. In most applications, you can confidently apply model-based methods for frequency analysis. Usually, you can choose the appropriate model based on physical modeling. In practice, you might not know which of the given models is best for the problem at hand. An important result from the Wold decomposition [38] and Kolmogorov theorems [15] is that any AR or Signal Processing Toolset User Manual 7-2 ni.com Chapter 7 Model-Based Frequency Analysis Algorithms ARMA process can be represented by an MA process of possibly infinite order. Likewise, any MA or ARMA process can be represented by an AR process of possibly infinite order [15] [38]. If you choose the wrong model among the three, you can still obtain a reasonable approximation by using a high enough model order. The next task is determining the model order. As shown in the Applying Model-Based Methods Properly section of Chapter 6, Introduction to Model-Based Frequency Analysis, the wrong model order can lead to an incorrect result. To select the right order, you need some knowledge about the signal. Each complex sinusoid component counts as one order. Each real sinusoid component generates two complex sinusoids that correspond to two orders. If you are not sure what order you should use, you can use the minimum description length algorithm, introduced in the Minimum Description Length section, to estimate the order. Because AR-based algorithms are better understood and more popular than their counterparts, the next two sections limit discussion to AR-based methods. Model Coefficients and Power Spectra Taking the z-transform of Equation 7-1 yields a rational transfer function: q 1+ ∑b mz –m m=1 ( z -) = --------------------------------- = H(z ) X(z) = B ---------p A(z) –k 1+ ak z (7-6) ∑ k=1 © National Instruments Corporation 7-3 Signal Processing Toolset User Manual Chapter 7 Model-Based Frequency Analysis Algorithms It can be proved that the power spectrum P(f) is P(z) evaluated along the unit circle, where B ( z )B∗ ( 1 ⁄ z∗ ) 2 2 P ( z ) = H ( z )H∗ ( 1 ⁄ z∗ )σ = ----------------------------------- σ A ( z )A∗ ( 1 ⁄ z∗ ) (7-7) where * denotes the complex conjugate. For the AR model, the power spectrum is 2 σ P ( f ) = -------------------------------------------p (7-8) 2 1+ ∑a e – j 2πfk k k=1 which implies that once you compute the coefficients ak of the AR model, you can obtain the power spectrum by taking the reciprocal of the fast Fourier transform (FFT) of ak. If A(z) is the z-transform of the coefficients ak as shown in Equation 7-6, it can be shown that p A∗ ( 1 ⁄ z∗ ) = 1 + ∑ ( a )∗ z k k k=1 whereas A(z)X(z) forms the forward prediction, A*(1/z*)X(z) constitutes a backward prediction: p ∑ ( a )∗ x [ n + k ] x̂ [ n ] = – k for 0 ≤ n < N (7-9) k=1 which uses future data to predict the data that was sampled at p steps before. The formula of the backward prediction in Equation 7-9 can be written as x[1 ] x[2 ] . : ( a 1 )∗ … x[p] … x [ p + 1 ] ( a 2 )∗ = – . . . : : : x[2] x[3] . : x [ N – p ] x [ N – p + 1 ] … x [ N – 1 ] ( a )∗ p Signal Processing Toolset User Manual 7-4 x̂ [ 0 ] x̂ [ 1 ] . : (7-10) x̂ [ N – p – 1 ] ni.com Chapter 7 Model-Based Frequency Analysis Algorithms The forward and backward predictions in Equation 7-8 are interchangeable. For example, let p A(z) = 1 + p ∑a z –k k A(z) = 1 + or k=0 ∑ ( a )∗ z k k k=0 The resulting P(z) in Equation 7-7 is the same. AR Model and Damped Sinusoids Damped sinusoids are common in applications such as noise and vibration. Many natural phenomena can be formulated as a linear combination of damped sinusoids: p x[n] = p ∑ C exp { ( α k k + j2πf k )n } = k=1 ∑ C (z ) k n k for 0 ≤ n < N k=1 (7-11) where the parameter αk indicates the damping factor and Ck denotes the complex amplitudes. Equation 7-11 also can be written in matrix form as ( z1 ) 0 ( z1 ) 1 . : ( z1 ) N–1 ( z2 ) 0 ( z2 ) 1 . : ( z2 ) N–1 … ( zp ) 0 … ( zp ) 1 . : . : … ( zp ) N–1 C1 C2 = . : Cp x[0] x[1] . : (7-12) x[N – 1] where the matrix of the time-indexed z elements has a Vandermonde structure. © National Instruments Corporation 7-5 Signal Processing Toolset User Manual Chapter 7 Model-Based Frequency Analysis Algorithms At first glance, Equation 7-12 does not seem to belong to any of the models described by Equations 7-1, 7-2, and 7-3. However, Equation 7-12 is closely related to the AR model in Equation 7-31. In 1795, Baron de Prony discovered that zk in Equation 7-12 actually are roots of the polynomial p A(z) = 1 + p ∑a z –k k k=1 = ∏ (1 – z z k –1 ) (7-13) k=1 where ak are the coefficients of the regular AR model in Equation 7-3. Consequently, the procedure for finding the damped sinusoids parameters is to first compute the AR coefficients ak. Then, solve the polynomial in Equation 7-13 to determine zk. Finally, the solution of the linear system in Equation 7-12 gives the complex amplitudes Ck. Algorithms for Super-Resolution Spectral Analysis and Parameter Estimation This section briefly introduces the algorithms included on the Easy Level SRSA and Advanced SRSA palettes of the Signal Processing Toolset. The covariance and PCAR methods are used to compute super-resolution power spectra. The matrix pencil and Prony’s methods are mainly used for parameter estimation. The minimum description length algorithm is used to estimate the number of complex sinusoids. Covariance Method Assume that the future data is estimated by the forward prediction in Equations 7-4 and 7-5. The covariance method computes the coefficients ak such that the error between x[n] and x̂ [ n ] is minimized: N–1 min ak ∑ x [ n ] –x̂ [ n ] 2 n=p 1 Prony developed this method 13 years before the Fourier transform was introduced. Signal Processing Toolset User Manual 7-6 ni.com Chapter 7 Model-Based Frequency Analysis Algorithms In Equation 7-5, the optimal coefficients ak are the solution of the linear system of x[p – 1] x[p – 2] x[p ] x[p – 1] . . : : … … . : a1 x[ 0 ] x[ 1 ] . : a2 . : x [ N – 2 ] x [ N – 1 ] … x [ N – p + 1 ] ap x[ p] x[p + 1] = – . : x[N – 1] The covariance method is not difficult, but it is sensitive to noise. Principle Component Auto-Regressive (PCAR) Method The covariance method only minimizes the error between x[n] and x̂ [ n ] for p ≤ n < N (that is, N – p points), even though there are N samples of x[n]. The PCAR method formulates the linear system as Xf a = – xf Xb xb (7-14) where a denotes the data vector a = a1 a2 … ap T x f and x b denote the right side vectors of the forward prediction in Equation 7-5 and the backward prediction in Equation 7-10. You also can write this relationship as xf = x[ p] x[ p + 1 ] … x[N – 1 ] x[0 ] x[1 ] … x[ N – p – 1 ] xb © National Instruments Corporation 7-7 T Signal Processing Toolset User Manual Chapter 7 Model-Based Frequency Analysis Algorithms Similarly, the matrices Xf and Xb are the left side matrices of the forward prediction in Equation 7-5 and the backward prediction in Equation 7-10. You can write this relationship as Xf Xb x[p – 1] x[p] x[p – 2] x[p – 1] … … x[0] x[1] . : . : . : . : = x[N – 2] x[1] x[2] x[N – 1] x[2] x[3] . : . : … x[ N – p + 1] … x[p] … x[p + 1] . : x[N – p] x[N – p + 1] … . : x[N – 1] Consequently, the linear system in Equation 7-14 uses forward and backward prediction information. In this manner, you obtain extra data points and average more errors. Moreover, you solve for the coefficients by L a = ∑ λ----v v 1 T i i T (7-15) X x i i=1 where X≡ Xf Xb and x ≡ xf xb λi denote the L largest eigenvalues of the matrix X. v i are L corresponding eigenvectors. The parameter L represents the number of complex sinusoids. Because you use only L principle components in Equation 7-15, the results obtained by PCAR are much less sensitive to noise than results obtained by the covariance method. Signal Processing Toolset User Manual 7-8 ni.com Chapter 7 Model-Based Frequency Analysis Algorithms Prony’s Method Prony’s method estimates the parameters of damped sinusoids. The following steps summarize Prony’s method. 1. Apply the covariance method to compute the AR coefficients ak. 2. Find the complex roots zk of the polynomial in Equation 7-13. The phase of zk indicates the frequency, and the amplitude is the damping factor. 3. Insert zk into Equation 7-12 to solve Ck. The amplitude and phase of the sinusoid component zk are equal to the amplitude and phase of Ck, respectively. Matrix Pencil Method The matrix pencil method is a modified Prony’s method. It is faster and less sensitive to noise than Prony’s method. However, the derivation is more involved. Refer to the work of Hua and Sarkar [10] for more information about the matrix pencil method. Minimum Description Length The minimum description length algorithm determines the number of sinusoids n by the following equation. 2 min n { N ln σ + 3n ln N } where σ2 is an estimation of the noise variance and N is the number of data samples. The optimal value n can be used as the AR order p for the covariance method or the number of complex sinusoids L for the PCAR and matrix pencil methods. © National Instruments Corporation 7-9 Signal Processing Toolset User Manual 8 Applying Super-Resolution Spectral Analysis and Parameter Estimation This chapter describes a comprehensive example based on the Super-Resolution Spectral Analysis (SRSA) VIs in the Signal Processing Toolset. The example is designed to help you learn about model-based analysis. With this example, you can try different algorithms for the data samples without needing to use any programming. Opening the SRSA Example The SRSA example resides on the SPT palette, shown in Figure 8-1. Select Start»Programs»National Instruments»Signal Processing Toolset» NI SPT Start-Up to open the SPT palette. On the SPT palette, click the Super-Resolution Spectral Analysis icon. When you click the icon, the Super-Resolution Spectral Analysis example front panel, shown in Figure 8-2, opens. 1 1 Super-Resolution Spectral Analysis Figure 8-1. SPT Palette Refer to the Accessing Example Application Source Code section of Chapter 1, Signal Processing Toolset Overview, for information about accessing the source code for the Super-Resolution Spectral Analysis example. © National Instruments Corporation 8-1 Signal Processing Toolset User Manual Chapter 8 Applying Super-Resolution Spectral Analysis and Parameter Estimation Performing Super-Resolution Spectral Analysis Complete the following steps to perform super-resolution spectral analysis using the SRSA example. 1. Load the test data. 2. Set the sampling frequency with the Sampling Rate (Hz) control. 3. Select the window type for the FFT-based spectrum. 4. Select the super-resolution spectrum method. 5. Select the damped sinusoid estimation method. 6. Set the number of complex sinusoids. The following sections describe the above steps and the SRSA example front panel controls and indicators. You also can select Help»Show Context Help or press <Ctrl-H> for more information about controls and indicators. Figure 8-2. Super-Resolution Spectral Analysis Front Panel Signal Processing Toolset User Manual 8-2 ni.com Chapter 8 Applying Super-Resolution Spectral Analysis and Parameter Estimation Loading the Test Data You can analyze either synthetic data supplied with the example or your own data text file. If you choose to use your own text file, the file must be a one-column or one-row spreadsheet text file. The synthetic data simulates two damped sinusoids plus Gaussian noise. If you are a first-time user, start with the synthetic data, which gives you a better idea of how to properly apply the model-based analysis. Synthetic Data To use the synthetic data, select File»Load»Signal Generator. When you select Signal Generator, the Synthetic Data front panel, shown in Figure 8-3, opens. The Synthetic Data front panel generates data samples containing two damped sinusoids corrupted with Gaussian white noise. Figure 8-3. Synthetic Data Front Panel © National Instruments Corporation 8-3 Signal Processing Toolset User Manual Chapter 8 Applying Super-Resolution Spectral Analysis and Parameter Estimation The damped sinusoid has the following form: s[n] = Ae–an cos(2πfn + θ) where A is the real-valued amplitude a is the real-valued damping factor f is the normalized frequency θ is the phase Use the Number of Samples control to specify the size of the data set. The SRSA example relies heavily on matrix computation, which requires more computer resources. National Instruments recommends that you limit the value of Number of Samples to less than a few hundred because of computing time and memory space considerations. The default value of Number of Samples is 50. Table 8-1 lists the default sinusoid parameters. Table 8-1. Default Sinusoid Parameters Sinusoid Amplitude Phase Damping Factor Frequency sinusoid 1 1.0 0.0 0.0 0.11 Hz sinusoid 2 1.0 0.0 0.0 0.13 Hz When Number of Samples is set at 50, both the FFT-based and model-based methods separate two different frequencies well. If you reduce Number of Samples to 25, only the model-based spectra are able to distinguish between the two frequencies. Use the Gaussian White Noise slide control to adjust the intensity of the additive Gaussian white noise. As mentioned in Chapter 6, Introduction to Model-Based Frequency Analysis, the results of model-based analysis are sensitive to the intensity and type of noise. The performance of model-based analysis deteriorates substantially as the intensity of noise increases or the noise differs from Gaussian white noise. Use the phase, damping, and frequency controls to see how the estimation results change. Click the Quit button to close the Synthetic Data front panel. Signal Processing Toolset User Manual 8-4 ni.com Chapter 8 Applying Super-Resolution Spectral Analysis and Parameter Estimation Data Stored as Text Files To use your own data files, select File»Load»Data File and navigate to the data file you want to analyze. The data file must be a one-column or one-row spreadsheet text file. Setting the Sampling Frequency Use the Sampling Rate (Hz) control, located above the Waveform graph on the Super-Resolution Spectral Analysis front panel in Figure 8-2, to specify the sampling frequency of the test data. The default value is 1.0E+3. Setting the Number of Complex Sinusoids Correctly specifying the number of complex sinusoids contained in the test data is one of the most important factors in effectively applying model-based analysis. Usually, each complex sinusoid counts as one order, and each real-valued sinusoid counts as two orders. You can have the SRSA example automatically count the number of complex sinusoids, or you can specify the number yourself. If the number of complex sinusoids contained in the test data is unknown, use the automatic method. Automatic Place a checkmark in the Automatically Estimating checkbox in the Model Parameters section on the Super-Resolution Spectral Analysis front panel, shown in Figure 8-2, to count the number of complex sinusoids automatically. The SRSA example uses the maximum description length algorithm to automatically estimate the number of complex sinusoids for the test data. # of Found Complex Sinusoids displays the result of this algorithm. To use the maximum description length algorithm, you need to define the upper boundary of the AR order. Use the Maximum AR Order control to specify the upper boundary. As the value of Maximum AR Order increases, your results become more precise. However, computation time also increases as Maximum AR Order increases. The value of Maximum AR Order should be two to three times larger than the real order but cannot be larger than two-thirds of the number of samples. Refer to Chapter 7, Model-Based Frequency Analysis Algorithms, for more information about the maximum description length algorithm. © National Instruments Corporation 8-5 Signal Processing Toolset User Manual Chapter 8 Applying Super-Resolution Spectral Analysis and Parameter Estimation Manual Remove the checkmark from the Automatically Estimating checkbox in the Model Parameters section to specify the number of complex sinusoids yourself. When you select to manually specify the number of complex sinusoids, the # of Complex Sinusoids control replaces the Maximum AR Order control. Use the # of Complex Sinusoids control to specify the number of complex sinusoids contained in the test data. For a real-valued signal, if DC is presented, # of Complex Sinusoids should be an odd number. In all other cases, # of Complex Sinusoids should be an even number. Selecting the Window Type Use the FFT Window control above the Power Spectrum graph on the Super-Resolution Spectral Analysis front panel, shown in Figure 8-2, to select the window type used to compute the FFT spectrum. You can choose from the following window types: • Blackman • Hamming (default) • Hanning • Rectangular Use the FFT-based spectrum for comparison with the model-based spectrum in the same display. Selecting the Super-Resolution Spectrum Method Use the SRSA Method control above the Power Spectrum graph on the Super-Resolution Spectral Analysis front panel, shown in Figure 8-2, to select the super-resolution spectrum method. You can choose either the covariance method or the principle component auto-regressive (PCAR) method (default). The PCAR method is less sensitive to noise than the covariance method, but the PCAR method requires more computing time and memory space. Selecting the Damped Sinusoid Estimation Method Use the Method control in the Parameters Estimation section on the Super-Resolution Spectral Analysis front panel, shown in Figure 8-2, to specify the method used to estimate the parameters associated with damped sinusoids. You can choose either the matrix pencil method (default) or Prony’s method. The matrix pencil method is more accurate and efficient Signal Processing Toolset User Manual 8-6 ni.com Chapter 8 Applying Super-Resolution Spectral Analysis and Parameter Estimation than Prony’s method. Refer to Chapter 7, Model-Based Frequency Analysis Algorithms, for more information about the matrix pencil method and Prony’s method. The indicators in the Parameters Estimation section of the front panel, shown in Figure 8-2, return values for amplitude, frequency, phase, and damping for each positive-frequency sinusoid. © National Instruments Corporation 8-7 Signal Processing Toolset User Manual Part IV Wavelet Analysis This section of the manual discusses wavelet analysis and filter bank design. • Chapter 9, The Fundamentals of Wavelet Analysis, describes the history of wavelet analysis, compares Fourier transform and wavelet analysis, and describes some applications of wavelet analysis. • Chapter 10, Wavelet Analysis by Discrete Filter Banks, describes the design of two-channel perfect reconstruction filter banks, defines the types of filter banks used with wavelet analysis, and discussed wavelet packets. • Chapter 11, Wavelet Analysis Applications, describes the 1D and 2D Wavelet Transform and Wavelet Packet examples and how to design a wavelet and filter bank. © National Instruments Corporation IV-1 Signal Processing Toolset User Manual The Fundamentals of Wavelet Analysis 9 Although Alfred Haar first mentioned the term wavelet in a 1909 thesis [9], wavelet analysis received little attention before the late 1970s. In the period between the 1970s and the present, scientists have carefully studied wavelet analysis and successfully applied it in many areas. Some people think current wavelet analysis is just the recasting and unifying of existing theories and techniques. However, there exists a wider range of potential applications for wavelet analysis than anyone anticipated. This chapter describes the history of wavelet analysis, compares Fourier transform to wavelet analysis, and describes some applications of wavelet analysis. Conventional Fourier Transform The development of wavelet analysis originally was motivated by the desire to overcome the drawbacks of traditional Fourier analysis and short-time Fourier transform (STFT) processes. Fourier transform characterizes the frequency behaviors of a signal but not the frequency changes over time. STFT, or windowed Fourier transform, simultaneously characterizes a signal in time and frequency. After you select a window type, the signal time and frequency resolutions remain fixed, which can cause problems. However, signals encountered in nature always have a long time period at low frequency and a short time period at high frequency. This suggests that the window should have high time resolution at high frequency. © National Instruments Corporation 9-1 Signal Processing Toolset User Manual Chapter 9 The Fundamentals of Wavelet Analysis To understand the fundamentals of wavelet analysis, start with an artificial example. Figure 9-1 shows a signal s(t) that consists of two truncated sine waveforms. s(t) √2 0.5 0.0 1.5 t 1.0 Figure 9-1. Sum of Two Truncated Sine Waveforms The first waveform in Figure 9-1 spans 0 to 1 second. The second waveform spans 1 to 1.5 seconds. In other words, the frequency of s(t) is 1 Hz for 0 ≤ t < 1 and 2 Hz for 1 ≤ t < 1.5. When describing frequency behavior, you traditionally compare s(t) with a group of harmonically-related complex sinusoidal functions, such as exp{j2πkt ⁄T}. Here, the term harmonically-related complex sinusoidal functions refers to the sets of periodic sinusoidal functions with fundamental frequencies that are all multiples of a single positive frequency 2π ⁄T. You accomplish the comparison process with the following correlation, or inner product operation. ak = 2πk - t dt ∫ s ( t )e ∗ ( t ) dt = ∫ s ( t ) exp – j -------T k T T where ak is the Fourier coefficient and * denotes a complex conjugate. The magnitude of ak indicates the degree of similarity between the signal s(t) and the elementary function exp{j2πkt ⁄T}. If the magnitude of ak is large, it indicates a high degree of correlation between s(t) and exp{j2πkt ⁄T}. If the magnitude of ak is almost 0, it indicates a low degree of correlation between s(t) and exp{j2πkt ⁄T}. Therefore, you can consider ak to be the measure of similarity between the signal s(t) and each complex sinusoidal function exp{j2πkt ⁄T}. Because exp{j2πkt ⁄T} represents a distinct frequency 2πk ⁄T, a frequency tick mark, the Fourier coefficient ak indicates the amount of signal present at the frequency 2πk ⁄T. Signal Processing Toolset User Manual 9-2 ni.com Chapter 9 The Fundamentals of Wavelet Analysis In Figure 9-1, s(t) consists of two truncated sine waveforms. The inner product of such truncated signals and pure sine waveforms, which extends from minus infinity to plus infinity, never vanishes. In other words, ak is not zero for all k. However, the dominant ak, with the largest magnitude, corresponds to 1 Hz and 2 Hz elementary functions. This indicates that the primary components of s(t) are 1 Hz and 2 Hz signals, but it is unclear, based on ak alone, when the 1 Hz or the 2 Hz components exist in time. You can use many ways of building the frequency tick marks to measure the frequency behavior of a signal. With complex sinusoidal functions, not only can you analyze signals but you also can reconstruct the original signal with the Fourier coefficient ak. For example, you can write s(t) in terms of the sum of complex sinusoidal functions according to Equation 9-1, traditionally known as Fourier expansion. s(t) = ∞ ∑ ak ek ( t ) = k = –∞ ∞ 2πt ∑ a exp j -------T - k k (9-1) k = –∞ where ak is the Fourier coefficient and 2πk ⁄T is the frequency tick mark. In Equation 9-1, because ak is not zero for all k, you must use an infinite number of complex sinusoidal functions to restore s(t) in Figure 9-1. Innovative Wavelet Analysis Looking at s(t) more closely, you find that to determine the frequency contents of s(t), you need information regarding only one cycle, such as the time span of one cycle. With this information, you can compute the frequency with the following equation. 1 frequency = ----------------------------------------------------time span of one cycle According to this equation, as the frequency becomes higher, the time span becomes shorter. Therefore, instead of using infinitely-long complex sinusoidal functions, you can use only one cycle of a sinusoidal waveform, or a wavelet, to measure s(t). The wavelet ψ(t) used to measure s(t) is one cycle of a sinusoidal waveform, as shown in Figure 9-2. © National Instruments Corporation 9-3 Signal Processing Toolset User Manual Chapter 9 The Fundamentals of Wavelet Analysis Frequency Spectrum m=1 0.5 0 2 t f 1 m=0 1 0 1 t f Figure 9-2. Wavelet Because ψ(t) spans 1 second, you can consider the frequency of ψ(t) to be 1 Hz. As in the case of Fourier analysis, you can achieve the comparison process with the following correlation, or inner product, operation. W m ,n = ∫ s ( t )ψ m, n ( t ) dt (9-2) T where Wm,n denotes the wavelet transform coefficients and ψm,n(t) are the elementary functions of the wavelet transform. However, the structure of the elementary functions ψm,n(t) differs from the Fourier transformations, which are the dilated and shifted versions of ψ(t). You can compute the elementary functions of the wavelet transform, ψm,n(t), with Equation 9-3. ψ m, n ( t ) = 2 m⁄2 m –m ψ ( 2 ( t – n2 ) ) (9-3) where m and n are integers. When you increase n, you shift ψm,n(t) forward in time. When you increase m, you compress the time duration, which increases the center frequency and frequency bandwidth of ψ(t) [27]. Consider the parameter m as the scale factor and 2–m as the sampling step. Therefore, as the time duration becomes shorter, the time sampling step becomes smaller, and vice versa. Signal Processing Toolset User Manual 9-4 ni.com Chapter 9 The Fundamentals of Wavelet Analysis If you assume that the center frequency of ψ(t) is ω0, the center frequency of ψm,n(t) is 2mω0. Consequently, you can systematically adjust the scale factor m to achieve different frequency tick marks to measure the signal frequency contents. In other words, as the scale factor m increases, the center frequency and bandwidth of the wavelet increases 2m. Figure 9-3 depicts the wavelet transform procedure. 0 1 2 0 0 1 0 2 Hz n 2ψ 2 t – --- 2 Ψ(t – n) 1 1 0 0 1 Hz 2 Wm n s(t) 2 1.5 0.5 0 t 1.0 s ( t ) = ψ ( t ) + 2ψ 2 t – 1--- 2 Two Basis Functions Figure 9-3. Wavelet Analysis For Figure 9-3, first let m = n = 0 by aligning ψ(t) and s(t) at t = 0. As in Equation 9-3, compare ψ(t) with s(t) for 0 ≤ t < 1. The comparison shows that W0,0 = 1. When you shift ψ(t) to the next second, n = 1, and compare it with s(t) for 1 ≤ t < 2, you see that W0,1 = 0. Compress ψ(t) into 0 seconds to 0.5 seconds, m = 1, and repeat the previous operations with the time-shift step 0.5. You obtain the following results, which are also displayed in the upper right corner of Figure 9-3: W 1, 0 = 0 © National Instruments Corporation W 1, 1 = 0 9-5 W 1, 2 = 1 W 1, 3 = 0 Signal Processing Toolset User Manual Chapter 9 The Fundamentals of Wavelet Analysis You can continue to compress ψ(t) by increasing the scale factor m and reducing the time-shift step 2–m to test s(t). This procedure is called wavelet transform. ψ(t) is called the mother wavelet, because the different wavelets used to measure s(t) are the dilated and shifted versions of this wavelet. The results of each comparison, Wm,n , are named wavelet coefficients. The index m and n are the scale and time indicators, respectively, which describe the signal behavior in the joint time-scale domain. As shown in Figure 9-5, you can convert the scale into frequency. Hence, you also can consider Wm,n to be the signal representation in the joint time and frequency domain. In the example in Figure 9-3, when you check the wavelet coefficients, you find out that for 0 ≤ t < 1, the frequency of s(t) is 1 Hz, and for 1 ≤ t < 1.5, the frequency of s(t) is 2 Hz. Unlike Fourier analysis, wavelet transform not only indicates what frequencies the signal s(t) contains but also indicates when these frequencies occur. Moreover, the wavelet coefficients Wm,n of a real-valued signal s(t) are always real as long as you choose real-valued ψ(t). Compared to Fourier expansion, you usually can use fewer wavelet functions to represent the signal s(t). In the example in Figure 9-3, s(t) can be completely represented by two terms, whereas an infinite number of complex sinusoidal functions would be needed in the case of Fourier expansion. Wavelet Analysis Versus Fourier Analysis You can apply short-time Fourier transform (STFT) to characterize a signal simultaneously in both the time and frequency domains. However, you also can use wavelet analysis to perform the same operation because of its similarity to STFT. You compute both the STFT and the wavelet transform by the correlation, or inner product operation, but the main difference lies in how you build the elementary functions. Figure 9-6 shows a comparison of the transform processes. Figure 9-4 illustrates the sampling grid for the STFT. For STFT, the elementary functions used to test the signal are time-shifted, frequency-modulated single window functions, all with some envelope. Because this modulation does not change the time or frequency resolutions, the time and frequency resolutions of the elementary functions employed in STFT are constant [27]. Signal Processing Toolset User Manual 9-6 ni.com Chapter 9 The Fundamentals of Wavelet Analysis Frequency Time Figure 9-4. Short-Time Fourier Transform Sampling Grid For wavelet transform, increasing the scale parameter m reduces the width of the wavelets. The time resolution of the wavelets increases, and the frequency resolution decreases as m becomes larger. This shows that wavelet analysis has good time resolution at high frequencies and good frequency resolution at low frequencies. Figure 9-5 illustrates the sampling grid for wavelet transform. Suppose that the center frequency and bandwidth of the mother wavelet ψ(t) are ω0 and ∆ω, respectively. For ψ(2mt), the center frequency is 2mω0, and the bandwidth is 2m∆ω. Although the time and frequency resolutions change at different scales m, the ratio between the bandwidth and the center frequency remains constant. Therefore, wavelet analysis is also called constant Q analysis, where Q = center frequency⁄ bandwidth. © National Instruments Corporation 9-7 Signal Processing Toolset User Manual Chapter 9 The Fundamentals of Wavelet Analysis better time resolution better frequency resolution Frequency Time Figure 9-5. Wavelet Transform Sampling Grid Wavelet transform is closely related to both conventional Fourier transform and short-time Fourier transform. As shown in Figure 9-6, all these transform processes employ the same mathematical tool, the correlation operation, or inner product, to compare the signal s(t) to the elementary function bα(t). The difference lies in the structure of the elementary functions {eα(t)}. In some cases, wavelet analysis is more natural because the signals always have a long time cycle at low frequency and a short time cycle at high frequency. Signal Processing Toolset User Manual 9-8 ni.com Chapter 9 The Fundamentals of Wavelet Analysis Fourier Transform Windowed FT Wavelet Transform Figure 9-6. Comparison of Transform Processes Applications of Wavelet Analysis You can use wavelet analysis in a variety of applications, including detecting the discontinuity of a signal, looking at a signal from different scales, removing the trend of a signal, suppressing noise, and compressing data. Discontinuity Detection Wavelet analysis detects signal discontinuity, such as jumps, spikes, and other non-smooth features. Ridding signals of noise is often much easier to identify in the wavelet domain than in the original domain For example, the top plot of Figure 9-7 illustrates a signal s(k) made up of two exponential functions. The turning point, or the discontinuity, of the first derivative is at k = 500. The remaining plots are wavelet coefficients with different scale factors m. As the scale factor increases, you can pinpoint the location of the discontinuity. © National Instruments Corporation 9-9 Signal Processing Toolset User Manual Chapter 9 The Fundamentals of Wavelet Analysis Discontinuity Large Scale m Medial Scale m Small Scale m Figure 9-7. Detection of Discontinuity Using wavelet analysis to detect the discontinuity, or break point, of a signal has helped to successfully repair scratches on old phonograph records. The procedure works by taking the wavelet transform on the signal, smoothing unwanted spikes, and inverting the transform to reconstruct the original signal minus the noise. In 1889, an agent of Thomas Edison used a wax cylinder to record Johannes Brahms performing his Hungarian Dance No. 1 in G minor. The recording was so poor that it was hard to discern the melody. By using wavelet transform, researchers improved the sound quality enough to distinguish the melody. Multiscale Analysis Multiscale analysis involves looking at a signal from different scales. Wavelet transform-based multiscale analysis helps you better understand the signal and provides a useful tool for selectively discarding undesired components, such as noise and trend, that corrupt the original signal. Figure 9-8 illustrates a multiscale analysis of a Standard & Poor’s (S&P) 500 stock index during the years 1947 through 1993. Signal Processing Toolset User Manual 9-10 ni.com Chapter 9 The Fundamentals of Wavelet Analysis S&P 500 Index Long-Term Trend Figure 9-8. Multiscale Analysis In Figure 9-8, the top plot displays a monthly S&P 500 index, and the bottom plot describes the long-term trend of the stock movement. The remaining two plots display the short-term fluctuation of the stock, at different levels, during this time. To better characterize the fluctuation that reflects the short-term behavior of the stock, you must remove the trend. To do this, first adjust the wavelet decomposition level until you obtain a desired trend. Then, set the corresponding wavelet coefficients to zero and reconstruct the original samples minus the trend. Detrending The trend of a signal is often one of the least interesting aspects of the signal. Also, because the trend attaches to a strong DC component in the frequency spectrum, it blocks many other important signal features. Detrending involves removing the trend from a signal. How to remove the trend is one of the most important issues in the application of joint time-frequency analysis. Traditional detrending techniques usually use lowpass filtering to remove the trend, which blurs sharp features in the underlying signal. © National Instruments Corporation 9-11 Signal Processing Toolset User Manual Chapter 9 The Fundamentals of Wavelet Analysis Wavelet-based detrending is somewhat superior to this process because it preserves the important features of the original signal. Figures 9-8 and 9-9 illustrate the same S&P 500 stock index information, but Figure 9-9 shows it as a joint time-frequency analysis. Long-Term Trend Frequency Residue Four-Year Cycle Figure 9-9. Detrend In Figure 9-9, the top plot illustrates the S&P 500 stock index and its corresponding long-term trend, smooth curve. The center plot displays the residue between the original data and the trend, reflecting the short-term fluctuation. The bottom plot displays the joint time and frequency behavior of the residue. The bottom plot shows that over the past 50 years, a four-year cycle dominates the S&P 500 index, which agrees with most economists’ assertions. Denoise Unlike conventional Fourier transform, which uses only one basis function, wavelet transform provides an infinite number of mother wavelets to select. Consequently, you can select the wavelets that best match the signal. Once the wavelets match the signal, you can use a few wavelets as a basis from which to approximate the signal and achieve denoise. Signal Processing Toolset User Manual 9-12 ni.com Chapter 9 The Fundamentals of Wavelet Analysis Figure 9-10 illustrates denoise, one of the most successful applications of wavelet analysis. This application works by first taking the wavelet transform of the signal, setting the coefficients below a certain threshold to zero, and finally, inverting the transform to reconstruct the original signal. If the threshold is set properly, the resulting signal has less noise interference. Refer to Donoho’s work for more information about wavelet transform-based denoising [8]. Original Image Reconstruction Figure 9-10. Denoise Although Figure 9-10 uses only 25% of the original data, the reconstruction preserves all important features contained in the original image. The left image is transformed into the wavelet basis with 75% of the wavelet components, those of the smallest magnitude, set to zero. The right image is reconstructed from the remaining 25% of the wavelet components. Performance Issues Although wavelet analysis possesses many attractive features, its numerical implementation is not as straightforward as that of its counterparts, such as conventional Fourier transform and STFT. The difficulty arises from the following two aspects: • © National Instruments Corporation In order to reconstruct the original signal, the selection of the mother wavelet ψ(t) is not arbitrary. Although any function can be used in Equation 9-2, you sometimes cannot restore the original signal based on the resulting wavelet coefficients Wm,n. ψ(t) is a valid, or qualified, wavelet only if you can reconstruct the original signal from its corresponding wavelet coefficients. The selection of the qualified wavelet is subject to certain restrictions. On the other hand, it is not unique. Unlike the case of conventional Fourier transform, in which the basis functions must be complex sinusoidal functions, you can select from an infinite number of mother wavelet functions. Therefore, the biggest issue of applying wavelet analysis is how to choose a 9-13 Signal Processing Toolset User Manual Chapter 9 The Fundamentals of Wavelet Analysis desired mother wavelet ψ(t). It is generally agreed that the success of the wavelet transform application depends on a proper wavelet function selection. • Because the scale factor m could go from negative infinity to positive infinity, it is impossible to make the time index of the wavelet function, 2m(t – n2–m), an integer number simply by digitizing t as i∆t, where ∆t denotes the time sampling interval. This problem prohibits using digital computers to evaluate wavelet transform. Fortunately, researchers discovered a relationship between wavelet transform and the perfect reconstruction filter bank, a type of digital filter bank. You can implement wavelet transform with specific types of digital filter banks known as two-channel perfect reconstruction filter banks. Chapter 10, Wavelet Analysis by Discrete Filter Banks, describes the basics of two-channel perfect reconstruction filter banks and the types of digital filter banks used with wavelet analysis. Signal Processing Toolset User Manual 9-14 ni.com 10 Wavelet Analysis by Discrete Filter Banks This chapter describes the design of two-channel perfect reconstruction filter banks, defines the types of filter banks used with wavelet analysis, and discusses wavelet packets. Two-Channel Perfect Reconstruction Filter Banks Two-channel perfect reconstruction (PR) filter banks have been recognized as useful in signal processing for a long time, particularly after researchers discovered that two-channel PR filter banks are closely related to wavelet transform. Now, two-channel PR filter banks are a common technique for computing wavelet transform. Figure 10-1 illustrates a typical two-channel filter bank system. The signal X(z) is first filtered by a filter bank constituted by G0(z) and G1(z). ^ Y1(z) G1(z) Processing 2 X(z) G0(z) Y1(z) 2 H1(z) 2 ^ X(z) + H0(z) 2 ^ Y0(z) Y0(z) Figure 10-1. Two-Channel Filter Bank Note For a finite impulse response (FIR) digital filter g[n], the z-transform is defined as N G(z) = N ∑ g[ n]z n=0 © National Instruments Corporation –n jω = G (e ) = G ( ω ) = ∑ g[ n]e – jωn n=0 10-1 Signal Processing Toolset User Manual Chapter 10 Wavelet Analysis by Discrete Filter Banks where N denotes the filter order. Consequently, the filter length is equal to N + 1. Thus, ω = 0 is equivalent to z = 1 and ω = π is equivalent to z = –1. That is, G(0) and G(p) in the frequency domain correspond to G(1) and G(–1) in the z-domain. The outputs of G0(z) and G1(z) are downsampled by two to obtain Y0(z) and Y1(z). After some processing, the modified signals are upsampled and filtered by another filter bank constituted by H0(z) and H1(z). If no processing takes place between the two filter banks, Y0(z) and Y1(z) are not altered. The sum of outputs of H0(z) and H1(z) is identical to the original signal X(z), except for the time delay. Such a system is commonly referred to as a two-channel PR filter bank. G0(z) and G1(z) form an analysis filter bank, whereas H0(z) and H1(z) form a synthesis filter bank. Note G(z) and H(z) can be interchanged. For instance, you can use H0(z) and H1(z) for analysis and G0(z) and G1(z) for synthesis. H0(z) and H1(z) are usually considered as the dual of G0(z) and G1(z), and vice versa. Traditionally, G0(z) and H0(z) are lowpass filters, whereas G1(z) and H1(z) are highpass filters, where the subscripts 0 and 1 represent lowpass and highpass filters, respectively. Because two-channel PR filter banks process Y0(z) and Y1(z) at half the sampling rate of the original signal X(z), they are used in many signal processing applications. Figure 10-2 illustrates conventions for wavelet transform. G1(z) 2 G0(z) 2 Figure 10-2. Conventions for Wavelet Transform If you assume the conventions shown in Figure 10-2, then Figure 10-3 illustrates the relationship between two-channel PR filter banks and wavelet transform. Signal Processing Toolset User Manual 10-2 ni.com Chapter 10 Wavelet Analysis by Discrete Filter Banks Wm,n Wm – 1,n Wm – 2,n Wm – k,n Figure 10-3. Relationship of Two-Channel PR Filter Banks and Wavelet Transform Under certain conditions, two-channel PR filter banks are related to wavelet transform in the following ways: • The impulse response of the lowpass filters converges to the scaling function φ(t). Once you obtain φ(t), you can compute the mother wavelet function ψ(t) by highpass φ(t), as shown in Figure 10-3. • The outputs of each of the highpass filters are approximations of the wavelet transform. You can accomplish wavelet transform with a tree of two-channel PR filter banks. The selection of a desirable mother wavelet becomes the design of two-channel PR filter banks [27]. Figure 10-4 illustrates the relationship of filter banks and wavelet transform coefficients. © National Instruments Corporation 10-3 Signal Processing Toolset User Manual Chapter 10 Wavelet Analysis by Discrete Filter Banks Frequency Filter Banks Time Figure 10-4. Filter Bank and Wavelet Transform Coefficients The following sections describe the design fundamentals for two types of two-channel PR filter banks, biorthogonal and orthogonal. In most equations, you receive the results without justification. Refer to the works of Oppenheim and Schafer [19], Parks and Burrus [20], and Parks and McClellan [21] [22] for more information about the mathematical bases used in the following sections. Biorthogonal Filter Banks In Figure 10-1, you can define the output of the low-channel according to the following equation. [30] [31] 1 Yˆ0 ( z ) = --- H 0 ( z ) [ G 0 ( z )X ( z ) + G 0 ( – z )X ( – z ) ] 2 Similarly, you can define the output of the high channel according to the following equation. 1 ˆ Y 1 ( z ) = --- H 1 ( z ) [ G 1 ( z )X ( z ) + G 1 ( – z )X ( – z ) ] 2 Signal Processing Toolset User Manual 10-4 ni.com Chapter 10 Wavelet Analysis by Discrete Filter Banks Add the outputs of the two channels together to obtain 1 1 --- [ H 0 ( z )G 0 ( z ) + H 1 ( z )G 1 ( z ) ]X ( z ) + --- [ H 0 ( z )G 0 ( – z ) + H 1 ( z )G 1 ( – z ) ] X ( – z ) 2 2 (10-1) One term involves X(z), and the other involves X(–z). For perfect reconstruction, the term with X(–z), traditionally called the alias term, must be zero. To achieve this, you want H 0 ( z )G 0 ( – z ) + H 1 ( z )G 1 ( – z ) = 0 (10-2) which you accomplish by letting H 0 ( z ) = G1 ( –z ) H 1 ( z ) = –G 0 ( – z ) and (10-3) The relationship in Equation 10-3 implies that you can obtain h0[n] by alternating the sign of g1[n], as shown in the following equation. h0[n] = (–1)ng1[n] Similarly, h1 [ n ] = ( –1 ) n+1 g0 [ n ] (10-4) Therefore, g1[n] and h1[n] are the highpass filters, if g0[n] and h0[n] are the lowpass filters. For perfect reconstruction, you also want the first term in Equation 10-1, called the distortion term, to be a constant or a pure time delay. For example, H 0 ( z )G 0 ( z ) + H 1 ( z )G 1 ( z ) = 2z –l (10-5) where l denotes a time delay. If you satisfy both Equations 10-2 and 10-5, the output of the two-channel filter bank in Figure 10-1 is a delayed version of the input signal: –l Xˆ ( z ) = z X ( z ) © National Instruments Corporation 10-5 Signal Processing Toolset User Manual Chapter 10 Wavelet Analysis by Discrete Filter Banks However, there remains a problem computing G0(z) and G1(z), or H0(z) and H1(z). Once you determine G0(z) and G1(z), you can find the rest of the filters with Equation 10-3. You also can write Equation 10-3 as G 1 ( z ) = H0 ( –z ) and H 1 ( z ) = –G 0 ( – z ) which, when substituted into Equation 10-5, yields G 0 ( z )H 0 ( z ) – G 0 ( – z )H 0 ( – z ) = P 0 ( z ) – P 0 ( – z ) = 2z –l (10-6) where P0(z) denotes the product of two lowpass filters, G0(z) and H0(z), from Equation 10-7. P 0 ( z ) = G 0 ( z )H 0 ( z ) (10-7) Equation 10-6 indicates that all odd terms of the product of the two lowpass filters, G0(z) and H0(z), must be zero except for order l, where l must be odd. However, even order terms are arbitrary. You can summarize these observations with Equation 10-8. 0 p0 [ n ] = 2 arbitrary n odd and n ≠ l n=l n even (10-8) This reduces the design of two-channel PR filter banks to two steps. 1. Design a filter P0(z) that satisfies Equation 10-8. 2. Factorize P0(z) into G0(z) and H0(z). Then use Equation 10-3 to compute G1(z) and H1(z). The following two types of filters are frequently used for P0(z): • Equiripple halfband filter [32] • Maximum flat filter Signal Processing Toolset User Manual 10-6 ni.com Chapter 10 Wavelet Analysis by Discrete Filter Banks In the equiripple halfband filter, halfband refers to a filter in which ωs + ωp = π, where ωs denotes the stopband frequency and ωp denotes the passband frequency, as shown in Figure 10-5. 0 Figure 10-5. Halfband Filter The form of the maximum flat filter is defined by Equation 10-9. – 1 2p P0 ( z ) = ( 1 + z ) Q ( z ) (10-9) which has 2p zeros at z = –1 or ω = π. If you limit the order of the polynomial Q(z) to 2p – 2, then Q(z) is unique. Note Here, the maximum flat filter differs from the Butterworth filter. The low-frequency asymptote of the Butterworth filter is a constant. The low-frequency asymptote of the maximum flat filter is not constant. In all cases, the product of lowpass filter P0(z) is a type I filter: p0 [ n ] = p0 [ N – n ] N even where N denotes the filter order. Consequently, the number of coefficients p0[n] is odd, N + 1. © National Instruments Corporation 10-7 Signal Processing Toolset User Manual Chapter 10 Wavelet Analysis by Discrete Filter Banks Figure 10-6 plots the zeros distribution of a maximum flat filter P0(z) for p = 3. Figure 10-6. Zeros Distribution for (1 – z –1)6Q(z) In Figure 10-6, six zeros are at ω = π. In this case, the order of the unique polynomial Q(z) is four, which contributes another four zeros that are not on the unit circle. If you let three zeros at ω = π go to G0(z) according to the equation G0(z) = (1 + z–1)3 and the rest of the zeros go to H0(z), you obtain B-spline filter banks. The coefficients of g0[n] and g1[n] and the corresponding scaling function and mother wavelet are plotted in Figure 10-7. Both the scaling function and mother wavelet generated by g0[n] and g1[n] are smooth. Figure 10-7. B-Spline Filter Bank Signal Processing Toolset User Manual 10-8 ni.com Chapter 10 Wavelet Analysis by Discrete Filter Banks Figure 10-8 depicts the dual filter bank h0[n] and h1[n] and the corresponding scaling function and mother wavelet. You also can use h0[n] and h1[n] for analysis. In Figure 10-8, the tree filter banks constituted by h0[n] and h1[n] do not converge. Figure 10-8. Dual B-Spline Filter Bank Remember that two-channel PR filter banks do not necessarily correspond to the wavelet transform. The wavelet transformations are special cases of two-channel PR filter banks. The conditions of two-channel PR filter banks are more moderate than those for the wavelet transform. Finally, the analysis filter banks and synthesis filter banks presented in this section are orthogonal to each other: ∑ g [ n – 2k ]h [ n ] = δ ( k ) i (10-10) i n and ∑ g [ n – 2k ] h [ n ] = 0 i © National Instruments Corporation l 10-9 i ≠ l, ∀k Signal Processing Toolset User Manual Chapter 10 Wavelet Analysis by Discrete Filter Banks The filters banks that satisfy Equation 10-10 are traditionally called biorthogonal filter banks. In addition to Equation 10-10, if the analysis filter banks also satisfy the following equations. ∑ g [ n – 2k ]g [ n ] = δ ( k ) i (10-11) i n and ∑ g [ n – 2k ] g [ n ] = 0 i l i ≠ l, ∀k The resulting filter banks are called orthogonal filter banks. Orthogonal filter banks are special cases of biorthogonal filter banks. Orthogonal Filter Banks As shown in the Biorthogonal Filter Banks section, once you determine P0(z), the product of two lowpass filters, you must factorize P0(z) into G0(z) and H0(z). The combinations of zeros are not unique. Different combinations lead to different filter banks. Sometimes G0(z) and G1(z) work well, but H0(z) and H1(z) might not; refer to Figure 10-7 and Figure 10-8. One way to make this process easier is to limit the selections to a subset. The most effective approach is to require G0(z) and G1(z), and thereby H0(z) and H1(z), to be orthogonal, as described by Equation 10-11. These constraints reduce the filter bank design to one filter design. Once you select G0(z), you can find the other filters. The constraints imposed by Equation 10-11 guarantee that both filter banks have the same performance and provide other advantages, as well. For example, many applications demonstrate that the lack of orthogonality complicates quantization and bit allocation between bands, eliminating the conservation of energy. To achieve Equation 10-11, let –N –1 G 1 ( z ) = –z G0 ( – z ) (10-12) which implies that g1[n] is the alternating flip of g0[n] ( g 1 [ 0 ], g 1 [ 1 ], g 1 [ 2 ], … ) = ( g 0 [ N ], – g 0 [ N – 1 ], g 0 [ N – 2 ], … ) Signal Processing Toolset User Manual 10-10 ni.com Chapter 10 Wavelet Analysis by Discrete Filter Banks Equation 10-12 implies that, for orthogonal wavelets and filter banks, –N –1 H0 ( z ) = z G0 ( z ) where you use the relation in Equation 10-3. Consequently, Equation 10-7 can be written as –N –1 P 0 ( z ) = z G 0 ( z )G 0 ( z ) –1 If G 0 ( z )G 0 ( z ) = P ( z ) , then P( e ) = ∑ p [ n ]e 2 N N jω – jωn = n = –N ∑ g [ n ]e – jωn 0 (10-13) n=0 which implies that P(z) is non-negative. Similar to biorthogonal cases, the selection of P0(z) in orthogonal cases is dominated by maximum flat and equiripple halfband filters. However, because of constraints imposed by Equation 10-13, P0(z) must be the time-shifted, non-negative function P(z). Although the maximum flat filter in Equation 10-9 ensures this requirement, special care must be taken when P0(z) is an equiripple halfband filter. Figure 10-9 plots the third-order Daubechies filter banks and wavelets. It is derived from the same maximum flat filter as that depicted in Figure 10-6. Figure 10-9. Third-Order Daubechies Filter Banks and Wavelets © National Instruments Corporation 10-11 Signal Processing Toolset User Manual Chapter 10 Wavelet Analysis by Discrete Filter Banks In Figure 10-9, G0(z) contains three zeros at ω = π and all zeros inside the unit circle, therefore possessing minimum phase. Because of the orthogonality, its dual filter bank has the same convergence property. Compared to the B-spline cases in Figures 10-7 and 10-8, the third-order Daubechies wavelet and scaling function is not as smooth as that of G0(z) and G1(z) in Figure 10-7 but is much smoother than that of H0(z) and H1(z) in Figure 10-8. 2D Signal Processing The preceding sections introduced two-channel PR filter banks for 1D signal processing. In fact, you also can use two-channel PR filter banks for 2D signals, as shown in Figure 10-10. Rows G1(z) G0(z) Columns G1(z) 2 high-high G0(z) 2 high-low G1(z) 2 low-high G0(z) 2 low-low 2 2 Figure 10-10. 2D Signal Processing As shown in Figure 10-10, when using two-channel PR filter banks for 2D signals, you process rows first and then columns. Consequently, one 2D array splits into the following four 2D sub-arrays: • low-low • low-high • high-low • high-high Each sub-array is a quarter the size of the original 2D signal. Figure 10-11 illustrates 2D image decomposition by two-channel PR filter banks. Signal Processing Toolset User Manual 10-12 ni.com Chapter 10 low-low low-high high-low high-high Wavelet Analysis by Discrete Filter Banks Figure 10-11. 2D Image Decomposition In Figure 10-11, the original 128-by-128 2D array is decomposed into four 64 × 64 sub-arrays. The total size of the four sub-arrays is the same as the original 2D array. For example, the total number of elements in the four sub-arrays is 16,384, which equals 128 × 128. However, if you select the filters properly, you can make sub-arrays such that the majority elements are small enough to be neglected. Consequently, you can use a fraction of the entire wavelet transform coefficients to recover the original image and achieve data compression. In this example, you use the largest 25% wavelet transform coefficients to rebuild the original image. Among them, the majority, 93.22%, are from the low-low sub-array. The remaining three sub-arrays contain limited information. If you repeat the wavelet transform to the low-low sub-array, you can further reduce the compression rate. © National Instruments Corporation 10-13 Signal Processing Toolset User Manual Chapter 10 Wavelet Analysis by Discrete Filter Banks Wavelet Packets The discrete wavelet transform is usually computed by the filter banks. As shown by Figure 10-3, applying the filter bank we can split a signal into an approximation (lowpass) sequence and a detail (highpass) sequence, respectively. The approximation sequence is then further split into second-level approximation and detail sequences, and the process is repeated. Consequently, the set of sequences containing detail information constitutes the wavelet coefficients, or the discrete wavelet transform. Obviously, the approach described above is not the only way of performing decomposition based on filter banks. For example, you can not only split the approximation sequence but also split the detail sequence. The process is depicted by Figure 10-12, in which the path of each sequence is described by a string composed of 0 or 1. Zero represents passing a lowpass filter G0(z) (approximation). One represents passing a highpass filter G1(z) (detail). The decomposition scheme described in Figure 10-12 is commonly named wavelet packet decomposition. 111 11 110 1 101 10 100 011 01 010 0 001 00 000 Figure 10-12. Wavelet Packet Decomposition Tree at Level Three Signal Processing Toolset User Manual 10-14 ni.com Chapter 10 Wavelet Analysis by Discrete Filter Banks You can consider the wavelet packet method as a generalization of wavelet decomposition that offers a richer signal analysis. Based on Figure 10-12, you can represent a signal by many different sets of sequences, such as (1, 01, 001, 000), (1, 00, 010, 011), or (000, 001, 010, 011, 100, 101, 110, 111). For a given number of levels k, the number of different decomposition schemes is given by the following equation. 2 P(k) = P(k – 1) + 1 P(1) = 1 Each of these different decomposition schemes offers a particular way of coding signals, preserving global energy, and reconstructing features. Then, we can select the most suitable decomposition of a given signal with respect to an entropy-based criterion. Table 10-1 lists the entropy types available in the Signal Processing Toolset. Table 10-1. Entropy Types Available in the Signal Processing Toolset Type Shannon Description – ∑ s [ i ] log s [ i ] 2 2 Threshold exceed a threshold ε Norm the concentration in l Log Energy ∑ log s [ i ] Stein’s Unbiased Risk Estimate (SURE) p 1≤P<2 2 ∑ { E[ i ] – N [ i ] + min ( s ( [ i ], p )) } 2 2 where E[i] = 1 if s [ i ] > p and 0 elsewhere, N[i] = 1 if s [ i ] ≤ p and 0 elsewhere © National Instruments Corporation 10-15 Signal Processing Toolset User Manual Wavelet Analysis Applications 11 This chapter describes the 1D and 2D Wavelet Transform examples, the Wavelet Packet example, and how to design a wavelet and filter bank to meet your application needs. With the wavelet transform examples, you can apply wavelet transform to 1D and 2D signals, perform wavelet packet analysis, and design wavelets without using any programming. Although you can use these examples without understanding the fundamentals of wavelets and filter banks, you should review Chapter 9, The Fundamentals of Wavelet Analysis, and Chapter 10, Wavelet Analysis by Discrete Filter Banks, before running the examples. Review those two chapters to help you attain the best results. Opening the Wavelet Analysis Examples The wavelet transform and wavelet packet examples reside on the SPT palette, shown in Figure 11-1. Select Start»Programs»National Instruments»Signal Processing Toolset»NI SPT Start-Up to open the SPT palette. On the SPT palette, click the 1D Wavelet Transform icon, the 2D Wavelet Transform icon, or the Wavelet Packet icon. 1 1 1D Wavelet Transform 2 2 2D Wavelet Transform 3 3 Wavelet Packet Figure 11-1. SPT Palette Refer to the Accessing Example Application Source Code section of Chapter 1, Signal Processing Toolset Overview, for information about accessing the source code for the wavelet analysis examples. © National Instruments Corporation 11-1 Signal Processing Toolset User Manual Chapter 11 Wavelet Analysis Applications 1D Wavelet Transform You can use the 1D Wavelet Transform example to compute the wavelet packet for 1D test data. A wavelet packet is a generalized wavelet composition. Refer to the Wavelet Packets section of Chapter 10, Wavelet Analysis by Discrete Filter Banks, for more information about wavelet packets. You also can use the 1D Wavelet Transform example to test a wavelet and filter bank of your own design. When you click the 1D Wavelet Transform icon on the SPT palette, the 1D Wavelet Transform front panel, shown in Figure 11-2, and the Wavelets and Filters front panel, shown in Figure 11-3, open. Refer to the Selecting the Wavelet section for more information about the Wavelets and Filters front panel. The 1D Wavelet Transform front panel includes four plots. The upper plot displays the original signal. The other three plots display the wavelet transform results for different tree paths. Signal Processing Toolset User Manual 11-2 ni.com Chapter 11 Wavelet Analysis Applications 1 2 1 Original Signal 2 Wavelet Transform Results Figure 11-2. 1D Wavelet Transform Front Panel © National Instruments Corporation 11-3 Signal Processing Toolset User Manual Chapter 11 Wavelet Analysis Applications Figure 11-3. Wavelets and Filters Front Panel Using the 1D Wavelet Transform Example Complete the following steps to use the 1D Wavelet Transform example to compute the wavelet packet for 1D test data. 1. Load the test data. 2. Select the wavelet. 3. Specify the extension type. 4. Specify the tree path. 5. Specify the display method. 6. Save the wavelet transform results. Signal Processing Toolset User Manual 11-4 ni.com Chapter 11 Wavelet Analysis Applications The following sections describe the preceding steps and the 1D Wavelet Transform example front panel controls and indicators. You also can select Help»Show Context Help or press <Ctrl-H> for more information about controls and indicators. Loading the Test Data You can choose to analyze one of the example data files supplied with the Signal Processing Toolset or your own data file. Your data file must be either a one-column or one-row spreadsheet text file. Complete the following steps to load your test data. 1. Select File»Load»Data File to open the Choose spreadsheet file to read dialog box. 2. Navigate to the location of the data file you want to analyze. 3. Select the data file you want to analyze and click the Open button or double-click the data file name. Selecting the Wavelet You can choose to use wavelets supplied with the Signal Processing Toolset or wavelets from your own data file, or you can design wavelets with the Wavelets Designer. Your wavelet file must contain the filter coefficients of G0(z), G1(z), H0(z), and H1(z) in four lines consecutively. You can create your data file with the Wavelets Designer or another application. Refer to the Wavelets Designer section for information about the Wavelets Designer. Complete the following steps to load a wavelet from your own data file. 1. Select File»Load»Wavelet to open the Choose file to read dialog box. 2. Navigate to the location of the data file containing the filter coefficients of the wavelet you want to load. 3. Select the data file you want to load and click the Open button or double-click the data file name. Use the Wavelet control to select a wavelet supplied with the Signal Processing Toolset. © National Instruments Corporation 11-5 Signal Processing Toolset User Manual Chapter 11 Wavelet Analysis Applications The wavelets are stored with the global variables Analysis Filters and Synthesis Filters. The mother wavelet, scaling functions, and filter coefficients for the global variables are displayed by the following Wavelets and Filters front panel indicators, shown in Figure 11-3: • Analysis Scaling displays the scaling function of the wavelet transform. • Analysis Wavelet displays the mother wavelet of the wavelet transform. • Analysis Lowpass displays the coefficients of the analysis lowpass filter G0(z). • Analysis Highpass displays the coefficients of the analysis highpass filter G1(z). • Synthesis Scaling displays the scaling function of the inverse wavelet transform. • Synthesis Wavelet displays the mother wavelet of the inverse wavelet transform. • Synthesis Lowpass displays the coefficients of the synthesis lowpass filter H0(z). • Synthesis Highpass displays the coefficients of the synthesis highpass filter H1(z). Use the Refinement control on the Wavelets and Filters front panel, shown in Figure 11-3, to specify how many levels to go through to compute the wavelet and scaling function. A proper wavelet usually converges after four or five levels. Use the Swap control on the 1D Wavelet Transform front panel, shown in Figure 11-2, to specify whether the analysis filter is swapped with the synthesis filter. The Swap control allows you to select a better combination of analysis parameters for your application. Usually, the filter with the smoother time waveform is chosen as the synthesis filter. Specifying the Extension Type Use the Extension control on the 1D Wavelet Transform front panel, shown in Figure 11-2, to specify the padding method for the data. You can choose from the following padding methods: • Zero padding adds zeros at the beginning and end of the original data. • Symmetric symmetrically folds the original signal at the beginning and end. • Periodic treats the original data as a periodic signal. Signal Processing Toolset User Manual 11-6 ni.com Chapter 11 • Wavelet Analysis Applications Spline (default) symmetrically folds the original signal at the beginning and end and then smooths with spline. The number of points padded at either the beginning or end of the original signal is determined by the following equation. [ Maximum ( N 0, N 1 ) + 1 ] ------------------------------------------------------------2 where N0 is the number of coefficients of filter G0(z), and N1 is the number of coefficients of filter G1(z). Specifying the Tree Path Enter a value in Tree Path on the 1D Wavelet Transform front panel, shown in Figure 11-2, to specify a path for the wavelet packet. The Tree Path value must be a string composed of 0 or 1, where 0 represents passing a lowpass filter G0(z) and 1 represents passing a highpass filter G1(z). Figure 11-4 illustrates an example tree path. 1 G1(z) 2 01 G1(z) 2 001 G0(z) 2 0 G0(z) G1(z) 2 G0(z) 2 2 00 000 Figure 11-4. Example of Tree Path You can define any tree path for your application. Figure 11-5 illustrates the full path for a three-level decomposition. © National Instruments Corporation 11-7 Signal Processing Toolset User Manual Chapter 11 Wavelet Analysis Applications 11 111 110 101 1 10 01 100 011 010 0 001 00 000 Figure 11-5. Full Path of a Three-Level Perfect Reconstruction Tree For example, you can decompose the signal X as 0, 100, 101, and 11. Then, you use those coefficients to reconstruct the original signal with synthesis filter banks, as shown in Figure 11-6. 11 1 101 X(z) 10 100 X(z) 0 Figure 11-6. Wavelet Packet In this case, although you do not follow the ordinary wavelet decomposition scheme discussed in the earlier chapters, you can still fully recover the original signal X, if the coefficients are not altered. This generalized wavelet decomposition is called a wavelet packet and offers a wider range of possibilities for signal processing. You should let your application determine the tree path you specify. One common technique used to determine the tree path is called entropy-based criterion. In entropy-based criterion, you check each node of the decomposition tree and quantify the information. Then, you continue to decompose those nodes that contain more information. Signal Processing Toolset User Manual 11-8 ni.com Chapter 11 Wavelet Analysis Applications Specifying the Display Method The plot below Tree Path on the 1D Wavelet Transform front panel, as shown in Figure 11-2, displays the wavelet transform result for that path. You can display the result as either a waveform or a histogram. Select View»Show Waveform or Show Histogram to specify the display method. Saving the Wavelet Transform Result Click the Save button above the wavelet transform result plot on the 1D Wavelet Transform front panel, shown in Figure 11-2, to save that particular result as a text file. You can use the wavelet transform result to fully reconstruct the original signal. 2D Wavelet Transform As discussed in Chapter 10, Wavelet Analysis by Discrete Filter Banks, by applying wavelet transform, you can break one image into four subimages: low-low, low-high, high-low, and high-high. With the 2D Wavelet Transform example, you can apply 2D wavelet transform to an image and use part of the subimage data to reconstruct the image. When you click the 2D Wavelet Transform icon on the SPT palette, shown in Figure 11-1, the 2D Wavelet Transform front panel opens. Figure 11-7 shows the 2D Wavelet Transform front panel with a data file already loaded. © National Instruments Corporation 11-9 Signal Processing Toolset User Manual Chapter 11 Wavelet Analysis Applications 1 2 3 4 1 low-low 2 low-high 3 high-high 4 high-low Figure 11-7. 2D Wavelet Transform Front Panel Using the 2D Wavelet Transform Example Complete the following steps to use the 2D Wavelet Transform example to apply 2D wavelet transform to an image and then reconstruct the image. 1. Load the image. 2. Select a wavelet. 3. Specify the extension type used for reconstruction. 4. Specify the data percentage used for reconstruction. The following sections describe the preceding steps and the 2D Wavelet Transform example front panel controls and indicators. You also can select Help»Show Context Help or press <Ctrl-H> for more information about controls and indicators. Signal Processing Toolset User Manual 11-10 ni.com Chapter 11 Wavelet Analysis Applications Loading the Image Your image file should be a .bmp file. Complete the following steps to load an image. 1. Select File»Load»BMP image to open the Select a BMP file to open dialog box. 2. Navigate to the location of the image file you want to analyze. 3. Select the image file you want to analyze and click the Open button or double-click the image file name. Selecting a Wavelet Refer to the 1D Wavelet Transform section for information about selecting a wavelet. Specifying the Extension Type Use the Extension control on the 2D Wavelet Transform front panel, shown in Figure 11-7, to specify the padding method for the data. Refer to the 1D Wavelet Transform section for information about specifying an extension. Specifying the Data Percentage Used for Reconstruction Use the Used coeffs control on the 2D Wavelet Transform front panel, shown in Figure 11-7, to specify the data percentage used for reconstruction. The value of Used coeffs represents the percentage of the largest wavelet coefficients used from all the subimages to restore the image. Using the Zoom Control The zoom control on the 2D Wavelet Transform front panel, shown in Figure 11-7, is located above each image display and is represented by the magnifying glass icon. Use the zoom control to zoom in on the front panel images. Clicking the zoom control opens a new window containing the image. Resizing the new window resizes the image. © National Instruments Corporation 11-11 Signal Processing Toolset User Manual Chapter 11 Wavelet Analysis Applications Wavelet Packet You can use the Wavelet Packet example to compute the wavelet packet for 1D test data. A wavelet packet is a generalized wavelet composition. Refer to the Wavelet Packets section of Chapter 10, Wavelet Analysis Applications, for more information about wavelet packets. When you click the Wavelet Packet icon on the SPT palette, shown in Figure 11-1, the Wavelet Packet front panel, shown in Figure 11-8, opens. Figure 11-8. Wavelet Packet Front Panel The Wavelet Packet front panel includes the following plots: • Analyzed Signal displays the original signal. • Node Coefficients displays the decomposition coefficients of the node you select in the plot on the right. • The plot on the right displays the tree structure of the wavelet packet decomposition. Signal Processing Toolset User Manual 11-12 ni.com Chapter 11 Wavelet Analysis Applications Using the Wavelet Packet Example Complete the following steps to use the Wavelet Packet example to compute the wavelet packet for 1D test data. 1. Load the test data. 2. Select the wavelet. 3. Specify the extension type. 4. Specify the method to compute entropy. 5. Specify the number of levels. 6. Operate on a tree node. The following sections describe the preceding steps and the Wavelet Packet example front panel controls and indicators. You also can select Help»Show Context Help or press <Ctrl-H> for more information about controls and indicators. Loading the Test Data You can choose to analyze your own data file or one of the example data files supplied with the Signal Processing Toolset. Your data file must be either a one-column or one-row spreadsheet text file. Refer to the 1D Wavelet Transform section for more information about loading test data. Selecting the Wavelet Refer to the 1D Wavelet Transform section for information about selecting a wavelet. Specifying the Extension Type Refer to the 1D Wavelet Transform section for information about specifying the extension type. Specifying the Method to Compute Entropy Use the Entropy Type control on the Wavelet Packet front panel, shown in Figure 11-8, to specify the method to compute the entropies of the wavelet packets. Refer to the Wavelet Packets section of Chapter 10, Wavelet Analysis by Discrete Filter Banks, for information about selecting the entropy type. © National Instruments Corporation 11-13 Signal Processing Toolset User Manual Chapter 11 Wavelet Analysis Applications Specifying the Number of Levels Use the # of Levels control on the Wavelet Packet front panel, shown in Figure 11-8, to specify the number of levels of the wavelet packet decomposition. Operating On a Tree Node Click the node in the right-hand plot on the Wavelet Packet front panel, shown in Figure 11-8, on which you want to operate to open a shortcut menu. You can choose from the following shortcut menu items: • Split Node decomposes the wavelet packet. • Join Node reconstructs the wavelet packet. • Read Node reads the coefficients and entropy of the selected node. Selecting Read Node highlights the node and displays its coefficients and entropy in the Node Coefficients graph and the Entropy indicator on the front panel. Specifying the Display Mode Use the Display Mode control on the Wavelet Packet front panel, shown in Figure 11-8, to specify how to display the tree structure of the wavelet packet decomposition. You can choose from the following display modes: • node path displays the path of the node. 1 denotes highpass filtering. 0 denotes lowpass filtering. For example, 110 denotes a three-level decomposition. The decomposition process specified by 110 is highpass-highpass-lowpass. • (depth, pos) displays the level index and the node index at its level of a node. For example, (3, 4) is the fourth node at level three. • entropy displays the entropy of the node. Drawing the Best Tree Place a checkmark in the Best Tree checkbox on the Wavelet Packet front panel, shown in Figure 11-8, to compute from entropy-based criteria the most suitable decomposition tree for the signal. Remove the checkmark from the Best Tree checkbox to perform a full tree decomposition. Signal Processing Toolset User Manual 11-14 ni.com Chapter 11 Wavelet Analysis Applications Wavelets Designer With the Wavelets Designer, you can design the filters G0(z) and H0(z), which can be used to derive G1(z) and H1(z). The mother wavelet and the scaling function can then be computed by G0(z), G1(z), H0(z), and H1(z). Refer to Chapter 10, Wavelet Analysis by Discrete Filter Banks, for more information about the wavelet and filter banks. Opening the Wavelets Designer Front Panel You can open the Wavelets Designer front panel, shown in Figure 11-9, from the front panels of the 1D Wavelet Transform example, the 2D Wavelet Transform example, and the Wavelet Packet example. You can use the following methods to open the Wavelets Designer front panel: • Select Tools»Wavelet Designer when using the 1D Wavelet Transform example. • Select Tools»Show Wavelet Designer when using the 2D Wavelet Transform and Wavelet Packet examples. • Click in the Wavelet control and select user defined from the shortcut menu. Refer to the Accessing Example Application Source Code section of Chapter 1, Signal Processing Toolset Overview, for information about accessing the source code for the Wavelets Designer. Wavelets Designer Front Panel Displays The upper plot on the Wavelets Designer front panel, shown in Figure 11-9, displays the frequency response of G0(z) and G1(z). The lower plot on the Wavelets Designer front panel, shown in Figure 11-9, illustrates the zero distribution of G0(z) and H0(z). Because all the zeros are symmetrical with respect to the x-axis, only the upper half of the plane is displayed. The ° symbol represents the zeros in G0(z), and the × symbol represents the zeros in H0(z). To select a zero, place the cursor on the zero that you want to choose and click the left mouse button. This switches the zeros from G0(z) to H0(z) and vice versa. If two zeros are too close to choose, use the Zoom Tool on the graph palette to zoom in on the zeros until you can identify the them. Refer to the Digital Filter Design Front Panels section of Chapter 12, Digital Filter Design Application, for information about the Zoom Tool and the graph palette. © National Instruments Corporation 11-15 Signal Processing Toolset User Manual Chapter 11 Wavelet Analysis Applications 1 2 6 2 3 5 1 2 3 4 Frequency Response of G0(z) and G1(z) Step1: Type of Filter Banks Zero Distribution of G0(z) and H0(z) x: G0(z) o: H0(z) 4 5 6 Zoom Tool Step 3: Type of G0(z) and H0(z) Step 2: Type of P0(z) Figure 11-9. Wavelets Designer Designing Wavelets Figure 11-10 illustrates the wavelet design process. Figure 11-9 shows the Wavelets Designer controls to use when designing wavelets. Signal Processing Toolset User Manual 11-16 ni.com Chapter 11 Step 1 Step 2 Step 3 Product of Lowpass Factorization Wavelet Analysis Applications P0(z) = G0(z)H0(z) B-spline G 0 (z) = (1 + z –1 ) k H 0 (z) = (1 + z –1 ) 2p–k Q(z) Maximum Flat Linear Phase (1 + z–1)2pQ(z) G 0 (z) has to contain both zero z i and its reciprocal 1/z i Arbitrary Linear Phase G 0 (z) has to contain both zero z i and its reciprocal 1/z i Biorthogonal General Equiripple Arbitrary Linear Phase G 0 (z) has to contain both zero z i and its reciprocal 1/z i Positive Equiripple P( e j ω ) ≥0 Arbitrary Minimum Phase (Daubechies) G 0 (z) contains all zeros |z i |<1 Maximum Flat (1 + z–1)2pQ(z) Orthogonal zi → G0(z) (1/z i ) → H 0 (z) Arbitrary Minimum Phase G 0 (z) contains all zeros |z i |<1 Positive Equiripple P( e j ω ) ≥0 Arbitrary Figure 11-10. Design Procedure for Wavelets and Filter Banks Complete the following steps to design wavelets. 1. Select the type of filter bank. 2. Find the product of G0(z) and H0(z), P0(z). 3. Factorize P0(z) into G0(z) and H0(z). © National Instruments Corporation 11-17 Signal Processing Toolset User Manual Chapter 11 Wavelet Analysis Applications The following sections describe each of the steps in the wavelet design process and the Wavelets Designer front panel controls you use to complete the steps. You also can select Help»Show Context Help or press <Ctrl-H> for more information about front panel controls and indicators. Selecting the Type of Filter Bank Use the Filter Bank control on the Wavelets Designer front panel, shown in Figure 11-9 as step 1, to select the filter bank type. You can choose from two types of wavelets and filter banks, Orthogonal (default) and Biorthogonal. The orthogonal filters and wavelets are easier to design because they involve fewer parameters, but the orthogonal filter banks cannot be linear phase. Finding the Product P0(z) P0(z) denotes the product of G0(z) and H0(z), as shown in the following equation. P0(z) = G0(z)H0(z) Use the P0(z) control, shown in Figure 11-9 as step 2, to specify the P0(z) type. When Filter Bank is set to Orthogonal, you can set P0(z) to either Maxflat (default), for a maximum flat filter, or to Positive Equiripple. When Filter Bank is set to Biorthogonal, you can set P0(z) to Maxflat (default), General Equiripple, or Positive Equiripple. Because all filters in the Wavelets Designer act as real-valued finite impulse response (FIR) filters, the zeros of P0(z), G0(z), and H0(z) are symmetrical in the z-plane. This implies that for any zero zi, there always exists zi*. If zi is complex, as shown in Figure 11-11, you only need to deal with half of the z-plane. Once you select zi, the Wavelets Designer automatically includes its complex conjugate zi*. Signal Processing Toolset User Manual 11-18 ni.com Chapter 11 Wavelet Analysis Applications 1 z1 1 z2 z1 z2 –1 1 z2* 1 z2* z1* 1 z1* Figure 11-11. Non-Negative Equiripple Halfband Filter The maximum flat filter has the form given by the following equation. – 1 2p P0 ( z ) = ( 1 + z ) Q ( z ) The maximum flat filter differs from the Butterworth filter. The maximum flat filter has good frequency attenuation but wider transition band. The parameter p is controlled by the zero pairs at π control on the Wavelets Designer front panel, shown in Figure 11-9. Q(z) is a 2p – 2 order polynomial, which you can uniquely determine if p is decided. Therefore, the total number of coefficients of P0(z) is 4p – 1. For maximum flat filters, there are multiple zeros at z = 0. Use the zeros at π control to determine how many zeros at z = 0. The equiripple is further divided into the general equiripple and positive equiripple filters. However, you can select only positive equiripple filters for orthogonal filter banks. Although both are halfband filters, the sum of the normalized passband and stopband frequencies equals 0.5, the Fourier transform of the positive equiripple filter p0[n] is always real and non-negative, as shown in Figure 11-11. Two parameters are associated with equiripple filters, # of taps and passband, as shown in Figure 11-12. Use the # of taps control to define the number of coefficients of P0(z). Because P0(z) is a type I FIR filter, the length of P0(z) must be 4p – 1, where p = 2, 3, …. Use the passband control to define the normalized cutoff frequency of P0(z), which must be less than 0.5. © National Instruments Corporation 11-19 Signal Processing Toolset User Manual Chapter 11 Wavelet Analysis Applications Figure 11-12. Equiripple Filter Factorizing P0(z) into G0(z) and H0(z) Once you determine P0(z), you must factorize it into the lowpass filters, G0(z) and H0(z). Use Type of G0(z) and H0(z), shown in Figure 11-9 as step 3, to accomplish the factorization. The combination of G0(z) and H0(z) is not unique. For a given P0(z), you have the following four choices for G0(z) and H0(z): • Linear Phase—Any zero and its reciprocal must belong to the same filter as shown in Figure 11-13. This selection is only available when the filter is biorthogonal. • Minimum Phase—G0(z) contains all the zeros inside the unit circle as shown in Figure 11-14. When P0(z) is maximum flat and G0(z) is minimum phase, the resulting wavelets are traditionally known as Daubechies wavelets. • B-Spline—This choice is only available when the filter is biorthogonal and maximum flat. In this case –1 k G0 ( z ) = ( 1 + z ) – 1 2p – k H0 ( z ) = ( 1 + z ) Q(z) where k is specified with the zeros at π control. p is decided by the zeros at π control. Figure 11-15 shows an example of B-Spline factorization. • Arbitrary—No specific constraints are associated with this filter. Figure 11-16 shows an example of arbitrary factorization. After you decide the type of G0(z) and H0(z), the Wavelets Designer automatically computes the constraints. For example, once you select a zero, the reciprocal of the zero is automatically included if you choose G0(z) for linear phase. Figure 11-10 summarizes all possible design combinations provided by the Wavelets Designer. Signal Processing Toolset User Manual 11-20 ni.com Chapter 11 Wavelet Analysis Applications Figure 11-13. Linear Phase Filter Figure 11-14. Minimum Phase Filter © National Instruments Corporation 11-21 Signal Processing Toolset User Manual Chapter 11 Wavelet Analysis Applications Figure 11-15. B-Spline Filter Figure 11-16. Arbitrary Filter Note The conditions for linear phase and orthogonality are contradictory. In general, you cannot achieve linear phase and orthogonality simultaneously. The Wavelets Designer also provides the following additional utilities: • Select File»Load»Design Spec to load a saved design file. • Select File»Save»Wavelet to save the designed analysis filter coefficients and synthesis filter coefficients in a text file. • Select File»Save»Design Spec to save your design information in a binary file. • Select Windows»Show Filter Coef to display a table listing the designed analysis and synthesis filter coefficients. Signal Processing Toolset User Manual 11-22 ni.com Chapter 11 • Wavelet Analysis Applications Select Windows»Show Wavelets to open the Wavelets and Filters front panel, shown in Figure 11-3. Refer to the 1D Wavelet Transform section for information about the Wavelets and Filters front panel. To assist you with testing your own applications, the Wavelets Designer saves the filter coefficients as the following global variables in the Wavelet Design Globals VI: • Analysis Filter Coefficients contains coefficients G0(z) and G1(z). • Synthesis Filter Coefficients contains coefficients H0(z) and H1(z). These variables simultaneously change as you change the design. If you incorporate those parameters into your own application, you can see the effect of the different design. © National Instruments Corporation 11-23 Signal Processing Toolset User Manual Part V Digital Filter Design This section of the manual describes the Digital Filter Design (DFD) application. Refer to the works of Jackson [13], Oppenheim and Schafer [19], Parks and Burrus [20], Parks and McClellan [21] [22], and Williams and Taylor [37] for more information about the theory and algorithms implemented in the DFD application. • Chapter 12, Digital Filter Design Application, describes the DFD application used to design infinite impulse response (IIR) and finite impulse response (FIR) digital filters. • Chapter 13, IIR and FIR Implementation, describes the filter implementation equations for IIR and FIR filtering and the format of the IIR and FIR filter coefficient files. © National Instruments Corporation V-1 Signal Processing Toolset User Manual Digital Filter Design Application 12 This chapter describes the Digital Filter Design (DFD) application, including all required filter coefficient forms and implementation equations. The DFD application provides complete filter design and analysis tools you can use to design digital filters to meet your precise filter specifications. You can graphically design infinite impulse response (IIR) and finite impulse response (FIR) digital filters, interactively review filter responses, save your filter design work, and load your design work from previous sessions. You can save digital-filter coefficients for later implementation from within LabVIEW and LabWindows/CVI. Also, you can call Windows DFD dynamic link libraries (DLLs) from other applications, or other applications can load the filter-coefficient files directly. If you have a National Instruments data acquisition (DAQ) device, you can perform real-world filter testing in the DFD application. You can view the time waveforms or the spectra of the input signal and the filtered signal while you simultaneously redesign your digital filters. © National Instruments Corporation 12-1 Signal Processing Toolset User Manual Chapter 12 Digital Filter Design Application Figure 12-1 illustrates the interaction between the DFD application and related applications. Digital Filter Design Application Save Load Data Acquisition and Filtering Save Filter Coefficient Files Filter Specification Files LabVIEW LabWindows/CVI Windows DLL Figure 12-1. Conceptual Overview of the Digital Filter Design Application Main Menu Select Start»Programs»National Instruments»Signal Processing Toolset»NI Digital Filter Design to open the Main Menu dialog box, shown in Figure 12-2. Figure 12-2. DFD Main Menu Signal Processing Toolset User Manual 12-2 ni.com Chapter 12 Digital Filter Design Application Opening the Filter Design Front Panels From the Main Menu dialog box, you can open any one of the following digital filter design front panels: • Classical IIR Filter Design • Classical FIR Filter Design • Pole-Zero Placement • Arbitrary FIR Filter Design. Refer to the Digital Filter Design Front Panels section for more information about each design front panel. Directly Loading a Filter Specification File Click the Load Spec button in the Main Menu dialog box to load a previously designed filter specification file directly from the Main Menu dialog box. The DFD application prompts you to select the filter specification file that you saved during previous design work. After you select the file, you can open the appropriate design front panel for that specification file. Then, resume work on an ongoing design project. Editing the DFD Preferences Click the Preferences button in the Main Menu dialog box to customize your DFD application preferences. You can edit your DFD application preferences for future design sessions. Getting Information about the DFD Application Click the Get Info button in the Main Menu dialog box to get information about the entire DFD application or an individual filter design application. Quitting the DFD Application Click the Quit button in the Main Menu dialog box to quit the DFD application. © National Instruments Corporation 12-3 Signal Processing Toolset User Manual Chapter 12 Digital Filter Design Application Digital Filter Design Front Panels When you double-click one of the four design selections in the Main Menu dialog box, the DFD application loads and runs the selected design front panel. You can use these design front panels to design IIR or FIR filters, save your design work and filter coefficients, or load previous filter designs. After designing your filter, you can move from the design front panels to the Analysis of Filter Design front panel to view various frequency domain and time domain filter responses. You can save these responses to text files for use in other applications. You also can perform real-world testing of your filter designs by moving to the DAQ and Filter front panel, which performs data acquisition and filtering in parallel with your filter designing. Refer to the Analysis of Filter Design Front Panel and the DAQ and Filter Front Panel sections for more information about these two front panels. Common Controls and Features The following sections describe the controls and features of the DFD application. Figure 12-3 shows the Classical IIR Filter Design front panel, which is representative of the filter design front panels. Figure 12-3. Classical IIR Filter Design Front Panel Signal Processing Toolset User Manual 12-4 ni.com Chapter 12 Digital Filter Design Application Saving Filter Specifications Select File»Save Spec to save all your specifications for the present filter design front panel. The DFD application prompts you for the name of the filter-specification file to save. Name your specification files appropriately for a given filter design. For example, if you design a lowpass IIR filter, name the file lowpass.iir or lowp1.iir if this design is the first of many lowpass IIR designs. Table 12-1 lists suggested filename extensions for the four filter design front panels. These names have no effect on how the DFD application interprets the file contents. Table 12-1. Suggested DFD Filename Extensions Design Front Panel Filename Classical IIR Design filename.iir Classical FIR Design filename.fir Pole-Zero Placement filename.pz Arbitrary FIR Design filename.arb Loading Filter Specifications Select File»Load Spec to load a filter specification file into the present filter design front panel. The DFD application prompts you for the location of the filter specification file to load. If the selected specification file is the same type design as the present design front panel, the DFD application loads the specification from the selected file into the present design front panel for viewing, editing, or analysis. If you designed the selected specification file in a different design front panel than the present front panel, the DFD application prompts you to open the appropriate design front panel for that specification file. For example, if you are using the Pole-Zero Placement front panel and you load a specification file saved in the Classical FIR Design front panel, the DFD application prompts you to open the Classical FIR Design front panel to resume work on the loaded filter specifications. Saving Filter Coefficients Select File»Save Coeff to save your filter coefficients to a file. The DFD application first prompts you for the format, either text or log, of the coefficient file. © National Instruments Corporation 12-5 Signal Processing Toolset User Manual Chapter 12 Digital Filter Design Application Click the text button to select the text format. The text format allows you to view or print the coefficient file or to use the coefficients in other non-LabVIEW filtering applications. Click the log button to select the log format for LabVIEW-only filtering applications. However, LabVIEW filtering utilities read both text-formatted and log-formatted coefficient files. After you select the format of the coefficient file, the DFD application prompts you for the name of the filter coefficient file to save. Name your coefficient files appropriately for a given filter design. For example, if you save bandpass IIR filter coefficients, name the file bpiir.txt or bpiir.log, depending on the coefficient file type. Analyzing Filter Designs Select File»Analysis to analyze your filter design. The DFD application loads and runs the Analysis of Filter Design front panel. From this analysis front panel, you can view the filter magnitude response, phase response, impulse response, step response, and pole-zero plot. You also can view and print full-screen plots of each response. From the full-screen views, you can save the analysis results to a text file. Refer to the Analysis of Filter Design Front Panel section for more information about analyzing filter designs. Testing Filter Designs If you have a National Instruments DAQ device, you can test the present filter design on real-world signals by selecting File»DAQ and Filter. The DFD application loads and runs the DAQ and Filter front panel. From this front panel, you can configure your DAQ device and then acquire real signals. The acquired data passes through the currently designed filter, and the DFD application plots the input and output waveforms and spectrums. You also can test your filter designs using a built-in simulated function generator. Select File»DAQ and Filter and configure the DAQ source to simulated DAQ. You then can click the Function Generator button on the DAQ and Filter front panel to view and edit settings that include signal type, frequency, amplitude, and noise level. Refer to the DAQ and Filter Front Panel section for more information about the DAQ and Filter front panel. Signal Processing Toolset User Manual 12-6 ni.com Chapter 12 Digital Filter Design Application Transferring Filter Designs You can transfer some filter design specifications from one design front panel to another. For example, you can configure your passband and stopband requirements while you design an FIR filter and find the IIR filter that meets your design specifications. Not all design front panels can share specifications. Table 12-2 shows the transfers you can perform and the corresponding command path. Table 12-2. Filter Specification Transfers Design Transfer Command Path Filter specs from the Classical IIR to the Classical FIR File»Xfer Classical FIR Filter specs from the Classical FIR to the Classical IIR File»Xfer Classical IIR Poles and zeros from Classical IIR to the Pole-Zero Placement File»Xfer Pole Zero Returning to the Main Menu Select File»Main Menu to return to the Main Menu dialog box. Panning and Zooming Options The graphs on the filter design front panels include the plot legend and graph palette. Use the controls on the plot legend and graph palette to pan the display area of a graph and zoom in and out of graph sections. Figure 12-4 shows a graph and its plot legend and graph palette. © National Instruments Corporation 12-7 Signal Processing Toolset User Manual Chapter 12 Digital Filter Design Application 1 1 Plot Legend 2 2 Graph Palette Figure 12-4. Graph with Plot Legend and Graph Palette Plot Legend Use the plot legend, shown in Figure 12-5, to pan the display of the graph. 1 1 2 Lock X Autoscale X 2 3 4 3 4 5 Scale Format X Lock Y 6 5 6 Autoscale Y Scale Format Y Figure 12-5. Plot Legend The plot legend contains the following controls: • Lock button—click the Lock button next to the desired autoscale button to autoscale that particular scale continuously. • Autoscale X button—click the Autoscale X button to autoscale the x-data of the graph. Signal Processing Toolset User Manual 12-8 ni.com Chapter 12 Digital Filter Design Application • Scale Format buttons—click the Scale Format buttons for run-time control over the format of the x-scale and y-scale markers. When you click a Scale Format button, a menu appears. From the shortcut menu, you can choose the Format, Precision, and Mapping Mode of the graph. • Autoscale Y button—click the Autoscale Y button to autoscale the y-data of the graph. Graph Palette Use the graph palette, shown in Figure 12-6, to zoom in and out of graph sections. 1 2 3 1 Plus 2 Panning Tool 3 Zoom Tool Figure 12-6. Graph Palette The graph palette contains the following controls: • Plus button—click the Plus button to place the graph in operate mode. In operate mode, you can click in the graph to move the cursors. • Zoom Tool—click the Zoom Tool to open the Zoom palette, shown in Figure 12-7. Figure 12-7. Zoom Palette © National Instruments Corporation 12-9 Signal Processing Toolset User Manual Chapter 12 Digital Filter Design Application The top row of the Zoom palette contains the following buttons from left to right: – Zoom by rectangle – Zoom by rectangle, with zooming restricted to x-data – Zoom by rectangle, with zooming restricted to y-data After choosing your zooming method, you can zoom in on a section of the graph by dragging a selection rectangle around that section. The bottom row of the Zoom palette contains the following buttons from left to right: • – Undo last zoom resets the graph to its previous setting. – Zoom in about a point allows you to zoom in on a specific point. If you click and hold the mouse button on a specific point, the graph continuously zooms in until you release the mouse button. Press <Shift> and click the mouse button to zoom in the opposite direction. – Zoom out about a point allows you to zoom out on a specific point. If you click and hold the mouse button on a specific point, the graph continuously zooms out until you release the mouse button. Press <Shift> and click the mouse button to zoom in the opposite direction. Click the Panning Tool to switch to a mode in which you can scroll the visible data by clicking and dragging sections of the graph. Graph Cursors The graphs on the Classical IIR and Classical FIR design front panels have movable cursors. Figure 12-8 shows two cursors on a graph. When the graph is in operate mode, you can move a cursor by clicking on it and dragging it with the Operating Tool. Signal Processing Toolset User Manual 12-10 ni.com Chapter 12 Digital Filter Design Application 1 1 Cursors Figure 12-8. Example of Two Cursors on a Graph You also can click the direction diamonds on the Cursor Movement control on the cursor legend to move selected cursors in the specified direction. You select cursors by first moving them on the graph with the Operating Tool. To make the cursor legend visible, right-click the graph and select Visible Items»Cursor Legend. Classical IIR Filter Design Figure 12-9 shows the Classical IIR Design front panel. This front panel includes a graphical interface with the magnitude versus frequency cursors and plot on the left side and a text-based interface with digital controls on the right side. © National Instruments Corporation 12-11 Signal Processing Toolset User Manual Chapter 12 Digital Filter Design Application Figure 12-9. Classical IIR Design Front Panel Use this front panel to design classical IIR digital filters. These filters include the classic types of lowpass, highpass, bandpass, and bandstop, as well as the classic designs of Butterworth, Chebyshev, Inverse Chebyshev, and Elliptic. To design classical IIR filters, adjust the filter specifications. The passband and stopband requirements define a filter specification. You can define these requirements by using either the text-based interface or the cursors in the magnitude versus frequency graph. As you use the mouse to click and drag the cursors, the panel updates the text-based entries. Similarly, as you enter new specifications in the text-base interface, the panel updates the cursors. The lower passband frequency fp1, upper passband frequency fp2, and the passband response Gp define the passband specification. For the bandpass filter, the passband ranges from fp1 to fp2. The passband is the region in the frequency domain with a response near 1.0. Gp is the minimum allowable passband gain or filter magnitude response. In Figure 12-9, the passband is specified as having a minimum gain of –5 dB between the frequencies of fp1 = 1,900 Hz and fp2 = 2,600 Hz. Signal Processing Toolset User Manual 12-12 ni.com Chapter 12 Digital Filter Design Application The following ranges define the passband: lowpass 0 ≤ f ≤ fp 1 highpass fp 1 ≤ f ≤ f samp ⁄ 2 bandpass fp 1 ≤ f ≤ fp 2 bandstop 0 ≤ f ≤ fp 1 , fp 2 ≤ f ≤ f samp ⁄ 2 where fp1 is passband frequency 1 fp2 is passband frequency 2 fsamp is the sampling rate The lower stopband frequencies fs1 and fs2 and the stopband attenuation Gs define the stopband specification. For the bandpass filter, the stopband ranges from 0.0, DC to the lower stopband frequency fs1, and from the upper stopband frequency fs2 to half of the sampling rate, or the Nyquist rate. The stopband is the region in the frequency domain with a response near 0.0. Gs is the minimum acceptable stopband attenuation or filter magnitude response. In Figure 12-9, the stopband specification has a minimum attenuation of –40 dB between the frequencies of 0 and fs1 = 1,500 Hz and between the frequencies of fs2 = 3,000 Hz and 4,000 Hz. The following ranges define the stopband: fs 1 ≤ f ≤ f samp ⁄ 2 lowpass 0 ≤ f ≤ fs 1 highpass bandpass 0 ≤ f ≤ fs 1 , fs 2 ≤ f ≤ f samp ⁄ 2 bandstop fs 1 ≤ f ≤ 2 where fs1 is passband frequency 1 fs2 is passband frequency 2 fsamp is the sampling rate The Classical IIR Design front panel estimates the minimum filter order required for the selected type and design to meet or exceed the modified filter specifications. The DFD application automatically computes other appropriate filter parameters and designs, and plots the IIR filter. You see immediate graphical feedback to help you determine whether the filter meets your specifications. © National Instruments Corporation 12-13 Signal Processing Toolset User Manual Chapter 12 Digital Filter Design Application Classical IIR Design Front Panel Controls and Displays Use the Classical IIR Design front panel File menu to complete the following tasks: • Save your filter specifications and coefficients. • Load filter designs from previous work. • Open the Analysis or DAQ and Filter front panels. • Transfer the IIR design specifications to the Classical FIR Design front panel. • Transfer the poles and zeros to the Pole-Zero Placement front panel. • Return to the Main Menu dialog box. Magnitude-Frequency Plot The graph in Figure 12-9 plots the frequency response H(f) as magnitude of the designed digital filter. The magnitude, or y-axis, is in linear or decibel units, depending on how you set the dB/linear button. The frequency, or x-axis, is in hertz. The full scale ranges from 0.0 to Nyquist, or half the sampling rate. Cursors When you move the blue cursors, you control the passband response, or horizontal lines, and the passband frequencies, or vertical lines. When you move the red cursors, you control the stopband attenuation, or horizontal lines, and the stopband frequencies, or vertical lines. These cursors represent the filter design specifications for the selected classical IIR filter. In the passband, the filter has a gain greater than or equal to the specified passband response. In the stopband, the filter has a gain less than or equal to the specified stopband attenuation. dB/Linear Button Use the dB/linear button to control the display units, either dB or linear, of all magnitude and gain controls and displays. The magnitude and gain controls and displays include the y-axis of the magnitude versus frequency plot, the passband response, the stopband attenuation, and the magnitude tracking cursor. Signal Processing Toolset User Manual 12-14 ni.com Chapter 12 Digital Filter Design Application Frequency and Magnitude Indicators The frequency and magnitude indicators display the location of the square, transparent tracking cursor. This cursor is locked to the frequency response H(f), so moving this cursor updates the frequency and magnitude digital displays with data points from H(f). Text-Based Interface You can enter the complete filter specifications using the text-based portion of the Classical IIR Design front panel, which is the right-hand side of the front panel, shown in Figure 12-9. Use passband resp to define the minimum gain in the passband. The horizontal blue cursor line represents this response in the magnitude versus frequency plot. In the passband, the filter gain is guaranteed to be at least as high as the specified passband response (Gp). That is, H ( f ) ≥ Gp. When type is set to bandpass or bandstop, use the first value in passband freq to define one frequency edge of the passband. In the magnitude versus frequency plot, the left-hand vertical blue cursor line represents the first value in passband freq. Use the second value in passband freq to define the second frequency edge of the passband. In the magnitude versus frequency plot, the right-hand vertical blue cursor line represents the second value in passband freq. Use stopband atten to define the minimum attenuation in the stopband. In the magnitude versus frequency plot, the horizontal red cursor line represents stopband atten. In the stopband, the filter gain is guaranteed to be no higher than the specified stopband attenuation (Gs). That is, H ( f ) ≤ Gs. When type is set to bandpass or bandstop, use the first value in stopband freq to define one frequency edge of the stopband. In the magnitude versus frequency plot, the left vertical red cursor line represents the first value in stopband freq. Use the second value in stopband freq to define the second frequency edge of the stopband. In the magnitude versus frequency plot, the right vertical red cursor line represents the second value in stopband freq. © National Instruments Corporation 12-15 Signal Processing Toolset User Manual Chapter 12 Digital Filter Design Application Sampling Rate Control Use the sampling rate control to specify the sampling rate in samples per second, hertz. Type Control Use the type control to specify one of the following filter types: • Lowpass • Highpass • Bandpass • Bandstop Design Control Use the design control to specify one of the following filter design algorithms: • Butterworth • Chebyshev • Inverse Chebyshev • Elliptic Filter Order Indicator The filter order indicator displays the estimated filter order of the classical IIR filter. The DFD application automatically estimates the filter order as the lowest possible order that meets or exceeds the desired filter specifications. Message Window The message window displays errors that occur during the IIR design procedure. These errors occur when the filter specifications are inconsistent with the chosen filter type. Classical FIR Design Figure 12-10 shows the Classical FIR Design front panel. This front panel functions similarly to the Classical IIR Design front panel. The front panel includes a graphical interface with the magnitude versus frequency cursors and plot on the left side and a text-based interface with digital controls on the right side. Signal Processing Toolset User Manual 12-16 ni.com Chapter 12 Digital Filter Design Application Figure 12-10. Classical FIR Design Front Panel Use the Classical FIR Design front panel to design classical FIR digital filters. These filters include the classic types of lowpass, highpass, bandpass, and bandstop and use the Parks-McClellan equiripple FIR filter design algorithm. To design classical FIR filters, adjust the desired filter specifications. The passband and stopband requirements define a filter specification. You can define these requirements by using either the text-based interface or the cursors in the magnitude versus frequency graph. As you use the mouse to click and drag the cursors, the text entries update. Similarly, as you enter new specifications in the text-based interface, the cursors update. The lower passband frequency fp1, upper passband frequency fp2, and the passband response Gp define the passband specification. For the bandpass filter, the passband ranges from fp1 to fp2. The passband is the region in the frequency domain with a response near 1.0. Gp is the minimum allowable passband gain or filter magnitude response. In Figure 12-10, the passband specification is a minimum gain of –5 dB between the frequencies of fp1 = 1,900 Hz and fp2 = 2,600 Hz. © National Instruments Corporation 12-17 Signal Processing Toolset User Manual Chapter 12 Digital Filter Design Application The following ranges define the passband: lowpass 0 ≤ f ≤ fp 1 highpass fp 1 ≤ f ≤ f samp ⁄ 2 bandpass fp 1 ≤ f ≤ fp 2 bandstop 0 ≤ f ≤ fp 1 , fp 2 ≤ f ≤ f samp ⁄ 2 where fp1 is passband frequency 1 fp2 is passband frequency 2 fsamp is the sampling rate The stopband frequencies fs1 and fs2 and the stopband attenuation Gs define the stopband specification. For the bandpass filter, the stopband ranges from 0.0, DC to the lower stopband frequency fs1, and from the upper stopband frequency fs2 to half of the sampling rate, or Nyquist. The stopband is the region in the frequency domain with a response near 0.0. Gs is the minimum acceptable stopband attenuation or filter magnitude response. In Figure 12-10, the stopband specification has a minimum attenuation of –40 dB between the frequencies of 0 and fs1 = 1,500 Hz and between the frequencies of fs2 = 3,000 Hz and 4,000 Hz. The following ranges define the stopband: fs 1 ≤ f ≤ f samp ⁄ 2 lowpass 0 ≤ f ≤ fs 1 highpass bandpass 0 ≤ f ≤ fs 1 , fs 2 ≤ f ≤ f samp ⁄ 2 bandstop fs 1 ≤ f ≤ 2 where fs1 is passband frequency 1 fs2 is passband frequency 2 fpsamp is the sampling rate The Classical FIR Design front panel estimates the minimal filter order required for the selected type and design to meet or exceed the modified filter specifications. The DFD application automatically computes other appropriate filter parameters and designs, and plots the FIR filter. You see immediate graphical feedback to help you determine whether the filter meets your specifications. Signal Processing Toolset User Manual 12-18 ni.com Chapter 12 Digital Filter Design Application Classical FIR Design Front Panel Controls and Displays The Classical FIR Design front panel controls and displays are similar to those on the Classical IIR Design front panel but with two exceptions. The Classical FIR Design front panel has a minimize filter order checkbox but does not have a design control. Use the minimize filter order checkbox to specify whether the DFD application minimizes the estimated filter order. If you place a checkmark in the minimize filter order checkbox, the DFD application iteratively adjusts the filter order until it finds the minimum order that meets or exceeds the filter specifications. If you do not place a checkmark in the minimize filter order checkbox, the DFD application uses a fast formula to estimate the filter order to meet or exceed the desired filter specifications. Use the Classical FIR Design front panel File menu to complete the following tasks: • Save your filter specifications and coefficients. • Load filter designs from previous work. • Open the Analysis or the DAQ and Filter front panels. • Transfer the FIR design specifications to the Classical IIR Design front panel. • Return to the Main Menu dialog box. Refer to the Classical IIR Design Front Panel Controls and Displays section for information about the same controls and displays on the Classical FIR Design front panel. Pole-Zero Placement Filter Design Figure 12-11 shows the Pole-Zero Placement filter design front panel. The front panel includes a graphical interface with the z-plane pole and zero cursors and the magnitude versus frequency plot on the left side and a text-based interface with digital controls on the right side. © National Instruments Corporation 12-19 Signal Processing Toolset User Manual Chapter 12 Digital Filter Design Application Figure 12-11. Pole-Zero Placement Filter Design Front Panel Use the Pole-Zero Placement filter design front panel to design IIR digital filters by manipulating the filter poles and zeros in the z-plane. The poles and zeros initially could have originated from classical IIR designs. Use this front panel to move existing poles and zeros directly on the z-plane plot. You can add and delete poles and zeros and accurately control their important characteristics. You can describe the poles and zeros by using either the text-based interface or the cursors in the z-plane plot. As you use the mouse to click and drag the cursors, the text entries update. Similarly, as you enter new specifications in the text entries, the pole and zero cursors update. The following specifications describe pole-zero filter designs: • Pole and zero locations in the z-plane • Characteristics of each pole and zero • Gain • Sampling rate Any change in these parameters corresponds to a change in the filter coefficients. The DFD application matches the poles and zeros and Signal Processing Toolset User Manual 12-20 ni.com Chapter 12 Digital Filter Design Application creates stable second-order stages for IIR filter coefficients. The DFD application then uses these coefficients to compute the filter magnitude response. For immediate graphical feedback to your pole-zero filter designs, the magnitude versus frequency plot updates automatically when you change the poles or zeros. Pole-Zero Placement Front Panel Controls and Displays Use the Pole-Zero Placement front panel File menu to complete the following tasks: • Save your filter specifications and coefficients. • Load filter designs from previous work. • Open the Analysis or the DAQ and Filter front panels. • Return to the Main Menu dialog box. Z-Plane Plot In the z-plane plot, you can move each pole, represented by a red ×, anywhere within the unit circle along and above the x-axis. You can move each zero, represented by a blue o, anywhere along and above the x-axis. Click the delete selected button to delete the selected pole or zero. Click poles and zeros to select them. Click the add pole button to add a pole to the z-plane. The new pole is located at the origin. Click the add zero button to add a zero to the z-plane. The new zero is located at the origin. Coordinates Control Use the coordinates control to specify how the DFD application displays the poles and zeros, either in rectangular or polar coordinates. Array of Zeros in Rectangular Coordinates The Zeros section of the Pole-Zero Placement front panel, shown in Figure 12-11, is the array of zeros in rectangular coordinates indicator. The complex value of each zero represents its rectangular position on the z-plane. The integer, 3, in the upper-left box is the index of the displayed zero. By changing this index value, you can display a particular © National Instruments Corporation 12-21 Signal Processing Toolset User Manual Chapter 12 Digital Filter Design Application zero of the array of zeros. When you select a particular zero in the z-plane plot, the DFD application sets the index value of the array to the selected zero. If you place a checkmark in the real checkbox, the zero becomes purely real and is limited to real-axis movement. When you place a checkmark in the lp checkbox, the zero has linear phase. If the zero is not real or on the unit circle, the DFD application matches it with another zero at a radius of 1/r, where r is the radius of the original zero. The radius is the distance from the origin. Linear-phase zeros are important in linear-phase FIR filters. If your z-plane plot contains only zeros and all the zeros have linear phase, the FIR filter you designed has an overall linear phase response. If you place a checkmark in the uc checkbox, the zero must be located on the unit circle with a radius of 1.0 The zero is limited to movement along the unit circle. The order control specifies the order of the zero or the number of actual zeros at this location in the z-plane. An M th-order zero at z = b has a z-transform of H(z) = (z – b)M. Array of Poles in Rectangular Coordinates The Poles section of the Pole-Zero Placement front panel, shown in Figure 12-11, is the array of poles in rectangular coordinates. The complex value of each pole represents its rectangular position on the z-plane. The integer 0 in the upper-left box is the index of the displayed pole. By changing this index value, you can display a particular pole of the array of poles. When you select a particular pole in the z-plane plot, the DFD application sets the index value of the array to the selected pole. Whether poles are real is the only special characteristic that applies to poles. If you place a checkmark in the real checkbox, the pole becomes purely real and is limited to real-axis movement. The order text control specifies the pole order or the number of actual poles at this location in the z-plane. An M th-order pole at z = a has a z-transform of H(z) = (z – a)–M. If you change the coordinates to polar, the DFD application displays the poles and zeros in polar coordinates, as shown in Figure 12-12. Signal Processing Toolset User Manual 12-22 ni.com Chapter 12 Digital Filter Design Application Figure 12-12. Array of Zeros and Poles in Polar Coordinates Magnitude-Frequency Plot The magnitude versus frequency graph in Figure 12-11 plots the frequency response, H(f), and magnitude of the designed digital filter. The magnitude, y-axis, is in linear or decibel units, depending on how you set the linear/dB button in the upper-left corner of the graph. The frequency, x-axis, is in hertz. The full scale ranges from 0.0 to Nyquist, or half the sampling rate. Sampling Rate Control Use the sampling rate control to specify the sampling rate in samples per second, hertz. Gain Control Use the gain control to specify the gain constant for the designed filter. Increasing gain increases the overall gain of the designed filter. Setting the Normalize to ON adjusts the filter gain so that the maximum response is 1.0, 0 dB. If you set Normalize to ON, you cannot adjust the gain control manually. Setting the Normalize to OFF allows you to manually adjust the gain control but does not guarantee a maximum response of 1.0. Arbitrary FIR Design Figure 12-13 shows the Arbitrary FIR Design front panel. The front panel includes a graphical interface with the magnitude versus frequency cursors and plot on the left side and a text-based interface with digital controls on the right side. © National Instruments Corporation 12-23 Signal Processing Toolset User Manual Chapter 12 Digital Filter Design Application Figure 12-13. Arbitrary FIR Design Front Panel Use the Arbitrary FIR Design front panel to design arbitrary-magnitude FIR digital filters. Enter or modify the array magnitude response points, frequency and magnitude. From these points, the DFD application forms a desired magnitude response that covers the entire frequency range from 0.0 to Nyquist, or half the sampling rate. The DFD application then processes this desired response, along with the filter order, and uses the Parks-McClellan algorithm to design an optimal equiripple FIR filter. The Parks-McClellan algorithm minimizes the difference between the desired and the actual filter response across the entire frequency range. To design arbitrary-magnitude FIR filters, enter or modify the desired frequency-magnitude points and choose an interpolation type to generate the desired response between your specified points. The DFD application automatically designs and plots the equiripple FIR filter. You receive immediate graphical feedback to help you determine whether the filter meets your specifications. Signal Processing Toolset User Manual 12-24 ni.com Chapter 12 Digital Filter Design Application Arbitrary FIR Filter Design Front Panel Controls and Displays Use the Arbitrary FIR Design front panel File menu to complete the following tasks: • Save your filter specifications and coefficients. • Load filter designs from previous work. • Open the Analysis or the DAQ and Filter front panels. • Return to the Main Menu dialog box. Magnitude versus Frequency Graph The magnitude versus frequency graph in Figure 12-13 plots the desired and actual magnitude response of the designed FIR filter. The magnitude, y-axis, is in linear or decibel units, depending on how you set the linear/dB button in the upper-left corner of the graph. The frequency, x-axis, is in hertz. The full scale ranges from 0.0 to Nyquist, or half the sampling rate. Linear/dB Button Use the linear/dB button to control the display units, either linear or dB, of all magnitude and gain controls and displays. These controls and displays include the y-axis of the magnitude versus frequency plot, passband response, stopband attenuation, and the magnitude tracking cursor. # Points Control Use # points to specify the number of frequency-magnitude points the DFD application uses to create the desired filter magnitude-response. Reducing the value of # points deletes points from the end of the frequency-magnitude array. Increasing the value of # points inserts the additional number of points to the right of the selected point. Multiple Select Checkbox Place a checkmark in the multiple select checkbox to select more than one frequency-magnitude point on the response graph. Clicking a selected point removes that point from the selection list. Interpolation Control Use the interpolation control to select the type of interpolation the DFD application uses to generate the desired response from the array of frequency-magnitude points. Choose linear interp to create flat filters, © National Instruments Corporation 12-25 Signal Processing Toolset User Manual Chapter 12 Digital Filter Design Application such as lowpass, highpass, bandpass, and bandstop. Choose spline interp to create smoothly varying filters. Ins Button Click the ins button to insert a frequency-magnitude point between the selected point and the next point. If the selected point is the last point in the frequency-magnitude array, the DFD application inserts the new point between the last two points of the array. The DFD application inserts new points halfway along the line connecting the two outer points. Del Button Click the del button to delete the selected frequency-magnitude points. The DFD application deletes all selected points. Selected Points Indicator The selected points indicator displays the selected frequency-magnitude points. You can select points on the magnitude versus frequency graph by clicking the point. You also can select points directly from the frequency-magnitude array by clicking the circle to the right of each point. Array of Frequency-Magnitude Points The right side of the Arbitrary FIR Design front panel displays the array of frequency-magnitude points the DFD application uses to construct the desired filter magnitude response. The DFD application forms the desired filter response by interpolating between these points. The frequency of each point is in hertz. The magnitude is in linear or decibel units of gain, depending on the setting of the linear/dB button in the upper-left corner of the magnitude versus frequency graph. You can select points in this array by clicking the circle to the right of each point. Then, you can click the del button to delete the selected points. To move selected points, click the desired direction diamond in the cursor movement control in the lower-right corner of the magnitude versus frequency graph. Filter Order Control Use filter order to specify the total number of coefficients in the digital FIR filter. Signal Processing Toolset User Manual 12-26 ni.com Chapter 12 Digital Filter Design Application Ripple Indicator The ripple indicator displays the largest absolute error, linear, between the desired and actual filter responses. Message Window The message window displays errors that occurred during the FIR design procedure. Locked Frequencies Checkbox Place a checkmark in the locked frequencies checkbox to lock the present frequency values of the frequency-magnitude points. If you place a checkmark in this checkbox, you can alter only the magnitude, the y-value, of the frequency-magnitude points. Uniform Spacing Checkbox Place a checkmark in the uniform spacing checkbox to space the frequency values of the frequency-magnitude points. The DFD application spaces the frequency-magnitude points uniformly from 0.0 to half the sampling rate, inclusive. Before spacing the frequency-magnitude points, the DFD application displays a dialog box. Click the Uniform Spacing button to continue and the Cancel button to cancel the spacing operation. Sort by Frequency Button Click the sort by frequency button to sort the frequency-magnitude points in both the response graph and the array by ascending frequency. The value of each frequency-magnitude point remains unchanged. Only the order of the points can change. © National Instruments Corporation 12-27 Signal Processing Toolset User Manual Chapter 12 Digital Filter Design Application Import from File Button Click the import from file button to import frequency-magnitude points from a text file. The imported file format consists of the following tab-delimited columns: 1st line: 2nd line: 3rd line: 4th line: . . . last line: sampling rate frequency 1 frequency 2 frequency 3 . . . last frequency dB/linear setting (0 for linear, 1 for dB) magnitude 1 magnitude 2 magnitude 3 . . . last magnitude For example, a file with five frequency-magnitude points appears as 8000.0 1 0.0 –60.0 1000.0 –40.0 2000.0 –20.0 3000.0 0.0 4000.0 –60.0 Sampling Rate Control Use the sampling rate control to specify the sampling rate in samples per second, hertz. Analysis of Filter Design Front Panel Select File»Analysis from a filter design front panel toolbar to open the Analysis of Filter Design front panel, shown in Figure 12-14. Use the Analysis of Filter Design front panel to complete the following tasks: • View the filter magnitude response, phase response, impulse response, step response, and pole-zero plot. • View and print full-screen plots of each response. • Save the analysis results in the full-screen views to text files. The Analysis of Filter Design front panel uses the particular filter design specified in the filter design front panel from which it is opened to compute the various filter responses. You also can choose any of the four filter Signal Processing Toolset User Manual 12-28 ni.com Chapter 12 Digital Filter Design Application designs to analyze with the Design Analyzed control on the Analysis of Filter Design front panel, shown in Figure 12-14. The Analysis of Filter Design front panel uses the filter parameters from the selected filter design. Figure 12-14. Analysis of Filter Design Front Panel File Menu Use the File menu to complete the following tasks: • Load filter designs from previous work. • Open the DAQ and Filter front panel. • Go to the filter design front panel specified in Design Analyzed. • Return to the Main Menu dialog box. © National Instruments Corporation 12-29 Signal Processing Toolset User Manual Chapter 12 Digital Filter Design Application Design Analyzed Control Use the Design Analyzed control to select the filter control to analyze. Select File»Goto Design to load and run the filter design front panel selected with the Design Analyzed control. If you continue to modify the same filter design that the DFD application is analyzing, the application recomputes all filter responses. Analysis Displays Each of the five filter plots has a zoom box control in the upper-right corner. Click the zoom box to display a full-screen version of the plot. You can change the units in the full-screen versions of the following plots: • Magnitude Response—you can change the units from linear to decibel. • Phase Response—you can change the units from radians to degrees. • Impulse Response and Step Response—you can change the units from seconds to samples. At each full-screen view, you can save the response data to text files. Magnitude Response Plot Magnitude Response displays the magnitude of the filter response H(f) as frequency varies from zero to half the sampling rate. Phase Response Plot Phase Response displays the phase of the filter response H(f) as frequency varies from zero to the sampling rate. Impulse Response Plot Impulse Response displays the output of the digital filter when the input is a unit sample sequence, such as 1, 0, 0, … The input before the unity sample is also zero. Step Response Plot Step Response displays the output of the digital filter when the input is a unit step sequence, such as 1, 1, 1, … The input samples before the step sequence are defined as zero. Signal Processing Toolset User Manual 12-30 ni.com Chapter 12 Digital Filter Design Application Z-Plane Plot In the z-plane plot, each pole is represented by a red ×, and each zero is represented by a blue o. H(z) for IIR Filters H(z) is the z-transform of the designed digital filter. For an IIR filter, H(z) can be represented by a product of fractions of second-order z-polynomials: Ns H(z) = N k(z) ∏ ----------D (z) k=1 where k N k ( z ) is the numerator for stage k D k ( z ) is the denominator for stage k N s is the number of second-order stages You can view the N(z) and D(z) polynomials for other stages by incrementing the index shown in the upper-left side of the H(z) display. H(z) for FIR Filters H(z) is the z-transform of the designed digital filter. You can scroll through H(z) using the scroll bar. For an FIR filter, H(z) can be represented as a polynomial in z–1: order – 1 H(z) = ∑ hj z –j j=0 where j = 0, 1, …, order – 1 , h j represents the FIR filter coefficients, and order is the number of FIR coefficients. DAQ and Filter Front Panel Select File»DAQ and Filter from a filter design front panel toolbar to access the DAQ and Filter front panel, shown in Figure 12-15. Use the DAQ and Filter front panel to accomplish the following tasks: • © National Instruments Corporation Check the performance of your filter design on your own signals, if you have a National Instruments DAQ device. 12-31 Signal Processing Toolset User Manual Chapter 12 Digital Filter Design Application • Check the performance of your filter design with a simulated signal. • Configure your DAQ device and acquire your own signals. When filtering signals, the DAQ and Filter front panel uses the particular set of filter coefficients specified in the filter design front panel from which it is opened. The signal data passes through the designed filter, and the DFD application plots the input and output waveforms and spectrums. You also can use any of the four filter designs from the Filter Design control on the DAQ and Filter front panel, shown in Figure 12-15. The DAQ and Filter front panel uses the filter parameters from the selected design specification. Figure 12-15. DAQ and Filter Front Panel File Menu Use the File menu to complete the following tasks: • Load and test filter designs from previous work. • Open the Analysis of Filter Design front panel. • Go to the filter design front panel specified by Filter Design. • Return to the Main Menu dialog box. Signal Processing Toolset User Manual 12-32 ni.com Chapter 12 Digital Filter Design Application Filter Design Control Use the Filter Design control to designate the filter design to use in filtering the acquired signal. Select File»Goto Design to load and run the filter design front panel selected with the Filter Design control. Off/On Switch Use the off/on switch to specify whether you want the DFD to acquire blocks continuously or on demand. Set the switch to on to continuously acquire blocks of data. Set the switch to off to acquire data when the Acquire Once button is clicked. The Acquire Once button only appears when the switch is set to off. Function Generator Button If you select simulated DAQ in the source control on the DAQ Setup front panel, shown in Figure 12-16, a built-in simulated function generator provides signals to the DAQ and Filter front panel. On the DAQ and Filter front panel, click the Function Generator button to view and edit settings, including signal type, frequency, amplitude, and noise level. Time Waveform/Spectrum Control To change the view of a response plot, use the ring control above the plot. Select either Time Waveform or Spectrum for the input acquired signal or the output signal. Sampling Rate Indicator The actual sampling rate appears in the sampling rate indicator on the DAQ and Filter front panel, shown in Figure 12-15. DAQ Setup Button and DAQ Setup Front Panel Click the DAQ Setup button on the DAQ and Filter front panel to open the DAQ Setup front panel, shown in Figure 12-16. With the DAQ Setup front panel, you can change the data acquisition settings, such as the device number, number of samples to acquire, triggering parameters, or sampling rate. You also can set the signal source to either DAQ Device or simulated DAQ with the source control. © National Instruments Corporation 12-33 Signal Processing Toolset User Manual Chapter 12 Digital Filter Design Application Figure 12-16. DAQ Setup Front Panel Signal Processing Toolset User Manual 12-34 ni.com 13 IIR and FIR Implementation This chapter describes the filter implementation equations for IIR and FIR filtering and the format of the IIR and FIR filter coefficient files. Infinite Impulse Response Filters Infinite impulse response (IIR) filters are digital filters with impulse responses that, theoretically, can be infinite in length or duration. The general difference equation characterizing IIR filters is shown in Equation 13-1. Na – 1 Nb – 1 1 y i = ----ak yi – k bj xi – j – a0 j=0 k=1 ∑ ∑ (13-1) where Nb is the number of forward coefficients bj and Na is the number of reverse coefficients ak. In most IIR filter designs, coefficient a0 is 1. The output sample at the present sample index i consists of the sum of scaled present and past inputs (xi and xi – j when j ≠ 0) and scaled past outputs (yi – k). The response of the general IIR filter to an impulse where x0 = 1 and xi = 0 for all i ≠ 0 is called the impulse response of the filter. The impulse response of the filter described by Equation 13-1 has an infinite length for nonzero coefficients. In practical filter applications, however, the impulse response of stable IIR filters decays to near zero in a finite number of samples. The advantage of digital IIR filters over finite impulse response (FIR) filters is that IIR filters usually require fewer coefficients to perform similar filtering operations. Therefore, IIR filters execute much faster and do not require extra memory because they execute in place. The disadvantage of IIR filters is that the phase response is nonlinear. If the application does not require phase information, such as simple signal monitoring, IIR filters might be appropriate. Use FIR filters for applications that require linear phase responses. © National Instruments Corporation 13-1 Signal Processing Toolset User Manual Chapter 13 IIR and FIR Implementation IIR filters are also known as recursive filters or autoregressive moving-average (ARMA) filters. Refer to the works of Jackson [13], Oppenheim and Schafer [19], Parks and Burrus [20], and Parks and McClellan [21] [22] for more information about digital filter design. Cascade-Form IIR Filtering Filters implemented using the structure which Equation 13-1 directly defines are known as direct-form IIR filters. Direct form implementations often are sensitive to errors introduced by coefficient quantization and by computational precision limits. Additionally, a filter designed to be stable can become unstable with increasing coefficient length, which is proportional to filter order. You can obtain a less-sensitive structure by dividing the direct-form transfer function into lower-order sections, or filter stages. The direct-form transfer function of the filter given by Equation 13-1, with a0 = 1, can be written as a ratio of z transforms in Equation 13-2. –( Nb – 1 ) –1 b 0 + b 1 z + … + b Nb – 1 z H ( z ) = --------------------------------------------------------------------------–( N – 1 ) –1 1 + a 1 z + … + aNa – 1 z a (13-2) When you factor Equation 13-2 into second-order sections, the transfer function of the filter becomes a product of second-order filter functions: Ns H(z) = –1 –2 b 0k + b 1k z + b 2k z ------------------------------------------------–1 –2 1 + a 1k z + a 2k z k=1 ∏ where Ns = Na/2 is the largest integer less than or equal to Na/2 and Na ≥ Nb. This new filter structure can be described as a cascade of second-order filters, as shown in Figure 13-1. x [ i] Stage 1 Stage 2 ••• Stage Ns y [ i] Figure 13-1. Cascaded Filter Stages You can implement each second-order stage using the direct-form filter equations: y [ i ] = b0 x [ i ] + b1 x[ i – 1 ] + b2 x [ i – 2 ] – a1 y [ i – 1 ] – a2 y [ i – 2 ] Signal Processing Toolset User Manual 13-2 ni.com Chapter 13 IIR and FIR Implementation The illustration in Figure 13-2 shows the graphical representation of these direct-form equations. b0 x [i ] + y [i ] + z –1 z –1 b1 + + –a1 z –1 z –1 b2 –a2 Figure 13-2. Direct Form Structure For each stage, you must maintain two past inputs (x[i – 1], x[i – 2]) and two past outputs (y[i – 1], y[i – 2]). A more efficient implementation of each second-order stage is known as the direct-form II. You can implement each second-order stage using the direct-form II filter equations: s [ i ] = x [ i ] – a1 s [ i – 1 ] – a2 s [ i – 2 ] y [ i ] = b 0 s [ i ] + b 1 s [ i – 1 ] + b2 s [ i – 2 ] The illustration in Figure 13-3 shows the graphical representation of these direct-form II equations. © National Instruments Corporation 13-3 Signal Processing Toolset User Manual Chapter 13 IIR and FIR Implementation s [i ] x [i ] b0 + + z –1 –a1 y [i ] b1 + + z –1 –a2 b2 Figure 13-3. Direct Form II Structure Finite Impulse Response Filters FIR filters are digital filters with finite impulse responses. FIR filters are also known as nonrecursive filters, convolution filters, or moving-average (MA) filters because you can express the output of an FIR filter as a finite convolution: n–1 yi = ∑h x k i–k (13-3) k=0 where xi represents the input sequence to be filtered, yi represents the output filtered sequence, and hk represents the FIR filter coefficients. FIR filters have the following characteristics: • They can be designed to have linear phase by ensuring coefficient symmetry. • They are always stable. • You can perform the filtering function using the convolution. A delay generally is associated with the output sequence: n–1 delay = -----------2 where n is the number of FIR filter coefficients. Signal Processing Toolset User Manual 13-4 ni.com Chapter 13 IIR and FIR Implementation You design FIR filters by approximating a specified desired-frequency response of a discrete-time system. The most common techniques approximate the desired-magnitude response while maintaining a linear-phase response. Format of the Filter-Coefficient Text Files When you save your filter coefficients to a text file, the DFD application generates a readable text file that contains all the information you need to implement the designed FIR or IIR digital filter. This section describes the format for both FIR and IIR filter-coefficient files. FIR-Coefficient File Format Table 13-1 provides example FIR-coefficient text files and descriptions. You can use Equation 13-3 directly to implement the FIR filter. Table 13-1. FIR-Coefficient Text Files and Descriptions Coefficient File Example Description FIR filter coefficients type of file Sampling rate sampling rate label 8.000000E+3 sampling rate in Hz N filter order label 22 filter order h[0..21] coefficients label 6.350871E–3 first coefficient, h[0] –8.833535E–3 second coefficient, h[1] –2.847674E–2 . 4.626607E–2 . 4.103986E–2 . –1.114579E–1 –1.412791E–2 1.810791E–1 –5.984635E–2 © National Instruments Corporation 13-5 Signal Processing Toolset User Manual Chapter 13 IIR and FIR Implementation Table 13-1. FIR-Coefficient Text Files and Descriptions (Continued) Coefficient File Example Description –2.002337E–1 1.516199E–1 1.516199E–1 –2.002337E–1 –5.984635E–2 1.810791E–1 –1.412791E–2 –1.114579E–1 4.103986E–2 4.626607E–2 . –2.847674E–2 . –8.833535E–3 . 6.350871E–3 last coefficient, h[N – 1] IIR Coefficient File Format IIR coefficient files are slightly more complex than FIR coefficient files. IIR filters are usually described by two sets of coefficients, a and b coefficients. The total number of existing a coefficients equals M × S, and the total number of existing b coefficients equals (M + 1) × S, where M is the stage order, usually two, and S is the number of stages. An IIR filter with three second-order stages has two a coefficients per stage, for a total of six a coefficients, and three b coefficients per stage, for a total of nine b coefficients. You can use Equation 13-1 to implement the IIR filter in cascade stages and maintain two past inputs and two past outputs for each stage, or you can use the direct form II equations and maintain two past internal states. Table 13-2 provides example IIR-coefficient text files and descriptions. Signal Processing Toolset User Manual 13-6 ni.com Chapter 13 IIR and FIR Implementation Table 13-2. IIR-Coefficient Text Files and Descriptions Coefficient File Example © National Instruments Corporation Description IIR filter coefficients coefficient type Sampling rate sampling rate label 8.000000E+3 sampling rate in Hz Stage order stage order label 2 order of each stage Number of stages number of stages label 3 number of stages a coefficients a coefficients label 6 number of coefficients 3.801467E–1 a1 for stage 1 8.754090E–1 a2 for stage 1 –1.021050E–1 a1 for stage 2 9.492741E–1 a2 for stage 2 8.460304E–1 a1 for stage 3 9.450986E–1 a2 for stage 3 b coefficients b coefficients label 9 number of b coefficients 1.514603E–2 b0 for stage 1 0.000000E+0 b1 for stage 1 1.514603E–2 b2 for stage 1 1.000000E+0 b0 for stage 2 6.618322E–1 b1 for stage 2 1.000000E+0 b2 for stage 2 13-7 Signal Processing Toolset User Manual Chapter 13 IIR and FIR Implementation Table 13-2. IIR-Coefficient Text Files and Descriptions (Continued) Coefficient File Example Description 1.000000E+0 b0 for stage 3 1.276187E+0 b1 for stage 3 1.000000E+0 b2 for stage 3 Signal Processing Toolset User Manual 13-8 ni.com A Frequently Asked Questions This appendix addresses some questions users frequently ask. What is the difference between linear and quadratic JTFA methods? This package includes both linear and quadratic methods. Linear JTFA transforms include the following methods: • Gabor expansion, which is the inverse of short-time Fourier transform (STFT) • STFT, which computes the Gabor coefficients • Adaptive representation, which is the inverse of adaptive transform • Adaptive transform Quadratic JTFA algorithms include the following methods: • STFT spectrogram • Wigner-Ville Distribution (WVD) • Pseudo Wigner-Ville Distribution (PWVD) • Cohen’s class • Choi-Williams Distribution (CWD) • Cone-shaped distribution • Gabor spectrogram • Adaptive spectrogram If you consider linear JTFA to be an evolved form of conventional Fourier transform, then quadratic JTFA is the counterpart of the standard power spectrum. The difference between using linear and quadratic JTFA methods is that you can invert linear transform. As with fast-Fourier transform (FFT), you can use the Gabor coefficients to reconstruct the original signal. Linear transform is suitable for signal processing, such as time-varying filtering. In general, the quadratic form is not reversible. You cannot restore the original time waveform from the time-dependent spectrum. However, quadratic JTFA describes the energy distribution of the signal in the joint time-frequency domain, which is useful for signal analysis. © National Instruments Corporation A-1 Signal Processing Toolset User Manual Appendix A Frequently Asked Questions Which quadratic JTFA algorithms should I use? Each quadratic JTFA algorithm has advantages and disadvantages. You should select an algorithm that fits the application. Generally speaking, no algorithm is superior to all others in all applications. Table A-1 summarizes the advantages and disadvantages of all quadratic algorithms provided in this package. Table A-1. Quadratic JTFA Algorithms Resolution and Crossterm Description Method Adaptive spectrogram • extremely high resolution when a signal is made up of Gaussian pulses Speed slow • no crossterms • non-negative CWD less crossterm than PWVD very slow Cone-shaped distribution less crossterm interference than PWVD or CWD slow Gabor spectrogram • good resolution moderate • robust • minor crossterms PWVD • extremely high resolution for a few types of signals fast • severe crossterms STFT spectrogram • poor resolution fast • robust • non-negative If the frequency contents of the analyzed signal do not change rapidly, try the STFT spectrogram first. You can apply a relatively long window function to obtain a good frequency resolution with tolerable time resolution deterioration. Because the STFT spectrogram is fast, it is suitable for online analysis. The other algorithms generally have better joint time and frequency resolution than the STFT spectrogram, but they require more computation Signal Processing Toolset User Manual A-2 ni.com Appendix A Frequently Asked Questions time, which is only suitable for offline analysis. If you need a higher resolution, use the third- or fourth-order Gabor spectrogram to reduce crossterm interference and achieve faster processing speeds. National Instruments recommends that you complete the following steps when you analyze a signal: 1. Begin with the STFT and determine which analysis window is best—wideband, mediumband, or narrowband. 2. If you are satisfied with the results, use STFT. If not, continue with step 3. 3. If the STFT does not produce satisfactory results, try the Gabor spectrogram. Regardless of the analysis window you use, as the order increases, the Gabor spectrogram converges to the Wigner-Ville Distribution. If the order is low, the type of the analysis window influences the Gabor spectrogram, although the effect is not as large as the effect type has on the STFT. Select your Gabor spectrogram analysis window based on the window information obtained in step 1. 4. Increase the order until the crossterm interference is evident. For most applications, an order of three to five is adequate. 5. Reduce the data block length and increase the freq. zoom to examine detailed features. Can I measure a signal’s energy point-to-point in the joint time-frequency domain? This question addresses a fundamental issue in the joint time-frequency analysis area. Except for a few special cases, the answer is no. At this point, scientists know that no algorithm can meaningfully measure a signal’s energy point-to-point in the joint time-frequency domain. Roughly speaking, the result, P(t,w), of all quadratic JTFA algorithms indicates a certain type of weighted average energy near the point (t, f). Some algorithms take the average over a larger area, such as the STFT spectrogram. In this case, the time-frequency resolution is poor, but it is always greater than or equal to zero. Some methods cause heavy weights on a small number of points, such as the high-order Gabor spectrogram, which yields better time-frequency resolution. In this case, some points might approach negativity, which is not acceptable for certain applications. In short, every algorithm has advantages and disadvantages. Figure A-1 shows an STFT spectrogram with a test signal that contains 10 sine cycles at 10 Hz. Although the signal starts at t = 1 s and ends at t = 2 s, the STFT spectrogram clearly shows something before t = 1 s and after t = 2 s, as indicated by the arrows. The time-dependent spectrum © National Instruments Corporation A-3 Signal Processing Toolset User Manual Appendix A Frequently Asked Questions indicates that the signal not only contains 10 Hz, but that it possesses a certain bandwidth. Figure A-1. STFT Spectrogram (Hanning Window) You can apply other methods to substantially suppress the energy outside 1 s to 2 s and 10 Hz, and achieve a near point-to-point measurement. Figure A-2, shows the Gabor spectrogram. Most of the signal’s energy is between 1 s to 2 s and 10 Hz. As the order increases, the concentration also increases, and you come closer to achieving a point-to-point measurement. However, a higher order Gabor spectrogram produces negative values, which can cause problems with the classical energy definition. The Gabor spectrogram generally requires more computation time than the STFT spectrogram. Signal Processing Toolset User Manual A-4 ni.com Appendix A Frequently Asked Questions Figure A-2. Gabor Spectrogram (Order Four) What can I do if the time-dependent spectrum only shows a line at DC? If the analyzed signal is non-negative, such as an ECG or the stock index, or if it contains a large DC offset, the resulting time-dependent spectrum is dominated by a single line in the vicinity of DC. You might not be able to see more interesting frequency patterns. To suppress the DC component, you have to apply certain types of preprocessing. However, the methods for removing the DC components, or detrending, are application dependent. No general method works in all cases. Common techniques of detrending include lowpass filtering and curve fitting. However, a more promising technique is the wavelet transform. Refer to Part IV, Wavelet Analysis, for information on wavelet-based detrending. Can I use other software to plot the time-dependent spectrum? Yes. Save the time-dependent spectrum to a text file. The resulting text file contains only Z values and does not retain the time and frequency axis information. The time and frequency axis can be determined as follows. © National Instruments Corporation A-5 Signal Processing Toolset User Manual Appendix A Frequently Asked Questions When t0 and f0 are shown on the front panel of Offline Analyzer, the time increment ∆t is computed by the following equation: time span ∆t = -----------------------------------------number of rows and the frequency increment ∆f is determined by the following equation: sampling frequency ∆f = -------------------------------------------------------2 × zoom factor × 128 Signal Processing Toolset User Manual A-6 ni.com B References This appendix lists reference material that contains more information on the theory and algorithms implemented in the Signal Processing Toolset. [1] Bastiaans, B. “A sampling theorem for the complex spectrogram, and Gabor’s expansion of a signal in Gaussian elementary signals,” Optical Engineering, vol. 20, no. 4, pp. 594-598, July/August 1981. [2] Choi, H., and W. J. Williams. “Improved time-frequency representation of multicomponent signals using exponential kernels.” IEEE Trans. Acoustics, Speech, Signal Processing vol. 37.6 (1989):862–871. [3] Claasen, T. A. C. M., and W. F. G. Mecklenbräuker. “The Wigner Distribution—A tool for time-frequency signal analysis,” Phillips J. Res., vol. 35, pp. 217-250, pp. 276-300, pp. 1067-1072, 1980. [4] Cohen, L. “Generalized phase-space distribution functions.” J. Math. Phys. vol. 7 (1966):781–806. [5] Cohen, L. “Time-frequency distribution: A review.” Proc. IEEE vol. 77.7 (1989):941–981. [6] Cohen, L. Time-frequency analysis. Englewood Cliffs, N.J.: Prentice-Hall, 1995. [7] Crochiere, R. E., and L. R. Rabiner. Multirate Digital Signal Processing. Englewood Cliffs, N.J.: Prentice-Hall, 1983. [8] Donoho, D. L. “De-noise by soft thresholding.” IEEE Transactions Information Theory vol. 3.41 (1995): 613–627. [9] Haar, A. “Zur Theorie der Orthogonalen Funktionenysystem,” Math. Annal., Vol. 69, pp. 331-371, 1910. [10] Hua, Y., and T. K. Sarkar. “Matrix Pencil Method for Estimating Parameters of Exponentially Damped/Undamped Sinusoids in Noise.” IEEE Transaction on Acoustic, Speech, and Signal Processing vol. 38.5 (1990): 814–824. [11] Hubbard, B. B. The World According to Wavelets, A K Peters, Second Edition, Wellesley, Massachusetts, 1998. © National Instruments Corporation B-1 Signal Processing Toolset User Manual Appendix B References [12] Gabor, D. “Theory of communication,” J. IEE (London), vol. 93, no. III, pp. 429-457, November 1946. [13] Jackson, L. B. Digital Filters and Signal Processing. Boston: Kluwer, 1986. [14] Kay, S. M. Modern Spectral Estimation. Englewood Cliffs, N.J.: Prentice-Hall, 1987. [15] Kolmogorov, A. N. “Interpolation and Extrapolation von Stationaren Zufalligen Folgen.” Bull. Acad. Sci. USSR., Ser. Math. vol. 5 (1941): 3–14. [16] Mallat, S., and Z. Zhang. “Matching Pursuits with Time-Frequency Dictionaries,” IEEE Trans. Signal Process. vol. 41.12 (1993): 3397–3415. [17] Mallat, S. A Wavelets Tour of Signal Processing, Academic Press, 1998. [18] Marple, Jr., S. L. Digital Spectral Analysis with Applications. Englewood Cliffs, N.J.: Prentice-Hall, 1987. [19] Oppenheim, A. V., and R. W. Schafer. Discrete-Time Signal Processing. Englewood Cliffs, N.J.: Prentice-Hall, 1989. [20] Parks, T. W., and C. S. Burrus. Digital Filter Design. New York: John Wiley & Sons, Inc., 1987. [21] Parks, T. W., and J. H. McClellan. “A Program for the Design of Linear Phase Finite Impulse Response Filters.” IEEE Trans. Audio Electroacoustics vol. AU-20.3 (Aug. 1972a): 195–199. [22] Parks, T. W., and J. H. McClellan. “Chebyshev Approximation for Nonrecursive Digital Filters with Linear Phase.” IEEE Trans. Circuit Theory vol. CT- 19 (March 1972a): 189–194. [23] Qian, S., and J. M. Morris. “Wigner distribution decomposition and crossterm deleted representation.” Signal Processing vol. 25.2 (1992):125–144. [24] Qian, S., and D. Chen. “Discrete Gabor transform.” IEEE Trans. Signal Processing vol. 41.7 (1993):2429–2439. [25] Qian, S., and D. Chen. “Signal Representation Using Adaptive Normalized Gaussian Functions.” IEEE Trans. Signal Processing vol. 36.10 (1994):1–11. [26] Qian, S., and D. Chen. “Decomposition of the Wigner-Ville distribution and time-frequency distribution series.” IEEE Trans. Signal Processing vol. 42.10 (1994):2836–2841. [27] Qian, S., and D. Chen. Joint Time-Frequency Analysis. Englewood Cliffs, N.J.: Prentice-Hall, 1996. Signal Processing Toolset User Manual B-2 ni.com Appendix B References [28] Qian, S., and D. Chen. “Joint time-frequency analysis,” IEEE Signal Processing Magazine, vol. 16, No. 2, pp. 52-67, March 1999. [29] Shannon C.E., and W. Weaver. The Mathematical Theory of Communication, The University of Illinois Press, IL, 1964. [30] Strang, G., and T. Nguyen. Wavelets and Filter Banks. Wellesley, MA: Wellesley-Cambridge Press, 1995. [31] Vaidyanathan, P.P. Multirate Systems and Filter Banks, Englewood Cliffs, N.J.: Prentice-Hall, 1993. [32] Vaidyanathan, P.P., and T. Nguyen. “A ‘Trick’ for the Design of FIR Half-Band Filters.” IEEE Transactions on Circuits and Systems vol. 3 (March 1987): 297–300. [33] Ville, J. “Thovrie et applications de la notion de signal analylique,” (in French) Câbles et Transmission, vol. 2, pp. 61-74, 1948. [34] Wexler, J., and S. Raz. “Discrete Gabor expansions.” Signal Processing, vol. 21.3 (1990):207–221. [35] Whittaker, J. “Interpolaroty Function Theory,” Cambridge Tracts in Math. and Math. Physics, vol.33, 1935. [36] Wigner, E. P. “On the Quantum Correction for Thermodynamic Equilibrium,” Phys. Rev., vol. 40, pp. 749, 1932. [37] Williams, A. B., and F. J. Taylor. Electronic Filter Design Handbook. New York: McGraw-Hill, 1988. [38] Wold, H. Stationary Time Series. Uppsala, Sweden: Almqvist and Wiksell, 1938, republished 1954. [39] Xia, X. G., and S. Qian. “Convergence of an iterative time-variant filtering based on discrete Gabor transform.” IEEE Trans. on Signal Processing vol. 47 (1999). [40] Zhao, Y., L. E. Atlas, and R. J. Marks. “The use of cone-shaped kernels for generalized time-frequency representations of nonstationary signals.” IEEE Trans. Acoustics, Speech, Signal Processing, vol. 38.7 (1990):1084–1091. © National Instruments Corporation B-3 Signal Processing Toolset User Manual Technical Support and Professional Services C Visit the following sections of the National Instruments Web site at ni.com for technical support and professional services: • Support—Online technical support resources include the following: – Self-Help Resources—For immediate answers and solutions, visit our extensive library of technical support resources available in English, Japanese, and Spanish at ni.com/support. These resources are available for most products at no cost to registered users and include software drivers and updates, a KnowledgeBase, product manuals, step-by-step troubleshooting wizards, hardware schematics and conformity documentation, example code, tutorials and application notes, instrument drivers, discussion forums, a measurement glossary, and so on. – Assisted Support Options—Contact NI engineers and other measurement and automation professionals by visiting ni.com/ask. Our online system helps you define your question and connects you to the experts by phone, discussion forum, or email. • Training—Visit ni.com/custed for self-paced tutorials, videos, and interactive CDs. You also can register for instructor-led, hands-on courses at locations around the world. • System Integration—If you have time constraints, limited in-house technical resources, or other project challenges, NI Alliance Program members can help. To learn more, call your local NI office or visit ni.com/alliance. If you searched ni.com and could not find the answers you need, contact your local office or NI corporate headquarters. Phone numbers for our worldwide offices are listed at the front of this manual. You also can visit the Worldwide Offices section of ni.com/niglobal to access the branch office Web sites, which provide up-to-date contact information, support phone numbers, email addresses, and current events. © National Instruments Corporation C-1 Signal Processing Toolset User Manual Glossary Numbers/Symbols % Percent. ∞ Infinity. π Pi. 1D One-dimensional. 2D Two-dimensional. A alias term An image term in the frequency domain. alternating flip For a periodic sequence g[n] with a period N, the sequence (–1)ng[N – n] is considered the alternating flip of g[n]. analysis filter bank A filter bank that converts a signal from time domain into wavelet domain. B basis A core or fundamental function. biorthogonal filter bank A filter bank in which analysis and synthesis filter banks are orthogonal to each other. Butterworth filter A special kind of filter in which the low-frequency asymptope is a constant. C chirplet A complex chirp function with Gaussian envelope. constant Q analysis Analysis in which the ratio between the center frequency and frequency bandwidth is constant. © National Instruments Corporation G-1 Signal Processing Toolset User Manual Glossary CWD Choi-Williams distribution. D Daubechies wavelet and filter bank Wavelet and filter bank that has a maximum number of zeros at π. The wavelet and filter bank was initially developed by Ingrid Daubechies. dB Decibels. A logarithmic unit for measuring ratios of amplitude levels. If the amplitudes are specified in terms of power, then 1 dB = 10 × log 10 ( P ⁄ Pr ) where P is the measured power and Pr is the reference power. If the amplitudes are specified in terms of voltage, then 1 dB = 20 × log 10 ( V ⁄ Vr ) where V is the measured voltage and Vr is the reference voltage. decimation filter The output of the filter does not preserve all points. denoise Remove the noise from the original signal. DFD Digital Filter Design. distortion term A term that causes distortion in a filter output. DLL Dynamic Link Library. E equiripple filter A filter with equiripples in the passband and stopband. F FFT Fast Fourier Transform, an efficient and fast method for calculating the discrete Fourier transform. The number of samples must usually be a power of two. The fast Fourier transform (or the discrete Fourier transform) determines the amplitude and phase of the frequency components present in a time domain digital signal. filter bank A group of filters. finite impulse response filter A filter without feedback that only contains zeros in the z-domain. FIR Finite impulse response. Signal Processing Toolset User Manual G-2 ni.com Glossary frame Segment of time domain data. G Gaussian pulse A complex sinusoidal function with Gaussian envelope. H halfband filter A filter with a cut-off frequency at half of the frequency band. Hz Hertz. Cycles per second. I IEEE Institute for Electrical and Electronic Engineers. IIR filters Infinite impulse response filters. image compression Using only part of the data to recover the original image. inner product A mathematical operation used to test the difference between two functions. J JTFA Joint time-frequency analysis. M maximum flat filter A type I filter that has a maximum number of zeros at π. MB Megabytes of memory. mother wavelet An elementary wavelet. multicomponent signal A signal containing significant energy concentrated around more than one distinct and separate frequency. multiscale analysis Analyzing a signal in several different scales. © National Instruments Corporation G-3 Signal Processing Toolset User Manual Glossary N nonstationary signal Signal whose frequency content changes within a captured frame. Nyquist rate Half the sampling rate. O octave Interval between two frequencies, one of which is twice the other. For example, frequencies of 250 Hz and 500 Hz are one octave apart, as are frequencies of 1 kHz and 2 kHz. See also third-octave. orthogonal filter bank A filter bank where both the analysis and synthesis filter banks are orthogonal to themselves. It is a special case of biorthogonal filter banks. oversampling rate Ratio between the number of Gabor coefficients and the number of test samples. P preemphasis Filtering before processing. PWVD Pseudo Wigner-Ville Distribution. S sampling rate Rate at which a continuous waveform is digitized. signal discontinuity The point where the first derivative does not exist. spectral changes Changes in the frequency content of a signal. spectral leakage Phenomenon whereby the measured spectral energy appears to leak from one frequency into other frequencies. It occurs when a sampled waveform does not contain an integral number of cycles over the time period during which it was sampled. To reduce spectral leakage, multiply the time-domain waveform by the window function. See also window. spectrogram A display of the energy distribution of a signal with one axis being time and the other being frequency. STFT Short-time Fourier Transform. Signal Processing Toolset User Manual G-4 ni.com Glossary string controls and indicators Front panel objects used to manipulate and display, or input and output, text. synthesis filter bank A filter bank that transfers a signal from the wavelet domain into the time domain. T temporal Of or relating to time domain. third-octave Ratio between two frequencies, equal to 21/3. See also octave. two-dimensional Having two dimensions, such as an array with both rows and columns. type I filter The filter coefficients are symmetric around the middle point. W wavelet transform A transform using wavelet as the elementary functions. wavelet-based detrend A method of detrend, which is achieved by wavelet transform. window Technique used to reduce spectral leakage by multiplying the time-domain waveform by a window function. The process of windowing reduces the amplitudes of discontinuities at the edges of a waveform, which reduces spectral leakage. If the waveform contains an integral number of cycles, there is no spectral leakage. See also spectral leakage. WVD Wigner-Ville Distribution. © National Instruments Corporation G-5 Signal Processing Toolset User Manual Index Numerics 1D wavelet transform, 11-2 2D signal processing, 10-12 2D wavelet transform, 11-9 A accessing example application source code, 1-4 adaptive representation, 4-2 adaptive spectrogram, 3-4, 4-12, A-2 equation for, 4-12 JTFA example, 5-5 adaptive transform, 4-2 algorithms adaptive representation, 4-2 adaptive spectrogram, 4-12 adaptive transform, 4-2 Choi-Williams distribution (CWD), 4-9 Cohen’s class, 3-4, 4-8 cone-shaped distribution, 4-10 estimating number of complex sinusoids minimum description length, 7-9 Gabor expansion, 4-1 Gabor spectrogram, 4-11 linear vs. quadratic, A-1 parameter estimation, 7-6 matrix pencil method, 7-9 Prony’s method, 7-9 point-to-point measurement of a signal, A-3 pseudo Wigner-Ville distribution (PWVD), 4-5 selecting, A-2 SRSA, 7-1, 7-6 covariance, 7-6 PCAR, 7-7 STFT, 4-1 STFT spectrogram, 4-3 © National Instruments Corporation Wigner-Ville distribution, 4-5 Analysis of Filter Design front panel, 12-6, 12-28 applications DFD, 1-4, 12-1 accessing, 12-2 editing preferences, 12-3 loading filter specification files, 12-3 obtaining information about, 12-3 opening front panels, 12-3 quitting, 12-3 digital filter design, 1-4, 12-1 JTFA, 5-1 SRSA, 8-1 wavelet analysis, 11-1 1D wavelet transform, 11-2 2D wavelet transform, 11-9 wavelet packet, 11-12 Wavelets Designer, 11-15 Wavelets Designer front panel, 11-15 Wavelets Designer front panel (figure), 11-16 approaches to JTFA, 3-3 AR, 7-2, 7-4, 7-5 ARMA, 7-1, 7-2 Atlas, L.E., B-3 auto-regressive and moving average. See ARMA auto-regressive. See AR B bibliography, B-1 biorthogonal filter banks, 10-4 block diagram accessing example, 1-4 Index-1 Signal Processing Toolset User Manual Index C classical IIR, 12-11 front panel controls and indicators, 12-14 passband ranges, 12-13 stopband ranges, 12-13 DAQ and Filter front panel, 12-31 DAQ Setup front panel, 12-33 pole-zero placement, 12-19 front panel controls and indicators, 12-21 specifications for, 12-20 DFD, 1-4, 12-1 accessing, 12-2 designing filters arbitrary FIR, 12-23 classical FIR, 12-16 classical FIR passband ranges, 12-18 classical FIR stopband ranges, 12-18 classical IIR, 12-11 classical IIR passband ranges, 12-13 classical IIR stopband ranges, 12-13 pole-zero placement, 12-19 pole-zero placement specifications, 12-20 editing preferences, 12-3 filter specifications filename extensions (table), 12-5 transfers (table), 12-7 front panels, 12-4 Analysis of Filter Design, 12-6, 12-28 analyzing filter designs, 12-6 arbitrary FIR, 12-25 classical FIR, 12-19 classical IIR, 12-14 DAQ and Filter, 12-6, 12-31 DAQ Setup, 12-33 Function Generator, 12-6 graph cursors, 12-10 graph palette, 12-9 loading filter specifications, 12-5 Chen, D., B-2 Choi, H., B-1 Choi-Williams distribution, 3-4, A-2 equation for, 4-9 JTFA example, 5-6 Cohen, L., B-1 Cohen’s class, 3-4, 4-8 equation for, 4-8 cone-shaped distribution, 3-4, 4-10, A-2 equation for, 4-10 JTFA example, 5-7 contacting National Instruments, C-1 conventions used in this manual, xiv covariance method, 7-6 crossterm interference, 3-4, 4-5, 4-9, 4-11 customer education, C-1 professional services, C-1 technical support, C-1 CWD. See Choi-Williams distribution D damped sinusoids, 7-5 DAQ and Filter front panel, 12-6, 12-31 DAQ Setup front panel, 12-33 DC component, A-5 designing filters Analysis of Filter Design front panel, 12-28 arbitrary FIR, 12-23 front panel controls and indicators, 12-25 classical FIR, 12-16 front panel controls and indicators, 12-19 passband ranges, 12-18 stopband ranges, 12-18 Signal Processing Toolset User Manual Index-2 ni.com Index E panning and zooming, 12-7 plot legend, 12-8 pole-zero placement, 12-21 returning to Main Menu dialog box, 12-7 saving filter coefficients, 12-5 saving filter specifications, 12-5 testing filter designs, 12-6 transferring filter designs, 12-7 Zoom palette, 12-10 Zoom palette (figure), 12-9 interaction with related applications (figure), 12-2 loading filter specification files, 12-3 Main Menu dialog box, 12-2 obtaining information about, 12-3 opening front panels, 12-3 quitting, 12-3 diagnostic resources, C-1 digital filter design. See DFD distribution Choi-Williams, 3-4 equation for, 4-9 JTFA example, 5-6 cone-shaped, 3-4 equation for, 4-10 JTFA example, 5-7 Wigner-Ville, 2-5, 3-4 equation for, 4-5 JTFA example, 5-6 documentation conventions used in manual, xiv online library, C-1 drivers instrument, C-1 software, C-1 © National Instruments Corporation entropy types (table), 10-15 equiripple filters, 11-19 positive, 11-19 estimating number of complex sinusoids, 7-9 example code, C-1 examples DFD, 1-4, 12-1 accessing, 12-2 editing preferences, 12-3 loading filter specification files, 12-3 obtaining information about, 12-3 opening front panels, 12-3 quitting, 12-3 JTFA, 5-1, 5-2 adaptive spectrogram, 5-5 calculating mean instantaneous frequency, 5-8 changing spectrogram display, 5-7 Choi-Williams distribution, 5-6 cone-shaped distribution, 5-7 detrending, 5-3 displaying data, 5-7 frequency zooming, 5-8 Gabor spectrogram, 5-5 loading data, 5-2 saving results, 5-9 selecting method, 5-3 setting sampling rate, 5-3 STFT spectrogram, 5-4 Wigner-Ville distribution, 5-6 SRSA, 8-1 wavelet analysis, 11-1 1D wavelet transform, 11-2 2D wavelet transform, 11-9 wavelet packet, 11-12 Wavelets Designer, 11-15 Wavelets Designer front panel, 11-15 Wavelets Designer front panel (figure), 11-16 Index-3 Signal Processing Toolset User Manual Index F I filter banks biorthogonal, 10-4 designing (figure), 11-17 discrete, 10-1 orthogonal, 10-10 relationship to wavelet transform coefficients (figure), 10-4 two-channel perfect reconstruction, 10-1 relationship to wavelet transform, 10-3 filters equiripple, 11-19 general, 11-19 maximum flat, 11-19 Fourier transform, 2-2 compared to wavelet analysis, 9-6 frequently asked questions, A-1, C-1 Function Generator, 12-6, 12-33 installing Signal Processing Toolset, 1-5 instrument drivers, C-1 J joint time-frequency analysis. See JTFA JTFA, 3-1 Advanced JTFA palette, 1-2 algorithms, 4-1 adaptive representation, 4-2 adaptive spectrogram, 4-12 adaptive transform, 4-2 Choi-Williams distribution (CWD), 4-9 Cohen’s class, 3-4, 4-8 cone-shaped distribution, 4-10 Gabor expansion, 4-1 Gabor spectrogram, 4-11 linear, 4-1 pseudo Wigner-Ville distribution (PWVD), 4-5 quadratic, 4-3, A-2 STFT, 4-1 STFT spectrogram, 4-3 Wigner-Ville distribution (WVD), 4-5 applications, 5-1 approaches to, 3-3 Easy Level JTFA palette, 1-2 example, 5-1 adaptive spectrogram, 5-5 calculating mean instantaneous frequency, 5-8 changing spectrogram display, 5-7 Choi-Williams distribution, 5-6 cone-shaped distribution, 5-7 detrending, 5-3 displaying data, 5-7 G Gabor expansion, 2-5, 3-4, 4-1 Gabor spectrogram, 2-8, 3-4, 4-11, A-2 detecting aneurysms, 2-10 earthquake engineering, 2-12 equation for, 4-11 JTFA Example, 5-5 Gabor, Dennis, 3-4 general equiripple filter, 11-19 graph palette, 12-9 H help professional services, C-1 technical support, C-1 Signal Processing Toolset User Manual Index-4 ni.com Index N frequency zooming, 5-8 Gabor spectrogram, 5-5 loading data, 5-2 saving results, 5-9 selecting method, 5-3 setting sampling rate, 5-3 STFT spectrogram, 5-4 Wigner-Ville distribution, 5-6 introduction to, 1-2 LabWindows/CVI, 1-2 need for, 3-1 quadratic, 3-4 Refnum JTFA palette, 1-2 National Instruments customer education, C-1 professional services, C-1 system integration services, C-1 technical support, C-1 worldwide offices, C-1 O online technical support, C-1 orthogonal filter banks, 10-10 P K palette Adv Sig Processing, 1-2 Advanced JTFA, 1-2 Advanced SRSA, 1-3 Advanced Wavelet, 1-4 Easy Level JTFA, 1-2 Easy Level SRSA, 1-3 Easy Level Wavelet, 1-4 Refnum JTFA, 1-2 SPT JTFA, 5-1 SRSA, 8-1 wavelet analysis, 11-1 Wavelet Packet, 1-4 parameter estimation algorithms for, 7-6 matrix pencil method, 7-9 Prony’s method, 7-9 example, 8-1 PCAR, 7-7 phone technical support, C-1 plot legend, 12-8 point-to-point measurement, A-3 positive equiripple filter, 11-19 KnowledgeBase, C-1 L LabWindows/CVI JTFA, 1-2 SRSA, 1-3 wavelet analysis, 1-4 linear JTFA, 3-4 linear JTFA algorithms, 4-1 linear vs. quadratic methods, A-1 M MA, 7-2 Marks, R.J., B-3 matrix pencil method, 7-9 maximum flat filter, 11-19 measuring signal energy, A-3 minimum length description algorithm, 7-9 model-based frequency analysis. See SRSA Morris, J.M., B-2 moving average. See MA © National Instruments Corporation Index-5 Signal Processing Toolset User Manual Index principle component auto-regressive method. See PCAR professional services, C-1 programming examples, C-1 Prony’s method, 7-9 pseudo Wigner-Ville distribution (PWVD), 4-5, A-2 STFT, 3-4 equation for, 4-3 JTFA example, 5-4 SPT palette JTFA, 5-1 SRSA, 8-1 wavelet analysis, 11-1 SRSA, 6-1 Advanced SRSA palette, 1-3 algorithms for, 7-1 covariance, 7-6 PCAR, 7-7 applying methods of, 6-6 comparing FFT, 6-7 JTFA, 6-7 to wavelets, 6-7 damped sinusoids, 7-5 Easy Level SRSA palette, 1-3 examples, 8-1 introduction to, 1-2 LabWindows/CVI, 1-3 model coefficients, 7-3 models, 7-1 AR, 7-2, 7-4, 7-5 ARMA, 7-1, 7-2 auto-regressive, 7-2 auto-regressive and moving average, 7-1 MA, 7-2 moving average, 7-2 need for, 6-1 performing, 8-2 loading data, 8-3 selecting damped sinusoid estimation method, 8-6 selecting SRSA method, 8-6 selecting window type, 8-6 setting number of complex sinusoids, 8-5 setting sampling rate, 8-5 Q Qian, S., B-2 quadratic JTFA, 3-4 algorithms for, 4-3 quadratic vs. linear methods, A-1 R Raz, S., B-3 references, B-1 residual equation, 5-6 S saving time-dependent spectrums to a text file, A-5 selecting an algorithm, A-2 short-time Fourier transform (STFT), 3-3, 4-1 signal energy measurements, A-3 Signal Generator, 8-3 Signal Processing Toolset role in signal processing, 2-15 software drivers, C-1 source code accessing examples, 1-4 spectrogram adaptive equation for, 4-12 JTFA example, 5-5 Gabor, 2-8, 3-4 equation for, 4-11 JTFA example, 5-5 Signal Processing Toolset User Manual Index-6 ni.com Index using data from text files, 8-5 using synthetic data, 8-3 power spectra, 7-3 STFT compared to wavelet analysis, 9-6 STFT spectrogram, 3-4, 4-3, A-2 equation for, 4-3 JTFA example, 5-4 super-resolution spectral analysis. See SRSA support technical, C-1 suppressing the DC component, A-5 Synthetic Data front panel, 8-3 system integration services, C-1 system requirements, 1-5 applications of, 9-9 denoise, 9-12 detecting discontinuity, 9-9 detrending, 9-11 multiscale analysis, 9-10 compared to Fourier transform, 9-6 computing frequency, 9-3 Easy Level Wavelet palette, 1-4 entropy types (table), 10-15 examples, 11-1 1D wavelet analysis, 11-2 2D wavelet transform, 11-9 using the 1D wavelet transform example, 11-4 using the 2D wavelet transform example, 11-10 wavelet packet, 11-12 Wavelets Designer, 11-15 Wavelets Designer front panel, 11-15 Wavelets Designer front panel (figure), 11-16 filter banks biorthogonal filter, 10-4 orthogonal, 10-10 two-channel perfect reconstruction, 10-1 fundamentals of, 9-1 introduction to, 1-3 LabWindows/CVI, 1-4 performance issues, 9-13 procedure for (figure), 9-5 relationship of wavelet transform coefficients to filter banks (figure), 10-4 relationship to two-channel perfect reconstruction filter banks, 10-3 SPT palette, 11-1 using discrete filter banks, 10-1 Wavelet Packet palette, 1-4 wavelet packets, 10-14 T technical support, C-1 telephone technical support, C-1 time-dependent spectrum plotting with other software, A-5 saving to a text file, A-5 time-frequency transform, 2-8 training customer, C-1 transform, 2-1 Fourier, 2-2, 9-1 compared to wavelet analysis, 9-6 short-time Fourier, 3-3 time-frequency, 2-8 wavelet, 2-6 troubleshooting resources, C-1 two-channel perfect reconstruction filter banks, 10-1 W wavelet analysis 2D signal processing, 10-12 Advanced Wavelet palette, 1-4 © National Instruments Corporation Index-7 Signal Processing Toolset User Manual Index wavelet packets, 10-14 example, 11-12 wavelet transform, 2-6 wavelets designing (figure), 11-17 designing, procedure for, 11-17 factorizing P0(z) into G0(z) and H0(z), 11-20 finding the product P0(z), 11-18 selecting filter bank type, 11-18 using the Wavelets Designer (figure), 11-16 examples using the wavelet packet example, 11-13 Wavelets Designer, 11-15 additional utilities, 11-22 front panel (figure), 11-16 opening front panel, 11-15 Web professional services, C-1 technical support, C-1 Wexler, J., B-3 Wigner, Eugene P., 3-4 Wigner-Ville distribution, 2-5, 3-4, 4-5 equation for, 4-5 JTFA example, 5-6 Williams, W.J., B-1 works cited, B-1 worldwide technical support, C-1 WVD. See Wigner-Ville distribution X Xia, X.G., B-3 Z Zhao, Y., B-3 Zoom palette, 12-10 Signal Processing Toolset User Manual Index-8 ni.com