1
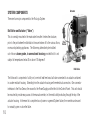
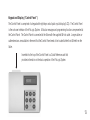
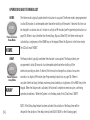
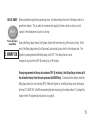
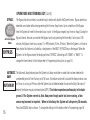
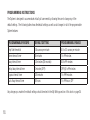
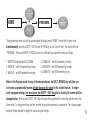
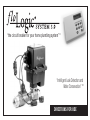
“the circuit breaker for your home plumbing system” ®
“Intelligent Leak Detection and
Water Conservation” TM
DIRECTIONS FOR USE
Date of Purchase / Installation
Installed By
Attach receipt here
Contents
General Information .........................4-5
Basic Operation................................6-9
System Components.....................10-13
Operations and Terminology..........14-17
Programming Instructions.............18-27
Disabling System / Sensor Testing.... 28
Addendum
Display Messages.........................30-33
My Settings........................................34
Drip Rate Table...................................35
Quick Reference....................Back Cover
GENERAL INFORMATION
Congratulations on your purchase and installation of the FloLogic System® 3.0 (“System”). You can now
relax knowing that your home or business is constantly protected against flooding due to leaks or failures
in its plumbing system. In addition, the System will give you early notice of water wastage due to leaks that,
according to the EPA, account for 14% of domestic water use in the USA. The FloLogic System will monitor
and control virtually all water flowing through a residence or building’s plumbing system. The System works by detecting and timing the flow of water through the inlet water pipe of any given structure. There are two basic operating modes for the System, Home and Away; the difference is the occupancy status
of the building and thus the amount of water that is expected to be used. The default detectable flow rate has
been embedded in the software at 2.0 ounces per minute. Once flow above 2.0 ounces per minute is detected,
the System allows water to flow for whatever length of time the user has stipulated for each of the modes. The
4.
default timer interval for the Home mode is 30 minutes, and the Away mode is 30 seconds. Switching
from Home mode to Away mode, and conversely from Away mode to Home mode, is accomplished by
simply pressing the corresponding key on the Control Panel. When water flow is detected that exceeds
the preset timer intervals, the water is turned off, an audible alarm is sounded and the wall-mounted
LCD panel displays the message “LEAK”. If connected to a security system, the System will communicate the leak condition to your security monitoring company so they can notify you of the problem, no
matter where your travels may take you. The FloLogic System also includes several convenience features
and allows the user to change any of the default timer intervals if so desired. Another feature that
distinguishes the FloLogic System from others in the market is a patented process whereby the System
periodically “exercises” the ball valve to ensure the product is operating correctly and will respond when
called upon. No other automatic shut-off system can provide this unique and comforting feature.
5.
Control Panel
6.
BASIC OPERATION
Home vs. Away
Upon System start-up the LCD panel will read “HOME” indicating that the Home timer is in effect. Unless previously changed by the user, the timer interval for the Home mode is 30 minutes. When before the System sounds an alarm and turns off the water.
When you wish to change to Away mode, press the AWAY key. Unless previously changed by the user, the timer interval for the Away mode is 30 seconds. When you switch from Home mode HOME
the display reads “HOME”, this is the length of time that water will be allowed to run uninterrupted
AWAY
Switches to Away
Mode
AWAY HOME
in the Valve closing and the reopening. During this time you may hear the motor turning the valve. To exit the Away mode, simply press the HOME key to return to the Home mode.
Flow Indication
to Away mode, the display will read “AWAY” and the Valve will enter an exercise cycle that results *
When water is running anywhere in the building monitored by the FloLogic System, a rotating pinwheel will appear on the right side of the LCD screen. On the left side of the display, a text
message will continue to indicate the current operating mode for the System. The pinwheel is illuminated within a few seconds once water begins running and will disappear within a few
seconds after the water has stopped running.
7.
BASIC OPERATION (Cont’d)
As an added security feature, the FloLogic System will automatically place itself into the Away mode (Auto Away)
after detecting no water flow for an extended period of time. The default interval timer embedded in the software for
this function is 18 hours and can be changed to a value as low as 1 hour and as high as 99 hours, or this feature can
be completely disabled by the user (see Programming Instructions on page 18). Clearing Alarms
When either the Home or Away timer limits are exceeded, the System will turn off the water, display “LEAK” on the LCD and sound a low-decibel, audible alarm at the Control Panel.
To disable the audible alarm, press the DISABLE key. DISABLE
Silences Alarm
8.
HOME
Restores Water
Service
Once the source of the leak has been identified and corrective action taken, press the
HOME key to restore water service. During the first few minutes of water service restoration, the pinwheel may illuminate as any previously emptied pipes are refilled with water.
This is normal and will stop as your plumbing system refills and is purged of air.
Water Shutoff
from Keypad
NEXT BYPASS
+
If you want to manually turn off the water to the building protected by the FloLogic
System, you can accomplish this by simultaneously pressing the NEXT / BYPASS key and the DISABLE key at the Control Panel. When the Valve is closed by this
keystroke command, the display will read “WATER.OFF”. DISABLE
Water Off
Turn
WATER.OFF
HOME
Restores Water
Service
NOTE: Pressing and holding the DISABLE key slightly before the NEXT / BYPASS
key will ensure you don’t accidentally place the System in Bypass Mode (see Bypass
Mode description on page 16).
Restoration of water service is accomplished by simply pressing the HOME key.
HOME
9.
Actuator
SYSTEM COMPONENTS
There are four major components to the FloLogic System:
Ball Valve and Actuator (“Valve”)
This is normally mounted in the main water line after it enters the structure,
prior to the point where the distribution lines are broken off to the various floors,
Flow
Sensor
rooms and plumbing appliances. The Valve may alternatively be installed
out-of-doors above grade, in an enclosed housing provided that it is not subject to temperatures below 35 or above 115 degrees F. Ball Valve
The Valve unit is comprised of a full-port, one-inch lead free brass ball valve connected to an actuator contained
in a water resistant housing. Extending from the actuator housing are three electrical connectors. One connector
interfaces to the Flow Sensor, the second to the Power Supply and the third to the Control Panel. This unit should
be mounted to provide easy access to the manual override, i.e. the metal shaft protruding through the top of the
actuator housing. In the event of a complete loss of power or a general System failure, the override can be used
to manually open or close the Valve.
10.
Flow Sensor (“Sensor”)
The Flow Sensor is directly connected to the Valve assembly via one of the three electrical connectors. The Sensor
is responsible for the detection of water running through the System. While the Sensor is able to detect flow as low
as 0.5 ounce per minute, the software monitoring the Sensor has been factory pre-set to recognize 2.0 ounces of
flow per minute as the point when the flow timer is initiated. Depending on your specific needs, you can adjust the
sensitivity of the Sensor (see Programming Instructions on page 18).
The Flow Sensor has been designed as a field-replaceable item, as the service life of this component is dependent
on the water quality where the System is installed. Water hardness and debris, such as sand or silt, may shorten
the expected life of the Sensor. Water treatment regimens such as filtration and softening may lengthen the life of
the Sensor. A replacement Sensor can be ordered from FloLogic at www.flologic.com. In addition, FloLogic has
optional extended warranty plans that provide for periodic replacement of this component.
11.
SYSTEM COMPONENTS (Cont’d)
System Battery and AC Adapter (“Power Supply”)
The Power Supply is comprised of a 12 volt, 4.5 amp-hour rechargeable, sealed-lead-acid battery connected to an
AC adapter. The adapter is connected to the Valve assembly with a 15-foot cable. The battery and AC adapter must
be located in a protected environment such as a crawl space, basement, or in a watertight outdoor enclosure. The Power Supply AC requires access to AC power within 6 feet of the AC adapter. The battery is required to turn the valve and will power the System in the event of an AC power failure. The length
of time the battery will power the System is dependent on several variables, including air temperature and the age
of the battery. When new, the standard battery should power the System for a minimum of five days provided the
battery is located in an environment with temperatures between 50 and 90 degrees F. When AC power is restored,
the battery will gradually recharge. A complete battery discharge due to prolonged power loss will substantially
shorten battery life and may necessitate an immediate replacement. A replacement battery can be purchased in
many stores or ordered directly from FloLogic.
The replacementt battery should be 12VDC and rated at a minimum of 4 amp hours (4AH).
12.
Keypad and Display (“Control Panel”)
The Control Panel is comprised of a keypad with eight keys and a liquid crystal display (LCD). The Control Panel
is the sole user interface of the FloLogic System. All status messages and programming functions are presented at
the Control Panel. The Control Panel is connected to the Valve with the supplied 50-foot cable. Longer cables or
cable extensions are available in the event that the Control Panel needs to be located further than 50 feet from the
Valve.
Inserted into the top of the Control Panel is a Quick Reference card that
provides information on the basic operation of the FloLogic System.
13.
OPERATIONS AND TERMINOLOGY
HOME
The Home mode is typically used when the structure is occupied. The Home mode is preprogrammed
to allow 30 minutes of uninterrupted water flow before shutting off the water. If desired, this time can
HOME
System in
Places
Home Mode
page 18). When in any state other than Home (Away, Bypass, Water Off), the Home mode may be activated by a single press of the HOME key on the keypad. When the System is in the Home mode,
the LCD will read “HOME”.
HOME
AWAY
The Away mode is typically used when the structure is unoccupied. The Away mode is pre-
programmed to allow 30 seconds of uninterrupted water flow before shutting off the
AWAY
System in
Places
Away Mode
water and sounding an alarm. If desired, this time can be changed to a value as low as zero
seconds or as high as 99 minutes (see Programming Instructions on page 18). When in
any state other than Away, the Away mode may be activated by a single press of the AWAY key on the
keypad. When the Away mode is activated, the Valve will complete an exercise cycle, confirming
operational readiness. When the System is in the Away mode, the LCD will read “AWAY”. NOTE: If the Delay Away feature has been activated, the activation of the Away timer will be
delayed for the duration of the delay interval (see DELAY AWAY on the following page).
AWAY
14.
be changed to a value as low as 1 minute or as high as 99 minutes (see Programming Instructions on DELAY AWAY When activated through the programming menu, this feature delays the start of the Away mode for a
preset time interval. This is useful for someone who regularly flushes a toilet or starts a load of
AWAY
laundry or the dishwasher just prior to leaving. Places System in
Away Mode
During the Delay Away interval, the System utilizes the Home timer (e.g. 30 minutes of flow). At the
end of the Delay Away interval, the System will automatically place itself into the Away mode. The
D. AWAY
XX
System is preprogrammed with Delay Away set to OFF. This delay interval can be
changed to any value from OFF (0 minutes) up to 99 minutes. Once programmed with any value above OFF (0 minutes), the Delay Away interval will
be activated every time the user presses the AWAY key. To deactivate this feature, reset the Delay Away interval to zero minutes (OFF). When the System is in the Delay Away mode, the display
will read “D. AWAY XX”, with XX representing the time remaining in the delay interval. To change this
feature, refer to Programming Instructions on page 18.
15.
OPERATIONS AND TERMINOLOGY (Cont’d)
BYPASS
The Bypass function provides a convenient way to temporarily disable the System timers. Bypass permits an
NEXT
BYPASS
extended use of water without reprogramming the Home or Away timers. Upon completion of the Bypass
time, the System will revert to the mode it was in prior to the Bypass request (e.g. Home or Away). During the
Activates
Bypass Bypass interval, the user can override the Bypass function by pressing the Home key. Factory set at 120
Mode
BYPASS
minutes, the Bypass timer has a range of 1 to 999 minutes (16 hrs, 39 mins). When the System is in Home or
Away mode, this feature is activated by a single press of the NEXT / BYPASS key on the keypad. When the
System is in the Bypass mode, the display will read “BYPASS” alternating with “HOME” or “AWAY”. To
change the timer interval for this feature refer to Programming Instructions on page 18.
AUTOMATIC The Automatic Away feature places the System into Away mode after no water flow has been detected for
AWAY
an extended period of time. Factory set at 18 hours, this feature can be set to activate the Away mode as soon
as 1 hour or as long as 99 hours after the System has last detected water flow above the Drip Rate value. If
AUTOAWAY
16.
desired, the feature may also be deactivated (OFF). This feature operates continuously in the back-
ground. If the System reverts to Auto Away even though water has been running, a flow
sensor replacement is required. When in Auto Away the System will chirp every 20 seconds. Press the DISABLE key to silence. To change the settings for this feature, refer to Programming page 18.
DRIP RATE This feature allows the user to change the flow detection baseline to accommodate intermittant low-use water demand from appliances such as humidifiers as well as known “nuisance leaks” such as leaky toilet valves and drippy faucets. The System ships from the factory with a default Drip Rate of 2.0 ounces
per minute. Based on the specific characteristics of your plumbing system, the Drip Rate setting can be changed to a higher or lower threshold. The System does not start the Home or Away timers until the Drip Rate is exceeded.
This feature operates continuously in the background and thus will have no visual
indication on the display of its status except when using the programming menu. To change the default value for this feature, refer to Programming Instructions on page 18.
NOTE: Caution should be used when changing the Drip Rate value. Lowering the Drip Rate can
result in frequent “false alarms.” Raising the Drip Rate will allow elevated volumes of water to flow
undetected into your home or business. See the reference table on page 35 for Drip Rate water flow equivalents over daily, monthly, and annual periods.
17.
Programming Instructions
The System is designed to accommodate virtually all user needs by allowing the user to change any of the
default settings. The following table shows the default settings as well as valid ranges for all of the programmable
System features: PROGRAMMABLE FEATURE
DEFAULT SETTING
PROGRAMMABLE RANGE
Drip Rate threshold
2.0 ounces per minute
0.5 to 32 ounces per minute
Home interval timer
30 minutes
1 to 99 minutes
Away interval timer
0.5 minutes (30 seconds)
0.0 to 99 minutes
Delay Away interval timer
0 minutes (OFF)
OFF (0) to 99 minutes
Bypass interval timer
120 minutes
1 to 999 minutes
Auto Away interval timer
18 hours
1 to 99 hours, OFF
Any changes you make in the default settings should be noted in the My Settings section of this book on page 34.
18.
ACCEPT
EXIT
HOME
+
PROGRAM
NEXT
BYPASS
PROG
The programming menu can only be accessed when the display reads “HOME”. To enter the Program mode,
simultaneously press the ACCEPT / EXIT key and the PROG key on the Control Panel. The display will read
“PROGRAM”. Pressing the NEXT / BYPASS key will scroll through the programming menu as follows:
1. DRIP.RATE alternates with X.X OZ/MIN
2. HOME XX – with XX representing minutes
3. AWAY XX – with XX representing minutes
4. D.AWAY XX – with XX representing minutes
5. BYPASXXX – with XXX representing minutes
6. A.AWAY XX – with XX representing hours
When in the Program mode for any of the above features, the NEXT / BYPASS key will take you
to the next programmable feature without changing the value for the current feature. To implement a program change, you must press the ACCEPT / EXIT key prior to leaving the screen with the
changed value. Pressing the ACCEPT / EXIT key will update the program with the new value and then exit to the
Home mode. To change more than one item, re-enter the programming menu as noted above. The following pages
explain the steps required to change the various program settings.
19.
Programming Instructions (Cont’d)
Drip Rate
If you have a known, low-flow water demand from an appliance such as a humidifier or nuisance
Programming leak such as a dripping faucet and the System is regularly turning off the water, it may be
necessary for you to raise the detectable flow baseline of the System. Any setting above 0.0
ounces per minute (0.0 OZ/M) is referred to as your Drip Rate. The System is shipped with a
default Drip Rate setting of 2.0 ounces per minute. Changing this Drip Rate to a lower number
DRIP.RATE
2.0 OZ/M
can result in a higher incidence of “false alarms”. Raising this to a higher number can result in
prolonged, chronic water use that is either running down the sewer or is leaking somewhere out
of sight in your home or business.
Prior to changing the Drip Rate, please check that all faucets are off and no toilets are running.
Follow the steps outlined on page 19 to get into the Program mode and scroll to the Drip Rate
screen using the NEXT / BYPASS key. When the display reads “DRIP.RATE” and alternates with
“X.X OZ/M”, you can either query the System to show how much water is flowing in your home
or business or adjust the Drip Rate value manually. The table found on the inside back cover gives you a perspective of how
20.
much each Drip Rate value equates to in water usage over time.
Automatic
PROG
Samples Drip
Rate
X.X OZ/M
When on the Drip Rate screen, to sample the water flow currently running in the building, press the PROG
key. The display will change to show the volume of water flowing through the sensor in ounces per
minute. If the detected flow exceeds 32.0 ounces per minute, the display will read “INVALID”. If you wish
to change the Drip Rate to accommodate the measured value, press the ACCEPT / EXIT key. To exit the
Drip Rate programming menu without making changes, press the NEXT / BYPASS key.
Manual
As a second option, you can manually raise or lower the Drip Rate threshold by pressing the UP or DN
UP
DN
keys on the keypad. To accept this change, press the ACCEPT / EXIT key. This will store the new Drip Rate
value in the program, exit you from the programming menu and return the System to Home mode.
To exit the Drip Rate programming menu without making changes and move to the next
X.X OZ/M
programmable feature (Home timer), press the NEXT / BYPASS key.
Accept Changes
ACCEPT
EXIT
ACCEPTED
21.
Programming Instructions (Cont’d)
Home Timer After you have entered the Program menu, press the NEXT / BYPASS key to scroll to the
Programming “HOME XX” screen. The XX will be a number between 1 and 99 with the default setting at 30, HOME
30
To increase or decrease this value, press the UP or DN key to scroll to the desired number of
UP
minutes. To accept this change, press the ACCEPT / EXIT key. This will store the new Home timer value
in the program, exit you from the programming menu and return the System to Home mode. DN
To exit the Home timer programming menu without making changes and move to the next
ACCEPT
EXIT
ACCEPTED
22.
representing 30 minutes of allowable flow in the Home mode. programmable feature (Away timer), press the NEXT / BYPASS key.
Away Timer After you have entered the Program menu, press the NEXT / BYPASS key to scroll to the
Programming “AWAY XX” screen. The XX will be a number between 0.0 and 99 with the default setting at 0.5, representing 30 seconds of allowable flow in the Away mode. To increase or decrease this value, press the UP or DN key to scroll to the desired number of
UP
minutes. To accept this change, press the ACCEPT / EXIT key. This will store the new DN
Home mode. ACCEPT
EXIT
To exit the Away timer programming menu without making changes and move to the next
AWAY 0.5
Away timer value in the program, exit you from the programming menu and return the System to
programmable feature (Delay Away timer), press the NEXT / BYPASS key.
ACCEPTED
23.
Programming Instructions (Cont’d)
Delay Away Timer After you have entered the Program menu, press the NEXT / BYPASS key to scroll to the
Programming “D.AWAY XX” screen. The XX will be a value between OFF and 99 (minutes) with the
D.AWAY.OFF
UP
default setting at OFF. Setting a value above OFF will cause the switch to the Away mode to be
delayed each time the Away mode is activated. If you wish to raise or lower this value, press the UP or DN key to scroll to the desired number of
minutes. To accept this change, press the ACCEPT / EXIT key. This will store the new Delay Away
DN
ACCEPT
EXIT
timer value, exit you from the programming menu and return the System to Home mode.
NOTE: During the Delay Away interval, the Home flow timer limit will be in effect.
After the Delay Away interval has expired, the Away timer limit will be in effect. The
Delay Away interval will be used every time the System is placed into Away mode.
ACCEPTED
24.
To exit the Delay Away timer menu without making changes and move to the next programmable feature (Bypass timer), press the NEXT / BYPASS key.
Bypass Timer
Programming
After you have entered the Program menu, press the NEXT / BYPASS key to scroll to the
setting at 120. BYPAS 120
UP
DN
“BYPASXXX” screen. The XXX will be a number between 001 and 999 (minutes) with the default
If you wish to raise or lower this value, press the UP or DN key to scroll to the desired number of
minutes. To accept this change, press the ACCEPT / EXIT key. This will store the new Bypass
timer value , exit you from the programming menu and return the System to Home mode.
To exit the Bypass timer menu without making changes and move to the next programmable ACCEPT
EXIT
feature (Auto Away timer), press the NEXT / BYPASS key.
ACCEPTED
25.
Programming Instructions (Cont’d)
Auto Away Timer After you have entered the Program menu, press the NEXT / BYPASS key to scroll to the
Programming “A.AWAY XX” screen. The XX will be a value between 1 and 99 (hours) or OFF with the
default setting at 18 (hours). If you wish to raise or lower this value, press the UP or DN key to scrollto the desired number
A.AWAY 18
UP
of hours. To accept this change, press the ACCEPT / EXIT key. This will store the new Auto
DN
Home mode.
Away value in the program, exit you from the programming menu and return the System to
ACCEPT
EXIT
NOTE: With Auto Away set to OFF, the System never automatically switches itself
ACCEPTED
To exit the Auto Away menu without making changes and move to the next screen (Exit), press
26.
into the Away mode and detection of a failed flow sensor will be diminished. the NEXT / BYPASS key.
Exiting
Programming
To exit the programming mode when the LCD indicates “EXIT?”, press
any changes and return the System to Home mode.
EXIT ?
ACCEPT
EXIT
the ACCEPT / EXIT key. This will exit you from programming without making
To scroll back to the top of the programming menu, press the NEXT / BYPASS key.
HOME
27.
DISABLING / RE-ENABLING SYSTEM
To disable the System so it is not actively responding to leaks, while in the Home mode, simultaneously press the
PROG and DISABLE keys. The screen will read DISABLE?. Press the ACCEPT / EXIT key within three (3) seconds. The screen will read DISABLED.
PROG
+ DISABLE
HOME
DISABLE?
ACCEPT
EXIT
DISABLED
To re-enable the System when the display reads DISABLED, simultaneously press the PROG and DISABLE keys. The
screen will read ENABLE?. Press the ACCEPT / EXIT key within three (3) seconds. The display will read HOME.
FLOW SENSOR TEST (Perform Semi-Annually)
In order to ensure proper operation of the System, the Flow Sensor should be tested every six months. If the System
switches to AUTOAWAY when the home is occupied, this may be due to a failed sensor and the following test should
be conducted as soon as possible. HOME
No Flow Detected
HOME
*
Flow Detected
While in the Home mode, turn on a faucet or flush a toilet. Look for the flow indicator (pinwheel) on the display. If
there is no flow indication, your sensor will need to be replaced. Call FloLogic at (877) 356-5644 for a replacement.
28.
ADDENDUM
Normal Messages..................................30
Fault Messages......................................31
Programming Messages........................32
External Contact Closure Messages.......33
My Settings............................................34
Drip Rate Table.......................................35
29.
OPERATIONAL MODE MESSAGES – DISPLAYED DURING NORMAL OPERATION
HOME
Home timer setting in effect
Press AWAY to activate Away mode
AWAY
Away timer setting in effect
Press HOME to exit Away mode
D.AWAY XX
Home timer in effect. System will automatically switch to Away timer after XX minutes
Press HOME to exit from Delay Away
BYPASS or EXT. BYPASS
Home and Away timers temporarily disabled
System will revert to Home or Away mode after Bypass
interval expires. Press HOME to manually exit Bypass mode
OVERRIDE
System is overidden by external device such
as an irrigation system or water softener
Wait for external device to finish cycle
WATER.OFF
Water has been turned off at Control Panel.
Press HOME to restore water
DISABLED
System is disabled
Press PROG+DISABLE then ACCEPT to re-enable system
LEAK
HOME or AWAY timer limit exceeded.
Water turned off
Press DISABLE to silence the audible alarm then
HOME to restore water
EXT. LEAK
External device instructed FloLogic to
turn off water. Water turned off
Clear condition on external device. Press
DISABLE to silence and HOME to restore water
AUTO.AWAY
Away mode auto-activated. No water flow
above Drip Rate for Auto Away interval.
Press DISABLE to silence chirp or HOME to exit Away mode. IF NEEDED,CHECK SENSOR (see page 28)
30.
ATTENTION REQUIRED - ERROR NOTIFICATION MESSAGES
AC LOST
AC power supply interrupted and System
is operating on battery
Check circuit breaker to AC outlet and make
sure power supply is plugged in. Alarm
clears when AC power restored
SYS.DOWN
Valve inoperable typically due to missing
or discharged battery
Check / Replace battery. Press DN key till
beeping stops. Valve will cycle in 8 secs.
VAL.FAIL
Valve unable to detect open/closed
position or does not rotate on power-up
Call 877-356-5644 for assistance
COMM ERR
Keypad and valve not communicating
Call 877-356-5644 for assistance
CHK BATT
Battery missing or not detected
Reconnect battery. Press DN key till beeping stops. Valve will cycle in 8 secs.
CHG BATT
Battery unable to hold charge and needs
replacement
Connect new battery. Press DN key till
beeping stops. Valve will cycle in 8 secs.
CHK PS
Power supply fault detected
Press DN key ftill beeping stops to restart
System. If message remains, press UP key
till screen clears and keypad resets
31.
PROGRAMMING MESSAGES – DISPLAYED ONLY WHEN IN PROGRAM MODE
PROGRAM
Initial screen in Programming mode
Press NEXT to go to Drip Rate or EXIT to exit
Program mode
DRIP.RATE
alternates with
XX OZ/MN
XX is current Drip Rate setting
(in ounces per minute)
Press PROG to sample current rate or UP
/ DN keys to manually change setting, then
press ACCEPT to change or NEXT to go to
Home setting screen
HOME XX
XX is current Home mode timer setting
(in minutes)
Press UP / DN, then press ACCEPT to change
or NEXT to go to Away setting screen
AWAY XX
XX is current Away mode timer setting
(in minutes)
Press UP / DN, then press ACCEPT to change
or NEXT to go to Delay Away setting screen
D.AWAY XX or
D.AWAY.OFF
XX or OFF is current Delay Away timer
setting (in minutes)
Press UP / DN, then press ACCEPT to change
or NEXT to go to Bypass setting setting
BYPASXXX
XXX is current Bypass timer setting
(in minutes)
Press UP / DN, then press ACCEPT to change
or NEXT to go to Auto Away setting screen
A.AWAY XX
XX is current Auto Away timer setting
(in hours)
Press UP / DN, then press ACCEPT to change
or NEXT to go to program Exit screen
EXIT?
End of Program menu
Press ACCEPT to exit programming or NEXT
to return to initial screen in program menu
32.
EXTERNAL CONTACT CLOSURE MESSAGES
(from external devices connected to FloLogic keypad via dry contacts)
EXT AWAY
Away timer activated by external device
such as a home security system
Deactivate external system to return to
Home mode
EXT LEAK
External system or device requested emergency water shutoff. Water is turned off.
After clearing external alarm condition,
press DISABLE to silence alarm then
HOME to restore water service
EX.BYPASS
External device such as an irrigation
system or water softener has initiated
Bypass mode. Home and Away timers are
temporarily disabled
System automatically reverts to Home
or Away mode after Bypass interval
expires. Press and hold HOME key to
force exit from Bypass mode
OVERRIDE
External device such as an irrigation
system or water softener has disabled the
Home and Away timers
System automatically reverts to Home or
Away mode when external system opens
contacts
33.
MY SETTINGS
34.
PROGRAMMABLE FEATURE
DEFAULT SETTING
Drip Rate threshold
2.0 oz. per minute
Home interval timer
30 minutes
Away interval timer
0.5 minutes (30 seconds)
Delay Away interval timer
0 minutes (OFF)
Bypass interval timer
120 minutes
Auto Away interval timer
18 hours
ENTER YOUR SETTINGS HERE
The table below gives you a perspective of how much each Drip Rate value equates to in water usage over time.
OZ / MINUTE GAL / DAY
GAL / MONTH
GAL / YEAR
1.0
11.25
337
4,106
2.0
22.5
675
8,212
4.0
45
1,350
16,425
6.0
67.5
2,025
24,637
8.0
90
2,700
32,850
12.0
135
4,050
49,274
16.0
180
5,400
65,700
20.0
225
6,750
82,120
24.0
270
8,100
98,548
28.0
315
9,450
113,400
32.0
360
10,800
129,600
Based on EPA statistics, the average home in the USA has plumbing leakage averaging 2.5 oz / minute. This is equivalent to 10,000 gallons annually per home or over 1 Trillion gallons nationally.
35.
Quick Reference
1PRT005.03
1-2012
HOME key - places system in Home mode
AWAY key - places system in Away mode
BYPASS / NEXT key - temporarily disables Home and Away timers
DISABLE key + BYPASS / NEXT key - turns the water off
Restore Water Service
Press DISABLE to silence alarm (if needed) then HOME to turn on water
Test Flow Sensor (Perform semi-annually)
While in Home mode, turn on faucet or flush toilet. Confirm flow indicator (pinwheel) illuminates on LCD
Disable System
Press both PROG+DISABLE then ACCEPT to disable the FloLogic System
Re-Activate System
When disabled press both PROG+DISABLE then ACCEPT to re-enable the FloLogic System
FloLogic, Inc.
7413-130 Six Forks Road
Raleigh, NC 27615
www.flologic.com
877-FloLogic (877-356-5644)