1
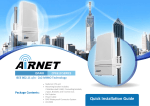
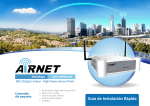
Quick Installation Guide AIRNET 54Mb 802.11b/g Low Cost Indoor Access Point with passive PoE AIR-AP100GH Package Contents: Airnet Low Cost Indoor Access Point Power Adapter Detachable antenna CD-ROM 1 Installing and Using the . Wireless Indoor AP This chapter provides a step-by-step guide to the installation and configuration of this Wireless Indoor Access Point. Connect the power adapter with the connector end to the power socket in the rear panel of the device and the plug end to an appropriate outlet. Connect the LAN port with an RJ-45 cable to: 1. A broad band router to allow wireless clients to connect to WAN. 2. A switch to allow wireless clients to communicate with wired LAN. 3. A computer directly to use the computer configuring this AP. Note: You have to configure the network settings of this AP to be communicable with your router, switch or computer first. To change the default network settings of the AP, please refer to “LAN Interface setup” in user’s manual. Connect this AP wirelessly: You can communicate with this AP wirelessly after connecting this AP to your LAN. The default SSID of this AP is WLAN-11g-AP. To change the SSID or secure your wireless network with encryption, please refer to the user’s manual that came with the CD. Setup Requirements Before starting, please verify that the following is available: CAT5/5e Ethernet cable (from the indoor AP to switch or PC) At least one computer is installed with a Web browser and a wired or wireless network interface adapter TCP/IP protocol is installed and IP address parameters are properly configured on all your network’s nodes Important! Configure and verify the indoor AP operations first before you mount the unit in a remote location. For choosing the best location for your Indoor AP choose an elevated location where obstacles will not obstruct the antenna signals and which offers maximum line-of-sight propagation with the users. 2 PC Configuration . Before configuring the Indoor AP you need to establish Ethernet connectivity between your PC and the AIRNET Low Cost Indoor Access Point, by default the indoor AP has the IP address 192.168.1.1. Therefore, your PC must be in the same network segment as the AIRNET Indoor Access Point is to get Ethernet connectivity. Step 1 Go to Start button, then go to My Network Places and finally click on Network Connections. Right-Click over your network adapter and select Properties. Step 2 Select the Internet Protocol Option and then click in Properties. Step 3 Now configure the IP Address of your network adapter with an IP in the same Network segment as your AIRNET Indoor Access Point is as it is shown in the picture, you don’t need to assign any gateway address. Press OK and then press the Close button. 3 Common Configurations . Before using this wireless AP, you have to configure the wireless AP through your computer with a WEB browser installed. Please follow the steps listed below: Getting Started Double click the Internet WEB browser icon on your desktop screen. Type 192.168.1.1 into the URL and press Enter. Note: The IP address of your computer should be within the same range with the IP address of this AP. The default network settings of this AP: IP Address: 192.168.1.1 Subnet Mask: 255.255.255.0 DHCP Server: disabled The Username and Password Required window appears: Enter admin in the User Name Location. Enter admin in the Password Location. Click “OK” button 4 Congratulations With these basics steps you can enjoy your wireless link without problems, please for more information about the capabilities and advanced configuration of our product please see the user manual. Contact Information Address: 2134 NW 99th Avenue, Miami FL 33172 Phones: (+1) 305-418-2232 Fax: (+1) 305-418-9266 Sales and ordering: American Customers: [email protected] Worldwide Customers: [email protected] Latin American and Spanish Customers: [email protected] Technical Support: Worldwide and English Customers: [email protected] Latin American Customers: [email protected]