1
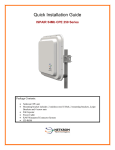
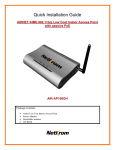
ISPAIR
CPE610 SERIES
IEEE 802.11 a/n - 2x2 MIMO Technology
Package Contents:
Netkrom CPE unit
Mounting bracket includes:
2 stainless steel U-Bolt, 2 mounting brackets,
2 pipe, Brackets and 4 screw nuts
PoE Injector
Power Cable
RJ45 Waterproof Connector System
CD-ROM
Quick Installation Guide
Quick
Installation
Guide
1
Hardware
Installation
ISPAIR
CPE610 SERIES
Warnings
Do not work on the system or connect or disconnect cables during periods of lightning activity.
NETKROM shall not be liable for incidental or consequential damages resulting from the furnishing, performance, or use of
this manual.
Do not locate the antenna near overhead power lines or other electric light or power circuits, or where it can come into
contact with such circuits. When installing the antenna, take extreme care not to come into contact with such circuits, as they
may cause serious injury or death.
Only trained and qualified personnel should be allowed to install, replace, or service this equipment.
To meet regulatory restrictions, the radio and the external antenna must be professionally installed. The network
administrator or other IT professional responsible for installing and configuring the unit must be a suitable professional
installer. Following installation, access to the unit should be password protected by the network administrator to maintain
regulatory compliance.
The ISPAIR CPE 610 and PoE injector can be damaged by incorrect power application. Read and carefully follow the installation
instructions before connecting the system to its power source.
High Capacity Wireless Networks
www.netkrom.com
2
Quick
Installation
Guide
1
Hardware
Installation
ISPAIR
CPE610 SERIES
Package contents
Take a moment to ensure you have all of the following parts in your Outdoor Waterproof Unit installation kit before you begin
installing the product. If any parts are missing, please contact your local vendor or contact us, please see the contact
information in Section 6.
High Capacity Wireless Networks
www.netkrom.com
3
Quick
Installation
Guide
1
Hardware
Installation
ISPAIR
CPE610 SERIES
Setup Requirements
Before starting, please verify that the following is available:
CAT5/5e or FTP Outdoor Ethernet cable (from the CPE to PoE Injector)
At least one computer is installed with a Web browser and a wired or wireless
network interface adapter
TCP/IP protocol is installed and IP address parameters are properly configured
on all your network’s nodes
Important!
Configure and verify the CPE operations first before you mount the unit in a
remote location.
You may need to install a lightning arrestor to protect your CPE from lightning.
For choosing the best location for your CPE choose an elevated location where
trees, buildings and large steel structures will not obstruct the antenna signals
and which offers maximum line-of-sight propagation with the users.
High Capacity Wireless Networks
www.netkrom.com
4
Quick
Installation
Guide
1
Hardware
Installation
ISPAIR
CPE610 SERIES
ISPAIR CPE 610 Installation
Step 1:
Connect one end of your UTP or FTP Outdoor cat.5 Ethernet cable
with waterproof connector to the RJ-45 connector located in the
CPE. Then connect the other end of the cable to the PoE injector.
For the Netkrom PoE, the recommended length of the Category 5
cable is up to 260 feet or 80 meters.
1.
enclosure nut
Remove the thin enclosure nut from the feedthru assembly.
This can be discarded. Loosen the compression nut completely.
2.
Insert the RJ45 connector thru the feedthru assembly.
3.
Tighten the compression nut loosely to the feedthru assembly.
feedthru
assembly
compression nut
High Capacity Wireless Networks
www.netkrom.com
5
Quick
Installation
Guide
1
Hardware
Installation
4.
Screw the entire feedthru assembly into the RJ45-ECS housing
which is already mounted in the CPE. There should be a rubber
gasket between the two assemblies. Tighten the feedthru
assembly to create a seal.
5.
The final step is to tighten the compression nut until the gaskets
are tight around the Cat5 cable. Always push the cable toward
the connector while tightening to ensure good strain relief of
cable to connector.
ISPAIR
CPE610 SERIES
RJ45-ECS housing
Step 2:
From the PoE injector connect one cat.5 Ethernet cable to the radio
and another cat.5 cable to a switch or PC.
Step 3:
Connect the power cable supplied in the Netkrom PoE kit to the
main electrical supply and the power plug into the socket of the
injector. Now, turn on your power supply. Notice that the POWER
LED has lighted up. This indicates that the CPE is receiving power
through the Netkrom PoE Injector and that connection between
your CPE and your network has been established.
Note: Please use the PoE injector provided in the package. Using a
PoE with a different voltage rating will damage this product.
High Capacity Wireless Networks
www.netkrom.com
6
Quick
Installation
Guide
1
Hardware
Installation
ISPAIR
CPE610 SERIES
Mounting the ISPAIR CPE 610
in a Pole or Tower
Netkrom CPE device can be mounted on the pole or tower as shown in following:
1.
Attach the mounting bracket to the back of the CPE using the three hex
screws provided. (Do not over tighten the screws.)
Note The bracket in the illustration side shows the normal orientation which
allows the CPE to be pointed up towards the base station antenna.
However, if you live somewhere that would require you pointing the CPE
down towards the base station antenna (for example, you are on the side
of a mountain in view of the base station antenna below), reverse the
bracket so the Netkrom CPE Unit can be “tilted” downward when you aim
the CPE in a later step.
2.
Remove the U-bolt and pipe bracket assembly from the plastic bag. Place
the washer, lock nut to each side of the U-bolt, and then tighten until the
U-bolts are approximately 1/4" from the end.
Note Do not tighten the screws all the way because you will need to adjust the CPE
direction in a later step.
3.
Mount the CPE to the top of the pipe or other support and point the CPE in
the approximate direction of the base station antenna, then hand-tighten
the nuts on the U- bolt.
High Capacity Wireless Networks
www.netkrom.com
7
Quick
Installation
Guide
2
uConfig
Utility
ISPAIR
CPE610 SERIES
uConfig is a feature that provides the ability to directly access the
CPE without the need to know absolutely its IP address. It may be
run directly from the product CD or installed on the user’s PC for
later access.
Using uConfig
When you execute the uConfig file you should see a window as it is
shown on the right side. Click yes to continue
The screen is divided into three sections. The top section shows the
Ethernet adapter that is accessing the network device and the middle
portion shows the routing table associated with the Ethernet adapter.
In the lower window, a list of all uConfig compatible devices on the
network is shown.
Highlight the device you desire to configure. Then click on the “Open
web” button.
High Capacity Wireless Networks
www.netkrom.com
8
Quick
Installation
Guide
2
uConfig
Utility
ISPAIR
CPE610 SERIES
Click the OK button to continue
At the login prompt, enter the User name and Password. The default
are:
User name: admin
Password: password
Click on OK and start configuring the radio.
High Capacity Wireless Networks
www.netkrom.com
9
Quick
Installation
Guide
3
PC
Configuration
ISPAIR
CPE610 SERIES
If you don’t use the uConfig Utility you need to establish Ethernet
connection between your PC and the CPE, by default the CPE has the
IP address 192.168.168.1. Therefore, your PC must be in the same
network segment as the CPE to get Ethernet connectivity. The steps
shown below are for Windows XP.
Step 1:
Go to Start button, then go to My Network Places and finally
click on Network Connections.
Right Click over your network adapter and select Properties.
Step 2:
Select the Internet Protocol Option and then click in Properties.
Step 3:
Now configure the IP Address of your network adapter with an
IP in the same Network segment as your CPE is as it is shown in
the picture, you don’t need to assign any gateway address.
Press OK and then press the Close button.
High Capacity Wireless Networks
www.netkrom.com
10
Quick
Installation
Guide
4
Common
Configurations
ISPAIR
CPE610 SERIES
Find below typical and basic configurations using CPE. For advanced features
please refer to the user manual.
Getting Started
You can start configuring your CPE using either your Web Browser or
the uConfig utility.
At the Address bar, enter http://192.168.168.1 and press Enter on
your keyboard.
At the login prompt, enter the Username and Password and then click
on OK.
User name: admin
Default Password: password
You will then reach the home page of your radio’s Web interface: the
Status Page.
High Capacity Wireless Networks
www.netkrom.com
11
Quick
Installation
Guide
4
Common
Configurations
ISPAIR
CPE610 SERIES
Client Mode
The ISPAIR CPE is basically used as a Client unit under a Point
to Multipoint Application. This type of application is
usually used by WISPs (Wireless Internet Service Provider).
Configure the Client device to operate in Station Mode and
perform a Site Survey.
Click on Basic wireless Tab and then choose Station Mode
from the Selected Wireless Mode Menu. Click the Site
Survey button
High Capacity Wireless Networks
www.netkrom.com
12
Quick
Installation
Guide
4
Common
Configurations
ISPAIR
CPE610 SERIES
Connect with the desired Access Point. Select the desired
ESSID from the Site Survey Pop- up Menu.
Click the Connect button
As soon as the devices get connected, the connection status
bar informs you about the link quality and the Signal Level.
Repeat the Client Mode steps to add more Clients to the Point-to-Multipoint connection.
High Capacity Wireless Networks
www.netkrom.com
13
Quick
Installation
Guide
5
Advanced
Configuration
ISPAIR
CPE610 SERIES
Configuring AP mode:
Please go to page 51 of User Manual.
Configuring VLANs:
Please go to page 40 of User Manual.
Advanced Routing Configuration:
Please go to page 43 of User Manual.
Advanced Wireless Configuration:
Please go to page 49 of User Manual.
Wireless Security Settings:
Please go to page 63 of User Manual.
Configuring Atheros Advanced Capabilities:
Please go to page 67 of User Manual.
Firewall and NAT:
Please go to page 73 of User Manual.
DHCP Server, Client, Relay:
Please go to page 87 of User Manual.
Quality of Service:
Please go to page 99 of User Manual.
High Capacity Wireless Networks
www.netkrom.com
14
Quick
Installation
Guide
ISPAIR
CPE610 SERIES
Congratulations
With these basics steps you can enjoy your wireless link without problems,
please for more information about the capabilities and advance configuration
of our product please see the user manual.
High Capacity Wireless Networks
www.netkrom.com
15
Quick
Installation
Guide
ISPAIR
CPE610 SERIES
Contact Information
Address:
2134 NW 99th Avenue, Miami FL 33172
Phones:
(+1) 305-418-2232
Fax:
(+1) 305-418-9266
Sales and ordering:
American Customers: [email protected]
Worldwide Customers: [email protected]
Latin American and Spanish Customers: [email protected]
Technical Support:
Worldwide and English Customers: [email protected]
Latin American Customers: [email protected]
Powered by
High Capacity Wireless Networks
www.netkrom.com
16
ISPAIR
CPE610 SERIES