1
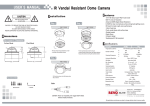
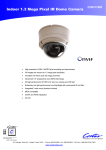
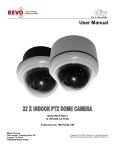
Model Number: RECLK-1
REVO AMERICA
700 FREEPORT PARKWAY SUITE 100 COPPELL
TX 75019 U.S.A TEL: 1-866-625-REVO (7386)
Alarm Clock Camera
USER MANUAL
VER.: 1.0, P/N: R040610C-REVOCAM
Contents
1. SAFETY PRECAUTIONS .......................................................................................................... 1
2. PACKAGE CONTENT................................................................................................................ 2
3. ALARM CLOCK CAMERA....................................................................................................... 3
3.1 Function Button...................................................................................................................... 3
3.2 Alarm Clock Operation .......................................................................................................... 4
4. SPECIFICATION......................................................................................................................... 5
2
1. SAFETY PRECAUTIONS
CAUTION
RISK OF ELECTRIC SHOCK.
DO NOT OPEN!
CAUTION :
TO REDUCE THE RISK OF ELECTRICAL SHOCK,
DO NOT OPEN COVERS (OR BACK).
NO USER SERVICEABLE PARTS INSIDE.
REFER SERVICING TO QUALIFIED
SERVICE PERSONNEL.
It is advised to read the Safety Precaution Guide through carefully before operating the
product, to prevent any possible danger.
WARNING: This symbol is intended to alert the user to the presence of un-insulated “dangerous voltage”.
CAUTION: This symbol is intended to alert the user to presence of important operating and
maintenance (Servicing) instructions in the literature accompanying the appliance.
Disposal of Old Electrical & Electronic Equipment (Applicable in the European Union
and other European countries with separate collection systems).
This symbol on the product or on its packaging indicates that this product shall not be treated as household
waste. Instead it shall be handed over to the applicable collection point for the recycling of electrical and
electronic equipment. By ensuring this product is disposed of correctly, you will help prevent potential
negative consequences for the environment and human health, which could otherwise be caused by
inappropriate waste handling of this product. The recycling of materials will help to conserve natural
resources. For more detailed information about recycling of this product, please contact your local city office,
your household waste disposal service or the shop where you purchased the product.
Do not plug and unplug the power cord during operation, it may result product malfunction.
Do not install the product in an environment where the humidity is high.
Unless the product is waterproof or weatherproof, otherwise poor image quality may occur.
Do not drop the product or subject them to physical shocks.
Except for vandal-proof or shockproof product, otherwise malfunctions may occur.
Never keep the product to direct strong light.
It can damage the product.
Do not spill liquid of any kind on the product.
If it gets wet, wipe it dry immediately. Alcohol or beverage can contain minerals that corrode the
electronic components.
Do not install the product in extreme temperature conditions.
Use the product under conditions where temperatures are between 5∘
C(41∘
F) ~ 45∘
C.(113∘
F). Be especially
careful to provide ventilation when operating under high temperatures.
1
2. PACKAGE CONTENT
Check to make sure all of the items shown below are included. If something is missing, contact
your dealer as soon as possible.
Item Picture
Item Description
QTY
Alarm Clock Camera
1
RJ12 Cable
1
RJ12 Inline Coupler
1
Power Adaptor
1
Manual
1
2
3. ALARM CLOCK CAMERA
3.1 Function Button
Front View
Rear View
3
3.2 Alarm Clock Operation
Start the Device
z
After the Alarm Clock DVR has been connected to the power supply, please check the
time displayed. You will have to manually set the correct time and alarm.
z
Time is displayed in PM; A “PM” indicator will appear on the display for PM time only
and when PM is not displayed this indicates that the time is AM.
z
Alarm symbol ( ) appear on the display indicates that the alarm has been setup to
activate at the preset time.
Set the Clock
z
Slide the switch to the TIME (4) position.
z
Press and hold the HOUR button (1) to advance to the desired hour. A “PM” indicator
will appear on the display for PM time only.
z
Press and hold the MINUTE button (2) to advance to the desired minute.
z
Slide the mode switch to LOCK position (4) to complete the clock time setting.
Set the Alarm Time
z
Slide the switch to the ALARM (4) position.
z
Press and hold the HOUR button (1) to advance to the desired hour. A “PM” indicator
will appear on the display for PM time only.
z
Press and hold the MINUTE button (2) to advance to the desired minute.
z
Slide the mode switch to LOCK position (4) to complete the alarm time setting.
Set the Alarm ON/ OFF
z
Move the Alarm ON/OFF (3) switch to ON position. The alarm symbol ( ) will
appear on the display. The alarm will activate alarm at the preset time and sound for
8~9 minutes.
z
Move the Alarm ON/OFF (3) switch to OFF position to shut off the alarm.
Snooze Operation
•
Press the SNOOZE (5) button to delay the Alarm for 8~9 minutes after the alarm
sounds.
Cleaning the Device
z
Do not use polish solvents or strong detergents to clean the unit. The cabinet can be
cleaned with a piece of soft cloth soaked with little water. The power plug should
ALWAYS be disconnected from the main power supply during the cleaning process.
4
4. SPECIFICATION
STANDARD FUNCTION
Signal System
NTSC
Image Sensor
1/3“ High Resolution Sensor
Effective Pixels
768 x 494 (H x V)
Synchronous System
Internal
Horizontal Resolution
540 TVL
Lens
Pinhole Lens,F2.0 / f =3.7mm
White Balance
Auto
Shutter Speed Control
Auto: 1/60~1/100,000s
Gain Control
Auto
Minimum Illumination
0.3Lux / F2.0
S/N Ratio
More than 48dB
Gamma Characteristic
0.45
Video Output
1Vp-p / 75 Ohm
Video Port
BNC / RJ12
Power Supply
DC 12V ±10% / 500mA
Operating Environment
20%~80% RH, 5℃ ~ 45℃ (41℉ ~ 113℉)
Storage Environment
20%~80% RH, 0℃ ~ 50℃ (32℉ ~ 122℉)
Dimensions
205 mm (W) x 90 mm (H) x 55 mm (D)
Weight
270 g
(Note: Design and Specifications are subject to change without notice.)
5