1
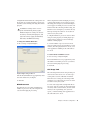
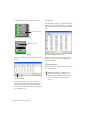
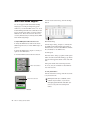
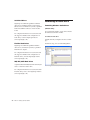
◆ Higher CPU Usage Limit settings allocate
more processing power to Pro Tools, and are
useful for playing back large sessions or using
more real-time plug-ins.
The maximum available CPU Usage Limit depends on the number of processors in your computer and on the number of processors you
specify for RTAS processing. This value can
range from 85 percent for single-processor computers to 99 percent for multi-processor computers.
There is one RTAS Engine option:
Ignore Errors During Playback/Record When enabled, Pro Tools continues to play and record
even if the RTAS processing requirements exceed the selected CPU Usage Limit. This can result in pops and clicks in the audio, but does not
stop the transport.
To enable RTAS error suppression:
1 Choose Setup > Playback Engine.
2 Select Ignore Errors During Playback/Record.
Increasing the CPU Usage Limit may slow
down screen response on slower computers.
To change the CPU Usage Limit:
DAE Playback Buffer Size
1 Choose Setup > Playback Engine.
The DAE Playback Buffer Size determines the
amount of memory DAE allocates for disk buffers. The optimum DAE Playback Buffer Size for
most disk operations is Level 2.
2 From the CPU Usage Limit pop-up menu, select the percentage of CPU processing you want
to allocate to Pro Tools.
3 Click OK.
RTAS Engine (RTAS Error Suppression)
The RTAS Engine option determines RTAS error
reporting during playback and recording. This is
especially useful when working with instrument
plug-ins.
You should only enable RTAS error suppression
if you are experiencing frequent RTAS errors
that are interrupting your creative workflow.
When RTAS error suppression is enabled, you
can experience a degradation of audio quality.
However, this may be acceptable in order to
avoid interrupting playback and recording
when working with instrument plug-ins. Be sure
to disable RTAS error suppression when you
need to ensure the highest possible audio quality, such as for a final mix.
16
3 Click OK.
Mbox 2 Getting Started Guide
◆ DAE Playback Buffer Size settings lower than
Level 2 may improve playback and recording
initiation speed, but may make it difficult to
play or record tracks reliably with sessions containing a large number of tracks or a high density of edits, or with systems that have slower or
heavily fragmented hard drives.
◆ DAE Playback Buffer Size settings higher than
Level 2 will allow for a higher density of edits in
a session or a higher track count when using
slower hard drives. However, a higher setting
can also cause a time lag to occur when starting
playback or recording, or longer audible time lag
while editing during playback.
Using a larger DAE Playback Buffer Size
leaves less system memory for other tasks.
The default setting of Level 2 is recommended unless you are encountering -9073
(“Disk too slow or fragmented”) errors.