1
ultra
S7090PVR
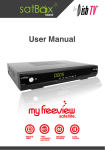
DishTV S7090PVR
500GB Hard Drive Freeview Recorder
(Dual Tuner)
User Manual
Thank you for choosing this DishTV Freeview Satellite Digital Set Top Box. You will be
able to receive all Freeview Satellite digital TV channels and radio channels, as well as
detailed Freeview program information with the Freeview 8 Day Electronic Program Guide,
can also be tuned to non-freeview satellite channels.
For more information about Freeview visit www.freeviewnz.tv
With
A Freeview Digital Set Top Box gives you access
to over 15 free to air digital channels, without a
subscription or contract. For more information on
Freeview please visit www.freeviewnz.tv
Warranty & Product Registration
Please register your product to assist with warranty and product updates.
To do this please visit www.dishtv.co.nz and click on Warranty & Registration
02
Loop Cable
AV Cable
DishTV S7090PVR
User Manual
9
Quickstart Guide
SAT IN Satellite Dish USB Factory
input 2.
upgrade +HDD
connection
SAT IN Satellite Dish
input 1.
DC 12V
Connect 230V~12V adaptor
LOOP OUT Satellite LOOP OUT Satellite
signal
signal
output 1.
output 2.
03
Page
Your Remote Control
Connecting your satBox
Getting Started
Main Menu
User Settings
- Favourite View
- Organizer
- User Preference
Installation
- Tuning Wizard
- Blind Scan
- Satellite Scan
- System Setting
- Country Setup
- Factory Default
- S/W upgrade via OTA
System Configuration
- Wakeup Timer
- Version
ESG
Recall List
Media Manager
- Thumbnail Browser
- Recorded Book List
- Media Information
- File Transfer
- PVR Playback from USB
Common Interface
Connectivity
- eNet Buttons/ eMail
- eWeather/ eMap
Recording
- Timer Recording
- Instant Recording/ Wake Up Timer
Recordings Library
Bookmarking
Editing Recordings
Firmware Upgrade
Frequently Asked Questions
Troubleshooting/ Check Signal
Technical Specifications
Warranty
04
5
6
7
8
9
9
10
11
12
13
14
14
14
15
15
16
16
17
18
18
19
20
21
22
23
24
25
26
27
28
29
30
31
32
33
0 to 9
Use to select channels & enter Pin numbers
STANDBY Power On/Standby
AUDIO Changes the audio language
SUB Displays Subtitles when availible
MENU Brings up the Main Menu
CURSOR Selects options in the
menu / onscreen display
EPG/GUIDE Electronic Programme Guide,
opens the programme guide window
FAV Brings up the favourite channel list
VOL +/- Volume up and down
Colour Buttons For interactive use and
navigating menus
Pause Pause playback
Skip Forward/Back 10min
PLAY Plays your recordings
JUMP Allows you to enter a time to
jump to
WIDE Changes the aspect ratio
TEXT Digital text if available
AD Enables Audio Descript
INFO Use for more information
Holding the INFO button for 3 sec displays
the Version page.
TTX Brings up Teletext.
EXIT Exits menus or screens
OK Confirms selection in menu/
on screen displays, also plays a
recording from the library
LIB Library displays the recorded
program list (See page 26 for more info)
Holding the LIB button for 3 sec displays the
Record Booking List.
Interactive Channel
MUTE Turns the sound on/off
CH +/- Changes the channel up or down
Fast Forward/Rewind playback
Record Instant Record a programme
Stop Stops playback
TV/R Switches between TV and Radio
channels
TIMER Displays the wakeup timer menu
05
Connect the supplied LNB Loop cable between the
LNB 1 Loop Out connection(on the rear panel) and
the LNB 2 In connection.
This links the two tuners together to allow you to
record two channels and watch a third.
Connect that cable that comes from your Satellite dish to the SAT IN socket in the back of your
set top box.
Connect the AV cable that came with your set top box between the yellow red and white sockets on the
back panel of your set top box and the AV input on your TV.
06
Open the battery cover of the remote control and put two
AAA size batteries so the ‘+’ and ‘-’ marks on the batteries
match the ‘+’ and ‘-’ marks inside the remote control.
Replace the battery cover.
Switch your TV on and select the correct video input.
Switch the satBox ultra on and wait for it to boot up.
The Country setup install screen
should appear on your TV*. Set the
Region closest to you.(this is only to
receive ads for your area on TV1) and
press OK.
An auto scan will now start, please
do not push any buttons until it has
finnished. Once it has finnished if the
signal from your dish is good TV1 will
appear and you can start using your
satBox Ultra.
* If the Country Setup screen does not appear go to the Menu select Installation then Factory Default. The default
pin/password is 0000.
Please make sure you don’t have a USB device plugged in while going through the setup process.
Once you are setup you can then plug your device in.
07
Main Menu
Main Menu:
All other settings and tuning menus are selected from this main menu.
This menu is the gateway for all other menus.
You can invoke the main menu by pressing the MENU button.
This main menu contains several options:
User Settings
Installation
System Configuration
ESG
Media Manager
You can toggle between the options by using UP/DOWN or LEFT/RIGHT arrow keys in the center of the remote
To enter a sub menu from the main menu press the OK button.
08
Main Menu - User Settings - Favourite
View/Organizer
Favourite View:
To enter this menu you will be prompted for your password (Default is 0000)
This menu allows you to view your favourite channel list and allows you to classify channels
and group them together to be viewed through favourites later. These groups can then be accessed via
the FAV button on your remote. Use the number keys on your remote according to the numbers on the
right hand side of the screen to add or remove channels from your favoute group.
Organizer:
To enter this menu you will be prompted for your password (Default is 0000)
In this menu you will have the options to Lock, Skip or Delete your channels from the list.
Lock: Allows you to lock a selected channel. Once a channel is set to Lock you will need to enter
your password to view the channel.
Skip: Means when browsing with P+/- the selected channel will be skipped over, but is still able to be
accessed by pressing the channel number button.
Delete: Deletes a channel off the list.
NOTE: Due to freeview standards channels cannot be moved around.
09
Main Menu - User Settings - User
Preference
User Preference:
NOTE: To adjust a preference use the right arrow on your remote not the OK button. The OK button will
save the changes you have made.
Here you can adjust your Brightness and Contrast levels.
Visual Impaired - This option turns discriptive audio on/off. This setting is for the sight impaired.
OSD TimeOut or On-Screen-Display timeout - This option will adjust how long the information banners will stay
on the bottom of your screen, these banners appear each time you change channel.
Parental Rating - To enter this option you will be prompted for your password (Default is 0000). Here you can
change the password. (Passwords can only be 4 numbers.) You can also set the parental rating using the
YELLOW and BLUE buttons on your remote.
Recording Start Offset - This option will adjust how many minutes before your program the unit will start recording.
This is very handy when programs are not running on time so you don’t miss part of your program.
Recording Stop Offset - This option will adjust how many minutes after your program the unit will stop recording.
This is very handy when programs are not running on time so you don’t miss part of your program.
Auto Time Shift Mode - When this option is on the unit will time-shift continually. Each time you change channel
the previous time shift will be deleted and it will start again on that channel.
Time Shift Mode - When this option is on the unit will time-shift only when the Pause button is pushed.
Time Shift Duration - Here you can set the maximum length of your time shift.
Load Date & Time - It is best to leave this set to Optus D1 to keep the correct time for NZ.
10
Main Menu - Installation - Tuning Wizard - Blind
Scan
To enter this menu you will be prompted for your password (Default is 0000)
Installation Screen Shot - To Be Updated
Blind Scan
Allows you to specify what frequency range to
scan. You can also select the polarity, or to scan FTA
or scrambled channels.
Pressing the BLUE button will take you into the
LNB setup menu and allow you to adjust LNB
settings.
Before scanning, LNB frequency, DiSEqC and
positioner details, if used, need to be set for
each satellite. Press OK once correct settings are
completed. You will be returned to the Blind
Scan page.
11
Main Menu - Installation - Tuning wizard -
Satellite Scan
Satellite Scan:
From here you can set all the necessary parameters i.e. LNB
settings, DiSEqC, tone switch and positioner details for each
satellite. All options are displayed along the bottom of the
window and accessed through there. Allows you to scan a specific
frequency.
Pressing the YELLOW button and selecting LNB setup brings you
to the page shown in the screenshot on the right hand side. From
here you can set the LNB settings, DiSEqC, tone switch and
positioner details. Press OK to save changes and go back to the
Satellite Scan page.
From here by pressing the GREEN button will do a full satellite
scan, using the existing TPs or Carriers in the list.
To scan just one transponder, view the transponder list by using
the left/right navigation keys.
The Carrier list page will display as show in the screenshot below.
Once in the Carrier list, use the up/down navigation keys to select
the desired TP. Then press the GREEN button to perform the scan.
To add an additional TP press the YELLOW button and select Add
Carrier. Type in the new TP details and press OK to scan. Press Exit
to return to normal viewing once completed.
If your dish is connected and correctly aligned to the satellite you
wish to scan you should get a good signal Strength and Quality
reading at the top of the page. Once you have these readings you
can push the GREEN button to start the scan.
12
Main Menu - Installation - System
Setting
Note: To adjust a setting use the right arrow on your remote. To select a setting use the OK button.
Digital Video – Here you have the option of Auto, HDMI and DVI. DVI is HDMI video but no sound.
It is best to keep this setting to HDMI. The resolution will always be 576i.
HD Resolution – This lets you change the output reolution of the receiver. Here you have the option of 1080i,
720p, 576p, 576i, 1080p, Native. All resolutiions operate at 50Hz.
HDMI Output Mode – Here you can choose between Compressed Audio and UnCompressed Audio.
HDCP – This option turns HDCP on/off.
Aspect Ratio – This is to set the output picture shape depending on your TV. If you have a modern LCD or Plasma
TV or a wide screen, then you most likely need to set it to 16:9. If you have an older square TV then 4:3 Panscan will
most likely suit.
LPM in stand-by – This option turns Low Power mode on/off
4 AM S/W upgrade - With this option set to on your receiver will automaticlly update to the latest software at
4am. (When the software is broadcast)
RF Mode – With this setting you can adjust the RF output frequancy if its conflicting with another unit or
broadcast.
Hearing Impaired – This option is to turn subtitles on/off.
13
Main Menu - Installation - Country
Setup/ Factory Default/ S/W upgrade via OTA
Country Setup
Here you can change your Region. Setting this to the nearest region to you will ensure you view the Ads for your
area.
Factory Default
This will reset all settings back to factory, deleting all channels and user settings. Default password is
0000.
S/W Upgrade via OTA
This option can be used only if an Over The Air software
update is broadcasted via satellite. The software will
only be broadcast for a few weeks when there is a
major update needed. But if Auto OTA Search in the
settings menu is set to on, you won’t need to use this
option.
S/W Upgrade via USB
This option can be used only when you have a software
update on a USB device currently plugged into your
unit. This will start the update for you, loading the
software to your unit.
14
Main Menu - System Configuration - Wakeup
Timer/Version
Wakeup Timer
You can set a service to be recorded at a specific time. Even if the digital receiver is in standby mode, it will start
recording at a specified time. When the recording comes to the end, the unit will stay in standby until you press
the standby button. A maximum of 8 timers can be set at once.
1. Set the Timer Mode to Once, Daily or Weekly to make a recording. If this option is set to Off, the timer will not
operate.
2. Set the Wakeup Mode to Recording, Services or Message. If you only want the unit to wake up on a channel at
the set time without recording, set this to Services
3. Set the channel you want to record, or set the message you want to appear at the set day and time.
4. Set the Date option to a desired date, on which the digital receiver will turn on. Use the left, right buttons on
your remote to navigate and change. The date format is Day/Month/Year.
5. Set the start Time option to a desired time, at which the recording will be started. Use the left, right and
number buttons on your remote to navigate and change. The time format is Hour:Minute.
6. Set the Duration option to a desired length of time, in which the recording will be finished. Use the left, right
and number buttons on your remote to navigate and change.
Version
This is an information
page only. Here you
can find your units
Software/ Firmware
version.
15
Main Menu - ESG
ESG
The ESG is an Electronic Service Guide. This is in addition to the freeview EPG (accessed using the EPG button) . Usually
you will only use the ESG for non-freeview satellite channels. The ESG will be displayed when selecting the ESG option
from the Main Menu. It will list the available services and when focus is set to the current service then its corresponding
current and next events are displayed.
When in the ESG schedule dialog and the INFO button is pressed on the selected event a short description is shown
above, pressing the INFO button again will give an extended description of the selected event that will be displayed.
Recall List
The Recall List is a feature available that
allows you to bring up a horizontal list of
selectable thumbnails, which shows all the
channels you have been watching since
last turning on your unit.
To bring up the Recall List, simply hold
down the EXIT button for 3 seconds.
16
Main Menu - Media Manager - Thumbnail
Browser
Here you can browse through your recorded programs as thumbnails, the title and information for your
recording is displayed below for the selected thumbnail/recording. The information displayed includes the
duration of your recording, the size, the age rating(eg G, PGR, AO), the recordings created date and also the
access date. The access date is the date and time the recording was last viewed. If the access date is blank this
means the recording has not yet been viewed. The thumbnail browser can be accessed from the library by
pushing the LIB button.
If you push the Yellow button when in the thumbnail
browser, this will take you to the recording library
where you can view your recordings by title. Here
you can select and delete multiple recordings.
By pushing the Blue button you will see the sort by
options. You can also go directly to the recording
booklist using the blue button and selecting
Booking List.
17
Main Menu - Media Manager - Recorded
Book List/Media Information
To view the Record Booked List, Hold down the LIB button for 3 seconds while viewing a channel. Or
if you are in the library press the Options button (Blue) and select it in the options list that appears.
Here you can view all your programs waiting to record. You can use the Red button on your remote
to delete a booking. The Green button on your remote will change the selected booking between a
single record or a series booking. The Yellow button will take you to the recordings library. A max of
16 bookings can be made. (This limit may be increased in the future.)
Media Information
This window provides your storage
device information. In this window you
can select which Hard Drive you wish to
format (Internal/ External) and just press
the RED button to format your storage
device.
Formatting will remove all your
recordings.
18
Main Menu - Media Manager - File
Transfer
File Transfer can be accessed from the Main Menu - Media Manager,
where you will see the File Transfer option.
Here you can transfer your recorded programs that you have
stored on the internal hard drive of your S7090PVR unit to a
removable external USB Hard Drive* (SATA to USB).
If already copied to the removable external USB Hard Drive*, it can
be transferred back to the internal Hard Drive at a later date
(USB to SATA).
Once “File Transfer” is selected you will see two Menu options
“SATA to USB” and “USB to SATA” , depending which way you
wish to transfer your files. Selecting one will show you a window
similar to that on the right...
Here the RED button on the remote lets you mark a recording
or several recordings. The GREEN button on the remote to start
the copying process for what you select or the YELLOW button
to start the moving process for recordings selected.
By pressing the GREEN button you will have the choice to copy
files over, this will leave the recording on the Drive you are copying
from and duplicate it at the new location.
By pressing the YELLOW button you will have the choice to move
files over, this will remove it from original Drive and shift it over to
the other device in the process.
The total copying/ moving time will take a few minutes on
average to complete per selected recording. With the status
of the transfer shown as a percentage in the transfer window.
Transferring files between “SATA” and “USB”, can only be done
with content recorded on the S7090PVR. Alternate files types
from outside sources will be unable to be played/ transferred
on to the S7090PVR unit. (Excluding JPEG which can be viewed
from the USB device in “Photo Viewer”, but not transferred over)
*External USB Hard Drive will need to be formatted to FAT32.
19
Main Menu - Media Manager - Media Center - PVR
123
Playback from USB
PVR Playbackfrom USB, can be
accessed from the Main Menu Media Manager - Media Center PVR Playback from USB. Here you
can view recorded video files you
have transferred to an external
USB device .
Once PVR Playback from USB is
selected, you will see a list which
will show your external USB
device. Press OK to select it and
access your videos (MENU to go
back) you will then see a screen
like the one directly below.
When a Video is selected you will be asked Resume
Playback or Play From Beginning (Shown Below)
selecting one will then start playback of the recorded
content.
Press Stop or Menu to go back to the recording list at
any time.
20
Main Menu - Common
Interface
Under this menu you can adjust the
settings of your CAM. If this menu is
greyed out in the main menu it
means you don’t have a CAM
inserted or the CAM is faulty.
Common Interface
What is common interface?
Some broadcasts are scrambled so that only paid subscribers can enjoy them. Scrambled services can only
be viewed with a Conditional Access Module (CAM) and a subscription card belonging with the
scrambling system. Common Interface (CI) is the slot on a digital receiver into which a conditional access
module may be inserted. To watch a pay service, you should take the following steps:
1. Purchase a conditional access module and a subscription card for the pay service you want to watch.
2. Insert the subscription card into the conditional access module.
3. Insert the conditional access module into the common interface on the front of the digital receiver
(Make sure the unit is turned off when doing this).
21
Main Menu - Connectivity - eNet
eWeather - Allows you to view the
weather conditions for the day. It
shows Humidity, Temperature etc.
Buttons
eMap - Allows you to browse and
search maps on the internet.
eMail - Allows you to log in to your
email address, to send/recieve
messages and view attached files.
Note: All of the eNet features require an internet connection via the LAN port on the rear panel of the satBox-ultra. The
weather and map services are provided by secondary providers and are not under the control of DishTV. DishTV cannot
guarantee the ongoing availablility of these free services.
eNet Buttons - eMap
To check your email on your TV
choose eMail from the eNet Buttons
menu.
Use Up/Down to navigate between
eNet buttons.
Use SMS type keyboard to enter
letters. (Entry using number keys)
22
Type in the area you wish to search
and press OK for the map to start
loading.
Press the BLUE button to zoom in on
the map, YELLOW to zoom out.
Press the Left/Right button to move
the map left and right.
Press the Up/Down button to
move the map up and down.
eNet Buttons - eWeather
From the eNet Buttons menu you
can select eWeather.
Use Up/Down to navigate between
eNet buttons.
Use SMS type keyboard to enter
letters. (Entry using number keys)
Type in the Country you desire and
then the closest city name to you.
Press the OK button to load the
weather page.
Press Blue button to change the view
between
Celsius, Fahrenheit and Kelvin.
Press the Info button to toggle
between
minimum & maximum mode.
eNet Buttons - eMail
From the eNet Buttons menu you
can select eMap.
Use Up/Down to navigate between
eNet buttons.
Profile Entry - To keep your email
account secure this digital receiver
allows multiple secure profiles. The
profle has nothing to do with your
email login or password. Simply create
your own personal profile, which then
allows you to keep your email private
from other users of this receiver.
- Use the Green button to change
the keypad mode( uppercase, special
characters, numbers ).
- Use the Info button to navigate
between the
different text boxes (like a tab key).
- The Back button will exit the keypad
mode
to allow you to save your profile.
Follow the help bar information for
further navigation short cut keys
available for quick navigation to
create mail, forward mail, reply,
address book, etc. Press Up/Down
button to navigate the different mail
headers. If the number of mails is
more than 20, mails are split by pages,
one page contains 20 messages.
23
Recording
Please note: This unit has a dual tuner so this means there will be some limitations to what channels
you can watch while you are recording. Freeview Satellite has FOUR* channel groups, when recording
two channels you can only watch another channel from the same groups as the one you are recording
from. When recording is finished, the other channels will be available again.
See page 32 for channel groups.
*Channel groups may change at Freeviews discretion.
Timer Recordings:
This is done through the EPG. Access the EPG by
pressing the EPG button (the grey button under
the red one) on the remote. It will bring up the
guide from which you can then browse to choose
a programme to record.
Pressing the Red button on a selected show in
the EPG menu will mark the program to be
recorded. If the program is part of a series you
will have the option of recording the whole series
(Yellow button) or just this episode (Blue
button).
Once you have a recording set you will see a small
R or S to the righthand side of your program. The
R indicates the program will only be recorded
once, the S indicates the program will be recorded
every time it appears on TV.
If you want to cancel a recording, all you have to
do is go back into the EPG menu, go to the
programme you selected for recording and press
the Red button this will ask you whether you
want to cancel the recording or not.
24
Recording
Instant Record:
This is done by pressing the record button on
the remote. (This is the grey button with a red
circle on it.)
Pressing it will start recording on the channel
you are currently watching and allow you to
select the duration of the recording.
The default duration is to the end of the
current programme.
You can select to the end of the following
programme or manually enter a duration by
pressing the left/right navigation keys.
If you press the stop button you will then have
the options of renaming and continuing to
record, just saving or discarding it.
Wakeup Timer - Recording:
From here you can manually set timer
recordings.
This is done through Main Menu/System
Configuration/Wakeup Timer.
By going down to the Wakeup Mode and
scrolling across to Recording the options
beneath will change to accomodate the new
wakeup mode, giving you choices of Channel,
Date, Time and Duration.
See page 15 for more info on the wakeup timer.
25
Recordings Library
To view recorded programmes, press the Library button.
It will be labeled LIB on the remote.
From here you can select the programme you wish to play.
To play a recording press the OK button, this will then ask you if
you want to play from the beginning or from your last viewed
position.
To delete mutiple recordings you need to select the
recordings you want to remove using the Yellow button, then
push the Red button to delete.
To view booked recordings, Hold down the LIB button for 3
seconds while viewing a channel. Or if you are in the library
press the Options button (Blue) and select it in the options list
that appears.
From here you can delete bookings, choose to convert to a
series recording or not by following on screen instructions.
By pressing the Library button (LIB) a second time, the Thumbnail
browser menu of your video recordings will be opened.
You can also access the Thumbnail Browser in the Main Menu
By selecting Media Manager then Thumbnail Browser.
26
Bookmarking
What is Bookmarking?
You can mark favourite parts of a recording by creating bookmarks, and then jump to them. You can also use
bookmarks to skip ads, just place a bookmark at the end of each ad break and when you next play your
recording you can easly skip the ads by pressing the Right Arrow button next to the OK button. Bookmarks are
stored with the recordings so that you can use them again afterwards.
To enter the bookmarking window select your recording from the Library or Thumbnail Browser, then push
the Green button on your remote then the OK button.
You can also set bookmarks when playing back a recording or while watching the programme live at the same
time you record it. To do this all you have to do is press the FAV button when you wish to set a book mark nd
when you next play your recording you can easly skip the ads by pressing the Right Arrow button next to the
OK button. Bookmarks are stored with the recordings so that you can use them again afterwards.
27
Editing Recordings
To enter the Record Edit window select your recording from the Library or
Thumbnail Browser, then push the Green button on your remote then the OK
button.
Here you can remove sections of your recordings. In the record edit window your recording will play in
the top right of the screen, you can use all your normal play, fast forward, rewind, pause functions to
get to where you want to edit. To select an area to delete push the Red button to start the selection,
and then the Red button again to end. If the selection you have made is not quite in the right place
you can press the Yellow button to edit/move the start of your selection(A) or the end (B). The Blue
button on your remote will remove the selected section but will not delete that part of your recording.
To move between the selections use the Up/Down arrows on your remote. Once you are happy with
the selections you have made and want to delete these parts from your recording, press the OK button
and select yes.
28
Firmware Upgrade
Via USB:
One way to perform a firmware upgrade on your receiver is via USB, using the USB connection in the back of your unit.
To do this just follow the instructions below... Note: The USB drive must be formatted to FAT32
1. Download updated firmware from www.dishtv.co.nz, follow the instructions provided on the website.
2. Turn off power to satBox, insert the flashdrive.
3. Press and hold the Menu button on the front of your S7090PVR while powering on the unit, Keep the menu button
held down until the unit says USB on the front panel.
The receiver will first display Load and if done correctly the display on the front will show USB after about 3 seconds.
Once USB is displayed on the front panel you can release the menu button and leave the unit to do the rest.
On screen at the same time it will present a window headed Software Update through USB
If the upgrade has been loaded correctly onto the USB flashdrive it will come up with SW Image File Reading in
progress... straight after it displays Searching USB Memory stick...
Then to a couple of loading screens which will take about 4-5 minutes to complete.
If the firmware upgrade was incorrectly placed on the USB it will also come up with the “Searching USB Memory Stick...”
message, the difference is the next message will say “SW Image is not present” it will then quickly display the Flash
Verification screen which will last only a few seconds.
S/W Upgrade OTA:
This is a Software Upgrade over the air. This will only work if the upgrade is being
broadcast. It can be selected from the Installation option in the Main Menu.
If you leave this set to on your unit will automaticly update to new software
when its broadcast.
29
Frequently Asked Questions
S7090 Satellite PVR– Use with Satellite Dish Only
Troubleshooting FAQ’s
Q. Why is there a message on the TV saying “No signal” ?
A. This could be due to a faulty LNB or the satellite dish is not aligned correctly, or the coax cable has
been damaged (If you are using a dish previously used for SKY the LNB quite likely could be faulty,
as these are well known for going faulty)
Q. Why is the TV picture pixellating (breaking up) while watching live TV, or why can’t i get some
channels?
A. It could be due to weak signal which can be caused by:
1. An old LNB that is drifting frequency
2. The LNB skew is not correct
3. The Dish is not aligned correctly
4. Coax cable may be damaged
5. The signal is split to too many rooms causing the signal to be weak
Q. Why can’t I record a second channel?
A. The loop cable may not be fitted between tuners at the back. Connect loop cable from LNB 1 Loop
Out to LNB 2 Sat In. Refer to page 6 of this user manual.
Q. What does LCN mean?
A. LCN stands for Logical Channel Numbering. This keeps all the channels in the correct order.
Q. Why is the Lock light on?
A. This is a good thing and indicates your unit is locked to the correct signal.
Q. Why is my unit not responding to remote / receiver locked up?
A. Check and replace the batteries in the remote.
A. A power spike can lock the processor up, power your unit off and on from the wall to make it work
again.
Before returning the unit back to your supplier:
1. Do a factory reset by going to MENU>Installation>Factory Reset> Pin 0000. Retune and test again.
2. Check Software version by Clicking MENU>CONFIGURATION>VERSION>SOFTWARE VERSION and
check on www.dishtv.co.nz if not latest please follow the instructions on the web site to update to
the latest software version.
3. If problem persists please call Dish TV on 0800 DISH TV (0800 3474 88) or email [email protected]
30
Troubleshooting
Problem
Possible Causes
Solution
S7090PVR is not plugged in or turned
on at the wall.
Check the front panel. If nothing
is illuminated then it is a power
issue - please check power
socket and plug socket.
Your TV isn’t able to display the
current Output Format.
Please make sure that Main Menu Installation - System Setting - HD
Resolution is set to one that
your TV will be able to display.
You can view this using the
composite output
No batteries or batteries incorrectly
inserted.
Insert the supplied 2x AAA batteries
as shown on page 7.
Batteries are flat.
Insert new batteries as shown on
page 7.
Infrared receiver on S7090PVR is
obstructed.
Check that there is a clear “line of
sight” from the remote to the sensor
on the front panel.
When recording 1 channel
cannot go to another
channel
No Signal to second Tuner.
Fit loop cable from LNB1 Out to
LNB 2 In
Picture is distorted too wide or narrow
Wrong TV shape is set.
Go to Main Menu/Installation/System
Setting/Aspect Ratio, make sure it is
set to match the shape of your display.
No Channels loaded.
Database is Empty
This means the unit did not have Signal
when a scan was done.
Dish Cable not plugged into LNB in
No picture
Remote control is not
working
Faulty LNB or Dish.
After you have had your dish
checked then got to Main
Menu/Installation/Factory Default
and scan again.
How to check your signal and quality levels
Push the info button on your remote twice to display the screen to the left.
Down the bottom right you will see your signal and quality levels. A
normal signal strength is around 80-100% and a normal signal quality level
is 70-100%. If your levels are lower than normal and you are having
problems you will need to get your dish checked by a satellite technician.
31
Technical Specifications
Item
Specification
Tuner
Frequency Range
Demodulation
Connections
950MHz to 2150MHz
Input Impedance
75Ohms unbalanced
Signal Input Level
-65 ~ -25dBm
Symbol Rate
2-45Mbps
LNB Power
13/18V,Max 500mA
Demodulator
QPSK/8PSK
FEC
1/2,2/3,3/4,5/6,7/8,8/9,9/10
LNB IN
F connector
LOOP OUT
F connector
YPbPr
L/R
Connect to your TV component Input
terminals
Analog audio L/R signal
Optical
SPDIF digital audio output
USB 2.0
For firmware update and external drive use
HDMI
Connects to HDMI in device
Power
Input
12v DC or 100 - 240V ~ 50/60 Hz Via adapter
Consumption
Max 20W
Display
Decoder Module
PAL,NTSC
Resolution
720X576(PAL),720X480(NTSC),720P,1080i
480i,480P,576i,576P,1080P
Decoding
Aspect Rate
4:3(Letterbox, Pan& Scan)16:9
Video
MPEG2 Transport [email protected]
Audio
MPEG2 Audio Layer I&II
MPEG4 AVC/H.264 HP@L4
Others
Compliance
DVB-S DVB-S2 compliant
Sound Mode
Right, Left, Stereo
HDD
Built in 500GB 2.5”
Dimensions
Width 280mm / Height 60mm / Depth 245mm
Freeview Satellite Channel Groupings
32
Frequency 1
Frequency 2
Frequency 3
Frequency 4
TV3
Four
TV3 + 1
Choice TV
Cue TV
Te Reo
Shine TV
Parliment TV
TV One
TV2
TV One + 1
TV2 + 1
Maori TV
Edge
Four + 1
Prime
Channel groups may change at Freeviews discretion.
For more information on limitations regarding recording refer to Page 24
Warranty
Please keep your receipt as proof of purchase. This product is warranted
of any defect in materials or workmanship for one year after the original
date of purchase. This product is for normal domestic and office use only.
this warranty does not cover damage from misuse or neglect, accidental
damage, vermin infestation, eccessive voltages such us lightning or power
surges or any alteration that affects the performance or reliability of the
product.
In the unlikely event that your product fails to work normally please
contact your supplier and have your receipt of purchase on hand.
This warranty is subject to the following provisions:
● This is only valid within New Zealand.
●
The product must be correctly assembled and operated in
accordance with the instructions contained in the manual.
●
This product must be used solely for domestic purposes.
●
The warranty does not cover accidental damage.
●
The warranty will be rendered invalid if the product is resold or has
been damaged by inexpert repair.
●
The manufacturer disclaims any liability or incidental or
consequential damaged.
Warranty & Product Registration
Please register your product to assist with warranty and product updates.
To do this please visit www.dishtv.co.nz and click on Warranty & Registration
33