1
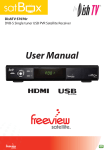
sat
S8200
User Manual
TWO
CHANNEL
RECORD
sat
Welcome
Thank you for choosing this Dish TV Freeview Satellite Digital Set Top
Box. You will be able to receive all Freeview Satellite digital TV and radio
channels, as well as the detailed Freeview® 8 Day Electronic Program
Guide. You can also tune in Non-Freeview HD & SD channels.
For more information about Freeview® visit www.freeviewnz.tv
This Freeview Digital Set Top Box gives you access to over 15 free to
air digital channels, without a subscription or contract.
For more information about Freeview, visit www.freeviewnz.tv
This product is capable of receiving and decoding Dolby Digital Plus.
Manufactured under license from Dolby Laboratories. Dolby and the
double D symbol are trademarks of Dolby Laboratories.
This product has a HDMI Connector so that you can watch high
definition TV via an HDMI lead when connected to an HD Ready TV.
HDMI, the HDMI logo and High Definition Multimedia Interface are
trademarks or registered trademarks of HDMI Licensing LLC.
3
sat
Contents
About your Set Top Box.............................................................................
Main Features ....................................................................................... 6
What’s in the Box?................................................................................. 6
Product Overview.......................................................................................
Front and Back View ...............................................................................7
Remote Control.......................................................................................7
Connecting Up..........................................................................................9
Getting Started........................................................................................10
Main Features..............................................................................................
Changing the Channel ..........................................................................12
Information Banner..................................................................................
12
Service and Carrier Details.....................................................................
12
Quick Selection.......................................................................................
13
Audio Descriptions....................................................................................
14
Subtitles.................................................................................................14
Freeview EPG..............................................................................................
Launching the EPG ..............................................................................15
Navigating Around.................................................................................15
Recording.....................................................................................................
Instant Recording .................................................................................16
Recording via the Freeview EPG...........................................................17
Canceling a Recording (Freeview EPG).................................................17
Pause Live TV........................................................................................18
Playback Library.....................................................................................18
Delete Recordings.................................................................................19
Library Options..................................................................................... 19
Editing Recordings............................................................................... 20
4
sat
Main Menu...................................................................................................
Installation..............................................................................................
21
Satellite Scan.........................................................................................
Blind Scan.............................................................................................22
Factory Reset.......................................................................................23
Country Setup......................................................................................23
Version/System Info...............................................................................23
Settings..................................................................................................
24
Language................................................................................................
24
OSD On Screen Display..........................................................................
25
Audio.......................................................................................................
25
Video......................................................................................................
26
Wakeup Timer.........................................................................................
27
Parental Controls....................................................................................
27
Time Settings...........................................................................................
Admin....................................................................................................27
27
PVR Settings...........................................................................................
28
Channel Organiser................................................................................
29
Network Setup.....................................................................................
Media Manager......................................................................................
USB.........................................................................................................
30
Media Info................................................................................................
30
Booked List..............................................................................................
30
File Transfer.............................................................................................
31
Firmware......................................................................................................
Upgrading via USB ...............................................................................32
Upgrading via Network..........................................................................32
Upgrading via Over the Air.....................................................................
32
Frequently Asked Questions.................................................................33
Troubleshooting......................................................................................34
Support Information...............................................................................35
Warranty Information.............................................................................36
5
sat
About your Set Top Box
Main Features
•
•
•
•
•
•
•
•
•
•
•
•
myFreeview Satellite Dual Tuner Recorder
Built-in WiFi
Built in 1 TB Hard Drive (approx. 500 hours recording)
7 Day Electronic Programme Guide (EPG)
Pause, Rewind & Record Live TV*
Record while watching from your Library*
Record two channels at the same time, while watching a recording a third*
Series Linking (record an entire season)
Enjoy 1080p Upscaling TV
Watch all Freeview Satellite TV channels and Radio stations
Automatic Updates via Network
Easy to Install
What’s in the box?
Please check to see weather you have all the following in this box, you should have:
Your new set top box
Remote Control
AV Cables
LNB Loop Cable
MUTE
AUDIO
SUB
TV/R
FAV
LIST
INFO
SCHEDULE
MENU
EXIT
LIB
L IB R A R Y
APPS
VOL
PORTAL
CH
EPG
2x AAA Batteries
GUIDE
STOP
REW
RECORD
MEDIA
PLAY/PAUSE
FF
SKIP
SKIP
USB
TEXT
SETTINGS
TTXT
STATS
NETWORK BOOKMARK
Also comes with 1x Power Supply and
1x Quick Start Guide
6
*Recording - Channel selection is limited when recording two channels, some combinations may not be available.
sat
Product Overview
Front View
3
2
1
4
3. Signal/Power/Standby Indicator
Orange: Signal Lock
Green: Power
Red: Standby
4. Menu buttons
Access Menu, volume, channel.
1. Standby Button
Switches on/off the receiver
2. LED Display
Displays channel number, menu.
Back View
1
3
8
2
4
5
6
7
1. LNB IN 2
Input for Loop Cable
2. LNB IN 1
Input for Satellite Dish
3. LNB Out 3
Spare output for STB or Room.
4. LNB Out 2
Output for Loop Cable.
5. USB
Media Playback/ Firmware upgrade
6. HDMI Output
Connection to HD Ready TV
12
9
10
11
7. AV Video Out
Yellow connection to non HD TV
8. Coaxial
Digital Audio for Surround Sound
9. Audio L and R
10. Ethernet Port
For Wired Internet connection.
11. DC 12V IN
Connect power supply.
12. Wifi Antenna
For Wireless Internet Connection
7
sat
Remote Control
Power Key
Subtitle Key
Audio Key
MUTE
AUDIO
SUB
TV/R
FAV
Mute Key
Subtitle Key
Favourite Key
Numeric Keys
Info Key
LIST
INFO
Record List Key
SCHEDULE
Colour Keys
MENU
EXIT
Menu Key
Record List Key
OK/Select Key
Navigation Keys
Library List Key
Record List Key
LIB
Portal Key
L IB R A R Y
APPS
Volume Keys
VOL
PORTAL
CH
Channel Navigation Keys
EPG
GUIDE
Rewind Key
Stop Key
Media Key
Record Key
Teletext Key
Quick Settings Key
STOP
PLAY/PAUSE
FF
MEDIA
SKIP
SKIP
TEXT
STATS
USB
RECORD
SETTINGS
8
REW
TTXT
NETWORK BOOKMARK
EPG Guide Key
Play/Pause Key
Forward Key
Backward Skip Key
Forward Skip Key
Network Statistics Key
Bookmark Key
Connecting Up
sat
Connecting to the Satellite Dish
Connect the cable from your dish to the
LNB IN socket in the back of your receiver.
Please connect as shown right in the picture
Connect the supplied LNB Loop cable between the LNB 1 Loop Out connection and
the LNB 2 In connection. (See Right)
This links the two tuners together to allow
you to record two channels and watch a
third.
Connecting to your TV
Connecting using a HDMI Cable
HD Ready TV
Connect one end of the HDMI cable
into the HDMI socket on the back of the
receiver, then connect the other end to the
HDMI input sockets on your HD Ready TV.
Connecting using an AV Cable
If your TV doesn’t have HD compatibility,
you can connect the receiver using the
supplied AV Cable, using the Red, White
and Yellow sockets on both your TV and
receiver.
Connect your supplied AV Cable into
the correct Red, White and Yellow
sockets.
Please note if you are using an AV connection
then it is not possible to upscale the satellite
pictures.
9
Getting Started
sat
Step 1
Install batteries in the remote control
Open the battery cover of the remote control
and put two AAA size batteries so the ‘+’ and
‘-’ marks on the batteries match the ‘+’ and ‘-’
marks inside the remote control. Replace the
battery cover.
Step 2
Plug in and switch on
Plug the AC adapter into the wall socket and
switch on, then switch your TV on and select
the correct video input (i.e. HDMI1 or AV)
The Receiver will take some time for it to
boot up as part of the initial installation.
Step 3
First time installation screen
The welcome screen should appear on your
TV*
The setup process will ensure you are all set
to enjoy Freeview,
Follow the instructions on the next page to
go through the setup process
10
*If the welcome screen does not appear, go to the
Menu select Admin then Factory Reset. The
default password is 0000.
1. Select your Country
By Default, this is set to New Zealand
so you don’t have to do anything.
Press the ▶ key to continue
sat
2. Select your Region
Select your region, this will ensure you
receive the correct channels and that
advertisements are tailored to your part
of New Zealand. Use the OK button to
select the region then press the ▶ key
to continue
3. Select your OSD Language
By Default, this is set to English,
Press the ▶ key to continue
4. Select your Info Banner timeout
Choose how long you want the on
screen information to appear when you
change channels, Use the OK button to
select the region then press the ▶ key
to continue
5. Select your Beeptone option
You can choose to have this either ON
or OFF, Press the ▶ key to continue.
6. Select your Video Resolution
Choose your video resolution for your
TV. , Use the OK button to select the
resolution then press the ▶ key to
continue.
7. Select your Aspect Ratio
The default is 16:9 for wide screen
TVs or you can choose 4:3 for older
square TVs or if you are unsure select
Auto. Use the OK button to select the
resolution then press the green button
to continue.
8. This will take a few seconds you will
be promoted to scan for Freeview
Channels, highlight Yes and press OK
Scanning will take 2-5 minutes.
11
Main Features
sat
INFO
LIST
SCHEDULE
MENU
EXIT
Your receiver comes packed full of great features which you can use
right away, this section
will tell you the basic functions of the receiver so that you can get used to it.
MUTE
AUDIO
Changing the channel
Use your remote to quickly change the
channel, you can use either the numeric pad
on the top half of the remote or you can use
the + CH - button.
SUB
TV/R
LIB
L IB R A R Y
APPS
LIST
INFO
STOP
EXIT
REW
PLAY/PAUSE
FF
RECORD
MEDIA
SKIP
SKIP
TEXT
STATS
1.
2.
3.
4.
SETTINGS
NETWORK
Current Channel
No. TTXT
, Logo
andBOOKMARK
Name
Current Date and Time
Current
Programme and Rating
LIB
Next
Programme
and Rating
L IB R A R Y
APPS
PORTAL
CH
EPG
GUIDE
STOP
REW
PLAY/PAUSE
FF
USB
Service and Carrier Details
Pressing the INFO button twice will display
the technical information about the channel;
including the signal strength.
This is very useful when you want to provide
a support tech with additional information
12
EPG
USB
VOL
3
CH
SCHEDULEGUIDE
MENU
1
PORTAL
VOL
Press the BACK button to view the previous
channel selected.
Info Banner
Every-time you change the channel, the Info
Banner will display on the bottom of your
screen. This will tell you what channel you
are on and what the current programme is
and what’s on next.
FAV
RECORD
MEDIA
TEXT
SETTINGS
TTXT
4
SKIP
SKIP
STATS
NETWORK BOOKMARK
2
Quick Select
This will allow you to select other channels
or view its schedule while allowing you to
view the current channel.
1.
2.
3.
sat
Press OK on your remote.
Use the ▼▲ keys to select a channel.
Press OK to view that channel.
Quick Select - Programme Guide
You can also view a 7 Day schedule of any
channel without interrupting the current
channel, this is very handy if you want to
view what’s on TV later on in the day.
1. With the Quick Select menu open:
2. Use the ▼▲ keys to select a channel
3. To view its schedule press ▶ to
access the 7 Day guide. You need to
scroll down to see the schedule of
programmes.
Once you have finished you can press
EXIT or BACK if you want to view
another channel.
Quick Select - Sort, Group, Search
You can change the way channels can be
viewed in the Quick Select menu as well as
toggling between TV and Radio channels.
Pressing the RED button will allow you to
sort the order of the channels, keep pressing
the button to your preferred order.
Pressing the GREEN button will allow you to
toggle between Radio and TV channels.
Pressing the Yellow button will allow you to
search for a channel. Use the ◀▶ and OK
keys to search for a particular channel.
13
Audio Descriptions
Audio Descriptions are helpful for those who
are visually impaired, Audio Descriptions
narrate the programme so that you can
understand what is happening in a scene.
Please Note: Audio Descriptions are only
available on TV One and TV2 and with
selected programmes only with the
icon
in the Freeview EPG (Page )
1. Press AUD twice on the remote to activate
Audio Description
2. Audio Description will now begin
To turn off the feature, press the AUD button
twice.
Subtitles
This feature is for those who are Hearing
Impaired.
1. Press SUB twice on the remote to activate
Subtitles
2. Wait until the subtitle notification is gone
for the subtitles to turn on.
To turn off the subtitles, press the SUB
button twice.
14
sat
Freeview EPG
The Freeview EPG allows you to view
detailed programme information on your
favorite channels for up to 8 Days. You can
also view what’s on now/next and switch to
another channel.
sat
Launching the Freeview EPG
1. Press the EPG (Guide)
2. Wait for the guide to load.
3. You will have the EPG viewed with the
current channels listings.
Navigating Around
Use the ▼▲ keys to scroll up and down on
the channel’s schedule.
Use the ◀▶ keys to view the other channel
schedules.
Press the YELLOW Button to view next
weeks listings e.g. Its a Monday today and
you want to look at next Monday’s schedule.
Press the BLUE button to view the schedule
for the next day.
Press the EPG (Guide) button to view
what’s currently on now/next on all channels.
15
Recording
sat
MyFreeview allows you to watch your favorite TV Shows when you want, record a whole
series so you can watch them back to back in the future, Pause and rewind live TV and
heaps more! You have a built-in 1TB hard-drive so you can record just over 200 Hours of
your favorite TV programs for free!
Instant Recording
1. Press the ● REC button to initiate
recording.
2. Please wait until the record duration
message appears.
3. You can manually adjust the record
duration using the ◀ ▶ buttons or leave
it to the default duration which is set to
the end of the current program.
4. Press OK to confirm the Instant Record.
When you want to stop recording you can
press the ■ button to bring up options, you
can choose to rename, stop or discard the
recording.
Recording Notes:
You can book two shows at the same time and watch a third, if you try to book a third show
in the same time slot then the receiver cannot complete this request, unless you are booking
shows on TV One, TV2, TV3 or FOUR then the receiver will schedule these on the Time
shifted Channels (Plus1 Channels on CH 6, 7, 8 and 9)
Hard drive Allocation
Everytime you schedule a recording, the required space needed is reserved for that
recording to avoid any conflicts.
16
sat
Recording via the Freeview EPG
1. Press the EPG (Guide) button.
2. Browse for a programme you wish to
schedule for recording, and then press
the RED button.
3. The EPG will mark the programme to
record.
If the programme has more than one
episodes then the EPG will ask if you
wish to record the series (YELLOW) or
only just the one episode (BLUE).
4. Once the recording has been set, you
will see a small R or S in red beside the
program name.
R indicates that the recording will be a
one off. S indicates the programme will
be recorded in a series.
Canceling a Recording
1. Press the EPG (Guide) button.
2. Locate the programme you have set.
3. Press the RED button, the guide will
then ask you if you want to continue the
cancellation of the recording.
17
Pause Live TV (Time shifting)
If you are interrupted while you are watching
a live TV programme such as a telephone
call or have to leave the room, then you can
pause the TV and pick up where you left off.
1. Press Pause on your remote.
2. Your content will now pause and the
rest of programme will be recorded.
3. Press PLAY to resume the programme,
you can fast forward and rewind parts of
the recorded segment, the Stop button
catches up to live TV and discards the
recording.
To adjust this feature go to Page X
Playback Recordings
To view all your recorded programs you
can access the Library, there you can view,
delete, edit, and rename them.
1. Press Library
2. Select a program you wish to play and
press OK
3. If promoted, you will be asked whether
you want to watch from the beginning or
from your last viewed position.
When you want to return back to the Library,
press either the BACK, STOP or Library
buttons and confirm by selecting Yes on the
top of the screen
18
sat
Delete Recordings
To delete a recording in the Library, highlight
your selected program and then press the
RED button to delete, confirm and your
show is now erased from the HDD
sat
If you want to delete multiple recordings at
the same time, simply press the GREEN
button to mark each program (You will notice
a small blue tick appearing beside the
channel name) then press RED to delete.
Library Options
Library options provide more settings you
can adjust to customize the library. You
can bring up the options by pressing the
YELLOW button.
Filter: You can adjust so you can only see
All, New, Viewed, Recently Viewed, Locked
or HD programs in the Library.
Sort: Sort how you view the library by
Programme, Channel, Start Time, Duration
and Size.
Rename: Rename the selected program to
something else.
Lock: Lock the selected program so you can
only view this by entering in your PIN.
Record Edit: Remove certain content from
your recording (Page 20)
Book Mark: Bookmark certain scenes in the
recording so you can quickly view them.
19
Editing Recordings
You can edit out certain parts of a program
which is handy if you want to create a
seamless viewing.
1. Once you have selected your program
and accessed the Recording Edit from
the options menu the program will play
in its real-time.
2. Using the Fast Forward and Rewind
buttons on your remote you can change
the where the Red ▼ marker will set
the start of your A Mark. Use the Pause
button to stop on that point.
3. Press the RED button to mark pointer A.
4. Press Play and mark where you want
put the B mark press RED to add end
mark.
5. You will notice your selected marker line
in yellow, if you want to mark another
scene at the same time you can do so
by following the same process, once
you are happy with your markers you
can press the BLUE button to delete
that section from the recording.
6. Your recording will now be edited and
saved and you can return to the Library
to view that program
20
sat
Main Menu
sat
Satellite Scan
Scan other Satellites for channels
The Satellite Scan will allow you to scan
for channels on other satellites, adjust your
LNB settings and check signal strength and
quality.
1. Select your desired satellite to scan,
(Freeview uses Optus D1)
2. Press the GREEN button and select
what type of channels you want to scan,
FTA= Free to Air
Scrambled= Paid TV Channels
3. Wait for the unit to scan channels,
this process may take 5-10 minutes
depending on how many channels are
available on the satellite.
4. If you wish to stop scanning press the
RED button.
Add/Remove Transponders
You can also add or remove Transponders
on the satellite and scan for Non-Freeview
channels. Press the RED button to adjust
the transponders on the selected satellite.
LNB Settings
If you have made changes to your setup
such as installing a 22Khz switch you can
adjust the receiver to receive the correct
signal by pressing the YELLOW button (LNB
Setup)
21
Blind Scan
Blind Scans gives you the option to let
the receiver to scan all frequencies on the
satellite automatically, this is handy if you
do not know hoe to enter in Transponders
to receive certain channels and this usually
restores missing channels.
1. Launch Blind-scan
2. Select your satellite that you wish to
scan, by default Optus D1 (Freeview)
will be selected.
3. Specify the start and end frequency that
you want the receiver to scan from and
to (You can skip this if you want to)
4. Select the polarization that you want the
receiver to scan to, wither Horizontal
or Vertically, generally Freeview
broadcasts are Horizontal.
5. Specify the search type, are you
scanning for all available Free channels
or are you looking at some Paid
scrambled channels?
6. You can adjust the LNB settings via
the YELLOW button but by default the
settings are ready to go so you don’t
need to do anything.
7. Press the GREEN button to begin Blind
Scan, this will take 5-10 minutes, once
the scan is completed you will return
to live TV and any new channels will
appear at the bottom of the channel list.
22
sat
Factory Reset
If you experience any issues with your
receiver and can’t get channels or things are
not right you can do a factory reset which
will refresh the unit and reset all the internal
components.
sat
PLEASE NOTE:
A Factory Reset will loose all your
recorded programs!
1. Launch Factory Reset.
2. Confirm if you want to complete a
factory reset.
3. Enter in your PIN number (Default is
0000)
Country Setup
If you have moved region, you can set the
receiver to tailor channels to your part of the
country.
1. Launch Change Region
2. Change your Country (Default is New
Zealand)
3. Change your Region by using the ◀▶
keys.
4. Press the GREEN button to save.
Version/System Info
If a technician or support person wants
to find out more information about your
receiver you can find them in the Version
section of the Installation Menu.
You will find firmware versions, hardware
information and the network status as well
as the support information if you want to
contact Dish TV.
23
Language
The language settings allow you to adjust
the native language for the unit.
There are several adjustments you can
make which includes:
•
•
•
•
•
•
OSD (On Screen Display)
First Preferred Audio
Second Preferred Audio
First Preferred Subtitle
Second Preferred Subtitle
MHEG Preferences
OSD: On Screen Display
The OSD adjusts how you want to view info
banners and their colors.
•
•
•
•
Info Banner Timeout
Banner Position
Theme Selection (Color)
OSD Animation
Press the GREEN button to apply the
changes.
24
sat
Audio
If you have a home theatre system that
you are using to get digital audio from the
receiver then you can adjust the settings
according to your setup.
•
•
•
•
•
sat
SPDIF Delay
Adjust the delay time for the audio to
come through.
SPDIF Output Mode
Choose either Compressed or
Uncompressed Audio.
HDMI Output Mode
Audio Description
Turn this either on/off for Audio
Descriptions.
Sub Audio Mix Level
Press the GREEN button to save any
changes.
Video
•
•
•
•
•
•
•
•
Resolution
576i, 576p, 720p,1080i, 1080p & Native
Aspect Ratio
Choose either 4:3 (Older TVs) 16:9
(Newer TVs) or AUTO
Scaling Method
Change appearance of video by
Stretch, Zoom or leave it as normal.
Audio Description
Turn this either on/off for Audio
Descriptions.
HDCP
High Definition Copy Protection
HDMI Control
Control your unit via your TV remote.
Brightness
Contrast
25
Wakeup Timer
sat
You can set a service to be recorded at a specific time. Even if the digital receiver is in
standby mode, it will start recording at a specified time.
When the recording comes to the end the unit will stay in standby until you press the standby
button.
How to set up the Wakeup Timer
1. Press the GREEN button to begin a
new time
2. Wakeup Mode:
• Recording: The Receiver will wakeup
and record a channel at a certain time.
• Service The Receiver will wake up and
show the selected channel only
• Message: The Receiver will wakeup
and display a message at a certain
time.
3. Timer Mode:
Choose if you want this repeated daily,
weekly, a certain date or only once.
4. Message:
If you have chosen Message then you
can choose if its a Birthday, Anniversary
or General Greeting.
5. Service Name
Choose the channel you want to
wakeup on or record.
6. Date
Set the date of the timer
7. Time
Set the time
8. Duration
Set the duration of the recording
Press the GREEN button to save the timer.
26
Parental Controls
Parental controls are handy if you have
young children. You can lock programs that
have a G, PGR or AO rating.
To unlock the channel/programme you can
enter your PIN to view.
Admin
The Admin Settings allow you configure the
receivers auto-shutdown mode and LCN
arrangements as well as changing your 4
Digit PIN number.
•
•
•
•
Auto Shutdown (Mins)
Set the unit to automatically shut down.
LPM in Standby
Reduces Energy when in standby
Beep Tone
LCN
Local Channel Number, ensures
Freeview channels are in correct logical
order.
sat
Time Settings
Adjust how you want to retrieve the Time and
Date via any of the following methods:
• Air (Optus D1)
• Internet Connection Required)
• Manual (Set the Time yourself)
PVR Settings
If you find that your recordings are cutting
off, you can adjust the recording settings so
you can allow when recordings can start and
end in case a programme is delayed.
• Start Offset
Adjust how many minutes before your
program the unit can start recording.
The default is currently at 1 Minute.
• End Offset
Adjust how many minutes after your
program the unit can stop recording.
The default is currently at 5 Minutes.
• Timeshift
You can set the maximum length the
unit will time-shift to.
27
sat
The Channel organiser is a great way to sort through the channels and organise them into
favorites, lock, rename and skip them.
The Organiser displays the list of channels
which you can use the ▲/▼ keys to scroll
through, select a channel by pressing the
OK button to do any of the following:
Press the following number to:
1. Lock Channel
Locks selected channel so when you
try to view any program you will be
prompted to enter in your four digit PIN
number.
2. Skip Channel
You can skip this channel when using
the CH +/- keys to scroll through live TV,
the only way to access that channel is
by entering in its channel number.
3. Move Channel
You can only move Non-Freeview
channels as the LCN option is enabled
in the Admin Settings.
4. Delete Channel
Removes the channel from the receiver
and list, to restore you will need to retune the receiver.
5. Favorites
Organise channels into favorites
categories so when you push the FAV
button on the remote you can access
certain channels within that group.
The Favorite List will pop up and you
can select which category you want
the channel to fall under, press OK to
confirm.
6. Press BACK to Return.
28
Network Setup
To access Internet Services you will need to
connect the receiver to the Internet. You can
connect using two methods:
sat
Ethernet Cable (LAN)
Connect an Ethernet cable from your router
into the back of the receiver to connect to
the Internet., Configuration will be done
automatically .
Wireless (Built-in WIFI)
This receiver comes with a built in WIFI
dongle for easier wireless Internet access.
1. Ensure you are on the Wireless Page
by pressing the GREEN button (A WIFI
router image should show up along with
nearby access points)
2. Select your Access Point and press the
YELLOW button to connect.
3. Select your WiFi network and enter
in the network password using the
◀▶▲▼ keys on your remote to select
the letters. Press the GREEN button
to save and wait for the network to be
configured successfully.
4. You should now be able to access
Internet features and update your
receiver software via the Internet.
29
USB
You can open up photo, music and video
files from a USB drive that you can playback
on the receiver.
Navigate through the menu to select and
playback your content.
Media Info
This displays the current USB Media
interfaces that are connected to the receiver.
You will be able see their total space and
free space and can format the drive to work
on the receiver.
If you want to access the USB drive you will
need to go into the USB Menu.
Booked List
The Booked List displays all the programs
that will be recorded throughout the week,
as well as the Freeview EPG, you can
cancel or change some of the booking
details from this menu.
View booking information
Select a schedule booking that you wish to
view and press the INFO key to open up its
booking information.
Delete a Booking
Select a scheduled booking and then press
the RED key, confirm and the booking will be
deleted
Change to a Series or Single Recording
Select a schedule booking that you wish to
change its series or single recording and
press the INFO key, A synopsis will appear
and a indicator on the bottom right press the
GREEN key and confirm the changes.
30
sat
File Transfer
You can move recorded content from either
the built in memory (SATA) or a plugged in
USB drive to another, very handy if you wish
to view content on the go or on your PC.
sat
Transfer from SATA to USB
Select a program you wish to move or copy
to USB, you can also mark several programs
by pressing the YELLOW button.
To Move the content completely to USB
press the RED key and wait for the transfer
to finish.
To Copy the content to USB press the
GREEN key and wait for the transfer to
finish.
The process will take a few minutes.
Transfer from USB to SATA
Follow the same instructions as above to
move or copy content into the built in SATA
memory.
31
Firmware
Overtime, software updates may become
available to this receiver either through the
USB, Internet or over the Freeview platform.
To update the receiver go to
Menu>Software Update then follow any of
these steps to update
Upgrading via USB
1. Download firmware from dishtv.co.nz
ensure you download the correct
firmware and follow the instructions on
the website.
2. Insert the USB into the USB socket on
the receiver.
3.
4. On the Software Updates menu toggle
to USB and press OK,
5. The unit will search for the firmware
and then update, this will take several
minutes.
Upgrading via Internet
1. On the Software Updates menu toggle
to OND and press OK,
2. The unit will search for the firmware on
the server and then update, this will
take several minutes.
Upgrading via Freeview (OTA)
1. On the Software Updates menu toggle
to AIR and press OK,
2. The unit will search for the firmware on
the satellite and then update, this will
take several minutes.
32
sat
Frequently Asked Questions
sat
Dish TV S8200 - Satellite Dish connection only.
Q. There is a message on my TV saying “No signal”
A. Low or No signal can cause this message to appear, it could be either or all of the following:
•
•
•
•
•
•
Faulty Satellite Set-Up i.e. LNB
Satellite dish not pointing to Optus D1
Cables are too old or are worn
Poor joints in cable
Split into too many rooms
Dish blocked by objects, environment.
Q. How do I set the time?
A. Your unit will automatically update the time from the Satellite or Internet.
Q. I get pixelation on some channels
A. Please check the answer to the first question and consult a local installer.
Q. What is the default PIN code?
A. The default PIN is 0000.
If you are getting unusual issues with your unit such as freezing on menus please
• Factory Reset the unit,
• Check that software is up to date. (Page 26)
For more FAQ’s visit http://www.dishtv.co.nz/support/support-for-current-products.htm
Check the Troubleshooting on Page 34 for additional help, otherwise you can contact Dish
TV via Page 35
33
sat
Troubleshooting
Problem
Power Indicator on front
panel not lit.
No picture on TV
Possible Causes
What to do
Main Lead unplugged/switched off
Check that the adapter is
plugged in and switched on.
Your TV isn’t able to display the current
output format
Check to see if your TV is set to
the current source.
Go to Menu>Settings>
System Settings
Adjust the resolution to suit the
TV, sometimes HDMI cables
can’t provide a 1080p picture
to your TV.
Tuning Failed or
Database Empty
•
•
Dish cable not plugged in
Dish may be misaligned
You might be located in an area which
has very limited Satellite coverage
Remote Control is not
responding /working
Picture is distorted either
too wide or narrow and
image cuts off.
34
No batteries or batteries incorrectly
inserted into the back of the remote
Plug in the Dish aerial into the
LNB IN socket at the back of
the receiver.
Align the Dish to Optus D1, ensure that there are no objects
that could interrupt the signal
path.
Though this is rare, check that
any mountains, valleys are not
interrupting the signal path.
Insert the supplied 2x AAA
batteries as shown on Page X.
Batteries are flat
Replace batteries with new
ones.
The Infrared receiver on the S8200
receiver is obstructed (Front panel
blocked by objects)
Check that there is a clear line
of sight between the front panel
and your remote control, move
objects if necessary.
The TV ratio has been incorrectly set
Go to Menu>Settings>System
Settings and adjust the Aspect
Ratio settings.
sat
Support Information
We provide free technical assistance to all our products during our normal business
hours. We try our best to get the issues sorted either over the phone or via email.
Contact us through either of these methods
Phone
Method
Contact Details
0800 DISH TV (0800 347 488) or 07 929 4123
Fax
07 929 4122
Email
[email protected]
Website
www.dishtv.co.nz/contact-us/Hamilton-Office
Geekzone*
www.geekzone.co.nz then submit a forum post
Freeview Forum*
www.freeviewforum.co.nz then submit a forum post
Office Hours are 9:00am - 5pm NZST, Mon - Fri.
* Geekzone and Freeview Forum free registration required, please be a descriptive as possible
when posting and make sure you include Dish TV in the post title.
35
Warranty Information
sat
Please keep your receipt as proof of purchase. This product is warranted for any
defect in materials or workmanship for one year after the original date of purchase.
This product is for normal domestic use only.
This warranty does not cover damage from misuse or neglect, accidental damage,
vermin infestation, excessive voltages such as lightening or power surges or any
modification that affects the reliability of the product.
In the unlikely event that your product fails to work normally please contact your
supplier and have your receipt of purchase on hand.
This warranty is subject to the following provisions:
• This is only valid in New Zealand.
• The product must be correctly connected and operated in accordance with the instructions contained in the manual.
• This product must be used solely for domestic purposes only.
• The warranty will be rendered invalid if the product is resold or has been damaged by unauthorized repair.
Warranty and Product Registration:
To assist with any product or warranty updates in the future please register your
product on our website.
1. Go to www.dishtv.co.nz
2. Click on Support and Downloads from the menu bar
3. Click Warranty and Registration
More information about support and warranty returns can be found on this page
and will ensure you have the right information when contacting us.
36
sat
37
www.dishtv.co.nz
0800 347 488
[email protected]