1
•
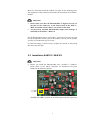
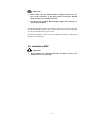
If both capacitors are missing, as in the picture above, please contact
the Audionet Service Center.
•
If you want to install a Phonomodule originating from a SAM V2 /
SAM G2 into a different type of Audionet unit, please make sure to
remove the capacitors mentioned above prior to installing!
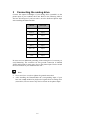
First remove the 3 screws in the lower row of each side panel. Then remove the 3 screws of the top cover right beside the front panel and 3
screws right beside the back panel. After removing the screw in the middle of the ventilation slots you can lift up the cover of the SAM V2 /
SAM G2.Place the unit in front of you with the front panel facing towards you. On the right side of the back panel you can see a board with
all the input relays and input jacks.
2.2.1
SAM V2
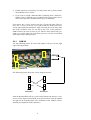
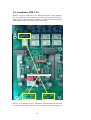
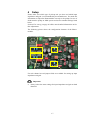
Use the following picture to locate both jumpers. They are on the right
edge of the input board:
Jumpers
Connectors for mounting the Phonomodule
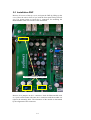
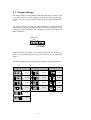
The following picture shows the correct jumper positions:
Jumpers
without
Phonomodule
with
Phonomodule
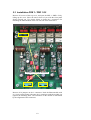
Push the Phonomodule with its 3 jacks on the bottom side onto the 3 connectors on the input board marked in the picture above until the module
sits tight on the mounting bolts. The orientation of the module is determined by the alignment of the connectors.
8