1
Setting up the camera hardware Please note that camera modules are static-sensitive. Earth
yourself prior to handling the PCB: a sink tap/faucet or similar
should suffice if you don’t have an earthing strap.
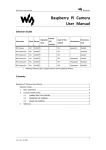
The camera board attaches to the Raspberry Pi via a 15-way
ribbon cable. There are only two connections to make: the ribbon
cable need to be attached to the camera PCB and the Raspberry
Pi itself. You need to get it the right way round, or the camera will
not work. On the camera PCB, the blue backing on the cable
should be facing away from the PCB, and on the Raspberry Pi it
should be facing towards the Ethernet connection (or where the
Ethernet connector would be if you are using a model A).
Although the connectors on the PCB and the Pi are different,
they work in a similar way. On the Raspberry Pi, pull up the tabs
on each end of the connector. It should slide up easily, and be
able to pivot around slightly. Fully insert the ribbon cable into the
slot, ensuring it is straight, then gently press down the tabs to
clip it into place. The camera PCB itself also requires you to pull
the tabs away from the board, gently insert the cable, then push
the tabs back. The PCB connector is a little more awkward than
the one on the Pi itself. You can watch a video showing you how
to attach the connectors at www.raspberrypi.org/archives/3890
(scroll down for the video).