1
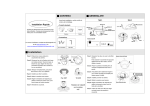
H.264 HD IP Cameras
INSTRUCTION MANUAL
Executive Summary
The video compression engine of the H.264 HD (high definition) IP camera
provides high video quality, 720P resolution, bandwidth efficiency, and
real-time streaming for network monitoring systems. The cutting edge H.264
HD encoding technology can provide better compression rate and superior
video quality at 128 Kbps to 5 Mbps bit rate. Multiple profiles streaming
design, JPEG and H.264 at CIF, VGA, and 720P, allows to stream video at
both low bandwidth (Internet) and high bandwidth (LAN) for optimizing video
quality.
Key Features
Up to 720P 30 FPS encoding capacity
Support ONVIF protocol
Four profiles for H.264 and JPEG at CIF, VGA, and 720P.
Motion detection engine for image alarm notification via Email or FTP
Two-way audio (for audio models only)
SD card recording (for SD card models only)
Constant bit rate (CBR)/variable bit rate (VBR) supported
Bit rate adjustable
Network time protocol (NTP) supported
Dynamic DNS (DDNS) supported
PPPoE supported
Free Java Phone, BlackBerry, iPhone, Window Mobile, and PDA software
support
PCM/G.711 audio (for audio models only)
Free 36 channels CMX Software HD 3.2
1
Trademark Acknowledgments
Microsoft, Windows 2000, Windows XP, Windows Vista, Windows 7, ActiveX,
and Internet Explorer are registered trademarks of Microsoft Corporation in the
U.S. and/or other countries.
Java and all Java-based trademarks and logos are trademarks or registered
trademarks of Sun Microsystems, Inc. in the United States and other countries.
Flash, Macromedia, and Macromedia Flash Player are either trademarks or
registered trademarks of Adobe Systems Incorporated in the United States
and/or other countries.
Linux and DynDNS are registered trademarks of the respective holders.
Intel, Pentium, and Intel® Core™ 2 Duo are registered trademarks of Intel
Corporation.
Other names of companies and their products mentioned in this manual may
be trademarks or registered trademarks of their respective owners.
Universal ActiveX uses libraries from the FFmpeg project under the LGPLv2.1
Other References
Mobile phone
For free mobile surveillance, please refer to eMobile document in the product
CD or download the document from our company web site.
Universal ActiveX Control
Sample code and document are included in product CD and can be
downloaded from our company web site.
HTTP API
For non-ONVIF integration, please see HTTP API document. We adopt
HTTP API document for all IP cameras.
2
Caution
Do not drop or strike this equipment
Do not install the equipment near any naked flames or heat sources
Do not expose this unit to rain, moisture, smoke or dust environment
Do not cover the opening of the cabinet with cloth and plastic or to install
this unit in poor ventilated places. Allow 10cm between this unit and its
surroundings
Do not continue to operate the unit under abnormal conditions such as
detection of smoke, strange smell or no display on screen while power is
turned on
Do not touch the power connection with wet hands
Do not damage the power cord or leave it under pressure
Do not operate this unit near magnet, speaker system, etc., to avoid
unnecessary magnetic interference
Connection cables should be grounded properly
3
Table of Content
Chapter 1
Chapter 2
System Overview ........................................................................... 6
Before Accessing IP Camera......................................................... 7
Chapter 2-1 Configure IP Address Using IPScan Utility............................... 7
Chapter 2-2 Configure IP Address Using HTML Page................................. 8
Chapter 2-3 Internet Browser Setting & Software Component Required..... 8
Chapter 2-4 Login ......................................................................................... 9
Chapter 3
Start Using H.264 HD IP Camera Network Features .................. 10
Chapter 3-1 IP Camera Operational HTML Page ...................................... 10
Chapter 3-2 IP Camera Main Page Controls.............................................. 11
Chapter 3-2-1 ePTZ ............................................................................... 11
Chapter 3-2-2 Control Panel .................................................................. 12
Chapter 3-2-3 Two-way Audio ............................................................... 12
Chapter 3-2-4 Playback video................................................................ 13
Chapter 3-3 Configuration .......................................................................... 13
Chapter 3-3-1 Server Settings ............................................................... 13
Chapter 3-3-2 User Settings .................................................................. 14
Chapter 3-3-3 Timer............................................................................... 15
Chapter 3-3-4 System Setting................................................................ 15
Chapter 3-4 Network................................................................................... 16
Chapter 3-4-1 General Settings ............................................................. 16
Chapter 3-4-2 DHCP Setting ................................................................. 17
Chapter 3-4-3 PPPoE Settings .............................................................. 18
Chapter 3-4-4 HTTP & RTSP Service ................................................... 18
Chapter 3-4-5 SMTP Service................................................................. 18
Chapter 3-4-6 FTP Service .................................................................... 20
Chapter 3-4-7 DDNS Settings................................................................ 20
Chapter 3-5 Video Settings......................................................................... 21
4
Chapter 3-5-1 Video General................................................................. 21
Chapter 3-5-2 Video Quality .................................................................. 23
Chapter 3-6 Alarm Settings ........................................................................ 24
Chapter 3-6-1 Motion/Alarm Setup ........................................................ 24
Chapter 3-6-2 Motion/Alarm Setup for Camera with Alarm Input .......... 24
Chapter 3-6-3 Motion Area .................................................................... 25
Chapter 3-7 IR Cut Removable .................................................................. 26
Chapter 3-8 Alarm Output........................................................................... 26
Chapter 3-9 SD Card Recording ................................................................ 27
Chapter 3-9-1 Download SD Card Recording ....................................... 27
Appendix ..................................................................................................... 28
Advance Network DDNS and PPPoE Technologies ............................. 28
Advance Network Port Forwarding Technology .................................... 29
Emergency Factory Default ................................................................... 29
Specification................................................................................................ 30
5
Chapter 1 System Overview
Chapter 1-1 System Requirements
The IP Camera’s H.264 HD video compression technology can provide high
compression rate and superior video quality. However, the performance
highly depends on both CPU computational power of a client PC and the
network bandwidth for transmitting video streaming. The following sections
specify system requirement for running H.264 HD:
Chapter 1-2 Minimum Bandwidth Requirement
Please reserve 20% more bandwidth for specified bit rate. For example, if
the video streaming bit rate control is set to 1 Mbps. The network should
reserve at least 1.2 Mbps bit rate to gain maximum performance. If your
application is running for both Internet and LAN, it is highly recommended to
use JPEG encoding for Internet, especially very low bit rate environment. It
can maximize H.264 HD video quality for LAN application.
Chapter 1-3 Software Requirements
Merit LILIN Universal ActiveX software components are required for web
interface displaying JPEG or H.264 HD video. When you first time login the
IP camera using Internet Explorer, it prompts for a security warning dialog box
for downloading LILIN Universal ActiveX. Please click on Install button to
download.
6
Chapter 2 Before Accessing IP Camera
Before accessing the IP camera, make sure that the camera’s analog BNC
output, RJ-45 network cable, audio cable, and IP camera’s power cable are
properly installed. For setup IP address, please consult your network
administrator for available IP addresses. The default IP address of IP camera
is 192.168.0.200. User can also user default IP address to verify IP camera’s
network connection.
Chapter 2-1 Configure IP Address Using IPScan Utility
To configure IP address using IPScan utility, copy IPScan application from
installation CD to your local PC or execute IPScan software from installation
CD directly. IPScan utility can also be downloaded from our company web
site. To change IP address, subnet mask, gateway, or HTTP port, please
follow steps below:
Run IPScan utility.
Click on Refresh button. All available devices get listed in Device list box.
Select the device item in Device list box.
Edit or modify addresses in IP, Subnet Mask, Gateway, or HTTP Port edit
box.
Click on Apply button to configure the settings.
Click on Refresh button to verify the settings.
7
Note: Make sure that IPScan is version 1.0.0.22 or above to support H.264 HD IP
camera
Chapter 2-2 Configure IP Address Using HTML Page
To change IP address using HTML page, please first type the default IP
address, 192.168.0.200 in Internet browser and follow steps below:
Logon H.264 HD IP camera using default username and
password—“admin” and “pass”.
Click on “Configure” hyper link.
Click on “Network->General” hyper link.
Type or modify edit box for IP address, subnet mask, gateway, or HTTP
connection port.
Click on Submit button.
Chapter 2-3 Internet Browser Setting & Software Component
Required
Make sure that your Internet Browser allows signed ActiveX plug-in running on
your PC. Set “Download Signed ActiveX plug-in controls” to “Prompt” and
“Run ActiveX control and plug-in” to “Enable” at Internet
Explore->Tools->Options->Security Settings.
8
Please uncheck the “Enable Protected Mode” at Security tab of Internet Options
dialog box.
After finishing above security settings, accessing H.264 HD IP camera’s live
video by default IP address of H.264 HD IP camera using Internet Explorer will
prompt a Security Warning dialog box. Click on OK button to download the
ActiveX directly from H.264 HD IP camera.
Chapter 2-4 Login
There are two levels of user authentication including administrator and guest
for accessing the H.264 HD IP camera.
The default settings of username and password are described as follows:
Administrator
Guest
Username
admin
guest
Password
pass
guest
To logon the H.264 HD IP camera, please type username and password in
logon HTML page and click on Submit button to enter the system.
9
Chapter 3 Start Using H.264 HD IP Camera Network
Features
After login H.264 HD IP camera as administrator, there are two main
features—system operation and configuration. Operation and configuration
features are described as follows:
Chapter 3-1 IP Camera Operational HTML Page
H.264 HD Series operational HTML page layout
3.
1.
4.
2.
1. Control panel— Quick IP camera control panel.
2. Universal ActiveX control—Display RTSP H.264 or JPEG network
video.
3. Profile switching menu—Switching one profile to another
4. Setup menu—IP camera setup manual
10
Chapter 3-2 IP Camera Main Page Controls
Chapter 3-2-1 ePTZ
Universal ActiveX control provides ePTZ (electronically pan, tile, and zoom)
feature. To perform ePTZ feature, please use a computer mouse to drag on
the ActiveX control.
Universal ActiveX control becomes eZoom mode.
Please use computer mouse pointing to the sub-window of PIP view.
Dragging the sub-window can perform ePan and eTilt. Using mouse scroll
button can perform zoom in and out features.
11
Performing right-mouse click on the video can disable ePTZ feature.
Chapter 3-2-2 Control Panel
Control panel buttons are described as below:
Snapshot: Take a snapshot of the video.
Audio on: Set audio on (for audio model only).
Speak on: Speak to remote site (for audio model only).
Recording at PC
Activate alarm output (for alarm model only).
Chapter 3-2-3 Two-way Audio
For two-way audio, please click on Microphone icon for speaking to the
remote site. To stop speaking to the remote site, please click on
Microphone icon again.
To listen to the remote site, please click Speaker icon for listening to the
remote site. To stop listening to the remote site, please click on Speaker
icon again.
Note: Only IP camera models with audio can support this feature.
12
Chapter 3-2-4 Playback video
For play video for SD card or PC recording, please download Windows Media
Player. H.264 IP camera supports WMV file format. Plug-n-play for H.264
video clips is allowed.
Chapter 3-3 Configuration
H.264 HD IP camera’s administrator can configure H.264 HD IP camera via
standard HTML web page. This chapter explains the detail of each
configuration setting.
Chapter 3-3-1 Server Settings
Server settings contain H.264 HD IP camera server’s system information such
as MAC address, firmware version, users, system timer, and other system
settings. To change or to use these options, please follow the instructions at
this section.
MAC Address
MAC address of the IP camera
Firmware Version
Firmware update allows a user to upgrade H.264 HD IP camera’s firmware
remotely. A user can use firmware version to verify that if the device has
the latest update.
13
Device Name
The device name can be used by IPScan utility to identify the H.264 HD IP
camera To change the device name, enter the name for H.264 HD IP
camera and click on Submit button.
Language
Language setting can be changed dynamically.
Chapter 3-3-2 User Settings
There are ten user accounts allowed for the system. Each account can be
configured for its access rights. To add/edit a user, please click on Add/Edit
User button. To access H.264 HD IP camera without authentication, set
Bypass Logon radio button to ON.
To change account name, please type new account name in Account edit box.
To change new password, please type the new password in the New
Password edit box. Click on Submit button to update the user settings. To
delete a user, please click on “Remove User” button.
14
To disable Control Panel, please disable “Panel Control” option.
Chapter 3-3-3 Timer
H.264 HD IP camera allows a user to change system timer via standard HTML
web page. To change H.264 HD IP camera’s system timer, please enter the
date and time in the edit boxes. Click on Submit button to apply this
operation.
Synchronize with NTP
To synchronize Internet time system, check Auto Synchronize option to
“Every Hour”. H.264 HD IP camera synchronizes its system timer with a
time server every hour.
Note: Network Time Protocol feature requires Internet connection.
Chapter 3-3-4 System Setting
Load Default feature allows to load manufacturing default. There are certain
critical settings such as IP addresses and video system which do not be
affected by this operation.
To reboot H.264 HD IP camera, click on Reboot System hyper link.
15
Note: In case of forgetting password, the device is required to send back to our
company for a manufacturing default or read appendix for emergency default.
To update firmware of H.264 HD IP camera, please click on Firmware Update
hyper link. Locate “flash352.bin” in your computer by click the Browse button.
Click Submit button to finish firmware upgrade. To ensure the quality of
transmission, please make sure that there is no user accessing H.264 HD IP
camera during firmware upgrade.
Chapter 3-4 Network
H.264 HD IP camera provides many Internet protocols such as IP, DHCP,
PPPoE, and DDNS. A user can configure these Internet protocol settings.
To setup above, please read the following sections:
Chapter 3-4-1 General Settings
Network general settings are the basic settings connecting H.264 HD IP
camera to the network. The default IP Address of H.264 HD IP camera is
192.168.0.200. A user can use this IP address to verify the network
connection between a local PC and H.264 HD IP camera using Internet
Browser.
For local area network configuration, please enter, at least, IP address, Subnet
Mask, and Gateway IP. Click Submit button to update these settings.
16
For Internet access configuration, please contact your local ISP for global IP
address. Once the physical Internet connection gets installed, enter IP
address (global), Subnet Mask, and Gateway IP from the ISP.
• Default DNS IP Address—First Domain Name Server, the IP address of
the domain name server
• Second DNS IP Address—Second Domain Name Server, the IP
address of the domain name server, a backup DNS server for default
DNS
• PPPoE Account—Account name of PPPoE service
• PPPoE Password—Password of PPPoE service
Chapter 3-4-2 DHCP Setting
Router, gateway, or other software DHCP servers can dynamically assign an
IP address to H.264 HD IP camera. There is no need to configure IP address,
subnet mask, and gateway. Since the DHCP may assign a different IP
address to H.264 HD IP camera after power off, a user can use IPScan utility
to launch Internet browser for searching H.264 HD IP camera.
To enable
DHCP, click on DHCP option and click on Submit button.
Note: Once the DHCP option gets enable, IP camera of the IP address assigned by
DHCP server. This feature allows only in LAN environment.
17
Chapter 3-4-3 PPPoE Settings
Point-to-Point Protocol over Ethernet (PPPoE) is an Internet protocol that is
capable of receiving dynamic global IP address from an ISP. This protocol
allows switching to another global IP address to maintain the Internet
connection due to expiration of a global IP address based on ISP’s IP
distribution’s policy.
Primary purpose of adopting PPPoE can avoid the fee of leasing global IP
address. Please consult your local ISP for this service. To use PPPoE,
please provide account and password information for the service.
Chapter 3-4-4 HTTP & RTSP Service
HTTP protocol is a reliable protocol for sending video streaming. Port
forwarding technology can be used for sending video over Internet. The
detail is described in the appendix. For changing HTTP service’s port
number, please consult available port number from your network administrator.
Change the port number at the port field and click on “Submit” button.
Chapter 3-4-5 SMTP Service
Alarm or motion notification feature can send an alarm or motion detection
snapshot to an E-mail account. To enable alarm or motion sending E-mail
feature, please setup the following email accounts.
18
E-mail receiver setting
E-mail address— E-mail address of the recipient
E-mail sender setting
E-mail address— E-mail address of the sender
SMTP server— Sender’s SMTP server
Authorization— SMTP server’s authorization option if applicable
Authorization account— Account of the SMTP server
Authorization password— Password of the account
To send a testing snapshot to a SMTP server, please click “Send” button to
test and to verify the connection of the SMTP server.
19
Chapter 3-4-6 FTP Service
Alarm or motion notification feature can send alarm or motion detection
snapshot to an FTP account. To enable alarm or motion sending FTP feature,
please setup the following FTP account information.
FTP server IP/DNS— IP address or domain name of the FTP
server
Account— Account of the FTP server
Password— Password of the account
Directory— File saving directory
Chapter 3-4-7 DDNS Settings
DNS stands for domain name server, which provides domain name translation
service for a device’s IP. Basically, domain name is easier to remember than
numeric values (IP). DNS service requires service registration and
subscription. DynDNS (DDNS) provides domain name service without
subscription. Please logon www.dyndns.org and register for the service. To
use DDNS, please enter DDNS server, account ID, and password to logon to
the server. Click on Submit button to perform the task. The DDNS message
box shows the connection status sent by DynDNS server, after H.264 HD IP
camera establishes network connection with DDNS server.
20
Note: DDNS feature requires Internet connection.
Chapter 3-5 Video Settings
This section describes the details in setting H.264 HD video’s attributes.
VBR/CBR, bit rate control, video input, and video resolution settings can be
configured.
Chapter 3-5-1 Video General
For transmitting H.264 HD over low bandwidth network such as Internet,
please set the bit rate close to network upload bandwidth. H.264 HD can
encode H.264 HD frames based on the bit rate setting.
21
Profile Enable: Enable or disable the profile
Profile Name: Description of the profile
Enable Profile: Enable or disable a profile.
Compression: compression of the profile
Resolution: the resolution of the compression
Player: software decoder on the main page
Bit Rate: Maximum bit rate available for a network connection
VBR/CBR: Variable bit rate/constant bit rate if limited frame size is
required for an application, set this option to CBR.
Output Frame Rate: streaming output frame rate
Output frame rate: the frame rate of the profile
Video output: NTSC/PAL video system for analog
22
Chapter 3-5-2 Video Quality
Brightness: Brightness setting of the video
Contrast: Contrast setting of the video
Hue: Hue setting of the video
Saturation: Saturation setting of the video
Sharpness: Sharpness setting of the video
23
Exposure Control: Auto or manual exposure mode
Exposure value: Auto exposure mode setting
Electronic Shutter: Sensor shutter setting
Automatic Gain Control: Automatic gain control
White Balance Control: Video white balance control
Black Level Calibration: Video black level calibration
Sensor Up: Increase sensitive at night
Mirror: Left and right mirroring of the video
Flip: Top and down flipping of the video
Chapter 3-6 Alarm Settings
H.264 HD IP camera’s hardware alarm system contains motion detection,
alarm sensors, and one alarm/relay output. Many alarm features such as
motion/alarm email notification and FTP archiving can be found at this section.
Chapter 3-6-1 Motion/Alarm Setup
There are motion detection zones allowed in H.264 HD IP camera. A user
can enable the detection zones with different sensitivities ranging from 1 to 99
(highest to lowest) for motion detection. Once a suspicious motion activity
gets triggered, H.264 HD IP camera can start to capture one JPEG snapshot
on various recording mediums.
Chapter 3-6-2 Motion/Alarm Setup for Camera with Alarm Input
•
•
•
•
•
Alarm Notification—Enable alarm input notification.
Alarm Input Mode—Normal open/normal close alarm input
Motion Detection—Enable motion detection notification.
Motion sensitivity—1 to 99 (highest to lowest).
Alarm/motion detection notification via—FTP or Email
24
Chapter 3-6-3 Motion Area
Once above information get set, please configure the motion area of the
monitored environment. To configure motion area, perform mouse click on
the video area.
25
Chapter 3-7 IR Cut Removable
IR Cut removable allows to schedule IR activation by (1) auto, (2) in, (3) out, or
(4) schedule.
When the setting is set to "Auto", IR activation is determined by the light
sensor. "In" setting means that the IR cut feature is removed. "Out" setting
means that the IR cut feature is forced to be always on. When activation
schedule is enabled, IR cut feature can be scheduled based on a specific time
frame. For example, a user can set the IR cut activation time starting from
19:00 pm (day to night time) until 6:00 am (night day time).
Note: This feature is only applicable to IR and day-n-night IP cameras.
Chapter 3-8 Alarm Output
For the camera with alarm output device, it has built-in NO relay output, dry
contact, DC 24 1A. To enable, relay output, please click “Alarm output”
button.
26
Chapter 3-9 SD Card Recording
The SD card can record H.264 HD video clips when alarm/motion triggering
and continuous recording. To enable SD Recording feature, please set the
option to On. The details are described as below:
•
•
•
•
•
Alarm/Motion Triggering—Activate SD Recording when
alarm/motion triggers.
Record Time—Recording duration after alarm/motion triggering
Continuous —Continuous recording
No Network Activity—Record when network loss connection or no
client connection
I-Frame Only—Record only I frame
Chapter 3-9-1 Download SD Card Recording
The SD Card recordings can be downloaded via HTTP web interface. To
download the file, simply click on the hyper link to download the file. To play
the video clips, please use KMPlayer for playing the H.264 video files.
27
Appendix
Advance Network DDNS and PPPoE Technologies
The advantage of using DDNS and PPPoE is to save the expense of IP
address. H.264 HD IP camera’s PPPoE service gets a dynamic global IP
address after system reboot. This IP address may get changed periodically.
This is the address needed to access the video server over Internet. When
ISP re-assigns a new IP address to H.264 HD IP camera, H.264 HD IP camera
notifies DDNS service. A remote PC can access H.264 HD IP camera by
typing domain name in a browser. The domain name gets resolved by DDNS
service and gets translated to its dynamic global IP address. The dynamic
global IP address can now be accessed by the remote PC.
Remote PC
4. Access FAST DOME
CAMERA using the dynamic
global IP address.
DDNS Server
ISP
Internet
2. ISP assigns global IP to
5. Resolve domain name to IP
FAST DOME CAMERA
address and sent back to
remote PC..
1.
2.
Get IP address from ISP after reboot.
Notify DDNS server for the new IP address if
FAST DOME CAMERA gets reboot or assigned
a new IP address.
28
Advance Network Port Forwarding Technology
Port forwarding technology is an advanced network technology which is wildly
used for using one global IP shared by many network devices. The network
architecture is illustrated as below. Port 80 of the router (61.220.86.166) is
assigned to the device IP address, 192.168.0.10. Port 81 of the router is
assigned to the device IP address, 192.168.0.11. When Remote PC
accesses the router’s port 81 (61.220.86.166:81), it eventually accesses the
video server at 192.168.0.11.
Internet
http://61.220.86.166:81
Router’s global IP: 61.220.86.166
Port 80: 192.168.0.10
IP: 192.168.0.11
IP: 192.168.0.10
Port 81: 192.168.0.11
Emergency Factory Default
To restore the server to factory default settings, please:
1. Hold Load Default Button for 10 second
2. Green network LED blinks after about 20 second , to complete load
default setting
3. The server board reboots itself.
4. Using IPScan scanning for the IP address of the IP device.
5. Launch Internet browser for the IP address of the IP device.
6. Type default username “admin” and password “pass” for enter web interface
of the IP device.
Note: For convenient purpose, IP address resets to default IP address,
192.168.0.200, after performing Load Default operation.
29
Specification
Video compression H.264 and Motion JPEG
Resolution
720P: 1280 * 768 / VGA: 640 * 384 / CIF: 320 * 192
Multiple profile
Stream 4 profiles, H.264 at 720P; JPEG at 720P, H.264 at VGA, JPEG at VGA
Frame rate
Up to 720P 30 FPS shared by profiles
Video streaming
RTSP: RTP/HTTP, RTP/TCP, RTP/UDP
Video bitrate
5Mbps to 128Kbps
Base64 HTTP encryption
Multiple user access levels with password protection
10 user accounts available
Yes
Events triggered by built-in motion detection
20*12 motion detection zone
Alarm/motion triggering recording into SD card.
Image upload over FTP and e-mail by motion detection and external alarm
inputs
Embedded SoC ARM9, 500Mhz, 64MB DDR, 8 MB flash memory
Security
Digital Zoom
Alarm/motion
CPU, memory
IR Cut removal
Scheduling, auto, and manual
Alarm input
TTL input +3VDC to +5VDC (for alarm supported model only)
Alarm output
DC 24 1A, dry-contact (N.O.) (for alarm supported model only)
Firmware update via HTTP
Firmware available at web site
Maintenance
Network interface
PC requirement
Two-way audio
10Mbps/100Mbps, RJ-45
OS: Windows 2000, Windows XP, Windows Vista, Windows 7
Browser: Windows Internet Explore 5.0 or above
CPU: Intel Pentium 4 1.8GHz or above
RAM: 1GB or above
G.711/PCM (for audio supported model only)
SD Card recording Support SD card for circular recording (for SD card supported model only)
Network protocols
IP, TCP, UDP, HTTP, SMTP, ESMTP, NTP, DDNS, FTP, ARP, DHCP, PPPoE, DNS,
Telnet, ONVIF
Mobile phone &
PDA
Free eMobile software for Java mobile phone, Windows Mobile 5/6, PDA,
BlackBerry, and iPhone
System integration ONVIF
CMX
Free CMX Software HD 3.2 support
OS
Embedded Linux 2.4.19
30
DISTRIBUTOR:
66-IP12ESOOE-1
31