1
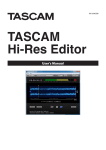
TASCAM Hi-Res Editor
3 Audio Driver setting
Sets the audio driver used for playback.
u File information
This shows information about the open audio file.
4 Audio Device setting
Sets the audio device used for playback.
5 Play Frequency setting
Sets the sampling frequency used for playback.
When set to AUTO, the open file will be played back at
its sampling frequency.
6 Control Panel button (ASIO only)
Click this button when the Audio Driver setting is ASIO
to open the setting screen for the device set as the
“Audio Device”.
7 Time counter
This shows the elapsed time during file playback.
When stopped, the playback time can be input to
change the playback position. (See “Changing the
playback position” on page 6)
8 Waveform display
This shows the waveforms of the audio file.
The IN/OUT points are shown with the audio file
waveforms.(See “Setting IN/OUT points” on page 7)
9Cursor
This shows the playback position. Click the waveform
display area to move the cursor (playback position) to
that point. (See “Changing the playback position” on
page 6)
0Scrollbar
When the waveform display is zoomed in, drag the
scrollbar left or right to move the waveform left or
right.
q SET POINT (IN/OUT) buttons
Sets the IN/OUT point at the cursor position. (See
“Setting IN/OUT points” on page 7)
w OPEN button
Opens the “Open Audio File” screen where you can
open audio files. (See “Opening audio files” on page
5)
e EXPORT button
Opens the “Export File” screen where file conversion
functions can be set and files exported. (See
“Outputting audio files” on page 7)
r Level meters
These show the audio levels during audio file
playback.
If “OVER Indicator” in the Tools menu is set to “Holds
Until Clicked,” clicking a lit OVER indicator at the right
end of these meters will turn it off.
t Waveform area amplitude zoom in/out (+/−) buttons
Use to zoom in/out on the waveform display in the
amplitude (vertical) direction.
y Waveform area time axis zoom in/out (+/−) buttons
Use to zoom in/out on the waveform display in the
time axis (horizontal) direction.
a File name
b File playback time
c File format
d Sampling frequency
e Bit rate
f Number of channels
i : button
Starts playback from the IN point.(See “Setting IN/OUT
points” on page 7)
o 8 button
Stops playback of the audio file.
p 7 button
Starts playback from the cursor position.
a COMBINE button
Opens the “Combine Files” screen where two files can
be joined together.(See “Combining audio files” on
page 9)
Opening audio files
88 Using the OPEN button to select a file
Click the OPEN button to open the “Open Audio File”
screen, and select the file to playback.
88 Dragging and dropping a file to select it
Drag and drop the file you want to play to the TASCAM
Hi-Res Editor screen.
Selecting the audio device for audio output
1. Connect the audio device for audio output to the
computer.
2. Click the Audio Driver setting area, and click the type
of audio driver to use to set it.
Options: ASIO (default value), WASAPI
The selected audio driver will be shown. This enables
the selection of an audio device that is compatible
with the selected driver in the Audio Device area.
3. Click the options in the Audio Device setting area, and
click the name of the audio device to use to set it.
This shows the name of the selected audio device.
NOTE
The options shown in the Audio Device setting area
depend on the drivers installed on the computer being
used.
Playing audio files
1. Open a DSD file or PCM file for playback (audio
output). (See “Opening audio files” on page 5)
TASCAM Hi-Res Editor
5