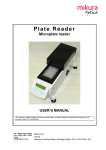
1
Operating Manual PV 403
Table of contents
Table of contents
1
Introduction ................................................................................. 5
1.1
1.2
1.3
2
Safety precautions ...................................................................... 7
2.1
3
Humidification devices ....................................................................... 26
Placing a heated humidifier ................................................................ 26
Connecting the humidifier .................................................................. 26
Supplying oxygen ..................................................................... 27
7.1
7.2
7.3
7.4
7.5
8
Power source priority.......................................................................... 23
Indicating battery operation ................................................................ 23
Using an external battery .................................................................... 23
Using an internal battery..................................................................... 24
Using a humidifier with the PV 403 PEEP ............................... 26
6.1
6.2
6.3
7
Installing the PV 403 PEEP ................................................................ 19
Placing the PV 403 PEEP ................................................................... 19
Connecting the patient circuit ............................................................. 19
Connecting the PV 403 PEEP to the mains ........................................ 20
Switching the PV 403 PEEP on and off ............................................. 21
Displaying the voltage of the current power source ........................... 21
Checking the PV 403 PEEP before use .............................................. 21
To monitor the exhaled volume .......................................................... 22
Using a battery supply.............................................................. 23
5.1
5.2
5.3
5.4
6
Main components................................................................................ 11
Front panel .......................................................................................... 12
Settings panel ...................................................................................... 13
LCD display ........................................................................................ 16
Rear panel ........................................................................................... 17
Using the PV 403 PEEP............................................................. 19
4.1
4.2
4.3
4.4
4.5
4.6
4.7
4.8
5
Safety symbols .................................................................................... 10
Main components and panels .................................................. 11
3.1
3.2
3.3
3.4
3.5
4
Intended use .......................................................................................... 5
Contraindications .................................................................................. 5
About this manual ................................................................................. 6
Oxygen source .................................................................................... 27
Oxygen monitor .................................................................................. 27
Pressure limiter ................................................................................... 27
Connecting the oxygen supply............................................................ 28
Adjusting the tidal volume and the oxygen flow (VCV mode) .......... 29
Ventilation modes and parameters.......................................... 30
8.1
8.2
8.3
8.4
8.5
Setting parameters............................................................................... 30
PCV mode (Pressure Control Ventilation) ......................................... 32
PSV mode (Pressure Support Ventilation) ......................................... 33
Comparing PCV and PSV modes ....................................................... 34
VCV mode (Volume Control Ventilation) ......................................... 35
Doc. No. 003 176 En
Issue: X-1
BREAS MEDICAL
Page 1
Table of contents
9
Operating Manual PV 403
Setting the PV 403 PEEP .......................................................... 36
9.1
9.2
9.3
9.4
9.5
9.6
9.7
9.8
9.9
9.10
9.11
9.12
9.13
9.14
Locking/unlocking the settings panel ................................................. 36
Selecting the ventilation mode............................................................ 37
Setting the pressure ............................................................................. 37
Setting the rate .................................................................................... 37
Setting the inspiration time (Insp. Time) ............................................ 38
I/E Ratio table ..................................................................................... 38
Incorrect settings for rate and inspiration time ................................... 39
Setting the inspiration trigger (Insp. Trig.) ......................................... 39
Setting the plateau............................................................................... 40
Setting the expiratory trigger (Exp. Trig.) .......................................... 40
Setting the tidal volume ...................................................................... 41
Incorrect settings for rate and tidal volume ........................................ 41
Setting the PEEP function................................................................... 42
Incorrect settings for pressure and PEEP............................................ 42
10 Alarm .......................................................................................... 43
10.1
10.2
10.3
10.4
10.5
10.6
10.7
10.8
10.9
10.10
Audible alarm...................................................................................... 43
Power failure alarm............................................................................. 43
Alarm for low pressure ....................................................................... 44
Alarm for high pressure ...................................................................... 44
Alarm for low tidal volume................................................................. 45
Alarm for high rate.............................................................................. 45
Low battery alarm ............................................................................... 45
Function error alarm ........................................................................... 46
Setting the alarm levels in PSV and PCV modes ............................... 46
Setting the alarm levels in VCV mode ............................................... 47
11 Complete function check.......................................................... 49
11.1
11.2
11.3
11.4
11.5
11.6
11.7
11.8
11.9
11.10
11.11
11.12
11.13
Preparing the function check .............................................................. 49
Alarm check – low pressure................................................................ 50
Inspiration check ................................................................................. 50
Exhalation check ................................................................................. 51
Alarm check – high pressure............................................................... 51
Inspiration trigger check ..................................................................... 51
Expiratory trigger check ..................................................................... 52
Tidal volume check............................................................................. 52
Alarm check – low tidal volume ......................................................... 52
Alarm check – high rate ...................................................................... 53
PEEP function check........................................................................... 53
Power failure check............................................................................. 53
Completing the function check ........................................................... 54
12 Cleaning the PV 403 PEEP and replacing the filters.............. 55
12.1
12.2
12.3
12.4
12.5
12.6
12.7
Page 2
Cleaning/disinfection in the clinic ...................................................... 55
Cleaning/disinfection in the home ...................................................... 56
Cleaning and replacing the patient air filter........................................ 56
Using a bacteria filter.......................................................................... 57
Cleaning the mask and tubes............................................................... 57
Cleaning the BREAS exhalation valve ............................................... 58
Change of patient ................................................................................ 58
BREAS MEDICAL
Doc. No. 003 176 En
Issue: X-1
Operating Manual PV 403
Table of contents
13 Maintenance............................................................................... 59
13.1
13.2
13.3
Checking the operation hours and software version ........................... 59
Setting the date and time..................................................................... 59
Disposal .............................................................................................. 60
14 Troubleshooting ........................................................................ 61
15 Service........................................................................................ 63
15.1
15.2
Yearly maintenance check .................................................................. 63
Service records.................................................................................... 64
16 Technical specifications........................................................... 65
16.1
16.2
16.3
16.4
Analog/Digital output connector ........................................................ 68
Alarm output connector ...................................................................... 69
Compliance of Standards .................................................................... 71
Delivery settings ................................................................................. 72
17 Accessories ............................................................................... 73
18 Patient settings – BREAS PV 403 PEEP.................................. 74
19 Patient instructions – BREAS ventilator PV 403 PEEP.......... 76
Doc. No. 003 176 En
Issue: X-1
BREAS MEDICAL
Page 3
Table of contents
Page 4
Operating Manual PV 403
BREAS MEDICAL
Doc. No. 003 176 En
Issue: X-1
Operating Manual PV 403 PEEP
1
Introduction
Introduction
The PV 403 PEEP is a pressure-controlled, pressure-support, and volume-controlled
ventilator for patients who require continuous or intermittent support by mechanical ventilation.
It has three modes of operation: PSV, PCV, and VCV. All modes have an adjustable trigger sensitivity setting which allows the patient to initiate ventilator-assisted breaths.
In the PCV mode (Pressure Controlled Ventilation), the ventilator provides assisted or
controlled pressure-regulated breathing.
In the PSV mode (Pressure Support Ventilation), the ventilator’s expiratory sense can
also be adjusted allowing the ventilator to more easily match each patient’s needs.
In the VCV mode (Volume Controlled Ventilation), the ventilator provides assisted or
controlled volume-regulated breathing.
The internal PEEP (Positive End Expiratory Pressure) function is used for controlling the
patient’s airway pressure during the exhalation phase.
The internal patient data memory of the PV 403 PEEP can be downloaded to a PC,
printed out, and analysed via the Patient Data Analysis software package. For more
information about this software package, please contact your BREAS representative.
1.1
Intended use
The PV 403 PEEP is intended for treatment
•
in institutions and patients’ homes,
1.2
•
by qualified, trained personnel under the direction of a physician,
•
of adult and pediatric patients with reduced lung function, using either a nasal mask
or a trach tube,
•
that may be life-supporting, provided that an internal or external battery back-up
source is used and emergency equipment (resuscitation bag) is available.
Contraindications
The contraindications for treatment by the PV 403 PEEP could be as follows:
•
Generally after thoracic surgery, the surgeon has to be consulted to avoid organ
damage.
•
After heart surgery, care should be taken to choose ventilator parameters which do
not adversely affect haemodynamics.
•
In case of facial surgery, the ventilator shall not be used with a nasal mask.
•
After abdominal surgery, cautious use of ventilatory therapy is necessary because
of pressure changes transmitted to the abdomen.
Doc. No. 003 176 En
Issue: X-1
BREAS MEDICAL
Page 5
Introduction
1.3
Operating Manual PV 403 PEEP
About this manual
Read this manual before setting up and using the PV 403 PEEP to ensure correct usage, maximum performance, and serviceability.
This manual is primarily intended for care providers, clinical personnel, doctors and others who require a working knowledge of the PV 403 PEEP. However, the chapter
“Patient instructions – BREAS ventilator PV 403 PEEP” on page 76 is intended for the
end-user.
Service personnel may order the BREAS PV 403 PEEP Service Manual which
contains detailed service and repair information, such as technical instructions, calibration data, electrical diagrams, component lists, and so on. It also contains information on the installation and maintenance of accessories.
Icons
In this manual, icons are used to alert you to specific information. The meaning of each
icon is explained in the table below.
Icon
Page 6
Type of
information
Explanation
Note
A “note” provides information that is not of critical importance, but may nevertheless be valuable, such as tips and
tricks.
Warning
A “warning” is used when there is a risk of personal injury
or equipment damage. Moreover, it is used when you may
risk losing data, getting an unexpected result or having to
redo (part of) a procedure.
Reference
A “reference” guides you to other manuals where you will
find additional information on a specific topic.
BREAS MEDICAL
Doc. No. 003 176 En
Issue: X-1
Operating Manual PV 403 PEEP
2
Safety precautions
Safety precautions
This chapter lists all safety precautions for the PV 403 PEEP. Furthermore, the safety
symbols on the equipment designation label are described.
General
•
Do not use the PV 403 PEEP for any other treatment than the intended use recommended by BREAS.
•
Clinic personnel and the end-user must read this operating manual and understand
how the PV 403 PEEP is used before setting up and using the apparatus.
•
The PV 403 PEEP may be used for total life support provided that emergency
equipment (resuscitation bag) is available and either an external battery and/or an
internal back-up battery pack is installed. The battery supply serves as a back-up
power supply if the mains power supply fails or is disconnected. For more information, see the chapter “Using a battery supply” on page 23.
•
Adjustment of settings should always be based on medical advice and must be carried out by authorised clinic personnel only. Blood gas measurement shall be performed when changing settings or changing to another device.
•
All the patient alarms of the PV 403 PEEP must be set at safe levels that will effectively warn the user of any incident. The alarm levels should be assessed considering the patient settings and the exact configuration of the patient circuit
components. Any change of settings or components may require the readjustment
of the alarm levels.
•
Do not use an autoclave to sterilise the PV 403 PEEP.
•
Always perform a function check before use, see page 21.
•
If the PV 403 PEEP is used continuously (24 hours a day), it must be switched off
and on again once a day while connected to the power source (mains supply, external battery, or internal battery). This is necessary in order for the PV 403 PEEP to
perform a self-test.
•
If the electronics fail, the PV 403 PEEP cannot deliver a pressure higher than 60
mbar at single fault condition.
•
To ensure maximum operational reliability, the PV 403 PEEP must be serviced at
the specified intervals by authorised service personnel.
Environmental conditions
•
Do not use the PV 403 PEEP in environments where there are explosive gases or
other flammable anaesthetic agents present.
•
Do not place the ventilator so that the air inlet at the rear can be blocked.
•
Do not use the PV 403 PEEP when placed in direct sunlight.
Doc. No. 003 176 En
Issue: X-1
BREAS MEDICAL
Page 7
Safety precautions
Operating Manual PV 403 PEEP
•
The performance of the ventilator and the treatment of the patient may deteriorate if
the operation conditions are not fulfilled, see the chapter “Technical specifications”
on page 65.
•
Do not use the PV 403 PEEP immediately after storage or transport outside the recommended operating conditions.
•
The device complies with the requirements of IEC 601-1-2 with regards to “Electromagnetic compatibility”. Necessary measures must be taken in order to ascertain
that the specified limits are not exceeded as this may impair the safety of the ventilator. Such measures should include, but not be limited to:
– normal precautions with regard to relative humidity and conductive characteristics of clothing in order to minimise the build-up of electrostatic charges.
– avoiding the use of radio emitting devices in close proximity to the equipment,
such as high-frequency surgery apparatus or cordless (mobile) telephones, CB
radios, microwave ovens, etc. resulting in a field level exceeding 10 V/m.
– avoiding the use of patient hoses or tubes made of static or electrically conductive material.
User precautions
•
Use a new patient circuit for each new user of the PV 403 PEEP.
•
Patient-connected parts and filter must be replaced regularly to ensure correct function of the PV 403 PEEP. All replaced parts must be disposed of according to local
environmental regulations regarding the disposal of used equipment and parts.
•
If the PV 403 PEEP is used in a clinic by several users, a bacteria filter must be fitted between the air outlet and the patient circuit to prevent contamination.
•
Contact your responsible clinic if any of the following symptoms appear: dryness of
air passages or nose, skin sensitivity, runny nose, ear pain, sinus discomfort, mood
change, disorientation, irritability, or memory lapse.
Use of humidifier
•
If a heated humidifier is used together with the PV 403 PEEP, it must comply with
the ISO 8185 standard.
•
If a heated humidifier is used, always place the humidifier lower than the patient
and the PV 403 PEEP. This prevents the water from causing personal injury or
equipment damage when running down if the humidifier tips over.
•
The use of an HME or a heated humidifier may require readjustment of the
PV 403 PEEP’s low-pressure alarm.
•
When using a heated humidifier, condensation may form in the patient circuit over
time.
– Periodically check for moisture in the patient circuit. When present, remove the
moisture. Before attempting to dry the circuit, disconnect it from the ventilator.
The frequency at which these checks must be performed will depend on the
Page 8
BREAS MEDICAL
Doc. No. 003 176 En
Issue: X-1
Operating Manual PV 403 PEEP
Safety precautions
patient’s own condition and the device used. You should assess this on an individual basis in accordance with the patient’s needs.
– If the condensation in the patient circuit is excessive, the use of a heated humidifier may require the installation of a water trap in the circuit. The water trap prevents any condensated water in the patient circuit from running into the patient
airways and causing personal injury.
Use of oxygen
•
Oxygen must only be supplied through the patient hose using the BREAS oxygen
adapter.
•
In some cases, an external pressure limiter may be required when adding supplemental oxygen to the patient circuit.
The following precautions must be taken when using oxygen as its presence can
speed up the combustion of flammable materials:
•
Naked lights and other sources of ignition must be kept well away from the oxygen
cylinder, at least two metres.
•
Do not smoke in a room where oxygen is being used.
•
The room must be well ventilated.
•
Do not use aerosols or solvents close to the oxygen supply, even when switched off.
Doc. No. 003 176 En
Issue: X-1
BREAS MEDICAL
Page 9
Safety precautions
2.1
Operating Manual PV 403 PEEP
Safety symbols
The safety symbols are printed on the equipment designation label of the PV 403 PEEP.
The equipment designation label and the model/serial number label are located underneath the machine. They are displayed in the figure below.
This table describes the symbols on the model/serial number label and the equipment
designation label.
No.
Symbol
Explanation
1
–
Model designation
2
–
Serial number
3
Read “Disposal” on page 60 for information about recycling
and disposal.
4
Class II equipment; dual isolation
5
Body floating
6
Read the operating manual thoroughly before connecting the
PV 403 PEEP to the patient.
7
0123
Page 10
CE marking applies according to the directive MDD 93/42/
EEC.
BREAS MEDICAL
Doc. No. 003 176 En
Issue: X-1
Operating Manual PV 403 PEEP
3
Main components and panels
Main components and panels
This chapter gives an overview of the main components and the panels of the
PV 403 PEEP. For more information on the settings of the ventilator, see the chapter
“Setting the PV 403 PEEP” on page 36.
3.1
Main components
The figure below displays the main components of the PV 403 PEEP.
Main components
The table below describes the main components of the PV 403 PEEP.
No.
Component
Description
1
Front panel
Panel used for connecting PV 403 PEEP to the patient
circuit.
2
Settings panel
Panel with user controls, indicator LEDs, and LCD display
used for adjusting the patient settings.
3
Rear panel
Panel used for connecting the PV 403 PEEP to the power
source and to external equipment.
4
Air inlet and filter
cassette
The filter is used for filtering incoming air.
For details, see page 55.
Doc. No. 003 176 En
Issue: X-1
BREAS MEDICAL
Page 11
Main components and panels
3.2
Operating Manual PV 403 PEEP
Front panel
The front panel of the PV 403 PEEP is shown in the illustration below.
Front connectors
The table below describes the connectors of the front of the PV 403 PEEP.
Page 12
No.
Connector
Function
1
Patient air outlet
Used for connecting the ventilator to the patient tube.
Diameter 22 mm ISO cone, male.
2
Exhalation valve
connector
Used for connecting the white control tube to the exhalation
valve. Diameter 4 mm tube.
3
Pressure measuring
connector
Used for connecting the green pressure tube to the exhalation valve. Diameter 3 mm tube.
BREAS MEDICAL
Doc. No. 003 176 En
Issue: X-1
Operating Manual PV 403 PEEP
3.3
Main components and panels
Settings panel
The user controls and the LEDs on the settings panel that is located on the top of the
PV 403 PEEP are shown in the illustration below.
Doc. No. 003 176 En
Issue: X-1
BREAS MEDICAL
Page 13
Main components and panels
Operating Manual PV 403 PEEP
User controls and indicator LEDs
The table below describes the user controls and LEDs on the settings panel of the
PV 403 PEEP.
Page 14
No.
User controls,
indicator LEDs
Function
1
Patient pressure
meter
Used for displaying the current patient pressure, measured
at the exhalation valve.
2
LCD display
Used for controlling various settings and functions of the
PV 403 PEEP, see the following table.
3
+/– Setting buttons
User control used for:
• checking the voltage of the current power source
• locking the settings panel
• increasing and decreasing the value of the selected setting
parameter
• adjusting the alarm levels for low and high pressure, high
rate, and low tidal volume
• setting the actual date and time
4
Alarm set button
Used for displaying and setting the alarm levels for high and
low pressure, high rate, and low tidal volume.
5
Mode button
Used for displaying and setting the active ventilation mode;
PCV, PSV, or VCV mode.
6
Muted alarm LED
Indicates that the audible alarm is temporarily muted.
7
Function button
User control used for:
• lighting the background illumination of the LCD display
• selecting the setting parameters to be adjusted
• displaying the actual date and time
• muting the audible alarms for low pressure, low tidal
volume, and high rate
8
Lock function LED
Used for indicating that the settings panel of the
PV 403 PEEP is locked (green light).
9
Alarm indicator
panel
Used for activating the alarm settings.
The alarm LEDs lights as follows:
High priority alarms (red LEDs):
• Power – power failure during operation (steady light).
• Pressure – the delivered pressure is higher, or lower than
the set alarm levels.
• Volume – the tidal volume is below the set alarm level.
Medium priority alarms (yellow LEDs):
• Rate – the breath rate has exceeded the set alarm level.
• Battery – the internal battery voltage drops below 23.3 V
during operation.
BREAS MEDICAL
Doc. No. 003 176 En
Issue: X-1
Operating Manual PV 403 PEEP
Main components and panels
No.
User controls,
indicator LEDs
Function
10
On/Off button
Used for switching the PV 403 PEEP on or off.
LED indicating that the ventilator is switched on and
connected to power source:
• Steady light – running from mains supply.
• Flashing light – running from battery supply.
Doc. No. 003 176 En
Issue: X-1
BREAS MEDICAL
Page 15
Main components and panels
3.4
Operating Manual PV 403 PEEP
LCD display
The table below describes the user controls and the corresponding indicator LEDs on the
LCD display of the PV 403 PEEP.
Page 16
No. User controls
and
indicator LEDs
Function
A
Pressure
User control used for reading and setting the patient pressure.
Left LED indicating inspiration.
B
Rate
User control used for setting and displaying the patient’s
breathing rate.
C
Insp. Time
User control used for setting and displaying the inspiration
time.
D
Insp. Trig.
Used for setting and displaying the inspiration trigger setting.
Left LED indicating that the patient triggers a breath.
E
Plateau
Used for setting and displaying the speed at which the pressure or volume increases to the desired value.
F
Exp. Trig.
Used for setting and displaying the expiratory trigger.
G
Volume
User control used for setting and displaying the delivered
tidal volume.
H
Power
User control used for displaying
• the current power source: M – mains power, E – external
battery, or I – internal battery
• the voltage of the current power source
Left LED indicating that the PV 403 PEEP is connected to
the mains.
I
PEEP
Used for setting and displaying the internal PEEP function.
J
Indicator LEDs
LEDs on the right-hand side of the display that indicate
which of the functions listed above is selected when pressing
the Function button:
• Pressure (mbar)
• Rate (BPM)
• Inspiration time (Sec)
• Inspiration trigger (mbar)
• Plateau (–)
• Expiratory trigger (%)
• Tidal volume (Litre)
• PEEP (mbar)
BREAS MEDICAL
Doc. No. 003 176 En
Issue: X-1
Operating Manual PV 403 PEEP
3.5
Main components and panels
Rear panel
The components and the user controls on the rear panel of the PV 403 PEEP are shown
in the illustration below.
User controls and components
The table below describes the functions of the user controls, the connectors, and other
components on the rear panel.
No.
User controls
and components
Function
1
Mains power socket
Used for connecting the PV 403 PEEP to the mains through
the power cord.
2
Alarm output
connector
Used for connecting the PV 403 PEEP to an external alarm
device.
Read the operating manual thoroughly before using the
alarm connector, see page 69.
3
Fastening clamp
Used for securing the power cord.
4
Alarm buzzer
Used for the audible alarm of the PV 403 PEEP.
5
Adjust screw for
sound level
Used for adjusting the sound level of the audible alarm.
6
Connector for
external battery
supply
Used for connecting the PV 403 PEEP with BREAS
external battery EB 2 or another 24 V DC power source.
Read the operating manual thoroughly before using the
battery connector, see page 23.
Doc. No. 003 176 En
Issue: X-1
BREAS MEDICAL
Page 17
Main components and panels
Page 18
Operating Manual PV 403 PEEP
No.
User controls
and components
Function
7
Analog/Digital
output connector
Used for connecting the PV 403 PEEP to a remote alarm, a
PC, or other external equipment.
Read the operating manual thoroughly before using the
analog/digital connector, see page 68.
BREAS MEDICAL
Doc. No. 003 176 En
Issue: X-1
Operating Manual PV 403 PEEP
4
Using the PV 403 PEEP
Using the PV 403 PEEP
This chapter describes the basic procedure for operating the PV 403 PEEP. It is mainly
intended for clinic personnel.
Read the chapter “Safety precautions” on page 7 before setting up and using
the PV 403 PEEP.
4.1
Installing the PV 403 PEEP
When using the PV 403 PEEP for the first time, check the device for damage and to be
sure that all ordered accessories are included according to the packing note or the
invoice.
4.2
Placing the PV 403 PEEP
Follow the instructions below for the placement of the PV 403 PEEP:
•
Do not use the PV 403 PEEP when exposed to direct sunlight.
4.3
•
Place the PV 403 PEEP on a solid, flat surface.
•
Make sure that nothing can block the filter cassette air inlet at the rear, right-hand
side of the ventilator.
•
Check that the PV 403 PEEP cannot be affected by any electromagnetic fields emitted by other nearby equipment.
Connecting the patient circuit
To connect the PV 403 PEEP to the patient circuit:
1 Connect the patient circuit to the patient air outlet on the front panel, see figure
below. If a bacteria filter/oxygen adapter is used, connect it between the hose and
the patient air outlet.
2
3
4
5
Connect the other end of the patient tube to the exhalation valve.
Connect the thin white control tube to the exhalation valve connector (indicated by
a white symbol) on the front panel. Connect the other end to the membrane nipple.
Connect the green pressure sensor tube to the pressure measuring connector (indicated by a green symbol) on the front panel. Connect the other end to the pressure
sensor nipple of the exhalation valve.
Connect the exhalation valve to the flex tube. Connect the other end of the flex tube
to the mask or the trachea cannula.
Always follow the mask manufacturer’s instructions when applying a nasal
mask.
Doc. No. 003 176 En
Issue: X-1
BREAS MEDICAL
Page 19
Using the PV 403 PEEP
Operating Manual PV 403 PEEP
To adjust the mask and patient circuit:
1 Adjust the mask straps so that it feels comfortable for the patient.
2
Route the patient circuit in a way convenient for the patient. Try different ways to
find the best one.
Do not strap the patient mask too tight. Start with loose straps and tighten as necessary to prevent leakage from the mask.
4.4
Connecting the PV 403 PEEP to the mains
To connect the PV 403 PEEP:
1 Plug the power cord into the power socket of the PV 403 PEEP.
2
3
Connect the cord to the mains supply.
Secure the power cord in the cable strain-relief clamp on the rear panel, to prevent
that the power cord is accidentally disconnected.
The Power LED on the settings panel is lit when the PV 403 PEEP is connected to the
mains.
Make sure that the power cord is undamaged before it is connected to the
machine.
To isolate the PV 403 PEEP from the mains supply, remove the power cord.
Page 20
BREAS MEDICAL
Doc. No. 003 176 En
Issue: X-1
Operating Manual PV 403 PEEP
Using the PV 403 PEEP
The ventilator should be connected to the mains supply, even when not in use,
in order to keep the alarm batteries and the internal batteries charged.
The PV 403 PEEP can also be operated from an external or internal battery supply, see
the chapter “Using a battery supply” on page 23.
The ventilator will start the power failure alarm and then will be switched off,
if the mains voltage drops below 85 V AC and there is no back-up battery
source installed.
4.5
Switching the PV 403 PEEP on and off
To switch on the PV 403 PEEP:
•
Press the On/Off button on the settings panel for 2 seconds.
The LED on the On/Off button is used as follows:
•
Steady green light – the PV 403 PEEP is switched on, running from the mains supply.
•
Flashing green light – the PV 403 PEEP is switched on, running from the external
or internal battery supply.
To switch off the PV 403 PEEP:
1 Press the On/Off button on the settings panel for 2 seconds.
The alarm LEDs start flashing and an audible alarm is heard.
2
4.6
Press the On/Off button once again to switch off the ventilator. If you do not press
the button within 5 seconds, the ventilator will return to normal operation.
Displaying the voltage of the current power source
To check the voltage:
•
Press the + button on the settings panel.
The voltage of the current power source used by the ventilator is displayed
(M – mains power, E – external battery, I – internal battery).
4.7
Checking the PV 403 PEEP before use
Before using the PV 403 PEEP, perform the following checks:
•
Perform a short function check once a day, see the chapter “Patient instructions –
BREAS ventilator PV 403 PEEP” on page 76.
•
Perform a complete function check, if you have changed the ventilation mode or if
you need to control the ventilation function for any other reason, see the chapter
“Complete function check” on page 49.
Doc. No. 003 176 En
Issue: X-1
BREAS MEDICAL
Page 21
Using the PV 403 PEEP
4.8
Operating Manual PV 403 PEEP
To monitor the exhaled volume
If you want to check the tidal volume using a volume monitor, you need an exhalation
valve with a PEEP valve connector. Connect the volume monitor to the PEEP valve outlet on the exhalation valve outlet.
PEEP valve
Volume monitor
Fig. 2-a
Page 22
Checking the tidal volume
BREAS MEDICAL
Doc. No. 003 176 En
Issue: X-1
Operating Manual PV 403 PEEP
5
Using a battery supply
Using a battery supply
This chapter describes the use of external and internal battery back-up sources for the
PV 403 PEEP.
The additional battery supply of the PV 403 PEEP must be controlled and/or
replaced regularly, when used as a back-up power source.
5.1
Power source priority
The PV 403 PEEP automatically selects the power source as follows, if both mains
power and battery power are available:
1 Normally, the mains supply is selected first.
2
3
The external battery source is selected if no mains supply is connected, or if the
mains power supply fails during operation.
The ventilator will use the internal battery supply if no external battery is connected, or its voltage is too low.
The ventilator will automatically return to the mains power once it is restored.
5.2
Indicating battery operation
The battery operation is indicated as follows:
•
The LED of the On/Off button on the settings panel shows a flashing green light.
5.3
•
In the Power field on the LCD display, the letter E (external battery) or I (internal
battery) is displayed.
•
A short audible alarm is given in case the PV 403 PEEP switches to the internal
battery.
Using an external battery
The PV 403 PEEP can be operated from a 24 V or a 12 V DC external battery.
Following the instructions below when connecting an external battery:
•
Use BREAS battery cable or the BREAS external EB 2 Battery Pack. If using other
DC power than BREAS external EB 2 Battery Pack, check carefully that the voltage is 12 or 24 V.
•
Always check the polarity of the external battery before connecting it to the
PV 403 PEEP.
To connect the external battery:
1 Connect the battery cable to the external battery connector in the rear panel of the
PV 403 PEEP.
2
Connect the other end of the cable to the battery source or, for example, the cigarette lighter socket in a vehicle.
Doc. No. 003 176 En
Issue: X-1
BREAS MEDICAL
Page 23
Using a battery supply
Operating Manual PV 403 PEEP
Low battery voltage
The ventilator will switch over to the internal battery supply in case the battery voltage
drops below 21.2 V/10.6 V during operation.
5.4
Using an internal battery
The PV 403 PEEP is equipped with a 24 V/3200 mAh internal battery as a back-up
power source.
Operating time
The operating time of the internal battery depends on the settings, enviromental conditions and the patient’s physiological characteristics.
Examples of battery operating time at 25 degrees Celcius with a new and fully charged
internal battery:
Setting 1:
Parameter
Value/Result
Mode
Pressure
Rate
Insp. time
Insp. trig
Plateau
Exp. trig
Volume
PEEP
PCV
30 mbar
12 BPM
2.0 Sec
OFF
5
30%
appr. 700 ml
OFF
Operating time
10 hours
Setting 2:
Page 24
Parameter
Value/Result
Mode
Pressure
Rate
Insp. time
Insp. trig
Plateau
Exp. trig
Volume
PEEP
PCV
50 mbar
20 BPM
2.0 Sec
OFF
9
30%
appr. 600 ml
5 mbar
Operating time
4 hours
BREAS MEDICAL
Doc. No. 003 176 En
Issue: X-1
Operating Manual PV 403 PEEP
Using a battery supply
Setting 3:
Parameter
Value/Result
Mode
Pressure
Rate
Insp. time
Insp. trig
Plateau
Exp. trig
Volume
PEEP
PCV
18 mbar
8 BPM
2.0 Sec
OFF
5
30%
appr. 200 ml
5 mbar
Operating time
15 hours
Low battery voltage
The ventilator will start the low battery alarm, if the battery voltage drops below 23.3 V
during operation.
The ventilator will start the power failure alarm and then will be switched off,
if the internal battery voltage drops below 21.2 V for more than 15 seconds.
Doc. No. 003 176 En
Issue: X-1
BREAS MEDICAL
Page 25
Using a humidifier with the PV 403 PEEP
6
Operating Manual PV 403 PEEP
Using a humidifier with the PV 403 PEEP
This chapter describes how to use the PV 403 PEEP with an optional humidifier.
If humidification is needed when using the PV 403 PEEP, make sure you follow the
instructions below as well as the instructions from the manufacturer of the humidifier.
6.1
Humidification devices
These instructions relate to the following types of humidification devices:
•
Heat and moisture exchanger (HME or artificial nose)
•
6.2
Heated humidifier that complies with the ISO 8185 standard
Placing a heated humidifier
If a heated humidifier is used, always place the humidifier lower than the patient and the
PV 403 PEEP. This prevents the water from causing personal injury or equipment damage when running down if the humidifier tips over.
6.3
Connecting the humidifier
To connect an HME:
•
Connect the device to the patient circuit between the trach connector and the flextube, or follow the manufacturer’s instructions.
The HME increases resistance to airflow, especially when saturated with exhaled moisture. The HME may cause the PV 403 PEEP to show a small pressure on the display
bars, even when not connected to a patient. The low-pressure alarm must be readjusted to
a safe level well above this HME-generated pressure.
To connect a heated humidifier:
•
Follow the manufacturer’s instructions.
The use of an HME or a heated humidifier may require readjustment of the
PV 403 PEEP’s low-pressure alarm, see page 44.
When using a heated humidifier, condensation may form in the patient circuit
over time.
– Periodically check for moisture in the patient circuit. When present, remove
the moisture. Before attempting to dry the circuit, disconnect it from the
ventilator. The frequency at which these checks must be performed will
depend on the patient’s own condition and the device used. You should
assess this on an individual basis in accordance with the patient’s needs.
– If the condensation in the patient circuit is excessive, the use of a heated
humidifier may require the installation of a water trap in the circuit. The
water trap prevents any condensated water in the patient circuit from running into the patient airways and causing personal injury.
Page 26
BREAS MEDICAL
Doc. No. 003 176 En
Issue: X-1
Operating Manual PV 403 PEEP
7
Supplying oxygen
Supplying oxygen
This chapter describes how to connect the PV 403 PEEP to an additional oxygen source.
Oxygen can be supplied to the patient circuit if the oxygen level of the inspiration air
needs to be increased.
Do not smoke in a room where oxygen is being used.
Precautions must be taken when using oxygen as its presence can speed up the
combustion of flammable materials.
When oxygen is added, the tidal volume delivered by the PV 403 PEEP
increases slightly, and thus the tidal volume setting needs to be adjusted in
VCV mode. In addition, the trigger sensitivity may need to be readjusted.
7.1
Oxygen source
An oxygen concentrator or an oxygen container with a flow meter can be used as an oxygen source.
Follow the instructions below when applying the oxygen source:
•
Oxygen must be added via a BREAS oxygen adapter only.
•
The tube connection of the oxygen source should meet the requirements of the harmonised European standard EN 737.
Naked lights and other sources of ignition must be kept well away from the cylinder, at least two meters.
7.2
Oxygen monitor
The oxygen content of the inspiration air should be controlled continuously using an
oxygen monitor with both visual and audible alarms.
Follow the instructions below when using the oxygen monitor:
•
The lower and upper alarm levels must be set according to the doctor’s medical
instructions.
•
The oxygen monitor should meet the requirements of the ISO 7767 standard and
the CE directives (and MPG for the German market).
Read carefully the supplier’s operating instructions for the oxygen monitor
before use.
7.3
Pressure limiter
When oxygen is supplied, a pressure limiter should be installed between the patient air
outlet and the patient circuit to prevent pulmonary injury.
Doc. No. 003 176 En
Issue: X-1
BREAS MEDICAL
Page 27
Supplying oxygen
Operating Manual PV 403 PEEP
Follow the instructions below for the pressure limiter:
•
The tube connection of the pressure limiter must comply with requirements of the
EN 739 standard.
•
7.4
The pressure limiter should be set to approximately 5 mbar higher than the maximum expected patient pressure. Instructions for the setting procedure can be found
in the operating instructions that accompany the pressure limiter.
Connecting the oxygen supply
To connect the oxygen supply to the patient circuit:
1 Connect the pressure limiter to the patient air outlet on the PV 403 PEEP.
2
3
4
5
6
7
8
9
Connect the oxygen adapter for the oxygen connector to the pressure limiter.
Fit the T-adapter for the oxygen sensor between the exhalation valve and the patient
circuit tube.
Fit the oxygen sensor to the T-adapter and connect it to the oxygen monitor.
Start the PV 403 PEEP and the oxygen monitor.
Adjust the alarm levels for the oxygen monitor.
Connect, as described in the monitor’s operating instructions, the monitor’s oxygen
alarm.
Connect the oxygen source to the patient circuit tube and the oxygen adapter.
Adjust the oxygen flow at the oxygen source flow meter until the oxygen monitor
shows the prescribed value.
O2 analyser
Pressure
limiter
Page 28
BREAS MEDICAL
Doc. No. 003 176 En
Issue: X-1
Operating Manual PV 403 PEEP
7.5
Supplying oxygen
Adjusting the tidal volume and the oxygen flow (VCV mode)
When oxygen is supplied to the ventilator in VCV mode, the tidal volume setting and
oxygen flow should be reduced to balance the additional volume of the oxygen apparatus.
To adjust the tidal volume:
1 Use the following formula for calculating the adjusted tidal volume:
Vv = VT (1 – FIO2)
0.79
where:
Vv = Adjusted tidal volume setting for the PV 403 PEEP in litres
VT = Prescribed tidal volume for the patient in litres
FIO2 = The oxygen’s fractional concentration for the patient in %/100 (for example
45% = 0.45)
2
Set the tidal volume of the ventilator, see page 41.
To adjust the oxygen flow:
1 Use the following formula for calculating the adjusted oxygen flow:
O2 flow = ( VT
–
Vv ) × f R
where:
O2 flow = Oxygen flow, litres/min
VT = Prescribed tidal volume for the patient in litres
Vv = Adjusted tidal volume setting for the PV 403 PEEP in litres
fR = The patient’s breath rate (BPM)
2
Set the oxygen flow at the oxygen supply equipment.
Doc. No. 003 176 En
Issue: X-1
BREAS MEDICAL
Page 29
Ventilation modes and parameters
8
Operating Manual PV 403 PEEP
Ventilation modes and parameters
This chapter includes descriptions of the modes and parameters used for controlling the
ventilation of the PV 403 PEEP.
Clinic personnel should read this reference chapter to fully understand the function of the
PV 403 PEEP before setting up the apparatus. For detailed instructions on how to set the
PV 403 PEEP for the patient, see the chapter “Setting the PV 403 PEEP” on page 36.
Ventilation modes
The following ventilation modes can be selected for the PV 403 PEEP:
•
PCV mode (Pressure Control Ventilation)
•
PSV mode (Pressure Support Ventilation)
•
VCV mode (Volume Control Ventilation)
The modes are described in detail in the following sections.
8.1
Setting parameters
All the parameters that are used for controlling the breathing by the PV 403 PEEP are
listed below.
Pressure
The pressure parameter is used for defining the patient’s airway pressure during the
inspiration phase, measured at the exhalation valve on the patient circuit (or Y-piece, if
used). This setting is used in the PCV and PSV mode.
Rate
The rate setting corresponds to the patient’s breathing rate expressed as the number of
breaths per minute (BPM). The ventilator gives the set number of breaths, plus any triggered breaths.
Inspiration time (Insp. Time)
The inspiration time parameter controls the length of each inspiration. This setting is
used in the PCV and VCV mode.
Plateau
The plateau parameter sets the speed at which the pressure increases to the desired value.
This setting is used in the PCV and PSV mode.
The setting has 9 steps where 1 is the lowest and 9 is the highest. A low setting will give
a slow increase and therefore a shorter plateau. A higher setting will give a faster
increase and therefore a longer plateau.
Inspiration trigger (Insp. Trig.)
The inspiration trigger setting is used for defining the pressure at which the patient initiates a breath assisted by the ventilator.
Page 30
BREAS MEDICAL
Doc. No. 003 176 En
Issue: X-1
Operating Manual PV 403 PEEP
Ventilation modes and parameters
When the patient starts a breath, a negative pressure is created in the patient circuit. It is
registered by the ventilator that immediately starts an inspiration. If the patient cannot
trigger a breath, the ventilator will automatically take over and deliver breaths according
to the set rate.
Expiratory trigger (Exp. Trig.)
The expiratory trigger setting is defined as a percentage of the maximum inspiration
flow. This setting is used only in the PSV mode.
The ventilator measures the internal maximum flow during the inspiration. When the
flow drops below the set percentage of the expiration trigger setting, the inspiration
phase stops and an exhalation phase starts.
The expiratory trigger setting allows the tidal volume to be matched to different types of
diagnosis/compliance. A low percentage gives a relatively larger tidal volume. A high
percentage gives a relatively lower tidal volume.
Tidal volume
The tidal volume setting controls the volume delivered by the ventilator at each breath.
This setting is only used in the VCV mode.
PEEP (Positive End Expiratory Pressure)
The PEEP setting is used for controlling the patient’s airway pressure during the exhalation phase. If the PEEP function is activated, the ventilator lets the patient exhale until
the set PEEP value is reached. When the pressure in the patient circuit is equal to or
lower than the set PEEP value, the exhalation valve closes.
The ventilator does not compensate for a lower expiratory pressure caused by leakage.
Therefore, make sure the patient circuit and mask are not leaking.
Do not use the internal PEEP function together with an external PEEP valve
on the patient circuit.
Doc. No. 003 176 En
Issue: X-1
BREAS MEDICAL
Page 31
Ventilation modes and parameters
8.2
Operating Manual PV 403 PEEP
PCV mode (Pressure Control Ventilation)
In the PCV mode, the ventilation is controlled by the PV 403 PEEP. This is done by the
pressure, rate, inspiration time, and plateau settings.
An inspiration is started either when the set rate starts a breath, or when the patient triggers a breath (if the trigger function is activated). The ventilator tries to reach and maintain the set pressure until the expiration starts.
The inspiration stops and an exhalation starts in three cases:
•
The inspiration time expires.
•
The bellows reaches its end-position.
•
The limit for the high-pressure alarm is reached.
The figure below shows how the pressure, plateau, and inspiration time settings control
the ventilator’s function in the PCV mode.
The following settings have been used: Pressure 20 mbar, Inspiration time 1.8 seconds,
Plateau 5.
Page 32
BREAS MEDICAL
Doc. No. 003 176 En
Issue: X-1
Operating Manual PV 403 PEEP
8.3
Ventilation modes and parameters
PSV mode (Pressure Support Ventilation)
In the PSV mode, the patient normally controls both the inspiration through the inspiration trigger, and the exhalation by the expiratory trigger. The ventilator has basic settings
which are usually suitable to start with during the set-up.
An inspiration is started when either the patient triggers a breath (if the trigger is activated), or the back-up rate setting of the apparatus takes over. The ventilator tries to
reach and maintain the set pressure until the expiration starts.
The inspiration stops and an exhalation starts in four cases:
•
The inspiration flow has dropped to the value set for expiratory trigger.
•
The inspiration is longer than 3 seconds.
•
The ventilator bellows reaches its end-position.
•
The limit for the high-pressure alarm is reached.
The figure below shows how the pressure, plateau, and expiratory trigger settings control
the ventilator’s function in the PSV mode.
The following settings have been used: Pressure 20 mbar, Expiratory trigger 25%, and
Plateau 5.
Doc. No. 003 176 En
Issue: X-1
BREAS MEDICAL
Page 33
Ventilation modes and parameters
8.4
Operating Manual PV 403 PEEP
Comparing PCV and PSV modes
The figure below shows the previous two examples superimposed to illustrate how the
PCV and PSV modes differ.
Page 34
BREAS MEDICAL
Doc. No. 003 176 En
Issue: X-1
Operating Manual PV 403 PEEP
8.5
Ventilation modes and parameters
VCV mode (Volume Control Ventilation)
In the VCV mode, the ventilation is controlled by the PV 403 PEEP. This is done by the
volume, rate, and inspiration time settings.
An inspiration is started either when the set rate of the ventilator starts a breath, or when
the patient triggers a breath (if the trigger function is activated).
The ventilator calculates at which speed the volume must be increased to reach the set
volume during the set inspiration time. The inspiration stops and an exhalation starts in
two cases:
•
The set value for volume has been reached.
•
The limit for the high-pressure alarm is reached.
The figure below shows how the volume and inspiration time settings control the ventilator’s function in the VCV mode.
The following settings have been used: Volume 1.0 litre, Inspiration time 1.8 seconds.
Doc. No. 003 176 En
Issue: X-1
BREAS MEDICAL
Page 35
Setting the PV 403 PEEP
9
Operating Manual PV 403 PEEP
Setting the PV 403 PEEP
This chapter describes how to set the different parameters that are used for controlling
the ventilation of the PV 403 PEEP. It is only intended for clinic personnel.
The ventilation modes and setting parameters are described in detail in the chapter “Ventilation modes and parameters” on page 30. For information on how to set the alarm levels for the PV 403 PEEP, see the chapter “Alarm” on page 43.
Adjustment of settings should always be based on medical advice and must be
carried out by authorised clinic personnel only. Any adjustment of settings
may require readjustment of the alarm levels.
Follow the instructions below when setting the PV 403 PEEP:
•
Adjust the settings to find the best possible breathing comfort for each patient.
•
Always measure the blood gases during the set-up period and when the settings
have been changed.
•
Always document the set values before the patient returns home.
•
Do not change the ventilation mode when the patient is connected to the apparatus.
•
If you have changed the ventilation mode, always check the settings and perform a
complete function test, see the chapter “Complete function check” on page 49.
•
You must adjust all applicable settings for each of the PSV, PCV, or VCV modes
that are to be used by the patient, see the table matrix below.
Applicable setting
Pressure
Rate
Inspiration time
Inspiration trigger
Plateau
Expiration trigger
Tidal volume
PEEP
PCV mode
PSV mode
X
X
X
X
X
X
X
X
X
X
X
X
VCV mode
X
X
X
X
X
The setting parameter is active for 5 seconds after the latest press on a button.
Thereafter, the parameter must be reselected in order to be adjusted.
9.1
Locking/unlocking the settings panel
The lock function is used for locking the settings panel to prevent accidental changes to
the settings. When the settings panel of the PV 403 PEEP is locked, only the On/Off button is active.
The settings panel should normally be locked when the ventilator is used away
from the clinic.
Page 36
BREAS MEDICAL
Doc. No. 003 176 En
Issue: X-1
Operating Manual PV 403 PEEP
Setting the PV 403 PEEP
When the lock function is activated, the Lock function LED on the settings panel shows
a green light.
To lock/unlock the settings panel:
•
Press and hold down the – and + buttons on the settings panel for 5 seconds.
9.2
Selecting the ventilation mode
The ventilator always starts in the mode that was active when it was switched off.
To select the ventilation mode:
1 To select the PCV, PSV, or VCV mode, press the Mode
button for 1 second.
The LED of the next mode in sequence starts to flash.
2
3
9.3
Press the Mode button once more to activate this mode.
The LED shows a steady light.
If necessary, repeat the steps above until you have
selected and activated the right mode.
PSV MODE
PCV
VCV
Setting the pressure
The pressure parameter is used for setting the patient’s airway pressure during the inspiration phase. The pressure is measured at the exhalation valve on the patient circuit. This
setting is done in the PCV and PSV mode.
The green Pressure LED on the left-hand side of
settings panel indicates an inspiration. The actual
patient pressure is displayed in the pressure meter
on the settings panel.
Setting range: 6 to 50 mbar
If the control electronics fail, the PV 403 PEEP cannot deliver a pressure higher than 60
mbar at a single fault condition.
To set the inspiratory pressure:
1 Press the Function button until the Pressure
LED is lit.
2
9.4
Press the – / + buttons to decrease/increase
the setting.
15
10
1.8
Setting the rate
The rate setting corresponds to the patient’s breathing rate expressed as the number of
breaths per minute (BPM).
The ventilator gives the set number of breaths, plus any triggered breaths. The display
always shows the set or triggered value the ventilator is currently working at.
Setting range: 4 to 40 BPM
Doc. No. 003 176 En
Issue: X-1
BREAS MEDICAL
Page 37
Setting the PV 403 PEEP
Operating Manual PV 403 PEEP
To set the rate:
1 Press the Function button until the Rate LED is
lit.
The current rate setting is displayed.
2
9.5
15
10
1.8
Press the – / + buttons to decrease/increase the
setting, if necessary.
–0.5
Setting the inspiration time (Insp. Time)
The inspiration time setting controls the length of each inspiration.
This setting can be selected in the PCV and VCV modes. An accurate setting of the
inspiration time is required for maximum patient comfort and the most effective result.
Setting range: 0.5 to 5 seconds
To set the inspiration time:
1 Press the Function button until the Insp. Time
LED is lit.
The current inspiration time setting is displayed.
2
9.6
Press the – / + buttons to decrease/increase the
setting, if required.
15
10
1.8
–0.5
I/E Ratio table
The table below displays the values used for calculating the I/E ratio based on the inspiration time and rate.
In the example below (see the markings in the table), the inspiration time is set to 1.5 seconds and rate to 12 BPM. This gives an I/E ratio of 1:2.
Page 38
BREAS MEDICAL
Doc. No. 003 176 En
Issue: X-1
Operating Manual PV 403 PEEP
Setting the PV 403 PEEP
Breaths per minute
Inspiration time (seconds)
0.5
6
7
8
9
10
11
12
13
14
15
16
17
18
19
20
22
24
26
28
30
32
34
36
38
1:19
1:16
1:14
1:12
1:11
1:10
1:9
1:8
1:8
1:7
1:7
1:6
1:6
1:5
1:5
1:4
1:4
1:4
1:3
1:3
1:3
1:3
1:2
1:2
1:2
1:1.9 1:1.8 1:1.6
0.6
1:16
1:13
1:12
1:10
1:9
1:8
1:7
1:7
1:6
1:6
1:5
1:5
1:5
1:4
1:4
1:4
1:3
1:3
1:3
1:2
0.7
1:13
1:11
1:10
1:9
1:8
1:7
1:6
1:6
1:5
1:5
1:4
1:4
1:4
1:4
1:3
1:3
1:3
1:2
1:2
1:1.9 1:1.7 1:1.5 1:1.4 1:1.3
1:1.9 1:1.7 1:1.5 1:1.3 1:1.2 1:1.1
0.8
1:12
1:10
1:8
1:7
1:7
1:6
1:5
1:5
1:4
1:4
1:4
1:3
1:3
1:3
1:3
1:2
1:2
0.9
1:10
1:9
1:7
1:6
1:6
1:5
1:5
1:4
1:4
1:3
1:3
1:3
1:3
1:3
1:2
1:2
1:1.8 1:1.6 1:1.4 1:1.2 1:1.1
1.0
1:9
1:8
1:7
1:6
1:5
1:4
1:4
1:4
1:3
1:3
1:3
1:3
1:2
1:2.2 1:2
1.2
1:7
1:6
1:5
1:5
1:4
1:4
1:3
1:3
1:3
1:2
1:2
1:1.9 1:1.8 1:1.6 1:1.5 1:1.3 1:1.1
1:2
1:2
1:1.9 1:1.7 1:1.5 1:1.4 1:1.2 1:1.1 1:1.0
1.5
1:6
1:5
1:4
1:3
1:3
1:3
2.0
1:4
1:3
1:3
1:2
1:2
1:1.7 1:1.5 1:1.3 1:1.1 1:1.0
2.5
1:3
1:2
1:2
1:1.7 1:1.4 1:1.2 1:1.0
3.0
1:2
1:1.9 1:1.5 1:1.2 1:1.0
4.0
1:1.5 1:1.4 1:1.1
4.5
1:1.2 1:1.1
5.0
1:1.0
9.7
1:1.7 1:1.5 1:1.3 1:1.1 1:1.0
Incorrect settings for rate and inspiration time
If the set values for inspiration time and rate are outside the ventilator’s working range
and cannot be achieved, the Rate and Insp. Time LEDs will flash as a warning.
In the PSV mode, only the Rate LED will flash, if the patient triggers too many breaths.
To stop the warning indication:
1 Press the Function button until the Rate or
Insp. Time LED is lit.
2
Press the – or + buttons to adjust the settings
for rate or inspiration time.
20
20
3.3
–0.5
9
-0.75
M
9.8
Setting the inspiration trigger (Insp. Trig.)
The inspiration trigger setting is used for defining the pressure when the patient initiates
a breath assisted by the ventilator. If the patient cannot trigger a breath, the ventilator will
automatically take over and deliver breaths according to the set rate.
For each breath the patient triggers, the green Insp. Trig. LED on the left-hand side of
settings panel is lit.
Setting range: Off / –2 to +8 mbar
Follow the instructions below when setting the pressure of the inspiration trigger:
•
Choose a setting comfortable for the patient; normally between –0.2 and
–0.5 mbar.
Doc. No. 003 176 En
Issue: X-1
BREAS MEDICAL
Page 39
Setting the PV 403 PEEP
Operating Manual PV 403 PEEP
•
If a PEEP valve or the PV 403 PEEP’s internal PEEP function is used, the trigger
setting can be set to a positive (+) value that depends on the pressure resistance of
the PEEP.
Example: The PEEP gives a pressure resistance of 4 mbar. Therefore, to maintain
the value of the –0.5 mbar required to trigger a breath, the trigger setting is set at
+3.5 mbar.
•
If the trigger is not used by the patient, it is recommended to set the trigger function
to Off, so that the patient cannot trigger any extra breaths.
In the range 0 to +8 mbar there is a risk of the ventilator “self triggering”.
To set the inspiration trigger:
1 Press the Function button until the Insp. Trig.
LED is lit.
The current inspiration trigger setting is displayed.
2
9.9
10
1.8
–0.5
9
Press the – / + buttons to decrease/increase the
setting, if required.
If you want to turn off the inspiration trigger, press the – button repeatedly until
“Off” is displayed.
Setting the plateau
The plateau parameter is used for setting the speed at which the set pressure increase is
reached. This setting is used in the PCV and PSV mode.
As the increase is experienced differently by each patient, it should be adjusted to give
each patient the best possible breathing comfort.
Setting range: 1 to 9
To set the plateau:
1 Press the Function button until the Plateau LED
is lit.
The current plateau setting is displayed.
2
1.8
–0.5
9
--
Press the – / + buttons to decrease/increase the
setting, if required.
9.10 Setting the expiratory trigger (Exp. Trig.)
The expiratory trigger setting is the set percentage of the maximum inspiration flow, at
which the inspiration phase should stop and an exhalation phase should start.
This setting can only be selected in the PSV mode.
Setting range: 10% to 50% of the maximum flow.
Page 40
BREAS MEDICAL
Doc. No. 003 176 En
Issue: X-1
Operating Manual PV 403 PEEP
Setting the PV 403 PEEP
10% gives a relatively longer inspiration time and larger volume. 50% gives a relatively
shorter inspiration time and smaller volume. A normal setting is 25% to 30%.
To set the expiratory trigger:
1 Press the Function button until the Exp. Trig.
LED is lit.
The current expiratory trigger setting is displayed.
2
9
30
0.75
M
Press the – / + buttons to decrease/increase the
setting, if required.
9.11 Setting the tidal volume
The tidal volume setting controls the volume delivered by the ventilator at each breath.
You can only adjust this setting in the VCV mode. However, the measured tidal volume
delivered by the ventilator is shown on the display in the PSV and PCV modes.
If the patient uses an oxygen supply with the ventilator, you must adjust the setting to
balance the additional apparatus, see page 29.
Setting range: 0.3 litre to 1.6 litre
To set the tidal volume:
1 Press the Function button until the Volume LED
is lit.
2
--
1.1
M
Press the – / + buttons to adjust the tidal volume
setting.
9.12 Incorrect settings for rate and tidal volume
If the settings combination for tidal volume and rate in the VCV mode is outside the ventilator’s working range, the correct tidal volume will always be delivered, but the actual
rate may be incorrect. On the settings panel, the Volume and Rate LEDs will thus flash as
a warning.
To stop the warning indication:
1 Press the Function button until the Rate or Volume LED is lit.
2
Press the – / + buttons to adjust the settings for
rate or volume.
20
20
3.3
–0.5
9
-0.75
M
Doc. No. 003 176 En
Issue: X-1
BREAS MEDICAL
Page 41
Setting the PV 403 PEEP
Operating Manual PV 403 PEEP
9.13 Setting the PEEP function
The PEEP setting is used for controlling the patient’s airway pressure during the exhalation phase. If the PEEP function is activated, the ventilator keeps a positive end expiratory pressure when the patient exhales.
Do not use the internal PEEP function together with an external PEEP valve
on the patient circuit.
Setting range: 0 mbar to 10 mbar
To set the internal PEEP function:
1 Press the Function button until the PEEP LED
is lit.
2
--
1.1
M
5
Press the – / + buttons to adjust the PEEP setting.
9.14 Incorrect settings for pressure and PEEP
If the set patient pressure in the PCV mode or the PSV mode is lower than the set PEEP
value, the Pressure and PEEP LEDs will flash as a warning that is followed by the lowtidal volume alarm.
To stop the warning indication:
1 Press the Function button until the Pressure or
PEEP LED is lit.
2
15
20
3.3
Press the – / + buttons to adjust the settings for
pressure or PEEP.
–0.5
9
-0.75
M
Page 42
BREAS MEDICAL
10
Doc. No. 003 176 En
Issue: X-1
Operating Manual PV 403 PEEP
10
Alarm
Alarm
This chapter describes the alarm functions used for the PV 403 PEEP, and how to adjust
the alarm levels for each ventilation mode.
The alarm function of the PV 403 PEEP consists of the alarm LEDs on the settings
panel, an audible alarm, and, for some alarm functions, messages on the LCD display.
The following alarms are used by the ventilator:
•
Power failure alarm
•
Alarm for low pressure
•
Alarm for high pressure
•
Alarm for low tidal volume
•
Alarm for high rate
•
Alarm for low battery
•
Function error alarm
10.1 Audible alarm
You can adjust the audible alarm to a suitable sound level. The audible alarm can be
muted for low pressure, low tidal volume, and high rate.
To adjust the alarm sound level:
•
Adjust the screw on the ventilator’s rear panel
using a screwdriver.
Adjustment
screw
To mute the audible alarm:
•
Press the Function button on the settings panel.
The muted alarm LCD is lit and the audible alarm
remains muted for 1 minute.
10.2 Power failure alarm
The power failure alarm is alerted if the internal battery voltage drops below21.2 V (for
more than 15 seconds) during operation, or if you try to start the ventilator without any
power source connected and the internal battery is faulty or discharged.
The following are the alarm levels for power failure:
•
Internal battery: 21.2 V
The power failure alarm is indicated as follows:
•
The red alarm LED for power failure is lit.
•
A continuous audible alarm is given.
•
A message about low voltage is displayed on the LCD display, depending on the
current power source.
Doc. No. 003 176 En
Issue: X-1
BREAS MEDICAL
Page 43
Alarm
Operating Manual PV 403 PEEP
The audible alarm and alarm indicator LED may continue for 5 minutes without any
power source available. The PV 403 PEEP will then automatically switch to standbymode for low current consumption.
To stop the alarm:
1 Switch off the ventilator using the On/Off button.
2
Restore the mains power supply/battery back-up source.
10.3 Alarm for low pressure
The alarm for low pressure is activated if the set alarm level for low pressure is not
reached within 15 seconds. This can be due to leakage from the mask or any component
of the patient circuit, and/or the tidal volume being too low.
When the alarm for low pressure is alerted, the following happens:
•
The red alarm LED for pressure flashes.
•
The high priority alarm signal is given.
•
On the LCD display, a flashing down-arrow is shown in the pressure field.
The alarm is reset once the pressure reaches its set value again.
Some patients will be in danger if they become disconnected from the ventilator. The purpose of the low-pressure alarm is to detect such a disconnection,
but the ventilator can only do so if the alarm is adjusted properly.
Some patient circuit components will defeat a low-pressure alarm by keeping
the pressure in the circuit above the alarm limit. Examples of such components
include artificial noses (HMEs) and tracheostomy extension/flex tubes.
If the tubing set is accidentally disconnected from the patient, and the set
alarm level for low pressure is misleadingly reached owing to an occlusion
caused by a nearby object, the low-pressure alarm will not be activated.
10.4 Alarm for high pressure
In the PSV and PCV modes, the alarm for high pressure is activated if the actual patient
pressure
•
is the interval between min. 20 mbar and max. 55 mbar, and
•
exceeds the set patient pressure by 50%.
The alarm is only activated under exceptional conditions in PSV and PCV modes,
such as a strong cough during the ventilator’s inspiration phase or an internal error
of the PV 403 PEEP. Normally, the ventilator adjusts the pressure to the set level.
In the VCV mode, the alarm for high pressure is activated if the actual patient pressure
reaches the set alarm level.
When the alarm for high pressure is alerted, the following happens:
•
The red alarm LED for pressure flashes.
Page 44
BREAS MEDICAL
Doc. No. 003 176 En
Issue: X-1
Operating Manual PV 403 PEEP
Alarm
•
The high priority alarm signal is given.
•
On the LCD display, a flashing up-arrow is shown in the pressure field.
The alarm is reset once the pressure drops below the alarm level.
The ventilator bellow returns to its end-position, and a new inspiration is started when
the expiration phase of the previous breath has finished, or when a breath is triggered by
the patient.
10.5 Alarm for low tidal volume
The alarm for low tidal volume is activated if the delivered tidal volume does not reach
the alarm level within 15 seconds. The alarm is only used in the PSV and PCV modes.
When the alarm for low tidal volume is alerted, the following happens:
•
The red alarm LED for volume flashes.
•
The high priority alarm signal is given.
The alarm is reset once the tidal volume reaches its set value again.
10.6 Alarm for high rate
The alarm for high rate is activated if the patient hyperventilates or if the ventilator
starts to self-trigger because of incorrect settings. The alarm is alerted if the actual rate
exceeds the alarm level for more than 15 seconds.
The delivery setting for the alarm for high rate is “Off”. As the use of this alarm is
optional, you may keep it turned off during operation.
When the alarm for high rate is alerted, the following happens:
•
The yellow alarm LED for high rate flashes.
•
The medium priority alarm signal is given.
The alarm is reset once the rate drops below the alarm level.
10.7 Low battery alarm
The low battery alarm is alerted when the PV 403 PEEP is run from the internal battery
source, and the voltage drops below 23.3V.
The low battery alarm is indicated as follows:
•
The yellow alarm LED for battery failure flashes.
•
The meduim priority alarm signal is given.
The alarm will be reset once the battery voltage reaches or exceeds the alarm level.
If operated from an external battery, the PV 403 PEEP will switch over to the internal
battery source in case the voltage drops below 21.2 V/10.6 V.
The ventilator will continue to run for approximately 10 minutes and then it will be
switched off.
Doc. No. 003 176 En
Issue: X-1
BREAS MEDICAL
Page 45
Alarm
Operating Manual PV 403 PEEP
10.8 Function error alarm
If an internal fault occurs, the following happens:
•
A continous audible alarm is given.
•
On the LCD display, a fault code is shown (for example, GAUGE MATCH FAIL
CHECK TUBE?), see the chapter “Troubleshooting” on page 61 or the BREAS Service Manual.
Follow the instructions below:
•
Switch off the machine.
•
If the fault persists, do not use the machine and send it for service.
10.9 Setting the alarm levels in PSV and PCV modes
In the PSV and PCV modes, you should set the alarm levels for low pressure, high rate,
and low tidal volume.
If you have started the alarm setting procedure and do not press any button within
10 seconds, the display will return to the standard setting display. Press the Function button once to return to the alarm setting function.
To start the alarm setting:
1 Press the Alarm set button on the settings panel.
The display will change as shown in the figure.
2
ALARM
SET
Select “Yes” by pressing the + button.
The display shows the current alarm settings, see
figure below.
NO
YES
-
+
M
To set the alarm level for high rate:
3 Press the Function button until the Rate LED is
lit.
4 Adjust the setting using the – and/or + button.
If you want to turn off the alarm, press the + button repeatedly until “Off” is displayed.
40
MIN 15
Setting range: 10 to 60 BPM/Off
To set the alarm level for low pressure:
5 Press the Function button until the Insp. Trig.
LED is lit.
6 Adjust the setting using the – and/or + button.
1.40
QUIT +
Setting range: 3 to 40 mbar
Page 46
BREAS MEDICAL
Doc. No. 003 176 En
Issue: X-1
Operating Manual PV 403 PEEP
Alarm
The low-pressure alarm must be set for the exact configuration of the patient
circuit components. If you add, remove or change components, readjust the
low-pressure alarm.
The low-pressure alarm level is recommended to be set at a level below the set
pressure that will effectively warn the user of any disconnection or loss of pressure in the patient circuit. This should be assessed in accordance with the
patient’s needs.
To set the alarm level for low tidal volume:
7 Press the Function button until the Volume LED is lit.
8 Adjust the setting using the – and/or + button.
Setting range: 0.05 to 1.4 litres
To exit the alarm setting:
9 To exit, press the Function button until the QUIT LED is lit.
Press the + button to quit.
The value of the alarm level is automatically saved when you quit, or when the display
switches back to the standard setting display.
10.10 Setting the alarm levels in VCV mode
In the VCV mode, you should set the alarm levels for high and low pressure, and high
rate.
If you have started the alarm setting procedure and do not press any button within
10 seconds, the display will return to the standard display. Press the Function button once to return to the alarm setting function.
To start the alarm setting:
1 Press the Alarm set button on the settings panel.
The display will change as shown in the figure.
2
ALARM
SET
Select “Yes” by pressing the + button.
The display shows the current alarm settings, see
figure below.
NO
YES
-
+
M
Doc. No. 003 176 En
Issue: X-1
BREAS MEDICAL
Page 47
Alarm
Operating Manual PV 403 PEEP
To set the alarm level for high pressure:
3 Press the Function button until the Pressure LED
is lit.
4 Adjust the setting using the – and/or + button.
MAX 50
40
Setting range: 10 to 50 mbar
MIN 15
To set the alarm level for high rate:
5 Press the Function button until the Rate LED is
lit.
6 Adjust the setting using the – and/or + button.
If you want to turn off the alarm, press the + button repeatedly until “Off” is displayed.
QUIT +
Setting range: 10 to 60 BPM/Off
To set the alarm level for low pressure:
7 Press the Function button until the Insp. Trig. LED is lit.
8 Adjust the setting using the – and/or + button.
Setting range: 3 to 40 mbar
The low-pressure alarm must be set for the exact configuration of the patient
circuit components. If you add, remove or change components, readjust the
low-pressure alarm.
The low-pressure alarm level is recommended to be set at a level below the
average peak airway pressure that will effectively warn the user of any disconnection or loss of pressure in the patient circuit. This should be assessed in
accordance with the patient’s needs.
To exit the alarm setting:
9 To exit, press the Function button until the QUIT LED is lit.
Press the + button to quit.
The value of the alarm level is automatically saved when you quit, or when the display
switches back to the standard setting display.
Page 48
BREAS MEDICAL
Doc. No. 003 176 En
Issue: X-1
Operating Manual PV 403 PEEP
11
Complete function check
Complete function check
This chapter describes the complete function check of the PV 403 PEEP. This function
check should be performed after changing the ventilation mode, or if the ventilator function needs to be checked for any other reason.
For information on the short function check, which should be performed once a day, see
the chapter “Patient instructions – BREAS ventilator PV 403 PEEP” on page 76.
You must perform all checks for each of the PSV, PCV, or VCV modes that are to be
used by the patient, see the table matrix below.
Function check
Low-pressure alarm
Inspiration
Exhalation
High-pressure alarm
Inspiration trigger
Expiratory trigger
Tidal volume
Low-tidal volume alarm
High-rate alarm, if used
PEEP
Power failure
PCV mode
PSV mode
X
X
X
X
X
X
X
X
X
X
X
X
X
X
X
X
X
X
X
VCV mode
X
X
X
X
X
(X)
X
X
X
If anything is unclear or if there are doubts, perform a new function check,
reading the description for each function.
11.1 Preparing the function check
To prepare the PV 403 PEEP for the function check:
1 Connect the ventilator to the mains supply.
2
3
4
5
Make sure the patient circuit is correctly connected, see page 19.
Start the ventilator by pressing the On/Off button for 2 seconds.
The green Power and On/Off LEDs are lit and the ventilator starts.
If the lock function LED shows a green light, the settings panel has been locked.
Press and hold both the – and + buttons for 5 seconds to unlock the settings panel.
If necessary, change the selected mode by using the Mode button.
Adjust the ventilator settings as follows:
Doc. No. 003 176 En
Issue: X-1
BREAS MEDICAL
Page 49
Complete function check
Operating Manual PV 403 PEEP
Pressure:
15 mbar
Rate:
10 BPM
Insp. Time:
PSV mode: –
VCV, PCV mode: 1.8 seconds
15
10
--
Insp. Trig:
–0.5 mbar
–0.5
Plateau:
PSV, PCV mode: Setting 6
6
30
VCV mode: –
Exp. Trig:
-M
PSV mode: 30%
VCV, PCV mode: –
Volume:
VCV mode: 0.5 litres
PSV, PCV mode: –
11.2 Alarm check – low pressure
To check the low-pressure alarm:
1 Make sure that the red alarm LED for pressure starts to
flash after 15 seconds and that an audible alarm is heard.
2
Block the exhalation valve with your hand to create a
pressure.
3
Check that the set pressure is indicated on the
pressure meter.
The alarm should stop once the pressure exceeds
the set alarm level.
The low-tidal volume alarm may be alerted when you are blocking the exhalation
valve.
11.3 Inspiration check
To check the inspiration:
1 Connect a 0.5 litre reservoir bag to the patient circuit.
2
3
Check that the membrane in the exhalation valve seals properly.
Check that the reservoir bag inflates.
The pressure meter should show a pressure of approximately 15 mbar before the inspiration stops. Depending on the compliance of the reservoir bag, the breaths can be stopped
more quickly for different reservoir bags.
Page 50
BREAS MEDICAL
Doc. No. 003 176 En
Issue: X-1
Operating Manual PV 403 PEEP
Complete function check
11.4 Exhalation check
To check the exhalation:
•
Check that the air flows easily from the reservoir bag out through the exhalation
valve.
11.5 Alarm check – high pressure
To check the high-pressure alarm (PSV, PCV mode):
The alarm is only activated under exceptional conditions in PSV and PCV modes,
such as a strong cough during the ventilator’s inspiration phase or an internal error
of the PV 403 PEEP. Normally, the ventilator adjusts the pressure to the set level.
1
During the inspiration phase, press the reservoir bag to alert the high-pressure alarm by
imitating, for example, a cough.
2
At the same time, control the pressure meter to
see at what pressure the high-pressure alarm
starts.
Make sure the pressure shown on the pressure meter is 50% higher than the set
patient pressure and in the interval between min. 20 mbar and max. 55 mbar.
3
To check the high-pressure alarm
(VCV mode):
1 Set the alarm level for high pressure to 30
mbar, see page 44.
2
3
4
5
30
MAX
40
During the inspiration phase, start pressing the
reservoir bag to alert the high-pressure alarm
by imitating, for example, a cough. The audible alarm will start on the third inspiration
exceeding the alarm level for high pressure.
Control the pressure meter to see at what pressure the high-pressure alarm starts.
Compare the pressure shown on the pressure meter to the set alarm level for high
pressure.
Readjust the alarm level to its original setting.
11.6 Inspiration trigger check
To check the inspiration trigger:
1 Create a negative pressure in the patient circuit.
2
Check that the Insp. Trig. LED shows a green
light and a breath is started.
- –0.5
6
- -
Doc. No. 003 176 En
Issue: X-1
BREAS MEDICAL
Page 51
Complete function check
Operating Manual PV 403 PEEP
11.7 Expiratory trigger check
The expiratory trigger check can only be performed in the PSV mode.
To check the expiratory trigger:
1 Create a pressure in the patient circuit, running the ventilator in normal operation.
2
3
10
0.5
M
Set the expiratory trigger to 10%, see
page 40. On the LCD display, check the measured tidal volume delivered by the ventilator.
Set the expiration trigger to 50% and check the measured tidal volume again.
The measured tidal volume should be lower when the expiration trigger is set to 50%.
11.8 Tidal volume check
This check is done in the VCV mode and only if you have a volume meter at hand.
To check the tidal volume:
1 Check the tidal volume setting on the display.
2
3
- -
Connect the volume meter to the
PV 403 PEEP.
Check that the delivered tidal volume displayed on the volume meter is equal to the set tidal volume.
0.5
M
11.9 Alarm check – low tidal volume
This check is done in the PSV and PCV mode.
To check the alarm for tidal volume:
1 Press the Alarm set button.
2
3
4
5
6
7
Page 52
Select the tidal volume parameter, see
page 45.
Set the alarm level for low tidal volume to 0.1.
Exit the alarm setting function.
Block the patient circuit.
Check that the red alarm LED for volume flashes and
an audible alarm is given, when the tidal volume has
dropped below the set alarm level for more than 15 seconds.
Readjust the alarm level to its original setting.
BREAS MEDICAL
0.1
QUIT +
Doc. No. 003 176 En
Issue: X-1
Operating Manual PV 403 PEEP
Complete function check
11.10 Alarm check – high rate
To check the alarm for high rate:
1 Press the Alarm set button.
2
3
4
5
6
7
Select the Rate parameter.
Set the alarm level for high rate to 20 BPM.
Exit the alarm setting function.
Set the inspiration trigger to +1.0 mbar, to
make the ventilator “self-trigger”, see page 39.
20
- + 1.0
6
Check that the yellow alarm LED for rate
flashes and an audible alarm is given, when the
rate has exceeded the set alarm level.
Readjust the alarm level to its original setting.
11.11 PEEP function check
1
2
Press the Function button to select any setting
parameter. Check the PEEP setting on the display.
- 0.5
M
5
Wait for 5 seconds until no parameter is
selected. Using a reservoir bag, check that the
PEEP setting is equal to the actual expiratory pressure now shown on the pressure
meter.
11.12 Power failure check
The alarm check below should be done without an internal and/or external battery supply connected.
To check the alarm for power failure:
1 Disconnect the power cord while the ventilator is running.
2
3
Check that the red alarm LED for power is lit and an
audible alarm is given.
Reconnect the power supply. The ventilator will start
automatically.
The check below should be done if an internal and/or external battery supply is
connected to the ventilator.
To check the battery supply in case of mains power failure:
1 Disconnect the power cord while the ventilator is running from the mains power.
2
Make sure the ventilator switches to the external/internal battery source connected.
Doc. No. 003 176 En
Issue: X-1
BREAS MEDICAL
Page 53
Complete function check
Operating Manual PV 403 PEEP
11.13 Completing the function check
To complete the function check:
1 Press the On/Off button on the settings panel for 2 seconds.
The alarm LEDs start flashing and an audible alarm is heard.
2
Press the On/Off button once again to switch off the ventilator.
The function check is now completed.
After the function test, always adjust the settings to the values prescribed for
the patient by the doctor.
Page 54
BREAS MEDICAL
Doc. No. 003 176 En
Issue: X-1
Operating Manual PV 403 PEEP
12
Cleaning the PV 403 PEEP and replacing the filters
Cleaning the PV 403 PEEP and replacing the filters
This chapter describes how to clean the different parts of the PV 403 PEEP, and how to
replace the patient air filters.
The patient-connected parts and the filters must be replaced regularly to ensure correct
function of the PV 403 PEEP. All replaced parts must be disposed of according to local
environmental regulations regarding the disposal of used equipment and parts.
12.1 Cleaning/disinfection in the clinic
PV 403 PEEP
Follow the instructions below when cleaning the casing of the PV 403 PEEP:
•
Do not sterilise the machine using an autoclave.
•
Clean the outside of the machine using a lint-free cloth and a mild detergent, such
as washing-up liquid, or surface disinfectant.
•
Fluid or moisture must not be allowed to enter into the PV 403 PEEP.
Disinfection agents
Preparations in which the active agent is one of the following will not harm the material:
•
Aldehydes
•
Alcohols
Agents based on the following may damage the materials:
•
Compounds that release halogens
•
Strong organic acids
•
Compounds that release oxygen
Follow the manufacturer’s instructions for use.
Ventilator accessories
The following accessories can be sterilised in steam sterilisers at up to 126°C:
•
Patient circuit tube, Hytrel ®
•
Silicone exhalation valve line
•
Silicone PAP pressure line
•
Exhalation valve dismantled
•
AMBU ® PEEP valve
•
Pressure limiter
Doc. No. 003 176 En
Issue: X-1
BREAS MEDICAL
Page 55
Cleaning the PV 403 PEEP and replacing the filters
Operating Manual PV 403 PEEP
12.2 Cleaning/disinfection in the home
PV 403 PEEP
Follow the instructions below when cleaning the casing of the PV 403 PEEP:
•
Clean the outside of the machine using a lint-free cloth and a mild detergent, such
as washing-up liquid.
•
Fluid or moisture must not be allowed to enter into the PV 403 PEEP.
Ventilator accessories
All parts that come into contact with the respiration gas must be cleaned as follows:
1 Place the dismantled parts in hot water containing washing-up liquid.
2
3
4
5
6
Remove fouling with a brush.
Rinse parts thoroughly under running hot water.
Shake water out of all parts, especially the control and metering hose and the balloon of the exhalation valve.
Dry the parts completely.
Store in dust-free location.
If the parts need to be disinfected, this can be done in a bath of Virkon ® or Lysetol® Med,
for instance. Then rinse the parts well in clear water and dry them thoroughly.
Follow the manufacturer’s instructions for use.
Any water left behind in the control hose or the exhalations valve may lead to
malfunctions.
12.3 Cleaning and replacing the patient air filter
The patient air filter is located in the filter/air inlet cassette at the rear of the ventilator,
see figure below. There are two types of filters: washable filters and disposable filters.
Filter
Usage
Washable filter
(grey colour)
• Mandatory filter
• Wash the filter at least once a week.
• Replace the washable filter at least once a year.
Disposable filter
(white colour)
• Mandatory filter
• Replace the filter at least every month/after 500 operation hours, or more often when used in high pollution
or pollen-rich environments.
Do not wash and reuse the disposable filter.
Page 56
BREAS MEDICAL
Doc. No. 003 176 En
Issue: X-1
Operating Manual PV 403 PEEP
Cleaning the PV 403 PEEP and replacing the filters
To wash the air filter:
1 Pull out the filter cassette and take the air filter out of its holder.
2
3
4
5
Wash the filter using warm water and, if necessary, a mild detergent. Rinse thoroughly.
Dry the filter by squeezing it out in a towel. Do not wring the filter.
Fit the filter to its holder when the filter is dry.
Switch on the ventilator, and make sure it operates normally.
12.4 Using a bacteria filter
Use a bacteria filter between the patient and the PV 403 PEEP. This is intended to protect the patient from contamination from the unit and the unit from bacteria and viruses
from the patient.
In the case of non-invasive ventilation, the bacteria/virus filter must be replaced at least
once a week. With invasive ventilation, after 48 hours at most.
Observe the bacteria filter life stated by the manufacturer.
12.5 Cleaning the mask and tubes
Follow the instructions below when cleaning the mask and tubes:
•
Clean the mask each day according to the instructions from the responsible clinic or
manufacturer.
•
Hang up the cleaned mask and tubes so that they dry before they are used again.
Doc. No. 003 176 En
Issue: X-1
BREAS MEDICAL
Page 57
Cleaning the PV 403 PEEP and replacing the filters
Operating Manual PV 403 PEEP
•
Always clean the mask and tubes or use a new mask when the PV 403 PEEP is to
be used by a new patient.
•
Use a bacteria filter between the patient outlet and the tube if the PV 403 PEEP is
used by different patients at the clinic.
12.6 Cleaning the BREAS exhalation valve
The exhalation valve should be cleaned according to the clinic’s instructions.
To clean the exhalation valve:
1 Unscrew the cover completely together with the
membrane assembly (A). The membrane can be
cleaned properly while still fitted to its cover. The
membrane assembly is replaced as a complete
unit.
2
3
4
Use warm water and a mild detergent to clean the
exhalation valve.
Let the thin tube remain connected to the nipple
(B) to prevent water from entering into the membrane. Take care not to allow water to enter into
the thin tube. The inside of this tube does not
need to be cleaned.
Always perform a leakage test after cleaning the
exhalation valve before reconnecting the patient
circuit, see the chapter “Patient instructions –
BREAS ventilator PV 403 PEEP” on page 76.
12.7 Change of patient
If the PV 403 PEEP is taken over by another patient, take the following steps:
1 Change bacteria filter and air filters (fine and coarse dust filters).
2
3
4
5
Page 58
Clean the outside of the PV 403 PEEP and if contamination is suspected, carry out
a bacteriological investigation.
If step 2 is positive, the air-carrying parts should be disinfected in the Aseptor/steriliser.
If step 2 is negative, clean as described in this chapter.
Install a clean patient circuit, etc.
BREAS MEDICAL
Doc. No. 003 176 En
Issue: X-1
Operating Manual PV 403 PEEP
13
Maintenance
Maintenance
13.1 Checking the operation hours and software version
To check the operation hours and software version:
•
Switch on the PV 403 PEEP.
The display on the settings panel will show the following settings for approximately 1 second before the
ventilator starts working:
•
Model designation
•
Installed master software version
•
Installed slave software version
•
Total number of operation hours
The display only shows whole operation hours.
403
MDH
SBC
01238
HOURS
13.2 Setting the date and time
As part of the data analysis function of the PV 403 PEEP, the date and time are recorded.
The recording allows detailed time analysis of the patient data in the different printouts
that are available for the ventilator.
The clock function uses the 24-hour clock standard.
To check the date and time:
•
Switch on the ventilator by pressing the On/Off
button for 2 seconds. At the same time, press and
hold down the Function button until the display
shows the current date and time, see figure.
Y 00
M 02
D 25
H 11
To set the date and time:
1 Press the Function button until the corresponding LED for the required setting is lit.
2
3
4
Press the +/– buttons to increase or decrease the
setting value.
Continue by stepping down through the settings
to the last setting, M – minutes.
Switch off the ventilator.
The new date and/or time setting is saved.
Doc. No. 003 176 En
Issue: X-1
BREAS MEDICAL
M 05
SET
DATE
TIME
Page 59
Maintenance
Operating Manual PV 403 PEEP
13.3 Disposal
The PV 403 PEEP, any accessories and all replaced parts must be disposed of and recycled in accordance with the local environmental regulations regarding the disposal of
used equipment and waste.
Batteries used with the PV 403 PEEP shall be recycled in accordance with the local
environmental regulations.
Page 60
BREAS MEDICAL
Doc. No. 003 176 En
Issue: X-1
Operating Manual PV 403 PEEP
14
Troubleshooting
Troubleshooting
If the PV 403 PEEP does not work properly, try to identify the problem in the table
below. Check the possible causes and carry out the suggested remedial actions.
The alarm functions of the PV 403 PEEP are described in detail in the chapter “Alarm”
on page 43.
The fault codes below are only examples. BREAS Service Manual includes a
complete list of all fault codes used for the PV 403 PEEP.
Problem
Possible cause
The power indicator LED • The power cord is not
is lit and the ventilator
properly connected.
alarms at start-up.
Remedial action
• Connect the power cord. Check the connection at the rear of the ventilator and at the
power socket.
• If the fault persists, contact service
personnel.
The PV 403 PEEP does
not run from the external
battery.
• The external battery cable • Connect the cable.
is not connected properly • Check for open circuit and replace the cable
or is faulty.
if necessary.
• The external battery fuse
is blown.
• Replace the fuse.
• The fuse blows immediately after connecting the
external battery cable.
• Check the polarity of the connector.
• If the fault persists, contact service
personnel.
The PV 403 PEEP does
not run from the internal
battery.
• The internal battery is
• Contact service personnel.
incorrectly installed or has
not been properly
charged.
• A fuse has blown.
The ventilator does not
give adequate pressure/
volume.
• Leakage from the patient
circuit or the mask.
• Check the tubes, mask and exhalation valve
for leakage.
• Check the pressure line (green) for humidity
and dry if humid.
• The filter is dirty.
• Clean or replace the filter.
• The PEEP function may
• Check the PEEP function.
have been activated or
switched off without your
knowledge.
• If the fault persists, contact service
personnel.
Doc. No. 003 176 En
Issue: X-1
BREAS MEDICAL
Page 61
Troubleshooting
Problem
Operating Manual PV 403 PEEP
Possible cause
Remedial action
Fault code FAIL 66 or
• The green pressure tube in • Connect the patient circuit correctly.
GAUGE MATCH FAIL
the patient circuit is incorCHECK TUBE? is
rectly connected.
shown on the display.
• Humidity in green pressure tube.
• Dry the green pressure tube.
• If the fault persists, contact service
personnel.
Fault code LOW
VOLTAGE is shown on
the display.
• The power voltage –
mains or battery – is too
low.
• Check the power source.
Fault code FAIL XX is
shown on the display,
where XX is a number.
• The ventilator does not
function.
• Send the ventilator for service.
Page 62
BREAS MEDICAL
Doc. No. 003 176 En
Issue: X-1
Operating Manual PV 403 PEEP
15
Service
Service
Service of the PV 403 PEEP must be carried out by authorised personnel only.
Authorised service workshops may order the BREAS Service Manual that contains all technical documentation, such as instructions, calibration data, circuit
diagrams, component lists, and so on, required for the maintenance and service of
the PV 403 PEEP.
15.1 Yearly maintenance check
The PV 403 PEEP should be tested and inspected by the responsible clinic with the following frequency:
•
Once a year, if the ventilator is used only at night (10–12 hours a day).
•
Twice a year, if the ventilator is used day and night.
This maintenance service must be carried out according to the maintenance scheme in
the BREAS Service Manual and any amendments issued. The inspection should include
checking that all the functions of the unit and accessories are operating correctly, checking for damage and materials ageing, verifying that the correct pressure is delivered,
checking and/or replacing the battery supply, etc.
Doc. No. 003 176 En
Issue: X-1
BREAS MEDICAL
Page 63
Service
Operating Manual PV 403 PEEP
15.2 Service records
The form below should be used when recording the results of the yearly maintenance
check.
1st yearly service
Date performed:
Name of Servicing Technician/Workshop:
Signature:
Work Order No/Remarks:
2nd yearly service
Date performed:
Name of Servicing Technician/Workshop:
Signature:
Work Order No/Remarks:
3rd yearly service
Date performed:
Name of Servicing Technician/Workshop:
Signature:
Work Order No/Remarks:
4th yearly service
Date performed:
Name of Servicing Technician/Workshop:
Signature:
Work Order No/Remarks:
5th yearly service
Date performed:
Name of Servicing Technician/Workshop:
Signature:
Work Order No/Remarks:
6th yearly service
Date performed:
Name of Servicing Technician/Workshop:
Signature:
Work Order No/Remarks:
7th yearly service
Date performed:
Name of Servicing Technician/Workshop:
Signature:
Work Order No/Remarks:
8th yearly service
Date performed:
Name of Servicing Technician/Workshop:
Signature:
Work Order No/Remarks:
9th yearly service
Date performed:
Name of Servicing Technician/Workshop:
Signature:
Work Order No/Remarks:
10th yearly service
Date performed:
Name of Servicing Technician/Workshop:
Signature:
Work Order No/Remarks:
Page 64
BREAS MEDICAL
Doc. No. 003 176 En
Issue: X-1
Operating Manual PV 403 PEEP
16
Technical specifications
Technical specifications
The technical specifications of the PV 403 PEEP are listed in the tables below. This
chapter also contains detailed descriptions of the analog/digital connector and the alarm
output connector of the PV 403 PEEP.
Setting ranges/performance Specifications
Modes
PSV (Pressure Supported Ventilation)
PCV (Pressure Controlled Ventilation)
VCV (Volume Controlled Ventilation)
Patient pressure
6–50 mbar, tolerance: ±10% of set value
Rate
4–40 breaths per minute (BPM), tolerance: ±10%
of set value
Inspiration time
0.5–5 seconds, tolerance: ±10% of set value
Inspiration trigger
–2 to +8 mbar, tolerance: ±10% of set value
Pressure plateau
Adjustable, tolerance: ±10% of set value
Expiration time
10–50% of max. flow, tolerance: ± 10% of set
value
Tidal volume
0.3–1.6 litres, tolerance: ±10% of set value
PEEP
0–10 mbar, tolerance: ±2 mbars
Minute volume
2–50 l/min, tolerance: ±10%
Maximum flow
120 l/min, tolerance: ±10%
Maximum limited pressure
during single fault condition
60 mbar
Display/Output
Specifications
Patient pressure
0–50 mbar, tolerance: ±4% of max. value and
±8% of actual value
Delivered tidal volume
0.1–1.6 litres, tolerance: ±4% of max. value and
±8% of actual value
Analog output
0–6 V
Digital output
PC connector
Alarm output
Connector for external alarm equipment
Power supplies
Specifications
Mains supply
100–240 V AC, 50–60 Hz, 0.8 A
External battery operation
12 V or 24 V DC, max. 4 A
Doc. No. 003 176 En
Issue: X-1
BREAS MEDICAL
Page 65
Technical specifications
Page 66
Operating Manual PV 403 PEEP
Operating conditions
Specifications
Operating temperature range
5 to 35°C (41 to 95°F)
Storage and transport temperature
–20 to +60°C (–4 to +140°F)
Ambient pressure range
700–1060 mbar
Humidity
< 95%
Indications
Specifications
Mains
Green Power LED
Green On/Off LED
“M” in power field on LCD display
External battery operation
Flashing green On/Off LED,
“E” in power field on LCD display
Internal battery operation
Flashing green On/Off LED,
“I” in power field on LCD display
Inspiration
Green LED
Trigger
Green LED
Lock function
Green LED
Alarms
Specifications
Auditory alarm signal pressure
60 dB(A) ±5 dB(A), Measured at 1 m
Power failure
Red LED, continous audible alarm, message on
LCD display
Low pressure
Red flashing LED, high priority audible alarm,
flashing down-arrow in pressure field in LCD
display
High pressure
Red flashing LED, high priority audible alarm,
flashing up-arrow in pressure field in LCD display
Low tidal volume
Red flashing LED, high priority audible alarm
High rate
Yellow flashing LED, medium priority audible
alarm
Low battery
Yellow flashing LED, medium priority audible
alarm
Function error
Continous audible alarm, fault code on LCD
display
Dimensions/Weight
Specifications
Dimensions (WxHxD)
350x175x260 mm
BREAS MEDICAL
Doc. No. 003 176 En
Issue: X-1
Operating Manual PV 403 PEEP
Technical specifications
Dimensions/Weight
Specifications
Weight
5.5 kg
Doc. No. 003 176 En
Issue: X-1
BREAS MEDICAL
Page 67
Technical specifications
Operating Manual PV 403 PEEP
16.1 Analog/Digital output connector
A D-sub, 25 pin, female connector is provided in the rear panel of the ventilator for analog and digital communication. It is used for connecting the PV 403 PEEP to a PC when
downloading patient data for analysis.
Follow the instructions below when using the output connection:
•
Only use BREAS cables for the connection.
•
Accessory equipment connected to the analog or digital interface must be certified
according to the respective IEC standards (for example IEC 950 for data processing
equipment and IEC 601-1 for medical equipment). Furthermore, all configurations
shall comply with the valid version of the system standard IEC 601-1-1. Everybody
who connects additional equipment to the signal input part or signal output part
configures a medical system, and is therefore responsible that the system complies
with the requirements of the valid version of the system standard IEC 601-1-1. If in
doubt, consult the technical service department or your local representative.
•
All connected equipment must be placed at least 1.5 metres away from the patient.
When the PV 403 PEEP is being used by a patient, it must not be connected to
a PC.
Analog connection
The analog connection is used for registering the patient pressure and the estimated tidal
volume during operation at night. It is normally connected to an analog printer or sleep
registering equipment.
Page 68
Pins
Input/Output
Pins 1, 7, 21, 23, 24, 25
Ground
Pin 4
Reference
Pin 9
Analog 1: 0–5 V; input
Pin 10
Analog 1: Ground
Pin 11
Analog 2: 0–5 V; input
Pin 12
Analog 2: Ground
Pin 16
Pressure: 0 mbar = 1 V, 10 mbar = 2 V, etc.; output
Pin 17
Volume: 0.5 litre = 0.5 V, 1 litre = 1 V, etc.; output
BREAS MEDICAL
Doc. No. 003 176 En
Issue: X-1
Operating Manual PV 403 PEEP
Technical specifications
Digital connection
The digital connection may be used for connecting the PV 403 PEEP to a PC for patient
data analysis.
Pins
Input/Output
Pin 2
TX
Pin 3
RX
Pin 7
Ground
Pin 18
+ 12 V DC
Pin 19
+ 12 V DC
16.2 Alarm output connector
The alarm output connector in the rear panel is used for connecting the PV 403 PEEP to
an external alarm device. This way, any signal from the ventilator’s audible alarm can
also be given through the external alarm equipment.
Follow the instructions below when using the alarm connection:
•
Only use equipment approved according to the relevant IEC standard. If in doubt,
consult the technical service personnel or your local BREAS representative.
A function test of the connected alarm equipment must be performed before
using the alarm the first time, and then at least every 24 hours in continuous
operation.
Switching the alarm connection
The alarm connection setting can be changed to suit the external alarm device.
The alarm connector settings must be
adjusted by authorised service personnel
only.
To switch the alarm connection:
1 Switch off and disconnect the ventilator from
the power source.
2
3
4
Unscrew the alarm connector.
Use a pair of pincers to move the plastic jumper
J1 and/or J2 to the desired position.
Replace the alarm connector.
Doc. No. 003 176 En
Issue: X-1
BREAS MEDICAL
Page 69
Technical specifications
Operating Manual PV 403 PEEP
The following are the settings of the alarm connector:
•
J2, position B: 10 K ohm in series with the relay output (default setting).
•
J2, position A: Resistance short-circuited.
•
J1, position A: At alarm, the relay closes.
•
J1, position B: At alarm, the relay opens (default setting).
RELAY OUTPUT, REAR PANEL
ALARM RELAY (K4) ALARMING
Page 70
BREAS MEDICAL
Doc. No. 003 176 En
Issue: X-1
Operating Manual PV 403 PEEP
Technical specifications
16.3 Compliance of Standards
Standard
Specification
IEC 60601-1 (1988)
A1 (1991)
A2 (1995)
Medical electrical equipment - Part 1: General requirements for safety.
IEC 60601-1-1 (2000)
Medical electrical equipment - Part 1-1: General
requirements for safety - Collateral standard: Safety
requirements for medical electrical systems.
IEC 60601-1-2 (2001)
Medical electrical equipment - Part 1-2: General
requirements for safety - Collateral standard: Electromagnetic compatibility - requirements and tests.
IEC 60601-1-4 (2000)
Medical electrical equipment - Part 1-4: General
requirements for safety - Collateral Standard: Programmable electrical medical systems.
IEC 60601-1-8 (2003)
Medical electrical equipment - Part 1-8: General
requirements for safety - Collateral standard: Alarm
systems - requirements, tests and guidelines.
ISO 10651-2 (2004)
Lung Ventilators for Medical use – Particular requirements for basic safety and essential performance – Part
2: Home care ventilators for ventilator-dependent
patients.
ISO 10651-6 (2004)
Lung ventilators for medical use - Particular requirements for basic safety and essential performance - Part
6: Home care ventilatory support devices.
ISO 17510-1 (2001)
Sleep apnea breathing therapy - Part 1: Sleep apnea
breathing therapy devices.
Classification
Specification
Class II (IEC 60601-1)
Class II, Type BF.
Electrical equipment with dual isolation and body
floating (isolated) applied part according to IEC 606011.
Class IIb
Classification according to the European Medical
Device Directive 93/42/EEC.
IPX1
Degree of protection provided by enclosure.
The PV 403 PEEP and it’s packaging does not contain any natural rubber latex.
Doc. No. 003 176 En
Issue: X-1
BREAS MEDICAL
Page 71
Technical specifications
Operating Manual PV 403 PEEP
16.4 Delivery settings
Page 72
Parameter
Setting
Mode
PCV
Pressure
10 mbar
Rate
8 BPM
Inspiration time
1,5 Seconds
Inspiration trigger
-0,5 mbar
Plateau
7
Expiration trigger
-
Alarm for low volume
0,05 Litres
Alarm for low pressure
5 mbar
Alarm for high rate
OFF
BREAS MEDICAL
Doc. No. 003 176 En
Issue: X-1
Operating Manual PV 403 PEEP
17
Accessories
Accessories
This chapter presents the BREAS accessories that are currently available for the
PV 403 PEEP.
In the following section, you will also find user instructions for the external battery pack.
Use only BREAS accessories for maximum performance and safety.
Description
Part no.
Patient circuit PV 403 PEEP/PV 401, with exhalation valve
000 402
Flex tube 22/22 mm, 8.5 cm length
000 297
Flex tube 22/15 mm, 13 cm length
000 278
Exhalation valve PV 403 PEEP/PV 401, BREAS
000 486
Oxygen adapter, PV 403 PEEP (disposable)
000 256
Adapter 22/22/15F
000 250
PEEP adapter for exhalation valve, BREAS
000 521
Diaphragm kit, exhalation valve
000 518
External pressure limiter 5–50 mbar
000 229
Arm for patient circuit, including mount (table mounting)
000 273
Nylon carry bag, PV 403 PEEP/PV 401
003317
Ventilator trolley, VB 301
000 259
Filter LF 403, 5 pcs/package (disposable)
001 428
Battery cable, BK 524, 12/24 V DC
001 508
EB 2 External battery pack 24 V, including cable, charger and 000 538
bag
Filter, grey foam rubber (3 pcs/package)
001 445
Communication cable for Calendar Data software,
PV 403 PEEP
001 488
Communication cable for Calendar Data software,
all BREAS ventilators
001 980
Doc. No. 003 176 En
Issue: X-1
BREAS MEDICAL
Page 73
Patient settings – BREAS PV 403 PEEP
Operating Manual PV 403 PEEP
Patient settings – BREAS PV 403 PEEP
Patient: ......................................................................................................................
Date:
......................................................................................................................
Clinic:
......................................................................................................................
Set by: ......................................................................................................................
Mode:
PSV
VCV
PRESSURE:
...............................................mbar
RATE:
............................................... BPM
INSPIRATION TIME:
..........................................seconds
INSPIRATION TRIGGER:
...............................................mbar
PLATEAU:
Page 74
PCV
_ _ _ _ _ _ _ _ _ _
EXPIRATORY TRIGGER:
....................................................%
TIDAL VOLUME:
............................................... litres
PEEP:
...............................................mbar
LOW-TIDAL VOLUME ALARM:
............................................... litres
LOW-PRESSURE ALARM:
...............................................mbar
HIGH-PRESSURE ALARM:
...............................................mbar
HIGH-RATE ALARM:
............................................... BPM
BREAS MEDICAL
Doc. No. 003 176 En
Issue: X-1
Operating Manual PV 403 PEEP
Patient settings – BREAS PV 403 PEEP
Notes
.............................................................................................................................
.............................................................................................................................
.............................................................................................................................
.............................................................................................................................
.............................................................................................................................
.............................................................................................................................
.............................................................................................................................
.............................................................................................................................
.............................................................................................................................
.............................................................................................................................
.............................................................................................................................
.............................................................................................................................
.............................................................................................................................
.............................................................................................................................
.............................................................................................................................
.............................................................................................................................
.............................................................................................................................
.............................................................................................................................
.............................................................................................................................
.............................................................................................................................
.............................................................................................................................
Doc. No. 003 176 En
Issue: X-1
BREAS MEDICAL
Page 75
Patient instructions – BREAS ventilator PV 403 PEEP
Operating Manual PV 403 PEEP
Patient instructions – BREAS ventilator
PV 403 PEEP
These instructions must be thoroughly explained to the patient together with the doctor
before the patient or care-giver takes over the operation at home.
The settings of the ventilator may be adjusted by clinic personnel only. The
ventilator casing may be opened by authorised personnel only.
Daily function check
Before using the ventilator, always perform the following function check:
Step
Function check
Comment
1
• Start the ventilator by pressing the On/Off
button.
• Check the power source.
Mains power: Green On/Off LED, “M” in
power field on LCD display.
Battery supply: Flashing green On/Off LED,
“E” (external) or “I” (internal) in power field
on LCD display.
2
• Connect the complete patient circuit
including HME (if used) and tracheostomy
extension/flex tube or mask. Make sure it is
not blocked.
• Check that the low-pressure alarm is activated. If not, adjust the low-pressure alarm
setting.
• Block the patient circuit and check that the
alarm is reset.
The alarm LED for pressure is lit, and an
audible alarm is given after 15 seconds.
3
• Check the high-pressure alarm.
See page 44 in the operating manual.
4
• Block the patient circuit.
• Check the low-tidal volume alarm
(only in the PSV and PCV modes).
The alarm LED for volume is lit, and an
audible alarm is given after 15 seconds.
The low-tidal volume alarm should be reset
once the pressure reaches the alarm level.
5
• Check that the air inlet in the filter cassette at Replace the filter after 500 operating hours, or
the rear of the ventilator is not blocked.
more often if needed, for example in high• Check the filter.
pollution environments, see page 56 in the
operating manual.
6
• Block the tube when the ventilator delivers an Instructions on how to perform a leakage test
of the mask should be given by the doctor,
inspiration.
depending on what type of mask is used.
• Check, by listening, that there is no leakage
from the patient circuit.
• Make sure that all hoses are connected properly.
• If a mask is used, perform a leakage test of
the mask after the mask has been fitted.
Page 76
The low-pressure alarm should be reset once
the pressure reaches the alarm level.
BREAS MEDICAL
Doc. No. 003 176 En
Issue: X-1
Operating Manual PV 403 PEEP
Patient instructions – BREAS ventilator
If the alarm indication “FAIL” is shown on the display and an audible alarm is
heard, switch off the ventilator and then on again. If the fault persists, call for
service personnel immediately, and do not use the ventilator.
At the slightest doubt about the ventilator operating incorrectly, always contact
the medical staff.
Cleaning the ventilator
The responsible clinic must always instruct on how to best clean the patient circuit and
mask. Follow the instructions below when cleaning the ventilator (see also page 55 in the
operating manual). Always be careful when cleaning so as not to damage any equipment.
Step
Procedure
Comment
1
• Wipe the outside of the ventilator using a damp cloth with a The fluid must not enter into the
little mild washing-up liquid or window cleaning fluid.
ventilator.
2
• Remove all tubes before cleaning.
• Clean the patient hose, exhalation valve, flex tube, and
mask when required, using warm water and a mild detergent.
3
• Unscrew the cover to the exhalation valve.
No water must enter into the
• Let the thin tube remain connected to the exhalation valve. membrane or the thin tube.
• Clean the membrane assembly while still fitted to the cover.
4
• Let all parts dry before reconnecting them, see figure.
• Always perform a leakage test when you have cleaned/
disconnected the patient circuit before connecting it to the
patient.
Doc. No. 003 176 En
Issue: X-1
BREAS MEDICAL
Make sure that no water enters
into the tubes.
The thin tube to the exhalation
valve does not need to be
cleaned.
Page 77
Patient instructions – BREAS ventilator PV 403 PEEP
Operating Manual PV 403 PEEP
Maintenance
The ventilator, complete with patient circuit, power cord, and operating manual, must be
handed in every 12 months (or 6 months if used 24 hours a day) to authorised personnel
for maintenance service.
Page 78
BREAS MEDICAL
Doc. No. 003 176 En
Issue: X-1
Operating Manual PV 403 PEEP
Doc. No. 003 176 En
Issue: X-1
Patient instructions – BREAS ventilator
BREAS MEDICAL
Page 79
Patient instructions – BREAS ventilator PV 403 PEEP
Page 80
BREAS MEDICAL
Operating Manual PV 403 PEEP
Doc. No. 003 176 En
Issue: X-1
Operating Manual PV 403 PEEP
Doc. No. 003 176 En
Issue: X-1
Patient instructions – BREAS ventilator
BREAS MEDICAL
Page 81
Patient instructions – BREAS ventilator PV 403 PEEP
Page 82
BREAS MEDICAL
Operating Manual PV 403 PEEP
Doc. No. 003 176 En
Issue: X-1
Operating Manual PV 403 PEEP
Doc. No. 003 176 En
Issue: X-1
Patient instructions – BREAS ventilator
BREAS MEDICAL
Page 83
Patient instructions – BREAS ventilator PV 403 PEEP
Page 84
BREAS MEDICAL
Operating Manual PV 403 PEEP
Doc. No. 003 176 En
Issue: X-1