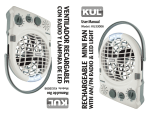
1
MMED6000DP M7 VER 2.0M7-608 Copyright Our company owns all right to this unpublished work and intends to maintain this work as confidential. Our company may also seek to maintain this work as an unpublished copyright. This publication is to be used solely for the purpose of reference, operation, maintenance, or repair of our equipment. No part of this can be disseminated for other purposes. In the event of inadvertent or deliberate publication, Our Company intends to enforce its right to this work under copyright laws as a published work. Those having access to this work may not copy, use, or disclose the information in this work unless expressly authorized by our company to do so. All information contained in this publication is believed to be correct. Our shall not be liable for errors contained herein nor for incidental or consequential damages in connection with the furnishing, performance, or use of this material. This publication may refer to information and protected by copyrights or patents and does not convey any license under the patent rights of Our Company, nor the rights of others. Our company does not assume any liability arising out of any infringements of patents or other rights of third parties. Content of the manual is subject to changes without prior notice. ALL RIGHTS RESERVED Portable Patient Monitor Operator’s Manual MMED6000DP-M7 CONTENT CHAPTER 1 INTRODUCTION...................................................................................................................... - 6 1.1 About the Manual ................................................................................................................................................- 6 1.2 Safety Information...............................................................................................................................................- 6 1.3 Explanation of Symbols .....................................................................................................................................- 7 1.4 Description of Abbreviation ...............................................................................................................................- 7 - CHAPTER 2 OVERVIEW OF MONITOR...................................................................................................... - 8 2.1 General Information ............................................................................................................................................- 8 2.2 Special Feature....................................................................................................................................................- 8 2.3 General Introduction...........................................................................................................................................- 8 2.3.1 Front Panel....................................................................................................................................................................................... - 8 2.3.2 Side Panel ........................................................................................................................................................................................ - 9 2.3.3 CF card and Recorder ................................................................................................................................................................... - 10 2.3.4 Rear Panel ...................................................................................................................................................................................... - 10 2.3.5 Display Introduction ...................................................................................................................................................................... - 11 - 2.4 Specification......................................................................................................................................................- 12 2.4.1 Environment................................................................................................................................................................................... - 12 2.4.2 Display............................................................................................................................................................................................ - 12 2.4.3 Displayed Parameters ................................................................................................................................................................... - 12 2.4.4 ECG................................................................................................................................................................................................. - 12 2.4.5 ST segment .................................................................................................................................................................................... - 13 2.4.6 SpO2 ............................................................................................................................................................................................... - 13 2.4.7 Pulse Rate ...................................................................................................................................................................................... - 13 2.4.8 NIBP ................................................................................................................................................................................................ - 13 2.4.9 RESP............................................................................................................................................................................................... - 14 2.4.10 TEMP............................................................................................................................................................................................. - 14 2.4.11 Power Requirements................................................................................................................................................................... - 14 2.4.12 Dimension and Weight ................................................................................................................................................................ - 14 2.4.13 Alarm Range................................................................................................................................................................................. - 14 2.4.14 Default Alarm Setup .................................................................................................................................................................... - 14 - CHAPTER 3 PATIENT SAFETY................................................................................................................. - 15 3.1 Environment ......................................................................................................................................................- 15 3.2 Condensation ....................................................................................................................................................- 15 3.3 Grounding..........................................................................................................................................................- 15 - CHAPTER 4 GETTING STARTED ............................................................................................................. - 16 4.1 Unpacking and Inspection ...............................................................................................................................- 16 4.2 Install the Battery & Connect the Power Cable ..............................................................................................- 16 4.3 Power on the Monitor .......................................................................................................................................- 16 4.4 Connecting Patient Sensors ............................................................................................................................- 17 4.5 Check the Recorder ..........................................................................................................................................- 17 - CHAPTER 5 MENU TREE OF OPERATION ............................................................................................. - 18 - - 2 - Portable Patient Monitor Operator’s Manual MMED6000DP-M7 5.1 System menu.....................................................................................................................................................- 18 5.2 Trend menu .......................................................................................................................................................- 19 5.3 ALARM Set menu ..............................................................................................................................................- 19 5.4 Sound menu ......................................................................................................................................................- 20 5.5 ECG Menu..........................................................................................................................................................- 21 5.6 NIBP Menu .........................................................................................................................................................- 22 5.7 SpO2 Menu .........................................................................................................................................................- 22 5.8 RESP Menu........................................................................................................................................................- 23 5.9 TEMP Menu........................................................................................................................................................- 23 - CHAPTER 6 SYSTEM MENU..................................................................................................................... - 24 6.1 Time Setup.........................................................................................................................................................- 24 6.2 Volume ...............................................................................................................................................................- 24 6.3 Print Setup.........................................................................................................................................................- 24 6.3.1 Performance of the recorder ........................................................................................................................................................ - 24 6.3.2 Printing paper ................................................................................................................................................................................ - 24 6.3.3 Operation of the recorder menu................................................................................................................................................... - 25 6.3.4 Printed content by the build-in recorder ..................................................................................................................................... - 26 - 6.4 Color...................................................................................................................................................................- 26 6.5 FAN.....................................................................................................................................................................- 26 6.6 Extend ................................................................................................................................................................- 26 - CHAPTER 7 TRENDS ................................................................................................................................ - 28 7.1 Table...................................................................................................................................................................- 28 7.1.1 TREND ............................................................................................................................................................................................ - 28 7.1.2 ALARM ............................................................................................................................................................................................ - 28 7.1.3 OXYCRG ......................................................................................................................................................................................... - 29 - 7.2 HR.......................................................................................................................................................................- 29 7.3 NIBP ...................................................................................................................................................................- 30 7.4 SpO2 ...................................................................................................................................................................- 30 7.5 ST .......................................................................................................................................................................- 31 7.6 ERASE................................................................................................................................................................- 31 - CHAPTER 8 ALARMS AND SILENCE ...................................................................................................... - 32 8.1 Alarm Modes......................................................................................................................................................- 32 8.2 Alarm Setup .......................................................................................................................................................- 32 8.3 Common Method of Alarm Setup ....................................................................................................................- 32 8.4 Silence ...............................................................................................................................................................- 32 - CHAPTER 9 ECG SETUP .......................................................................................................................... - 33 9.1 What is ECG MONITORING? ............................................................................................................................- 33 9.2 Precautions during ECG Monitoring ...............................................................................................................- 33 9.3 Monitoring Procedure.......................................................................................................................................- 33 9.3.1 Precondition................................................................................................................................................................................... - 33 9.3.2 Placing the electrodes for ECG monitoring ................................................................................................................................ - 33 - 9.4 ECG Screen .......................................................................................................................................................- 34 - - 3 - Portable Patient Monitor Operator’s Manual MMED6000DP-M7 9.4.1 ECG Displaying Area ..................................................................................................................................................................... - 34 9.4.2 ECG Waveform............................................................................................................................................................................... - 35 - 9.5 ECG Menu..........................................................................................................................................................- 35 9.5.1 AMPL............................................................................................................................................................................................... - 35 9.5.2 ALARM ............................................................................................................................................................................................ - 35 9.5.3 ECG ANALYSE ............................................................................................................................................................................... - 35 9.5.4 LEAD ............................................................................................................................................................................................... - 39 9.5.5 SWEEP SPEED............................................................................................................................................................................... - 39 9.5.6 MODE.............................................................................................................................................................................................. - 39 - 9.6 Maintenance and Cleaning...............................................................................................................................- 39 - CHAPTER 10 NIBP MONITORING ............................................................................................................ - 40 10.1 Introduction .....................................................................................................................................................- 40 10.2 Preparation for Cuff ........................................................................................................................................- 40 10.3 NIBP Displaying Area......................................................................................................................................- 41 10.4 Operation of NIBP Monitoring........................................................................................................................- 41 10.4.1 ALARM .......................................................................................................................................................................................... - 41 10.4.2 UNIT .............................................................................................................................................................................................. - 41 10.4.3 CYCLE .......................................................................................................................................................................................... - 41 10.4.4 MODE............................................................................................................................................................................................ - 42 10.4.5 NON-S ........................................................................................................................................................................................... - 42 - 10.5 Pressure Safety Protection ............................................................................................................................- 43 10.6 Maintenance and Cleaning.............................................................................................................................- 43 - CHAPTER 11 SPO2 MONITORING............................................................................................................ - 44 11.1 What is SpO2 Monitoring ................................................................................................................................- 44 11.2 Precautions during SpO2/Pulse Monitoring..................................................................................................- 44 11.3 Monitoring Procedure.....................................................................................................................................- 44 11.4 SpO2 Displaying Area.....................................................................................................................................- 45 11.5 Operation of SpO2 Monitoring .......................................................................................................................- 45 11.5.1 AMPLITUDE .................................................................................................................................................................................. - 45 11.5.2 HR FROM ...................................................................................................................................................................................... - 45 11.5.3 ALARM .......................................................................................................................................................................................... - 45 11.5.4 PR SOUND.................................................................................................................................................................................... - 46 11.5.5 WAVEFORM ................................................................................................................................................................................. - 46 - 11.6 Maintenance and Cleaning.............................................................................................................................- 46 - CHAPTER 12 RESP MONITORING ........................................................................................................... - 47 12.1 How to Measure RESP?..................................................................................................................................- 47 12.2 Setting up RESP Measurement......................................................................................................................- 47 12.3 Procedures of RESP Measurement ...............................................................................................................- 47 12.4 RESP Displaying Area ....................................................................................................................................- 47 12.5 Operation of RESP Monitoring ......................................................................................................................- 47 12.5.1 AMPLITUDE .................................................................................................................................................................................. - 47 12.5.2 ALARM .......................................................................................................................................................................................... - 47 12.5.3 APNEA .......................................................................................................................................................................................... - 48 - - 4 - Portable Patient Monitor Operator’s Manual MMED6000DP-M7 12.6 Maintenance and Cleaning.............................................................................................................................- 48 - CHAPTER 13 TEMP MONITORING........................................................................................................... - 49 13.1 Procedure of TEMP Measurement .................................................................................................................- 49 13.2 TEMP Displaying Area ....................................................................................................................................- 49 13.3 Operation of TEMP Monitoring ......................................................................................................................- 49 13.3.1 ALARM .......................................................................................................................................................................................... - 49 13.3.2 UNIT .............................................................................................................................................................................................. - 49 - 13.4 Maintenance and Cleaning.............................................................................................................................- 49 - CHAPTER 14 MAINTENANCE AND TROUBLESHOOTING.................................................................... - 50 14.1 Maintenance ....................................................................................................................................................- 50 14.2 Troubleshooting..............................................................................................................................................- 51 14.3 Warranty and Repair .......................................................................................................................................- 51 14.3.1 Warranty and repair content ....................................................................................................................................................... - 51 14.3.2 Exemption and restriction .......................................................................................................................................................... - 51 14.3.3 Customer guarantees.................................................................................................................................................................. - 51 14.3.4 Non-warranty and Non-replacement Policy............................................................................................................................... - 52 14.3.5 Customer special warranty period............................................................................................................................................. - 52 - 14.4 Storage and Transportation ...........................................................................................................................- 52 - APPENDIX .................................................................................................................................................. - 53 List of Accessories .................................................................................................................................................- 53 - - 5 - Portable Patient Monitor Operator’s Manual MMED6000DP-M7 CHAPTER 1 INTRODUCTION 1.1 About the Manual This manual explains how to set up and use the patient monitor. Important safety information relating to general use of the monitor appears in front of this manual. Other important safety information is located throughout the text where appropriate. Before using the patient monitor, read this manual carefully so that the user can operate the patient monitor properly and make it reach the specific safety standard and performance index. Note: The illustrations used in this manual may differ slightly from the appearance of the actual product. 1.2 Safety Information z This patient monitor only can be operated by qualified personnel. Before use, carefully read this manual, directions for use of any accessories, all precautions, and all specifications. And then check out that the equipment functions are safe and ensure that the monitor is in proper working condition. z This monitor is intended to be used only as an adjunct in patient assessment. It must be used in conjunction with clinical signs and symptoms. z To avoid an electrical hazard, never immerse the unit in any fluid or attempt to clean it with liquid cleaning agents. Always disconnect monitor from AC Main Power before performing cleaning of maintenance. z If monitor becomes accidentally wet during use, discontinue operation of the monitor until all affected components have been cleaned and permitted to dry completely. Contact our local representative if additional information is required. z Connect the monitor to a three-wire, grounded, hospital-grade receptacle. z By replacing the fuse, please use the safety device of the same type and rated fuse. z Before using the equipment, check out whether all the cables are in good condition, the damaged cables and connectors must be replaced. Operator should examine whether the system is in correct working state and operating condition. z As with all medical equipment, carefully route patient cabling to reduce the possibility of patient entanglement or strangulation. z To avoid monitor fall, secure monitor on the shelf or bracket prior to use. z Be sure to use anti-defibrillation electrodes and ECG cable if the monitor is used with defibrillation equipment. z If any parameter displayed on monitor and working station are not accurate, adopt the other methods to diagnosis patient. z The medical equipment must be manipulated by professional personnel who have already got relative training of operation. z For safe and accurate operation, use only our company recommended patient cable, lead wires, cuffs, hose, sensors, tubing, etc. Request for the special accessories infantren or infant when monitor infant. z Single-use devices should never be reused. z Do not use the monitor in the presence of a flammable anesthetic mixture with air or with oxygen or nitrous oxide. z The system may not conform to all performance specifications if stored or used outside the environmental specification identified in specification. z If you are uncertain about the accuracy of any measurement, first check the patient’s vital signs by alternate means and then make sure the monitor is functioning correctly. z Alarm must be set up according to different situation of individual patient. Make sure that audio sound can be activated when alarm occurs. z When an “X” appears in the Alarm Bell symbol, the audible alarm tone will not sound for any reason. z Do not only depend on the alarm system, the doctor and nurse should draw more attention when a alarm turn down or turn off. z When connecting the monitor to any instrument, verify proper operation before clinical use. Refer to the other device’s manual for full instructions. Accessory equipment connected to the monitors data interface must be certified according to IEC Standard 60601-1 for electro medical equipment. All combinations of equipment must be in compliance with IEC Standard 61601-1-1 systems requirements. To avoid potentially hazardous leakage currents, always check the summation of leakage currents when several items of equipment are interconnected. z For proper equipment maintenance, perform the service procedures at the recommended intervals as described in the manual. z If the patient monitor needs to be used continuously chronically, please note to connect the patient monitor with the main power supply by the alarm of battery, otherwise, the patient monitor will automatically shut down, which leads to the break-off of the monitoring. z Do not use the patient monitor during Magnetic Resonance Imaging (MRI) scanning. Induced current could potentially cause burns. The monitor may affect the MRI image, and the MRI unit may affect the accuracy of monitor measurements. z Do not place the monitor in any position that might cause it to fall on the patient. Do not lift the monitor by the power supply cord or patient connections. z The monitor can monitor only one patient synchronously. z DO NOT put the batteries together with metal objects, such as keys, pens, knives, etc. As these may cause short circuit. - 6 - Portable Patient Monitor Operator’s Manual MMED6000DP-M7 z BE SURE TO USE the batteries supplied by our company. z Charge the batteries about two months if the batteries will not be used for a long time, because of the battery self-discharge. z Please carefully read the relevant chapter in this instruction for more attention. 1.3 Explanation of Symbols Attention!Refer to the relevant prompt. I Resistant defibrillator BF type equipment According to the type of protection against electrical shock: Class I Equipment Heart Beat Detected Manufacture date Manufacture address Power on/off Rotated knob Counter-clockwise and clockwise Sound on Sound off Alarm on Alarm off System setup menu Trend menu Equipotential grounding terminal AC 50/60 HZ Fuse Battery status icon This symbol indicates that the instrument is IEC 60601-1 Type CF equipment. The unit displaying this symbol contains an F-type isolated (floating) patient applied part providing a high degree of protection against shock, and is suitable for use during defibrillation. This item is compliant with Medical Device Directive 93/42/EEC of 14 June 1993, a directive of the European Economic Community. 1.4 Description of Abbreviation HR: heart rate ECG: 2-channel or 7-channel ECG waveform SPO2: arterial oxygen saturation SpO2 Plethysmogram M: mean blood pressure NIBP: non-invasive blood pressure D: diastolic TEMP: temperature channel 1 temperature channel 2 Temperature Difference between two channels (TD) PR: pulse rate S: systolic RR: respiration rate Respiration Waveform - 7 - Portable Patient Monitor Operator’s Manual MMED6000DP-M7 CHAPTER 2 OVERVIEW OF MONITOR 2.1 General Information This instrument is a portable patient monitor that has abundant monitoring functions and is used for the clinical monitoring of adult, infant and infant. In addition, the user could select the different parameter configuration according to different requirements. This patient monitor can be connected to the central monitoring system via our company network so as to form a network monitoring system. 2.2 Special Feature z Portable, compact, AC power and internal rechargeable battery; z New design of NIBP module, support rapid and continuous measurement, higher precision and consistency; z Multi-bandwidth design of ECG module, adapt to various conditions; z Resistant high-frequency electrosurgical generator design, reliable and special module is used in operation room; z Inner printer (recorder) with 3 channels wave; z Adjust volume more accurately by digital system; z Menu design adopts Huffman decode, operating more effectively; z Support Ethernet, wireless LAN and could be connected with Central monitoring system. 2.3 General Introduction 2.3.1 Front Panel Fig. 2-1 (1) Indicator light: Indicating the power supplying state of the monitor Green: power supplying (2) Power switch: Press the button for about 3/4 seconds to power on/off. (3) Indicator light: Indicating battery charging status Orange and flash: the battery is in the process of quick charging. Orange: the battery is slowly being charged or the charge is finished. (4) FREEZE Pressing the button will freeze the waveform of ECG. Pressing “FREEZE” button again will restore the normal monitor status. (5) SILENCE ALARM function button. When pressing the button, the icon in menu status is shown as , which indicates all the audible alarms have been shut off. Once a new alarm event occurs, the audible alarm function will be activated automatically. Or the audible alarm will be restarted automatically if the alarm event still exists after 3 minutes.You can also restore the audible alarm by pressing the button again. The icon shown as which indicates the audible alarm function is restored. - 8 - Portable Patient Monitor Operator’s Manual NOTE: When “ MMED6000DP-M7 ” mark appears, the system can not give the audible alarm prompt. Therefore, the operator should use this function carefully. (6) NIBP Start/Cancel NIBP measuring button. Pressing the button will inflate the cuff to start a new NIBP measurement. During the measurement, press this button to cancel the measurement and deflate the cuff, including the “CYCLE” and “STAT (NOT STOP)” measuring mode. (7) PRINT PRINT button. Pressing this button will motivate the recorder to output the results if the monitor is equipped with them. (8) REFRESH Pressing the button will exit the submenu and refresh the screen. If the CF card is inserted, you can store the changed parameters setting as configuration files in a CF card only by pressing the REFRESH button. Any setting is not refreshed in a CF card before you press the REFRESH button. (9) Rotary Knob The operator uses the rotary knob to select the menu item and modify the setup. It can be rotated clockwise or counter-clockwise and pressed like other buttons. The operator uses the knob to realize the operations. The method of using the knob to execute the operation: Rotary knob is just like the cursor of computer. When operator rotates the knob on the icon where the operation is wanted, the icon will be automatically highlighted. Then pressing the knob, operator will open the setup menu of the corresponding parameter so as to set up the menu. Fig. 2-2 (10) ALARM Indicator If there is physiological alarm, it demonstrates that some parameters measurement is beyond alarm limitation, in the meantime, the indicator begin flashing. There are three alarm-levels in all for selection: High level: when alarm occurs, the color of the indicator becomes red and starts flashing once every one second. Mid level: when alarm occurs, the color of the indicator becomes orange and starts flashing once every one second. Low level: when alarm occurs, the color of the indicator becomes green and starts flashing once every one second. 2.3.2 Side Panel Fig. 2-3 (1). NIBP socket:connect NIBP cuff with extension tube. (2). Temperature socket1: connecting the TEMP probe. (3). Temperature socket2: connecting the TEMP probe. (4). ECG socket:Connect ECG 5-lead wire with 6 PIN connector. (5). SpO2 socket:Connect the SpO2 sensor with extension cable. (6). Battery cover. - 9 - Portable Patient Monitor Operator’s Manual MMED6000DP-M7 2.3.3 CF card and Recorder Fig. 2-4 (1) CF card interface: CF card is a memory. Plug a CF card in this interface. If the CF card has been inserted before power on, the configuration files (including all the set parameters) and the measurement data stored in the CF card will be read after power on. During the operation, the measured data will be automatically stored in the CF card. You can store the changed parameters setting as configuration files in the CF card only by pressing the REFRESH button. NOTE: z DO NOT plug and insert the CF card when the monitor is working! z Any setting is not refreshed in a CF card before you press the REFRESH button. (2) A thermal array recorder with standard 50mm (+1/-1) wide printout paper is used for the portable patient monitor. About the detailed information, please refer to Section 6.3 Print Setup. NOTE: The thermal array recorder should be installed by the adequate technician. 2.3.4 Rear Panel Fig. 2-5 (1) Power socket AC Power supply: 100-240 (VAC), 47-63(Hz); Fuse: standard –T 2.0A 250(VAC) (2) DC power supply (reserved) (3) Equivalent electric ground access for connecting with the hospital’s grounding system. (4) NET access point: connecting with the central monitoring system through the standard RJ-45. - 10 - Portable Patient Monitor Operator’s Manual MMED6000DP-M7 2.3.5 Display Introduction The screen display of the portable patient monitor is shown as the following picture: Fig. 2-6 z Monitoring status frame (1) Bed No.: indicates the bed number of the patient who is being monitored when the patient monitor is connected with the workstation. (2) DEMO: Indicates the device is in DEMO monitoring mode now. In clinical application, this function is not recommended because the DEMO will mislead the hospital workers to treat the waveform and parameter as actual data of the patient, which may cause the delay of treatment or mistreatment. (3) Current time: Indicates the date and the current time, it shows in such format as “03/27/2008 17:17:32”. z Graphic displaying area The graphic area can maximally display 3 waveforms. The colour of waveforms matches with the parameter’s on the right of the screen. The waveforms provided by the system are (from up to down): ECG waveform, SpO2 waveform and RESP waveform. (4) ECG waveform ① ECG waveform only shows one lead status, it is continuous and ceaseless waveform. The lead status of showing waveform displays on the right of ECG frame. ② A scale bar is displayed to the left side of ECG waveform. (5) SpO2 waveform (6) RESP waveform z Numeric displaying area The numeric area lies on the right side of the graphic area, which includes: (7) ECG: Heart rate (unit: beats/minute) (8) NIBP: From left to right, there are Systolic pressure, Mean pressure and Diastolic pressure (unit: mmHg or kPa) (9) SpO2: SpO2 (unit: %) Pulse rate (unit: beats/minute) (10) RESP: Respiration rate (unit:breaths/minute) (11) TEMP: temperature of channel 1 and 2 (unit: ℃ or ℉) z others (12) System setup: you can configure various aspects of the monitor, including system time, simulation, print setup, color, display wave, language, color, etc., the detailed operation please refer to Chapter 6 System Menu. (13) Trend: the function is for operator to observe the patient’s latest change, including historical data table, HR, NIBP, SpO2, ST segment. Trend data in graphical or tabular format can be presented on the screen. About the detailed operation, please refer to Chapter 7 Trends. (14) Alarm on/off and alarm setup: shows the status of alarm on Alarm and Silence. (15) Sound on/off: shows the status of sound on or off or off , about the detailed operation please refer to Chapter 8 , about the detailed operation please refer to Chapter 8 Alarm and Silence. (16) The Monitor Inner Temperature Indicator: The indicator’s color will turn red when the monitor inner temperature is higher than the upper limit (the default setting is 62℃). - 11 - Portable Patient Monitor Operator’s Manual MMED6000DP-M7 (17) Remaining Battery Power Indicator (Battery Status Icon ): The icon is dynamic. It is in the form of a “gauge” providing a graphic indication of remaining battery power. There are four shapes of the indicator: the centre with 3 bars (full),2 bars,1 bar, empty and the frame in red. The frame of indicator turns red when low battery power is detected by the monitor. At this time you should immediately plug the AC power supply cable into the socket. Or else, the indicator displays with a red frame constantly when battery capacity reaches critical condition at which time the monitor shuts down. 2.4 Specification 2.4.1 Environment The operating environment should comply with the following conditions: Operating Temperature: 5℃~40℃ Relative Humidity: ≤80%, non-condensing Atmospheric pressure: 86kPa~106kPa The transport and storage environment should comply with the following conditions: Storage Temperature: -20℃~55℃ Relative Humidity: ≤93%, non-condensing Atmospheric pressure: 50kPa~106kPa 2.4.2 Display Type: 480X234 pixel color TFT Screen Size: 7 inch 2.4.3 Displayed Parameters Time: Battery-backed quartz crystal clock Alarms: High and low limits selectable on patient parameters ECG: ECG Waveform Scale, displayed lead Heart Rate: Derived from ECG or SpO2 NIBP: Pressure (systolic, mean and diastolic) Pulse Oximeter: Pulse Rate, SpO2 waveform, and Oxygen saturation. Respiration Rate: Respiration rate derived from ECG. Trends: HR, RR, NIBP, TEMP and SpO2 Temperatures: Two channels Trace Freeze: Trace ECG 2.4.4 ECG Protected against defibrillator and electrosurgery potentials. Standard Lead I, II, III, avL, avR, avF, V1, V2, V3, V4, V5,V6 Display Gain Scales 5mm/mV, 7mm/mV, 10mm/mV, 15mm/mV, 20mm/mV, 25mm/mV Sweep Speed 12.5mm/s, 25mm/s, 50mm/s Input Resistance > 5M Ohm (at 10 Hz, not including patient cable) Frequency Response 0.05Hz-100Hz (3dB) Common Mode Rejection Ratio >80 dB Electrode Offset Potential Maximum ±0.3V Baseline Recovery <5s after 5KV defibrillation Heart Rate range 15 to 300 bpm Resolution 1 bpm Accuracy <100 bpm ±1%; ≥100 bpm ±2% Alarm Heart rate high and low limits alarm delay<12s Lead Off condition Detected and displayed - 12 - Portable Patient Monitor Operator’s Manual MMED6000DP-M7 2.4.5 ST segment ST segment range -0.8mV to +0.8mV Accuracy ±0.05mV 2.4.6 SpO2 Display range 0~99% Accuracy 80%~99%, ±2digits; 70%~79%, ±3digits; 0-69% Unspecified LED Specifications Wavelength Radiant Power RED 660±2nm 1.8mW IR 905±10nm 2.0mW Alarm delay SpO2 high and low limits alarm delay<7s Display Update <5s Resolution 1% 2.4.7 Pulse Rate Measurement Range 30 to 235bpm Resolution 1bpm Accuracy The larger one between ±2bpm and ±2%. Alarm delay Pulse rate high and low limits alarm delay<7s 2.4.8 NIBP Technique Oscillometric method (with inflatable cuff) Determines systolic, diastolic and mean arterial pressures. Patient Types Adult and Infant Cuff Inflation Time 3-15 seconds depending on cuff size. Cuff Inflation Pressure Initially 180 mmHg for Adult auto mode Manual: Immediate upon operator command Measurement Modes AUTO: Determinations automatically made with selectable intervals STAT: Determinations continues in 5 minutes First Inflation Measurement Manual: 9.3kPa (70 mmHg), 13.3kPa (100 mmHg),16.0kPa (120 mmHg)18.6kPa (140 mmHg), 20.0kPa (150 mmHg),21.3kPa (160 mmHg), 24.0kPa (180 mmHg) AUTO: 24kPa(180 mmHg) Measurement Interval Time 1-240min Step: 1 min (1-10min)、5 min (10-30min)、10 min (30-90min)、30 min (90-240min) Measurement Range Adult Systolic 30-255 mmHg Mean Arterial 20-235 mmHg Diastolic 15-220 mmHg Measurement Range Infant Systolic 30-135 mmHg Mean Arterial 20-125 mmHg Diastolic 15-110 mmHg Pressure Resolution 1 mmHg Accuracy Dynamic difference: ±3 mmHg MAX Mean difference: ±5 mmHg Determination Time MAX Standard deviation: ≤8 mmHg Typically 25 seconds. Varies with patient’s pulse rate, pulse pressure and amount of artifact present. Overpressure Valve (Adult/Infant) Automatically releases cuff pressure if inflation pressure exceeds 280mmHg/150mmHg Overtime Protection (Adult/Infant) Stop determinates if the measurement time exceeds 120s/90s. Alarm delay Pressure high and low limits alarm delay<7s - 13 - Portable Patient Monitor Operator’s Manual MMED6000DP-M7 2.4.9 RESP Technique Trans-thoracic impedance (RA-LL) Range 0~100 rpm Resolution 1 rpm Accuracy ±2 rpm (0~60 rpm) Alarm delay Respiration rate high and low limits alarm delay<7s 2.4.10 TEMP Technique Resistance Channel 2 (T1 and T2) Scales ℉ Or ℃ Probes Resistive; recta and skin (reusable and disposable) YSI 400 Series types Range 20.0℃~45.0℃ Revolution 0.1℃ Accuracy ±0.1℃ Alarm delay Body temperature high and low limits alarm delay<7s 2.4.11 Power Requirements Power Supply: 100~240VAC,47-63Hz 2.0A max; Internal Battery: 12V, Ni-MH rechargeable battery; Capacity: 2400 mAH Operating Time: 2 hours typical at 25℃, no printing, one NIBP measurement per 15 min. (fully charged battery) The cycle life of the battery is more than 500 cycles while with capacity ≥70% after 300 cycles. 2.4.12 Dimension and Weight Dimension 268mmX176mmX212mm Weight 3.3kg(including a CF card) 2.4.13 Alarm Range Parameter HR (bpm) Upper Limit Range Lower Limit Range 40-300 20-160 Systolic (kPa) (mmHg) 12.0-34.0 90-255 8.0-29.3 60-220 Diastolic (kPa) (mmHg) 8.0-29.3 60-220 4.0-24.0 30-180 Systolic (kPa) (mmHg) 21.3 160 12.0 90 Diastolic (kPa) (mmHg) 12.6 95 8.0 60 Mean Arterial (kPa) (mmHg) 4.6-29.3 35-220 4-26.6 30-200 SpO2 (%) RR (rpm) TEMP (℃) (Fº) PR (bpm) 80-100 10-120 30-300 70-99 5-80 25.5-45 77.9-113 25-44.5 77-112.1 15-290 2.4.14 Default Alarm Setup Parameter HR (bpm) Upper Limit 120 Lower Limit 50 Mean Arterial (kPa) (mmHg) 14.6 110 8.0 60 - 14 - SpO2 (%) RR (rpm) TEMP (℃) (Fº) PR (bpm) 100 20 140 80 5 39.5 103.1 36 96.8 60 Portable Patient Monitor Operator’s Manual MMED6000DP-M7 CHAPTER 3 PATIENT SAFETY The portable patient monitor is designed to comply with the International Safety requirements for medical electrical equipment. This device has floating inputs and is protected against the effects of defibrillation and electrosurgery. If the correct electrodes and ECG cable are used and applied in accordance with the manufacturer instructions, the screen display will recover within 10 seconds after defibrillation. 3.1 Environment Follow the instructions below to ensure a completely sage electrical installation. The environment where the patient monitor will be used should be reasonably free from vibration, dust, corrosive or explosive gases, extremes of temperature, humidity, and so on. For a cabinet mounted installation, allow sufficient room at the front for operation and sufficient room at the rear for servicing with the cabinet access door open. The Patient Monitor must be operated within specifications at ambient temperatures between 5℃ and 40℃. Ambient temperatures that exceed these limits could affect the accuracy of the instrument and cause damage to the modules and circuits. Allow at least 2 inches (5cms) space around the instrument for proper air circulation. 3.2 Condensation Make sure that during operation, the instrument is free of condensation. Condensation can form when equipment is moved from one building to another, thus being exposed to moisture and differences in temperature. 3.3 Grounding To protect the patient and hospital personnel, the cabinet of the patient monitor must be grounded. Accordingly, the patient monitor is equipped with a detachable 3-wire cable which grounds the instrument to the power line ground (protective earth) when plugged into an appropriate 3-wire receptacle. If a 3-wire receptacle is not available, consult the hospital electrician. If the capacity of the protective grounding wires is in doubt, the equipment must be operated with internal power supply. - 15 - Portable Patient Monitor Operator’s Manual MMED6000DP-M7 CHAPTER 4 GETTING STARTED NOTE: To ensure that the monitor works properly, please read Chapter 3, and follow the steps before using the monitor. 4.1 Unpacking and Inspection Open the package and take out the monitor and accessories carefully. Keep the package for possible future transportation or storage. Check the components according to the packing list. z Check the monitor for any mechanical damage. z Check out all the cables, modules and accessories. If there is any problem, contact the distributor immediately. 4.2 Install the Battery & Connect the Power Cable ◆ Installation of battery: Fig. 4-1 (1) Open the battery cover with a nail. (2) Keep the battery side with arrow mark upward and poke the baffle from one side with the battery coner near to the arrow mark (refer to the direction indicated by the arrow line in Fig. 4-1), then plug the battery into the battery box until the baffle return to original position. (3) Close the battery cover. Caution: If you want to take out the battery, first poke the baffle and push the rear of the battery to flick out the battery. ◆ Connection of the AC power line: Make sure the AC power supply complies with the following specification: 100-240 (VAC), 50/60 (Hz) ⑴ Apply the power line provided with the monitor. Plug the power line into the power socket on the rear panel. ⑵ Connect the other end of the power line to a grounded 3-phase power output. NOTE z Connect the power line to the jack special for hospital usage. z The battery needs to be charged after transportation or storage. If the power supply is not properly connected before turning on the monitor, it may not work properly because of insufficient power. Connect the power supply to charge the battery. 4.3 Power on the Monitor Press the POWER button (on the front panel) for about 4 seconds to turn on the monitor. Then the monitor speaker sounds a one-second tone. The verification procedure Power-On-Self-Test (POST) takes approximately 5 seconds to complete. The system enters monitoring status after POST completion. - 16 - Portable Patient Monitor Operator’s Manual MMED6000DP-M7 NOTE: z Check all the functions that may be used to monitor and make sure that the monitor is in good status. z The battery must be recharged to the full electricity after each use of monitoring so as to reserve sufficient power in battery. z If the CF card has been inserted when power on, the patient’s name data stored in CF card will be read. When the system enters monitoring status, the name of a patient will be shown highlightly with red background color in the centre of the status frame for about three minutes which prompt you should check accordance between the informations of the current patient and those of the patient stored in CF card. After confirming that, you can perform normal monitoring. z The interval between twice presses of POWER switch should be more than 1 minute. WARNING If any sign of damage is detected, or any system failure occurs (e.g. some error messages or an unexplained continuous audible alarm), remove the monitor from use and contact the biomedical engineer in the hospital or the distributor immediately. 4.4 Connecting Patient Sensors Connect all the necessary patient sensors between the monitor and the patient. About the detailed information, please refer to corresponding chapters. 4.5 Check the Recorder If your monitor is equipped with a recorder, open the recorder door to check out whether the paper is properly installed in the output slot. If no papers present, do not press “PRINT” function button. - 17 - Portable Patient Monitor Operator’s Manual MMED6000DP-M7 CHAPTER 5 MENU TREE OF OPERATION In order to give operators a succinct direction about operations, the following MENU TREES shows the overview of all the settings, which can guide you to operate the system simply. To get more information for each setting, you can refer to each Chapter. For the monitor working properly, you should pay attention to the following NOTE. PROMPT: z Color: there are 15 colors for each parameters, the clockwise sequence is: red, purple, brown, light blue, blue, peak green, aqua, rosiness, pink, yellow, white, black, sky blue, green, cyan. You’d better keep the background color to black for getting the better view. z SYSTEM SETUP-EXTEND-SYSTEM: the function is set by manufacturer, please keep it constant. z SOUND OFF: the function prohibits all the sound including sound of heart beat, sound of pressing operation and audible alarms. z NIBP mode: if the inflating pressure is selected between 70~120mmHg, the monitoring patient should be infant; if the inflating pressure is selected between 140~180mmHg, the monitoring patient is adult. 5.1 System menu Pick “System” icon SYSTEM SETUP to access the system menu: TIME VOLUME PRINT DAY MONTH YEAR HOUR MINUTE SECOND TYPE SPRT-B6J TR60 GRID ON OFF TIME ALARM 5SECONDS 10SECONDS 15SECONDS 20SECONDS 25SECONDS 30SECONDS ON OFF OFF CYCLE WAVE COLOR FAN EXTEND NIBP SpO2 RESP TEMP ECG BACKGROUD 1--480MIN NONE ECG SpO2 ECG+SpO2 RESP ECG+RESP SpO2+RESP 3 CHANNELS OFF ON AUTO VER608 SEND RESET SEND BED - 18 - Portable Patient Monitor Operator’s Manual MMED6000DP-M7 SYSTEM NAME SEX AGE SECTION NAME_S MESSAGE OTHER BigMode Standard Cascaded 5.2 Trend menu Pick “Trend” icon TREND to access the trend menu: TREND ALARM OXYCRG TABLE HR > > > > CHART NIBP > > > > CHART SpO2 > > > > CHART ST > > > > CHART ERASE > > > > CHART CHART CHART ON OFF 5.3 ALARM Set menu Pick “ALARM” icon ALARM to access the ALARM menu: ECG HR HIGH LOW BEEP ALARM NIBP ON OFF OFF LOW MEDIUM HIGH LEADA ON OFF SYS(systolic) HIGH LOW MEAN HIGH LOW DIAS(diastolic) - 19 - HIGH Portable Patient Monitor Operator’s Manual MMED6000DP-M7 LOW ALARM OFF LOW MEDIUM HIGH HIGH SpO2 PR AL LOW ALARM PROBE ON OFF HIGH LOW ALARM RESP OFF LOW MEDIUM HIGH HIGH LOW ALARM TEMP OFF LOW MEDIUM HIGH HIGH LOW ALARM OFF LOW MEDIUM HIGH DI_LMT TEMPDI 5.4 Sound menu Press “SOUND” The icon icon, the icon is turn to indicates the sound is on; the icon , indicates the sound is off. - 20 - ON OFF ON OFF Portable Patient Monitor Operator’s Manual MMED6000DP-M7 5.5 ECG Menu Pick “ECG” area in the display to access to the ECG menu: ECG A MPL ALARM 5mm/mV 7mm/mV 10mm/mV 15mm/mV 20mm/mV 25mm/mV HIGH LOW ON OFF BEEP OFF LOW MEDIUM HIGH ALARM ANA LEADA ON OFF ST SET POSI NEG ON OFF ALARM HR V > > > > CHART ANA-S ON OFF HR A FAST SLOW ANA > > > > CHART STOP JFrmR REPLAY LEAD SPEED MODE 12.5mm/s 25mm/s 50mm/s DIA-M (diagnosis) MON-M (monitoring) OPR-M (operation) OFF-M - 21 - HIEST(highest) AUTO I II III aVR aVL aVF V1 V2 V3 V4 V5 V6 HIGHER MIDDLE LOWER LOWEST TIME Portable Patient Monitor Operator’s Manual MMED6000DP-M7 5.6 NIBP Menu Pick “NIBP” area in the display to access to the NIBP menu: NIBP ALARM SYS HIGH LOW MEAN HIGH LOW DIAS HIGH LOW ALARM UNIT mmHg kPa CYCLE MANUAL 1-240min MODE AUTO 70-180 NON-S (NON-STOP) ON OFF OFF LOW MEDIUM HIGH 5.7 SpO2 Menu Pick “SpO2” SpO2 area in the display to access to the SpO2 menu: AMPL(Amplitude) 1-5 HR FROM SpO2 ECG HIGH ALARM PRAL LOW ALARM PROBE ON OFF HIGH LOW ALARM PR SOU ON OFF WAVE FILL LINE - 22 - OFF LOW MEDIUM HIGH ON OFF Portable Patient Monitor Operator’s Manual MMED6000DP-M7 5.8 RESP Menu Pick “RESP” area in the display to access to the RESP menu: RESP AMPL 1-12 ALARM HIGH LOW ALARM APNEA OFF LOW MEDIUM HIGH TIME 10-120sec ALARM ON OFF OFFSET 1-60 5.9 TEMP Menu Pick “TEMP” area in the display to access to the TEMP menu: UNIT Cel Fah TEMP ALARM HIGH LOW ALARM DI _LMT TEMPDI - 23 - OFF LOW MEDIUM HIGH Portable Patient Monitor Operator’s Manual MMED6000DP-M7 CHAPTER 6 SYSTEM MENU This Portable Patient Monitor features flexible configurations. You can configure various aspects of the monitor, including TIME, PRINTER, COLOR, DISPLAY WAVEFORM and other extending functions. NOTE: BE SURE that pressing the REFRESH button after any setting. Otherwise, the settings will not be active and saved in a CF card. In monitoring status, rotate the knob to highlight the bottom of screen. MENU icon, and then press the knob, the menu bar of “system setup” appears on the Fig.6-1 The “system setup” menu includes 6 items. Rotating and pressing the knob to select the menu to be set. Having finished the setup, just press “RETURN”, the system will return to the previous menu. All the settings will be stored automatically when powering off the monitor. 6.1 Time Setup Select “TIME” item in “SYSTEM SETUP” menu to access the sub-menu of “TIME” as shown below Fig.6-2: Fig.6-2 System time is in the format of “day/month/year hour: minute: second”. Pick the item you want to modify and turn the knob, the number will increase or decrease by 1 degree. Then select “RETURN” to the previous menu and press REFRESH button. 6.2 Volume Volume: user may select different level of volume according to different clinical requirement. There are 7 levels for you to select. Along with the level number increasing, the volume will be loud. 6.3 Print Setup 6.3.1 Performance of the recorder ⑴ It can record up to 3 waveforms. ⑵ Output with selectable grid ⑶ The real-time recording and waveform are user-configurable. ⑷ Auto recording interval is set by the user, the waveform is in accordance with the real time recording. ⑸ The alarm recording waveform is automatically selected by the monitor. 6.3.2 Printing paper ⑴ Record paper requirement Only standard 50(+0/-1) mm thermosensitive record paper can be used, otherwise the recorder may not function, the recording quality may be poor, and the thermosensitive print head may be damaged. NOTE: z When the recorder is working, the record paper goes out steadily. Do not pull the paper, or the recorder will be damaged. z Do not operate the recorder without record paper. ⑵ Paper replacement ① From the position with Open Mark pull the paper cassette door towards you until it is completely open. Refer to Fig.6-3. ② Remove the spent paper core. ③ Place a new roll of paper into the paper cassette with a few inches of paper being unrolled. Ensure proper orientation of paper roll. ④ Close the paper cassette door with a few inches of paper being kept outside of the door. - 24 - Portable Patient Monitor Operator’s Manual MMED6000DP-M7 Fig. 6-3 6.3.3 Operation of the recorder menu Select “PRINT” in “SYSTEM SETUP” menu to call up the following menus: Fig. 6-4 (1) TYPE: set the type of thermal recorder “SPRT_B6J” or “TR 60” (Default) according to the factory setting. (2) GRID:Select whether the grid is shown on printing paper or not. Pressing “ON” item, the grid will appear on the paper, which is for doctor to have more facility for observe the patient’s status. Pressing “OFF”, there will be only printed waveforms on the paper. (3) TIME: Represents the length of the printing time, 6 options are available : “5s,10s,15s,20s, 25s,30s”. It means that the recorder will last to print the waveform for the length of time you chosen. (4) ALARM: Select “ON” for this item, the printer will print alarm event when it occurs. (5) CYCLE: Represents “time interval between two times of timing recording”. “OFF or 1Min~480Min” is available to select. It means the system will activate the recording operation according to the selected time interval. The length of printing time is in accordance with the setup in “TIME” item. NOTE: If you select “OFF” item in this menu, the real-time recording will be performed. (6) WAVE:The waveforms displayed on the screen can be selected. The options are available “ECG, SpO2, ECG+SpO2, RESP, ECG+ RESP, SpO2+RESP, 3 CHANNEL, None”. ① ECG: The ECG waveform can be printed on the recording paper. If no ECG waveform is currently displayed on the screen, the waveform will be printed as a beeline on the paper.) ② SpO2: The SpO2 plethysmogram can be printed on the recording paper. If there is no SpO2waveform being currently displayed on the screen, the waveform will be printed as a beeline on the paper. ③ ECG+SpO2: The ECG waveform and SpO2 plethysmogram can be printed on the recording paper. ④ RESP: The Respiration waveform can be printed on the recording paper. If no RESP waveform is currently displayed on the screen, the waveform will be printed as a beeline on the paper. If Et CO2 module is working, CO2 waveform will be printed instead of RESP waveform. ⑤ ECG+RESP: The ECG waveform and Respiration waveform can be printed on the recording paper. ⑥ SpO2+RESP: The SpO2 plethysmogram and Respiration waveform can be printed on the recording paper. ⑦ 3 CHANNEL: Three channels, including: ECG waveform, SpO2 waveform, RESP waveform will be entirely printed. ⑧ None: None waveforms will be printed on the paper. - 25 - Portable Patient Monitor Operator’s Manual MMED6000DP-M7 6.3.4 Printed content by the build-in recorder Fig. 6-5 The printed-paper is shown as Fig. 6-5: ① Bed No. ② The printed data and time, they are shown as “07/28/2004 15:17:36”. ③ Waveforms: Waveforms will be printed according to your settings. When recorder prints 3 waveforms, they will overlap. ④ Parameters: Parameters are recorded on the bottom of the printing paper, the contents are: RR, HR, SpO2, ECG lead, sweep speed, PR, TEMP. 6.4 Color The item is used to define the color of the waveform and parameters displayed on the screen. Rotate the knob to select the “COLOR” item to access the sub-menu shown in the Fig. 6-6. There are 15 colors for each parameters, clockwise rotating the knob, the sequence is: red, purple, brown, light blue, blue, peak green, aqua, rosiness, pink, yellow, white, black, sky blue, green, cyan. You’d better keep the background color as black for getting the better view. Fig. 6-6 6.5 FAN By this menu you can select ON, OFF or AUTO. In AUTO mode, the fan will automatically be opened when the monitor inner temperature is higher than the temperature upper limit (the default setting is 62℃), and will automatically be closed when the monitor inner temperature reaches the fan-off limit (the default setting is 58℃). NOTE: The monitor inner temperature limits for fan-on or fan-off can be set by entering SYSTEM sub-menu in EXTEND menu of SYSTEM main menu through password. 6.6 Extend Rotate the knob and select “EXTEND” item to access the sub-menu shown as below Fig. 6-7: Fig. 6-7 (1). VER608: when you set it “send”, it will get the version of the CSN608 module. (2). RESET: when HR value is not activated, press this item will refresh the value and make it work orderly. (3). SYSTEM: this function is set by the distributor, please keep them unchanged. (4). BED: Indicates the bed number of the patient being monitored when the patient monitor is connected with the workstation, it always shows on the top left corner in the monitor status frame. (5). MESSAGE: Rotate the knob and select “MESSAGE” item to access the picture shown as below Fig.6-8. ”MESSAGE” sub-menu will be indicated in the bottom of the picture. ① NAME: You can select “A-Z”,”DELETE”,”DELETE ALL”,or ”CANCEL”. In the “A-Z” mode you can input the name of the patient one by one character by rotating and pressing the knob, the name will be indicated on the right side of the “NAME” item. The number of the characters is 20 at the most. “DELETE” can delete the last character. “DELETE ALL” can delete all characters inputted. “CANCEL” means this setup will be cancelled. ② SEX: You can set it “FEMALE” or “MALE”. It will be shown on the right side of the “SEX” item. ③ AGE: In the item, input the age of the patient. The range of age is 1-200. The value will be indicated on the right side of “AGE” item. ④ SECTION: The selected items are “A-Z”,”DELETE”,”DELETE ALL”,or ”CANCEL”.The same as “NAME” setup, you can input the name of the section office. You can cancel this setup by selecting “CANCEL”. - 26 - Portable Patient Monitor Operator’s Manual ⑤ MMED6000DP-M7 NAME_S: If you set it “ON”, the name of the patient will be shown in the middle of status frame. If “OFF”, the name won’t be shown. Fig.6-8 (6). OTHER: rotate the knob and select “OTHER” item to access the sub-menu as shown in Fig. 6-9. In MODESET item, there are three options: “standard”, “cascaded” and “BigMode”. Fig.6-9 Cascaded: If you select “cascaded”, two traces of ECG waveform will be shown in the graphic displaying area as below. These two traces of ECG waveform only show one lead status. In another word, the two frames form a cascaded waveform, effectively presenting a sample over twice the time interval of one frame. Fig. 6-10 (01) BigMode: The “BigMode” is big font mode, only ECG, SpO2 and NIBP parameters will be displayed on the screen under this mode. Fig. 6-10(02) NOTE: The item “EXTEND” is useful to the engineers and technicians to adjust the monitor’s configurations. But for the doctors, we do not suggest that those lack of the electronic professional knowledge use this item. As for the details of the item’s usage please refer to the SERVICE MANUAL correspondingly. - 27 - Portable Patient Monitor Operator’s Manual MMED6000DP-M7 CHAPTER 7 TRENDS Trend data in graphical or tabular format can be presented on the screen. 240 hours trend data in tabular format and 216 hours trend data in graphical format can be stored in a CF card. A date/time annotation is included at the start of each new record so that the record can be correlated with the patient whose signs are monitored. NOTE: If there is no CF card in the monitor, the trend or tabular data will not be saved. Trend Setup In monitoring status, rotate the knob to highlight the screen. icon, and then press the knob, the menu bar of “Trend setup” appears on the bottom of Fig. 7-1 7.1 Table 7.1.1 TREND Please select the TABLE to enter into the sub-menu shown as Fig. 7-2: Fig. 7-2 The latest 240 hours data table can be displayed at every 1 minute. The first column shows the items of the parameters. The first and the second line of the table indicate the date and time of measurement respectively. The left column of the table always shows the latest measurement. Rotate the knob to turn pages. The page number is displayed on the bottom right corner. When “END” appears, it indicates this is the last page of records. When the interface is shown as Fig. 7-3, press “FREEZE” function button to enter the “set page” screen. Rotate the knob to set the passing pages at each switch. Press “FREEZE” button again to exit the page set,and then rotate the knob to turn the pages you want. Fig. 7-3 7.1.2 ALARM Pick the ALARM item to enter the setup of alarm event storage shown as Fig. 7-3: 100 alarm events can be totally recorded in the system. Fig. 7-4 - 28 - Portable Patient Monitor Operator’s Manual MMED6000DP-M7 7.1.3 OXYCRG Pick OXYCRG in the TABLE menu to call up the following chart as Fig. 7-5: OxyCRG show HR trend、SpO2 trend、RR trend in one screen. The first one is HR trend, the second one is SpO2 trend, and the third one is RR trend. Fig. 7-5 7.2 HR Pick HR in the TREND MENU to call up the following chart as Fig. 7-6: Fig. 7-6 - 29 - Portable Patient Monitor Operator’s Manual MMED6000DP-M7 7.3 NIBP Pick NIBP in the TREND MENU to call up the following chart as Fig. 7-7: Fig. 7-7 7.4 SpO2 Pick SpO2 in the TREND MENU to call up the following chart as Fig. 7-8: Fig. 7-8 - 30 - Portable Patient Monitor Operator’s Manual MMED6000DP-M7 7.5 ST Pick ST in the TREND MENU to call up the following chart as Fig. 7-9: Fig. 7-9 7.6 ERASE Pick ERASE in the TREND MENU and select ON; then pick RETURN to confirm removing all the data saved in the CF card. NOTE: The data will not be removed, if not picking RETURN. - 31 - Portable Patient Monitor Operator’s Manual MMED6000DP-M7 CHAPTER 8 ALARMS and SILENCE This chapter gives the general information about alarm function and silence function. Alarm setup and prompt messages are provided in respective parameter setup sections. 8.1 Alarm Modes When alarm occurs, the monitor may draw the user’s attention in two ways, which are audible prompt and visual prompt. Physiological and technical alarms are displayed in the displaying areas of the relative parameters. You can control audible alarms by pressing ALARM function button (SILENCE button) on the front panel of the monitor. When pressing the button, the icon in menu status is shown as , which indicates all the audible alarms have been shut off. Once a new alarm event occurs, the audible alarm function will be activated automatically. Or the audible alarm will be restarted automatically if the alarm event still exists after 3 minutes. You can also restore the audible alarm by pressing the button again. The icon shown as is restored. which indicates the audible alarm function Alarm level and different prompt The high/medium/low-level alarms can be set according to the user’s setup in following different audio ways, High Level is the most serious warning, Medium Level is the serious warning and Low Level is the general warning. Alarm level High Medium Low Audio prompt Mode is “DODODO---DODO”, the audible alarm is sent out continuously. Mode is “DO-DO-DO”, which is triggered once every 24 seconds. Mode is “DODO-DODO”, which is triggered once every 12 seconds. Visual prompt The relevant data is displayed highlighted. The alarm indicator light flashes in red. The relevant data is displayed highlighted. The alarm indicator light flashes in orange. The relevant data is displayed highlighted. The alarm indicator light flashes in green. 8.2 Alarm Setup In monitoring status, rotate the knob to highlight the screen as shown below Fig. 8-1: icon, and then press the knob, the menu of “alarm setup” appears on the bottom of Fig. 8-1 PROMPT: There are two methods to set the alarm of each parameter, one of which is setting all alarms of every parameter when you press the icon, another is setting “ALARM” in the individual menu of each parameter setup. 8.3 Common Method of Alarm Setup In “ALARM SETUP” menu, you can set the alarm information of following parameters: ECG HR, NIBP, SpO2, RESP, and TEMP. For example, the method to set up alarm information of HR: ⑴ Select “ECG-HR” in alarm menu to call up the sub-menu shown as below Fig. 8-2: Fig. 8-2 ⑵ Five items are available for the user to set up, which are HIGH (high limit), LOW (low limit), BEEP (Sound of heart beep on or off), ALARM (OFF, HIGH, MEDIUM, LOW). LEADA (alarm of the leadoff) ,When pressing the knob to select each item, a pull-down list appears for the user to choose his desired selection. NOTE: z Selecting “ON/OFF” item for “OFF” in sub-menu of the parameter only prohibits the alarm of the relevant parameter individually. z If you select “ON/OFF” item in sub-menu for OFF, even if the ALARM icon is on, shown as z Triggering the alarm function should simultaneously satisfy the three requests: , the alarm will not still be activated. (1) Rotate knob and highlight in the frame of menu status to call up alarm sub-menu of each parameter, keep “ON/OFF” items be ON. Or enter the each parameter menu to keep “ON/OFF” item to be ON to open the alarm function of the monitor. (2) Make SILENCE icon in the frame of menu status showing as (3) Make ALARM icon in the frame of menu status showing as . . 8.4 Silence In monitoring status, rotate and press the knob on the icon , it will change into indicating that all kinds of sound including the audible alarm and heart beep have been manually silenced until the icon has been pressed again, the system will immediately restore the normal status, and the icon shows . - 32 - Portable Patient Monitor Operator’s Manual MMED6000DP-M7 CHAPTER 9 ECG SETUP 9.1 What is ECG MONITORING? Monitoring the ECG produces a continuous waveform of the patient’s cardiac electric activity to enable an accurate assessment of his current physiological state. Only proper connection of the ECG cables can ensure satisfactory measurement. The monitor can display the Heart Rate (HR), ST segment and Arrhythmia analysis. The ECG waveforms are showing on the top of graphic area. 9.2 Precautions during ECG Monitoring WARNING: z Do not touch the patient, table nearby, or the equipment during defibrillation. z Use only the original ECG cable of the monitor for monitoring. z When connecting the cables and electrodes, make sure no conductive part is in contact with the ground. Verify that all ECG electrodes, including neutral electrodes, are securely attached to the patient. 9.3 Monitoring Procedure 9.3.1 Precondition ⑴ For patient’s skin is not in a good condition, which need to be preconditioned before placing electrode in order to make the leads connect to skin tightly. a) Washing skin completely using soap and water. Ether and pure alcohol is prohibited because they can increase skin’s impedance. b) Shave body hair on where electrodes are placed, if necessary. c) Rub skin briskly to increase capillary flood flow in the tissues and remove skin scurf and grease. d) If electrodes without conducting cream are used, conducting cream should be smeared on skin before placement. ⑵ Attach clip or snap to electrodes prior to placement. ⑶ Put the electrodes on the patient. Before attaching, apply some conductive jelly on the electrodes if the electrodes are not self-supplied electrolyte. ⑷ Connect the electrode lead to the patient’s cable. ⑸ Make sure the monitor is ready with power supply. WARNING z Check everyday whether there is skin irritation resulted from the ECG electrodes. If so, replace electrodes every 24 hours or change their sites. z Verify lead fault detection prior to the start of monitoring phase. Unplug the ECG cable from the socket, the screen will display the error message “LEAD OFF” and the audible alarm is activated. 9.3.2 Placing the electrodes for ECG monitoring For 5-lead set, attach the electrodes to the positions as below Fig. 9-1: Fig. 9-1 Position, identification and color of Electodes: AHA Electrodes Identifier RA IEC Color code Red Position on body surface Color Code White Electrodes Identifier R LA Black L Yellow Left arm LL Red F Green Left leg RL Green N Black Right leg (neutral electrode) V Brown C White Signal movable chest electrode - 33 - Right arm Portable Patient Monitor Operator’s Manual MMED6000DP-M7 NOTE:To ensure patient safety, all leads must be attached to the patient. For 5-lead set, attach the C (V) - electrode to one of the indicated positions as below Fig. 9-2: Fig. 9-2 V1: On the 4th intercostal space at the right sterna margin. V2: On the 4th intercostal space at the left sterna margin. V3: Midway between V2 and V4 electrodes. V4: On the 5th intercostal space at the left sterna margin. V5: On the left anterior axillary line, horizontal with V4 electrodes. V6: On the left middle axillary line,horizontal with V4 electrode. V3R-V7R On the right side of the chest in positions corresponding to those on the left. VE Over the xiphoid position. V7 On the 5th intercostal space at the left posterior axillary line of back. V7R On the 5th intercostal space at the right posterior axillary line of back. WARNING When using electrosurgery equipment, leads should be placed in a position in equal distance from electrosurgery electrotome and the grounding plate in order to avoid cautery. Electrosurgery equipment wire and ECG cable must not be tangled up. The placing of ECG electrodes placement is depended on the type of operation. For example, electrode can be placed in back or flank of chest for operation of opening chest. Sometime ECG wave can be influenced with artificial because of using ES in operation room. In this case, place electrodes at left and right shoulder close with left and right side of abdomen and chest lead at left side of internal in chest to avoid placing in upper arm, which will lead ECG wave smaller. When using electrosurgery equipment, never place an electrode near the grounding plate of the electrosurgery device, otherwise there will be a great deal of interference with the ECG signal. ATTENTION ) ) ) ) For the movement of the lead cable will result in the inaccurate HR value, try to avoid the interference. This monitor can detect ECG signal when at least standard three ECG leads are properly attached to the patient. Should one or more of the leads come off (or lose good electrical contact), after the monitor has established that all related leads are attached, a low-priority “Lead Off” alarm will be issued to alert the caregiver to remedy the problem. When the leads are unattached from patient’s skin, “LDOFF” technical alarm will be displayed in the ECG displaying area. “ECG ERROR” indicates ECG board with trouble. Please stop ECG monitoring at once and contact with the distributor or Customer Service Dept. of our company. 9.4 ECG Screen 9.4.1 ECG Displaying Area (1) ECG numeric display area Fig. 9-3 HR: Heart rate value (the value is 83 here) - 34 - Portable Patient Monitor Operator’s Manual MMED6000DP-M7 ST mm: The height of ST segment (the height is -0.02 here) LEAD: The lead of showing ECG waveform (the lead is II here) (2) ECG graphic display area The following information is shown on the top of ECG graphic display area when certain condition: ECG ERROR: Technical alarm of ECG module. It means that the module is in trouble. LEAD OFF: Technical alarm means lead off, please check the connector of lead cable and electrodes connection. PROMPT By picking ECG, the monitor prompts HR and activates HR beep. By picking SpO2, the monitor prompts PULSE and activates pulse beep. Both mode display HR and PR simultaneously, when this item is picked, PR parameter is displayed to the right side of SpO2. As for the sound of HR or PR, HR is given the priority, i.e., if HR is available, whose sound will be sent out, but if HR is not available, then the sound will be for PR. 9.4.2 ECG Waveform The ECG waveform shows on the left of the ECG numeric display area, whose color matches with the color of ECG parameter. A scale bar is displayed on the left side of ECG waveform as Fig. 9-4: Fig. 9-4 9.5 ECG Menu In monitoring status, rotate the knob to highlight the ECG icon in the ECG displaying area, and then press the knob, the menu of “ECG setup” appears on the bottom of screen as shown below Fig. 9-5. 9.5.1 AMPL Pick this item to access the amplitudes setup of ECG waveform. 6 options are available: 5mm/mV, 7mm/mV, 10mm/mV, 15mm/mV, 20mm/mV, and 25mm/mV. As adjusting, the scale bar will change accordingly. Fig. 9-5 9.5.2 ALARM Prompt: The operation and function are the same as the ECG sub-menu when pressing alarm icon in the frame of menu status. Select “ALARM” in ECG menu to call up the sub-menu shown as below Fig. 9-6: Fig. 9-6 NOTE :It only sets ECG alarm; the alarms of other parameters will not be affected. Six items are available for the user to set up, which are HIGH(high limit), LOW(low limit), BEEP(the sound of heart beep on or off ), ALARM(OFF,HIGH,MEDIUM,LOW), LEADOFF. When you use the knob to select each item and press the knob, a pull-down list appears for the user to choose his desired selection. About the detailed operation, please refer to Chapter 8 Alarm and Silence. 9.5.3 ECG ANALYSE NOTE Doctor should not only use the information offered by the monitor to make diagnosis, the accurate result must be combined with doctor’s experience and knowledge. Select “ANA” item in ECG setup menu to access the sub-menu of “ANA” shown as below Fig. 9-7: Fig. 9-7 ST Segment The information of ST segment is useful for physician’s diagnosis. Normally, the doctor observes its graph carefully to judge whether the patient’s heart work orderly. - 35 - Portable Patient Monitor Operator’s Manual MMED6000DP-M7 NOTE: This menu is available on the condition that you select “DIA-MODE” for “MODE”, About the relevant operation of “MODE” please refer to 9.5.6 instruction. ① ST segment Unit: +mm or -mm. The program of monitor calculates ST segment from: ST = R peak + 109 ms. ISO = R peak – 78 ms. Fig. 9-8 ST Segment ② ST Point limit can be adjusted among followings; ST Point J Point+0ms J Point+30ms J Point+40ms J Point+50ms J Point+60ms J Point+80ms ③ The operation of ST analysis Pick “ST setup” item to call up the sub-menu as below Fig. 9-9: Fig. 9-9 It defines the alarm setup of ST segment. There are three items are available for the user, which are POSI(positive), NEG(negative) and ALARM. When using the knob to select each item and press the knob, a pull-down list appears for the user to choose. NOTE If you select “OFF” for alarm item, the alarm will not be activated when alarm event occurs (1) Pick “HR V” item to call up the analyzing chart of heart rate variation as Fig. 9-10: Fig. 9-10 - 36 - Portable Patient Monitor Operator’s Manual MMED6000DP-M7 Lorenze chart: Lorenze chart is a kind of way to analyze HR V by statistical method. The X axis of the Lorenze chart is the n times RR interphase value (RR interphase is another way to denote the HR value, it represents the time between the twice of R wave, if the HR value is 60 times/min, then the RR Interphase should be 1000ms), The Y axis is (n-1) times, namely the previous time interphase value according to the n time in the X axis. Thus, if supposing the ideal situation, the HR is steady and does not vary, the Lorenze chart should be a line whose slope is 1 namely the bevel is 45 degree. If the HR varies, Lorenze chart is the figure composed by the dots upper or lower than the line whose bevel is 45 degree. The different statistic chart has different analysis and diagnosis meaning in the clinic situation. The data in the Lorenze chart are selected from the data table, one dot per minute, totally 24 hours for a complete chart. (2) Select “ANA_S” item to startup the analyzing software of the monitor. Rotate the knob to pick “ON”, the analyzed result will be shown on the right of ECG display area in time. NOTE: We don’t recommend use this function while monitoring the patient. The analysis results are only references helping doctor to make diagnosis. (4) Select “HR A” item to enter into the submenu shown as Fig. 9-11. Fig. 9-11 The items in this menu are used for setting the alarm of arrhythmia. The numerical options are the period of RR interval. The monitor calculates the patient’s heart rate through reckoning the times of RR interval. Therefore, in the fixed time, shorter the period of RR interval is, faster the heartbeat is. ① FAST: The alarm is for tachyrhythmia. As Fig. 9-11 shown, the alarm will be activated if RR interval is less than 300 ms. ② SLOW: The alarm is for bradycardia. As Fig. 9-11 shown, the alarm will be activated if RR interval is more than 3000 ms. ③ STOP: The alarm is for cardiac arrest. As Fig. 9-11 shown, the alarm will be activated if RR interval is more than 4000 ms. ④ JFrmR: The point is help doctor to judge the location of ST segment, whether it is positive, negative or normal. ⑤ Analysis: The menu is used for setting the standard of judging arrhythmia. Pick “ANA” item to enter the analyzed results shown as below screen Fig. 9-12: Arrhythmia is disorders of the regular rhythmic beating of the heart. The monitor offers 20 kinds of arrhythmia symptom for reference. When arrhythmia occurs, alarm messages will be displayed in the ECG display screen, and the audible and visual alarms will be activated if the parameter value exceeds the limit. Fig. 9-12 The monitor can judge the ECG abnormal events including: CA、CA、BC、TC、SPB、VPB、APB、BR、TR、IVPB、RonT、FVPB、VF、1_AVB、 Noise、AF、BVPB、MVTD、CTVPB、CMVPB. ·CA: Cardiac Arrest or Asystole (ASY) ·CA: Misystole ·BC: Bradycardia ·TC: Tachyrhythmia ·SPB: Supraventricular Premature Beat ·VPB: Ventricular Premature Beat ·APB: Atrial Premature Beat - 37 - Portable Patient Monitor Operator’s Manual MMED6000DP-M7 ·BR: Bigeminy Rhythm ·TR: Trigeminy Rhythm ·IVPB: Invasive Ventricular Premature Beat ·FVPB: Frequent Ventricular Premature Beat ·RONT: R on T Ventricular Fibrillation ·VF: ·1_AVB: 1-AtrioVenicular Block Atrial Fibrillation ·AF: ·Noise: Noise ·BVPB: Bi-Ventricular Premature Beat ·MVTD: Multi-Veetor ·CTVPB: Chained Triple Ventricular Premature Beat ·CMVPB: Chained Multi-Ventricular Premature Beat NOTE: Doctors should not just use the information offered by this monitor to make diagnosis, the accurate result must be combined with doctor’s experience and knowledge. z How to define arrhythmia? Type Condition Tachyrhythmia (TC) ARt<0.5s Bradycardia (BC) RRt >1.5s, ARt>1.2s Cardiac Arrest (CA) Consecutive RR Interval>3s Ventricular Premature RRt-1<0.9(ARt-2) Beat (VPB) RRt-1+RRt≈2(ARt-2), rate>10/min R on T RRt-1<0.33(ARt-2), RRt-1+RRt≈2(ARt-2) RRt-3<0.9(ARt-4), RRt-1<0.9(ARt-4) Bigeminy Rhythm (BR) RRt-3+RRt-2≈2(ARt-4),RRt-1+RRt≈2(ARt-4) RRt-4<0.9(ARt-5), RRt-1<0.9(ARt-5) Trigeminy Rhythm (TR) RRt-4+RRt-3≈2(ARt-5),RRt-1+RRt≈2(ARt-5) PROMPT: RR is RR interphase; AR is the average time of 8 RR intervals, and the suffixes indicate time sequence, for example, RRt means the latest RR interval and RRt-1 refers the previous RR interphase of RRt. NOTE:We don’t recommend you use this function while monitoring the patient. The analysis results are only references helping doctor to make diagnosis. (5)Press “REPLAY” item to call up the sub-menu shown as below Fig. 9-13: Fig. 9-13 The menu defines the speed and length of replaying waveform. HIGHEST: replay the ECG waveform in the fastest speed. HIGHER: replay the ECG waveform in the faster speed. MIDDLE: replay the ECG waveform in the medium speed. LOWER: replay the ECG waveform in the slower speed. LOWEST: replay the ECG waveform in the slowest speed. TIME: 10 options are available for the length of replaying waveform: 30s, 60s, 90s, 120s, 150s, 180s, 210s, 240s, 270s, 300s. The ECG graphic area will replay the previous ECG waveform shown as Fig. 9-14 in a selected speed during a selected time. Fig. 9-14 - 38 - Portable Patient Monitor Operator’s Manual MMED6000DP-M7 9.5.4 LEAD This monitor adopts the standard 5-lead to detect the patient’s electrocardiogram. The selectable leads are Ⅰ,Ⅱ,Ⅲ,avL,avF,avR,V1, V2,V3,V4,V5,V6, AUTO. PROMPT z Lead Ⅱ is default which can get the best view of ECG waveform. z AUTO: the ECG waveforms of various lead will be displayed circularly on the screen when the item is selected. 9.5.5 SWEEP SPEED The menu is used to define the sweep speed of ECG waveform, the available options are 12.5mm/s, 25mm/s, and 50mm/s, please select the proper sweep speed according the clinical requirement. 9.5.6 MODE Filter method: used for displaying clearer and more detailed waveform. There are three filter modes for selection. DIA-MODE, MON-MODE, OPR-MODE may reduce interference from other electrosurgery equipment. You can also select OFF-M to cancel filter. The difference of every mode is the corresponding bandwidth. DIA-MODE: Diagnosis mode, bandwidth: 0.05 - 100 Hz MON-MODE: Monitor mode, bandwidth: 0.5 - 75 Hz OPR-MODE: Operation mode, bandwidth: 1 - 25 Hz OFF-MODE: the signals are not filtered. 9.6 Maintenance and Cleaning WARNINGS z Power must be shut off and main supply plug must be pulled out before cleaning monitor or sensor. z Do not use damaged ECG leads. Do not immerse ECG leads completely in water, solvents, or cleaning solutions because the connectors are not waterproof. Do not sterilize ECG leads by irradiation, steam, or ethylene oxide. Clean: Clean the monitor or sensor using a wet no-floss cloth, which should be washed in 70% alcohol or neutral soap. Sterilization: It is suggested sterilization on instrument is going only when it is required by hospital regulation in order to avoid long-term damage on instrument. We also suggest that the product used to sterilize our instrument is cleaned first. Disinfection: It is suggested disinfection on instrument is going only when it is required by hospital regulation in order to avoid long-term damage on instrument. We also suggest that the product used to disinfect our instrument is cleaned first. - 39 - Portable Patient Monitor Operator’s Manual MMED6000DP-M7 CHAPTER 10 NIBP MONITORING 10.1 Introduction ⑴ The Non-invasive Blood Pressure(NIBP) module measures the blood pressure using the oscillometric method. ⑵ It is applicable for adult, infant to use. ⑶ There are three modes of measurement available: Manual, Cycle and STAT (Not-stop); each mode displays the diastolic, systolic and mean blood pressure. WARNING z You must not perform NIBP measurements on patients with sickle-cell disease or under any condition which the skin is damaged or expected to be damaged. z For a thrombasthemia patient, it is important to determine whether measurement of the blood pressure shall be done automatically. The determination should base on the clinical evaluation. z Ensure that the correct setting is selected when performing measurements on infantren. It may be dangerous for infantren to use an over pressure level. 10.2 Preparation for Cuff WARNING z Before starting a measurement, verify that you have selected a setting appropriate for your patient (adult or infant). z Do not apply the cuff to a limb that has an intravenous infusion or catheter in place. This could cause tissue damage around the catheter when infusion is slowed or blocked during cuff inflation. z Make sure that the air conduit which connects the blood pressure cuff with the monitor is neither blocked nor tangled. ⑴ Plug in the air hose and switch on the system. ⑵ Apply the blood pressure cuff to the patient’s arm z Ensure that the cuff is completely deflated. z Apply the appropriate size cuff to the patient, and make sure that the symbol “Ф” is over the appropriate artery. Ensure that the cuff is not wrapped too tightly around the limb. Excessive tightness may cause discoloration and eventual ischemia of the extremities. NOTE z The width of the cuff should be either 40% of the limb circumference (50% for infants) or 2/3 of the upper arm length. The inflatable part of the cuff should be long enough to encircle 50~80% of the limb. The wrong size of cuff can cause erroneous readings. If the cuff size is in question, then use a larger cuff. Size of reusable cuff for infant/infantren/adult z Patient Type Cuff Width Infant 6~11cm Infant 10~19cm Infant 18~26cm Adult 25~35cm Outsize 33~47cm Hose 1.5m Make sure that the cuff edge falls within the range of mark <->. If it does not, use a larger or smaller cuff that fits better. ⑶ Connect the cuff to the air hose. The limb chosen for taking the measurement should be placed at the same level as the patient’s heart. If this is not possible you should apply the following corrections to the measured values. ① If the cuff is placed higher than the heart level, add 0.9 mmHg(0.10kPa) for each inch of different. ② If it is placed lower than the heart level, deduct 0.9 mmHg (0.10kPa)for each inch of different. ⑷ Check whether the patient mode is appropriately selected. Abut the detailed operation please refers to Section 10.4.4 MODE. ⑸ Select a measurement mode in the NIBP SETUP menu. About the detailed operation please refers to Section 10.4.3 Cycle. ⑹ Press the NIBP button on the front panel to start a measurement. - 40 - Portable Patient Monitor Operator’s Manual MMED6000DP-M7 10.3 NIBP Displaying Area NIBP measurement result and corresponding message are displayed as follows Fig.10-1: or Fig.10-1 S: Systolic 116 D: Diastolic 93 M: Mean arterial 77 ADU: The type of current measuring patient, two selections are available: INFANT and ADULT. About the detailed operation please refer to Section 10.4.4 MODE. mmHg: Two units are available: mmHg and KPa. MANUAL: The present measurement mode, MANUAL, CYCLE and STAT (not-stop) modes are available, the detailed operation please refer to Section 10.4.3 CYCLE. 10.4 Operation of NIBP Monitoring In monitoring status, rotate the knob to highlight the NIBP icon in the NIBP displaying area, and then press the knob, the menu of “NIBP setup” will be shown as Fig. 10-2: Fig. 10-2 10.4.1 ALARM PROMPT The operation and function are the same as the ECG sub-menu when pressing alarm icon Select “ALARM” in NIBP menu to call up the sub-menu shown as Fig. 10-3: in the frame of menu status. Fig. 10-3 NOTE:It only sets NIBP alarm solely; the alarms of other parameters will not be affected. Four items are available for the user to set up, which are SYS (systolic limit), MEAN (the limit of mean arterial pressure), DIAS (diastolic limit), and ALARM (OFF, HIGH, MEDIUM, and LOW). When use the knob to select each item and press the knob, a pull-down list appears for the user to choose his desired selection. 10.4.2 UNIT Pick this item to set measurement unit. (Selection: mmHg or kPa) 10.4.3 CYCLE NIBP Measurement Modes There are three methods to conduct NIBP measurement: Manual, Cycle and STAT (Not-stop). In manual mode, only one measurement is conducted for each time. In the AUTO mode, the measurement will cycle; you can set the interval time to 1/2/3/4/5/6/7/8/9/10/15/20/25/30 /40/50/ 60/70/80/90/120 /150/180/210/240 minutes. z Manual Each of the three blood pressure measurements (Systolic/Mean Arterial Pressure/Diastolic) is made and displayed in the numeric frame. Press NIBP button on the front-panel. A single blood pressure measurement will be made. Press NIBP button again to cancel this measurement. The measurements remain in the numeric frame as long as what you set up. As soon as an NIBP measurement begins, any existing NIBP values in the numeric frame are removed, and the current, variable value of the cuff pressure is shown. Systolic, diastolic and MAP values are presented when the measurement is completed. If fail to measure, the numeric frame displays “_ _”. - 41 - Portable Patient Monitor Operator’s Manual MMED6000DP-M7 z Automatic NIBP measurements are performed at the intervals as you set. Access NIBP SETUP menu and pick the CYCLE item to set measuring mode. Select the CYCLE selection. Then press NIBP button on the front panel to start the first auto measuring. Selected interval indicates you have set AUTO Monitoring Mode; the device will successively measure patient’s BP after taking break for the time you set in “CYCLE” item. If you press NIBP button during AUTO mode, the measurement in progress will stop to another manual measurement. After this manual measurement, the device will enter AUTO monitoring mode again. You want to get the patient’s NIBP value by manual operation, just pick “MANUAL” in “CYCLE” item. 10.4.4 MODE Access NIBP SETUP menu and pick the MODE item to set the type of monitoring patient. The options include Auto, 70, 100, 120, 140, 150, 160 and 180. You can select AUTO mode or set inflated pressure. The AUTO mode is adult. When measuring infant, please ensure to select the lower inflated pressure. 10 kPa (70mmHg) or 13.3kPa (100mmHg) is the infant mode. When setting the AUTO (adult) mode, inflated pressure is 24 kPa (180 mmHg). Normally, due to the oscillometric technic, the setup of inflated pressure greatly affects the result of the monitored NIBP value. The highest inflated pressure is +4 kPa (30 mmHg) more than the Systolic pressure. NOTE: Ensure that the correct setting is selected when performing measurements on infant. It may be dangerous for the infant to use an over pressure level. How to stop the BP Measurements: If a measurement is in process, press the NIBP button whenever that you wish to cancel the current measurement. If an automatic measurement is underway, the interval time will be reset. The measurement values will be displayed after normally measurement. Alarm will be activated if those values out of limit. Only visible alarm can be seen when the audible alarm be disabled. Refer to the ALARM chapter for information. 10.4.5 NON-S If you set the NON-S item ON, the monitor measures the blood pressure continuously in 5 minutes. After completion of the last measurement it waits 5 seconds, and then measures the pressure again. NOTE: Ensure that the correct setting is selected when performing measurements on infant. It may be dangerous for the infant to use an over pressure level. WARNING: z This monitor displays results of the last blood pressure measurement until another measurement is completed. If a patient’s condition changes during the time interval between measurements, it will not detect the change or indicate an alarm condition. z Prolonged non-invasive blood pressure measurement in AUTO mode may be associated with purpuric, ischemia and neuropathy in the limb wearing the cuff. When monitoring a patient, examine the extremities of the limb frequently for normal color, warmth and sensitivity. If any abnormality is observed, stop the blood pressure measurements. z The blood pressure cuff should not be applied to the limb attaching the SpO2 sensor, since cuff inflation will disrupt SpO2 monitoring. z Do not place the cuff on an extremity being used for intravenous infusion or any area where circulation is compromised or has the potential to be compromised. z When the measurement be performed on infant and infant. Make sure that correct mode setting has been selected (refer to NIBP menu setting section). For higher adult NIBP doesn’t fit for infant and infant, wrong selection of patient mode may be dangerous to them. z Inaccurate measurements may result from such causes: a. Limb’s twitch and tremble will cause inaccuracy or prolonged the cycling of measurement, serious tremble will lead to the failure of measure. b. Placing the cuff too loosely or tightly on the patient. c. Leaky cuff or hose d. Insure the NIBP and pulse rate within the range of this monitor. e. Excessive patient motion will cause the inaccuracy, patient should be relax and avoid movement. - 42 - Portable Patient Monitor Operator’s Manual MMED6000DP-M7 10.5 Pressure Safety Protection z Automatic deflation will be activated when the cuff pressure exceed 280 mmHg under the adult mode and exceed 150 mmHg under the infant mode. z Automatic deflation will be activated when the continuous inflation last more than 30 seconds. z If there is no value when measurement time exceeds 120 seconds under the adult mode and 90 seconds under the infant mode, the measurement will be canceled. z Patient can press the NIBP button to start/cancel whenever it is necessary. 10.6 Maintenance and Cleaning WARNING z Do not squeeze the hose of cuff. z Do not allow liquid to enter the connector socket when cleaning the monitor. z Do not wipe the inner part of the connector socket when cleaning the monitor. z When the reusable cuff is not connected with the monitor, or being cleaned, always place the cover on the rubber tube to avoid liquid permeation. NIBP cuff disinfection The cuff can be sterilized by means of conventional autoclaving, gas, or radiation sterilization in hot air ovens or disinfected by immersion in decontamination solutions, but remember to remove the rubber bag if you use this method. The cuff should not be dry-cleaned. The cuff can also be machine-washed or hand-washed, and the latter method may prolong the service life of the cuff. Before washing, remove the latex rubber bag, and for machine-washing, close the Velcro fastening. Allow the cuff to dry thoroughly after washing, and then reinsert the rubber bag. - 43 - Portable Patient Monitor Operator’s Manual MMED6000DP-M7 CHAPTER 11 SpO2 MONITORING 11.1 What is SpO2 Monitoring SpO2 plethysmogram measurement is used to determine the oxygen saturation of hemoglobin in the arterial blood. If, for example, 97% hemoglobin molecules in the red blood cells of the arterial blood combine with oxygen, then the blood has a SpO2 oxygen saturation of 97%. The SpO2 numeric on the monitor will read 97%. The SpO2 numeric shows the percentage of hemoglobin molecules which have combined with oxygen molecules to form oxyhemoglobin. The SpO2/PLETH parameter can also provide a pulse rate signal and a plethysmogram wave. How the SpO2/PLETH Parameter Works ⑴ Arterial oxygen saturation is measured by a method called pulse oximetry. It is a continuous, non-invasive method based on the different absorption spectra of reduced hemoglobin and oxyhemoglobin. It measures how much light sent from light sources on one side of the sensor, is transmitted through patient tissue (such as a finger or an ear) to a receiver on the other side. ⑵ The amount of light transmitted depends on many factors, most of which are constant. However, one of these factors, the blood flow in the arteries varies with time, because it is pulsating. By measuring the light absorption during a pulsation, it is possible to derive the oxygen saturation of the arterial blood. Detecting the pulsation gives a PLETH waveform and pulse rate signal. 11.2 Precautions during SpO2/Pulse Monitoring WARNING z ES (Electrosurgery) equipment wire and SpO2 cable must not be tangled up. z Do not put the sensor on extremities with arterial catheter or venous syringe. Verify sensor cable fault detection before beginning of monitoring phase. Unplug the SpO2 sensor cable from the socket, the screen will display the error message “SENSOR OFF” and the alarm is activated. If the message “PLETH ERROR” displays on the displaying area, it means the SpO2 board with trouble. z Do not use the sterile supplied SpO2 sensor if the packaging or the sensor is damaged and return them to the vendor. z Prolonged and continuous monitoring may increase jeopardy of unexpected change of dermal condition such as abnormal sensitivity, rubescence, vesicle, repressive putrescence, and so on. It is especially important to check the sensor placement of infant and patient of poor perfusion or immature dermogram by light collimation and proper attaching strictly according to changes of the skin. Check the sensor placement every 2~3 hours and move it if the skin deteriorates. More frequent examinations may be required for different patient. NOTE z Do not perform SpO2 measuring and NIBP measuring in same limb, because obstruction of blood flow during NIBP measuring may adversely affect the reading of SpO2 value. z Make sure the nail covers the light window. z The wire should be on the backside of the hand. 11.3 Monitoring Procedure ⑴ Switch on the monitor ⑵ Plug the connector of sensor into SpO2 socket on the side panel of the monitor. ⑶ Attach the sensor to the appropriate site of the patient finger. NOTE: Ensure the finger insert the sensor completely (the finger has touched the bottom of the sensor). Limitation for measurement: In operation, the accuracy of oximetry readings can be affected by: z High-frequency electrical noise, including noise created by the host system, or noise from external source, such as electrosurgical apparatus, which is admitted by the host system. z Do not use oximeters and oximetry sensors during magnetic resonance imaging (MRI) scanning. Induced current could potentially cause burns. z Intravascular dye injections z Excessive patient movement z Improper sensor application z Sensor temperature (maintain between 28℃ and 42℃for the best operation) - 44 - Portable Patient Monitor Operator’s Manual MMED6000DP-M7 z Placement of the sensor on an extremity that has a blood pressure cuff, arterial catheter, or intravascular line z Significant concentration of dysfunctional hemoglobin, such as carboxyhemoglobin and methemoglobin. z External illumination more than 5,000 lumens/square meter (typical office lighting) z Venous pulsations z It is recommended to use SpO2 sensor provided by our company. 11.4 SpO2 Displaying Area (1) SpO2 numeric display area SpO2 measurement result and corresponding message are displayed as follows Fig. 11-1: Fig. 11-1 SPO2: Measured value of SpO2% (the value is 99 here) PR: Pulse rate value (the value is 65 here) (2) SpO2 graphic display area The following information is shown on the top of SpO2 graphic display area when certain condition: ERROR: A technical alarm. It means that the module is in trouble. PROBE OFF: A technical alarm. It indicates the sensor cannot detect the finger, or please check whether the sensor has been well connected. 11.5 Operation of SpO2 Monitoring In monitoring status, rotate the knob to highlight the SpO2 icon in the SpO2 displaying area, and then press the knob, the menu of “SpO2 setup” appears on the bottom of screen as shown below Fig. 11-2: Fig. 11-2 11.5.1 AMPLITUDE The amplitude indicates the status of the patient’s blood circulation. Pick this item to access the amplitudes setup of SpO2 waveform. 5 options are available: 1, 2, 3, 4, 5. Amplitude of SpO2 waveform will be changed as setting. 11.5.2 HR FROM The monitor can use ECG to get the value of HR and use SpO2 to get the value of PR. Normally When we setup this item to “ECG” which means we select to use ECG to get the value of HR. On the other side if we setup this item to “SpO2” which means we select use SpO2 to get the value of HR, and the item indicator in the ECG numeric display area will be shown as “PR” not “HR”, such as the following two pictures. Normally we use ECG to get the value of HR and there is a little difference between the HR and PR. But if we select “SpO2” in this item then the value in ECG HR position and the PR value in SpO2 area are same. HR from ECG PR from SpO2 11.5.3 ALARM Select “ALARM” in SpO2 menu to call up the sub-menu shown as below Fig.11-3: Fig. 11-3 NOTE: It only sets SpO2 alarm individually; the alarms of other parameters will not be affected. - 45 - Portable Patient Monitor Operator’s Manual MMED6000DP-M7 Audible and visual alarm will be activated when alarm events occur. Five items are available for the user to set up, which are PRALARM (Alarm setup of PR), HIGH (high limit of SpO2%), LOW (low limit of SpO2%) and ALARM (OFF, HIGH, MEDIUM, and LOW). and When use the knob to select each item and press the knob, a pull-down list appears for the user to choose his desired selection. 11.5.4 PR SOUND The PR SOU item is for setting sound on/off of pulse beep. 11.5.5 WAVEFORM The WAVE item is for setting the mode of displaying SpO2 waveform. Pick the “FILL” item in “WAVE” menu, SpO2 waveforms displaying on the screen is filled as Fig. 11-4: Fig. 11-4 Select “LINE” item in “WAVE” menu, SpO2 waveform is in line as Fig. 11-5: Fig. 11-5 11.6 Maintenance and Cleaning WARNING z Cut off and disconnect the AC power before cleaning the monitor or sensor. z Do not immerse sensor completely in water, solvents, or cleaning solutions because the sensor and connector are not waterproof. z Do not sterilize SpO2 sensors by irradiation, steam, or ethylene oxide. z Do not soak the sensor in the detergent liquid; if any abnormity of the sensor or cable is detected, stop using it immediately. Cleaning: Moisten the soft cloth or gauze with alcohol and use it to wipe the surface of sensor, and then use the clean cloth to dry it. The same method can be used to clean the light source and photo detector. Cables can be disinfected by 3% of hydrogen-peroxide or 7% of isopropyl alcohol .Do not immerse the connector into the liquid. - 46 - Portable Patient Monitor Operator’s Manual MMED6000DP-M7 CHAPTER 12 RESP MONITORING 12.1 How to Measure RESP? The monitor measures respiration from the amount of thoracic impedance between two ECG electrodes. The change of impedance between the two electrodes, (due to the thoracic movement), produces a respiratory waveform on the screen. 12.2 Setting up RESP Measurement For RESP monitoring, it is not necessary for additional electrodes, however, the place of electrodes is important. Some patients, due to their clinical condition, expand their chest laterally, causing a negative intrathoracic pressure. In these cases it is better to place the two RESP electrodes laterally in the right axillary and left lateral chest areas at the maximum point of breathing movement to optimize the respiratory waveform. NOTE:The RESP monitoring is not recommended to be used on patients who are very activate, as this can cause false alarm. 12.3 Procedures of RESP Measurement ⑴ Prepare the patient’s skin prior to place the electrodes. ⑵ Attach snap or clip to the electrodes and attach the electrodes to the patient as described as Fig.9-1. NOTE:Place the red and green electrodes diagonally to optimize the respiration waveform. Avoid the liver area and the ventricles of the heart in the line between the RESP electrodes so as to avoid cardiac overlay or artifacts from pulsating blood flow. This is particularly important for infants. ⑶ Switch on the monitor WARNING z The respiration signal is acquired using the ECG. Refer to the ECG Monitoring section, for information regarding patient connection. z Respiration signals are relatively more sensitive than any other physiological signals. It can cause inaccurate respiration measurements by the interference of patient activity and electrical surgery equipments .Do not rely entirely on the respiration measurements of this monitor for patient assessment. 12.4 RESP Displaying Area RESP measured result and corresponding message are displayed as follows Fig. 12-1: Fig. 12-1 RESP: Respiration Rate 12.5 Operation of RESP Monitoring In monitoring status, rotate the knob to highlight the RESP icon in the RESP displaying area, and then press the knob, the menu of “RESP setup” will appear on the bottom of screen as shown below as Fig.12-2: Fig. 12-2 12.5.1 AMPLITUDE Pick this item to access the amplitudes setup of RESP waveform. 12 selections are available: 1, 2, 3, 4, 5, 6, 7, 8, 9, 10, 11 and 12. The amplitude of RESP waveform will be corresponding changed as setting. 12.5.2 ALARM Select “ALARM” in RESP menu to call up the sub-menu shown as below Fig. 12-3: Fig. 12-3 - 47 - Portable Patient Monitor Operator’s Manual MMED6000DP-M7 NOTE: It can only set RESP alarm individually; the alarms of other parameters will not be affected. Three items are available for the user to set up, which are HIGH (upper limit), LOW(low limit), ALARM(OFF,HIGH,MEDIUM,LOW).When use the knob to select each item and press the knob, a pull-down list appears for the user to choose his desired selection. 12.5.3 APNEA Set the standard of judging an apnea case, it ranges from 10 to 120 seconds. Fig. 12-4 Time: Apnea alarm is triggered according to the time which was set by user (10s-120s). Alarm: set the Apnea alarm on/off Offset: Apnea alarm is triggered in terms of the passed wave crest which was set by user (1-60). 12.6 Maintenance and Cleaning For the detailed information refer to Section 9.6 ECG Maintenance and Cleaning. - 48 - Portable Patient Monitor Operator’s Manual MMED6000DP-M7 CHAPTER 13 TEMP MONITORING 13.1 Procedure of TEMP Measurement ⑴ Plug a reusable TEMP probe into monitor directly. ⑵ Apply the TEMP probe securely to the patient. ⑶ Switch on the system. 13.2 TEMP Displaying Area TEMP measured result and corresponding message are displayed as follows in the displaying area as Fig.13-1: Fig. 13-1 T1: Temperature 1 (the value is 35.7 here). T2: Temperature 2 (the value is 36.8 here). Dt: The difference between T1 and T2 (the value is 1.1 here). It will not be shown if “TEMPDI” item in ALARM sub-menu is set to OFF as Fig.13-3. 13.3 Operation of TEMP Monitoring In monitoring status, rotate the knob to highlight the TEMP icon in the TEMP displaying area, and then press the knob, the menu of “TEMP setup” will appear on the bottom of screen as shown below Fig. 13-2: Fig. 13-2 13.3.1 ALARM Select “ALARM” in TEMP menu to call up the sub-menu shown as below Fig. 13-3: Fig. 13-3 NOTE:It can only set TEMP alarm individually; the alarms of other parameters are not affected. Five items are available for the user to set up, which are HIGH (upper limit), LOW (lower limit), DIFF_LMT, TEMPDI and ALARM (OFF, HIGH, MEDIUM, and LOW). When use the knob to select each item and press the knob, a pull-down list appears for the user to choose his desired selection. Rotate and press the knob to enter the submenu, and proceed to the relevant setup. (1) DIFF_LMT: it indicates the difference of TEMP(△T). This monitor offers two channels of TEMP, one of the channels can connect with the skin probe, the other can connect with the rectal probe, which would induce the difference of TEMP. The clients are able to set the value of difference of TEMP to trigger the alarm. (2) TEMPDI: If you set OFF to this item, you can not hear the audible alarm of △T. If you select ON, the audible and visual alarm will be activated when alarm occurs. 13.3.2 UNIT Pick this item to set measurement unit: Centigrade (℃) or Fahrenheit (℉). 13.4 Maintenance and Cleaning WARNING:Before cleaning the monitor or the probe, make sure that the equipment has already been switched off and disconnected from the power line. Cleaning ⑴ The TEMP probe should not be heated above 100℃ (212℉). It should only be subjected briefly to temperatures between 80℃(176℉) and 100℃ (212℉). ⑵ The probe must not be sterilized in steam. ⑶ Only detergents containing no alcohol can be used for disaffection. ⑷ The rectal probes should be used, if possible, in conjunction with a protective rubber cover. ⑸ To clean the probe, hold the tip with one hand and the other hand rubbing the probe down in the direction of the connector with a moist line-free cloth. - 49 - Portable Patient Monitor Operator’s Manual MMED6000DP-M7 CHAPTER 14 MAINTENANCE AND TROUBLESHOOTING 14.1 Maintenance Customers should responsible for periodic maintaining of the product and its accessories. It is very important for our company to warrant the service and repairs. We reserve the rights to change the time limit of warranty and replacement if the following steps are non-implemented: ⑴ An effective maintenance plan should be designed for the product and its reusable accessories. It includes periodic inspections and cleaning. It should accord with the policy of local infection control department or health institution. ⑵ Be sure to disconnect power line to the product before cleaning and inspecting. ⑶ Periodic cleaning (accordance with the policy of local infection control department or health institution). Dampen a cloth with a commercial, nonabrasive cleaner and wipe the tip, bottom, and front surfaces lightly. The following admissive liquor can be used: ● Ammonia (diluted), ● Glutaraldehyde, ● Sodium hypochlorite bleacher (diluted) ● Mildness suds (diluted). Please abide by the following rules to prevent from damaging the product: ● Always using diluted liquor recommend by the manufacture. ● Always wipe up cleaning liquor after cleaning. ● Never use cleaning matter containing wax. ● Never spray water or cleaning liquor over the product, neither allows any liquid to flow into power switcher, connector, or other intake. ● Never use the following cleanser: ○ any kinds of abrasive cleaner and menstruum ○ acetone ○ ketone ○ spirituous cleanser ○ lycine. ● In order to clean the display screen, please use clean flexible cloth and make it wet with cleanser in the glass. Never spray cleanser in the glass on the screen, neither use alcohol nor medical disinfector, such as glutaraldehyde or lycine. ● Please use warm wet cloth and mildness suds to clean cables and lead wires. Other cleaning ways may reduce the life of cables and lead wires. Recommendation: ● Do not power on/off frequently. ● Take down and safekeeping probes, lead wires, gluey tube after using product. ● Please keep the product in package if the product would not work for a long time. ● Do not make the product contact with chemical medicine and reagent. ● Battery Maintenance If the monitor has not been used for a long period of time, you should charge the battery fully before storage. To charge the battery, connect the monitor to an AC outlet. Usually, a complete battery recharge requires 6 hours. After completion of charging, take out the battery and store it properly. The battery should be stored in the temperature of -20℃ to 55℃. Note: Storing the battery for a long period more than one year without charging the battery may degrade the battery capacity. The remaining capacity reaches 65% at most after 12 months self-discharge. Please use the battery in temperature range: from 5℃ to 40℃. Note: If the monitor equipped with the battery is always operated beyond normal temperature range, the useful life of the battery may be shortened. If there is any abnormity, stop working. It can be reused after inspecting and repairing by technician. Notes: ◇ Specifications may be changed without prior notice. ◇ The circuit diagrams, the list of components, the illustration of diagrams, and the detailed rules of calibration, are provided exclusively to professional personnel authorized by our company. ◇ Dispose of this product and used batteries in accordance with the local ordinances and regulations for the disposal of electronic products. - 50 - Portable Patient Monitor Operator’s Manual MMED6000DP-M7 14.2 Troubleshooting No display after power on Check the power connections, or the power adapter. ECG wave is not correct when monitoring the patient Check the LEAD wires and the electrodes position. No SpO2 wave and pulse rate display when monitoring Check the probe connection and the finger temperature Cuff inflation lacked when measuring blood pressure. Cuff too loose or leak, Check the connections of tube. No ECG analysis function Check whether this function open or not in ECG menu Can not printing Check the print cable, print power, printer setup and the printer type. 14.3 Warranty and Repair 14.3.1 Warranty and repair content ⑴Repair response time: AM9:00 to PM17: 30 on Monday to Friday except legal holiday. Repair time: AM9:00 to PM17: 30 on Monday to Friday except legal holiday. ⑵Repair service: Including telephone support, field inspecting, fittings replacement. z Telephone support: we can give guidance to customer’s engineer to inspecting the instrument when you dial our service line. Professional repair engineer online provides technical support. z Field inspecting: we will send engineers to repair the instrument if necessary. Certified engineers of our company or local repair team trained by our company provide this service. z Fittings replacement: if necessary, we will replace the damaged fittings according to contract. The damaged fittings should be returned to us except for special reason. ⑶ Spare machine for repair: it is used to replace the damaged machine for customer, and customer should send the damaged machine to us to repair. ⑷ Repair for sponsoring and contributing machine: Customers should send the machine back to us to repair. ⑸ Updating software is free. 14.3.2 Exemption and restriction ⑴ Warranty does not apply to the damage or loss sustained due to force majeure such as fire, earthquake, flood, thunder, cyclone, hail, electrical storm, blast, building collapse, commotion, etc. ⑵ Non-service items: ① The cost and insurance of dismantling and testing, overhauling, reinstall, transfer, moving the instrument or parts. ② Damage or loss sustained due to inspected or repaired by other institute that is not certified ③ Damage or alteration by anyone else who is not our company authorized service personnel. ⑶ The damage or lose sustained due to connection to peripheral equipment (such as printer, computer etc.), that are not provided by our company are not covered by the warranty. ⑷Obligation restriction: In the duration of warranty, if the operators use other fittings that are not provided by us, we reserve the right to cancel warranty. 14.3.3 Customer guarantees ⑴ It is required that every operator read this manual completely before attempting to operate the monitor. ⑵ Operation and maintenance according to the user manual, and guarantee the requests of power and environment. - 51 - Portable Patient Monitor Operator’s Manual MMED6000DP-M7 14.3.4 Non-warranty and Non-replacement Policy ● The work environment is not eligible. For example, if the relative humidity exceeds 70%, circuit boards of the instrument may be damaged due to condensate. ● If voltage of power supply is fluctuant and exceeds 240V/AC, the power adapter may be damaged. ● There is smear or marks that are not belong to the instrument and cannot be removed from the outside surface of the instrument. ● The instrument or its fittings are mechanically damaged. ● The circuit is short and damaged due to liquor or other stuff flow in the instrument or its fittings. ● All probes and accessories are not free replacement. ● Leakage of air cell of blood pressure sleeve due to improper storage or operation is not free replacement. ● The malfunction with result form improper repair by anyone other than our company authorized service personnel. ● The malfunction with result from improper use. 14.3.5 Customer special warranty period Due to our warranty period according to the relevant electronic regulation of country, which we stipulate is one year on this product other than its accesories, and the warranty is made for a period of three months on accessories. When customer requires to extending the warranty period, you should consider whether it is reasonable. Because electronic product quickly replace, as to the warranty period over three years, purchased accessories may be out of stock. In this case, we will adopt to entirely upgrade or replace the old, you should pay the minimum acceptable cost of renewed device. 14.4 Storage and Transportation Storage: Temperature: -20℃~55℃, Humidity: ≤93% Transportation: Transportation: via road, rail or aviation after properly insured and packaged. - 52 - Portable Patient Monitor Operator’s Manual MMED6000DP-M7 Appendix List of Accessories The accessories list below is specified to be used in this device. The user can order the various accessories according to the hospital requirements. The standard accessories: No. Accessories Quantity 1 ECG-cable (standard) 1 piece 2 Electrode 1 pack 3 NIBP cuff and extension tube (for adult) 1 piece 4 SpO2 finger clip probe and extension cable (for adult) 1 piece 5 TEMP probe (Skin or rectal) YSI 400 1 piece 6 Power cable 1 piece 7 Grounding wire 1 piece 8 Operator’s manual 1 piece 9 Ni-MH rechargeable battery 1 piece The optional accessories: No. Accessories Quantity 1 Defi-protected ECG-cable 1 piece 2 NIBP cuff (for Infants and infant) 1 piece 3 SpO2 probe and extension cable (for Infants and infant) 1 piece 4 Thermal array recorder 1 piece 5 Paper for recorder 1 piece Issue date: 12/November 2009 - 53 -