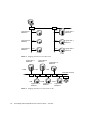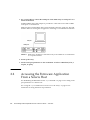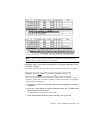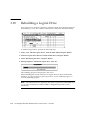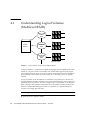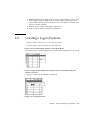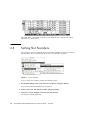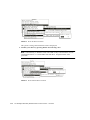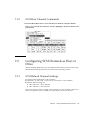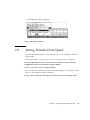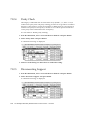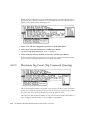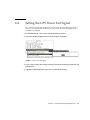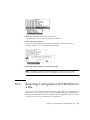
1
Sun StorEdge™ 3000 Family
RAID Firmware 3.25 User’s Guide
Sun StorEdge 3310 SCSI Array
Sun Microsystems, Inc.
4150 Network Circle
Santa Clara, CA 95054 U.S.A.
650-960-1300
Part No. 816-7296-13
June 2003, Revision A
Submit comments about this document at: http://www.sun.com/hwdocs/feedback
Copyright © 2002–2003 Dot Hill Systems Corporation, 6305 El Camino Real, Carlsbad, California 92009, USA. All rights reserved.
Sun Microsystems, Inc. and Dot Hill Systems Corporation may have intellectual property rights relating to technology embodied in this product
or document. In particular, and without limitation, these intellectual property rights may include one or more of the U.S. patents listed at
http://www.sun.com/patents and one or more additional patents or pending patent applications in the U.S. and other countries.
This product or document is distributed under licenses restricting its use, copying distribution, and decompilation. No part of this product or
document may be reproduced in any form by any means without prior written authorization of Sun and its licensors, if any.
Third-party software is copyrighted and licensed from Sun suppliers.
Parts of the product may be derived from Berkeley BSD systems, licensed from the University of California. UNIX is a registered trademark in
the U.S. and in other countries, exclusively licensed through X/Open Company, Ltd.
Sun, Sun Microsystems, the Sun logo, Sun StorEdge, AnswerBook2, docs.sun.com, and Solaris are trademarks or registered trademarks of Sun
Microsystems, Inc. in the U.S. and in other countries.
U.S. Government Rights—Commercial use. Government users are subject to the Sun Microsystems, Inc. standard license agreement and
applicable provisions of the FAR and its supplements.
DOCUMENTATION IS PROVIDED “AS IS” AND ALL EXPRESS OR IMPLIED CONDITIONS, REPRESENTATIONS AND WARRANTIES,
INCLUDING ANY IMPLIED WARRANTY OF MERCHANTABILITY, FITNESS FOR A PARTICULAR PURPOSE OR NONINFRINGEMENT,
ARE DISCLAIMED, EXCEPT TO THE EXTENT THAT SUCH DISCLAIMERS ARE HELD TO BE LEGALLY INVALID.
Copyright © 2002–2003 Dot Hill Systems Corporation, 6305 El Camino Real, Carlsbad, California 92009, Etats-Unis. Tous droits réservés.
Sun Microsystems, Inc. et Dot Hill Systems Corporation peuvent avoir les droits de propriété intellectuels relatants à la technologie incorporée
dans le produit qui est décrit dans ce document. En particulier, et sans la limitation, ces droits de propriété intellectuels peuvent inclure un ou
plus des brevets américains énumérés à http://www.sun.com/patents et un ou les brevets plus supplémentaires ou les applications de brevet
en attente dans les Etats-Unis et dans les autres pays.
Ce produit ou document est protégé par un copyright et distribué avec des licences qui en restreignent l’utilisation, la copie, la distribution, et la
décompilation. Aucune partie de ce produit ou document ne peut être reproduite sous aucune forme, par quelque moyen que ce soit, sans
l'autorisation préalable et écrite de Sun et de ses bailleurs de licence, s’il y ena.
Le logiciel détenu par des tiers, et qui comprend la technologie relative aux polices de caractères, est protégé par un copyright et licencié par des
fournisseurs de Sun.
Des parties de ce produit pourront être dérivées des systèmes Berkeley BSD licenciés par l’Université de Californie. UNIX est une marque
déposée aux Etats-Unis et dans d’autres pays et licenciée exclusivement par X/Open Company, Ltd.
Sun, Sun Microsystems, le logo Sun, Sun StorEdge, AnswerBook2, docs.sun.com, et Solaris sont des marques de fabrique ou des marques
déposées de Sun Microsystems, Inc. aux Etats-Unis et dans d’autres pays.
LA DOCUMENTATION EST FOURNIE “EN L’ÉTAT” ET TOUTES AUTRES CONDITIONS, CONDITIONS, DECLARATIONS ET
GARANTIES EXPRESSES OU TACITES SONT FORMELLEMENT EXCLUES, DANS LA MESURE AUTORISEE PAR LA LOI APPLICABLE,
Y COMPRIS NOTAMMENT TOUTE GARANTIE IMPLICITE RELATIVE A LA QUALITE MARCHANDE, A L'APTITUDE A UNE
UTILISATION PARTICULIERE OU A L’ABSENCE DE CONTREFAÇON.
Contents
Preface
1.
xiii
Basic RAID Concepts and Planning
1.1
Before You Begin
1.1.1
1.2
1.3
1–1
1–2
Determining Which Version of the RAID Firmware Applies to Your
Array 1–2
RAID Terminology Overview
1–2
1.2.1
Logical Drives
1.2.2
Logical Volumes
1.2.3
Understanding Local Spare Drives
1.2.4
Understanding Global Spare Drives
1.2.5
SCSI Channels
RAID Levels
1–3
1–3
1–3
1–4
1–4
1–7
1.3.1
JBOD (Single Drive Control)
1.3.2
RAID 0
1.3.3
RAID 1 1–11
1.3.4
RAID 1+0
1.3.5
RAID 3
1–13
1.3.6
RAID 5
1–14
1.3.7
Advanced RAID Levels
1–10
1–10
1–12
1–15
iii
1.4
2.
3.
iv
Local and Global Spare Drives
1–16
1.4.1
Local Spare Drives
1–16
1.4.2
Global Spare Drives
1.4.3
Using Both Local and Global Spare Drives
1–17
1.5
Controller Defaults and Limitations
1.6
Battery Operation
1–18
1–19
1–20
1.6.1
Battery Status
1–20
1.6.2
Write-Back Versus Write-Through Cache Options
1.7
RAID Planning Considerations
1.8
Basic Configuration Overview
Accessing the Controller Firmware
1–20
1–20
1–22
2–1
2.1
Setting Up the Serial Port Connection
2–1
2.2
Accessing the Firmware Application From a Solaris Host
2.3
Redefining the Baud Rate for the tip Command
2.4
Using the tip Command for Local Access to the Array
2.5
The Controller Firmware Initial Screens
2.6
Main Menu
2.7
Quick Installation (Reserved)
2.8
Upgrading Firmware
2–3
2–4
2–5
2–5
2–6
Viewing and Editing Logical Drives
3–1
3.1
Introducing the Logical Drive Commands
3.2
Default Logical Drives and RAID Levels
3.3
Viewing the Logical Drive Status Table
3.4
Creating Logical Drive(s)
3.5
Changing a Logical Drive Controller Assignment
3.6
Partitioning a Logical Drive
3–1
3.7
Deleting a Logical Drive
3–2
3–3
3–4
3–11
3–15
Sun StorEdge 3000 Family RAID Firmware 3.25 User’s Guide • June 2003
2–2
3–10
2–3
4.
5.
6.
3.8
Deleting a Partition of a Logical Drive
3–16
3.9
Assigning Logical Drive Name
3.10
Rebuilding a Logical Drive
3.11
Performing a Logical Drive Parity Check
3.12
Overwriting Inconsistent Parity
3.13
Adding a SCSI Drive to a Logical Drive
3.14
Copying and Replacing Drives with Drives of Larger Capacity
3.15
Expanding a Logical Drive
3–17
3–18
3–19
3–20
3–21
3–24
3–27
Viewing and Editing Logical Volumes
4–1
4.1
Understanding Logical Volumes (Multilevel RAID)
4.2
Creating a Logical Volume
4.3
Expanding a Logical Volume
4.4
Viewing a Logical Volume Status Table
4–2
4–5
Viewing and Editing Host LUNs
4–7
4–7
5–1
5.1
Mapping Logical Drive Partitions to Host LUNs
5.2
SCSI ID/LUNs
5.3
Planning for 128 LUNs
5.4
Example Host LUN Mappings
5–6
5.5
Deleting a Host LUN Mapping
5–8
5–1
5–2
5–5
Viewing and Editing SCSI Drives
6–1
6.1
SCSI Drive Status Table
6–2
6.2
Assigning a Local Spare Drive
6.3
Creating a Global Spare
6.4
Viewing Drive Information
6.5
Viewing the Connected Drives
6.6
Scanning Drives
6.7
Deleting a Spare Drive
6–4
6–4
6–5
6–6
6–6
6–7
Contents
v
6.8
6.9
Setting Slot Numbers
6.8.1
Assigning a Slot Number to an Empty Slot
6.8.2
Deleting a Slot Number
6.11
6.12
7.
7.2
vi
6–10
Identifying a Failed Drive for Replacement
6.10.1
Flashing Selected SCSI Drive
6.10.2
Flashing All SCSI Drives
6.10.3
Flashing All But Selected Drives
6–11
6–13
6–14
6–14
6–15
6.11.1
Cloning a Failing Drive
6.11.2
Viewing the Status of a Cloning Operation
6.11.3
Understanding SMART Technology
6.11.4
How Sun StorEdge 3000 Family Arrays Use SMART
6.11.5
Enabling SMART From Firmware Menus
6.11.6
Detect Only
6–15
6.11.7
Detect and Perpetual Clone
6.11.8
Detect and Clone+Replace
SCSI Drive Utilities (Reserved)
6–24
6–25
6–26
6.12.1
SCSI Drive Low-Level Format
6.12.2
SCSI Drive Read/Write Test
SCSI Channel Status Table
6–27
6–28
7–1
7–1
7.1.1
SCSI Drive Channel Commands
7.1.2
SCSI Host Channel Commands
7–4
7–5
Configuring SCSI Channels as Host or Drive
7.2.1
SCSI Default Channel Settings
7.2.2
Changing Channel Assignments
7–5
Sun StorEdge 3000 Family RAID Firmware 3.25 User’s Guide • June 2003
6–20
6–21
6–24
Viewing and Editing SCSI Channels
7.1
6–9
Removing an Empty Drive Entry
Fault Protection Measures
6–9
6–9
Adding or Deleting Drive Entries
6.9.1
6.10
6–8
7–6
7–5
6–22
6–21
8.
7.3
Permanent SCSI Drive Channel IDs
7–7
7.4
Creating Additional Host IDs
7.5
Deleting a Host Channel SCSI ID
7.6
Drive Channel SCSI IDs (Reserved)
7.7
Setting a SCSI Channel Termination (Reserved)
7.8
Setting Transfer Clock Speed
7–8
7–10
7–11
7–13
7.8.1
Host Channel Transfer Clock Speed
7–14
7.8.2
Drive Channel Transfer Clock Speed
7–14
7.9
Setting the SCSI Transfer Width
7.10
Viewing and Editing Drive Channel SCSI Targets
7–14
7.10.1
Providing a Slot Number
7.10.2
Maximum Synchronous Transfer Clock
7.10.3
Maximum Transfer Width
7.10.4
Parity Check
7.10.5
Disconnecting Support
7.10.6
Maximum Tag Count
7–15
7–16
7–17
7–17
7–18
7–18
7–19
Viewing and Editing Configuration Parameters
8.1
7–12
Optimization Modes (Caching Parameters)
8–1
8–2
8.1.1
Optimization Limitations
8–2
8.1.2
Database and Transaction-Based Applications
8.1.3
Video Recording, Playback, and Imaging Applications
8.1.4
Optimization for Random I/O (32K block size)
8.1.5
Optimization for Sequential I/O (128K block size)
8.1.6
Maximum Number of Disks and Maximum Usable Capacity for
Random and Sequential Optimization 8–4
8–3
8–3
8–3
8–4
8.2
Optimizing for Random or Sequential I/O
8–5
8.3
Enabling and Disabling Write-Back and Write-Through Cache
8.4
Controller Failure
8–6
8–6
Contents
vii
8.5
8–7
8.5.1
Automatic Logical Drive Rebuild
8.5.2
Manual Rebuild
8.5.3
Concurrent Rebuild in RAID 1+0
8–7
8–10
8–11
8.6
Identifying a Failed Drive for Replacement
8.7
Restoring Your Configuration (NVRAM) From a File
8.8
Recovering From Fatal Drive Failure
8.9
Controller Parameters
8.10
8.11
8.12
viii
Rebuilding Logical Drives
8–12
8–12
8–13
8–14
8.9.1
Controller Name
8–14
8.9.2
LCD Title Display - Controller Logo (Not Applicable)
8.9.3
Password Validation Timeout
8.9.4
Controller Unique Identifier
8.9.5
SDRAM ECC Function (Reserved)
Drive-side SCSI Parameters
8–16
8–17
8–18
8–18
8.10.1
SCSI Motor Spin-Up (Reserved)
8.10.2
SCSI Reset at Power-Up (Reserved)
8.10.3
Disk Access Delay Time
8.10.4
SCSI I/O Timeout
8.10.5
Maximum Tag Count (Tag Command Queuing)
8.10.6
SAF-TE and SES Enclosure Monitoring
8.10.7
Periodic Drive Check Time
8.10.8
Auto-Detect Failure Drive Swap Check Time
Disk Array Parameters
8–19
8–20
8–21
8–21
8–22
8–23
8–24
8–24
8–25
8.11.1
Rebuild Priority
8.11.2
Verification on Writes
Host-side SCSI Parameters
8–26
8–27
8–28
8.12.1
Overview of SCSI Channel, SCSI ID, and LUNs
8.12.2
Maximum Concurrent Host-LUN Connections
Sun StorEdge 3000 Family RAID Firmware 3.25 User’s Guide • June 2003
8–29
8–29
8–15
9.
10.
8.12.3
Number of Tags Reserved for Each Host LUN Connection
8.12.4
Maximum Queued I/O Count
8.12.5
LUNs Per Host SCSI ID
8.12.6
Cylinder/Head/Sector Mapping
8–30
8–31
8–32
8–32
8.13
Redundant Controller Parameters Menu (Reserved)
8.14
Peripheral Device Type Parameters
8.15
Setting an IP Address
8–34
8–35
8–36
Viewing and Editing Peripheral Devices
9–1
9.1
Viewing Peripheral Device Controller Status
9.2
Viewing Peripheral Device SAF-TE Status
9.3
Setting Peripheral Device Entry
9–2
9–2
9–5
9.3.1
Redundant Controller Mode (Do Not Change)
9.3.2
Enable UPS Status
9–5
9–6
9.4
Setting the UPS Power Fail Signal
9–7
9.5
Viewing the Controller Voltage and Temperature Status Window
System Functions, Info, and Event Logs
10.1
System Functions
10.2
Muting the Beeper
10.3
Setting a New Password
9–8
10–1
10–1
10–2
10–3
10.3.1
Changing a Password
10.3.2
Disabling the Password
10–4
10–4
10.4
Resetting a Controller
10–5
10.5
Shutting Down the Controller
10.6
Restoring Configuration (NVRAM) from a File
10.7
Saving Configuration (NVRAM) to Disk
10.8
Viewing Event Logs on Screen
10–6
10–7
10–8
10–9
Contents
ix
A. Firmware Specifications
A–1
B. Parameter Summary Tables
B.1
Introducing Default Parameters
B.2
Basic Default Parameters
B.3
Default Configuration Parameters
B.4
Default Peripheral Device Parameters
B.5
Default System Functions
B.6
Keeping Specific Parameter Defaults
C. Event Messages
C.1
C.2
C.3
C.4
C.5
x
B–1
B–1
B–2
B–3
B–9
B–10
B–11
C–1
Controller Events
C–1
C.1.1
Alerts
C–2
C.1.2
Warnings
C.1.3
Notifications
C–2
SCSI Drive Events
C–2
C–2
C.2.1
Warnings
C–2
C.2.2
Notifications
C–2
SCSI Channel Events
C–3
C.3.1
Alerts
C–3
C.3.2
Notifications
C–3
Logical Drive Events
C–3
C.4.1
Alerts
C–3
C.4.2
Notifications
C–3
General Target Alerts
C–3
C.5.1
SAF-TE Device
C–4
C.5.2
Controller On-Board
C.5.3
I2C Device
C–4
C–4
Sun StorEdge 3000 Family RAID Firmware 3.25 User’s Guide • June 2003
C.5.4
SES Devices
C.5.5
General Peripheral Device
Glossary
C–4
Glossary–1
Acronyms
Glossary–1
Terminology
Index
C–4
Glossary–3
Index–1
Contents
xi
xii
Sun StorEdge 3000 Family RAID Firmware 3.25 User’s Guide • June 2003
Preface
This guide provides an overview of RAID terminology and explains the use of
controller firmware and VT100 commands to configure and monitor Sun StorEdgeTM
3000 Family arrays.
Note – Different versions of controller firmware apply to different Sun StorEdge
3000 Family arrays. Before downloading new firmware, be sure to check the Readme
file or appropriate release notes to make sure you are upgrading a supported version
of the firmware for your array.
This manual is written for customers and Sun Microsystems service representative
who are already familiar with Sun Microsystems hardware and software products.
Caution – You should read the Sun StorEdge 3000 Family Safety, Regulatory, and
Compliance Manual for your array before beginning any procedure in this manual.
How This Book Is Organized
This book covers the following topics:
Chapter 1 introduces the RAID terminology concepts.
Chapter 2 explains how to access the array through the COM port and a terminal
emulation program.
Chapter 3 describes the “view and edit Logical drives” command and related
procedures.
xiii
Chapter 4 describes the “view and edit logical Volumes” command and related
procedures.
Chapter 5 describes the “view and edit Host luns” command and related procedures.
Chapter 6 describes the “view and edit scsi Drives” command and related
procedures.
Chapter 7 describes the “view and edit Scsi channels” command and related
procedures.
Chapter 8 describes the “view and edit Configuration parameters” command and
related procedures.
Chapter 9 describes the “view and edit Peripheral devices” command and related
procedures.
Chapter 10 describes the “system Functions” command, array information, and
event logs.
Appendix A provides the array firmware specifications.
Appendix B summarizes controller parameters for optimization and parameter
defaults which should not be changed.
Appendix C lists the event messages.
The Glossary provides RAID terminology and definitions used throughout the
product documentation
Using UNIX Commands
This document might not contain information on basic UNIX® commands and
procedures such as shutting down the system, booting the system, and configuring
devices.
See one or more of the following for this information:
■
■
■
xiv
Solaris Handbook for Sun Peripherals
AnswerBook2™ online documentation for the Solaris™ operating environment.
Other software documentation that you received with your system
Sun StorEdge 3000 Family RAID Firmware 3.25 User’s Guide • June 2003
Typographic Conventions
Typeface*
Meaning
Examples
AaBbCc123
The names of commands, files,
and directories; on-screen
computer output
Edit your.login.login file.
Use ls -a to list all files.
% You have mail.
AaBbCc123
What you type, when contrasted
with on-screen computer output
% su
Password:
AaBbCc123
Book titles, new words or terms,
words to be emphasized.
Replace command-line variables
with real names or values.
Read Chapter 6 in the User’s Guide.
These are called class options.
You must be superuser to do this.
To delete a file, type rm filename.
* The settings on your browser might differ from these settings.
Shell Prompts
Shell
Prompt
C shell
machine-name%
C shell superuser
machine-name#
Bourne shell and Korn shell
$
Bourne shell and Korn shell superuser
#
Preface
xv
Related Documentation
Title
Part Number
Sun StorEdge 3310 SCSI Array Release Notes
816-7292
Sun StorEdge 3000 Family Best Practices Manual
816-7293
Sun StorEdge 3000 Family Installation, Operation, and Service Manual
816-7290
Sun StorEdge 3000 Family Configuration Service 1.3 User’s Guide
817-3337
Sun StorEdge 3000 Family Diagnostic Reporter 1.3 User’s Guide
817-3338
Sun StorEdge 3000 Family Rack Installation Guide
816-7320
Sun StorEdge 3000 Family FRU Installation Guide
816-7326
Sun StorEdge 3000 Family Safety, Regulatory, and Compliance Manual
816-7930
Contacting Sun Technical Support
For late-breaking news and troubleshooting tips, review the Sun StorEdge 3310 SCSI
Array Release Notes located at:
www.sun.com/products-n-solutions/
hardware/docs/Network_Storage_Solutions/Workgroup/3310
If you have technical questions about this product that are not answered in the
documentation, go to:
http://www.sun.com/service/contacting
To initiate or check on a USA-only service request, contact Sun support at:
800-USA4SUN
To obtain international technical support, contact the sales office of each country at:
www.sun.com/service/contacting/sales.html
xvi Sun StorEdge 3000 Family RAID Firmware 3.25 User’s Guide • June 2003
Accessing Sun Documentation
All Sun StorEdge 3310 SCSI array documentation is available online in both PDF and
HTML format at the following location:
http://www.sun.com/products-n-solutions/
hardware/docs/Network_Storage_Solutions/Workgroup/3310
You can view, print, or purchase a broad selection of Sun documentation at:
http://www.sun.com/documentation
You can order printed copies of manuals for the Sun StorEdge 3310 SCSI array at:
http://corppub.iuniverse.com/marketplace/sun
508 Accessibility Features
The Sun StorEdge documentation is available in 508-compliant HTML files that can
be used with assistive technology programs for visually impaired personnel. These
files are provided on the Documentation CD for your product as well as on the
websites identified in the previous “Accessing Sun Documentation” section.
Additionally, the software and firmware applications provide keyboard navigation
and shortcuts, which are documented in the user's guides.
Sun Welcomes Your Comments
Sun is interested in improving its documentation and welcomes your comments and
suggestions. You can submit your comments by going to:
http://www.sun.com/hwdocs/feedback
Please include the title and part number of your document with your feedback: Sun
StorEdge 3000 Family RAID Firmware 3.25 User’s Guide, part number 816-7296-13
Preface
xvii
xviii
Sun StorEdge 3000 Family RAID Firmware 3.25 User’s Guide • June 2003
CHAPTER
1
Basic RAID Concepts and Planning
A redundant arrays of independent disks, or RAID, offers major benefits in
availability, capacity, and performance. Sun StorEdge 3000 Family arrays provide
complete RAID functionality and enhanced drive failure management.
This chapter covers the following concepts and planning guidelines:
■
■
■
■
■
■
■
■
“Before You Begin” on page 1-2
■
“Determining Which Version of the RAID Firmware Applies to Your Array” on
page 1-2
“RAID Terminology Overview” on page 1-2
■
“Logical Drives” on page 1-3
■
“Logical Volumes” on page 1-3
■
“Understanding Local Spare Drives” on page 1-3
■
“Understanding Global Spare Drives” on page 1-4
■
“SCSI Channels” on page 1-4
“RAID Levels” on page 1-7
■
“JBOD (Single Drive Control)” on page 1-10
■
“RAID 0” on page 1-10
■
“RAID 1” on page 1-11
■
“RAID 1+0” on page 1-12
■
“RAID 3” on page 1-13
■
“RAID 5” on page 1-14
■
“Advanced RAID Levels” on page 1-15
“Local and Global Spare Drives” on page 1-16
■
“Local Spare Drives” on page 1-16
■
“Global Spare Drives” on page 1-17
■
“Using Both Local and Global Spare Drives” on page 1-18
“Controller Defaults and Limitations” on page 1-19
“Battery Operation” on page 1-20
■
“Battery Status” on page 1-20
■
“Write-Back Versus Write-Through Cache Options” on page 1-20
“RAID Planning Considerations” on page 1-20
“Basic Configuration Overview” on page 1-22
1-1
1.1
Before You Begin
The firmware of the Sun StorEdge 3000 Family arrays is software that is installed or
“flashed” into the array hardware before it is shipped. Later versions of the firmware
can be downloaded and flashed at the customer site.
Different versions of controller firmware apply to various Sun StorEdge 3000 Family
arrays. Before downloading new firmware, be sure to check the Readme file or
appropriate release notes to make sure you are upgrading a supported version of the
firmware for your array.
1.1.1
Determining Which Version of the RAID
Firmware Applies to Your Array
It is important that you run a version of firmware that is supported for your array.
Caution – Before updating your firmware, make sure that the version of firmware
you want to use is supported for your array.
If you are downloading a Sun Microsystems patch that includes a firmware upgrade,
the Readme file associated with that patch tells you which Sun StorEdge 3000 family
arrays support this firmware release.
1.2
RAID Terminology Overview
Redundant array of independent disks (RAID) is a storage technology used to
improve the processing capability of storage systems. This technology is designed to
provide reliability in disk array systems and to take advantage of the performance
gains offered by an array of multiple disks over single-disk storage.
RAID’s two primary underlying concepts are:
■
Distributing data over multiple hard drives improves performance.
■
Using multiple drives properly allows for any one drive to fail without loss of
data and without system downtime.
In the event of a disk failure, disk access continues normally and the failure is
transparent to the host system.
1-2
Sun StorEdge 3000 Family RAID Firmware 3.25 User’s Guide • June 2003
1.2.1
Logical Drives
Increased availability, capacity, and performance are achieved by creating logical
drives. A logical drive is an array of independent physical drives. To the host, the
logical drive appears the same as a local hard disk drive.
FIGURE 1-1
Logical Drive Including Multiple Physical Drives
Logical drives can be configured to provide several distinct RAID levels, described
in the remainder of this section.
1.2.2
Logical Volumes
The concept of a logical volume is very similar to that of a logical drive. A logical
volume is composed of one or more logical drives. The logical drives in a logical
volume do not have to be composed of the same RAID level.
A logical volume can be divided into a maximum of 32 partitions for SCSI arrays
and 128 partitions for Fibre Channel arrays.
During operation, the host sees n unpartitioned logical volume or a partition of a
partitioned logical volume as one single physical drive.
1.2.3
Understanding Local Spare Drives
A local spare drive is a standby drive assigned to serve one specified logical drive.
When a member drive of this specified logical drive fails, the local spare drive
becomes a member drive and automatically starts to rebuild.
Chapter 1
Basic RAID Concepts and Planning
1-3
1.2.4
Understanding Global Spare Drives
A global spare drive is not reserved for a single logical drive. When a member drive
from any of the logical drives fail, the global spare drive joins that logical drive and
automatically starts to rebuild.
1.2.5
SCSI Channels
A SCSI channel can connect up to 15 devices (excluding the controller itself) when
the Wide function is enabled (16-bit SCSI). Fibre Channel enables the connectivity of
up to 125 devices in a loop. Each device has one unique ID.
A logical drive consists of a group of SCSI or Fibre Channel drives. Physical drives
in one logical drive do not have to come from the same SCSI channel. Also, each
logical drive can be configured for a different RAID level.
A drive can be assigned as the local spare drive to one specified logical drive, or as a
global spare drive. A spare is not available for logical drives that have no data
redundancy (RAID 0).
Drive channel 0
4
GB
4
GB
ID5
2
GB
ID0
2
GB
ID3
ID2
Drive channel 1
4
GB
4
GB
ID6
2
GB
ID1
2
GB
ID0
ID14
Global spare
Local spare for LD1
RAID 5
8 GB
RAID 3
6 GB
Logical drive 0
FIGURE 1-2
1-4
Logical drive 1
Allocation of Drives in Logical Drive Configurations
Sun StorEdge 3000 Family RAID Firmware 3.25 User’s Guide • June 2003
You can divide a logical drive or logical volume into several partitions or use the
entire logical drive as single partition.
Partition 0
2 GB
Partition 1
1 GB
Partition 2
5 GB
Partition 0
2.5 GB
Partition 1
1.5 GB
Partition 2
2 GB
Logical drive 0
RAID 5 (8 GB)
Logical drive 1
RAID 3 (6 GB)
FIGURE 1-3
Partitions in Logical Drive Configurations
Each partition is mapped to LUNs under host FC or SCSI IDs, or IDs on host
channels. Each FC or SCSI ID/LUN is seen as an individual hard drive by the host
computer.
Chapter 1
Basic RAID Concepts and Planning
1-5
ID 0
Logical drive 1
Partition 0
ID 1
LUN 0
LUN 0
2.5 GB
Logical drive 0
Partition 1
5 GB
LUN 1
LUN 1
1 GB
Logical drive 1
Partition 2
Logical drive 1
Partition 1
1.5 GB
LUN 2
LUN 2
2.5 GB
FIGURE 1-4
Logical drive 0
Partition 2
Logical drive 0
Partition 0
2 GB
Mapping Partitions to Host ID/LUNs
Logical drive 1
Partition 0
4.5 GB
Logical drive 0
Partition 2
5 GB
Logical drive 0
Partition 0
2 GB
Host SCSI channel
LUN 5
LUN 4
LUN 3
LUN 2
LUN 1
LUN 0
ID 0
1 GB
Logical drive 0
Partition 1
FIGURE 1-5
1-6
1.5 GB
2 GB
Logical drive 1
Partition 1
Mapping Partitions to LUNs Under an ID
Sun StorEdge 3000 Family RAID Firmware 3.25 User’s Guide • June 2003
Logical drive 1
Partition 2
1.3
RAID Levels
A RAID array has several advantages over non-RAID disk arrays.:
■
Provides disk spanning by weaving all connected drives into one single volume.
■
Increases disk access speed by breaking data into several blocks when reading
and writing to several drives in parallel. With RAID, storage speed increases as
more drives are added.
■
Provides fault-tolerance by mirroring or parity operation.
There are several ways to implement a RAID array, using a combination of
mirroring, striping, duplexing, and parity technologies. These various techniques are
referred to as RAID levels. Each level offers a mix of performance, reliability, and
cost. Each level uses a distinct algorithm to implement fault tolerance.
There are several RAID level choices: RAID 0, 1, 3, 5, 1+0, 3+0 (30), and 5+0 (50).
RAID levels 1, 3, and 5 are the most commonly used.
Note – The NRAID option that appears in some firmware menus is no longer used
and is not recommended.
Note – Drives on separate channels can be included in a logical drive, and logical
drives of various RAID levels can be used to configure a logical volume.
The following table provides a brief overview of the RAID levels.
TABLE 1-1
RAID Level Overview
RAID Level
Description
Number of Drives
Supported
Capacity
Redundancy
0
Striping
2–36 physical drives
N
No
1
Mirroring
2 physical drives
N/2
Yes
1+0
Mirroring and
striping
4–36 physical drives
(even number only)
N/2
Yes
3
Striping with
dedicated parity
3–31 physical drives
N-1
Yes
Chapter 1
Basic RAID Concepts and Planning
1-7
TABLE 1-1
RAID Level Overview (Continued)
Number of Drives
Supported
Capacity
Redundancy
Striping with
distributed parity
3–31 physical drives
N-1
Yes
3+0 (30)
Striping of RAID 3
logical drives
2–8 logical drives
N-# of
logical
drives
Yes
5+0 (50)
Striping of RAID 5
logical drives
2–8 logical drives
N-# of
logical
drives
Yes
RAID Level
Description
5
Capacity refers to the total number (N) of physical drives available for data storage.
For example, if the capacity is N-1 and the total number of disk drives in the logical
drive is six 36-Mbyte drives, the disk space available for storage is equal to five disk
drives (5 x 36 MBytes or 180 Mbytes).
The -1 refers to the amount of striping across the example six drives, which provides
redundancy of data and is equal to the size of one of the disk drives.
For RAID 3+0 (30) and 5+0 (50), capacity refers to the total number of physical drives
(N) minus one physical drive (#) for each logical drive in the volume. For example, if
the total number of disk drives in the logical drive is twenty 36-Mbyte drives and
the total number of logical drives is 2, the disk space available for storage is equal to
18 disk drives (18 x 36 Mbytes or 648 Mbytes).
The advantages and disadvantages of different RAID levels are described in the
following table.
TABLE 1-2
1-8
RAID Level Characteristics
RAID Level
Description
RAID 0
Striping without fault tolerance; provides maximum
performance.
RAID 1
Mirrored or duplexed disks; for each disk in the array, a
duplicate disk is maintained for fault tolerance. RAID 1 does
not improve performance over that of a single disk drive. It
requires 50% of total disk capacity for overhead.
RAID 3
One drive is dedicated to parity. Data is divided into blocks and
distributed sequentially among the remaining drives. You need
at least three physical drives for a RAID 3 logical drive.
Sun StorEdge 3000 Family RAID Firmware 3.25 User’s Guide • June 2003
TABLE 1-2
RAID Level Characteristics (Continued)
RAID Level
Description
RAID 5
Striping with fault tolerance; this is the best-suited RAID level
for multitasking or transaction processing.
In RAID 5, an entire transfer block is placed on a single drive,
but there are no dedicated data or Error Correction Code (ECC)
drives. The data and ECC are striped across each drive in the
disk array, so that each drive contains a combination of data
and ECC blocks. This allows data to be reconstructed on a
replacement drive in the event of a single disk drive failure.
The primary advantages of RAID 5 are as follows:
• It provides fault tolerance.
• It increases performance through the ability to perform both
read and write seeks in parallel.
• The cost per usable megabyte of disk storage is low.
RAID 5 requires at least 3 drives.
RAID 1+0
RAID 1+0 combines RAID 0 and RAID 1 to offer mirroring and
disk striping. RAID 1+0 enables recovery from multiple drive
failures because of the full redundancy of the hard disk drives.
If four or more disk drives are chosen for a RAID 1 logical
drive, RAID 1+0 is performed automatically.
RAID (3+0)
A logical volume with several RAID 3 member logical drives.
RAID (5+0)
A logical volume with several RAID 5 member logical drives.
Chapter 1
Basic RAID Concepts and Planning
1-9
1.3.1
JBOD (Single Drive Control)
2 GB
=
2 GB Hard Drive
Logical Drive
3 GB
=
2 GB Hard Drive
Logical Drive
1 GB
=
1 GB Hard Drive
Logical Drive
2 GB
=
2 GB Hard Drive
Logical Drive
FIGURE 1-6
JBOD Configuration
JBOD is an abbreviation for “Just a Bunch of Disks.” A JBOD is a disk array directly
attached to a host rather than to an array controller and does not provide data
redundancy. The JBOD controller treats each drive as a standalone disk, so each
drive is an independent logical drive.
1.3.2
RAID 0
RAID 0 implements block striping, where data is broken into logical blocks and is
striped across several drives. Unlike other RAID levels, there is no facility for
redundancy. In the event of a disk failure, data is lost.
In block striping, the total disk capacity is equivalent to the sum of the capacities of
all drives in the array. This combination of drives appears to the system as a single
logical drive.
RAID 0 provides the highest performance. It is fast because data can be
simultaneously transferred to and from every disk in the array. Furthermore, read
and writes to separate drives can be processed concurrently.
1-10
Sun StorEdge 3000 Family RAID Firmware 3.25 User’s Guide • June 2003
Logical drive
Physical disks
Block 1
Block 2
Block 1
Block 3
Block 2
Striping
Block 4
Block 3
Block 5
Block 5
Block 6
Block 6
Block 7
Block 8
Block 4
Block 7
Block 8
FIGURE 1-7
1.3.3
RAID 0 Configuration
RAID 1
RAID 1 implements disk mirroring, where a copy of the same data is recorded onto
two drives. By keeping two copies of data on separate disks, data is protected
against a disk failure. If, at any time, a disk in the RAID 1 array fails, the remaining
good disk (copy) can provide all of the data needed, thus preventing downtime.
In disk mirroring, the total usable capacity is equivalent to the capacity of one drive
in the RAID 1 array. Thus, combining two 1-Gbyte drives, for example, creates a
single logical drive with a total usable capacity of 1 Gbyte. This combination of
drives appears to the system as a single logical drive.
Note – RAID 1 does not allow expansion. RAID levels 3 and 5 permit expansion by
adding drives to an existing array.
Chapter 1
Basic RAID Concepts and Planning
1-11
Logical drive
Physical disks
Block 1
Block 2
Block 1
Block 3
Block 1
Mirroring
Block 4
Block 2
Block 5
Block 3
Block 3
Block 6
Block 4
Block 4
Block 2
Block 7
Block 8
FIGURE 1-8
RAID 1 Configuration
In addition to the data protection that RAID 1 provides, this RAID level also
improves performance. In cases where multiple concurrent I/O is occurring, this I/O
can be distributed between disk copies, thus reducing total effective data access
time.
1.3.4
RAID 1+0
RAID 1+0 combines RAID 0 and RAID 1 to offer mirroring and disk striping. Using
RAID 1+0 is a time-saving feature that enables you to configure a large number of
disks for mirroring in one step. It is not a standard RAID level option that you can
select; it does not appear in the list of RAID level options supported by the
controller. If four or more disk drives are chosen for a RAID 1 logical drive, RAID
1+0 is performed automatically.
1-12
Sun StorEdge 3000 Family RAID Firmware 3.25 User’s Guide • June 2003
Physical disks
Logical drive
Block 1
Block 2
Block 1
Block 2
Block 1
Mirroring
Block 2
Block 3
Block 3
Block 4
Block 4
Block 3
Striping
Block 4
Block 5
Block 6
Block 5
Block 7
Block 6
Block 8
FIGURE 1-9
1.3.5
Block 5
Mirroring
Block 6
Block 7
Block 7
Block 8
Block 8
RAID 1+0 Configuration
RAID 3
RAID 3 implements block striping with dedicated parity. This RAID level breaks
data into logical blocks, the size of a disk block, and then stripes these blocks across
several drives. One drive is dedicated to parity. In the event that a disk fails, the
original data can be reconstructed using the parity information and the information
on the remaining disks.
In RAID 3, the total disk capacity is equivalent to the sum of the capacities of all
drives in the combination, excluding the parity drive. Thus, combining four 1-Gbyte
drives, for example, creates a single logical drive with a total usable capacity of 3
Gbytes. This combination appears to the system as a single logical drive.
RAID 3 provides increased data transfer rates when data is being read in small
chunks or sequentially. However, in write operations that do not span every drive,
performance is reduced because the information stored in the parity drive needs to
be recalculated and rewritten every time new data is written, limiting simultaneous
I/O.
Chapter 1
Basic RAID Concepts and Planning
1-13
Logical drive
Physical disks
Dedicated parity
Block 1
Block 2
Block 1
Block 3
Striping
Block 2
Parity (1.2)
Block 4
Parity (3,4)
Block 4
Block 3
Block 5
Block 5
Block 6
Parity (5,6)
Block 6
Block 7
Block 8
Parity (7,8)
Block 7
Block 8
FIGURE 1-10
1.3.6
RAID 3 Configuration
RAID 5
RAID 5 implements multiple-block striping with distributed parity. This RAID level
offers redundancy with the parity information distributed across all disks in the
array. Data and its parity are never stored on the same disk. In the event that a disk
fails, original data can be reconstructed using the parity information and the
information on the remaining disks.
1-14
Sun StorEdge 3000 Family RAID Firmware 3.25 User’s Guide • June 2003
Logical drive
Physical disks
Striping + nondedicated parity
Block 1
Block 2
Block 3
Block 1
Block 2
Parity (3,4)
Block 4
Block 4
Parity (3,4)
Block 3
Block 5
Parity (5,6)
Block 5
Block 6
Block 6
Block 7
Block 8
Parity (7,8)
Block 7
Block 8
FIGURE 1-11
RAID 5 Configuration
RAID 5 offers increased data transfer rates when data is accessed randomly or in
large chunks, and reduced data access time during simultaneous I/O operations.
1.3.7
Advanced RAID Levels
The following advanced RAID levels require the use of the array’s built-in volume
manager. These combination RAID levels provide the protection benefits of RAID 1,
3, or 5 with the performance of RAID 1. To use advanced RAID, first create two or
more RAID 1, 3, or 5 arrays, and then join them.
The following table provides a description of the advanced RAID levels.
TABLE 1-3
Advanced RAID Levels
RAID Level
Description
RAID 3+0 (30)
RAID 3 logical drives that have been joined together using the array’s
built-in volume manager.
RAID 5+0 (50)
RAID 5 logical drives that have been joined together using the array’s
volume manager.
Chapter 1
Basic RAID Concepts and Planning
1-15
1.4
Local and Global Spare Drives
The external RAID controllers provide both local spare drive and global spare drive
functions. The local spare drive is used only for one specified drive; the global spare
drive can be used for any logical drive on the array.
The local spare drive always has higher priority than the global spare drive.
Therefore, if a drive fails and both types of spares are available at the same or
greater size to replace the failed drive, the local spare is used.
If there is a failed drive in the RAID 5 logical drive, replace the failed drive with a
new drive to keep the logical drive working. To identify a failed drive, see
“Identifying a Failed Drive for Replacement” on page 8-12.
Caution – If, when trying to remove a failed drive, you mistakenly remove the
wrong drive, you will no longer be able to access the logical drive because you have
incorrectly failed another drive.
1.4.1
Local Spare Drives
A local spare drive is a standby drive assigned to serve one specified logical drive.
When a member drive of this specified logical drive fails, the local spare drive
becomes a member drive and automatically starts to rebuild.
A local spare drive always has higher priority than a global spare drive; that is, if a
drive fails and there is a local spare and a global spare drive available, the local
spare drive is used.
Local spare drive
FIGURE 1-12
1-16
Local (Dedicated) Spare
Sun StorEdge 3000 Family RAID Firmware 3.25 User’s Guide • June 2003
1.4.2
Global Spare Drives
A global spare drive is available for all logical drives rather than serving only one
logical drive (see FIGURE 1-13). When a member drive from any of the logical drives
fails, the global spare drive joins that logical drive and automatically starts to
rebuild.
A local spare drive always has higher priority than a global spare drive; that is, if a
drive fails and there is a local spare and a global spare drive available, the local
spare drive is used.
Global spare drive
Logical drive 0
FIGURE 1-13
Global spare drive
Logical drive 1
Logical drive 2
Global Spare
Chapter 1
Basic RAID Concepts and Planning
1-17
1.4.3
Using Both Local and Global Spare Drives
In FIGURE 1-14, the member drives in logical drive 0 are 9 Gbyte drives, and the
members in logical drives 1 and 2 are all 4 Gbyte drives.
Local spare drive
(9 GB)
Global spare drive
(4 GB)
(4 GB)
(9 GB)
(9 GB)
(4 GB)
(9 GB)
Logical drive 0
FIGURE 1-14
(4 GB)
(4 GB)
Logical drive 1
(4 GB)
(4 GB)
Logical drive 2
Mixing Local and Global Spares
A local spare drive always has higher priority than a global spare drive; that is, if a
drive fails and both a local spare and a global spare drive are available, the local
spare drive is used.
In FIGURE 1-14, it is not possible for the 4 Gbyte global spare drive to join logical
drive 0 because of its insufficient capacity. The 9 Gbyte local spare drive aids logical
drive 0 once a drive in this logical drive fails. If the failed drive is in logical drive 1
or 2, the 4 Gbyte global spare drive immediately aids the failed drive.
1-18
Sun StorEdge 3000 Family RAID Firmware 3.25 User’s Guide • June 2003
1.5
Controller Defaults and Limitations
The following controller functions describe the redundant controller operation:
■
Both controllers must be exactly the same. Namely, they must operate with the
same firmware version, the same size of memory, the same number of host and
drive channels, etc. When a replacement controller is placed in a system, the
firmware of the first controller automatically synchronizes (overwrites) the
firmware of the second controller to be the same firmware.
■
In redundant mode, the maximum number of disk drive IDs on a SCSI drive
channel is 16. IDs 6 and 7 are used for host HBA connections.
■
Both controllers must be initially configured as primary controllers. Upon boot-up
in a redundant configuration, the controllers autonegotiate and designate one
controller as primary and the other controller as secondary.
■
The two controllers behave as one primary controller. Once the redundant
configuration takes effect, user configurations and settings can be done only on
the primary controller. The secondary controller then synchronizes with the
configuration of the primary controller, making the configurations of the two
controllers exactly the same.
The two controllers continuously monitor each other. When a controller detects
that the other controller is not responding, the working controller immediately
takes over and disables the failed controller.
■
It is necessary to connect all interfaces to both controllers so that the surviving
controller can readily continue all services provided for the RAID system. For
example, if you connect one controller to the Ethernet, you should also connect
the second controller to the Ethernet.
■
In an active-to-active configuration (standard configuration), you can assign any
appropriate logical drives to either of the controllers, and then map the logical
configurations to host channel IDs/LUNs. I/O requests from a host computer are
directed to the primary or the secondary controller accordingly. The total drive
capacity can be grouped into several logical configurations and equally assigned
to both controllers so that they share the workload.
The active-to-active configuration engages all array resources to actively
maximize performance. Users might also assign all logical configurations to one
controller and let the other act as a standby.
An active-to-standby configuration is an available configuration, but it is not
usually selected. When you assign all the logical configurations of drives to one
controller, the other controller stays idle and becomes active only when its
counterpart fails.
Chapter 1
Basic RAID Concepts and Planning
1-19
1.6
Battery Operation
A battery should be changed every two years if the unit is continuously operated at
25 degrees C, and yearly if continuously operated at 35 degrees C or higher. The
FRU shelf life for a battery is three years.
1.6.1
Battery Status
The battery LED (on the far right side of the controller module) is yellow if the
battery is bad or is missing. The LED blinks green if the battery is charging, and is
solid green when the battery is fully charged.
The initial firmware screen also displays the battery charging status at the top of the
initial screen. The BAT: status displays somewhere in the range from BAT: BAD to
BAT: ----- (charging), to BAT: +++++ (fully charged). For example, a partially charged
battery might show BAT: +++--.
1.6.2
Write-Back Versus Write-Through Cache Options
Unfinished writes are cached in memory in write-back mode. If power to the array is
discontinued, data stored in the cache memory is not lost. Battery modules can
support cache memory for several days.
Write cache is not automatically disabled when the battery is offline due to battery
failure or a disconnected battery. You can enable or disable the write-back cache
capabilities of the RAID controller. To ensure data integrity, you can disable the
Write-Back cache option and switch to the Write-Through cache option by selecting
“view and edit Configuration parameters” and then selecting “Caching Parameters.”
1.7
RAID Planning Considerations
Here are some questions that can help you plan your RAID array.
■
How many physical drives do you have?
You have from 5 drives to 12 drives in your array.
■
1-20
How many drives would you like to appear to the host computer?
Sun StorEdge 3000 Family RAID Firmware 3.25 User’s Guide • June 2003
Determine what capacity will be included in a logical configuration of drives. A
logical configuration of drives is displayed to the host as a single physical drive.
For the default logical drive configuration, see “Default Logical Drives and RAID
Levels” on page 3-2.
■
What kind of host applications will you be using?
The frequency of read/write activities can vary from one host application to
another. The application can be a SQL server, Oracle server, Informix, or other
database server of a transaction-based nature. Applications like video playback
and video post-production editing require read/write operations involving huge
files in a sequential order.
The RAID level setting depends on what is most important for a given
application—capacity, availability, or performance. Before revising your RAID
level (prior to storing data), you need to choose an optimization scheme and
optimize the controller for your application.
The controller optimization mode can be changed only when there are no logical
configurations. Once the controller optimization mode is set, the same mode is
applied to all logical drives. Data stripe size is changed once the optimization
method is changed. Therefore, you cannot proceed with changing the
optimization mode until data is backed up, all logical drives are deleted, and the
array is restarted. Therefore, be careful in choosing an optimization mode for your
controller.
Note – The controller factory defaults guarantee the optimal performance for most
applications.
■
How many logical drives do you want, and at what RAID level?
A logical drive is a set of drives grouped together to operate under a given RAID
level. It appears as a single contiguous storage volume. The controller is capable
of grouping drives into eight logical drives, each configured on the same or
different RAID levels. Different RAID levels provide varying degrees of
performance and fault tolerance.
■
Do you want to reserve any spare drives?
Spare drives allow for the unattended rebuilding of a failed drive, heightening the
degree of fault tolerance. If there is no spare drive, data rebuild has to be
performed manually.
Drives must be configured and the controller properly initialized before a host
computer can access the storage capacity.
Chapter 1
Basic RAID Concepts and Planning
1-21
1.8
Basic Configuration Overview
This section briefly outlines steps you can take to configure your array.
1. If a hard drive was connected after the controller completes initialization, use the
“Scan scsi drive” function (under the “view and edit scsi Drives” in the Main
Menu) to let the controller recognize the newly added hard drive and to make it
available to be configured as a member of a logical drive.
2. Optionally define any additional partitions for each logical drive. Refer to
“Partitioning a Logical Drive” on page 3-11. A logical drive can be divided into a
maximum of 32 Partitions. A total of 128 partitions can be created in an array.
3. Optionally add host SCSI IDs and more logical drives to create 128 LUNs.
Refer to:
■
■
■
“Planning for 128 LUNs” on page 5-5
“Creating Additional Host IDs” on page 7-8
“Creating Logical Drive(s)” on page 3-4
4. Map each logical drive and storage partition to a host ID/LUN. Refer to
“Mapping Logical Drive Partitions to Host LUNs” on page 5-1. The host adapter
recognizes the system drives after reinitializing the host bus.
5. Optionally, optimize controller's parameters for your applications. For details on
optimization modes, refer to “Optimization Modes (Caching Parameters)” on
page 8-2.
6. Save your configuration profile as a file.
Note – The controller is totally independent from host operating environment. The
host operating environment cannot determine whether the attached storage is a
physical hard drive or the logical drives created by the RAID controller.
1-22
Sun StorEdge 3000 Family RAID Firmware 3.25 User’s Guide • June 2003
CHAPTER
2
Accessing the Controller Firmware
The RAID controller firmware can be configured via a workstation running a
terminal emulation program or on a VT-100 compatible terminal. Topics covered in
this chapter include:
■
■
■
■
■
■
■
2.1
“Setting Up the Serial Port Connection” on page 2-1
“Accessing the Firmware Application From a Solaris Host” on page 2-2
“Redefining the Baud Rate for the tip Command” on page 2-3
“The Controller Firmware Initial Screens” on page 2-4
“Main Menu” on page 2-5
“Quick Installation (Reserved)” on page 2-5
“Upgrading Firmware” on page 2-6
Setting Up the Serial Port Connection
The RAID controller can be configured by means of a Solaris workstation running a
VT-100 terminal emulation program or by a Windows terminal emulation program
such as HyperTerminal.
Note – You can also monitor and configure a RAID array over an IP network with
the Configuration Service program after you assign an IP address to the array. For
details, refer to Appendix C in the Sun StorEdge 3310 SCSI Array Installation,
Operation, and Service Manual and to the Sun StorEdge 3310 SCSI Configuration Service
User Guide.
To set up the serial port connection, perform the following steps.
2-1
1. Use a serial cable to connect the COM port of the RAID array to serial port b on a
Solaris workstation.
A DB9-to-DB25 serial cable adapter is provided to connect the serial cable to DB25
serial ports on workstations.
Make sure that a null modem cable can be attached to the host serial port. The null
modem cable has serial signals swapped for connecting to a standard serial interface.
COM port
COM port
FIGURE 2-1
RAID Array COM Port Connected Locally to the COM Port of a Workstation
or Computer Terminal
2. Power up the array.
3. Set the serial port parameters on the workstation as follows: 38400 baud, 8 bit, 1
stop bit, no parity.
2.2
Accessing the Firmware Application
From a Solaris Host
See “Redefining the Baud Rate for the tip Command” on page 2-3 for setting serial
port parameters on a Solaris host.
See “Using the tip Command for Local Access to the Array” on page 2-3 for
instructions on using the Solaris tip command.
2-2
Sun StorEdge 3000 Family RAID Firmware 3.25 User’s Guide • June 2003
2.3
Redefining the Baud Rate for the tip
Command
This section describes the method for using the Solaris tip command to access the
array. Before you can use the tip command, you must redefine the baud rate.
The tip command uses the 9600 baud specified in the /etc/remote file on the
Solaris host by default. The serial port of the array requires 38400 baud so you must
edit the etc/remote file and revise your use of the tip command, to use the 38400
baud rate.
To edit the /etc/remote file for the 38400 baud rate, perform the following steps:
1. In the /etc/remote file, copy and edit the hardware line as follows:
Locate:
hardware: :dv=/dev/term/b:br#9600:el= . . .
Copy the hardware line into a blank line below the hardware line, rename the
hardware term as ss3000 and replace #9600 with #38400. The editing will look
like the following line:
ss3000: :dv=/dev/term/b:br#38400:el= . . .
2. Save the file in the /etc directory.
Use the replacement term ss3000 with the tip command.
2.4
Using the tip Command for Local
Access to the Array
You can access the RAID COM port (DB9 connector on the controller module) locally
with the following commands:
Chapter 2
Accessing the Controller Firmware
2-3
3. Connect the RAID array COM port to the serial port of a Solaris workstation (see
FIGURE 2-1)
tip ss3000 /dev/ttyb
cntrl-l (to refresh the screen)
2.5
The Controller Firmware Initial Screens
You will see the following initial controller screen when you first access the RAID
controller firmware (via the controller COM port of Ethernet port).
To complete the connection to your management console, select the VT100 terminal
mode or the appropriate mode for your communications software, and press Return.
2-4
Cursor Bar:
Move the cursor bar to a desired item and press Return to
select.
Controller Name:
Identifies the type of controller.
Transfer Rate Indicator
Indicates the current data transfer rate.
Gauge Range:
Use + or - keys to change the gauge range in order to
view the transfer rate indicator.
Cache Status:
Indicates the current cache status.
PC Graphic (ANSI Mode):
Enters the Main Menu and operates in ANSI mode
Sun StorEdge 3000 Family RAID Firmware 3.25 User’s Guide • June 2003
(VT-100 Mode):
2.6
Enters the Main Menu and operates in VT-100 mode.
PC Graphic (ANSI+Color
Mode):
Enters the Main Menu and operates in ANSI color mode.
Show Transfer Rate+Show
Cache Status:
Press Return on this item to show the cache status and
transfer rate.
Main Menu
After you have selected the mode on the initial screen and pressed Return on the
initial screen, the Main Menu is displayed.
Use the arrow keys to move the cursor bar through the menu items, and then press
Return to choose a menu, or Esc key to return to the previous menu/screen.
2.7
←→↑↓
To select options
Return
To go to a submenu or to execute a selected option
[ESC]
To escape and go back to the previous menu
[Ctrl] [L]
To refresh the screen information
Quick Installation (Reserved)
RESERVED for special use.
Caution – DO NOT USE this command unless directed by Technical Support.
Chapter 2
Accessing the Controller Firmware
2-5
2.8
Upgrading Firmware
For firmware upgrade procedures, refer to the Sun StorEdge 3000 Family Installation,
Operation, and Service Manual for your array.
2-6
Sun StorEdge 3000 Family RAID Firmware 3.25 User’s Guide • June 2003
CHAPTER
3
Viewing and Editing Logical Drives
This chapter explains how to view and edit logical drives. Topics covered include:
■
■
■
■
■
■
■
■
■
■
■
■
■
■
■
■
3.1
“Introducing the Logical Drive Commands” on page 3-1
“Default Logical Drives and RAID Levels” on page 3-2
“Viewing the Logical Drive Status Table” on page 3-3
“Creating Logical Drive(s)” on page 3-4
“Changing a Logical Drive Controller Assignment” on page 3-10
“Viewing the Logical Drive Status Table” on page 3-3
“Partitioning a Logical Drive” on page 3-11
“Deleting a Logical Drive” on page 3-15
“Deleting a Partition of a Logical Drive” on page 3-16
“Assigning Logical Drive Name” on page 3-17
“Rebuilding a Logical Drive” on page 3-18
“Performing a Logical Drive Parity Check” on page 3-19
“Overwriting Inconsistent Parity” on page 3-20
“Adding a SCSI Drive to a Logical Drive” on page 3-21
“Copying and Replacing Drives with Drives of Larger Capacity” on page 3-24
“Expanding a Logical Drive” on page 3-27
Introducing the Logical Drive
Commands
On the Main Menu, the “view and edit Logical drives” command is used to stripe
physical SCSI drives into a logical drive.
3-1
For additional commands, highlight the first line or the desired logical drive (LG),
and press Return. The following menu is displayed:
Under this menu command, you can create multiple logical drives. Once logical
drives are created, you can manipulate them by selecting the desired LG and
pressing Return.
To create logical drives, you must map the logical drives to a host channel with the
“view and edit Host luns” command. If this step is skipped, the logical drives will
not be visible to the host.
3.2
Default Logical Drives and RAID Levels
A logical drive is a set of drives grouped together to operate under a given RAID
level. Each controller is capable of supporting as many as eight logical drives. The
logical drives can have the same or different RAID levels.
■
A logical drive can be further divided into a maximum of 32 partitions.
■
The total number of partitions must not exceed 128 partitions per RAID array. To
create a maximum of 128 partitions, refer to “Planning for 128 LUNs” on page 5-5.
For a 12-drive array, the RAID array is preconfigured as follows:
3-2
Sun StorEdge 3000 Family RAID Firmware 3.25 User’s Guide • June 2003
■
Two RAID 5 logical drives, consisting of five physical drives in each logical drive
■
Two global spares
For a 5-drive array, the RAID array is preconfigured as follows:
■
One RAID 5 logical drive, consisting of four physical drives
■
One global spare
For more information about spares and RAID levels, refer to “RAID Levels” on
page 1-7 and “Local and Global Spare Drives” on page 1-16.
3.3
Viewing the Logical Drive Status Table
To check and configure logical drives, from the Main Menu select “view and edit
Logical drives,” and press Return. The following screen displays the status of all
logical drives.
TABLE 3-1
Parameters Displayed in the Logical Drive Status Window
Parameter
Description
LG
Logical drive number.
P0: Logical drive 0 of the primary controller where P = primary
controller and 0 = logical drive number.
S1: Logical drive 1 of the secondary controller where s =
secondary controller and 1 = logical drive number.
ID
Logical drive ID number (controller-generated).
LV
The logical volume to which this logical drive belongs. NA
indicated no logical volume.
RAID
RAID level.
SIZE (MB)
Capacity of the logical drive in megabytes.
Status
Logical drive status.
INITING
The logical drive is now initializing.
Chapter 3
Viewing and Editing Logical Drives
3-3
TABLE 3-1
Parameters Displayed in the Logical Drive Status Window (Continued)
Parameter
3.4
Description
INVALID
The logical drive was improperly created or
modified. For example, the logical drive was
created with “Optimization for Sequential I/O,”
but the current setting is “Optimization for
Random I/O.”
GOOD
The logical drive is in good condition.
DRV FAILED
A drive member failed in the logical drive.
FATAL FAIL
More than one drive member in a logical drive
has failed.
REBUILDING
The logical drive is rebuilding.
DRV ABSENT
INCOMPLETE
One of the disk drives cannot be detected.
Not enough drives are available to support the
current RAID configuration. This status is
displayed only when the array is powering up.
O
Indicates the performance optimization set when the logical
drive was initialized. This cannot be changed after the logical
drive is created.
S
Optimization for Sequential I/O
R
Optimization for Random I/O
#LN
Total number of drive members in this logical drive.
#SB
Number of standby drives available for the logical drive. This
includes local spare and global spare disk drives available for
the logical drive.
#FL
Number of failed disk drive member(s) in the logical drive.
Name
Logical drive name (user configurable).
Creating Logical Drive(s)
The RAID array is already configured with one or two RAID 5 logical drives and one
global spare. Each logical drive consists of a single partition by default.
This procedure is used to modify the RAID level and to add more logical drives, if
necessary. In this procedure, you configure a logical drive to contain one or more
hard drives based on the desired RAID level, and partition the logical drive into
additional partitions.
3-4
Sun StorEdge 3000 Family RAID Firmware 3.25 User’s Guide • June 2003
Note – If you want to assign 128 partitions to 128 LUNs in an array, you need to
have a minimum of four logical drives (each with 32 partitions).
For redundancy across separate channels, you can also create a logical drive
containing drives distributed over separate channels. You can then partition the
logical unit into one or several partitions.
A logical drive consists of a group of SCSI drives. Each logical drive can be
configured a different RAID level.
A drive can be assigned as the local spare drive to one specified logical drive, or as a
global spare drive that is available to all logical drives on the RAID array. Spares can
be part of automatic array rebuild. A spare is not available for logical drives with no
data redundancy (RAID 0).
Drive Channel 0
4
GB
ID 0
ID 5
Drive Channel 1
2
GB
4
GB
4
GB
2
GB
ID 2
ID 3
2
GB
4
GB
ID 6
ID 1
2
GB
ID 14
ID 0
Global Spare
Drive
RAID 5
8GB
Local Drive 0
FIGURE 3-1
Local Spare Drive of LD1
RAID 3
6GB
Local Drive 1
Allocation of drives in Logical Configurations
Chapter 3
Viewing and Editing Logical Drives
3-5
1. View the connected drivesphysical.
Before configuring disk drives into a logical drive, it is necessary to understand the
status of physical drives in your enclosure.
a. Use the arrow keys to scroll down to “view and edit Scsi drives” and press
Return.
This displays information of all the physical drives that are installed.
b. Use the arrow keys to scroll through the table. Check that all installed drives
are listed here.
If a drive is installed but is not listed, it might be defective or might not be
installed correctly, contact your RAID supplier.
When the power is on, the controller scans all hard drives that are connected
through the drive channels. If a hard drive was connected after the controller
completed initialization, use the “Scan scsi drive” function accessed with the
“view and edit scsi Drives” command on the Main Menu, to let the controller
recognize the newly added hard drive and configure it as a member of a logical
drive.
Caution – Scanning an existing drive removes its metadata references and its
assignment to any logical drive. All data on that drive will be lost.
2. Create a logical drive.
a. Scroll through the Main Menu and select “view and edit logical drive.”
3-6
Sun StorEdge 3000 Family RAID Firmware 3.25 User’s Guide • June 2003
b. Select the first available unassigned logical drive (LG) and press Return to
proceed.
You can create as many as eight logical drives from drives on any SCSI bus.
When prompted to “Create Logical Drive?” select Yes and press Return to
proceed.
A pull-down list of supported RAID levels is displayed.
3. Select a RAID level for this logical drive.
RAID 5 is used in the following example screens
For brief descriptions of RAID levels, refer to “Default Logical Drives and RAID
Levels” on page 3-2. For more information about RAID levels, see “Basic RAID
Concepts and Planning” on page 1-1.
4. Select your member drive(s) from the list of available physical drives.
The drives can be tagged for inclusion by positioning the cursor bar on the drive and
then pressing Return. An asterisk (*) is displayed on the selected physical drive(s).
To deselect the drive, press Return again on the selected drive. The asterisk
disappears.
Note – You must select at least the minimum number of drives required per RAID
level.
a. Use the up and down arrow keys to select more drives.
Chapter 3
Viewing and Editing Logical Drives
3-7
b. After all physical drives have been selected for the logical drive, press Esc key
to continue to the next option.
After member physical drives are selected, a list of selections is displayed.
5. Optionally set Maximum Physical Drive Capacity and assign spares.
a. Optionally select “Maximum Drive Capacity” from the above menu, and press
Return.
Note – Changing the maximum drive capacity will reduce the size of the logical
drive and leave some disk space unused.
As a rule, a logical drive should be composed of physical drives with the same
capacity. A logical drive can only use the capacity of each drive up to the
maximum capacity of the smallest drive.
b. Optionally add a local spare drive from the list of unused physical drives.
Note – A global spare cannot be created while creating a logical drive.
The spare chosen here is a local spare and will automatically replace any failed disk
drive in this logical drive. The local spare will not be available for any other logical
drive.
3-8
Sun StorEdge 3000 Family RAID Firmware 3.25 User’s Guide • June 2003
Note – A logical drive created in a RAID level which has no data redundancy
(RAID 0) does not support spare drive rebuilding.
6. Optionally select “Logical Drive Assignments” to assign this logical drive to the
secondary controller.
By default, all logical drives are automatically assigned to the primary controller.
If you use two controllers for the redundant configuration, a logical drive can be
assigned to either of the controllers to balance workload. Logical drive assignment
can be changed any time later.
a. Press Esc key or No to exit from this window without changing the controller
assignment.
b. Select “Yes”, press Return to confirm, and then press Esc key to continue when
all the preferences have been set.
A confirmation box is displayed on the screen.
c. Verify all information in the box before choosing “Yes” to proceed.
Chapter 3
Viewing and Editing Logical Drives
3-9
A message will indicate that the logical drive initialization has begun.
d. Press Esc key to cancel the “Notification” prompt.
e. After the logical drive initialization is completed, use the Esc key to return to
the Main Menu.
7. Select “view and edit Logical drives” to view details of the created logical drive.
3.5
Changing a Logical Drive Controller Assignment
By default, logical drives are automatically assigned to the primary controller. If you
assign half the drives to the secondary controller, the maximum speed and
performance will be somewhat improved due to the redistribution of the traffic.
To balance the workload between both controllers, you can distribute your logical
drives between the primary controller (displayed as the Primary ID or PID) and the
secondary controller (displayed as the Secondary ID or SID).
After a logical drive has been created, it can be assigned to the secondary controller.
Then the host computer associated with the logical drive can be mapped to the
secondary controller (see “Mapping Logical Drive Partitions to Host LUNs” on
page 5-1).
1. To change a logical drive controller assignment, select “view and edit Logical
drives” from the Main Menu, and press Return.
2. Select “logical drive assignments” and press Return.
3-10
Sun StorEdge 3000 Family RAID Firmware 3.25 User’s Guide • June 2003
The reassignment is evident from the “view and edit Logical drives” screen.
A “P” in front of the LG number means that the logical drive is assigned to the
primary controller. An “S” in front of the LG number means that the logical drive is
assigned to a Secondary controller.
For example, “S1” indicates that logical drive 1 assigned to the secondary controller.
Note – The editable logical drive NAME name is used only in the RAID firmware
administration and monitoring, and does not appear anywhere on the host. You can
create a logical drive NAME after the logical drive is created: Select the logical drive
in the above screen, and press Return. Then select “logical drive name, “enter the
desired name, and press Return.
3. Press Esc to return to the Main Menu.
4. Reset the controller to implement the change.
Select “system Functions” on the Main Menu. Then select “Reset Controller” and
press Return.
You must reset the controller for the changes to take effect.
3.6
Partitioning a Logical Drive
You can divide a logical drive into several partitions, or use the entire logical drive
as a single partition. You might configure up to 32 partitions for each logical drive.
For guidelines on setting up 128 LUNs, refer to “Mapping Logical Drive Partitions to
Host LUNs” on page 5-1.
Chapter 3
Viewing and Editing Logical Drives
3-11
Caution – If you modify the size of a partition or logical drive, you lose all data on
those drives.
Partition 0
Partition 1
2GB
1GB
RAID 5 (8GB)
Logical Drive 0
Partition 2
5GB
Partition 0 2.5GB
RAID (3 6GB)
Partition 1 1.5GB
Logical Drive 1
Partition 2
FIGURE 3-2
3-12
2GB
Partitions in Logical Configurations
Sun StorEdge 3000 Family RAID Firmware 3.25 User’s Guide • June 2003
To partition a logical drive, perform the following steps:
1. From the Main Menu, select “view and edit Logical drives.”
2. Select the logical drive you want to partition and press Return
3. Select “Partition logical drive” from the menu and press Return.
4. Select from the list of undefined partitions and press Return.
The following message is displayed.
Partitioning the Logical Drive will make it no longer eligible for
membership in a logical volume.
Continue Partition Logical Drive?
5. Select Yes.
A list of the partitions for this logical drive is displayed. If the logical drive has not
yet been partitioned, all the logical drive capacity will list as “partition 0.”
6. Press Return and type the desired size for the selected partition, and then press
Return to proceed.
Chapter 3
Viewing and Editing Logical Drives
3-13
A warning prompt is displayed.
This operation will result in the loss of all data on the partition.
Partition Logical Drive?
Caution – Make sure any data on this partition that you want to save has been
backed up before you partition the logical drive.
7. Select Yes and press Return to confirm.
The remaining capacity of the logical drive will be automatically allotted to the next
partition. In the following figure, a partition size of 3000MB was entered; the
remaining storage of 27000 MB is allocated to the partition below the partition
created.
8. Repeat the preceding steps to partition the remaining capacity of your logical
drive.
You can create up to 32 partitions per logical drive, with a total number of partitions
not to exceed 128 partitions/LUNs per the RAID array.
Note – When you modify a partition or logical drive size, you must reconfigure all
host LUN mappings. All the host LUN mappings are removed with any change to
partition capacity. See “Mapping Logical Drive Partitions to Host LUNs” on
page 5-1.
3-14
Sun StorEdge 3000 Family RAID Firmware 3.25 User’s Guide • June 2003
Note – When a partition of logical drive/logical volume is deleted, the capacity of
the deleted partition is added to the partition above the deleted partition.
3.7
Deleting a Logical Drive
You can keep the default logical drive configuration, or create new logical drives and
different RAID levels with the following procedure. To reconfigure the entire array
with different logical drives and RAID levels, you must delete the existing logical
drive(s) and reconfigured the array prior to storing data on the array.
Note – We highly recommend that you keep the default configuration, which
provides the maximum storage protection.
To delete a logical drive, perform the following steps.
1. On the Main Menu, select “view and edit Logical drives.”
2. Highlight the line with the logical drive and press Return.
3. Select “Delete logical drive” and press Return.
Caution – Deleting a logical drive will destroy data.
4. Select Yes when prompted to confirm.
Chapter 3
Viewing and Editing Logical Drives
3-15
3.8
Deleting a Partition of a Logical Drive
To delete a partition, perform the following steps.
1. Select “view and edit Logical drives” from the Main Menu and press Return.
2. Select the logical drive that has a partition you want to delete and press Return.
3. Select “Partition logical drive.” Partitions of the logical drive are displayed in
tabulated form.
4. Select the partition you want to delete and press Return. Return “0” on the
partition size to delete this partition.
Logical Drive (1000 MB)
Logical Drive (1000 MB)
Partition 0 - 100 MB
Partition 0 - 100 MB
Partition 1 - 200 MB
Partition 2 - 300 MB
Delete
Partition 1
Partition 1 - 300 MB
Partition 3 - 400 MB
FIGURE 3-3
3-16
Example of Deleted Partitions
Sun StorEdge 3000 Family RAID Firmware 3.25 User’s Guide • June 2003
Partition 2 - 600 MB
(400 + 200)
As illustrated in FIGURE 3-3, the capacity of the deleted partition 1 (200 MB) is added
into the last partition (now Partition 2), which combines 400 MB and 200 MB for a
total of 600 MB.
Caution – As long as a partition has been changed, it is necessary to reconfigure all
host LUN mappings. All the host LUN mappings will be removed with any partition
change.
3.9
Assigning Logical Drive Name
Naming a logical drive can help to identify different logical drives. If one or more
logical drives have been deleted, the drive indexing is changed after system reboot.
The second logical drive might become the first on the list after system reboot.
To enter a name for the logical drive, perform the following steps.
1. Select “view and edit Logical drives” from the Main Menu and press Return.
2. Select the logical drive you want to assign a name and press Return.
3. Select “logical drive name” and press Return again.
The current logical drive name will be displayed on the screen. You may now enter
the new logical drive name in this field.
4. Type the logical drive name and press Return to save the new name.
Chapter 3
Viewing and Editing Logical Drives
3-17
3.10
Rebuilding a Logical Drive
If no spare drive is ready for logical drive rebuild, a failed drive should be replaced
immediately by a new drive and the rebuild process should be initiated manually.
To rebuild a logical drive, perform the following steps.
1. Select “view and edit Logical drives” from the Main Menu and press Return.
2. Select the logical drive that has a failed member drive and press Return.
3. Select “Rebuild logical drive” and press Return.
4. When prompted to rebuild the logical drive, select Yes.
The rebuilding progress is displayed on the screen.
When rebuilding has already started or the logical drive has been automatically
rebuilt by a local spare drive or global spare drive, choose “Rebuild progress” to
view the rebuilding progress.
Note – The rebuild function is displayed only when a logical drive (with RAID level
1, 3 or 5) has a failed drive member. RAID 0 configurations provide no data
redundancy.
3-18
Sun StorEdge 3000 Family RAID Firmware 3.25 User’s Guide • June 2003
3.11
Performing a Logical Drive Parity Check
RAID 3 and RAID 5 configurations support parity checking. If no verifying method
is applied to data writes in these configurations, you can periodically use the
“reGenerate parity” menu option to perform a parity check for RAID levels that
support parity. In a RAID unit, data is striped across multiple member drives and
this menu option can regenerate parity and report any discrepancy.
To check logical drive parity, perform the following steps.
1. Select “view and edit Logical drives” from the Main Menu and press Return.
2. Select the logical drive that you want to regenerate the parity for and press
Return.
3. Select “reGenerate parity” and press Return.
4. When prompted to “Regenerate Parity?” select Yes.
Note – If a regenerating process is stopped by a drive failure, the process cannot
restart until logical drive rebuild has been completed.
5. Select “Execute Regenerate Logical Drive Parity” and press Return.
6. When prompted to regenerate the parity, select Yes.
Chapter 3
Viewing and Editing Logical Drives
3-19
Note – If a regenerating process is stopped by a drive failure, the process cannot
restart until logical drive rebuild has been completed.
3.12
Overwriting Inconsistent Parity
In normal operation, many regions of physical disks may not be accessed for long
periods of time. The primary purpose of the parity checking operation in RAID 3
and RAID 5 configurations is to ensure that all sectors of the media can be
successfully read and to provide alerts if a disk is starting to experience read or write
errors.
If the result of a parity check indicates an inconsistency, it indicates that a data error
exists either on one of the disk drives or on the parity drive. However, RAID
algorithms such as RAID-5 that use XOR parity cannot determine if the error resides
on a data disk or on the parity disk. Enabling the “Overwrite Inconsistent Parity”
menu option causes the RAID controller to correct the data on the parity disk
automatically whenever a parity check detects an inconsistency. In most cases it is
important to correct the data on the parity disk as soon as an inconsistency is
detected, in order to avoid the potential for data loss in the event of a drive failure.
However, some users prefer to check the integrity of their data before overwriting
the parity disk. Disabling the “Overwrite Inconsistent Parity” menu option causes
the controller to report any inconsistency found in a parity check without
overwriting the parity disk. In this case you can check your data and determine if it
is intact, or if the error occurred on a data disk. Once you’ve made this
determination, and reloaded the data from backup if necessary, you can manually
regenerate the parity using the “reGenerate parity” menu option.
To enable or disable the “Overwrite Inconsistent Parity” menu option menu option,
perform these steps.
1. Select “view and edit Logical drives” from the Main Menu and press Return.
2. Select the logical drive whose automatic parity area overwriting you wish to
enable or disable and press Return.
3. Select “reGenerate parity” and press Return.
3-20
Sun StorEdge 3000 Family RAID Firmware 3.25 User’s Guide • June 2003
4. Select “Overwrite Inconsistent Parity - ” and press Return to toggle between
enabling and disabling this menu option.
3.13
Adding a SCSI Drive to a Logical Drive
RAID expansion allows users to expand a logical drive by adding new drives, or by
copying the data from the original member drives to the new drives, and then
replacing the original member drives without powering down the array.
■
Expansion can only be performed on RAID 0, 3 and 5 logical drives. Expansion
cannot be performed on an RAID 1 logical drive.
■
When you add a drive to a logical drive, you add a partition (the size of the new
drive) to the logical drive. Therefore, if you have a single 200 GB logical drive and
add a 36 GB drive, the total logical drive will be 236 GB with two partitions (one
200 GB and one 36 GB).
■
All SCSI drives in a logical drive must be the same size, namely, 36GB or 73GB
drives.
■
The new partition must be mapped to a host LUN in order for the HBA (hostbus adapter) to recognize its presence. If you want to add the new partition into
an existing partition, operating environment support is necessary.
Chapter 3
Viewing and Editing Logical Drives
3-21
■
Expanding logical drives by adding more SCSI hard disk drives cannot be
canceled once begun. If a power failure occurs, the expansion pauses and the
controller does not automatically continue the expansion when the power comes
back on. Restarting of the RAID expansion must be performed manually.
■
If a member drive of the logical drive fails during RAID expansion, the expansion
pauses. The expansion resumes automatically after logical drive rebuild has been
completed.
After new drives are added, the capacity of the original logical drive is the same and
the additional capacity is displayed as another partition (new partition).
When expansion is completed, data is re-striped across the original and the newly
added drives. After adding SCSI drives, the additional capacity is displayed as a
new partition (see FIGURE 3-4).
2 GB
2 GB
2 GB
2 GB
2 GB
RAID 5 Logical Drive (4 GB)
Add-in New Drives
Add SCSI Drives
2 GB
2 GB
2 GB
2 GB
2 GB
N partitions
Partitions N+1
(new partition)
RAID 5 Logical Drive (8 GB)
FIGURE 3-4
Expansion by Adding Drive
RAID levels supported: RAID 0, 3, and 5.
To add a SCSI drive to a logical drive, perform the following steps.
1. From the Main Menu, select “view and edit logical drive,” and highlight a logical
drive.
The drive selected for adding a SCSI drive should have a capacity no less than the
original member drive. If possible, use drives of the same capacity because all drives
in the array are treated as though they have the capacity of the smallest member
drive in the logical array.
3-22
Sun StorEdge 3000 Family RAID Firmware 3.25 User’s Guide • June 2003
2. Press Return to select a logical drive and choose “add SCSI drives” from the
menu.
Proceed with confirming the selection.
3. A list of available drives is displayed. Select one or more drive(s) to add to the
target logical drive by pressing Return.
The selected drive is indicated by an asterisk.
4. Press Esc to proceed.
A confirmation prompt is displayed.
5. Press Esc again to cancel the notification prompt. A status bar indicates the
percentage of progress.
Chapter 3
Viewing and Editing Logical Drives
3-23
A notification message informs you when the process is complete.
Add SCSI Drive to Logical Drive 0 Complete
The capacity of the added drive is displayed as an unused partition.
The added capacity is included in the logical drive automatically, meaning that you
do not have to perform “Expand logical drive” later.
6. However, if the logical drive has already been mapped with a host LUN, you have
to map the added capacity to another host ID/LUN to make use of it.
In the previous “view and edit Host luns” example, the original capacity is 9999 MB,
its host LUN mapping remains unchanged, and the added capacity is displayed as a
second partition.
3.14
Copying and Replacing Drives with
Drives of Larger Capacity
You can expand a logical drive by copying and replacing all member drives with
drives of higher capacity. Refer to the following diagram. The capacity of member
drives are copied and replaced one by one onto drives of larger capacity.
3-24
Sun StorEdge 3000 Family RAID Firmware 3.25 User’s Guide • June 2003
When all the member drives have been replaced, execute the “Expand logical
drives” function to make use of the unused capacity.
Note – The new created area becomes a new partition.
RAID levels supported: RAID 0, 3, and 5.
2 GB
2 GB
2 GB
New
Drive
4 GB
New
Drive
4 GB
New
Drive
4 GB
RAID 5 (4GB)
Copy and Replace each member drive
4 GB
4 GB
4 GB
In Use
Unused
FIGURE 3-5
Expansion by Copy & Replace
To copy and replace drives with drives of larger capacity, perform the following
steps.
1. From the Main Menu, select “view and edit Logical drives.”
2. Select a target logical drive, press Return and scroll down to choose “copy and
replace drive.” Press Return to proceed.
Chapter 3
Viewing and Editing Logical Drives
3-25
3. The member drives belonging to the selected logical drive will be listed. Select
the member drive (the source drive) which you want to replace with a larger one.
4. Select one of the member drives as the source drive (status indicated as ON-LINE)
by pressing Return.
A table of available SCSI drives will prompt.
Select a new drive to copy the capacity of the source drive. The channel number and
ID number of both the Source Drive and the Destination Drive will be indicated in
the confirming box.
5. Select Yes to confirm and proceed.
A notification message is displayed.
[21A1] LG:0 Logical Drive NOTICE: CHL:1 ID:3 Starting Clone
6. Press Esc to view the progress.
3-26
Sun StorEdge 3000 Family RAID Firmware 3.25 User’s Guide • June 2003
7. Completion of the Copy and Replace process will be indicated by a notification
message.
A notification message informs you when the process is complete.
[21A2] LG:0 Logical Drive NOTICE: CHL:1 ID:3 Copy and Replace Completed
8. Follow the same method to copy and replace every member drive with drives of
higher capacity as needed.
You may now perform “Expand logical drive” to make use of the capacity brought
by the new drives and then map the additional capacity to a Host LUN.
3.15
Expanding a Logical Drive
The user can make use of unused capacity in a logical drive by expanding the logical
drive.
An unused capacity is usually created by replacing the original members with drives
of larger capacity; or, by adding new drive(s) to a logical drive. After a logical drive
is expanded, the additional capacity is displayed as another partition (a new
partition). FIGURE 3-6 illustrates this idea.
Chapter 3
Viewing and Editing Logical Drives
3-27
4 GB
4 GB
4 GB
In Use (2 GB)
Unused (2 GB)
RAID 5 (4 GB)
Expand Logical Drive
RAID 5 (8 GB)
4 GB
4 GB
4 GB
N partitions
Partitions N+1
(new partition)
FIGURE 3-6
Logical Drive Expansion
Note – The new created area becomes a new partition.
RAID levels supported: RAID 0, 1, 3, and 5.
The new partition must be mapped to a host LUN in order for the HBA (host-bus
adapter) to recognize its presence. To add the new partition into an existing logical
drive, operating environment support is needed.
In the following example, the logical drive is originally composed of three member
drives and each member drive has the capacity of 1 Gigabyte.The “Copy and
Replace” function has been performed on the logical drive and each member drive
has been replaced by a new drive with the capacity of 2 Gigabytes. The next step is
to perform “Expand logical drive” function to utilize the additional capacity brought
by the new drives.
1. Select “view and edit Logical drives” from the Main Menu, select the logical drive
with its members copied and replaced, and press Return.
2. Select “Expand logical drive” in the submenu and press Return to proceed. A
confirming box is displayed.
3. Proceed by pressing Return or entering any value no larger than the “maximum
drive expand capacity” and press Return.
3-28
Sun StorEdge 3000 Family RAID Firmware 3.25 User’s Guide • June 2003
4. Select Yes to confirm and proceed.
A notification message informs you when the process is complete.
[2188] Expansion of Logical Drive 0 Completed
5. Press Esc to return to the previous menu screen.
The total capacity of logical drive has been expanded to 6 Gigabytes.
Chapter 3
Viewing and Editing Logical Drives
3-29
3-30
Sun StorEdge 3000 Family RAID Firmware 3.25 User’s Guide • June 2003
CHAPTER
4
Viewing and Editing Logical
Volumes
Topics covered in this chapter include:
■
■
■
■
“Understanding Logical Volumes (Multilevel RAID)” on page 4-2
“Creating a Logical Volume” on page 4-5
“Expanding a Logical Volume” on page 4-7
“Viewing a Logical Volume Status Table” on page 4-7
4-1
4.1
Understanding Logical Volumes
(Multilevel RAID)
Logical
Disk
Physical Drives
Logical
Volume
Logical
Disk
Physical Drives
Logical
Disk
Physical Drives
FIGURE 4-1
Logical Volume Composed of Multiple Drives
A logical volume is a combination of RAID 0 (Striping) and other RAID levels. Data
written to a logical volume is first broken into smaller data segments and striped
across different logical drives in a logical volume. Each logical drive then distributes
data segments to its member drives according to its mirroring, parity, or striping
scheme.
A logical volume can be divided into a maximum of 32 partitions for SCSI arrays
and 128 partitions for Fibre Channel arrays. The preferred function is the creation of
partitions into logical drives. You may configure up to 32 partitions for each logical
drive, and up to 128 partitions total within an array. During normal operation, the
host sees an unpartitioned logical volume or a partition of a partitioned logical
volume as one single physical drive.
Note – Logical drives with many more partitions serve the same purpose.
■
4-2
Spare drives in a logical volume?
Sun StorEdge 3000 Family RAID Firmware 3.25 User’s Guide • June 2003
A local spare cannot be assigned to a logical volume. If a drive fails, it fails as a
member of a logical drive; therefore, the controller allows local spare assignment
to logical drives rather than logical volumes.
■
Logical volume limitations?
The logical volume cannot have any logical drive with a status of “fatal failed.” If
there is a failed drive in any of the member logical drives (of a logical volume),
the controller will start to rebuild that logical drive.
If any of the member logical drives fails fatally, the logical volume fails fatally and
data will not be accessible.
To avoid a logical volume failure:
■
■
■
■
Logical drives as members to a logical volume should be configured in RAID
levels that provide redundancy, namely, RAID level 1, 1+0, 3, or 5.
Rebuild the logical drive as soon as possible whenever a drive failure occurs.
A logical drive should be composed of physical drives from different drive
channels. Compose the logical drive with drives from different drive channels
to avoid the fatal loss of data caused by bus failure.
Partitioning the logical drive or partitioning the logical volume?
Once a logical drive has been divided into partitions, the logical drive can no
longer be used as a member of a logical volume. The member logical drives of a
logical volume should have one partition only with the entire capacity.
If you want to use a partitioned logical drive for a logical volume, delete the other
partitions in this logical drive until only one partition remains that uses the entire
logical drive capacity.
Caution – Deleting the partition of the logical drive will also destroy all the data.
Data should be backed up to somewhere else before making partition configuration.
When a logical drive is used as a member to a logical volume, this logical drive
can no longer be partitioned in “View and Edit Logical Drives.” Instead, the
logical volume can be partitioned in “View and Edit Logical Volume.”
The procedure for partitioning a logical volume is the same as that for
partitioning a logical drive. After the logical volume has been partitioned, map
each partition to a host ID/LUN to allow the host computer to utilize the
partitions as individual drives.
Chapter 4
Viewing and Editing Logical Volumes
4-3
■
RAID expansion with logical volume?
The Logical Volume can also be expanded using the RAID expansion function.
The concept of expanding a logical volume is similar to that of expanding a
logical drive. To perform RAID expansion on a logical drive, replace each member
physical drive with a drive of larger capacity or add a new drive, then perform
logical drive expansion to utilize the newly added capacity.
To perform RAID expansion on a logical volume, expand each member logical
drive, then perform RAID expansion on the logical volume.
■
Is there anything changed after using logical volume?
Without a logical volume: Logical drives can be assigned to the primary
controller or to the secondary controller. The host I/O directed to a logical drive is
served by the controller to which this logical drive is assigned. If a controller fails,
the host I/O originally assigned to the failed controller is taken over by the
existing controller. When the controller fails back (failed controller being replaced
by a new one), logical drives are returned to the replacement controller in the
original configuration.
With a logical volume: Logical volumes can also be assigned to different
controllers. The only difference is that the logical volumes are considered as the
base units for shifting the control during a controller failure.
■
A logical volume with logical drives of different levels (Multilevel RAID arrays)?
A multilevel RAID with logical volume support offers the following available
applications.
■
■
■
■
4-4
RAID 1+0: This is a standard feature of Sun StorEdge 3000 Family RAID
controllers. It has the benefits of RAID 1 (high availability) and RAID 0
(enhanced I/O performance through striping). Simply choose four or more
drives for a RAID 1 logical drive and the RAID controller will implement
RAID 1+0 automatically.
RAID (3+0): A logical volume itself is a multilevel RAID implementation. A
logical volume is composed of one or several logical drives with data
“striping” (RAID 0). A logical volume with several RAID 3 member logical
drives can be considered as a RAID (3+0), or RAID 53 as defined in “The RAID
Book” (from The RAID Advisory Board).
RAID (5+0): A logical volume with several RAID 5 member logical drives.
RAID (5+1): Requires multiple RAID controllers. In a RAID (5+1) array, each
layer-1 RAID controller handles one RAID 5 logical drive and a layer-2 RAID
controller performs RAID 1 (mirroring) function to the virtual disks controlled
by all of the layer-1 RAID controllers.
Sun StorEdge 3000 Family RAID Firmware 3.25 User’s Guide • June 2003
■
4.2
RAID (5+5): Requires multiple RAID controllers. In the RAID (5+5) array, each
layer-1 RAID controllers handles one to several RAID 5 logical drives and a
layer-2 RAID controller performs RAID 5 to the virtual disks provided by all of
the layer-1 RAID controllers.
■
RAID 30 Logical volume with RAID 3 logical drives.
■
RAID 5 Logical volume with RAID 5 logical drives.
Creating a Logical Volume
A logical volume consists of one or several logical drives.
To create a logical volume, preform the following steps.
1. Select “view and edit logical Volumes” in the Main Menu.
The current logical volume configuration and status will be displayed on the screen.
2. Select a logical volume number (0–7) that has not yet been defined and press
Return to proceed.
A prompt “Create Logical Volume?” is displayed.
3. Select “Yes” and press Return.
Chapter 4
Viewing and Editing Logical Volumes
4-5
4. Select one or more logical drive(s) available on the list, and press Return to tag the
logical drive(s) to be included in the volume.
An asterisk (*) is displayed on the selected drive.
Press Return to deselect a logical drive.
Logical volumes can also be assigned to different controllers (primary or secondary).
The default is primary. Press ESC if change is not preferred.
5. As all the member logical drives are selected, press ESC to continue.
The logical volume creation confirm box is displayed. Select Yes to create the logical
volume.
6. Press Return and the information of the created logical volume is displayed.
4-6
Sun StorEdge 3000 Family RAID Firmware 3.25 User’s Guide • June 2003
4.3
Expanding a Logical Volume
To expand a logical volume, expand logical drive(s) in the logical volume and then
perform “Expand logical volume.”
When prompted by “Expand Logical Volume?” select Yes to confirm, and the process
will be completed immediately.
4.4
Viewing a Logical Volume Status Table
To check and configure logical drives, from the Main Menu select “view and edit
Logical drives,” and press Return. The following screen displays the status of all
logical drives.
Chapter 4
Viewing and Editing Logical Volumes
4-7
TABLE 4-1
4-8
Parameters Displayed in the Logical Volume Status Window
Parameters
Description
LV
Logical volume number
P = primary controller
S = secondary controller
ID
Logical volume ID number (controller-generated)
Size(MB)
Capacity of the logical volume in megabytes
#LD
The number of logical drive(s) in this logical volume
Sun StorEdge 3000 Family RAID Firmware 3.25 User’s Guide • June 2003
CHAPTER
5
Viewing and Editing Host LUNs
The “view and edit Host luns” command allows you to map logical groups or logical
volumes to the desired host channels. Each LG or LV may be mapped more than
once to achieve a redundant data path (additional software is required).
Topics covered in this chapter include:
■
■
■
■
■
5.1
“Mapping Logical Drive Partitions to Host LUNs” on page 5-1
“SCSI ID/LUNs” on page 5-2
“Planning for 128 LUNs” on page 5-5
“Example Host LUN Mappings” on page 5-6
“Deleting a Host LUN Mapping” on page 5-8
Mapping Logical Drive Partitions to
Host LUNs
A logical unit number (LUN) is a unique identifier used on a SCSI channel that
enables a host to differentiate between separate devices.
Once you have created logical drives or logical volumes, you can map each storage
partition as one system drive (host ID/LUN). The host adapter recognizes the
system drives after reinitializing the host bus.
Note – The UNIX format and Solaris probe-scsi-all commands will not
display all mapped LUNs if there is not a logical drive mapped to LUN 0.
A SCSI channel (SCSI bus) can connect up to 15 devices (excluding the controller
itself) when the Wide function is enabled (16-bit SCSI). Each device has one unique
ID.
5-1
The following figure illustrates the idea of mapping a system drive to a host
ID/LUN combination.
■
The SCSI ID is like a cabinet, and the drawers are the LUNs (LUN is short for
logical unit number).
■
Each cabinet (SCSI ID) can have up to 32 drawers (LUNs).
■
Data can be stored into one of the LUNs of the SCSI ID. Most SCSI host adapters
treat a LUN like another SCSI device.
■
The maximum number of LUNs which can be created for a RAID array is 128. To
create a total of 128 LUNs, refer to “Planning for 128 LUNs” on page 5-5
LUN 0
LUN 1
LUN 2
FIGURE 5-1
5.2
Filing Cabinet Represents the SCSI ID and File Drawers Represent the LUNs
SCSI ID/LUNs
Each SCSI ID/LUN looks like a storage device to the host computer.
5-2
Sun StorEdge 3000 Family RAID Firmware 3.25 User’s Guide • June 2003
Channel 3
Channel 1
ID 0
ID 1
LUN 0
2.5GB
LUN 1
1GB
Logical Drive 1
Partition 0
Logical Drive 0
Partition 1
LUN 0
5GB
LUN 1
1.5GB
LUN 2
2GB
Logical Drive 1
Partition 2
LUN 2
2GB
FIGURE 5-2
Logical Drive 0
Partition 2
Logical Drive 1
Partition 1
Logical Drive 0
Partition 0
Mapping Partitions to Host ID/LUNs
To map a logical drive partition to a LUN, perform the following steps.
1. On the Main Menu, select “view and edit Host luns.”
2. Select a specific host-channel ID and press Return. Select a logical drive if
prompted.
3. Select a LUN number, and press Return. Select a logical drive, then highlight a
partition, and press Return.
Chapter 5
Viewing and Editing Host LUNs
5-3
4. Select “Map Host LUN.”
5. Confirm the mapping scheme by selecting “Yes.”
The same partition might be mapped to multiple LUNs on multiple host channels.
This feature is necessary for clustered environments and redundant path
environments.
6. Press the Esc key to return to the Main Menu.
7. Repeat Step 1 through Step 6 for each partition until all partitions are mapped to a
LUN.
8. Select “system Functions” on the Main Menu, and select “Reset Controller” to
implement the new configuration settings.
9. To verify unique mapping of each LUN (unique LUN number, unique DRV
number, or unique Partition number), select the “view and edit Host luns”
command and press Return.
10. Reboot the host(s) to complete the settings, and confirm that LUNs are connected
to and visible by the hosts. For additional Solaris operating environment
information, refer to Chapter 6 in the Sun StorEdge 3310 SCSI Array Installation,
Operation and Service Manual.
5-4
Sun StorEdge 3000 Family RAID Firmware 3.25 User’s Guide • June 2003
5.3
Planning for 128 LUNs
If you want to create 128 LUNs which is the maximum number of storage partitions
which can be mapped for a RAID array, you need to set up one of the following
configurations:
■
Create four host IDs and four logical drives. Partition each logical drive into 32
partitions (4 times 32 = 128). Map the 128 partitions to the four host IDs. This is
the most commonly used configuration.
or
■
Create six host IDs (this requires three host drives), perform one of the following
steps, and then map the 128 partitions to the 6 host IDs.
■
■
■
Create 4 logical drives of 32 partitions each.
Create 5 logical drives with total number of partitions equaling 128 (four
logical drives with 25 partitions each and one with 28 partitions).
Create 6 logical drives (six logical drives with 21 partitions each and one with
23 partitions).
For details on how to add host IDs, refer to “Creating Additional Host IDs” on
page 7-8.
Note – For an overview of how partitions, LUNs, and host IDs work, refer to
“Mapping Logical Drive Partitions to Host LUNs” on page 5-1.
To set up 128 LUNs, the following steps are required.
1. Create a minimum of four host IDs.
By default, you have two host IDs: Channel 1 ID 0 (primary controller) and Channel
3 ID 1 (secondary controller). You can have a total of two IDs per channel, one for
the Primary Controller and one for the secondary controller.
For the detailed procedure, refer to “Creating Additional Host IDs” on page 7-8.
2. Confirm that the allowed number of LUNs per host id is 32.
Go to “view and edit Configuration parameters,” and select “hostside scsi
parameters.”
If the “LUNs per Host SCSI ID” is not 32, highlight the line, press Return, and select
the number 32.
Chapter 5
Viewing and Editing Host LUNs
5-5
3. Create at least four logical drives.
For the detailed procedure, refer to “Creating Logical Drive(s)” on page 3-4.
4. For each logical drive, create a number of partitions per logical drive until you
reach a total of 128 partitions, then map those partitions to the host IDs.
For the detailed procedures, refer to “Partitioning a Logical Drive” on page 3-11 and
“Mapping Logical Drive Partitions to Host LUNs” on page 5-1.
5.4
Example Host LUN Mappings
The following example screens illustrate four channel IDs with eight LUNs per
channel:
5-6
Sun StorEdge 3000 Family RAID Firmware 3.25 User’s Guide • June 2003
Chapter 5
Viewing and Editing Host LUNs
5-7
5.5
Deleting a Host LUN Mapping
To delete a host LUN mapping, perform the following steps:
1. On the Main Menu, select “view and edit Host luns.”
2. Highlight the channel and ID that are mapped to the host LUN, and press Return.
3. Highlight the specific host LUN and press Return.
4. Select Yes to delete the host LUN.
This option deletes the logical drive or logical volume mapping to the host channel.
This option will not delete the data contained within the logical drive.
Note – All host LUN mappings are removed when there is any partition change.
5-8
Sun StorEdge 3000 Family RAID Firmware 3.25 User’s Guide • June 2003
CHAPTER
6
Viewing and Editing SCSI Drives
This chapter explains how to view and edit physical drive parameters. Topics
covered include:
■
■
■
■
■
■
■
■
■
■
■
■
“SCSI Drive Status Table” on page 6-2
“Assigning a Local Spare Drive” on page 6-4
“Creating a Global Spare” on page 6-4
“Viewing Drive Information” on page 6-5
“Viewing the Connected Drives” on page 6-6
“Scanning Drives” on page 6-6
“Deleting a Spare Drive” on page 6-7
“Setting Slot Numbers” on page 6-8
■
“Assigning a Slot Number to an Empty Slot” on page 6-9
■
“Adding or Deleting Drive Entries” on page 6-9
■
“Deleting a Slot Number” on page 6-9
“Adding or Deleting Drive Entries” on page 6-9
■
“Removing an Empty Drive Entry” on page 6-10
“Identifying a Failed Drive for Replacement” on page 6-11
■
“Flashing Selected SCSI Drive” on page 6-13
■
“Flashing All SCSI Drives” on page 6-14
■
“Flashing All But Selected Drives” on page 6-14
“Fault Protection Measures” on page 6-15
■
“Cloning a Failing Drive” on page 6-15
■
“Understanding SMART Technology” on page 6-21
■
“How Sun StorEdge 3000 Family Arrays Use SMART” on page 6-21
■
“Enabling SMART From Firmware Menus” on page 6-22
■
“Detect Only” on page 6-24
■
“Detect and Perpetual Clone” on page 6-24
■
“Detect and Clone+Replace” on page 6-25
“SCSI Drive Utilities (Reserved)” on page 6-26
■
“SCSI Drive Low-Level Format” on page 6-27
■
“SCSI Drive Read/Write Test” on page 6-28
6-1
To view and edit physical drive parameters, select “view and edit scsi Drives” on the
Main Menu, and press Return. The SCSI drive status table is displayed. Use this
command to view the SCSI drives associated with the selected logical drive. The
drive’s channel, ID, status, and model number can be viewed in the table displayed
on screen.
To modify or view additional information, highlight a line in the SCSI drive table
and press Return to view the available commands.
Note – The menu will vary according to the drive status.
6.1
SCSI Drive Status Table
To check and configure physical SCSI drives, on the Main Menu, select “view and
edit scsi Drives,” and then press Return. The resulting screen displays the status of
all SCSI drives.
If there is a drive installed but not listed, the drive may be defective or not installed
correctly.
When power is on, the controller scans all hard drives that are connected through
the drive channels. If a hard drive was connected after the controller completes
initialization, select any SCSI drive on the SCSI table, press Return, and use the
“Scan scsi drive” function to let the controller recognize the newly added hard drive
and configure it as a member of a logical drive.
TABLE 6-1
6-2
Parameters Displayed in the Drive Status Window
Parameters
Description
Slot
Slot number of the SCSI drive.
Chl
SCSI channel of the connected drive.
ID
SCSI ID of the drive.
Sun StorEdge 3000 Family RAID Firmware 3.25 User’s Guide • June 2003
TABLE 6-1
Parameters Displayed in the Drive Status Window (Continued)
Parameters
Description
Size (MB)
Drive capacity in megabytes.
Speed
xxMB Maximum synchronous transfer rate of this drive.
Async The drive is using asynchronous mode.
LG_DRV
x
Status
Vendor and
Product ID
The SCSI drive is a drive member of logical drive x. If Status shows
“STAND-BY,” the SCSI drive is a local spare drive of logical drive x.
GLOBAL
The SCSI drive is a global spare drive.
INITING
The drive is initializing.
ON-LINE
The drive is in good condition.
REBUILD
The drive is rebuilding.
STAND-BY
Local spare drive or global spare drive. The local spare
drive’s LG_DRV column shows the logical drive
number. The global spare drive’s LG_DRV column
shows “Global.”
NEW DRV
The new drive has not been configured to any logical
drive or as a spare drive.
USED DRV
The drive was previously configured as part of a logical
drive from which it has been removed; it still contains
data from this logical drive.
FRMT DRV
The drive has been formatted with reserved space
allocated for controller-specific information.
BAD
Failed drive.
ABSENT
Drive slot is not occupied.
MISSING
Drive once existed, but is now missing.
SB-MISS
Spare drive missing.
Vendor and product model information of the drive.
A physical drive has a USED status when it was once a part of a logical drive but no
longer is. This can happen, for instance, when a drive in a RAID 5 array is replaced
by a spare drive and the logical drive is rebuilt with the new drive. If the removed
drive is later replaced in the array and scanned, the drive status is identified as
USED since the drive still has data on it from a logical drive.
When the RAID set is deleted properly, this information is erased and the drive
status is shown as FRMT rather than USED. A drive with FRMT status has been
formatted with either 64 KB or 256 MB of reserved space for storing controllerspecific information, but has no user data on it.
Chapter 6
Viewing and Editing SCSI Drives
6-3
If you remove the reserved space, using the View and Edit SCSI drives menu, the
drive status changes to NEW.
To handle BAD drives, refer to “Controller Failure” on page 8-6. If two drives show
BAD and MISSING status, see “Recovering From Fatal Drive Failure” on page 8-13.
6.2
Assigning a Local Spare Drive
A local spare drive is a standby drive assigned to serve one specified logical drive.
When a member drive of this specified logical drive fails, the local spare drive
becomes a member drive and automatically starts to rebuild.
Note – A logical drive configured as part of a RAID level that does not support
redundancy, such as RAID 0, also does not support spare drive rebuild.
To assign a local spare drive, perform the following steps:
1. Select “view and edit scsi Drives.”
2. Highlight the drive which you want to designate as a spare and press Return.
3. Select “add Local spare drive.”
4. When the prompt “Add Local Spare?” is displayed, select Yes and assign the
logical drive which will have the local spare.
6.3
Creating a Global Spare
To create a global spare, a spare drive that will automatically be used to replace any
failed drive within the array, perform the following steps:
1. Select “view and edit scsi Drives.”
6-4
Sun StorEdge 3000 Family RAID Firmware 3.25 User’s Guide • June 2003
2. Highlight the drive that you want to designate as a spare, press Return, and select
“add Global spare drive.”
3. When the prompt “Add Global Spare?” is displayed, select Yes.
6.4
Viewing Drive Information
To view the SCSI drive information, such as the revision number, serial number, and
disk capacity of an individual drive, perform the following steps.
FIGURE 6-1
View Drive Information
1. On the Main Menu, select “view and edit scsi Drives” and press Return.
2. Highlight the SCSI drive you want to view, and then press Return.
3. Select the “view drive information” command.
The revision number, serial number and disk capacity (counts in block; one block
refers to 512K) of the drive will be displayed on the screen.
Chapter 6
Viewing and Editing SCSI Drives
6-5
6.5
Viewing the Connected Drives
Prior to configuring disk drives into a logical drive, it is necessary to understand the
status of physical drives in your enclosure.
To view the list of available SCSI drives, perform the following steps.
1. Use arrow keys to scroll down to “view and edit scsi Drives” and press Return.
2. Use arrow keys to scroll the table. Check to see if there are any drives installed
but not listed here.
If there is a drive installed but not listed, the drive may be defective or not installed
correctly, contact your RAID supplier.
3. If a hard drive was connected after the controller completes initialization, select a
drive from the table, press Return, and use the “Scan scsi drive” function to
enable recognition of the newly added hard drive and to configure the new drive
as a member of a logical drive.
Caution – Scanning an existing drive will remove its assignment to any logical
drive. All data on that drive will be lost.
6.6
Scanning Drives
To scan a new SCSI drive installed after the controller completed initialization and to
enable its use, perform the following steps.
1. On the Main Menu, select “view and edit scsi Drives” and press Return.
2. Select a drive from the SCSI drive table and press Return.
Caution – Scanning an existing drive will remove its assignment to any logical
drive. All data on that drive will be lost.
6-6
Sun StorEdge 3000 Family RAID Firmware 3.25 User’s Guide • June 2003
FIGURE 6-2
“Scan scsi drive” Option
3. Select the “Scan scsi drive” function, and then press Return.
The menu options will vary according to the drive status.
4. Select the drive channel and SCSI ID of the drive you want to scan, and press
Return.
6.7
Deleting a Spare Drive
To delete a spare drive, perform the following steps.
1. Move the cursor to a local spare drive or global spare drive and press Return.
2. Select “Delete global/local spare drive,” and then press Return again.
3. Select Yes to confirm.
Chapter 6
Viewing and Editing SCSI Drives
6-7
The spare drive you deleted or any drive you replaced from a logical unit will be
indicated as a “used drive.”
6.8
Setting Slot Numbers
This function is used to optionally add a slot number identifier in the Slot column of
the SCSI drive table. This function has no effect on controller operation.
FIGURE 6-3
Set Slot Number
To set or edit a slot number, perform the following steps.
1. On the Main Menu, select “view and edit scsi Drives” and press Return.
A list of the connected SCSI drives is displayed.
2. Select a drive from the SCSI drive table and press Return.
3. Select the “set slot Number” function, and press Return.
An entry box will be displayed.
6-8
Sun StorEdge 3000 Family RAID Firmware 3.25 User’s Guide • June 2003
4. Type in a value (0–15) that represents the slot number of the drive, and press
Return.
This value does not need to be the device’s predetermined SCSI ID number. The slot
number is displayed in the Slot column of the drive information list.
6.8.1
Assigning a Slot Number to an Empty Slot
When there is an empty slot (or sled) that does not contain a drive, the
corresponding SCSI channel/ID will not appear in the drive information list.
You can assign a slot number to the empty slot and add a drive entry in order to use
it later when a drive is installed.
6.8.2
Deleting a Slot Number
To delete the slot number of a SCSI drive, perform the following steps:
1. On the Main Menu, select “view and edit scsi Drives” and press Return.
2. Select the desired SCSI drive and press Return.
3. Select “Set Slot Number,” select “0,” and press Return.
6.9
Adding or Deleting Drive Entries
This function is used to add an additional record to the SCSI drive table.
Use the command “Clear drive status” if you want to later remove a drive
designation from the table.
Chapter 6
Viewing and Editing SCSI Drives
6-9
FIGURE 6-4
Add Drive Entry
1. On the Main Menu, select “view and edit scsi Drives” and press Return.
2. Select an insertion spot within the SCSI drive table and press Return.
3. Select the “add drive Entry” function, and press Return.
4. A channel list will be displayed. Select a channel.
5. Enter the desired ID number.
For installed SCSI drives, a table will be shown indicating the available IDs.
6. Then press the Return key and select “Yes.”
7. A confirmation box will then be displayed. Select “Yes” and press Return.
6.9.1
Removing an Empty Drive Entry
To remove an empty drive entry, delete its slot number (specify the value 0), then
remove the drive entry, by performing the following steps.
1. On the Main Menu, select “view and edit scsi Drives” and press Return.
2. Select the desired SCSI drive and press Return.
3. Select “set slot Number,” select “0” and press Return.
4. Now select “Clear drive status” and press Return.
The empty drive entry will now disappear from the drive information list.
5. Then delete the empty drive entry (refer to “Adding or Deleting Drive Entries” on
page 6-9).
6-10
Sun StorEdge 3000 Family RAID Firmware 3.25 User’s Guide • June 2003
Note – You will not be able to remove an empty drive entry if it has been assigned
a slot number. Delete the slot number before removing the empty drive entry.
6.10
Identifying a Failed Drive for
Replacement
If there is a failed drive in a RAID 5 logical drive, replace the failed drive with a new
drive to keep the logical drive working. To identify a failed drive, refer to
“Identifying a Failed Drive for Replacement” on page 6-11.
Caution – If, when trying to remove a failed drive, you mistakenly remove the
wrong drive, you will no longer be able to access the logical drive because you have
incorrectly failed another drive and caused a critical failure of the RAID set.
Note – The following procedure works only if there is no I/O activity.
To find a failed drive, identify a single drive, or test all drive activity LEDs, you can
flash the LEDs of any or all drives in an array. Since a defective drive will not light
up, this provides a good way for you to visually identify a failed drive before
replacing it.
1. On the Main Menu, select “view and edit scsi Drives” and press Return.
2. Select the drive you want to identify, and then press Return.
3. Select the “Identify scsi drive” menu option and press Return.
4. Select “flash All drives” to flash the activity LEDs of all of the drives in the drive
channel, and press Return.
Chapter 6
Viewing and Editing SCSI Drives
6-11
FIGURE 6-5
Flash All Drives Function
The option to change the Flash Drive Time is displayed.
5. Confirm your choice by pressing Return and selecting “Yes.”
Note – Alternatively, to flash the read/write LED of only a selected drive, choose
“flash Selected drive” or “flash all But selected drive” and perform the same
procedure.
FIGURE 6-6
6-12
Flash Selected Drive Function
Sun StorEdge 3000 Family RAID Firmware 3.25 User’s Guide • June 2003
6.10.1
Flashing Selected SCSI Drive
The read/write LED of the drive you select lights steadily for a configurable period of
time from 1 to 999 seconds.
LED steadily on
Disk 1
Disk 4
Disk 7
Disk 10
Disk 2
Disk 5
Disk 8
Disk 11
Disk 3
Disk 6
Disk 9
Disk 12
Flashing the Drive LED of a Selected Drive
Chapter 6
Viewing and Editing SCSI Drives
6-13
6.10.2
Flashing All SCSI Drives
The “Flash All SCSI Drives” function lights LEDs of all good drives except the
defective one.
Disk 1
Disk 4
Disk 7
Disk 10
Disk 2
Disk 5
Disk 8
Disk 11
Disk 3
Disk 6
Disk 9
Disk 12
Flashing All Drive LEDs to Detect a Defective Non-Flashing Drive
6.10.3
Flashing All But Selected Drives
With this menu option, except for the selected drive, the read/write LEDs of all
connected drives will light for a configurable period of time from 1 to 999 seconds.
6-14
Sun StorEdge 3000 Family RAID Firmware 3.25 User’s Guide • June 2003
LED is not lit
Disk 1
Disk 4
Disk 7
Disk 10
Disk 2
Disk 5
Disk 8
Disk 11
Disk 3
Disk 6
Disk 9
Disk 12
Flashing All Drive LEDs Except a Selected Drive LED
6.11
Fault Protection Measures
With the maturity of industry-standard technologies such as Self-Monitoring,
Analysis and Reporting Technology (SMART), disk drive failures can sometimes be
predicted before they happen. Encountering drive bad block reassignments is one
common predictor of a drive that is about to fail.
System administrators can decide when to substitute a healthy drive for a drive
showing symptoms of impending failure. This section discusses manual and
automated procedures for averting disk drive failures.
6.11.1
Cloning a Failing Drive
To assist fault prevention, a system administrator can manually clone a disk drive
that shows signs of failing, choosing a convenient time when system performance
will not be adversely affected.
The Clone Failing Drive procedure is performed under the following conditions:
■
■
Replacing drives about to fail, either detected by SMART or notified by the
controller.
Manually replacing and cloning drive data from any drive to a new drive.
There are two options for cloning a failing drive:
■
Replace after Clone
Chapter 6
Viewing and Editing SCSI Drives
6-15
■
Perpetual Clone
These options are described in this section.
6.11.1.1
Replacing After Clone
Data on the source drive (the drive with predicted error or any selected member
drive) is cloned to a standby spare and the spare then becomes the new source drive.
The status of the original source drive is redefined as a “used drive.” System
administrators may replace the used drive with a new one, and then configure the
new drive as a spare drive.
Note – If there is no standby drive (local or global spare drive), you need to add a
new drive and configure it as a standby drive. If there is no standby drive, the “clone
failing drive” option is not displayed.
To replace after clone, perform the following steps.
1. Select “view and edit scsi Drives” and press Return.
2. Select the member drive that you want to clone and press Return.
3. Select the “clone failing drive” function.
This option is displayed only if there is a standby drive available.
4. Select “Replace After Clone.”
The controller automatically starts the cloning process using the existing stand-by
(local or global spare drive) to clone the source drive (the target member drive with
predicted error).
A notification message is displayed.
6-16
Sun StorEdge 3000 Family RAID Firmware 3.25 User’s Guide • June 2003
[21A1] LG:0 Logical Drive NOTICE: CHL:1 ID:3 Starting Clone
5. Press Esc to proceed.
The cloning process is indicated by a status bar.
6. Select the drive indicated as “CLONING” by pressing Return.
Note – To quit the status bar, press ESC to return to the table of the connected
drives.
7. Select “clone Failing drive” again to view the current status.
Note – You can identify the source drive and choose to “View clone progress,” or
“Abort clone” if you selected the wrong drive.
When the process is completed, the following message is displayed.
[21A2] LG:0 Logical Drive NOTICE: CHL:1 ID:3 Copy and Replace
Completed
Chapter 6
Viewing and Editing SCSI Drives
6-17
8. Press Esc to proceed.
6.11.1.2
Perpetual Clone
Data on the source drive (the drive with a predicted error or any selected member
drive) will be cloned to the standby spare but the spare will not become the new
source drive. The standby spare drive will clone the source drive, member drive
with predicted error or any selected drive, without substituting it.
The status of the spare drive will be displayed as a CLONE drive after the cloning
process. The source drive will remain as a member of the logical drive.
1. Select “view and edit scsi Drives” from the Main Menu and press Return.
2. Select the member drive with predicted error and press Return.
3. Select “clone Failing drive” and press Return.
4. Select “Perpetual Clone” and press Return.
The controller will automatically start the cloning process by using the existing
stand-by (local or global spare drive) to clone the source drive.
Note – If there is no standby drive (local or global spare drive), you need to add a
new drive and configure it as a standby drive.
A notification message is displayed.
[21A1] LG:0 Logical Drive NOTICE: CHL:1 ID:3 Starting Clone
5. Press ESC to view current progress on a status bar.
6-18
Sun StorEdge 3000 Family RAID Firmware 3.25 User’s Guide • June 2003
6. To quit viewing the status bar, press ESC to return to the previous menu screen.
7. Select the drive indicated as “CLONING” by pressing Return.
8. Select “clone Failing drive” again to view the progress.
Note – You can identify the source drive and choose to “View clone progress” or
“Abort clone” if you have selected the wrong drive.
A notification message informs you when the process is complete.
[21A2] LG:0 Logical Drive NOTICE: CHL:1 ID:3 Copy and Replace Completed
9. Press ESC to clear the notification message and to see the SCSI drives’ status after
the cloning process.
The source drive (Channel 1 ID 5) remains as a member of logical drive “0,” and the
“stand-by” drive (Channel 1 ID 2, the local or global spare drive) has become a
CLONE drive.
Chapter 6
Viewing and Editing SCSI Drives
6-19
6.11.2
Viewing the Status of a Cloning Operation
While a cloning operation is underway you can examine its status, including the
operation’s progress and the identity of the target drive.
1. Select “view and edit Logical drives” from the Main Menu and press Return.
The status of all logical drives is displayed in a table.
2. Select the logical drive where the cloning drive operation is in progress.
3. Select “View scsi Drives” to see both the drive that is being cloned and the drive
it is being cloned to.
4. For more information, select “copy and replace drive” to display the drives
included in the logical drive.
5. Select the drive that is identified as copying, and press Return to see a menu
whose options enable you to identify the source drive, display the progress of the
cloning operation, and abort the cloning operation.
Note – If you are viewing an active monitoring session with Sun StorEdge
Configuration Services software, the progress of the cloning operation is displayed
by the Controller Array Progress bar.
6-20
Sun StorEdge 3000 Family RAID Firmware 3.25 User’s Guide • June 2003
6.11.3
Understanding SMART Technology
SMART is an industry-standard technology that provides near-term failure
prediction for disk drives. When SMART is enabled, the drive monitors
predetermined drive attributes that are susceptible to degradation over time. If a
failure is likely to occur, SMART makes a status report available so that the host can
prompt the user to back up data on the failing drive.
Not all failures can be predicted, however. SMART predictability is limited to the
attributes the drive can monitor that are selected by the device manufacturer, based
on the attribute's ability to contribute to the prediction of degrading or fault
conditions.
Although SMART attributes are drive-specific, a variety of typical characteristics can
be identified:
■
■
■
■
■
■
■
■
6.11.4
Head flying height
Data throughput performance
Spin-up time
Reallocated sector count
Seek error rate
Seek time performance
Spin try recount
Drive calibration retry count
How Sun StorEdge 3000 Family Arrays Use
SMART
Sun StorEdge 3000 Family arrays implement the ANSI-SCSI Informational Exception
Control (IEC) document X3T10/94-190 standard.
Sun StorEdge 3000 Family array firmware supports four manual selections related to
SMART function in firmware.
■
Disable: SMART functions are not activated
■
Detect Only: SMART functions are enabled. The controller sends a command to
enable all the drives' SMART functions. If a drive predicts a problem, the
controller reports the predicted problem as an entry in the event log.
■
Perpetual Clone: The controller sends a command to enable all the drives' SMART
functions. If a drive predicts a problem, the controller reports the predicted
problem as an entry in the event log. The controller then clones the drive whose
failure has been predicted if a global or local spare drive is available. The clone
drive still functions as a standby drive.
If the drive whose failure has been predicted does fail subsequently, the clone
drive takes over immediately.
Chapter 6
Viewing and Editing SCSI Drives
6-21
Note – If the drive whose failure has been predicted continues to work successfully
and another drive in the same logical drive fails, the clone drive performs as a
standby spare drive and start to rebuild the failed drive immediately. This helps
prevent a fatal drive error if yet another drive fails.
■
6.11.5
Clone + Replace: The controller sends a command to enable all the drives' SMART
functions. If a drive predicts a problem, the controller reports the predicted
problem as an entry in the event log. The controller then clones the drive whose
failure has been predicted to a standby spare drive and takes the drive whose
failure has been predicted off-line as soon as the cloning process is completed.
Enabling SMART From Firmware Menus
Follow these steps to enable SMART on all drives.
1. Enable the “Periodic Drive Check Time” function.
a. Select “Drive-side SCSI Parameters” from the “View and Edit Configuration
Parameters” menu.
b. Select “Periodic Drive Check Time” from the “Drive-side SCSI Parameters”
menu.
c. Select a time interval.
2. Select “Drive Predictable Failure Mode (SMART)” from the “Drive-side SCSI
Parameters” menu.
3. Select one of the menu options from the “Drive Predictable Failure Mode
(SMART)” menu.
■
■
■
■
6-22
“Disable”
“Detect Only”
“Detect and Perpetual Clone”
“Detect and Clone+Replace”
Sun StorEdge 3000 Family RAID Firmware 3.25 User’s Guide • June 2003
4. Determine whether your drives support SMART.
a. From the “View and Edit SCSI Drives” menu, select one drive to test and press
Return.
A new “Predictable Failure Test” menu option is displayed.
Note – If the SMART feature is not properly enabled, this menu option will not be
displayed.
b. Select the “Predictable Failure Test” menu option and press Return to display a
confirmation prompt.
c. Select Yes to confirm.
The drive simulates a predictable drive error.
Chapter 6
Viewing and Editing SCSI Drives
6-23
d. Press Return.
The next time the controller performs the periodic drive check, the controller
detects the error simulated by the drive and displays an error message.
[1142] SMART-CH:? ID:?
Predictable Failure Detected (TEST)
Note – The “(TEST)” component of the message indicates that no predictable failure
was actually detected and no action is necessary.
6.11.6
Detect Only
1. Select “Drive-side SCSI Parameters” from the “View and Edit Configuration
Parameters” menu.
2. Select “Drive Predictable Failure Mode (SMART)” from the “Drive-side SCSI
Parameters” menu.
Select “Detect Only” from the “Drive Predictable Failure Mode (SMART)” menu.
Whenever a drive predicts symptoms of predictable drive failure, the controller
writes an error message to the event log.
6.11.7
Detect and Perpetual Clone
1. Select “Drive-side SCSI Parameters” from the “View and Edit Configuration
Parameters” menu.
2. Select “Drive Predictable Failure Mode (SMART)” from the “Drive-side SCSI
Parameters” menu.
6-24
Sun StorEdge 3000 Family RAID Firmware 3.25 User’s Guide • June 2003
3. Select “Detect and Perpetual Clone” from the “Drive Predictable Failure Mode
(SMART)” menu.
4. Assign at least one spare drive to the logical drive (either a local spare or global
spare.
When a drive (logical drive member) detects a predictable drive failure, the
controller clones the drive to a spare drive.
5. To see the status of the source drive or the cloning progress, or to cancel the
cloning process, from the “View and Edit SCSI Drive” menu click on the spare
drive (either local or global) and choose the appropriate menu option.
Note – With the precaution of untimely drive failure of yet another drive, when
configured as “perpetual clone,” the spare drive stays mirrored to the source drive
(the drive whose failure has been) but does not replace it until the source drive fails.
6. When the spare drive is mirroring the source drive, any occurrence of drive failure
(when there is no other spare drives) forces the spare drive to give up the mirrored
data and resume its original role, becoming a spare drive and rebuilding the failed
drive.
6.11.8
Detect and Clone+Replace
1. Select “Drive-side SCSI Parameters” from the “View and Edit Configuration
Parameters” menu.
2. Select “Drive Predictable Failure Mode (SMART)” from the “Drive-side SCSI
Parameters” menu.
3. Select “Detect and Clone+Replace” from the “Drive Predictable Failure Mode
(SMART)” menu.
Chapter 6
Viewing and Editing SCSI Drives
6-25
4. Assign at least one spare drive (either local or global) to the logical drive.
When a drive failure is predicted, the controller clones that drive to a spare drive.
After the clone process is complete, it immediately replaces the source drive (the
drive whose failure has been predicted). The status of the source drive then is
changed to a used drive, and you can replace this drive with a new one.
Note – If you want to see the progress of cloning, press Esc to clear the notification
message and see the status bar.
6.12
SCSI Drive Utilities (Reserved)
Do not use this menu option. These utilities are reserved for specific troubleshooting
methods and should be used only by qualified technicians.
To use this menu option, qualified technicians follow these steps:
1. Select “view and edit scsi Drives” on the Main Menu and press Return.
2. Select the drive that the utility is to performed on and press Return.
3. Select “scsi drive Utilities” and press Return.
4. Select “SCSI Drive Low-level Format” or “Read/Write Test” and press Return.
6-26
Sun StorEdge 3000 Family RAID Firmware 3.25 User’s Guide • June 2003
6.12.1
SCSI Drive Low-Level Format
Caution – All data on the disk drive will be destroyed when you use this command.
The SCSI disk drive on which a low-level disk format will be performed cannot be a
spare drive (local or global) nor a member drive of a logical drive.
The “SCSI Drive Low-level Format” option appears only if the drive status is a NEW
or USED drive.
1. Select “view and edit scsi Drives” on the Main Menu.
2. Select a new or used drive that the utility is to performed on and press Return.
3. Select “scsi drive Utilities” and press Return.
4. Select “scsi Drive Low-level Format” and confirm by selecting Yes.
Note – Do not switch the controller or SCSI disk drive power off during the SCSI
Drive Low-level Format. If any power failure occurs during a drive low-level format,
the formatting must be performed again when power resumes.
Chapter 6
Viewing and Editing SCSI Drives
6-27
6.12.2
SCSI Drive Read/Write Test
1. Select “view and edit scsi Drives” on the Main Menu.
2. Select a new or used drive on which the utility is to be performed and press
Return.
3. Select “scsi drive Utilities” and press Return.
4. Select “Read/Write Test” and press Return.
5. Enable or disable the following options and press Return after each change:
■
■
■
Auto Reassign Bad Block
Abort When Error Occurs
Drive Test for - Read Only/Read and Write
6. When configuration is complete, select “Execute Drive Testing” and press Return
to continue.
The Read/Write test progress will be indicated by a status bar.
Note – At any time you can press Esc, select “Read/Write Test,” and then select
“View Read/Write Testing Progress” or “List Current Bad Block Table.”
6-28
Sun StorEdge 3000 Family RAID Firmware 3.25 User’s Guide • June 2003
If you want to stop testing the drive, select “Abort Drive Testing” and press Return.
Chapter 6
Viewing and Editing SCSI Drives
6-29
6-30
Sun StorEdge 3000 Family RAID Firmware 3.25 User’s Guide • June 2003
CHAPTER
7
Viewing and Editing SCSI Channels
This chapter explains how to view and edit SCSI channels. Topics covered include:
■
■
■
■
■
■
■
■
■
■
7.1
“SCSI Channel Status Table” on page 7-1
■
“SCSI Drive Channel Commands” on page 7-4
■
“SCSI Host Channel Commands” on page 7-5
“Configuring SCSI Channels as Host or Drive” on page 7-5
■
“SCSI Default Channel Settings” on page 7-5
■
“Changing Channel Assignments” on page 7-6
“Permanent SCSI Drive Channel IDs” on page 7-7
“Creating Additional Host IDs” on page 7-8
“Deleting a Host Channel SCSI ID” on page 7-10
“Drive Channel SCSI IDs (Reserved)” on page 7-11
“Setting a SCSI Channel Termination (Reserved)” on page 7-12
“Setting Transfer Clock Speed” on page 7-13
■
“Host Channel Transfer Clock Speed” on page 7-14
■
“Drive Channel Transfer Clock Speed” on page 7-14
“Setting the SCSI Transfer Width” on page 7-14
“Viewing and Editing Drive Channel SCSI Targets” on page 7-15
■
“Providing a Slot Number” on page 7-16
■
“Maximum Synchronous Transfer Clock” on page 7-17
■
“Maximum Transfer Width” on page 7-17
■
“Parity Check” on page 7-18
■
“Disconnecting Support” on page 7-18
■
“Maximum Tag Count” on page 7-19
SCSI Channel Status Table
To check and configure SCSI channels, from the Main Menu select “view and edit
Scsi channels,” and press Return. The following screen displays the status of all SCSI
channels for this controller.
7-1
Caution – Do not change the PID and SID values of drive channels.
Note – A mapped host channel sometimes shows the current sync clock as
“Async/Narrow” and correctly identifies the change in speed. The host adapter
driver is designed to downgrade the negotiation rate on certain errors
(predominantly parity errors). There is little or no performance change.
Note – Each controller has a separate RS232 port, as well as an Ethernet chip. This
architecture ensures continuous communication should a controller fail. Since the
connection is established to only one controller (even when the array is in redundant
mode), the CurSyncClk and CurWid settings are displayed for that individual
controller. Therefore, if a user maps one LUN to the primary controller, and another
LUN to a secondary controller, only the established connection to that individual
controller is displayed through the serial and Ethernet port menu.
1. Highlight a SCSI channel.
2. Return to view the additional commands available for that channel.
7-2
Sun StorEdge 3000 Family RAID Firmware 3.25 User’s Guide • June 2003
TABLE 7-1
Parameters Displayed in the SCSI Channel Window
Parameters
Description
Chl
SCSI channel’s ID.
Mode
Channel mode:
PID
SID
DefSynClk
DefWid
S
Term
RCCom
Redundant controller communication channel.
Host
The channel is functioning as a host channel.
Drive
The channel is functioning as a drive channel.
Primary controller’s SCSI ID mapping:
*
Multiple SCSI IDs were applied (host channel mode only).
x
The SCSI ID for host LUNs mapped to this channel in Host
Channel mode. SCSI ID for the primary controller in drive
channel mode.
NA
No SCSI ID applied.
Secondary controller’s SCSI ID mapping:
*
Multiple SCSI IDs (Host Channel mode only).
x
The SCSI ID for host LUNs mapped to this channel in host
channel mode. SCSI ID for the secondary controller in drive
channel mode.
NA
No SCSI ID applied
Default SCSI bus synchronous clock:
xx.xMHz
Maximum synchronous transfer rate set to xx.x.
Async
Channel is set for asynchronous transfers.
Default SCSI bus width:
Wide
Channel is set to allow wide (16-bit) transfers.
Narrow
Channel is set to allow narrow (8-bit) transfers.
Serial
Fibre Channel loops do not use narrow or wide bus widths.
Signal:
S
Single-ended
L
LVD
F
Fibre
Terminator status:
On
Termination is enabled.
Chapter 7
Viewing and Editing SCSI Channels
7-3
TABLE 7-1
Parameters
CurSynClk
CurWid
7.1.1
Parameters Displayed in the SCSI Channel Window (Continued)
Description
Off
Termination is disabled.
NA
For a redundant controller communications channel
(RCCOM).
Current SCSI bus synchronous clock:
xx.xMHz
The current speed at which the channel is communicating.
Async.
The channel is communicating asynchronously or not
device is detected.
(Empty)
The default SCSI bus synchronous clock has changed. Reset
the controller for changes to take effect.
Current SCSI bus width:
Wide
The channel is currently servicing wide 16-bit transfers.
Narrow
The channel is currently servicing wide 8-bit transfers.
(Empty)
The default SCSI bus width has changed. Reset the
controller for the changes to take effect.
SCSI Drive Channel Commands
1. From the Main Menu select “view and edit Scsi channels” and press Return.
2. In the “view and edit Scsi channels” window, highlight a SCSI drive channel and
press Return.
7-4
Sun StorEdge 3000 Family RAID Firmware 3.25 User’s Guide • June 2003
7.1.2
SCSI Host Channel Commands
1. From the Main Menu select “view and edit Scsi channels” and press Return.
In the “view and edit Scsi channels” window, highlight a SCSI host channel and
press Return.
7.2
Configuring SCSI Channels as Host or
Drive
All Sun StorEdge RAID arrays are preconfigured when they arrive from the factory.
Default channel settings and rules are shown in the following sections.
7.2.1
SCSI Default Channel Settings
■
■
■
Channel 0 (CH 0) MUST be a drive channel.
Channels 1, 2, and 3 (CH 1, CH 2, CH 3) can be drive or host channels.
Default channel settings are:
■
CH 0 and CH 2 = Drive channels
■
CH 1 and CH 3 = Host channels
The most common reason to change a host channel to a drive channel is when you
attach an expansion unit to a RAID array and only need one host channel.
Chapter 7
Viewing and Editing SCSI Channels
7-5
7.2.2
Changing Channel Assignments
To change the use of a SCSI channel, reconfigure the channel according to the
following procedure:
1. Select “view and edit Scsi channels” from the Main Menu.
Note – The Mode column for at least one channel must include the RCC or RCCOM
abbreviation for redundant controller communications.
2. Highlight the channel that you want to modify and press Return.
3. Use the arrow key to select Yes if you want to change the host or drive assignment.
7-6
Sun StorEdge 3000 Family RAID Firmware 3.25 User’s Guide • June 2003
Caution – The channels of redundant controllers must be the same. For example, if
the primary controller uses channel 2 to connect to a group of drives, the secondary
controller must also use channel 2 to connect to the same group of drives. Changes
to the primary controller are automatically be made to the secondary controller.
7.3
Permanent SCSI Drive Channel IDs
Each array must be configured as a single-bus configuration or a dual-bus
configuration, based on where the SCSI bus cable is attached on the I/O module. For
bus configuration details, refer to the Sun StorEdge 3000 Family Installation, Operation,
and Service Manual for your array.
The drive-bus configuration determines how drives and drive IDs are assigned to
drive channels on the controller.
■
A single-bus configuration assigns all 12 disk drive IDs in a controller to one
channel (typically CH 0 for the RAID array and CH 2 for an expansion unit).
RAID Array - Single-Bus Configuration - Default IDs
Disk 1
CH0-ID0
Disk 4
CH0-ID3
Disk 7
CH0-ID8
Disk 10
CH0-ID11
Disk 2
CH0-ID1
Disk 5
CH0-ID4
Disk 8
CH0-ID9
Disk 11
CH0-ID12
Disk 3
CH0-ID2
Disk 6
CH0-ID5
Disk 9
CH0-ID10
Disk 12
CH0-ID13
Expansion Unit - Single-Bus Configuration - Default IDs
Disk 1
CH2-ID0
Disk 4
CH2-ID3
Disk 7
CH2-ID8
Disk 10
CH2-ID11
Disk 2
CH2-ID1
Disk 5
CH2-ID4
Disk 8
CH2-ID9
Disk 11
CH2-ID12
Disk 3
CH2-ID2
Disk 6
CH2-ID5
Disk 9
CH2-ID10
Disk 12
CH2-ID13
■
A dual-bus configuration assigns 6 disk drive IDs to CH 0 and 6 disk drive IDs to
CH 2 in the RAID array, and then typically adds an additional 6 disk drive IDs to
both CH 0 and CH2 when it is connected to an expansion unit.
Chapter 7
Viewing and Editing SCSI Channels
7-7
RAID Array - Dual-Bus Configuration - Default IDs
Disk 1
CH2-ID0
Disk 4
CH2-ID3
Disk 7
CH0-ID0
Disk 10
CH0-ID3
Disk 2
CH2-ID1
Disk 5
CH2-ID4
Disk 8
CH0-ID1
Disk 11
CH0-ID4
Disk 3
CH2-ID2
Disk 6
CH2-ID5
Disk 9
CH0-ID2
Disk 12
CH0-ID5
Expansion Unit - Dual-Bus Configuration - Default IDs
Disk 1
CH2-ID8
Disk 4
CH2-ID11
Disk 7
CH0-ID8
Disk 10
CH0-ID11
Disk 2
CH2-ID9
Disk 5
CH2-ID12
Disk 8
CH0-ID9
Disk 11
CH0-ID12
Disk 3
CH2-ID10
Disk 6
CH2-ID13
Disk 9
CH0-ID10
Disk 12
CH0-ID13
For JBOD cabling and drive ID information, refer to the appendix on JBODs in the
refer to the Sun StorEdge 3000 Family Installation, Operation, and Service Manual for
your array. JBODs are arrays without controllers that are connected directly to host
servers.
7.4
Creating Additional Host IDs
All RAID arrays are preconfigured when they arrive from the factory.
Default host channel IDs are:
■
■
Channel 1 ID 0 (primary controller)
Channel 3 ID 1 (secondary controller)
Each host channel might have two editable ID numbers:
■
■
Primary controller ID
Secondary controller ID
Each ID number must be a unique number within the host channel. You can:
7-8
■
Edit each host ID number to change the SCSI target number of each controller
host channel that is seen by the host.
■
Add additional host ID numbers (by adding a second host ID to channels 1 and 3,
and additional host IDs if you make Channel 2 into a host channel).
Sun StorEdge 3000 Family RAID Firmware 3.25 User’s Guide • June 2003
Note – To map 128 partitions into 128 LUNs, you must add additional host IDs. A
minimum of four host IDs are required; a maximum of six host IDs are possible. For
details on mapping 128 LUNs, refer to “Mapping Logical Drive Partitions to Host
LUNs” on page 5-1.
To select a unique ID number for a host channel, perform the following steps.
1. Select “view and edit Scsi channels.”
Press Return.
2. Highlight the host channel on which you want to edit the Primary/Secondary ID,
and press Return.
Press Return to access the list of IDs and use the arrow keys to select an ID number
(0 through 15) and press Return again.
3. Select “view and edit scsi Id” and press Return. Select “Add Channel SCSI ID.”
Chapter 7
Viewing and Editing SCSI Channels
7-9
4. Select the controller on which you want to add a host ID.
5. Select an ID number for that controller.
Note – To create a total of 128 LUNs, you must have a minimum of four host IDs
(two each for Channels 1 and 3) and might have a maximum of six host IDs (two
each for Channels 1 and 2, and 3). Each host ID can have up to 32 partitions, which
are then mapped to LUNs to create a total not to exceed 128.
6. From the Main Menu, select “system Functions,” then “Reset controller.”
The configuration change takes effect only after the controller is reset.
7.5
Deleting a Host Channel SCSI ID
To delete a host channel SCSI ID, perform the following steps.
1. On the Main Menu, select “view and edit Scsi channels” and press Return.
2. Select the host channel with the SCSI ID you want to delete and press Return.
7-10
Sun StorEdge 3000 Family RAID Firmware 3.25 User’s Guide • June 2003
3. Select “Delete Channel SCSI ID” and press Return.
A “Delete Primary/Secondary Controller SCSI ID?” confirmation message is
displayed.
4. Select Yes and press Return.
5. On the Main Menu, select “system Functions” and press Return.
6. Select “Reset controller” and press Return.
The configuration change take effect only after the controller is reset.
7.6
Drive Channel SCSI IDs (Reserved)
Do not use this menu option. It is reserved for specific troubleshooting methods and
should be used only by qualified technicians.
On SCSI arrays this menu option provides two choices:
■
■
“Primary controller scsi id”
“Secondary controller scsi id”
These commands are used to change the default drive SCSI IDs.
Chapter 7
Viewing and Editing SCSI Channels
7-11
Caution – Editing a drive channel SCSI ID may create conflicts with the controller
communication channels and create confusion in tracking the status of drive IDs in
either single-bus or dual-bus configurations.
For default drive channel IDs, refer to “Permanent SCSI Drive Channel IDs” on
page 7-7.
7.7
Setting a SCSI Channel Termination
(Reserved)
Do not use this menu option. It is reserved for specific troubleshooting methods and
should be used only by qualified technicians.
Typically the default setting is not changed.
If you are a qualified technician and have reason to perform this operation, follow
these steps:
1. Select the channel for which you want the terminator enabled or disabled and
press Return.
2. Select “scsi Terminator” and press Return.
7-12
Sun StorEdge 3000 Family RAID Firmware 3.25 User’s Guide • June 2003
A confirmation message is displayed.
3. Select Yes and press Return.
7.8
Setting Transfer Clock Speed
Typically the default setting for “sync transfer clock” is not changed for the host or
drive channel.
Follow these steps to view the options for host or drive transfer clock speed.
1. From the Main Menu, select “view and edit Scsi channels” and press Return.
2. Highlight the drive or host channel and press Return.
3. Select “sync transfer Clock” and press Return.
The clock speed is displayed. Typically the default setting for “Host Channel Clock
Speed” is not changed for the host channel.
4. If you want to change the clock speed, select Yes and select the desired speed.
Chapter 7
Viewing and Editing SCSI Channels
7-13
7.8.1
Host Channel Transfer Clock Speed
Note – Every time you change the clock speed, you must reset the controller for the
changes to take effect.
7.8.2
Drive Channel Transfer Clock Speed
Note – Every time you change the clock speed, you must reset the controller for the
changes to take effect.
7.9
Setting the SCSI Transfer Width
Typically the default setting for transfer speed is not changed for the host or drive
channel.
On a SCSI array, follow these steps to view the options for transfer speed
7-14
Sun StorEdge 3000 Family RAID Firmware 3.25 User’s Guide • June 2003
1. Select “view and edit Scsi channels” from the Main Menu and press Return.
2. Highlight the drive or host channel and press Return.
3. If you want to change the transfer width, select “Wide transfer” (if the channel
setting is “Narrow”) or select “narrow transfer” (if the channel setting is “Wide”).
Note – Every time you change the SCSI Transfer Width, you must reset the
controller for the changes to take effect.
4. Select Yes
7.10
Viewing and Editing Drive Channel SCSI
Targets
Follow these steps to view or edit the SCSI targets for a selected drive channel.
1. From the Main Menu, select “view and edit Scsi channels” and press Return.
2. Highlight the drive channel and press Return.
3. Select “View and edit scsi target” and press Return.
Chapter 7
Viewing and Editing SCSI Channels
7-15
A list of all the SCSI targets and their current settings is displayed.
4. Press Return on a SCSI target to display an editable parameter menu on the
screen.
Note – Alter the SCSI target settings only when adjustments need to be made to
specific devices on a drive channel. You can change the SCSI parameters for specific
drives when mixing different drives or connecting other SCSI device like a CD-ROM
on a drive channel.
Note – Neither mixing drives nor connecting a CD-ROM is recommended for the
controller.
7.10.1
Providing a Slot Number
1. From the Main Menu, select “view and edit Scsi channels” and press Return.
2. Select “Slot number” and press Return.
3. Type a slot number and press Return.
7-16
Sun StorEdge 3000 Family RAID Firmware 3.25 User’s Guide • June 2003
7.10.2
Maximum Synchronous Transfer Clock
1. From the Main Menu, select “view and edit Scsi channels” and press Return.
2. Select “maximum sync. xfer Clock” and press Return.
An input screen is displayed.
3. Type the clock transfer period factor and press Return.
7.10.3
Maximum Transfer Width
1. From the Main Menu, select “view and edit Scsi channels” and press Return.
2. Select “maximum xfer Width” and press Return.
A confirmation message is displayed.
Select Yes in the dialog box to confirm the setting, and press Return.
Chapter 7
Viewing and Editing SCSI Channels
7-17
7.10.4
Parity Check
The integrity of redundant data on fault-tolerant arrays (RAID 1, 3, 5, and 6 or 1+0) is
verified with a parity check. The parity-checking procedure on a logical drive recalculates
the parity of data stripes in each of the logical drive’s RAID stripe sets and compares it
with the stored parity. If a discrepancy is found, an error will be reported and the new
correct parity will be substituted for the stored parity.
You can enable or disable parity checking.
1. From the Main Menu, select “view and edit Scsi channels” and press Return.
2. Select “Parity check” and press Return.
A confirmation message is displayed.
“
3. Select Yes in the dialog box that follows to confirm the setting.
7.10.5
Disconnecting Support
1. From the Main Menu, select “view and edit Scsi channels” and press Return.
2. Select “Disconnect support” and press Return.
A confirmation message is displayed.
7-18
Sun StorEdge 3000 Family RAID Firmware 3.25 User’s Guide • June 2003
3. Select Yes in the dialog box that follows to confirm the setting.
7.10.6
Maximum Tag Count
The maximum tag count is the maximum number of tags that can be sent to each
drive at the same time. A drive has a built-in cache that is used to sort all of the I/O
requests (tags) that are sent to the drive, enabling the drive to finish the requests
more quickly.
The cache size and maximum number of tags varies between different brands and
models of drive. Use the default setting of 32. Changing the maximum tag count to
Disable causes the internal cache of the drive to not be used.
It is possible to configure command tag queuing with a maximum tag count of 128
(SCSI) and 256 (FC).
1. From the Main Menu, select “view and edit Scsi channels” and press Return.
2. Select “maximum Tag count” and press Return.
A list of available tag count numbers is displayed.
3. Select a number and press Return.
A confirmation message is displayed.
4. Select Yes and press Return to confirm the setting.
Caution – Disabling the Maximum Tag Count will disable the internal cache of the
SCSI drive.
Chapter 7
Viewing and Editing SCSI Channels
7-19
7-20
Sun StorEdge 3000 Family RAID Firmware 3.25 User’s Guide • June 2003
CHAPTER
8
Viewing and Editing Configuration
Parameters
This chapter describes viewing and editing configuration parameters. Topics
covered:
■
■
■
■
■
■
■
“Optimization Modes (Caching Parameters)” on page 8-2
■
“Optimizing for Random or Sequential I/O” on page 8-5
■
“Enabling and Disabling Write-Back and Write-Through Cache” on page 8-6
“Controller Failure” on page 8-6
“Automatic Logical Drive Rebuild” on page 8-7
■
“Manual Rebuild” on page 8-10
■
“Concurrent Rebuild in RAID 1+0” on page 8-11
■
“Identifying a Failed Drive for Replacement” on page 8-12
■
“Restoring Your Configuration (NVRAM) From a File” on page 8-12
■
“Recovering From Fatal Drive Failure” on page 8-13
“Controller Parameters” on page 8-14
■
“Controller Name” on page 8-14
■
“LCD Title Display - Controller Logo (Not Applicable)” on page 8-15
■
“Password Validation Timeout” on page 8-16
■
“Controller Unique Identifier” on page 8-17
■
“SDRAM ECC Function (Reserved)” on page 8-18
“Drive-side SCSI Parameters” on page 8-18
■
“SCSI Motor Spin-Up (Reserved)” on page 8-19
■
“SCSI Reset at Power-Up (Reserved)” on page 8-20
■
“Disk Access Delay Time” on page 8-21
■
“SCSI I/O Timeout” on page 8-21
■
“Maximum Tag Count (Tag Command Queuing)” on page 8-22
■
“SAF-TE and SES Enclosure Monitoring” on page 8-23
■
“Periodic Drive Check Time” on page 8-24
■
“Auto-Detect Failure Drive Swap Check Time” on page 8-24
“Disk Array Parameters” on page 8-25
■
“Rebuild Priority” on page 8-26
■
“Verification on Writes” on page 8-27
“Host-side SCSI Parameters” on page 8-28
8-1
“Overview of SCSI Channel, SCSI ID, and LUNs” on page 8-29
“Maximum Concurrent Host-LUN Connections” on page 8-29
■
“Number of Tags Reserved for Each Host LUN Connection” on page 8-30
■
“Maximum Queued I/O Count” on page 8-31
■
“LUNs Per Host SCSI ID” on page 8-32
■
“Cylinder/Head/Sector Mapping” on page 8-32
“Redundant Controller Parameters Menu (Reserved)” on page 8-34
“Peripheral Device Type Parameters” on page 8-35
“Setting an IP Address” on page 8-36
■
■
■
■
■
8.1
Optimization Modes (Caching
Parameters)
Mass storage applications fall into two major categories: database applications and
video/imaging applications. The controller supports two embedded optimization
modes.
■
■
Optimization for random I/O
Optimization for sequential I/O
The random I/O optimization mode reads and writes data in small 32K blocks,
while sequential optimization mode reads and writes data in larger 128K blocks, in
order to transfer information more efficiently for the kinds of applications most often
employed. The types of applications appropriate for random and sequential
optimization are described in “Database and Transaction-Based Applications” on
page 8-3 and “Video Recording, Playback, and Imaging Applications” on page 8-3.
8.1.1
Optimization Limitations
There are two limitations that apply to the optimization modes:
■
■
One optimization mode must be applied to all logical units in a RAID array.
Once the optimization mode is selected and data written in logical units, the only
way to change the optimization mode is to back up all data to another location,
delete all logical configurations of drives, reconfigure the logical drive
configuration with the new optimization mode, and reboot the array.
This limitation results from the redundant configuration of controllers. Data
inconsistency can occur when a controller configured with one optimization mode
is used to replace a failed controller with a different mode.
8-2
Sun StorEdge 3000 Family RAID Firmware 3.25 User’s Guide • June 2003
Note – The maximum allowable size of a logical drive optimized for Sequential I/O
is 2 Tbyte. The maximum allowable size of a logical drive optimized for Random
I/O is 512 Gbyte. When creating a logical drive that is greater than these limits, an
error message is displayed.
8.1.2
Database and Transaction-Based Applications
Database and transaction-based applications include an SQL server, Oracle server,
Informix, and other database services.
Transaction size ranges from 2K to 4K. These applications keep each transaction
small so that I/O transfers are not clogged by one large transaction.
Transaction-based applications do not read or write data in a sequential order.
Instead, access to data occurs randomly. Transaction-based performance is usually
measured in I/O operations per second or IOPS.
8.1.3
Video Recording, Playback, and Imaging
Applications
Video playback, video post-production editing, and similar applications applications
read and write large files to and from storage in sequential order. The size of each
I/O can be 128K, 256K, 512K, or up to 1 MB. Performance is measured in MB per
second.
When an array works with applications such as video or image-oriented
applications, the application reads and writes data to and from the drive as largeblock, sequential files instead of small-block, randomly accessed files.
8.1.4
Optimization for Random I/O (32K block size)
The logical drive, cache memory, and other controller parameters are adjusted for
the use of database/transaction-processing applications.
Chapter 8
Viewing and Editing Configuration Parameters
8-3
8.1.5
Optimization for Sequential I/O (128K block size)
Optimization for sequential I/O provides larger stripe size (block size, also known
as chunk size) than optimization for random I/O. Numerous controller’s internal
parameters will also be changed to optimize for sequential or random I/O. The
change will take effect after the controller resets.
The logical drive, cache memory, and other controller internal parameters are
adjusted for the use of video/imaging applications.
8.1.6
Maximum Number of Disks and Maximum
Usable Capacity for Random and Sequential
Optimization
Your choice of Random or Sequential optimization affects the maximum number of
disks you can include in an array and the maximum usable capacity of a logical
drive. The following tables contain the maximum number of disks per logical drive
and the maximum usable capacity of a logical drive.
Note – You can have a maximum of eight logical drives and 36 disks, using one
array and two expansion units.
TABLE 8-1
Maximum Number of Disks per Logical Drive for a 2U Array
Disk Capacity
(GB)
RAID 5
Random
RAID 5
Sequential
RAID 3
Random
RAID 3
Sequential
RAID 1
Random
RAID 1
Sequential
RAID 0
Random
RAID 0
Sequential
36.2
14
31
14
31
28
36
14
36
73.4
7
28
7
28
12
30
6
27
146.8
4
14
4
14
6
26
3
13
TABLE 8-2
Maximum Usable Capacity (Gbyte) per Logical Drive for a 2U Array
Disk Capacity
RAID 5
Random
RAID 5
Sequential
RAID 3
Random
RAID 3
Sequential
RAID 1
Random
RAID 1
Sequential
RAID 0
Random
RAID 0
Sequential
36.2
471
1086
471
1086
507
543
507
1122
73.4
440
1982
440
1982
440
1101
440
1982
146.8
440
1908
440
1908
440
1908
440
1908
8-4
Sun StorEdge 3000 Family RAID Firmware 3.25 User’s Guide • June 2003
Note – You might not be able to use all disks for data when using 36 146-Gbyte
disks. Any remaining disks can be used as spares.
8.2
Optimizing for Random or Sequential
I/O
The default optimization mode is for “Sequential.” Optimization mode for
sequential is automatically applied to any logical configuration of drives larger than
512GB.
To select the optimization mode for all drives, perform the following steps.
1. On the Main Menu, select “view and edit Configuration parameters,” then select
“Caching Parameters.”
2. Select “Optimization for Random I/O” or “Optimization for Sequential I/O.”
3. Then press Return. The “Random” or “Sequential” dialog box is displayed,
depending on the option you have selected.
4. Select Yes in the dialog box that follows to confirm the setting.
Chapter 8
Viewing and Editing Configuration Parameters
8-5
8.3
Enabling and Disabling Write-Back and
Write-Through Cache
The write-back cache function significantly enhances controller performance. Writethrough strategy is considered more secure if power failure should occur. Because a
battery module is installed, power will be supplied to the data cached in memory
and the cached writes can be completed when power is restored.
To change the caching parameter option, perform the following steps.
1. On the Main Menu, select “view and edit Configuration parameters” and press
Return.
2. Select “Caching Parameters,” and press Return.
3. Select “Write-Back Cache,” and then press Return.
displays The current write-back cache setting is displayed as either “Enabled” or
“Disabled.”
4. Select Yes in the dialog box that follows to confirm the setting.
8.4
Controller Failure
Controller failure symptoms are as follows:
8-6
■
The surviving controller sounds an audible alarm.
■
The center LED (status symbol) flashes yellow on the failed controller.
Sun StorEdge 3000 Family RAID Firmware 3.25 User’s Guide • June 2003
■
The surviving controller sends event messages announcing the controller failure
of the other controller.
A “Bus Reset Issued” warning message is displayed for each of the channels. In
addition, a “Redundant Controller Failure Detected” alert message is displayed.
If one controller in the redundant controller configuration fails, the surviving
controller temporarily takes over for the failed controller until it is replaced.
A failed controller is managed by the surviving controller which disables and
disconnects from its counterpart while gaining access to all the signal paths. The
surviving controller then manages the ensuing event notifications and takes over all
processes. It is always the primary controller regardless of its original status, and
any replacement controller afterward will assume the role of the secondary
controller.
The failover and failback processes are completely transparent to the host.
Controllers are hot-swappable, and replacing a failed unit takes only a few minutes.
To maintain your redundant controller configuration, replace the failed controller as
soon as possible.
8.5
Rebuilding Logical Drives
This section describes automatic and manual procedures for rebuilding logical
drives.
8.5.1
Automatic Logical Drive Rebuild
Rebuild with Spare: When a member drive in a logical drive fails, the controller first
examines whether there is a local spare drive assigned to this logical drive. If yes, it
automatically starts to rebuild the data of the failed disk to it.
If there is no local spare available, the controller searches for a global spare. If there
is a global spare, it automatically uses it to rebuild the logical drive.
Failed Drive Swap Detect: If neither a local spare drive nor a global spare drive is
available, and the “Periodic Auto-Detect Failure Drive Swap Check Time” is
“disabled,” the controller does not attempt to rebuild unless you apply a forcedmanual rebuild.
To enable this feature, go to the Main Menu choose “view and edit Configuration
parameters,” then select “Drive-side SCSI Parameters,” and select “Periodic AutoDetect Failure Drive Swap Check Time.”
Chapter 8
Viewing and Editing Configuration Parameters
8-7
When the “Periodic Auto-Detect Failure Drive Swap Check Time” is “Enabled” (that
is, a check time interval has been selected), the controller detects whether or not the
failed drive has been swapped (by checking the failed drive's channel/ID). Once the
failed drive has been swapped, the rebuild begins immediately.
Note – This feature requires system resources and can impact performance.
If the failed drive is not swapped but a local spare is added to the logical drive, the
rebuild begins with the spare.
For a flowchart of automatic rebuild, see FIGURE 8-1.
8-8
Sun StorEdge 3000 Family RAID Firmware 3.25 User’s Guide • June 2003
One member drive fails
in a logical drive
Any local spare
drive assigned to
logical drive?
Yes
Rebuild using the
local spare drive
Yes
Rebuild using the
global spare drive
Yes
Rebuild using the
swapped drive
No
Any global spare
drive assigned to
logical drive?
No
Waiting for
spare drive to be
added or manual
rebuild
No
“Periodic AutoDetect Failure
Drive Swap Check
Time” enabled?
Yes
Has the failed
drive been
swapped?
No
Keep detecting if drive has been swapped
or spare drive has been added
FIGURE 8-1
Automatic Rebuild
Chapter 8
Viewing and Editing Configuration Parameters
8-9
8.5.2
Manual Rebuild
When a user applies forced-manual rebuild, the controller will first examine whether
there is any local spare assigned to the logical drive. If yes, it will automatically start
to rebuild.
If there is no local spare available, the controller will search for a global spare. If
there is a global spare, the logical drive rebuild will begin. See FIGURE 8-2.
If neither local spare nor global spare is available, the controller will examine the
channel and ID of the failed drive. After the failed drive has been replaced by a
healthy one, the logical drive rebuild begins on the new drive. If there is no drive
available for rebuilding, the controller will not attempt to rebuild until the user
applies another forced-manual rebuild.
8-10
Sun StorEdge 3000 Family RAID Firmware 3.25 User’s Guide • June 2003
User applies forcedmanual rebuild
Any local spare
drive assigned to
logical drive?
Yes
Rebuild using the
local spare drive
Yes
Rebuild using the
global spare drive
Yes
Rebuild using the
swapped drive
No
Any global spare
drive assigned to
logical drive?
No
Has the failed
drive been
replaced?
Exit
FIGURE 8-2
8.5.3
Manual Rebuild
Concurrent Rebuild in RAID 1+0
RAID 1+0 allows multiple-drive failure and concurrent multiple-drive rebuild.
Drives newly swapped must be scanned and set as local spares. These drives will be
rebuilt at the same time (you do not need to repeat the rebuilding process for each
drive.)
Chapter 8
Viewing and Editing Configuration Parameters
8-11
8.6
Identifying a Failed Drive for
Replacement
If there is a failed drive in the RAID 5 logical drive, replace the failed drive with a
new drive to keep the logical drive working. To identify a failed drive, refer to
“Identifying a Failed Drive for Replacement” on page 6-11.
Caution – If, when trying to remove a failed drive, you mistakenly remove the
wrong drive, you will no longer be able to access the logical drive because you have
incorrectly failed another drive.
8.7
Restoring Your Configuration (NVRAM)
From a File
If you have saved a configuration file and want to apply the same configuration to
another array or reapply it to the array that had the configuration originally, you
must be certain that the channels and SCSI IDs in the configuration file are correct
for the array where you are restoring the configuration.
The NVRAM configuration file will restore all configuration settings (channel
settings, host IDs, etc.) but does not rebuild logical drives.
To save a configuration file, refer to “Saving Configuration (NVRAM) to Disk” on
page 10-8.
Caution – If the channels or SCIS IDs are not a correct match for the array, you will
lose access to the mismatched channels or drives when you restore the configuration
with the configuration file.
Note – In the Configuration Service program, you can save a configuration file that
can restore all configurations and rebuild all logical drives. However, it will also
erase all data when it rebuilds all logical drives, so operation is performed only
when no data has been stored or all data has been transferred to another array.
8-12
Sun StorEdge 3000 Family RAID Firmware 3.25 User’s Guide • June 2003
To restore configuration settings from a saved NVRAM file, perform the following
steps.
1. From the Main Menu choose “system Functions.”
2. Select “Controller maintenance” and press Return.
3. Select “Restore NVRAM from disks,” and press Return.
4. Press Yes to confirm.
A prompt will notify you that the controller NVRAM data has been successfully
restored from disks.
8.8
Recovering From Fatal Drive Failure
With the redundant RAID array system, your system is protected with the RAID
parity drive and by the default global spare (you may have more than one).
Note – A FATAL FAIL status occurs when there is one more drive failing than the
number of spare drives available for the logical drive. If a logical drive has two
global spares available, then three failed drives must occur for FATAL FAIL status.
In an extremely rare occurrence where two or more drives appear to fail at the same
time, perform the following steps.
1. Discontinue all input/output activity immediately.
2. To cancel the beeping alarm, use a paperclip to press the Reset button (below the
LEDs on the front-right ear of the array).
3. Physically check whether all the drives are firmly seated in the array and that
none have been partially or completely removed.
4. Check again the firmware Main Menu and check the “view and edit Logical
drives,” and look for:
Status: FAILED DRV (one failed drive) or
Status: FATAL FAIL (two or more failed drives)
5. Highlight the logical drive, press Return, and select “view scsi drives.”
If two physical drives have a problem, one drive will have a BAD status and one
drive will have a MISSING. The MISSING status is a reminder that one of the drives
may be a “false” failure. The status does not tell you which drive might be a false
failure.
Chapter 8
Viewing and Editing Configuration Parameters
8-13
6. Do one of the following:
■
Choose “system Functions” from the Main Menu and press Return. Select “Reset
controller,” and press Return.
or
■
Power off the array. Wait five seconds, and power on the array.
7. Repeat steps 4 and 5 to check the logical and SCSI drive status.
After resetting the controller, if there is a false bad drive, the array will automatically
start rebuilding the failed RAID set.
If the array does not automatically start rebuilding the RAID set, check the status
under “view and edit Logical drives.”
■
If the status is “FAILED DRV,” manually rebuild the RAID set (refer to “Manual
Rebuild” on page 8-10).
■
If the status is still “FATAL FAIL,” you have lost all data on the logical drive and
must re-create the logical drive. Proceed with the following procedures:
■
Replace the failed drive with a new disk drive (refer to the Sun StorEdge 3310
SCSI Array Installation, Operation and Service Manual Guide)
■
“Deleting a Logical Drive” on page 3-15
■
“Creating Logical Drive(s)” on page 3-4
For additional troubleshooting tips, refer to the Sun StorEdge 3310 SCSI Array
Release Notes located at:
www.sun.com/products-n-solutions/
hardware/docs/Network_Storage_Solutions/Workgroup/3310
8.9
Controller Parameters
Controller parameters are described in this section.
8.9.1
Controller Name
The Controller Name is displayed only in the firmware program and is used to
identify separate controllers.
8-14
Sun StorEdge 3000 Family RAID Firmware 3.25 User’s Guide • June 2003
Note – The controller’s name and password jointly share a 16-character
alphanumeric field. If you set up a password, check that both the controller name
and any password can fit within the 16-character field.
FIGURE 8-3
Controller Name
1. Select “view and edit Configuration parameters,” select “Controller Parameters,”
and then press Return.
2. From the “Controller Parameters” menu, select “Controller Name”, and then press
Return.
Depending on the controller’s current settings, you will be prompted to either enter
a new name or modify the existing name for the designated controller.
3. Enter a name for the controller, and confirm by pressing the Enter key.
8.9.2
LCD Title Display - Controller Logo (Not
Applicable)
This function is not applicable to this product.
Chapter 8
Viewing and Editing Configuration Parameters
8-15
8.9.3
Password Validation Timeout
This function sets a timeout when a password is required to be entered.
If a single password is set, the operator must enter this case-sensitive, alphanumeric
password each time the controller is reset, causing an initial display of the Terminal
Interface screen. In most cases, the default value “Always Check” should be left
unchanged.
Although this function allows you to set the timeout setting, it does not provide a
means of counting “retries”. In other words the user may continue to retry entering
a password until the preset timeout expires, unless the default “Always Check”
value is selected. The other options available are Disable or setting a value for 1, 2,
or 5 minutes.
Leaving this setting at Always Check means that there is no defined timeout, and
the operator has unlimited opportunities to enter the correct password, but each try
is validated before access to the firmware’s functions is permitted. If this function is
disabled, any entry will provide immediate access to the Main Menu topics, despite
whether or not a password has been established.
Note – This firmware only allows one password to be entered. Subsequently, there
are not unique timeout options for each potential operator.
FIGURE 8-4
Password Validation Timeout
To set Password Validation Timeout, follow these steps.
1. From the Main Menu, select “view and edit Configuration parameters,” then select
“Controller Parameters,” and press Return.
2. Select “Password Validation Timeout”, and then press Return.
8-16
Sun StorEdge 3000 Family RAID Firmware 3.25 User’s Guide • June 2003
3. Select a validation timeout from the list displayed and press Return.
Enable a validation timeout from one minute to Always Check. The Always Check
timeout will disable any configuration change without entering the correct
password.
4. A prompt will then be displayed. Select “Yes” to confirm.
8.9.4
Controller Unique Identifier
The Controller Unique Identifier is automatically set by the SAF-TE device. The
Controller Unique Identifier is used to create Ethernet Addresses and World Wide
Names.
Caution – However, if the array is powered off during the controller replacement or if you
replaced a controller in a single-controller configuration, you must set the Controller
Unique Identifier to the correct value or the array could become inaccessible.
To set the “Controller Unique Identifier” parameter to the correct value, perform
the following steps.
1. On the firmware main menu, select “view and edit configuration parameters,”
then select “Controller Parameters,” and press Return.
2. From the Controller Parameters menu, select “Controller Unique Identifier <hex>”
and press Return.
Chapter 8
Viewing and Editing Configuration Parameters
8-17
3. Type in the value 0 (to automatically read the chassis serial number from the
midplane) or type the hex value for the original serial number of the chassis (used
when the midplane has been replaced).
The value 0 is immediately replaced with the hex value of the chassis serial number.
A non-zero value should only be specified if the chassis has been replaced but the
original chassis serial number must be retained; this feature is especially important
in a Sun Cluster environment to maintain the same disk device names in a cluster.
4. To implement the revised parameter value, select “system Functions” on the Main
Menu, select “Reset Controller” and press Return.
8.9.5
SDRAM ECC Function (Reserved)
The default setting is always set to Enabled.
Do not use this setting. It is reserved for specific troubleshooting methods and
should only be used by qualified technicians.
8.10
Drive-side SCSI Parameters
The configurable drive-side SCSI parameters are:
■
■
■
■
■
■
■
■
SCSI Motor Spin-Up (Reserved)
SCSI Reset at Power-Up (Reserved)
Disk Access Delay Time
SCSI I/O Timeout
Maximum Tag Count (Tag Command Queuing)
SAF-TE and SES Enclosure Monitoring
SAF-TE and SES Enclosure Monitoring
Auto-Detect Failure Drive Swap Check Time
To access the drive-side parameter list, follow the next two steps:
1. Select “view and edit Configuration parameters” on the Main Menu.
2. Select “Drive-side SCSI Parameters,” and then press Return.
The “Drive-side SCSI Parameters” menu is displayed.
8-18
Sun StorEdge 3000 Family RAID Firmware 3.25 User’s Guide • June 2003
8.10.1
SCSI Motor Spin-Up (Reserved)
Do not use the “SCSI Motor Spin-Up” menu option. It is reserved for specific
troubleshooting methods and should only be used by qualified technicians.
The SCSI spin-up decides how the SCSI drives in a disk array are started. When the
power supply is unable to provide sufficient current for the hard drives and
controllers that are powered on at the same time, spinning-up the hard drives
serially is one of the best ways to consume lower power-up current.
If the drives are configured as Delay Motor Spin-up or Motor Spin-up in Random
Sequence, some of these drives may not be ready for the controller to access when
the array powers up. Increase the disk access delay time so that the controller will
wait a longer time for the drive to be ready.
By default, all hard drives will spin-up when powered on. These hard drives can be
configured so that they will not all spin-up at the same time.
1. Select “view and edit Configuration parameters” on the Main Menu.
2. Select “Drive-side SCSI Parameters,” and then press Return.
The Drive-side SCSI parameters menu is displayed.
3. Select “SCSI Motor Spin-Up,” and then press Return. Select Yes in the dialog box
that follows to confirm the setting.
Chapter 8
Viewing and Editing Configuration Parameters
8-19
8.10.2
SCSI Reset at Power-Up (Reserved)
Do not use the “SCSI Reset at Power-Up” menu option. It is reserved for specific
troubleshooting methods and should only be used by qualified technicians.
By default, when the controller is powered on, it sends a SCSI bus reset command to
the SCSI bus. When disabled, it does not send a SCSI bus reset command when
powered on.
When connecting dual host computers to the same SCSI bus, the SCSI bus reset
interrupts all the read/write requests being performed. This can cause some
operating environments or host computers to act abnormally. Disable the “SCSI
Reset at Power-Up” menu option to avoid this situation.
1. Select “view and edit Configuration parameters” on the Main Menu.
2. Select “Drive-side SCSI Parameters,” and then press Return.
The Drive-side SCSI parameters menu is displayed.
3. Select “SCSI Reset at Power-Up” and press Return.
4. Select Yes in the dialog box that follows to confirm the setting.
5. Power off all hard drives and controller, and power them on again.
All the hard drives will not spin-up at this time. The controller will then spin-up the
hard drives one by one at a four-second interval.
8-20
Sun StorEdge 3000 Family RAID Firmware 3.25 User’s Guide • June 2003
8.10.3
Disk Access Delay Time
This function sets the delay time before the controller tries to access the hard drives
after power-on. The default is 15 seconds. The range is No Delay to 75 seconds.
1. Select “view and edit Configuration parameters” on the Main Menu.
2. Select “Drive-side SCSI Parameters,” and then press Return.
The Drive-side SCSI parameters menu is displayed.
3. Select “Disk Access Delay Time,” and then press Return.
A list of selections is displayed.
4. Select the desired delay time, and press Return. Select Yes to confirm the setting.
8.10.4
SCSI I/O Timeout
The “SCSI I/O Timeout” is the time interval for the controller to wait for a drive to
respond. If the controller attempts to read data from or write data to a drive but the
drive does not respond within the SCSI I/O timeout value, the drive will be
considered a failed drive.
The default setting for “SCSI I/O Timeout” is 15 seconds. Do not change this setting.
Setting the timeout to a lower value will cause the controller to judge a drive as
failed while a drive is still retrying or while a drive is unable to arbitrate the SCSI
bus. Setting the timeout to a greater value will cause the controller to keep waiting
for a drive, and it may sometimes cause a host timeout.
When the drive detects a media error while reading from the drive platter, it will
retry the previous reading or recalibrate the head. When the drive encounters a bad
block on the media, it reassigns the bad block to another spare block. However, all of
this takes time. The time to perform these operations can vary between brands and
models of drives.
Chapter 8
Viewing and Editing Configuration Parameters
8-21
During SCSI bus arbitration, a device with higher priority can utilize the bus first. A
device with lower priority sometimes receives a SCSI I/O timeout when devices of
higher priority devices keep utilizing the bus.
1. Select “view and edit Configuration parameters” on the Main Menu.
2. Select “Drive-side SCSI Parameters,” and then press Return.
The “Drive-side SCSI Parameters” menu is displayed.
3. Select “SCSI I/O Timeout –Default (15 seconds),” and then press Return.
A list of selections is displayed. Move the cursor bar on a selection and press Return.
Select Yes in the dialog box that follows to confirm the setting.
8.10.5
Maximum Tag Count (Tag Command Queuing)
This is the maximum number of tags that can be sent to each drive at the same time.
A drive has a built-in cache that is used to sort all of the I/O requests (“tags”) that
are sent to the drive, allowing the drive to finish the requests faster.
The cache size and maximum number of tags varies between brands and models of
drive. Using the default setting of “32” is highly recommended.
8-22
Sun StorEdge 3000 Family RAID Firmware 3.25 User’s Guide • June 2003
Note – Changing the maximum tag count to “Disable” will cause the Write-Back
cache in the hard drive to not be used).
The controller supports tag command queuing with an adjustable tag count from 1
to 128. The default setting is “Enabled” with a maximum tag count of 32.
To change the default setting, perform the following steps.
1. Select “view and edit Configuration parameters” on the Main Menu.
2. Select “Drive-side SCSI Parameters,” and then press Return.
The “Drive-side SCSI Parameters” menu is displayed.
3. Select “Maximum Tag Count” and press Return. A list of available tag count
numbers is displayed.
4. Select a number and press Return. Select Yes in the dialog box that follows to
confirm the setting.
5. For the changes to take effect, select “system Functions,” select “Reset Controller,”
and press Return.
8.10.6
SAF-TE and SES Enclosure Monitoring
If there are remote devices within your RAID enclosure monitored via SAFTE/S.E.S., use this function to decide at what interval the controller will check the
status of these devices.
Select “Periodic SAF-TE and SES Device Check Time,” and press Return. Move the
cursor to the desired interval; then press Return. Select Yes in the dialog box to
confirm the setting.
Chapter 8
Viewing and Editing Configuration Parameters
8-23
8.10.7
Periodic Drive Check Time
The Periodic Drive Check Time is an interval for the controller to check the drives on
the SCSI bus at controller startup (a list of all detected drives can be seen under
“view and edit scsi Drives”). The default value is Disabled, which means that if a
drive is removed from the bus, the controller will not know that the drive is
removed until a host tries to access that drive.
Changing the check time to any other value allows the controller to check at the
selected interval all of the drives that are listed under “view and edit scsi Drives.” If
any drive is then removed, the controller will know even if a host does not access
that drive.
8.10.8
Auto-Detect Failure Drive Swap Check Time
The Drive-Swap Check Time is the interval at which the controller checks to see
whether a failed drive has been swapped. When a logical drive’s member drive fails,
the controller will detect the failed drive (at the selected time interval). Once the
failed drive has been swapped with a drive that has adequate capacity to rebuild the
logical drive, the rebuild will begin automatically.
The default setting is Disabled, which means that the controller will not auto-detect
the swap of a failed drive. When the Periodic Drive Check Time is set to Disabled,
the controller is not able to detect any drive removal that occurs after the controller
has been powered on. The controller detects drive removal only when a host
attempts to access the data on the drive.
8-24
Sun StorEdge 3000 Family RAID Firmware 3.25 User’s Guide • June 2003
To enable this feature, perform the following steps.
1. Select “Periodic Auto-Detect Failure Drive Swap Check Time,” and press Return.
2. Select the interval you want and press Return.
A confirmation message is displayed.
3. Select Yes and press Return to confirm the setting.
By choosing a time value to enable the Periodic Drive Check Time, the controller
polls all connected drives in the controller’s drive channels at the assigned interval.
Drive removal is detected even if a host does not attempt to access data on the drive.
8.11
Disk Array Parameters
1. To display the Disk Array Parameters menu, select “View and edit Configuration
parameters” from the Main Menu and press Return.
2. Select “Disk Array Parameters” to display the following submenu options.
Chapter 8
Viewing and Editing Configuration Parameters
8-25
8.11.1
Rebuild Priority
The RAID controller provides a background rebuilding ability. This means the
controller is able to serve other I/O requests while rebuilding the Logical Drives.
The time required to rebuild a drive set will largely depend on the total capacity of
the Logical Drive being rebuilt. Additionally, the rebuilding process is totally
transparent to the host computer or the operating environment.
1. Select “view and edit Configuration parameters,” then select “Disk Array
Parameters,” and then press Return again.
The Disk Array Parameters menu is displayed.
2. Select “Rebuild Priority,” and then press Return.
A list of the priority selections (Low, Normal, Improved, or High) is displayed.
The background rebuild process has four priority options:
■ Low (the default which uses the controller’s minimum resources to rebuild)
8-26
Sun StorEdge 3000 Family RAID Firmware 3.25 User’s Guide • June 2003
■
■
■
Normal (to speed up the rebuilding process)
Improved (to speed up the rebuilding process)
High (to use the controller’s maximum resources to complete the rebuilding
process in the shortest possible time)
3. Select the desired setting and press Return.
8.11.2
Verification on Writes
Normally, errors may occur when a hard drive writes data. In order to avoid the
write error, the controller can force the hard drives to verify the written data. There
are three selectable methods:
■
Verification on LD Initialization Writes
Performs Verify-after-Write while initializing the logical drive.
■
Verification on LD Rebuild Writes
Performs Verify-after-Write during the rebuilding process.
■
Verification on LD Normal Drive Writes
Performs Verify-after-Write during normal I/O requests.
Each method can be enabled or disabled individually. Hard drives will perform
Verify-after-Write according to the selected method.
Note – The “verification on Normal Drive Writes” method will affect the write
performance during normal use.
To select the type of verification wanted, perform the following steps:
1. Select “view and edit Configuration parameters,” then select “Disk Array
Parameters,” and then press Return again.
The Disk Array Parameters menu is displayed.
2. Press Return on the “Verification on Writes” in the “Disk Array Parameters”
menu.
The items for selection is displayed on screen.
Chapter 8
Viewing and Editing Configuration Parameters
8-27
3. Select the desired item and press Return.
4. Select Yes in the confirm box to enable or disable the function.
Follow the same procedure to enable or disable each method.
8.12
Host-side SCSI Parameters
Select the “view and edit Configuration parameters” command, select “Host-side
SCSI Parameters,” and press Return to access the following parameters:
■
■
■
■
■
■
8-28
Maximum Queued I/O Count
LUNs per Host SCSI ID
Max Number of Concurrent Host-LUN Connection - Def (4)
Number of Tags Reserved for each Host-LUN Connection
Peripheral Device Type Parameters
Host Cylinder/Head/Sector Mapping Configuration
Sun StorEdge 3000 Family RAID Firmware 3.25 User’s Guide • June 2003
8.12.1
Overview of SCSI Channel, SCSI ID, and LUNs
A SCSI channel (SCSI bus) can connect up to 15 devices (not including the SCSI
controller itself) when the Wide function is enabled (16-bit SCSI).
It can connect up to 7 devices (not including the controller itself) when the Wide
function is disabled (8-bit SCSI).
Each device has one unique SCSI ID. Two devices owning the same SCSI ID are not
allowed.
8.12.2
Maximum Concurrent Host-LUN Connections
The “Max Number of Concurrent Host-LUN Connection” menu option is used to
set the maximum number of concurrent host-LUN connections. The default setting is
4 LUNs, with a predefined range of 1 to 64.
Note – The “Max Number of Concurrent Host-LUN Connection” menu option
should be changed only if you have more than four logical drives or partitions.
Increasing this number may increase your performance.
Maximum concurrent host LUN connection (nexus in SCSI) is the arrangement of
the controller internal resources for use with a number of the current host nexus.
For example, you can have four hosts (A, B, C, and D) and four host IDs/LUNs (ID
0, 1, 2 and 3) in a configuration where:
■
■
■
■
host
host
host
host
A accesses ID 0 (one nexus)
B accesses ID 1 (one nexus)
C accesses ID 2 (one nexus)
D accesses ID 3 (one nexus)
These connections are all queued in the cache and are called four nexus.
If there is I/O in the cache with four different nexus, and another host I/O comes
with a nexus different than the four in the cache (for example, host A accesses ID 3),
the controller returns busy. This occurs with the concurrent active nexus; if the cache
is cleared, it will accept four different nexus again. Many I/O operations can be
accessed via the same nexus.
Chapter 8
Viewing and Editing Configuration Parameters
8-29
To change the default number of nexus for a host (the default setting is 4), perform
the following steps:
1. From the Main Menu, select “view and edit Configuration parameters,” select
“Host-side SCSI Parameters,” and then press Return.
2. Select “Max Number of Concurrent Host-LUN Connection,” and then press
Return.
A list of available selections is displayed. Select an item and press Return.
3. Select Yes in the dialog box that follows to confirm the setting.
8.12.3
Number of Tags Reserved for Each Host LUN
Connection
This function is used to modify the tag command queuing on the Host-LUN
connection. The default setting is 32 tags, with a predefined range of 1 to 256. Unless
it is necessary, the default factory setting should not be changed.
Each nexus has 32 (the default setting) tags reserved. This setting ensures that the
controller accepts at least 32 tags per nexus. The controller will be able to accept
more than that as long as the controller internal resources allow it; if the controller
does not have enough internal resources, at least 32 tags can be accepted per nexus.
8-30
Sun StorEdge 3000 Family RAID Firmware 3.25 User’s Guide • June 2003
1. From the Main Menu, select “view and edit Configuration parameters,” select
“Host-side SCSI Parameters,” and then press Return.
2. Select “Number of Tags Reserved for each Host-LUN Connection,” and then press
Return.
A list of available selections is displayed.
3. Select an item and press Return. Select Yes in the dialog box that follows to
confirm the setting.
8.12.4
Maximum Queued I/O Count
This function allows you to configure the maximum size of the I/O queue the
controller can accept from the host computer by byte size. The predefined range is
from 1 to 1024 bytes, or you may choose the “Auto” (automatically configured)
mode. The default value is 256 bytes.
1. From the Main Menu, select “view and edit Configuration parameters,” select
“Host-side SCSI Parameters,” and then press Return.
2. Select “Maximum Queued I/O Count,” and then press Return.
A list of available selections is displayed.
Chapter 8
Viewing and Editing Configuration Parameters
8-31
3. Select an item and press Return. Select Yes in the dialog box that follows to
confirm the setting.
8.12.5
LUNs Per Host SCSI ID
This function is used to change the number of LUNs per host SCSI ID. The default
setting is 32 LUNs, with a predefined range of 1 to 32 LUNs per logical drive
available. A maximum of 128 LUNs per array is allowed.
1. From the Main Menu, select “view and edit Configuration parameters,” select
“Host-side SCSI Parameters,” and then press Return.
2. Select “LUNs per Host SCSI ID,” and then press Return.
A list of selections is displayed.
3. Select an item and press Return. Select Yes to confirm the setting.
8.12.6
Cylinder/Head/Sector Mapping
In SCSI arrays, the drive capacity is decided by the number of blocks. Some
operating environments read the capacity of the array based on the
cylinder/head/sector count of the drives.
For Sun Solaris, the cylinder cannot exceed 65535, so you can choose < 65536
Cylinders. The controller then automatically adjusts the head/sector count so the
operating environment can read the correct drive capacity.
8-32
Sun StorEdge 3000 Family RAID Firmware 3.25 User’s Guide • June 2003
Note – To avoid difficulties with Solaris operating environment configurations, use
the values in the following table.
TABLE 8-3
Cylinder/Head Sector Mapping for the Solaris Operating Environment
Capacity
Cylinder
Head
< 64 GB
depends on capacity 64
32
64 - 128 GB
depends on capacity 64
64
128 - 256 GB
depends on capacity 127
64
256 - 512 GB
depends on capacity 127
127
512 GB - 1 TB
< 65536 Cylinders
127
255
Sector
Note – Currently, Solaris does not support drive capacity larger than 1 terabyte.
To configure Sector Ranges, Head Ranges, and Cylinder Ranges, perform the
following steps.
1. Select “view and edit Configuration parameters” from the Main Menu and press
Return.
2. Select “Host-Side SCSI Parameters” and press Return.
3. Select “Host Cylinder/Head/Sector Mapping Configuration” and press Return.
4. Select Sector Ranges and press Return.
5. Select the value you want and press Return.
6. Select Head Ranges and press Return.
Chapter 8
Viewing and Editing Configuration Parameters
8-33
7. Select the value you want and press Return.
8. Select Cylinder Ranges and press Return.
9. Select the value you want and press Return.
8.13
Redundant Controller Parameters Menu
(Reserved)
The “Redundant Controller Parameters” menu options are:
■
■
“Secondary Controller RS-232C”
“Remote Redundant Controller”
Do not use these menu options. They are reserved for specific troubleshooting
procedures and should only be used by qualified technicians.
1. To display the “Redundant Controller Parameters” menu, select the “view and
edit Configuration parameters” command from the Main Menu and press Return.
2. Select “Redundant Controller Parameters” and press Return.
The “Redundant Controller Parameters” menu options are displayed.
8-34
Sun StorEdge 3000 Family RAID Firmware 3.25 User’s Guide • June 2003
8.14
Peripheral Device Type Parameters
The functions included within this section are provided for arrays without a preset
logical RAID unit, connected to a host. Subsequently, the majority of these functions
do not apply to the Sun StorEdge product line.
Caution – Modification of these settings will likely cause problems with your
storage array. All parameters are typically preset.
FIGURE 8-5
Peripheral Device Type Parameters
Peripheral Device Qualifier: The default setting for this parameter is “Connected.”
Device Supports Removable Media: The default setting for this parameter is
“Disabled.”
LUN Applicability: The default setting is “All Undefined LUNs.”
Related to the other LUN functions, LUN Applicability is primarily used when no
logical drive has been created and mapped to a host LUN, and the RAID controller
is the only device connecting to the host SCSI card. For such instances, the operating
environment will typically not load the driver of the host SCSI adapter. If the driver
is not loaded, the in-band SCSI utility cannot communicate to the RAID controller.
If “LUN-0's only” is selected, only LUN-0 of the host ID is displayed as a device
with the user-defined peripheral device type. If “All Undefined LUNs” is selected,
each LUN in that host ID is displayed as a device with the user-defined peripheral
device type.
Chapter 8
Viewing and Editing Configuration Parameters
8-35
8.15
Setting an IP Address
The controller Ethernet port offers out-of-band management through two programs:
■
The Configuration Service program. Refer to the Sun StorEdge 3310 SCSI
Configuration Service User Guide for details.
■
The firmware program when you use the telnet command to connect to the IP
address of the controller to enter the firmware program.
To access the array using the Ethernet port, you must set up an IP address for the
controller.
To set the IP address, netmask and gateway values of the RAID controller, perform
the following steps.
1. Access the array through the COM port on the controller module of the array.
2. On the Main Menu, select “view and edit Configuration parameters.”
3. Select “Communication Parameters,” then select “Internet Protocol (TCP/IP).”
4. Press Return on the chip hardware address, and then select “Set IP Address.”
5. Enter the desired IP address, NetMask, and Gateway values.
6. Reset the controller for the configuration to take effect:
Select “system Functions” from the Main Menu, then select “Reset controller” and
press Return.
8-36
Sun StorEdge 3000 Family RAID Firmware 3.25 User’s Guide • June 2003
CHAPTER
9
Viewing and Editing Peripheral
Devices
This chapter describes viewing and editing parameters for peripheral devices. Topics
covered include:
■
■
■
■
■
“Viewing Peripheral Device Controller Status” on page 9-2
“Viewing Peripheral Device SAF-TE Status” on page 9-2
“Setting Peripheral Device Entry” on page 9-5
■
“Redundant Controller Mode (Do Not Change)” on page 9-5
■
“Enable UPS Status” on page 9-6
“Setting the UPS Power Fail Signal” on page 9-7
“Viewing the Controller Voltage and Temperature Status Window” on page 9-8
FIGURE 9-1
View and Edit Peripheral Devices Menu
9-1
9.1
Viewing Peripheral Device Controller
Status
To view the status of each controller, perform the following steps.
1. Select “view and edit Peripheral devices” on the Main Menu.
2. Select the “View Peripheral Device Status” option. A table will display the status.
FIGURE 9-2
9.2
View Peripheral Device Status
Viewing Peripheral Device SAF-TE
Status
To check the status of SAF-TE components (temperature sensors, cooling fans, the
beeper speaker, power supplies, and slot status), perform the following steps.
The SAF-TE controller is located on the SCSI I/O module.
1. From the Main Menu select “view and edit Peripheral devices,” and press Return.
9-2
Sun StorEdge 3000 Family RAID Firmware 3.25 User’s Guide • June 2003
2. Select “View Peripheral Device Status,” and press Return.
3. Select “SAF-TE Device,” and press Return to view the status of temperature
sensors, power supplies, beeper speaker, and cooling fans.
The temperature sensor displays the current temperature of each sensor in degrees
Fahrenheit.
The drive slot status indicates that a slot is filled by displaying a SCSI ID number:
■
Single-bus configuration: 0 through 13 ID numbers if all 12 drives are filled. SCSI
IDs 6 and 7 are reserved for host communication. If there is an empty slot, the
message “No Device Inserted” is displayed. See FIGURE 9-3.
■
Dual-bus configuration (not supported): the message “No Device Inserted” for
the six drives on one channel and six ID numbers for the second channel. See
FIGURE 9-4.
To check whether you have all slots filled in a dual-bus configuration, see “SCSI
Drive Status Table” on page 6-2 and check the column labeled “Chl ID.”
Chapter 9
Viewing and Editing Peripheral Devices
9-3
FIGURE 9-3
Example of SAF-TE Device Status Window in a Single-Bus Configuration
In a dual-bus configuration example, the following SAF-TE window displays “No
Device Inserted” for six drives that are actually inserted into slots. The SAF-TE
protocol does not support a dual-bus configuration and recognizes only one bus
(half the drives) if you have a dual-bus configuration.
FIGURE 9-4
9-4
Example of SAF-TE Device Status Window in a Dual-Bus Configuration
Sun StorEdge 3000 Family RAID Firmware 3.25 User’s Guide • June 2003
9.3
Setting Peripheral Device Entry
The menu functions within the Set Peripheral Device Entry include the following:
■
■
Redundant Controller
UPS Status
FIGURE 9-5
9.3.1
Set Peripheral Device Entry
Redundant Controller Mode (Do Not Change)
The redundant controller mode is automatically set to Enabled. Do not change this
setting.
For more information about redundant controller operation, refer to “Controller
Defaults and Limitations” on page 1-19.
Chapter 9
Viewing and Editing Peripheral Devices
9-5
9.3.2
Enable UPS Status
This function is used to enable the Uninterruptible Power Supply (UPS) status if a
UPS unit is installed for power redundancy and backup. The default value for this
function is Disabled.
1. Select the “UPS Status” option and press Return.
FIGURE 9-6
UPS Status
A confirmation prompt will be displayed.
2. Select “Yes,” and press Return to confirm.
9-6
Sun StorEdge 3000 Family RAID Firmware 3.25 User’s Guide • June 2003
9.4
Setting the UPS Power Fail Signal
The “UPS Power Fail Signal” function is to prioritize the alert notification level if
power to your UPS device should fail for any reason. The default High priority
should not be changed.
1. On the Main Menu, select “view and edit Peripheral devices.”
2. Select the “Define Peripheral Device Active Signal” command.
FIGURE 9-7
UPS Power Fail Signal
3. If you want to change the setting, select the “UPS Power Fail Signal” function and
press Return.
4. A prompt will be displayed. Select “Yes” to change the setting.
Chapter 9
Viewing and Editing Peripheral Devices
9-7
9.5
Viewing the Controller Voltage and
Temperature Status Window
To check the status of controller voltage and temperature, perform the following
steps.
1. From the Main Menu, select “view and edit Peripheral devices,” and press Return.
2. Select “Controller Peripheral Device Configuration,” and press Return.
3. Select “View Peripheral Device Status,” and press Return to view voltage and
temperature status of the RAID unit.
The components checked for voltage and temperature will be displayed on screen
and will be defined as normal or out-of-order.
9-8
Sun StorEdge 3000 Family RAID Firmware 3.25 User’s Guide • June 2003
CHAPTER
10
System Functions, Info, and Event
Logs
This chapter contains a discussion of system functions, configuration information,
and shows you how to view event logs. Topics covered include:
■
■
■
■
■
■
■
■
10.1
“System Functions” on page 10-1
“Muting the Beeper” on page 10-2
“Setting a New Password” on page 10-3
■
“Changing a Password” on page 10-4
■
“Disabling the Password” on page 10-4
“Resetting a Controller” on page 10-5
“Shutting Down the Controller” on page 10-6
“Restoring Configuration (NVRAM) from a File” on page 10-7
“Saving Configuration (NVRAM) to Disk” on page 10-8
“Viewing Event Logs on Screen” on page 10-9
System Functions
1. Select “system Functions” from the Main Menu and press Return.
The system Functions menu is displayed.
10-1
2. Select a menu option from the “system Functions” menu and press Return.
10.2
Muting the Beeper
To change the beeper setting, perform the following steps.
1. Select “system Functions” in the Main Menu and press Return.
2. When the controller’s beeper has been activated, choose “Mute beeper,” and then
press Return.
10-2
Sun StorEdge 3000 Family RAID Firmware 3.25 User’s Guide • June 2003
3. Select “Yes” and press Return in the next dialog box to turn the beeper off
temporarily for the current event.
The beeper will still be activated on the next event.
10.3
Setting a New Password
To change the password, perform the following steps.
1. Select “system Functions” in the Main Menu and press Return, and select “change
Password.”
2. Enter the desired password in the column and press Return.
The next dialog box will display “Re-Enter Password”.
3. Enter the password again to confirm and press Return.
The new password now becomes the controller’s password. Providing the correct
password may be necessary when entering the Main Menu from the Initial screen.
Chapter 10
System Functions, Info, and Event Logs
10-3
10.3.1
Changing a Password
1. Select “system Functions” from the Main Menu and press Return.
Use the controller’s password to protect the array from unauthorized entry. Once the
controller’s password has been set, the user can only configure and monitor the
RAID controller by providing the correct password.
Note – The controller is able to verify the password when entering the Main Menu
from the initial screen or making configuration change. If the controller will be left
unattended, the “Password Validation Timeout” can be set to “Always Check.”
Setting validation timeout to “always check” protects the controller configuration
from any unauthorized change.
Note – The controller password and controller name share a 16-character space. The
maximum characters for the controller password is 15. When the controller name
occupies 15 characters, there is only one character left for the controller password,
and vice versa.
2. To set or change the controller password, move the cursor bar to “Change
Password,” and then press Return.
If a password has previously been set, the controller will ask for the old password
first. If the password has not been set, the controller will ask for the new password.
The password cannot be replaced unless a correct old password is provided.
3. Enter the old password and press Return.
If the password is incorrect, it will not allow you to change the password. Instead, it
will display the message Password incorrect! then return to the previous menu.
If the password is correct, or there is no preset password, it will ask for the new
password.
10.3.2
Disabling the Password
To disable or delete the password, press Return only in the password column that is
used for entering a new password. The existing password will be deleted. No
password checking will occur when entering the Main Menu from the Initial screen.
10-4
Sun StorEdge 3000 Family RAID Firmware 3.25 User’s Guide • June 2003
10.4
Resetting a Controller
It is sometimes necessary after changing controller parameters to reset the controller
before the parameter changes can take effect. However, there are two ways of
resetting a controller from the firmware application, the “Reset Controller” menu
option and the “Shutdown Controller” menu option. It is important that you
distinguish between the results of these two menu options.
Use the “Reset Controller” menu option to reset the controller without saving the
contents of the controller’s cache to disk. This can be desirable if you believe that a
software crash or hardware fault may have corrupted the cached data.
Caution – If you want to write the cache contents to disk, do not use the “Reset
Controller” menu option while the controller is connected to host systems. Instead,
use the “Shutdown Controller” menu option and select Yes when you see the “Reset
Controller?” prompt. See “Shutting Down the Controller” on page 10-6 for more
information.
To reset the controller without saving cache contents, follow these steps.
1. Select “system Functions” from the Main Menu and press Return.
2. To reset the controller without powering off the array, select “Reset Controller”
and then press Return.
Chapter 10
System Functions, Info, and Event Logs
10-5
3. Select Yes in the dialog box that follows and press Return.
The controller will now reset as well as power-off or re-power-on.
Caution – Resetting the controller does not preserve the contents of the cache or
write them to disk. When the controller is reset, all cache contents are lost.
Note – Resetting the controller can result in occasional host-side error messages
such as parity error and synchronous error messages. No action is required, and the
condition corrects itself as soon as reinitialization of the controller is complete.
10.5
Shutting Down the Controller
The “Shutdown Controller” menu option first halts all I/O activity, and so it should
be used when all I/O activity from hosts has already been quiesced.
The “Shutdown Controller” menu option then writes the contents of the cache to the
drives.
Note – If you want to restart the controller after shutdown, confirm when prompted
that you want to reset the controller after the shutdown function has completed.
To shut down a controller, with the option of resetting it automatically, follow these
steps.
1. Select “system Functions” from the Main Menu and press Return.
The system Functions menu is displayed.
10-6
Sun StorEdge 3000 Family RAID Firmware 3.25 User’s Guide • June 2003
2. Select the “Shutdown Controller” menu option.
A prompt asks if you want to shut down the controller.
3. Select Yes and press Return.
A status and confirmation message tells you that the controller shutdown is
complete and asks if you want to reset the controller.
4. Select Yes and press Return to reset the controller.
Note – If instead you select No and press Return, you will lose access to the
controller and will need to power it up manually or use the CLI to restart it.
10.6
Restoring Configuration (NVRAM) from
a File
If you have saved a configuration file and want to apply the same configuration to
another array or re-apply it to the array which had the configuration originally, you
must be certain that the channels and SCSI IDs in the configuration file are correct
for the array where you are restoring the configuration.
Chapter 10
System Functions, Info, and Event Logs
10-7
The NVRAM configuration file will restore all configuration settings (channel
settings, host IDs, etc.) but does not rebuild logical drives. To save a configuration
file, refer to “Saving Configuration (NVRAM) to Disk” on page 10-8.
Caution – If the channels or SCIS IDs are not a correct match for the array, you will
lose access to the mismatched channels or drives when you restore the configuration
with the configuration file.
Note – In the Configuration Service program, you can save a configuration file
which can restore all configurations and rebuild all logical drives. However, it will
also erase all data when it rebuilds all logical drives so operation is only performed
when no data has been stored or all data has been transferred to another array.
To restore configuration settings from a saved NVRAM file, perform the following
steps.
1. From the Main Menu, choose “system functions.”
2. Select “Controller maintenance” and press Return.
3. Select “Restore NVRAM from disks,” and press Return.
4. Press Yes to confirm.
A prompt will notify you that the controller NVRAM data has been successfully
restored from disks.
10.7
Saving Configuration (NVRAM) to Disk
This function is used to save controller-dependent configuration information and is
highly recommended whenever a configuration change is made.
The logical configuration information will be stored within the logical drive.
Note – A logical drive must exist for the controller to write NVRAM content onto it.
1. From the Main Menu, select “system Functions.”
2. Use arrow keys to scroll down and select “Controller Maintenance,” select “save
nvram to disks,” and then press Return.
10-8
Sun StorEdge 3000 Family RAID Firmware 3.25 User’s Guide • June 2003
3. Select Yes to confirm.
A prompt will inform you that NVRAM information has been successfully saved.
To restore the configuration, refer to“Restoring Configuration (NVRAM) from a File”
on page 10-7.
10.8
Viewing Event Logs on Screen
A controller event log records an event or alarm that occurs after the system is
powered on
Note – The Event Monitoring Units in each RAID unit and each Expansion Unit
send messages to the controller log that report problems and status of the fans,
temperature, and voltage.
Caution – Powering off or resetting the controller will automatically delete all
recorded event logs.
1. To view the event logs on screen, select “view and edit Event logs” on the Main
Menu and press Return.
Chapter 10
System Functions, Info, and Event Logs
10-9
The controller can store up to 1000 event logs. An event log can record a
configuration or operation event as well as an error message or alarm event.
TABLE 10-1
Example Event Logs
[0181] Controller Initialization Completed
[2181] LG:0 Logical Drive NOTICE: Starting Initialization
[2182] Initialization of Logical Drive 0 Completed
[2181] LG:1 Logical Drive NOTICE: Starting Initialization
[2182] Initialization of Logical Drive 2 Completed
2. To clear the saved event logs, scroll the cursor down to the last event and press
Return.
A “Clear Above xx Event Logs?” confirmation message is displayed.
3. Choose Yes to clear the recorded event logs.
Note – Resetting the controller clears the recorded event logs. If you want event
logs to persist after controller resets, refer to Sun StorEdge 3000 Family Configuration
Service User’s Guide for information about how to install and configure the
Configuration Service software.
10-10
Sun StorEdge 3000 Family RAID Firmware 3.25 User’s Guide • June 2003
APPENDIX
A
Firmware Specifications
This appendix contains the firmware specifications in the following tables:
■
■
■
■
■
■
■
■
■
“Basic RAID Management” on page A-1
“Advanced Features” on page A-2
“Caching Operation” on page A-3
“RAID Expansion” on page A-4
“Redundant Controller” on page A-4
“Data Safety” on page A-5
“Security” on page A-6
“Environment Management” on page A-6
“User Interface” on page A-6
Note – Refer to the Sun StorEdge 3000 Family Installation, Operation, and Service
Manual for your SCSI or Fibre Channel array for up-to-date information about
specific firmware features and descriptions that apply to your array.
TABLE A-1
Basic RAID Management
Feature
Description
RAID Levels
0, 1, 1+0, 3, 5, 30, and 50. Enhanced RAID Levels
supported (with logical volume implementation).
Maximum Number of Logical
Drives
8
Raid Level Dependency to
Each Logical Drive
Independent. Logical drive configured in different RAID
levels can coexist in an array.
Maximum Drive Number of
Each Logical Drive
31 (RAID 3 or 5); 45 (RAID 0); 44 (RAID 1).
Logical Drive Identification
Unique, controller-generated logical drive ID; logical
drive name is user-configurable.
A-1
TABLE A-1
MaXimum Partitions per
Array
128 for SCSI arrays, 1028 for FC arrays.
Maximum Number of Logical
Drives in a Logical Volume
8
Feature
Description
Maximum Number of Luns
per Host ID
Up to 32, user-configurable.
Concurrent I/O
Supported.
Tag Command Queuing
Supported.
Dedicated Spare Drive
Supported; defined as the spare drive specifically
assigned to a logical drive.
Global Spare Drive
Supported; the spare drive is available for all logical
drives.
Auto-Rebuild Onto Spare
Drive
Supported.
Auto-Scan of Replacement
Drive Upon Manually Initiated
Rebuild
One-Step Rebuild Onto
Replacement Drive
Supported.
Auto-Rebuild Onto Failed
Drive Replacement
Supported. With no spare drive assigned, the controller
auto-scans the failed drive and starts to rebuild
automatically once the failed drive has been replaced.
Auto Recovery From Logical
Drive Failure
Supported. When user accidentally removes the wrong
drive to cause the second drive failure of a one-drivefailed RAID 5 or RAID 3 logical drive, switch off the
controller, put the drive back and power on the controller.
The logical drive will be restored to one-drive-failed
status.
TABLE A-2
A-2
Basic RAID Management (Continued)
Advanced Features
Feature
Description
Drive Low-Level Format
Supported.
Drive Identification
Supported. Force the drive to light on the activity
indicator for user to recognize the correct drive.
Sun StorEdge 3000 Family RAID Firmware 3.25 User’s Guide • June 2003
TABLE A-2
Advanced Features (Continued)
Drive Information Listing
Supported.
Drive Read/Write Testing
Supported.
Configuration on Disk
Supported. The logical drive information is recorded on
drive media.
Save and Restore NVRAM to
and From Disks
Supported. Save all the settings stored in the controller
NVRAM to the logical drive members.
Feature
Description
User-Configurable Geometry
Range:
Sector: 32, 64, 127, 255 or Variable.
Head: 64, 127, 255 or Variable.
Cylinder: <1024, <32784, <65536 or Variable.
Drive Motor Spin-Up
Supported. The controller will send spin-up (start unit)
command to each drive at four second intervals.
Drive-Side Tag Command
Queue
Supported. User-adjustable up to 128 for each drive.
Host-Side Maximum Queued
I/O Count
User-adjustable up to 1024.
Maximum Concurrent HostLUN Connection
User-adjustable up to 64.
Number of Tags Reserved for
Each Host-LUN connection
User-adjustable up to 256.
Drive I/O Timeout
User-adjustable.
TABLE A-3
Caching Operation
Feature
Description
Write-Back and Write-Through
Cache
Supported.
Supported Memory Type
SDRAM memory for enhanced performance.
Fast Page Memory with Parity for enhanced data security.
Appendix A
Firmware Specifications
A-3
TABLE A-3
Scatter / Gather
Supported.
I/O Sorting
Supported. Optimized I/O sorting for enhanced
performance.
Variable Stripe Size
RAID 5:
Optimization for random I/O (32k), optimization for
sequential I/O (128k), user selectable.
RAID 3:
Optimization for random I/O (4k), optimization for
sequential I/O (16k), user selectable.
TABLE A-4
RAID Expansion
Feature
Description
On-Line RAID Expansion
Supported.
RAID Expansion - Add Drive
Supported. Multiple drives can be added concurrently.
RAID Expansion – Copy and
Replace Drives
Supported. Replace members with drives of larger
capacity.
TABLE A-5
A-4
Caching Operation
Redundant Controller
Feature
Description
Active-Active Redundant
Controller
Supported.
Synchronized Cache for Both
Controllers
Supported.
Write-back Cache Enabled in
Redundant Controller Mode
Yes; with synchronized cache connection between
controllers.
Hot-Swappable Controller
Supported.
No Single-Point-of-Failure
Supported.
Dynamic Cache Memory
Allocation
Yes. Cache memory is dynamically allocated, not fixed.
Cache Battery Backup
Supported.
Load-Sharing
Supported. Workload can be flexibly divided between
different controllers by assigning logical drives to
different controllers.
Sun StorEdge 3000 Family RAID Firmware 3.25 User’s Guide • June 2003
TABLE A-5
Redundant Controller
User-Configurable Channel
Mode
Supported. Channel modes are configurable as HOST or
DRIVE in both single controller and redundant controller
mode.
Redundant Controller Rolling
Firmware Upgrade
Firmware upgrade can be downloaded to the primary
controller and then be adopted by both controllers.
Redundant Controller
Firmware Synchronization
In the event of controller failure, a replacement controller
running a different version of firmware can restore a
redundant array with a failed controller. Different
firmware versions can be auto-synchronized later.
TABLE A-6
Data Safety
Feature
Description
Regenerate Parity of Logical
Drives
Supported. Can be performed periodically by the user to
ensure that bad sectors do not cause data loss in the event
of drive failure.
Bad Block Auto-Reassignment
Supported. Automatic reassignment of bad blocks.
Battery Backup for Cache
Memory
Supported. The battery backup solutions provide longlasting battery support to the cache memory when power
failure occurs. The unwritten data in the cache memory
can be committed to drive media when power is restored.
Verification on Normal Writes
Supported. Performs read-after-write during normal
write processes to ensure data is properly written to
drives.
Verification on Rebuild Writes
Supported. Performs read-after-write during rebuild
write to ensure data is properly written to drives.
Verification on LD
Initialization Writes
Supported. Performs read-after-write during logical drive
initialization to ensure data is properly written to drives.
Drive SMART Support
Supported. Default: Disabled.
Clone Failing Drive
Users may choose to clone data from a failing drive to a
backup drive manually.
Appendix A
Firmware Specifications
A-5
TABLE A-7
Feature
Description
Password Protection
Supported.
User-Configurable Password
Validation Timeout
Supported. After a specific period of time without any
user interaction, the password will be requested again.
This prevents unauthorized operation when the user is
away.
TABLE A-8
Environment Management
Feature
Description
SAF-TE and SES Support
Supported.
SAF-TE and SES Polling Period
User-configurable (50ms, 100ms, 200ms, 500ms,
1~60sec).
Feature
Description
SAF-TE and SES Temperature Value
Display
Supported. Displays the temperature value
provided by enclosure SAF-TE module (if available).
On-Board Controller Voltage
Monitors
Supported. Monitors the 3.3V, 5V, and 12V voltage
status. Event trigger threshold user-configurable.
On-Board Controller Temperature
Sensors
Supported. Monitors the CPU and board
temperature status. Event trigger threshold userconfigurable.
Enclosure Monitoring of Redundant
Power Supply Status, Fan Status,
UPS Status and Temperature Status
Supported. Fault-Bus, SAF-TE, SES, ISEMS.
TABLE A-9
A-6
Security
User Interface
Feature
Description
RS-232C Terminal
Supports terminal modes: ANSI, VT-100, ANSI Color.
Provides menu-driven user-friendly text-based interface.
Beeper Alarm
Warns user when any failure or critical event occurs.
Sun StorEdge 3000 Family RAID Firmware 3.25 User’s Guide • June 2003
APPENDIX
B
Parameter Summary Tables
This appendix lists the firmware parameter settings for both the FC and SCSI arrays.
You can fine-tune your array by making changes to these settings. It also lists the
parameter defaults that you should not change unless advised to by Technical
Support.
Topics covered include:
B.1
■
“Introducing Default Parameters” on page B-1
■
“Basic Default Parameters” on page B-2
■
“Default Configuration Parameters” on page B-3
■
“Default Peripheral Device Parameters” on page B-9
■
“Default System Functions” on page B-10
■
“Keeping Specific Parameter Defaults” on page B-11
Introducing Default Parameters
Although the factory defaults provide optimized controller operation, you may want
to fine-tune your array through minor modifications to the following parameters
listed.
Some parameters can be changed only at the initial array configuration; other
parameters may be changed at any time. Please note the listing of parameters
defaults that should not be changed unless directed by Technical Support.
Note – For customer convenience, these tables apply to both the Sun StorEdge 3310
SCSI array, using firmware version 3.25, and the Sun StorEdge 3510 FC array using
firmware version 3.27.
B-1
B.2
Basic Default Parameters
These parameters are the primary settings for each array.
TABLE B-1
Logical Drive Parameters (View and Edit Logical Drives)
User-Defined Parameter
FC Default Setting
Create Logical Drives
• 1–2 per array.
• 1–2 spares per array.
• 1–8 drives per array.
Change a Logical Drive
Controller Assignment
Primary.
TABLE B-2
Range of Values
Secondary.
Logical Volume Parameters (View and Edit Logical Volumes)
User-Defined Parameter
FC Default Setting
Create a Logical Volume
Primary controller.
Auto-Assign Global Spare
Drive
Disabled.
TABLE B-3
SCSI Default Settings
SCSI Default Settings
Range of Values
Secondary.
Disabled.
Enabled.
Disabled.
Host LUN Parameters (View and Edit Host LUNs)
User-Defined Parameter
FC Default Setting
SCSI Default Settings
Host LUN IDs
16 IDs per channel maximum in loop
mode; 1 ID per channel in point-topoint mode.
Channel 0 ID 40 - primary.
Channel 1 ID 42 - secondary.
Channel 4 ID 44 - primary.
Channel 5 ID 46 - secondary.
2 IDs per channel maximum.
Channel 1 ID 0 - primary.
Channel 1 ID NA- secondary.
Channel 3 ID NA- primary.
Channel 3 ID 1- secondary.
TABLE B-4
SCSI Drive Parameters (View and Edit SCSI Drives)
User-Defined Parameter
FC Default Setting
FC Drive ID Switch Settings
0
B-2
SCSI Default Settings
Sun StorEdge 3000 Family RAID Firmware 3.25 User’s Guide • June 2003
Range of Values
0–7
TABLE B-5
SCSI Channel Parameters (View and Edit SCSI Channels)
User-Defined Parameter
FC Default Setting
SCSI Default Settings
Range of Values
Host Channel Settings
0, 1, 4, 5 Host Channels.
1, 3 Host Channels.
Vary by product.
Drive Channel Settings
2 and 3
0 and 2
Vary by product.
Sync Transfer Clock
80 MHz
80 MHz
Do Not Change this
parameter.
2.5 MHz to 80 MHz and
Async.
Wide Transfer
Enabled.
Enabled.
Do Not Change this
parameter.
Enabled.
Disabled.
Parity Check
Enabled.
Enabled.
Do Not Change this
parameter.
Disabled.
Enabled.
B.3
Default Configuration Parameters
The most important parameter to review are the Caching Parameters which impact
the block size and optimization performance. Many parameters are optional or
unused, depending on the applicable product.
The parameters in the following tables can be set using the View and Edit
Configuration Parameters menu:
■
■
■
■
■
“Communication Parameters” on page B-4
“Caching Parameters” on page B-5
“Peripheral Device Type Parameters” on page B-6
“Host-Side and Drive-Side Parameters” on page B-6
“Other Configuration Parameters” on page B-8
Appendix B
Parameter Summary Tables
B-3
TABLE B-6
Communication Parameters
User-Defined Parameter
FC Default Setting
SCSI Default Settings
Range of Values
Communication Parameters > RS-232 Port Configuration
Baud Rate
38400
38400
9600, 19200, 4800, 2400,
38400
Data Routing
Direct to Port.
Direct to Port.
Point to Point (PPP).
Direct to Port.
Terminal Emulation
Enabled.
Enabled.
Disabled.
Enabled.
Communication Parameters > PPP Configuration
Access Name
Not Set.
Not Set.
Type an access name.
Not Set.
Access Password
Not Set.
Not Set.
Type an access password.
Not Set.
Communication Parameters > Modem Operation > Modem Setup
Configure Modem Port
Not configured.
Not configured.
Type a port.
Communication Parameters > Modem Operation > Modem Setup > Dial-out Function
Dial-out Modem
command
Not set.
Not Set.
Type a command.
Auto Dial-out on
Initialization
Disabled.
Disabled.
Enabled.
Disabled.
Dial-out Timeout
(Seconds)
None.
None.
Type the number of
seconds.
Dial-out Retry Count
2
2
Type a number.
Dial-out Retry Interval
(Minutes)
5 minutes.
5 minutes.
Type a number.
Dial-out Event
Condition
Disabled.
Disabled.
Critical Events only.
Critical Events and
Warnings.
All Events, Warnings, and
Notifications.
Disabled.
B-4
Sun StorEdge 3000 Family RAID Firmware 3.25 User’s Guide • June 2003
TABLE B-6
Communication Parameters (Continued)
User-Defined Parameter
FC Default Setting
SCSI Default Settings
Range of Values
Communication Parameters > SNMP Configuration
SNMP Agent
Community Name
Not Set.
Not Set.
Type a name.
SNMP Trap Destination
Community Name
(Parameters 1 through 4)
Not Set.
Not Set.
Type a community name
for each of the parameters
that you want to use.
SNMP Trap Destination
IP Address (Parameters
1 through 4)
Not Set.
Not Set.
Type an IP address for each
of the parameters that you
want to use.
Internet Protocol
Not Set.
Not Set.
Type the Internet Protocol
for the SNMP
configuration.
TABLE B-7
Caching Parameters
User-Defined Parameter
FC Default Setting
SCSI Default Settings
Range of Values
Write-Back Cache
Enabled.
Enabled.
Disabled.
Enabled.
Optimization for
Random/Sequential
Sequential
(cannot be changed after
the creation of a logical
drive).
Sequential
(cannot be changed after
the creation of a logical
drive).
Sequential or Random.
Appendix B
Parameter Summary Tables
B-5
TABLE B-8
Peripheral Device Type Parameters
User-Defined Parameter
FC Default Setting
SCSI Default Settings
Range of Values
Peripheral Device Type
Enclosure Services
Device.
Enclosure Services
Device.
No Device Present.
Direct-Access Device.
Sequential-Access Device.
Processor Device.
CD-ROM Device.
Scanner Device.
M0 Device.
Storage Array Controller
Device.
Unknown Device.
Enclosure Services Device.
Peripheral Device Type
Qualifier.
Connected.
Connected.
Disconnected.
Connected.
User-Defined Parameter
FC Default Setting
SCSI Default Settings
Range of Values
Device Supports
Removable Media
Disabled.
Disabled.
Enabled.
Disabled.
LUN Applicability
Undefined LUN-0s
Only.
TABLE B-9
Disabled.
Host-Side and Drive-Side Parameters
User-Defined Parameter
FC Default Setting
SCSI Default Settings
Range of Values
Maximum Queued I/O Count
1024 bytes
256 bytes
Auto, or 1-1024 bytes
LUNs per Host SCSI ID
32
32
1 to 32
Maximum Number of Concurrent
Host-LUN Connections
1024
128
1 to 1024
Number of Tags
Reserved for Each HostLUN Connection
1024
32
1 to 1024 (FC)
1 to 256 (SCSI)
Host-side SCSI Parameters
Host-side SCSI Parameters > Host Cylinder/ Head/ Sector Mapping Parameters
Sector Ranges
Variable.
Variable.
32, 64, 127, 255, Variable
sectors.
Head Ranges
Variable.
Variable.
64, 127, 255, Variable heads.
Cylinder Ranges
Variable.
Variable.
1024, 32768, 65536, Variable
cylinders.
B-6
Sun StorEdge 3000 Family RAID Firmware 3.25 User’s Guide • June 2003
TABLE B-9
Host-Side and Drive-Side Parameters (Continued)
Host-side SCSI Parameters > Fibre Connection Option
Loop only
Not applicable
FC Range of Values:
Point to point only.
Loop only.
Loop preferred, otherwise
point to point.
SCSI Motor Spin-Up
Disabled.
Disabled.
Do Not Change this
parameter.
Enabled.
Disabled.
SCSI Reset at Power-Up
Enabled.
Enabled.
Do Not Change this
parameter.
Disabled.
Enabled.
User-Defined Parameter
FC Default Setting
SCSI Default Settings
Range of Values
Disk Access Delay Time
15 seconds.
15 seconds.
Do Not Change this
parameter.
None to 75 seconds.
SCSI I/O Timeout
30 seconds.
7 seconds.
500 milliseconds to 30
seconds.
Maximum Tag Count
32
32
1-256 or Disabled.
Periodic Drive Check
Time
Disabled.
Disabled.
1/2 to 30 seconds, Disabled.
Periodic SAF-TE/SES
Check Time
30 seconds.
30 seconds.
Disabled to 60 seconds.
Periodic Auto-Detect
Failure Drive Swap
Check Time
Disabled.
Disabled.
5 to 60 seconds.
Disabled.
Drive Predictable Failure
Mode (SMART)
Disabled.
Disabled.
Do Not Change this
parameter.
Detect Only.
Detect and Perpetual Clone.
Detect and Clone +
Replace.
Disabled.
Disabled.
Disabled.
Enabled.
Disabled.
Drive-side SCSI Parameters
Auto-Assign Global Spare
Drive
Appendix B
Parameter Summary Tables
B-7
TABLE B-10
Other Configuration Parameters
User-Defined Parameter
FC Default Setting
SCSI Default Settings
Range of Values
Rebuild Priority
Low.
Low.
Normal, Improved,
High, Low.
Verification on Writes
Disabled.
Disabled.
On LD Initialization
Writes Disabled.
On LD Rebuild Writes
Disabled.
On Normal Drive Writes
Disabled.
Disk Array Parameters
Redundant Controller Parameters
Secondary Controller RS232
Disabled.
Disabled.
Enabled.
Disabled.
Remote Redundant
Controller
Disabled.
Disabled.
Enabled.
Disabled.
User-Defined Parameter
FC Default Setting.
SCSI Default Settings
Range of Values
Controller Name
Not Set.
Not Set.
Type a name.
LCD Title Display
Controller Logo.
Controller Logo.
Do Not Change this
parameter.
Password Validation
Timeout
Always Check.
Always Check.
Disable, 1, 2, or 5
minutes.
Controller Unique
Identifier
Automatically set by the
SAF-TE or SES device.
Automatically set by the
SAF-TE or SES device.
Type a value.
SDRAM ECC
Enabled.
Enabled.
Do Not Change this
parameter.
Disabled.
Disabled.
Type a percentage based
on the RAM available
from the controller.
Controller Parameters
DMEP Controller Parameters
Total Usable Memory for
DMEP
B-8
Sun StorEdge 3000 Family RAID Firmware 3.25 User’s Guide • June 2003
B.4
Default Peripheral Device Parameters
The following peripheral device parameters are available.
TABLE B-11
Peripheral Device Type Parameters (View and Edit Peripheral Devices)
User-Defined Parameter
FC Default Setting
SCSI Default Settings
Range of Values
Redundant Controller
Primary.
Primary.
Force primary controller
failure.
Force secondary
controller failure.
UPS Status
Disabled.
Disabled.
Enabled.
Disabled.
Set Peripheral Device Entry
Set Peripheral Device Entry > Event Trigger Operations.
Temperature exceeds
threshold
Not applicable in FC.
Enabled.
Disabled.
Enabled.
Define Peripheral Device Active
Signal
Low.
Low.
High.
Low.
User-Defined Parameter
FC Default Setting
SCSI Default Settings
Range of Values
Controller Peripheral Device Configuration > Voltage and Temperature Parameters
Upper Trigger Threshold for
+3.3V Event
Default (3.6V).
Default (3.6V).
Disable, 3.4V - 3.9V.
Lower Trigger Threshold for
+3.3V Event
Default (2.9V).
Default (2.9V).
Disable, 2.6V - 3.2V.
Upper Trigger Threshold for
+5V Event
Default (5.5V).
Default (5.5V).
Disable, 5.2V - 6.0V.
Lower Trigger Threshold for
+5V Event
Default (4.5V).
Default (4.5V).
Disable, 4.0V - 4.8V.
Upper Trigger Threshold for
+12V Event
Default (13.2V).
Default (13.2V).
Disable, 12.5V - 14.4V.
Lower Trigger Threshold for
+12V Event
Default (10.8V).
Default (10.8V).
Disable, 9.6V - 11.5V.
Upper Trigger Threshold for
CPU Temperature Events
95 (C).
95 (C).
Disable, 50-100C.
Appendix B
Parameter Summary Tables
B-9
TABLE B-11
Peripheral Device Type Parameters (View and Edit Peripheral Devices) (Continued)
Lower Trigger Threshold for
CPU Temperature Events
Default 0 (C).
Default 0 (C).
Disable, 0-20C.
Upper Trigger Threshold for
Board Temperature Events
85 (C).
85 (C).
Disable, 50-100C.
Lower Trigger Threshold for
Board Temperature Events
Default 0 (C).
Default 0 (C).
Disable, 0-20C.
B.5
Default System Functions
The following system function parameters are available.
TABLE B-12
System Parameters (System Functions)
User-Defined Parameter
FC Default Setting
SCSI Default Setting
Range of Values
Mute Beeper
No.
No.
Yes.
No.
change Password
No.
No.
Type a password.
No.
Reset Controller
No.
No.
Yes.
No.
Shutdown controller (reserved)
No.
No.
Yes.
No.
Restore nvram from disks
No.
No.
Yes.
No.
Save nvram to disks
No.
No.
Yes.
No.
No.
Yes.
No.
Controller Maintenance
Controller Maintenance > Advanced Maintenance Functions
Download Boot Record with
Firmware
B-10
No.
Sun StorEdge 3000 Family RAID Firmware 3.25 User’s Guide • June 2003
B.6
Keeping Specific Parameter Defaults
Default Parameter
Do Not Change these Default Parameters (unless directed
by Technical Support)
Fault Management:
Drive Predictable Failure Mode (SMART)
Disabled on drives.
SDRAM ECC
Enabled.
SCSI Parameters:
Data Transfer Rate (sync transfer clock)
80 MHz.
Wide Transfer
Enabled.
Parity Check
Enabled.
Spin-Up Parameters:
SCSI Motor Spin-Up
Disabled.
SCSI Reset at Power-Up
Enabled.
Disk Access Delay Time
15 (none to 75 seconds).
Appendix B
Parameter Summary Tables
B-11
B-12
Sun StorEdge 3000 Family RAID Firmware 3.25 User’s Guide • June 2003
APPENDIX
C
Event Messages
This appendix lists the following event messages:
■
■
■
■
“Controller Events” on page C-1
“SCSI Drive Events” on page C-2
“Logical Drive Events” on page C-4
“General Target Alerts” on page C-6
There are three categories of events.
TABLE C-1
Category
Description/Response
Alert
Errors that need to attend to immediately; may require reconnecting
cables, replacing a component, or rebuilding a drive.
Warning
Notification
C.1
Categories of Event Messages
Errors which may indicate a temporary condition, a possible component
problem or the need to adjust controller parameters. Press Esc to clear
message.
Informational message sent from controller firmware; press Esc to clear
message.
Controller Events
The controller records all array events during power on; it records up to 1,000
events.
Caution – Powering off or resetting the controller will cause an automatic deletion
of all recorded event logs.
C-1
C.1.1
Alerts
[0104] Controller ALERT: DRAM Parity Error Detected
[0105] Controller <primary/secondary> SDRAM ECC <multi-bits/single-bit>
Error Detected
[0110] CHL:_ FATAL ERROR (_)
[0111] Controller ALERT: Redundant Controller Failure Detected
[0114] Controller ALERT: Power Supply Unstable or NVRAM Failed
C.1.2
Warnings
[0107] Memory Not Sufficient to Fully Support Current Config.
C.1.3
Notifications
[0111] Controller NOTICE: Redundant Controller Firmware Updated
[0181] Controller Initialization Completed
[0187] Memory is Now Sufficient to Fully Support Current Config.
[0189] NVRAM Factory Defaults Restored
[0189] NVRAM Restore from Disk is Completed
[0189] NVRAM Restore from File is Completed
C.2
SCSI Drive Events
SCSI Drive Event messages include:
C-2
Sun StorEdge 3000 Family RAID Firmware 3.25 User’s Guide • June 2003
C.2.1
Warnings
[1101] CHL:_ ID:_ SCSI Target ALERT: Unexpected Select Timeout
[1102] CHL:_ ID:_ SCSI Target ALERT: Gross Phase/Signal Error Detected
[1103] CHL:_ ID:_ SCSI Target ALERT: Unexpected Disconnect Encountered
[1104] CHL:_ ID:_ SCSI Drive ALERT: Negotiation Error Detected
[1105] CHL:_ ID:_ SCSI Target ALERT: Timeout Waiting for I/O to Complete
[1106] CHL:_ ID:_ SCSI Target ALERT: SCSI Parity/CRC Error Detected
[1107] CHL:_ ID:_ SCSI Drive ALERT: Data Overrun/Underrun Detected
[1108] CHL:_ ID:_ SCSI Target ALERT: Invalid Status/Sense Data Received (_)
[110f] CHL:_ LIP(_ _) Detected
[110f] CHL:_ SCSI Drive Channel Notification: SCSI Bus Reset Issued
[110f] CHL:_ SCSI Drive Channel ALERT: SCSI Bus Reset Issued
[1111] CHL:_ ID:_ SCSI Target ALERT: Unexpected Drive Not Ready
[1112] CHL:_ ID:_ SCSI Drive ALERT: Drive HW Error (_)]
[1113] CHL:_ ID:_ SCSI Drive ALERT: Bad Block Encountered - _ (_)
[1114] CHL:_ ID:_ SCSI Target ALERT: Unit Attention Received
[1115] CHL:_ ID:_ SCSI Drive ALERT: Unexpected Sense Received (_)
[1116] CHL:_ ID:_ SCSI Drive ALERT: Block Reassignment Failed - _ (_)
[1117] CHL:_ ID:_ SCSI Drive ALERT: Block Successfully Reassigned - _ (_)
[1118] CHL:_ ID:_ SCSI Drive ALERT: Aborted Command (_)
[1142] SMART-CH:_ ID:_ Predictable Failure Detected (TEST)
[1142] SMART-CH:_ ID:_ Predictable Failure Detected
[1142] SMART-CH:_ ID:_ Predictable Failure Detected-Starting Clone
[1142] SMART-CH:_ ID:_ Predictable Failure Detected-Clone Failed
C.2.2
Notifications
[11c1] CHL:_ ID:_ SCSI Drive NOTICE: Scan scsi drive Successful
Appendix C
Event Messages
C-3
C.3
SCSI Channel Events
SCSI Channel Event messages include:
C.3.1
Alerts
[113f] CHL:_ ALERT: Redundant Loop Connection Error Detected on ID:
[113f] CHL:_ SCSI Drive Channel ALERT: SCSI Channel Failure
[113f] CHL:_ ALERT: Fibre Channel Loop Failure Detected
[113f] CHL:_ ALERT: Redundant Loop for Chl:_ Failure Detected
[113f] CHL:_ ALERT: Redundant Path for Chl:_ ID:_ Expected but Not Found
[113f] CHL:_ ID:_ ALERT: Redundant Path for Chl:_ ID:_ Failure Detected
C.3.2
Notifications
[113f] CHL:_ NOTICE: Fibre Channel Loop Connection Restored
[113f] CHL:_ ID:_ NOTICE: Redundant Path for Chl:_ ID:_ Restored
C.4
Logical Drive Events
Logical Drive Event messages include:
C-4
Sun StorEdge 3000 Family RAID Firmware 3.25 User’s Guide • June 2003
C.4.1
Alerts
[2101] LG: <NA/Logical Drive Index> Logical Drive ALERT: CHL:_ ID:_ SCSI
Drive Failure
[2103] LG:_ Logical Drive ALERT: Rebuild Failed
[2106] LG:_ Logical Drive ALERT: Add SCSI Drive Operation Failed
[2102] LG:_ Logical Drive ALERT: Initialization Failed
[2104] LG:_ Logical Drive ALERT: Parity Regeneration Failed
[2105] LG:_ Logical Drive ALERT: Expansion Failed
[2111] LG:_ Logical Drive ALERT: CHL:_ ID:_ Clone Failed
C.4.2
Notifications
[2181] LG:_ Logical Drive NOTICE: Starting Initialization
[2182] Initialization of Logical Drive _ Completed
[2183] LG:_ Logical Drive NOTICE: Starting Rebuild
[2184] Rebuild of Logical Drive _ Completed
[2185] LG:_ Logical Drive NOTICE: Starting Parity Regeneration
[2186] Parity Regeneration of Logical Drive _ Completed
[2187] LG:_ Logical Drive NOTICE: Starting Expansion
[2188] Expansion of Logical Drive _ Completed
[2189] LG:_ Logical Drive NOTICE: Starting Add SCSI Drive Operation
[218a] Add SCSI Drive to Logical Drive _ Completed
[218b] LG:_ Logical Drive NOTICE: Add SCSI Drive Operation Paused
[218c] LG:_ Logical Drive NOTICE: Continue Add SCSI Drive Operation
[21a1] LG:_ Logical Drive NOTICE: CHL:_ ID:_ Starting Clone
[21a2] LG:_ Logical Drive NOTICE: CHL:_ ID:_ Clone Completed
Appendix C
Event Messages
C-5
C.5
General Target Alerts
General Target Alert messages include:
C.5.1
SAF-TE Device
[3f21] SAF-TE Device (_) ALERT: Power Supply Failure Detected (_)
[3f22] SAF-TE Device (_) ALERT: Cooling Fan Not Installed (_)
[3f22] SAF-TE Device (_) ALERT: Cooling Fan Failure Detected (_)
[3f23] SAF-TE Device (_) ALERT: Elevated Temperature Alert (_)
[3f24] SAF-TE Device (_) ALERT: UPS Power Failure Detected (_)
C.5.2
Controller On-Board
[3f23] Peripheral Device ALERT: CPU Temperature <high/low threshold>
Temperature Detected (_._C)
[3f23] Peripheral Device ALERT: Board1 Temperature <high/low threshold>
Temperature Detected (_._C)
[3f22] Peripheral Device ALERT: Controller FAN _ Not Present or Failure
Detected
[3f22] Peripheral Device ALERT: Controller FAN _ <high/low threshold> Speed
Detected (_RPM)
[3f21] Peripheral Device ALERT: +3.3V <upper/lower threshold> Voltage
Detected (_)
[3f21] Peripheral Device ALERT: +5V <upper/lower threshold> Voltage Detected
(_)
[3f21] Peripheral Device ALERT: +12V <upper/lower threshold> Voltage
Detected (_)
C-6
Sun StorEdge 3000 Family RAID Firmware 3.25 User’s Guide • June 2003
C.5.3
I2C Device
[3f23] Peripheral Device ALERT: Temperature Sensor _ Failure Detected
[3f23] Peripheral Device ALERT: Temperature Sensor _ Not Present
[3f23] Peripheral Device ALERT: <high/low threshold> Temperature _ Detected
(_(F/C)]
[3f22] Peripheral Device ALERT: FAN _ Failure Detected
[3f22] Peripheral Device ALERT: FAN _ Not Present
[3f22] Peripheral Device ALERT: <high/low threshold> FAN _ Speed Detected (_
RPM)
[3f21] Peripheral Device ALERT: Power Supply _ Failure Detected
[3f21] Peripheral Device ALERT: Power Supply _ Not Present
[3f21] Peripheral Device ALERT: <high/low threshold> Power Supply _ Voltage
Detected (_)
[3f24] Peripheral Device ALERT: UPS _ AC Power Failure Detected
[3f24] Peripheral Device ALERT: UPS _ Battery Failure Detected
Appendix C
Event Messages
C-7
C.5.4
SES Devices
[3f21] SES (C_ I_) Power Supply _: <Vendor descriptor strings/Device Not
Supported>!
[3f21] SES (C_ I_) Power Supply _: <Vendor descriptor strings/Device Not
Installed>!
[3f21] SES (C_ I_) Power Supply _: <Vendor descriptor strings/Device Unknown
Status>!
[3f21] SES (C_ I_) Power Supply _: <Vendor descriptor strings/Device Not
Available>!
[3f22] SES (C_ I_) Cooling element _: <Vendor descriptor strings/Device Not
Supported>!
[3f22] SES (C_ I_) Cooling element _: <Vendor descriptor strings/Device Not
installed>!
[3f22] SES (C_ I_) Cooling element _: <Vendor descriptor strings/Device
Unknown Status>!
[3f22] SES (C_ I_) Cooling element _: <Vendor descriptor strings/Device Not
Available>!
[3f23] SES (C_ I_) Temperature Sensor _: <Vendor descriptor strings/Device Not
Supported>!
[3f23] SES (C_ I_) Temperature Sensor _: <Vendor descriptor strings/Device Not
installed>!
[3f23] SES (C_ I_) Temperature Sensor _: <Vendor descriptor strings/Device
Unknown Status>!
[3f23] SES (C_ I_) Temperature Sensor _: <Vendor descriptor strings/Device Not
Available>!
[3f24] SES (C_ I_) UPS _: <Vendor descriptor strings/Device Not Supported>!
[3f24] SES (C_ I_) UPS _: <Vendor descriptor strings/Device Not installed>!
[3f24] SES (C_ I_) UPS _: <Vendor descriptor strings/Device Unknown Status>!
[3f24] SES (C_ I_) UPS _: <Vendor descriptor strings/Device Not Available>!
[3f21] SES (C_ I_) Voltage sensor _: <Vendor descriptor strings/Device Not
Supported>!
[3f21] SES (C_ I_) Voltage sensor _: <Vendor descriptor strings/Device Not
installed>!
C-8
Sun StorEdge 3000 Family RAID Firmware 3.25 User’s Guide • June 2003
[3f21] SES (C_ I_) Voltage sensor _: <Vendor descriptor strings/Device Unknown
Status>!
[3f21] SES (C_ I_) Voltage sensor _: <Vendor descriptor strings/Device Not
Available>!
[3f21] SES (C_ I_) Current sensor _: <Vendor descriptor strings/Device Not
Supported>!
[3f21] SES (C_ I_) Current sensor _: <Vendor descriptor strings/Device Not
installed>!
[3f21] SES (C_ I_) Current sensor _: <Vendor descriptor strings/Device Unknown
Status>!
[3f21] SES (C_ I_) Current sensor _: <Vendor descriptor strings/Device Not
Available>!
C.5.5
General Peripheral Device
[3f21] Peripheral Device ALERT: Power Supply Failure Detected
[3f22] Cooling Fan Not Installed
[3f22] Cooling Fan Failure Detected
[3f24] Elevated Temperature Alert
[3f24] UPS Power Failure Detected
Appendix C
Event Messages
C-9
C-10
Sun StorEdge 3000 Family RAID Firmware 3.25 User’s Guide • June 2003
Glossary
The glossary lists acronyms and defines RAID terms found throughout the
documentation. It also includes definitions of the operational states for disk drives,
logical drives, and redundant controllers.
Acronyms
ANSI
CH
CISPR
EMU
FC-AL
FRU
GB
GBIC
American National Standards Institute.
Channel.
International Special Committee on Radio Interference.
Event Monitoring Unit.
Fibre Channel-Arbitrated Loop. FC-AL is implemented as either a loop or a
Fabric. A loop can contain up to 126 nodes, accessible through only one or two
servers.
Field-replaceable unit.
Gigabyte. 1,000,000,000 (one billion) bytes.
Gigabit Interface Converter. A hot-swappable input/output device that plugs
into a Gigabit Ethernet port or Fibre Channel.
HBA
Host bus adapter.
ID
Identifier number.
IEC
JBOD/Expansion Unit
LAN
LD
International Electrotechnical Commission.
Just a Bunch of Disks (a Sun StorEdge unit with drives and no controllers).
Local area network.
Logical drive.
Glossary-1
LUN
Logical unit number. A logical unit number (LUN) is a unique identifier used
on a SCSI channel that enables a host to differentiate between separate devices.
LVD
A low-noise, low-power, and low-amplitude signaling technology that enables
data communication between a supported server and storage devices. LVD
signaling uses two wires to drive one signal over copper wire and requires a
cable that is no longer than 25 meters (82 ft.).
MB
NVRAM
PID
Non-volatile random access memory. A memory unit equipped with a battery
so that the data stays intact even after the main power had been switched off.
Primary controller identifier number.
RAID
Redundant array of independent disks. A configuration in which multiple
drives are combined into a single virtual drive to improve performance and
reliability.
SAN
Storage area networking. A high-speed, open-standard scalable network of
storage devices and servers providing accelerated data access.
SCSI
Small Computer Systems Interface. An industry standard for connecting disk
and tape devices to a workstation.
SES
SCSI Enclosure Services driver. An interface to SCSI Enclosure Services
devices. These devices sense and monitor the physical conditions within an
enclosure, as well as enable access to the status reporting and configuration
features of the enclosure (such as indicator LEDs on the enclosure).
SID
Primary controller identifier number.
SMART
Glossary-2
Megabyte. 1,000,000 bytes or characters of data.
Self Monitoring Analysis and Reporting Technology. The industry standard
reliability prediction indicator for both the IDE/ATA and SCSI hard disk
drives. Hard disk drives with SMART offer early warning of some hard disk
failures so critical data can be protected.
SMTP
Simple Mail Transfer Protocol. A protocol for sending e-mail messages between
servers and from mail clients to mail servers. The messages can then be
retrieved with an e-mail client using either POP or IMAP.
SNMP
Simple Network Management Protocol. A set of protocols for managing
complex networks. SNMP works by sending messages, called protocol data
units (PDUs), to different parts of a network. SNMP-compliant devices, called
agents, store data about themselves in Management Information Bases (MIBs)
and return this data to the SNMP requesters.
WWN
Worldwide name. A number used to identify array logical drives in both the
array software and in systems using the Solaris operating environment.
Sun StorEdge 3000 Family RAID Firmware 3.25 User’s Guide • June 2003
Terminology
active-active
controllers
automatic rebuild
A pair of components, such as storage controllers in a failure-tolerant RAID
array that share a task or set of tasks when both are functioning normally.
When one component of the pair fails, the other takes the entire load. Dual
active controllers (also called dual-active controllers) are connected to the same
set of devices and provide a combination of higher I/O performance and
greater failure tolerance than a single controller.
A process where data is automatically reconstructed after a drive failure and
written to a standby (spare) drive. An automatic rebuild will also occur when a
new drive is installed manually in place of a failed drive. If the rebuild process
is interrupted by a reset, use the Rebuild command on the Array
Administration menu to restart the rebuilding process.
background rate
The background rate is the percentage of available array controller CPU time
assigned to array administration activities, such as rebuilding failed drives,
checking parity, and initialization. If the background rate is set to 100%, the
array administration activities have a higher priority than any other array
activity. At 0%, the array administration activity is done only if there is no
other activity on the array controller.
caching
Allows data to be stored in a pre-designated area of a disk or RAM (random
access memory). Caching is used to speed up the operation of RAID arrays,
disk drives, computers and servers, or other peripheral devices.
channel
Any path used for the transfer of data and control information between storage
devices and a storage controller or I/O adapter. Also refers to one SCSI bus on
a disk array controller. Each disk array controller provides at least one channel.
fabric
fabric switch
failover
fault tolerance
Fibre Channel network built around one or more switches.
A fabric switch functions as a routing engine, which actively directs data
transfer from source to destination and arbitrates every connection. Bandwidth
per node through a Fabric switch remains constant when more nodes are
added, and a node on a switch port uses an up-to-100 MB-per-second data path
to send or receive data.
A mode of operation for failure-tolerant arrays in which a component has
failed and its function has been assumed by a redundant component.
The capacity to cope with internal hardware problems without interrupting the
array’s data availability, often by using backup systems brought online when a
failure is detected. Many arrays provide fault tolerance by using RAID
architecture to give protection against loss of data when a single disk drive
fails. Using RAID 1 (mirroring), RAID 3 or 5 (striping with parity), or RAID 6
or 1+0 (mirroring and striping) techniques, the array controller can reconstruct
data from a failed drive and write it to a standby or replacement drive.
Glossary-3
fault-tolerant logical
drive
Fibre Channel
Fibre Channel HBA
A logical drive that provides protection of data in the event of a single drive
failure by employing RAID 1, 3, 5, or 6 (also known as RAID 1+0).
A cost-effective gigabit communications link deployed across a wide range of
hardware.
Fibre channel adapter of a host computer, server, or workstation.
fibre hubs
An Arbitrated Loop Hub is a wiring concentrator. “Arbitrated” means that all
nodes communicating over this Fibre loop are sharing a 100 MB-per-second
segment. Whenever more devices are added to a single segment, the
bandwidth available to each node is further divided. A loop configuration
allows different devices in the loop to be configured in a token ring style. With
a Fibre Hub, a Fibre loop can be re-arranged in a star-like configuration for the
Hub itself contains port bypass circuitry that forms an internal loop inside.
Bypass circuits can automatically reconfigure the loop once a device is
removed or added without disrupting the physical connection to other devices.
groups
A group is a new data object that allows multiple servers to be contained under
a single category, are similar in concept to domains, and allow you to organize
servers within Configuration Service. Instead of a linear tree of all the managed
servers, the Configuration Service operator can organize the servers into like
sets or groups. In the case where many servers are present, groups allow more
icons to appear at the same time in the main Configuration Service window
without scrolling.
Groups are not required. You can configure Configuration Service for no
groups and fifteen servers, for example, or for one group with ten servers
underneath, with an additional five at the top level. Configuration Service
allows any combination.
The number of groups permitted and the number of servers within a group is
limited only by available array memory. If a server is a member of a group and
a user deletes that group from the group list box, Configuration Service
reassigns the servers in that group to the no group category. Configuration
Service automatically remaps the tree in the main window.
hot spare
A drive in a RAID 1 or RAID 5 configuration that contains no data and acts as
a standby in case another drive fails.
hot-swappable
The ability of a field-replaceable unit (FRU) to be removed and replaced while
the array remains powered on and operational.
initialization
The process of writing a specific pattern to all data blocks on all drives in a
logical drive. This process overwrites and destroys existing data on the disks
and the logical drive. Initialization is required to make the entire logical drive
consistent at the onset. Initialization ensures that any parity checks performed
in the future will execute correctly.
Glossary-4
Sun StorEdge 3000 Family RAID Firmware 3.25 User’s Guide • June 2003
logical drive
A section of disk storage space, also referred to as a LUN, that is presented to
the host operating environment as a single physical drive. A logical drive may
be located on one or more physical drives. Each array controller can manage
one to eight logical drives
LUN mapping
The ability to change the virtual LUN as presented to the server from storage.
This enables such benefits as the ability of a server to boot from the SAN
without requiring of a local disk drive. Each server requires LUN 0 to boot.
LUN masking
The characteristic that enables an administrator to dynamically map an HBA to
a specified LUN. This provides an individual server or multiple servers access
to an individual drive or to multiple drives, and prohibits unwanted server
access to the same drives.
mirroring (RAID 1)
Data written to one disk drive is simultaneously written to another disk drive.
If one disk fails, the other disk can be used to run the array and reconstruct the
failed disk. The primary advantage of disk mirroring is 100% data redundancy.
Since the disk is mirrored, it does not matter if one of the disks fails. Both disks
contain the same data at all times and either can act as the operational disk.
Disk mirroring provides 100% redundancy, but is expensive because each drive
in the array is duplicated.
N port
A Fibre Channel port in a point-to-point or Fabric connection.
out-of-band
Refers to the connections and devices that are not in the data path.
parity check
A process whereby the integrity of the redundant data on fault tolerant arrays
(RAID 1, 3, 5, and 6 or 1+0) is checked. The parity checking procedure on a
logical drive recalculates the parity of data stripes in each of the logical drive’s
RAID stripe sets and compares it with the stored parity. If a discrepancy is
found, an error will be reported and the new correct parity will be substituted
for the stored parity.
partner group
A pair of interconnected controller units. Expansion units interconnected to the
pair of controller units can also be part of the partner group.
physical array
A physical array is a group of physical drives in Configuration Service that
participate in one or more logical drives. If a group of physical drives is
configured into a logical drive without using the entire capacity of the physical
drives, Configuration Service will require that the same physical array of
drives be used together in any remaining logical drives that are created with
the remaining capacity.
In the New Configuration window, the Add Disk button changes to Add Array when
the remaining drive capacity is on multiple physical drives that have already been used
to create a logical drive. Now that the physical drives have been sliced, they have to be
selected as an array. They cannot be selected separately.
Glossary-5
RAID
Redundant Array of Independent Disks. An arrangement of two or more disk
drives configured to work together to provide more disk storage space, better
performance, and/or redundant backup of data. Various combinations of these
features are described by defined RAID levels. Sun StorEdge 3000 Family
arrays can support RAID 0, 1, 3, 5, and 6 (also called 1+0).
For more detailed RAID definitions, refer to “RAID Levels” on page 1-7.
read policy
Descriptions of the read policies are as follows:
When you indicate a No Cache read policy, the controller will not store data in
the read cache.
Normal specifies that the current controller does not use Read ahead caching
for the current drive.
Set the read policy to Read Ahead and the controller will read multiple
adjacent blocks of data automatically. This is most effective for applications
with sequential reads.
rebuild
Rebuilding a disk is the process of reconstructing the data on a disk before it
failed. Rebuilding can be done only in arrays with data redundancy, such as
RAID levels 1, 3, 5, 6 or 1+0.
See “automatic rebuild” on page -3 for detailed information on rebuilding. For
the Rebuild rate, refer to “background rate” on page -3.
spanning
Disk spanning makes use of the firmware’s striping capability to stripe data
across two otherwise independent RAID logical drives. The two spanned
logical drives are presented to the operating environment as one logical drive.
The advantages of spanning are:
-- Supports two simultaneous drive failures in the combined fault tolerant
logical drives (provided there is one drive failure from each logical drive).
-- Improves performance because the number of spindles is increased.
The disadvantage of spanning is that the RAID overhead for redundant RAID
levels is increased since each logical drive handles fault tolerance separately.
Glossary-6
standby drive
A drive that is marked as a spare to support automatic data rebuilding after a
physical drive associated with a logical drive fails. For a standby drive to take
the place of another drive, it must be at least equal in size to the failed drive
and all of the logical drives dependent on the failed disk must be
redundant—RAID 1, 3, 5, and 6 or 1+0.
state
The current operational status of a disk drive, a logical drive, or redundant
controllers. The arrays stores the states of drives, logical drives, and redundant
controllers in its nonvolatile memory. This information is retained across array
power interruptions.
Sun StorEdge 3000 Family RAID Firmware 3.25 User’s Guide • June 2003
stripe size
This is the amount of data in kilobytes that is striped across each physical drive
in a logical drive. The values are in increments of 8 kilobytes and range from 8
to 64 kilobytes. Generally, large stripe sizes are more effective for arrays with
primarily sequential reads.
To change the stripe size on an existing drive, you need to back up your data,
redefine the stripe size, reconfigure the storage, and restore all the data.
striping
The storing of sequential blocks of incoming data on all the different SCSI
drives in a logical drive. For example, if there are three SCSI drives in a logical
drive, data will be stored as follows (partial listing):
block 1 on SCSI drive 1
block 2 on SCSI drive 2
block 3 on SCSI drive 3
block 4 on SCSI drive 1
block 5 on SCSI drive 2
This method of writing data increases the disk array throughput because
multiple drives are working simultaneously, retrieving and storing. RAID 0, 3,
5, and 6 or 1+ 0 all use striping.
terminator
A part used to end a SCSI bus. Terminators prevent energy from reflecting back
into a cable plant by absorbing the radio frequency signals.
volume
Also called a logical unit number or LUN, a volume is one or more drives that
can be grouped into a unit for data storage.
write-back cache
A cache-writing strategy in which the array controller receives the data to be
written to disk, stores it in the memory buffer, and immediately sends the host
operating environment a signal that the write operation is complete, without
waiting until the data is actually written to the disk drive. Within a short time,
the controller, when not busy, writes the data to the disk drive.
Write-back caching improves the performance of write operations and the
throughput of the controller card. However, because there is a danger of data
loss in the case of a power failure, arrays with write-back caching should be
equipped with a UPS or battery backup cache. A UPS will provide power long
enough to allow any data in the cache memory to be written to the disk drive.
With battery backup cache, the battery will provide power to retain the
memory data for up to 72 hours.
write policy
A cache-writing strategy used to control write operations. The write policy
options are write-back and write-through cache.
Glossary-7
write-through cache
Glossary-8
A cache-writing strategy in which the array controller writes the data to the
disk drive before signaling the host operating environment that the process is
complete. Write-through cache has lower write operation and throughput
performance than write-back cache, but it is the safer strategy, with minimum
risk of data loss on power failure.
Sun StorEdge 3000 Family RAID Firmware 3.25 User’s Guide • June 2003
Index
SYMBOLS
bus configurations, 7-7
#FL, 3-4
#LN, 3-4
#SB, 3-4
C
A
Add Channel SCSI ID command, 7-8
add drive Entry command, 6-10
Add Global spare drive command, 6-5
add Local spare drive command, 6-4
add SCSI drives command, 3-23
adding
drive entry, 6-10
global spare drive, 6-5
host channel SCSI ID, 7-8
local spare drive, 6-4
SCSI drives, 3-23
automatic rebuild, 8-7
definition, Glossary-3
B
background rate
definition, Glossary-3
BAD drive status, 6-3
battery support, 1-20
baud rate, 2-3
beeper muting, 10-2
Before You Begin, 1-2
cabling
single- and dual-bus configurations, 7-7
cache parameters, 8-3
cache status, 2-4
caching parameters
parameters
caching, 8-2
Caching Parameters command, 8-6
check time
periodic auto-detection of failed drive swap, 824
Clear drive status command, 6-9
clone failing drive, 6-15
perpetual clone, 6-18
concurrent rebuild, 8-11
configuration
minimum requirements, 1-22
saving to disk, 10-8
controller
defaults, 1-19
muting beeper, 10-2
name, 8-14
naming, 8-14, 8-15, 8-16
optimization mode, 1-21
parameters, B-2
name, 8-14
password validation timeout, 8-16
Index-1
SDRAM ECC, 8-18
unique identifier, 8-17
resetting, 10-5
shutting down, 10-6
voltage and temperature
checking, 9-8
controller assignment, 3-10
controller failure, 8-7
controller IDs, 7-8
controller NAME, 3-11
Controller Name command, 8-15
Controller Parameters command, 8-15
copy and replace
logical drive, 3-24
copy and replace drive command, 3-25
create
logical drive, 3-6
creating
logical volume, 4-5
cylinder/head/sector mapping, 8-32
D
defaults
controller, 1-19
drive-swap check time, 8-24
enable UPS status, 9-6
host LUN connections, 8-29
logical drives, 3-2
number of LUNs per host SCSI ID, 8-32
password validation, 8-16
RAID levels, 3-2
SDRAM ECC, 8-18
UPS alert notification level, 9-7
Define Peripheral Device Active Signal
command, 9-7
Delete Channel SCSI ID command, 7-11
Delete global/local spare drive command, 6-7
deleting
drive entries, 6-9
host channel SCSI ID, 7-10
logical drive, 3-15
partition of a logical drive, 3-16
partition of logical drive, 3-16
caution, 4-3
SCSI drive table
Index-2
slot number, 6-9
SCSI ID, 7-10
spare drive, 6-7
global or local, 6-7
detection
idle drive failure, 8-25
device supports removable media
peripheral device parameters, 8-35
Disconnect support, 7-19
disconnecting support, 7-18
SCSI target/drive channel, 7-18
disk
access delay time, 8-21
array parameters
advanced config, 8-25
documentation
how book is organized, Preface-xiii
drive
configuring, 1-22
entries
adding, 6-9
deleting, 6-9
failed, 1-16
checking, 8-24
spare, 1-16
spares
global, 1-17
local, 1-17
drive channel commands, 7-4
drive-side parameters
advanced config, 8-18
Drive-side SCSI Parameters command, 8-19, 8-20
DRV FAILED status, 3-4
dual-bus configurations, 7-7
E
ECC
drives, 1-9
ECC SDRAM function, 8-18
error correction code
drives, 1-9
event logs
viewing on screen, 10-9
Execute Drive Testing command, 6-28
Expand logical drive command, 3-28
Sun StorEdge 3000 Family RAID Firmware 3.25 User’s Guide • June 2003
Expand logical volume command, 4-7
expanding
limitations, 3-21
logical drive, 3-27
copy and replace, 3-24
logical volume, 4-4, 4-7
expansion
limitations, 3-21
flash selected drive command, 6-12
flashing
all SCSI drives, 6-14
selected SCSI drives, 6-13
format
low-level, 6-27
G
F
fabric
definition, Glossary-3
fault management, controller parameters, B-2
fault prevention, 6-15
fault tolerance
definition, Glossary-3
fault-tolerance, 8-6
fault-tolerant logical drive
definition, Glossary-4
FC-AL
definition, Glossary-1
fibre channel
controller parameter settings, B-2
definition, Glossary-4
firmware
automatic rebuild, 8-9
cache status, 2-4
controller failure/rebuild/replacement, 8-6
controller voltage and temperature, 9-8
cursor bar, 2-4
gauge range, 2-4
logical drive status, 3-3, 6-20
main menu, 2-5
manual rebuild, 8-10
quick installation, 2-5
SCSI channel
status, 7-1
SCSI drive status, 6-2
transfer rate indicator, 2-4
VT-100 screen selection, 2-4
firmware download
considerations, 1-2
flash all but selected drive command, 6-12
Flash All Drives command, 6-11
flash drive time command, 6-12
gauge range, 2-4
GBIC
definition, Glossary-1
global spare drive, 1-16, 1-17
creating, 6-4
definition, 1-4
deleting, 6-7
explained, 1-17
groups
definition, Glossary-4
H
head
mapping, 8-32
host application, 1-21
host channel commands, 7-4
host channel SCSI ID
adding, 7-8
deleting, 7-10
Host Cylinder/Head/Sector Mapping
Configuration command, 8-33
host IDs (adding), 7-8
host LUN
connection
number of tags reserved, 8-30
example mappings, 5-6
mapping
deleting, 5-8
host LUN connections, 8-29
host-side
parameters, 8-28
hot spare
definition, Glossary-4
hot-swappable
definition, Glossary-4
Index-3
I
I/O
maximum queued count, 8-31
random or sequential optimization, 8-5
SCSI timeout, 8-21
ID
SCSI, deleting, 7-10
identifying drives, 1-16, 6-11, 8-12
Identifying SCSI drive command, 6-11
idle drive failure detection, 8-25
INCOMPLETE status, 3-4
initial screen
main menu, 2-5
initialization
definition, Glossary-4
INITING status, 3-3
INVALID status, 3-3
J
JBOD
explained, 1-10
L
LCD title display controller name
not applicable, 8-15
limitations
expanding, 3-21
logical volume, 4-3
redundant config, 1-19
local spare assignment, 3-8
local spare drive, 1-16
definition, 1-3
local spare drives
deleting, 6-7
explained, 1-17
logical drive
128-LUN limit, 3-2
adding a SCSI drive, 3-21
assign local spare, 3-8
assigning name, 3-17
change assignment, 3-10
commands, 3-1
logical drive Assignments, 3-10
Index-4
view and edit logical drives, 3-3, 3-15, 6-20
copying and replacing, 3-24
creating, 3-2, 3-4, 3-6
defaults, 3-2
definition, Glossary-5
deleting, 3-15
drive allocation, 1-4
expanding, 3-27
explained, 1-3
ID, 3-3
LG number, 3-3
maximum number of disks per logical drive, 8-4
maximum physical capacity, 3-8
maximum physical drive capacity, 3-8
maximum usable capacity per logical drive, 8-4
minimum requirements, 1-22
parity
checking, 3-19, 3-20
partitions
maximum, 1-22
RAID level, 3-3
RAID level selected, 3-7
RAID levels
default, 3-2
rebuilding, 3-18
size, 3-3
status, 3-3
logical drive Assignments command, 3-10
logical drive name command, 3-17
logical drive preferences, 3-8
logical drives, 8-26
rebuilding, 8-7
logical volume, 4-2, 4-3, 4-4
avoiding failure, 4-3
creating, 4-5
example
multi-level, 4-2
expanding, 4-7
using RAID expansion, 4-4
explained, 1-3, 4-2
limitations, 4-3
maximum partitions, 1-3, 4-2
multi-level RAID, 4-4
partitioning, 4-3
spare drives, 4-3
logical volume status, 4-7
low-level format, 6-27
LUN
Sun StorEdge 3000 Family RAID Firmware 3.25 User’s Guide • June 2003
described, 5-2
mapping
definition, Glossary-5
masking
definition, Glossary-5
per host SCSI ID, 8-32
changing, 8-32
LUN Applicability parameter, 8-35
LUN defined, 8-29
narrow transfer, 7-15
NEW DRV drive status, 6-3
nexus (SCSI), 8-29
Number of Tags Reserved for each Host-LUN
Connection Command, 8-31
NVRAM
saving to disk, 10-8
O
M
main menu, 2-5
navigating, 2-5
quick installation, 2-5
manual rebuild, 8-10
mapping
cylinder/head/sector, 8-32
maximum
queued I/O count, 8-31
tag count, 7-19
tag count (tag command queuing), 8-22
transfer width, 7-17
maximum concurrent host LUN connections, 8-29
maximum drive capacity, 3-8
Maximum Queued I/O Count command, 8-31
maximum sync. xfer Clock command, 7-17
Maximum Tag Count (tag command queuing)
command, 8-23
maximum Tag count command, 7-19
maximum xfer Width command, 7-17
mirroring (RAID 1)
definition, Glossary-5
MISSING drive status, 6-3
motor spin-up, 8-19
SCSI, 8-19
N
N port
definition, Glossary-5
NAME (controller), 3-11
naming
controller, 8-14, 8-15, 8-16
optimization
random I/O
maximum size, 8-3
sequential I/O
maximum size, 8-3
Optimization for Random I/O command, 8-5
Optimization for Sequential I/O command, 8-5
optimization mode, 1-21
limitations, 8-2
random or sequential, 8-5
Optimization Modes (Caching Parameters), 8-2
out-of-band
definition, Glossary-5
P
parameters
cache, 8-3
controller, 8-14
drive-side, 8-18
drive-side SCSI, 8-19
host-side
advanced config, 8-28
peripheral device, 8-35
physical drives, 6-2
parity
logical drive
checking, 3-19, 3-20
parity check, 7-18
definition, Glossary-5
SCSI target/drive channel, 7-18
partitioning
logical volume, 4-3
partitions
deleting, 3-16
Index-5
logical drive
deleting, 3-16
logical volume
maximum, 1-3
maximum, 1-22, 4-2
partner group
definition, Glossary-5
password
changing, 10-4
disabling, 10-4
setting a new, 10-3
setting new, 10-3
validation timeout, 8-16
Password Validation Timeout command, 8-16
periodic drive check time, 8-24
periodic drive swap auto check, 8-24
peripheral device
parameters, 8-35
setting, 9-5
viewing status, 9-2
Peripheral Device Qualifier parameter, 8-35
perpetual clone
clone failing drive, 6-18
physical array
definition, Glossary-5
physical drive capacity setting, 3-8
physical drives
parameters, 6-2
primary/secondary controller ID, 7-8
Q
quick installation, 2-5
warning, 2-5
R
RAID
advantages, 1-7
controller, 8-26
expansion with logical volume, 4-4
glossary, Glossary-1
planning considerations, 1-20
RAID (3+0), 4-4
RAID (5+0), 4-4
Index-6
RAID (5+1), 4-4
RAID (5+5), 4-5
RAID 1+0, 4-4
RAID Levels, 1-7
RAID levels
controller optimization mode, 1-21
described, 1-8
explained, Glossary-6
planning, 1-21
RAID 0, 1-10
RAID 1, 1-11
RAID 1+0, 1-12
RAID 3, 1-13
RAID 5, 1-14
range of disks/logical drives supported, 1-7
selected, 3-7
RAID Terminology Overview, 1-2
RAID1+0
concurrent rebuild in, 8-11
random I/O optimization
maximum size, 8-3
read ahead policy
definition, Glossary-6
read policy
definition, Glossary-6
Read/Write Test, 6-28
rebuild
automatic, 8-7
concurrent in RAID 1+0, 8-11
definition, Glossary-6
manual, 8-10
Rebuild logical drive command, 3-18
Rebuild Priority command, 8-26
rebuilding, 8-26
logical drive, 3-18
Rebuilding Logical Drives, 8-7
redundant controller
explained, 8-7
Regenerate Parity command, 3-20, 3-21
remote file, 2-3
replace after clone
clone failing drive, 6-16
Replace After Clone command, 6-16
reset controller
controller reset, 3-11
RS-232
Sun StorEdge 3000 Family RAID Firmware 3.25 User’s Guide • June 2003
connecting to, 2-2
S
SAF-TE
enclosure monitoring, 8-23
saving
configuration to disk, 10-8
SB-MISS drive status, 6-3
Scan SCSI drive command, 6-7
scanning
new SCSI drive, 6-6
scanning a new SCSI drive, 6-6
SCSI
channel
explained, 8-29
setting termination, 7-12
status, 7-1
terminator, 7-12
drive-side parameters, 8-19
I/O timeout, 8-21
ID
deleting, 7-10
explained, 8-29
motor spin-up, 8-19
reset at power-up, 8-20
target drive channel
viewing and editing, 7-15
transfer clock speed
setting, 7-13
SCSI channel commands, 7-4
SCSI channel defined, 8-29
SCSI drive
adding to logical drive, 3-21
disk capacity, 6-5
fibre port name, 6-5
global or local spare, 6-3
identifying a drive
diagnosing system errors, 6-11
low-level format, 6-27
read/write test, 6-28
redundant loop ID, 6-5
revision number, 6-5
scanning new, 6-6
serial number, 6-5
slot number
deleting, 6-9
STANDBY mode, 6-3
table
adding entries, 6-9
clear drive status, 6-9
deleting drive entries, 6-9
removing empty drive entry, 6-10
setting slot numbers, 6-8
USED DRV mode, 6-3
utilities, 6-26
vendor ID, 6-3
viewing information, 6-5
scsi Drive Low-Level Format command, 6-27
SCSI host IDs (creating), 7-8
SCSI ID defined, 8-29
SCSI Motor Spin-Up command, 8-19
SCSI Reset at Power-Up command, 8-20
SCSI target/drive channel
maximum tag count, 7-19
parity check, 7-18
slot number, 7-16
scsi Terminator command, 7-12
SDRAM ECC, 8-18
default, 8-18
sector
mapping, 8-32
sequential I/O optimization
maximum size, 8-3
serial port
connection and setup, 2-1
serial port parameters, 2-2
SES
definition, Glossary-2
Set Peripheral Device Entry
command, 9-5
set slot Number command, 6-10
setting a new password, 10-3
single-bus configurations, 7-7
slot number
assigning to empty slot, 6-9
deleting, 6-9
SCSI target/drive, 7-16
setting, 6-8
Solaris
reset baud rate, 2-3
spanning
definition, Glossary-6
Index-7
spare (local for logical drive), 3-8
spare drives, 1-21, 8-11
assigning, 6-4
deleting, 6-7
global, 1-16
creating, 6-4
local, 1-16
explained, 6-4
logical volume, 4-3
standby drive
definition, Glossary-6
STAND-BY drive status, 6-3
status
logical drive, 3-3
peripheral device, 9-2
temperature, 9-8
UPS, 9-6
voltage, 9-8
stripe size
definition, Glossary-7
striping
definition, Glossary-7
sync transfer clock, 7-13
system functions, 10-1
controller
resetting, 10-5
shutting down, 10-6
muting beeper, 10-2
password
changing, 10-4
disabling, 10-4
saving NVRAM to disk, 10-8
setting new password, 10-3
T
tag count
maximum, 7-19, 8-22
temperature
check status, 9-8
terminator
SCSI channel, 7-12
tip command, 2-3
transfer clock
maximum synchronous, 7-17
transfer clock speed
Index-8
options, 7-15
setting, 7-13
transfer rate indicator, 2-4
transfer speed
setting, 7-14
transfer width
maximum, 7-17
setting, 7-14
U
uninterruptible power supply
enable status, 9-6
UPS
enable status, 9-6
fail signal, 9-7
status, 9-6
UPS power fail signal, 9-7
UPS status, 9-6
USED DRV drive status, 6-3
V
Verification on LD Initialization Writes Disabled
command, 8-27
verification on writes, 8-27
view and edit Configuration parameters
command, 8-5, 8-6
view and edit Event logs command, 10-9
view and edit Host luns command, 5-8
view and edit logical drives command, 3-3, 3-15, 620
view and edit logical Volumes command, 4-5
view and edit scsi drives command, 6-2, 6-4
view peripheral device status command, 9-2, 9-8
voltage
check status, 9-8
volume
definition, Glossary-7
VT-100
connection and setup, 2-1
Sun StorEdge 3000 Family RAID Firmware 3.25 User’s Guide • June 2003
W
warnings
quick installation, 2-5
world wide name
definition, Glossary-2
write error
avoiding, 8-27
write policy
definition, Glossary-7
write-back cache
definition, Glossary-7
disabling, 8-6
enabling, 8-6
write-through
disabling, 8-6
enabling, 8-6
write-through cache
definition, Glossary-8
Index-9
Index-10
Sun StorEdge 3000 Family RAID Firmware 3.25 User’s Guide • June 2003