1
TROUBLESHOOTING
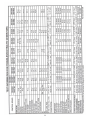
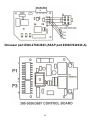
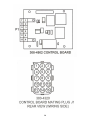
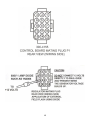
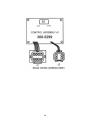
Determine the control board part number from the board or from the Application Chart, then refer to the
Troubleshooting Chart for test information specific to that board. This troubleshooting guide assumes that the person
doing the work has basic mechanical skills and is familiar with electrical troubleshooting procedures using a
multimeter. Having a practical knowledge of RV generators is helpful, but not absolutely necessary. DISCLAIMER:
Generator servicing can present certain hazards such as cuts, burns, electric shock, fire, and exposure to exhaust
fumes. Take suitable precautions. Advanced Service And Parts, LLC will not assume any liability for personal
injury or damage to equipment or property as a result of using this Troubleshooting Guide.
Getting the Engine Running
Before any evaluation of the controls, regulator or generator can proceed, the Onan engine must have oil and fuel, be
in running condition and the 12-volt battery charged. The electronic governor, 151-0752, on Models BGM and NHM,
Spec B and later, must be functioning properly. This guide does not cover engine maintenance and repair procedures
(please refer to the applicable Onan Service Manual for this information). The most common engine problems are
caused mainly by lack of use and/or lack of regular monthly exercise and include the following:
•
•
•
•
•
•
•
•
•
Low battery voltage because of insufficient charge, worn out battery, faulty cables (partly broken or corroded)
or poor connections, resulting in slow cranking and hard starting.
Old or contaminated fuel that has gummed up the lines, fuel filter and carburetor. This can cause clogged jets
(mixture too lean) and/or a stuck carburetor float resulting in an improper mixture (too rich or too lean) or
flooding.
Weak spark and/or fouled spark plug(s) causing hard starting and rough running.
Stuck automatic choke causing an excessively rich mixture and smoking.
Stuck oil pressure switch causing shutdown as soon as the start button is released.
Dirty air filter, causing an excessively rich mixture and smoking.
Low oil level preventing starting on models equipped with low oil level switch.
Wiring harness damage from rodents chewing on the wires.
Corrosion of control board or connections from salty air or road chemicals.
FOLLOW THESE STEPS:
1. CHECK OIL Check engine oil level before starting.
2. GAIN ACCESS Remove panel or cover to gain access to the control board. Some disassembly may be required.
The exact procedure depends on the model.
3. CHECK BATTERY VOLTAGE Connect the negative voltmeter lead to GROUND and the positive lead to the
positive battery cable on the starter solenoid and read the battery voltage. The same reading should be obtained
at the BATTERY POSITIVE pin of the control board. A fully charged battery in good condition should read 12.6
to
12.8 VDC. Charge the battery if necessary.
CHECK CRANKING Try to start the engine. If it does not crank, check the control fuse (5A Slo Blo, except models
with electronic governor 10A). If the fuse is good, jumper the positive battery post to the coil terminal on the start
solenoid. If the engine cranks, there is a poor connection, wiring damage or the control board is defective. If the engine
cranks when the BATTERY POSITIVE pin is jumpered to the START SOLENOID pin on the control board, the board
is defective. NOTE: The battery voltage should not go below 9.5 VDC during cranking.
2