1
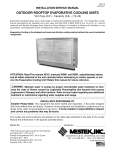
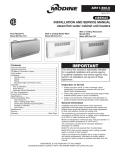
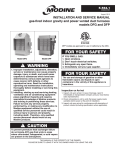
5-588.3 5H76353A May, 2010 installation and service manual evaporative cooler model series “H” & “O” us c 9900100 FOR YOUR SAFETY The use and storage of gasoline or other flammable vapors and liquids in open containers in the vicinity of this appliance is hazardous. IMPORTANT WARNING Improper installation, adjustment, alteration, service or maintenance can cause property damage, injury or death, and could cause exposure to substances which have been determined by various state agencies to cause cancer, birth defects or other reproductive harm. Read the installation, operating and maintenance instructions thoroughly before installing or servicing this equipment. 1. The use of this manual is specifically intended for a qualified installation and service agency. All installation and service of these units must be performed by a qualified installation and service agency. 2. These instructions must also be used in conjunction with the Installation and Service Manual originally shipped with the appliance, in addition to any other accompanying component supplier literature. Inspection on Arrival 1. Inspect unit upon arrival. In case of damage, report it immediately to transportation company and your local factory sales representative. 2. Check rating plate on unit to verify that power supply meets available electric power at the point of installation. 3. Inspect unit upon arrival for conformance with description of product ordered (including specifications where applicable). THIS MANUAL IS THE PROPERTY OF THE OWNER. PLEASE BE SURE TO LEAVE IT WITH the owner WHEN YOU LEAVE THE JOB. SPECIAL PRECAUTIONS / TABLE OF CONTENTS / SI (METRIC) CONVERSION FACTORS / UNIT LOCATION / UNIT LIFTING SPECIAL PRECAUTIONS Table of Contents THE INSTALLATION AND MAINTENANCE INSTRUCTIONS IN THIS MANUAL MUST BE FOLLOWED TO PROVIDE SAFE, EFFICIENT AND TROUBLE-FREE OPERATION. IN ADDITION, PARTICULAR CARE MUST BE EXERCISED REGARDING THE SPECIAL PRECAUTIONS LISTED BELOW. FAILURE TO PROPERLY ADDRESS THESE CRITICAL AREAS COULD RESULT IN PROPERTY DAMAGE OR LOSS, PERSONAL INJURY, OR DEATH. THESE INSTRUCTIONS ARE SUBJECT TO ANY MORE RESTRICTIVE LOCAL OR NATIONAL CODES. Inspection on Arrival................................................................... 1 General Information/Installation Codes...................................... 1 Special Precautions.................................................................... 2 SI (Metric) Conversion Factors.................................................. 2 Unit Location.............................................................................. 2 Unit Lifting.................................................................................. 2 Unit Installation........................................................................... 3 Unit Leveling....................................................................... 3 Water Supply, Drain, and Overflow Connections................ 3 Electrical Connections......................................................... 4 Start-Up Procedure.................................................................... 4 Bleed Adjustment................................................................ 4 Media Water Flow Adjustment............................................ 5 Control Operating Sequence............................................... 5 Option & Accessory Control Devices......................................... 6 Dimensions, Weight, and Performance Data............................. 7 Maintenance............................................................................... 8 Media Replacement................................................................... 8 Service & Troubleshooting......................................................... 9 Model Nomenclature for Evaporative Coolers......................... 10 Media and Pump Motor Specifications..................................... 10 HAZARD INTENSITY LEVELS 1. DANGER: Indicates an imminently hazardous situation which, if not avoided, WILL result in death or serious injury. 2. WARNING: Indicates a potentially hazardous situation which, if not avoided, COULD result in death or serious injury. 3. CAUTION: Indicates a potentially hazardous situation which, if not avoided, MAY result in minor or moderate injury. 4. IMPORTANT: Indicates a situation which, if not avoided, MAY result in a potential safety concern. Table 2.1 - SI (Metric) Conversion Factors WARNING To ConvertMultiply ByTo Obtain 1.When servicing or repairing this equipment, use only factory-approved service replacement parts. A complete replacement parts list may be obtained by contacting Modine Manufacturing Company. Refer to the rating plate on the unit for complete unit model number, serial number, and company address. Any substitution of parts or controls not approved by the factory will be at the owner’s risk. 2.Disconnect power supply before making wiring connections to prevent electrical shock and equipment damage. 3.Do not submerse the pump motor in water. The evaporative cooler pump motor is not submersible. CAUTION Any original factory wiring that requires replacement must be replaced with wiring material having a temperature rating of at least 105°C. important 1. To prevent heat exchanger failure, do not operate the evaporative cooling unit in air streams with temperatures below 40°F. Operating the unit in temperatures less than 40°F will cause icing. Normally ice will not harm the media, but it can block the airflow and possibly crack the plumbing. 2. Start-up and adjustment procedures should be performed by a qualified service agency. 3. The proper media direction must have the 45° flutes slope down toward the air entering side. The 15° flutes must slope down toward the air leaving side. See Figure 8.2 for media direction. 4.To check most of the Possible Remedies in the troubleshooting guide listed in Table 9.1, refer to the applicable sections of the manual. 2 "W.C. (inches water column) psig °F inches 0.24 kPa 6.893 kpa subtract 32 and then multiply by 0.555 °C 25.4 mm feet 0.305 meters CFM 0.028 m3/min CFH 1.699 m3/min 3 btu/ft 0.0374 mJ/m3 pound 0.453 kg btu/hr 0.000293 kW/hr gallons 3.785 liters UNIT LOCATION RECOMMENDATIONS 1. When the unit is equipped with an evaporative cooler, the module is factory installed and wired. Refer to Literature 5-572 or AIR5-572 - Installation and Service Manual for recommendations. 2. When locating the unit, consider general space and cooling requirements and availability of water supply/drain and electrical supply. 3. Be sure the structural support at the unit location is adequate to support the weight of the unit. UNIT LIFTING When the unit is equipped with an evaporative cooler, the module is factory installed and wired. Four 3/4" holes at the extended ends of the unit mounting channels are supplied to facilitate lifting the unit. Refer to Literature 5-572 or AIR5-572 – Installation and Service Manual for recommendations. 5-588.3 UNIT INSTALLATION UNIT INSTALLATION Refer to Literature 5-572 or AIR 5-572 – Installation and Service Manual for general installation instructions. The following are additional requirements for the evaporative cooling section. 4. Calculate Approximate Evaporation Rate (GPM): CFM x (EATDB - LATDB) Approx. Evaporation (GPM) = 500,000 Example: Unit Leveling Approx. Evaporation (GPM) = For proper operation, the evaporative cooler must be installed in a horizontal level position. The evaporative cooler is provided with two leveling feet with 20'' leveling adjustment range (See Dimensions). Once the blower and duct furnace section has been leveled, the evaporative cooler must be leveled by adjusting the leveling screws until the leveling feet reach the roof or slab. The support under each leveling foot must be capable of carrying 1/4 of the operating weight of the unit (See Weights). Determine Maximum Design Water Flow Rate Before running the water supply line to the evaporative cooler, the following procedure is to be used to calculate the maximum design water flow rate. Example calculations will be used based on the following conditions: 2 • Model Size 200 (7.5 ft media face area from Table 7.1) • 12" Media Depth • 4500 CFM • Location: Phoenix, AZ, ASHRAE Design Temps: Entering Dry Bulb Temp (EATDB) = 108°F Entering Wet Bulb Temp (EATWB) = 69°F 1. Calculate the Media Face Velocity: Media Face Velocity = CFM / Media Face Area Example: Media Face Velocity = 4500 / 7.5 = 600 fpm 2.Find Cooling Effectiveness from Figure 3.1: Example: The 12" media effectiveness curve is approximately 88.5% at 600 fpm Figure 3.1 - Evaporative Cooling Effectiveness 4500 x (108°F - 73° F) ≈ 0.3 GPM 500,000 Water Supply Connection The water supply is located on the side of the evaporative cooler (See Dimensions). The water supply must be run to the float valve connector (1/2" NPT Water Inlet) on the unit. The 1/2" supply line may be either galvanized or copper pipe. Verify that the proper water supply capacity is available by referring to the previous section. Use a municipal water supply or well water which maintains a pH between 6 and 9. Do not use untreated surface water as the water supply. If equipment is to be supplied with well water, it is recommended that a water treatment company investigate possible requirements to control mineral deposits. In certain locations, even municipal water has enough minerals to warrant consideration of water treatment. The water supply line must be furnished with indoor inlet and drain valves to prevent freezing and rupture when the temperature drops below 32°F. See Figure 3.2. Drain Connection The drain connection is located on the bottom of the evaporative cooler (See Dimensions). Provide a 1/2" manual valve in the drain line to permit draining and cleaning of the evaporative cooler tank. Overflow Connection The overflow connection is located on the bottom of the evaporative cooler (See Dimensions). When permitted by local codes, the overflow connection can be left open to drain to the nearest roof drain for outdoor units. This connection will have a constant water flow because it is used to drain the bleed. For bleed water flow rates, refer to Start-up Procedure – Bleed Adjustment. If the constant water flow on the roof is not desired or permitted by local codes, piping should be provided from the 1/2" NPT connection to the building drain line. Figure 3.2 - Field Supplied Evap Cooler Piping RECOMMENDED HOSE BIBB WITH ANTI-SIPHON VACUUM BREAKER FOR EQUIPMENT WASHDOWN (BY OTHERS) OVERFLOW FILL VALVE = ENERGIZED (FILL EVAP) FILL VALVE = DE-ENERGIZED (DRAIN FILL LINE) WATER INLET (50PSI MAX) SERVICE VALVE (BY OTHERS) 3-WAY FILL VALVE* *3-WAY FILL VALVE AND 2-WAY DRAIN VALVE BY OTHERS OR FROM MODINE AS AN ACCESSORY 3. C alculate the Leaving Dry Bulb Air Temp (LATDB): LATDB = EATDB - Effectiveness x (EATDB – EATDB) Example: LATDB = 108°F - 88.5% x (108°F – 69°F) ≈ 3°F 5-588.3 DRAIN DRAIN VALVE = ENERGIZED (PREVENT EVAP FROM DRAINING) 2-WAY DRAIN VALVE* (NORMALLY OPEN) DRAIN VALVE = DE-ENERGIZED (DRAIN EVAP) TO DRAIN 3 UNIT INSTALLATION / START-UP PROCEDURE Electrical Connections Refer to Literature 5-572 or AIR5-572 - Installation and Service Manual for electrical installation instructions and unit amp draws. The evaporative cooler is factory wired. Two copies of the job specific wiring diagram are provided with each unit, one located in the duct furnace electrical junction box and one in the electrical section of the unit. Refer to this diagram for all wiring connections. START-UP PROCEDURE IMPORTANT 1.To prevent heat exchanger failure, do not operate the evaporative cooling unit in air streams with temperatures below 40°F. Operating the unit in temperatures less than 40°F will cause icing. Normally ice will not harm the media, but it can block the airflow and possibly crack the plumbing. 2.Start-up and adjustment procedures should be performed by a qualified service agency. Refer to Literature 5-572 or AIR 5-572 – Installation and Service Manual for general start-up instructions. The following are additional requirements for the evaporative cooling section (reference Figure 4.1). Figure 4.1 - Evaporative Cooler Components ➀ ➂ ➃ 1. 2. 3. 4. ➄ Water Inlet Valve (Float Valve) Inlet Valve Float Arm and Float Overflow Drain (bottom panel shown as clear for illustrative purposes) Pump Motor Media Supply Line and Flow Restrictor Bleed Line and Flow Restrictor Turn off power to the unit at the disconnect switch. Check that all water connections are weatherized. Remove the birdscreen. Remove the hose clamp and bleed tube from the overflow tee. Cover the tee opening to prevent the tank water from draining. 5. Tighten the bleed line flow restrictor (See Figure 5.1) completely. Then loosen the screw 2 counterclockwise turns. 4 Bleed Line Adjustment The recirculated water in the tank must have continual bleed to prevent an excessive concentration of mineral buildup in the tank water. A high concentration of minerals will cause a buildup on the media. The surface adhesion and wicking action of the media is reduced by these deposits, ultimately causing small droplets of water to be carried off leaving side of the media. It is recommended that the bleed rate be set for the conditions of maximum water evaporation. The bleed rate is adjusted as follows: ➆ ➀ ➁ ➂ ➃ ➄ ➅ ➆ Open the water supply valves and close the drain valves. Refer to Figure 3.1 for valve sequence. Check the water supply for adequate flow. When the float valve shuts off the water supply, the depth of the water should be 2 3/4'' or 1/4'' below the overflow. If the water level requires adjustment, bend the float arm to provide the proper water level. 9. Check the evaporative cooler tank for leaks. If any leaks are detected, drain the tank and apply waterproof silicone sealer at the leaks. 10. Adjust the bleed line flow rate. See Bleed Line Adjustment. 11. Adjust the water flow rate over the evaporative cooler media. See Media Water Flow Adjustment. 12. Drain the tank and repeat step 8 two more times. This will flush the media of dirt obtained during shipment. It will also wash away the odor on new media. 13. Adjustment of the water flow rate over the media may have changed the bleed line flow rate. Check and readjust if necessary. 14.Replace the birdscreen. The unit is provided with a manually adjustable bleed which will allow for continuous bleed-off into the overflow connection on the tank. The bleed rate required is dependent on the quality of water used and the rate of evaporation. As climate conditions change, the rate of evaporation may increase, thereby requiring an increase in the bleed rate. An indication of insufficient bleed is a uniform buildup of minerals on the entering air face of the media. If this condition is observed, increase the rate of bleed until the mineral deposits dissipate. ➅ ➁ 6. 7. 8. 1. With the disconnect switch in the “OFF” position, place a jumper wire between electrical section terminals 80 and 82. This will energize the pump motor when the power is provided to the unit. 2. Turn on power to the unit at the disconnect switch. 3. With the pump motor running, measure the amount of water through the bleed line. Refer to Formula 4.1 for recommended bleed line flow rates. Adjust the bleed line flow restrictor as necessary. 4. Turn off power to the unit at the disconnect switch. 5. Reattach the hose clamp and bleed tube to the overflow tee. 6. Remove the jumper wire between terminals 80 and 82. Formula 4.1 - Evaporative Cooler Water Bleed Rate Bleed Rate = Approx. Evaporation Rate (GPM) Cycle Rate • Approx. Evaporation Rate (GPM) was calulated on page 3 • Cycle Rate = 1.5 for hard water, 3 for soft water (maximum), or 15 for soft water (minimum) For ease of measurement, the Bleed Rate (GPM) can be converted to fluid ounces per minute by dividing by 0.0078125. 5-588.3 START-UP PROCEDURE / CONTROL OPERATING SEQUENCE Figure 5.1 - Bleed and Media Line Flow Restrictors CONTROL OPERATING SEQUENCE The following is the sequence of operation for the unit. Option and accessory control devices (Float switch, evaporative cooling thermostat, and/or fill and drain kits) are included only when ordered. Flow Restrictor Adjustment Screw Media Water Flow Adjustment Proper water flow over the media is important. Insufficient water flow will result in increased accumulation of minerals on the media. Excessive water flow will result in deterioration of the media and moisture carryover. The media water flow is adjusted as follows: 1. With the disconnect switch in the “OFF” position, place a jumper wire between electrical section terminals 80 and 82 This will energize the pump motor when the power is provided to the unit. 2. Use a jumper wire to energize the unit blower. Refer to the unit wiring diagram to determine location required. 3. Turn on power to the unit at the disconnect switch. 4. After allowing the blower and pump motor to operate for 15 minutes, adjust the media line flow restrictor so that the media is damp from top to bottom on the entering air side. If water flowing on the entering surface of the media is visible, the water flow rate is too high and must be reduced. Refer to the Approximate Evaporation Rate (GPM) calculated on page 3. 5. Turn off power to the unit at the disconnect switch. 6. Remove all jumper wires. 1. The evaporative cooler tank is filled at the beginning of the cooling season (See Maintenance-Water Tank Flushing). For units without the Accessory Fill and Drain Kits, the tank is filled by manually closing /opening the valves as described in Figure 3.1. For units with Accessory Fill and Drain Kits, the tank is filled each time the system switch is placed in the cooling mode (Refer to Steps 3, 4, 5, and 14). 2. The system switch is placed in the position to enable the evaporative cooler (e.g. Summer, Cool, etc.). 3. The freeze protection thermostat (if supplied) must sense an outside air temperature above the set point (Minimum 40°F) to energize the cooling circuit. 4. If an automatic time clock activated fill and drain kit is used, when the time clock is in the occupied mode, the SPST contact closes energizing the cooling circuit. 5. The fill and drain valves (accessory or by others) are energized. a. The normally open side of the 3-way fill valve closes to prevent water from draining and the normally closed side of the fill valve opens to allow water to flow to the evaporative cooler (See Figure 3.1). b.The normally open side of the 2-way drain valve closes to prevent the water in the evaporative cooler from draining (See Figure 3.1). 6. The low voltage cooling relay, which controls the pump motor, and the unit time delay relay, which controls the blower operation, are energized. 7. If the unit was supplied with an optional float switch, the float switch contact closes when the tank reaches the proper water level. 8. The evaporative cooling pump motor starts. 9. The time delay relay starts the blower after 30 to 45 seconds. 10.The evaporative cooling pump motor and the blower continue to operate. 11.For units with the evaporative cooling thermostat, the pump motor cycles on a call for cooling. 12.The system switch is placed in the Off mode. 13. The evaporative cooling pump motor stops. 14. The fill and drain valves (accessory or by others) are de-energized. a.The normally open side of the 3-way fill valve opens to allow water to drain and the normally closed side of the fill valve closes to prevent water from flowing to the evaporative cooler (See Figure 3.1). b.The normally open side of the 2-way drain valve opens to allow the water in the evaporative cooler to drain (See Figure 3.1). 15.The time delay relay stops the blower after 30 to 45 seconds. 5-588.3 5 OPTION AND ACCESSORY CONTROL DEVICES Figure 6.1 - Dimensions - Fill and Drain Valves OPTION AND ACCESSORY CONTROLS Float Switch 4.00 The float switch is factory installed in the evaporative cooler electrical junction box. The switch includes a float level and contact that prevents the pump motor from operating until the water level in the tank has reached the required level. 2.50 3.25 0.75 1.00 0.75 2.50 Evaporative Cooler Transformer and Fuses 3.25 An evaporative cooler transformer and fuses are required for supply voltages of 208V/1Ph, 208V/3Ph, 460V/3Ph, and 575V/3Ph. Refer to Literature 5-572 or MAS5-572 – Installation and Service Manual – Options, for locations. 0.88 (2- Way) 1.38 (3-Way) Evaporative Cooling Thermostat The evaporative cooling duct thermostat (Penn A19AAF-12, 25°225°F SPDT) cycles the pump motor based on a call for cooling in the is shipped loose for field installation in the discharge air stream. Refer to the unit job specific wiring diagram for low voltage field electrical wiring connections. Fill and Drain Kits • Manual Remote Operated Fill and Drain Kit The manual remote fill and drain kit is used to prevent standing water in the evaporative cooling unit when not in the cooling mode. The kit provides cleaning and flushing of the evaporative cooler tank each time the system is placed in the cooling mode. Cleaning and flushing of the tank removes the build-up of mineral deposits from the tank. All fill and drain kits include low voltage (24V) valves, one 1/2'' 3-way fill valve and one 1/2'' 2-way drain valve for filling and draining of the evaporative cooler tank. The maximum water pressure for both valves is 50 psi. Refer to Figure 3.1 for locations of the field installed valves in the supply and drain lines. • Automatic Fill and Drain Kit The automatic fill and drain kit is identical to the manual remote fill and drain kit but it also includes a 7-day push pin style appliance timer with single pole, single throw (SPST) switching. 12 settings per day with 2 hour per pin time increments. The timer power supply requires a separate line for 115V power. Refer to the unit wiring diagram for connections and Literature 5-582 – 7-day programmable time clock for mounting instructions. •Fill and Drain Kit Freeze Protection Freeze protection can be included with both the manual remote and the automatic fill and drain kits. The freeze protection thermostat prevents the evaporative cooler tank from filling when the outside air temperature is below the thermostat set point (Typically 40°F). The freeze protection duct thermostat (Penn A19AAF-12, 25°-225°F SPDT) is shipped loose for field installation in a location that will sense the outside air temperature. Refer to the unit job specific wiring diagram for low voltage field electrical wiring connections. 6 5-588.3 0.13 1.13 1.38 1.38 2.25 EVAPORATIVE COOLER DIMENSIONS, WEIGHTS, AND PERFORMANCE DATA Figure 7.1 - Evaporative Cooling Module Top View J-Box 1.25 Pump 1/2" NPT Drain W/2 -1.50 1/2" NPT Overflow W 3.00 Optional 1" Pre-Filter Rack 1.50 4.50 1.25 Side View Blower Section 36.00 6" or 12" Media H 1/2" NPT Water Inlet 4.50 3.00 .25 Leveling Legs 25.50 Table 7.1 - Evaporative Cooler Dimensional, Performance, and Weight Data (All dimensions in inches) Model Blower TypeMaximumMedia Face Size (Digit 16) H W Cooling CFMArea (ft2) 75 All 34 30 2778 4.0 100/125 All 34 30 4000 5.0 150/175 All 34 36 5200 6.5 200/225 All 38 36 6000 7.5 250/300 E,F,G, or H 38 39 6500 8.1 250/300 I, J, or K 56 39 10400 13.0 350/400 E,F,G, or H 38 51 8500 10.6 350/400 I, J, or K 47 51 11050 13.8 500/600 G or H 38 39 6500 8.1 500/600 I, J, K or L 56 39 10400 13.0 700/800 G or H 38 51 8500 10.6 700/800 I, J, K or L 47 51 11050 13.8 840/960 I, J, K or L 47 51 11050 13.8 ➀ 6" Media ➀ 12" Media ➀ Face Velocity (Digit 23 = 3, 5, A, or C) (Digit 23 = 4, 6, B, or D) at Max CFMDryOperatingDryOperating (ft/min) Weight Weight Weight Weight 695 149 273 154 285 800 154 280 159 295 800 159 313 169 336 800 164 318 174 341 800 171 338 182 363 800 200 371 214 404 800 211 433 228 473 800 225 450 244 496 800 171 338 182 363 800 200 371 214 404 800 211 433 228 473 800 225 450 244 496 800 225 450 244 496 All weights in pounds. 5-588.3 7 MAINTENANCE MAINTENANCE Figure 8.1 - Media Replacement The evaporative cooling unit should be serviced before each heating/cooling season to assure proper operations. The following items may be required to have more frequent service schedule based on the environment in which the unit is installed, and the frequency of the equipment operation. Water Tank Flushing Clean the water tank of the evaporative cooling unit by flushing it out weekly with fresh water. Refill the tank and adjust the float valve so that the water level will be up to 1/4'' below the top of the overflow pipe. If the float valve is not operating properly, a new assembly is available from the factory. Step 4 Step 6 Evaporative Cooling Media The evaporative cooling media should be checked annually for dry spots, scale, and algae formation. Normally, the media water will flush debris and dirt from the face of the media. To remove scale and algae deposits, dry the pad completely and brush up and down with a soft bristled brush. Do not brush side to side. Test a small area first to make sure the media can withstand the brushing. If the deposits cannot be removed, the media should be replaced (See Media Replacement). Average media life expectancy is five cooling seasons. Birdscreen and Optional Pre-Filters The birdscreen should be cleaned at the beginning of each year so that any debris that may have been caught will not restrict the air flow to the unit. If the unit was supplied with optional pre-filters, the pre-filter should be checked monthly. Clean or replace if necessary. In dirty atmospheres, filter maintenance may be required more often. Pump Assembly and Water Flow Check the pump assembly operation and water flow. Ensure proper water distribution across the media (See Start-Up, Media Water Flow Adjustment). Blower Assembly Refer to Literature 5-572 or AIR5-572 - Installation and Service Manual for blower assembly maintenance instructions. Step 5 Step 3 1. Turn off power to the unit at the disconnect switch. 2. Close the water supply valve and open the drain valve to drain the evaporative cooler. 3. Remove the birdscreen. 4. Remove the four screws (two on each side) that support the front media support plate. 5. Remove front media support plate. The electrical cord will hang loose. Remove the V-shaped water distribution plate and attached piping from support pins. 6. Remove/replace the media with the correct media. To determine the media provided with the unit, see Model Nomenclature. When replacing the media, the configuration of the media in the evaporative cooler is important. See Figure 8.2 – Media Direction. 7. With the media installed, replace the front media support plate and the water distribution piping. Ensure that the electrical cord and bushing are properly located in the Ushaped notch in the front media support plate. 8. Replace the four screws removed in Step 4. 9. Replace the birdscreen. 10.Open the water supply valve and close the drain valve to fill the evaporative cooler. 11.Turn on power to the unit at the disconnect switch. Figure 8.2 - Media Direction Electrical Wiring The electrical wiring should be checked annually for loose connections or deteriorated insulation. IMPORTANT The proper media direction must have the 45° flutes slope down toward the air entering side. The 15° flutes must slope down toward the air leaving side. See Figure 8.2 for media direction. 8 5-588.3 SERVICE & TROUBLESHOOTING SERVICE & TROUBLESHOOTING WARNING 1.When servicing or repairing this equipment, use only factory-approved service replacement parts. A complete replacement parts list may be obtained by contacting Modine Manufacturing Company. Refer to the rating plate on the unit for complete unit model number, serial number, and company address. Any substitution of parts or controls not approved by the factory will be at the owner’s risk. 2.Disconnect power supply before making wiring connections to prevent electrical shock and equipment damage. 3.Do not submerse the pump motor in water. The evaporative cooler pump motor is not submersible. CAUTION Any original factory wiring that requires replacement must be replaced with wiring material having a temperature rating of at least 105°C. IMPORTANT To check most of the Possible Remedies in the troubleshooting guide listed in Table 9.1, refer to the applicable sections of the manual. Table 9.1 - Troubleshooting Trouble Possible Cause Possible Remedy Tank does not fill or remain filled. 1. Main water supply valve is not open. 1. 2. Optional fill valve does not open. 2. 3. Float valve stuck in closed position. 3. 4. Drain or overflow leaking. 4. 5. Tank leaking. 5. Pump does not run when system switch is 1. System does not have power. 1. placed in the cooling mode. (Tank is full) 2. Opt. time clock in unoccupied mode. 2. 3. Thermostat not calling for cooling. 3. 4. Float Switch is not contacting. 4. 5. Defective pump. 5. Media has dry spots. 1. Insufficient water flow rate. 1. 2. Distribution line blocked. 2. Open main water supply valve. Check wiring to fill valve. Replace valve if necessary. Check/adjust float valve. Check piping for leaks. Tighten if necessary. Check tank for leaks. Silicone if necessary. Check supply power and control transformer. Set time clock to occupied mode. Set thermostat above discharge temp. Check/adjust float switch. Replace pump. See Media Water Flow Adjustment. Check the distribution line for obstructions. Water dripping off media. 1. Excessive water flow. 1. 2. Worn or dirty media. 2. Water blowing off media. 1. Excessive water flow. 1. 2. Media installed incorrectly. 2. 3. Air velocity to high. 3. 4. Worn or damaged media. 4. Media contains debris and scale. 1. Bleed line clogged. 1. 2. Bleed line not adjusted. 2. See Media Water Flow Adjustment. Clean or replace media. See Media Water Flow Adjustment See Media Replacement. Adjust blower speed below Max cooling CFM. See Performance Data. Replace media. Check the distribution line for obstructions. See Bleed Line Adjustment. 5-588.3 9 MODEL NOMENCLATURE / SPECIFICATIONS Model Nomenclature for Evaporative Coolers Refer to Literature 5-572 or AIR 5-572 - Installation and Service Manual for complete Model Nomenclature descriptions. Digit 22 of the Model Number (Located on the Model Identification plate) defines the evaporative cooler media type based on the following numbering system: Digit 22 – Evaporative Cooling (EC) 3 4 5 6 0 – 6" Munters CELdek® Media – 12" Munters CELdek® Media – 6" Munters GLASdek® Media – 12" Munters GLASdek® Media - None A - 6" Munters CELdek® Media, Stainless Steel Cabinet B - 12" Munters CELdek® Media, Stainless Steel Cabinet C - 6" Munters GLASdek® Media, Stainless Steel Cabinet D - 12" Munters GLASdek® Media, Stainless Steel Cabinet Table 10.1 - Media Specifications Media Specifications ConditionMunters CELdek ®Munters GLASdek ® Base Sheet Cellulose Glass Fiber Maximum Water Temperature 130°F 130°F Maximum Air Temperature 300°F 300°F pH Range 6-9 6-9 Dry Weight (lb/ft3) 2.4 1.4 Wet Weight (lb/ft3) Operating Weight (lb/ft3) Water Load (gpm/ft2) Maximum Pack Size (DxWxH) Fire Rating, UL Flame Spread Index, E84-81a 5.6 6.0 1.5 12" x 12" x 72" None 450 7.0 9.0 1.5 12" x 12" x 72" 900 Class II 5 Table 10.2 - Pump Motor Specifications Digit 14=A, B, D, F, or G (115V/1, 208V/1, 208/3, 460V/3, 575V/3) 6" Media Model Size 75 100/125 150/175 200/225 250/300 350/400 500/600 700/800 250/300 350/400 12" Media 6" Media 12" Media Digit 16 (Blower Type) Motor HP Pump Amp Draw Motor HP Pump Amp Draw Motor HP Pump Amp Draw Motor HP Pump Amp Draw All 1/70 0.8 1/70 0.8 1/70 0.4 1/70 0.4 1/70 0.8 1/50 1.0 1/70 0.4 1/50 0.5 1/70 0.8 1/30 1.1 1/70 0.4 1/30 0.6 All E, F, G, or H G or H I, J, or K 500/600 700/800 Digit 14=C or E (230V/1 or 230V/3) I, J, K, L 840/960 ➀ For 208V/1, 208V/3, 460V/3, and 575V/3 units, the pump motor operates at 115V/1. A 250 VA transformer is supplied to step down the voltage. 10 5-588.3 (THIS PAGE INTENTIONALLY LEFT BLANK) 5-588.3 11 Commercial Products Group • Modine Manufacturing Company • 1500 DeKoven Avenue • Racine, Wisconsin 53403-2552 "H" Model Series - Phone: 1.800.828.4328 (HEAT) • Fax: 1.800.204.6011 "O" Model Series - Phone: 1.866.823.1631 (Toll Free) • Fax: 1.800.204.6011 © Modine Manufacturing Company 2010 Litho in USA 5-588.3