1
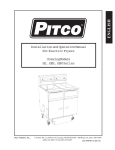
Installation and Operation Manual For Electric Fryers Covering Models SE, SEH, SEM Series Pitco Frialator, Inc., P.O. Box 501, Jct I-89 & I-93 Concord, NH 03302-0501 • 509 Route 3A, Bow, NH 03304 (603) 225-6684 • FAX (603) 225-8497 L20-246 Rev 3 (05/12) WARNING! FIRE HAZARD THE OIL LEVEL SHOULD NOT FALL BELOW THE MINIMUM INDICATED LEVEL AT ANY TIME. THE USE OF OLD OIL CAN BE DANGEROUS AS IT WILL HAVE A REDUCED FLASHPOINT AND BE MORE PRONE TO SURGE BOILING. WARNING INSTALLATION AND ALL CONNECTIONS MUST BE MADE ACCORDING TO NATIONAL AND LOCAL REGULATIONS AND CODES IN FORCE. WARNING A COUNTRY APPROVED ALL POLE CIRCUIT BREAKER WITH A MINIMUM OPEN CONTACT GAP OF 3mm MUST BE USED FOR PROPER INSTALLATION. WARNING THE FRYER IS NOT JET STREAM APPROVED. DO NOT CLEAN THE APPLIANCE WITH A WATER JET. NOTICE INSTALLATION SHOULD ONLY BE DONE BY A COMPETENT SERVICE TECHNICIAN. THE MODEL & SERIAL NUMBER, AND ELECTRICAL REQUIREMENTS STAMPED INTO THE DATA PLATE, LOCATED ON THE INSIDE PANEL OF THE DOOR. NOTICE THIS APPLIANCE IS INTENDED FOR PROFESSIONAL USE ONLY, AND AS SUCH, SHOULD BE OPERATED BY FULLY TRAINED PERSONNEL. NOTICE IT IS RECOMMENDED THAT THIS MACHINE BE INSPECTED BY A QUALIFIED TECHNICIAN ON A YEARLY BASIS. WARNING THE POWER SUPPLY MUST BE DISCONNECTED SERVICING OR CLEANING THE UNIT. WARNING SHORTENING, WHEN IT IS AT OPERATING TEMPERATURES, IS VERY HOT AND DANGEROUS! USE EXTREME CAUTION WHEN HANDLING! USE PROPER PROTECTIVE GEAR SUCH AS INSULATED GLOVES, APRONS, FACE SHIELD, AND SLEEVES WHEN HANDLING HOT SHORTENING. DO NOT ATTEMPT TO MOVE MACHINE THAT HAS HOT OIL IN IT. ALLOW TO COOL TO ROOM TEMPERATURE OR DRAIN THE OIL INTO A SUITABLE CONTAINER BEFORE MOVING THE FRYER. L20-246 Rev 3 (05/12) Pitco Frialator, Inc. makes the following limited warranties to the original purchaser only for this equipment and replacement parts: FOR YOUR SAFETY: DO NOT STORE OR USE GASOLINE OR OTHER FLAMMABLE VAPORS AND LIQUIDS IN THE VICINITY OF THIS OR ANY OTHER APPLIANCE. 1. WARRANTY PROVISIONS - FRYERS A. Pitco Frialator, Inc. warrants all parts, with the exception of the frypot, elements and computer for 1 year after the date of installation of the fryer. B. If any parts become defective during the first year after the installation date, Pitco Frialator will also pay for the labor, freight and travel costs involved in replacing said part. WARNING: IMPOPER INSTALLATION, ADJUSTMENT, ALTERATION, SERVICE OR MAINTENANCE CAN CAUSE PROPERTY DAMAGE, INJURY OR DEATH. READ THE INSTALLATION, OPERATION AND MAINTENACE MANUALS THOROUGHLY BEFORE INSTALLING OR SERVICING THIS EQUIPMENT. 2. WARRANTY PROVISIONS - FRYPOTS A. If a frypot develops a leak due to a defect in material or workmanship within the first 10 years after installation, Pitco Frialator, Inc. will either weld or replace, at its discretion, the frypot. B. The customer will be responsible for all freight, labor and travel charges for this repair. 3. WARRANTY PROVISIONS - COMPUTER A. Pitco Frialator, Inc. will warrant the Intellifry Computer from defects in material or workmanship for a period of two years. B. If the computer is found to be defective after the first year the customer will be responsible for all freight, labor and travel charges for this repair. 4. WARRANTY PROVISIONS - ELEMENTS A. Pitco Frialator, Inc. will warrant the Electric Elements from defects in material or workmanship for a period of 3 years. B. The customer will be responsible for all freight, labor and travel charges for this repair. Retain this manual for future reference. L20-246 Rev 3 (05/12) WARRANTY STATEMENT INSTALLATION INSTRUCTIONS tion, maintenance and servicing. CAUTION: This equipment is manufactured for the use on a particular voltage and phase which is specified on the rating plate located on the inside of the door. Wiring diagram(s) are located in the back of the service manual and inside the fryers. Regular cleaning of this equipment, as well as the hood, is an important part of proper maintenance. When your fryers arrive, inspect carefully noting any damage on the freight bill. If concealed damage is found after you have accepted the equipment, report it to the carrier immediately as all claims must be filled within 15 days of the receipt of the shipment. Also, be sure to keep all packing materials as these will be necessary to make any claim. Once the fryers are in place: Leveling the fryers will help ensure proper operation. To level the fryers loosen the two set screws on the caster stem. Rotate the collar of the caster to raise or lower the height of the unit. Tighten set screws to lock the adjustment. Casters should be adjusted so that the fryers are level and at the correct height under the hood system. Follow these installation instructions carefully. A proper installation is important for the operation of the fryers. All installations must conform to all local and national codes. Do not block the area around the casters and under the fryers. Contact the Authorized Pitco Frialator representative for any service related problems. Routine maintenance may be performed by qualified personnel. The duct system, the hood system and the fryers must be cleaned on a regular basis and must be kept clear of any grease build up. Ventilation: A proper ventilation system is also an important part of the installation. Clearances: Minimum clearance of 6" (15cm) must be maintained from combustible construction on each side and the rear of the equipment. This equipment may be installed on combustible floors. Maintain a minimum of 24"(61cm) clearance in front of the fryer to provide for proper opera- L20-246 Rev 3 (05/12) 1 NOTE: Should you experience a power failure, your fryers will shut off automatically. Once the power key to turn the fryer has been restored, press the back ON. If the machine is being filtered, close the Make sure that the shortening is at the proper RED return valve so that the filter does not run if the level after cooking temperature has been reached. machine is left unattended. Do not attempt to restart It may be necessary to add shortening to maintain the fryers until the power is restored. the proper level. Filling the fryer with oil: NOTE: When adding solid shortening to an empty fry tank, first remove the baskets and support racks and fill the bottom of the tank with shortening, continue to pack the remaining shortening into the tank. Place the basket support rack on top of the shortening before turning the unit ON. For liquid shortening fill to the level lines indicated on the side of the tank. It is very important to make sure the oil level is correct before attempting to heat shortening in your Pitco fryer. Liquid shortening can be poured directly into the fry tank until the correct level has been reached. This is indicated by a line on the right hand side of the inside of the tank. NOTE: Maximum cooking load is not to exceed 3lbs (6.6kg) per basket. NOTE: The “COLD” level is considered to be the CAUTION: “MINIMUM” oil level and the “HOT” level is conExcessive loading or loading of over-wet food can sidered to be the “MAXIMUM” oil level. cause surge boiling. For solid shortening, the shortening must be cut into small blocks about 1" (2.54 Cm) in size. These small blocks must be placed under and around the heating elements. Shut Down: Press the corresponding key to turn the fryer OFF. The Computer display will go blank and all heating functions will cease. The fryer can now be turned ON. Set-Up: NOTE: When the fryer is not being used, place the cover over the fry tank. (The covers are optional and do not come with fryer unless ordered) NOTE: Please read the Operating instructions thoroughly before attempting to operate this equipment. Press the key on either side of the full vat computer, or the right key for the right side and the left key for the left side of a split vat computer to turn the unit ON. The computer display will light and the heating elements will begin to heat and will be controlled by the computer/controller. 2 L20-246 Rev 3 (05/12) NOTE: It is recommended that melt cycle be used . This will extend the shortening life. In melt cycle the shortening turns from solid to liquid gradually through short, controlled bursts of heat. Once the predetermined temperature has been reached, the unit will exit the melt cycle and go to normal operation. EQUIPMENT SET UP AND SHUT DOWN PROCEDURES return valve to the tank you are filtering. This will start the pump and return the oil to the bottom of the fry tank. FILTER PROCEDURES FOR FLAT PAPER FILTER SYSTEMS NOTE When working with hot oil ALWAYS wear oil proof, insulated gloves. f. When bubbles are seen coming out of the oil return spout, close the red handled valve to turn the pump off. If necessary add more oil to the tank to return the oil level to the fill mark. The fryer is now ready for use. WARNING NEVER - Run the filter system without a filter bag/paper. DRAINING A TANK The filter system is also used to drain the fryers. You will need a container capable of holding 4000F oil and protective gloves. NEVER - Empty the oil from the fryer before turning OFF the fryer burners. NEVER - Store the Filter Unit anywhere other than in the fryer filter cavity. a. b. c. c. a. Slide the filter pan out. Carefully remove filtered residue off the filter media. Examine the filter media for clogged or torn areas. Refer to filter media replacement instructions following this section. Reinstall the pan. b. Turn the fryer that is to be filtered OFF (See Standby Shutdown). Remove the baskets from the fryer tank(s). Use the clean out brush to lift out the tube screens. c. Check the pickup tube screen by unscrewing the cap counterclockwise. Any debris should be cleaned from the screen before using the filter system. Reinstall the screen by scewing the cap back on clockwise. Do not overtighten. Preparing the filter for use: Slowly open the green handled drain valve for the tank being filtered. If necessary use the clean-brush to clear the crumbs from the drain. Use the brush to clean the sides of the tank as the oil drains. · · · · · Slide drawer forward until it stops. Grasp the Left and Right handles of the Paper Retaining Frame and lift upward to remove it. Remove the filter paper or pad by folding the edges inward so that the debris is collected. Lift the Paper Support Screen out of the pan. The Pan, Paper Support Screen and Paper Retaining Frame can now be cleaned. NOTE: Be sure that the filter pan is free of any debris which could cause the paper and hold down ring not to seat properly. When the tank is empty, close the green handled drain valve. Open the red handled L20-246 Rev 3 (05/12) Once tank is completely empty add new shortenning and follow fryer start up procedures. WARNING The power supply must be disconnected before servicing or cleaning the appliance. WARNING This filter pan is only large enough to hold the contents of one (1) tank at once, during the filter process. e. Rotate the drain down spout so that it extends in the container that you want to drain the shortening into. Open the green handled drain valve for the tank to be drained. The oil will drain into the container you have chosen. When the container is full or the fry tank is empty, close the green handled drain valve. If the container was full repeat this step until fryer tank is empty. 3 · · · Place the Paper Support Screen in the bottom of the pan. Place filter Paper or Pad over screen making sure that there is an equal amount of excess paper on each side. Place the Retaining Frame on the paper or pad making sure that all edges are being pressed down evenly. Slide filter drawer back under fryer making sure that the oil return pipe locates into its mating connection. · CAUTION: Be careful when using the clean out rod. Damage to the drain valve may result. WARNING: Hot shortening can cause severe injury. Take care when filtering or disposing of hot shortening. Protective gear such as gloves, apron, face shield and sleeves should be worn. · · · Allow all of the shortening to return to the tank. Bubbles will be produced in the vat when all the shortening has been returned. This means that the return lines have been cleared. Close the RED Return Valve, by pushing upward on the Red Return Valve Handle. This will turn the pump off. key and the Display will show Press the “OFF”. Allow the Drain and Return lines to drain for at least 5 minutes before removing filter pan to reduce dripping. Your machine is now ready to use. 4 L20-246 Rev 3 (05/12) FILTER PROCEDURES FOR ENVELOPE PAPER FILTER SYSTEMS NOTE When working with hot oil ALWAYS wear oil-proof, insulated gloves. WARNING This filter pan is only large enough to hold the contents of one (1) tank at once, during the filter process. g. When the tank is empty, close the green handled drain valve. Open the red handled return valve to the tank you are filtering. This will start the pump and return the oil to the bottom of the fry tank. h. When bubbles are seen coming out of the oil return spout, close the red handled valve to turn the pump off. If necessary add more oil to the tank to return the oil level to the fill mark. The fryer is now ready for use. WARNING NEVER • Run the filter system without a filter bag/paper. NEVER • Empty the oil from the fryer before turning OFF the fryer burners. NEVER • Store the UFM Filter Unit anywhere other than in the fryer filter cavity. a. Slide the filter pan out. Carefully remove filtered residue off the filter media. Examine the filter media for clogged or torn areas. Refer to filter media replacement instructions following this section. Reinstall the pan. b. Turn the fryer that is to be filtered OFF (See Standby Shutdown). Remove the baskets from the fryer tank(s). Use the clean out brush to lift out the tube screens. If there are excess crumbs in the fryer tank, remove them with the crumb scoop. c. d. e. f. If you have replaced the filter media or remove crumbs and debris, sprinkle Precoat Filter Aid on the filter paper. Check the drain spout to ensure that it is in the drain tower and over the filter pan opening. Slowly open the green handled drain valve for the tank being filtered. If necessary use the clean-brush to clear the crumbs from the drain. Use the brush to clean the sides of the tank as the oil drains. Slowly open the green handled drain valve for the tank being filtered. If necessary use the clean-brush to clear the crumbs from the drain. Use the brush to clean the sides of the tank as the oil drains. L20-246 Rev 3 (05/12) DRAINING A TANK The filter system is also used to drain the fryers. You will need a container capable of holding 4000F oil and protective gloves. a. b. c. Rotate the drain down spout so that it extends in the container that you want to drain the shortening into. Open the green handled drain valve for the tank to be drained. The oil will drain into the container you have chosen. When the container is full or the fry tank is empty, close the green handled drain valve. If the container was full repeat this step until fryer tank is empty. Once tank is completely empty add new shortenning and follow fryer start up procedures. WARNING The power supply must be disconnected before servicing or cleaning the appliance. FILTER MEDIA REPLACEMENT The filter module stores neatly under the fryer when not in use. The unit is very easy to use and allows for quick installation and filtration, even under the busiest conditions. Follow the procedures below to change the filter media. a. With the filter pan empty of oil, remove the filter media by grasping the filter pan handle and gently pull the assembly toward the front of the fryer. b. Separate the filter pickup tube from the filter pickup screen assembly by pulling up on the pickup tube just above where it connects to the pickup screen assembly. Lift pickup tube and swing it to the left, until it rests on the left hand side of the filter pan. c. Grab filter screen pickup assembly lift handles and carry it to a trash barrel and shake off heavy discard any debris that may be built upon the top of the assembly. d. Unscrew the filter paper clip bracket from the filter paper support screen and slide the filter paper support screen out of the filter paper clip bracket. e. Remove filter paper support screen from the filter envelope. f. All of the filter pick up assembly parts can be washed in a dish washer or a pot sink. Flush out the suction tube assembly with hot water. After cleaning, it is very important to thoroughly dry the parts before reassembling. Water and oil do not mix. Water in hot oil will cause the oil to splatter. g. Start reassembling the filter pick up assembly by sliding the new filter paper on to the filter paper support rack. Ensure that the hole in the filter paper goes over the pick up tube assembly threaded connector. h. Fold the open end of the bag in two folds. The first fold should be approximately 1 inch from the end and the second should be over the edge of the rack assembly. i. Slide the clip screen over the folded end of the filter paper. Ensure the opening of the clip screen goes over the pick up tube connection. Screw the suction tube connection onto the threaded connection. j. Place the filter pickup assembly into the filter pan and slide the filter pan assembly back into the fryer cabinet. k. Filter unit is now ready for use. L20-246 Rev 3 (05/12) WARNING At operating temperature, the shortening in the fryer may be hotter than 375°F (190°C). This hot, melted shortening will cause severe burns. Do not let the hot shortening touch your skin or clothing. Always wear insulated oil-proof gloves when working on the filter system. It will be easier and safer if the filter assembly has cooled to room temperature before handling any filter parts. MULTIPLE LEVEL COMPUTER PROGRAMMING INSTRUCTIONS POWER ON/OFF KEY PROGRAM KEY TEMPERATURE KEY TIME KEY POWER ON/OFF KEY PRODUCT KEYS TO CHECK ACTUAL TEMP. After 5 secs. machine will return to run mode. TO CHECK SET TEMP. After 5 secs. machine will return to run mode. TO CHECK COOK, SHAKE, AND HOLD TIMES THEN THE PRODUCT KEY DESIRED NOTE: THE TIMES WILL BE DISPLAYED IN SEQUENCE PAUSING MOMENTARILY ON EACH TIME AND THEN RETURN TO COOK MODE. TO ENTER BOIL MODE enter ( if using ºC mode) when last digit of temperature is entered, boil mode will start automatically. You must turn off both fryers to exit Boil mode. CHECKING THE REMAINING TIME WHEN USING MULTIPLE TIMERS TO VIEW REMAINING TIME ON ANY FUNCTION KEYS WHEN MULTIPLE TIMERS ARE COUNTING IS AS FOLLOWS: PRESS THEN PRESS FUNCTION KEY OF ANY NON DISPLAYED ACTIVE TIMERS YOU WANT TO VIEW FIRST LEVEL PROGRAMMING USING AND ENTERING FIRST LEVEL PROGRAMMING AND PROGRAMMING FUNCTION KEYS Press the key (display shows "PROGRAM"), then enter pass word if needed. If you are unable to remember the set pass word use (6684). TO PROGRAM SINGLE OR DUAL TANK COMPUTER SET TEMP LEFT SIDE ENTER DESIRED TEMP. TO PROGRAM DUAL TANK COMPUTER SET TEMP RIGHT SIDE TO SAVE OR EXIT TO SET COOK TIME TO SET SHAKE TIME ENTER TIME TO SET HOLD TIME ENTER TIME AND TO SAVE OR EXIT L20-246 Rev 3 (05/12) 5 AND A PRODUCT KEY THEN ENTER TIME 6 L20-246 Rev 3 (05/12) L20-246 Rev 3 (05/12) 7 8 L20-246 Rev 3 (05/12) TROUBLESHOOTING PROBLEM PROBABLE CAUSE CORRECTIVE ACTION Computer does not come on nothing shows in either display A. Main circuit breaker is turned off B. Fryer fuse is blown A. Locate the correct building circuit breaker and turn OFF and back ON again. B. Call an Authorized Service Technician Computer heat light comes on but elements do not heat A. If the oil is hot the Hi - Limit may be tripped A. Allow the oil to cool, reset the Hi Limit and turn the computer OFF and back ON again. Computer display shows "OFF" and cannot be turned "ON". A. Bad computer A. Locate the correct building circuit breaker and turn OFF and back ON again. If this does not reset the computer call an Authorized Service Technician. RED return valve is open no pump sound can be heard A. RED return valve not fully open B. Filter circuit breaker may be tripped C. Filter motor Thermal Overload may be tripped D. Sensor switch may be loose A. Pull slightly on the RED return valve handle Drain valve is closed and the computer has been reset but still shows "DRAINING" or "TURN OFF" A. GREEN drain valve is not fully closed B. Sensor switch may be loose A. Apply a little more pressure to close the valve Drain valve is open, the oil is draining slowly or not at all. A. GREEN drain valve is not fully open B. Drain is plugged with debris A. Apply a little more pressure to open the valve L20-246 Rev 3 (05/12) 9 B. Locate the filter circuit breaker behind the door of the left hand fryer and reset it. C. Push RED reset button located on end of filter motor, behind the door of left hand fryer. D. If the mounting screws are loose try to tighten them, if this is not possible call an Authorized Service Agency. B. If the mounting screws are loose try to tighten them, if this is not possible call an Authorized Service Agency. B. Use the clean out rod to clear the drain valve from inside the fry vat. If this does not clear the blockage, CLOSE the GREEN drain valve and follow the instructions for clearing the main drain line. CAUTION: Some HOT oil may come out when the cap is removed. Remove the two wing nuts from the end cap (do NOT lose these.) Use the clean out rod to clear the main drain tube. Install the end cap along with its gasket and four screws. Do not overtighten these screws or remove drain "T" cleanout access covers, by removing thumb screws (do not loose screws). Then clean drain, replace access cover and thumb screws. 10 L20-246 Rev 3 (05/12) In the event of problems with or questions about your order, please contact the Pitco Frialator factory at: (603)225-6684 World Wide L20-246 Rev 3 (05/12) In the event of problems with or questions about your equipment, please contact the Pitco Frialator Authorized Service and Parts representative (ASAP) covering you area, or contact Pitco at the numbers listed to the left.