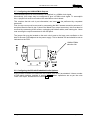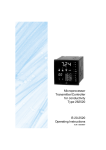
1
DIGITAL SPG/TSG
USER GUIDE
ISSUE 7
TRILOGY BROADCAST LIMITED
26 Focus Way
Andover
Hampshire
SP10 5NY
United Kingdom
Telephone.
+44 (0)1264 384000
Fax.
+44 (0)1264 334806
www.trilogy-broadcast.co.uk
PAGE INTENTIONALLY LEFT BLANK.
350 “Mentor Plus” User Guide
The Copyright of the information and drawings in this
document is the property of Trilogy Broadcast Limited of
Andover, Hampshire and is neither to be reproduced in whole
or in part, nor disclosed to a third party, without the prior written
consent of Trilogy Broadcast Limited.
The information in this document has been carefully compiled
and checked for accuracy. However, Trilogy Broadcast Limited
accepts no responsibility for inaccuracies which may occur
and, further, reserves the right to make changes to
specification or design without prior notice.
Comments or correspondence concerning this manual should
be addressed to The Design Manager at the address given at
the front of this User Guide.
DOCUMENT NUMBER
35000600.DOC
Issue
Date
Reason for Change
1
28/5/95
First Issue
2
22/9/95
Descriptions for 525 operation added
3
11/4/96
Spec change (video failure level) due to revision 4
PCB
4
6/8/96
350-26 Composite/Component TSG board added
5
25/8/99
350-28 Pulse board added and Addresses Updated
6
28/1/00
Layout errors corrected. 350-24-01 Added
7
14/5/02
Updated option board references, replaced front
panel pictures with new style, removed references to
legacy options, updated waveform lists, several minor
corrections
Trilogy Broadcast Limited
Issue 7
ISSUE 7
Approved
Page 3 of 64
350 “Mentor Plus” User Guide
ERRATA SHEET
This sheet contains information regarding errors in this user guide.
Date
Description
Trilogy Broadcast Limited
Issue 7
Page 4 of 64
350 “Mentor Plus” User Guide
CONTENTS
1. APPLICATION .....................................................................................................9
1.1 SUMMARY OF MENTOR PLUS FEATURES ........................................................................ 9
1.2 AVAILABLE OPTIONS ..................................................................................................... 9
2. SPECIFICATION................................................................................................10
2.1 GENERAL ................................................................................................................... 10
2.2 EMC ......................................................................................................................... 10
2.3 POWER ...................................................................................................................... 10
2.4 INTERNAL REFERENCE OSCILLATOR STABILITY ............................................................ 10
2.5 GENLOCK VIDEO INPUT PERFORMANCE ....................................................................... 11
2.6 10 MHZ INPUT PERFORMANCE.................................................................................... 12
2.7 GENLOCK OPERATIONAL CONTROL ............................................................................. 12
2.8 BLACK BURST PERFORMANCE .................................................................................... 12
2.9 BLACK BURST OUTPUTS 2 AND 3, OPERATIONAL CONTROL .......................................... 13
2.10 MIXED SYNC/8 FIELD IDENT PULSE OUTPUT PERFORMANCE ..................................... 13
2.11 10MHZ/27MHZ OUTPUT PERFORMANCE ................................................................. 13
2.12 SDI TEST OUTPUT PERFORMANCE .......................................................................... 13
2.13 SDI TEST OUTPUT, OPERATIONAL CONTROL ........................................................... 13
2.14 AES/EBU OUTPUT PERFORMANCE ......................................................................... 14
2.15 AES/EBU OUTPUT OPERATIONAL CONTROL ............................................................ 14
2.16 ANALOGUE AUDIO OUTPUT PERFORMANCE .............................................................. 14
2.17 PERFORMANCE OF OPTIONAL OUTPUTS ................................................................... 15
2.17.1 Digital Reference Black Outputs ........................................................................ 15
2.17.2 Digital Test Signal Outputs ................................................................................ 15
2.17.3 AES/EBU Digital Audio Reference Output ......................................................... 15
2.17.4 Analogue Composite/Component Test Signal Outputs ...................................... 16
2.17.5 VITC Board ....................................................................................................... 16
2.17.6 Pulse Board....................................................................................................... 17
2.17.6.1 PAL Pulse timings ...................................................................................... 17
2.17.6.2 NTSC Pulse timings ................................................................................... 17
2.17.7 Outputs - General.............................................................................................. 18
2.18 MISCELLANEOUS .................................................................................................... 18
3. INSTALLATION .................................................................................................19
3.1 UNPACKING ............................................................................................................... 19
3.2 RACK MOUNTING........................................................................................................ 19
3.3 MAINS CONNECTION AND FUSING ................................................................................ 19
3.4 EARTHING REQUIREMENTS ......................................................................................... 19
3.5 SIGNAL CONNECTIONS ............................................................................................... 20
3.5.1 Remote Connector Pinout ................................................................................. 21
3.5.2 Remote Connector - Use. .................................................................................. 21
3.5.2.1 RS422 Port................................................................................................. 21
3.5.2.2 Step Through Set-Up Memories ................................................................. 21
3.5.2.3 Step Through Option Board 1 Test Signals. ............................................... 21
3.5.2.4 Genlock Status Output. .............................................................................. 22
3.5.2.5 Analogue Audio Outputs............................................................................. 22
3.5.2.6 Power Fail Output....................................................................................... 22
3.5.2.7 Fan Fail Output .......................................................................................... 22
3.6 CONFIGURING THE MIXED SYNC/EIGHT FIELD PULSE OUTPUT. ..................................... 23
3.7 CONFIGURING THE 10MHZ/27MHZ OUTPUTS .............................................................. 24
3.8 CONFIGURING THE SDI WITH EMBEDDED AUDIO OPTIONS. ........................................... 24
Trilogy Broadcast Limited
Issue 7
Page 5 of 64
350 “Mentor Plus” User Guide
4. OPERATION ......................................................................................................25
4.1 THE FRONT PANEL ..................................................................................................... 25
4.2 POWER ON DISPLAY................................................................................................... 26
4.3 FRONT PANEL CONTROLS ........................................................................................... 26
4.4 BASIC OPERATIONAL TECHNIQUE ................................................................................ 26
4.5 SELECTING A FUNCTION ............................................................................................. 27
4.6 CHANGING VALUES .................................................................................................... 27
4.6.1 Leaving the Selected Function .......................................................................... 27
5. LOCK MODE .....................................................................................................28
5.1 GENLOCK, MODE ....................................................................................................... 29
5.2 GENLOCK, OFFSETS................................................................................................... 29
5.2.1 Genlock, Offsets, Line ....................................................................................... 30
5.2.2 Genlock, Offsets, Field ...................................................................................... 30
5.2.3 Genlock, Offsets, S/C ........................................................................................ 30
5.2.4 Genlock, Offsets, Clear Offsets ......................................................................... 30
5.3 GENLOCK, CONTROL .................................................................................................. 30
5.4 GENLOCK, FIELD ........................................................................................................ 31
6. FRONT PANEL STATUS INDICATOR LAMPS ................................................32
6.1 EXT PRESENT LAMP .................................................................................................. 32
6.1.1 Summary, EXT Lamp, Genlock Control “Use“ is FLYWHEEL or OVEN............. 32
6.1.2 Summary, EXT Lamp, Genlock Control “Use” is 10MHz................................... 33
6.2 HORIZONTAL LOCK LAMP ............................................................................................ 33
6.3 SUBCARRIER LOCK LAMP ............................................................................................ 33
6.4 SC.H. ERROR LAMP ................................................................................................... 33
7. OUTPUT CONTROL..........................................................................................34
7.1 SDI OUTPUT .............................................................................................................. 34
7.1.1 SDI Output, Change Test Signal........................................................................ 35
7.1.2 SDI Output, Options .......................................................................................... 35
7.1.2.1 SDI Output, Options, Moving ...................................................................... 35
7.1.2.2 SDI Output, Options, APL........................................................................... 35
7.1.2.3 SDI Output, Options, BIT (word format) ...................................................... 35
7.1.2.4 SDI Output, Options, VOFF (vertical offset)................................................ 36
7.1.3 SDI Output, Colour Bar Ident............................................................................. 36
7.2 AES OUTPUT............................................................................................................. 36
7.2.1 AES Output, Frequency..................................................................................... 36
7.2.2 AES Output, Tone ............................................................................................. 37
7.2.2.1 AES Output, Tone, Channel 1 .................................................................... 37
7.2.2.2 AES Output, Tone, Channel 2 .................................................................... 38
7.2.2.3 AES Output, Tone, Both ............................................................................. 39
7.3 BLACK/BURST 2 OUTPUT ............................................................................................ 40
7.3.1 Black/Burst 2 Output, Line Offset....................................................................... 40
7.3.2 Black/Burst 2 Output, Field Offset...................................................................... 40
7.3.3 Black/Burst 2 Output, Eight Field Offset............................................................. 40
7.3.4 Black/Burst 2 Output, Subcarrier Phase Offset .................................................. 41
7.3.5 Black/Burst 2 Output, Clear Offsets ................................................................... 41
7.4 BLACK/BURST 3 OUTPUT ............................................................................................ 41
7.4.1 Black/Burst 3 Output, Line Offset....................................................................... 41
7.4.2 Black/Burst 3 Output, Field Offset...................................................................... 42
7.4.3 Black/Burst 3 Output, Eight Field Offset............................................................. 42
7.4.4 Black/Burst 3 Output, Subcarrier Phase Offset .................................................. 42
7.4.5 Black/Burst 3 Output, Clear Offsets ................................................................... 42
Trilogy Broadcast Limited
Issue 7
Page 6 of 64
350 “Mentor Plus” User Guide
8. OPTION BUTTONS ...........................................................................................43
8.1 OPTION BUTTON, OPTION BOARD NOT PRESENT. ........................................................ 43
8.2 OPTION BUTTON, OPTION BOARD PRESENT................................................................. 43
8.3 OPTION BUTTON, 350-24 SDI TSG ............................................................................ 44
8.3.1 Option Button, 350-24 SDI TSG, Change Test Signal ....................................... 44
8.3.2 Option Button, 350-24 SDI TSG, Options .......................................................... 44
8.3.2.1 Option Button, 350-24 SDI TSG, Options, Moving...................................... 44
8.3.2.2 Option Button, 350-24 SDI TSG, Options, APL .......................................... 45
8.3.2.3 Option Button, 350-24 SDI TSG, Options, BIT (word format)...................... 45
8.3.2.4 Option Button, 350-24 SDI TSG, Options, VOFF (vertical offset)................ 45
8.3.3 Option Button, 350-24 SDI TSG, Colour Bar Ident............................................. 45
8.4 OPTION BUTTON, 350-24-01 SDI GENERATOR WITH EMBEDDED AES........................... 45
8.5 OPTION BUTTON, 350-25 AES/SDI REFERENCE GENERATOR ...................................... 45
8.5.1 Option Button, 350-25 AES/SDI, Configure AES ............................................... 46
8.5.1.1 Option Button, 350-25 AES/SDI, Configure AES, frequency....................... 46
8.5.1.2 Option Button, 350-25 AES/SDI, Configure AES, tone ............................... 46
8.5.1.3 Option Button, 350-25 AES/SDI, Configure AES, Mode ............................. 47
8.5.1.4 Option Button, 350-25 AES/SDI, Configure AES, Misc ............................... 47
8.5.2 Option Button, 350-25 AES/SDI, Configure SDI ................................................ 48
8.5.2.1 Option Button, 350-25 AES/SDI, Configure SDI, V timing........................... 48
8.5.2.2 Option Button, 350-25 AES/SDI, Configure SDI, H timing .......................... 48
8.6 OPTION BUTTON, 350-26 COMPOSITE/COMPONENT BOARD ......................................... 48
8.6.1 Option Button, 350-26, Change Test Signal Ch.1, 2, 3 ...................................... 49
8.6.1.1 Option Button, 350-26, Change Test Signal ............................................... 49
8.6.2 Option Button, 350-26, Options ......................................................................... 49
8.6.2.1 Option Button, 350-26, Options, APL CH1, 2, 3.......................................... 49
8.6.2.2 Option Button, 350-26, Options, APL.......................................................... 50
8.6.2.3 Option Button, 350-26, Options, Format ..................................................... 50
8.6.3 Option Button, 350-26, Ident.............................................................................. 50
9. SETUP ...............................................................................................................51
9.1 SETUP, MEMORY ....................................................................................................... 51
9.1.1 Setup, Memory, Save ........................................................................................ 52
9.1.2 Setup, Memory, Load ........................................................................................ 52
9.1.3 Setup, Memory, Name....................................................................................... 53
9.1.3.1 Setup, Memory, Name, Memory 1 .............................................................. 53
9.1.3.2 Setup, Memory, Name, Memory 2 .............................................................. 53
9.1.3.3 Setup, Memory, Name, Memory 3 .............................................................. 53
9.1.3.4 Setup, Memory, Name, Memory 4 .............................................................. 53
9.2 SETUP, LCD CONTRAST ............................................................................................. 53
9.3 SETUP, STANDARD (525/625 OPERATION) .................................................................. 53
10. OTHER FEATURES ..........................................................................................55
10.1
10.2
FRONT PANEL LOCKOUT ......................................................................................... 55
VIEWING STATUS .................................................................................................... 55
11. IDENTIFYING PROBLEMS ...............................................................................56
11.1
REVERSION TO FACTORY DEFAULT SETTINGS - LOSS OF BATTERY BACK-UP.............. 56
Trilogy Broadcast Limited
Issue 7
Page 7 of 64
350 “Mentor Plus” User Guide
12. LIST OF CURRENTLY AVAILABLE TEST PATTERNS...................................57
12.1
12.2
12.3
12.4
12.5
12.6
12.7
12.8
PAL COMPOSITE W AVEFORMS (350-26).................................................................. 57
NTSC COMPOSITE W AVEFORMS (350-26)............................................................... 57
625 RGB W AVEFORMS, (350-26) ........................................................................... 57
525 RGB W AVEFORMS, (350-26) ........................................................................... 57
625 YUV W AVEFORMS, (350-26) ........................................................................... 58
525 YUV W AVEFORMS, (350-26) ........................................................................... 58
625 LINE SDI W AVEFORMS ..................................................................................... 58
525 LINE SDI W AVEFORMS ..................................................................................... 58
13. ADDING/REMOVING AN OPTION BOARD......................................................59
13.1 DISASSEMBLY INSTRUCTIONS .................................................................................. 59
13.2 REMOVAL OF AN OPTION BOARD ............................................................................. 59
13.3 INSTALLATION OF AN OPTION BOARD ....................................................................... 60
13.3.1 Option Board Link Settings ................................................................................ 60
13.3.2 350-28 Pulse Option Board DIP Switch Settings ............................................... 61
13.3.3 350-24-01 SDI With Embedded Audio – Functions and DIP Switch Settings..... 63
13.3.3.1 Summary of Features ................................................................................. 63
13.3.3.2 DIP Switch Settings.................................................................................... 64
Trilogy Broadcast Limited
Issue 7
Page 8 of 64
350 “Mentor Plus” User Guide
1. APPLICATION
The Trilogy 350 Mentor Plus Synchronising Pulse Generator is one of the most flexible units
available on the market today.
It is suitable for any digital or mixed format environment where a high quality Digital SPG is
required. As standard, the unit is provided with five analogue black and burst outputs.
Optional modules allow high quality PAL and/or component waveforms to be generated.
The digital television environment is catered for with a standard output of an AES/EBU digital
audio reference and "SDI" digital serial test pattern generator. Optionally, additional SDI test
pattern generator modules, a second AES/EBU digital audio reference generator (with SDI
reference black generator) may be fitted.
Mentor is fitted, as standard, with an oven-controlled reference oscillator allowing the unit to
be used either a station master or as a slave.
The main black/burst generator provides 3 co-timed outputs, whereas two further outputs
provide independent timing relative to the main output. This gives total timing freedom with
adjustment of ±4 fields (±2 fields NTSC) relative to the main output in 0.5ns steps.
This User Guide concentrates on the operational aspects of the unit and includes a full
technical specification. A maintenance handbook is also available.
We hope you are pleased with this equipment. If you have any problems or wish to suggest
improvements to this product or for future products, please contact Trilogy Broadcast Limited
where our staff will be available to assist you.
1.1 Summary of Mentor Plus Features
The Mentor Plus SPG/TSG provides the following features and facilities.
•
•
•
•
•
•
•
•
•
•
•
•
•
Full Broadcast Master Digital SPG/TSG - Genlock or Free running
Black/burst and 10MHz genlock inputs
Precision “master” oscillator as standard fitment
Switchable 525/625 operation
3 independently timed black and burst outputs
Timing range of ±4 fields (±2 fields NTSC)
Digital video test signal output
Digital AES/EBU Audio Tones/Silence output and Analogue Audio Tone output
Embedded Audio on SDI available from some models, or as option.
Mixed sync and 10MHz/27MHz outputs
Meets EU EMC requirements
Timing resolution Accuracy of 0.5ns
Multiple optional test signal outputs
1.2 Available Options
Part Number
350-24-00
350-24-01
350-25-00
350-26-00
350-28-00
350-29-00
350-30-00
350-88-00
330-00-00
350-90-00
Trilogy Broadcast Limited
Description
SDI Test Pattern Generator
SDI Generator with Embedded Audio
AES/EBU Digital Audio and SDI black reference generator
Analogue Composite/Component Test Signal Board
Pulse Output Board
Dual Black/Burst option board
HDTV tri-level sync board.
SDI Black/Embedded VITC Translator
Changeover Unit
Service Manual
Issue 7
Page 9 of 64
350 “Mentor Plus” User Guide
2. SPECIFICATION
Note. All measurements are made assuming, where appropriate, that the Mentor various
offsets controlled from the front panel are set to zero unless otherwise stated. All signal
measurements are made with inputs and outputs terminated in 75Ω unless otherwise stated.
2.1 General
Width
Height
Depth
19” rack mounting
44 mm (1U)
433
mm
(excluding
connectors)
4kg, no option boards
5kg max. with option boards
0 to 50°C
-45 to 80°C
Weight
Operating temperature range
Storage temperature range
2.2 EMC
Emissions
EN55022, Class B, 30-1000MHz
EN55022 Class B, 0.15-30MHz
Immunity
Radiated
IEC801 Part 3, 27-500MHz
ESD
IEC801 Part 2
Fast Transients on connected leads IEC801 Part 4, common mode
AC Power port
IEC801 Part4, common mode
Radiated
AC Mains Conducted
NOTE: Immunity is specified to criterion B - the unit’s outputs may suffer some degradation
during the disturbance, but the unit recovers on removal of the disturbance source and
continues to operate as intended.
2.3 Power
Mains input
Power consumption
Fuse
83-135/170-265 VAC, 45-60Hz auto select
75VA max. (depending on number of option boards fitted)
2A (T)
2.4 Internal Reference Oscillator Stability
Values quoted are with respect to outgoing subcarrier frequency noting that all output
timings are derived from the same oscillator. The outputs of the unit will be referenced to the
internal oscillator if the genlock lock mode is set to ‘INT’ or the genlock mode is set to EXT1,
2, 3, 4 or 5 and the appropriate genlock input is missing and the failsafe is set to ‘Oven’.
Nominal error
Temperature drift
Ageing rate
Warm up settling time to 0.2Hz
Trilogy Broadcast Limited
Issue 7
< ±0.5Hz (0.1ppm)
< 0.2Hz/10°C
< 0.05Hz/day
< 10 minutes
Page 10 of 64
350 “Mentor Plus” User Guide
2.5 Genlock Video Input Performance
The unit’s lock mode is assumed set to EXT1, 2, or 3 unless otherwise stated.
Measurements (for example jitter) are taken by observing the main black burst with respect
to the genlock video input. Other composite outputs will meet the same specification.
Video input type
Return loss @ subcarrier
Video D.C. range
Video signal amplitude (to keep unit within
specification)
Sync attenuation below which signal will be
indicated as missing.
Burst attenuation below which signal will be
indicated as monochrome.
Sync frequency lock range
Subcarrier lock range
2 BNC high impedance loop through
< -40dB
< ±12V
300mV sync/burst ±6 dB
(285mV 525 operation)
-8dB (with respect to 300mV/625 or
285mV/525)
-8dB (with respect to 300mV/625 or
285mV/525))
15.625kHz ± 1.5Hz (±100 ppm) - 625
15.734kHz ± 1.5Hz (±100 ppm) - 525
4.43361875MHz (625)
3.579545MHz (525)
± 200Hz (±50 ppm) (see note 1)
< 7 seconds
< ± 3ns
Genlock video lock up time
Output sync jitter with respect to ‘clean’
genlock video input
Output subcarrier jitter with respect to ‘clean’ < ±0.25°
genlock video input, lock mode = EXT1/2/3
Output subcarrier jitter with respect to ‘clean’ < ±2°
genlock video input, lock mode = EXT 4
Input video Sc.H. phase over which an Sc.H. +90±15°, -90±15° (approx.)
error is indicated.
Genlock video sync to output sync timing
< 5ns
accuracy, over full operating temperature
range
Genlock video subcarrier to output subcarrier < 5°
phase accuracy over full operating
temperature range
Vertical lock up rate, genlock video to output, 1 line / 5 field
when unit set to FIELD LOCK = SLOW
Note1: Assumes 15625Hz (15734.268Hz NTSC) line frequency and subcarrier varied about
nominal Fsc.
Trilogy Broadcast Limited
Issue 7
Page 11 of 64
350 “Mentor Plus” User Guide
2.6 10 MHz Input Performance
The unit’s lock mode is assumed set to EXT5. Measurements (jitter for example) are taken
by observing an output of the unit, normally the main black burst output.
10MHz input type
10MHz input return loss @ 10 MHz
10MHz D.C. range
10MHz signal amplitude (to keep unit
within specification)
Signal amplitude below which signal will
be indicated as missing.
10MHz frequency lock range
Lock up time
Output sync jitter with respect to ‘clean’
10MHz input
Output subcarrier jitter with respect to
‘clean’ 10MHz input
1 BNC, 75Ω terminated
< -35dB
< ±3V
0.5V to 3V p to p (terminated)
0.4V
10MHz ±200 Hz (±20 ppm)
< 0.1 seconds
< ±2 ns
< ±0.2°
2.7 Genlock Operational Control
Horizontal offset adjustment range
Horizontal offset resolution
Horizontal offset accuracy
Subcarrier phase adjustment range
Subcarrier phase resolution
Line offset adjustment range
±30 µS
0.5ns
±5ns over full range
0 to 360°
0.1°
±15 lines in 1 line steps
2.8 Black Burst Performance
Signal source
Output impedance
Sync amplitude
Burst amplitude
Black level D.C.
Noise to 20MHz
Noise above 20MHz
Sc.H. accuracy, all controls set to zero
Sync edge risetime
Burst edge risetime
Difference in time between any black/burst output
and any other (all controls set to zero)
Difference in time between any black/burst output
and the genlock video input (all controls set to
zero). Genlock lock mode set to EXT1, 2, 3, or 4.
Sc.H. change throughout offset adjustment range
(Black/burst 2 and 3 outputs only )
Trilogy Broadcast Limited
Issue 7
Digital, converted using 10 bit DAC
75Ω ±0.2%
300mV ± 3mV (625)
285mV ± 3mV (525)
300mV ± 9mV (625)
285mV ±9mV (525)
0V ± 20mV
< -60dB (with respect to 700mV)
< -40dB (with respect to 700mV)
± 5°
250ns, gaussian (625)
140ns, gaussian (525)
350ns, gaussian (625)
300ns, gaussian (525)
±10 ns
±10 ns
< ±1°
Page 12 of 64
350 “Mentor Plus” User Guide
2.9 Black Burst Outputs 2 and 3, Operational Control
Offset adjustment range * see note 1
±4 fields (±2 fields, NTSC)
Offset resolution
0.5ns
Offset accuracy
±5ns over full range
Subcarrier phase adjustment range
0 to 360°
Subcarrier phase resolution
0.1°
Note 1 . The ±4 field (±2 field, NTSC) offset range is complete - there are no discontinuities.
It is possible to offset the signal by any value within this range to a resolution of 0.5ns. To
aid adjustment, the offset may be altered in 0.5ns, line or field increments.
2.10 Mixed Sync/8 Field Ident Pulse Output Performance
75Ω ±0.2%
2V ± 200mV (625)
4V ± 200mV (525)
0V ± 200mV
< -60dB (with respect to 700mV)
< -40dB (with respect to 700mV)
140ns±25ns, approx. gaussian
< ±25 ns
Output impedance
Sync amplitude
Noise to 20MHz
Noise above 20MHz
Edge risetime
Difference in time between the mixed sync
output to the Main black burst signal
2.11 10MHz/27MHz Output Performance
Output impedance
Amplitude
Synchronism
Noise to 20MHz
Noise above 20MHz
75Ω ±0.2%
1.2V ±100mV (10MHz) 1V ± 100mV (27MHz) 0V ± 100mV
The signal is derived from the clock source, whether it be the
internal oven oscillator or derived from the genlock feed.
< -60dB (with respect to 700mV)
< -40dB (with respect to 700mV)
2.12 SDI Test Output Performance
Format
Resolution
Output impedance
Return loss to 270MHz
Time offset with respect to
Main black burst signal
Noise to 20MHz
Noise above 20MHz
270MHz serial SDI, conforms to EBU Tech 3267E (625 line)
and relevant sections of CCIR601, CCIR656 or
SMPTE RP125M.
10 bits, selectable to 8 bits.
approx. 75Ω
≈ -14dB
< ±100 ns
< -60dB (with respect to 700mV)
< -40dB (with respect to 700mV)
2.13 SDI Test Output, Operational Control
Vertical Offset
APL
Moving
Resolution
± 3 lines in line steps
Controls signal Average Picture Level, selectable on/off/bounce.
Adds moving bars to top and bottom of most test patterns, selectable on/off.
10 bits, can be rounded for 8 bit systems
Trilogy Broadcast Limited
Issue 7
Page 13 of 64
350 “Mentor Plus” User Guide
2.14 AES/EBU Output Performance
Format
Synchronism
Grade * see note 1
Clock jitter * see note 1
Tone resolution
Tone linearity error
Noise to 20MHz
Noise above 20MHz
Conforms to EBU Tech 3250E
The signal timing is derived from the video clock source,
Either the internal oven oscillator or the genlock feed 48kHz
signal is related to video frame as per SMPTE/EBU
recommendations.
Meets grade 1 when genlock lock mode = INTernal.
< 1ns
24 bit
< 1ppm
< -60dB (with respect to 700mV)
< -40dB (with respect to 700mV)
Note 1. When the unit is locked to a genlock feed, the frequency stability of the AES signal
will be dependant on the quality of that feed.
2.15 AES/EBU Output Operational Control
Sample frequency control
Tone frequency adjustment
Tone amplitude adjustment
Tone identification
Grade
User data
Other
Selectable, 32kHz, 44.1kHz, 48kHz
100Hz to 10kHz in 100Hz steps. Left/right channel
independent adjustment.
-40dB to 0dB in 1dB steps. 0dB = full scale digital
signal. Left/right channel independent adjustment.
Left/right channels can pulse according to
EBU/CCIR recommendations.
Grade bit manually adjustable between grade 1
and grade 2.
Set to zero.
Both channels may be set to silence.
2.16 Analogue Audio Output Performance
Note - this output was not available on early units.
The outputs provide an analogue conversion of the AES left and right channels - all
adjustments to the AES data stream will be reflected in the analogue output.
Signal source
Output type
Output impedance
Amplitude
Noise to 20MHz
Noise above 20MHz
Trilogy Broadcast Limited
Digital, converted to analogue using 18 bit
DAC, connected to top 18 bits of AES signal.
Differential, electronically balanced, intended
for driving 600Ω lines only.
Low impedance, < 10Ω.
0dBU ±0.1dB (when AES tone amplitudes
are set to -20dB).
< -60dB (with respect to 700mV)
< -40dB (with respect to 700mV)
Issue 7
Page 14 of 64
350 “Mentor Plus” User Guide
2.17 Performance of Optional Outputs
2.17.1 Digital Reference Black Outputs
Format
Vertical Offset
Horizontal Offset
Serial
±3 lines
±14µs
2.17.2 Digital Test Signal Outputs
Generation Accuracy
Format
Vertical Offset
Selectable 8/10 bit
Serial
±3 lines
2.17.3 AES/EBU Digital Audio Reference Output
General
Grade
Sample Frequencies
Tone, Left channel
Tone, Right channel
Tone types
Tone resolution
Peak Tone codes
User Data
Video Locking
Clock Jitter
Generation Accuracy
Quantisation level
Trilogy Broadcast Limited
To EBU Tech 3250E
1 (2 when genlocked)
32, 44.1, 48kHz
800Hz, 1kHz, silence
800Hz, 1kHz, silence
EBU, CCIR, continuous
23 bit
0CCD0/F3330 Hex (-20dBm.)
-18dBm available to special order
Set to 0
Selectable for 48kHz
<±1ns
12bit
0.3mV/bit
Issue 7
Page 15 of 64
350 “Mentor Plus” User Guide
2.17.4 Analogue Composite/Component Test Signal Outputs
Note: non-factory fitted Modules may require the frequency response to be set once installed
in the metalwork. Please refer to the Maintenance Handbook or to Trilogy. The module will
otherwise not meet this specification.
Generation Accuracy
Quantisation level
Output impedance
Timing Accuracy YUV Relative
Single PAL output to Black/Burst
Level, 0dB:pk-pk:
Level, +3dB pk-pk:
Black level DC:
Chrom/Lum gain:
Chrom/Lum delay:
Chrom phase accuracy:
Linearity:
Frequency Response to 6MHz
Diff. Gain:
Diff. Phase:
2T K rating:
Sc.H accuracy:
Line tilt:
Field tilt:
Triple channel crosstalk 0-5.8MHz
10bit
1.333mV/bit
75Ω
<±5ns
<±5ns
1V±1%
1.41V ±1.5%
0V ±25mV
<1%
<5ns
<±5°
<0.25%
±0.2dB
< 0.5%
< 0.5°
< 0.5%K
±5°
<0.5%
<0.5%
<-60dB
2.17.5 VITC Board
Input
Analogue VITC to EBU tech 3097 B
Input type
Looping, hi Z
Input Return loss
>40dB @4.43MHz:
Input allowable D.C. range:
±6V
Input signal range (75_ term), to keep unit +6 to -12dB
within specification:
Input VITC lines
Variable, lines 6-22 (319-335)
Output
Serial SDI to CCIR 601/656
Generation Accuracy
10 bit
Output VITC lines
Variable, lines 6-22 (319-335)
Trilogy Broadcast Limited
Issue 7
Page 16 of 64
350 “Mentor Plus” User Guide
2.17.6 Pulse Board
Output impedance
Pulse Levels (Not PAL Ident)
75Ω
2V ± 0.2V (PAL)
4V ± 0.2V (NTSC)
Pulse levels, PAL Ident
1V ± 0.1V
Pulse black level
0V ± 0.1V
Pulse rise fall times, 10 % to 90 %
150nS ± 10nS
Subcarrier amplitude
1V ± 0.1V (PAL)
2V ± 0.2V (NTSC)
Subcarrier D.C. level
0V ± 0.1V
Subcarrier phase (relative to main black 0° ± 5°
burst output)
2.17.6.1 PAL Pulse timings
Burst Gate timing
Mixed Blanking
Line Drive
PAL Ident
Field 1 marker
Field Drive
Starts 5.5µS after sync falling edge, duration of 2.3µS
Starts 1.5µS before sync falling edge, duration of 11.9µS
Early - Starts 1.5µS before sync falling edge, duration of 6.5µS
Normal - Starts coincident with sync falling edge, duration of
6.5µS
Transition is coincident with sync falling edge
Starts 10.4µS after sync falling edge, duration of 52µS (active
picture width).
Occurs on line seven only
The start is coincident with the last mixed blanking edge prior to
the field interval, duration 7½ lines
2.17.6.2 NTSC Pulse timings
Burst Gate timing
Mixed Blanking
Line Drive
Field 1 marker
Field Drive
Trilogy Broadcast Limited
Starts 5.3µS after sync falling edge, duration of 2.5µS
Starts 1.5µS before sync falling edge, duration of 10.7µS
Early - Starts 1.5µS before sync falling edge, duration of 6.5µS
Normal - Starts coincident with sync falling edge, duration of
6.5µS
Starts 9.2µS after sync falling edge, duration of 53µS (active
picture width).
Occurs on line seven only
The start is coincident with the last mixed blanking edge prior to
the field interval, duration 9 lines
Issue 7
Page 17 of 64
350 “Mentor Plus” User Guide
2.17.7 Outputs - General
SNR unweighted:
SNR weighted:
H.F. noise 6MHz to 100MHz
SDI digital outputs
-60dB
-75dB
<-40dB
conform to EBU Tech. 3267E and SMPTE
125M as appropriate
Conform to EBU N14 and SMPTE RP154 as
appropriate
Analogue outputs
2.18 Miscellaneous
Setup data retention when unit not powered
Serial communication type
Power fail indication
Fan fail indication
Remote Inputs
Remote Output
Option interfaces
Trilogy Broadcast Limited
>1000 hours. Unit must have been powered
for >24 hours prior to this.
Balanced RS422
Relay normally open/ normally closed
provided on Remote D-type.
Open collector output provided on D-type
connector. 45V/500mA maximum
Two grounding inputs provided on D-type
connector. See section 3.5 for further details.
One output provided on D-type connector.
See section 3.5 for further details. Open
collector outputs rated at 45V/500mA
maximum.
Up to three single width option boards may
be fitted to the unit.
Issue 7
Page 18 of 64
350 “Mentor Plus” User Guide
3. INSTALLATION
3.1 Unpacking
Carefully unpack the unit from its transit material and carefully check the unit for signs of
damage.
Check the contents of the box against our despatch note and your original order to ensure
that you have received the correct parts.
In the event that the unit has been damaged or does not match your order, contact Trilogy
Broadcast Ltd. at the address given at the front of this guide immediately.
3.2 Rack Mounting
The 1U rack frame has integral 19" mounting ears for direct mounting in a standard 19" rack.
Carefully place the unit in your rack and firmly attach it to the rack using 4 bolts.
IMPORTANT This unit has air intakes on one side of the unit and fan assisted exhaust
vents on the other side and the back of the unit. Ensure that these have an
unobstructed air flow, otherwise the unit will overheat. Pay particular attention to
ensure that any rack wiring or cable trays do not obstruct the vent. Approximately
60mm of clear space should be allowed between the vents and any potential
obstruction.
3.3 Mains Connection and Fusing
The power supply within the unit is a switch mode unit and will cope automatically with an
input voltage of between 98-135 and 200-260 Volts AC
A standard IEC mains plug is provided on the rear of the unit complete with a retaining strap
to suit a BULGIN mains socket.
This should be wired according to the instructions provided with a mating mains socket using
suitable cable. See below for earthing details.
The mains plug has an integral fuse tray fitted with a 20mm glass cartridge 2 Amp (T) slow
blow/anti-surge fuse.
3.4 Earthing Requirements
The unit is provided with a single 4mm earthing stud on the rear panel. Incoming mains earth
from the IEC connector is internally bonded to both the chassis and technical 0V to meet
safety requirements and performance specifications. The stud allows the addition of an earth
strap in rack installations.
Trilogy Broadcast Limited
Issue 7
Page 19 of 64
350 “Mentor Plus” User Guide
3.5 Signal Connections
Mains
IEC
Connector
Fan exhaust
vent
Option Board Output of AES/EBU Digital Audio (if fitted)
4mm Earthing Stud
10 MHz Reference Input
Looping Genlock Input
Option Board 3 Outputs.
27MHz/10MHz Output
2V(625/PAL)/4V(525/NTSC) Mixed Sync Output (or 8 Field
Ident Pulse - see Section 3.6).
3 co-timed outputs of “MAIN” black and burst
Option Board 2 Outputs
Second black and burst output.
Third black and burst output.
2 simultaneous outputs of SDI test signal.
Option Board 1 Outputs
Remote Interface Connector.
Fixed AES/EBU Digital
Audio Output
Trilogy Broadcast Limited
Issue 7
Page 20 of 64
350 “Mentor Plus” User Guide
3.5.1 Remote Connector Pinout
The following gives the pinout of the 25 way D-type socket of the remote interface connector.
Pin
1
2
3
4
5
6
7
8
9
10
11
12
13
Description
Fan Fail Output
RS422 CTSRS422 RXD+
RS422 TXD+
RS422 RTSRS422 TXDGND
RS422 RXDAnalogue Audio Out 1+
Analogue Audio Out 2 +
GND
Pin
14
15
16
17
18
19
20
21
22
23
24
25
Description
Power Fail Common
Power Fail Normally Closed
Power Fail Normally Open
Genlock Status Out
Step Option Board 1 Test Signals
Step Through Setup Memories
RS422 CTS+
RS422 RTS+
Analogue Audio Out 1Analogue Audio Out 2GND
3.5.2 Remote Connector - Use.
3.5.2.1 RS422 Port
The RS422 port is used during manufacturing test and alignment. As from software revision
‘G’, limited control is provided. Please contact Trilogy for details.
3.5.2.2 Step Through Set-Up Memories
The remote “Step Setup Memories” input may be used to step between the Mentor’s 4 setup
memories -see Section 9.1 for a full description of these memories. A step may be
accomplished by a momentary ground applied to this pin.
3.5.2.3 Step Through Option Board 1 Test Signals.
The remote “Step Option 1 Test Signals” input may be used to cycle through the available
test signals on the option board fitted in slot 1. A step may be accomplished by a momentary
ground applied to this pin.
Trilogy Broadcast Limited
Issue 7
Page 21 of 64
350 “Mentor Plus” User Guide
3.5.2.4 Genlock Status Output.
The remote “Genlock Status” output is used to indicate that the unit is correctly genlocked as
follows:
• the genlock signal is present (as indicated by the EXT PRES lamp - see section 6)
• the horizontal lock has been achieved (as indicated by the HORIZontal Lock lamp - see
section 6) - unless the genlock mode is set to “EX5” (locked to the 10MHz input)
• the subcarrier lock has been achieved (as indicated by the S/C Lock lamp - see section 6)
• that the incoming genlock feed has an unambiguous Sc.H. phase (as indicated by the
Sc.H error lamp not being lit - see section 6.)
3.5.2.5 Analogue Audio Outputs
The analogue audio output is a direct digital to analogue conversion of the fixed AES/EBU
digital audio output.
Therefore any tones etc. configured on the fixed AES/EBU output (see7.2) will also cause
the analogue audio output to change.
3.5.2.6 Power Fail Output
This is a status output provided by relay contacts. Both normally closed and normally open
contacts are provided.
The relay itself is placed across the internal voltage rails; should one of these fail the relay
will change state.
3.5.2.7 Fan Fail Output
This open collector output senses the current drawn by the cooling fans fitted to the
enclosure. The detector indicates a fail if the pulsing fan current drops below a preset
threshold (i.e. a stuck fan and/or an open circuit/broken fan will give an indication of failure).
Trilogy Broadcast Limited
Issue 7
Page 22 of 64
350 “Mentor Plus” User Guide
3.6 Configuring the Mixed Sync/Eight Field Pulse Output.
The standard output from this connector, as supplied, is a 2V(625/PAL) or 4V(525/NTSC)
mixed sync pulse.
Alternatively, this output may be configured to give an eight field pulse output. To accomplish
this, a jumper link must be moved on the main Mentor circuit board.
This requires that the unit is part dismantled, and must only be performed by competent
personnel.
First, the top cover must be removed by unscrewing the M2.5 screws around its perimeter. If
an option board is fitted in slot 3 (above the Mixed Sync output connector), this must also be
removed by unscrewing 4 M3 screws, unplugging two ribbon cables, and undoing the 14mm
nuts securing the output connectors to the rear panel.
The jumper link may be located on the main circuit board approximately 50mm from the
mixed sync output connector. This is labelled J41 and should be set as follows.
Mixed-sync
output connector
8 Field Pulse
Mixed Syncs
Trilogy Broadcast Limited
Issue 7
Page 23 of 64
350 “Mentor Plus” User Guide
3.7 Configuring the 10MHz/27MHz Outputs
The standard output from this connector, as supplied, is a 10MHz clock signal.
Alternatively, this output may be configured to give a 27MHz clock signal. To accomplish
this, a jumper link must be moved on the main Mentor circuit board.
This requires that the unit is part dismantled, and must only be performed by competent
personnel.
First, the top cover must be removed by unscrewing the M2.5 screws around its perimeter. If
an option board is fitted in slot 3 (above the Mixed Sync output connector), this must also be
removed by unscrewing 4 M3 screws, unplugging two ribbon cables, and undoing the 14mm
nuts securing the output connectors to the rear panel.
The jumper link may be located on the main circuit next to the large oven oscillator on the
side of the main PCB adjacent to the power supply. This is labelled J42 and should be set as
indicated on the PCB.
10MHz/27MHz
selection link
3.8 Configuring the SDI with Embedded Audio Options.
Some models of Mentor are fitted with this module (350-24-01) as standard. It has a number
of DIP switch settings, detailed in section 13.3.3. Menu operations are as per the units
“fixed” SDI output, as described in section 7.1
Trilogy Broadcast Limited
Issue 7
Page 24 of 64
350 “Mentor Plus” User Guide
4. OPERATION
This section describes the basic operation of the unit.
Sc H
ERROR
4.1 The Front Panel
“SETUP” used to store/recall memories, change
the video standard and adjust the LCD
brightness.
“OPTION 1, 2 AND 3” used to adjust settings of
optionally fitted modules.
ADJUST
<<
>>
SELECT
LOCK
MODE
OUTPUT
CONTROL
1
2
3
SETUP
EXT
PRESENT
H
S/C
Genlock Status lamps.
“OUTPUT CONTROL” used to change settings of
standard Black/burst, SDI and AES/EBU audio
outputs.
“LOCK MODE” used to access menus for Genlock
settings.
“SELECT” button, used to confirm other button presses
and/or menu selections.
<< and >> (left and right) buttons used for value
adjustment, selection of menu entries and cursor
movement when entering text or values
“ADJUST” control, used for fine value adjustments and
selection of alphanumeric values.
LCD, used to display information during unit set-up
Trilogy Broadcast Limited
Issue 7
Page 25 of 64
350 “Mentor Plus” User Guide
4.2 Power On Display
When the unit is powered up, the LCD will display initialisation messages, as it configures
the internal hardware of the unit. A count down from 5 to 1 indicates the various stages of
initialisation, shown below.
Initialising
Please Wait..
<6>
Once initialisation is complete, a message indicating a normal operational status is
displayed, as shown below.
MENTOR PLUS (625 +)
<Press<<>> For Status>
The top line gives the name of this unit (i.e. Mentor) and the current format (i.e. 625 or 525).
The bottom line invites the user to use the adjustment controls to display the current settings
of the unit. This is described in detail in section 10.2.
4.3 Front Panel Controls
The panel has four functional areas.
A Liquid Crystal Display (LCD) used to show information to guide the user through operating
the various functions and show status information
An adjustment knob and "<< " and ">> " control buttons. These allow the user to alter the
settings of the SPG/TSG as directed by the LCD. The knob allows fine adjustments to be
made for any chosen function, while the buttons generally allow for coarser settings.
Function Buttons that allow the user to select the various functions that may be set via the
adjustment controls. These have indicator lamps above them that show valid key presses for
any given mode.
Indicator lamps used to show the state of the SPG when genlocked.
A detailed description of the buttons and lamps is given in the following sections.
LOCK MODE
GENLOCK INDICATOR LAMPS
OUTPUT CONTROL
OPTION BUTTONS
SETUP
Section 5
Section 6
Section 7
Section 8
Section 9
4.4 Basic Operational Technique
There are a number of basic concepts that once appreciated will simplify the use of the unit.
Valid button pushes are indicated by a lamp alight in a button. In most cases, buttons without
a lamp lit will not be prohibited, allowing rapid changes between functions grouped on each
button.
Genuinely invalid button pushes will always result in an informative message on the LCD.
Trilogy Broadcast Limited
Issue 7
Page 26 of 64
350 “Mentor Plus” User Guide
4.5 Selecting a Function
To change any parameter the appropriate function button must first be pushed.
Once a function button is pushed, the lamp above it will flash to provide a reminder of which
function is active.
Pushing a function button that has sub-functions under the first menu will cause the top row
of the LCD to show abbreviations of the lower level functions.
To choose which of these sub-functions is required either the knob or << or >> buttons may
be used to step between the sub-functions. Each sub-function will be underlined in turn as
the adjust controls are utilised.
The bottom row of the LCD will provide a fuller explanation of the particular function.
Once the required sub-function is underlined, the SELECT button is used to choose it.
Depending on the sub-function chosen, either a further set of sub-functions or the current
value of that function will be displayed.
4.6 Changing Values
To actually change the value of the function, the ADJUST knob or << or >> buttons are
used.
In the case of numerical values (for example line phase, in microseconds) the adjustment
knob always alters the value by the smallest possible amount.
The LEFT and RIGHT buttons provide a choice of two adjustment rates. Pressing a button
will cause the value to change by the smallest increment, either to increase or decrease the
value depending on whether the << or >> button was pressed. If this button is kept pressed,
and the second button is then pressed, the rate of adjustment will increase.
Releasing the second button will cause the rate to drop back to the slowest rate.
The combined use of the knob and << or >> buttons, combined with the two rates available
on the buttons allows rapid setting of numerical values.
As the parameter is changed, the new value will be shown on the LCD, and the unit
responds by actually altering that value immediately - it is not necessary to confirm, SELECT
or otherwise activate the change.
4.6.1 Leaving the Selected Function
Once the parameter has been set the unit can be returned to its normal operating mode, or
another function chosen by one of three methods.
Pressing the current (flashing) function button will step up through the menu structure until
either the top (normal) state is reached, or until another menu level of the button is reached,
at which point another menu can be accessed by pressing the SELECT button. Thus another
parameter related to that function button may be changed.
The SELECT button allows you to descend the menu structure and the current Function key
allows you to ascend the menu structure.
At any time any other function key may be pressed causing the menu structure to be
traversed sideways. For example, having set an OUTPUT CONTROL function, the SETUP key
may be pushed without having to step back up through the menus first.
In addition, there is an in-built time-out mechanism that will automatically step back up
through the menu structure until the top level is reached if a key is not pressed within a
preset time period. In any event, once the top level is reached, the lamp in the function key
will stop flashing.
Trilogy Broadcast Limited
Issue 7
Page 27 of 64
350 “Mentor Plus” User Guide
5. LOCK MODE
The Genlock settings of the unit (for example, the current genlock mode and timing offsets)
may be changed as follows. Press the LOCK MODE button .
ADJUST
<<
>>
SELECT
LOCK
MODE
OUTPUT
CONTROL
1
2
3
SETUP
P
Use the arrow keys or the knob to select one of the four sub-menu options. The options are
as follows.
MODE OFFSETS CONTROL FLD
Change genlock mode
Changes the basic genlock mode i.e. internal (free
run), lock to video etc..
MODE OFFSETS CONTROL FLD
Change genlock mode
Adjusts the offset between all the outputs of the
unit and the genlock video input.
MODE OFFSETS CONTROL FLD
Change genlock mode
Alter the way the unit will respond when the
genlock video input is removed
MODE OFFSETS CONTROL FLD
Change genlock mode
Alter the field lock action - instantaneous or slow
lock.
To enter any of these sub-menus, press SELECT. To return to the top level display press
LOCK MODE. To go to another menu, press either OUTPUT CONTROL / OPTION 1 /
OPTION 2 / OPTION 3 / SETUP as required.
The sub-menus are described below.
Trilogy Broadcast Limited
Issue 7
Page 28 of 64
350 “Mentor Plus” User Guide
5.1 Genlock, Mode
Select the mode required using the knob or << or >> buttons. Please be aware that the
mode will change immediately each option is selected.
INT EX1 EX2 EX3 EX4 EX5
Free running
Sets the unit to be free running, relying on the internal
oven oscillator for stability. The Sc.H. of the unit will be
set to zero.
INT EX1 EX2 EX3 EX4 EX5
Manual s/c phasing
Sets the unit to genlock to the video input. The
subcarrier phase offset may be adjusted as required.
INT EX1 EX2 EX3 EX4 EX5
Output Sc.H correct
Sets the unit to genlock to the video input. The Sc.H. of
the outputs of the unit is forced to be zero regardless of
the genlock video Sc.H. This is achieved by moving the
line timing with respect to the genlock input until the
correct Sc.H. phase results.
INT EX1 EX2 EX3 EX4 EX5
Follow ext s/c phase
Sets the unit to genlock to the video input. The
subcarrier output phase is set to be the same as the
input genlock video.
INT EX1 EX2 EX3 EX4 EX5
Sync lock, Sc.h=0
Sets the unit to genlock to the video input. The system
is genlocked using only the sync information of the
genlock video input. The Sc.H. phase of the output is
forced to be zero - i.e. “correct”.
INT EX1 EX2 EX3 EX4 EX5
Lock to 10MHz input
Sets the unit to genlock to the 10MHz input. There will
no fixed phase relationship with any other units locked
to this signal. The Sc.H. of the unit will be set to zero.
5.2 Genlock, Offsets
Use the arrow keys or the knob to select one of the three sub-menu options. Note that these
options will not be available if the genlock mode is set to internal. The options are as follows.
LINE FIELD S/C CLR
Set genlock H offset
Change the horizontal offset between the genlock
video input and all the outputs.
LINE FIELD S/C CLR
Set subcarrier phase
Change the vertical offset between the genlock
video input and all the outputs.
Change the subcarrier phase between the genlock
video input and all the appropriate outputs.
LINE FIELD S/C CLR
Clear genlock offsets
Allows all previously set line, field and subcarrier
offsets to be cleared (“zeroed”).
LINE FIELD S/C CLR
Set field offset
To enter any of these sub-menus, press SELECT. To return to the previous level display
press LOCK MODE. To go to another menu, press either OUTPUT CONTROL / OPTION 1
/ OPTION 2 / OPTION 3 / SETUP as required.
The sub-menus are described below.
Trilogy Broadcast Limited
Issue 7
Page 29 of 64
350 “Mentor Plus” User Guide
5.2.1 Genlock, Offsets, Line
HORIZONTAL OFFSET
OFFSET = 0.0000uS
Use the knob or << or >> buttons to change the
horizontal offset between the genlock video input
and all the outputs. The offset can be adjusted
between -30µS and +30µS to a resolution of 0.5ns.
5.2.2 Genlock, Offsets, Field
FIELD OFFSET
OFFSET = +00 lines
Use the knob or << or >> buttons to change the
field offset between the genlock video input and all
the outputs. The offset can be adjusted between 15 lines and +15 lines in 1 line steps.
5.2.3 Genlock, Offsets, S/C
Use the knob or << or >> buttons to change the
horizontal offset between the genlock video input
and all the outputs. The phase can be adjusted
over 360° to a resolution of 0.1°.
5.2.4 Genlock, Offsets, Clear Offsets
S/C PHASE
PHASE = 0.0 deg
SET GENL OFFSETS TO ZERO
<SELECT> TO CLEAR
Press the SELECT button to reset all line, field and
subcarrier offsets to zero.
5.3 Genlock, Control
Select the required mode using the knob or << or >> buttons.
NO INPUT:FLY 10MHZ OVEN
Flywheel
NO INPUT:FLY 10MHZ OVEN
Use 10MHz input
NO INPUT:FLY 10MHZ OVEN
Use internal oven osc.
Trilogy Broadcast Limited
If the genlock video input is removed, the unit will
continue to operate - “flywheel” - at the same
frequency as the genlock input just removed. Note
that if the unit is powered up in this mode with no
genlock input applied, the Mentor outputs may not
be within specification.
If the genlock video input is removed, the unit will
use the 10MHz input as its master oscillator. If the
10MHz input is removed, the unit will use the
internal oven oscillator as its master oscillator.
If the genlock video input is removed, the unit will
use the internal oven oscillator as its master
oscillator.
Issue 7
Page 30 of 64
350 “Mentor Plus” User Guide
5.4 Genlock, Field
Select the mode required using knob or << or >> buttons
FIELD LOCK:CRASH SLOW
Crash lock
FIELDLOCK:CRASH SLOW
+/-1 line / 5 fields
Trilogy Broadcast Limited
Sets the unit to lock near instantaneously to the
field information of an applied genlock video input.
This is the normal mode of operation.
Sets the unit to lock to the field information of an
applied genlock video input by moving the outputs
one line nearer to the genlock video input every 5
fields until the unit is locked. This mode is useful if
the instant locking of the crash mode is found to
upset any subsequent equipment.
Issue 7
Page 31 of 64
350 “Mentor Plus” User Guide
6. FRONT PANEL STATUS INDICATOR LAMPS
EXT
PRESENT
H
Sc H
ERROR
S/C
The status indicator lamps are used to inform the user about the condition of the genlock
video and 10MHz inputs and whether the Mentor has successfully locked to them.
6.1 EXT Present Lamp
EXT
PRESENT
The EXT PRESENT lamp will indicate when the genlock video signal or
the 10MHz signal is applied to the unit, depending upon the current lock
mode setting as follows.
If the lock mode is set to EX1, EX2, EX3 or EX4 (i.e. the unit is locking to
the genlock video input) and the Genlock control mode is set to OVEN or
FLYWHEEL, the lamp will light if the genlock video input is present.
If the lock mode is set to EX1, EX2, EX3 or EX4 (i.e. the unit is locking to
the genlock video input) and the Genlock control mode is set to 10MHz,
the lamp will light if the genlock video input AND the 10MHz input is
present, flash if either is missing and be off if both are missing.
If the lock mode is set to EX5 (i.e. the unit is locking to the 10MHz input)
then the lamp will light when the 10MHz signal is present.
If the lock is set to INT (i.e. the unit is free running) then if the Genlock
control mode is set to OVEN or FLYWHEEL, the lamp will light if the
genlock video input is present, otherwise if the Genlock control mode is
set to 10MHz, the lamp will light if the genlock video input AND the
10MHz input is present, flash if either is missing and be off if both are
missing.
6.1.1 Summary, EXT Lamp, Genlock Control “Use“ is FLYWHEEL or OVEN
The following table summarises the various states of the “External Present” lamp, when the
genlock control mode is set to either flywheel mode, or revert to the internal oven oscillator.
GENLOCK MODE
LED
ON
FLASHING
OFF
Trilogy Broadcast Limited
INTERNAL
Genlock video
detected
Genlock Video
Missing
EXT 1 to 4
Genlock video
detected
Genlock Video
Missing
Issue 7
EXT 5
10MHz detected
10MHz input missing
Page 32 of 64
350 “Mentor Plus” User Guide
6.1.2 Summary, EXT Lamp, Genlock Control “Use” is 10MHz
The following table shows the various states of the “External Present” lamp, when the
genlock control mode is set to use the external 10MHz reference input.
GENLOCK MODE
INTERNAL
ON
Genlock video and
10MHz input detected
FLASHING
Genlock Video or
10MHz input missing
OFF
Genlock Video and
10MHz input missing
6.2 Horizontal Lock Lamp
LED
HORIZ
EXT 1 to 4
Genlock video and
10MHz input detected
Genlock video or
10MHz input missing
Genlock Video and
10MHz input missing
EXT 5
10MHz input detected
10MHz input missing
The HORIZ lamp will be lit when the unit is correctly line locked to the
applied genlock video signal. It will flash if the unit is correctly line locked
but has not locked to the applied genlock video field information. It will be
off if the unit is not correctly locked to the applied genlock video signal.
The lamp will only operate when the unit is set to the lock modes EX1,
EX2, EX3 or EX4, otherwise it will be permanently off.
6.3 Subcarrier Lock Lamp
S/C
The S/C lamp will be lit when the unit is correctly subcarrier locked to the
applied genlock video signal. It will flash if it detects the applied genlock
video signal has no burst - i.e. it is a luminance only signal. It will be off if
the unit is not correctly locked to the subcarrier of the applied genlock
video signal.
The lamp will only operate when the unit is set to the lock modes EX1,
EX2 or EX3, otherwise it will be permanently off. It will also be off if the
HORIZ lamp is not lit.
6.4 Sc.H. Error Lamp
Sc.H.
ERROR
The Sc.H. lamp will be on when the applied genlock video has an
ambiguous value of Sc.H. This is the case when the Sc.H. phase of the
applied genlock signal is outside of the range -80° to +80°. The lamp will
be off if the genlock signal is not ambiguous. The lamp will flash if the
applied signal has non mathematical subcarrier - i.e. it is not in the correct
mathematical relationship to the line frequency.
The lamp will only operate when the unit is set to the lock modes EX1,
EX2 or EX3, otherwise it will be permanently off. It will also be off if the
HORIZ or S/C lamps are off.
Trilogy Broadcast Limited
Issue 7
Page 33 of 64
350 “Mentor Plus” User Guide
7. OUTPUT CONTROL
The Output Control button is used to change the settings of the standard outputs of the
Mentor Plus. These outputs are black/burst output 2, black/burst output 3, the AES/EBU
digital audio output and the SDI test signal output.
Output settings may be changed as follows. Press the OUTPUT CONTROL button.
<<
ADJUST
>>
SELECT
LOCK
MODE
OUTPUT
CONTROL
1
2
3
SETUP
PR
Use the knob or << or >> buttons to select one of the four sub-menu options. The options
are as follows.
Adjusts the SDI test signal parameters, including the
OUTPUT: SDI AES BB2 BB3
test signal, moving, APL, 8/10 bit selection, Vertical
Adjust SDI signal
Offset adjustment and the character Ident to be set.
OUTPUT: SDI AES BB2 BB3
Adjust AES signal
Adjusts the AES/EBU output, including sample
frequency, tone on/off/mode and grade to be set.
OUTPUT: SDI AES BB2 BB3
Adjust B/B 2 signal
Adjusts the black/burst output 2 timings in line,
field, 8 field and/or subcarrier.
OUTPUT: SDI AES BB2 BB3
Adjust B/B 3 signal
Adjusts the black/burst output 3 timings in line,
field, 8 field and/or subcarrier.
To enter any of these sub-menus, press SELECT. To return to the top level display press
OUTPUT CONTROL. To go to another menu, press either LOCK MODE / OPTION 1 /
OPTION 2 / OPTION 3 / SETUP as required.
The sub-menus are described below.
7.1 SDI Output
Select the mode required using the knob or << or >> buttons.
FIXED SDI: SIG OPTS ID
Change test signal
Allows the test signal to be changed, from a list of 47
PAL or 45 NTSC currently available.
FIXED SDI: SIG OPTS ID
Test signal options
Allows test signal options to be changed (moving, APL,
8/10 bit selection and Vertical Offset adjustment).
FIXED SDI: SIG OPTS ID
Change bars ID text
Allows the 13 character Ident that may be displayed on
certain outputs to be changed.
To enter any of these sub-menus, press SELECT. To return to the previous menu level
display press OUTPUT CONTROL. To go to another menu, press either LOCK MODE /
OPTION 1 / OPTION 2 / OPTION 3 / SETUP as required.
The sub-menus are described below.
Trilogy Broadcast Limited
Issue 7
Page 34 of 64
350 “Mentor Plus” User Guide
7.1.1 SDI Output, Change Test Signal
Select the test signal required using the knob or << or >> buttons, followed by SELECT to
return to the previous menu.
TEST SIGNAL OUTPUT
FULL FIELD RED
Allows the test signal to be changed, from a
maximum of 47 currently available.
Note that as test signals are selected they will appear immediately at the output.
7.1.2 SDI Output, Options
A further set of menu selections are displayed. Select the option required using the knob or
left/right buttons, followed by the SELECT button.
OPTS: MOV APL BIT VOFF
Control moving mode
OPTS: MOV APL BIT VOFF
Set signal apl
OPTS: MOV APL BIT VOFF
Select data word format
OPTS: MOV APL BIT VOFF
Adjust vert. offset
Allows a moving pattern to be displayed on test
signals, allowing signals freeze-framed via a frame
buffer to be noticed.
Allows the APL (average picture level) mode to be
set. This option is only available on certain
waveforms.
Allows the test signal output to be set to 10 bit, or
rounded to 8 bit precision.
Allows the test signal output to be offset in the
vertical (field) direction with respect to the main
black/burst output by ±3 lines
7.1.2.1 SDI Output, Options, Moving
Select the option required using the knob or << or >> buttons.
MOVEMENT: OFF ON
Moving pattern off
Turns the moving pattern off.
MOVEMENT: OFF ON
Moving pattern on
Turns the moving pattern on.
7.1.2.2 SDI Output, Options, APL
Select the option required using the knob or << or >> buttons.
APL: OFF HI LO BOUNCE
Signal APL off
Turns APL off.
APL: OFF HI LO BOUNCE
Signal APL off
Turns APL High on. This will select a repeating
pattern of 9 lines of white and 3 lines of the
selected test signal.
APL: OFF HI LO BOUNCE
Signal APL off
Turns APL Low on. This will select a repeating
pattern of 9 lines of black and 3 lines of the
selected test signal.
Turns APL bounce on. This will alternate between
APL High and APL Low every 3 seconds.
APL: OFF HI LO BOUNCE
Signal APL off
7.1.2.3 SDI Output, Options, BIT (word format)
Select the option required using the knob or << or >> buttons.
BITS: 8-BIT 10-BIT
Test Signal 8 bits
Selects 8 bit data format. This data is arithmetically
rounded from the internal 10 bit data format.
BITS: 8-BIT 10-BIT
Test Signal 10 bits
Selects 10 bit data format.
Trilogy Broadcast Limited
Issue 7
Page 35 of 64
350 “Mentor Plus” User Guide
7.1.2.4 SDI Output, Options, VOFF (vertical offset)
Select the offset required using the knob or << or >> buttons. Note that the offset will
change at the test signal output immediately a new value is chosen.
SDI VERTICAL OFFSET
Offset= +1 Lines
Allows the SDI test signal output to be offset by ±3
lines with respect to the main black/burst output.
7.1.3 SDI Output, Colour Bar Ident
Select the character to be changed using the << or >> buttons, and the required character
using the knob, followed by SELECT to return to the previous menu.
POSN:<< >> CHAR.KNOB
IDENT. TRILOGY SPG
Allows the 13 character Ident that appears on
(some) colour bar outputs to be changed.
Note that the new Ident. will not appear on the test signal output until the SELECT button is
pressed.
7.2 AES Output
Select the mode required using the knob or << or >> buttons.
AES:FREQ TONE MODE GRADE
Set AES sample freq
Allows the AES sample frequency to be set to
32kHz, 44.1kHz or 48kHz.
AES:FREQ TONE MODE GRADE
Set AES channels tone
Allows the AES channel 1 and 2 output tone
frequency and level to be individually set.
AES:FREQ TONE MODE GRADE
Set AES tone mode
Allows the AES output tones to be turned on or off,
or set to EBU or CCIR pulsing modes.
AES:FREQ TONE MODE GRADE
Allows the AES grade to be specified as grade 1 or
grade 2.
Set AES grade
To enter any of these sub-menus, press SELECT. To return to the previous menu level
display press OUTPUT CONTROL. To go to another menu, press either LOCK MODE /
OPTION 1 / OPTION 2 / OPTION 3 / SETUP as required.
The sub-menus are described below.
7.2.1 AES Output, Frequency
Select the sample frequency required using the knob or << or >> buttons.
AES: 32kHz 44.1kHz 48kHz
AES sample freq.
Sets the AES sample frequency to 32kHz.
AES: 32kHz 44.1kHz 48kHz
AES sample freq.
Sets the AES sample frequency to 44.1kHz.
AES: 32kHz 44.1kHz 48kHz
AES sample freq.
Sets the AES sample frequency to 48kHz.
Trilogy Broadcast Limited
Issue 7
Page 36 of 64
350 “Mentor Plus” User Guide
7.2.2 AES Output, Tone
A further menu is displayed. Select the option required using the << or >> buttons, followed
by the SELECT button.
TONES:CHAN 1 CHAN2 BOTH
Change Ch1 tone
Allows the AES channel 1 output tone frequency
and amplitude to be set.
TONES:CHAN 1 CHAN2 BOTH
Change Ch2 tone
Allows the AES channel 2 output tone frequency
and amplitude to be set.
TONES:CHAN 1 CHAN2 BOTH
Change both tones
Allows both AES channel 1 and channel 2 output
tone frequency and amplitude to be set
simultaneously
7.2.2.1 AES Output, Tone, Channel 1
A further menu is displayed. Select the option required using the knob or << or >> buttons,
followed by the SELECT button.
CHAN 1: FREQ AMP
Adjust chan 1 tone freq
Allows the AES channel 1 output tone frequency to
be set.
CHAN 1: FREQ AMP
Adjust chan 1 tone freq
Allows the AES channel 1 output tone amplitude to
be set.
7.2.2.1.1 AES Output, Tone, Channel 1, Frequency
Select the required tone frequency using the knob or << or >> buttons, followed by the
SELECT button.
Chan 1 Tone frequency
1000.0 Hz
Allows the AES channel 1 output tone frequency to
be set between 100Hz and 10kHz in 100Hz steps.
Note that there will be a small delay as the frequency is changed whilst the new values are
calculated and loaded before the change is reflected at the output, and before a further
change may be made.
Trilogy Broadcast Limited
Issue 7
Page 37 of 64
350 “Mentor Plus” User Guide
7.2.2.1.2 AES Output, Tone, Channel 1, Amplitude
Select the required tone amplitude using the knob or << or >> buttons, followed by the
SELECT button.
Allows the AES channel 1 output tone amplitude to
Chan 1 Tone amplitude
be set between 0dB to -40dB in 1dB steps, with
-20.0dB
respect to peak code value.
A further menu is displayed. Select the option required using the knob or left/right buttons,
followed by the SELECT button.
Note that there will be a small delay as the amplitude is changed whilst the new values are
calculated and loaded before the change is reflected at the output, and before a further
change may be made.
7.2.2.2 AES Output, Tone, Channel 2
CHAN 2: FREQ AMP
Adjust chan 2 tone freq
Allows the AES channel 2 output tone frequency to
be set.
CHAN 2: FREQ AMP
Adjust chan 2 tone freq
Allows the AES channel 2 output tone amplitude to
be set.
7.2.2.2.1 AES Output, Tone, Channel 2, Frequency
Select the required tone frequency using the knob or << or >> buttons, followed by the
SELECT button.
Chan 2 Tone frequency
1000.0 Hz
Allows the AES channel 2 output tone frequency to
be set between 100Hz and 10kHz in 100Hz steps.
Note that there will be a small delay as the frequency is changed whilst the new values are
calculated and loaded before the change is reflected at the output, and before a further
change may be made.
7.2.2.2.2 AES Output, Tone, Channel 2, Amplitude
Select the required tone amplitude using the knob or << or >> buttons, followed by the
SELECT button.
Allows the AES channel 2 output tone amplitude to
Chan 2 Tone amplitude
-20.0dB
be set between 0dB to -40dB in 1dB steps, with
respect to peak code value.
Note that there will be a small delay as the amplitude is changed whilst the new values are
calculated and loaded before the change is reflected at the output, and before a further
change may be made.
Trilogy Broadcast Limited
Issue 7
Page 38 of 64
350 “Mentor Plus” User Guide
7.2.2.3 AES Output, Tone, Both
A further menu is displayed. Select the option required using the knob or << or >> buttons,
followed by the SELECT button.
BOTH: FREQ AMP
Adjust both tone freq
Allows both AES channel 1 and channel 2 output
tone frequency to be set together.
BOTH: FREQ AMP
Allows both AES channel 1 and channel 2 output
tone amplitude to be set together.
Adjust both tone freq
Please note that when the AES output is changed in “both” mode, the current values for
channel 1 are copied to output 2 when the BOTH selection is made. Thereafter, changes
made to amplitude and/or frequency will only be made to channel 1, until leaving the menus
when the new values are once again copied from channel 1 to channel 2.
7.2.2.3.1 AES Output, Tone, Both, Frequency
Select the required tone frequency using the knob or << or >> buttons, followed by the
SELECT button.
Both Tone frequency
1000.0 Hz
Allows both AES channel 1 and channel 2 output
tone frequency to be set together, between 100Hz
and 10kHz in 100Hz steps.
Note that there will be a small delay as the frequency is changed whilst the new values are
calculated and loaded before the change is reflected at the output, and before a further
change may be made.
7.2.2.3.2 AES Output, Tone, Both, Amplitude
Select the required tone amplitude using the knob or << or >> buttons, followed by the
SELECT button.
Allows both AES channel 1 and channel 2 output
Both Tone amplitude
tone amplitude to be set together between 0dB to -20.0dB
40dB in 1dB steps, with respect to peak code
Note that there will be a small delay as the amplitude is changed whilst the new values are
calculated and loaded before the change is reflected at the output, and before a further
change may be made.
Trilogy Broadcast Limited
Issue 7
Page 39 of 64
350 “Mentor Plus” User Guide
7.3 Black/Burst 2 Output
Select the mode required using knob or << or >> buttons.
LINE FLD 8-FLD S/C CLR
B/B 2 Line Offset
Allows the black/burst 2 output timing relative to the main
black/burst output to be set ±32µs, in 0.5ns steps.
LINE FLD 8-FLD S/C CLR
B/B 2 Field Offset
Allows the black/burst 2 output timing relative to the main
black/burst output to be set ±155 lines in 1 line steps.
LINE FLD 8-FLD S/C CLR
B/B 2 8 field Offset
Allows the black/burst 2 output timing relative to the main
black/burst output to be set ±4 fields, in 1 field steps.
LINE FLD 8-FLD S/C CLR
B/B 2 S/C Phase
Allows the black/burst 2 output subcarrier phase, relative to
the main black/burst output to be set 0-360°, in 0.05° steps.
LINE FLD 8-FLD S/C CLR
B/B2 Clear All
Clears all black/burst two line, field, 8-field and subcarrier
offsets to zero.
Note that these settings are interactive. Changing line phase, for example, by >+31.9995µs
will automatically increment the field setting by 1 line, and change the displayed line offset to
-32.0µs.
To enter any of these sub-menus, press SELECT. To return to the previous menu level
display press OUTPUT CONTROL. To go to another menu, press either LOCK MODE /
OPTION 1 / OPTION 2 / OPTION 3 / SETUP as required.
The sub-menus are described below.
7.3.1 Black/Burst 2 Output, Line Offset
Select the offset required using the knob or << or >> buttons, followed by SELECT to return
to the previous menu.
Allows the black/burst 2 timing offset with respect
to the main black/burst output to be changed in
0.5ns steps.
Note that the offset will change at the black/burst outputs as the value is changed.
+1 lines +1 fields
OFFSET = +16.3950us
7.3.2 Black/Burst 2 Output, Field Offset
Select the line offset required using the knob or << or >> buttons, followed by SELECT to
return to the previous menu.
Allows the black/burst 2 timing offset with respect
to the main black/burst output to be changed in 1
line steps.
Note that the line offset will change at the black/burst outputs as the value is changed.
+16.3950us +1 fields
OFFSET = +1 LINES
7.3.3 Black/Burst 2 Output, Eight Field Offset
Select the field offset required using the knob or << or >> buttons, followed by SELECT to
return to the previous menu.
+16.3950us +1 Lines
OFFSET = +1 FIELDS
Allows the black/burst 2 timing offset with respect
to the main black/burst output to be changed in 1
field steps.
Note that the field offset will change at the black/burst outputs as the value is changed.
Trilogy Broadcast Limited
Issue 7
Page 40 of 64
350 “Mentor Plus” User Guide
7.3.4 Black/Burst 2 Output, Subcarrier Phase Offset
Select the subcarrier phase offset required using the knob or << or >> buttons, followed by
SELECT to return to the previous menu.
B/B 2 S/C
PHASE =
+0.15deg
Allows the black/burst 2 subcarrier phase to be set
in 0.05º steps.
Note that the subcarrier phase will change at the black/burst outputs as the value is
changed.
7.3.5 Black/Burst 2 Output, Clear Offsets
To zero all black/burst two output offsets to zero, press the SELECT button.
SET BB2 OFFSETS TO ZERO
<SELECT> TO CLEAR
Allows all black/burst 2 output offsets to be set to
zero.
7.4 Black/Burst 3 Output
Select the mode required using knob or << or >> buttons.
LINE FLD 8-FLD S/C CLR
B/B 3 Line Offset
Allows the black/burst 3 output timing relative to the main
black/burst output to be set ±32µs, in 0.5ns steps.
LINE FLD 8-FLD S/C CLR
B/B 3 Field Offset
Allows the black/burst 3 output timing relative to the main
black/burst output to be set ±155 lines in 1 line steps.
LINE FLD 8-FLD S/C CLR
Allows the black/burst 3 output timing relative to the main
black/burst output to be set ±4 fields, in 1 field steps.
B/B 3 8 field Offset
LINE FLD 8-FLD S/C CLR
B/B 3 S/C Phase
LINE FLD 8-FLD S/C CLR
B/B3 Clear All
Allows the black/burst 3 output subcarrier phase, relative to
the main black/burst output to be set 0-360°, in 0.05° steps.
Clears all black/burst three line, field, 8-field and subcarrier
offsets to zero.
Note that these settings are interactive. Changing line phase, for example, by >+31.9995µs
will automatically increment the field setting by 1 line, and change the displayed line offset to
-32.0µs.
To enter any of these sub-menus, press SELECT. To return to the previous menu level
display press OUTPUT CONTROL. To go to another menu, press either LOCK MODE /
OPTION 1 / OPTION 2 / OPTION 3 / SETUP as required.
The sub-menus are described below.
7.4.1 Black/Burst 3 Output, Line Offset
Select the offset required using the knob or << or >> buttons, followed by SELECT to return
to the previous menu.
Allows the black/burst 3 timing offset with respect
to the main black/burst output to be changed in
0.5ns steps.
Note the offset will change at the black/burst outputs as the value is changed.
+1 lines +1 fields
OFFSET = +16.3950us
Trilogy Broadcast Limited
Issue 7
Page 41 of 64
350 “Mentor Plus” User Guide
7.4.2 Black/Burst 3 Output, Field Offset
Select the line offset required using the knob or << or >>
return to the previous menu.
+16.3950us +1 fields
OFFSET = +1 LINES
buttons, followed by SELECT to
Allows the black/burst 3 timing offset with respect
to the main black/burst output to be changed in 1
line steps.
Note the line offset will change at the black/burst outputs as the value is changed.
7.4.3 Black/Burst 3 Output, Eight Field Offset
Select the field offset required using the knob or << or >>
return to the previous menu.
+16.3950us +1 Lines
OFFSET = +1 FIELDS
buttons, followed by SELECT to
Allows the black/burst 3 timing offset with respect
to the main black/burst output to be changed in 1
field steps.
Note the field offset will change at the black/burst outputs as the value is changed.
7.4.4 Black/Burst 3 Output, Subcarrier Phase Offset
Select the subcarrier phase offset required using the knob or << or >> buttons, followed by
SELECT to return to the previous menu.
B/B 3 S/C
PHASE =
+0.15deg
Allows the black/burst 3 subcarrier phase to be set
in 0.05º steps.
Note the subcarrier phase will change at the black/burst outputs as the value is changed.
7.4.5 Black/Burst 3 Output, Clear Offsets
To zero all black/burst three output offsets to zero, press the SELECT button.
SET BB3 OFFSETS TO ZERO
<SELECT> TO CLEAR
Trilogy Broadcast Limited
Allows all black/burst 3 output offsets to be set to
zero.
Issue 7
Page 42 of 64
350 “Mentor Plus” User Guide
8. OPTION BUTTONS
The Option buttons (1, 2 and 3) are used to setup the various features of any option boards
fitted to the Mentor Plus. The exact functionality of each option button will depend on the
exact option module fitted. These are described separately below.
If option boards are fitted in any slot, the lamp in the appropriate option button will be lit to
indicate that a board is present.
To change an Option setting, press the appropriate illuminated OPTION button .
ADJUST
<<
>>
SELECT
LOCK
MODE
OUTPUT
CONTROL
1
2
3
350-26: 3 Channel TSG
Press
Select
To
Continue
8.1 Option Button, Option Board Not Present.
If there is not an option board fitted in the appropriate internal position, the following
message will be displayed if an OPTION button is pressed.
ERROR ! No board Fitted
Press Select To Continue
Indicates that there is no option board fitted to the
option output chosen.
8.2 Option Button, Option Board Present.
Pressing the option button will display one of the following messages, depending on the
option board fitted in that option slot.
350-20: Composite Board
Press Select To Continue
350-22: Triple Board
Press Select To Continue
350-20 Composite test signal generator module
present.
350-22 YUV/RGB test signal generator module
present. Note that this module must occupy both
option slots 2 and 3. Only the option 2 button may be
used to set up this module.
Note that at present, the 350-22 option board will only
work if the unit is operating in the PAL/625 standard.
350-24: SDI Board
Press Select To Continue
350-24 SDI test signal generator module present.
350-24-01: Embedded AES
Press Select To Continue
350-24-01 SDI test signal with embedded AES
generator module present.
350-25: AES/SDI Board
Press Select To Continue
350-25 AES/EBU digital audio and SDI serial digital
video black reference generator module present.
350-26: 3 Channel TSG
Press Select To Continue
350-26 3 Channel Composite / Component Test
signal generator module present.
350-29: Dual B&B
Press Select To Continue
350-29 Dual Black/burst module present.
N.B. If a 350-30-00 Tri-level HDTV sync pulse generator is fitted it will not be indicated on
the front panel, as the only settings that can be changed are controlled by DIP switches on
the option module itself.
To continue setting up one of these modules, press the SELECT button to continue. Details
of the setup options for each module type are given below.
Trilogy Broadcast Limited
Issue 7
Page 43 of 64
350 “Mentor Plus” User Guide
8.3 Option Button, 350-24 SDI TSG
Select the mode required using knob or << or >> buttons.
TEST SDI: SIG OPTS ID
Change test signal
Allows the test signal to be changed, from a list of
38 currently available.
Allows test signal options to be changed (moving,
APL, 8/10 bit selection and Vertical Offset
adjustment).
TEST SDI: SIG OPTS ID
Allows the 12 character Ident that may be displayed
Change bars ID text
on colour bar outputs to be changed.
To enter any of these sub-menus, press SELECT. To return to the previous menu level
display press the OPTION button. To go to another menu, press either LOCK MODE /
OPTION 1 / OPTION 2 / OPTION 3 / SETUP as required.
TEST SDI: SIG OPTS ID
Test signal options
The sub-menus are described below.
8.3.1 Option Button, 350-24 SDI TSG, Change Test Signal
Select the test signal required using the knob or << or >>
return to the previous menu.
TEST SIGNAL OUTPUT
FULL FIELD RED
buttons, followed by SELECT to
Allows the test signal to be changed, from a list of
38 currently available.
Note that as test signals are selected they will appear immediately at the output.
8.3.2 Option Button, 350-24 SDI TSG, Options
A further menu is displayed. Select the option required using the knob or << or >> buttons,
followed by the SELECT button.
OPTS: MOV APL BIT VOFF
Control moving mode
OPTS: MOV APL BIT VOFF
Set signal apl
OPTS: MOV APL BIT VOFF
Select data word format
OPTS: MOV APL BIT VOFF
Adjust vert. offset
Allows a moving cursor to be displayed on test
signals, allowing signals freeze-framed via a frame
buffer to be noticed.
Allows the APL (average picture level) mode to be
set. This option is only available on certain
waveforms.
Allows the test signal output to be set to 10 bit, or
rounded to 8 bit precision.
Allows the test signal output to be offset in the
vertical (field) direction with respect to the main
black/burst output by ±3 lines
8.3.2.1 Option Button, 350-24 SDI TSG, Options, Moving
Select the option required using the knob or << or >>
button.
buttons, followed by the SELECT
MOVEMENT: OFF ON
Moving pattern off
Turns the moving pattern off.
MOVEMENT: OFF ON
Moving pattern on
Turns the moving pattern on.
Trilogy Broadcast Limited
Issue 7
Page 44 of 64
350 “Mentor Plus” User Guide
8.3.2.2 Option Button, 350-24 SDI TSG, Options, APL
Select the option required using the knob or << or >>
button.
APL: OFF HI LO BOUNCE
Signal APL off
APL: OFF HI LO BOUNCE
Signal APL off
APL: OFF HI LO BOUNCE
Signal APL off
APL: OFF HI LO BOUNCE
Signal APL off
buttons, followed by the SELECT
Turns APL off.
Turns APL HI on. This will select a repeating pattern
of 9 lines of white and 3 lines of the selected test
signal.
Turns APL LO on. This will select a repeating
pattern of 9 lines of black and 3 lines of the selected
test signal.
Turns APL bounce on. This will alternate between
APL HI and APL LO every 3 seconds.
8.3.2.3 Option Button, 350-24 SDI TSG, Options, BIT (word format)
Select the option required using the knob or << or >>
button.
buttons, followed by the SELECT
BITS: 8-BIT 10-BIT
Test Signal 8 bits
Selects 8 bit data format. This data is arithmetically
rounded from the internal 10 bit data format.
BITS: 8-BIT 10-BIT
Test Signal 10 bits
Selects 10 bit data format.
8.3.2.4 Option Button, 350-24 SDI TSG, Options, VOFF (vertical offset)
Select the offset required using the knob or << or >> buttons, followed by the SELECT
button. Note that the offset will change at the test signal output immediately a new value is
chosen.
SDI VERTICAL OFFSET
Offset= +1 Lines
Allows the SDI test signal output to be offset by ±3
lines with respect to the main black/burst output.
8.3.3 Option Button, 350-24 SDI TSG, Colour Bar Ident
Select the character to be changed using the left/right buttons, and the required character
using the knob or << or >> buttons, followed by SELECT to return to the previous menu.
POSN:<< >> CHAR.KNOB
IDENT. TRILOGY SPG
Allows the 13 character Ident that may be selected
on colour bar outputs to be changed.
Note that the new Ident will not appear on the test signal output until the SELECT button is
pressed.
8.4 Option Button, 350-24-01 SDI generator with Embedded AES
The operation of this board from the front panel is identical to the 350-24 module described
above. For additional settings, refer to section 13.3.3 in this document.
8.5 Option Button, 350-25 AES/SDI Reference Generator
Select the output to be configured using the knob or << or >> buttons.
350-25: AES SDI
Set AES parameters
Allows the AES/EBU digital audio reference output
to be configured.
350-25: AES SDI
Set SDI parameters
Allows the SDI digital video reference black output
to be configured.
Trilogy Broadcast Limited
Issue 7
Page 45 of 64
350 “Mentor Plus” User Guide
To enter any of these sub-menus, press SELECT. To return to the previous menu level
display press the OPTION button. To go to another menu, press either LOCK MODE /
OPTION 1 / OPTION 2 / OPTION 3 / SETUP as required.
The sub-menus are described below.
8.5.1 Option Button, 350-25 AES/SDI, Configure AES
Select the mode required using knob or << or >> buttons.
AES:FREQ TONE MODE MISC
Set AES sample freq
Allows the AES sample frequency to be set to
32kHz, 44.1kHz or 48kHz.
AES:FREQ TONE MODE MISC
Set AES channels tone
Allows the AES channel 1 and 2 output tone
frequency and level to be individually set.
AES:FREQ TONE MODE MISC
Set AES tone mode
Allows the AES output tones to be turned on or off,
or set to EBU or CCIR pulsing modes.
AES:FREQ TONE MODE MISC
Set Miscellaneous
Allows the AES grade to be specified (grade 1 or
grade 2) and locking to video turned on or off.
To enter any of these sub-menus, press SELECT. To return to the previous menu level
display press OPTION. To go to another menu, press either LOCK MODE / OPTION 1 /
OPTION 2 / OPTION 3 / SETUP as required.
The sub-menus are described below.
8.5.1.1 Option Button, 350-25 AES/SDI, Configure AES, frequency
Select the sample frequency required using knob or << or >> buttons.
AES: 32kHz 44.1kHz 48kHz
AES sample freq.
Sets the AES sample frequency to 32kHz.
AES:32kHz 44.1kHz 48kHz
AES sample freq.
Sets the AES sample frequency to 44.1kHz.
AES:32kHz 44.1kHz 48kHz
AES sample freq.
Sets the AES sample frequency to 48kHz.
8.5.1.2 Option Button, 350-25 AES/SDI, Configure AES, tone
Select the required tone frequencies using the knob or << or >>
SELECT button.
buttons, followed by the
AES TONES:1 2 3 4
CH1. 1kHz CH2. 1kHz
Sets AES channel 1 and channel 2 outputs both to 1kHz.
AES TONES:1 2 3 4
CH1. 800Hz CH2. 1kHz
Sets AES channel 1 output to 800Hz and the
channel 2 output to 1kHz.
AES TONES:1 2 3 4
CH1. 1kHz CH2. 800Hz
Sets AES channel 1 output to 1kHz and the channel
2 output to 800Hz.
AES TONES:1 2 3 4
CH1. 800Hz CH2. 800Hz
Sets AES channel 1 and channel 2 outputs both to
800Hz.
Trilogy Broadcast Limited
Issue 7
Page 46 of 64
350 “Mentor Plus” User Guide
8.5.1.3 Option Button, 350-25 AES/SDI, Configure AES, Mode
Select the required tone mode using the knob or << or >> buttons, followed by the SELECT
button.
AES MODE:OFF CCIR EBU ON
No test tone
Turns the tones off for both channels, giving
silence.
CCIR audio test tone
Turns the tone on for both channels in CCIR mode
(channel 1 off for ¼ second in every 4 seconds,
channel 2 off for ¼ second twice in every 4
seconds).
AES MODE:OFF CCIR EBU ON
EBU test tone
Turns the tones on for both channels in EBU mode
(channel 1 off for ¼ seconds in every 3 seconds,
channel 2 continuous).
AES MODE:OFF CCIR EBU ON
Turns the tones on continuously for both channels.
AES MODE:OFF CCIR EBU ON
Continuous test tone
8.5.1.4 Option Button, 350-25 AES/SDI, Configure AES, Misc
Select the function to be changed using knob or << or >> buttons.
MISC: GRADE LOCK
Select AES grade
Allows the AES output to be set to Grade 1 or
Grade 2.
MISC: GRADE LOCK
Sel. AES/video lock
Allows the AES output to be locked to the video
output.
To enter either of these sub-menus, press SELECT. The sub-menus are described below.
8.5.1.4.1 Option Button, 350-25 AES/SDI, Configure AES, Misc, Grade
Select the mode required using the knob or << or >> buttons.
AES GRADE: 1 2
AES grade 1 selected
Sets the AES grade bit to indicate Grade 1.
AES GRADE: 1 2
AES grade 2 selected
Sets the AES grade bit to indicate Grade 2.
N.B. This is a manual setting. Trilogy Broadcast can only guarantee that the AES conforms
to grade 1 when the Mentor unit is free-running.
Trilogy Broadcast Limited
Issue 7
Page 47 of 64
350 “Mentor Plus” User Guide
8.5.1.4.2 Option Button, 350-25 AES/SDI, Configure AES, Misc, Lock
Select the mode required using the knob or << or >> buttons.
VIDEO LOCK: ON OFF
AES/video lock on
AES output is locked to video.
VIDEO LOCK: ON OFF
AES/video lock off
AES output is not locked to video.
8.5.2 Option Button, 350-25 AES/SDI, Configure SDI
Select the mode required using knob or << or >> buttons.
SDI: V TIMING H TIMING
SDI Vertical offset
Allows the SDI output vertical timing to be offset
relative to the main black/burst output by ±3 lines.
SDI: V TIMING H TIMING
SDI Horiz. offset
Allows the SDI output horizontal timing to be offset
relative to the main black/burst output by ±14µs in
27MHz clock steps (i.e. approximately 37nS).
The sub-menus are described below.
8.5.2.1 Option Button, 350-25 AES/SDI, Configure SDI, V timing
Select the vertical offset required using the knob or << or >> buttons.
SDI VERTICAL OFFSET
Offset= +1 Lines
Sets the SDI output vertical timing in 1 line increments.
8.5.2.2 Option Button, 350-25 AES/SDI, Configure SDI, H timing
Select the horizontal offset required using the knob or << or >> buttons.
Sets the SDI output horizontal timing relative to the
main black/burst output by ±14µs in 27MHz clock
steps (i.e. approximately 37nS).
8.6 Option Button, 350-26 Composite/Component Board
SDI HORIZ. OFFSET
OFFSET= -0.0370us
Use the knob or << or >> buttons to select one of the three sub-menu options. The options
are as follows.
COMPOSITE: SIG OPTS ID
Change Test Signal
Allows the composite or component (RGB/YUV) test
pattern to be changed.
COMPOSITE: SIG OPTS ID
Test Signal options
Allows the test signal options to be changed (output
gain or APL settings).
COMPOSITE: SIG OPTS ID
Change Bars ID Text
Allows the 12 character Ident displayed on some
outputs to be changed.
To enter any of these sub-menus, press SELECT. To return to the top level display press the
OPTION button. To go to another menu, press either LOCK MODE / OUTPUT CONTROL /
ANOTHER OPTION BUTTON / SETUP as required.
The sub-menus are described below.
Trilogy Broadcast Limited
Issue 7
Page 48 of 64
350 “Mentor Plus” User Guide
8.6.1 Option Button, 350-26, Change Test Signal Ch.1, 2, 3
This menu will only appear if the unit is set to operate in separate mode, otherwise the menu
in the following section will appear.
Use the knob or << or >> buttons to select one of the three sub-menu options. The options
are as follows.
SIGNAL: Ch.1 Ch.2 Ch.3
Change Test Signal Ch1
Allows the test pattern to be changed for channel 1 the full Composite channel.
SIGNAL: Ch.1 Ch.2 Ch.3
Change Test Signal Ch2
Allows the test pattern to be changed for channel 2 the luminance channel.
SIGNAL: Ch.1 Ch.2 Ch.3
Change Test Signal Ch3
Allows the test pattern to be changed for channel 3 the luminance channel.
8.6.1.1 Option Button, 350-26, Change Test Signal
Select the test signal required using the knob or << or >>
return to the previous menu.
TEST SIGNAL OUTPUT
FULL FIELD RED
buttons, followed by SELECT to
Allows the test signal to be changed, from a list of
38 PAL or 32 NTSC currently available.
Note that as test signals are selected they will appear immediately at the output.
8.6.2 Option Button, 350-26, Options
A further menu is displayed. Select the option required using the knob or << or >> buttons,
followed by the SELECT button.
OPTS: APL FORMAT
Set signal apl
OPTS: APL FORMAT
Change RGB/YUV/Sep.
Allows the APL (average picture level) mode to be
set. This option is only available on certain
waveforms.
Allows the signal format, RGB, YUV or Separate to
be selected. Separate allows 3 different composite
waveforms to be produced.
8.6.2.1 Option Button, 350-26, Options, APL CH1, 2, 3
This menu will only appear if the unit is set to operate in separate mode, otherwise the menu
in the following section will appear.
Use the knob or << or >> buttons to select one of the three sub-menu options. The options
are as follows.
APL: Ch.1 Ch.2 Ch.3
Change APL Channel 1
Allows the APL to be changed for channel 1 - the full
Composite channel.
APL: Ch.1 Ch.2 Ch.3
Change APL Channel 2
Allows the APL to be changed for channel 2 - the
luminance channel.
APL: Ch.1 Ch.2 Ch.3
Change APL Channel 3
Allows the APL to be changed for channel 3 - the
luminance channel.
Trilogy Broadcast Limited
Issue 7
Page 49 of 64
350 “Mentor Plus” User Guide
8.6.2.2 Option Button, 350-26, Options, APL
Select the option required using the knob or << or >>
button.
SIG1: OFF HI LO BOUNCE
Signal APL off
SIG1: OFF HI LO BOUNCE
Signal APL high
SIG1: OFF HI LO BOUNCE
Signal APL lo
SIG1: OFF HI LO BOUNCE
Signal APL bounce
buttons, followed by the SELECT
Turns APL off.
Turns APL HI on. This will select
pattern of 9 lines of white and 3
selected test signal.
Turns APL LO on. This will select
pattern of 9 lines of black and 3
selected test signal.
a repeating
lines of the
a repeating
lines of the
Turns APL bounce on. This will alternate between
APL HI and APL LO every 3 seconds.
8.6.2.3 Option Button, 350-26, Options, Format
Select the format required using the knob or << or >>
return to the previous menu.
buttons, followed by SELECT to
FORMAT: RGB YUV SEP
350-26 card: RGB
Sets the component output to RGB.
FORMAT: RGB YUV SEP
Sets the component output to YUV.
350-26 card: YUV
FORMAT: RGB YUV SEP
350-26 card: SEPARATE
Sets the composite output to Separate: three separate signals,
two of which are luminance only (with burst).
8.6.3 Option Button, 350-26, Ident
Select the character to be changed using the left/right buttons, and the required character
using the knob, followed by SELECT to return to the previous menu.
POSN:<< >> CHAR:KNOB
IDENT: TRILOGY SPG1
Allows the 13 character Ident that may be selected
on certain outputs to be changed.
Note that the new Ident will not appear on the test signal output until the SELECT button is
pressed.
Trilogy Broadcast Limited
Issue 7
Page 50 of 64
350 “Mentor Plus” User Guide
9. SETUP
The Setup button is used to change the settings of the four memories provided on Mentor
Plus, and also to allow adjustment of the LCD contrast (brightness).
Setup settings may be changed as follows. Press the SETUP button .
ADJUST
<<
>>
SELECT
LOCK
MODE
OUTPUT
CONTROL
1
2
3
SETUP
MEMORY LCD STD
Change Setup memory
Use the knob or << or >> buttons to select one of the three sub-menu options. The options
are as follows.
MEMORY LCD STD
Change Setup memory
Allows the 4 setup memories to be saved, recalled
and named.
MEMORY LCD STD
Set LCD contrast
Allows the front panel display contrast (brightness) to
be set.
MEMORY LCD STD
Set Video Standard
Allows the Mentor Plus SPG to be set to 625(PAL) or
525(NTSC) operation.
To enter one of these sub-menus, press SELECT. To return to the top level display press
SETUP. To go to another menu, press either LOCK MODE / OUTPUT CONTROL / OPTION
1 / OPTION 2 / OPTION 3 as required.
The sub-menus are described below.
9.1 Setup, Memory
Use the knob or << or >> buttons to select one of the three sub-menu options. The options
are as follows.
MEMORY:SAVE LOAD NAME
Save to memory
Allows the current Mentor setup to be stored to one of
four memories.
MEMORY: SAVE LOAD NAME
Load from memory
Allows one of four previously stored Mentor set-ups to
be recalled.
MEMORY: SAVE LOAD NAME
Name setup
Allows the four setup memories to be given names.
To enter either of these sub-menus, press SELECT. To return to the previous menu display
press SETUP. To go to another menu, press either LOCK MODE / OUTPUT CONTROL /
OPTION 1 / OPTION 2 / OPTION 3 / SETUP as required.
The sub-menus are described below.
Trilogy Broadcast Limited
Issue 7
Page 51 of 64
PR
350 “Mentor Plus” User Guide
9.1.1 Setup, Memory, Save
Select one of the four memories to store the current Mentor setup.
MEMORY. 1 2 3 4 (625)
<SELECT> saves STUDIO1
Stores the current setup in memory 1 when the
SELECT button is pressed. The name displayed is
that stored in the NAME option (see below). The
memory location is tagged as being 625 or 525 as
appropriate.
MEMORY. 1 2 3 4 (625)
<SELECT> saves STUDIO2
Stores the current setup in memory 2 when the
SELECT button is pressed. The name displayed is
that stored in the NAME option (see below). The
memory location is tagged as being 625 or 525 as
appropriate.
MEMORY. 1 2 3 4 (625)
<SELECT> saves STUDIO3
Stores the current setup in memory 3 when the
SELECT button is pressed. The name displayed is
that stored in the NAME option (see below). The
memory location is tagged as being 625 or 525 as
appropriate.
MEMORY. 1 2 3 4 (625)
<SELECT> saves STUDIO4
Stores the current setup in memory 4 when the
SELECT button is pressed. The name displayed is
that stored in the NAME option (see below). The
memory location is tagged as being 625 or 525 as
appropriate.
9.1.2 Setup, Memory, Load
Select one of the four memories to load a Mentor setup.
MEMORY. 1 2 3 4 (625)
<SELECT> loads STUDIO1
MEMORY. 1 2 3 4 (625)
<SELECT> loads STUDIO2
MEMORY. 1 2 3 4 (625)
<SELECT> loads STUDIO3
MEMORY. 1 2 3 4 (625)
<SELECT> loads STUDIO4
Trilogy Broadcast Limited
Loads the setup from memory 1 when the SELECT
button is pressed. The name displayed is that stored
in the NAME option (see below). The memory
location is tagged as being 625 or 525 as appropriate.
Loads the setup from memory 2 when the SELECT
button is pressed. The name displayed is that stored
in the NAME option (see below). The memory
location is tagged as being 625 or 525 as appropriate.
Loads the setup from memory 3 when the SELECT
button is pressed. The name displayed is that stored
in the NAME option (see below). The memory
location is tagged as being 625 or 525 as appropriate.
Loads the setup from memory 4 when the SELECT
button is pressed. The name displayed is that stored
in the NAME option (see below). The memory
location is tagged as being 625 or 525 as appropriate.
Issue 7
Page 52 of 64
350 “Mentor Plus” User Guide
9.1.3 Setup, Memory, Name
Select one of the four Mentor setup memories to name.
MEMORY. 1 2 3 4
Name STUDIO1
(625)
Selects memory one to be renamed.
MEMORY. 1 2 3 4
Name STUDIO2
(625
Selects memory two to be renamed.
MEMORY. 1 2 3 4
Name STUDIO3
(625)
Selects memory three to be renamed.
MEMORY. 1 2 3 4
Name STUDIO4
(625)
Selects memory four to be renamed.
9.1.3.1 Setup, Memory, Name, Memory 1
Change the setup memory name using the << or >> buttons to select the character to be
changed, and the knob to select the character required
POSN:<< >> CHAR: KNOB
SETUP NAME : STUDIO1
Allows the name of setup memory 1 to be changed.
9.1.3.2 Setup, Memory, Name, Memory 2
Change the setup memory name using the << or >> buttons to select the character to be
changed, and the knob to select the character required
POSN:<< >> CHAR: KNOB
SETUP NAME : STUDIO2
Allows the name of setup memory 2 to be changed.
9.1.3.3 Setup, Memory, Name, Memory 3
Change the setup memory name using the << or >> buttons to select the character to be
changed, and the knob to select the character required
POSN:<< >> CHAR: KNOB
SETUP NAME : STUDIO3
Allows the name of setup memory 3 to be changed.
9.1.3.4 Setup, Memory, Name, Memory 4
Change the setup memory name using the << or >> buttons to select the character to be
changed, and the knob to select the character required
POSN:<< >> CHAR: KNOB
SETUP NAME : STUDIO4
Allows the name of setup memory 4 to be changed.
9.2 Setup, LCD contrast
Use the knob to change the display contrast (brightness), or press the right arrow key (>>) to
restore the contrast to the default value.
KNOB ADJUSTS LCD
>> for default
Allows the LCD contrast (brightness) to be set or
restored to the default value.
9.3 Setup, Standard (525/625 Operation)
Use the arrow keys or the knob to select one of the two sub-menu options. The options are
as follows.
STANDARD: 625 525
Current Standard
STANDARD: 625 525
<Select> sets 525
Trilogy Broadcast Limited
Shows the current operating standard of the Mentor
Plus SPG. (PAL/625 in this example).
Allows the unit to be set to NTSC/525 line operation.
Issue 7
Page 53 of 64
350 “Mentor Plus” User Guide
To choose a different operating standard press SELECT. To return to the previous menu
display press SETUP. To go to another menu, press either LOCK MODE / OUTPUT
CONTROL / OPTION 1 / OPTION 2 / OPTION 3 / SETUP as required.
Once a new standard has been selected, the following message will be displayed for
approximately 5 seconds whilst the unit re-initialises to the new operating standard.
STANDARD: 625 525
Resetting Memory..
Trilogy Broadcast Limited
Issue 7
Page 54 of 64
350 “Mentor Plus” User Guide
10. OTHER FEATURES
10.1 Front Panel Lockout
If it is required in a particular installation to prevent inadvertent or unauthorised adjustment,
the Mentor Plus unit has a software controlled locking mechanism that disables the front
panel.
This may be activated by simultaneously pushing the <<, >> and SELECT buttons. The LCD
will temporarily start displaying status information (see below) and then display a message
indicating that the unit is locked.
MENTOR (625 +)
<Front Panel Locked>
Indicates that the front panel is locked.
The operation of the genlock status lamps is not affected by locking the panel.
Unlocking the front panel is by the same procedure. Push <<, >> and SELECT together. The
unit will return to normal operation and re-enable the front panel.
10.2 Viewing Status
In order to check the settings of all the normal unit functions, provision is made to cycle
through a number of status messages without having to actually select the function itself.
The normal display on the LCD shows the name of the unit (i.e. Mentor) and the current
operating standard (625 or 525) on the top line. The bottom line gives an invitation to use the
<< or >> buttons to display status. Using these buttons will cycle through the unit status.
To finish viewing the status either
• push SELECT to return to the normal display
• push any function button to change another setting
• wait for the timeout period.
One of the status displays indicates the software revision and date. Some fault conditions
will overwrite the date with an error message which may prove useful in tracking the faults.
Trilogy Broadcast Limited
Issue 7
Page 55 of 64
350 “Mentor Plus” User Guide
11. IDENTIFYING PROBLEMS
The Trilogy 350 Mentor Plus is a complex, software driven precision instrument.
Before concluding that the unit is faulty please check the following.
• Read this User Guide thoroughly. The menu system is complex, and many faults are
attributable to incorrectly set features and functions.
• Check that the unit is powered; check the mains fuse in the IEC connector. Note that the
main PCB uses self-resetting thermal fuses.
• Check that the genlocking signal is present (if appropriate). Use the front panel status
LEDs to confirm this.
• Check that any cables leading to and from the unit are not faulty, and have been properly
connected.
• Check that the outputs are properly terminated at the destination equipment.
• Check that the air intakes and fan exhausts are not blocked. Overheating of the unit is
possible if the warning in the installation section of this guide is not heeded!
• Isolate the fault to a specific output if possible. Refer to the maintenance guide for
detailed descriptions of the electronics.
• If the fault cannot be located, please contact Trilogy Broadcast Limited by emailing
[email protected] and a member of our staff will be pleased to
assist you.
11.1 Reversion to Factory Default Settings - Loss of Battery Back-up.
Should the internal battery back-up fail, and the unit is re-powered, the unit will automatically
reset all its parameters to the factory default.
This includes, for example, re-setting all the genlock and black burst offsets to zero.
It also will cause the unit to default to the PAL/625 operating standard.
The battery is trickle charged from the internal power supply, and under normal operating
conditions will provide in excess of 1000 hours of data retention. In keeping with all trickle
charged batteries, if the battery is discharged, power must be applied for a suitable period
(greater than 24 hours in the case of Mentor Plus) to ensure that it is fully charged.
Trilogy Broadcast Limited
Issue 7
Page 56 of 64
350 “Mentor Plus” User Guide
12. LIST OF CURRENTLY AVAILABLE TEST PATTERNS
12.1 PAL Composite Waveforms (350-26)
FULL FIELD RED
FULL FIELD BLACK
FULL FIELD WHITE
100% BARS+SPLIT+ID
100% BARS+ID
100% BARS+SPLIT
100% BARS
EBU BARS+SPLIT+ID
EBU BARS+ID
EBU BARS+SPLIT
EBU BARS
100% VTBARS+SPLIT+ID
100% VT BARS+ID
100% VTBARS+SPLIT
100% VT BARS
CHROMINANCE RAMP
LUMINANCE RAMP
SHALLOW RAMP (11mV)
SHALLOW RAMP (105mV)
5 RISER CHROMA STAIR
5 STEP CHROMA STAIR
5 RISER LUMINANCE STAIR
SPLUGE
PLUGE
PLUGE + 100% WHITE
PLUGE + 15% WHITE
100% WHITE WINDOW
15% WHITE WINDOW
CONVERGENCE GRILLE
LINEARITY GRILLE
14 X 19 GRILLE
MONITOR LINE UP
TEST MATRIX
2T PULSE AND BAR
20T CHROM/2T + BAR
MULTIBURST
6.0 MHz LINE SWEEP
SIN(X) / X
12.2 NTSC Composite Waveforms (350-26)
FULL FIELD RED
0 IRE FIELD + BURST
BLACK BURST
FULL FIELD WHITE
FULL FIELD BLUE
SMPTE BARS + IDENT
SMPTE BARS
SMPTE BARS+ID+0 S/UP
SMPTE BARS+0 S/UP
75% BARS+SPLIT+ID
75% BARS+ID
75% BARS+SPLIT
75% BARS
IDENT
MODULATED RAMP
LUMINANCE RAMP
1.6 IRE SHALLOW RAMP
15 IRE SHALLOW RAMP
MUDULATED 5 STEP
5 STEP
SPLUGE
PLUGE
CONVERGENCE GRILLE
MONITOR SETUP MATRIX
TEST MATRIX
NTC7 COMBINATION
NTC7 COMPOSITE
MOD PULSE + BAR
MULTIBURST
MULTIPULSE
6.0 MHz LINE SWEEP
SIN(X) / X
12.3 625 RGB Waveforms, (350-26)
FULL FIELD RED
FULL FIELD BLACK
FULL FIELD WHITE
100% BARS+SPLIT+ID
100% BARS+ID
100% BARS+SPLIT
100% BARS
EBU BARS+SPLIT+ID
EBU BARS+ID
EBU BARS+SPLIT
EBU BARS
100% VTBARS+SPLIT+ID
100% VT BARS+ID
100% VTBARS+SPLIT
100% VT BARS
FS LUMINANCE RAMP
LIMIT RAMP
46mV SHALLOW RAMP
105mV SHALLOW RAMP
5 RISER STAIR
CONVERGENCE GRILLE
LINEARITY GRILLE
MONITOR LINE UP
2T PULSE AND BAR
GBR MULTIBURST
6.0 MHz LINE SWEEP
SIN(X) / X
BOWTIE
12.4 525 RGB Waveforms, (350-26)
FULL FIELD RED
FULL FIELD BLACK
FULL FIELD WHITE
100% BARS+SPLIT+ID
100% BARS+ID
100% BARS+SPLIT
100% BARS
75% BARS+SPLIT+ID
Trilogy Broadcast Limited
75% BARS+ID
75% BARS+SPLIT
75% BARS
FS LUMINANCE RAMP
LIMIT RAMP
46mV SHALLOW RAMP
105mV SHALLOW RAMP
5 STEP STAIR
Issue 7
CONVERGENCE GRILLE
2T PULSE AND BAR
MOD PULSE + BAR
MULTIPULSE
GBR MULTIBURST
6.0 MHz LINE SWEEP
SIN(X) / X
BOWTIE
Page 57 of 64
350 “Mentor Plus” User Guide
12.5 625 YUV Waveforms, (350-26)
FULL FIELD RED
FULL FIELD BLACK
FULL FIELD WHITE
100% BARS+SPLIT+ID
100% BARS+ID
100% BARS+SPLIT
100% BARS
EBU BARS+SPLIT+ID
EBU BARS+ID
EBU BARS+SPLIT
EBU BARS
100% VTBARS+SPLIT+ID
100% VT BARS+ID
100% VTBARS+SPLIT
100% VT BARS
YUV CHROMA RAMP
FS LUMINANCE RAMP
LIMIT RAMP
VALID RAMP
46mV SHALLOW RAMP
105mV SHALLOW RAMP
YUV CHROMA STAIR
5 RISER LUMINANCE STAIR
5 RISER STAIR
VALID 5 RISER STAIR
SPLUGE
PLUGE
CONVERGENCE GRILLE
LINEARITY GRILLE
MONITOR LINE UP
14 X 19 GRILLE
3T 2T PULSE AND BAR
YUV MULTIBURST
6.0 MHz LINE SWEEP
SIN(X) / X
BOWTIE
12.6 525 YUV Waveforms, (350-26)
FULL FIELD RED
FULL FIELD BLACK
FULL FIELD WHITE
100% BARS+SPLIT+ID
100% BARS+ID
100% BARS+SPLIT
100% BARS
SMPTE BARS + IDENT
SMPTE BARS
75% BARS+SPLIT+ID
75% BARS+ID
75% BARS+SPLIT
75% BARS
MODULATED RAMP
FS LUMINANCE RAMP
LIMIT RAMP
VALID RAMP
46mV SHALLOW RAMP
105mV SHALLOW RAMP
MODULATED 5 STEP
5 RISER LUMINANCE STAIR
5 STEP STAIR
VALID 5 RISER STAIR
SPLUGE
PLUGE
CONVERGENCE GRILLE
MONITOR SETUP MATRIX
3T 2T PULSE AND BAR
MOD PULSE + BAR
MULTIPULSE
YUV MULTIBURST
6.0 MHz LINE SWEEP
SIN(X) / X
BOWTIE
100% VT BARS
CONVERGENCE GRILLE
LINEARITY GRILLE
14 X 19 GRILLE
SPLUGE
PLUGE
100% WHITE WINDOW
15% WHITE WINDOW
CO-SITING CHECK
DIGITAL GREY
SDI CHECK FIELD
FULL FIELD UK ITS1
FULL FIELD UK ITS2
FULL FIELD ITS A
FULL FIELD ITS B
FULL FIELD ITS C
FULL FIELD ITS D
5 RISER STAIR
VALID 5 RISER STAIR
5 RISER LUMINANCE STAIR
RAMP
LUMINANCE RAMP
VALID RAMP
LIMIT RAMP
SHALLOW RAMP
SHALLOW BLUE RAMP
3T 2T PULSE AND BAR
BOWTIE
SIN(X) / X
MULTIBURST
6.0 MHz LINE SWEEP
75% BARS+ID
75% BARS+SPLIT
75% BARS
100% VTBARS+SPLIT+ID
100% VT BARS+ID
100% VTBARS+SPLIT
100% VT BARS
IDENT
CONVERGENCE GRILLE
PLUGE
CO-SITING CHECK
DIGITAL GREY
SDI CHECK FIELD
5 RISER STAIR
VALID 5 RISER STAIR
5 RISER LUMINANCE STAIR
RAMP
LUMINANCE RAMP
VALID RAMP
LIMIT RAMP
SHALLOW RAMP
SHALLOW BLUE RAMP
NTC7 COMBINATION
NTC7 COMPOSITE
3T 2T PULSE AND BAR
BOWTIE
SIN(X) / X
MULTIBURST
6.0 MHz LINE SWEEP
12.7 625 Line SDI Waveforms
IDENT
FULL FIELD RED
FULL FIELD WHITE
FULL FIELD BLACK
LINE TIMING CHECK
100% BARS+SPLIT+ID
100% BARS+ID
100% BARS+SPLIT
100% BARS
EBU BARS+SPLIT+ID
EBU BARS+ID
EBU BARS+SPLIT
EBU BARS
100% VTBARS+SPLIT+ID
100% VT BARS+ID
100% VTBARS+SPLIT
12.8 525 Line SDI Waveforms
FULL FIELD RED
FULL FIELD WHITE
FULL FIELD BLACK
LINE TIMING CHECK
FULL FIELD BLUE
100% BARS+SPLIT+ID
100% BARS+ID
100% BARS+SPLIT
100% BARS
EBU BARS+SPLIT+ID
EBU BARS+ID
EBU BARS+SPLIT
EBU BARS
SMPTE BARS + IDENT
SMPTE BARS
75% BARS+SPLIT+ID
Trilogy Broadcast Limited
Issue 7
Page 58 of 64
350 “Mentor Plus” User Guide
13. ADDING/REMOVING AN OPTION BOARD
It is possible to retro-fit or remove an option board to the Mentor Plus SPG. The procedure
involves the removal of the top cover, so should only be carried out by competent personnel.
ENSURE THAT MAINS POWER IS REMOVED FROM THE UNIT BEFORE REMOVING
THE LID OF THE UNIT!
Once an option board is fitted or removed, this will be detected automatically by software
when the unit is re-powered.
13.1 Disassembly Instructions
To remove the top cover, undo the thirteen M2.5 countersunk screws that hold the top cover
to the frame. The cover will then lift away to reveal the internal electronics.
The electronics comprises two 'layers' of boards. The bottom layer comprises the main
electronics PCB. The upper layer comprises the option boards. These are fixed on the M3
pillars by bolts, and by the location of the BNCs in the rear panel.
The unit has the capacity for a number of combinations of option boards. Please see section
1.2 or refer to Trilogy Broadcast Ltd. for the currently available range of options.
All option boards are connected to the main PCB by a 34 way ribbon cable fitted to the main
PCB.
Most option boards also plug into one of the three 40 way connectors, J6, J7 or J8, on the
main PCB.
All boards are powered using 8-way connectors on flying leads that plug into connectors on
the main PCB.
13.2 Removal of an Option Board
An option board should be removed using the following steps:
1.
Disconnect the 34 way cable from the option board, and the 40 way cable from the
main PCB.
2.
Disconnect the option board power lead from the which plugs onto the main PCB.
3.
A 350-25 option board must have the XLR cable on PL6 disconnected.
4.
A 350-24-01 must have the AES interconnect lead and XLR cable disconnected from
J10 and J11 respectively.
5.
Remove the BNC nuts and washers for the option board on the back panel.
6.
Undo the M3 X 6 screws (and nylon washers) that hold the option board onto the
stand-off pillars.
The option board can now be removed.
Trilogy Broadcast Limited
Issue 6
Page 59 of 64
350 “Mentor Plus” User Guide
13.3 Installation of an Option Board
Mechanically, assembly is the reverse of the removal process, but note the following:
The 350-25 is normally fitted adjacent to J6 as this is nearest the XLR mounting position.
The power cable should connect to the nearest power connector (J31, J32 or J33).
Each option board is supplied with a fitting kit of BNC nuts and washers and M3 bolts with
nylon washers. A legend plate is also provided to allow the board to be identified from the
rear of the unit.
See section 13.3.1 below for details of the link settings.
13.3.1 Option Board Link Settings
The jumper link is located near the 40 way connector on each option board. It is labelled
'SEL' and has three possible settings, labelled '1', '2' and '3'. The jumper should be set to
position '2'.
Slot 1 is on the right as the unit is viewed from the front.
Trilogy Broadcast Limited
Issue 6
Page 60 of 64
350 “Mentor Plus” User Guide
13.3.2 350-28 Pulse Option Board DIP Switch Settings
The 350-28 Pulse Option Board is designed to provide fundamental video timing signals.
The board can generate the following signals:
• Line Drive
• Field Drive
• Mixed Blanking
• PAL Ident
• Burst Gate
• Field 1 of eight (PAL) / four (NTSC) marker
• Subcarrier sine wave
The board is dual standard - the signals will be appropriate for PAL or NTSC depending on
the standard of the Mentor unit.
The board only has four BNC outputs. One output is used for the subcarrier signal; each of
the remaining outputs can supply one of two signals depending on on-board switch settings.
The BNCs are assigned as shown :
Output 4
Subcarrier
Output 3
PAL ident or
Line Drive
Output 2
Output 1
Mixed Blanking or Burst Gate or Field
Field Drive
1 of 8 (4)
The sense of
the PAL Ident
signal may be
inverted.
The falling edge of the line drive may be set ‘early’, to be coincident with start of the
horizontal blanking period or ‘normal, to be coincident with the falling edge of sync signal.
The switches are arranged as an eight way DIL switch mounted on the board. The location
of the switch is shown below. Each switch has two positions and the panel to the right of the
switch indicates the function when the switch for either position of the switch. This is
explained below.
Trilogy Broadcast Limited
Issue 6
Page 61 of 64
350 “Mentor Plus” User Guide
Switch S1
(Configuration)
Summary of switch
S1 Switch
Switch 1
Switch 2
Switch 3
Switch 4
Switch 5
Switch 6
Switch 7
Switch 8
functions
Function of switch in left
position
Output 1 is Burst Gate
Output 2 is Mixed Blanking
Output 3 is PAL Ident (Line Drive
if the unit is NTSC)
PAL Ident is normal
Line Drive is early
not used
not used
Normal
Trilogy Broadcast Limited
Issue 6
Function of switch in right
position
Output 1 is Field 1 marker
Output 2 is Field Drive
Output 3 is Line Drive
PAL Ident is inverted
Line Drive is normal
not used
not used
Test mode - do not use this
Page 62 of 64
350 “Mentor Plus” User Guide
13.3.3 350-24-01 SDI With Embedded Audio – Functions and DIP Switch Settings
Some models of Mentor Plus are provided with a 350-24-01 embedded audio card as
standard fitment. Alternatively a module may be retrofitted as an option.
Note that this board will only work with software revisions P onwards.
13.3.3.1 Summary of Features
Number of test pattern outputs
Number of reference black outputs
Front Panel adjustment of vertical video
timing for all outputs.
Test Patterns available
Number of AES audio channels on test
pattern outputs
Number of AES audio channels on
reference black outputs
AES Audio mode control options
2 SDI with EDH
1 SDI with EDH
± 3 vertical lines
As per 350-24-00
4 channels (2 stereo pairs)
4 channels (2 stereo pairs)
Sourced from Mentor motherboard AES audio
generator
AES Audio modes supported for 48kHz 20bit synchronous. (Any other modes
insertion into SDI
selected disable audio insertion on all SDI outputs)
AES/EBU serial digital audio output
1 buffered output of AES/EBU serial digital audio
input. (Normally connected to rear panel 3 pin XLR)
AES/EBU serial word clock output
1 output of AES/EBU serial digital word clock
operating at the frequency selected by the front
panel.
AES/EBU serial word clock output level 1volt peak-peak into 75 Ohms. (Link selectable DC
and impedance
or AC coupling)
Selection of embedding tone or silence Enabled or disabled by on board link
when reference black is selected on
test pattern outputs.
Selection of audio group to be Any one of the four groups selected by on board
embedded for test pattern output
link selection, or no groups i.e. embedding disabled.
Selection of audio group to be Any one of the four groups selected by on board
embedded for reference black output
link selection, or no groups i.e. embedding disabled.
Selection of audio channel pairs for test By on board link selection with the following options
pattern output
for each channel pair: Tone or Silence Enabled
Selection of audio channel pairs By on board link selection with the following options
reference black output
for each channel pair: Tone or Silence Enabled
Specification conformance
Conforms to ITU-R BT 601/656 (CCIR 601/656);
EBU Tech. 3267; ANSI/SMPT 259M, ANSI/SMPTE
272M-A-1994, ANSI/SMPTE RP155 (audio levels),
ANSI/SMPTE RP165 (EDH), ANSI/SMPTE 125M1995, ANSI/SMPTE RP 168-1993
Trilogy Broadcast Limited
Issue 6
Page 63 of 64
350 “Mentor Plus” User Guide
13.3.3.2 DIP Switch Settings
The 350-24-01 module has a number of facilities that may not be configured from the front
panel – these need to be pre-configured.
There are two DIP switches (SW1 and SW2), located adjacent to the 40 way ribbon cable at
the end of the board, as shown below. The switches should be each labelled 1 through 8
(switch 1 being nearest the BNC connectors), with ON clearly marked (the ON position being
towards the middle of the module)
Summary of DIP Switch Functions
SW1
Switch 1
Switch 2&3
Switch 4
Switch 5
Switch 6
Switch 7
Switch 8
SW2
Switch 1
Switch 2&3
Switch 4
Switch 5
Switch 6
Switch 7
Switch 81
1
Function of switch in OFF position
Function of switch in ON position
Test output Embedding enabled
Test output Embedding disabled
Test
Group 1-4:
Switch 2 ON Switch 3 ON
Output
Group 5-8:
Switch 2 OFF Switch 3 ON
Audio
Group 9-12: Switch 2 ON Switch 3 OFF
Group
Group 13-16: Switch 2 OFF Switch 3 OFF
Test Pattern Tone Pair 0 enabled
Test Pattern Tone Pair 0 silent
Test Pattern Tone Pair 1 enabled
Test Pattern Tone Pair 1 silent
not used
not used
not used
not used
Test Pattern output set to black
Test Pattern output set to test patterns
Function of switch in OFF position Function of switch in ON position
Black output Embedding enabled
Black output Embedding disabled
Black
Group 1-4:
Switch 2 ON Switch 3 ON
Output
Group 5-8:
Switch 2 OFF Switch 3 ON
Audio
Group 9-12: Switch 2 ON Switch 3 OFF
Group
Group 13-16: Switch 2 OFF Switch 3 OFF
Black Tone Pair 0 enabled
Black Pattern Tone Pair 0 silent
Black Pattern Tone Pair 1 enabled
Black Pattern Tone Pair 1 silent
not used
not used
not used
not used
AES receiver = CS8414
AES receiver = CS8412
Note – factory set to indicate the device used in position U15. Do not alter this setting.
Trilogy Broadcast Limited
Issue 6
Page 64 of 64