1
OPERATING PROCEDURE
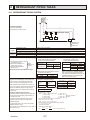
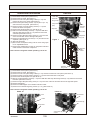
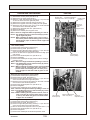
13. Removing the compressor (MC)
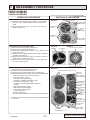
(1) Remove the service panel. (See Photo 1)
(2) Remove the top panel. (See Photo 1)
(3) Remove 2 front cover panel fixing screws (5 × 12) and
remove the front cover panel. (See Photo 4)
(4) Remove front panel fixing screws, 5 (5x12) and 2 (4 x 10)
and remove the front panel. (See Photo 4)
(5) Remove 4 back cover panel fixing screws (5 × 12) and
remove the back cover panel.
(6) Remove the electrical parts box. (See Photo 5)
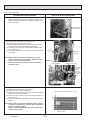
(7) Remove 3 valve bed fixing screws (4 × 10) and 4 ball valve
and stop valve fixing screws (5 × 16) and then remove the
valve bed. (See Photo 4 and 7)
(8) Remove 3 right side panel fixing screw (5 × 12) in the rear
of the unit and then remove the right side panel.
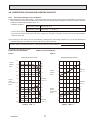
(9) Remove 3 separator fixing screws (4 × 10) and remove the
separator. (See Figure 1)
(10) Recover refrigerant.
(11) Remove the 3 compressor fixing nuts for motor using spanner or adjustable wrench.
(12) Remove the welded pipe of motor for compressor inlet and
outlet and then remove the compressor.
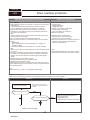
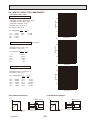
PHOTOS
Photo 13
Valve bed
Valve bed
fixing screw
Compressor
(MC)
Valve
bed fixing
screws
Separator
Accumulator
Compressor
fixing nuts
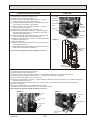
Figure 1
Separator
fixing
screws
Note: Recover refrigerant without spreading it in the air.
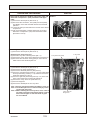
Separator
fixing screw
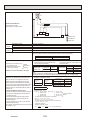
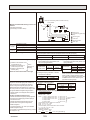
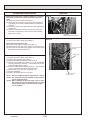
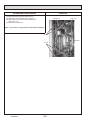
14. Removing the accumulator
(1) Remove the service panel. (See Photo 1)
(2) Remove the top panel. (See Photo 1)
(3) Remove 2 front cover panel fixing screws (5 × 12) and remove the front cover panel. (See Photo 4)
(4) Remove 4 back cover panel fixing screws (5 × 12) and remove the back cover panel.
(5) Remove the electrical parts box. (See Photo 5)
(6) Remove 3 valve bed fixing screws (4 × 10) and 4 ball valve and stop valve fixing screws (5 ×16), and then remove the
valve bed. (See Photo 4 and 7)
(7) Remove 3 right side panel fixing screw (5 × 12) in the rear of the unit and then remove the right side panel.
(8) Recover refrigerant.
(9) Remove 2 welded pipes of accumulator inlet and outlet.
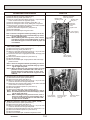
(10) Remove 2 accumulator leg fixing screws (4 × 10). (See Photo 15)
Note: Recover refrigerant without spreading it in the air.
Photo 14
Photo 15
Inlet
Accumulator
Outlet
Accumulator leg
Accumulator
Accumulator leg fixing
screws
OCH547
135