Download Milton Roy Spectronic 501/601 Spectrophotometer
Transcript
Go to:
CONTENTS
Milton Roy
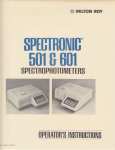
Spectronic 501/601
Spectrophotometer
Hospital Shared Services
PMQA Procedures Number
L-2910
NOTE:
Much of the material found in this report is taken from the manufacturer's
Instruction Manual and Service Manual. In many cases the material is quoted.
7/21/2004
Page 1 of 22
Spectronic 501 & 601.EDP.doc
Milton Roy
Spectronic 501/601
Spectrophotometer
Table of Contents
HOME
TECHNICIAN'S NOTES
1.
Equipment Needed
2.
Parts and Supplies Needed
3.
Introduction to equipment
4.
Special Precautions
5.
Initial Preparation
6.
QA - Operational Verification
7.
PMQA Procedures
8.
Check List / Log Forms
9.
Specifications
CONTENTS
10. Technician's Notes
11. Factory Modifications:
12. Troubleshooting
13. Block Diagram
14. Manufacturer & Vendor Information
15. Appendix
7/21/2004
Page 2 of 22
Spectronic 501 & 601.EDP.doc
Milton Roy
Spectronic 501/601
Spectrophotometer
Test Equipment Required
HOME
TECHNICIAN'S NOTES
Generic Test Equipment
CONTENTS
Equipment Specific Test Equipment
Leakage Current Meter / Safety Analyzer
1
Spectrophotometric Function Test Set
Milton Roy Standards #333150 or
(Harleco #64666 or equivalent)
Holmium test cuvette
Digital Volt Meter
1
Hand Tools
1
335101-10001 SPECTRONIC 501/601
Operator's Manual
Leakage Current Meter / Safety Analyzer
1
335101-10020 SPECTRONIC 501/601 Service
Manual
Digital Volt Meter
1
Stray Radiant Energy (SRE) filter
Hand Tools
Eye Protection (UV light and shattering
glass)
Protective gloves (UV light and lint-less)
7/21/2004
Page 3 of 22
Spectronic 501 & 601.EDP.doc
Milton Roy
Spectronic 501/601
Spectrophotometer
Parts and Supplies Needed
HOME
TECHNICIAN'S NOTES
SUPPLIES
CONTENTS
PARTS
Paper Towel
1
General purpose cleaner
1
335423 Tungsten-halogen lamp: 6V - 10 Watt
(Phillips type 6605)
343424: Deuterium lamp
Canned Air (Dry)
1
332879: 2.0 ampere Slo-Blo fuse
Lint-less wipes (Kim-Wipes)
Disinfectant (Clean Conscience)
7/21/2004
Page 4 of 22
Spectronic 501 & 601.EDP.doc
Milton Roy
Spectronic 501/601
Spectrophotometer
Introduction to Equipment
HOME
TECHNICIAN'S NOTES
CONTENTS
The Milton Roy 501/601 Spectrophotometer is a simple instrument designed for quick and easy
absorbency or transmittance measurements at single wavelengths. The 501 has a range of 325 to
999nm, while the 601 includes the UV range, (195-999nm), with the addition of a Deuterium lamp.
These units come with a variety of options such as a heated or cooled sample holder, a recorder
output, and an RS232 output. The units are designed for single wavelength measurements but a
scanning program could be written via the RS232 communications port. All necessary information is
given in the operator’s manual in section 9. Though the instrument could not be very accurate between
wavelengths far apart, it could be effective for short scans.
Operation is very basic. Enter the desired wavelength, zero the blank and read the sample. Results can
be printed out to a printer but it needs to accept serial data and at the set parameters of the unit – see
sections 7 and 8 of the operator’s manual.
Be aware of the precautions listed at the beginning of this procedure and servicing this unit can be very
simple.
7/21/2004
Page 5 of 22
Spectronic 501 & 601.EDP.doc
Milton Roy
Spectronic 501/601
Spectrophotometer
Special Precautions
HOME
TECHNICIAN'S NOTES
CONTENTS
1. The Tungsten-Halogen lamp operates under high pressure. To avoid accidents, protect the lamp
from fingerprints, abrasions, and scratches when handling. Wear eye protection when adjusting the
lamp interchange mirror, and never operate the lamp with the shield removed.
2. Allow enough time for the shield and lamp to cool. If the spectrophotometer has been operating
even for a short time, the shield and lamp will be very hot. Temperatures are high enough to cause
contact burns, so allow at least 5 minutes before removing the shield and lamp.
3. Use a clean lint-free cloth or wear lint-free gloves to handle the new lamp: fingerprints on
the lamp detract from its peak performance and shorten the life of the lamp.
SHATTERING: The tungsten lamp operates under high pressure. To avoid accidents,
protect the lamp from fingerprints, abrasions, and scratches when handling. Wear eye
protection when adjusting the lamp interchange mirror, and never operate the lamp with
the shield removed.
4. The deuterium lamp operates at an extremely high voltage, and has dangerous voltages on the
terminals even when the lamp is turned off. Be sure to turn off the power and disconnect the power
cord before you attempt to replace the lamp.
5. ULTRAVIOLET: The short wavelength UV radiation emitted by the deuterium lamp can be
harmful to the eyes and skin. Wear eye protection and avoid exposing skin whenever the lamp
cover is removed and the lamp is on (for example, when aligning the lamp mirror).
6. User Settings: If the unit is running, save that configuration in the unit’s non-volatile memory by
pressing the following keystrokes: 1,4 <SECOND> <DIAG>. Any changes you make will then be
replaced by these saved default values when the unit is powered on next unless you re-enter
different values via the keystrokes listed.
7/21/2004
Page 6 of 22
Spectronic 501 & 601.EDP.doc
Milton Roy
Spectronic 501/601
Spectrophotometer
Initial Preparation
HOME
TECHNICIAN'S NOTES
CONTENTS
Test Parameter Storage:
The SPECTRONIC 501/601 can store the existing set of test parameters as the "default" values in nonvolatile memory. Once stored, these values will be present the next time you turn your
spectrophotometer on. Any changes made to these parameters during subsequent use of the
spectrophotometer will be temporary and replaced with the stored “default” values when power is
cycled.
The parameters that are stored are:
_______
Current wavelength (wavelength shown at startup).
_______
LMP SAV – Lamp saver status. <SECOND> <LMP SAV>
_______
LMP CH – Wavelength defining the change from visible to UV. <SECOND> <LMP CH>
_______
Data mode <%T, A or C >: (shown at startup - %T, A or C)
_______
Factor – + 0.0000 to 9999 < SECOND > <FACTOR>
_______
SIG AV – Noise reduction factor. <SECOND> <SIG AV>
_______
HI LIM – The highest acceptable final result <SECOND> <HI LIM>
_______
LO LIM – The lowest acceptable final result <SECOND> <LO LIM>
RS-232 interface parameters: <1> <1> <SECOND> <DIAG>
_______
Baud rate – 110, 150, 300, 600, 1200, 2400, 4800 or 9600
_______
Parity – even, odd or none
_______
Number of stop bits – 1 or 2
_______
Terminator characters – CRLF, LFCR, CR, LF
_______
Echo – on or off
_______
Format - computer or printer
_______
Ctrl/s/q – on or off
_______
Answer Back – on or off
7/21/2004
Page 7 of 22
Spectronic 501 & 601.EDP.doc
Milton Roy
Spectronic 501/601
Spectrophotometer
QA – Operational Information
HOME
TECHNICIAN'S NOTES
CONTENTS
BASIC SPECTROPHOTOMETRIC MEASUREMENTS
To use the SPECTRONIC 501/601 for basic spectrophotometric measurements (absorbency,
transmittance, or concentration):
1. Turn Power on.
2. Await completion of SELF-TEST.
3. Enter analytical wavelength.
4. Press <SECOND FUNCTION> < GO TO λ >.
5. Allow 30-minute lamp warm-up.
6. Press < T%/A/C> to choose desired data mode.
7. Open sample compartment door, insert blank into sample holder.
8. Close sample compartment door.
9. Press < SECOND FUNCTION > <100% T/ZERO A >.
10. Open sample compartment door and remove the blank.
11. Insert sample into sample holder and close sample compartment door.
12. Read data that is displayed, or press < SEND > if a printer or computer is installed.
7/21/2004
Page 8 of 22
Spectronic 501 & 601.EDP.doc
Milton Roy
Spectronic 501/601
Spectrophotometer
PMQA Procedures
HOME
TECHNICIAN'S NOTES
CONTENTS
The following includes all levels of testing. The steps applicable to each level is as follows:
A (abbreviated): Step 1
QA (quality assurance - operational verification): Steps 1, . . .
PM (preventative maintenance): All steps
1. Historical: optional but beneficial in some cases
1.1. CHECK THE CURRENT EQUIPMENT LOG SHEET FOR:
1.1.1. General trends
1.1.2. Previous Problems and work performed on previous PMS.
1.2. RUN AN EQUIPMENT HISTORY FOR THIS SPECIFIC PIECE OF EQUIPMENT
1.2.1. Check for reoccurring problems.
1.2.2. Check for excessive repairs
1.2.3. Check for unresolved or intermittent problems.
1.3. RUN EQUIPMENT ERROR RECORDS (IF APPLICABLE).
1.4. CHECK ANY SERVICE REPORTS THAT THE CUSTOMER MIGHT HAVE FROM THE MANUFACTURER
OR OTHER
SERVICE VENDORS.
2. PRELIMINARY: This does not apply to two-wire and double-insulated equipment.
2.1. LEAKAGE CURRENT:
2.1.1. Chassis to Earth Ground (power-cord ground wire intact).
2.1.2. Chassis to Earth Ground (Open ground wire):
2.1.3. Ground Wire Resistance:
2.2. CLEAN EXTERIOR AND INTERIOR ACCESSORIES
2.3. VISUALLY INSPECT THE UNIT
2.3.1. all cords and cables
2.3.2. verify the viability of the strain relief,
2.3.3. Knobs and buttons condition.
3. Post notification of intent to Pm the unit. Give an appropriate length of time prior to servicing, if
applicable.
4. Contact customer to notify him of your arrival and post in the instrument's usage log, if
applicable.
5. Store changed settings Enter the following keystrokes: 1,4 <SECOND FUNCTION> <DIAG>. The
new settings will now be the default settings.
6. Clean exterior and interior accessories
6.1. Do Not Sterilize. May be cleaned by wiping with a dry cloth.
7/21/2004
Page 9 of 22
Spectronic 501 & 601.EDP.doc
Preventative Maintenance
(Continued)
HOME
TECHNICIAN'S NOTES
CONTENTS
7. LEAKAGE CURRENT:
7.1. Chassis to Earth Ground (power-cord ground wire intact).
7.2. Chassis to Earth Ground (Open ground wire):
7.3. Ground Wire Resistance:
8. Turn on and verify that it goes through the Self-Test
9. NOTE: For effective operation, the spectrophotometer must warm up for one-half hour after
being turned on. Allow an additional 15 minutes for stabilization when you turn a lamp on or off.
10. LAMP AND MIRROR ALIGNMENT: Proper alignment of the lamps and mirror is essential for
optimal performance of the spectrophotometer. (Far right Letter on display = lamp in use: T for
Tungsten, D = Deuterium and B = both.
11. The alignment itself consists of two parts:
11.1.
Adjusting the position of the light beam hitting and passing through the filters.
11.2.
Minimizing the absorbency reading.
12. The position of the mirror determines the amount of light hitting and passing through the slit. The
amount of light in turn directly affects your results and the overall performance of the
spectrophotometer. These steps help ensure peak performance of you instrument.
12.1.
12.2.
12.3.
12.4.
If the instrument is off, turn it on and wait for it to initialize. If it is on, turn it off and
then on again so that it initializes correctly.
Spectronic 601 only--Ensure that the wavelength is set to a value greater than 400 nm
and press <SECOND FUNCTION> <DEUT> to turn off the deuterium lamp. The lamp
indicator on the display should be a "T".
Remove the maintenance/lamp access door by loosening the lamp/maintenance
compartment access screw three to five complete turns and lifting up the door at the
back edge.
Examine the illuminated filter on the filter wheel to determine the position of the light.
Light should be centered on the filter and on the slit, as shown in Figure 6-3a.
7/21/2004
Page 10 of 22
Spectronic 501 & 601.EDP.doc
Preventative Maintenance
(Continued)
HOME
12.5.
TECHNICIAN'S NOTES
13.
14.1.
14.2.
14.3.
14.4.
14.5.
14.6.
14.7.
14.8.
14.9.
14.10.
CONTENTS
If the light is not passing through the center of the filter as shown in Figure 6-3b, adjust
the Tungsten-Halogen lamp adjustment screw (22) and/or the Tungsten-Halogen lamp
vertical adjustment screw (30), as indicated in Figure.6.4, until the light is centered on
the filter.
14. Figure 6.4
Press 6, 3, 0, <SECOND FUNCTION>, <GO TO λ > to set the wavelength to 630 nm.
Use the %T/A/C key to put the instrument into absorbency mode (A).
Press <1> <%T/A/C > and wait for the instrument to display an absorbency value. (It
should be near 1.0).
Use a flathead screwdriver with an insulated handle to turn the Tungsten-Halogen lamp
adjustment screw (22) until the instrument displays a minimum absorbency reading. If
the instrument displays a negative absorbency reading, stop and repeat step 14.3.
Use a phillips screwdriver to turn the Tungsten-Halogen lamp vertical adjustment screw
(30) until the instrument displays a minimum absorbency reading. If the instrument
displays a negative absorbency reading, stop and repeat step 14.3 and 14.4
Turn on Deuterium Lamp: <SECOND FUNCTION>, <DEUT>
Spectronic 601 only--Press 2,4,0, <SECOND FUNCTION>, <GO TO λ > to set the
wavelength to 240 nm.
Spectronic 601 only--Use the %T/A/C key to put the instrument into absorbency
mode.
Spectronic 601 only--Press <1> <%T/A/C > and wait for the instrument to display an
absorbency value. (It should be near 1.0).
Spectronic 601 only--Use a flathead screwdriver with an insulated handle to turn the
deuterium lamp adjustment screw (21) until the instrument displays a minimum
absorbency reading. If the instrument displays a negative absorbency reading, stop and
repeat step 14.9 and 14.10
7/21/2004
Page 11 of 22
Spectronic 501 & 601.EDP.doc
Preventative Maintenance
(Continued)
HOME
14.11.
14.12.
TECHNICIAN'S NOTES
CONTENTS
When adjustments are complete, turn the instrument off and then on again to reinitialize it.
Reposition the maintenance/lamp access door and secure it by tightening the
lamp/maintenance compartment access screw.
15. REVISION (DIAG 2): Press 2 <SECOND> <DIAG> and record the software revision.
16. DISPLAY TEST (DIAG 3):
16.1.
Checks the spectrophotometer’s display by testing all segments. First, sixteen '*'s will
appear, then sixteen "0"s. The final display scrolls from left to right, presenting the
characters A through Z, and 0 through 9. To stop the test, press any key after the *’s
and 0’s have been displayed.
17. 656NM DEUTERIUM PEAK FIND - Spectronic 601 ONLY (DIAG 6):
17.1.
This routine turns on the Deuterium lamp, rotates the mirror, and sets the appropriate
gain. It also moves the monochromator from 659 to 653nm and displays the measured
peak wavelength. Press <CLEAR> to exit. Result should be 656 ± 2nm. Record value on
log sheet.
17.2.
If out of specification perform the reprogramming of the EEPROM per EEPROM ERROR /
MONO ERROR CORRECTION PROCEDURES of August 13, 1997 - see at end of
bioengineering’s copy of the operation manual.
18. 486NM DEUTERIUM PEAK FIND – Spectronic 601 ONLY (DIAG 7):
18.1.
This routine is similar to diagnostic 6, except that monochromator scans from 489 to
483nm. Press <CLEAR> to exit. Result should be 486 nm (± 2nm). Record value on log
sheet.
19. PEAK NOISE MEASUREMENT (DIAG 8):
19.1.
Measures noise for approximately 15 seconds and displays peak-to-peak noise in
absorbency. The value is computed on the displayed data, and applies the <SIG AV>
value that is in effect before selecting this diagnostic. The result should be <0.0015 A>
19.1.1.
Press: 0, <SECOND> <SIG AV> to set for no filtering.
19.1.2.
Press: 8, <SECOND> <DIAG> to run test.
19.1.3.
Wait for the "Final PPK" value. Record value on log sheet.
19.1.4.
Press <CLEAR> to exit.
19.1.5.
Repeat steps 19.1.1 – 19.1.5 for SIG AV filtering values of 1 and 2.
20. STRAY RADIANT ENERGY (SRE) MEASUREMENT (DIAG 10): Optional
20.1.
Checks SRE by displaying transmittance to within 0.01% resolution. To use this
diagnostic, move the spectrophotometer to the appropriate wavelength, set 0A/100%T,
and insert the appropriate SRE filter (or Blocking beam assy. if no SRE filter - see NOTE
below). Then, enter 10. <SPECIAL FUNCTION> <DIAG>. The SRE measurement
will be displayed in the form "SRE=XX.XX T", and will be held for 0.5 seconds (for a
longer display, depress and hold down any key as long as you wish to see the display).
NOTE: If SRE filters are not available - use a blocking beam assy. (the holmium filter
turned sidewise works well). Set wavelength at 340nm, run and record reading. Reset
wavelength to 220nm and run and record again.
Remove the SRE or Blocking-Beam Filter.
7/21/2004
Page 12 of 22
Spectronic 501 & 601.EDP.doc
Preventative Maintenance
(Continued)
HOME
TECHNICIAN'S NOTES
CONTENTS
21. LAMP ALIGNMENT (DIAG 13): Inappropriately named, as it actually is a gain measurement.
21.1.
Prompts for lamp choice, (601 only), then moves to the appropriate wavelength.
Converts display to a linear-responding bar graph. The left-hand digit indicates the
relative gain achieved in hexadecimal format with 0 the lowest and F the highest.
21.1.1.
Press: 1,3 <SECOND> <DIAG>.
21.1.2.
Select lamp by pressing <TUNG> or <DEUT>.
21.1.3.
Record gain on log sheet for corresponding lamp.
21.1.4.
Press <CLEAR> to go back to the lamp select prompt or press <CLEAR> again to
exit.
22. KEYBOARD TEST (DIAG 15):
22.1.
Simply verifies that each key is working. Press the key and observe the display; if
keystroke does not produce the character listed in the chart below, contact you
authorized Milton Roy service representative. (To exit from this test turn the
spectrophotometer off and then on again.)
KEY:
DISPLAYED AS:
<CLEAR >
C
<SEND>
S
<SECOND FUNCTION> N
<DOWN ARROW>
<UP ARROW>
D
U
<%T/A/C>
<+/->
<.>
<0-9>
T
+
.
NUMBER PRESSED
23. PRINTER TEST (DIAG 16): Optional
23.1.
Checks printer operation by transmitting ASCII codes for SPECTRONIC 501/601's
character set. Operates continuously until you press <CLEAR> to exit.
24. Photometric Accuracy:
24.1.
24.2.
24.3.
0.3 ABS Filter:
0.5 ABS Filter:
1.0 ABS Filter:
Use Neutral-Density Filters at 546.1 nm: run 10 times each.
record both average and Std Deviation
record both average and Std Deviation
record both average and Std Deviation
24.4.
Holmium Oxide Filter:
24.4.1.
At 546.1 nm: record both average and Std Deviation
24.4.2.
At 360.8 nm: record both average and Std Deviation
7/21/2004
Page 13 of 22
Spectronic 501 & 601.EDP.doc
Preventative Maintenance
(Continued)
HOME
TECHNICIAN'S NOTES
CONTENTS
25. PHOTOMETRIC LINEARITY TEST
25.1.
Photometric Linearity: all three of each test tube set is within their respective tolerances.
(post readings below).
25.2.
Readings of Test Kit:
Wavelength
420 nm
520 nm
670 nm
Relative
Actual
Absorbance
Actual
%T
Concentration
Absorbance
tolerances
%T
tolerances
1.00
0.824 - 0.602
15.0 - 25.0
0.75
0.602 - 0.456
25.0 - 35.0
0.50
0.409 - o.310
39.0 - 49.0
0.25
0.215 - 0.149
61.0 - 71.0
1.00
0.824 - 0.602
15.0 - 25.0
0.75
0.602 - 0.456
25.0 - 35.0
0.50
0.409 - o.310
39.0 - 49.0
0.25
0.215 - 0.149
61.0 - 71.0
1.00
0.824 - 0.602
15.0 - 25.0
0.75
0.602 - 0.456
25.0 - 35.0
0.50
0.409 - o.310
39.0 - 49.0
0.25
0.215 - 0.149
61.0 - 71.0
26.
27. DRIFT TEST:
27.1.
Empty the sample compartment
27.2.
Enter: 5,0, 0, <SECOND FUNCTION>, <GO TO ^>
27.3.
Make sure it is in ABS mode: <SECOND FUNCTION>, %T/A.C>
27.4.
Record readings: Initial reading and reading after 1 hour.
7/21/2004
Page 14 of 22
Spectronic 501 & 601.EDP.doc
Milton Roy - SPECTRONICS 601 - Spectrophotometer
PMQA Check-List
Dept:
Location:
Procedure:
ASSET #:
Mfg:
Milton Roy
See the Corresponding PMQA Procedure for details
m/n:
Dates performed:
Technician's Initials:
601
L-2910
s/n
Service
Manual
Section
Self Test: (on power-up):
1. Revision Level: <2>, <SECOND FUNCT>, <DIAG>
2. Recorder Setup: <4>, <SECOND FUNCT>, <DIAG>
after reading press <CLEAR>
3. 656 nm Deuterium Peak: <6>, <SECOND FUNCT>, <DIAG>,
after reading press <CLEAR>
4. 486nm Deuterium Peak: <7>, <SECOND FUNCT>, <DIAG>,
after reading press <CLEAR>
5. Current wavelength: (wavelength shown at startup)
6. Lamp status (including <LMP SAV> status.
<SECOND FUNC>, <LMP SAV>
7. Lamp interchange wavelength <SECOND FUNCT>
<LMP CH>.
8. Data mode < %T, A or C>: (shown at startup - %T, A or C):
9. Factor: <SECOND FUNCT >, <FACTOR>
10. Signal averaging value: <SECOND FUNCT>, <SIG AV>:
11. High / Low Limits: <SECOND FUNCT>, <HI LIM> or
<SECOND FUNCT>, <LO LIM>:
12. RS-232 interface parameters: <1>, <1>, <SECOND FUNCT>
<DIAG> then step throught each setting by pressing <YES>
A. Baud Rate:
B. Parity:
C. No. of stop bits:
D. Terminator
E. Echo
F. Format:
G. CTRL / 5 / q:
H. Answer Back
13. Relative Tungsten-Halogen lamp intensity (gain). Hexadecimal format 0-9 and A-F: <1>, <3>, <SECOND FUNCT>
<DIAG>
14. Relative Deuterium lamp intensity (gain). Hexadecimal
format 0-9 and A-F: <1>, <3>, <SECOND FUNCTION>,
<DIAG>
REMARKS:
7/20/2004
Page 1 of 3
Spectronics601_ChkLst.xls
Milton Roy - SPECTRONICS 601 - Spectrophotometer
PMQA Check-List
Dept:
Location:
Procedure:
ASSET #:
Mfg:
m/n:
Milton Roy
Dates performed:
See the Corresponding PMQA Procedure for details
Technician's Initials:
601
L-2910
s/n
Service
Manual
Section
15.
16.
17,
18.
Self Test: (on power up)
pass / fail
Store settings: 1,4, <SECOND FUNCTION>, <DIAG>
Clean: Blow out lamp compartment and clean outside
Lamp & Mirror Adjustment:
A. VIS: settings… DEUT Lamp = OFF, 630nm,
<1> <%T/A/C> adjust screws # 22 and 30
B. UV: settings… DEUT lamp = ON, 240nm,
<1>, <%T/A/C>, adjust screw # 21
19. DISPLAY TEST: (Diag Test # 3) <3>, <Second Function>, <DIA>
20. PEAK FIND TEST: (Diag test # 6 and # 7)
A. 656 nm (± 2.0 nm): <6>, <SECOND FUNCTION>, <DIAG>
B. 486 nm (± 2.0 nm): <7>, <SECOND FUNCTION>, <DIAG>
21. PEAK NOISE test: (Diag. Test # 8)
A. SA = 0 (<0.0015A): <0>, <SECOND FUNCTION>, <SIG AV>
<8>, <SECOND FUNCTION>, <DIAG>
B. SA = 1 (<0.0015A): <1>,, <SECOND FUNCTION>, <SIG AV>
<8>, <SECOND FUNCTION>, <DIAG>
C. SA = 2 (<0.0015A): <2>,, <SECOND FUNCTION>, <SIG AV>
<8>, <SECOND FUNCTION>, <DIAG>
22. STRAY RADIANT ENERGY (SRE): (Diag test # 10)
A. 340 nm:
• 3,4,0, <SECOND FUNCTION>, <YES (Go to λ)>
• put into %T mode. . . <%T/A/C> until %T
• empty sample chamber,
• <SECOND FUNCTION>, <%T/A/C (100%T/ZEROA)>,
• insert blocking filter (Holminum - sideway),
• 1,0, <SECOND FUNCTION>, <DIAG>
B. 220 nm:
• 2,2,0, <SECOND FUNCTION>, <YES (Go to λ)>
• put into %T mode. . . <%T/A/C> until %T
• empty sample chamber,
• <SECOND FUNCTION>, <%T/A/C (100%T/ZEROA)>,
• insert blocking filter (Holminum - sideway),
• 1,0, <SECOND FUNCTION>, <DIAG>
23. LAMP GAIN: (Diag. # 13)
A. VIS (0 - F) (630nm): 1,3, <SECOND FUNCTION>,
<DIAG> Select <9 - TUNG> for lamp.
B. UV (0 - F) (240nm): <Clear>, select <6 - DEUT> for lamp
7/20/2004
Page 2 of 3
Spectronics601_ChkLst.xls
Milton Roy - SPECTRONICS 601 - Spectrophotometer
PMQA Check-List
Dept:
Location:
Procedure:
ASSET #:
Mfg:
m/n:
Milton Roy
See the Corresponding PMQA Procedure for details
Dates performed:
Technician's Initials:
601
L-2910
s/n
Service
Manual
Section
24. PHOTOMETRIC ACCURACY:
5,4,6, .,1, <SECOND FUNCTION>, <YES - GO TO λ>
a. 0.3 abs Neutral Density Filter @ 546.1 nm:
• Empty sample compartment
• <SECOND FUNCTION>, <%T/A/C>
• Insert 0.3 abs N.D. Filter and Read value:
• Remove N.D. Filter. Average/ Std. Deviation:
b. 0.5 abs Neutral Density Filter @ 546.1 nm:
• Empty sample compartment
• <SECOND FUNCTION>, <%T/A/C>
• Insert 0.5 abs N.D. Filter and Read value:
• Remove N.D. Filter. Average/ Std. Deviation:
c. 1.0 abs Neutral Density Filter @ 546.1 nm:
• Empty sample compartment
• <SECOND FUNCTION>, <%T/A/C>
• Insert 1.0 abs N.D. Filter and Read value:
• Remove N.D. Filter. Average/ Std. Deviation:
d. Holmium Oxide Filter @ 546.1 nm:
• Empty sample compartment
• <SECOND FUNCTION>, <%T/A/C>
• Insert Holmium Filter and Read value:
• Remove Filter.
Average/ Std. Deviation:
e. Holmium Oxide Filter @ 360.8 nm:
• 3, 6, 0, ., 8, <SECOND FUNCTION>, <GO TO λ>
• Empty sample compartment
• <SECOND FUNCTION>, <%T/A/C>
• Insert Holmium Filter and Read value:
• Remove Filter.
Average/ Std. Deviation:
25. DRIFT TEST: abs, 500 nm
• 5, 0, 0, <SECOND FUNCTION>, <GO TO λ>
• Empty sample compartment
• <SECOND FUNCTION>, <%T/A/C>
• Read value: initially and after 1 hour
• Remove Filter.
Initial reading & 1-hr reading:
REMARKS:
7/20/2004
Page 3 of 3
Spectronics601_ChkLst.xls
Milton Roy
Spectronic 501/601
Spectrophotometer
Specifications
HOME
Light sources
Monochromator
Detector
Wavelength range
Wavelength accuracy
Wavelength precision
Spectral slit width
Stray radiant energy
Photometric accuracy
Photometric stability
Noise
Photometric Ranges
Sample compartment
dimensions
Power requirements
Overall dimensions
Weight
Environment Operating
Storage
7/21/2004
TECHNICIAN'S NOTES
CONTENTS
Tungsten-Halogen (325 to 999nm)
Deuterium (195 to 380 nm) (SP 601 only)
Modified Czerny-Turner with holographic grating (1200 lines per
millimeter).
Single silicon photodiode
501: 325-999nm, 601: 195-999 nm
± 1.0 nm
Better than 0.5 nm
<= 5 nm
<= 0.05% T at 220nm and 340 nm
± 0.005 A near 1.0 A
± 0.003 A per hour near 0 A
Less than 0.004 A near 2 A nm, Less than 0.0015 A near 0 A
Absorbency: -0.1 to 3.0 A, Transmittance: 0.0 to 125% T, concentration:
-9999 to + 9999
10.2 cm (4 in) High x 10.6 cm (4.2 in) Wide x 17.1 cm (6.5 in) Deep
100/115 and 220/240 V. ± 10%; 50/60 Hz, ± 2 Hz; 2.0 A
19.7 cm H x 44.5 cm W x 49 cm D; (7.75" H x 17.5" W x 14.3"D).
15 kg (35 lbs.)
50-105 F; 10-40.5 C. relative humidity 10-60%
-40 to 105 F; -40 to 40.5 C; relative humidity not to exceed 60% (Allow
unit to adjust to room temperature for 24 hours when taking it out of
storage.)
Page 16 of 22
Spectronic 501 & 601.EDP.doc
Milton Roy
Spectronic 501/601
Spectrophotometer
Technician’s Notes
HOME
1
2
TECHNICIAN'S NOTES
CONTENTS
Thermo Spectronics has bought out Milton Roy.
Most parts and manuals are no longer available (1/1/02).
7/21/2004
Page 17 of 22
Spectronic 501 & 601.EDP.doc
Milton Roy
Spectronic 501/601
Spectrophotometer
Factory Modifications
HOME
TECHNICIAN'S NOTES
CONTENTS
EEPROM ERROR / MONO ERROR CORRECTIONS PROCEDURES
The following procedure should allow for correction of the EEPROM error that is occurring with the
501/601 Spectrophotometer.
This problem is usually caused by power line anomalies (surges, spikes, or low voltage conditions). A
line conditioner may be required if this is a recurring problem.
If the power line is okay, then a problem may exist on the CPU board in the unit. Replacement of the
board or the EEPROM may be required. An internal power supply problem could also be a cause.
See FAX from Milton Roy at the end of bioengineering’s operator manual.
7/21/2004
Page 18 of 22
Spectronic 501 & 601.EDP.doc
Milton Roy
Spectronic 501/601
Spectrophotometer
Troubleshooting
HOME
TECHNICIAN'S NOTES
CONTENTS
See Section 6.4 MAINTENANCE & TROUBLESHOOTING page 11 in bioengineering’s copy of Spectronic
601 Operation Manual.
See Section 6.4.2 ERROR MESSAGES page 12 in bioengineering’s copy of Spectronic 501/601 operation
manual.
See the August 13, 1997 FAX from Spectronic Instruments, Inc: EEPROM ERROR/ MONO ERROR
CORRECTIONS PROCEDURES at the back of bioengineering’s Spectronic 601 operation manual.
7/21/2004
Page 19 of 22
Spectronic 501 & 601.EDP.doc
Milton Roy
Spectronic 501/601
Spectrophotometer
Block Diagram
HOME
7/21/2004
TECHNICIAN'S NOTES
Page 20 of 22
CONTENTS
Spectronic 501 & 601.EDP.doc
Milton Roy
Spectronic 501/601
Spectrophotometer
Manufacturer & Vender Information
HOME
7/21/2004
TECHNICIAN'S NOTES
Page 21 of 22
CONTENTS
Spectronic 501 & 601.EDP.doc
Milton Roy
Spectronic 501/601
Spectrophotometer
Appendix
HOME
7/21/2004
TECHNICIAN'S NOTES
Page 22 of 22
CONTENTS
Spectronic 501 & 601.EDP.doc


