1
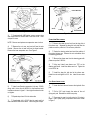
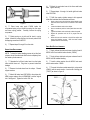
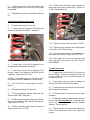
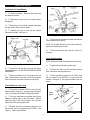
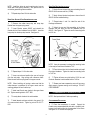
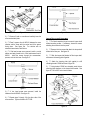
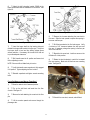
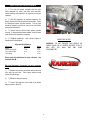
Frame Bracket Grease Fitting Link Shim 176080 Figure 4 Shims 176080 Axle Bracket Figure 6 3) If equipped with ABS brakes, remove sensor wires and clamps from the inboard side of the lower arms. Save clamps for reuse. PITMAN ARM REPLACEMENT NOTE: Remove and replace one suspension arm at a time. 1) Remove the cotter pin and nut from the drag link at the pitman arm. Separate the drag link ball stud from the pitman arm with a puller tool. Do not use a pickle fork. 4) Remove the nut, cam, and cam bolt from the axle bracket. Remove the nut and bolt from the frame bracket. Remove the lower suspension arm. See Figure 5. 2) Center the steering wheel and mark the position of the original pitman arm. Remove the nut and washer from the steering gear shaft. 3) Remove the pitman arm from the steering gear with pitman arm puller C-4150-A. 4) Align and install new pitman arm 7727 on the steering gear shaft. Install the washer and nut. Tighten the nut to 185 ft. lbs. 5) Install the drag link ball stud to the pitman arm. Install the nut and tighten to 60 ft. lbs. Install a new cotter pin. COIL SPRING INSTALLATION Figure 5 1) Lower the front axle and remove the hydraulic floor jack. 5) Install new Rancho suspension link assy 176080, along with 4 shims from kit 860218, to the frame and axle brackets as shown in figure 6. Use original hardware but do not tighten. 6) 2) Drill a 5/16" hole through the center of the coil spring axle pad. Reinstall the rubber bump stop. Repeat steps 4 and 5 for the other side. 3) Compress the new front coil spring to 16 inches in length. Use a quality spring compressor like the one shown in figure 7. 7) If applicable, drill a 23/64" hole into each cast link and reinstall the ABS sensor wires. Use the original clamps. 5