1
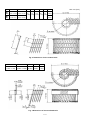
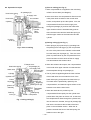
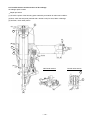
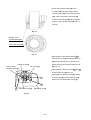
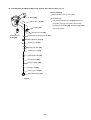
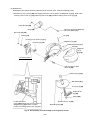
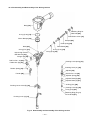
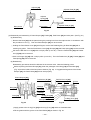
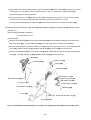
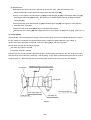
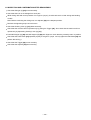
10-2. Disassembly and Reassembly of the Output Section (See Fig. 10)
[Tool required]
Hex. Socket Hd.
Bolt M6 x 12 [1]
Hex. bar wrench (4 mm)
(a) Disassembly
Plate [2]
Remove the Hex. Socket Hd. Bolts M6 x 12
Top Cover [3]
[1] with a hex. bar wrench (5 mm). Then
Hex. Socket Hd.
Bolt M5 x 35 [4]
the Top Cover [3] can be removed.
Remove the four Hex. Socket Hd. Bolts
M5 x 35 [4] with a hex. bar wrench (4 mm)
Exhaust Cover [5]
and remove the Exhaust Cover [5]. Then
the components of the output section such
as Piston (H) [17], Cylinder [15] and the
6 mm (0.236")
hole
Piston Bumper [20] can be removed.
(b) Reassembly
Gasket (B) [6]
Disassembly procedures should be
followed in the reverse order. Note the
Head Bumper [7]
following points:
Head Value Spring [8]
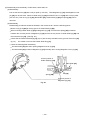
Apply grease to the inside of the O-ring (I.D
37) [16], O-ring (S-70) [11], O-ring (S-46)
O-Ring (P-22) [9]
[13] and the Cylinder [15] before
reassembly.
Head Valve (A) [10]
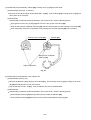
Mount Gasket (B) [6] aligning the 6 mm
(0.236") dia. hole with the blowhole of the
O-Ring (S-70) [11]
Body [18].
Cylinder Plate [12]
O-Ring (S-46) [13]
Piston (H) [17]
O-Ring (1AP-48) [14]
Piston Bumper [20]
Blowhole
Cylinder [15]
O-Ring (I.D 37) [16]
Body [18]
Fig. 10 Disassembly and reassembly of the output section
--- 23 ---