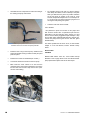
1
Turbo Diesel B uyer’s G uide A Publication of the TURBO DIESEL REGISTER A Publication of the Turbo Diesel Register A WORD ABOUT THE TURBO DIESEL REGISTER How did the Turbo Diesel Register get its start? First off, I’m an automotive enthusiast. An automotive enthusiast that was in search of a tow vehicle for my admittedly small collection of automobiles. As you can imagine, the search for the right tow vehicle took me in the direction of the Dodge/ Cummins Turbo Diesel. My search was aided by the fact that my previous job was in the diesel engine profession as a Cummins distributor product support representative. Do I have a good knowledge of the Turbo Diesel engine? Well, maybe. I’ll let you be the judge. Back to the “story.” As an automotive enthusiast, I am a member of a handful of car club/register type publications. In addition, I subscribe to just about every car and truck monthly publication in hopes that I can learn something more about my vehicles. The only vehicle I owned that didn’t have its own club was the Turbo Diesel. The light goes on. Why not start a Turbo Diesel club? The light flickers. I know the immediate answer: not enough time, no money, and who would write the articles? Needless to say, the idea got put on the back burner. Another great idea, but .... Looking back, that was many long years ago. Prior to our first magazine (Fall ’93) I took time to talk to other Turbo Diesel owners who wanted to know more about their truck and specifically the Cummins engine. At the time I knew the Turbo Diesel Register would work. I also knew it would be a lot of hard work with an up-front monetary investment and the commitment to publish the magazine. Positive discussions with other club/register publishers and an unofficial “good luck” or two from the manufacturers, and well, I was still hesitant. Back to the all-important concerns: time, money and writing skills. Time? In the initial two-career-days it was nothing to stay up until 2:00 a.m. Money? What the heck, we took out a second mortgage. And writing skills? You’ve heard the saying, “if it is to be, it is up to me.” Thus, we started the TDR way back in the summer of 1993. Robert Patton TDR Editor Table of Contents Looking at the Changes...................... 3 Buying a Used Truck......................... 20 Dodge Technical Service Bulletins.. 22 TSBs Issued During ‘95 and Prior....... 23 TSBs Issued During ‘96....................... 36 TSBs Issued During ‘97....................... 41 TSBs Issued During ‘98....................... 46 TSBs Issued During ‘99....................... 50 TSBs Issued During ‘00....................... 56 TSBs Issued During ‘01....................... 61 TSBs Issued During ‘02....................... 64 TSBs Issued During ‘03....................... 70 TSBs Issued During ‘03-’07................. 76 Recall Notices.................................... 96 Most Common Problems.................. 99 Favorite Fumbles—Fabulous Fixes..... 99 12-Valve Dowel Pin Common-Sensical Solution.......................................... 104 12-Valve No-Start Condition.............. 107 Fuel Transfer Pumps Revisited......... 108 Low Pressure Fuel System Problems........................................ 126 Turbo Tips........................................ 130 PS. We hope you’ll learn something from the following collection of tips and Dodge technical data. Please realize this booklet is just the “tip of the iceberg.” The TDR and its members provide a wealth of information. How to join? Please fill-out and mail the order form below or register on-line at www.turbodieselregister.com. Preventive Maintenance ................ 133 Mechanics Tips................................ 135 New Owner’s Corner............... 138 Part Number Reference.................. 139 Liquids in Your Truck...................... 141 Memorable Articles......................... 144 Join Us Today! Name__________________________________________ An annual subscription to the Turbo DIesel Register is $35.00. Address________________________________________ Please complete this subscription form and enclose it in an envelope along with your check or money order payable to: TURBO DIESEL REGISTER 1150 Samples Industrial Drive Cumming, Georgia 30041 (770) 844-1600 INFORMATION/ SUBSCRIPTION LINE City_______________________ State_ ______ Zip_______ ( )_____________________________ ( )_____________________________ Phone: Home Work Truck Year ___________ Model___________ Payment Enclosed Bill my Mastercard/VISA #________________________ Exp. Date_______________ A Publication of the TURBO DIESEL REGISTER Looking at the Changes – A TURBO DIESEL BUYER’S GUIDE by Jim Anderson Aside from the quarterly column and articles that I write for the TDR, I also serve as the “e-mail and call-back” guy. Yep, that means I get lots of correspondence from those interested in the TDR as well as those interested in the purchase of a truck. With the ever-changing ownership of vehicles, the idea of a Turbo Diesel Buyer’s Guide makes perfect sense. To that end, the editor asked me to do a study of changes by model year to Dodge/Cummins trucks. Since its1994 introduction, the current body style Dodge Ram pickup has undergone many changes and modifications. To properly compile such a list, changes for each model year seem to build on each preceding model year, and therefore you may want to read from the start (1994) to see total changes and cumulative modifications for the particular model year you wish to research. Each model year after 1994 contains changes in the form of additions and deletions to the previous model(s). Only major changes and major new options are covered. As you know, each year contains changes to paint colors and schemes, and interior upholstery colors and materials. These are not outlined in our research. Likewise, many minor technical adjustments and changes such as a change in tailgate hinge pin diameter are not listed, as they don’t really affect the overall performance of a given model. Changes and modifications covered will only be for those truck models (2500 and 3500 pickup and cab/chassis models) which were offered with the Cummins Turbo Diesel engine option package. Sharp-eyed owners may pick up discrepancies and/or errors of omission. These errors are solely the responsibility of your columnist who was assigned this daunting task. I went with the information provided by Dodge’s data books, which are written at the beginning of a model year and do not reflect later “running” production changes. Overview PROBLEM AREAS: Please keep in mind that there is no such thing as the perfect truck or car. All vehicles will contain certain designs, systems, or parts that are more prone to failure than might normally be expected. Looking at these negatives, the image of the vehicle can be tarnished. However, to look on the positive side, the owner is aware of the problems and can take corrective action and make informed decisions. With these thoughts in mind, the following are common problem areas on the subject trucks. Common Problem areas 1994-1998.5: Included failed engine start/run solenoids; frayed throttle cables; hard start due to degradation of the rubber fuel return line; automatic transmissions problems that were often caused by fluid loss at transmission line-to-cooler, line-to-transmission, quick couple plastic fittings; poor fuel filter access; loss of fifth gear in five-speed transmissions; failed front end parts on 4x4 models; poor front brake pad life in certain applications; poor paint adhesion of certain colors; failure of throttle position sensors on automatic trucks; and faulty fuel level sending units. Common Problem areas 1998.5 to 2002: Included failed fuel transfer pumps and fuel injection pumps; weak clutch on six-speed trucks; poor front brake pad life in certain applications; and poor front suspension bushing life on 4x4 models. From the Data Books The following information was compiled using DaimlerChrysler data books. Actual production may be slightly different, especially if a particular truck was produced near the beginning or end of a particular model year run. We will start with the 1994 model, which is the first year of the current body style. For each model year we will note what’s new, models available, engine ratings, transmissions, maximum tow ratings, cab/chassis models, and comments. Warranty began in 1994 with a basic one year 12,000 mile warranty on the entire truck, and 5 year/ 70,000 mile powertrain warranty. The separate truck/powertrain warranties were consolidated and currently the package is 3 years/36,000 miles on the entire truck, including powertrain. Engine warranty has stayed constant at 5 years/100,000 miles. Tow Ratings have changed considerably from year to year and from option model to option model, and even within option models, so read carefully if you are interested in or seeking such information. Some models were/are rated to tow much less weight than others. Watch out for “lightweights”! A Publication of the TURBO DIESEL REGISTER This interesting photo is an early ‘94 model truck that was modified to run at Bonneville. It successfully set a class record at the 1997 Bonneville speed weeks of 141.256 mph (TDR Issue 15, page 44). Second Generation 1994 Turbo Diesel What is New: Introduction of the current truck platform. Everything is new. Models offered: 2500 and 3500, two-wheel drive, fourwheel drive, standard cab, long bed only. Cab: Rather revolutionary styling, which has since been emulated by other truck manufacturers. Styling changes included protruding grille and hood. Grille is attached to hood and raises with hood for improved underhood access. Cab has aerodynamically correct shape. Offered only as a standard cab, long bed truck, and as a cab-chassis model. Two trim levels; ST in vinyl and SLT in cloth. Cab features include redesigned dash with full gauges featuring numbered graduations. All major cab controls designed to be operated by a gloved hand. An optional bench seat with a 40-20-40 center console split is offered with the center console capable of containing a laptop computer and cellular phone. Cab is attached to frame using resilient rubber donut cushions. Large sloped tinted windshield with parallel wipers, driver side air bag, open storage nook in right side of dash for future addition of passenger side air bag, cruise control buttons on steering wheel, and reclining driver seat. Chassis: All new frames with combinations of boxed and “C” channeled sections for greater rigidity. Front suspension consists of independent coil springs with 4500 pound capacity front axles on 16” tires. Rear suspension is 60” long semi-elliptic leaf springs on a rigid axle of varying capacity ratings by model for improved ride quality. Two axle ratios are offered: 3.54 and 4.10:1. Three rear axles are offered: Dana 70 for 2500 automatics, hybrid Dana 80 for 2500 manual, and Dana 80 for 3500 trucks and cab-chassis trucks. The long tapered rear springs offer a smoother, less choppy ride over rough roads. The truck bed is rigidly mounted to the frame, and is only offered as a sweptside design 8 foot box. The bed also features indents in the bed to allow building a framework to carry multi-tiered loads. Bed tiedown mounts are standard front and rear. The tailgate is detachable. Engine Ratings: The Cummins B 5.9 diesel was offered in two horsepower/torque ratings: 175HP/420 ft-lbs torque for manual transmissions, and 160/400 for automatic transmissions. New is an inline Bosch fuel injection pump (designated P7100). Intake air plumbing has been re-designed for greater airflow. The turbocharger is a wastegated design. Transmissions: Five-speed manual NV4500HD, 5th overdrive. 450 ft-lbs input torque capacity. Four-speed automatic 47RH, 4th overdrive with locking converter. 380 ft-lbs torque capacity. Looking Back: Being an all-new model, this truck had a number of teething problems which resulted in both federal safety recalls and factory TSB fixes. Chief among recalls was a fix for keys sticking in the backside of the steering wheel, causing the wheel to jam; recalls for various covers to be installed on steering shaft linkages, and headlight switches burning out. Major owner gripes centered around poor fuel filter and oil filter access, moisture intrusion and retention into cab and cab doors, vision obstruction by the A-pillars, poor adhesion of certain colors of paint, failure of the OEM Goodyear tires to maintain their balance, loss of fifth gear in the manual transmissions, fraying of the unsheathed throttle cable. Conclusions: These trucks have proven to be very durable, though not particularly good looking after several years of use. Owners have reported driving them in excess of one million miles without any major internal engine work. 1995 Turbo Diesel What is New: Extended cab. Revised paint schemes and colors. Models Available: 2500HD as standard cab, extended cab, long bed, 4x2 and 4x4. 3500: same as above. Engine Ratings: Same sas 1994 model year. 175 HP and 420 ft-lbs for manual transmission. 160 HP and 400 ft-lbs for automatic transmission. Transmissions: No changes from 1994. Five-speed manual 4500HD 5th overdrive. Four-speed automatic 47RH 4th overdrive with locking converter. Maximum Tow Ratings: 2500 and 3500: 3.54 Axle, maximum GCWR is 14,100 pounds. 4.10 Axle, maximum GCWR is 16,000 pounds. Cab/Chassis Models: None. Comments: The 1995 model is largely a carryover from the 1994 model year with the exception of the introduction of the extended cab. A Publication of the TURBO DIESEL REGISTER 1996 Turbo Diesel 1997 Turbo Diesel What is New: Deleted tailgate top protector. Deleted SLT tape stripe. Added optional Camper suspension package. Revised optional radio. Revised alternator rating to 136 amps. Revised “RE” electronic control of automatic transmission. What is New: Hydraulic power brake booster powered from power steering pump. Increased weight capacity to 11,000 GVW on club cab 3500 models. Remote keyless/ illuminated entry option. New AM/FM/Cassette/CD player option. Leather interior group option. Models Available: 2500HD as standard cab, extended cab, long bed, cab chassis, 4x2, and 4x4. 3500: same as above. No short bed models available. Engine Ratings: Increased for 1996 215 HP and 440 ft-lbs for manual transmission. 180 HP and 420 ft-lbs for automatic transmission. California engines were rated lower at 1995 specs. At midyear 1996 California engines were required to have exhaust gas recirculation (EGR). Transmissions: Five-speed manual NV4500 5th overdrive. Four-speed automatic 47RE 4th overdrive with locking converter. This is a new electronically controlled transmission. Maximum Tow Ratings: 2500 regular cab, manual or automatic, 3.54 axle: 10,500 pounds; 16,000 GCWR. 2500 regular cab, manual or automatic, 4.10 axle: 12,300 pounds; 18,000 GCWR. Derate trailer weight for 4x4: 3.54 axle -500 pounds; 4.10 axle -400 pounds. Derate trailer weight for extended cab: -0 3500 regular cab, manual or automatic, 3.54 axle: 10,500 pounds, 16,000 GCWR. 3500 regular cab, manual or automatic, 4.10 axle: 11,900 pounds, 18,000 GCWR. Derate trailer weight for 4x4: 3.54 axle ratio - 800 pounds; 4.10 axle -400 pounds. Derate trailer weight for extended cab: 3.54 ratio -800; 4.10 ratio -400 pounds. Cab/Chassis models: Available in regular cab only. 2500 is 8,800 GVWR, 56” C/A (cab rear to rear axle centerline) dimension. 3500 is 11,000 GVWR and available in 60” and 84” C/A dimensions. Comments: Trailer tow ratings begin to get confusing. Performance complaints stem from computer programming of new electronically controlled automatic transmission. Exhaust Gas Recirculation added to California trucks (1/1/96) to meet CARB emissions standards. Owners begin to find out how easy and inexpensive it is to “turn up the power.” A Publication of the TURBO DIESEL REGISTER Models Available: 2500HD as standard cab, extended cab, long bed, cab chassis, 4x2 and 4x4. Combo of short box extended cab diesel not offered. 3500: Same as above. No short bed models available. Engine Ratings: Same as 1996 model year. 215 HP and 440 ft-lbs for manual transmission. 180 HP and 420 ft-lbs for automatic transmission. California engines continue with EGR but are offered with 180 HP and 420 ft-lbs of torque in both automatic and manual transmission applications. Transmissions: No changes from 1996. Five-speed manual NV4500HD, 5th overdrive. Four-speed automatic 47RE 4th overdrive with locking converter. Maximum Tow Ratings: 2500 manual 4x2 regular and extended cabs: 20,000 GCWR. 2500 automatic 4x2 regular and extended cab: 3.54 axle, 16,000 GCWR; 4.10 axle, 18,000 GCWR. 2500 manual and automatic 4x4 regular and club cabs: 3.54 axle 16,000 GCWR; 4.10 axle 18,000 GCWR. 3500 manual 4x2 regular and extended cabs: 20,000 GCWR. 3500 automatic 4x2 regular and extended cab: 3.54 axle 16,000 GCWR; 4.10 axle 18,000 GCWR. 3500 manual 4x4 regular and extended cabs: 3.54 axle 16,000 GCWR, 4.10 axle 18,000 GCWR. 3500 automatic 4x4 regular and extended cabs: Regular cab, same as above. Extended cab, 4.10 axle only, 18,000 GCWR. 3.54 ratio not available with extended cab automatic option. Cab/Chassis models: Available in regular cab only. 2500 is 8,800 GVWR, 56” C/A (cab to axle) dimension. 3500 is 11,000 GVWR and available in 60” and 84” C/A dimensions. New options include rear helper spring and stabilizer bar group, 9.24 section modulus frame, snowplow prep group with some engine/transmission combos. Comments: California trucks have exhaust gas recirculation and net horsepower is lower. Last full year of the 12-valve engine production. 1998 Turbo Diesel What is New: Quad cab option featuring doors on each side of extended cab with no “B” pillar. Front seat belts integrated into seats on all extended cab and quad cab trucks. New interior with redesigned dash. Dash is electronic on 98.5 models. 2500 short box extended cab and quad cab model with diesel is available. Passenger side airbag with disable switch is standard. Next generation airbags. Heated power mirrors. Illuminated door lock and power window switches. Optional security alarm system. 24-valve electronic controlled injection diesel offered as a ’98.5 model. Revised fifth gear nut on five-speed manual transmission. Models Available: 2500HD: as standard cab, extended cab, quad cab, short bed, long bed, cab chassis, 4x2 and 4x4. 3500: Same as above. No short bed models available. Engine Ratings: 12-valve head, mechanical injection pump. 215 HP and 440 ft-lbs for manual transmission except California. 180 HP and 420 ft-lbs for automatic transmission and California manual transmission. California engines continue with EGR. Note: A ’98.5 engine was introduced (1/1/98) to meet more stringent emissions standards. It included electronic control of fuel injection and a 24-valve cylinder head. Rated at 235HP and 460 ft-lbs of torque for manual applications and 215/420 for automatic transmissions. No rating difference for California, as the 98.5 engine was 50-state certified without EGR. Transmissions: No changes from 1996. Five-speed manual NV4500HD 5th overdrive. Four-speed automatic 47RE 4th overdrive with locking converter. Maximum Tow Ratings: 2500 regular cab, extended cab, quad cab, manual, 4x2, 3.54 or 4.10 axle 20,000 GCWR. Except 12-valve California trucks, 3.54 axle is 16,000, 4.10 axle is 18,000 GCWR. 2500 regular cab, extended cab, quad cab, automatic 4x2 and all 4x4 models; 3.54 axle 16,000 GVWR, 4.10 axle 18,000 GVWR. 3500 regular cab, manual, 4x2, 3.54 or 4.10 axle is 20,000 GVWR. 3500 extended cab, quad cab, manual, 4x2 and 4x4; 3.54 axle 16,000 GCWR, 4.10 axle 18,000 GCWR. 3500 extended cab, quad cab, automatic, 4x2 and 4x4, 3.54 axle 16,000 GCWR, 4.10 axle 18,000 GCWR. Cab/Chassis models: Available in regular cab only. 2500 is 8,800 GVWR, 56” C/A (cab to axle) dimension. 3500 is 11,000 GVWR and available in 60” and 84” C/A dimensions. 2500 and 3500 manual have 20,000 pound tow rating with either axle in 4x2 and 4x4. 2500 and 3500 automatic 4x2 and 4x4 have 16,000 GCWR with 3.54 axle and 18,000 GCWR with 4.10 axle. Comments: Watch tow ratings carefully! Mid year introduction of the 24-valve engine for cleaner emissions. Early problems with failed fuel lift pumps and locked up injection pumps. Owners find out that a 4.10:1 axle ratio is better for towing with the 24valve engine, since the power band has been moved higher in the RPM range. 24-valve engine governed RPM is raised to 3,200. Electronically controlled fuel injection produces a flat torque curve from 1700-2700 RPM. In November of ’98, Dodge issues a bulletin to all dealers informing them that exhaust brakes are not approved for use with automatic transmission-equipped trucks (Issue 24, page 38). 1999 Turbo Diesel What is New: Deleted extended cab option in middle of model year. Deleted side body trim from aft of rear wheels. Electronic dash with all gauges run by computers. Models Available: 2500HD as standard cab, extended cab, quad cab, short bed, long bed, cab chassis, 4x2 and 4x4. 3500 same as above, except no short beds. Engine Ratings: Same as ‘98.5 model year. 24 valve electronic injection control 235HP 460 ft-lbs torque for manual transmissions. 24 valve electronic injection control 215HP 420 ft-lbs torque for automatic transmission. Peak torque available from 1700-2700 RPM. Transmissions: Five-speed manual NV4500HD 5th overdrive. Four-speed automatic 47RE 4th overdrive with locking converter. Six-speed manual NV5600 6th overdrive – late availability and soon withdrawn from sale. The ideal truck? How about this ‘98 Quad Cab, short box, 4x4? A Publication of the TURBO DIESEL REGISTER Maximum Tow Ratings: All configurations and axle ratios of manual transmission trucks: 20,000 GCWR. All configurations of automatic transmission trucks: 3.54 axle 16,000 GCWR, 4.10 axle 18,000 GCWR. Note: Maximum permissible trailer weight will vary by model and options. For example, 4x4 models are rated for lower maximum trailer weights than 4x2 models, and extended/ quad cab models are rated for lower maximum trailer weights than standard cab models. Highest trailer weight rating is for a 2500 regular cab 4x2 manual transmission long bed = 14,150 pounds trailer. Lowest trailer weight rating is for a 3500 quad cab 4x4 automatic transmission 3.54 axle = 9,050 pounds trailer. Cab/Chassis Models: Available in regular cab only. 2500 is 8,800 GVWR, 56” C/A dimension. 3500 is 11,000 GVWR and available in 60” and 84” C/A dimensions. Tow ratings are same as above. Comments: Six-speed transmission removed from sale due to quality control issues. Users find the 4.10 axle ratio is best for towing with the 24valve engine. 2000 Turbo Diesel What is New: Optional fold away towing mirrors. Optional automatic dimming rear view mirror. Revised front disc brakes with two piston calipers. 4 wheel anti lock brakes standard on 3500 series trucks. Added radio with CD changer controls. Changer is a dealer installed Mopar accessory. Deleted body side moldings from entire bed sides. Deleted extended cab option, leaving only the quad cab option. Anti-spin rear axle only available in 4.10 ratio. Optional 265/75R/16E Michelins on 7.5 x 16” cast aluminum wheels for all 2500 models. 3500 series standard tires are now LT235/85R/16E using steel wheels of greater offset. Models Available: 2500HD as standard cab, quad cab, short bed, long bed, cab chassis, 4x2 and 4x4. 3500: Same as above. No short bed models available. Maximum Tow Ratings: 2500 regular cab and quad cab, 4x2, both manual transmissions, both axle ratios 20,000 GCWR. 2500 regular cab and quad cab, 4x4, both manual transmissions, both axle ratios 20,000 GCWR with the exception of the quad cab 4x4 short bed 3.54 axle=16,000 GCWR; 4.10 axle=18,000 GCWR. 2500 regular cab and quad cab, 4x2 and 4x4, automatic; 3.54 axle=16,000 GCWR, 4.10 axle= 18,000 GCWR. 3500 regular cab and quad cab, 4x2 and 4x4, long bed, both manual transmissions, both axle ratios, 20,000 GCWR. All 3500 automatics: 3.54 axle=16,000 GCWR, 4.10 axle=18,000 GCWR. Cab/Chassis Models: Available in regular cab only. 2500 is 8,800 GVWR, 56” C/A (cab to axle) dimension. 3500 is 11,000 GVWR and available in 60” and 84” C/A dimensions. GCWR is same as tow ratings above. Comments: The 2000 model year Dodge truck was a production run of only three months. Effective on 1-1-2000, Dodge introduced their trucks as 2001 models. Coinciding with the 2001 pickups, Dodge introduced the 2001 PT Cruiser. For corporate average fuel economy (CAFE) criteria, the PT Cruiser is classified as a truck. We speculate the long model run of 2001 truck goes hand in hand with the higher mileage PT Cruiser, thus giving Dodge an edge in the CAFE numbers. The six speed manual transmission remained on back order all year due to high demand. Kelly Reed Engine Ratings: Same as ‘98.5/’99 model years. 235HP 460 ft-lbs torque for manual transmissions. 215 HP 420 ft-lbs torque for automatic transmissions. Transmissions: Five-speed manual NV4500HD 5th overdrive. Six-speed manual NV5600 6th overdrive. Four-speed automatic 47RE 4th overdrive with locking converter. The six-speed manual transmission has the same first and overdrive ratios as the five-speed, with an additional ratio interposed between second and fourth gears. Fifth gear is direct. A Publication of the TURBO DIESEL REGISTER Phil Putnam Examples of ‘94 - ‘02 Second Generation trucks. (TDR Member Archives) 2001 Turbo Diesel also 2001.5 models What is New: New “sport” and “off road” badges. Added child seat top tether anchors on quad cab rear seat. Four-wheel disc brakes are standard with vented rotors in rear, integral drum parking brake as a 2001.5 model. Four-wheel ABS standard, with new dynamic rear proportioning braking system as a 2001.5 model. Servoless speed control for manual transmission diesels. Forged aluminum wheel option on 2500 trucks. One touch drivers side power window down feature on SLT and + packages. New engine ratings of 235 HP/460 ft-lbs for both five-speed and automatic transmissions. New optional engine rating of 245HP/505 ft-lbs for the sixspeed transmission. Models Available: 2500HD as standard cab, quad cab, short bed, long bed, cab chassis, 4x2 and 4x4. 3500 same as above except no short beds. Engine Ratings: 235 HP 460 ft-lbs torque for five-speed manual and automatic transmissions. 245 HP 505 ft-lbs torque (HO engine) for six-speed manual transmission only. Transmissions: Five-speed manual NV4500HD 5th overdrive. Six-speed manual NV5600 6th overdrive, available only with the HO engine. Four-speed automatic 47RE 4th overdrive with locking converter. Maximum Tow Ratings: 2500 regular cab and quad cab, 4x2 and 4x4, both manual transmissions, both axle ratios, 20,000 GCWR. 3500 regular cab and quad cab, 4x2 and 4x4, both manual transmissions, both axle ratios, 20,000 GCWR. Exception: 3500 4x2 and 4x4 six-speed manual with 4.10 axle is rated at 21,500 GCWR. 2500 and 3500 regular cab and quad cab, 4x2 and 4x4 with automatic transmissions are rated 3.54 axle=16,000 GCWR, 4.10= 18,000 GCWR. Note: Maximum permissible trailer weight will vary by model and options. Highest trailer weight rating is for a 3500 regular cab 4x2 six-speed 4.10 axle= 15,150 pounds. Lowest trailer weight rating is for a 3500 quad cab 4x4 automatic 3.54 axle= 9,000 pounds. Cab/Chassis Models: Available in regular cab only. 2500 is 8,800 GVWR, 56” C/A dimension. 3500 is 11,000 GVWR and is available in 60” and 84”C/A dimensions. Tow ratings are same as above with maximum for 3500 six-speed 4.10 axle of 21,500 GCWR. Comments: The six-speed transmission remains on back order due to high demand. New disc brake rear axle and standard 4 wheel ABS greatly enhances stopping ability on ’01.5 trucks. All truck functions are increasingly controlled by computer electronics. 2002 Turbo Diesel What is New: Although the gas engine 1500 models received a whole new body and interior, the Turbo Diesel 2500 and 3500 model trucks experienced minor trim changes for this model year. Models Available: 2500HD as standard cab, quad cab, short bed, long bed, 4x2 and 4x4 models. 3500HD as standard cab, quad cab, long bed, 4x2 and 4x4 models. The 3500 cab/chassis line is discontinued. Engine Ratings: 235 HP and 460 ft-lbs torque for five-speed manual and 47RE automatic transmissions 245 HP and 505 ft-lbs torque (HO engine) for six-speed manual transmission only. Transmissions: Five-speed manual NV4500HD 5th overdrive. Six-speed manual NV5600HD 6th overdrive. Four-speed automatic 47RE 4th overdrive with locking converter. Maximum Tow Ratings: 2500 regular cab and quad cab, 4x2 and 4x4, both manual transmissions and both axle ratios, 20,000 GCWR. 3500 regular cab and quad cab, 4x2 and 4x4, both manual transmissions and both axle ratios, 20,000 GCWR. 2500 and 3500 regular cab and quad cab, 4x2 and 4x4 with automatic transmissions are rated: 3.54 axle = 16,000 GCWR, 4.10 = 18,000 GCWR. Note: Maximum permissible trailer weight will vary by model and options. Highest trailer weight ratings is for a 3500 regular cab, 4x2, six-speed manual, 4.10 axle = 15,150 pounds. Lowest trailer weight rating is for a 3500 quad cab 4x4, automatic 3.54 axle = 9,000 pounds. Cab Chassis Models: Discontinued. However commercial owners could order a “box delete” option. Comments: This is the first full model year of production of rear disc brakes with standard four-wheel antilock brakes. A Publication of the TURBO DIESEL REGISTER Third Generation 2003 Turbo Diesel What is New: All new body and cab interior layouts. It is called “Third Generation” by Turbo Diesel enthusiast. New full four-door cab option with forward hinged rear doors is still called the Quad Cab. New hydro-formed boxed frame for greater rigidity. New High Pressure, Common Rail diesel engine fuel injection system eliminates distributor-type fuel injection pump. New engine meets tighter emission control standards while offering more power. Driving axles are now supplied by American Axle in ratios of 3.73 and 4.10 to 1. The 4x2 models get new rack and pinion steering system, while 4x4 models retain recirculating ball system of previous models. All models use 17-inch wheels and tires. The 3500 model is available with either single or dual rear wheels. Models Available: 2500HD as standard cab, quad cab (full size rear doors) short bed, long bed, 4x2 and 4x4. 3500HD is available in single rear wheel and dual rear wheel versions. Dual wheel version has higher weight and towing capacities. Dual wheel version is not offered with a short box. Engine Ratings: 235 HP and 460 ft-lbs torque for 47RE automatic. The states of CA, ME, MA are only offered the 235 HP/460 ft.-lbs. engine. 250 HP and 460 ft-lbs torque for the 48RE automatic (introduced mid-year as an 03.5) and five-speed manual transmission. 305 HP and 555 ft-lbs torque high output (HO) engine with six-speed manual only. Transmissions: Five-speed manual NV4500HD 5th overdrive only with standard engine. Six-speed manual NV5600HD 6th overdrive only with HO engine. In the first half of the 2003 model year the four-speed automatic 47RE 4th overdrive with locking converter only with standard engine. In January of 2003 Dodge released the 48RE automatic transmission 4th overdrive with locking converter Maximum Tow Ratings: 2500 regular cab and quad cab, 4x2 and 4x4, five-speed, 250 hp engine: ▪ 3.73 differential – 19,000 GCWR/18,000 GCWR for the states of CA, ME, MA. ▪ 4.10 differential – 20,000 GCWR. 2500 regular cab and quad cab, 4x2 and 4x4, 47RE automatic transmission, 235 hp engine: A Publication of the TURBO DIESEL REGISTER ▪ 3.73 differential – 18,000 GCWR/17,000 GCWR for the states of CA, ME, MA. ▪ 4.10 differential – 20,000 GCWR/19,000 GCWR for the states of CA, ME, MA. 2500 regular cab and quad cab, 4x2 and 4x4, six-speed or 48RE automatic transmission. 3.73 or 4.10 differential, High Output/305 hp engine – 20,000 GCWR. 3500 regular cab and quad cab, 4x2 and 4x4, five-speed, 250 hp engine, single or dual rear wheels: ▪ 3.73 differential – 19,000 GCWR/18,000 GCWR for the states of CA, ME, MA. ▪ 4.10 differential – 21,000 GCWR/20,000 GCwr for the states of CA, ME, MA. 3500 single or dual wheels, regular cab and quad cab, 4x2 and 4x4, 47RE automatic transmission, 235 hp engine: ▪ 3.73 differential – 18,000 GCWR/17,000 GCWR for the states of CA, ME, MA. ▪ 4.10 differential – 20,000 GCWR/19,000 GCWR for the states of CA, ME, MA. 3500 regular cab and quad cab, 4x2 and 4x4, six-speed or 48RE transmission, High Output/ 305 hp engine: ▪ 3.73 differential – 21,000 GCWR. ▪ 4.10 differential – 23,000 GCWR. Summary: Varies with model and options. Maximum tow rating is a 3500 series with standard cab, long bed, manual transmission, 4x2, 4.10 axle ratio = 23,000 GCWR. Cab/Chassis Models: Not ofered by the factory. However, commercial owners could order a “box delete” option. Comments: This all-new body and cab interior layout also features options not previously offered. American rear axle features a larger ring and pinion set for greater strength and durability. New body gets new exterior paint colors and new interior upholstery colors and options. Cummins badging is moved form front doors to front fender edges near bumper. At mid-year the 47RE automatic transmission was discontinued. The 305 hp High Output engine was matched to a NV5600 six-speed manual transmission and a new 48RE automatic transmission. Dawna Eickhoff A ‘03-newer Third Generation truck. (TDR Member Archives) 2004 Turbo Diesel also 2004.5 models What is New: See 2003 model for description of new body and frame. Minor trim and color changes. 2004 model engine ratings and transmission choices are different for California, Maine, Massachusetts, New York and Vermont. These states were given the 235 HP/460 ft-lbs engine only.. At mid-year the 2004.5 engine with 325 HP and 600 ft-lbs torque is released. With it mid-year introduction this engine is now the only engine offered (50-state certified). Five-speed manual transmission is not offered in 2004.5 models with 325/600 engine. 2004.5 model is offered with uprated 48RE automatic transmission. 3500 Quad Cab, short bed now offered. 7/70 powertrain warranty, 7/100,000 Cummins engine warranty. Models Available: 2500HD as standard cab, quad cab, short bed, long bed, 4x2 and 4x4. 3500HD same as above. The dual wheel 3500 is not offered with a short box. Engine Ratings: The 2004 engine is 305 HP and 505 ft-lbs and is available with six-speed manual and 48RE automatic. The states of CA, ME, MA, NY, VT are only offered the 235 HP/460 ft-lbs engine for the first half of the year. The 2004.5 engine is 325 HP and 600 ft-lbs torque as standard with no optional engine. Offered only with sixspeed manual or 48RE automatic. Transmissions: Early 2004 models for California, Maine, Massachusetts,New York and Vermont: five-speed manual, NV4500HD 5th overdrive. All other states: six-speed manual, NV5600HD 6th overdrive. Four-speed automatic 48RE 4th overdrive with revised torque converter lockup clutch programming. Differential Ratios Offered: 3.73 and 4.10 to 1 Maximum Tow Ratings: 2500 rugular cab and quad cab, 4x2 and 4x4, 235 HP/460 ft-lbs torque engine in the states of California, Maine, Massachusetts, New York and Vermont: ▪ five-speed, 3.73 differential – 18,000 GCWR ▪ five-speed, 4.10 differential – 20,000 GCWR ▪ 48RE automatic, 3.73 differential – 17,0000 GCWR ▪ 48RE automatic, 4.10 differential – 19,000 GCWR All other states with the 305 HP/505 ft-lbs engine or the 2004.5 325 HP/600 ft-lbs engine (all states approved) were shown to have a 20,000 GCWR regardless of transmission or axle ratio. 3500 single or dual wheels, regular cab and quad cab, 4x2 and 4x4, 235 HP/460 ft-lbs torque engine in the states of California, Maine, Massachusetts, New York and Vermont: 10 ▪ five-speed, 3.73 differential – 18,000 GCWR ▪ five-speed, 4.10 differential – 20,000 GCWR ▪ 48RE automatic, 3.73 differential – 17,000 GCWR ▪ 48RE automatic, 4.10 differential – 19,000 GCWR All other states with the 305 HP/505 ft-lbs engine or the 2004.5 325HP/600 ft-lbs engine (all-states approved), with either an automatic transmission or six-speed: ▪ 3.73 differential – 21,000 GCWR ▪ 4.10 differential – 23,000 GCWR Summary: Varies by model and options. Maximum is quad cab or standard cab 4x2, six-speed manual, 4.10 axle ratio, 4x2 = 23,000 GCWR. Cab Chassis Models: Not offered by the factory. Howeve,r commercial owners could order a “box delete” option. Comments: The 2004 model year was an exciting one for Dodge/ Cummins fans. At year end, the bragging rights to the most powerful diesel engine belonged to Ram owners with an engine certification of 325 HP/610 ft-lbs torque. It is interesting to watch as the horsepower race continues. 2005 Turbo Diesel What is New: Polished aluminum wheel replaces the painted aluminum sheel on 2500/3500 SRW models. Optional on the Quad Cab are a power sunroof and satellite radio. The Cummins 325/600 engine was voted one of the “10 Best Engines” by Ward’s Models Available: 2500HD as standard cab, quad cab, short bed, long bed, 4x2 and 4x4. 3500HD same as above. The dual wheel 3500 is not offered with a short box. Engine Ratings: For 2005 the only rating offered is 325 HP and 610 ft-lbs torque. The engine is 50-state approved. Transmissions: Throughout the 2005 model year the New Venture NV5600, six-speed manual was replaced by a Mercedes Benz designed G56 six-speed manual transmission. The reason for the change: New Venture Gear was a joint venture company between DaimlerChrysler and GM. In December of 2002 the partnership was disolved and New Venture was/is wholly owned by GM. The ratios of the NV5600 versus the G56 are shown below: 1 2 3 4 5 6 R G56 6.29 3.48 2.10 1.38 1.0 .79 5.74 NV5600 5.63 3.38 2.04 1.39 1.0 .73 5.63 The automatic transmission remained the 48RE. Differential Ratios Offered: 3.73 and 4.10 to 1 A Publication of the TURBO DIESEL REGISTER Maximum Tow Ratings: In the 2005 Ram Truck brochure the factory simply lists payload and towing weights. With the previous GCWR numbers we’ve used, the reader knows that the maximum trailer weight plus weight of the truck equals the GCWR. Effectively, the heavier the truck is, the less the trailer can weigh to not exceed the GCWR. The 2005 brochure does not list truck weight or the TDR would do-the-math inorder to present consistant data to you. The data we have is presented below: 2005 Payload and Towing Maximums 2500 Regular Cab 4x2 Regular Cab 4x4 Quad Cab 4x2 Quad Cab 4x4 3500 Regular Cab 4x2 Regular Cab 4x4 Quad Cab 4x2 Quad Cab 4x4 Payload Trailer Weight 2740 2340 2520 2230 13,600 13,200 13,350 13,100 4910 5200 4550 4840 16,250 15,850 16,300 15,950 Cab Chassis Models: Not offered by the factory. However, commercial owners could order a “box delete” option. 2006 Turbo Diesel This 6.7 liter engine will be used in the pickup trucks in 2007 as it was designed to meet the tighter 2007 emissions regulations. Models Available: 2500HD as standard cab, quad cab, short bed, long bed, 4x2 and 4x4. 3500HD same as above. The dual wheel 3500 is not offered with a short box. The Mega Cab is offered only with a short box. With the dual rear wheel/3500 Mega Cab, Dodge had to introduce a short box option. Engine Ratings: Again, for 2006 the only engine offered is the 50-state approved, 325 HP and 610 ft-lbs torque Cummins Turbo Diesel. The Chassis Cab gets the 6.7 liter Cummins engine rated at 305 HP and 610 ft-lbs torque. Transmissions: Consumer pickup models 2500 and 3500 – no changes from 2005 Commercial Cab and Chassis 3500 – G56, six-speed manual transmission (same as consumer pickup), Aisin AS68RC, six-speed automatic transmission The Aisin internal gear ratios are as follow: Aisin AS68RC 1 2 3 4 5 3.74 2.00 1.34 1.00 .77 6 .63 What is New: In the fall of 2005, Dodge introduces the Mega Cab as a 2006 model. Although it has four doors, the current Quad Cab has always been seen by Dodge as an extended cab model. Differential Ratios Offered: 3.73 and 4.10 to 1 As its entry into the crew cab marketplace, the Dodge Mega Cab boastfully features the following largest/best-in-class attributes: ▪ Largest, longest cab – 143.2 cubic feet, 111.1 inches long ▪ Largest interior cargo valume – 72.2 cubic feet ▪ Largest cargo volumne behind rear seat – 7.7 cubic feet ▪ Largest flat floor load area – 16.8 square feet ▪ Largest second-row leg room – 44.2 inches ▪ Largest rear-door opening – 34.5 inches wide, 35.5 inches tall ▪ Largest rear-door open angle – 85 degrees ▪ First-ever reclining rear seats – 22 to 37-degree seatback angle In the Chassis Cab model 3500 both the 3.73 and 4.10 are available with the G56 manual transmission. The 4.10 is the only axle ratio offered with the Aisin AS68RC automatic transmission. Going hand-in-hand with the Mega Cab introduction, Dodge redesigned the interior dash and seats. A minor facelift to the truck’s headlights, bumper and grill were a part of the 2006 introduction. In the spring of 2006 dodge introduced the Chassis Cab truck for commercial markets. The truck started production in the summer months and was officially known as a 2007 model. The engine for the Chassis Cab was a new 6.7-liter Cummins Turbo Diesel. A Publication of the TURBO DIESEL REGISTER Both the 3.73 and 4.10 are offered in consumer pickup models 2500 and 3500. Maximum Towing Capacities: With the single power offering of 325 HP/610 ft-lbs torque the GCWR towing capacities are simplified. The numbers below are for regular, Quad and Mega Cab trucks. 2500 Manual or Automatic transmission with a 3.73 differential – 20,000 2500 Automatic transmission, 4.10 differential – 20,000 3500 Automatic transmission, 3.73 differential – 21,000 3500 Automatic transmission, 4.10 differential – 23,000 3500 Manual transmission, 3.73 differential – 23,000 Chassis Cab Models: Introduced in March of 2006 the Commercial Chassis Cab trucks are initially available as a 3500 series truck. The 3500 series truck is available in single or dual rear wheels (SRW/ DRW). The truck is available in both regular cab and Quad Cab configurations. The regular cab can be purchased with a 60-inch cab-to-rear axle length or a 84-inch cab-to-axle. The Quad Cab can only be purchased with a 60-inch cabto-rear axle length. 11 2007 Turbo Diesel What is New: New headlight design. New rear taillamps Mid-year introduction (2007.5) of Cummins 6.7 liter engine in consumer pickup models 2500 and 3500. Mid-year introduction of a Chrysler-supplied 68RE, six-speed automatic transmission. Mid-year introduction (February 2007) of commercial Chassis Cab models 4500 and 5500. Models Available: Same as 2006. 2500HD as standard cab, quad cab, short bed, long bed, 4x2 and 4x4. 3500HD same as above. The dual wheel 3500 is not offered with a short box. The Mega Cab is available in the 2500 or 3500 single rear wheels, or 3500 dual rear wheels. It is only offered with a short cargo box. Chassis Cab Models: The Commercial Chassis Cab trucks are initially available as a 3500 series truck. The 3500 series truck is available in single or dual rear wheels (SRW/DRW). The truck is available in both regular cab and Quad Cab configurations. The regular cab can be purchased with a 60-inch cab-torear axle length or a 84-inch cab-to-axle. The Quad Cab can only be purchased with a 60-inch cab-to-rear axle length. Engine Ratings: For early ‘07 models, 325 HP and 610 ft-lbs for consumer pickup models 2500 and 3500. This is a carry-over of the Cummins 5.9 liter engine. The 2007.5 consumer pickup models 2500 and 3500 received the Cummins 6.7 liter engine rated at 350 HP and 650 ft-lbs torque with the automatic transmission, 350HP and 610 ft-lbs torque with the manual transmission. 305 HP and 610 ft-lbs for commercial Chassis Cab 3500 models using the Cummins 6.7 liter engine. The 4500 and 5500 trucks are introduced with the same engine and engine ratings as the 3500 Chassis Cab. Transmissions: For early 2007 the consumer pickup models 2500 and 3500 used the existing G56, six-speed manual transmission and 48RE, four-speed manual transmission. With the mid-year (2007.5) introduction of the 6.7 liter engine the automatic transmission was revised to a Chrysler-supplied 68RFE, six-speed unit. 48 RE Versus 68RFE Gear Ratio Comparison 1 2 3 4 48RE 2.45 1.45 1.0 .69 ‘03.5-‘07 ‘07.5-newer 68RFE 3.23 1.84 1.41 1.00 5 6 .82 .63 With the mid-year (2007.5) introduction of the 6.7 liter engine the manual transmission (the Mercedes Benz designed G56 six-speed unit) was revised. In order to 12 raise the overall gear ratios in the manual transmission the redesign dropped a tooth on the input shaft. The resulting gear ratios are as follow. G56 Versus G56R Gear Ratio Comparison 1 2 3 4 5 6 G56 6.26 3.48 2.10 1.38 1.00 .79 ‘05-‘07 ‘07.5-newer G56R 5.94 3.28 1.98 1.31 1.00 .74 Commercial Cab Chassis – no changes from 2006: G56R, six-speed manual transmission and Aisin AS68RC, sixspeed automatic transmission. Maximum Towing Capacities: Again in 2007, with the single power offering of 325 HP/610 ft-lbs torque the GCWR towing capacities are simplified. The numbers below are for regular, Quad and Mega Cab trucks. 2500 Manual or Automatic transmission with a 3.73 differential – 20,000 2500 Automatic transmission, 4.10 differential – 20,000 3500 Automatic transmission, 3.73 differential – 21,000 3500 Automatic transmission, 4.10 differential – 23,000 3500 Manual transmission, 3.73 differential – 23,000 2008 Turbo Diesel What is New: Introduced to the public in February 2007 at the Chicago Auto Show, the Chassis Cab models 4500 and 5500 were officially known as 2008 model trucks. These Chassis Cab trucks share the same powertrain as the 3500 truck that was introduced in March of 2006. For the 4500 and 5500 trucks the differentials are larger. The front axle is made by Magna, the rear axle is made by Dana. Available gearing for the 4500: 4.10 and 4.44 to 1 for the manual transmission 4.44 and 4.88 to 1 for the automatic transmission Available gearing for the 5500: 4.44 and 4.88 to 1 for the manual transmission 4.88 to 1 for the automatic transmission Models Available: Same as 2006 and 2007 2500 HD as standard cab, quad cab, with short bed or long bed in 4x2 and 4x4 configurations. 3500 HD same as above, although the dual wheel 3500 is not offered wiith a short box. The Mega Cab is available in the 2500 or 3500 single rear wheels, or 3500 dual rear whels. It is only offered with a short cargo box. Chassis Cab Models: The 3500 is available in single or dual rear wheels The 4500 and 5500 are dual rear wheels. All three Chassis Cabs are available with a regular cab or Quad Cab configuration. A Publication of the TURBO DIESEL REGISTER With the 3500, the regular cab can be purchased with a 60-inch cab-to-rear axle length or a 84-inch cab-to-axle length with single or dual rear whels (SRW/DRW). The 3500 Quad Cab can only be purchased with the 60-inch cab-to-rear axle lenth with SRW or DRW. The 4500 and 5500 trucks are only offered with dual rear wheels. These trucks allow regular cab or Quad Cab cabins to be used with the 60-inch or 84-inch cab-to-axle length. Engine Ratings: Same as 2007 For 2008 the engine ratings for the Cummins 6.7-liter engine in consumer pickup models 2500 and 3500 remained the same as they were when the engine was introduced in January of 2007: 350 HP and 650 ft-lbs of torque with the automatic transmission and 350 HP and 610 ft-lbs of torque with the manual transmission. The engine ratings for the Cummins 6.7-liter engine in the Chassis Cab models 3500, 4500 and 5500 remained the same as they were when the engine was introduced in the first Chassis Cab 3500 model in March of 2006: 305 HP and 610 ft-lbs or torque. Transmissions: In the consumer pickup models 2500 and 3500 the automatic and manual transmission are the same as those used in the ‘07.5 introduction of the Cummins 6.7-liter engine in January of 2007. The nomenclature for the automatic transmission is the 68RFE; the nomenclature for the manual transmission is G56R. The gear ratio comparison chart is found in the “2007 Turbo Diesel” write-up. Commercial Chasis Cab models 3500, 4500, 5500 get the revised G56R manual transmission. The Aisin AS68RC six-speed automatic transmission is the same as the initial ofering of the first Chassis Cab 3500 model in March of 2006. Maximum Towing Capacities: In the 2008 Ram Truck brochure the factory has gone back to the rating guidelines that they used in 2005 whereby they simply list the payload and towing weights. With previous GCWR numbers the reader knows the maximum trailer weight plus the weight of the truck equals the GCWR. Effectively, the heavier the truck is, the less the trailer can weigh in order to not exceed the GCWR. The 2008 brochure does not list the truck weight or the TDR would do-the-math in order to present consistant data to you. The data we have from the 2008 brochure is presented below: 2500 Regular Cab 4x2 Regular Cab 4x4 Quad Cab 4x2 Quad Cab 4x4 Mega Cab 4x2 Mega Cab 4x4 Payload Trailer Weight 2,680 2,270 2,520 2,070 2,050 1,520 13,550 13,100 13,350 12,900 12,850 12,350 3500 (DRW equipped/4.10 axle) Regular Cab 4x2 4,790 Regular Cab 4x4 5,120 Quad Cab 4x2 4,480 Quad Cab 4x4 4,780 Mega Cab 4x2 3,200 Mega Cab 4x4 2,770 16,150 16,750 16,150 16,750 15,550 16,100 2009 Turbo Diesel What is New: Although the Dodge Ram 1500 model received a new body and interior, the Turbo Diesel 2500 and 3500 consumer pickups and 3500, 4500, 5500 Chassis Cab trucks saw only minor trim revision sin this carryover/transitional model year. Models Available: Same as 2006, 2007, and 2008 2500 HD as standard cab, quad cab, with short bed or long bed in 4x2 and 4x4 configurations. 3500 HD same as above, although the dual wheel 3500 is not offered wiith a short box. The Mega Cab is available in the 2500 or 3500 single rear wheels, or 3500 dual rear whels. It is only offered with a short cargo box. Chassis Cab Models: Same as 2008. The 3500 is available in single or dual rear wheels The 4500 and 5500 are dual rear wheels. All three Chassis Cabs are available with a regular cab or Quad Cab configuration. With the 3500, the regular cab can be purchased with a 60-inch cab-to-rear axle length or a 84-inch cab-to-axle length with single or dual rear whels (SRW/DRW). The 3500 Quad Cab can only be purchased with the 60-inch cab-to-rear axle lenth with SRW or DRW. The 4500 and 5500 trucks are only offered with dual rear wheels. These trucks allow regular cab or Quad Cab cabins to be used with the 60-inch or 84-inch cab-to-axle length. A Mega Cab/Long Bed...where did this truck come from? A Publication of the TURBO DIESEL REGISTER 13 Engine Ratings: Same as 2007and 2008. In consumer pickup models 2500 and 3500: 350 HP and 650 ft-lbs of torque with the automatic transmission and 350 HP and 610 ft-lbs of torque with the manual transmission. The engine ratings for the Cummins 6.7-liter engine in the Chassis Cab models 3500, 4500 and 5500 remained the same when the engine was introduced in 2006: 305 HP and 610 ft-lbs or torque. Transmissions: In the consumer pickup models 2500 and 3500 the automatic and manual transmission are the same as those used in the ‘07.5 and ‘08. The nomenclature for the automatic transmission is the 68RFE; the nomenclature for the manual transmission is G56R. The gear ratio comparison chart is found in the “2007 Turbo Diesel” write-up. Commercial Chasis Cab models 3500, 4500, 5500 use the same G56R manual transmission and Aisin AS68RC sixspeed automatic transmission. Engine Changes for 2009: Starting in ’02, the heavy duty trucks introduction has followed the Dodge Ram 1500 by one year. The model year 2009 heavy duty trucks are no exception, they continue with the same cab and chassis design. As you can expect there are only a few subtle changes to the engine. These changes are: Maximum Towing Capacities: No changes from the listing chart for 2008. • Access port on the turbocharger’s exhaust housing that allows for exhaust turbine cleaning as needed. • Revised stamped steel alternator bracket. • Revised coolant hoses and O-ring fittings for the plumbing that goes to cool the exhaust gas recirculation heat exchanger. • Revised fuel filter assembly that features a dual filter with greater filter area to strip away water as well as a secondary fuel filter with a smaller 5-micron rating. (The current fuel filter is 7-micron). The new fuel filter was released for production in January and the part can be retrofitted to the ’07.5 to early ’09 engines. Service parts for these engines will likely be released in May. • Revised water inlet housing. 14 Engine Data, Please Publishing the past and present ratings for your Turbo Diesel is as easy as making a chart. The horsepower and torque numbers make good copy, but you’ll note from the chart on the next page that there are two additional columns, “CPL and Comments.” The comments column is self explanatory. CPL is a Cummins abbreviation that stands for “control parts list.” The CPL provides a comprehensive breakdown of performance hardware, i.e. pistons, turbo, camshaft, injectors, and fuel pump that were used in the engine build. The CPL number along with the Cummins engine serial number will help your Cummins parts professional should you need engine hardware. A Publication of the TURBO DIESEL REGISTER Your Notes: A Publication of the TURBO DIESEL REGISTER 15 Your Truck and the Boost Treadmill Inside a turbocharger, exhaust gases flow out of the combustion chambers into the turbine housing. The exhaust gas is channeled to the pin wheel, causing the pin wheel “turbine” to rotate. Boost specifications: The TDR magazine has often been criticized for being too technical, I should take an opportunity to explain why the maximum boost specification is important to an owner. The turbine wheel turns a common shaft which is connected to a pin wheel on the fresh air side of the turbocharger, known as the “compressor.” I searched the archives for an easy-to-understand article on turbocharger boost. The following is a quick review of turbocharger basics. TURBO BASICS The principle behind a turbocharger is simple: get more power from the engine without increasing the engine’s size. To increase engine power, you start by adding more and more fuel. But soon, you’d be wasting fuel, because the fuel needs air to burn. Technically, it needs the oxygen in the air to burn. In a naturally aspirated engine, the air is pulled from the atmospheric pressure surrounding the engine into the combustion chamber on the intake stroke of the cycle. At sea level there are .016 pounds of oxygen per cubic foot. At higher altitudes, air is thinner and there’s less oxygen. For example, at 5,000 feet there’s only .010 pounds of oxygen per cubic foot. So, at higher altitudes there’s a greater demand for air to supply an engine with oxygen. A turbocharger is the solution. In the simplest of analogies, think of a turbocharger as two pinwheels connected, back-to-back, via a common shaft. As you blow on one wheel, the other wheel turns too. 16 The compressor wheel blades draw filtered air into the compressor housing, raising the air’s density and pressure, as the air is forced into the engine. More air mixed with more fuel equals more power. As you add air/fuel to the engine it makes more power. The temperature and flow of the exhaust gas increases. With the increased exhaust flow and temperature, the exhaust pin wheel (turbine) spins faster. Thus, the intake pin wheel (compressor) pressurizes (boosts) more air into the engine. More air/fuel to the engine makes more power, creates additional exhaust flow and temperature... Get the picture? BOOST DIAGNOSTICS How can we use the engine’s “boost” to diagnose engine performance? There are specifications for boost for the various engines which have been and are in current production. Keep in mind that it takes fuel and air to make power and boost. If the engine meets the boost specification, the power is there and it passes the “Boost Treadmill test.” At this juncture it is tempting to generalize the data. However, I’ll avoid the temptation and research the boost specification for a given engine build or, in Cummins-speak, control parts list (CPL). The Cummins CPL is a number that spells out key components (fuel pump settings, turbochargers, cylinder heads, pistons, etc.) used in the engine. The following detailed table presents the data. Model Year HP@RPM Torque @RPM CPL Transmission Comments Boost Specification ‘89 – ‘91 160@2500 400@1600 804 Auto/Manual 22-25 ‘91.5 – ‘92 160@2500 400@1600 1351 Auto/Manual Mid-year intercooler 15-19 ‘92.5 – ’93 160@2500 400@1600 1579 Auto/Manual Mid-year change 15-19 ‘94 12-Valve 160@2500 400@1600 1815 Auto 15-18 175@2500 420@1600 1816 Manual 15-18 ‘94.5 12-Valve 160@2500 400@1600 1549 Auto Mid-year catalyst 15-18 175@2500 420@1600 1550 Manual Mid-year catalyst 15-18 ‘95 12-Valve 160@2500 400@1600 1959 Auto 15-18 175@2500 420@1600 1550 Manual 15-18 A Publication of the TURBO DIESEL REGISTER Model Year HP@RPM Torque @RPM CPL Transmission Comments Boost Specification ‘95.5 12-Valve 160@2500 400@1600 1968 Auto mid-year change 15-18 175@2500 420@1600 1550 Manual mid-year change 15-18 180@2500 420@1600 2022 Auto EPA 19 215@2600 440@1600 2023 Manual EPA 25 180@2500 420@1600 1863 Auto/Manual CARB-Catalyst and EGR 19 180@2500 420@1600 2174 Auto EPA 19 215@2600 440@1600 2175 Manual EPA 25 180@2500 420@1600 2308 Auto/Manual CARB-Catalyst and EGR 19 215@2700 420@1600 2098/2513 Auto EPA 18 2280/2515 Auto CARB 18 2024/2512 Manual EPA 18 2279/2514 Manual CARB 18 2617 EPA 18 CARB 18 EPA 18 CARB 18 EPA 18 CARB 18 EPA 18 CARB 18 EPA 19.5 CARB 19.5 EPA 19.5 CARB 19.5 EPA 19.5 CARB 19.5 EPA 19.5 CARB 19.5 EPA 19.5 CARB 19.5 EPA 19.5 CARB 19.5 CARB – Catalyst equipped 23 ‘96 12-Valve ‘96.5 – ‘98 12-Valve ‘98.5 24-Valve ‘99 24-Valve ‘00 24-Valve 235@2700 420@1600 215@2700 420@1600 235@2700 460@1600 215@2700 420@1600 235@2700 460@1600 2619 2616 2618 2660 2661 2662 2663 2865/2902 ‘01 24-Valve 235@2700 460@1600 2866/2903 2496/2904 2497/2905 245@2700 505@1600 2415/2906 2495/2907 8030 ‘02 24-Valve ‘03 5.9 HPCR 235@2700 460@1600 8031 8032 8033 235@2700 505@1600 235@2700 460@1400 250@2900 460@1400 305@2900 555@1400 A Publication of the TURBO DIESEL REGISTER 8034 8035 Auto Manual Auto Manual Auto 5 Manual 6 Manual Auto 5 Manual 6 Manual 8216 47RE Auto 8224 5 Manual 2624 48RE Auto 8223 5 Manual “ “ 23 2998 6 Manual “ “ 26 “ “ EPA – Non-Catalyst “ 23 23 17 Model Year ‘03 5.9 HPCR ’03.5 5.9 HPCR ‘04 5.9 HPCR ’04.5 5.9 HPCR HP@RPM Torque @RPM 235@2700 460@1400 250@2900 460@1400 305@2900 555@1400 235@2700 460@1400 250@2900 460@1400 305@2900 555@1400 235@2700 460@1400 305@2900 555@1400 325@2900 600@1600 CPL Transmission Comments Boost Specification 8216 47RE Auto 23 8224 5 Manual 2624 47RE Auto 8223 5 Manual “ “ 23 2998 6 Manual “ “ 26 8410 48RE Auto 8412 5 Manual 8212 48RE Auto 8226 5 Manual “ “ 23 8228 6 Manual “ “ 26 8213 48RE Auto “ “ 26 8412 48RE Auto 8412 6 Manual 8213 48RE Auto 8228 6 Manual 8350 6 Manual 8351 8346 8347 8423 ’05 5.9 HPCR 325@2900 610@1600 8424 8421 8422 8348 ’06 5.9 HPCR 325@2900 610@1600 8349 8344 8345 1091 ’07 5.9 HPCR 325@2900 610@1600 1095 1000 1083 ’07.5 6.7 HPCR ’07.5 6.7L Cab/ Chassis 18 610@1600 350@3000 650@1600 8233 8234 8230 8231 8232 305@2900 610@1600 1264 2885 1257 “ 48RE Auto “ 6 Manual “ 48RE Auto “ 6 Manual “ 48RE Auto “ 6 Manual “ 48RE Auto “ 6 Manual “ 68RFE Auto “ 6 Manual “ Aisin Auto “ CARB – Catalyst equipped “ “ “ EPA – Non-Catalyst 23 CARB – Catalyst equipped “ “ “ EPA – Non-Catalyst “ “ EPA – Non-Catalyst “ “ 23 23 23 CARB – Catalyst equipped “ 23 23 23 26 “ 26 EPA – Catalyst equipped 30 CARB “ “ 30 EPA “ “ 30 CARB “ “ 30 EPA – Catalyst equipped 30 CARB “ “ 30 EPA “ “ 30 CARB “ “ 30 EPA – Catalyst equipped 30 CARB “ “ 30 EPA “ “ 30 CARB “ “ 30 EPA – Catalyst equipped 30 CARB “ “ 30 EPA “ “ 30 CARB “ “ 30 EPA 28* CARB 28* EPA 28* CARB 28* EPA 26* CARB 26* EPA 26* CARB 26* A Publication of the TURBO DIESEL REGISTER Torque @RPM CPL Transmission Comments Boost Specification 610@1600 1489 6 Manual All Certifications 28* 650@1600 1490 68RFE Auto All Certifications 28* 8235 6 Manual All Certifications 26* 2886 Aisin Auto All Certifications 26* 610@1600 1489 6 Manual All Certifications 28* 650@1600 1490 68RFE Auto All Certifications 28* 2780 6 Manual All Certifications 26* 2775 Aisin Auto All Certifications 26* 2779 6 Manual All Certifications 26* 2774 Aisin Auto All Certifications 26* Model Year HP@RPM ’08 6.7 HPCR 350@3000 ’08 Cab/ Chassis 305@2900 ’09 6.7 HPCR 350@3000 ’09 3500 Cab/ Chassis 305@2900 610@1600 ’09 45005500 Cab/ Chassis 305@2900 610@1600 610@1600 *The boost numbers for the ‘07.5 and newer 6.7 liter engine applications are approximate. There can be variance based on the amount of exhaust gas recirculation in the intake air, the intake thro the opening and variable geometry turbocharger’s position. As a side note, did you notice how uncluttered the table was in the early years? Compliance with emissions leglislation can make things complicated. Now that you have the specifications in hand—wait a minute, you don’t have a boost gauge? This instrument is easy to source, relatively cheap ($40-$60) and easy to install. The majority of gauges on the market are mechanical devices that do not require electricity to operate. To put a gauge in, one can use a “boost bolt” to access the pressurized intake air. How did your truck perform on the boost test we suggested? If your truck didn’t seem up-to-par there are several simple checks you can do before you take the truck to a service location. The following are some of the do-it-yourself areas to check: • Check for quality of fuel. • Check for full travel of the throttle lever at the fuel pump. • Check all turbo to intercooler, intercooler to intake manifold hoses and clamps for a tight fit. • Check the condition of your fuel filter. • Check for fuel inlet restriction. • Check the condition of your air filter. • Check for exhaust leaks prior to turbocharger. • Check for exhaust system restriction. • For automatic trucks, check your transmission fluid level. Hopefully our discussion on boost specifications and the use of turbo boost as a diagnostic tool will help you to ensure the best performance of your truck. Happy motoring. As mentioned, with a gauge installed you can use the boost readings as a diagnostic check of the engine’s performance. The engine will need to see a full throttle, loaded condition in order to make its maximum boost number. The easiest way to do this is to drive the truck up a hill. No hills in Kansas? Apply the brakes to load the engine. A Publication of the TURBO DIESEL REGISTER Robert Patton TDR Staff 19 Buying a Used Truck By Jim Anderson When you buy a new truck, you are protected by a manufacturer’s warranty and the integrity of the dealer from whom you purchase. When buying a used vehicle, you are much less protected by the law and frequently will have no warranty from a manufacturer to fall back on in case of a problem. Therefore you must be much more careful in inspecting your intended purchase. The benefits to the used truck purchase: the vehicle cost is less than new, used trucks typically have had the “new vehicle” bugs fixed, and they represent greater value for the dollar since the initial depreciation has already been taken by the first owner. A whole market has sprung up in the last few years for used Dodge/Cummins Turbo Diesel trucks, fueled in part by the high cost of a new one, and by the fact that even trucks with high mileage have lots of life left in them due to the legendary reliability and durability of the Cummins diesel. This has had a side benefit in that used Dodge/Cummins trucks have retained a greater percentage of their resale value than the average for all diesel trucks, and they command high prices on used vehicle lots. This means you may pay more for your truck but will get more for it when you eventually become a seller. A well maintained truck with high mileage should not be disregarded as a good value, since with good regular maintenance these trucks can reliably run half a million miles and more! Vehicle purchasing can be divided into two parts. One is buying the metal, and the other is buying the money used for the purchase. Your goal as a used truck purchaser is to get both parts right. How do you select just the right truck, and how do you make sure it has been well maintained? You surely don’t want to buy a “lemon” when an engine can cost upwards of $7,000, a new transmission can cost upwards of $3,500, and a P7100 rebuilt injection pump can cost you $1,400. Here are some buying tips to help you find just the right one for you! Keep in mind that this is likely the second largest purchase you’ll ever make, second only to a home. Some folks spend more on their transportation in their lifetime than they spend on housing. While you may live in one place your entire life, the average owner trades vehicles once every five years. Every dollar saved on the purchase price of either a home or a vehicle will also save on interest dollars paid back if you are getting a loan. So a dollar saved may actually amount to as much as $1.25 over the life of the loan. Inform Yourself Before you ever set foot on a dealer lot or peruse the want ads, take the time to familiarize yourself with the various models and options offered by the manufacturer, and see how they match your intended use. Narrow your search down to those models and model years which fit your budget and which will do the intended job. Select only those models with the options you want. Make a list of specifications, keep it with you during your search, and keep to your list. 20 For example, if you determine you want a truck for hauling and towing, but want an extended cab model with SLT interior, do the research to find which models and options are required to tow the intended weight, then stick to inspecting trucks which meet those criteria. Your familiarization session will lead you to ask the right questions when you visit the dealer lot or make contact with private sellers. Next, check the used vehicle value guides. Most banks and other agencies that make car loans will have a variety of used vehicle value guides such as the Kelly Blue Book or NADA book that list wholesale, retail, and loan values for each model, each accessory, and offer mileage compensation factors. These books are filled with option facts and regional pricing, so can serve as a useful guide to true worth. For those with a computer, walk your fingers across a computer keyboard and visit the various web sites that offer needed information. These include Kelly Blue Book (kbb.com), NADA used truck guide (NADA.com), carprice.com, edmunds.com, and others. The dot com sites often track actual prices paid for trucks in your area or in a nearby metropolitan area. If you want to research a particular truck, web sites exist that allow you to check a particular serial numbered truck for lost, stolen, totaled, reconstructed, etc, titles (carfax. com) for a nominal fee. You can also determine if a vehicle has been included in federal safety recalls by visiting several other sites. Mining information from the web can be rewarding, though time consuming, but the more thorough your research at this stage, the more informed you will become as a buyer. Now is also the time to make a call to your automobile insurance agent for a rate quote to make sure there are no after-the-purchase unpleasant surprises in this part of truck ownership. If you plan to get a loan for the vehicle, now is also a good time to shop around for the best interest rate and payment plans, and to get approval for the loan. It is as important to shop for the cost of money as it is to negotiate a good price for the truck. After you have done your research, then it is finally time to go looking for just the right truck! You now have a pretty good idea of what you want, what you might have to pay, and how you’re going to pay for it. My advice is to buy the latest model truck with the lowest mileage that you can afford. The newer the truck, the lower the maintenance and repair costs are likely to be over time. Look for a well-maintained “cream puff.” They’re out there, but it is up to you to find them. Inspection Time In looking at a used vehicle, don’t be dazzled by surface shine. Look behind the shine to uncover a vehicle’s true condition. Look at the truck’s overall cleanliness. There is A Publication of the TURBO DIESEL REGISTER a difference in appearance between a good cleanup job and continuous regular cleaning over the truck’s life to the present. Look at the interior for worn carpets and upholstery. (The editor’s favorite place to check for attention to detail cleanliness—the door jambs. A clean door jamb typically indicates a vehicle that has been fanatically maintained.) Wear should be commensurate with mileage. Look underneath the body for caked mud and dirt. This indicates off-road operation or an unintentional trip into the ditch. Look under the hood. Lots of dirt can indicate severe use and little maintenance. Check for worn or chafed hoses, oil leaks, coolant leaks, etc. Pull the dipsticks and check fluid colors and condition. Sight down the body sides to see if the panels are smooth. If they’re wavy, the truck has been wrecked, and further inspection underneath will reveal the severity of the accident. Paint color differences between panels and or variations in body seam gaps also indicate a wreck in the truck’s past. Inspect tires for uneven wear to determine if there are suspension or axle problems. This can also be an indicator of improperly repaired wreck damage. Look for lube drips from the underside of the engine, transmission and axles. Seal repairs may have to be made. A light oil drip or evidence of misting near the engine road draft tube is normal. Look in the glove box and console to see if any maintenance receipts or records have been left behind and compare them with what you see. Go for a ride and note if the engine idles smoothly and pulls strongly. Do the transmission and clutch work as intended? Does the automatic transmission shift without slipping or “hanging between gears”? Do the brakes pull to one side? Does the truck steer correctly? While driving, note if there is excessive smoke from the exhaust. Black smoke indicates overfueling or a clogged air filter. White or gray smoke indicates excessive oil getting by the piston rings or an injection pump problem. A puff of smoke of any color at startup is normal, but should abate when the engine warms. Walk around the truck immediately after the ride and note any smells of hot dragging brakes or leaking fuel. A hot oil smell can indicate an oil leak onto the exhaust system. Don’t be embarrassed to ask to put the truck up on a lift for a more thorough inspection, or to take the truck to a trusted mechanic for a professional inspection. A professional independent inspection for a fee is cheap insurance that you are making a wise purchase decision. After you are fully satisfied that the truck is what it is represented to be, move on to the next step. Contact the Owner There are many possible reasons why this particular truck came to be for sale, and it is up to you to determine the true reason. Is the owner financially able to afford a new vehicle with more fancy gadgets, or was the owner tired of fixing a A Publication of the TURBO DIESEL REGISTER problem or problems repeatedly? Is the owner simply selling a vehicle that is no longer needed? It is up to you to find out. When you find a likely candidate and your search narrows to a specific vehicle you may want to buy, consult your list again to make sure it meets all criteria. First on your “to do” list following a second general walk-around inspection and a ride-and-drive session of a particular truck should be some research to find out who the former owner was and initiate a conversation. If you’re buying from a dealer, ask the owner what the mileage was at turn in time and on what date the vehicle was turned in. If the truck has been in a dealer’s possession for a while, has it been used for hauling chores with no maintenance? Have other potential buyers shied away from it for some reason not readily evident? Find out why. Ask the former owner what maintenance has been performed and when, and if the truck has been wrecked. What was it used for? Was it satisfactory for that use? If the owner has maintenance records, arrange to pick them up if you buy the truck. Finishing Up You’ve done the research, negotiated the price, and now it is time to exchange dollars for the vehicle. The job’s not done until the paperwork is finished—and the paperwork had better be right! If buying from a dealer, you should receive a bill of sale and certification of the odometer reading, along with several other pieces of paper, which will vary by state. Usually the dealer will apply for a new title in your name. If buying from a private individual, you should receive a clear title signed over to you by the owner. You will then take the title to your vehicle registration place to get a new title in your name. Either a bill of sale from a dealer or a signed title from the owner should be placed in your hands at the time you give them your check—no exceptions, and no excuses by the seller. Remember, the job’s not done until the paperwork is right! Make sure the serial number on all paperwork agrees with the serial number stamped into the left front corner of the dashboard. Paperwork mistakes in this area are frequent and hard to correct later. Before driving your new purchase home, call your insurance agent to insurance. Failure to do so could have disastrous consequences just down the road. Finally, if there is any remaining warranty on the vehicle, be sure to fill out and send in the paperwork to get it transferred to you. If the truck is less than five years old and has less than 100,000 miles on the odometer, you should transfer the remaining engine warranty. That’s it. You now own your new (to you) truck, and if you have researched fully and purchased carefully, you’ll have many miles of enjoyable cruisin’ ahead of you. Jim Anderson TDR Writer 21 Over the Years— Dodge Technical Service Bulletins Not surprisingly, there have been comments by those unfamiliar with the truck (prospective new/used buyers, Internet, truck shows) that “the Turbo Diesel certainly has its share of problems.” To them, no doubt, the grass looks greener on the other side. Although some will dwell on the problems, the majority of owners take initiative to solve/correct, anticipate/prepare for a future situation. That’s what the TDR is all about! Thanks to the TDR membership group and the support from DaimlerChrysler and Cummins we are equipped with answers and solutions, rather than wonderment and isolation that would exist without a support group. My thanks goes out to the TDR members for being a supportive membership group. DODGE TECHNICAL SERVICE BULLETINS With the brief introduction out of the way, this is our review of Dodge Technical Service Bulletins issued in the previous years. For a given calendar year, all Dodge vehicle TSBs are published in book format and are available for purchase 22 in July/August. As a service, we purchase the TSB directory and then search through the book for only those bulletins relating to the Turbo Diesel truck. In an effort to consolidate the TSBs for the magazine, we use the same index system categories as DaimlerChrysler. Below are the index categories. 2 Front Suspension 3 Rear Axle 5 Brakes 6 Clutch 7 Cooling 8 Electrical 9 Engine 11 Exhaust 13 Frame & Bumpers 14 16 18 19 21 22 23 24 26 Fuel Propeller Shafts & U-Joints Vehicle Performance Steering Transmissions Wheels & Tires Body Air Conditioning Miscellaneous A note concerning the TSBs and their use: the bulletins are intended to provide dealers with the latest repair information. Often the TSB is vehicle identification number (VIN) specific. VIN data on the Chrysler service network helps the dealer in his service efforts. A TSB is not an implied warranty. A Publication of the TURBO DIESEL REGISTER TSBs Issued During ‘95 and Prior CATEGORY 2 FRONT SUSPENSION TSB # MODELS SUBJECT/DESCRIPTION 02-05-95 5/15/95 ‘94 - ‘95 (BR) 4x4 4x2 Cab Chassis Rattling/clunk type noise from front of vehicle. Verify that the stabilizer bar is built with the correct ball stud links. If necessary, the bulletin details the replacement of both stabilizer links with tapered ball stud links. 02-02-94 2/11/94 ‘94 (BR) Service manual revisions for torque values on front suspension. 02-07-94 6/15/94 ‘94 (BR) This information bulletin differentiates the track bar used on different vintage trucks. 02-08-94 7/22/94 ‘94 2500 (BR) Cab Chassis with sales code XBC Low ride height on 8800 GVW cab chassis. The bulletin describes abnormal low ride height in the rear where the truck is loaded near GVW. It lists the parts necessary to replace the shocks and rear leaf springs. 02-20-94 12/2/94 ‘94 (BR) Service manual revision for torque values on stabilizer link bar. 02-02-91 1/28/91 ‘92 (AD) 2wd vehicles only Front spring spacer for two wheel drive trucks. The condition is a vehicle leaning or low on the left front corner. The repair involves the installation of a spacer (4322629) on the left coil spring to raise the left front corner approximately one inch. 02-06-90A ‘90 - ‘91 (AD) 2wd 12/17/90 vehicles only Front spring spacer for two wheel drive trucks. The condition is a vehicle leaning or low on the left front corner. The repair involves the installation of a spacer (4322629) on the left coil spring to raise the left front corner approximately one inch. 02-09-90 11/19/90 Service manual revision for camber specification. ‘89 - ‘90 (AD) 4wd CATEGORY 3 REAR AXLE TSB # MODELS SUBJECT/DESCRIPTION 03-03-95 5/5/95 ‘94 - ‘95 (BR) Rear axle trac-loc chatter. This bulletin supersedes 03-01-94 (7/8/94) and applies to trac-loc Dana model 60, 70 and 80 axles. The symptom is chatter while turning corners. The bulletin involves draining and refilling the axle with new fluid and trac-loc additive. It is important that gear oil 4796517 and trac-loc additive 4318060 be used. 03-02-93 5/7/93 ‘92 - ‘93 (AD) Launch shudder/vibration. For 1992-1993 131” or 149” wheelbase trucks. Describes repair procedure to adjust the pinion angle of the rear-end to eliminate vibration or shudder in the 1-2 shift made at medium to heavy throttle. This TSB does not address “wheel hop” that occurs with manual transmission trucks at start off. Wheel hop is a function of driveline spring wrap up because of high torque being exerted on the pinion shaft. A Publication of the TURBO DIESEL REGISTER 23 CATEGORY 5 BRAKES TSB # MODELS SUBJECT/DESCRIPTION 05-09-95 B 9/22/95 ‘94 - ‘95 (BR) All 4x4 and 3500 4x2 Club Chassis only Drift left or right under moderate or hard braking. The symptom is a drift right or left during moderate to hard brake applications just short of antilock operation. The condition is more evident with worn brakes. The steering wheel remains straight ahead - truck drifts. The repair is not to correct a condition where the steering wheel moves during the drift. If steering wheel moves, a brake system inspection, according to the service manual, is in order. The repair involves installing shems between the wheel and (2500) hub/bearing assemble, (3500) hub extension as required. 05-02-95 3/24/95 ‘94 - ‘95 (BR) 3500 4x4/4x2 2500 4x4 Front brake noise on trucks with 86 mm diameter caliper pistons. The symptom is a squeal noise when applying the brakes for a normal stop. The repair involves grinding or filing a chamfer on both ends of the front brake pads. 05-03-94 3/4/94 ‘94 (BR) Service manual revision for brake bleeding procedure on trucks equipped with ABS brakes. 05-21-94 10/21/94 ‘89 - ‘93 (AD) Premature brake wear on trucks with 12” brake drums. The bulletin involves replacement of the rear brake shoes (linings) with revised shoes. 05-08-93 A 9/3/93 ‘94 (BR) Pedal feel/characteristics of ABS brakes is the subject of this information only bulletin. 05-15-93 11/1/93 ‘94 (BR) Brake pedal noise. The symptom is a squawk caused by the metering valve spring chattering when the brake is depressed. The bulletin involves the installation of a revised metering valve. 05-04-92 A 4/21/92 ‘89 - ‘92 (AD) sales code BKH, BKJ Premature brake wear on trucks with 12” brake drums. The bulletin involves replacement of the rear brake shoes (lining) with revised shoes. 05-01-91 1/28/91 ‘81 - ‘91 (AD) Rear wheel anti-lock speed sensor connector repair procedure. If a red/amber ANTILOCK warning light illuminates and a code 9 diagnostic code is found, a possible cause is the connector for the RWAL speed sensor. The bulletin describes the repair procedure and parts needed to correct the problem. 05-05-91 8/12/91 ‘90 - ‘91 (AD) Front disc brake noise from Bendix disc brakes. The bulletin applies to trucks with Bendix disc brakes (3.38” caliper pistons). Noise can occur and the repair involves grinding a chamfer on both ends of the outboard brake pad. 05-07-90 9/24/90 ‘89 - ‘90 (AD) Rear wheel anti-lock faults caused by water contamination. A possible cause for illumination of the BRAKE and ANTILOCK warning lamps could be water contamination of the 4-way connector at the hydraulic valve and/or at the 50-way connector. The bulletin describes the repair and parts necessary to add a service jumper harness to the existing harness. CATEGORY 6 CLUTCH TSB # MODELS SUBJECT/DESCRIPTION 06-01-94 8/12/94 ‘89 - ‘93 (AD) with manual transmission Transmission noise below 1400 rpm. The bulletin describes a powertrain induced cyclic noise condition that appears to be transmission/ driveline related. Especially noticeable in 4th and 5th gears, the noise occurs below 1400 rpm during coast or light throttle. The noise is not damaging to the powertrain and is due to the dampening characteristics of the clutch springs. The revision, if needed, involves replacement of the clutch disc. 24 A Publication of the TURBO DIESEL REGISTER CATEGORY 6 06-01-90 A 12/31/90 ‘89 - ‘91 (AD) with manual transmission CATEGORY 7 CLUTCH...Continued Transmission noise below 1400 rpm. The bulletin describes a powertrain induced cyclic noise condition that appears to be transmission/ driveline related. Especially noticeable in 4th and 5th gears, the noise occurs below 1400 rpm during coast or light throttle. The noise is not damaging or durability related. The diagnosis involves a road test to pinpoint the rpm at which the noise occurs. The revision involves a change of the flywheel. COOLING TSB # MODELS SUBJECT/DESCRIPTION 07-04-94 4/8/94 ‘94 (BR) Service manual revision - thermostat seals. Revised service manual pages showing t-stat seal pictures. 07-07-94 9/30/94 ‘94 - ‘95 (BR) Engine slow to warm-up in cold ambient temperatures. The bulletin describes an overcooling condition caused by the thermostat being stuck in a partial open position. Gauge fluction is addressed and is considered normal with no action required. Owners are advised that the cooling system is large to provide capacity and protection for high temperatures and high GCWR ratings. Slower warm-ups are to be expected. 07-01-91 1/28/91 ‘89 - 90 (AD) Overheating or no heat condition. An interference between the thermostat and cylinder head coolant passage on engines built before engine serial number 44465181 may result in a stuck t-stat in the open or closed position. A revised t-stat and coolant passage diameter check a part of the repair procedure. 07-04-91 9/23/91 ‘90 - ‘91 (AD) Lower radiator hose leakage. Some leakage from the lower radiator hose at the waterpump connection may occur due to a step cast in the water pump nipple. The repair involves installing a second hose clamp. 07-05-91 12/16/91 ‘91 (AD) Fan belt noise/chirp. The noise is caused by excessive paint in the grooves of the water pump allowing the belt to slip. Wire brush and solvent to remove the paint is the repair procedure. 07-03-90 12/21/90 All Recycled engine coolant. The use of “reconstituted” antifreeze/coolants is not authorized in the performance of any repair covered under the provisions of warranty. 07-01-89 2/27/89 Auxiliary oil cooler freeze-up. ‘88 - ‘89 with automatic transmission At ambient temperatures of -10°F or lower, trucks with auxiliary coolers (NHB) may loose transmission fluid due to a restriction of oil flow. A bypass line is the recommended repair. CATEGORY 8 ELECTRICAL TSB # MODELS SUBJECT/DESCRIPTION 08-25-95 6/9/95 ‘94 - ‘95 (BR) Power mirror vibration associated with installation of “bugscreen” deflectors. The symptom is blurred images in the power mirrors. The diagnostic procedure - remove the bugscreen. If vibration ceases the mirrors are ok. Bugscreen deflectors are designed to disrupt airflow which can lead to mirror/antenna vibration. 08-24-95 9/30/95 ‘94 - ‘95 (BR) Accessory frame ground jumper wire. The bulletin discusses a frame ground jumper wire from the battery negative to the frame bumper bracket be added if electrical accessories (winch, lights, snow plow, etc.) are added to the vehicle. A Publication of the TURBO DIESEL REGISTER 25 CATEGORY 8 ELECTRICAL...Continued 08-22-95 5/12/95 ‘94 - ‘96 (BR) ‘89 - ‘93 (AD) Installation of radio equipment. The bulletin supersedes 08-31-94, 7/15/94 and discusses the proper installation of communication equipment in Chrysler vehicles. 08-16-95 A ‘94 - ‘96 (BR) ‘89 - ‘93 (AD) Speed control - over/undershoot during set of speed selection. The bulletin discusses the “adaptive strategy” that compensates for vehicle-to-vehicle variations in speed control cable lengths. Pressing the “set” button without pressure on the accelerator pedal can cause speed fluctuations. Proper review of the condition with vehicle operator is recommended. 08-05-94 1/20/94 ‘94 (BR) Poor AM radio reception. Tighten the antenna base to 70 in/lbs to assure reception. 08-06-94 2/4/94 ‘94 (BR) Infinity radio (code RAY) looses sound on right channel speakers. Infinity (RAY) cassette with equalizer system may loose the sound of right side speakers. RAS code radios are not affected. An exchange radio is the repair. 08-08-94 A 5/20/94 ‘94 (BR) Weak sounding horn. The bulletin discusses an upgrade from a single horn to a dual horn system. 08-10-94 2/18/94 ‘94 (BR) Fuel gauge sticks. The bulletin covers replacing the fuel pump module, if the fuel gauge intermittently sticks at full, with less than full capacity. 08-17-94 4/1/94 ‘94 (BR) Battery drain on vehicles equipped with trailer tow package. Water may collect in the 7 pin trailer tow connector housing causing corrosion. Exterior or interior lights may erratically operate regardless of switch operation. Inspect the tow connector and notch the connector to allow for drain. 08-29-94 6/24/94 ‘94 (BR) Diesel secondary battery does not charge—vehicles built prior to 2/14/94. Corrosion at battery clamp to secondary battery may prevent charging. Inspect, test, and replace battery clamp bolt if necessary. 08-33-94 7/15/94 ‘91 - ‘93 (AD) Fuel gauge inaccuracy. If the fuel gauge reads inaccurately (too much reserve when the tank gauge reads empty), a revised fuel sending unit may be necessary. 08-41-94 8/5/94 ‘94 - ‘95 (BR) Trailer tow brake wire location. An information only bulletin showing the wiring provisions for an electric brake actuator. 08-64-94 11/4/94 ‘94 - ‘95 (BR) Power mirror vibration. On vehicles equipped with power mirrors built prior to 9/18/94 this TSB discusses the diagnosis and repair for excessive vibration/blurred images. 08-65-94 11/4/94 ‘94 (BR) Poor AM radio reception. On vehicles built prior to 12/01/93 poor AM reception can be repaired by replacement of the antenna base and cable assembly. 08-05-93 2/8/93 ‘93 (AD) White smoke at start-up. Service changes to the powertrain control module (SEBC) may cause white smoke at start-up. The SEBC is programmed to eliminate operation of the air intake heater for the first 25 vehicle starts. After service or in predelivery situations, there may be vehicles that have not accumulated 25 starts. The white smoke condition should be resolved after 25 starts are accumulated. 08-07-93 A 3/19/93 ‘92 - ‘93 (AD) with four wheel drive Speed control surge. The bulletin describes the correct speed control servo and cable match for the powertrain control module. Verify compatability of components. Replace speedometer drive gear, if necessary. 26 A Publication of the TURBO DIESEL REGISTER CATEGORY 8 ELECTRICAL...Continued 08-45-93 10/8/93 ‘94 (BR) Radio lock-up. The bulletin applies to AM/FM Stereo (RAL) or AM/FM stereo cassette (RAS) radios. If the buttons and controls do not function the condition is caused by a programming error. The condition is corrected by following the operational sequence outlined in the TSB. 08-47-93 10/15/93 ‘94 (BR) Erratic coolant temperature gauge reading. The cooling system on the Cummins diesel engine equipped vehicles provide for capacity and protection at high GCWR. THe large capacity can cause slower than normal warm-up. Also temperature gauge reading fluctuations are normal. 08-58-93 12/10/93 ‘91 - ‘93 (AD) Fuel gauge innaccuracy. Too much reserve fuel in the tank when the gauge indicates empty may be the fault of an incorrect sending unit. The repair involves a wiring harness and sending unit change. 08-67-93 12/31/93 ‘94 (BR) Service procedure for the stop light switch connector. An information only bulletin showing the disconnect procedure of the stop light switch. 08-05-91 4/22/91 All trucks Trailer tow wiring installation. The information only bulletin gives guidelines for proper wiring of trailer tow wiring packages. 08-10-91 9/9/91 ‘89 - ‘91 (AD) Speedometer reading fluctuates and/or the speed control disengages. The condition may be caused by spread female connectors at the 2-way distance sensor connector. Inspect and replace as necessary. ‘91 (AD) Fuel reads low when fuel tank is full. If fuel gauge does not read full after filling the fuel tank, the problem may be an incorrectly calibrated fuel sealing unit. Repair and replace as necessary. 08-11-91 10/7/91 CATEGORY 9 ENGINE TSB # MODELS SUBJECT/DESCRIPTION 09-10-95 6/2/95 ‘94 - ‘95 (BR) Diagnosing oil consumption. The concern is an operator report of greater than one quart per one thousand miles. Variations in oil level are likely possible if the oil check is performed on a warm engine due to slow drain back from the inline fuel pump. Discuss with customer and assure dipstick is updated to part number 4796874. The correct dipstick increases the safe zone to two quarts versus the early ‘94 vintage dipsticks with only a one quart safe zone. 09-04-95 4/14/95 ‘94 - ‘95 (BR) Excessive oil drainage from oil draft (breather) tube. The bulletin applies only to engines built prior to 12/1/94. It involves replacing the tappet cover with a new sealed version. 09-06-94 4/22/94 ‘94 (BR) Cummins exhaust manifold gaskets. Service gaskets and production gaskets can vary in thickness. Do not intermix. If an exhaust gasket requires replacement, then replace all six. 09-22-93 12/31/93 ‘94 (BR) Service manual revision for Cummins piston grading procedure. The information only bulletin details the pistons to be used if engine rebuild is necessary. 09-07-91 12/2/91 ‘91 - ‘92 (AD) Cylinder head bolt torque tightening procedure. The information only bulletin describes the bolt tightening procedure for cylinder head bolts. 09-11-89 7/3/89 ‘89 (AD) with automatic Knocking noise at rear of engine due to a cracked torque converter drive plate. transmission On trucks built prior to 2/8/89 if there exist a knocking or grinding noise at the rear of the engine check, the torque converter drive plate for cracking. Replace as necessary. A Publication of the TURBO DIESEL REGISTER 27 CATEGORY 11 EXHAUST TSB # MODELS SUBJECT/DESCRIPTION 11-03-94 5/13/94 ‘94 (BR) Diesel exhaust stains. The bulletin applies to 5-speed trucks built prior to 2/1/94 and automatic trucks between 2/1//94 and 10/1/94. The condition is exhaust soot on the side of the truck. A tail pipe extension is the part needed to remedy the situation. 11-02-92 7/27/92 ‘88 - ‘92 (AD) Rear tailpipe support bracket cracking. The condition is a rattle noise caused by a crack or break in the rear tailpipe support bracket area. A revised tailpipe support bracket (5 2018458) is the part used for repair. CATEGORY 14 FUEL TSB # MODELS SUBJECT/DESCRIPTION 14-05-94 4/8/94 ‘94 (BR) ‘89 - ‘93 (AD) Use of low sulfur fuel. The bulletin discusses the new for 1994 low sulfur fuel. Fuel lubricity concerns are addressed as the use of diesel fuel additives to increase the lubricity of low sulfur fuel are not required. 14-15-93 ‘89 - ‘93 (AD) Fuel leakage from the roll-over valve vent. The bulletin warns that repeated attempts to force fuel into the tank after the automatic shut off has engaged may lead to a condition where the fuel level in the tank is above the designed operating level. Fuel may leak out of the roll over valve in this situation. The repair involves raising the roll over vent location by installing fuel hose to the vent nipple and routing to a high location along the filler tube. 14-02-90 12/3/90 ‘89 - ‘90 (AD) Accelerator pedal effort too high. The bulletin describes the installation of revised parts to lessen the pedal effort. If the truck has a Mopar aftermarket speed control kit, the kit already has the revised parts. 14-01-89 10/2/89 ‘89 (AD) Injection pump diagnosis procedure. A troubleshooting procedure is outlined to help diagnose diesel engine problems. CATEGORY 16 PROPELLER SHAFTS & U-JOINTS TSB # MODELS 16-02-95 11/3/95 ‘94 - ‘95 (BR) Droaning noise/vibration. automatic transmission The symptom/condition is a droaning type noise and/or vibration felt in seat track, floor pan or trucks steering column. The noise is worst case when pulling a camper or trailer with significant wind drag. Peak noise level is 1900 rpm for 4x2 trucks 1850 rpm on 4x4 models with torque converter clutch engaged. The repair involves replacement of the propeller shaft. 16-01-94 10/14/94 ‘94 - ‘95 (BR) 28 SUBJECT/DESCRIPTION Shudder at start on vehicles with two piece driveshafts operated at near maximum GVW. The symptom is a driveline shudder when pulling away from a stop. As the vehicle is loaded, the driveline angle will change. In the case of maximum GVW, the rear differential may rise above the rear driveshaft center bearing. The alignment could cause a shudder in the driveline. The repair involves replacement of the driveshaft center support bearing bracket and/or driveshaft. A Publication of the TURBO DIESEL REGISTER CATEGORY 18 VEHICLE PERFORMANCE TSB # MODELS 18-29-95 A 10/16/95 ‘94 - 95 (BR) with Diesel low power/performance specs. automatic transmission The bulletin applies to automatic transmission trucks with a customer complaint of slow acceleration or low power. Performance tests (0-60) are performed and an acceleration table to reference is provided. The bulletin guides the dealership through a series of trouble shooting tests to troubleshoot the low power complaint. Checks for wide open throttle, a low pressure fuel system check, and finally, an injection pump timing adjustment are described. 18-01-94 1/14/94 ‘94 (BR) with Lack of power/harsh transmission shifts. automatic transmission The bulletin applies to vehicles built before 10/28/93 and involves the replacement of the throttle control lever to ensure full throttle travel. Also, adjustment of the throttle position sensor is described. 18-10-94 A 7/29/94 ‘94 (BR) Excessive White Smoke/Low Power. The bulletin involves a diagnostic check of the cooling system and starting instructions before verifying timing of the engine. Manual transmission engines are set to 12.5 degrees top dead center. Automatic engines should be set according to the engine data plate. 18-05-93 4/30/93 ‘91 - ‘93 (AD) Poor performance/lack of power. The bulletin discusses the troubleshooting procedures for a poor performance complaint. After verification of engine system performance, the bulletin outlines the criteria for a torque converter stall test for automatic equipped trucks and a 20-50 mph test for manual transmission trucks. An adjustment procedure for the LDA (a timing advance that is controlled by boost pressure) is described. The bulletin is known as the “starwheel” or “balloon test” by service technicians. 18-06-92 A 7/23/93 ‘91 - ‘93 (AD) with Erratic 3-4 or 4-3 shifts. automatic transmission The bulletin discusses erratic shifting (hunting) between third and fourth gear. The shift schedule is based on several inputs to the powertrain control module (SEBC). Diagnosis of the components is described. If a throttle position sensor is required the replacement part number is 4746966. 18-05-92 6/15/92 ‘92 (AD) Vehicle surging when cruise control is engaged. The condition may be caused by the calibration of the powertrain control module (SEBC). Replacement of the SEBC is covered in the repair procedure. 18-06-92 6/29/92 ‘91 - ‘92 (AD) Lack of power, poor acceleration in cold ambient temperatures. Below 33°F some vehicles may be slow to accelerate or feel low on power. The condition may be caused by ice forming at the fuel intake area of the fuel gauge sending unit module. A revised module part number and repair procedure are outlined. 18-10-92 A 9/8/92 ‘91 - ‘92 (AD) with automatic transmission Erratic 3-4 or 4-3 shifter. Note: See TSB 18-06-93 A 18-11-92 7/13/92 ‘91 - ‘92 (AD) Poor performance/lack of power. Note: See TSB 18-05-93 18-17-92 9/8/92 ‘91 (AD) Engine rpm fluctuates when the cruise control is engaged. This bulletin is for non-intercooled (build date prior to 1/1/91) trucks. The bulletin involves replacing the vehicle speed control module with a recalibrated module. 18-18-92 10/19/92 ‘91 - ‘92 (AD) Poor engine performance/erratic engine operation/transmission operation. Some vehicles may exhibit the above characteristics as well as transmission hunting. Corrosion or spreading of the female terminals in the 3-way throttle position sensor connector could be the problem. Diagnosis and repair as necessary. 18-15-92 ‘91 (AD) White smoke at start-up. At cold ambient conditions white smoke can be a condition. This bulletin applies to trucks built after 1/1/91. The repair involves replacing the air temperature sensor. If the engine serial number is higher than 44623028 the sensor is of the new design. A Publication of the TURBO DIESEL REGISTER SUBJECT/DESCRIPTION 29 CATEGORY 19 STEERING TSB # MODELS SUBJECT/DESCRIPTION 19-02-05 B 11/3/95 ‘94 - ‘95 (BR) trucks with a build date prior to 1/1/95 Clunk or rattle felt in steering wheel/column over rough surfaces or while making a turn. The repair involves performing an inspection of suspension and steering components to assure proper torque. The replacement of the steering column intermediate shaft is described. 19-01-94 1/28/94 ‘94 (BR) 4x4 Slow steering return. The bulletin applies to 4x4 trucks with a Dana 60 axle. The diagnosis involves using a spring scale to determine turning force. The repair involves performing a ball joint tightening. 19-04-94 6/3/94 ‘94 (BR) Low power assist in cold ambient temperatures. The condition can be minimized by reviewing the cold start procedures. Cold climate power steering fluid (pn 04778524) may be used. 19-03-93 4/16/93 ‘89 - ‘93 (AD) Steering Column coupler. A repair package with a revised boot has been developed to service the steering coupler. The part number is 4740761. This is an information only bulletin. 19-02-91 4/22/91 ‘89 - ‘91 (AD) with four wheel drive Steering wheel off-center. Due to a shift in the steering gear bracket in high load conditions, the steering wheel may be off center during straight driving. The repair involves installing a shoulder bolt that acts as a dowel pin locking the steering gear bracket to the frame. CATEGORY 21 TRANSMISSION TSB # MODELS SUBJECT/DESCRIPTION 21-02-95 3/31/95 ‘95 (BR) built after 3/20/95 Quick connect removal and reconnect procedure. The bulletin is an “information only” bulletin outlining two ways to disconnect the quick connectors of the automatic transmission lines. 21-03-95 A 6/16/95 ‘94 - ‘95 (BR) Automatic transmission cold temperature cooler bypass kit. The condition occurs at ambient temperatures of -15°F or below. Vehicles equipped with automatic transmission coolers may experience a lack of fluid flow to the transmission due to restricted cooler lines. In periods of extended driving transmission failure may result. The bulletin describes the installation of a cold weather transmission cooler by-pass kit. Caution is needed as the kit decreases the cooling capacity of the transmission when driving in hot ambient temperatures, and is not recommended. 21-04-95 4/14/95 ‘94 - ‘95 (BR) trucks with automatic transmission Vibration or perceived engine miss. The symtom is a vibration or perceived engine miss at approximately 1100 rpm as the torque converter clutch engages. The condition occurs in fourth gear lock-up at speeds between 42 to 48 mph. Depending on year model the powertrain control module is either replaced or reprogramed. 21-05-95 A 1/5/96 ‘94 - ‘95 (BR) trucks with automatic transmission Delayed transmission engagement/torque convertor drainback. The condition is delayed transmission engagement of 2 to 8 seconds at initial start-up. The problem is most noticeable after the vehicle has been parked for an extended period. The bulletin describes the installation of transmission lines with a one-way drainback valve. 21-08-95 1/30/95 ‘94 - ‘95 (BR) Speed sensor oil seepage. The bulletin describes how oil seepage can occur in the speed sensor area. The repair is the installation of a speedometer adapter. 21-09-95 6/30/95 ‘94 - ‘95 (BR) trucks with manual transmission Servicing of 5th gear mainshaft nut on NV 4500 manual transmission. The information only bulletin describes the replacement of the 5th gear main-shaft nut with a new nut if the original nut has to be removed. Under no circumstances is the original part to be reused. Special Mopar lock seal should be applied to the threads at reassembly. 30 A Publication of the TURBO DIESEL REGISTER CATEGORY 21 TRANSMISSION...Continued 21-11-95 7/7/95 ‘96 (BR) trucks with automatic transmission Overdrive unavailable in extreme cold temperatures. The information only bulletin emphasizes a change to the PCM for 1996. For ‘96 in ammbient temperatures of -5°F and below the PCM inhibits the transmission from shifting into overdrive. This protects the transmission from damage if the fluid would begin to freeze. The PCM will allow overdrive once the ambient temperature has risen approximately 7° above the temperature the ID was inhibited at. 21-04-94 3/4/94 ‘94 (BR) with manual transmission NV 4500 HD Transmission shift lever stuck in or blocked out of 5th gear/reverse. The shift lever does not shift out of 5th or reverse gear position, or the shift lever will not go into 5th/reverse. Diagnose the transmission and, if necessary, replace the transmission overdrive rail, lug shift fork, and synchronizer. 21-10-94 5/27/94 ‘94 (BR) with manual transmission NV 4500 HD Shift lever contacts instrument panel. Inspect the shift lever to transmission stub shaft connection. Reseat the lever to the stub shaft if necessary. 21-17-94 9/16/94 ‘94 (BR) ‘93 (AD) with automatic transmission Transmission diagnostic reference supplement. To assist in the repair of automatic transmission, the information only bulletin, lists symptom/cause/ correction information. 21-18-94 9/30/94 ‘94 (BR), ‘89 - ‘93 (AD) Transmission 4-3 downshift clunk. with automatic trans. A driveline clunk or harshness occurs during 4-3 coast downshift repair as described in bulletin. 21-24-94 12/2/94 ‘94 - ‘95 (BR) with automatic trans. Shift linkage adjustment. The information only bulletin explains how to correct a PRNUL misalignment. 21-25-94 12/23/94 ‘94 - ‘94 (BR) with NP 241 HD transfer case High effort when shifting from 2WD high to 4WD high in cold temperatures. If high effort condition occurs when shifting the transfer case in cold temperatures, the bulletin describes the repair. The procedure involves a change in the front axle lubricant or possibly a parts component replacement. 21-23-93 9/3/93 ‘92 - ‘93 (AD) with Lack of 3/4 up-shift and deep throttle 2/4 up-shift. automatic transmission A complaint of lack of 3/4 up-shift at 50 to 60 mph on the ‘92 MY trucks or complaint of deep throttle 2/4 up-shift on late built ‘92 and ‘93 models could be related to the overdrive shift calibration. Using the DRB scan tool verify the engine and transmission systems are functioning properly. The powertrain control module (SEBC) may require replacement to updated part number 4746568. 21-39-93 12/31/93 ‘89 - ‘93 (AD) with automatic transmission Four speed automatic transmission 4-3 downshift clunk. The bulletin describes a clunk or harshness during 4-3 coast downshift at approximately 18-20 mph. Verify all engine and transmission systems are functioning properly. Repair as required. 21-18-92 11/30/92 ‘92 - ‘93 (AD) with automatic transmission Delayed up-shifts and harsh engagement into drive or reverse. The bulletin describes a repair involving adjustment of the throttle valve cable and replacement of the return spring. 21-11-91 ‘89 - ‘91 (AD) with A 518 automatic transmission 3-4 up-shift noise with A 518 transmission. A noise or rattle during 3-4 up-shift or down-shift may be the result of an overdrive clutch pack vibration. Diagnose the vehicle to confirm condition and repair as necessary. 21-05-90 2/26/90 ‘89 - ‘90 (AD) with manual transmission Replacement of transmission shift lever and stubshifter. The shift lever and stub shifter are available as separate replacement parts. If replacement is required, use the component parts - do not replace the transmission assembly. 21-14-90 5/7/90 ‘90 (AD) with 518 Low/reverse band wear. automatic transmission Premature wear of the low/reverse band may be the result of one of the overdrive transmission mounting bolts making light contact with the band strut resulting in incomplete release of the band. A washer is installed to prevent contact. 21-12-89 5/1/89 ‘89 (AD) with manual transmission A Publication of the TURBO DIESEL REGISTER Speedometer drive gear replacement procedure. An information only brochure to supplement the service manual. 31 CATEGORY 22 WHEELS & TIRES TSB # MODELS SUBJECT/DESCRIPTION 22-03-95 3/3/95 ‘95 (BR) Match mounted tire/wheel combinations. The bulletin is an “information only” bulletin describing a match mounting process to improve ride characteristics. 22-04-95 4/7/95 ‘94 - ‘95 (BR) Spare tire winch operation. The bulletin is an “information only” bulletin reminding not to use power tools to drive the spare tire winch. 22-05-95 A 6/30/95 ‘94 - ‘95 (BR) with code WDC wheels Wheel runout measurement code WDC wheels procedures. The bulletin gives the allowable remount and informs the dealer that the tire must be dismounted to correctly measure radial and lateral runout. 22-06-95 6/16/95 ‘95 (BR) Match mounting during wheel service. The information only bulletin helps dealers match mount wheels and tires. Premature rust on chrome wheels. 22-03-94 6/24/94 ‘94 (BR) Wheels manufactured after 1/1/94 have an improved chrome plating process. Wheels prior to 1/1/94 may show signs of premature rust. Replacement of the wheels is described. 22-05-93 7/16/93 ‘93 (AD) Tire and wheel runout. A quick reference chart is provided for dealer diagnosing. 22-02-92 4/6/92 ‘89 - ‘92 (AD) Wheel vibration on 350 Series trucks with flange type lug nuts. Wheel/tire vibration may be caused by the wheels being off center on the wheel studs. The repair involves a wheel centering procedure using two 90° cone nuts. CATEGORY 23 BODY TSB # MODELS SUBJECT/DESCRIPTION 23-04-95 2/10/95 ‘94 - ‘95 (BR) Rattle due to seat belt latch plate bumping trim. The symptom is a noise due to the seat belt latch bumping against the trim when the belt is not in use. The repair involves the addition of a sound deadener pad to the trim panel. 23-29-95 6/9/95 ‘94 - ‘95 (BR) Cracked sunvisor support bracket/retainer. The bulletin involves the replacement of the visor bracket with a revised bracket. 23-43-95 6/14/95 ‘94 - ‘95 (BR) Door operation not smooth or feels loose. Visually inspect the door hinge area. If the door hinge bushing has fallen out the bushing should be reinstalled and crimped to prevent reccurance. 23-52-95 A ‘94 - ‘95 (BR) Standard cab only Creaking noise or exterior noise from back of cab. The condition is a sheet metal creaking or exterior noise from the back of the cab caused by verticle or horizontal cracks in cab back. Using a hoist and a strong light, look for cracks on lower portion of cab. If cracks are noted four cab reinforcements and replacement cab isolators should be installed. 23-74-95 12/8/95 ‘95 -’96 (BR) Interior film build-up on windows. Window film build-up is caused by vinyl interior trim material releasing gasses that adhere to the glass. The condition lessens as the vehicle gets older. 23-08-94 1/28/94 ‘94 (BR) Wind noise at front of door. Inspect the vehicle for the appropriate seal. If not present, perform the repair/installation procedure. 23-32-94 4/1/94 ‘94 (BR) Door fit at roof line. The top of the door should project higher than the roof panel. Do not attempt a repair if the door falls within the overflush 1-3 mm condition. 32 A Publication of the TURBO DIESEL REGISTER CATEGORY 23 BODY...Continued 23-36-94 4/22/94 ‘94 (BR) Front door to windshield moulding squeak/creak. A noise from the front of door/plastic windshield moulding can occur. The correction is to install anti-friction tape to the inside edge of the doors. 23-39-94 5/6/94 ‘94 (BR) Pickup box floor rattle. The bulletin involves applying sealer to the pickup box floor at the crossmember. 23-40-94 A 5/6/94 ‘94 (BR) Door glass rattle. If the door glass rattles when the door is closed and the window is open the bulletin describes the diagnosis and repair of the weather strips. 23-41-94 5/13/94 ‘94 (BR) Creak noise from instrument panel bezel. If a creaking noise occurs, coming from the instrument panel bezel, add felt tape to dash to dampen/isolate the components. 23-45-94 6/3/94 ‘94 (BR) Snapping noise at right side of instrument panel. A snapping noise (sounds like a small stone hitting the window) may occur. If diagnosed, add a pad to the stiffening rib of the instrument panel to isolate the components. 23-49-94 7/1/94 ‘94 (BR) Warped tailgate. Vehicles built at the Warren truck assembly plant (Dodge City complex) between 1/10/94 and 2/15/94 are suspect. Inspect as tailgate may be twisted or warped on the right side. Check the “run number” for date of production. Check the last three digits as 02X through 05X are suspect. Replace as necessary. 23-51-94 7/1/94 ‘94 (BR) Tailgate rattle. If a tailgate rattle is heard, inspect the tailgate pivot bracket. Repair as described in bulletin with replacement stud and bearing mount. 23-60-94 8/12/94 ‘94 (BR) Popping or snapping noise from windshield. The condition is a noise from the base of the windshield while traveling over rough roads/irregular surfaces. The repair involves removing windshield spacers at the base of the windshield. 23-63-94 8/26/94 ‘89 - ‘93 (AD) Cowl cracks. The condition is cracking or popping sounds from the cowl area at the lower corners of the windshield. Inspect the area underneath the fender at the cowl welds. The fenders must be removed to see the cracks. The repair involves installing cowl reinforcement brackets to the cowl. 23-68-94 9/30/94 ‘94 - ‘95 (BR) Glue seeps out at backlight or windshield moulding. Hot melt glue (clear to light brown) can seep out at the edge of the light or molding. The repair is to clean the glue with Mopar Concentrated Windshield Washer Solvent. 23-71-94 10/7/94 ‘95 (BR) Tailgate latch handle loose. The bulletin applies to vehicles built from 8/30/94 to 9/8/94. The hole in the tailgate was stamped oversize. Inspect the latch handle and apply Mopar Bond-All Gel Adhesive to correct. 23-73-94 10/7/94 ‘94 (BR) Cup holder rattle. If cup holder rattles in the closed position, add a foam block to the back of the mug holder. 23-95-94 A 12/30/94 ‘94 - ‘95 (BR) Front seat cover wear through above the recliner pivot. The condition is wear-through at the recliner pivot. Inspect as directed and repair if necessary. 23-98-94 12/23/94 ‘94 (BR) Tailgate hard to latch in cold temperatures. If the tailgate is difficult to latch when ambient temperatures are below freezing, the strikers should be checked for proper adjustment. If the problem persist, replace the caliper stop with a shorter one, part number 55075773. A Publication of the TURBO DIESEL REGISTER 33 CATEGORY 23 BODY...Continued 23-101-94 12/30/94 ‘94 - ‘95 (BR) Anti-friction tape on A-pillar. Bulletin 23-36-94 described a squeak and paint abrasion at the door to windshield A-pillar area. Anti-friction tape is now being applied at the assembly plants to prevent the problem. Do not remove the anti-friction tape. 23-57-93 10/8/93 ‘94 (BR) Instrument panel creak. A creak or squeak may be present on the left side of the instrument panel. The repair involves loosening of the instrument panel to provide additional clearance between the cowl side panel and instrument panel support joint. 23-64-93 11/19/93 ‘94 (BR) Tailgate rattles. If tailgate rattles over bumps, check for looseness. If tailgate does not close tightly, replace the overslam and alignment bumpers. 23-21-92 9/8/92 ‘93 (AD) ‘93 standard paint colors. 23-09-91 8/26/91 ‘92 (AD) ‘92 standard paint colors. 23-12-90 10/8/90 ‘91 (AD) ‘91 standard paint colors. 23-24-89 10/10/89 ‘90 (AD) ‘90 standard paint colors. 23-08-89 4/10/89 ‘89 (AD) ‘89 standard paint colors. CATEGORY 24 AIR CONDITIONING TSB # MODELS SUBJECT/DESCRIPTION 24-01-95 A 3/3/95 ’89 - ‘94 (AD) R-12 to R-134a refigerant adaptation procedure. The bulletin describes the conversion from R-12 to R-134a. The procedure should only be performed on vehicles when R-12 is no longer available. 24-06-95 A 5/26/95 ‘94 - ‘95 (BR) Odor from air conditioning ducts. Some vehicles may emit a “musty” odor from the airconditioning ducts. The odor is most noticable when the A/C system is first turned on. Two possible causes are discussed and repair procedure are outlined based on less than or greater than 12 months in service. 24-08-95 5/19/95 ‘94 - ‘95 (BR) White flakes from instrument panel outlet. Sodium silicate is used to coat the air conditioner evaporator for corrosion protection. If excessive amounts are applied during the manufacturing process, there is a tendency for the extra coating to flake off. Flakes may blow from the vents when the fan is turned on. The bulletin is issued for information only. 24-08-94 5/6/94 ‘94 (BR) A/C evaporator odor. A “musty” odor may be emitted from the air conditioner ducts. The odor is most noticeable when the A/C is first turned on after the system has been left off evernight or longer. The odor is a result of foreign material accumulating in the evaporator area. The bulletin involves cleaning and disinfecting the A/C evaporator and housing. 34 A Publication of the TURBO DIESEL REGISTER CATEGORY 24 24-17-94 11/18/94 ‘91 - ‘93 (AD) ‘94 - ‘95 (BR) AIR CONDITIONING...Continued A/C evaporation freeze-up or lack of cooling on cycling clutch of air conditioning system. Loss of A/C airflow and/or cooling while the blower fan continues to operate may occur. This bulletin discusses the role of the powertrain control module in the A/C system. The electrical signal from the A/C cycling clutch switch passes through the Powertrain Control Module (PCM) to engage and disengage the A/C clutch relay. If the PCM is not properly disengaging the A/C clutch via the relay, the compressor will stay on continuously and result in evaporator freeze-up. Also, the PCM may not energize the A/C clutch relay at all. THis condition results in the lack of cooling from the A/C system. The PCM should be checked per the procedure in the appropriate Powertrain Diagnostic Procedure Manual. Diagnostic Trouble Code 33 (A/C clutch relay circuit) will be present when either of these conditions are caused by the PCM. It is important to perform the complete test sequence because there are other A.C clutch relay circuit components that could also cause or contribute to the condition. 24-27-93 11/19/93 ‘91 -’93 (AD) ‘94 BR CATEGORY 26 Air conditioner compressor noise. A growling noise may be heard with the compressor running. Diagnose the condition as outlined and perform the repair procedure if necessary. The repair involves installing a revised compressor valve plate assembly. MISCELLANEOUS TSB # MODELS SUBJECT/DESCRIPTION 26-04-94 10/28/94 All Diagnostic procedure manuals. The bulletin gives a current list of available diagnostic procedure manuals. These manuals provide system information, step-by-step trouble shooting procedures, diagnostic and driveability tests, along with diagrams, illustrations and helpful charts to find and fix problems on Chrysler Corporation vehicles. These manuals can be ordered by calling 1-800-626-1523. A Publication of the TURBO DIESEL REGISTER 35 TSBs Issued During ‘96 CATEGORY 2 FRONT SUSPENSION TSB# MODELS SUBJECT/DESCRIPTION 02-01-96A 5/31/96 ‘94-’96 (BR) Camper Special service kit. The bulletin supersedes TSB 02-01-96 dated 3/15/96. The bulletin applies to body style codes 31, 32, and 62 with one of the listed GVW sales codes Z2B, Z3A, Z7B, Z8A or Z8B. The bulletin describes the parts and installation procedure for a special service kit developed for use by owners that consistently carry a box mounted camper. A rear stabilizer bar and auxiliary spring comprise the kit. 02-03-96 5/31/96 ‘94-’96 (BR) Creaking noise from rear of vehicle. The diagnosis involves the inspection of the rear leaf spring assembly to verify the appropriate number of spring tip inserts are present. If tip inserts are broken or missing the repair procedure is detailed in the TSB. 02-04-96 6/21/96 ‘94-’96 (BR) Two wheel drive (2WD) Lower ball joint replacement. This bulletin applies only to two wheel drive vehicles. It discusses the service differences in tack welded ball joints/control arms and non tack welded ball joints/control arms. 02-06-96 11/29/96 ‘94-’97 (BR) 4x4 only Track bar ball joint diagnosis. The bulletin refers to the ‘97 Truck Service Manual and is a supplement to help the technician troubleshoot loose or worn steering components. The track bar ball joint previously did not have an inspection procedure. CATEGORY 3 REAR AXLE TSB# MODELS SUBJECT/DESCRIPTION 03-02-96 5/10/96 ‘94-’96 (BR) 2500 and 3500 4x2 trucks, regular cab, automatic transmission and two-piece propeller shafts. Shudder when pulling away from stop when operated at maximum GVW rating. The bulletin is a supersession of bulletin 16-01-94. If the vehicle exhibits a driveline shudder while pulling away from a stop at maximum GVW rating, the bulletin describes the replacement of the two-piece driveline and center support bracket with a single piece assembly. 03-03-96 8/16/96 ‘94-’96 (BR) With automatic transmission and 5.9 Turbo Diesel engine. Note: ‘96 2500 club cab, 155 WB 4x4 with heavy duty transfer case built after 5/9/96 have the revised propeller shaft. Droaning noise/vibration. The symptom typically occurs at maximum load and is engine speed specific - 1900 rpm for 4x2 models, 1850 rpm for 4x4 models with the truck in fourth gear and the torque converter clutch locked up. If the problem is identified, a repair procedure involving a revised propeller shaft with a yoke weight damper is described. 36 A Publication of the TURBO DIESEL REGISTER CATEGORY 5 BRAKES TSB# MODELS SUBJECT/DESCRIPTION 05-14-95 A 2/9/96 ‘95 - ‘96 (BR) Brake pedal noise when depressed. The symptom is a squawk type noise when the brakes are depressed. The repair involves installing a revised back-up plate into the brake combination valve. 05-02-96 A 11/15/96 ‘94-’97 (BR) 2500, 8800 GVW - sales code and 3500 built before 8/5/96 Accelerated brake lining wear, front versus rear. The bulletin supersedes TSB 05-02-96 dated 2/23/96. The bulletin adds the 3500 series truck and incorporates the use of revised brake linings. The bulletin discusses wear conditions. The repair procedure involves replacing possibly the front brake linings, rear brake linings, or rear wheel cylinders, depending on truck model and vehicle sales code. 05-08-96 9/13/96 ‘94-’96 (BR) Brake pedal rattle. If a rattle is heard coming from the brake pedal area and is eliminated when pressure is applied to the side of the brake pedal, a repair procedure involving a “wave washer” is outlined. 05-09-96 10/4/96 All Brake noise. The information only bulletin describes the normal noises that may occur with a properly operating system, ABS self check, trace squeak, grinding, groaning etc., noises are discussed. 05-10-96 12/13/96 ‘94-’97 (BR) Chassis dynamics diagnosis. The bulletin discusses conditions where-by the vehicle may move to the right or left when not controlled by the driver. Several causes are cited (aftermarket wheels, road crown, cross winds, incorrect tire pressures, worn wheel bearings, etc.). Diagnosis involves testing the vehicle to determine if the drift is brake related. A brake system evaluation is outlined. Steering and suspension inspection is discussed. Suspension torque values for fasteners are discussed. A suspension geometry evaluation is outlined. Front end alignment specifications are provided. Wheel shim kits and installation of shims for 4x4 trucks is discussed. CATEGORY 8 ELECTRICAL TSB# MODELS SUBJECT/DESCRIPTION 08-20-96 7/19/96 ‘96-’97 (BR) Cassette auto load error on RAS code radio. This information only bulletin describes a condition where the radio may enter the cassette play mode without a cassette being inserted. The bulletin explains the correction and discusses the function of the Ignition Off Draw (IOD) fuse. 08-21-96A 10/18/96 ‘96 (BR) Wiring harness connector repair packages. This information only bulletin helps the service technician by providing a part number listing for the correct electrical components per an assembly. It also gives a review of the diagnosis procedure for electrical components. 08-23-96 8/23/96 ‘94-’96 (BR) built prior to 12/15/96 Clicking noise from speedometer. If a clicking/ticking noise is heard coming from the instrument cluster area, the bulletin describes the repair procedure to replace the speedometer. 08-33-96 10/11/96 ‘94-’97 (BR) Trailer tow wiring information. Chrysler Corporation has offered optional trailer tow packages on all ‘94 through ‘97 Dodge Ram Trucks and has made trailer tow packages available through Mopar for vehicles that were not built with the trailer tow package. Several changes to the trailer tow wiring have occurred since the truck was introduced. It also identifies flashers. This bulletin identifies the part numbers for the Mopar trailer tow packages required to adapt trailer wiring to a vehicle that did not have the trailer tow package installed as original equipment from the factory. 08-47-96 12/20/96 ‘97 (BR) Radio interference from buzzer module. The condition is a buzzing noise in the rear radio speakers with the radio on/ignition on and the door ajar. If a buzzing noise is heard the repair involves replacing the buzzer module. A Publication of the TURBO DIESEL REGISTER 37 CATEGORY 9 ENGINE TSB# MODELS SUBJECT/DESCRIPTION 09-07-96 6/7/96 ‘94-’95 (BR) Fuel injection pump oil supply bushing oil seepage. If oil seepage is diagnosed, the bulletin describes the repair procedure using a special oil supply and removal tool. CATEGORY 11 EXHAUST TSB# MODELS SUBJECT/DESCRIPTION 11-05-96 8/23/96 ‘94-’97 (BR) Diesel turbocharger diagnostic procedure. This information only bulletin guides the service technician thorough troubleshooting steps to properly diagnosis turbocharger situations. Normal/abnormal noises, oil leakage, acceleration and low boost, are topics discussed in the bulletin. CATEGORY 14 FUEL TSB# MODELS SUBJECT/DESCRIPTION 14-07-96 8/2/96 ‘94-’96 (BR) Low pressure fuel system diagnostic procedures. Too low a fuel supply to the Bosch P7100 fuel pump can affect performance. Low rpm miss/ instability, white smoke, hard starting, low power may be the result. This bulletin gives the technician additional information to assist in diagnosis of the above problems. CATEGORY 18 VEHICLE PERFORMANCE TSB# MODELS SUBJECT/DESCRIPTION 18-11-96 3/22/96 ‘96 (BR) Revised injection pump timing specifications. A revision in the injection pump timing specification on Cummins engines with a CPL 2022 or 2023 should be utilized when checking or performing injection pump timing. CATEGORY 19 STEERING TSB# MODELS SUBJECT/DESCRIPTION 19-01-96 2/9/96 ‘95-’96 (BR) Clunk or rattle felt in steering column/wheel. The condition is a clunk or rattle in the steering wheel/column during slow turns or stops on some ‘95-’96 trucks. Diagnosis includes a check of all fasteners for the appropriate torque value. 19-05-96 8/30/96 ‘94-’96 (BR) 4x4 trucks with sales codes Z8A and Z8B and 4x2 cab chassis (Z3B) built before 5/15/96. Shimmy after striking a bump or pothole. This bulletin supersedes TSB 19-04-95 (5/12/95). The bulletin discusses a sustaining vibration (shimmy) felt in the front end of the vehicle after striking a bump or pothole. The repair procedure involves replacing the steering damper, replacing the track bar (if necessary) and the addition of an auxiliary steering damper. 38 A Publication of the TURBO DIESEL REGISTER CATEGORY 19 STEERING TSB# MODELS SUBJECT/DESCRIPTION 21-04-96 3/15/96 ‘96 (BR) Transmission will not upshift following a 3-2 downshift. Under certain conditions the transmission will not upshift following a 3-2 downshift. In this condition, the engine will continue to operate at maximum governor speed in second gear until the throttle is reduced. The condition only occurs if the overdrive is “off.” The repair involves reprogramming the powertrain control module with new software. 21-13-96 9/20/96 ‘96 (BR) 4x4 Transfer case shifter buzz or clatter. A buzz or clatter may be heard from the 4x4 shifter at an engine speed of approximately 2000 rpm. The repair involves the addition of an insulating plastic gate liner to the transfer case shifter. 21-15-96 11/8/96 ‘95-’97 (BR) CATEGORY 23 Quick connect removal and reconnect procedure. The information only bulletin describes the repair procedure for removal/reconnect of the transmission cooler line fitting on trucks built after 3/20/95 and superseded bulletin 21-02-95, 3/31/95. BODY TSB# MODELS SUBJECT/DESCRIPTION 23-01-96 1/5/96 ‘94-’96 (BR) Replacement cargo box information. This information bulletin list the revised part numbers for the 6.5 ft. and 8.0 ft. cargo box with a reinforced front box floor. 23-02-96 1/19/96 ‘94-’96 (BR) Creak or tick noise from right side instrument panel. The noise can be reproduced by pushing on the instrument panel at the shelf above the glove box door. The repair involves the removal of a 3/10 rivet. 23-09-96 2/2/96 ‘96 (BR) Clubcab with a “J” in the VIN at position 11 and built prior to 10/6/95 Seatbelt buckle difficult to engage with one hand. The driver side power seat may have a seat belt buckle that may be difficult to latch. The repair involves replacement of the seatbelt buckle. 23-21-96 3/29/96 ‘94-’96 (BR) Tailgate difficult to close in cold weather. At less than 5° F the tailgate latch stop bumper may be too stiff to allow for easy closure. Inspect and replace bumper stop. 23-27-96 4/19/96 ‘96 (BR) Windnoise (whistle) around grille area. If vehicle exhibits a windnoise (whistle) at speeds of 45 to 85 mph the diagnosis involves checking the grille for a manufacturing code “CAV3.” If there is not a CAV3 stamp than the grille is not likely the source of the noise. If noise is from the grille, the repair involves adding 1/4” foam tape between the grille and hood. 23-29-96 5/10/96 ‘94-’96 (BR) Tailgate cracking on top inner ends. Some vehicles may exhibit a sheet metal crack along the top inner ends of the tailgate. The bulletin describes the parts and the correct repair procedure. 23-45-96 8/2/96 ‘94-’96 (BR) Instrument panel creak. This bulletin supersedes TSB 23-57-93, 8/8/93. A creak or squeak may be present on the left or right side of the instrument panel. The noise is caused by two sheet metal parts rubbing together. The repair involves loosening the instrument panel and providing additional clearance between the cowl and instrument panel support joint. 23-46-96 8/2/96 ‘94-’96 (BR) Rattle in door area. Inspect the area of the door latch face around the lower window channel retaining bolt. If necessary perform the outlined repair procedure. A Publication of the TURBO DIESEL REGISTER 39 CATEGORY 23 23-69-96 11/22/96 ‘97 (BR) BODY...Continued Repair procedure for fallout/damaged paint. Mopar Parts has released a new product, Mopar Fallout Removal Kit (p/n 04882417) for correcting paint damage due to industrial fallout, rail dust, over-spray and volcanic ash. The Mopar Fallout Removal Kit does not use a compounding process or acid wash and is the current Chrysler preferred method for correcting fallout damage. This product uses a clay polymer material and a liquid that are safer and better than other fallout removal methods. CATEGORY 24 TSB# MODELS 124-01-96A ‘94-’96 (BR) 10/18/96 AIR CONDITIONING SUBJECT/DESCRIPTION Heater A/C system changes mode to defrost when accelerating. This bulletin supersedes TSB 24-01-96 (2/2/96). The vacuum supply line to the Heater A/C system may drop when accelerating or when speed control engages. This may cause the vacuum motor to switch to defrost. The repair involves the addition of a vacuum check valve to the vacuum system. 24-12-96 8/2/96 ‘96 (BR) Water leaks from HVAC floor outlet onto floor. Vehicles assembled Water may drain out of the HVAC floor outlets while operating the A/C system. The bulletin between 2/1/96 and describes the diagnosis and repair procedure. 6/28/96 with a VIN code 3 as the first digit. 24-16-96 10/11/96 ‘95-’96 (BR) With engine serial number 56230585 thru 56293178 or 45232867 thru 45360437. These engines were installed befor 6/1/96. Vacuum system contaminated with engine oil. Some Turbo Diesel trucks were produced without a check valve on the vacuum pump. Without a check valve oil may enter the vacuum system. A visual inspection of the HVAC system is presented and the repair procedure outlined. YOU MIGHT BE A FORD/CHEVY OWNER IF...* 1. You write off a radiator as a business expense. 2. Your truck is insured by Smith & Wesson. 3. There is a puddle in your driveway year-round. 4. Your stereo speakers used to belong to the Moonlight Drive-in Theater. 5. Your wife has ever said, “Come move this transmission so I can take a bath.” 6. You read the Auto Trader with a highlight pen. 7. You’ve ever hit a deer with your truck, deliberately. 8. There are more than four hats in the rear window of your truck. 9. Directions to your house include “turn off the paved road.” 10.Your hood ornament used to be a bowling trophy. *From “You Might Be A Redneck If . . . .” by Jeff Foxworthy. Foxworthy’s “Southern” humor can be found at bookstores everywhere. Buy his books for some serious fun. 40 A Publication of the TURBO DIESEL REGISTER TSBs Issued During ‘97 CATEGORY 2 FRONT SUSPENSION TSB # MODELS SUBJECT/DESCRIPTION 02-03-97A 8/29/97 ‘94-’97 (BR) Rear of vehicle sits too low. This bulletin supersedes TSB 02-03-97 as there were part number errors in the previous bulletin. The bulletin applies to 1500 series trucks rated at 6400 GVW and 2500 series trucks rated at 8800 GVW. The bulletin discusses rear leaf springs and shock absorber availability that will increase the height of the vehicle when the vehicle is at maximum GVW. The bulletin gives specific part numbers for various applications. CATEGORY 5 BRAKES TSB # MODELS SUBJECT/DESCRIPTION 05-03-97 3/17/97 ‘94-’97 (BR) Chassis dynamics diagnosis. The bulletin supersedes TSB 05-10-96 as revisions have been made to torque specifications and procedures. The bulletin summarizes different conditions that can cause a vehicle to move to the right or left when not controlled by the driver. A lengthy test procedure is outlined to isolate the cause of vehicle drift. 05-04-97 3/28/97 ‘94-’97 (BR) 2500-3500 series Accelerated brake lining wear, front versus rear. This bulletin supersedes TSB 05-02-96A as the bulletin incorporates the use of revised brake linings for trucks with 80mm calipers (typically found on 2500, 4x2 trucks). The bulletin discusses wear conditions, repair procedures, part numbers and rear brake adjustment procedures. 05-07-97 9/22/97 ‘98 (BR) Parking brake release handle does not fully return. The bulletin applies to trucks built prior to 8/15/97. If applicable, the repair procedure involves replacing a park brake release lever with a revised part. CATEGORY 7 COOLING TSB # MODELS SUBJECT/DESCRIPTION 07-03-97 5/9/97 All Engine coolant usage. This information only bulletin discusses the use of propylene glycol instead of ethylene glycol coolants. CATEGORY 8 ELECTRICAL TSB # MODELS SUBJECT/DESCRIPTION 08-01-97 2/3/97 ‘96-’97 (BR) JTEC powertrain control wiring harness connector repair packages. If a dealership determines that a powertrain customer complaint could be related to a poor electrical connection, the PCM connectors should be inspected. The bulletin describes an assortment of electrical connector and terminal repair components that are available to aid in powertrain electrical wiring repairs. 08-21-97 5/23/97 ‘94-’97 (BR) Engine failed to crank—no start. This information only bulletin discusses a condition where the engine does not crank over when the ignition is placed in the start position. The shop should then refer to the appropriate ‘97 Service Manual for proper diagnosis of the starter motor’s electrical circuit. A Publication of the TURBO DIESEL REGISTER 41 CATEGORY 8 ELECTRICAL...Continued 08-22-97A 7/11/97 ‘96-’97 (BR) Inoperative speed control. This bulletin supersedes TSB 08-22-97, dated 6/20/97. The problem covered by the bulletin is an inoperative speed control due to a vacuum supply hose that is loose, leaking or deteriorated. Using the diagnosis as outlined in the ‘97 Service Manual determine the cause of the inoperative speed control. Perform the repair as outlined in the bulletin. 08-27-97A 9/26/97 ‘97 (BR) Inoperative CD player as a part of sales code RAZ radio. This bulletin supersedes TSB 08-27-97, dated 7/18/97. The bulletin applies to ‘97 vehicles equipped with an AM/FM/cassette/CD player, sales code “RAZ” radio. A condition is described where the CD player may become inoperative, and will not accept the CD when attempting to insert the disk into the radio. The condition can be intermittent and may occur more often in hotter ambient temperatures. The AM/FM radio and cassette portion of the radio will continue to operate normally. The repair involves an exchange of the unit as supplied by Chryslers repair center. 08-30-97 9/5/97 ‘98 (BR) Ashtray receiver lamp degrades from blue-green to bright white. The ash receiver lamp, when illuminated, may change from a blue-green illumination to a bright white illumination. This change will occur over a long period of time of continuous use. This bulletin involves replacing the ash receiver lamp and housing with revised parts. 08-32-97 9/19/97 ‘94-’98 (BR) NHTSA authorized airbag deactivation for medical necessity. This information only bulletin describes the procedures necessary to deactivate airbags authorized by NHTSA. Airbag deactivation is a customer pay procedure, not covered under the provisions of warranty. 08-35-97 9/26/97 ‘98 (BR) Dead battery from ignition off draw (IOD). The problem described is a dead battery due to the glove box lamp remaining illuminated when the glove box door is closed. The proper diagnosis involves performing an ignition-off draw (IOD) test as described in the ‘98 Service Manual. If necessary the bulletin outlines the installation of two spacers between the glove box lamp switch bracket and the instrument panel glove box opening upper reinforcement. 08-39-97 11/28/97 ‘98 (BR) Remote keyless entry transmitter batteries discharge prematurely. This bulletin applies to vehicles built prior to August 15, ‘97 and describes a condition where the Remote Keyless Entry transmitter batteries discharge in approximately 6 weeks. The repair calls for replacement and reprogramming of the transmitter. CATEGORY 11 EXHAUST TSB # MODELS SUBJECT/DESCRIPTION 11-01-97 5/16/97 ‘94-’97 (BR) Whine or howl while driving at highway speeds. This bulletin applies to vehicles equipped with the diesel engine option. Some vehicles may experience a whine or howl noise while driving at highway speeds. This noise may be missinterpreted as turbo whine. After proper diagnosis of the condition the bulletin’s repair procedure involves replacement of the muffler. CATEGORY 14 FUEL TSB # MODELS SUBJECT/DESCRIPTION 14-07-97 7/18/97 ‘94-’97 (BR) Diesel fuel injection pump tampering. This information only bulletin applies to inline fuel injection pumps as found on ‘94 thru early ‘98 model trucks. The bulletin stipulates that there are only a few items on the pump that are serviceable (low idle adjustment, timing adjustment, throttle linkage adjustment, and air bleed procedures). Any other adjustments or modifications are considered tampering. Tampered injection pumps are not warrantable. The bulletin shows the service location where to look for suspected tampering. 42 A Publication of the TURBO DIESEL REGISTER CATEGORY 18 VEHICLE PERFORMANCE TSB # MODELS SUBJECT/DESCRIPTION 18-25-97 8/15/97 ‘96-’97 (BR) EGR system failure with Hex Code $2E* on 5.9L Diesel. This bulletin applies to vehicles equipped with a 5.9L Cummins Diesel engine built between Jan. 1, 1996 and Dec. 31, 1996 with California emissions sales code NAE. If while performing other diagnostics, the technician notices Hex Code $2E - EGR SYSTEM FAILURE on the Diagnostic Scan Tool (DRB III) the diagnosis outlined in the bulletin should be followed. The customer may or may not experience any engine driveability symptoms. The Malfunction Indicator Lamp (MIL) will not be illuminated. The repair involves using revised test procedures to diagnose the EGR system and selectively erase and reprogram the Powertrain Control Module (PCM) with new software (calibration changes) for the condition listed. *Editor’s note: $2E is correct. 18-29-97A 12/5/97 ‘96-’98 (BR) with Cummins engine and five-speed transmission CATEGORY 19 Vehicle bucking on ‘96 thru ‘98 trucks with the Cummins engine and a manual transmission. This bulletin supersedes TSB 18-29-97, dated 10/17/97. The condition to be corrected is one where the vehicle may exhibit a bucking or jerking condition while under light acceleration or while driving at steady state speeds. The vehicle may be in a loaded or unloaded state when the bucking or jerking occurs. This condition results from the sensitivity of the throttle linkage to driver input. The repair procedure involves replacement of the throttle linkage levers with revised parts. STEERING TSB # MODELS SUBJECT/DESCRIPTION 19-08-97 5/30/97 ‘96-’97 (BR) Clunk/rattle felt in steering column/wheel. This bulletin supersedes TSB 19-01-96, dated 2/9/96 for 1996 model year vehicles. This bulletin applies to all vehicles built in the United States (first digit of VIN = 1) and vehicles built in Mexico (first digit of VIN = 3) before Mar. 3, 1997. The condition to be examined is a clunk or rattle that maybe felt in the steering wheel/column during slow turns, rough road driving, and stops. The diagnosis involves inspection of the front suspension and steering components, including a check of all fasteners for proper torque as specified in the appropriate Service Manual. The repair procedure involves replacement of the steering intermediate shaft. 19-10-97 8/15/97 ‘94-’98 (BR) Steering wander. If when driving on a straight road, a higher than normal steering wheel movement (perceived as excessive play) is required to keep the vehicle going straight or if over-compensating the steering to keep the vehicle from wandering is a condition, the bulletin describes the diagnosis and repair procedure. The repair involves adjustment of the over-center and, if necessary, the worm thrust bearing preload adjustments on the steering gear. 19-16-97 11/28/97 ‘94-’97 (BR) Lower steering column noise and/or minor lower steering column movement. This bulletin applies to vehicles built before Dec. 31, 1996 and describes a lower steering column noise and/or minor lower steering column movement. If movement in the steering column is greater than the tolerance, the repair involves adding a “toe plate” (shim) to the steering column. CATEGORY 21 TRANSMISSION TSB # MODELS SUBJECT/DESCRIPTION 21-12-97 8/29/97 ‘96-’97 (BR) Transfer case shifter buzz or rattle. This bulletin supersedes TSB 21-13-96, dated 9/20/96. A buzz or clatter may be heard from the 4x4 transfer case shifter at an engine speed of approximately 2000 rpm. The condition may worsen when the engine is under load. On vehicles equipped with automatic transmission the diagnosis must be done with the transmission in overdrive and torque converter clutch engaged. If necessary the correction involves bending the shift lever spring reaction tab outward to increase the spring tension on the shift lever. A Publication of the TURBO DIESEL REGISTER 43 CATEGORY 22 WHEELS & TIRES TSB # MODELS SUBJECT/DESCRIPTION 22-01-97 6/13/97 ‘94-’97 (BR) Tire and wheel runout. Radial runout is the vertical distance between the high and low points on the tire or wheel edge measured at the center line of the tread. Lateral runout is the horizontal movement of the tire or wheel measured near the shoulder of the tire. Runout of more than the preferred specification may cause the vehicle to shake. This information only bulletin provides the proper specification for runout. CATEGORY 23 BODY TSB # MODELS SUBJECT/DESCRIPTION 23-03-97 2/14/97 ‘89-’93 (AD) ‘94-’97 (BR) Difficult to clean light colored “chalky” residue from black plastic body components. The discussion covers difficult to clean light colored “chalky” residue from exterior plastic body components that are molded in black, especially those that are textured, such as door handles, mirrors, roof rack attachments, etc. Frequently, this “chalky” residue is actually an accumulation of car wax, road grime, etc. trapped in the plastic grain. The correction is to clean the component with a soft bristle brush and mild detergent (liquid dish soap) until the residue is gone. 23-22-97 4/4/97 ‘94-’97 (BR) Driver’s side wiper blade contacts A-Pillar. This bulletin applies to vehicles built before Oct. 15, 1996. If the driver’s side wiper blade contacts A-Pillar or a popping sound can be heard when the driver’s side wiper blade reaches its full upper wipe position (farthest to the left) during high speed wiper operation, this bulletin describes the repair procedure. The repair has the dealership replace the wiper blades with a blade that has a revised air deflector. 23-25-97 5/2/97 ‘96-’97 (BR) Windnoise (whistle) around grille area. This bulletin supersedes TSB 23-27-96, dated 4/19/96. Vehicles may exhibit a condition where a windnoise whistle occurs from the front of the vehicle. This condition can occur while driving the vehicle at highway speeds between 45-65 mph or at slower speeds when driving into a headwind. If necessary a foam strip is installed between the grille and hood. 23-27-97 5/9/97 ‘94-’97 (BR) Water leaking through rear window. The problem is water leaking past rear window module into cab of vehicle. The bulletin outlines the repair procedure. 23-39-97 6/27/97 ‘94-’97 (BR) Driver side power mirror vibrates while driving. This bulletin supersedes TSB 08-64-94, dated 11/4/94. The condition covered in the bulletin is one where the driver side power mirror vibrates causing blurred images in driver side mirror while driving. The repair involves installing a power mirror support bracket onto the driver’s side mirror 23-61-97 11/28/97 ‘94-’98 (BR) Noise coming from cargo box area. The problem is an “oil canning” noise complaint coming from the box area caused by the cargo box cross member contacting the vehicle’s frame as the vehicle is operated over a rough-surfaced road. The repair involves installing isolators on two cargo box cross member rails. 23-67-97 12/6/97 ‘98 (BR) Upper rear corner of front door contacts upper front corner of cargo door. This bulletin applies to Quad Cab Ram trucks and describes a door closing condition where the upper rear corner of the front door may come in contact with the upper front corner of the cargo door, causing the paint to chip off the front and/or cargo door. If such, the correction is the installation of an anti chip plastic molding over the chipped area. 23-68-97 12/19/97 ‘98 (BR) Water leaking into vehicle through side cowl panel. This bulletin applies to vehicles built between November 16, 1997 and November 26, 1997. If water leaks through either the right and/or left side cowl panels and dampens the carpet in the foot well area, a trim cover is removed and a water proof patch is installed over the cowl panel. 44 A Publication of the TURBO DIESEL REGISTER CATEGORY 24 AIR CONDITIONING TSB # MODELS SUBJECT/DESCRIPTION 24-11-97 7/11/97 ‘94-’98 (BR) A/C evaporator odor. This bulletin supersedes technical service bulletin 24-06-95A, dated 5/26/95. Some vehicle operators may experience a musty odor from the A/C system, primarily at start up in hot and humid climates. This odor may be the result of microbial growth on the evaporator core. During normal A/C system operation, condensation forms in and around the A/C evaporator. When airborne pollutants mix with this condensation, bacteria and fungi growth begins and odor results. The repair involves cleaning the evaporator with Mopar aerosol cleaner. A Publication of the TURBO DIESEL REGISTER 45 TSBs Issued During ‘98 CATEGORY 5 BRAKES TSB # MODELS SUBJECT/DESCRIPTION 05-04-98 6/12/98 ‘97 - ‘99 (BR) Height sensing proportioning valve removal. This procedure should only be performed on 2500 series 4x4 vehicles that are continuously operated at 75% or greater GVW and have had their rear suspension altered. The bulletin describes a procedure the dealer should follow in the removal of a rear height sensing proportioning valve. Removal of the proportioning valve should help prolong front brake life. CATEGORY 6 CLUTCH TSB # MODELS SUBJECT/DESCRIPTION 06-01-98 6/19/98 ‘97 - ‘98 (BR) Release fork orientation. This bulletin applies to vehicles equipped with an NV4500 manual transmission and either the 8.0L gas engine or the 5.9L Cummins diesel engine. The bulletin covers the proper installation of the clutch release fork. CATEGORY 7 COOLING TSB # MODELS SUBJECT/DESCRIPTION 07-08-98 12/11/98 ‘98 - ‘99 (BR) Diesel engine overheating. This information applies to vehicles equipped with a 24 valve Cummins diesel engine with an engine serial number (ESN) 56512007 or prior. This bulletin involves replacing the thermostat with a revised part (05015090AA). CATEGORY 8 ELECTRICAL TSB # MODELS SUBJECT/DESCRIPTION 08-09-98 3/13/98 ‘94 - ‘98 (BR) Driver side power mirror vibrates while driving. This bulletin supersedes technical service bulletin 23-39-97, dated June 27, 1997. The problem covered is that the driver side power mirror vibrates or causes blurred images in driver side mirror while driving. If removal of aftermarket bugscreen deflectors does not cure the problem, a procedure for installing a mirror reinforcement bracket is described. 08-11-98 3/13/98 ‘98 (BR) Delayed operation of fog lamps. The fog lamps illuminate approximately two seconds after being turned ON with the headlamp LOW beams illuminated. This condition may also occur when the headlamps are turned from HIGH beam to LOW beam with the fog lamps ON. The repair involves checking the headlamp connector for proper wire location. 08-13-98 3/27/98 ‘98 (BR) Headlamp switch knob pulls out of headlamp switch. This bulletin applies to vehicles built before November 16, 1997. Rotate the headlamp switch knob to the full dim position. Then, apply pressure to the side of the knob and pull the knob to turn the headlamps ON. If the knob pulls out of the headlamp switch when the headlamps are turned ON, replace the knob using the described repair procedure. 46 A Publication of the TURBO DIESEL REGISTER CATEGORY 8 08-14-98 3/27/98 ‘98 (BR) ELECTRICAL...Continued Clicking, rattling, or ratcheting noise coming from the seat belt retractor. This bulletin applies to all club cab vehicles (both two door Club Cab and Quad Cab models) built before March, 5, 1998. During normal operation, the seat belt retractor on the vehicles listed above may emit a clicking, rattling, or ratcheting noise. This noise may be caused by a solenoid that is energized and de-energized to operate the retractor spool of the seat belt retractor assembly. The solenoid is controlled by a Seatbelt Control Timer Module (SCTM) which unlocks the retractor when energized. If your diagnosis determines and the owner feels that the noise occurs too frequently, the SCTM on your vehicle may be too sensitive and should be replaced. 08-16-98 4/17/98 ‘89 - ‘93 (AD) ‘94 - ‘99 (BR) Installation of radio transmitting equipment. This bulletin supersedes technical service bulletin 08-22-95, dated May 12, 1995. This informationonly TSB is provided to assist in properly installing communication equipment in Chrysler vehicle. This information should be given to any owner inquiring about installing radio transmitting equipment. 08-17-98 Rev. C 12/30/98 ‘94 - ‘99 (BR) Airbag on-off switches. This bulletin supersedes technical service bulletin 08-17-98 Rev. B dated September 18, 1998. This information only bulletin is provided to identify the parts and procedures necessary to deactivate airbags authorized by NHTSA. Airbag deactivation is a customer pay procedure. 08-21-98 5/22/98 ‘98 (BR) Radio Interference to/from two-way radio receivers. Customers may complain of intermittent poor reception on their two-way radios. This condition does not affect the operation of any AM or FM band radio. Radio receivers from approximately 20 MHZ to 174 MHZ may be susceptible to Radio Frequency Interference (RFI) from the fuel pump module’s motor. If there is RFI, the bulletin describes the installation of an RFI filter in series with the electric fuel pump. 08-35-98 6/24/98 ‘98 (BR) Instrument cluster bezel breaks when removed. This information-only bulletin is a reminder that the instrument cluster bezel is retained by several snap clip retainers and one screw located underneath the power outlet access door. It is imperative that this singular screw is removed prior to attempting to remove the instrument cluster bezel from the instrument cluster. 08-36-98 6/24/98 ‘89 - ‘93 (AD) ‘94 - ‘99 (BR) Use of two digit calendar year codes in automotive computers. There has been a great deal of recent media attention regarding the turn of the century (year 2000, Y2K, etc.) and the effect it will have on computers that have used two-digit calendar year coding in their programming. Questions are arising regarding computers used in automotive applications and the effect year 2000 will have on them. Two digit calendar-year codes have not been used in any Chrysler automotive onboard applications and no problems related to use of two digit coding for calendar years are anticipated. 08-51-98 11/27/98 ‘99 (BR) Compass mini trip computer indicates erroneous average miles per gallon, distance to empty, and/or trip odometer. This bulletin applies to vehicles equipped with the compass mini trip computer (sales code CUS). The display will show an erroneous number in the third digit from the right. If repair is necessary, the module is replaced. 08-54-98 12/30/98 ‘99 (BR) Static inside speakers and/or side speaker cuts out when power outside mirror operates. This bulletin applies to vehicles equipped with the power audio amplifier (sales code RDE) and heated outside power mirrors (sales code GTS) built between September 7, 1998 and November 3, 1998. The problem discussed is that static can be heard in the side speakers and/or the sound coming from the side speakers can cut out and/or in extreme cases, the radio can cut out with the radio in the FM mode when the power mirror is actuated to its end of travel. The repair involves replacing the mirrors. A Publication of the TURBO DIESEL REGISTER 47 CATEGORY 9 ENGINE TSB # MODELS SUBJECT/DESCRIPTION 09-06-98 10/30/98 ‘98 (BR) Incorrect engine oil dipstick. This information applies to vehicles equipped with 24 valve Cummins diesel engines. Some early 1998 24 valve diesel engines were built with an incorrect dipstick calibration. This incorrect marking causes an overfilled condition of approximately 1 1/2 quarts when at the top end of the safe zone on the dipstick. This overfill condition is not damaging to the engine. The Cummins part number is stamped on the dipstick. The incorrect Cummins P/N is 3944594. The problem is corrected with the installation of a revised dipstick, 05014562AA/Cummins 3935648. CATEGORY 11 EXHAUST TSB # MODELS SUBJECT/DESCRIPTION 11-08-98 9/25/98 ‘94 - ’98 (BR) Turbo Diesel wastegate actuator repair kit. A new kit has been released that will allow technicians to repair turbochargers with failed wastegate actuators. CATEGORY 14 FUEL TSB # MODELS SUBJECT/DESCRIPTION 14-01-98 Rev. A 7/17/98 ‘98 (BR) High pressure fuel line service. This bulletin supersedes technical service bulletin 14-01-98 dated March 6, 1998. This information applies to the 5.9L Cummins electronically injected 24 valve diesel built prior to engine serial number (ESN) 56462592. Design revisions have been made to the injector connector tube, and the new design can be re-torqued multiple times without compromising the seal between the connector tube and high pressure fuel line. The new part number for this connector tube is 05013856AA/Cummins 3944833. 14-02-98 3/27/98 ‘98 (BR) Fuel filter requirements. With the introduction of the Cummins 24 valve electronically injected engine, a new VP44 injection pump was also introduced. The VP44 injection pump requires finer fuel filtration due to tighter tolerances within the pump. Whenever a fuel filter is replaced, make sure the replacement filter is part number 04883963AB/Cummins 3931476/Fleetguard FS19528. 14-04-98 5/8/98 ‘98 (BR) Accelerator pedal buzzing noise with cruise control engaged. This bulletin applies to vehicles equipped with the 5.9L 24 valve Cummins diesel engine. If an audible buzz is coming from the accelerator pedal when the cruise control is engaged a road test diagnosis is described. If necessary, a re-routing of the accelerator cable is described. CATEGORY 18 VEHICLE PERFORMANCE TSB # MODELS SUBJECT/DESCRIPTION 18-06-98 2/27/98 ‘94 - ‘98 (BR) Hard starting diagnosis. This information applies to the 5.9L Cummins mechanically injected 12 valve diesel. The discussion covers hard or no-start diagnosis and repair. 18-07-98 2/27/98 ‘94 - ‘98 (BR) Effects of incorrect idle speed. This information applies to the 5.9L Cummins mechanically injected 12 valve diesel. Incorrect idle adjustments (either too high or low) may cause many different customer concerns. The bulletin gives a list of items that explain the condition/symptoms associated with incorrect idle settings along with component checks and specifications to set it properly. 48 A Publication of the TURBO DIESEL REGISTER CATEGORY 21 TRANSMISSION TSB # MODELS SUBJECT/DESCRIPTION 21-10-98 Rev. A 9/25/98 ‘94 - ‘99 (BR) Loss of fifth gear. This bulletin supersedes technical service bulletin 21-10-98, with an effective date of September 11, 1998. This bulletin applies to vehicles equipped with a NV 4500 manual transmission and the 8.0L V10 gas engine or the 5.9L Cummins diesel engine. The problem described is that the transmission operates normally through all ranges except fifth gear. The 14 page bulletin describes the proper repair procedure. CATEGORY 23 BODY TSB # MODELS SUBJECT/DESCRIPTION 23-13-98 5/8/98 ‘98 (BR) Rear sliding window difficult to open, will not remain latched, and/or leaks water past the lower run channel. If the rear sliding window is difficult to open, will not latch, and/or leaks water past the sliding rear window’s lower run channel, this bulletin describes the proper diagnosis/repair. 23-16-98 5/1/98 ‘98 (BR) Splash guards (mud flaps) discolored and/or distorted due to proximity to tailpipe. This bulletin applies to vehicles equipped with dual rear wheels. Vehicles equipped with splash guards may experience discoloration and/or distortion along the outside edge of the passenger side rear splash guard due to the proximity to the tailpipe. If necessary, a new tailpipe assembly is installed. 23-17-98 5/1/98 ‘94 - ‘98 (BR) Center armrest driver side hinge cover broken. If the center armrest upper inertia latch cover (driver side hinge cover) is broken, the proper repair involves replacement of the hinge. 23-35-98 8/7/98 ‘94 - ‘99 (BR) Door trim panel retainer clip attachment breakage when door trim panel is removed for service. The bulletin cautions the dealer that damage to the door trim panel may occur if the door trim panel retainer clips are separated from the door without using a trim panel removing tool. 23-37-98 8/21/98 ‘98 - ‘99 (BR) Cargo net eliminated from production. This bulletin applies to standard cab vehicles and informs the dealer network that the cargo net is no longer a production item. It can be purchased through the parts department using Mopar number 04761197. 23-58-98 11/27/98 ‘99 (BR) Wind noise (whistle) around grill area and/or dimples on the grill painted surface opposite of the grill fasteners. This bulletin applies to Ram trucks equipped with the sport package. If there is a windnoise whistle occurring from the front of the vehicle at highway speeds between 45-65 mph or at slower speeds when driving into a headwind, this bulletin describes the repair procedure. A Publication of the TURBO DIESEL REGISTER 49 TSBs Issued During ‘99 CATEGORY 2 FRONT SUSPENSION TSB# MODEL SUBJECT/DESCRIPTION 02-06-99 Rev. A 12/17/99 ‘94-’00 (BR) Front wheel bearing grease is evident on the bearing seal area. This bulletin supersedes TSB 02-06-99, dated June 11, 1999. The revisions include the addition of 4x2 models and additional model years. This information-only bulletin discusses the fact that front wheel bearings may be incorrectly diagnosed as faulty due to the evidence of wheel bearing grease on the bearing seal areas. This grease purge is a normal design condition. The factory fill of the bearings includes a slightly greater amount of grease than is required for the bearing lifetime lubricant. A portion of the grease purges through the self-venting seal in the initial few thousand miles to form an additional barrier in the area of the seal and the stamped slinger. This barrier aids in the prevention of contaminants passing through the seal and into the bearing. Do not remove or clean the purged grease as part of normal maintenance because it provides additional protection and once removed, damage to the seal and bearing could result. 02-13-99 09/10/99 ‘94 - ‘99 (BR) Squeaking noise from rear leaf springs. This bulletin supersedes TSB 02-03-96, dated may 31, 1996. If the diagnosed condition is a squeaking noise coming from the rear of the vehicle, the bulletin gives the correct repair procedure to replace the leaf spring tip liners/install spring clip isolators. CATEGORY 5 BRAKES TSB# MODELS SUBJECT/DESCRIPTION 05-04-99 05/28/99 ‘98 - ‘99 (BR) Chassis dynamics diagnosis. This 21-page bulletin involves diagnosis and repair of a vehicle drift condition and on some vehicles, installing a shim between the wheel and the brake rotor, between the wheel and hub/ bearing assembly, or between the wheel and hub extension. Chassis dynamics diagnosis is the diagnosis of a condition where the vehicle may move either to the right or the left when not controlled by the driver. This condition can be caused by any of the following: Non-factory installed options (e.g. snow plow), tires or wheels of different size, aftermarket wheels, tires that have a belt that has shifted, incorrect tire pressure, a vehicle that is carrying extra added weight (e.g. tool boxes), steering and/or suspension components that are worn or damaged, wheel bearings that are worn or damaged, a vehicle that is not with in alignment specifications, brake drag from brake components that do not release, or braking imbalance. Additionally, under certain road conditions (e.g. high road crown, grooved roads, etc.), most vehicles will move to the right or left uncontrolled by the driver. Also, the same may happen if a cross-wind condition exists. 05-11-99 12/31/99 50 ‘94 - ‘96 (BR) Revised power brake booster check valve. This bulletin applies to vehicles equipped with the 5.9L Cummins diesel engine. A revised power brake booster check valve p/n 05011393AA has been released for service. The new check valve performance has been improved by changing the flapper style check valve to a spring loaded style check valve. The spring loaded style check valve performance is superior, especially in vehicles that utilize mechanical vacuum pumps to provide the vacuum source to operate the power brake booster. Part number 05011393AA should be used any time the power brake booster check valve is serviced on the subject model vehicles. A Publication of the TURBO DIESEL REGISTER CATEGORY 8 ELECTRICAL TSB# MODELS SUBJECT/DESCRIPTION 08-06-99 Rev. A 12/17/99 ‘98 - ‘00 (BR) Radio interference to/from two-way radio receivers. This bulletin supersedes technical service bulletin 08-06-99, dated March 5, 1999. Customers may complain of intermittent poor reception on their two-way radios. This bulletin involves installing a RFI filter in series with the electric fuel pump motor. 08-16-99 6/11/99 ‘99 (BR/BE) Inoperative or intermittent remote keyless entry (RKE) transmitter. This bulletin supersedes TSB 08-16-99, Dated May 28, 1999. This bulletin applies to vehicles built prior to March 1, 1999. It applies only to vehicles equipped with the new peanut shaped transmitters. The problem discussed is an inoperative RKE transmitter. This condition may be intermittent and will have similar symptoms to a dead transmitter battery. This can be caused by a lost or intermittent contact between the battery terminal and the printed circuit board. A transmitter repair kit containing a new case with an improved battery terminal has been released. This bulletin involves replacing the RKE transmitter case. 08-17-99 05/28/99 ‘99 (BR) Compass/mini-trip computers no longer need calibration during new vehicle preparation. This information-only bulletin applies to vehicles equipped with the compass/mini-trip computer (sales code CUS) built after April 28, 1999. Vehicles equipped with the compass/mini-trip computer are now having their compasses calibrated by the assembly plant making it no longer necessary to calibrate the compass during new vehicle preparation. However, in order to ensure proper operation of the compass, it will still be necessary to set the variance of the compass prior to vehicle retail delivery. 08-22-99 07/02/99 ‘98 (BR) Intermittent operation of oil pressure gauge. This bulletin applies to vehicles equipped with the 5.9L Cummins 12-valve Turbo Diesel engine built before January 5, 1998. The condition for correction is an oil pressure gauge that intermittently drops to zero pressure. In addition, the warning chime may sound when the oil pressure gauge drops to zero pressure and the check gauge lamp may come on. Proper repair involves selectively erasing and reprogramming the Powertrain Control Module (PCM) with new software (a calibration change). 08-28-99 08/20/99 ‘00 (BR) Simplified compass mini trip computer calibration. This bulletin applies to vehicles equipped with the compass mini trip computer (sales code CUS). The subject model vehicles are shipped from the assembly plants with the compass mini trip computer NOT calibrated. This will be identified by “CAL” displayed on the compass mini trip computer. To calibrate the compass mini trip computer, drive the vehicle in a complete circle until “CAL” is no longer displayed on the compass mini trip computer. 08-32-99 10/01/99 ‘98 - ‘99 (BR) Radio interference to/from two-way radio receivers. This bulletin addresses the complaint of intermittent poor reception on two-way radios, and discusses the proper repair. Radio receivers from approximately 30 MHZ to 50 MHZ may be susceptible to Radio Frequency Interference (RFI) from the Airbag Control Module (ACM). Note: technical service bulletin 08-06-99, dated March 5, 1999, addresses two-way radio interference from the fuel pump module and should be performed prior to performing this technical service bulletin. 08-37-99 11/12/99 ‘94 - ‘00 (BR) Airbag On-Off Switches. This bulletin supersedes technical service bulletin 08-17-98 Rev C, dated December 30, 1998. This information-only bulletin identifies the parts and procedures necessary to deactivate airbags authorized by NHTSA. Airbag deactivation is a customer pay procedure, NOT covered under the provisions of the warranty. 08-39-99 12/10/99 ‘00 (BR) Communications may stop between the JTEC PCM and a generic scan tool. This information applies to vehicles built before November 30, 1999. The JTEC Powertrain Control Module (PCM) may stop communications with a generic scan tool. This bulletin involves selectively erasing and reprogramming the JTEC PCM with new software calibration change (00Cal13 & 00Cal13A). A Publication of the TURBO DIESEL REGISTER 51 CATEGORY 8 ELECTRICAL...Continued 08-42-99 12/17/99 ‘98 - ‘99 (BR) The fuel gauge reads full for an excessive period of time. This bulletin applies to vehicles equipped with the 5.9L Cummins diesel engine. After driving over 200 miles, the fuel gauge may read full until the vehicle travels over a bump in the road and then the gauge operates normally. This condition may be caused by the float in the fuel pump module sticking and may be difficult to diagnose. Perform the repair procedure (new fuel pump module) if the customer’s concern matches the description identified in the Symptom/Condition. 08-43-99 12/17/99 ‘98 - ‘99 (BR) Central timer module software update when a wiper module is replaced. This bulletin applies to vehicles equipped with remote keyless entry. Due to a design change in MOPAR replacement wiper modules, the central timing module must be updated with new software in order to allow the wiper module to function properly. The outlined repair procedure must be performed any time the wiper module is replaced. 08-44-99 12/31/99 ‘99 - ‘00 (BR) Intermittent speaker operation/static. This bulletin applies to vehicles equipped with the Infinity sound system sales codes (RBR, RBN, and RAZ) built before October 1, 1999. The condition is intermittent operation/static that may occur in any or all speakers. The bulletin describes the proper repair. CATEGORY 9 ENGINE TSB# MODELS SUBJECT/DESCRIPTION 09-04-99 07/16/99 ‘98 - ‘99 (BR) Hard-to-diagnose noise coming from the engine turbocharger area. This bulletin applies to vehicles equipped with a Cummins 5.9L – 24V diesel engine built prior to engine serial number (ESN) 56587424. The ESN is located on the engine data plate which is located on the front left side of the engine, affixed to the gear housing. A noise may be present which on initial investigation may sound like a noisy turbocharger bearing. The sound of the noise may be described as a whistle, a squeal, a howl, a moan, or a gurgle. The noise will be more noticeable as engine temperature increases. The noise will most often occur when the warm engine is operated between 1,500 and 2,200 rpm’s. The noise is usually heard in the cab, louder on the passenger side or seems to come form the dash vents. The noise may be caused by the coolant supply hose connector. The connector is located on the cylinder head next to the turbocharger. The connector is used to supply coolant to the heater hose. The bulletin describes the replacement of the hose connector. CATEGORY 18 VEHICLE PERFORMANCE TSB# MODELS SUBJECT/DESCRIPTION 18-02-99 02/19/99 ‘98 - ‘99 (BR) Erratic torque converter clutch (TCC) operation. This information applies to vehicles equipped with a 5.9L 24-valve diesel engine and automatic transmission built between January 1, 1998 and December 18, 1998. Some vehicles may exhibit a surge-like condition while in fourth gear. This may be caused by the TTC unlocking and locking when it should be consistently locked. The cause of this erratic operation has been identified as electrical noise from the Throttle Position Sensor (TPS) or Alternator. This bulletin involves selectively erasing and reprogramming the Powertrain Control Module (PCM) with new software (calibration changes 98cal12 and 99cal14). 18-07-99 04/30/99 ‘98 - ‘99 (BR) Erroneous MIL illumination with DTC $A8 (P1763) governor pressure sensor volts too high. This information applies to vehicles equipped with a reseries automatic transmission built before December 18, 1998. Some vehicles may exhibit a MIL illumination with DTC $A8 (P1763) GOVERNOR PRESSURE SENSOR VOLTS TOO HIGH. The vehicle operator may experience slower than normal accelerations because the transmission may temporarily enter third gear “Limp-In” Mode. The “Limp-In” Mode may last until the vehicle owner cycles the ignition key. The technician may not detect a problem with the automatic transmission during a diagnostic test 52 A Publication of the TURBO DIESEL REGISTER CATEGORY 18 VEHICLE PERFORMANCE...Continued or test drive. The MIL is caused by an increase in hydraulic pressure. The increased hydraulic pressure is the result of a new valve body machining process. Vehicles built after January 1, 1998 have an automatic transmission with this new process valve body. Vehicles built before January 1, 1998 may experience this condition if either the transmission valve body or the entire automatic transmission was replaced with components manufactured after January 1, 1998. This bulletin involves selectively erasing and reprogramming the JTEC Powertrain Control Module (PCM) with new software (calibration changes 99Cal14, 98Cal12). 18-08-99 04/30/99 ‘98 - ‘99 (BR) Improved speed control system sensitivity to set speed. Some customers may complain that their vehicle speed control system may be too busy or drift more than 2 mph below or above the initial vehicle set speed. Vehicle load and road/terrain conditions may impact this issue. The new PCM software improves the speed control system sensitivity so that the vehicle speed remains closer to its set speed with fewer engine rpm oscillations. This bulletin involves selectively erasing and reprogramming the JTEC Powertrain Control Module (PCM) with new software (calibration changes 98Cal12A, 99Cal 17). There is no change to the Cummins CM551 Engine Control Module (ECM) software. 18-09-99 05/21/99 ‘99 (BR) Common diagnostic trouble codes caused by an open fuse. Analysis has revealed an issue with repeated repairs for the same Diagnostic Trouble Code (DTC). The DTC may be due to an overlooked open circuit used to power the component in question. In most instances, either the circuit fuse has been erroneously removed or the fuse itself is open (blown). The component in question, and its circuit, are often protected by two fuses. It is usually the lower amperage fuse that is either missing or open. The lower amperage fuse is positioned electrically in the circuit between the component in question and either a relay or the ignition switch. The lower amperage fuse will be located either in the underhood Power Distribution Center (PDC) or in the instrument panel Junction Block. The lower amperage fuse is often missing because it was removed erroneously for use in another low current circuit. If the lower amperage fuse is open (blown), then the circuit and component in question must be checked for an electrical short. Check to make sure that the open fuse was not exchanged with another fuse or was damaged by an installed accessory. 18-11-99 05/28/99 ‘98 - ‘99 (BR) Slow acceleration or lack of power while towing or hauling a heavy load. This information applies to vehicles equipped with a 5.9L - 24V diesel engine built before engine serial number 56587297 with a date of engine manufacture of May 5, 1999. This information is available on the engine data plate, which is located on the left side of the engine, affixed to the gear housing. There may be a condition of low power or slow acceleration when towing or when hauling a heavy load. This software change, to the Cummins CM551 diesel engine controller, will increase engine torque. Some 1998 BR vehicles equipped with a 5.9L - 24V diesel engine may already have the latest software revision. Verify that the ECM is at calibration level 98T17 (p/n’s 333034303J / 333035303J / 333036303J / 333037303J). If the calibration level is 98T17, then this TSB does not apply and further powertrain diagnosis may be required. This bulletin involves selectively erasing and reprogramming the Cummins CM551 Engine Control Module (ECM) with new software (calibration changes 98Cal T17 and 99CalT8B). There is no change to the JTEC PCM software. 18-21-99 ‘98 - ‘99 (BR) 5.9L - 24V Cummins diesel low power or poor performance diagnostic. The vehicle operator may complain of slow acceleration or a lack of power when towing or hauling moderate to heavy loads. The condition may be worse at higher altitude. Do not proceed with this technical service bulletin until TSB 18-11-99 has been performed. This bulletin further describes diagnostic procedures that may be used to assist the technician in the diagnosis of a low power or poor performance complaint. 18-24-99 11/15/99 ‘00 (BR) 5.9L - 24V Cummins diesel low power or poor performance diagnostic. The vehicle operator may complain of slow acceleration or a lack of power when towing or hauling moderate to heavy loads. The condition may be worse at higher altitude. This bulletin involves diagnostic procedures that may be used to assist the technician in the diagnosis of a low power or poor performance complaint. The procedures outlined start with confirmation that TSB 18-1198 (turbocharger wastegate actuator repair kit) has been performed. Additionally, the technician should verify that the throttle is opening fully. • Perform the complete FUEL TRANSFER PUMP PRESSURE TEST procedure. A Publication of the TURBO DIESEL REGISTER 53 CATEGORY 18 VEHICLE PERFORMANCE...Continued • Inspect the fuel tank rollover valve for restrictions and to ensure that the shipping cap has not been left on the end of the valve. • Inspect the charge air cooler hoses and clamps for proper installation. Inspect all connections and clamps for looseness. Verify that no leaks are present when the engine is under boost conditions. • While performing the following road test, verify that the turbo boost pressure is 16 psi during wide open throttle (WOT) acceleration. • While road testing the vehicle in a safe area and manner, conduct an acceleration test. For vehicles equipped with an automatic transmission conduct a 0-60 mph acceleration test. For vehicles equipped with a manual transmission, conduct a 40-60 mph acceleration test in fourth gear. It may take the technician performing several acceleration tests to obtain consistent acceleration times. A performance vehicle/tire size/weight chart is provided. A summary of the chart reveals 0-60 mph test for automatic trucks 13.5 to 15 secondsis acceptable. In the 40 to 60 mph test, for manual trucks in fourth gear, can vary from 7.5 to 9.0 seconds. Correction factors for vehicle weight and altitude are presented. 18-24-99 11/15/99 ‘00 (BR) CATEGORY 19 5.9L - 24V diesel engine intermittent engine stumble. This information applies to vehicles equipped with a 5.9L - 24V diesel engine built before engine serial number 56624822 with a date of manufacture of August 28, 1999. This information is available on the engine data plate, which is located on the left side of the engine, affixed to the gear housing. The customer may experience a quick, momentary stumble while driving or when stopped with t he engine running. This condition is intermittent and may occur at any time during the operation of the vehicle. A change to the Cummins CM551 Engine Control Module (ECM) software corrects this condition (calibration change 99CalT9A). STEERING TSB# MODELS SUBJECT/DESCRIPTION 19-03-99 05/07/99 ‘94 - ‘99 (BR) Steering slow to return to center. This bulletin supersedes technical service bulletin 19-01-94, dated January 28, 1994. This bulletin applies to 4x4 vehicles equipped with a Dana model 60 front axle (sales code DRD). The rate of steering return to center (after turning a corner) may be slower than normal or may require slight steering wheel correction while driving straight ahead. The repair involves performing a ball joint tightening sequence. 19-04-99 05/28/99 ‘99 (BR) Steering system diagnosis. Customers may complain that the steering system “feels heavy” or the steering wheel is not centered while driving on a straight road. The steering gear used on the 1999 Ram Truck is designed to have a heavy on-center steering characteristic. Before replacing a steering gear for a steering system “feel” complaint, perform the suggested diagnosis to ensure that the rest of the steering system components perform as designed. CATEGORY 21 TRANSMISSION TSB# MODELS SUBJECT/DESCRIPTION 21-08-99 04/30/99 ‘96 - ‘99 (BR) Buzz, whine or moaning-type noise from a cold transmission when reverse is selected. Some vehicles may exhibit an intermittent noise from the transmission when reverse gear is selected. This noise has been described as a buzz, whining, or moaning-like noise. The noise is most noticeable when transmission fluid temperature is below 100 degrees F (38C). The condition is caused by a resonance of the transmission regulator valve system. The repair involves replacing the transmission regulator valve. 21-14-99 11/05/99 ‘00 (BR) 47RE transmission - harsh or early shifts. This information applies to vehicles equipped with a 5.9L - 24V diesel engine and 47RE automatic transmission built before engine serial number 56624822 with a date of manufacture of August 54 A Publication of the TURBO DIESEL REGISTER CATEGORY 21 TRANSMISSION 28, 1999. This information is available on the engine data plate, which is located on the left side of the engine, affixed to the gear housing. Some early-built 2000 model year Ram Trucks may experience a harsh 3-4 shift. This condition may occur during any throttle position situation when transmission sump temperatures are 60 degrees F (15C) or higher. The harsh 3-4 shift may be more pronounced during heavy vehicle loading, e.g., trailer towing. Some 2000 M.Y vehicles may also experience an early 1-2 or 2-3 shift condition during wide open throttle (WOT) situations. This condition may have an impact on vehicle performance (acceleration). This condition may occur when transmission sump temperatures are 32 degrees F (0C) or higher. Changes to the Cummins CM551 engine control module (ECM) software/calibration corrects the above two conditions (calibration change 00Cal57T9A). 21-19-99 11/12/99 ‘99 - ‘00 (BR) CATEGORY 23 47RE delayed TCC lock-up and/or MIL P1740 = TCC or O/D solenoid performance. This information applies to vehicles built for the California market (NAE), equipped with a 5.9L - 24V diesel engine and built between March 2, 1999 and October 1, 1999. The customer may experience a delayed torque converter clutch engagement (lock-up). This condition may illuminate the Malfunction Indicator Lamp (MIL) due to Diagnostic Trouble Code (DTC) P1740 TCC or O/D Solenoid Performance. In some situations, the customer may describe the condition as a lack of a transmission shift (TCC lock-up) between 30 and 50 mph. The transmission valve body upper housing separator plate was revised (wider slot) to improve fluid flow to the torque converter clutch. This bulletin describes the replacement of the transmission valve body upper housing separator plate. BODY TSB# MODELS SUBJECT/DESCRIPTION 23-08-99 03/05/99 ‘94 - ‘99 (BR) Instrument panel creak. This bulletin supersedes technical service bulletin 23-45-96, dated August 2, 1996. A creak or squeak may be present near the left and/or right side(s) of the instrument panel. The noise is caused by the sheet metal joint between the A-pillar and the dash panel plenum lower rubbing together. This bulletin describes the repair procedure which involves loosening the instrument panel and providing additional clearance between the A-pillar inner panel and dash panel. 23-18-99 05/21/99 ‘98 - ‘99 (BR) Bezel comes loose from seat belt retractor cover. This bulletin applies to club/quad cab vehicles. The seat belt retractor cover bezel comes loose due to a cracked seat belt retractor cover. The crack may occur at the bottom of the opening where the seat belt bezel snaps into the cover. This bulletin describes the installation of a new seat belt retractor cover. 23-22-99 07/02/99 ‘94 - ‘00 (BR) Rattle in door area. This bulletin supersedes technical service bulletin 23-46-96, dated August 2, 1996. Customers may complain of one or more of the following symptoms: rattle heard in the door area; door window shakes when closing; door lower window channel bolt has pulled through the door sheet metal; door sheet metal is cracking around the lower window channel bolt. This bulletin involves removing the window channel from the door and installing a revised window channel. 23-28-99 08/13/99 ‘98 - ‘99 (BR) Power seat track vertical adjustment stuck in a full upward or full downward position. This bulletin applies to club or quad cab vehicles built before March 1, 1999. The repair condition is that the front and/or rear power seat track vertical adjuster motors are stuck in a full upward or full downward position. The repair involves removing existing lubrication on the power seat track adjustment lead screws and then applying a new lubricant. 23-35-99 Rev. A 10/01/99 ‘94 - ‘00 (BR) Child seat tether anchors. This bulletin supersedes technical service bulletin 23-35-99 dated September 3, 1999. This bulletin identifies the parts and labor operation numbers necessary to install a child seat tether anchor. A Publication of the TURBO DIESEL REGISTER 55 TSBs Issued During ‘00 CATEGORY 2 FRONT SUSPENSION TSB# MODELS SUBJECT/DESCRIPTION 02-04-00 Rev. A 05/12/00 ‘94 - ’01 (BR) Squeaking/clicking noise from rear leaf springs. If the vehicle has a squeaking/clicking noise coming from the rear of the vehicle, verify that the noise is coming from the rear springs as the vehicle’s suspension goes through jounce and rebound. If a squeaking/clicking noise is coming from the rear springs, perform the repair procedure. The procedure involves replacing the spring tip liners and installing spring clinch clip insolators. CATEGORY 5 BRAKES TSB# MODELS SUBJECT/DESCRIPTION 05-04-00 05/01/00 ‘00 (BR) High pitched squeal from rear brakes. This bulletin applies to 2500/3500 series Ram trucks built before March 1, 2000. The condition discussed is a high-pitched squeal coming from the rear brakes when the brakes are applied. The repair procedure involves installing revised rear brake shoes. 05-06-00 06/09/00 ‘00 - ‘01 (BR) Front brake caliper anti-rattle clip retainer service procedures. This bulletin applies to vehicles built before June 26, 2000. Vehicles built between April 19, 2000, and June 26, 2000, were built with a front brake caliper anti-rattle clip retainer. This Technical Service Bulletin provides the installation procedures for the retainer. CATEGORY 8 ELECTRICAL TSB# MODELS SUBJECT/DESCRIPTION 08-05-00 04/21/00 ‘99 (BR) Intermittent operation of the instrument cluster. The needle of the instrument cluster gauges may intermittently drop to zero and/or the telltale lamps, such as the AIRBAG warning lamp, may intermittently come on. The bulletin involves replacing the instrument cluster wire harness connector and associated wire terminals. 08-08-00 03/17/00 ‘99 - ‘00 (BR) Inoperative or intermittent remote keyless entry (RKE) transmitter. The problem described is an inoperative RKE transmitter. This condition may be intermittent and will have similar symptoms to a dead transmitter battery. This bulletin discusses replacing and reprogramming the (RKE) transmitter. 08-11-00 03/24/00 ‘94 - ‘00 (BR) Recordable compact discs used in automotive CD players. Some recordable compact disc media, such as CD-R and CD-RW, may not comply with the standard CD format used in automotive CD players. When these CDs are used, customers may encounter error messages skipping, or delaminating of the labels, which can cause an eject failure. It is important to question whether these kinds of CD media are being used. When customers encounter these symptoms, check the system with a known playable CD. The media may not be compatible with some automotive CD players. Replacing or exchanging the CD player will not address these issues. 08-16-00 04/28/00 ‘94 - ‘00 (BR) Front door speaker buzz. The bulletin discusses a buss noise coming from the front door speaker(s). The noise may be more noticeable while listening to “talk” radio segments with deep male voices. The repair procedure involves installing a urethane foam pad between the inner door panel and the door trim. 56 A Publication of the TURBO DIESEL REGISTER CATEGORY 8 ELECTRICAL...Continued 08-17-00 05/12/00 ‘99 - ‘00 (BR) Intermittent speaker operation/static. Intermittent operation/static may occur in any or all speakers. The bulletin applies to vehicles equipped with the Infinity sound system sales codes (RBR, RBN, and RAZ) built before October 1, 1999. This repair involves installing new speaker kits on both right and left front doors and installing foam between the inner door trim panel and the door. 08-18-00 05/12/00 ‘98 - ‘01 (BR) Radio Interference to/from two-way radio receivers. Customers may complain of intermittent poor reception on their two-way radios. This bulletin involves installing a RFI filter in series with the electric fuel pump motor. 08-23-00 06/23/00 ‘98 - ‘01 (BR) Plastic boot to protect the electrical harness B+ end terminal at the generator. While service is being performed to the engine, it may be possible for a momentary electrical short to occur. The electrical short may be caused when a metallic object, such as a wrench or oil filter, comes in contact with the B+ end terminal of the generator wire harness. The B+ end terminal is bolted to the generator B+ stud (output terminal). The B+ stud on the generator is protected by a plastic surround. Part of the wire harness end terminal may extend beyond the protective plastic surround for the B+ output terminal. This bulletin applies to vehicles equipped with a 5.9L – 24V diesel engine built before engine serial number 56681800 with a date of manufacture of January 29, 2000. The repair procedure involves the installation of a protective rubber boot (part number 04487042) over the B+ terminal. 08-26-00 09/29/00 ‘00 - ‘01 (BR) CATEGORY 9 Central timer module electrically “locks-up.” This bulletin applies to vehicles equipped with remote keyless entry (sales code GXR). In addition, this bulletin applies to vehicles built on or before the following build dates: Ram trucks built at the St. Louis North Assembly Plant on or before August 21, 2000; Ram trucks built at the Saltillo Truck Assembly Plant on or before August 31, 2000; Ram trucks built at the Lago Alberto Truck Assembly Plant on or before September 6, 2000. The repair involves replacing the Central Timer Module (CTM) with a revised part. ENGINE TSB# MODELS SUBJECT/DESCRIPTION 09-02-00 02/18/00 ‘99 - ‘00 (BR) A heavy oil or fuel-like odor coming from the diesel engine compartment. This bulletin applies to vehicles equipped with a 5.9L diesel engine. The problem is a heavy oil or fuel-like odor coming from the engine compartment. This condition may occur after the engine oil has been changed. The odor appears to reduce in intensity as the engine oil ages. This aging usually occurs between the first 300 to 500 miles following the oil change. The odor condition is the result of certain diesel engine oil additives. These oil additives are blended with the base oil during the manufacture of the engine oil. Some diesel engine oils with the American Petroleum Institute quality rating of CH-4 or CH-4+ may be more prone ot exhibiting the odor condition. The DaimlerChrysler recommended diesel engine oil (p/n 04798231 or p/n 0479832) is formulated to minimize the heavy oil odor condition. 09-03-00 02/18/00 ‘00 (BR) Engine oil seepage past the oil fill cap on 5.9L-24V diesel engine. This bulletin applies to vehicles equipped with a 5.9L-24V diesel engine built before engine serial number 56664950 with a date of manufacture of December 8,j 1999. Oil seepage may be noticed in the area of the oil fill cap. This may be due to paint overspray around the oil fill opening of the cylinder head valve cover. The paint overspray may cause an uneven sealing surface. The corrective action involves using fine grit sandpaper to insure a smooth mating surface. Another possible cause for the oil seepage may be a damaged oil fill cap o-ring. The o-ring may be cut die to the presence of a sharp corner around the top edge of the cylinder head cover oil fill opening. A Publication of the TURBO DIESEL REGISTER 57 CATEGORY 14 FUEL TSB# MODELS SUBJECT/DESCRIPTION 14-01-00 02/04/00 ‘00 (BR) Thump/bump sound heard 1-3 seconds after the vehicle comes to a stop. This bulletin applies to 2500 series Club/Quad cab vehicles equipped with the 6 ½ foot box built before December 1, 1999. Customers may hear a thump/bump sound that occurs 1-3 seconds after the vehicle comes to a complete stop. In some cases, the thump/bump sound may be transmitted through the floor of the vehicle allowing the customer to feel the thump/bump in the floor pan of the vehicle. The sound will only occur when the fuel level of the vehicle is between ½ and 7/8 tank of fuel. Since the fuel level of the vehicle must be between ½ to 7/8 full, the condition may be difficult to diagnose. The repair involves replacing the fuel tank. 14-02-00 04/14/00 ‘00 - ‘01 (BR) Crack in diesel fuel filter housing cover caused by an improper servicing procedure. This bulletin applies to vehicles equipped with a 5.9L-24V diesel engine built before engine serial number 56686747 with a date of manufacture of February 09, 2000. Analysis of returned fuel filter housing covers has determined that a number of plastic covers are being replaced due to cracks. Further analysis has revealed that the cracks may be caused by improper cover removal procedures. Do not use the square opening to remove or install the cover. The fuel filter cover may crack. To remove or install the fuel filter cover correctly, only use the 1 1/8” hex head. Use of a six point socket is preferred. 14-03-00 04/14/00 ‘98 - ‘01 (BR) Maintenance to the Water-In-Fuel sensor probes due to possible fuel contamination. The probes on the end of the Water-In-Fuel (WIF) sensor may become less effective at sensing the presence of water in the fuel if they are exposed to contaminated fuel. Contaminant from the fuel may insulate the WIF sensor probes and inhibit the WIF lamp from illuminating when water is present. Any time service is performed on the fuel filter or fuel filter housing, the probes on the end of the Water-In-Fuel sensor should be cleaned. Use a clean cloth to wipe the WIF probes of any contaminant. CATEGORY 18 VEHICLE PERFORMANCE TSB# MODELS SUBJECT/DESCRIPTION 18-015-00 Rev. A 12/21/00 ‘98 - ‘01 (BR) Driveability enhancements for winter fuel use and for hard starts. This bulletin applies to vehicles equipped with a 5.9L-24V diesel engine built between engine serial numbers 56419738 to 56798357, with a date of manufacture of December 16, 1997 to November 15, 2000. The customer may complain of poor driveability when winter fuel is used to power the engine. Or, the customer may complain of a hard or no-start condition, while the engine is at normal operating temperatures, when using any type of good quality diesel fuel. The poor driveability condition may occur only when either straight #1 diesel fuel is used or when other special cold climate winter blend fuels are in use. The no-start or long engine crank condition may occur when attempting to restart the engine while the temperature of the engine is till close to its normal operating temperature. This hard hot restart condition may be experienced in all ambient climates, but may be more of a concern in warmer ambient climates. The repair involves selectively erasing and reprogramming the Cummins CM551 Engine Control Module (ECM) with new software. 18-024-00 12/21/00 58 ‘01 (BR) Low engine power when the automatic transmission is in overdrive. This bulletin applies to vehicles equipped with a 24-valve diesel engine and automatic transmission built between engine serial numbers 56666444 to 56798357, with a date of manufacture of December 15, 1999 to November 15, 2000. This information is available on the engine data plate, which is located on the left side of the engine, affixed to the side of the timing gear housing. A Publication of the TURBO DIESEL REGISTER CATEGORY 18 VEHICLE PERFORMANCE...Continued The customer may complain of low engine power and/or poor performance. This engine condition may occur while the automatic transmission is being operated in its overdrive gear. This condition may be further aggravated if the customer is using the vehicle for towing purposes. The Engine Control Module (ECM) software, on a 2001 Ram Truck equipped with a 24-valve diesel engine, is designed to “torque manage” the power output of the engine. This is done to protect the automatic transmission components. The revised software calibration restores the power output and improves the vehicle performance in overdrive. Note: If TSB 18-015-00 Rev A has previously been performed too the vehicle in question, then the ECM software has already been revised with the correct calibration to address the above condition. The ECM will not require reprogramming. The repair procedure involves selectively erasing and reprogramming the Cummins CM551 Engine Control Module (ECM) with new software (calibration versions: 56T13, 59T6). There is no change to the JTEC PCM software. CATEGORY 19 STEERING TSB# MODELS SUBJECT/DESCRIPTION 19-04-00 06/09/00 ‘94 - ‘00 (BR) Squeaking/creaking sound in steering column while turning. This bulletin applies to vehicles equipped with non-tilt steering columns. A squeaking/creaking sound may be heard coming from the area of the steering wheel while turning. The sound is associated with rotation fo the steering wheel or may be heard while going over bumps in the road. The repair involves installing new lock housing attaching screws. CATEGORY 21 TRANSMISSION TSB# MODELS SUBJECT/DESCRIPTION 21-02-00 03/10/00 ‘99 - ‘00 (BR) 47RE transmission-delayed upshift or no TCC engagement between 30 and 50 MPH. This bulletin applies to vehicles equipped with a federal market 5.9L-24V diesel engine and built between March 2, 1999 and October 1, 1999. The customer may experience a condition where the transmission may seem to have a delayed 3-4 upshift, while moderately accelerating from 30 to 50 MPH. The customer may also note high engine rpm’s while operating in third or fourth gear. This condition may be caused by a delay in the engagement of the transmission torque converter clutch (torque converter lockup). The repair involves the replacement of the transmission valve body upper housing separator plate. 21-04-00 06/30/00 ‘96 - ‘99 (BR) Erroneous MIL illumination for P1763 – Transmission Governor Pressure Sensor Volts Too High. Some vehicles may exhibit a MIL illumination with a Diagnostic Trouble Code (DTC) of P1763 – Transmission Governor Pressure Sensor Volts Too High. The vehicle operator may experience slower than normal vehicle accelerations because the transmission may have temporarily entered its third gear “limp-In” mode as a result of the DTC. The “Limp-In” mode may last until the vehicle owner cycles the ignition key. The technician may not detect a problem with the automatic transmission during a diagnostic test or test drive. The MIL is caused by an increase in hydraulic pressure. The increased hydraulic pressure is the result of a new valve body machining process, which entered into production January 1, 1998. This condition will occur most often with vehicles that were built between January 1, 1998 and December 18, 1998. Vehicles built prior to January 1, 1998 may also experience this condition if the valve body or the transmission assembly is replaced with components built after January 1, 1998. A Publication of the TURBO DIESEL REGISTER This bulletin involves selectively erasing and reprogramming the JTEC Powertrain Control Module (PCN) with new software. 59 CATEGORY 21 21-08-00 09/01/00 ‘99 - ‘00 (BR) TRANSMISSION...Continued 47RE delayed TCC lock-up and/or MIL P1740 – TCC or O/D Solenoid Performance. This information applies to vehicles build for the California market (NAE), equipped with a 5.9L24V diesel engine and built between March 2, 1999 and October 1, 1999. The customer may experience a delayed torque converter clutch engagement (lock-up). This condition may illuminate the Malfunction Indicator Lamp (MIL) due to Diagnostic Trouble Code (DTC) P 1740 – TCC or O/D Solenoid Performance. In some situations, the customer may describe the condition as a lack of a transmission shift (TCC lock-up) between 30 to 50 MPH. The transmission valve body upper housing separator plate was revised, with a wider (0.470 inches) slot in the lockup vent circuit, to improve fluid flow in the torque converter clutch. This bulletin involves the replacement of the transmission valve body upper housing separator plate. 21-12-00 09/15/00 ‘00 - ‘01 (BR) CATEGORY 23 Tapping/knocking sound during idle. This bulletin applies to vehicles built before May 10, 2000, equipped with an automatic transmission. A tapping/knocking sound may be heard or felt in the driver side floor pan area during idle conditions. With the engine running at an idle, listen for knocking sound coming form the driver side floor pan area. If a tapping/knocking sound can be heard, replace the shift linkage with revised parts. BODY TSB# MODELS SUBJECT/DESCRIPTION 23-03-00 02/04/00 ‘00 (BR) Vehicle Identification Number (VIN) Plate Relocated The VIN plate on the subject model vehicles has been relocated from the instrument panel to the cowl bar. Due to the relocation of the VIN plate, the windshield frit (the frit is the black-out band at the bottom of the windshield) required a change so that the VIN plate could be seen through the windshield. The view of the VIN plate may be blocked if a 1999 or earlier windshield is installed on the vehicle. Do not install or have class suppliers install 1999 or earlier windshields on 2000 model year subject model vehicles. Likewise, do not install or have glass suppliers install 2000 or later windshields on earlier models. 23-19-00 05/05/00 ‘94 - ‘01 (BR) Instrument panel creak. A creak or squeak may be present near the left and/or right side(s) of the instrument panel. The noise is caused by the sheet metal joint between the A-pillar and the dash p0anel plenum lower rubbing together. The repair involves loosening that instrument panel and providing additional clearance between the A-pillar inner panel and dash panel. 23-25-00 06/30/00 ‘97 - ‘01 (BR) Paint fogging/whitening. Painted surfaces of the vehicle that are covered for extended periods of time with front end covers (bras), transit films or magnetic signs may appear to have a white “milky” spot on dark colors, or a fogging, coffee colored spot lighter colors. The repair involves removal of a fogging or staining condition from any painted surface where moisture may be trapped under the clear coat by using a heat gun. 60 A Publication of the TURBO DIESEL REGISTER TSBs Issued During ‘01 CATEGORY 2 FRONT SUSPENSION TSB# MODELS SUBJECT/DESCRIPTION 02-001-01 1/19/01 ‘94 - ‘01 Rear of vehicle sits too high to allow hook up to a fifth-wheel trailer. This bulletin applies to 2500 and 3500 4x4s. The curb hight lowering package is designed to reduce the rear spring spacer block by 1 7/8 inch, which will lower the rear of the vehicle by several inches proving clearance so that most customers can attach their fifth-wheel or goose neck trailer to the trailer hitch turntable. CATEGORY 5 BRAKES TSB# MODELS SUBJECT/DESCRIPTION 05-002-01 3/9/01 ‘01 Parking brake pedal adjustment. This bulletin applies to 2500/3500 series Ram trucks with four-wheel disc brakes, built before November 20, 2000. Parking brake cable appears to be mis-adjusted, which may cause the parking brake lamp to remain illuminated even after the parking brake pedal has been released. The parking brake system, however, is not mis-adjusted and functions normally. Install new parking brake cables. CATEGORY 8 ELECTRICAL TSB# MODELS SUBJECT/DESCRIPTION 08-010-01 5/25/01 ‘94 - ‘02 Airbag/clock spring service. When servicing any airbag system, it is essential to follow the proper Service Manual and/or Diagnostic Manual procedures for diagnosing, testing, and replacing of any component. Do not use silicone or any other lubricant spray on or near the clock spring. Lubricants are often used in the clock spring area of the steering column to eliminate noise. Any repair that may disrupt the positioning of the steering wheel with the front wheels will require that the clock spring be centered. This includes clock spring replacement, steering column service, HVAC service, steering gear service, and front suspension crossmember service. CATEGORY 9 ENGINE TSB# MODELS SUBJECT/DESCRIPTION 09-002-01 03/02/01 ‘98 - ‘01 (BR) Exhaust manifold bolt retention straps. This bulletin applies to vehicles equipped with a 24-valve diesel engine built on or between engine serial number 56419738 and 56777585, with a date of engine manufacture from January 01, 1998 to September 22, 2000. This information is available on the engine data plate, which is located on the left side of the engine, affixed to the side of the timing gear housing. Vehicles that are used for extended heavy trailer hauling purposes may experience a loss of exhaust manifold bolt torque. This condition may lead to exhaust gas blow-by past the exhaust manifold gasket(s) and even loss of exhaust manifold bolts. A new exhaust manifold bolt retention strap has been released as a means of locking the outboard exhaust manifold bolts in place. This will prevent bolt rotation and torque loss during the thermal expansion and contraction cycles of the exhaust manifold. A Publication of the TURBO DIESEL REGISTER 61 CATEGORY 9 ENGINE...Continued 09-001-01 1/19/01 ‘01 Intermittent loss of oil pressure sensor ouput voltage. This bulletin applies to 2500/3500 diesels with engine serial number 56744083 to 56809910. The output voltage of the oil pressure sensor may intermittently dropout. This condition may cause the engine oil pressure gauge needle to erroneously indicate lower than actual oil pressure. A warning chime may sound and the “Check Gauges” lamp may illuminate. The Engine Control Module (ECM) software has been revised to address this condition. Replacing the oil pressure sensor will not correct this condition. 09-003-01 5/4/01 All Engine oil additives/supplements. Engine oil additives/supplements (EOS) should not be used to enhance engine oil performance. Engine oil additives/supplements should not be used to extend engine oil change intervals. No additive is known to be safe for engine durability and can degrade emission components. Additives can contain undesirable materials that harm the long term durability of engines. Generally it is not desirable to mix additive packages from different suppliers in the crankcase; there have been reports of low temperature of low temperature engine failures caused by additive package incompatibility with such mixtures. 09-006-01 08/24/01 ‘98 - ‘02 (BR) Engine oil pan gasket sealing. This bulletin applies to Ram trucks equipped with the 24-valve diesel engine. Repeat oil pan gasket leaks can occur on 24-valve diesels if the gasket is applied without the use of Mopar Silicon Rubber Adhesive (RTV) sealant (PN 04883971). This bulletin provides specific routing of the sealant when replacing the engine oil pan gasket. When replacing an oil pan gasket, apply a 1/8” bead of RTV to the oil pan side of the gasket, around the back of the engine, extending up to the fourth bolt hole from the rear on each side, as per the referenced diagram. To be determined ‘98 - ‘02 (BR) Crankcase breather overflow. This bulletin applies to ’98 - ’02 (BR) Ram trucks equipped with the 24-valve Cummins diesel engine built after March 27, 1998 (ESN 56443872). Owners of ’98 - ’02 trucks equipped with the 24-valve Cummins diesel engine may experience engine oil overflow from the front crankcase breather when the vehicle is operated on an extreme downhill grade (36.5% or 22° slope/grade). Operation of this type for extended periods of time can cause enough engine oil depletion to damage the engine. A kit containing all components necessary to eliminate the oil overflow has been made available. The bulletin outlines the repair procedure that relocates the breather from the front of the engine to a new location on the driver’s side tappet cover. CATEGORY 18 VEHICLE PERFORMANCE TSB# MODELS SUBJECT/DESCRIPTION 18-31-1 New Release ‘98.5 - 2002 (BR/BE) Cold idle engine warming. This bulletin involves selectively erasing and reprogramming the Engine Control Module with new software. This bulletin applies to all Ram trucks built after December 17, 1997 equipped with the 24-valve 5.9L Cummins diesel engine. Extended idle operation, especially in cold weather, can allow varnishes/oils to condense on the exhaust valve stems, leading to stuck valves, and damaged valve train components. The repair procedure involves calibration software that will activate when certain parameters are met, reducing the chance of valve sticking as well as improving cab heat warm-up time. Idle speed will slowly ramp up from 800 rpm to 1200 rpm when all of the following conditions are met: Intake Manifold Temperature less than 60°C (32°F) Coolant Temp is less than 60°C (140°F) The transmission is in Neutral or Park The Service Brake pedal is not depressed Throttle = 0% Vehicle Speed = 0 mph 62 A Publication of the TURBO DIESEL REGISTER CATEGORY 18 VEHICLE PERFORMANCE...Continued If intake manifold temperature (IMT) is less than -9°C (15°F), three of the cylinders will be shut off upon reaching 1200 rpm, creating a slight change in engine sound which is normal. Thus the engine has to work to overcome the three “dead” cylinders. This allows the engine to create increased heat in the cooling system, allowing more rapid warm up. Either feature will abort when any one of the following occurs: The automatic transmission is placed in gear (forward or reverse) The service brake pedal is depressed Throttle position is greater than 0% Vehicle speed greater than 0 mph Coolant temperature is greater than 79°C (175°F) CATEGORY 21 TRANSMISSION TSB# MODELS SUBJECT/DESCRIPTION 21-004-01 02/16/01 ‘01 (BR) Overdrive disabled to improve transmission reliability during cold temperature operation. This bulletin applies to vehicles equipped with an automatic transmission where the vehicle was built on or between June 26, 2000 and December 23, 2000, and the PCM software level is earlier (lower) than calibration 14 for model year 2001. Quality analysis has determined that insufficient lubrication of certain internal transmission components may occur when a vehicle is operated in temperatures lower than -20°C (-5°F). This condition may be caused by the automatic transmission fluid (ATF) freezing in the cooler lines and interrupting the flow of lubricating oil (ATF) to the transmission overdrive unit. This condition should be a concern only in areas where very cold ambient temperatures of -20°C (-5°F) are experienced. The revised software will not allow 4th gear overdrive to occur if ambient temperatures are less than -20°C (-5°F). The revised PCM software has been implemented to improve transmission reliability. The customer should be informed that reduced fuel economy would be expected when overdrive is not in use. The repair involves selectively erasing and reprogramming the Powertrain Control Module (PCM) with new software (calibration level 01Cal14). CATEGORY 25 EMISSIONS TSB# MODELS SUBJECT/DESCRIPTION 25-001-01 1/19/01 ‘01 (BR/BE) Generic Scan Tool May Not Display Certain DTC’s and Erroneous LDP Switch. This bulletin applies to vehicles with an RE automatic transmission built before January 12, 2001 (MDH 0112XX). A generic scan tool may not display certain Diagnostic Trouble Codes (DTC) when a Malfunction Indicator Lamp (MIL) illuminates. The PCM software must be updated to calibration level 0lCall4A. 25-002-01 1/19/01 ‘01 (BR/BE) Scan Tool Erroneously Displays P000 For DTC’s P1740 And P0461. This bulletin applies to vehicles with an RE automatic transmission built before January 31, 2001 (MDH 0131XX). A Generic Scan Tool or an Enhanced Scan Tool, like the DRB III, may erroneously display certain Diagnostic Trouble Codes (DTC) as P0000. As a result, the scan tool may display Freeze Frame data incorrectly. The PCM software must be updated to calibration level 0lCall4A. A Publication of the TURBO DIESEL REGISTER 63 TSBs Issued During ‘02 CATEGORY 2 FRONT SUSPENSION TSB# MODELS SUBJECT/DESCRIPTION 02-001-01 1/19/01 ‘94 - ‘01 Rear of vehicle sits too high to allow hook up to a fifth-wheel trailer. This bulletin applies to 2500 and 3500 4x4s. The curb height lowering package is designed to reduce the rear spring spacer block by 1 7/8 inch, which will lower the rear of the vehicle by several inches providing clearance so that most customers can attach their fifth-wheel or goose neck trailer to the trailer hitch turntable. CATEGORY 5 BRAKES TSB# MODELS SUBJECT/DESCRIPTION 05-002-01 3/9/01 ‘01 Parking brake pedal adjustment. This bulletin applies to 2500/3500 series Ram trucks with four-wheel disc brakes, built before November 20, 2000. Parking brake cable appears to be mis-adjusted, which may cause the parking brake lamp to remain illuminated even after the parking brake pedal has been released. The parking brake system, however, is not mis-adjusted and functions normally. Install new parking brake cables. CATEGORY 8 ELECTRICAL TSB# MODELS SUBJECT/DESCRIPTION 08-010-01 5/25/01 ‘94 - ‘02 Airbag/clock spring service. When servicing any airbag system, it is essential to follow the proper Service Manual and/or Diagnostic Manual procedures for diagnosing, testing, and replacing of any component. Do not use silicone or any other lubricant spray on or near the clock spring. Lubricants are often used in the clock spring area of the steering column to eliminate noise. Any repair that may disrupt the positioning of the steering wheel with the front wheels will require that the clock spring be centered. This includes clock spring replacement, steering column service, HVAC service, steering gear service, and front suspension crossmember service. 08-016-01 8/3/01 ‘02 (BR/BE) Locking radio antenna connector. This information only bulletin applies to all 2002 vehicles equipped with radios. The radio units will have a new locking radio antenna connector. This connector requires that a sliding plastic collar be pulled away from the radio, similar to an air hose connector, to release the lock. Pulling the antenna out of the radio without activating the release could damage the antenna or the radio. 08-017-01 9/21/01 ‘02 (BR/BE) Safety systems -- Vehicle modifications/repair. Any of the safety systems may be disabled by inadvertent damage to wiring or system components or by changing or modifying the location of a component. 08-025-01 11/23/01 ‘94 - ‘01 (BR/BE) Airbag on-off switches. This bulletin supersedes technical service bulletin 08-037-99, dated 11/12/99. This bulletin is provided to identify the parts and procedures necessary to deactivate airbags authorized by NHTSA. Airbag deactivation is a customer pay procedure, not covered under the provisions of the warranty. The component parts are covered under the appropriate Mopar part warranty. 64 DaimlerChrysler Corporation is now offering airbag on-off switches for the selected vehicles listed above. The switches are packaged in a kit containing all necessary parts (except as indicated) and a detailed instruction sheet. Under the National Highway Traffic Safety Administration’s rule, consumers will be authorized for on-off switches by claiming they meet any of several criteria. Airbag on-off switches must not be installed without the vehicle owner presenting the NHTSA authorization letter. For more information concerning the authorization process and/or the authorization letter call NHTSA’s Auto Safety Hotline at 1-800-424-9393. We encourage the dealer to install these switches when the customer is interested in doing so and has the necessary NHTSA authorization. A Publication of the TURBO DIESEL REGISTER CATEGORY 9 ENGINE TSB# MODELS SUBJECT/DESCRIPTION 09-002-01 03/02/01 ‘98 - ‘01 (BR) Exhaust manifold bolt retention straps. This bulletin applies to vehicles equipped with a 24-valve diesel engine built on or between engine serial number 56419738 and 56777585, with a date of engine manufacture from January 01, 1998 to September 22, 2000. This information is available on the engine data plate, which is located on the left side of the engine, affixed to the side of the timing gear housing. 09-001-01 1/19/01 ‘01 Intermittent loss of oil pressure sensor ouput voltage. This bulletin applies to 2500/3500 diesels with engine serial number 56744083 to 56809910. The output voltage of the oil pressure sensor may intermittently dropout. This condition may cause the engine oil pressure gauge needle to erroneously indicate lower than actual oil pressure. A warning chime may sound and the “Check Gauges” lamp may illuminate. The Engine Control Module (ECM) software has been revised to address this condition. Replacing the oil pressure sensor will not correct this condition. 09-003-01 5/4/01 All Engine oil additives/supplements. Engine oil additives/supplements (EOS) should not be used to enhance engine oil performance. Engine oil additives/supplements should not be used to extend engine oil change intervals. No additive is known to be safe for engine durability and they can degrade emission components. Additives can contain undesirable materials that harm the long term durability of engines. Generally it is not desirable to mix additive packages from different suppliers in the crankcase; there have been reports of low temperature engine failures caused by additive package incompatibility with such mixtures. 09-004-01 5/18/01 ‘89 - ‘93 (AD) ‘94 - ‘01 (BR/BE) Engine lubricant. This bulletin involves 1989 – 2001 Ram trucks equipped with the 5.9L Cummins diesel engines. This bulletin discusses the recommended oil filters for use with Cummins 5.9L diesel engine: Part No. Manufacturer 05016547AC Mopar LF3894 Fleetguard Stratapore LF3552 Fleetguard Microglass LF3959 Fleetguard Cellulose 3937695Cummins Cellulose FL896 MotorCraft Cellulose L45335 Purolator Cellulose PF1070 AC Delco Cellulose The information only bulletin was issued to alert the field to problems caused by aftermarket oil filters. For example, neoprene compounds used internally in the manufacture of oil filters not recommended by DaimlerChrysler may separate from the filter, lodge in the piston cooling nozzle, and cause the engine to fail. This is not an engine defect. 09-006-01 08/24/01 ‘98 - ‘02 (BR) 09-002-02 3/11/02 ‘98 - ’02 (BR) A Publication of the TURBO DIESEL REGISTER Engine Oil Pan Gasket Sealing This bulletin applies to Ram trucks equipped with the 24-valve diesel engine. Repeated oil pan gasket leaks can occur on 24-valve diesels if the gasket is applied without the use of Mopar Silicon Rubber Adhesive (RTV) sealant (PN 04883971). This bulletin provides specific routing of the sealant when replacing the engine oil pan gasket. When replacing an oil pan gasket, apply a 1/8” bead of RTV to the oil pan side of the gasket, around the back of the engine, extending up to the fourth bolt hole from the rear on each side, as per the referenced diagram. Crankcase Breather Overflow This bulletin applies to ’98 - ’02 (BR) Ram trucks equipped with the 24-valve Cummins diesel engine built after March 27, 1998 (ESN 56443872). Owners of ’98 - ’02 trucks equipped with the 24-valve Cummins diesel engine may experience engine oil overflow from the front crankcase breather when the vehicle is operated on an extreme downhill grade (36.5% or 22° slope/grade). Operation of this type for extended periods of time can cause enough engine oil depletion to damage the engine. A kit containing all components necessary to eliminate the oil overflow has been made available. The bulletin outlines the repair procedure that relocates the breather from the front of the engine to a new location on the driver’s side tappet cover. 65 CATEGORY 18 VEHICLE PERFORMANCE TSB# MODELS SUBJECT/DESCRIPTION 18-019-01 9/3/01 ‘98.5 - ‘02 (BR/BE) Cold idle engine warming. This bulletin addresses selectively erasing and reprogramming the Engine Control Module with new software. This bulletin applies to all Ram trucks built after December 17, 1997, equipped with the 24-valve 5.9L Cummins diesel engine. Extended idle operation, especially in cold weather, can allow varnishes/oils to condense on the exhaust valve stems, leading to stuck valves, and damaged valve train components. The repair procedure involves calibration software that will activate when certain parameters are met, reducing the chance of valve sticking as well as improving cab heat warm-up time. Idle speed will slowly ramp up from 800 rpm to 1200 rpm when all of the following conditions are met: § Intake Manifold Temperature is less than 60°C (32°F) § Coolant Temp is less than 60°C (140°F) § The transmission is in Neutral or Park § The Service Brake pedal is not depressed § Throttle = 0% § Vehicle Speed = 0 mph If intake manifold temperature (IMT) is less than -9°C (15°F), three of the cylinders will be shut off upon reaching 1200 rpm, creating a slight change in engine sound which is normal. Thus the engine has to work to overcome the three “dead” cylinders. This allows the engine to create increased heat in the cooling system, allowing more rapid warm up. Either feature will abort when any one of the following occurs: § The automatic transmission is placed in gear (forward or reverse) § The service brake pedal is depressed § Throttle position is greater than 0% § Vehicle speed is greater than 0 mph § Coolant temperature is greater than 79°C (175°F) 18-014-01 7/9/01 ‘98 - ‘02 (BR/BE) Performance enhancement for severe cold weather environments. This bulletin applies to all Ram trucks equipped with a 5.9L 24-valve Cummins diesel engine with a 49-state emissions calibration and an automatic transmission. The bulletin describes how to selectively erase and reprogram the Powertrain Control Module (PCM) with new software (59t7a). The problem addressed by the PCM reprogram is a hard starting and/or idle speed fluctuations condition. Cummins 24-valve engines used with automatic transmissions can be severely affected by the use of sub-grade #1 diesel fuel when ambient temperatures are below 0°C (32°F), typically prevalent during the Winter months in Alaska, Northwestern Canada, and similar climates/temperatures elsewhere. This change will have no effect on performance during warm weather or when standard grade diesel fuels #1 or #2 are used. Vehicles with 49-state certification can apply this calibration change if needed. The calibration can be changed back to the original calibration if desired. 66 A Publication of the TURBO DIESEL REGISTER CATEGORY 19 STEERING TSB# MODELS SUBJECT/DESCRIPTION 19-009-01 10/26/01 ‘97 - ‘02 (BE/BR) Driver airbag trim cover service. Driver airbag trim covers/horn switches for the above vehicles are serviceable and as such, when applicable, must be used instead of replacing the airbag module assembly. Airbag module assemblies returned for trim cover and serviceable horn switch issues, are subject to charge back. The horn switch is integral to the driver airbag unit. Only DaimlerChrysler-trained and authorized dealer service technicians should perform service of this unit. Failure to take the proper precautions or to follow the proper procedures could result in accidental, incomplete, or improper airbag deployment and possible occupant injuries. CATEGORY 21 TRANSMISSION TSB# MODELS SUBJECT/DESCRIPTION 21-004-01 02/16/01 ‘01 (BR) Overdrive disabled to improve transmission reliability during cold temperature operation. This bulletin applies to vehicles equipped with an automatic transmission where the vehicle was built on or between June 26, 2000, and December 23, 2000, and the PCM software level is earlier (lower) than calibration 14 for model year 2001. Quality analysis has determined that insufficient lubrication of certain internal transmission components may occur when a vehicle is operated in temperatures lower than -20°C (-5°F). This condition may be caused by the automatic transmission fluid (ATF) freezing in the cooler lines and interrupting the flow of lubricating oil (ATF) to the transmission overdrive unit. This condition should be a concern only in areas where very cold ambient temperatures of -20°C (-5°F) are experienced. The revised software will not allow 4th gear overdrive to occur if ambient temperatures are less than -20°C (-5°F). The revised PCM software has been implemented to improve transmission reliability. The customer should be informed that reduced fuel economy would be expected when overdrive is not in use. The repair involves selectively erasing and reprogramming the Powertrain Control Module (PCM) with new software (calibration level 01Cal14). 21-009-01 10/15/01 ‘01 (BE/BR) NV5600 Countershaft service. This bulletin involves Ram trucks manufactured prior to March 17, 2001, and equipped with the NV5600 6-speed, heavy duty transmission. Customers may experience a shifter vibration (commonly referred to as “gear clash”) of the shift knob when shifting from one gear to another between 2500 and 3500 RPM after a cold start up. This condition is most evident when ambient temperatures are at or near 0°C (32°F) but can occur at warmer temperatures as well. The condition is most often reported on 3rd to 4th gear shifting, but can occur in the other shift ranges as well. The problem can be verified by assuring the transmission is at ambient temperature, vehicle moving and, with the engine at 2500 to 3500 RPM, shifting into and out of the gear ranges. This repair may include disassembly of the countershaft assembly, requiring the use of a 20-ton press. Attempts to use lesser equipment to effect this repair could result in damage or injury. If such a press is available, rebuilding the countershaft assembly is preferred. In the event a press is not available, a new countershaft assembly (PN 05073361AA) has been made available. Follow the service procedures in the appropriate service manual to complete necessary repairs. Follow normal warranty procedures to report the repairs. A Publication of the TURBO DIESEL REGISTER 67 CATEGORY 21 21-006-01 6/29/01 ‘94 - ‘02 (BR/BE) TRANSMISSION...Continued Automatic transmission fluid usage ATF+4 (Type 9602). This information only bulletin supersedes technical service bulletin 21-16-99, dated October 22, 1999. The bulletin discusses a new transmission fluid (ATF+4 – Type 9602) which has been developed and is being used as factory fill for all vehicles with Chrysler automatic transmissions. Until now, vehicles originally filled with ATF+2 or ATF+3 were to be serviced with ATF+3. Effective immediately, it is recommended that all vehicles with Chrysler automatic transmissions except for 1999 and earlier minivans be serviced with ATF+4. ATF+3 should continue to be used for 1999 and earlier minivans because of the potential for torque converter shudder during break in. For all other applications the ATF+4 fluid offers significant benefits as outlined below. ATF+4 must always be used in vehicles that were originally filled with ATF+4. Service intervals do not change. The service interval currently in effect for a given vehicle should continue to be followed. ATF+4 is compatible with ATF+3 and can be used to top off vehicles that currently have ATF+2 or ATF+3. Do not use ATF+2 or ATF+3 to top off vehicles that have ATF+4 fluid. Benefits: § Better anti-wear properties § Improved rust/corrosion prevention § Controls oxidation § Eliminates deposits § Controls friction § Retains anti-foaming properties § Superior properties for low temperature operation Mopar ATF+4 is a World Class Fluid having exceptional durability. However, the red dye used in ATF+4 is not permanent; as the fluid ages it may become darker or appear brown in color. ATF+4 also has a unique odor that may change with age. With ATF+4 fluid, color and odor are no longer indicators of fluid condition and do not support a fluid change. CATEGORY 22 WHEELS TSB# MODELS SUBJECT/DESCRIPTION 22-001-01 Rev. A 9/28/01 ‘00 - ‘01 (BR/BE) Chrome wheel care. Chrome wheels should be cleaned regularly with mild soap and water to maintain their luster and prevent corrosion. Wash them with the same soap solution as the body of the vehicle. To clean extremely dirty wheels care must be taken in the selection of tire and wheel cleaning chemicals and equipment to prevent damage to wheels. Only Mopar Wheel Treatment, p/n 05066247AB – 12 oz. Or 05066248AB – 5 gal., is recommended to remove brake dust, dirt, grease and grime. Any of the “DO NOT USE” items listed below can damage or stain wheels and wheel trim. DO NOT USE: § Any abrasive type cleaner § Any abrasive cleaning pad (such as steel wool) or abrasive brush § Any cleaner that contains an acid (this will immediately react with and discolor the chromium surface) § Any oven cleaner § Any abrasive metal cleaner. § Chrome polish unless it is buffed off immediately after application. § Any abrasive cleaning pad or brush § A car wash that has carbide tipped wheel-cleaning brushes. 68 A Publication of the TURBO DIESEL REGISTER CATEGORY 23 BODY TSB# MODELS SUBJECT/DESCRIPTION 23-027-01 9/21/01 ‘98 - ‘02 (BR/BE) Equipped with 6x9 Mirrors Sales Code GPS or GPU Outside rearview mirror glass replacement. This bulletin supersedes technical service bulletin 23-034-00 Rev. A, dated December 15, 2000. It is unnecessary to replace the entire outside rearview mirror assembly when the mirror glass is broken or is missing. Replacement mirror glasses are available from Mopar. Because of the extremely long list of part numbers involved, please consult the Mopar parts catalog for the correct part number(s). 23-034-01 11/30/01 ‘00 - ‘01 (BR/BE) Scratching sound from the door seal while driving. A scratching or itching type sound may be heard, coming from the front door opening. If a customer indicates that the condition is present, perform the repair procedure, which involves lubricating the secondary door seal with part number 04773427: Weather Seal Lubricant. CATEGORY 25 EMISSIONS TSB# MODELS SUBJECT/DESCRIPTION 25-001-01 1/19/01 ‘01 (BR/BE) Generic Scan Tool May Not Display Certain DTC’s and Erroneous LDP Switch. This bulletin applies to vehicles with an RE automatic transmission built before January 12, 2001 (MDH 0112XX). A generic scan tool may not display certain Diagnostic Trouble Codes (DTC) when a Malfunction Indicator Lamp (MIL) illuminates. The PCM software must be updated to calibration level 0lCall4A. 25-002-01 1/19/01 ‘01 (BR/BE) Scan Tool Erroneously Displays P000 For DTC’s P1740 And P0461. This bulletin applies to vehicles with an RE automatic transmission built before January 31, 2001 (MDH 0131XX). A Generic Scan Tool or an Enhanced Scan Tool, like the DRB III, may erroneously display certain Diagnostic Trouble Codes (DTC) as P0000. As a result, the scan tool may display Freeze Frame data incorrectly. The PCM software must be updated to calibration level 0lCall4A. A Publication of the TURBO DIESEL REGISTER 69 TSBs Issued During ‘03 CATEGORY 2 FRONT SUSPENSION TSB# MODELS SUBJECT/DESCRIPTION 02-003-02 6/17/02 ‘00 - ‘02 (BR/BE) Toe-in specification change. This bulletin involves an update to the toe-in specification for front end alignments. The specification for toe-in has been revised to 0.2° ± 0.1° total toe in. This change has been shown to improve straight ahead driving performance and should be used whenever a front end alignment is performed. CATEGORY 3 REAR AXLE TSB# MODELS SUBJECT/DESCRIPTION 03-001-02 2/11/02 ‘02 (BR/BE) Front axle disconnect system. This bulletin involves a mid-2002 model year deletion of the front axle disconnect system on 2002 (BE/BR) 2500 and 3500 Ram Trucks. This change effects the front axle, transfer case and engine/headlamp and dash wiring harnesses. The bulletin applies to 2500 and 3500 (BE/BR) Ram trucks built after January 4, 2002 and equipped with front axles with the following part numbers: 52070136AO, 52070137AO, 52070138AP, and 52070139AO. The vehicles involved will retain Shift On the Fly (SFO) capability; however, with this change, the front driveshaft will now turn continuously when the vehicle is being driven. Due to the timing of this change this information is not reflected in the Service Manual and a future release will outline service procedures. 03-002-02 7/1/02 ‘02 - ‘03 (DR) CATEGORY 6 Use of synthetic rear axle lubricant. This bulletin applies to 2002-2003 (DR) Ram trucks equipped with the 9 ¼” rear axle and trailer tow package. It is critical to optimum performance in trailer towing conditions that when service is being performed on the 9 ¼” rear axle on 2002-2003 (DR) Ram trucks, the axle must be refilled with Mopar 75W-140 synthetic gear and axle lubricant (PN 04874469). Five ounces (148ml) of Mopar friction modifier (PN 04318060AB) must also be added to vehicles equipped with the traclok style rear axle. CLUTCH TSB# MODELS SUBJECT/DESCRIPTION 06-001-03 5/16/03 ‘03 (BR) Rattle sound from transmission when idling. This bulletin applies to vehicles equipped with a 5.9L Cummins high output Turbo Diesel (sales code ETH) and NV5600 six-speed manual transmission (sales code DEE) built on or before May 11, 2003. The vehicle operator may describe a rattle sound when idling in neutral with the clutch pedal released. The bulletin involves replacing the clutch disc with a revised part. 70 A Publication of the TURBO DIESEL REGISTER CATEGORY 8 ELECTRICAL TSB# MODELS SUBJECT/DESCRIPTION 08-016-02 9/2/02 ‘02 - ‘03 (DR) Horn chirp and erroneous alarm. This bulletin involves reprogramming the forward control module (FCM) should there be an erroneous horn chirp when a door is opened or an erroneous alarm. The correction is a reflash of the FCM. 08-004-03 3/14/03 ‘02 - ‘03 (DR) Electro mechanical instrument cluster (MIC) erroneous indicator lamps. Three conditions have been identified which may be caused by communication errors between the electro mechanical instrument cluster (MIC) and other electronic modules on the vehicle. 1. An intermittent false “Check Gauges” on diesel engine equipped vehicles. 2. An intermittent false chime and “Low Wash” indicator. 3. A “Trans Temp” indicator on a manual transmissions equipped vehicle. This bulletin involves selectively erasing and reprogramming the MIC with new software. 08/007/03 4/4/03 ‘03 (DR) CATEGORY 9 Alternator mounting bracket cracked. This bulletin applies to vehicles equipped with a 5.9L 24-valve diesel engine (sales codes ETC, or ETH) and built on or before February 13, 2003, with engine serial numbers prior to 57013271. The problem is that the vehicle operator may experience an accessory drive belt squeal during normal driving conditions. This bulletin describes how to replace the alternator support bracket with a revised bracket. ENGINE TSB# MODELS SUBJECT/DESCRIPTION 09-002-02 3/11/02 ‘98 - ‘02 (BR) Crankcase breather overflow. This bulletin applies to 1998-2002 (BR) Ram trucks equipped with the 24-valve Cummins diesel engine built after March 27, 1998 (engine serial number 56443872). Owners of these vehicles may experience engine oil overflow from the front crankcase breather when the vehicle is operated off-road on an extreme downhill grade (37.5% or 22° slope/grade). Operation of this type for extended periods of time can cause enough engine oil depletion to damage the engine. A kit containing all components necessary to eliminate the oil overflow has been made available. If the condition exists, perform the repair procedure outlined in this bulletin. The repair involves the addition of a new breather kit. 09-008-02 10/21/02 ‘98 - ‘02 (BR/BE) Engine knock or rattle sound when climbing a long grade and towing a heavy trailer. This bulletin applies to 1998-2002 Ram trucks equipped with the 24-valve Cummins diesel engine (sales code ETC or ETH). Owners may experience an engine knock or rattle sound when climbing a long grade while towing a heavy trailer. If the condition exists, replace the engine thermostat as outlined in the service manual. Note: Mopar 05015708AC is to be used exclusively for this service bulletin. Use thermostat 05015708AB for all other 24-vlave Cummins thermostat repairs. CATEGORY 13 FRAME/BUMPER TSB# MODELS SUBJECT/DESCRIPTION 13-001-03 2/7/03 ‘03 (DR) Frame alterations. This bulletin is to support the 2003 Body Builder’s Guide and presents guidelines that must be followed during modifications or alterations to any 2003 Dodge Ram pickup frame. The following general industry standard procedures are recommended for proper installation of special bodies and/or equipment on the Ram pickup frame, such as fifth-wheel hitches, snow plows, etc. Failure to follow these recommendations could result in damage to the basic vehicle and possible injury to occupants. The information only bulletin gives the guidelines for welding and drilling of holes into the frame. A Publication of the TURBO DIESEL REGISTER 71 CATEGORY 14 FUEL TSB# MODELS SUBJECT/DESCRIPTION 14-001-02 Rev. A 10/7/02 ‘02 (BR/BE) Fuel cap difficult to remove. This bulletin involves installing a revised fuel cap. 14-002-02 Rev. A 7/22/02 ‘98 - ‘02 (BE/BR) Tampering with VP44 fuel pump on Cummins diesel engine. This bulletin supersedes technical service bulletin 14-002-02, dated July 1, 2002. A number of the VP44 fuel pumps have been returned through the warranty process as a result of tampering. Generally, the customer complains that the vehicle dies while driving. When diagnosed, there may or may not be Diagnostic Trouble Codes (DTC) present. When DTCs are present, there may be one or more of the following: DTC 124 146 361 363 364 375 P Code P 0234 P 0217 P 0254 P 0251 P 1689 P 0602 Description Turbo boost limit exceeded. Decreased engine performance due to engine overheat condition. Fuel injection pump fuel valve current too high. Fuel injection pump mechanical failure fuel valve feedback circuit. No communication between ECM and injector pump module. ECM fuel calibration error. The diagrams show the area where performance enhancing equipment is being connected into the outboard wire of the two wires that control operation of the metering solenoid in the pump. Another type of device places a connector between the metering solenoid harness and the upper connector on the pump. Telltale evidence can be seizure of the pump rotor, and/or cracked or overstressed pump cam ring. The protective sleeve around the two wires may be rolled or cut back to gain access for connection. Injection pumps that have been tampered with are not warrantable. 14-005-02 11/8/02 ‘03 (DR) CATEGORY 18 Fuel filter/water separator drain valve restriction. This bulletin applies to vehicles equipped with a 5.9L Cummins 24-valve diesel engine (sales code ETC or ETH), built before October 11, 2002. The problem described is that when the fuel filter/ water separator drain valve is opened, nothing comes out. The bulletin outlines the procedure for purging fluid out of the filter. VEHICLE PERFORMANCE TSB# MODELS SUBJECT/DESCRIPTION 18-024-02 8/12/02 ‘03 (DR) Incorrect dual wheel identification in VIN, may effect replacement powertrain control module (PCM) programming. The sixth character in the VIN is used to identify the vehicle series (1500, 2500, 3500). Some 2003 vehicles equipped with dual rear wheels, built prior to July 15, 2003, may have an incorrect number as the sixth character of the VIN. All vehicles equipped with dual wheels, sales code WLA, should have the number “4” as the sixth character. This identifies the vehicle as a 3500 series equipped with dual rear wheels. The incorrectly built vehicles will have the number “3” in that position. In the event that a Powertrain Control Module (PCM) would require replacement, the new module requires that the complete VIN be input during the programming procedure. If a new PCM is programmed with a “3” as the sixth character and it is equipped with dual rear wheels, a conflict is likely to occur with the ABS module which will set an error code. Dual rear wheel equipped vehicles require an ABS module calibrated for dual rear wheels. If PCM replacement is ever required, simply input a “4” instead of the “3” as the sixth character in the VIN when programming the PCM. 72 A Publication of the TURBO DIESEL REGISTER CATEGORY 18 VEHICLE PERFORMANCE . . . Continued 18-025-02 9/4/02 ‘03 (DR) Erroneous diagnostic trouble codes stored in the transfer case control module (TCCM). This bulletin applies to 2003 4WD ram trucks equipped with an electric shift-on-the-fly transfer case (sales codes DH3 or DH5) built before November 1, 2002. During a module scan or check of the TCCM, the technician may see erroneous stored trouble codes. The codes should be ignored. 18-015-03 4/4/03 ‘03 (DR) Powertrain control module (PCM) shift quality improvements The bulletin applies to vehicles equipped with a 5.9L standard output Cummins diesel engine(sales code ETC) and a 47RE transmission(sales code DGP) built before December 31, 2002. The vehicle operator may find that the vehicle will not shift out of third gear at throttle between 50% and 90% until 70 mph. The repair involves selectively erasing and reprogramming the powertrain control module (PCM) with new software. 18-027-03 7/4/03 ‘03 (DR) No throttle response, lack of power while towing and diagnostic trouble codes (DTC) P2638/ P0700. The bulletin applies to vehicles equipped with a Cummins diesel engine (sales code ETC or ETH) built on or before July 25, 2003. The vehicle may exhibit: · No throttle response if the engine is started with the Accelerator Pedal Position Sensor (APPS) in an off-idle position (pedal depressed) and the transmission is shifted into drive or reverse while the APPS remains in an off-idle position (pedal depressed), causing the engine to remain at idle. · Lack of power while towing or hauling a heavy load with the transmission in overdrive – vehicles equipped with 47RE transmission. The repair involves selectively erasing and reprogramming the Cummins CM845 engine control module (ECM) with new software. 18-030-03 8/29/03 ‘98.5 - ‘02 (BE/BR) ‘03 - ‘04 (DR) Generic Cummins engine control module (ECM) procedure. This bulletin applies to Ram trucks equipped with the 5.9L Cummins 24-valve diesel engine (sales code ETC or ETH). Mopar is phasing out pre-programmed Cummins Diesel engine control modules (ECM). New modules will no longer be pre-programmed when received from Mopar. Replacement of future ECM’s will require programming utilizing the DRBIII and TechCONNECT. CATEGORY 19 STEERING TSB# MODELS SUBJECT/DESCRIPTION 19-003-02 4/15/02 ‘97 - ‘02 (BR/BE) Hissing sound coming from the power steering system on vehicles equipped with hydroboost brakes. A hissing sound may be present in the power steering system during steering maneuvers or straight ahead driving. This bulletin involves replacing the power steering hoses connecting the hydroboost to the power steering pump and gear. 19-005-03 8/29/03 ‘94 - ‘02 (BR/BE) ‘02 - ‘04 (DR) Power steering fluid usage. The factory fill power steering fluid for most 2004 model year Chrysler Group vehicles is ATF+4 (part number 05013457AA/S9602) and it provides superior performance at both low and high temperatures. Refer to the table to identify factory fill and the approved service power steering fluid by year and model. From the table it is noted that the ’94 to ’02 truck uses part number 04883077/MS5931. MS9602 should not be mixed or used as a “topping off” fluid on systems requiring MS5931. A Publication of the TURBO DIESEL REGISTER 73 CATEGORY 23 BODY TSB# MODELS SUBJECT/DESCRIPTION 23-018-02 5/20/02 ‘00 - ‘01 (BR/BE) 23-018-03 6/13/03 ‘03 (DR) Armrest lid difficult to open. The armrest lid may be difficult to latch or if latched, may be difficult to open. This may be caused by an improperly adjusted latch pin. This bulletin involves adjusting the armrest lid latch pin. CATEGORY 24 Instrument panel whistle. A whistling sound may be present coming form the front of the instrument panel near the bottom of the windshield when the heater A/C blower is on. This may be caused by air escaping through the holes in the center of the rivets that attach the VIN plate to the instrument panel. This can be mis-diagnosed as a windshield air leak. If necessary, remove the instrument panel top cover and apply a small drop of clear glass sealer to the center of each of the rivets to seal the rivet holes. HEATING & A/C TSB# MODELS SUBJECT/DESCRIPTION 24-009-02 10/28/02 All Chrysler group products using R-134A refrigerant A/C system leak detection. Vehicles from the factory no longer have leak detection dye in the A/C system. To determine the source of a R-134a leak, a leak tracer dye has to be injected into the A/C system. 24-003-03 5/23/03 ‘90 - ‘04 All Chrysler group products A/C system additives. The use of A/C system sealers may result in damage to A/C refrigerant recovery/evacuation/ recharging equipment and/or A/C system components. Many federal, state/provincial and local regulations prohibit the recharge of A/C systems with known leaks. DaimlerChrysler recommends the detection of A/C system leaks through the use of approved leak detectors available through Pentastar Service Equipment (PSE) and fluorescent leak detection dyes available through Mopar Parts. Vehicles found with A/C system sealers should be treated as contaminated and replacement of the entire A/C refrigerant system is recommended. 24-004-03 6/13/03 ‘03 (DR) Defrost/door inoperative. The defrost door may break at the pivot shaft causing inadequate travel. The system may not completely close, causing a lack of air discharge out the floor vents and full discharge from the defrost outlet. This may be caused by a broken actuator stop on the heater A/C (HVAC) housing. The bulletin describes the repair procedure for replacing the defrost door and the lower half of the heater/AC housing. 74 A Publication of the TURBO DIESEL REGISTER ‘03/‘04/‘05/‘06/‘07 /‘08 TECHNICAL SERVICE BULLETINS The TSB directory is no longer available. However, the service that replaces it is an improvement. Armed with your truck’s vehicle indentification number (VIN) and a credit card you can log on to www.techauthority.com and, for $20, you can view/print all of the TSBs that apply to your vehicle. In an effort to consolidate the TSBs for the magazine, we’re going to use the same index system categories as DaimlerChrysler. Below are the index categories. 2 Front Suspension 14 Fuel 3 Axle/Driveline 16 Propeller Shafts and U-Joints 5 Brakes 18 Vehicle Performance 6 Clutch 19 Steering 7 Cooling 21 Transmission 8 Electrical 22 Wheels & Tires 9 Engine 23 Body 11 Exhaust 24 Air Conditioning 13 Frame & Bumpers 26 Miscellaneous Using several VINs from years 2003 to 2008 we downloaded the TSBs and have summarized the subject, the description of the problem, and the corrective action. Should you need the entire text, you should consult your dealer or use the www.techauthority. com web site to purchase the bulletin(s) pertaining to your truck. A note concerning the TSBs and their use: The bulletins are intended to provide dealers with the latest repair information. Often the TSB is specific to the VIN. VIN data on the Chrysler service network helps the dealer in his service efforts. A TSB is not an implied warranty. One final note: As mentioned, the TSBs that we’ve researched cover those issued from 2003 to date (8/2008). For clarity we have printed in bold the TSB number and the models of trucks to which the TSB applies. The bold print will help you distinguish the old lisitngs from the newer ones. 2008 TSBs This combined section represents our review of Dodge Technical Service Bulletins (TSBs) issued to date (8/2008). Previously, Dodge vehicle TSBs were published in CD format and were available for purchase in July/August. As a service, we would purchase the TSB directory and then search through the CD to isolate only those bulletins relating to the Turbo Diesel truck. With the new service at www.techauthority.com we’ve gathered information on Dodge Technical Service Bulletins that have been released thus far in 2008. These 2008 TSBs are incorporated into our summary listing. CATEGORY 2 FRONT SUSPENSION TSB# MODELS SUBJECT/DESCRIPTION 02-003-08 6/20/08 ’08 (DM) 4500/5500 Front and/or rear shock absorber noise. The customer may experience a clunking-like sound when traveling over small inputs (bumps and dips) in the road. This clunk-like sound is sometimes described as being similar to the sound that “loose lumber” may make when loose boards strike each other. This condition is more noticeable during cold ambient conditions below 40°F and at lower vehicle speeds when background noise is less. The sound may come from the front and/or rear shock absorbers. This condition is due to internal components within the vehicle shock absorber and the bulletin describes the replacement procedure. A Publication of the TURBO DIESEL REGISTER 75 TSBs Issued During ‘03-’07 CATEGORY 3 AXLE/DRIVELINE TSB# MODELS SUBJECT/DESCRIPTION 03-003-04 6/15/04 ‘03 - ‘04 (DR) Launch shudder. This bulletin involves adjusting the propeller shaft working angles and applies to vehicles equipped with a two-piece rear driveshaft. The problem is described as a drive line shudder or vibration while accelerating from a stop. The condition is most noticeable under heavy throttle acceleration and is usually present only at low speeds (below 25 mph). Vehicles equipped with a two-piece driveshaft are designed to minimize reaction forces that result from the universal joint transmitting torque at an angle. These forces cannot be eliminated entirely because of the necessity to compromise joint angle selection between curb and design loading conditions. Ujoint angles change depending upon the amount of weight applied to the vehicle bed. Therefore U-joint angle readings may need to be taken with different vehicle loads in order to obtain a satisfactory compromise. The vehicle should be evaluated under the loaded condition that produces the objectionable disturbance. The repair procedure involves measurements at the transmission yoke, front propeller shaft, rear propeller shaft and rear axle. The working angles should be adjusted to provide the lowest angle possible for the output shaft to front propeller shaft, front propeller shaft to rear propeller shaft, and rear propeller shaft to axle pinion. The measurements will determine which direction to move the center bearing to optimize the angles. Install the appropriate bracket to obtain the minimum working angle, but still maintain at least ½ degree to ensure that there will be some movement in the U-joint bearings. 03-004-04 6/22/04 ‘03 - ‘04 (DR) Axle whine. This bulletin applies to 4x2, 2500 series, 140.5 inch wheelbase vehicles equipped with diesel engine, sales code ETC/ETH, and an automatic transmission, sales code DG8. The problem is that some vehicles may exhibit rear axle whine at speeds between 35 and 70 mph. The repair procedure involves identification of the pinion flange and propeller shaft that the vehicle is equipped with. If a repair is necessary, the propeller shaft is replaced using the chart listing the appropriate part numbers. 03-003-06 10/20/06 ‘03-’07 (DR) Axle-fluid level. This bulletin supersedes TSB 03-001-04, revision A dated 5/11/04. The axle fill holes on some 2004 Dodge Truck axles may be located considerably higher than the actual fluid level. Filling the axle until the fluid comes out of the fill hole will overfill the axle, which could cause fluid foaming. When checking fluid level or filling a rear axle with fluid, you must measure distance from the bottom of the fill hole to the actual fluid level. This can easily be accomplished using a pipe cleaner or piece of wire. Make a 90 degree bend in the wire two inches from the end. The wire can then be inserted into the axle fill hole and used as a dipstick. Measure the distance from the bend to the oil level. The fluid levels for the axles are shown in the table below. Ram Truck 2500/3500 Axle 10.5 Rear Axle 11.5 Rear Axle 9 ¼ Front Axle Fluid Level (measured from the bottom of the fill hole) 1 inch ± ¼ inch ¼ inch ± ¼ inch ¼ inch ± ¼ inch Fluid Capacity 85 oz. SAE 75W-90 Synthetic 122 oz. SAE 75W-90 Synthetic 76 oz. SAE 75W-90 Synthetic Note: The limited slip feature on 2500/3500 series Ram Trucks utilizes the Trac Rite locking feature which does not require Trac-Lok additives or friction modifiers. 76 A Publication of the TURBO DIESEL REGISTER CATEGORY 6 CLUTCH TSB# MODELS SUBJECT/DESCRIPTION 06-001-03 5/16/03 ‘03 (BR) Rattle sound from transmission when idling. This bulletin applies to vehicles equipped with a 5.9L Cummins high output Turbo Diesel (sales code ETH) and NV5600 six-speed manual transmission (sales code DEE) built on or before May 11, 2003. The vehicle operator may describe a rattling sound when idling in neutral with the clutch pedal released. The bulletin involves replacing the clutch disc with a revised part. 06-001-07 2/03/07 ‘07 Clutch system may over-adjust causing difficulty engaging transmission gear. This bulletin involves replacement of the clutch system flywheel, pressure plate, and disc. This bulletin applies to vehicles equipped with a 5.9 liter or 6.7 liter Cummins Turbo Diesel engine and the G56 manual transmission (sales code ETH, ETJ, and DEG respectively), and built on or before November 09, 2006. The customer may experience difficulty attempting to engage a manual transmission gear. This may be due to the self-adjusting mechanism in the clutch system. The self-adjusting clutch mechanism may over-adjust (forward adjust). This condition most often will occur within the first 1,000 miles of vehicle operation. The bulletin describes the proper repair technique to replace the flywheel, clutch plate, and clutch disc. CATEGORY 8 ELECTRICAL TSB# MODELS SUBJECT/DESCRIPTION 08-004-03 3/14/03 ‘02 - ‘03 (DR) Electro mechanical instrument cluster (MIC) erroneous indicator lamps. Three conditions have been identified which may be caused by communication errors between the electro mechanical instrument cluster (MIC) and other electronic modules on the vehicle. 1. An intermittent false “Check Gauges” on diesel engine equipped vehicles. 2. An intermittent false chime and “Low Wash” indicator. 3. A “Trans Temp” indicator on a manual transmission equipped vehicle. This bulletin involves selectively erasing and reprogramming the MIC with new software. 08/007/03 4/4/03 ‘03 (DR) Alternator mounting bracket cracked. This bulletin applies to vehicles equipped with a 5.9L 24-valve diesel engine (sales codes ETC, or ETH) and built on or before February 13, 2003, with engine serial numbers prior to 57013271. The problem is that the vehicle operator may experience an accessory drive belt squeal during normal driving conditions. This bulletin describes how to replace the alternator support bracket with a revised bracket. 08-019-03 6/20/03 ‘03 (DR) Lamp-out indicator with aftermarket pickup box installation. This information-only bulletin discusses situations where an aftermarket utility box is installed after the removal of the original equipment pickup box. Under the circumstances the lamp-out indicator may illuminate. This is due to the use of aftermarket rear stop and turn signal lamps which use a dual filament bulb instead of separate circuits for the stop and turn indicator. The bulletin then describes the reprogramming procedure to reset the lamp-out indicator. A Publication of the TURBO DIESEL REGISTER 77 CATEGORY 8 ELECTRICAL . . . Continued 08-031-03 10/31/03 ‘03 (DR) PCM connector corroded—sets MIL light. This bulletin applies to vehicles equipped with a 5.9 liter diesel engine and an automatic transmission. Water may enter the PCM connector causing corrosion of electrical terminals on the PCM. This condition can set diagnostic trouble codes and illuminate the MIL light. If diagnostic trouble codes are present or other diagnostics lead to PCM connector problems, inspect the PCM and the PCM wire harness connector. The repair procedure involves replacement of the wiring harness. 08-011-04 3/16/04 ‘04 (DR) Poor radio sound quality with Infinity speakers. This bulletin applies to vehicles equipped with Infinity speakers, sales code RCK. Radios equipped with Infinity Speakers may exhibit a variety of symptoms due to reversed right front speaker wiring (polarity). Symptoms include: front door or speaker buzz, poor sound quality, lack of bass. The solution involves correcting speaker wiring polarity in the radio connector. 08-014-04 3/30/04 ‘04 (DR) Radio intermittent audio. This bulletin applies to vehicles equipped with an AM/FM/cassette radio built prior to January 30, 2004 or AM/FM/CD radio built prior to January 30, 2004. Radios built after 1/30/04 will no longer have vent holes in the area the repair procedure covers. If the audio drops out when the vehicle is moved from a cold to a warm or humid environment, the reason is that condensation builds up across the audio amplifier circuitry, causing the amplifier to shut down. Typically, cycling the ignition switch off and on will restore the audio output. If the problem persists, the correct repair procedure is to apply tape over the row of slots on the left hand side of the radio’s top cover. 08-014-05 2/17/05 ‘04 - ‘05 (DR) Mopar accessory remote starter inoperative due to hood switch. This bulletin applies to vehicles equipped with a Mopar remote starter kit. The problem frequently occurs as one or more of the following: • When the transmitter is pressed twice for start, the vehicle horn will chirp once but the vehicle engine will not start. • When the transmitter is pressed twice for start, the vehicle horn will chirp twice, indicating a problem with the remote start system and the vehicle engine will not start. • When the transmitter is pressed twice for start, the vehicle will chirp once, the engine will start and then turn off. The technician may not be able to verify the symptom(s) because it may be an intermittent condition. The corrective action involves replacing the hood switch for the remote starting system. 08-024-05 5/4/05 ‘02 - ‘06 (DR) Radio communication equipment installation recommendations. This information only bulletin gives the dealership technician some guidelines for the installation of two-way radio equipment. 08-058-05 10/29/05 ‘05 - ‘06 (DR) Revised radio antenna mast installation procedure. This information only bulletin advises the proper tightening torque (30-32 in-lbs) for the radio antenna mast for various Chrysler group products. 08-014-06 3/16/06 ‘06 (DR) UConnect Hands Free module fails to respond due to module lock-up. This bulletin supersedes service bulletin 08-049-05 dated September 1, 2005, and applies to vehicles equipped with UConnect Hands Free Communications (sales code RSP) that were built prior to October 2, 2005. If the UConnect Hands Free Communications system does not respond when system activation is attempted by the customer, the technical service bulletin gives the technician the proper repair technique to reset the hands-free module. 78 A Publication of the TURBO DIESEL REGISTER CATEGORY 8 ELECTRICAL . . . Continued 08-016-06 Rev. A 7/18/06 ‘06 - ‘07 (DR) Intermittent operation of electrical components due to ignition off draw (IOD) fuse not being fully seated. This bulletin supersedes technical service bulletin 08-016-06, dated March 22, 2006. The ignition off draw (IOD) fuse is used to prevent battery discharge during shipping and long term storage of vehicles. If the fuse is not completely inserted, partial contact of the fuse terminals could occur. When the vehicle is prepped for customer delivery, ensure that the fuse is fully engaged. When the IOD fuse holder is depressed into the carrier, an initial distinct detent will be felt to overcome the “pre-hold position.” On ’06 and ’07 DR vehicles the circuits fed by the IOD fuse are: Radio, EVIC, Wireless Control Module, Hands Free Module, Satellite Radio, Video Screen, CCN wakeup with ignition off, Underhood Lamp, and CCN Interior Lighting. 08-020-06 5/5/06 ‘06 (DR) Overhead console average fuel economy display. This information-only bulletin discusses the calculation method used by the truck’s average fuel economy display. On ’06 vehicles, the calculation has been changed to use the last displayed average fuel economy as a starting point for the calculation after a reset. The average fuel economy will then be adjusted from that point. If the display read 21.6 mpg at the time the reset was activated, the new display will start at 21.6 mpg and would change from that point depending on the current fuel usage. This was done to eliminate the extreme variations caused by very high or low fuel usage at the time of the reset. 08-021-06 Rev. A 10/13/06 ‘06 TIPM Flash: DTC’s indicating short circuits in the wiring on the trailer or no engine crank with DTC P1277 – starter control circuit too low. This bulletin supersedes technical service bulletin 08-021-06, dated May 10, 2006. This bulletin involves a discussion and reprogramming of the totally integrated power module (TIPM). This bulletin applies to vehicles built prior to April 03, 2006. The customer may experience any of the following TIPM diagnostic trouble codes (DTC’s): B166B - Left Trailer Tow Lamp Control Circuit Low. Trailer harness left lamp circuit is shorted to ground. B166C - Left Trailer Tow Lamp Control Circuit High. Trailer harness left lamp circuit is shorted to battery voltage. B178C - Left Trailer Tow Lamp Control Circuit Over Current. Trailer harness left lamp circuit is intermittently grounding. B166F - Right Trailer Tow Lamp Control Circuit Low. Trailer harness right lamp circuit is shorted to ground. B1670 - Right Trailer Tow Lamp Control Circuit High. Trailer harness right lamp circuit is shorted to battery voltage. B166E - Right Trailer Tow Lamp Control Circuit Over Current. Trailer harness right lamp circuit is intermittently grounding. B1667 - Back Up Lamp Feed Low. Trailer harness back up circuit is shorted to ground. B2215 - Front Control Module Internal (TIPM). An internal fault code counter has exceeded its limit of 250 counts and one or more electrical outputs controlled by the TOPM have been disabled. P1277 - Starter Control Circuit 2 Low (TIPM). The output feed current to the starter solenoid has exceeded the upper current limit of 75 amps. This may result in a no-crank condition. DTC’s B1667, B166B, B166E, B166F, B178C and B2215: These DTC’s indicate that a (hard or intermittent) short circuit to ground exists in the wiring of one or more of the trailer electrical harness circuits. The TIPM retries the output on each ignition cycle or request (brake or turn signal activation) in an attempt to enable the output in case the fault is intermittent. The new TIPM software raises the TIPM circuit trigger point from 15 amps to 20 amps. DTC’s B166C and B1670: These DTC’s indicate that a short circuit to battery voltage (12 volts) exists in the wiring of one of the trailer electrical harness circuits. A Publication of the TURBO DIESEL REGISTER 79 CATEGORY 8 ELECTRICAL . . . Continued DTC B2215 - Front Control Module (TIPM): This fault code occurs when the TIPM detects a short (to ground or to battery) on one of the trailer circuits more than 250 times. When B2215 is present with one of the above trailer circuit faults, the TIPM will turn off (disable) the respective faulty trailer circuit or circuits. This internal fault does not mean that the TIPM module is defective. The TIPM memory can be cleared, and this action will turn on a previously disabled trailer circuit. If possible, the fault in the circuit should be repaired first before clearing the TIPM memory. The dealer will need a scan tool to clear the TIPM memory. DTC P1277 - Starter Control Circuit too Low (TIPM): The TIPM monitors the output current to the starter solenoid for over-current conditions. The DTC is set when the output current to starter solenoid exceeds 75 amps. On trucks equipped with a diesel engine, there may be times in cold climates when it is normal for the starter solenoid current to exceed 75 amps. The new TIPM software raises the TIPM current trigger point for DTC P1277 from 75 amps to 100 amps. If any of the DTC’s listed above are present, perform the repair procedure. 08-026-06 Rev. A 10/25/06 ‘06 (DR/DH/D1) Overhead console temperature reading inaccurate or dome lamp turns off too soon. This bulletin supersedes technical service bulletin 08-026-06, dated June 02, 2006. This bulletin involves selectively erasing and reprogramming the cabin compartment node (CCN) with new software. This bulletin applies to vehicles built on or before May 30, 2006. The vehicle owner may notice that if a vehicle door is left open for longer than 20 seconds the illuminated interior (dome) lamps will turn off. Or the vehicle operator may report that the ambient temperature first displayed in the overhead console is not accurate (displays -40°C or -40°F), when the ignition switch is turned to the “On” position, then slowly updates to the outside ambient temperature as the vehicle is driven. If the vehicle operator describes or experiences the symptom/condition, perform the repair procedure which involves a reflash to the CCN. 08-044-06 10/07/06 ‘07 (DR) Steering angle sensor over travel performance (DTC:C1240). This bulletin involves the diagnosis and possible replacement of the steering angle sensor. This bulletin applies to vehicles equipped with the Electronic Stability Program (sales code BNB) and built prior to October 03, 2006. The customer may experience an illumination on the instrument cluster of the ABS (anti-Lock Brake System) and/or the ESP/BAS (Electronic Stability Program/ Brake Assist System) warning lights. Investigation may reveal the presence of diagnostic trouble code (DTC) C1240 – Steering Angle Sensor Over Travel Performance. If the diagnostic test procedure for DTC C1240 determines that the steering angle sensor is at fault, then perform the repair procedure. 08-046-06 10/25/06 ‘04-’07 Cell phone induced buzz or clicking-like sound in radio speakers. This bulletin involves a discussion regarding cell phone generated signal interference with the vehicle radio system. A customer may experience a buzzing or clicking-like sound coming from the vehicle radio speaker(s). The sound may be heard when the radio is in AM or FM mode. The clicking-like sound may sound like Morse code. This information-only bulletin points out that the construction of certain cell phones may generate frequencies that can interfere with the vehicle radio system. These frequencies may result in buzzing and/or clicking-like sounds in the vehicle radio. This condition can be easily corrected by instructing the customer to move their cell phone away from the immediate area around vehicle radio system (radio, radio amplifier, antenna, antenna lead). Do not replace any radio system component in an attempt to address this condition. 80 A Publication of the TURBO DIESEL REGISTER CATEGORY 8 ELECTRICAL . . . Continued 08-003-07 01/27/07 ‘07 (DR/DH/D1/DC) Remote start system – Diagnostic chart for antenna. This bulletin involves a diagnostic chart that may be used to aid the technician with the diagnosis of the antenna on an originally equipped (factory installed) remote start system. This bulletin applies to vehicles with an original equipment remote start system (sales code XBM). The customer may notice that the signal range of the remote keyless entry system is reduced (less than 100 feet). This condition may be due to the RKE antenna. The diagnostic flow chart is provided as a diagnostic aid for dealer technicians. 08-015-07 06/06/07 ‘06-’07 (DR) Flash: Sunroof module, excessive ignition off draw, pop in radio with ignition off, dome lamp flickers and may not go off. This bulletin involves selectively erasing and reprogramming the Sunroof Motor Module with new software. 08-018-07 06/23/07 ‘07 (DR/DH/D1/DC) Mopar remote start system – RKE – intermittent operation or alarm may sound. This bulletin involves the installation of a Mopar remote start system service repair kit. 08-007-08 REV. A 7/4/08 ’07-’08 CATEGORY 9 Engine does not crank or start due to electronic lockup of the remote key module. This bulletin applies to vehicles built on or before May 05, 2008. The customer may experience a no engine crank and a no engine start condition. Also, the remote keyless entry system will not operate. This condition may be due to an electrostatic discharge from the ignition key into the wireless control module (WCM), causing the WCM to electronically lock up. This condition is corrected by the replacement of the WCM (also known as the Sentry Key Remote Entry Module). ENGINE TSB# MODELS SUBJECT/DESCRIPTION 09-004-06 03/31/06 ‘03-’06 (DR) Accessory drive belt chirp at shut down. This bulletin applies to vehicles with diesel engine sales code ETH. A chirping sound may be heard coming from the accessory drive belt when the engine is shut down. If a customer indicates that the condition is present, the bulletin directs the technician to install an overrunning clutch pulley on the generator. CATEGORY 11 FRAME/BUMPER TSB# MODELS SUBJECT/DESCRIPTION 11-002-07 9/25/07 ’07-’08 (DH/D1) 2500/3500 Inspection and test procedures for the 6.7-liter diesel particulate filter (DPF). This bulletin applies to vehicle equipped with a Cummins 6.7-liter engines (sales code ETF). The customer may experience a malfunction indicator lamp (MIL) illumination, warning chime, and an overhead electronic vehicle information center (EVIC) message that states “Catalyst Full Service Required.” Investigation may reveal that the MIL illumination is due to one or more of the following diagnostic trouble codes (DTCs): P1451 – Diesel Particulate Filter System Performance. P2463 – Diesel Particulate Filter – Soot Accumulation. P242F – Diesel Particulate Filter Restriction – Ash Accumulation. The balance of the 10-page bulletin describes the inspection, test, repair, or replacement of the DPF based on the severity of the accumulation in the DPF. A Publication of the TURBO DIESEL REGISTER 81 CATEGORY 11 FRAME/BUMPER . . . Continued 11-001-08 5/21/08 Cleaning the turbocharger on the Cummins 6.7-liter engine. This 17-page bulletin describes the process of cleaning the turbocharger using Cummins Engine Update Kit 10138-UPD to address excess soot accumulation. The procedure cleans the internal components on the exhaust side of the turbocharger. ’07-’08 (DH/D1) 2500/3500 The bulletin goes hand-in-hand with TSBs 11-005-08 and 11-002-07 for detailed turbocharger, engine and exhaust aftertreatment system repair procedures. 11-002-08 5/21/08 ’07-’08 (DH/D1) 2500/3500 Inspections and test for the turbocharger on the Cummins 6.7-liter engine. The customer may experience a malfunction indicator lamp (MIL) illumination due to diagnostic trouble code (DTC): P2262 – Turbocharger Boost Pressure Not Detected – Mechanical. If further codes of P1451, P2463 or P242F are present, the technician is referred to the repair procedure listed in TSB 11-002-07. If the codes are not present, the repair and cleaning procedures in this 8-page bulletin and TSB 11-001-08 are to be performed. CATEGORY 13 FRAME/BUMPER TSB# MODELS SUBJECT/DESCRIPTION 13-001-03 2/7/03 ‘03 (DR) Frame alterations. This bulletin is to support the 2003 Body Builder’s Guide and presents guidelines that must be followed during modifications or alterations to any 2003 Dodge Ram pickup frame. The following general industry standard procedures are recommended for proper installation of special bodies and/or equipment on the Ram pickup frame, such as fifth-wheel hitches, snow plows, etc. Failure to follow these recommendations could result in damage to the basic vehicle and possible injury to occupants. The information-only bulletin gives the guidelines for welding and drilling of holes into the frame. CATEGORY 14 FUEL TSB# MODELS SUBJECT/DESCRIPTION 14-004-05 ‘03 - ‘05 (DR) Electronic fuel control (EFC) actuator available for service This bulletin deals specifically with an engine surge at idle condition. The diagnostic procedures are the same as those listed in TSB 14-003-05. The bulletin describes the repair procedure for replacement of the electronic fuel control actuator. 14-003-06 Rev. A 10/27/06 ‘03 - ‘07 (DR/DH/D1/DC) Cummins diesel diagnostics. This bulletin applies to vehicles with the 5.9 liter engine, sales code ETH or ETC. Revised diagnostic procedures are available for the following conditions: • Engine cranks for a long time or will not start • White smoke and/or misfire after starting when the engine temperature is below 150° F • Engine surges at idle • Engine sounds The 12-page bulletin gives the service technician a set of revised diagnostic procedures for the fuel system. Each condition is discussed and possible causes are established. Step-by-step instructions help the technician identify and repair the problem. 82 A Publication of the TURBO DIESEL REGISTER CATEGORY 14 14-005-06 07/27/06 ‘07 (DH/D1/DC) FUEL . . . Continued 5.9-liter and 6/7-liter Cummins diesel engines - correct low and ultra-low sulfur highway diesel fuel use. This bulletin involves a discussion regarding the correct diesel fuel to use for either the 5.9-liter or the 6.7-liter Cummins diesel engine (sales code ETH and ETJ respectively). Dodge Ram trucks equipped with the 6.7L Cummins Turbo-Diesel engine are required by Federal law to be fueled with ultra-low sulfur diesel fuel (model year ’07.5). Early production 2007 Dodge Ram trucks equipped with the 5.9 Cummins Turbo Diesel engine are allowed by Federal law to be fueled with low sulfur diesel fuel, and are encouraged to fuel with ultra-low sulfur diesel fuel. The new ultra-low sulfur highway diesel fuel enables vehicles equipped with the advanced emissions control devices to achieve more stringent U/S EPA vehicle emissions standards. 14-007-06 Rev. A 09/02/06 ‘06-’07 (DH/D1/DC) Fuel and fuel filtering requirements for Cummins 5.9-liter and 6.7-liter engines. This bulletin supersedes technical service bulletin 14-007-06, dated August 25, 2006. This information-only bulletin involves a discussion regarding fuel system requirements. The bulletin applies to vehicles equipped with a 5.9-liter High Output or a 6.7-liter Cummins Turbo Diesel engine (sales codes ETH or ETJ respectively) that were built on or after March 07, 2006. Bulletin highlights follow: For the diesel engine system to operate at its peak performance a high level of fuel quality must be maintained. Emission control and fuel delivery systems have advanced significantly. Care must be taken to ensure that the fuel that is delivered to the engine fuel injection system is of the highest quality possible and free of contaminants. Significant components to fuel quality are: the initial quality of the fuel (as dispensed from the service station fuel pump or bulk storage), on-vehicle fuel storage, and the on-vehicle fuel filtering of the diesel fuel prior to the fuel injection process. Use good quality diesel fuel from a reputable supplier. It is recommended that purchase of diesel fuel be made from a service station that is known to dispense a high volume of highway diesel fuel. Ultra low sulfur highway diesel fuel is required for use in Dodge Ram trucks equipped with a 6.7liter diesel engine. A maximum blend of 5% biodiesel (B5) is acceptable as long as the biodiesel mixture meets ASTM specification D-975, D-975-grade S-15, and ASTM D6751. A biodiesel fuel blend that is higher than 5% is not acceptable without additional fuel processing because these higher percentage biodiesel blends contain excess amounts of moisture which exceed the water stripping capability of the on-engine final fuel filter. Should a higher percentage biodiesel fuel be used, an auxiliary water stripping filter will be required. A maximum blend of 20% biodiesel (B20) can be used by government, military, and commercial fleets who equip their vehicle(s) with an optional water separator, and adhere to the guidelines in the Department of Defense specification A-A-59693. Fuel conditioners (additives) are not recommended and should not be required if you buy good quality fuel and follow cold weather advice supplied in the Owner’s Manual. A Publication of the TURBO DIESEL REGISTER 83 CATEGORY 18 VEHICLE PERFORMANCE TSB# MODELS SUBJECT/DESCRIPTION 18-015-03 4/4/03 ‘03 (DR) Powertrain control module (PCM) shift quality improvements. This bulletin applies to vehicles equipped with a 5.9L standard output Cummins diesel engine (sales code ETC) and a 47RE transmission(sales code DGP) built before December 31, 2002. The vehicle operator may find that the vehicle will not shift out of third gear at throttle between 50% and 90% until 70 mph. The repair involves selectively erasing and reprogramming the powertrain control module (PCM) with new software. 18-027-03 7/4/03 ‘03 (DR) No throttle response, lack of power while towing and diagnostic trouble codes P2638/P0700. This bulletin applies to vehicles equipped with a Cummins diesel engine (sales code ETC or ETH) built on or before July 25, 2003. The vehicle may exhibit: • No throttle response if the engine is started with the Accelerator Pedal Position Sensor (APPS) in an off-idle position (pedal depressed) and the transmission is shifted into drive or reverse while the APPS remains in an off-idle position (pedal depressed), causing the engine to remain at idle. • Lack of power while towing or hauling a heavy load with the transmission in overdrive— vehicles equipped with 47RE transmission. The repair involves selectively erasing and reprogramming the Cummins CM845 engine control module (ECM) with new software. 18-030-03 8/29/03 ‘98.5 - ‘02 (BE/BR) ‘03 - ‘04 (DR) Generic Cummins engine control module (ECM) procedure. This bulletin applies to Ram trucks equipped with the 5.9L Cummins 24-valve diesel engine (sales code ETC or ETH). Mopar is phasing out pre-programmed Cummins Diesel engine control modules (ECM). New modules will no longer be pre-programmed when received from Mopar. Replacement of future ECM’s will require programming utilizing the DRBIII and TechCONNECT. 18-003-04 2/3/04 ‘03 - ‘04 (DR) Poor A/C performance, slow fuel gauge response, and diagnostic trouble codes PO341 and P1757. This bulletin applies to vehicles equipped with a Cummins Turbo Diesel engine (sales code ETC or ETH) with an engine serial number 57130284 or earlier and the engine date of manufacture on or before December 10, 2003. The owner of the vehicle may describe slow fuel gauge response after adding fuel. On California emission equipped vehicles, the problem is rapid A/C clutch cycling and poor A/C performance until coolant temperature reaches 170°. The repair involves erasing and reprogramming the Cummins ECM with new software. 18-004-04 2/3/04 ‘04 (DR) Poor cab heat and/or slow engine warm-up in cold ambient temperatures. This bulletin applies to DR vehicles equipped with a Cummins Turbo Diesel engine (sales code ETC or ETH) and an automatic transmission, with an engine serial number 57130284 or earlier and the engine date of manufacture on or before December 10, 2003. The vehicle operator may describe poor cab heat and/or slow engine warm-up in cold ambient temperatures. A new feature has been added that allows the vehicle operator to use the speed control switches to increase the engine speed up to 1500 rpm in order to improve cab heat. The feature must be enabled using the DRBIII. If the vehicle operator would like to have the feature enabled, perform the repair procedure which involves erasing and reprogramming the Cummins ECM with new software. 18-007-04 2/24/04 ‘04 (DR) White smoke, engine stumble/misfire, or flat spot in engine performance. This bulletin applies to vehicles equipped with a Cummins Turbo Diesel engine (sales code ETH) with an engine serial number 57130285 through and including 57149668 and the engine date of manufacture 12/10/2003 through and including 2/2/2004. The vehicle operator may describe: • White smoke during no-load engine acceleration between 2800 and 3000 rpm. • Engine stumble/misfire or flat spot during moderate accelerations between 1500 and 2500 rpm. May be accompanied by white smoke. • During cold ambient temperatures (30° or below) white smoke and/or engine stumble when engine is started after an extended cold soak. • During cold ambient temperatures (30° or below) white smoke when restarting engine that has not yet reached normal operating temperature. If the vehicle operator describes or the technician experiences the problem, perform the repair procedure which involves erasing and reprogramming the Cummins ECM with new software. 84 A Publication of the TURBO DIESEL REGISTER CATEGORY 18 VEHICLE PERFORMANCE . . . Continued 18-033-04 8/20/04 ‘98.5 - ‘02 (BR) ‘03 - ‘05 (DR) Cummins engine control module (ECM) procedure. Mopar is phasing out pre-programmed Cummins diesel engine control modules (ECM). New modules will no longer be pre-programmed when received from Mopar. Replacement of future ECM’s will require programming at the dealership. This bulletin describes the programming procedure. 18-041-05 12/20/05 ‘06 Flash: engine performance/white smoke. This bulletin applies to Ram trucks equipped with the 5.9L Cummins 24-valve diesel engine (sales code ETH) built on or after June 9, 2005, through and including November 8, 2005. This bulletin involves programming the PCM (Cummins) with new software. The software is designed to reduce white smoke and improve engine performance after a cold start at ambient temperatures below 60°F and to improve oil pressure gauge operation. 18-001-06 Rev. A 7/12/06 ‘06 - ‘07 (DR, DH, D1) ‘07 (DC) StarSCAN StarMOBILE abort recovery procedures. This information only bulletin supersedes technical service bulletin 18-001-06, dated January 11, 2006, and provides guidelines to minimize flash reprogramming problems and recovery procedure information for failed flash attempts. 18-003-06 Rev. A 09/27/06 ‘05 - ‘06 (DH, D1) Flash: long crank when starting and/or transmission shift and battery charging enhancements. This bulletin applies to Ram trucks equipped with the 5.9L Cummins 24-valve diesel engine (sales code ETH) built on or after January 01, 2005. The vehicle operator may experience extended engine crank time in cold ambient temperatures on vehicles equipped with manual transmissions. This flash also provides the following enhancements: • Improved start times for manual transmission vehicles • Improved automatic transmission shifting • Engine fan is activated if the coolant temperature sensor fails • Enhanced battery charging This bulletin involves flash reprogramming the PCM (Cummins) with the software. 18-005-06 Rev. B 05/31/06 ‘06 (DH/D1) Flash: DTC correction, turbocharger protection, and clutch durability improvement. This bulletin supersedes technical service bulletin 18-005-06 Rev. A, dated April 26, 2006. This bulletin applies to Ram trucks equipped with the 5.9L Cummins 24-valve diesel engine (sales code ETH) built on or after June 9, 2005, through and including May 31, 2006. The PCM software has been revised to address the following issues: • A MIL may illuminate due to one or more of the following diagnostic trouble codes: P0071 – Inlet Air Temperature Sensor Rationality P0111 – Intake Air Temperature (IAT) Sensor Rationality P0514 – Battery Temperature Sensor Rationality P0191 – Fuel Pressure Rationality • Turbocharger durability improvement: Implemented an engine speed limitation when cold, to protect the turbocharger bearings. • Clutch durability improvement: Implemented a minimum engine speed limitation when launching vehicle from a stop, to protect the clutch. This bulletin involves selectively erasing and reprogramming the PCM (Cummins) with new software. 18-022-07 03/14/07 ‘03 - ‘05 (DR) Flash: 5.9L Turbo-Diesel engine system enhancements This bulletin applies to vehicles equipped with a 5.9L Turbo Diesel engine (sales codes ETC and ETH respectively). The bulletin supersedes 18-022-06 dated 07/13/06. The following enhancements are included with this software update: • Improved engine cooling (radiator fan activation) and prevention of possible engine overheat. When coolant temperature faults are present the radiator fan is enabled (turned on) during vehicle operation. • Correction to oil pressure reading when engine is operating at higher engine temperatures above 195°F. A Publication of the TURBO DIESEL REGISTER 85 CATEGORY 18 VEHICLE PERFORMANCE . . . Continued • Improvement to the Temperature Sensor Rationality Test to prevent possible false test failures and their following related diagnostic trouble codes: DTC P0071 – Inlet Air Temperature Sensor Rationality DTC P0111 – Intake Air Temperature (IAT) Sensor Rationality DTC P0514 – Battery Temperature Sensor Rationality. • Additional water-in-fuel (WIF) warning added to indicate that the operator has had a WIF (DTC P2269) and has continued to operate the vehicle in excess of 500 miles without draining the water from the fuel filter. The following is the new WIF DTC that has been added: DTC P0169 – WIF Too Long Error • Improvement to the fuel pressure rationality test to prevent false test failures and the related DTC 0191. This bulletin involves selectively erasing and reprogramming the engine control module with new software. 18-038-06 12/05/06 ‘07 (DC) Flash: DTC P0471 – Exhaust pressure sensor rationality on Cummins 6.7-liter Turbo Diesel. This bulletin applies to vehicles equipped with a 6.7-liter engine (sales code ETJ) built on or before October 05, 2006. The vehicle operator may experience a malfunction indicator lamp (MIL) illumination due to diagnostic trouble code (DTC) P0471: exhaust pressure sensor rationality. This bulletin involves selectively erasing and reprogramming the engine control module (ECMCummins) with new software. 18-001-07 01/06/07 ‘06 - ‘07 (DH/D1) Flash: check gauges lamp illuminates for alternator charging with DTC P2502, P2503, or P2509 This bulletin applies to vehicles equipped with a 5.9-liter engine (sales code ETH) built on or before November 29, 2006. The customer may experience the illumination of the “Check Gauges” lamp on the instrument panel cluster. Inspection of the gauges may reveal that the battery charging gauge may read in the 11-volt range rather than in the 14-volt range. There may not be a Check Engine/Malfunction Indicator Lamp (MIL) illumination. Further diagnosis may reveal the following diagnostic trouble codes (DTC’s) have been set: P2502 – Charging System Error – Diesel P2503 – Charging System Output Low – Diesel P2509 – Powerdown Data Lost Error – Diesel This bulletin involves selectively erasing and reprogramming the powertrain control module (Cummins PCM) with new software. 18-009-07 Rev. B 07/13/07 ‘07 (DC) Ram truck 3500 Cab and Chassis – Excessive soot accumulation in exhaust, PCM may not reprogram, and other engine system enhancements. This bulletin applies to Ram truck 3500 Cab and Chassis vehicles equipped with 6.7-liter Cummins Turbo Diesel engine (sales code ETJ). This bulletin supersedes technical service bulletin 18-00907 Rev. A, dated May 16, 2007. The vehicle operator and/or technician may experience one or more of the following conditions: • The technician may not be able to reprogram (flash) the PCM with new application software. • After extensive idling of the vehicle engine or if an intake air leak is present, the vehicle operator may experience a MIL illumination and/or an electronic vehicle information center (EVIC) message alert due to one or more of the following DTC’s: P1451 – Diesel Particulate Filter System Performance. P2463 – Diesel Particulate filter – Soot Accumulation P242F – Diesel Particulate Filter Restriction – Ash Accumulation. • The vehicle operator may experience a MIL illumination due to one of the following DTC’s: P0101 – Manifold Absolute Pressure Sensor Performance. P0106 – Boost Pressure Sensor Rationality. P0191 – Fuel Rail Pressure Sensor Circuit Performance. • Improved Water-In-Fuel (WIF) alert. To improve awareness that water has been detected in the fuel system, the vehicle operator will be alerted to a five (5) chime alert versus a single (1) chime alert. This bulletin involves selectively erasing and reprogramming the powertrain control module (PCM) with “bootloader” software and application software. 86 A Publication of the TURBO DIESEL REGISTER CATEGORY 18 VEHICLE PERFORMANCE . . . Continued 18-030-07 04/26/07 Engine off-idle speed limit feature to protect turbocharger when vehicle is not moving. This bulletin applies to vehicles equipped with a 5.9-liter or a 6.7-liter Cummins Turbo Diesel engine (sales codes: ETC, ETH, or ETJ). This bulletin involves a discussion regarding an engine control feature that limits engine off-idle speeds when the vehicle is not moving. ‘04 - ‘07 (DR/DH/D1/DC) Dependent upon engine coolant temperature, the engine control module (ECM) will temporarily limit the maximum engine speed when the vehicle is not moving. For automatic transmission equipped vehicles the maximum engine speed is temporarily delayed when the vehicle speed is less than one mph, and when the transmission selector is in either the neutral or park position. For manual transmission equipped vehicles, the maximum engine speed is temporarily delayed when the vehicle speed is less than one mph. This ECM feature is used to protect the engine turbocharger. This delay in maximum engine and turbocharger shaft speed allows for sufficient oil lubrication to the turbocharger shaft bearings which is important for long term turbocharger durability. The maximum engine speed for the 5.9-liter engine is temporarily limited to 1,600 RPM when the above conditions are met. The 6.7-liter engine speed is temporarily limited to 1,200 RPM when the above conditions are met. The length of time that the maximum engine speed is temporarily limited is dependent upon engine coolant temperature. For example, the delay can be up to 45 seconds at 35° or 7 seconds at 70°. 18-033-07 Rev. B 06/28/07 ‘07 (DH/D1) Ram truck 2500 and 3500 – Excessive soot accumulation in exhaust, PCM may not reprogram, OBD readiness status and other engine system enhancements. This bulletin applies to Ram truck 2500 and 3500 vehicles equipped with 6.7-liter Cummins Turbo Diesel engine (sales code ETJ) built on or before June 11, 2007. This bulletin supersedes technical service bulletin 18-033-07 Rev. A, dated June 12, 2007. The vehicle operator and/or technician may experience one or more of the following conditions and/or enhancements: • The technician may not be able to reprogram (flash) the PCM with new application software. • The vehicle may fail an emission inspection maintenance (I/M) test because two or more onaboard diagnostic (OBD) monitors report that they are not ready for testing. This condition may cause the customer vehicle to fail an emissions I/M test. The following is a list of OBD Monitors that may report as not ready for testing: a.Non-Methane Hydrocarbon (NMHC) Catalyst Monitor. b.Nitrogen Oxide (NOx) Absorber Monitor. c.Exhaust Gas Temperature Sensor Monitor. d.Electrical Charging System Monitor. e.EGR System Monitor. f. Oxygen Sensor Monitor. • After extensive idling of the vehicle engine or if an intake air leak is present, the vehicle operator may experience a MIL illumination and/or an electronic vehicle information center (EVIC) message alert due to one or more of the following DTC’s: P1451 – Diesel Particulate Filter System performance P2463 – Diesel Particulate Filter – Soot Accumulation P242F – Diesel Particulate Filter Restriction – Ash Accumulation. • The vehicle operator may experience a MIL illumination due to one of the following DTC’s: P0106 – Manifold Absolute Pressure Sensor Performance. P242B – Exhaust Gas Temperature Sensor Circuit Performance – Bank 1 Sensor 3 P245A – EGR Cooler Bypass Control Circuit – Open • An intermittent rough engine idle and/or white smoke following initial engine start. • A throttle tip-in stumble at engine speeds of 1,300 to 2,100 rpm. • An engine hesitation at altitude of 5,000 feet between engine speeds of 1,200 to 1,600 rpm. • A turbocharger “chuff-like” sound during rapid deceleration. This bulletin involves selectively erasing and reprogramming the Powertrain Control Module (PCM) with “bootloader” software and application software. A Publication of the TURBO DIESEL REGISTER 87 CATEGORY 18 18-037-07 Rev. A 07-20-07 ‘07 (DH/D1) VEHICLE PERFORMANCE . . . Continued 68RFE Transmission – DTC P0868 low line pressure. This bulletin applies to vehicles equipped with a 68RFE automatic transmission (sale code DG7) built on or before April 30, 2007. The customer may experience a malfunction indicator lamp (MIL) illumination due to diagnostic trouble code (DTC) P0868-Low Line Pressure. This condition may be due to the transmission control module (TCM) software or to a hardware circuit in the TCM. This bulletin involves checking the transmission control module (TCM) to determine that it is in proper working order and then selectively erasing and reprogramming the TCM with new software. 18-013-08 3/13/08 ’07 - ’08 Engine system and exhaust aftertreatment system enhancements. This bulletin applies to vehicles equipped with a Cummins 6.7-liter engine (sales code ETJ) built on or before February 14, 2008. This bulletin discusses the G30 recall and the many drivability issues that are addressed and covered in the G30 recall software update. CATEGORY 19 STEERING TSB# MODELS SUBJECT/DESCRIPTION 19-005-03 8/29/03 ‘94 - ‘02 (BR/BE) ‘02 - ‘04 (DR) Power steering fluid usage. The factory fill power steering fluid for most 2004 model year Chrysler Group vehicles is ATF+4 (part number 05013457AA/S9602) and it provides superior performance at both low and high temperatures. Refer to the table to identify factory fill and the approved service power steering fluid by year and model. From the table, it is noted that the ’94 to ’02 truck uses part number 04883077/MS5931. MS9602 should not be mixed or used as a “topping off” fluid on systems requiring MS5931. 19-008-03 11/28/03 ‘03 (DR) Vibration in steering column. A vibration may be felt in the steering wheel and/or the accelerator pedal on diesel engine vehicles with the engine operating between 2000 and 2200 rpm. The vibration may be more pronounced with the A/C compressor on. Operate the engine between 2000 and 2200 rpm. If the vibration is present, perform the repair procedure which involves installing a power steering hose containing a vibration damper. 19-010-04 11/29/04 ‘04 - ‘05 (DR) Power steering fluid contamination. This information-only bulletin discusses the use of supplements to the power steering fluid. Do not use fluids or supplements that contain Teflon as they will cause a restriction at the filter in the power steering system. The power steering fluid used in Chrysler Group vehicles is an engineered product. The addition of any unapproved fluids or supplements can interfere with the proper function of the fluid and cause damage to the steering system. To ensure the performance and durability of Chrysler Group steering systems, use only Mopar Power Steering Fluid +4, ATF+4 automatic transmission fluid, or equivalent (MS-9602), in the power steering system. 19-003-05 5/3/05 ‘03 - ‘05 (DR) In and out movement in steering column. This bulletin applies to vehicles built after December 1, 2003. If there is a small amount of movement in the steering column when pulling the steering wheel toward you while seated in the driver’s seat, the TSB outlines the proper repair procedure which involves the installation of a steering retainer kit to the steering column. 88 A Publication of the TURBO DIESEL REGISTER CATEGORY 19 STEERING . . . Continued 19-008-05 Rev. A 11/2/05 Revised power steering system bleeding procedures. This bulletin supersedes service bulletin 19-008-05, dated October 26, 2005. The bulletin discussed that Mopar Power Steering fluid +4 or ATF+4 (MS-9602) is to be used in the power steering system of DR vehicles. No other power steering or automatic transmission fluid is to be used in these systems. Damage may result to the power steering pump and system if the incorrect fluid is used. Do not overfill the power steering reservoir. If the air is not purged from the power steering system correctly, pump failure could result. ‘02 - ‘06 (DR) CATEGORY 21 TRANSMISSION TSB# MODELS SUBJECT/DESCRIPTION 21-023-05 11/11/05 ‘06 Out of park sense alarm. This information only bulletin applies to vehicles equipped with a 5.9L Turbo Diesel engine (sales code ETH). This information only bulletin discusses an alarm for “out of park” transmission setting. Vehicles with a diesel engine and an automatic transmission are equipped with an alarm that warns the customer, upon exiting the vehicle, that the transmission is not in the “Park” position. This feauture will only be functional under the following conditions: • engine running • foot off the brake pedal • driver’s seat belt is unbuckled • driver’s door is open. When this feature is triggered the horn will sound and the high beams and turn signal lamps will flash. This feature is standard equipment and cannot be disabled. 21-006-06 3/11/06 ‘05 - ‘06 Transmission jumps out of reverse. This bulletin applies to vehicles equipped with Cummins Turbo Diesel engines, sales code ETH and G56 manual transmissions sales code DEG. A customer may experience the transmission jumping out of reverse. If the customer indicates that the condition is present, perform the repair procedure which involves replacing the reverse synchronizer. 21-010-06 4/14/06 All Automatic transmission fluid usage ATF+4 (Type MS9602). This bulletin supersedes technical service bulletin 21-004-04, dated March 16, 2004. ATF+4, type 9602, is being used as factory fill for Chrysler Group automatic transmissions. ATF+4 is recommended for all vehicles equipped with Chrysler Group automatic transmissions except for those noted: AW-4 transmissions, Sprinter transmissions, Crossfire transmissions, MK/ PM vehicles equipped with Continuously Variable Transmission (CVT). ATF+4 is backward compatible with ATF+3, ATF+2, and ATF+. Additionally, ATF+4 can be used to top off vehicles that used ATF+3, ATF+2, or ATF+. Benefits: • Better anti-wear properties • Improved rust/corrosion prevention • Controls oxidation • Eliminates deposits • Controls friction • Retains anti-foaming properties • Superior properties for low temperature operation. Mopar ATF+4 has exceptional durability. However, the red dye used in ATF+4 is not permanent; as the fluid ages it may become darker or appear brown in color. ATF+4 also has a unique odor that may change with age. With ATF+4 fluid, color and odor are no longer indicators of fluid condition and do not necessarily support a fluid change. A Publication of the TURBO DIESEL REGISTER 89 CATEGORY 21 21-003-07 02/09/07 TRANSMISSION . . . Continued Automatic transmission diagnostic tear down procedure. This bulletin provides a procedure to determine repair versus replacement of an automatic transmission assembly. Follow the proper repair procedure based on the transmission type. This procedure is to be used after the transmission has been removed from the vehicle. This bulletin supersedes technical service bulletin 21-008-06, dated 04/08/06. 21-006-07 03/20/07 ‘05 (DH) Flash: New 48RE feature that allows normal shift schedule with full disable of 4th gear overdrive. This bulletin applies to vehicles equipped with a 5.9-liter Cummins Turbo Diesel engine and a 48RE automatic transmission (sales codes ETH and DG8 respectively). A new 48RE transmission feature is added that will allow normal shift schedule with full disable of 4th gear (overdrive gear), when the customer selects the Over-Drive (O/D) switch. Prior to the implementation of this new transmission feature, the use of the O/D switch changed the automatic transmission shift schedule from a “normal” shift schedule to a tow/haul mode shift schedule, and allowed 4th gear (overdrive gear) engagement. This new transmission feature will not change the transmission shift schedule, but will allow full 4th gear overdrive disable (lock out). With this new feature the customer will have the “normal” shift schedule with NO overdrive (4th gear). This bulletin involves selectively erasing and reprogramming the Cummins Engine Control Module (ECM) with new software. 21-009-07 5/24/07 ‘04 - ‘07 48RE Transmission – 1-2 shift hunt at light throttle. The customer may experience a 1-2 shift transmission hunt during light throttle application. This condition may be due to a governor pressure solenoid valve. This bulletin involves the replacement of the governor pressure solenoid valve in the transmission valve body. 21-019-07 11/14/07 ’07 - ’08 (DH/D1) 2500/3500 68RFE transmission – harsh coastdown shift and/or harsh 2-3 upshift. This bulletin applies to vehicles equipped with a 68RFE automatic transmission (sale code DG7) built on or before November 6, 2007. The customer may experience a harsh downshift from the transmission when coming to a stop. When a vehicle stop is initiated from 4th gear (around 25mph), the harsh downshift condition will usually occur as the vehicle decelerates to a speed of about 10mph. If the transmission is in 2nd, 3rd, 5th, or 6th gear when the stop is initiated, the condition will not be present. This may cause the condition to appear to be intermittent to the customer. Because the harsh downshift may occur below 10mph, the customer may believe that they are experiencing a harsh 2-1 downshift. Some customers may also experience a harsh 2-3 upshift during normal acceleration. This symptom is less common than the harsh coastdown shift. This bulletin involves selectively erasing and reprogramming the transmission control module (TCM) with new software. 90 A Publication of the TURBO DIESEL REGISTER CATEGORY 22 WHEELS AND TIRES TSB# MODELS SUBJECT/DESCRIPTION 22-001-05 12/1/05 ‘00 - ‘01 (BR/BE) ‘02 - ‘06 (DR) Chrome wheel care. This information-only bulletin discusses chrome wheel care. Chrome wheels should be cleaned regularly with mild soap and water or Mopar Car Wash Concentrate to maintain their luster and prevent corrosion. Wash them with the same soap solution as the body of the vehicle. Care must be taken in the selection of tire and wheel cleaning chemicals and equipment to prevent damage to wheels. Any of the “Do Not Use” items listed below can damage or stain wheels and wheel trim. • Wheel cleaners that contain hydrofluoric acid, biflouride compounds, sulfuric acid, or phosphoric acid. • Any abrasive type cleaner. • Any abrasive cleaning pad (such as steel wool) or abrasive brush. • Any oven cleaner. • A car wash that has carbide tipped wheel-cleaning brushes. 22-005-06 10/07/06 ‘03 - ‘07 (DR/DH/D1/DC) Front end shimmy on 4x4 vehicles when traveling over rough surfaces in the road. This bulletin applies to four wheel drive (4x4) 2500 and 3500 model vehicles. The customer may experience a self sustaining vibration (shimmy) felt in the front end of the vehicle after striking a bump or pothole. This bulletin involves verifying the condition of the vehicle front suspension and steering components, and adjusting the front tire pressure. If the customer experiences the above condition, perform the repair procedure which includes a steering damper, tie rods and end links. 22-002-07 Rev. A 7/12/07 ’08 (DH) 2500 CATEGORY 23 Tire pressure monitor system (TPMS) “Light Load” reset switch and tire rotation caution. This information-only bulletin provides information for new vehicle preparation, setting tire pressures, rotating tires and the right load switch on vehicles with the tire pressure monitoring system installed. BODY TSB# MODELS SUBJECT/DESCRIPTION 23-018-03 6/13/03 ‘03 (DR) Instrument panel whistle. A whistling sound may be present coming from the front of the instrument panel near the bottom of the windshield when the heater A/C blower is on. This may be caused by air escaping through the holes in the center of the rivets that attach the VIN plate to the instrument panel. This can be mis-diagnosed as a windshield air leak. If necessary, remove the instrument panel top cover and apply a small drop of clear glass sealer to the center of each of the rivets to seal the rivet holes. 23-016-03 6/13/03 ‘03 (DR) Buzzing or vibrating sound coming from the front of the vehicle. The description of the problem is a buzzing or vibrating sound coming from the front of the vehicle at highway speeds. Open the hood and inspect the ID plate located on the radiator support. The ID plate should be attached with four rivets. If there are only two rivets securing the ID plate, the ID plate may be vibrating against the radiator support. The repair involves securing the ID plate with additional rivets. 23-025-03 10/24/03 ‘03 (DR) Scratched aftermarket window tint film. Customers who have installed aftermarket window tint film see scratches on the film on the windows from contact with the door inner belt weather strip. Some vehicles may have been built with the weather strip not having a coating of soft protective flocking on the surface that contacts the window. The repair involves installing a revised door inner belt weather strip. A Publication of the TURBO DIESEL REGISTER 91 CATEGORY 23 BODY . . . Continued 23-001-04 1/13/04 ‘03 (DR) Bug deflector wind whistle. Some vehicles equipped with a factory installed hood mounted bug deflector may exhibit a whistling sound coming from the front of the vehicle. The repair procedure involves installing foam tape to the bug deflector. 23-003-04 1/27/04 ‘02 - ‘04 (DR) Water leak at grab handle. Water may enter the vehicle through the secondary door seal retainer or the roof seam, onto the headliner and run down the “A” pillar, coming out at the grab handle. The repair involves sealing holes in the roof panel. 23-004-04 ‘04 (DR) Cup holder binds or sticks. If the cup holder binds, will not open, or only opens partially, the instrument panel trim should be adjusted to provide clearance for the cup holder. 23-011-04 ‘03 - ‘04 (DR) Bug deflector loose/rattling. This bulletin applies to vehicles equipped with a factory installed bug deflector, sales code MXB. The bug deflector or air dam located on the front of the hood may become loose and rattle. The deflector could become dislodged in an automatic car wash. The repair involves replacing the bug deflector fasteners. 23-029-04 8/2/04 ‘04 (DR) Binding front power window. This bulletin applies to vehicles equipped with trailer tow mirrors, sales code GPD or GPG. Vehicle owners may experience the power window on the front door binding or slow to operate. The corrective action involves lubricating the window channel and installing a spacer under the outside mirror. 23-005-05 1/31/05 ‘03 - ‘04 (DR) Improved secondary door seal. Mud or dirt may accumulate on the rocker panel, causing customers to complain that their clothing gets dirty when they enter or exit the vehicle. This bulletin involves installing a new lower secondary door seal. 23-022-05 4/2/05 ‘05 - ‘06 (DR) Low gloss interior trim. This information-only bulletin discusses that all Chrysler, Dodge, and Jeep vehicles are designed with a low gloss interior trim. This low gloss finish maintains pleasing aesthetics, and minimizes glare of the instrument panel into the windshield. This low gloss finish should not be altered with a medium or high gloss interior treatment solution such as MOPAR Protector’s or other Armor All-like products. Instead, MOPAR Satin Select (part number 05174395AA) which has been specifically developed to remove minor surface contamination and maintain the low gloss appearance, should be used for interior trim treatment. 23-049-05 10/12/05 ‘04 - ‘05 (DR) Drip rail door seal torn. The drip rail or secondary door seal may become torn from contact with the lower “A” pillar of the front door. The repair involves replacing the secondary door seal with an improved seal. 23-009-06 2/14/06 ‘04 - ‘05 Water leak at roof mounted marker lamps. Water leaks may be present coming from the roof mounted marker lamps. New marker lamps have been released which contain base gaskets. These marker lamps should be used in all cases where water leaks are present at the marker lamps. These lamps will have to be replaced in sets of five due to appearance differences. If water leak tests reveal that water leaks are present at the marker lamps, perform the repair procedure. 92 A Publication of the TURBO DIESEL REGISTER CATEGORY 23 BODY . . . Continued 23-014-06 3/8/06 All Chrysler Group Vehicles Windshield wiper blade maintenance. Windshield wiper blades/elements are frequently replaced unnecessarily. If the wipe pattern appears to be streaky or if there is chatter and no damage to the wiper blades/elements is obvious, the following steps should be performed: • Use a soft cloth or sponge and squeegee and a solution of 50/50 alcohol and water, to wash the windshield. • Raise the wiper blades off the glass and clean the wiper blade elements with a solution of 50/50 alcohol and water and a soft cloth, paper towel or sponge. • Return the wiper blades to their normal operating position. If the wipe pattern is still objectionable, repeat several times. If the wipe pattern is still objectionable, replace the wiper blades/elements. 23-018-06 5/5/06 ‘06 (DR) Speaker buzz. Customers may experience a buzzing sound coming from the door area when the radio is on. This bulletin involves adding insulating tape to the inner door and door trim panel. 23-004-07 01/26/07 ‘04 - ‘07 (DR) Transit film removal. This information only bulletin provides a transit film removal procedure. 23-021-06 Rev. A 08/09/06 ‘07 (DR) YES Essentials stain, odor, and static resistant fabric care. This bulletin applies to vehicles equipped with YES Essentials stain, odor, and static resistant fabric (sales code XGW). YES Essentials fabric is an easy-care material that repels and releases soil to maintain the like-new appearance. Spills remain on the surface of the fabric to allow for easy clean up and to prevent stains and odors. The material is antimicrobial and static resistant. YES Essentials fabric may be cleaned in the following manner: • Remove as much of the stain as possible by blotting with a clean, dry towel. • Blot any remaining stain with a clean, damp towel. • For tough stains, apply Mopar Total clean, p/m 04897840AA, or a mild soap solution to a clean damp cloth and remove the stain. Use a fresh, damp towel to remove the soap residue. • For grease stains, apply Mopar Multi-purpose Cleaner, p/n 05127532AA, to a clean, damp cloth and remove the stain. Use a fresh, damp towel to remove the soap residue. • Do NOT use any solvents or fabric protectants on Yes Essentials fabric. 23-047-06 10/21/06 ‘06 - ‘07 (DR/DH/D1) Cracked windshield. Windshield cracks caused by an impact from a foreign object (i.e. stone) are often difficult to identify. The following assessment should be used to verify the presence of an impact chip on the crack. If no obvious impact chip is present, run a ball point pen along the crack and feel for a slight drop or pit in the glass. If a slight drop or pit in the glass is present, this indicates a small impact caused the crack. If the molding contains a witness mark or dent from an impact, inspect under the molding for an impact chip in the same manner. Cracks caused by an impact are not warrantable. 23-010-07 3/24/07 ’06 - ’07 (DR/DH/D1) 1500/2500/3500 A Publication of the TURBO DIESEL REGISTER Water leak due to small void in backlite sealer. The customer may experience the presence of water on or under the rear area floor carpet. This condition is likely due to water leaking past a small void in the adhesive used to retain the backlite glass to the body panel. It is recommended that a flowable sealer be applied to seal a small void in the backlite adhesive. 93 CATEGORY 23 BODY . . . Continued 23-011-07 3/30/07 ’06 - ’07 (DR/DH/D1) 1500/2500/3500 Glass keeper loose on back power sliding window. The customer may notice that the glass keeper on the rear backlite has separated from the glass. The bulletin gives directions for the proper repair procedure. 23-013-07 04/13/07 ‘02 - ‘07 (DR/DH/D1/DC) Trailer Towing Mirror – New mirror glass locking tab, new removal procedure. This bulletin applies to vehicles equipped with trailer tow mirrors (sales codes GPD or GPG) built after April 16, 2007, and for any vehicle where service replacement of the mirror glass is required. The trailer towing mirror assembly has a replaceable mirror glass. As part of the replaceable mirror glass, a locking tab has been added to the plastic backing on the mirror glass. This change has been made to vehicles built after April 16, 2007. This change is also being incorporated in service replacement mirror glass. This bulletin involves a discussion regarding new removal procedure when replacing the mirror glass on a trailer tow mirror. 23-028-07 Rev.A 7/20/07 ’06 - ’07 (DR/DH/D1) 1500/2500/3500 Buzz-like sound from front door speaker area when radio is on. The sound in question will come from the interior door trim panel, in the area where the radio speaker is mounted. This condition may be misdiagnosed as a bad radio speaker. The actual cause is typically the interface between the door trim panel sound insulation and the door water shield. The repair procedure involves the addition of sound insulation to the door panel. 23-035-07 08/08/07 ‘06 - ‘08 (DC/DM/DR/DH/D1) Exterior Lamp – lens fogging. Some customers may report that vehicle exterior lamp assemblies are fogged with a light layer of condensation on the inside of the lenses. This may be reported after the lamps have been turned on and brought up to operating temperature, turned off, and then rapidly cooled by cold water (such as rain, or the water from a car wash). Lens fogging can also occur under certain atmospheric conditions after a vehicle has been parked outside overnight (i.e., a warm humid day followed by clear cool night). This will usually clear as atmospheric conditions change to allow the condensation to change back into a vapor. Turning the lamps on will usually accelerate this process. A lamp that has a large number of water droplets visible on most internal surfaces indicates a problem with the lamp sealing that has allowed water to enter the lamp. In this instance, the customer is likely to report that moisture in the lamp is always present and never disappears. A lamp that exhibits internal moisture permanently should be replaced. This bulletin supersedes technical service bulletin 23-041-06, dated September 27, 2006. 23-017-08 5/10/08 ’08 (DR/DH/D1) 1500/2500/3500 Tailgate retaining cables appear to be of unequal lengths. This bulletin applies to vehicles built on or before May 7, 2008. One of the two side tailgate check cables may not be properly tensioned. This condition may cause an appearance that the tailgate cables are of unequal lengths. The repair procedure involves setting the loose/longer in appearance cable firmly into its seat. 23-046-07 10/30/07 ’06 - ’08 (DR/D1/DC/DH) Repair of etched paint. This bulletin involves evaluating the paint condition on all horizontal panels for etching. If the problem exists, the bulletin describes the proper repair procedure using sanding/buffing techniques or spot paint refinishing. 94 A Publication of the TURBO DIESEL REGISTER CATEGORY 24 HEATING & A/C TSB# MODELS SUBJECT/DESCRIPTION 24-003-03 5/23/03 ‘90 - ‘04 All Chrysler group products A/C system additives. The use of A/C system sealers may result in damage to A/C refrigerant recovery/evacuation/ recharging equipment and/or A/C system components. Many federal, state/provincial and local regulations prohibit the recharge of A/C systems with known leaks. DaimlerChrysler recommends the detection of A/C system leaks through the use of approved leak detectors available through Pentastar Service Equipment (PSE) and fluorescent leak detection dyes available through Mopar Parts. Vehicles found with A/C system sealers should be treated as contaminated, and replacement of the entire A/C refrigerant system is recommended. 24-004-03 6/13/03 ‘03 (DR) Defrost/door inoperative. The defrost door may break at the pivot shaft, causing inadequate travel. The system may not completely close, causing a lack of air discharge out of the floor vents and full discharge from the defrost outlet. This may be caused by a broken actuator stop on the heater A/C (HVAC) housing. The bulletin describes the repair procedure for replacing the defrost door and the lower half of the heater/AC housing. 24-006-06 8/9/06 ‘02 - ‘07 (DR) A/C cooling coil odor. This bulletin involves inspecting for leaves and other foreign material, cleaning, and treating the cooling coil and housing. Some vehicle operators may experience a musty odor from the A/C system, primarily at start up in hot and humid climates. This odor may be the result of microbial growth on the cooling coil. During normal A/C system operation, condensation, bacteria and fungi growth begins and odor results. If the operator describes, or the technician experiences a musty odor when operating the A/C system, perform the appropriate repair procedure based on the vehicle model. 24-021-05 12/16/05 ‘06 (DR) Mega Cab – lack of air flow from rear seat heat duct. This bulletin applies to 2006 Ram Truck Mega Cab built between 8/29/2005 and 8/31/2005. The rear seat actuator rod could become disconnected from the actuator lever, causing the rear seat heater door to become inoperative. This bulletin involves replacing the rear seat heat duct actuator lever. A Publication of the TURBO DIESEL REGISTER 95 Recall Notices OUTER DASH SILENCER PAD AND HEAT SHIELD SAFETY RECALL (737) at terminals four and five. Very few vehicles are expected to require ignition switch replacement. The outer dash silencer pad, on the below listed vehicles, may contact the exhaust pipe. Under certain operating conditions, the exhaust pipe may become not enough to over heat or ignite the silencer pad. To correct this condition, part of the silencer pad must be removed and a heat shield must be added to the exhaust pipe. Editor’s note: The title of the recall, “Ignition Switch Recall 875” leads one to conclude that the recall is to replace the ignition switch assembly. As summarized from the dealer service instructions, the recall has very little to do with the ignition switch, but rather is focused on adding a relay to the blower motor circuit. The moral of the story – don’t jump to conclusions based on the title of a memo and be sure additional trailer light wiring and accessories that are added to your vehicle are on a separate relay-switched circuit. Models: 1997 model year Dodge Ram (BR) trucks equipped with a 5.9L diesel engine (‘D’ in the 8th VIN Position) built at the: Saltillo Assembly Plant (‘G’ in the 11th VIN Position) from March 7, 1997 through May 15, 1997 St. Louis North Assembly Plant (‘J’ in the 11th VIN Position) from March 15, 1997 through May 16, 1997 Lago Alberto Assembly Plant (‘M’ in the 11th VIN Position) from March 18, 1997 through May 15, 1997 The service/repair procedure involves removal of a portion of the silencer pad and the installation of heat resistant foil tape to the remainder of the silencer pad and the installation of a heat shield onto the exhaust pipe. IGNITION SWITCH WIRING RECALL (875) The ignition switch and/or steering column wiring may overheat when the blower motor is operated at high speed for an extended period of time. This can cause stalling, loss of blower motor or power window operation, ABS or airbag lamp illumination or a steering column/instrument panel fire. The vehicles involved in the recall have a vehicle identification number as follows: Warren (“S” in the 11th VIN position) through April 4, 1996; St. Louis (“J” in the 11th VIN position) through March 23, 1996; Lago Alberto (“M” in the 11th VIN position) through April 14, 1996; Saltillo (“G” in the 11th VIN position) through April 14, 1996. The repair involves installing a blower motor relay and overlay harness to remove the blower motor circuit from the ignition switch. In addition, the ignition switch and electrical connector must be inspected for damage and replaced if necessary. Note to TDR subscribers: the primary parts package for this repair does not include a replacement ignition switch assembly, but rather provides a blower motor relay and overlay harness; if necessary, an ignition switch wiring pigtail; clips, screws, washers, etc., to install the blower motor relay. During the repair the ignition switch and associated connectors are to be inspected. The technician is instructed to look for indications of melting or deformation, specifically 96 FUEL TRANSFER PUMP RECALL (878) The fuel transfer (lift) pump on about 12,000 24-valve vehicles may be susceptible to premature internal armature shaft bushing wear. Failure of the shaft bushing typically causes a no-start condition. To correct the problem, the supplier of the fuel transfer pump (Federal Mogul) has returned to the original sintered iron bushing design. The suspect vehicles have a Cummins engine serial number sequence that falls between 56662576 and 56671920. These engines were installed at the DaimlerChrysler assembly plant in St. Louis from 12/3/99 to 1/18/00; Lago Alberto from 12/2/99 to 2/1/00; Satillo from 12/2/99 to 2/1/00. The replacement involves removal of the starter motor to gain access to the electronic transfer pump. Remove and install a replacement pump. Reinstall the starter and check for leaks and proper operation. The flat rate time schedule for replacement is approximately one hour. THROTTLE CONTROL CABLE AND THROTTLE LINKAGE REPLACEMENT SAFETY RECALL (970) DaimlerChrysler Corporation has determined that a defect, which relates to motor vehicle safety, exists in some 1994 through 1996 model year Dodge Trucks equipped with a Cummins Turbo Diesel engine (identified by a “C” in the eighth position of the VIN). The throttle control cable on your Ram truck may fray and eventually break. A frayed throttle control cable may not allow the throttle to return to the idle position. In addition, the throttle control linkage joints may corrode and cause the throttle to bind or stick. Either of the above conditions could increase the truck’s stopping distance and cause an accident without warning. DaimlerChrysler will repair your truck free of charge (parts and labor). To do this, your dealer will replace your truck’s throttle control cable and throttle linkage. The work will take about 1.0 hour to complete. The service/repair procedure A Publication of the TURBO DIESEL REGISTER involves removal of the throttle control cable, throttle linkage rod ends and linkage ball studs as all of these parts are replaced. Detailed removal and reinstallation instructions are provided to the dealership (reference Safety Recall 970). in the brake line, affecting brake effectiveness, increasing the risk of a crash. Dealers will replace the front brake hose assemblies, and the ABS sensor wire will be inspected and replaced if necessary. If you have already experienced the problem described above and have paid to have it repaired, you may send your original receipts and/or other adequate proof of payment to the following address for reimbursement: DaimlerChrysler Customer Assistance Center, PO Box 1040, St. Charles, MO 63302-1040, Attention: Recall Center. Clockspring (Recall 982) Upper Control Arm Fasteners (Recall 955) 2001 BR/BE Ram Truck Quad Cab manufactured in July 2000. The upper control arms attached with cadmium coated nuts can cause the bolts to stretch due to the application of a higher than specified clamp load. Breakage of the upper control arm fasteners could cause the axle to rotate forward under braking conditions. This rotation could twist the steering linkage and possibly separate the brake lines, increasing the risk of a crash. Dealers will replace the upper control arm bolts and nuts. Rear Axle Spacer Plate (Recall 966) 2001 (BR/BE) Dodge Ram Truck Quad Cab equipped with a camper package and overload springs manufactured in July 2000. The rear axle spacer plate could lead to deformation of the upper spring plate during assembly of the axle to the vehicle resulting a soft joint. The soft joint could cause the rear axle U-bolts to lose clamp load, resulting in displacement of the rear axle and a loss of vehicle control. This could increase the risk of a crash. Dealers will remove the spacer plates and the spring plates will be replaced. Throttle Cable (Recall 970) 1994-1996 (BR/BE) Dodge Ram Truck with diesel engine manufactured from July 1993 to July 1996. On certain pickup trucks, the throttle cable could unravel (fray) or break, resulting in a loss of throttle control. A throttle that does not return to idle could result in unexpected acceleration, increasing the risk of a crash. Dealers will inspect and replace the throttle cable and upper bell crank lever. Brake Hose/ABS Sensor Wire Assembly Clearance (Recall 971) 2000 (BR/BE) Dodge Ram Truck with ABS manufactured from July 1999 To September 1999. Some vehicles may have inadequate clearance between the front tire/wheel and the brake hose/ABS sensor wire assembly. During full lock turns, it is possible for the tire or wheel to contact the brake hose/ABS sensor wire assembly. This could ultimately result in wire damage and/or a hole A Publication of the TURBO DIESEL REGISTER 2001 (BR/BE) Dodge Ram Truck manufactured from May 2000 To October 2000. Sound deadener material internal to the clockspring could become detached from the clockspring cover and housing. When this occurs, the material could interfere with the clockspring ribbon and cause an open circuit. The driver air bag system will become disabled and the air bag warning lamp will illuminate on the instrument panel. Dealers will replace the clockspring assembly. Customer Satisfaction Notification No. C44 Transmission Cooler Line Date: February 2004 Models: ’03-’04 (DR) This notification applies only to trucks equipped with a 5.9 liter Cummins diesel engine (sales code ETC or ETH) and an automatic transmission (sales code DG8 or DGP) built through November 24, 2003. The transmission cooler line on about 97,000 of the above vehicles can transmit high pressure pulses when the vehicle is operated at heavy loads. These pulses may cause the engine-mounted transmission cooler to crack and leak fluid which could result in significant transmission damage. Repair: The transmission cooler line must be replaced on all involved vehicles. In addition, the engine-mounted transmission cooler must be inspected and replaced if necessary. Customer Satisfaction Notification No. C42 Powertrain Control Module Connectors Date: February 2004 Models: ’03 (DR) This notification applies only to trucks equipped with a 5.9 liter Cummins diesel engine (sales code ETC or ETH) and an automatic transmission (sales code DGP or DG8) built through July 9, 2003. The Powertrain Control Module (PCM) electrical connectors on about 70,000 of the above trucks may allow water to enter into the connectors. Water and the resulting corrosion in a PCM connector can cause the speed control and/or transmission overdrive function to become inoperative. Repair: The three electrical connectors on the PCM must be removed and inspected for corrosion. If no corrosion is found, the connectors must be sealed by installing rubber O-rings onto the harness connectors. If corrosion is found in the connector, the transmission wiring harness and PCM must be replaced. 97 CUSTOMER SATISFACTION NOTIFICATION E10 FRONT SUSPENSION COIL SPRINGS CUSTOMER SATISFACTION NOTIFICATION F19 ROLL-OVER VALVE VENT HOSES Date: July 2005 Models: ’05 (DH) Dodge Ram 3500 4x2 Pickup Truck This notification applies only to the above vehicles built through May 27, 2005. Incorrect front coil springs may have been installed on about 8,100 of the above truck’s front suspension. This may cause the front suspension to bottom out prematurely, which can reduce ride quality. Date: June 2006 Models: ’06 (DH) Dodge Ram 2500 Pickup and Cab-Chassis ’06 (D1) Dodge Ram 3500 Pickup and Cab-Chassis Repair: Both front suspension coil springs must be replaced. SAFETY RECALL E17 OUT-OF-PARK ALARM SYSTEM Date: March 2006 Models: ’03 – ’04 (DR) ’05 (DH) This recall applies only to the above vehicles equipped with a 5.9L diesel engine (6 or C in the eighth VIN Position) and an automatic transmission (sales code DGP or DG8). In certain circumstances when a driver has not placed the shifter lever fully into the “Park” position and leaves the engine running, the vehicle may unexpectedly move rearward after seeming to be stable. Unintended rearward movement of a vehicle could injure those in and/or near the vehicle. Repair: An Out-of-Park alarm system must be installed on the vehicle. The alarm system will beep the horn and flash the headlamps and shift indicator if a driver tries to exit a running vehicle without fully placing the shifter into the “Park” position. SAFETY RECALL F05 ANTILOCK BRAKE SYSTEM CONTROL MODULE Date: July 2006 Models: ’06 (D1) Dodge Ram Pickup (3500 Series) ’06 (DH) Dodge Ram Pickup (1500 Mega Cab and 2500 Series) This recall applies only to the above vehicles equipped with a four-wheel Antilock Brake System (sales code BGK or BRT) built from September 12, 2005 through December 11, 2005. The Antilock Brake System (ABS) control module on about 37,900 of the above vehicles may cause the rear brakes to lock up during certain braking conditions. This could result in a loss of vehicle control and cause a crash without warning. Repair: The ABS control module must be replaced and initialized with the StarSCAN tool. 98 This notification applies only to the above vehicles equipped with a 5.9L diesel engine (C in the eighth VIN position) built through February 1, 2006. The roll-over valves on about 69,300 of the above vehicles may allow water to enter into the fuel tank. Excessive water in the fuel can damage the injection pump and/or injectors if the engine is off for an extended period of time. Repair: A vent hose must be installed at each tank rollover valve (ROV). The fuel system must be inspected for excessive water content. If excessive water is found, the water must be removed and the fuel filter must be replaced. EMISSIONS RECALL G30 REPLACE OXYGEN SENSOR MODULE AND REPROGRAM ECM Date: October 2007 Models: ’07 – ’08 (DH/D1) Dodge Ram 2500/3500 Pickup Truck This notification applies only to the above vehicles equipped with a 6.7-liter diesel engine built through August 20, 2007. The on-board diagnostic (OBD) system on about 74,000 of the above vehicles may not detect a failed oxygen sensor or illuminate the malfunction indicator light (MIL) as required. In addition, the OBD system may cause these trucks to fail an inspection maintenance test and may not store mileage as required for certain transmission faults. Repair: The oxygen sensor module must be replaced and the engine control module (ECM) must be reprogrammed (flashed). The new software will also improve vehicle drivability and reduce the potential for exhaust soot accumulation in the vehicle’s particulate filter. The recalibration of the ECM updates and supersedes TSB 18-033-07 Revision B, dated 6/28/07 (see page 63 for details). Conclusion Wow, what a listing of information! Thanks, again, to the TDR members that forward information to us. Also, thanks to those at DaimlerChrysler and Cummins that provided their insight. Is the grass greener on the other side? We hope the TSB and Recall information will help you in your purchase/ ownership of the Dodge Cummins Turbo Diesel truck. We choose to think that answers and solutions are much better than wonderment. Happy Motoring! A Publication of the TURBO DIESEL REGISTER Most Common Problems The “Most Common Problems” title is certain to catch your attention. Rightfully so, we chose the brazen title to serve a purpose. “Favorite Fumbles—Fabulous Fixes” looks at problems that we’ve seen in the many years of the TDR magazine and web site. As a prospective owner or as the new owner of a used Turbo Diesel you need to be aware of the problems that are inherent with the truck you are considering or have recently purchased. Although some will dwell on the problems, the majority of TDR owners take initiative to solve/correct, anticipate/prepare for a future situation. That’s what the TDR is all about! And, thanks to the support from Chrysler and Cummins, we are equipped with answers and solutions rather than wonderment and isolation that would exist without a support group. “12-Valve Dowel Pin Solution” gives a discussion and solution to the problem that can happen to a ‘89-‘98 12valve engine. With the introduction out of the way, I resourced three important TDR articles: “Fuel Transfer Pumps Revisited” talks about the low pressure fuel system for all year model trucks and then gives specific repair techniques for the vintage year truck you may own. This is a must-read for anyone with a ‘98.5‘02 model year Turbo Diesel. We hope you find “Most Common Problems” to be helpful in your evaluation of the Dodge/Cummins Turbo Diesel pickup. Favorite Fumbles—Fabulous Fixes G. R. Whale and Jim Anderson Everyone knows the automakers have proving grounds where, rather obviously, part of the process is to prove things work. In theory, any part the customer can break can be broken under controlled circumstances at the proving grounds. However, customers routinely outnumber proving ground personnel. At some western desert testing centers the typical daily on-site staff amounts to 25-50 people, and if you put each in a car and spread them out on the “big” oval track, there’d still be a quarter of a mile of space between the cars. The reptiles outnumber humans exponentially and they don’t drive—does that tell you anything? So things go wrong with vehicles. And without debating what might cause the TDR readership to be so adept at it (or Dodge for the lack of satisfactory “proving”), the readers do find many things that go wrong. And then they figure out how to fix them. When the first Dodge/Cummins arrived in 1989, it had more than a few things going for it. Apart from the engine and transmission, not too much of it was new . . . heck, a lot of it could be traced to the early 1970s. So, again in theory, the only “new” problems would be limited to the engine or some part of the driveline, wiring, or cooling system attached to it. So let’s begin our discussion with problems that can be associated with Dodge/Cummins pickups, in First, Second, and Third Generation order, and randomly chosen by TDR writers Whale and Anderson. Some are more infamous than others, as it is with customers. A Publication of the TURBO DIESEL REGISTER Across the Board Glitch: My steering’s sloppy or the tires are cupping. Fix: This one can oft be traced beyond pilot error, although we’re certainly not ruling that out. It tends to be more of an issue on 4WD trucks, and newer models have fewer problems. A Borgeson steering shaft helps on almost any truck, and First Generation four-wheel drives often benefit from an adjustable drag link; a mild drop-pitman arm; or on really heavy front ends, an upgrade or replacement of the upper kingpin bushing—a much simpler job than it sounds. Two-wheel-drive versions benefit from a set of Moog ball joints. Later model 4WDs tend to wear out trackbars, and Luke’s Link appears to have the fix for that one. In some First Generation trucks the steering box broke off the frame rail, or the box moved on the frame from elongated bolt holes. Like many ‘70s vintage GM 4x4s, adding a brace from the opposite side frame rail fixed it, but unlike the GMs, the aftermarket did not develop a kit for it. Worn axle U-joints (4x4 only) along with other worn front end parts could cause a phenomenon known among Dodge diesel owners as a “death wobble” that was set up by crossing a seam in the road that ran at an angle to the direction of travel. Cure: inspect/ replace any loose or worn front end component including wheel bearings, front axle Ujoints, hubs, tie-rod ends, pitman arms, steering boxes, ball joints, steering stabilizer, track bar, etc. The cumulative slop of all the above components leads to the “death wobble”. Ref: I 33, p 41; I 35, p 13; I46, p 20 99 Glitch: My truck’s dripping oil. Fix: Not until many years into the Dodge/Cummins partnership did the engine have PCV . . . it was positively vented straight overboard. Occasionally some oil would find its way into the blow-by tube, and eventually drip out the bottom. When Second Generation trucks came out, this problem also resulted in a lot of erroneous front differential yoke seal replacements because the engine oil (not differential fluid) dripped down in the same area. Of course, if Dodge hadn’t moved the differential from the right side to the wrong side, this problem wouldn’t have existed. Most people simply put a small bottle with some holes in the side on the bottom of the vent tube—it could still “breathe” but the oil was trapped in the bottle. Dodge did this for 2001 but most oil change locations forget to empty it, and when it fills the fan blows oil all over the place. On 24-valve engines the breather moved to the front . . . and any truck on a steep descent could lose a lot of engine oil as crankcase pressure pushed it out the tube. Cummins offers a fix that moves the breather inlet back alongside the engine where it is less affected by crankcase oil level on steep grades—right where it was on 12-valve engines (Dodge TSB 09-002-02, Crankcase Breather Overflow: I38, page 84). Ref: I 24, p 17 The old cotton sock idea is an easy fix with no drips or oily film on anything but the outer sock. I replace the sock while I am under the truck changing oil. I extended the tube and drip catch bottle down to the anti-sway bar and secured it with a couple of wire ties. Gary-K7GLD, Canyon City, OR Glitch: My truck smells like a refinery. Owners of 24-valve trucks reported a “heavy oil smell” coming into the truck cab, caused by the crankcase breather tube venting the smell (particularly after an oil change) into the air stream of the engine fan, especially when sitting at a stoplight with the heater or air conditioner running and the cab fan on. The vent fan sucked the smell into the cab air intake at the windshield base. Fix: Extend the crankcase breather outlet toward the rear of the engine out of the engine fan air stream. Dodge offers an engine oil that lacks the aromatic compounds that cause the objectionable smell. 100 Other ways to cure the heavy oil smell are to drive the truck only in warm weather and to use used lube oil when you do an oil change. Say what? During the winter months the air is colder and the diesel exhaust fumes and oil breather fumes hang low to the ground. Thus, an explanation for the noticeable smell in the winter months. But, used oil? Seriously there is a Dodge technical service bulletin (TSB 09-02-00; I34, page 99) that addresses the heavy oil smell. The odor condition is a result of certain diesel oil additives and the odor reduces in intensity as the oil ages. The aging process typically takes place in 250 to 750 miles after the oil change. Used oil anyone? Glitch: The truck started, but the starter won’t stop. Fix: Worn and pitted starter solenoid contacts will cause the truck not to start, or the starter won’t disengage after the engine fires. A heavy duty contact kit is available from Larry B (I 49, p 154) to fix the problem. Glitch: Gauges don’t work. Fix: The cause is most often a poor ground between the dashboard and the body, chassis, and engine. Run new ground straps from the dashboard frame to the body, from the body to the frame, and from the frame to the engine. This can affect all diesel Rams. A secondary cause on ’99 to ’02 trucks is a faulty connection between the dash display driver cable and the PCM. Glitch: Gauges do work, but the fuel reading is inaccurate. On ’89 to ’02 trucks the Dodge-only fuel tank sending unit fails, either by becoming stuck at a certain fuel level or by reading low level at all times. Fix: The only solution is to drop the fuel tank and replace the sender. The barrel strainer the level sender attaches to may also develop a glitch where it doesn’t move up and down with fuel level, thus leading to erroneous level readings. Replace the barrel strainer. Ref: I 49, p 148 Glitch: My clutch won’t release. Fix: This may happen to any Dodge diesel. If the clutch fails to release upon stopping the truck, either the clutch master/ slave cylinder circuit has failed, thus requiring replacement; or the pilot bearing in the flywheel, which captures the nose of the transmission input shaft, has failed, allowing the input shaft to be deflected sideways when the clutch pedal is pushed, which binds the clutch as it slides on the input shaft splines. Pilot bearing replacement is necessary, along with replacement of the transmission input shaft if the nose of the shaft is not perfectly round or is scored. While the Dodge input shaft is priced at over $500, the shaft can be bought in the same box with similar part numbers from other sources for about $100. Damage to both components can be avoided by using the clutch only for gear changes, and not sitting with your foot on it. Ref: I50, p 36; I49, p 10; I36, p 75 A Publication of the TURBO DIESEL REGISTER Glitch: Driveline vibration based on road speed. Fix: It sounds like a worn out driveshaft universal joint or unbalanced shaft, but may also be caused by a bad carrier bearing or bearing support in a two-piece driveshaft system. The bearing cannot be re-lubricated by the owner, and the entire sealed carrier bearing assembly must be replaced. This is presently a Dodge-only part. A heavy load in the lower gears will cause driveline windup as well, leading to vibration that lessens with road speed or less torque applied to the axle. On Third Generation trucks, the driveline alignment should be checked as well. First Generation Glitch: The front driveshaft on First Generation trucks falls out. Fix: With the newfound massive torque, slipping front wheels that quickly found traction inevitably made the engine jump out of its mounts or snapped the little Spicer 1310-series front u-joint. A rebuilt driveshaft with a 1350 ujoint solves the problem, and owners with a lifted truck are cautioned to check the Cardan joint cage clearance at the back of this driveshaft. Glitch: My windshield squeaks. Fix: All trucks squeak, but this problem applies only to First Generation trucks and involves the bodywork cracking— more literally breaking apart—at the cowl near the lower corners of the windshield. TSB 23-63-94 showed the parts (steel stampings) and procedure for repairing the problem. The adhesive mentioned in the TSB has been discontinued and 3M Panel Bonding Adhesive recommended as the substitute. Ref: I 33, p 41 Glitch: My automatic is too automated. Fix: If your automatic transmission truck changes its mind a lot about what gear to use, don’t start with the gearbox, but check the throttle position sensor. The letters TPS are as well known to readers, as this infamous part could be a major nuisance. The TPS failure is characterized by a 100-200 rpm swing as the torque converter clutch locks and unlocks repeatedly while the transmission remains in 4th (overdrive) gear. Clean it and the connectors yourself or get a new one; chances are if it hasn’t gone bad, it will. Do not confuse a TPS failure with a TTS (Transmission Temperature Sensor) failure, which is characterized by a 200-400 rpm swing as the transmission cycles between 3rd and 4th gear. Replace the TTS and check the connectors for corrosion. The downshift is made when the failed TTS sensor says the outside temp is below –5° (zero volts). The upshift is made when the TTS again sends a signal (+1 to +5 volts) to the PCM saying the outside temp suddenly climbed to ambient temp, thus allowing overdrive to be engaged. Ref: I 37, p 46 A Publication of the TURBO DIESEL REGISTER Glitch: ’89-’91.5 truck runs hot. Fix: This version of the engine was turbocharged, but not intercooled, and long uphill climbs at full throttle caused the engine to overheat due to hot turbocharged air, particularly if the fueling had been turned up for more power. Members routed a fresh air duct from the front of the truck to the turbocharger area to cool the turbo, thus cutting the heat load on the engine, and the aftermarket developed intercoolers that usually came with a new grille for clearance. Another solution to the ‘89 to ‘91 run hot problem was the retrofit of the larger radiator and fan used in the ‘91.5 to ‘93 trucks. Way back in Issue 6 TDR member Bruce Burney presented four pages of step-by-step instructions as well as a detailed parts list (approximately $750 in 1991) to do the conversion. From pictures in our archives the ‘91.5/’93 radiator looks to be about half-again as large. Should a member need a reprint, we will be happy to fax the article to him. Second Generation Glitch: My gearbox is a nut short. Fix: One of the most infamous flaws in Second Generation trucks with the NV4500 gearbox was the mainshaft nut backing off and making fifth gear useless or gone altogether. TSB 21-10-98 Rev A from 9/25/98 addresses this issue in 13 pages of detail. The replacement nut has a set screw to lock it in place, after you’ve installed thread locker and torqued it to 350 ft-lbs. The Dodge fix didn’t always work, since the original nut was cheaply made. Sometimes a new gear was needed due to internal gear spline wear, or a new transmission output rear shaft was needed due to external spline wear. Sometimes the Dodge revised nut didn’t work, but the similar-appearing Standard Transmission and Gear nut did. Welding the nut onto the shaft didn’t work, as it crystallized the surface steel on the shaft and it later broke at the weld point. There was no Dodge recall on this problem. An avoidance tactic on 12-valve engines is to downshift from 5th to 4th gear when at full throttle at a minimum of 1,800 RPM to avoid excessive torque and engine vibration that causes the nut to loosen. And remember to use GL4 lubricant as called for by New Venture Gear and your manual. Ref: I 24, p 27; I 46, p 17 Glitch: The headlights don’t work anymore. Fix: A problem common to many versions, this is usually caused by running too many trailer lights. The parking circuit in your light switch was never designed to run 40 clearance lamps on the trailer and it failed in protest. Replacing the light switch does not solve the problem, but adding a relay to take all the added load does. If you use a camper or pull a trailer, you might consider adding a “ground switch” to the rear lights on your truck, so that they do not reflect in your mirrors when backing up or when the camper is onboard. In late 2001 there was a recall issued for ’94 to ’96 model year trucks covering problems associated with the ignition circuit and the truck’s blower motor. This important recall information follows: 101 Ignition Switch Wiring Recall 875 The ignition switch and/or steering column wiring on about 710,000 of the above vehicles may overheat when the blower motor is operated at high speed for an extended period of time. This can cause stalling, loss of blower motor or power window operation, ABS and airbag lamp illumination or a steering column/instrument panel fire. The vehicles involved in the recall have a vehicle identification number as follows: Warren (“S” in the 11th VIN position) through April 4, 1996; St. Louis (“J” in the 11th VIN position) through March 23, 1996 Lago Alberto (“M” in the 11th VIN position) through April 14, 1996; Saltillo (“G” in the 11th VIN position) through April 14, 1996. The repair involves installing a blower motor relay and overlay harness to remove the blower motor circuit from the ignition switch. In addition, the ignition switch and electrical connector must be inspected for damage and replaced if necessary. Note to the membership: the primary parts package for this repair does not include a replacement ignition switch assembly, but rather provides a blower motor relay and overlay harness; if necessary, an ignition switch wiring pigtail; clips, screws, washers, etc., to install the blower motor relay. During the repair the ignition switch and associated connectors are to be inspected. The technician is instructed to look for indications of melting or deformation, specifically at terminals four and five. Very few vehicles are expected to require ignition switch replacement. Editor’s note: The title of the recall, “Ignition Switch Recall 875” leads one to conclude that the recall is to replace the ignition switch assembly. As summarized from the dealer service instructions, the recall has very little to do with the ignition switch, but rather is focused on adding a relay to the blower motor circuit. The moral of the story—don’t jump to conclusions based on the title of a memo and be sure additional trailer light wiring and accessories that are added to your vehicle are on a separate relay-switched circuit. Ref: I 30, p 50 Glitch: Go with no throttle. Fix: With all the racing antics and double-clutching gear jammers, it’s no wonder the throttle cable on ’94-’96 trucks tended to wear out. It might be the worn spring, ball joints, or the cable itself, but a lot of TDR owners had trouble getting the throttle response desired. This became Safety Recall 970 (part # CANZ9700). Ref: I 34, p 44 102 If your truck has throttle but low power/excessive smoke, it’s quite possible that one or more of the rubber boots connecting the turbocharger and intercooler piping has slipped under its clamp, allowing your turbocharger’s pressurized air to leak. Properly replace the boot under the clamp, retighten the clamp and inspect the rest of the rubber boots of the system for holes in boots or slipping under clamps to restore full manifold boost pressure. Glitch: Can you say diet? Fix: No recall, service bulletin or advisory has ever been published on this subject, but some Ram owners found that the seat cushion collapses and the problem is common to all Second Generation trucks. Repair options include an aftermarket seat or new replacement seat, both of which may cost as much as the truck’s Blue Book value at this point; a local reupholstery shop; or since the seats have springs at the bottom, a home-made remedy of restuffing for a few bucks. Alternate fixes include new shock absorbers, more weight in the bed, or cutting back the calories. Ref: I 35, p 14 Glitch: It’s very hard to stop. No 4WD. HVAC acting weird. (vintage ’94-’96 trucks) Fix: So what.?To paraphrase the immortal words of Commendatore Fanfani, anybody can make a car go slow, don’t bother me with details about brakes. Any time the brakes and HVAC act strangely simultaneously, suspect the vacuum source. Typically the problem occurs where the hose connects to the 4WD shift collar. Of course your engine doesn’t draw a vacuum but a pump generates it to power some brake boosters, most HVAC systems (which default to Defrost as a safety issue) and on Second Generation and later 4WD models, the front axle disconnect system. The vacuum hose is cheap and easy to find, regardless of the size. Ref: I 39, p 40 Glitch: ATF drools. Fix: Although a number of things could be to blame, the first place to look was always the plastic fittings on the transmission fluid cooler lines on ’94-’96 trucks. Sooner or later, these got brittle from being overheated and expired, allowing the transmission to pump its fluid all over the road. The fix involves changing the plastic line retainers to Weatherhead fittings; Dodge also offered an upgraded set of lines with metal clips. On ’94-’98 models the transmission lines crossed on the bellhousing. At the cross point, the metal lines rubbed together and wore a hole in one line thus causing loss of all ATF fluid. After replacing the lines, owners installed rubber hose over the lines to keep them apart and prevent vibration rubbing. Ref: I 17, p 30; I 21, p 39; I 35, p 45 A Publication of the TURBO DIESEL REGISTER Glitch: My truck’s dripping . . . fuel this time, and it’s hard to start. Fix: Fuel out often means air in, and most diesels will be hard, if not impossible, to start with air in the fuel lines. The hoses around the lift pump, mostly on P7100 trucks, degrade over time and develop leaks. And the clamps used tend to distort and often lead to their own leaks; better to get some screw-type band clamps when you do the job. Ref: I 24, p 19; I 46, p 26 part. There are a number of preventative measures, some of which can be done with hand tools. When replacing the dowel pin, replace the crankshaft oil seal and vice versa due to a seal leak. The fix involves staking the pin, covering the pin with a teardrop-shaped washer placed under a nearby bolt, or removing the pin altogether since it has already served its purpose in locating the housing during engine assembly. Ref: I 40, p 56 and p 148 Glitch: Engine quits, tach drops to “0.” Fix: When your diesel behaves like a gas engine with broken points, it’s often a bad crankshaft position or camshaft position sensor. Depending on the year, it may also be characterized by the alternator, cruise control, air conditioner compressor not working properly; failure of the automatic transmission to engage overdrive; or failure of the lockup clutch to operate. The crankshaft position sensor is located on the front of the engine immediately above the crankshaft pulley on 12-valve engines or behind the starter on 24-valve engines. Without a cam or crankshaft position signal going to the PCM, the above features won’t operate. Replacement of the sensor restores operation. This is a Cummins part, not a Dodge part. Glitch: Shut-down solenoid is shut down. Fix: The fuel shutdown solenoid on ’94-’98 12-valve trucks has caused its fair share of difficulties, leaving trucks that won’t start, won’t stay running, or won’t shut off. In some cases a “manual” approach to fixing it (much like tapping an old starter solenoid with a mallet), might get you home. An alternate method is to delete the start/run solenoid and replace it with a cab controlled cable to move the fuel shutdown arm. This also makes a fine theft deterrent for the vehicle. Adjustments and replacements are do-it-yourself operations. Ref: I 46, p 32 (adjust) Re: start/run solenoid.; I 41, p 38; I 48, p 98 A close-up picture of the dowel pin. Glitch: Manual transmissions fluid specials. Fix: The five-speed and six-speed New Venture Gear (NV series) manual transmissions both specify a lubricant that is not available at retail locations in quart quantities. Suitable substitutes have been discovered by TDR members that include: 80W-90 synthetic GL-4 gear oil from Amsoil and Red Line for five-speed transmissions, and Pennzoil synthetic 75W-90 gear oil for six-speed manual transmissions at much lower cost than the Mopar lubricant from the Dodge dealer. Use of the wrong lube in either transmission will result in poor shifting and increased wear. Ref: I 37, p 104 Glitch: No cruise control . . . crankshaft position sensor okay. Fix: On ’89 to ’98.5 12-valve trucks the cruise control can become inoperative due to battery acid corrosion from the driver side battery. Replace the control unit after cleaning the area with a baking soda/water solution to neutralize spilled battery acid. Also inspect the battery tray above the solenoids for corrosion damage and repair as necessary. Glitch: The dreaded dowel pin drop. Fix: A potential problem for ’94-’98 12-valve trucks and some ‘99 trucks is the dowel pin used to locate the aluminum timing gear cover on the front of the engine. When this cheap part falls out, expensive things happen, and it’s shown some proclivity for falling out. Cummins says the number of problem engines has been very small, but has revised the Glitch: Low power output on 24-valve engines. Fix: Clean/replace the MAP (Manifold Absolute Pressure) sensor and/or the AIT (Air Intake Temperature) sensor to restore power that is caused by false readings from these dirty sensors. Dirty sensor tips or poor electrical connections at ostensibly weatherproof plugs render the sensors inoperative, which causes restrictions in fueling. A Publication of the TURBO DIESEL REGISTER A picture showing an egg-shaped washer that covers the dowel pin. 103 Glitch: ’94-’98 12-valve, P-7100 engine specific problems. Fix: The fuel return line rubber portion on the underside of the intake manifold, in the area of the fuel filter boss, tended to fail due to engine heat and to air getting into the fuel system. Replacing the hose with a better quality hose that is diesel fuel rated and more heat resistant is the solution. Low fuel system pressure that causes low power and stalling at hot idle, especially in automatic transmission trucks, may not necessarily signal a failing lift pump. It can also be caused by a failing fuel overflow valve that bypasses too much fuel through the injection pump. Low power and smoke complaints point to intercooler piping that may not be tight. Additionally, the fuel heater/ pre-strainer is probably clogged. This strainer is used only on the Dodge application. The nylon pre-strainer clogs with trash, restricting fuel flow to the lift pump and injection pump. Clean pre-strainer by unscrewing the bottom of the unit, or replace it if damaged. Another 12-valve specific problem: the quad ring on prestrainer bowl is cut or distorted. Dodge offers a kit that consists of a new strainer and a new quad ring (O-ring with squared edges) for the strainer bottom assembly for about $32. The strainer seldom fails. A new quad ring is available at most rubber supply and larger auto supply stores for a buck or two. Ref: These problems with the 12-valve low pressure fuel system were covered in detail in Issue 49, pages 148-152. Third Generation Glitch: Third Generation performance and fuel issues. The lift pump located in the area of the fuel filter is being upgraded/replaced by Dodge dealers with the in-tank fuel lift pump as used on the ’05 trucks when failure on earlier models is reported during the warranty period. Fix: If your Third Generation truck is hard to start or offers limited output, check the CP-3 high pressure fuel pump that feeds fuel at 23,000 PSI to the fuel manifold. Failure of the high pressure fuel pump is cured by pump replacement. You should also check the voltage at the electric in-tank fuel pump. There is no TSB on either of these at this time. Glitch: Excess truck washing due to fuel spills. Fix: Fuel can spill on the painted fender surface from fuel overflow during the tank filling process on some Third Generation trucks. Drill a small hole in the plastic piece surrounding the fuel filler opening below the fill tube opening to allow any fuel overflow to drain out rather than run down the painted side of your truck. G.R. Whale Jim Anderson TDR Writers 12-Valve Dowel Pin Common-Sensical Solution Always on the lookout for a better way to accomplish a task, the folks at TST products have developed a commonsensical (is that a word?) method to correct the dowel pin problem that many owners have seen with their 12-valve engines. Before I present their solution, let’s provide a brief history of the problem. The dowel pin has been (starting with production in 1983), and continues to be, used on the Cummins B-series engine as a locating and alignment point for the attachment of the front gear cover to the engine block. The problem that has been encountered by owners is predominately with the ’94 to ’98 12-valve engines. The dowel pin is not a problem on 24-valve engines as the timing cover was changed to fit the 24-valve’s VP44 fuel pump. These 12-valve engines have the heavier Bosch P7100 fuel pump which was required for higher horsepower ratings and for the higher injection pressures needed to meet stricter emission legislation enacted 1/1/1994. The belief is that the vibrations and weight of the P7100 fuel pump cause the dowel pin to loosen in its bore and possibly fall out. If the dowel pin does fall, it can be caught in the fuel pump gear causing a major problem (cracked cam nose): 104 or it can fall between the cam gear and the front housing and, in its path to the bottom of the oil pan, crack the gear case housing. I’ve heard many a story of how the cracked housing has been fixed using J-B Weld epoxy. Alternately, the gear housing can be removed and replaced, but this is a big task as the engine’s camshaft has to be removed to remove/replace the housing. A final fall-out scenario, the pin falls to the bottom of the oil pan and resides in the bottom of the pan forever (or at least until the pan is removed). There is a screen on the oil pickup tube that prevents the pin from moving into anywhere other than the bottom of the oil pan. The TST Solution Several methods of securing the pin into its bore have been developed by shops that service B-series engines. These methods have been covered in previous TDR magazines (Issue 38, page 136; Issue 33, page 46). Additionally, there is a thread on the TDR web site that takes you through the “how-to” should one wish to use the drill/jig method. However, on a recent visit to TST’s shop outside Columbus, Indiana, I discovered yet another way to perform this preventive maintenance type procedure. A Publication of the TURBO DIESEL REGISTER to a job that can be tackled by the shadetree mechanic. A brief descriptive of the steps involved (again, shadetree-type work as it is simply parts removal and installation) and a few key pictures will take you through the major steps. TST has a comprehensive set of instructions, an egg-washer, with a longer gear cover bolt, a Cummins crankcase seal, a tube of gasket maker (RTV) for the front cover. The price for the kit is $48. As a note, TST suggests that you consider a replacement fan belt (it’s time to change the belt and keep the old one for a spare) and replacement hoses (time to change these too). You’ll find other vendors offer these replacement parts. The TST shop guys have this project down to a two hour science. Lots of removals are necessary, but the repair is simple in scope. For those not familiar with the dowel pin the arrow shows its location. 1) Drain and remove the coolant overflow tank. 2) Drain and remove, or push to the side, the windshield washer tank. 3) Remove 10mm bolts (4) and clips that hold the fan shroud in place. The fan shroud will later be removed with the fan in step 7. 4) Remove engine accessory drive belt using your 3/8” ratchet in the belt tensioner access socket. 5) Cut a piece of cardboard big enough to cover the engine-side of the radiator. Tape the cardboard into place. A close-up picture of the dowel pin. 6) Locate the 10mm bolts (4) for the fan support bracket. Remove the three (#1, #2, #3) easy-to-access bolts. The last bolt (#4) can only be removed with an open end wrench. Support the fan assembly with one hand and loosen the bolt with the other, making sure not to damage the radiator fins. 2 1 3 4 Above is a picture of an egg-shaped washer that is their solution to the problem. Again, many methods of dowel pin preventive maintenance have been previously discussed. Using some TST shop short-cuts, and the TST developed egg-washer, the task of dowel pin correction has been reduced from highly involved A Publication of the TURBO DIESEL REGISTER 7) CAREFULLY work the fan and the fan shroud out together. This takes time, so go slow. Working with a friend helps. Make sure not to DAMAGE the radiator cooling fins or any hoses that may be in the way. 105 8) Remove the engine oil fill tube located at the front upper side of the gear case. To do this, remove the one 16mm bolt from the bracket to the cylinder head, and loosen the 8mm bolt that clamps the bracket to the oil fill tube. Now rotate the bracket out of the way, and with the use of a large pair of pliers rotate the assembly counterclockwise to remove it from the gear case cover. 9) Remove the two 13mm nuts from the engine speed sensor (RPM pick up). Make sure to make note the orientation of the bracket and the placement of the wire hold-down bracket. Place the sensor off to the side, making sure not to damage the sensor or the wires to the sensor. 10) Remove the engine vibration damper using a 15mm socket and ½ inch drive breaker bar. 11) Using a 10mm socket, remove all the gear cover bolts. Two of these bolts are 8mm and it is best to use a wrench, as these bolts are for the engine speed sensor. Note there are long and short bolts; they will need to be put in the proper locations when reinstalled. Remove the gear cover. 12) Locate the dowel pin and look to see if it is fully seated. Most of the pins will be flush with the gear housing or just below flush if they have not backed out. If the pin seems to be backed out find a small punch. With a hammer and punch tap on the head of the dowel pin and drive it into the block as far as possible. 15) Remove the crankshaft oil seal from the gear cover using a punch or seal driver. Located in the kit is a new crankshaft seal, seal driver, crankshaft seal starter and a dust shield. Install the new crankshaft seal in the gear housing cover applying loctite to the outside of the seal. Using the seal driver, install the new seal in the gear housing cover making sure it is square in the opening. Clean all oil residues from the gear housing cover and gear housing gasket surface and any old gasket material. Apply a light coating of RTV or an oil resistant weather trim adhesive to the gasket surface area of the gear housing cover and place the new gasket on in the proper orientation. Clean all oil off the front of the crankshaft. The new Teflon seal must be installed on a clean dry surface. Using the crankshaft seal starter in the new seal, place the gear housing onto the front of the engine, push the gear housing cover over the crankshaft nose, and remove the seal starter from the crankshaft. Start a couple of bolts to hold cover in place. 16) Reinstall the gear cover bolts and torque to 18 ft. lbs. 17) Reinstall the four (15mm) engine dampener bolts and torque bolts to 92 ft. lbs. 18) Reinstall the engine speed sensor. Set the sensor-tovibration damper air gap to 0.49 in. minimum to 0.51 in. maximum. Make sure that the two notches in the damper aren’t under the sensor when setting the air gap, tighten and torque the mounting nuts to 18 ft. lbs. and remove the feeler gauge. 19) Reinstall the fan and fan support bracket along with the fan shroud. The torque value for the four 10mm fan shroud bolts is 18 ft. lbs. Once the fan is in place the fan shroud can be installed. Again, it is nice to have assistance as you carefully lower the fan/fan support into place. 20) Reinstall the windshield washer tank to the fan shroud. 21) Reinstall the engine accessory drive belt according to the diagram on the front radiator support of your truck. 13) Lucky step 13! Time to install the special egg-washer, preventive maintenance part. Locate the 10mm bolt next to the dowel pin and remove it, reinstall the longer bolt using the special washer supplied in the kit. This washer will prevent the dowel pin from backing out. Apply loctite high strength (red) thread locker to the threads and torque the bolt to 18 ft. lbs. torque. 14) Using a gasket scraper, clean the gear housing gasket surface and the gear housing cover. 106 22) Check around the engine compartment and make sure all tools and equipment are clear of any moving parts and test start the engine. Check for any oil leaks and to make sure the engine drive belt is running straight. Correct any oil leaks or drive belt problems before driving the truck. Thanks to the folks at TST for allowing us to take excerpts from their detailed installation instructions. Scott Kilby TST Products (812) 342-6741 Robert Patton TDR Staff A Publication of the TURBO DIESEL REGISTER 12-VALVE NO-START CONDITION The bolt that clamps the positive battery cable to the driver’s side battery has a stud on its head, with various leads attached. One is the hot lead to the passenger side battery. Two are fusible links, one blue and one orange. The blue one goes to the fuel shutdown relay. Either this connector or the wire often become corroded because of battery acid. If so, slip off the terminal and crimp on a new one. My local Dodge dealer quoted me $450 for the part; my local Cummins distributor quoted $285. I decided to call my friend Randy at Dave’s Diesel ([800] 343-73580). Dave’s Diesel had one in stock for $265 less an additional 10% TDR member discount. I decided I couldn’t beat that. The new kit comes complete with new solenoid and all new brackets and heavy-duty hardware. The key to this diagnosis is the use of a cheap twelve-volt test light. Disconnect the fuel shutdown solenoid. There are three leads in the wiring harness: hot=start, ground, and hot=run. When the connection at the battery is poor, the test light will probably glow dimly when connected to the start pin of the wiring harness. To remove the old solenoid, start by disconnecting the wiring harness. Then unbolt the two 8mm bolts that hold the solenoid in place and remove the clip that holds the solenoid to the linkage. Next, remove the three 8mm bolts that hold the mounting bracket to the governor housing. Finally, remove the old shutoff lever. The new kit replaces the old 8mm hardware with new 10mm hardware. If your fuel shutdown solenoid is bad, usually the start circuit is the one that has burned out. If you turn the key on and pull up the fuel lever on the P7100 injection pump and the lever stays up, the start circuit is bad or the solenoid is bad. Cummins offers a newly designed solenoid that is much larger than the original that came on our Turbo Diesels, and it comes with a much thicker mounting bracket. Otherwise it will fit right onto the pump, and its wiring harness plugs right into the Dodge harness. The Cummins part number is 3800723, but be prepared for the cost, about $278. Joe Donnelly TDR Writer MORE NO START—SOLENOID REPLACEMENT In Issue 36 on page 36, Joe G, Eureka, CA, discusses the method of checking the fuel shut-off solenoid on the ’94 thru ’98 12-valve engines. The editor made note to check your local Radio Shack for generic relays at a substantial cost savings. But what do you do if the problem ends up being the fuel shut-off solenoid itself? I, like everyone else, try to save as much money as possible so I can spend money on things that I want. I went through the diagnostic steps as Joe G stated by finding and locating the large three wire connector between the master cylinder and the engine and disconnected the solenoid from the wiring harness. The black wire with the trace is the ground and the white wire is the hot to the pullup coil power. You will need a 10-gauge wire for your test leads. Apply the ground test wire to the black wire in the connector and 12-volts to the white wire. The solenoid should pull up. If it does not, disconnect the linkage and try it again. If the solenoid works, the problem is most likely the relay, but if it does not move, then it is the solenoid. A Publication of the TURBO DIESEL REGISTER Installation is in reverse of removal. Check the length of shaft on the solenoid; it should be 2.64 inches from the top of the lever pin to the bottom of the bracket. The new solenoid linkage comes preset and tightened so you should not have to adjust the linkage, but if the linkage has been misaligned you will have to loosen the shaft locknut and rotate the adjuster to the correct length. Just by following Joe G’s easy steps I was able to save myself a lot of money and a lot of hassle. Overall the replacement took about thirty minutes and was a fairly easy job (skill level 2). Just the job for the do-it-yourselfer. Hopefully next time I will get to write about something that was not broken. Brandon Parks Geno’s Garage Editor’s note: In a previous life I owned a ’96 Turbo Diesel. I had the same no-start, need-to-replace-something problem with either the relay or the solenoid. Brandon didn’t mention, but if a no-start condition occurs one of the first things you should check is the movement of the solenoid linkage. If the pull-up coil doesn’t work (no matter the reason—wiring, relay, solenoid) with the key in the on position, reach below the rod and push it up! Now, drive on to your destination and troubleshoot the problem as time permits. Likewise, if you turn the key off but the solenoid doesn’t release, the engine will keep running. Time to push the solenoid lever down and the engine will stop. Final notes from the voice-of-experience: I had a heck of a time correcting my no-start problem. With both new relay and new solenoid laid out on top of the engine, the solenoid did not want to pull up. I proceeded to un-wire my hidden anti theft switch (Issue 26, page 17), but that did not help. After much frustration, the solution presented itself: the solenoid needed a little bit of pretension and it would pullup every time. As it is installed there is pre-tension in the linkage…but there wasn’t any with the solenoid laid out on top of the engine. Jeez… 107 Fuel Transfer Pumps Revisited The following article is from Issue 56 of the Turbo Diesel Register. It was written in May of ‘07 by TDR Editor Robert Patton. the fuel transfer pump. Less than 5-6psi (more is better) and there is a danger of “overheating” the VP44 pump for it uses fuel to cool and lubricate its internal parts. As the deadline for Issue 56 was fast approaching, I called TDR writer Jim Anderson. Jim is the point guy for miscellaneous e-mail and phone inquiries that come into the TDR. I asked, “Hey Jim, what’s on the minds of those that you are corresponding with?” His response, “It seems that problems with the Third Generation trucks vary. There is not a common complaint that needs to be addressed.” This is good news for the Third Generation crowd. Jim continued, “However, with the used truck purchase of ’98.5-’02 vehicles the education about fuel transfer pumps is an endless task.” I responded, “Ouch, I know what you mean. Perhaps I should emulate the country music singer David Allen Coe’s efforts to write the perfect country music song by writing the perfect transfer pump article.” Jim responded, “Keep it simple, try the catch phrase from the Millionaire show ‘Is that your final answer?’” Thus, I present the final-answer, perfect transfer pump article. While the article focuses on the ’98.5-’02 owners, this collection of TDR oldies also has tips for ’94-’98 12valve owners and ’03-’07 HPCR owners. The information was pulled from our Issue 32, 48, and 50 magazines. Updates have been added to reflect the latest part number information. Then, to add a final crescendo to the article, I’ll share with you a story that will be of interest to 300,000+ owners of ’03 and ’04.5 HPCR owners. Below is an outline of the topics that will be covered. • ’98.5-’02 trucks, correct fuel pressure • ‘94-’98 12-valve, fuel transfer pump replacement • ‘98.5-’02 24-valve, fuel transfer pump replacement • Fuel pressure gauges and opinions • ‘98.5-’02 24-valve, fuel transfer pump relocation kit • ‘98.5-’02 24-valve, what to do • ‘03-’04.5 HPCR, what to do • ‘05 to current HPCR, what to do In the photo, note that the Editor’s truck (a ’99 model) is outfitted with two gauges—one is a mechanical, liquid-filled gauge and the other is a Westach electrical gauge with a pressure sending-unit mounted to the filter head assembly. In order to install a gauge, the ’98 and ’99 24-valve engines have a filter head with easily accessible 1/8 NPT fittings. On the 2000 and up trucks the service design team at Cummins was mindful of the need to test the fuel transfer pump’s delivery pressure. Thus, your truck is equipped with a “banjo adapter with a Schrader valve assembly.” Say what? For clarification let’s look at a photo and a description. Here we go… CORRECT FUEL PRESSURE— ‘98.5-’02 TRUCKS In May of 2001 there was a great deal of concern about fuel transfer pump delivery pressures. The problem first surfaced as a result of a production batch of inadequate transfer pumps and the resulting product recall. Hand-inhand with the recall was the increasing number of warranty claims. (When the article was written the early ‘98.5 engines were 2.5 years old.) The problems were aggravated by those that hot-rod their trucks as well as purchase fuel system accessories that add restriction to the system. The bottom line is that the 24-valve’s Bosch VP44 electronic fuel delivery pump needs to see at least 5-6psi of pressure from 108 On the inside, the part with the rifled opening attaches the fuel line to the fuel pump. On the outside, the Schrader valve (think A/C valve or, better yet, a tire valve) has a press-for-pressure needle. Here is the catch, you can take the pressure needle out of the Schrader valve. A Publication of the TURBO DIESEL REGISTER What Pressure Should I See? The readings that I am seeing on the gauge: 13-14 psi at idle 12 psi @ 2000 rpm – no load 11 psi @ 3000 rpm – no load 10 psi @ 3500 rpm – no load 10 psi @ various rpm – 10 psi boost 8 psi @ various rpm – 20 psi boost 3 psi @ various rpm – 30 psi boost * *From the readings at idle and at various rpm with a load (and a resulting boost reading that is at stock truck/20 psi or below levels), the gauge checks out okay. As I push the performance envelope with my hot-rodded engine (i.e. the 30 psi boost reading), the fuel pump is marginal. Does the fuel pump meet the stock specifications? Yes. Is it ideal for my truck’s hot-rodded performance? Good question. In discussions with other hot-rod owners I find that the old adage, “I am my own warranty station” once again proves correct. As you increase the output power of the engine from its design, the hot-rodder has to look at upgrading other components. Discussions with other owners have uncovered various solutions to the low pressure at high performance blues: drilled out banjo bolts for better fuel flow, bigger fuel lines, different fuel pumps, different pump locations. The saga will continue. FROM ISSUE 40: ’94 to ’98 12-VALVE FUEL TRANSFER PUMP REPLACEMENT by Brandon Parks I did not think fuel transfer pumps on 12-valve engines were a problem. I recall reading the “Backfire” column in Issue 39, where the editor states, “The old 12-valve engines used a mechanical fuel pump (the type driven off the engine’s camshaft) which is essentially problem free.” Nevertheless, as I started to read more about the transfer pump for 12valve engines on the TDR website, it became obvious that there are many instances of pump failure. Is this something that we 12-valve owners should be watching out for? Warning Signs The first sign suggesting that my pump might be failing was very hard startups in the morning. Then I noticed that the idle rpm was slowly getting lower and when driving the truck it had lost its pep. Finally, the truck just wouldn’t start. After running a fuel pressure test to determine the problem, I concluded that it was the fuel lift pump. You can purchase a new lift pump from a Cummins distributor for around $170.00 (part number 3936316; gaskets, 3939258 at $1.68). Replacement Following the procedure in the Service Manual, the first step is to disconnect the battery terminals. The instructions read to remove the starter motor (Remove the starter . . . there has to be a better way.), place a drain pan below the pump, remove the fuel line fittings at the top of the fuel pump, and fuel heater housing. Next, remove the fuel hose clamps and rubber fuel hose. (You can leave them connected and remove after you have removed the fuel pump and fuel heater.) Remove the two mounting bolts. Remove the fuel pump and fuel heater as one unit. Be careful not to allow the plunger to catch on the edge of the hole in the cylinder block and drop into the engine. As intimidating as this sounds, you would have to try to do this, as the plunger has to be pulled from its bore. Simple enough? Carter lift pump with plunger removed. A Publication of the TURBO DIESEL REGISTER 109 Helpful Hints Instead of removing the starter motor, I decided to get really acquainted with my engine and come in from the top of the engine compartment. This appeared easier than trying to work around the front differential to remove the heavy, bulky and greasy starter. The only problem is that when you try to reinstall your fuel pump and fuel heater unit you cannot push the pump back into place because your arms are not long enough to get any leverage to push the plunger against the camshaft. This is the voice of experience (and about an hour of labor and an evening in the easy-chair thinking about the problem) speaking to my fellow TDR members. Learn from my situation that there is a simple solution, thus making the top-removal a practical service technique. ton jacks) that has a slot in the center of the open-ended pipe. Another method that’s been used at Geno’s Garage is using an old broom handle to push the primer button. I decided to make my broom handle a little easier to use by taking a ¾” PVC coupling and sliding it on the end of the broom handle and drilling a hole about a 1/8” below the top ridge and installing a bolt in it. This is to help prevent the rubber boot from tearing. This will always come in handy when you have to prime the fuel system. When you hear the fuel hit the pump, try starting your truck. Broom handle, 3/4” coupling with hole drilled and bolt. Carter lift pump with regular mounting bolt and longer temporary bolt. Here is the secret: When you remove the fuel lift pump, take one of the two mounting bolts and find a replacement that is the same metric thread size but about ¾” longer. You probably have one in your parts box or you can borrow one from elsewhere on the engine. When reinstalling your lift pump use the longer bolt as your starter bolt. Once you get the lift pump and fuel heater partially tightened down, install one of the original bolts in the other hole. Once it is partially tightened, remove the longer bolt and replace it with the other original bolt. Tighten the two bolts to 18 ft-lbs torque. (Tighten the two bolts alternately to prevent damage to the fuel pump housing.) I thought this was the easier and less time consuming way than removing the starter and trying to be a contortionist by working my way around the front differential. Next step, bleed air from the fuel system. Begin by loosening either (doesn’t matter which) of the two 10mm bolts on top of the fuel filter housing. This will allow the air to escape as you prime the system. When priming the fuel system, begin by pushing the primer button a few hundred times and when you finally feel like your thumb is about to fall off, do it a few hundred more times. Seriously, don’t use your finger to push the primer button. My favorite tool for this job is a jack handle (from one of those cheap automotive two- 110 Broom handle assembled. Overall, it was a fairly easy installation. Skill level: give it a five on the 1 to 10 scale—make that a three, you know the shortcuts. Using the longer bolt and the broom handle made it much easier. Brandon Parks Geno’s Garage A Publication of the TURBO DIESEL REGISTER FROM ISSUE 34: ’98.5 to ’02, 24-VALVE FUEL TRANSFER PUMP REPLACEMENT by Robert Patton In two previous Issues of the TDR we’ve followed the editor’s difficulties with his 24-valve engine (self-inflicted VP-44 fuel injection pump failure—Issue 30, page 36; marginal fuel transfer pump performance—Issue 32, page 39). In this issue we continue the saga with the replacement of the fuel transfer pump. Step (1): This step is not pictured, but it involves the common sense recommendation of disconnecting and pushing the oil dipstick tube and other related cables and wires out of the way of my access-from-above service location. Step (2): Remove the fuel supply line from the transfer pump. From the bench-picture you can see the two, blue quick-connects that you push in to release the fuel supply line. Hindsight is 20/20. With the marginal performance of the fuel transfer pump I should not have installed the performance module and then drag raced the truck. The Bosch VP44 fuel injection pump needs fuel for lubrication and for cooling. With its acknowledged marginal performance, would the VP44 fuel injection pump fail? “As you increase the power output of the engine from its intended design, the hotrodder has to look at upgrading other components.” This hot-rodder should have looked closely at this fuel transfer pump’s performance, as I knew it wasn’t up to par. The VP44 bit the dust, leaving me stranded at the drag strip. Fuel Transfer Pump Failure Pinch the blue disconnect and the fuel line will come loose. After the installation of a Westach fuel pressure gauge, the fuel transfer pump on my truck would only give a reading of 3 psi. Having earned the degree of “shadetree mechanic,” I first looked at my workmanship with the gauge for the cause of the problem. As a test bed for products sold at Geno’s Garage, the truck is equipped with two fuel pressure gauges—one reading fuel pressure prior to the fuel filter, the other reading fuel pressure after the fuel filter. Yes, they both showed 3 psi. I swapped the sensor leads and even tried a replacement sensor to see if the problem was with my workmanship. The reading was still 3 psi. Convinced that the transfer pump was the problem, I ordered a fuel transfer pump from Cummins. Likely this could have been covered under the engine’s warranty, but I did not have time to spare. The latest Cummins part number is 3990082 (the part numbers have been changing with much frequency). The cost, $160. The 3990082 kit includes a wiring pigtail to allow the pump to be used in all 24-valve applications. I also ordered four fuel line, banjo bolt gaskets, part number 3963983 at approximately $1.00 each. Before examining the illustrations of the transfer pump, let’s refer to the Dodge Service Manual for their pump removal instructions. When I read Step (3): remove starter motor, I knew two things. One – I don’t have a service bay with a hydraulic lift allowing access to the starter motor and transfer pump from underneath. Two – I would not be doing the job as outlined in the Service Manual. Sounds like an opportunity to rewrite the manual. Can this job be accomplished from above? You bet, and it is not as difficult as one might imagine. Follow the pictorial for tips on how to do it. A Publication of the TURBO DIESEL REGISTER The fuel line to the transfer pump and the fuel line that goes to the fuel tank are pictured here. Step (3): Disconnect the transfer pump’s wiring harness. Step (4): Disconnect the supply-to-filter assembly fuel line from the transfer pump. A 17 mm “stubby” wrench works wonders for the removal of the banjo bolt holding the fuel line to the transfer pump. 111 Step (5): Loosen the three 15mm nuts that hold the transfer pump to the bracket. Remove the 10mm bolt that positions the fuel line to the bracket. Remove the 15mm nuts that you previously loosened and remove the transfer pump. 4 2 1 3 5 The three 15mm nuts that hold the fuel transfer pump in place (1-3) and 10 mm bolt holding the fuel line (4). Arrow 5 points to a fuel line that you have to remove with a 17 mm stubby wrench. Step (6): Remove the supply-from-tank fuel line from the old transfer pump and reinstall loosely on to the new transfer pump. Step (7): Reinstall the new transfer pump. Reconnect wiring harness and the fuel lines—the torque specification for the banjo bolts is 18 ft-lbs. Reconnect the supply line from the tank by pushing the line into the quick connect fittings. Listen for the fittings to click. Step (8): Purge air from the fuel system (easier said than done). This can be a long and arduous experience. Turn the key to start the engine (that is, briefly turn the engine over). Let the key come back to run. Leave the key in the run position and listen for the fuel pump to operate. It should run for 25 seconds. Repeat this procedure at least four times before trying to start the engine. Continue until the air is purged from the system. It is normal for the engine to sputter and cough. Step (9): Engine cranks? You’re finished. Robert Patton TDR Editor 112 FUEL PRESSURE GAUGES AND OPINIONS by Robert Patton Let’s continue and discuss fuel pressure, fuel pressure gauges and opinions. To start let’s look to Webster’s dictionary for a definition. Webster’s: opinion n. 1. A brief, conclusion or judgment not substantiated by proof. 2. An evaluation based on special knowledge. The TDR offices are only 20 steps away from the accessory business of Geno’s Garage. The Geno’s phone rings and the voice on the intercom asks for assistance, “Can someone help the customer on line one with a fuel pressure gauge question?” Should the Geno’s staff offer an opinion based on Webster’s first definition or Webster’s second definition? Future success in business dictates that definition 2 be used. As I’ve overheard the dialogue so many times, the exchange goes something like this: GG: What year model truck do you own? Customer: It’s a truck (pick your year ’98.5 to ’02) with a 24valve engine. I’ve heard opinions that I need a fuel pressure gauge. What do you think? GG: Yours is a 24-valve engine—yes, you need to monitor the fuel pressure. We’ve got gauges and accessories in stock that will make installing the gauge an easy project. Customer: Okay, what do you suggest and how do I install a gauge? GG: Do you want the long story or the short story? Customer: I’ve got time. GG. Here goes... The 24-valve engine’s VP-44 fuel injection pump relies on fuel from the transfer pump to keep the VP44’s internal parts lubricated and cool. A bad fuel transfer pump (and the transfer pump is known to be problematic) means a loss of fuel pressure to the VP-44 and often leads to the demise of the very expensive VP-44 injection pump. A fuel pressure gauge for a 24-valve engine is mandatory. As for the installation, you will be dealing with fuel, albeit less volatile diesel fuel. Nonetheless, you want to minimize the possibility of fuel leakage. On the ’98.5 and ’99 trucks the filter is in a housing and the housing drops down from a horizontal filter bracket. On top of the bracket are two ports that are tapped and plugged with a 1/8 NPT plug. The innermost plug is the clean side of the filter. Remove the innermost plug and install an electric Westach fuel pressure sending unit. Because the Westach fuel pressure gauge does not always match other gauges that owners have installed, the gauge can be mounted at the bottom of the kick-panel in a rubber donut mounting kit. This keeps the gauge hidden and unnoticed. Because the Westach gauge is electric, the chance of fuel leakage is minimized. There are no fuel isolators to malfunction, and therefore no fluid A Publication of the TURBO DIESEL REGISTER can leak into the cab. The Westach gauge is also the least expensive and least prone to give the customer a problem. Low cost and dependability—an unbeatable combination. For the ’00 to ’02 trucks the fuel filter assembly was changed to make fuel filter changes easier to perform. To change the fuel filter one simply removes a plastic cap and the filter comes out of its housing. For those wanting to install a fuel pressure gauge this presents a problem, as tapping into the fuel system is no longer as easy as removing a 1/8 NPT plug. The first solution that we offered called for replacing one of the fuel system banjo bolts with a bolt that was drilled and tapped to accept a 1/8 NPT pressure sending unit. Unfortunately, none of the banjo fittings are located in a vertical position. Common sense dictated that mounting a 6-ounce sending unit that is on an angle into a fragile banjo bolt on an engine that vibrates is not a good idea. At first we suggested that customers purchase a 1/8” NPT hydraulic “whip hose” for a grease gun and use the hose to plumb from a tapped banjo bolt to a mounting point for their Westach pressure sending unit. As the technique evolved, TDR member John Holmes developed a hose that would screw onto the Schraedervalve, test port and also screw onto the 1/8 NPT male Westach pressure sending unit. After several generations of hoses, the Geno’s group now offers a universal hose kit to access the fuel system’s pressure. Customer: Wow, that’s a story! It is now easy to understand the answer for 24-valve customers. GG: For ‘98.5 and ‘99 owners all that is needed is the Westach electronic fuel pressure gauge and an acceptable gauge mount. The ‘00 to ‘02 owners should purchase a universal fuel line, a Westach gauge and an acceptable gauge mount. Customer: Do you have any suggestions about transfer pump replacement for the ‘98.5 to ‘02 owners? GG: Okay, this is another of our favorite topics. Many TDR members have added aftermarket fuel pumps to work in tandem with or in lieu of the existing factory pump. The drawback to any aftermarket accessory is that the owner is now responsible for installation of the product, special parts and tools to support the installation, and parts necessary should the new-and-improved accessory fail. Admittedly, the original fuel transfer pump has been problematic. However, before I would recommend going the aftermarket route, I would suggest the keep-it-simple-stupid solution. Purchase a spare Cummins transfer pump. Yes, the part number has been superseded numerous times (the final kit number: 3990082). The current price at a Cummins distributor is $160. Next, read (and copy?) and understand the previous article showing how to replace the fuel transfer pump. By using the factory parts you’ll not have to worry about special aftermarket parts that may not be available to complete the repair when the truck breaks down. A Publication of the TURBO DIESEL REGISTER Better yet, consider the ‘98.5-’02 transfer pump relocation kit from Vulcan Performance and Geno’s Garage that allows you to change-out the transfer pump in five-minutes or less. (Read more about this kit on page 72.) Customer: What should I tell my friend with the ‘03 and newer HPCR engine? GG: The HPCR fuel system is entirely different. First and foremost, the fuel transfer pump is of a different design than the fuel transfer pump on the 24-valve engine. Although we are early in the ’03 and ’04 engine’s life cycle, there are not reports of widespread problems with this newly-designed transfer pump. For ’05, the transfer pump has been moved to a unit located in the fuel tank where the pump pushes fuel to the engine rather than pulling fuel from the tank. On the HPCR engine, the fuel is pressurized by a gear pump and loss of fuel pressure from the transfer pump does not equal an expensive fuel injection system failure. The gear pump is not fully capable of pulling fuel from the tank, so should a transfer pump fail, the worst scenario is that the truck does not start due to loss of fuel prime. Should you spend money on a gauge to tell you that the truck is not starting? Customer: Is there enough pressure to support higher horsepower settings with the ‘03-’07’s fuel transfer pump? GG: In Issue 47, page 60, “Technical Topics” authors Doug Leno and Joe Donnelly had this to say about the HPCR fuel system: “It is not the purpose of this article to repeat the multitude of experiments showing the limitations of the stock lift pump and low pressure fuel system. This series of tests was done simply to validate that the stock fuel system is sufficient for power enhancements delivered by the boxes we tested (100 horsepower and below). We found no stumbling, hesitation, or other performance problems using any of the tested boxes; the power was smooth and predictable. As for actually measuring low-side fuel pressure, we hooked up the boost channel of the SPA Technique EGT/boost gauge to an SPA pressure sender on the Bosch CP3 fuel pump inlet. For the most aggressive power increase we tested, the low-side fuel pressure dipped to a value that is nominally equal to atmospheric pressure (gauge pressure read zero). This means that the low pressure fuel system is at the limit of its capacity, and from this we concluded that for the power levels tested, the low-pressure fuel system was sufficient, although barely so. Zero gauge pressure simply means that the CP3 inlet is not drawing (or pulling) fuel under vacuum.” Okay, should you spend money on a gauge to tell you that the truck is not starting? Will you be increasing the engine’s output by a number larger than 100 horsepower? I can’t answer these questions for you. I can suggest a combination of parts (a fuel cap and a Westach gauge) to make the installation on a ’03 and newer truck easy to do. Go forth and make an informed decision. 113 24-VALVE TRANSFER PUMP RELOCATION KIT In August ‘05 TDR writer Andy Redmond wrote in to tell about a Mopar retrofit kit for the fuel transfer pump used on ’98.5 to ’04.5 Turbo Diesel pickup trucks. The following are the highlights from Andy’s e-mail. At the conclusion of his discussion I’ll offer my opinion of the kit. Robert, here are the highlights on the Mopar fuel transfer pump retrofit kit (05175538AA) with instruction sheet K6855481. Although I’m a proponent of the popular FASS fuel system, this would be a runner up. As long as it proves reliable, I tip my hat to Mopar! Andy Redmond TDR Writer • The kit retrofits all ’98.5-’02 Turbo Diesels. These trucks were equipped with a Carter electric fuel transfer pump. The kit includes all parts necessary to convert to a tank module mounted pump, very similar to the design on ’05up Turbo Diesels. Major items include a new fuel tank module, electrical harness, fasteners and fuel connection hardware and supplies. Now, my opinion: NO! Do not retrofit your truck. In the prededing pages we’ve covered the replacement of this troublesome part. My answer to the question, “Do you have any suggestion’s about transfer pump replacement for the ’98.5 to ’02 owners?” has not changed with the announcement of the Mopar retrofit kit (05175538AA). A similar kit is also available for the ’03-’04.5 Turbo Diesels that currently use a fuel transfer pump mounted on the rear of the fuel filter housing. First let’s review the prpevious correspondence from Issue 48. “Okay, this is another of my favorite topics. Many TDR members have added aftermarket fuel pumps to work in tandem with or in lieu of the existing factory pump. The drawback to any aftermarket accessory is that the owner is now responsible for installation of the product, special parts and tools to support the installation, and parts necessary should the new-andimproved accessory fail. • It’s best to order by VIN because slightly different modules fit different size fuel tanks (which can vary about 1-2 gallons on some models). • Reason for retrofit: As the readers are aware, the infamous electric transfer lift pump design has been problematic and unreliable at best. The controversy concerns a transfer lift pump that must lift fuel (Dodgeonly application) much farther than on other ISB applications. The Dodge application requires that fuel be pulled in excess of five feet. Contrast this to a ISBequipped Freightliner FL50 truck with a saddle tank less than three feet from the pump inlet. Additionally, many VP44 injection pumps would likely have not suffered catastrophic failure had the transfer lift pump not failed or partially failed, which starved the injection pump of fuel and fuel cooling (lubrication). The design specifications on the Carter lift pump are very close to, if not exceeding, manufacturer specifications. I guess now we know what happens when a part is pushed to its design limits! • The kit lists for approximately $400. It likely requires about 4-5 hours of shop rate labor to install the kit. DIY’s should likely add more time. • Reliability is unknown, but Dodge must believe the design on the ’05-up Turbo Diesels to be superior to the previous design. • A possible negative would be if a failure of the new transfer pump (now located in the tank) is experienced, the additional labor required to drain/drop the fuel tank and service the module/pump assembly could be more expensive. I have personal experience with one retrofit so far. My friend that works in Mopar wholesale parts has a ’00 model, which we diagnosed with an inoperable transfer pump. One of his 114 friends at the dealership, a technician, did the retrofit in a couple of hours. Another feature is greatly reduced pump operation noise before the engine is started. Unfortunately, I was unable to take photos while it was on the hoist at the dealership to show harness wiring, routing, etc. “Admittedly, the original fuel transfer pump has been problematic. However, before I would recommend going the aftermarket route, I would suggest the keepit-simple-stupid solution. Purchase a spare Cummins transfer pump. Yes, the part number has been superseded numerous times (the final kit number: 3990082; a 4943048 pump and 4025182 harness). The current price at a Cummins distributor is $180. Next, read (and copy?) and understand the previous article showing how to replace the fuel transfer pump. By using the factory parts you’ll not have to worry about special aftermarket parts to complete the repair that may not be available when the truck breaks down. “Additionally, my suggestion for all 24-valve owners is the purchase and installation of a fuel pressure gauge. “The 24-valve engine’s VP-44 fuel injection pump relies on fuel from the transfer pump to keep the VP44’s internal parts lubricated and cool. A bad fuel transfer pump (and the transfer pump is known to be problematic) means a loss of fuel pressure to the VP-44 and often leads to the demise of the very expensive VP44 injection pump. A fuel pressure gauge for a 24-valve engine is mandatory.” Andy mentions that, “a possible negative would be if a failure of the new transfer pump, now located in the tank, is experienced the additional labor required to drain/drop the fuel tank and service the module/pump assembly could be more expensive.” Change the words “could be more expensive” to “would most definitely be A Publication of the TURBO DIESEL REGISTER more expensive.” Add to the cost factor the realization that an on-the-road failure (These failures do not happen as you’re pulling into a Dodge dealership, do they?) is now an expensive towing bill or a major timewaster even if you have the tools to swap a fuel transfer pump on the side of the road. (Yeah, right, change it on the side of the road.) My keep-it-simple solution of having a spare lift pump will be complicated by misinformation in the field. Owners are being told that they can no longer purchase the lift pump at their Dodge dealership. Regardless of the story from Mopar, there is good news for ‘98.5-’02 owners from the rest of the parts aftermarket. The staff at Geno’s was solicited to purchase the “Carter (division of Federal Mogul) F74213” or “FP Diesel part number 3990105 fuel transfer pump assembly with wiring harness” from a diesel injection shop. (Interesting how the 3990105 number matches the number sold by Cummins.) Furthermore, Delphi is offering a fuel transfer pump, part number FP923 at other diesel injection shops. The Delphi, FP923 box was opened and there was not a wiring harness included in their kit. If my memory is correct, the wiring harness is needed on ’98.5 to ’99 trucks, as the early pumps had the harness pigtail protruding from the pump. Without the harness extension, the wires would be too short and not reach the replacement part. So, it looks like availability of a transfer pump for ‘98.5-’02 will not be a problem. However, availability of a replacement pump for ‘03-’04.5 owners is a major problem. Page 74 has the details. One last item to consider: the devil you know is preferable to the devil you don’t know. None of the TDR audience knows how good or bad the ’05 fuel transfer pump will be. There is not yet enough time on the clock. Nor do we know the symptoms of impending failure. Nor do we know the high, low, and mid-point performance (in psi) of the ’05 pump. Enough said? As a side note, Geno’s Garage has chosen not to sell the fuel transfer pumps. Although it would be no fault of the retail outlet that you may purchase the pump from, the possibility of an unhappy customer was too ominous. Robert Patton TDR Staff 24-VALVE (’98.5-’02 OWNERS)—WHAT TO DO? The First Step: Buy a Gauge If you are the owner of a ’98.5-’02 Dodge/Cummins Turbo Diesel truck, it is mandatory that you purchase a fuel pressure gauge. A gauge allows you to monitor the fuel transfer pump’s performance and correct a small problem before it becomes a big and expensive problem—the replacement of the VP44 fuel injection pump. Mandatory. Buy a gauge. That is right, a gauge. Do not trust the low fuel pressure idiot lights. Your gauge will allow you to watch fuel pressure trends. A light tells you it is too late… So, which fuel pressure gauge should you choose? From listening to the guys at Geno’s Garage, they recommend the Westach fuel pressure gauge. It is an electrical gauge. It is inexpensive and easy to install. The price is about $75 for a Westach gauge; $200+ for Autometer. Owners of the ’00-’02 trucks will need a $19 fuel pressure line to allow you to marry a fuel pressure sending unit to the fuel system. Alternately you can purchase a mechanical fuel pressure gauge. This design will have a pressure isolator that is mounted under the hood. The isolator is an interface that keeps diesel fuel in the engine compartment; a glycol fluid fills the capillary tube that goes through the firewall into the cab and to the back of the gauge. Mechanical gauges go from $130 to over $180. Because of their complexity the mechanical gauge is not recommended. Owners of the ’00’02 trucks would need a $19 fuel pressure line to marry the fuel pressure sending capillary tube to the fuel system. Step Two: Whose Fuel Transfer Pump This is the $150, $210, $400, or $650 decision. Starting at $150: Purchase a spare Cummins fuel transfer pump (part number 3990082). Monitor the fuel pressure with your gauge and become familiar with how to change the pump at its location on the engine. A Publication of the TURBO DIESEL REGISTER 115 Moving to $210: Purchase a spare Cummins fuel transfer pump. Purchase a transfer pump relocation kit for $59 (Vulcan Performance/Geno’s Garage), and move the transfer pump to an easy-to-access location on the truck’s frame rail. ’03-’04.5 WHAT TO DO I have a ’03 Turbo Diesel. Recently (45,000 miles) the filtermounted fuel transfer pump stopped delivering fuel from the tank. After a lot of looking around the Dodge mechanic was able to get the replacement pump supplied by Mopar. These replacement pumps are in very short supply, which leads me to think I am not the only one with this original pump problem. Am I correct, and can you give me any information on this? Larry Durkee My response: Larry, wow! In Issue 50, page 108 (November ’05) John Holmes reported that the ’03-’04 transfer pump failures would have to be fixed using the in-tank designed fuel transfer pump. After much research I have concluded you were very lucky. The benefits of relocation: the transfer pump is not subjected to continual engine vibration; the transfer pump is closer to the fuel tank and operates more like a pusher pump. Should the pump fail, the pump is very easy to access. Moving to $400+: There are several vendors that sell performance-type fuel transfer pumps. If you’ve made changes to the engine that have pushed your horsepower to over 300 you’ve likely already added one of these pumps. TDR writer Joe Donnelly discussed the FASS system (www.dieselpp.com) in his Issue 54 column. Other vendors: Pure Flow Technologies (www.pureflowtechnologies.com); Glacier Diesel Power (www.glacierdieselpower.com); and Vulcan Performance (www.vulcanperformance.com) offer similar pump-only kits for the ’98.5-’02 trucks. Alternately you can become a fuel systems engineer and source a Holley, Carter, Walboro, etc., fuel transfer pump from a variety of automotive catalogs and retrofit a pump to your truck. I, too, have an ’03 Turbo Diesel. The warranty period has expired. Your correspondence prompted me to call my Dodge dealer to order a spare fuel transfer pump. Yes, we’ve all been told by Dodge and Cummins that the ’03 transfer pump redesign is better than the old ’98.5 to ’02 pump, but I wanted to be prepared. Guess what? John Holmes wasn’t joking. You cannot buy the engine-mounted ’03-’05 transfer pump from Dodge. The old inventory has been scrapped-out. (Believe me on this--I tried to purchase 1150 units through Geno’s Garage and was told about the scrap decision just prior to press time. The part number (5093135AA) has been superseded to the “module in the fuel tank” kit 68003869AA or 68003870AA at a price of about $375. Labor to remove the fuel tank and install the kit…I’m guessing $400+. No problem. With my engine serial number in hand I called my Cummins distributor. Long-story-short, same answer: you cannot purchase the engine-mounted fuel transfer pump from Cummins. Their part number3957922 is superseded by a $95 conversion kit that is simply the seals, washers, screws, fittings and hose that go with the relocation of a pump into the fuel tank. The old 3957922 was priced fairly at about $150. Call me cheap. Call me apprehensive, but the claims that the ’05 and newer pump-in-the-tank is the greatest thing since sliced bread have not been substantiated by Father Time. Call me lazy. Call me incompetent. I do not want to drop my fuel tank to install the in-tank kit. So, where can I find the obsolete 3957922? If not the 395722, what other options do I have? Moving to $650+: The price tag moves to $650+ when you take the performance-type fuel transfer pump kit as offered by the vendors above, and add to that kit a mounting block that holds one or two additional fuel filters. In the quest for clean fuel and reliable fuel pressure, this is the utmost solution. 116 Four weeks worth of research and I was no better off than when I started. My quest was not clouded by the need for better transfer pump performance. I simply wanted a costeffective solution to a problem that could arise. Solve the problem and provide others with a fairly priced alternative. A Publication of the TURBO DIESEL REGISTER Sure, I could go the aftermarket transfer pump route at $400+, or the aftermarket transfer pump with single or dual fuel filters as a part of the kit at $650+. And, as you know, there is the factory answer that would cost about $850. I could recite the numerous parts supercessions. I could send you on the same wild goose chase for the transfer pump that is used in other non-Dodge B-series engine applications. But, I’ll save you some time; the part is made by Airtex and the part number is 3968188. The price is $140. At Geno’s Garage we found some brackets and had it ready for release as an alternative to the aftermarket and factory answers. Then I called Cummins to place an initial stock order. You guessed it…nationwide backorder. At this point I was exasperated. So I called Eric at Vulcan Performance (www.vulcanperformance.com). We discussed the cheap, apprehensive, lazy and incompetent man’s options to solve the ’03-’04.5 transfer pump problem. We tried to formulate an answer. ’05-’07 WHAT TO DO Starting with the ’05 model year the fuel transfer pump was relocated into the fuel tank. The overly simplistic answer to a fuel pump failure is to return to your dealership for a warranty repair. Have you exceeded the 36,000 mile (or is it covered for 100,000 miles—I don’t know) warranty period? Labor for an in-tank replacement will be expensive. the aftermarket vendors listed for your ’03-’04.5 Third Generation brothers offer fuel transfer pump kits with “sippy straws” to bypass a failed in-tank unit. The price range is $450 and up depending on the pumps performance and whether or not you want additional filtration. Robert Patton TDR Staff We discussed an inexpensive kit to relocate the fuel pump onto the frame rail underneath the truck. We discussed many aftermarket pumps that could be used in the new frame rail location—the Cummins Airtex, the old Cummins/Federal Mogal ’24-valve design, Walboro, Carter and Holley. Then we agreed that none of these fuel pumps offer the ’03-’04.5 customer a proven record of performance. As a plug-and-play option I understand that Delphi offer a replacement. The part number is FP943. Several TDR vendors offer this unit: Diesel Injection (www.dieselinjection. com) and Scheid Diesel (www.scheiddiesel.com) are two locations that I am aware of. The retail price is about $450. I was pushed to consider the aftermarket The installation requires hardware and fuel lines to relocate the transfer pump to the frame rail underneath the truck. Several TDR vendors and their dealers offer relocation kits and pumps in prices that range from $400 and up depending on the pump’s performance and whether or not you want additional filtration. Vendors that I am aware: • Vulcan Performance (www.vulcanperformance.com) • Diesel Performance Products (FASS system, www. dieselpp.com) • Pureflow Technologies (AirDog system, www.pureflowtechnologies.com) • Glacier Diesel Power (www.glacierdieselpower.com) Also, there are many dealer outlets that offer these vendor kits. At this juncture the aftermarket is the cost-effective answer. A Publication of the TURBO DIESEL REGISTER 117 5/2008 Epilogue—Attention ‘03-’04.5 Owners As you may have noted, I had hoped that the May 2007 fuel transfer pump article would be the final word on what owners would need to do to make the different year model engines bulletproof. Fortunately for the owners of ’03-’04.5 trucks there is an update to their story. The article “The Ongoing Fuel Transfer pump Saga” is reprinted from TDR Issue 60, May 2008. So, ’03-’04.5 owners (and there are about 300,000 of you out there) read-on. FROM ISSUE 60: THE ONGOING FUEL TRANSFER PUMP SAGA (Or, Why Subscribe to the TDR?) by Robert Patton Why subscribe to the TDR? ‘Cause the following can happen to you, your family, or your friends. In a time of unknown, you’ll need a solution. Here is the story. Brother-in-law purchases your used truck. Brother-in-law is in your big city and ventures downtown. Brother-in-law calls from the side of the expressway located in the less desirable side of town. The truck will not run. He has not read the TDR. You have. You start with the basics. What happened? – It just quit running. Did you just fuel-up? – Nope. Will it restart or is it completely dead? – It will run for a few seconds then it shuts off. Okay, open the hood and find the fuel filter. Next bump the engine over and bring the key back to the run position. Do you hear the buzz of the fuel transfer pump? – Ah, okay, I did that and no buzz noise, just some clicking noises. Bythe-way, what’s a fuel transfer pump? The ’03-’04.5 owners: Previously it was thought that the revised electric fuel transfer pump for these trucks was a better design than the ’98.5-’02 pump. Well, brother-inlaw’s transfer pump lasted 115K miles. Armed with information in the TDR (and a $180 towing bill), the brother-in-law has some new-found options. Postscript to the Issue 56 article, Page 74, “’03-’04.5 What to do?” As you’ve previously read, the Mopar and Cummins parts networks have deleted the replacement fuel transfer pump from their inventories. Issue 56 was written in April ’07. At that time the only plug-and-play option was a part number FP943 that was offered by Delphi at a retail price of about $450. Since that time we have found that the FP943 pump is made by one source—the same source that made the pump for Mopar and Cummins: Carter division of FederalMogul. I can only imagine their surprise when Mopar and Cummins scrapped-out their inventories last spring. Lots of extra inventory? Perhaps so. The same part is not only showing up in a brown Delphi box, it is now available in a white Fel Pro box. We’ve closely inspected the pump and its contents. They are the same. And, available in stock. More good news…the price has substantially dropped. How about less than $200? For those that want a plug-n-play option (or spare part), there is availability at several vendors. Diesel Injection, Scheid diesel and Geno’s Garage are locations that I am aware of. So, ’03-’04.5 owners it is time to purchase a spare. Be ready for the inevitable! Arrg…Obviously brother-in-law missed the 12-page article in Issue 56 about fuel transfer pumps. Since this part (which is the Achilles heel of a fine Cummins engine) can lead to a compromising and perhaps expensive engine-down situation, you’ll want to have a plan of action. Don’t think that the fuel transfer pump problem won’t happen to you or someone you know. As you read in the Issue 56 article, it is not likely to cause the ’94-’98 owners too much trouble, as their fuel transfer pump is a mechanical unit that fails gradually. The ’98.5-’02 owners: you desperately need to have a plan of action. There were about 450,000 trucks made in this series of 4.5 years. For these owners nothing has changed in the past year. You’ll want to read (reread) Issue 56. 118 A Publication of the TURBO DIESEL REGISTER ’03-’04.5 Fuel Transfer Pump Installation Following the well-written instructions that were in the Fel Pro “M4089602” box, the installation went on and off without a hitch. The following is a combination of the instruction sheet directive and some common-sense tips. • Push the cables and wiring to the side of the fuel filter to make the transfer pump easier to access. • Crawl underneath the truck and slip a heater hose (5/8” inside diameter) over the existing fuel filter drain hose. • Open the fuel drain valve at the fuel filter housing. Drain the fuel and close the drain valve. • Back up top: Disconnect the electrical connector from the fuel transfer pump (the pinch-to-release is on the bottom of the connector). Unplug the water-in-fuel sensor. Note how the wires and cables have been pushed to the side of the fuel filter. Extend the fuel filter drain hose to save the aggravation of having the fuel drain onto the frame which is caused by the existing short drain hose. • • Remove the four 5mm hex head bolts that hold the transfer pump to the filter housing. • Remove the transfer pump and confirm that the sealing O-ring is also removed from the filter housing. Back under the truck: Locate the junction of the truck’s hard fuel line-to-rubber fuel line. Pinch the tabs of the quick disconnect fitting and remove the fuel line. Pinch the outer tangs of the fuel line quick-fitting to separate the rubber hose from the hard fuel line. A Publication of the TURBO DIESEL REGISTER Do not forget to remove the old O-ring. An O-ring on top of an O-ring doesn’t work too well. Ask me how I know. 119 • Assemble the new components to match the routing of the existing fuel pump and fuel line. • Do a double check of your work. It is time to start the truck. Bump the starter, but do not attempt a complete start cycle. Return the key to the run position and listen for the fuel pump to operate. it will cycle for 15-20 seconds. Repeat the bump/return to run technique for 4-5 cycles to be sure that air has been purged out of the engine’s self-priming fuel system. • Crank the truck and check for leaks. You’re finished. I am pleased to report the success of this project and that ’03-’04.5 owners have a replacement part from the aftermarket. This plug-and-play option means you don’t have to use the factory suggested repair technique—drop the fuel tank (labor estimate $300-400) and add the ’05current fuel pump kit that goes into the fuel tank (parts estimate $400). With the old transfer pump and fuel line removed you can see the orientation of the new fuel lines and primary fuel filter. • Install the new O-ring to the fuel pump. Install the fuel pump into the filter housing. Position the fuel pump and push into place. • Install the four 5mm hex head bolts (61 inch-lbs.). • Connect the electrical connector to the fuel pump. • Back under the truck: Check to be sure that the orientation of the new fuel line matches the route of the fuel line that was removed. Snap the fuel line quickconnect onto its fitting. This article updates the 56 article. Thus, we add another chapter to “The final Answer, Perfect Transfer Pump” article. Robert Patton TDR Staff Related TDR articles: Issue 56, “Fuel Transfer Pumps Revisited.” This 14 page article covers ’94-’08 fuel transfer pump replacement options and service techniques. The installed orientation of the new fuel filter. 120 A Publication of the TURBO DIESEL REGISTER 11/2008 Epilogue—Attention ’98.5-’02 Owners Tired of reading about fuel transfer pumps? No doubt that you are and, if I have done my job as a writer, there is no doubt that you understand the important role the fuel transfer pump plays in the well-being of your expensive Bosch VP-44 fuel injection pump. The VP-44 injection pump has to have fuel pressure from the fuel transfer pump or it will fail in short order. In your readings you may have also noted my frugal recommendations: • Purchase and install a cost-effective fuel pressure gauge (≈ $75). • Purchase a spare factory fuel transfer pump and kept he pump, your tools and the instructions on how-tochange handy (≈$150) In the fall of 2008 the folks at Diesel Performance Products (the makers of the Fuel Air Separation System or FASS) introduced a mid-price fuel transfer pump option for the ’98.5-’02 owner. The product is called the Dodge direct replacement pump (DDRP) and it sells for ≈$285. Advertised as a direct replacement the installation should be simple. To test out that belief, the following is a pictorial showing how we installed the DDRP. MORE LATER A Publication of the TURBO DIESEL REGISTER 121 FROM ISSUE 60: HOW DO YOU CHANGE THE FUEL FILTER If you are an experienced diesel owner feel free to skip this article. But, be forewarned, the convention of the TDR is to add information to an article that will make it worth reading for the seasoned professional. Let’s see what can be added to this simple project to validate the worth of your TDR subscription. FUEL FILTER BASICS You can browse through your Dodge Owner’s Manual, you can preach the virtues of maintenance to your friends and your offspring, but nothing makes a lasting impression like practicing what you preach. Maybe I should rephrase this to read that nothing makes a lasting impression like not practicing what you preach. Admittedly, I’ll end up replacing an entire assembly because of my lack of maintenance to a component part of the assembly. Just like running out of fuel when you’re the driver…it’s my fault and I end up taking the long costly road to correcting the situation. The most delicate part of a diesel engine is the fuel injection system. Because of the extremely close tolerances, the fuel injection system cannot tolerate contamination. Contamination can cause damage and, at a minimum, erratic performance. The majority of low-mileage fuel injection pump failures seen by Cummins’ warranty research department are caused by trash in the fuel system. Considering that trash is not a defect in material and workmanship, the resulting repair can be an expensive lesson in fuel system maintenance. Replace the assembly or perform maintenance on a component part, the choice is yours. 122 In this issue our back-to-the-basics article will show you how to change a fuel filter on a 2007.5 to current model year engine. On a one-to-ten scale, this maintenance procedure ranks about a two in difficulty. However, fuel filter maintenance is often overlooked as new-to-diesel owners don’t realize that fuel filter maintenance is called for every 15,000 miles. After all, when was the last time you changed your gasolinepowered vehicle’s fuel filter? Why only 15,000 miles between fuel filter changes with a diesel? The obvious answer, diesel fuel is less refined than gasoline and is more susceptible to contamination by water and microbial activity. Additionally, to the diesel novice the job of changing a fuel filler can be intimidating. Influenced by diesel folklore, the novice is concerned that the injectors and/or fuel system will have to be bled of trapped air, a task that he does not know how to perform. And, as recently as the ’98 model year, air (and an accompanying squirt of diesel fuel) had to be vented using the manual fuel lift pump purging the air from a bleed screw. With the ’98.5 24-valve engine’s electric fuel lift pump and self-venting fuel system, the bleedscrew/squirt of diesel problem went away. However, the I-don’t-know-how intimidation factor remains. As with the ’98.5-’02 and ’03-’07 trucks, owners of 2007.5 and newer trucks have a fuel filter system that has an electric fuel lift pump and is self-venting. For ’98.5 and ’99 owners, the fuel filter how-to was covered in Issue 25, pages 84-86. For ’00-’07 owners, the how-to was in Issue 45. Now that we have established the need for fuel filter maintenance. Let’s get started on the how-to section of this article for the newer ’07.5 audience. A Publication of the TURBO DIESEL REGISTER 2007.5 and Newer Fuel Filter Change First, let’s present three tips that will save you time and aggravation. • • • Purchase your fuel filters in quantity. This prevents the excuse that you could not change the filter due to a notin-stock situation. Additionally, a spare fuel filter should be in your box of emergency parts that you carry inside the truck. You cannot predict when or where you might receive a bad fill of fuel. Extend the fuel drain hose. The existing drain hose is about 18" long and hangs directly below the fuel filter housing. When fuel is drained, it is difficult to catch because the drain hose is not easily accessible. To correct this condition, I slipped a three-foot length of 5/8" heater hose over the existing drain hose (perfect inside-to-outside diameter interference fit). Extend and tie-wrap your longer drain hose to a convenient drain location. Purchase a one-gallon plastic fuel container. Keep it filled with quality diesel and use the fuel to pre-fill your filter. Do not store diesel fuel in metal, zinc-lined cans: the diesel fuel reacts with the zinc and forms a goo that can clog a filter and damage a fuel injection pump. Let’s Begin the Fuel Filter Change • First extend the drain hose. • Position your newly-added drain hose in a location that is easy-to-reach and easy-to-catch. Open the drain valve and drain the fuel from the filter canister. The drain handle is open. Unlike the ’00-’07 trucks, when you open the fuel filter drain valve there is only a trickle of fuel. Instructions in the Mopar filter box will tell you to drain only about eight ounces. You’ll be lucky if that much drains out. Remove the water-in-fuel (WIF) sensor electrical connector from the bottom of the filter’s plastic cartridge. The tang on the connector wires is pushed out and the connector wires and female socket can then be pulled downward. In shadetree fashion, I cut the tang so that the connector will be easier to remove in the future. I’ll let you debate the merits of tang-cutting. As I mentioned in Issue 59, page 42, the fuel filter is buried under a myriad of electrical wires, electrical relays and cables. The fuel filter is next to impossible to access. The advisability of pre-filling the filter was debated in Issue 43, on page 148. Caterpillar heavy equipment mechanic and TDR member Craig Hubachek maintains that this technique is a service no-no as it puts unfiltered liquids (fuel or oil) on the filtered side of the filter. The audience should use due caution if you use the pre-fill technique. Note that since the ’98.5 model year, with the truck’s electric fuel lift pump and self-venting fuel system, the self-priming nature of the fuel system make the pre-fill unnecessary. I tried to access the filter from above—no way. An accepted field service practice on 4x4 trucks is to hug the front tire and come in from the side in between the gap in the plastic wheel-well liner and the frame. Two-wheel drive guys need to remove the 8mm screws that hold the fender wheel-well liner in place and drop the liner out of position. For the truck’s initial fuel filter service I chose the under-thevehicle service technique and a strap wrench to remove the filter. I wish I had known about the Harvey Barlow technique (page 40). Subsequent fuel filter changes can be done from above if you take the time to move the aforementioned electrical wires, relays and cables to the side. You will have to move the oil dipstick tube to the left and modify the bat wing to accept the new dipstick location. A Publication of the TURBO DIESEL REGISTER 123 Once the fuel filter is removed, following the Mopar/ Fleetguard directions is very easy. The next several steps are from the instruction sheet. • A screwdriver blade and an upward pry will enable you to pop the fuel filter from its plastic cartridge. Remove the filter and inspect the filter and the cartridge for contaminants. Likely the filter is discolored and is black in color. No cause for alarm, the filter is doing its job. There is cause for concern if you find lots-of-junk in the plastic cartridge. An accumulation of junk could indicate microbe activity in the fuel tank. Draining the tank and treating the fuel system would be the necessary service technique. Relocate the oil dipstick tube to the valve cover. With one hand above and one hand below you can get to the fuel filter from above. • Discard the old parts. • Confirm that the used end seal is removed from inside the head. • Wipe clean the sealing surfaces of the new O-ring and end seal inside the head. • Install canister sealing O-ring and confirm the end seal is in place on the canister. • Lubricate the canister O-ring with clean engine oil. Do not pre-fill the canister with fuel. • Install to the point of first contact for canister-flange and head. • Tighten the canister an additional 1/2-turn of rotation. • Reconnect the WIF sensor electrical connection and ensure proper connection is made. • Reinstall the drain hose. It is now time to re-prime the fuel filter canister. With the key in the ignition, briefly bump the starter, but don’t attempt to crank the engine. Let the key fall back to the run position. Listen for the electric fuel transfer pump to operate. It should hum for about 20 seconds. The transfer pump is located in the fuel tank so you’ll have to either carefully listen or have someone crawl under the truck and listen. Repeat this bump-and-prime procedure four or five times. Now, the moment of truth…Crank the engine and let it run for 2030 seconds. Check the filter area and confirm that no fuel leaks are present. Restart your engine and you are good-to-go for another 15,000 miles. Robert Patton TDR Writer Modified “bat wing” with new dipstick location. 124 A Publication of the TURBO DIESEL REGISTER THE HARVEY BARLOW METHOD Those that frequent the TDR’s web site are likely familiar with Harvey Barlow and his helpful post in the 6.7-liter area of the discussion forums. In early August Harvey discovered another (and perhaps easier?) way to change the 6.7-liter fuel filter. The following is Harvey’s method. Using this do-it-yourself tip it is not necessary to remove the left front tire or even the left front fender inner lining. As Patton suggests, you may want to spend some time from above and below tie-wrapping cables and wiring to make it easier to access the fuel filter. From below the truck, reach up and disconnect the water-in-fuel sensor wiring plug from the base of the fuel filter canister. Again, as Patton suggests, you may want to de-tang the sensor wiring plug connector. I like the idea of extending the fuel filter drain hose. Do so by slipping some 5/8” ID hose over the existing plastic hose, or remove the plastic hose and permanently replace it with a longer length of 3/8” ID hose. Loosen the drain valve on the bottom of the canister by twisting the 2” plastic “star wheel” counterclockwise and allow the canister to drain. As mentioned, you’ll not be able to drain much fuel. Now for the tip-of-the-quarter: Using a 1/2” ratchet and a 1/2” extension long enough to reach the bottom of the canister, insert the 1/2” drive tip of the extension in the slot in the bottom center of the filter and back it out one turn. You can now remove the canister by hand from above or below, taking care not to spill the remaining fuel in the canister. Start the engine and test for leaks. Record the date and mileage in your truck maintenance record book. If your truck runs and doesn’t leak fuel, you did good! HBarlow And the editor thought to himself, “Why didn’t I discover the 1/2” drive indentation on the bottom of the canister?” As you inspect the canister you’ll notice that is an off-only type indentation. Thanks, Harvey, for the tip. THE SEARCH FOR A 6.7-LITER FUEL FILTER ONLY Short answer: You cannot purchase a fuel filter only. The replacement kit is sold through Mopar (05183410AA), Fleetguard (FS43252) and Cummins (4936025) as a filter, gasket, O-ring and plastic cartridge assembly. Yes, you get the plastic cartridge whether you need it or not. The plastic cartridge is reusable, right? Long Answer: To no avail, the Geno’s Garage staff tried for 18 months to purchase the required gasket, O-ring and filter from Fleetguard. Fleetguard makes and packages the filter kit for Mopar. I’ve seen the notes from the e-mail and the telephone conversations and the words “dogged determination” describe their pursuit of the lower cost filter-only. It is not to say that the Fleetguard FS43252 is outrageously expensive. At less than $30 it is fairly priced. Be glad you’re not a PowerStroke owner where the price for a 6.0-liter engine fuel filter package is $55. I’ll bet you didn’t know that there was a 1/2” drive indentation on the bottom of the filter canister. The replacement canister contains a new filter element and the water-in-fuel sensor. Simply apply the supplied replacement O-ring to the male end of the canister and screw it in by hand. Hand tighten it. Reconnect the water-in-fuel sensor plug. Cycle the key twice, just enough to bump the starter but do not turn the engine over. This will cycle the fuel transfer pump in the fuel tank to refill the canister. A Publication of the TURBO DIESEL REGISTER How about the Mopar-boxed fuel filter kit? In fact, the Mopar part is made by Fleetguard. However, would you believe the Geno’s folks sell the kit for $10? That is not a typo—the Geno’s staff knows that their price from their Dodge dealership is too low and not correct. Being forthright, they advised the Dodge dealership and the dealership advised Mopar. Oh well… Owners of the 6.7-liter truck should take advantage of this pricing glitch while you can. The folks at Geno’s will honor the price as long as possible. They have 500 filter kits in stock. As a postscript, I received a follow-up phone call from Fleetguard. The response, “The plastic cartridge unit was not designed as a lifetime product. As such there has not been validation done to substantiate the cartridge’s use long term.” So, the final answer: There is not much hope for a fuel filter only, so get ‘em (the mis-priced Mopar fuel filter kit) while you can. 125 LOW PRESSURE FUEL SYSTEM PROBLEMS by Andy Redmond We all see much discussion on the TDR web forums and in the TDR publications regarding performance/drivability issues, which are often traced to a low pressure fuel delivery problem. Although the narrative that follows is specific to the 12-valve Turbo Diesel trucks, model year ’94 to early ‘98 (pre 24-valve engine), the discussion on the components from the fuel tank (float and sending unit) to the fuel transfer pump apply to all Second Generation trucks. The term low pressure fuel delivery system covers the components from the fuel tank up to the truck’s fuel injection pump and from the injection pump back to the fuel tank. Common problems that will be discussed: fuel level sending unit; fuel heating element; fuel transfer pump; overflow valve; fuel return line. Let’s start at the beginning, the fuel tank. The fuel tank is approximately 34 gallons and made of an injection molded-type plastic material. The tank utilizes a fuel tank module with an integral fuel level sending unit. Carter (Federal-Mogul company) is typically the fuel tank module manufacturer; Walbro manufactures the sender. The module is installed vertically in the fuel tank and is retained by a large plastic nut and o-ring gasket to the threaded top of the fuel tank. The module has a lower half that can float up and down somewhat on a slide system. The purpose of the float is to prevent erratic fuel gauge readings due to fuel slosh when driving off-road. It also serves as a small basket, which will hold approximately one quart of fuel. This prevents air entrainment in the fuel system when the tank level is low and steep approach angles are tackled. The top of the module has ports for fuel supply (3/8”) and fuel return (5/16”), a rollover valve/tank vent, an auxiliary fuel port and an electrical connector. The only serviceable parts on the module are the sending unit and the rollover valve and its grommet. The sending unit is notorious for the wiper contact area to wear out, which results in erratic fuel readings or fuel gauge malfunction. A sender-testing chart is shown should you desire to test your sender while the truck module is removed from the fuel tank. Model Year of Truck Sender Ohms at Full Sender Ohms at Empty Low fuel Indicator Lamp ohms ‘94-‘97 0 +/- 100 +/- 65 +/- ‘98-‘02 20 +/- 220 +/- PCM Function Looking back in my TDR index, I see that members have been bothered by this problem since Issue 16 in the Spring of ’97 when member Russell Caya did a how-to on fuel tank removal. Other memorable articles: Issue 26 where Mel Lang took the sending unit apart in an attempt to understand why it was/is problematic. My look back at these old sources of information did not reveal a shadetree repair procedure. Perhaps the labor and time involved to remove the unit dictates that one should install a new sending unit rather than hope a repair would work. Oops . . . I’ve gotten a bit ahead of myself. I’ve got you diagnosing the fuel tank sending unit, but I haven’t given you some tips on removing the fuel tank, much less the fuel tank module which houses the sending unit. I prefer to drop the tank from the truck rather than lifting the truck bed. A tank with a couple of gallons can be a circus to balance, even with a large floor jack and a four-foot section of 2x12 or similar sized plywood, so it’s nice to drain the tank. My “Rube Goldberg tank drainer” idea was first presented by TDR writer Joe Donnelly in Issue 37, page 45. “Unfortunately many of us have bed-mounted fuel tanks, toolboxes, fifthwheel hitches, etc., making the bed-lift method impractical. In that event, run the fuel low, and remove the filler neck (it has a check ball in it so the hose won’t snake down in to the tank). Put a piece of 3/8” hose into the tank, cut a whistle near the end, and blow air through the whistle with compressed air. This will start fuel flow and if your catch can is lower than the tank, it will flow until the tank is virtually empty.” Hard plastic lines (supply and return) of a quick-connect variety connect to the module and run along the frame rail (this plastic line mates to a metal or braided line on some models). The lines then mount onto a bell-housing bracket. Then they bend around the bell housing where a short length of 3/8” rubber fuel line provides a fuel supply to the fuel heater line that extends behind the fuel filter. Due to the age of the 12-valve truck, careful inspection is necessary from the tank to the fuel heater/strainer, to ensure that there are no leaks in the fuel lines. I recall a discussion (Issue 44, page 32) where Brandon Parks at Geno’s Garage had a lengthy battle with a hard-tostart ’97 12-valve truck. After weeks of troubleshooting he did a close inspection of the metal fuel supply line comming from the tank as it turned upward by the firewall. A pin hole caused by years of chafing was the problem. Sometimes the use of an old-school analog multimeter will catch a dead or bad spot as the sender is moved up and down. The needle will falter or jump at the contact failure. Digital multimeters (DMM) are great tools, but my old analog meter still gets plenty of use for tasks like this. The DMM is constantly auto-ranging for accuracy in a specific reading versus the analog meter holding a steady reading. Now you have an excuse to purchase both types of multimeters! 126 A Publication of the TURBO DIESEL REGISTER The module has metal pipes exiting the top of the module (supply and return) and has hard plastic tubing coils that extend to the bottom of the module where a removable screen covers the pickup and return. Most of them that I’ve dissected have a one-way check valve in the fuel pickup to assist in holding fuel prime. Many members have noted that these lines sometimes chafe and develop a pinhole, which allows for fuel aeration, not a good thing! The perforated tubing seems to have rubbed on a sharp edge, or on the mounting hardware for the lower float we previously discussed. The return also returns fuel to the bottom of the module (above tank bottom about ¼”). This is preferable, as it allows returned fuel to be released into the remaining fuel rather than spraying on the tank’s upper surface introducing foam and air. Permit me to further digress: I recently made a road call to visit a sick ’95 model truck. The owner complained of a tapping noise and suspected connecting rod since the truck showed about 250,000 on the odometer. Over the phone when he held it near the source of the noise it sounded to me like a worn out lift pump tapping away on the cam lobe. The problem was missing fuel line routing brackets, which mount to the bell housing. It seems that the clutch had been recently changed and I assume the technician was speeding along attempting to “beat the book” (flat rate) and didn’t see the need to attach the awkward brackets. The supply and return were chattering away on the bell housing which was driving its owner to near insanity. Some zip ties and split pieces of fuel line temporarily solved the problem while the replacement brackets were ordered. Again, due to age, the fuel heater/pre-filter is a common repair area on 12-valve Turbo Diesels. TDR member Joe George showed us his method for finding a problematic air leaks at his fuel heater several issues ago (compressed air and a bucket of water). Joe’s dilemma was much like Brandon’s. Quoting from Issue 44, page 49, “I removed the fuel filter assembly (with the attached fuel heater and fuel pre-filter) from the truck. I applied 30psi of air to the assembly and lowered it into a bucket of water. Instantly, I observed a stream of bubbles rising from the fuel heater electrical connector. The connector had a crack in it, causing the lift pump to suck air into the fuel system. Without the removal of the assembly and the pressure test, I’m not sure I would have found this rare problem.” The fuel heater warms the fuel if the fuel temperature is below 40° and shuts off when the fuel temperature reaches 80°. The heater draws about 300 watts at 0°. This should help to prevent fuel gel in sub-zero climates. Should your fuel heater fail, it can be removed or eliminated. The prefilter bowl is removed (using a short 17mm box combination wrench), and then a 8mm hex wrench is used to remove the shoulder bolt that retains it to the fuel heater casting. Once the fuel heater is removed the pre-filter bowl should spin onto the pre-filter base, the heater can be unplugged and you should be on your way. The pre-filter assembly is attached to the engine block with the transfer lift pump cap screws. Fuel comes into the top of the unit via a short metal supply line, which attaches to the short length of 3/8” fuel line. It then passes through the A Publication of the TURBO DIESEL REGISTER 127 pre-filter screen, then the fuel heater then back out through a port and over to the transfer lift pump. This connection is made by a rubber supply line elbow that makes a sharp ninety-degree bend. I change this rubber elbow (item 11) when a transfer lift pump is serviced. Often this line is a major source of air leakage and subsequent fuel aeration. As confirmation of my replace-the-elbow service technique, I had a discussion with a friend who is a competent technician. He had replaced a lift pump and now the truck would not restart. He stated that the lift pump would raise fuel up to the air bleed port on the fuel filter outlet, but with many bubbles rather than a clear stream of fuel. After we discussed probable causes, he called me back a short time later to report his findings. Sure enough, the rubber elbow was sucking air when the lift pump was manually primed. He also noted fuel weeping into the electrical connector on the fuel heater and a bad seal at the upper base and the upper heater “quad ring” (o-ring with square vs. round sides). Since he was short of parts, he removed the constant tension clamps and added gear-drive type clamps to the rubber line and removed the fuel heater and upper oring. After about twenty strokes on the primer and the truck started right up. 128 The fuel exits the lift pump through a metal tube to the fuel filter base inlet. It then is filtered and exits the outlet of the fuel filter assembly to travel to the injection pump. It is desirable to see 25psi at the fuel filter inlet. If you notice more than a 5psi drop across the filter (inlet to outlet) the filter is likely causing restriction. When testing the lift pump, should more than 4.0 inch Hg be shown on a vacuum gauge an inlet restriction exists somewhere back at the fuel tank. There are several things to watch for when servicing your fuel filter. The spin-on cartridge used in ’94 to ’96 vehicles (Fleetguard FS1253) has three o-rings that require attention when installing the filter: one on the re-usable water in fuel sensor, one that contacts the filter base and also one that fits onto the filter nipple. It’s not a bad idea to check that the filter nipple is tight in the filter base with a hex wrench. Fuel Filter 1994-1996 1997-1998 Spin-on cartridge w/ removable fuel drain/WIF (water in fuel sensor). Drop-in cartridge. Filter cartridge canister housing contains a fuel drain and WIF sensor. The next component, the heart of the low pressure fuel system for 12-valve owners, is the fuel transfer or lift pump. (Note to 24-valve owners: you can stop reading at this point. I don’t want to discuss your electronic fuel transfer pump.) The lift pump is a piston style pump typically manufactured by Carter. It is designed to provide about 25psi to the fuel filter. It contains a manual primer and integral check valves that prevent prime loss and pressure delivery as fuel exits the pump. The pump is actuated by a plunger tappet, which rides on an eccentric engine camshaft lobe. Often as the pump ages the check valves wear and the plunger springs weaken. This can cause internal as well as external air and fuel leaks and a loss of fuel prime. Additionally, the fuel volume and/or pressure can diminish to a level which will cause sub-par engine performance. A healthy lift pump provides a volume of fuel far in excess of what the Bosch P7100 injection pump can use, with the exception being very high horsepower demands. At 400 rpm (starter motor cranking speed) for a thirty second cranking duration, the pump should deliver a volume of 20 oz. of fuel. On the drop-in style cartridge used in ’97 and ’98 vehicles (Fleetguard 19578), the o-ring on the canister housing’s threaded shaft (just below the brass bushing) is sometimes omitted from a filter kit. Should that be the case it is an acceptable practice to reuse the existing o-ring. 1998 12-valve illustration, part number 13 differs on 1994-1997 designs. The Bosch P7100 over-flow valve. The fuel then travels from the filter outlet to the Bosch P-7100 fuel injection pump. This concludes the delivery portion of the tour of the low-pressure fuel system. However, several other items are worth mentioning on the return circuit of the fuel system. On the backside of the injection pump near the front corner of the pump is the location of the Bosch P7100 fuel pump overflow valve. This valve opens and allows fuel return to the fuel tank at approximately 22psi. When diagnosing fuel pressure problems, one can often determine if a lift pump or overflow valve problem exists by doing the following test. Let’s assume we see a 12psi reading on our fuel pressure gauge. With the engine idling and a pressure gauge attached, slowly squeeze the rubber return line (this infamous rubber fuel return line is often A Publication of the TURBO DIESEL REGISTER problematic, but more on that subject in a minute) that runs behind the fuel filter. If the pressure gauge starts to rise, it means that the lift pump is making good pressure and that the overflow valve may be opening too soon. An overflow valve that opens at too low of a pressure will result in poor performance. Too much fuel will return to the fuel tank which robs the injection pump of fuel pressure that is necessary for proper operation. If the line pinch test makes little or no difference on the fuel pressure gauge, it would suggest that the lift pump is weak. A drain manifold is available for excess fuel not injected by the six fuel injectors. The return path is sequential at each injector and returned to the fuel filter inlet. Usually these will leak fuel noticeably if a problem occurs, allowing the owner to quickly pinpoint the leak. Last, but not least (as evidenced by the numbers of problems that this hose has caused) is the rubber fuel return line. The illustration shows the rubber line used on a ‘98 12-valve. The ‘94-‘97 trucks use a rubber line (5/16”) that is about three times as long. The illustration is misleading. This hose is very difficult to see and access as it is tucked behind the fuel filter assembly. Engine heat and age will cause this hose to develop cracks. It will leak air first, then fuel. Many owners report the use of a silicone grade marine fuel line as a permanent repair. I’ve had good luck as well with a Gates fuel injection hose, which seems to withstand the heat and elements far better than the factory-supplied SAE J 30R7, rubber fuel line. I find it helpful to remove the fuel filter base from the engine when changing the rubber return and/or supply lines. The lines can be gently slipped out of the brackets at the bell housing to provide better access. I also like to have a fresh razor blade handy to split the old lines where they are often stuck onto the metal fuel piping. Some fresh stainless steel clamps are smart too. I will leave you with a list of part numbers that may help you in sourcing parts. Be advised that the part numbers may have been superseded. Notice the return line parts diagram: (illustration for 1998 12-valve). Part number 8, rubber fuel return line, is about three times as long on the earlier 12 valve applications. Also, part no. 7 is different as well. Common part numbers Mopar Andy Redmond Redmond Enterprises and Engine Repair Plano, Texas Cummins Lift pump 5012209AB 3936316 Lift pump gaskets 5014230AB 3931059 Injection pump overflow valve 4883838AB 3932096 Gaskets for overflow valve 5015576AB 3935171 ? Metal return line (ov. flow to rubber line) 4746641 3923171 Fuel filter to injection pump (metal line) Other 2417413093, now ends in 101 (Bosch) 3936691 Rubber elbow (fuel heater to lift pump) 4883978aa 4746638 Not handy Sending unit (fuel) 1994-1997 04797738 or 05013467AA N/a N/a Sending unit (fuel) 1998-2002 4897669AB N/a N/a Roll-over valve (fuel module) 52127666 N/a Roll-over valve grommet 4002149 N/a Pre filter screen kit 4762962 3845400S (Fleetguard) Fuel heater to heater base (upper) 3834185S (Fleetguard) Fuel heater element 3907766S (Fleetguard) Fuel heater harness 3843722S (Fleetguard) WIF (water in fuel sensor) 1994-1996 only. 3831852-S (Fleetguard) A Publication of the TURBO DIESEL REGISTER 129 Turbo Tips The following is a collection of tips, minimal cost modifications, and solutions found by Dodge/Cummins Turbo Diesel owners in real-life operation of their vehicles. It is gleaned from previous issues of the Turbo Diesel Register, and is sometimes edited for brevity and clarity. The categories in this harvest of hints follow the system of classification used in Dodge’s Technical Service Bulletins. 3 REAR AXLE TDR member John Holmes gives some tips for ensuring that rear differential lube is at the proper level following a differential oil change. Jack up each side of the rear axle for five minutes each to ensure that oil reaches the axle bearings, then lower the truck to a level floor and check the fluid level. Add additional fluid as necessary to complete the fill. On some trucks with heavy-duty suspension and overload springs, suspension noise from the overload springs slapping the frame stop can be annoying. Slip and tighten a plumber’s pipe connector over the end of the frame stop. A plumber’s pipe connector is a 3” diameter rubber tube about 4” long and about 3/8” thick with a stainless steel hose clamp on each end. It is available at plumbing supply shops or stores such as Home Depot for about $4.00 each. Frank Howatt Another method to cure overload spring slap is to cut and fit a piece of old tire carcass to the overload spring end, using one clamp to attach it at the axle end only. The cost is less than a dollar per side. John Holmes 7 COOLING 1989 and ‘90 Turbo Diesels were not equipped with an air-to-air intercooler. These trucks tend to run hot in the summer on long pulls. Member Tom Clayton used a section of 4” aluminum dryer vent hose to direct cool air from the front of the truck onto the turbocharger area. He also installed a revised Cummins thermostat P/N 3802273, which further improved engine cooling. To protect the cooling system from bugs and debris, insert an old aluminum-framed window screen behind the grille and ahead of the radiator, or simply cover the radiator with window screen material. Then a few taps of the hand will remove the collected bugs. This quick fix provides a free or almost free preventive maintenance solution. For extreme cold weather operation if you install a winterfront radiator cover on your truck, it must have a minimum one square foot opening in its center for radiator and intercooler airflow. This tip is from the Cummins, 5.9 Liter Engine Operation’s Manual. The correct type of antifreeze/coolant to use in your Turbo Diesel is an ethylene glycol- (not propylene-) based product. If possible, use a low silicate, diesel-type of coolant. It should be mixed fifty-fifty with distilled water. Or you can buy a pre-mixed product. But if you “mix your 130 own”, be sure to mix thoroughly before pouring it into the cooling system. 8 ELECTRICAL On ’89-93 trucks, the voltage regulator seemed to fail too often. Member Earl Peck solved the problem by relocating the regulator to the front of the hood pivot assembly on the left side of the engine, away from all the engine’s heat. His regulator hasn’t failed since. On second generation trucks, Dodge redesigned the system, and the regulator is integral with the alternator and it is not a problem. On some maintenance free batteries it is possible to check the electrolyte level. If the case is transparent or white plastic, shine a flashlight on the case while looking at the other side of the case. The liquid level will clearly show. Try this in a garage or other low-level light situation. David Burton 9 ENGINE If you need to turn the engine over to locate Top Dead Center of a cylinder and lack the special tool to do this job, use a 22 mm socket wrench on the alternator pulley nut. Turn the engine backwards from its normal rotation (backward rotation for servicing is not a concern) to keep the pulley from slipping on the belt. Or put a socket on one of the crankshaft damper nuts and have an assistant turn the engine over from underneath the truck. Member Ed Wash of Alaska wrote in to ask for a solution to oil dripping from the plastic pipe road draft tube under his engine. It is normal for a drop or two to come from this tube when the truck has been parked overnight. A member solved the same problem by drilling a 1-1/4” hole in the lid of a large Rolaids jar, and drilling eight holes around the top of the jar body. Drill a horizontal hole at the bottom of the draft tube. Slide the lid over the hose and secure the underside with a tie wrap. Screw the jar onto the lid. It stops the drips! Keeps the driveway spotless. If you have trouble reading the oil level dipstick without your glasses, put the dipstick in a vise and file a “V” notch in the side of the stick at the “full” mark and one at the “add” mark. Makes it much easier to read the oil level accurately. Steve Richards Use a “Sidewinder” ratchet wrench (available at many chain auto parts stores) for fuel filter removal with a strap wrench. The Sidewinder also keeps your hands clean when removing the oil pan drain plug. Barely loosen the A Publication of the TURBO DIESEL REGISTER plug with a standard 3/8” drive ratchet, then switch to the sidewinder and twist the “T” handle to avoid having hot oil run down your arm as the plug is loosened. Edmund Turner, Jr. An easy and clean way to drain the engine oil is to loosen, but not remove, the drain plug. Oil will come out of the pan through grooves cut in pan sides if the plug is loosened by more than two turns. Then you don’t have to fish in the drain pan for the plug and gasket. Louis Barnhart Oil changes become even simpler and cleaner with the addition of an inexpensive accessory called the EZ change drain plug, which replaces the standard drain plug. By screwing on a special hose/adapter at drain time, the plug’s drain valve automatically opens, and the draining oil is directed through a hose to the drain pan. Removing the drain tube reseals the plug. The plug kit is available from Geno’s Garage. Call 1-800-755-1715. A way to loosen a tight oil filter or canister-type fuel filter is to take a long flat-blade screwdriver, place it on the filter rim at the proper angle and strike it several times with a hammer to drive the filter in a counter-clockwise direction. Louis Sytsma It is easier to pour new oil into your engine if you make your wobble-proof funnel from a used plastic 1.75 liter Skol Vodka jug. It seems the spout diameter and lid threads are an exact fit to the oil fill opening and threads on your Cummins engine. R.J. Stamper Member Scott Morneau adds that you can use the oil fill cap to test other potential bottles. If the oil fill plug fits the cap of the bottle, the bottle will likely fit in the oil fill port. We are reminded that when changing engine oil, the new filter should be primed with clean oil (the filter will hold nearly a quart) before installation on the engine. This will cut the time the engine runs without oil pressure during its first start after the oil change. Gus Hrncir Here’s a free pre-luber for your Cummins engine. If your engine is not run for long periods, or if you want to build oil pressure before starting it in cold weather, or after an oil change, disconnect the fuel shutoff solenoid wire and crank the engine for 15 seconds. Reconnect the wires and crank it again to start it. It’s an “almost free” solution if you add a switch in the cab to make raising the hood unnecessary. Excerpted from the Cummins Operations Manual, the tip applies to all the 12-valve engines. Here’s the editor’s all-time favorite low cost service tip! When removing the oil filter, use a large heavy-duty freezer bag. After loosening the filter part way, slide the zip-loc freezer bag under and around the filter, then spin the filter off and let it drop into the bag. Zip-up the bag. No mess, and it is then easy to remove the filter from its crowded location. I will note, however, if your engine is hot, you may need to work fast or the filter could melt through the bag. Justin Kirchhoft A Publication of the TURBO DIESEL REGISTER Another method is to drain the filter first by punching a small hole in its bottom before removing it. Dave Lewis and James Johnson 14 FUEL In model years ’94 through ’98 the engines are equipped with a plunger-type fuel transfer pump with a button-type primer. It is hard to locate and see the plunger button to prime the fuel system. Paint the end of the plunger with a bit of white paint for greater visibility. Jim Anderson With the introduction of the Second Generation trucks in ‘94, many members adapted to the decreased clearance problems in removing and replacing the fuel filter by using a filter strap wrench with a socket extension to remove the old fuel filter. The procedure is to disconnect the water sensor wire, thread the strap wrench under the wire and the drain tube onto the filter near the top, tighten the wrench strapping and loosen the filter. It is then spun off and removed by hand. Prime the new filter with clean fuel before installing it! TDR member Earl Kenney cautions us about diesel fuel storage. Fuel stored in cans can collect water that may produce gels. Fuel stored for long periods in cans coated with galvanizing or zinc will liberate a chemical from the coating that can form harmful compounds, resulting in hard crystalline deposits in the injector system. Worried about being in the middle of nowhere and running out of fuel? Cummins reminds us that the 12 valve B 5.9 engine will run on fuels besides #1 and #2 diesel and blends thereof. Alternate fuels include #1-K and #2-K kerosene; Jet A, Jet A-1, JP-5, and JP-8 jet fuels. Fuels not approved by Cummins are Jet-B, JP-4, and gasoline. Cummins stipulates that alternative fuels must be used only in an emergency and that the engine runs best and most efficiently on #2 diesel fuel. On ’94 through ’98 12-valve Cummins engines there is a fuel pre-filter/heater that most mechanics don’t know about. It is located between the fuel tank and the fuel transfer pump, low on the engine left side near the rear. The bottom bowl screws off, and the plastic strainer screen should be cleaned periodically. Don’t forget to properly reseat the gasket before reinstalling the filter bowl. Robert Patton If you damage or lose the fuel pre-strainer gasket during servicing, you have two alternatives: Purchase a kit from Dodge for $27.00 which contains the gasket, or go to an industrial rubber supply house and purchase a 2-3/4” x 3” x 1/8” rubber quad ring for less than $2.00. A perfect fit. John Murry A card is available from Flying J truck stops which entitles you to a one-cent per gallon fuel discount, minimum 20 gallon purchase. The card is free, and application blanks are available at all Flying J locations. 131 18 VEHICLE PERFORMANCE Interested in improving the highway fuel mileage of your Dodge? Joe Kubina, Aerodynamic Development Engineer at Chrysler Corp. says removing or laying down the tailgate on your truck will not improve fuel mileage, and in fact, could worsen it. It seems the Dodge body shape is designed to flow air properly across a closed tailgate to maximize highway fuel economy. 21 TRANSMISSIONS Michigan TDR member Paul Refer wrote in to say his automatic transmission would not go into overdrive after a cold start in very cold weather. The editor pointed to the Owner’s Manual that says, “If the vehicle is started in ambient temperatures of -5 degrees F or below, the overdrive will not turn on. This protects the transmission from damage if the cooling system freezes. Overdrive operation will resume when the ambient temperature has risen to approximately +2 degrees F.” If you tow or haul heavy loads with an automatic transmission, a transmission temperature gauge is a must. Reluctant to cut a hole in the oil pan to install the sensor? Member John Holmes tested a gauge/sender unit in which the sender is installed on the transmission oil dipstick. Slick – and it works! Available as a kit from Geno’s Garage. Call 1-800-755-1715. When installing a new automatic transmission pan gasket, or almost any other gasket that doesn’t want to stay in place during the mating of the gasketed parts, spread a light coat of chassis grease on one surface and place the gasket on it. The gasket will then stay in place and be lined up for the rest of the installation. Robert Patton When checking the oil level in your automatic transmission, it is important to follow the Owner’s Manual directions that specify checking the level with the transmission in neutral, not in park. Does the transfer case shift lever in your 4x4 truck buzz and vibrate? Remove the trim and cement a small piece of rubber inner tube to the shift gate in the 2H position. Alternatively, you can place a wire tie on the lever where it passes through the shift gate. W.L. Mayo and Robert Patton In a standard oil change of the automatic transmission, only about five quarts of the old fluid can be drained out. To get a complete change (for example when switching to synthetic fluid), disconnect the transmission cooler line at the radiator, cut and fit a piece of hose to the coupler end and place the other end in a five gallon container. Put your truck in park with the brake on, and start the engine. ATF will flow into the container. As soon as the flow begins to dwindle, immediately shut off the engine. Reattach the cooler line, and refill the transmission with fresh ATF before restarting the engine. It may take up to 11 quarts. Scott Dalgleish 132 23 BODY Charles Shields wrote in to say he had a problem with dust entering his instrument cluster through the odometer reset-button hole. He installed a small “O” ring on the button shaft, and now keeps a clean instrument cluster. If your shoulder/seat belt buckle rattles against interior trim while driving, install a small piece of velcro on the back of the seat belt buckle/ trim where the buckle hits the trim. With the velcro the buckle will stay in place. Robert Patton To remove bugs from the grille area, fill a spray bottle with one part diesel fuel, one part water, and a small amount of detergent. Shake well and apply, let it sit, then hose it off. Tom Clayton Four-wheel drive, 2500 series Dodge trucks come with plastic rear wheel well liners as standard, while twowheel drive trucks do not. The four-wheel drive liners can be used on two-wheel drive trucks with no modifications. They are available through Dodge parts for about $60.00 per set. The liners make cleaning easier and prevent mud and salt buildup in the fenderwells. Do your outside rearview mirrors jiggle when going down the road? For trucks equipped with an aftermarket wind deflector/bugshield, start your troubleshooting by removing it. The same advice applies if your radio antenna whips about violently. 24 AIR CONDITIONING Spray a disinfectant such as Lysol into the A/C vents occasionally to kill mold and odors. 26 MISCELLANEOUS Here are several cleaning tips: After washing your truck, give it a final rinse using water from the hose without the nozzle on it. The solid stream results in fewer water beads on the waxed surface. Clean window glass with a mixture of ammonia and warm water applied with a cloth or sponge. Dry the glass with old newspaper pages. Cheap and effective! To clean your engine, use a solution of Simple Green in water. Spray it on a cold engine, let it sit briefly, hose it off. Contributed by Don Mallinson and Robert Patton. Installing a pyrometer gauge in the exhaust provides the greatest accuracy in assessing exhaust temperature. Pyrometer temperature should read less than 300 degrees before shutting down when measured in the elbow after the turbocharger. Gauges are available from Geno’s Garage. Call 1-800-755-1715. Extended idling over 10 minutes is not recommended by Cummins. On ’99 and newer trucks with central locking, the doors automatically lock at speeds above 15 MPH. Your owner’s manual explains how to disable this feature if you desire. A Publication of the TURBO DIESEL REGISTER Preventive Maintenance FOR DODGE TRUCKS All vehicles develop maintenance problems that require special attention to prevent breakdowns or part failures. The following is a list of special areas on Turbo Diesel trucks that warrant attention. These items have been discovered through miles and miles of driving by the TDR membership. This list is categorized in the same classification as Dodge’s Technical Service Bulletins. The list was compiled by TDR correspondent Jim Anderson. This is an excellent complement to Jim’s research in last issue’s Turbo Tips where he gave us a collection of lowcost solutions to common problems we encounter. 7 COOLING Installing a piece of metal screening in front of the truck’s radiator is strongly recommended. With three radiators (engine cooling, air-to-air intercooler, air conditioning condenser) it is important to have maximum airflow and minimum clogging due to bugs, chaff and dirt. The screen should also stop radiator penetration by rocks. 9 ENGINE On all 12 valve engines with the P-7100 injection pump (all ‘94-’98.5 trucks), a fuel return line runs from the engine side of the injection pump (near the front of the pump) to return unused fuel to the fuel tank. Part of the line is rubber. This rubber line, hidden under the intake manifold, is subject to heat deterioration and should be replaced approximately every 50,000 miles. (This problem has been well documented in the TDR. Issue 19, page 26, has the best write-up. See the picture below.) When changing the serpentine accessory drive belt, always check the idler tensioner pulley to make sure its bearing is good. The belt change interval is every 100,000 miles. The turbocharger to intercooler to intake manifold piping clamps can come loose, causing loss of turbo boost. Check all rubber boots and clamps periodically for boot slippage under the clamps, particularly if a loss of performance or a whistling noise is noticed while the engine is under load. Periodically inspect the engine water pump bearing for leakage. If any coolant is seen to drip or “weep” from the pump shaft area, replace the pump before it fails. 14 FUEL Trucks using an aftermarket remote-mounted fuel filter have experienced abrasion of one or both hoses where they have contacted engine parts, other underhood parts, or each other. Cover both lines with convoluted loom or rubber hose and route them in such a manner that they don’t touch anything. A few ’97 trucks equipped with the remote-mounted, aftermarket, Prime-Loc fuel filter have experienced cracking of the bolt which holds the adapter to the Cummins fuel filter mount boss. This results in serious fuel leakage. Either replace the standard bolt with a modified bolt or check frequently for fuel leakage. The fuel filter element should be changed at every other oil change or every 12,000 miles. Always prime the fuel filter before placing a new one on the engine. Then follow the procedure for bleeding the remaining air from the fuel filter assembly prior to starting. A Publication of the TURBO DIESEL REGISTER Look closely for the problematic fuel return line. All rubber fuel lines, both supply and return, should be checked periodically for integrity. Some lines can leak fuel, or admit air to the system, or cause loss of prime and resultant hard starting. Starting in 1994 the Cummins engine is equipped with a pre-strainer/fuel heater. It is located low on the left side of the engine in the fuel line before the fuel transfer pump. The strainer should be removed for inspection by unscrewing the bottom bowl of the unit. The strainer should be cleaned/checked at least every 40,000 miles or more often if contaminants clog your primary fuel filter. This strainer is not shown in any Cummins parts books. It has been the culprit for many complaints of low power as it performs its designed task of screening the fuel prior to the primary fuel filter. 133 16 PROPELLER SHAFT AND U-JOINTS Trucks with two piece driveshaft systems (extended-cab trucks) can experience a vibration when towing a heavy load at engine peak-torque RPM in lower gears. The vibration lessens, and then disappears, as engine speed builds. This vibration is caused by the center carrier bearing being moved sideways against the bearing carrier frame, and is considered normal. 18 VEHICLE PERFORMANCE All 4x4 trucks built after 1994 use engine vacuum to engage the front axle drive. Periodically inspect the vacuum hoses going to the front axle for holes, abrasions, and splits. A damaged vacuum hose will prevent the front axle from engaging when the 4x4 lever is shifted in the cab. 19 STEERING A steering “clunk” in two wheel drive trucks produced after 1993 can be traced to lube pushing out of the telescoping steering column parts into the rubber boot on the shaft. Squeezing the boot to push lube back into the splined area is a temporary cure for the “clunk.” A replacement steering shaft/coupler is a long-term solution. In 4x4 models, a “clunk” similar to that found in two-wheel drive trucks may be caused by faulty track-bar bushings or worn front suspension grease joints. “Groaning” and other front suspension noises on 4x4 models built prior to 1994 can sometimes be traced to the universal joints at the outboard axle ends of 4x4 models. A simple test is to engage the manual locking hubs and drive the vehicle. If the noise disappears, replace one or both joints. On 4x4 models, a front-end shimmy may be caused by a worn steering stabilizer unit. This horizontally mounted shock absorber should be periodically replaced as a wear-out item. This problem appears more frequently on trucks equipped with aftermarket tires and rims of a larger than standard size. During servicing, don’t forget to check the fluid level in the power steering pump. It is located low on the driver’s side of the engine near the front in a location covered by hoses and wires. 21 TRANSMISSIONS The cooling lines for automatic transmissions can have a point of close contact with each other where they cross near the bellhousing. A piece of convoluted loom or rubber hose placed on one of the lines will prevent chafing and wearing through of the metal tubing. All trucks built prior to 1998.5 and equipped with the NV4500 five-speed manual transmission have a problem with fifth gear coming unpinned from the mainshaft. A revised nut and crush washer have been developed to 134 cure this problem, along with a 14 page Dodge Factory, Tech Service Bulletin outlining the proper repair procedure and special tools needed. Trucks equipped with the five-speed manual transmission are prone to excessive gear lash in the driveline. This can cause hard “jerking” when the throttle is suddenly lifted, particularly when hauling or towing heavy loads. This condition is normal. In addition to gear lash, the rubberbushed drivetrain windup is partially responsible. Draining and refilling the automatic transmission oil pan is not fun for the backyard mechanic because the pan cannot be drained before removal. B&M offers a drain plug that can be inexpensively installed in the pan to make fluid and filter changes easier and cleaner. The plug is available from Geno’s Garage. In vintage ’94 to ’98 trucks with automatic transmissions, cooling lines have plastic quick-disconnect couplers that can fail under high heat conditions, causing a loss of transmission fluid. A revised coupler is available from Dodge parts. Or you can make your own, using weatherhead brass fittings of the appropriate size, available at most auto parts stores. The fittings are listed under the trade name Dana/Weatherhead 68x8x4. Caution: we have seen reports that the “hard” fittings can cause stress cracks in the transmission line due to vibration. When draining the lube from five-speed manual transmissions, remove the PTO cover from the side of the transmission. Start with the bottom bolt as it acts as a drain plug. Refill with synthetic gear oil in 75W-90 or 80W-90 weights with a GL-4 rating. Often members will ask about the GL-4 rated Castrol Synthetic gear lubricant (75W-90) specified for the five-speed NV4500 manual transmission. If the GL-4 classification is good… shouldn’t a GL-5 rated lubricant be better? It may seem reasonable, but in the case of the NV4500 gearbox, not necessarily so. The GL-5 oil contains twice the amount of sulfur/phosphorous additive package as GL-4. At high temperatures, the phosphorous plates out and reduces the coefficient of friction of the synchronizer rings (New Venture Gear has seen this on shift stand tests). Since there’s twice as much of it, there’s more of a detrimental effect compared to GL-4. 23 BODY Because a diesel engine vibrates more than its gasoline engine counterpart, all fasteners should be checked periodically for tightness. Also, body fasteners and bracket fasteners, which might vibrate in sympathy with engine vibration, should be checked for tightness. If the GL-4 classification is good… shouldn’t a GL-5 rated lubricant be better? A Publication of the TURBO DIESEL REGISTER Mechanics Tips Here’s a collection of tips to help the mechanic/handyman while working on his or her vehicle. These tips have been collected by the editor over a period of years from many different magazines and other sources, and have been organized into categories for easier reference. WORK ENVIRONMENT TAKE IT OFF First, here are some tips from the pros about your work environment. • Never wear rings or other jewelry while working on your vehicle. Jewelry can scratch paint, get caught in turning belts, cause wiring short circuits, and otherwise ruin your day! • Keep your work area and tools clean, neat and organized. That way things will be easier to find when needed, and safer to use. When you disassemble any piece of mechanical equipment, you will end up with a bunch of random fasteners and pieces, and can easily forget your re-assembly order, or you can lose one or more fasteners. Use several small plastic tubs to hold stuff, and/or a large plastic tray where parts and fasteners can be laid out in the order they were removed. Just turn the tray around for re-assembly in order. If you leave your worksite, cover the tray or tubs with plastic food wrap to keep things from being disturbed. For longterm disassembly a freezer bag marked with the content description is a good alternative. • Wipe up floor spills before you slip and fall. Keep tools free of grease and oil so your hands won’t slip off. STUBBORN FASTENERS • Place removed parts in a safe place so you won’t trip over them while moving around the vehicle. • Provide proper light for a better quality repair. • Provide adequate ventilation if you are using chemicals or fuel as a solvent. • Adequately support the vehicle on jack stands if you are working underneath it. Use jacks and chains to support or move heavy loads. • Never put a tool back in the toolbox without first cleaning it to be ready for the next use. VEHICLE TRIM If your pickup has a top over the bed, wedge a section of foam pipe insulation across the bottom of the bed where the tailgate closes against the bed. This will keep most dust and water out of the bed interior. If you install carpet remnants in your cab or truck bed, you’ll soon find that the cut edges will fray. To keep the edges looking neat, lay the carpet on a concrete floor, lay a piece of metal 1/8 inch from the edge, then heat the carpet edge with a propane torch. Use care not to get the carpet too hot as you simply want to melt the synthetic fibers enough to seal the edge from unraveling. This tip will not work on carpet with all-natural fibers. Practice on a scrap piece first. Wrap a fingertip with duct tape, glue side out... A Publication of the TURBO DIESEL REGISTER If your screwdriver slips off a Phillips or slot head screw when you try to loosen it, put a bit of grinding compound in the slots to increase the screwdriver’s grip on the fastener. Another method is to strike the end of the screwdriver with a hammer while twisting it to break the fastener loose. This works particularly well on aluminum fasteners, or with steel fasteners in aluminum. Better yet, purchase an impact screwdriver to properly loosen those stubborn fasteners. If you are trying to install a screw in an inaccessible place, tape the screw to the screwdriver point, insert the screw in its hole and turn it in. The tape will eventually fall off. A dab of grease or body putty may hold a light screw the same way. Want to prevent a fastener from rusting after it has been installed? Simply coat the head with clear nail polish. Clear nail polish also works as a thread locker. Coat the threads, then quickly install the fastener. For removing rusty nuts and bolts, always use penetrating oil first, and let it soak a bit before trying to break them loose. If you’re trying to fish a part or fastener out of an inaccessible place, simply wrap some duct tape sticky side out around the end of a straightened coat hanger. It may take a couple of tries, but if the tape will stick to the part, the part will come out with the coat hanger. This works better than a magnet if you are working in an area full of metal. Ever tried to hold a nut in a tight spot while threading a bolt into it? Wrap a fingertip with duct tape, glue side out, or make a loop of the tape to stick it to your fingertip, then place the nut on the tape. The nut will stay put and not rock around while starting the bolt threads. 135 ELECTRIC TIPS When taping a bundle of wires together, coat the tape end with clear nail polish to keep it from coming loose. If a vehicle battery is constantly boiling over, check and clean the ground from the alternator and/or voltage regulator to the vehicle frame. A poor ground connection will cause the alternator to put out too much juice. Measuring alternator output with a voltmeter may show it is putting out 14.8 volts or more, when it should charge at 14.2 volts. When the rubber boot covering your positive battery terminal connector becomes worn, replace it with an old spark plug wire boot, or make a sleeve-type cover from an appropriate size plastic bottle. Have you found yourself with a difficult-to-remove oil filter? You tried, with no avail, the band wrench, strap wrench, and filter claw tool that you found at the auto parts store. You tried the screwdriver through the side of the filter trick – only to have the screwdriver twist in place? Your last resort… try a hammer and chisel to the top edge of the filter housing. Oh yeah, be sure to knock the chisel in the counter-clock wise direction as viewed from the bottom of the filter. Best ever filter removal tip: once the filter is moved from its tool-tight position to a hand-tight removal, place a large freezer bag around the filter. Now, when it drops from the housing, extra fluid simply spills into the bag and not on the floor. Additionally, it is easy to retrieve the bag-filter from around the air-conditioning lines, as you don’t have to worry about tipping/spilling oil. Just a reminder, when replacing quartz halogen lights, use clean cloth gloves or otherwise cover the bulb with clean cloth or paper to prevent oil from your hands getting on the glass. Finger oils make the glass shatter under high heat conditions. LUBE TIPS Trying to pour oil or other fluid into a fill hole and don’t have a funnel handy? Stick a screwdriver in the fill hole and pour the liquid down the screwdriver shaft. It will follow the shaft into the fill hole. Need some good parts cleaning solution but hate to spend the bucks. Use old automatic transmission fluid. It will make greasy parts shiny- clean after an overnight soaking. Wash the ATF off with soapy water. If you have a mysterious oil leak on your automatic transmission, check where the transmission dipstick tube goes into the case. You’ll likely find a cracked “O” ring when you remove the dipstick tube. Replace the “O” ring for a quick fix. FILTER TIPS If your engine oil filter or fuel filter simply refuses to budge when you’re trying to remove it, let the engine fully cool off, and it may be much easier to remove. To make the job of removing your oil filter easier and neater, put on a pair of surgical gloves. They improve your grip and keep your hands clean. When the filter is off the vehicle, simply hold the filter top with one hand, and with the other pull the glove off your hand by turning it inside out over the top of the filter. Then oil can’t get out of the filter opening! A commonsense reminder: before installing a new oil or fuel filter, write the date and mileage on the filter with a marker to make remembering these vital details easier. Also, before installing a new oil filter or a new diesel fuel filter, prime it with the appropriate fluid first. Get the filter as full as possible. 136 EMERGENCY REPAIRS Emergency repair of small holes in a gas tank can be made by rubbing a bar of soap across the hole. The leak will stop. A permanent repair can be made using epoxy. Emergency temporary repair of small radiator leaks can be made by putting in two or three egg whites. Start the engine to circulate the coolant and get the egg to the hole. Oatmeal or flour may also work. An emergency repair for a hole punched in your oil pan is to round the hole with a punch, then insert a rubber tire valve, stem first into the hole. Coat the valve with gasket cement if available. Push or pound it home with a hammer. IN THE TOOLBOX Plastic tie-wraps are so handy, almost everyone has them in the toolbox. Keep them organized by hanging a bunch on a single tie, then cut the head off the single tie. Friction will keep them in place. To get a new one, just slide it off the end. When cutting off old ties, cut them near the back of the head so they can be used again for a smaller project. Most tool kits contain both metric and standard wrenches. Color code with paint or tape the wrenches of a certain type to make them easier to identify. A Publication of the TURBO DIESEL REGISTER If your ratcheting socket wrench handle constantly bangs on nearby metal while in use, slip a piece of rubber tubing over the handle end to cushion it. If you want to magnetize a screwdriver or other tool, stroke its tip with a magnet. If you want to demagnetize a tool, run the shaft or tip between the electrode arms of a soldering gun while it is turned on. Slip a tube of closed-cell foam pipe insulation over your floor jack handle to keep it from damaging the paint on the body sides of your ride. Leave the top of the handle clear for a good grip. Make an old dental pick a part of your toolbox. It has many uses, such as picking up small parts, scraping gasket material out of tight corners, cleaning grease out of cracks, and aiding in assembly of small parts. Cleaning up your tools after a project is fast and easy with this tip! Spray them with carb cleaner, and then wipe them dry and clean before putting them away. THRU THE LOOKING GLASS If your wiper blades streak the windshield or otherwise act as if they are worn out, don’t replace them. Just sand them! That’s right, run a block with wet 600 grit paper along the rubber wiper edge for a few strokes to remove the small cut places in the blades, and they’ll work like new. If your windshield is badly streaked from worn out blades, polish out the streaks with toothpaste. Apply to a damp cloth and wipe back and forth across the affected area applying moderate pressure. Rinse off the residue when finished. CLEAN YOUR RIDE An easy-to-make bug scrubber that won’t scratch paint can be made by wadding several pairs of old panty hose together and using it as a wet sponge. This also works to remove tar from chrome trim. Tired of getting spray tire dressing all over your newly cleaned wheels? Make a cardboard template to hold over the rims and spray away! It is likely you already have a great tar remover in your toolbox. Spray WD-40 on the tar, let it sit, then wipe the tar off. It won’t hurt the paint, either! If you want the interior of your ride to always smell fresh and clean, lay a bar of Irish Spring soap under the seat. If you want a different scent, a sheet of fabric softener works too. Your truck is washed and it is time to dry it. Before you break out the towels/chamois, let’s play a litlle bit longer and put the water to work drying the vehicle. Say what... Follow the procedure. Remove the spray nozzle from the hose. Starting at the roof, let the steady stream of water collect the drops and flow them off the surface. Move to the windshield, hood, windows, doors, cargo box, tailgate. The A Publication of the TURBO DIESEL REGISTER stream of water does a great job of drying your truck. Finish off the job with your towel. CLEAN YOURSELF A good way to clean your hands after a dirty job is to use soap and used coffee grounds. Just put some of each in your hand, add water, and then scrub ‘till your hands are clean. BODY WORK When sanding inside curves, wrap sandpaper around an old piece of radiator hose or other thick walled hose of the correct diameter. You’ll get a smooth material removal. Planning to put a wild paint scheme or set of stripes on your truck, but you’re not sure how it will look? Take some pictures of the truck, have them blown up to 8x10s, then use water-based colored markers to draw the different schemes on the pictures. The indented bottom of a soft drink can makes a good place to mix up a small batch of two-part epoxy. The handle of a small plastic spoon or fork makes a good stirring stick and an applicator. Old gaskets can be tough to remove from parts, even with a scraper. Chuck a wire wheel into your electric drill and brush them off clean. Be sure to wear safety glasses. TAPE TRICKS An easy way to keep grease from your hands and other dirt off new brake shoes during installation is to cover the shoe surface with masking tape. Remove the tape before you reinstall the brake drums. Masking tape or duct tape wrapped around the ends of the “U” joints on a driveshaft keeps the bearing caps in place while handling the shaft. GET THE RIGHT SIZE THE FIRST TRIP Determining the outer diameter of a piece of tubing or a bolt is easy. Just slip the appropriate size open-end wrench over the tubing, then read the size of the wrench. MECHANICAL When installing a gasket that refuses to stay in place during installation, put a light coat of chassis grease on the gasket’s undersurface, then stick the gasket to the metal. It will now stay in place during assembly. Put a light coat of chassis grease on the gasket’s undersurface, then stick the gasket to the metal. 137 New Owner’s Corner.... Lube and service basics for your new truck. Always follow the recommendations in your Owner’s Manual. Below are excerpts from the manual and further TDR commentary. Breaking in your new truck: Drive moderately for the first 1,000 miles to assist in breaking in the powertrain, brakes, bearings, etc. Do not use full throttle for extended periods, and vary speeds frequently. After the first 1,000 miles, use the truck normally. Particularly during the breaking-in period, avoid extended idling. Your Cummins engine will break in faster if you haul or tow with the truck. The engine will not be fully broken in, and will not reach its full power and fuel mileage potential, until it has operated for approximately 10,000 miles. Fuel: Use only #2 diesel fuel. As an option in winter you may use #2 diesel fuel blended with #1 diesel or kerosene, or #2 diesel otherwise treated to lower the pour point of the fuel. Use #1 diesel fuel for extreme cold weather operation only. Always fill at popular locations that sell a lot of fuel. Diesel that has not been subject to long storage should contain less moisture and sediment. Engine Oil: Use any high quality lube oil diesel rated 15W40 with the API “donut” symbol CH-4/SH or better, such as Cummins Premium Blue, Shell Rotella T, Chevron Delo 400. For very cold weather operation, you may use a diesel rated 10W-30, meeting the same API spec as above. Do not use synthetic oil if your engine has less than 10,000 miles on it. Engine Fuel Filter: Fill the fuel filter with fuel before installation and purge all air from the fuel system before starting the engine. Issue 25, page 84, has the details on a 24-valve fuel filter change. Change Intervals: Change your engine oil and oil filter according to the chart in your Owner’s Manual. Change the fuel filter at every other oil change. Neither Dodge nor Cummins recommends using extended drain intervals with the use of synthetic engine oils. Change transmission and axle fluids according to the types of service listed in your Owner’s Manual. Anti freeze/Coolant: Drain and refill every 24 to 36 months, using low silicate, diesel-rated, ethylene glycol based coolant. Pre mix half-and-half with distilled water before installation or addition. Automatic Transmission fluid: Change fluid and filter every 40,000 miles for normal operation. For operation such as towing or heavy loads, change every 15-20 thousand miles. The latest Mopar specification is ATF +4, type 7176. The latest ATF +4 can safely be used in all previous 47 RE/ RH automatic transmissions. In this case, logic prevails – if +3 is good then +4 is better! This information was verified by D/C’s customer advocate personnel. If you have any doubts about the correct transmission fluid, consult your Owner’s Manual. 138 Five-Speed NV4500 Manual Transmission: Change every 30-50 thousand miles, depending on load. Use 75W-90, GL-4 or 80W-90, GL-4 rated synthetic oil. Often members will ask about the GL-4 rated Castrol synthetic gear lubricant (75W-90). If the GL-4 classification is good, shouldn’t a GL-5 rated lubricant be better? In the case of the NV4500 gearbox, not necessarily so. The GL-5 oil uses twice the amount of sulfur/phosphorous additive package as GL4. At high temperatures, the phosphorous plates out and reduces the coefficient of friction of the synchronizer rings (New Venture Gear has seen this on shift stand tests). Since there’s twice as much of it, there’s more of a detrimental effect compared to GL-4. Although it does not affect the NV4500, the additional sulphur content of GL-5 attacks brass. Six-Speed NV5600 Manual Transmission: This transmission is filled with manual transmission fluid at the factory. This fluid does not require periodic changing. If it is necessary to add or change the fluid in this transmission use Mopar manual transmission fluid (Mopar P/N 4874464 or Texaco 1874). These are the only lubricants recommended for use in the NV-5600 transmission. Axle oil: Change every 30-50 thousand miles, depending on load. Use 75W-90, GL-5 rated synthetic oil for normal light to medium load duty cycle. Tires: Weekly, check for proper air pressure with tires at ambient temperature. Follow the Owner’s Manual recommendations for increasing pressure as load increases. Front: 45-55 lbs. Rear: 40-80 lbs. Cold Starting: Turn on key, and when “wait to start” light goes out, start the engine. You may need to apply light throttle (up to 1,000 RPM) to keep the engine running if it is very cold. Allow two or three minutes of idling time for oil to circulate in the engine before driving away. Use light throttle until engine has fully warmed up. Washing and waxing: New paint is soft for the first 30 to 60 days after spraying, and should cure up to three months before gaining full strength. Wash your new truck with clean water on a cool paint surface for the first 30 days. Use a soft cloth with a “nap” surface. If the truck is very dirty, use a mild car wash soap diluted in water and applied with a soft cloth. Do not wax your truck for 30 days, then use a cleaner-wax which is suitable for clear coated finishes. In this case, logic prevails – if +3 is good then +4 is better! A Publication of the TURBO DIESEL REGISTER Mopar/Cummins/Fleetguard Part Number Reference Notes: This table Includes part number supercessions as of 11/05. Part numbers at the top are Mopar; middle are Cummins; bottom are Fleetguard. For lube filters the numbers on the left are paper/cellulose media design. The numbers to the right are Microglass or StrataPore design. Belt part numbers are Dayco. Hose part numbers are Dayco and Mopar. Hoses are listed with upper hose (top) and lower hose (bottom) of chart. MODEL YR FUEL FILTER PART # LUBE FILTER PART # AIR FILTER PART # (Assumes A/C) 2008 FS43252E 5083285AA 3949561 LF3972 LF16035 53034051AB 53041138 52028872 U 55056945 L 2007.5 6.7-liter FS43252E 5083285AA 3949561 LF3972 LF16035 53034051AB 53041138 52028872 U 55056945 L 2007 05015581AB 3942470 FS19800E 5083285AA 3949561 LF3972 LF16035 53032700AB AF26106 53041138 52028872 U 52028873 L 2006 05015581AB 3942470 FS19800E 5083285AA 3949561 LF3972 LF16035 53032700AB AF26106 53041138 52028872 U 52028873 L 2005 05015581AB 3942470 FS19856E 5083285AA 3949561 LF3972 LF16035 53032700AB AF26106 53041138 52028872 U 52028873 L 2004 05015581AB 3942470 FS19856E 5083285AA 3949561 LF3972 LF16035 53032700AB AF26106 53041138 52028872 U 52028873 L 2003 05015581AB 3942470 FS19856E 5083285AA 3949561 LF3972 LF16035 53032700AB AF26106 53041138 52028872 U 52028873 L 2002 05015581AA 3942470 FS19855E 05016547AB 3937145 LF3959 LF3894 4728406 3097074 AF25541 5080810 52028715 52006482AB 2001 05015581AA 3942470 FS19855E 05016547AB 3937145 LF3959 LF3894 4728406 3097074 AF25541 5080810 52028715 52006482AB 2000 05015581AA 3942470 FS19855E 05016547AB 3937145 LF3959 LF3894 4728406 3097074 AF25541 5080810 52028715 52006482AB ‘99 04883963AB 3931476 FS19598 05016547AB 3937145 LF3959 LF3894 4728406 3097074 AF25541 5080810 52028715 52006482AB 1998.5 24-valve engine 04883963AB 3931476 FS19598 05016547AB 3937145 LF3959 LF3894 4728406 3097074 AF25541 5080810 52028715 52006482AB A Publication of the TURBO DIESEL REGISTER BELT HOSES 139 140 1998 12-valve engine 04883963AB 3931476 FS19598 05016547AA 3932217 3865405 LF3349 LF3552 4728406 3097074 AF25541 5080810 ‘97 04883963AB 3931476 FS19598 05016547AA 3932217 3865405 LF3349 LF3552 4728406 3097074 AF25541 5080810 ‘96 4741689 3923108 FS1253 05016547AA 3932217 3865405 LF3349 LF3552 4728406 3097074 AF25541 5080810 71715 71716 ‘95 4741689 3923108 FS1253 05016547AA 3932217 3865405 LF3349 LF3552 4728406 3097074 AF25541 5080810 71715 71716 ‘94 4741689 3923108 FS1253 05016547AA 3932217 3865405 LF3349 LF3552 4728406 3097074 AF25541 5080810 71715 71716 ‘93 4429107 3834656 FS1232 05016547AA 3932217 3865405 LF3349 LF3552 4713953 3097073 AF25023 5080830 71594 71595 ‘92 4429107 3834656 FS1232 05016547AA 3932217 3865405 LF3349 LF3552 4428308 3097072 AF4555M 5080830 71594 71595 ‘91.5 4429107 3834656 FS1232 05016547AA 3932217 3865405 LF3349 LF3552 4428308 3097072 AF4555M 5080830 71594 71595 ‘91 4429107 3834656 FS1232 05016547AA 3932217 3865405 LF3349 LF3552 4428308 3097072 AF4555M 5080820 70540 71530 ‘90 4429107 3834656 FS1232 05016547AA 3932217 3865405 LF3349 LF3552 4428308 3097072 AF4555M 5080820 70540 71530 ‘89 4429107 3834656 FS1232 05016547AA 3932217 3865405 LF3349 LF3552 4428308 3097072 AF4555M 5080820 70540 71530 71715 71716 71715 71716 A Publication of the TURBO DIESEL REGISTER Why Ask Why—Liquids in Your Truck By Robert Patton (updated 7/08) Servicing a new and unfamiliar vehicle model for the first time can be frustrating. As I thumbed through the Volkswagen New Beetle (diesel) Owner’s Manual there were many listings for lubricants that only showed the manufacturer’s part numbers (in this case, those of Volkswagen). Purchase of the Robert Bentley shop manual did not give any further insight. Nor did a visit to the local VW parts counter unlock the mystery of the specification of the lubricants needed for routine maintenance. Case in point, what is the specification for and, thus, alternate (read: less expensive?) the lubricant needed for the five-speed gearbox? I took the path less researched, as there was not an easy answer, and purchased ($20 per liter) the Volkswagen part number G005 000 oil for my gearbox. I vowed to get some answers to many of the other VW specific part numbers, as they have a special number for all things liquid [power steering (what is G002 000 synthetic oil?), oil, and antifreeze] used in the vehicle. The only thing easy was the DOT-4 brake fluid. Thinking back, I had run into a similar situation with another foreign car I once owned. Anyone care to point me in the direction of a “Pentosin CHF 7.1 or equivalent” fluid for a car’s power steering system? Perhaps your experience as a new Turbo Diesel owner and its unique liquids is not unlike mine with the Volkswagen’s mystery lubricants. Care to explain the difference in the engine oil for a diesel versus the engine oil used in your car? How about the New Venture 4500, five-speed gearbox oil—what makes it so unusual? The NV5600 gearbox oil is yet again different? The G56 gearbox oil is different too? Friction modifier fluid for the differential—where do I find such a product? Automatic transmission fluid, specification ATF 7176+4, sounds strange to me. Anything special needed for antifreeze? Brake fluid? Power steering fluid? Do my new car experiences parallel your experience with the new ownership of your Turbo Diesel truck? Can we take these frustrations and make them into an opportunity to learn? You bet. Let’s start with the lubricant that gets changed with the greatest frequency, the engine’s lube oil. First Thing to Note—Your Owner’s Manual Yep, time to issue the editorial disclaimer. The authoritative source for this article is the Owner’s Manual from my ’99 2500 Turbo Diesel. Specifications do change and you should use the products listed in your manual. Our article is an effort to clarify and thus help you find readily available lubricants. Also, our article is written to stress the importance of using the correct lubricant by giving you some of the technical reasons behind the lubricant’s uniqueness. Lube Oil Considerations Many of you inquire about selecting the “best” for your truck. We hear a lot of questions like, “How about Mobil 1 or the Castrol Syntec synthetic lubricants?” Good intentions, but these oils are not blended to meet the requirements of a diesel. The API (American Petroleum Institute) “donut” rating for both oils is CD. Note the first letter “C” stands for Commercial or compression engine (a diesel). The “D” is the specification test the oil was tested at and was able to pass. The “D” specification was developed in 1952. Up until the ’07.5 6.7-liter engines the diesel specification was CI-4 plus/SM. For ’07.5 it changed to CJ. Is the CJ specification better than CI+4? Good question. Up until the CJ introduction the lube oils were better as the specification evolved. But, our Issue 54 thru 58 magazines had a lengthy discussion on why CJ may not be better than CI+4 for the pre ’07.5 engines. The oil also needs to pass the API S (S stands for a service or spark/gasoline engine) category and current specification M. The S classification is needed to address and prevent wear on the sliding camshaft tappets. Special lubricants for your vehicle. A Publication of the TURBO DIESEL REGISTER 141 MANUAL TRANSMISSION 1994-2003 Five-Speed NV4500 Manual Transmission Reference your Owner’s Manual and you’ll note instructions to change the NV4500’s gearbox oil every 30-50 thousand miles, depending on load. Use 75W-90, GL-4 or 80W-90, GL-4 rated synthetic oil. Chrysler part number 4874459 or Castrol Syntorq. Often members will ask about the GL-4 rated Castrol synthetic gear lubricant (75W-90). If the GL-4 classification is good, shouldn’t a GL-5 rated lubricant be better? In the case of the NV4500 gearbox, not necessarily so. The GL-5 oil uses twice the amount of sulfur/phosphorous additive package as GL-4. At high temperatures, the phosphorous plates out and reduces the coefficient of friction of the synchronizer rings, (New Venture Gear has seen this on shift stand tests). Since there’s twice as much of it, there’s more of a detrimental effect compared to GL-4. Although it does not affect the NV4500, the additional sulfur content of GL-5 attacks brass. Like the Volkswagen saga, the GL-4 rated, Castrol Syntorq lubricant is difficult, if not impossible, to find at the local auto parts store. Thankfully there are advertisers in the TDR [Standard Transmission and Gear comes to mind—they sell the Syntorq in ½ and one-gallon quantities, (800) 7838726] that have this lubricant for resale. AUTOMATIC TRANSMISSION FLUID For the automatic transmission the latest DaimlerChrysler specification calls for the use of “ATF+4, type 7176.” Unlike the scenario of GL-4 versus GL-5 (in which the former is good but the latter is not better), the latest ATF+4 type 7176 can safely be used in all previous 47 RE/RH automatic transmissions. In this case, logic prevails—if +3 is good, then +4 is better! This information was verified by D/C’s customer advocate personnel. If you have any doubts about the correct transmission fluid, consult your Owner’s Manual. Briefly the reason Dodge has the +3 and +4 designations is the highly refined base stock and friction modifiers that are specifically designed for the Chrysler transmission. A footnote to the ATF fluid discussion. Many owners are new to the Dodge product. In order to check the ATF fluid level, the transmission should be at operating temperature and the fluid checked on level ground with the transmission sector in neutral. When in neutral the fluid is being routed through the transmission cooler unit. If you check the fluid in park the level will show higher than it actually is, as fluid is not being routed to the cooler in the park position. If you make the mistake of checking the fluid level with the vehicle in park, the transmission may be operating without sufficient fluid. 2001-2005 Six-Speed NV5600 Manual Transmission AXLE LUBRICANT To quote from the Owner’s Manual, “This transmission is filled with manual transmission fluid at the factory. This fluid does not require periodic changing. If it is necessary to add or change the fluid in this transmission use Mopar manual transmission fluid (Mopar part number 4874464 or Texaco 1874). These are the only lubricants recommended for use in the NV-5600 transmission.” The Owner’s Manual suggests that the differential oil be changed every 30-50 thousand miles depending on the load factor. The specification for the axle oil is straightforward: use an API GL-5 rated oil. Use the viscosity that is recommended in your manual. This is another example of a lubricant that you will not find at the local auto parts store. We’ve yet to do a fullblown exposé on the NV5600’s lubricant. Discussions with Mike Patton, owner of Standard Transmission and Gear, revealed the following: The New Venture 5600 gearbox uses a synthetic 30-weight oil. From New Venture literature we know to use the Mopar 4874464 part number. However, Pennzoil Synchromesh, 30weight, synthetic fluid has been confirmed as an acceptable alternative. The Pennzoil will likely not be easily found, but they’ve got it in stock at Standard Transmission. 2005-Current Six-Speed G56 Manual Transmission This replacement fluid is easy to find at the local auto parts store. However, should your ’89-’02 truck with a Dana differential be a limited slip model you’ll have to add Mopar’s Hypoid Gear Oil Additive Friction Modifier to your fluid mixture. Yes, the lubricant is easy to find: the friction modifier is not. For the modifier I do not know of any product other than the recommended Mopar fluid that could (or should) be considered for use. For lack of verifiable information, stay with the factory recommended Mopar friction modifier for your ’89-’02 limited slip differential. In 2003 Dodge changed from Dana to American Axle as the vendor of the front and rear differential units. From my 2003 and 2007 Owner’s Manual, “Limited slip rear axles do not require a limited slip additive.” The Owner’s Manual states fluid changes should be done every 15,000 miles for schedule “B: service. The lube oil recommended for the G56 transmission is Mopar ATF+4. Mopar ATF+4 is readily available at your local auto parts or Mopar dealership. 142 A Publication of the TURBO DIESEL REGISTER TRANSFER CASE Wow, here is another easy one. The manual reads, “Use Mopar ATF +4 Automatic Transmission Fluid Type 7176 or equivalent, or a fluid of the type labeled Merco or Dexron III automatic transmission fluid.” It is easy to find the Mopar ATF +4, 7176 at the local parts store. For simplicity I would suggest using the ATF +4 in the transfer case too. ANTIFREEZE/COOLANT Many owners have heard the truck-stop stories about special additives and conditioners that are necessary in diesel engines. These stories are occasioned by a problem called cavitation erosion (pitting of they cylinder walls due to the implosion of air bubbles in the cooling system) which does occur in many diesel engines. But the answer is not to be found in a special “brew” for your Turbo Diesel engine. For a complete technical discussion, see Issue 54 and 59. For the definitive answer on coolant, I consulted the 1999 Owner’s Manual, “Recommended Engine Coolant.” The manual reads: “Chrysler Corporation vehicles have been designed to operate on ethylene glycol-based engine coolant. Ethylene glycol-based coolants are the only type recommended for use in your Chrysler Corporation vehicle. “Maintain cooling system solution at a 50% concentration of ethylene glycol antifreeze with water. A higher concentration of antifreeze is recommended if temperatures below -37°F are anticipated, but not to exceed 70% antifreeze. A 50% antifreeze mixture should be maintained year-round for protection against corrosion, boiling, or freezing. If coolant is rusty or dirty, discard and refill as recommended. Do not use additional rust inhibitors or anti-rust products, as they may not be compatible with the radiator coolant.” The preceding passage material does not give glycol-based coolants to there newer information Manual? from the 1999 Owner’s Manual any specifics on the ethylene be used in your Turbo Diesel. Is in later versions of the Owner’s A Publication of the TURBO DIESEL REGISTER Yes, the ’03 and ’07 manuals are much more specific than the ’99 book. Reading from the manual, “Mopar antifreeze/ coolant 5year/100.000 mile formula HOAT (hybrid organic additive technology) 5011764AB or equivalent.” Wow, is the HOAT coolant backward compatible with the good ‘ole ethylene glycol green stuff that we are all familiar with? Yes, HOAT coolant is backward compatible. Again, this issue has a detailed write-up on all of the different types of antifreeze that are in use. POWER STEERING Oops, from the 1999 Owner’s Manual here is another vague specification: “Only petroleum fluids specially formulated for minimum effect on rubber hoses should be used. Mopar Power Steering Fluid 04883077 is a fluid of this type and is recommended.” Without a clear definition I have defaulted to the Mopar part number. However, the Owner’s Manual for a 2003 Turbo Diesel shows the proper fluid to be Mopar ATF+4. Ditto the 2007 manual. So, just as we saw with different manual transmissions, there is not a one-size-fitsall lubricant for truck’s power steering. When in doubt check the manual for your truck. BRAKE FLUID Yes, another easy item to cross-reference. The manual from my ’99 Turbo Diesel reads, “Only brake fluid conforming to DOT-3 and SAE 1703 should be used.” DOT-3 fluid is easy to obtain. The 2003 Owner’s Manual shows DOT-3, DOT-4 or DOT-4+, the 2007 manual shows the same. CONCLUSION No doubt you noticed that there were differences in the specifications from the three Owner’s Manuals (1999, 2003, and 2007) that were the basis for this article. Your Owner’s Manual is the resource for the specifications. Follow the book’s recommendations. Likely you also noticed the evolution of the lube oil specification (from CH to the newly released CJ) and the ATF fluid from Mopar 7176 to 7176 +4. The ATF is backward compatible. 143 Memorable Articles In Issue 41 we made mention of several surveys that we conducted at the TDR website. As a follow-up I think you’ll find the following questions and answers of interest, for we have tried to summarize and add reference listings for this valuable information. “What is your most memorable article from the TDR?” The responses to this question were refreshing and energizing to all who contribute their articles, whether it be the staff or a member write-in. A couple of examples of comments we received include these: “there are so many memorable articles that my truck would not be where it is now if I had not joined the TDR. “ [I hope that is a good thing.] “I first read the TDR in the spring of ’97. It sold me on the Dodge/ Cummins combination and I ordered one of the first ’99 models with the six-speed transmission.” Several names appeared frequently in responses to the survey. Is there a risk of giving these guys an inflated ego? I think not, as the writers are all down-to-earth guys that take pride in their work and enjoy teaching what they have learned. Contributions by writers particularly appreciated by the readership include the following: Anything technical by Joe Donnelly; the travel adventures of Bill Swail’s EarthRoamer truck (Will the articles have the same interest level now that he has Ford sponsorship? I’m hopeful the answer is yes!); and Kevin Cameron’s technical discussions on all things mechanical. Particularly valuable articles include the following: Third Generation Overview (Issue 36, page 62-28 by writers St. Laurent and Anderson; various articles on the 12-valve engine dowel pin problem and its solutions (Issue 33, page 46; Issue 37, page 16; Issue 38, page 136; and Issue 40, page 56 and 148) by writers Donnelly, Anderson, Timochko and Kilby. I could continue reporting the positive comments and generalizations, but the purpose of this article is to summarize and mention issue numbers and page references so that you might revisit the article as a learning experience. The following are some of your favorite articles. Million-mile trucks: Issue 41, page 60; Issue 40, page 90; Issue 33, page 23; Issue 28, page 22. 24-valve lift pump saga: Issue 34, page 47; Issue 36, page 22; Issue 37, page 48; Issue 38, page 46. 24-valve lift pump replacement: Issue 34, page 48. 12-Valve hard start/no start: Issue 41, page 16 and 38; Issue 38, page 42; Issue 36, page 36. Economical operation of the diesel engine: Issue 29, page 30. Gauge evaluation: Issue 34, page 20. Oil Filter evaluation: Issue 32, page 36. 144 Exhaust brake installation and 12-valve valve spring change out: Issue 36, page 30 and 124. 12-valve valve adjustment: Issue 29, page 44. First Generation best tips: Issue 39, page 34. Clutches and drivetrain upgrades: Issue 30, page 36. Premium diesel fuel and fuel additives: Issue 36, page 24; Issue 30, page 12. Differential repair: Issue 41, page 150; Issue 24, page 42. Antifreeze/coolant change: Issue 35, page 76. Moto-Connoisseurism and the desire for something better: Issue 38, page 68. Braking systems in plain English: Issue 40, page 96. Banks’ land speed record and Bonneville coverage: Issue 39, page 30. Trailer towing capacities and payload limits: Issue 35, page 30. Air + Fuel = Power revisited: Issue 41, page 22. Fuel quality and the gasoline-in-diesel article: Issue 39, page 138. Automatic transmission upgrade: Issue 36, page 46. The options and specifications for all of the different year model trucks: Issue 34, page 74. NV4500 upgrade for a First Generation truck: Issue 21, page 115. 24-valve fuel pressure specifications: Issue 32, page 38. 24-valve valve adjustment procedure: Issue 30, page 54. The above list makes me thankful for the many indexes that TDR member Clay Maxam has compiled for us. It made the task of finding “that article about valve-adjustment” easy. My vote for the most memorable TDR articles: Clay’s indexes from Issue 41, 37, 33, 29, 25, 21, and 17. Certainly I have found these most useful. I pulled out my Issue 17 magazine (Clay’s index of magazines 1-16) and reminisced. We have covered so many topics! It was interesting to note your favorites, and the listing I made above may prompt many of you to reread an article or two. No doubt that you have more experience since you first read the article and to read it again now will give it new meaning. A Publication of the TURBO DIESEL REGISTER Best Tips “What is the best tip you’ve received from the magazine or website (saved the most money, time, or aggravation)?” As editor it is tempting to cite the following answer given by a respondent, “The whole concept of self help and preventive maintenance that is presented in the magazine and on the website is irreplaceable! I get my $35 worth every year; all of the magazines are good.” So, there is your answer, “all of the magazines are good and the website is irreplaceable.” However, I can’t get away without presenting specifics. So, in no particular order, here is a brief list of the best tips that were submitted. The seat fix for the “sinking feeling:” Issue 35, page 14. 12-valve throttle cable break—a few weeks later mine broke and I was prepared for the problem: Issue 34, page 44. 12-valve return fuel line crack problem: Issue 24, page 19. NV4500 fifth-gear nut problem: Issue 24, page 26. Understandably survey respondents and the editor had a difficult time differentiating between a self contained tip and an article. I’ve tried to break them out into the appropriate category. Regardless, I’ll reemphasize that the text may prompt a reread and thus additional meaning to you. An interesting point that I noted is that the favorite article/ best tip references were from TDR magazines that were less than two years old which indicates that there is a limit to the shelf-life of the magazine. However, rather than recycle technical data that is past the two-year shelf life, we will try to bring back articles that are still relevant (often appearing in “The Way We Were” column) and update projects and issues as we have more data. This gives another opportunity to reemphasize the value of the TDR indexes that have been published in Issues 41, 37, 33, 29, 25, 21, and 17. Also note the yearly Dodge Technical Service Bulletin summaries that are in this issue of the magazine. The index and the TSB summaries that have appeared in Issue 38, 34, 30, 26, 22 and 18 are great tools to have in your toolbox. Robert Patton TDR Staff 24-valve pusher pump installation: Issue 34, page 47. Fog light relay jumper (keeps fog lights on with high-beams): Issue 23, page 23. Cary a spare fuel filter, no particular issue, just good common sense. Changing engine coolant: Issue 35, page 76. Oil filter disposal in a bag: Issue 26, page 18. Exhaust manifold retention straps for 24-valve trucks: Issue 38, page 84. Replacement engine parts from Cummins at a lower price than quoted by my local dealership: various magazines. First Generaton hood cowl repair: Issue 34, page 58; Issue 33, page 41. First Generation Getrag gearbox lubricant overfill: Issue 38, page 40. Throttle position sensor repair: Issue 37, page 46. Installation of a torque converter lockup switch: Issue 23, page 23. Grid heater dims the lights: Issue 23, page 22. Cleaning the fuel filter’s pre-screen assembly: Issue 38, page 45; Issue 35, page 85. Starter rebuild kit: Issue 37, page 151. Automatic transmission lines and the problems with the plastic fittings (quick connects): Issue 21, page 39. A Publication of the TURBO DIESEL REGISTER 145