1
FALL 1996
T H E K A W A S A K I TECHNICAL MAGAZINE
VOL. 9, NO. 3
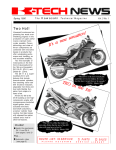
Performance For Three
The
1100 STX
and
900 STX
Are
Three
Times
The Fun
by John Griffin
Instructional
Designer/Instructor
Kawasaki aims to take
the lead in the threeperson personal watercraft
market for 1997. The new
flagship 1100 STX and
powerful 900 STX join the
STS to create a formidable
three-person lineup. The
1100 STX is a pleasure to
ride with its large
displacement, high-power
three-cylinder engine,
ample seating space,
extended touring range,
and large storage areas.
The 900 STX bridges the
gap between the 1100 STX
and the STS, combining
three-cylinder performance with excellent
handling for a great value.
A retractable rear step, rear boarding area, tow bar, and cargo net with six anchors, make the
1100 STX the only choice for skiers.
The 1100 STX offers a variety of information on its easy-toread LCD display.
1100 STX
settings are new to
maximize performance of
the new configuration. A
122 inch hull smoothes out
rough water with ease and
rewards riders with
confident handling. A new
Pure excitement
explodes with each stab of
the throttle because the
1100 STX uses the 120hp
engine from the 1100 ZXi.
Only the carburetor
FALL 1996
2
K-TECH NEWS
single stage, axial-flow jet
pump produces 803
pounds of thrust using a
special 148mm three-blade
stainless steel impeller (see
sidebar on page 12).
Skiers are going to fall
in love with the 1100 STX
for its abilities and
features. Pulling large
skiers out of the hole is not
a problem with this craft,
and getting into and out of
the water has never been
easier. The 1100 STX is the
first watercraft to come
standard with a retracting
boarding step, and there is
a large flat area at the stern
for loading, unloading, or
even storage using
Kawasaki’s included
Continued on page 3
K-TECH News
Vol. 9, No. 3
Fall 1996
K-TECH News Staff
Publisher
Kawasaki Tech Services
Publications Manager
Don Church
Executive Editor
Gary Herzog
Editor-in-Chief
Gregg Thompson
Regional Editors
North and East
Fred DeHart
Central and South
Walter Rainwater
West
Robert Taylor
Contributors
Shannon Beeson, Dove Behlings, John
Griffin, Keith Pestotnik, David Pyle,
Pat Shibata
driveshaft housing for
driveline inspection. The
magneto cover is water
cooled to help the electrical
components last longer.
New tools should not be
required since the engine
and pump are shared with
the 1100 ZXi.
The first thing you
notice when sitting on
board is the giant liquid
crystal display (LCD).
Speed, hours, time, trip
distance, trip time, fuel
level, and oil level are
indicated and are easily
read with just a glance.
Warning lamps and icons
alert the rider of low oil,
low fuel, or high engine
temperature. A cavernous
glove box, choke knob, fuel
petcock, finger throttle and
reverse lever are right at
your fingertips. Refueling
occurs less frequently with
the 14 gallon fuel tank and
flexible cargo net. Six
bungee hook anchors and
a large, sturdy tow bar are
welcome luxuries.
The 1100 STX features a
cab-forward design, with
the steering and controls
positioned far forward on
the hull. This design
allows for a long seat and a
large platform at the stern.
The hull is made of handlaid fiberglass, topped with
Gelcoat for a deep and
durable finish with light
weight (595113. dry) and
high strength. Kawasaki
Splash Deflectors (KSD)
are used to keep excess
water off the riders.
Technicians will be
happy to note a few points
on the 1100 STX. The fuel
tank uses dual rubber
straps with interlocking
hooks at the top for easy
removal. There is also an
access panel above the
3.5 quart oil tank.
The 1100 STX rewards
its owner with a beautiful,
high-quality finish and
performance to match.
900 STX
The 900 STX bolsters
Kawasaki‘s three-person
watercraft lineup as a
combination of the
successful STS and the 900
ZXi. The three-cylinder
891cc engine received
changes to fit into the
smaller confines of the STS
hull and still develop the
same performance as the
900 ZXi (100hp and 732lb.
of thrust). The exhaust
system has a 50mm longer
center section of the
chamber to counteract the
tighter bends needed for
clearance. The airbox is
also more narrow and
compact. The igniter
Continued on page 12
Graphics/Production
Graphic Art
Gregg Thompson
Photography
Dove Corey, Rich Cox, Kevin Wing
Copy Editor
Pat Shibata
Production
Holland Marketing Services
Rancho Santa Margarita, Calif.
©1996 Kawasaki Motors Corp., U.S.A.
All rights reserved.
Published by Kawasaki
All suggestions become the property of KMC.
Sending a service suggestion gives Kawasaki
permission to publish and/or use it
without further consideration
Specifications subject to change without notice.
A revised STS hull and 900 ZXi powertrain are blended to create the 900 STX. Notice the
service access hatch below the front corner of the seat.
F AIL 1996
3
K-T ECH N EWS
NORTH & EAST
ZX-11 Doesn’t Cut It...
...nor does KEl00,
KLF220, or MULE l000!
When you speak to us on
the Hot Line, or at any
other extension, we need to
know the exact model
designation of the product
in question. The model
designation changes for
each year the product is
SOUTH & CENTRAL
Promote Your
Dealership and Increase
Business
Ron Smith and Sonny
Fishpaw started R&S
Kawasaki in 1992 as a full
line, Kawasaki-only
dealership. The original
facility was just about
3,000sq.ft. and the company
operated there for two
years. In 1994, they added
Triumph, Polaris, and
Arctco models and also
moved the business into a
produced, with the
exception of utility vehicles
and generators. Frame
numbers will only match
specific model years. Be
specific; say
"ZXll00-D4 ('96),
KEl00-B12 ('93),
KLF220-A7 ('94), or
KAF450-Bl, which
is the MULE 1000.
This information
is listed on the
Kawasaki Micro-K
index, the motorcycle, JET SKI
watercraft and ATV
chronology charts
that are furnished to
each dealership
every year. The
information is also
on the microfiche cards,
warranty registration, and
MSO for each product.
Save yourself time and
money by keeping one of
9,000sq.ft. building in
Mechanicsville, Va., (a
suburb of Richmond). They
are located near the Blue
Ridge Mountains that offer
a wide variety of riding
areas for motorcycles,
ATVs, and JET SKI
watercraft.
R&S sponsors many
different types of events
through their dealership.
One of their most
successful events was a
charity motorcycle ride:
More than 160 participants
attended the event that
benefited a teenager who
needed a bone marrow
transplant. They also plan
mountain rides on statemaintained trails sufficient
for both dirt bikes and
ATVs. Dealer-sponsored
rides and events generate
increased business for the
dealership. Before
participants leave, they
often purchase needed
parts and accessories. Also
at these events, new
customers can get
acquainted with the store
and its employees.
R&S has earned a
reputation for good
customer service-keeping
the service and parts
departments busy. John
Libron and Jim Carroll
work in the service
department. Libron has 24
years of experience, and
Carroll has worked in
dealerships for 11 years.
They keep updated by
attending Kawasaki
technical training classes.
Besides completing normal
repairs, both have
experience in performance
work on watercraft and
FALL 1996
these references by each
dealership department’s
phone. It is extremely hard
to render effective
assistance if we are not sure
what product model is
being discussed. Also, it
slows us down since our
computer program will not
continue to the next screen
if the model year and frame
number are not correct.
Thanks for your help,
and we will be talking with
you soon.
w
Fred DeHart
201 Circle Drive N. #107
Piscataway, NJ 08854
(908) 469-1221
4
K-TECH NEWS
motorcycles. Matt
Anderson, the parts and
accessories manager, keeps
the customers happy by
keeping current on all the
performance parts that are
available for JET SKI
watercraft and motorcycles.
All R&S employees are
motorcycle drag racing
enthusiasts. To promote
their performance work,
R&S will debut a new drag
bike late this fall. The
motorcycle is a ZX-9R with
a 1428cc engine in a chassis
designed by Jim Carroll.
Good luck to the R&S drag
racing efforts!
w
Walter Rainwater
6110 Boat Rock Blvd. S.W.
Atlanta, GA 30378
(404) 349-2000
being you can use this
article for reference when
placing an order. Here are
the tools:
WEST
New Tools For The
Prairie 400 4X4
The all-new KVF400-Al
Prairie 400 4X4 will
require – during certain
service procedures -a few
new tools. These tools are
not yet listed in the special
tool catalog (P/N 999600065-02), so for the time
P/N 57001-1404
Drive Pulley Puller Bolt
P/N 57001-l401
Socket Wrench, 48mm
P/N 57001-l403
Flywheel Puller
P/N 57001-1402
Socket Wrench, 41mm
The two socket
wrenches are used to
remove the pinion gear
bearing holders on the
front and rear final drive
cases. The drive pulley bolt
removes the drive torque
converter on the new
Kawasaki Automatic
Power-Drive System
(KAPS), and the flywheel
puller...you guessed it
already?... removes the
engine’s flywheel. w
Robert Taylor
9950 Jeronimo Road
Irvine, CA 92718
(714) 770-0400
Trained Motorcycle Technicians
Announcing the development of the K-Tech Specialist Elective at Motorcycle
Mechanics Institute in Phoenix, Ariz.
by Don Church
Manager, Service Training and Communications
Since 1989 when Kawasaki formally endorsed MMI, we have worked together in many innovative ways to
promote the career opportunities for trained motorcycle technicians and provide Kawasaki dealerships with a
source for these individuals.
Kawasaki has participated in Advisory Committee meetings at the Phoenix and Orlando campuses where we
have carefully studied the lesson plans and made suggestions based upon skills needed in today’s dealerships.
Motorcycle Mechanics Institute has participated in Kawasaki National Dealer meetings over the years and formed
relationships with many Kawasaki dealers.
We have seen considerable growth at MMI and respect their achievements and professionalism. Together, we
are opening a new chapter. With the development of the six-week K-Tech Specialist advanced elective, MMI's
objective is to supply Kawasaki dealerships with technicians having specialized skills in the service and
maintenance of Kawasaki products. They are striving to develop committed career professionals who will stay
with Kawasaki in the future. Upon graduating from MMI's nine-month MTP program, students are eligible to
attend the Kawasaki K-Tech Specialist elective and build upon their excellent foundation of core skills.
We will be working with MMI to help place students graduating from the K-Tech Specialist elective. The first
class will be graduating in March 1997. At that time, we will publish a list of the graduates and their preferred
work locations. Look through the next issue of K-Tech News for more details on the new K-Tech Specialist
program. w
F ALL 1996
5
K-T ECH N EWS
Micro-K
2) Go back to the Microfiche and make sure you
ordered the correct part number. Take your time here to
make sure you have the correct year, and model, and
VIN/H.I.N range. Make sure you are using the most upto-date microfiche. Do this by comparing the date on
your microfiche to the date on the “Micro-K Index.”
If the date does not match, you are probably using an
When You Receive the Wrong Part
by David Pyle
Parts Data Coordinator
Have you ever received a parts order containing a part
that didn’t exactly meet the expectations you or your
customer had when you ordered it? You find yourself
mumbling (or otherwise expressing): “that’s not what I
ordered!,” or “this is the wrong color!” Chances are if you
work in the parts department at your dealership, this
kind of thing will happen to you at some time in your
career. If it does, (once you’ve properly expressed your
feelings) you need to find out if this is Kawasaki’s
mistake or yours. An error at Kawasaki’s end would be
either a "Mispicked Part," a "Mispackaged Part,” or a
Microfiche error. If it is Kawasaki’s error, you need to
find out which kind of error so you can take the
appropriate action. The problem is, this can eat up some
time, and possibly money, if you don’t take the right
steps. Here are some suggestions that will help you
eliminate some of the guesswork.
Assuming you have ordered a part and what you
received is not what you wanted:
outdated microfiche that could have a part number error.
If you believe that you have found an error on the most
current microfiche, please fill out a pink Micro-K Report
Card (P/N M99994- 152) and send it in.
If you are selling parts over the counter to customers
who are doing their own work, make sure they really
know what they want. Often customers may identify a
part by a different name or term than you would use. If
the part number matches the microfiche correctly and
you are sure you ordered the right part, proceed to step
1) Verify that the part numbers on the “pick label” and
the vendor “part number label” are the same. The pick
label is the orange and white one which includes the part
number, your dealer number, order number and invoice
number. The vendor part number label is the white one
with red “Genuine Parts” at the top and “Kawasaki”
across the bottom, and the part number printed in black.
If they are not the same, then you have received a
“Mispick.” Reorder the part and do an RFC (request for
credit) to return the part that was sent to you in error. If
the part numbers do match and the “pick-label” shows
your dealer number, proceed to step two.
Part Number Label
3) Call your Distribution Center’s “parts specialist.” (In
Irvine, Calif., it’s Bob Jacobi; in Grand Rapids, Mich., it’s
Jerry Hooker; and in Atlanta, Ga., it’s Bill Parrish.) Ask
him if he knows of any problems with the part you are
working with. Be sure to have all information ready
when you call so you don’t have to call him twice. He will
want to know the lot number of the part, which is found
on the white Vendor Part Number label. It’s usually a
number followed by a letter, (e.g., 95,L). If you get your
parts specialist’s voice mail, leave a detailed message for
him so he can get a head start on your problem before he
calls you back. If the part is mispackaged, the parts
department needs to know as soon as possible so they can
correct stock and notify KMM, KHI and/or the vendor.
The parts specialist can help ensure that you get the right
part on your reorder.
w
Pick Label
F ALL 1996
6
K-T ECH N EWS
ZX1100-D1 Service
Manual Error
by Dave Behlings
Product Support Specialist
The original ZXll00-Dl
service manuals had
errors on the rod bearing
insert selection charts in
the crankshaft chapter. All
the information was
transposed from the
More Decal Info
by David Pyle
Parts Data Coordinator
different rod bearings
which required different
part numbers. With the
exception of one number,
all the errors were
corrected in later editions
of the manual.
The bearing selection
charts on pages 8-5 and 813 should look like this:
As I mentioned in the
last issue of K-Tech News,
many replacement parts
will now be shipped with
no decals. In a continued
effort to make it easier for
you to identify which
parts do or don’t come
with decals, there has
been a code added under
the appropriate
microfiche illustration for
the affected parts. Below
each color/ graphics detail
Rod Bearing Insert Selection Chart
ZXll00-C service manual
into the new “D” model
manual, but the new ll00D ended up having
The circled items are
where you might find
errors in your service
manual.
illustration, you will
notice a “WD” or a
“WOD.” These stand for
“With Decals” or “WithOut Decals.” If the part
you are ordering has a
“WOD,”
make sure
you order
the decals
also.
w
w
Are You Getting All That You Deserve?
by Pat Shibata
Service Material Production
Supervisor
Are you missing the
chance to get reimbursed
for doing warranty
repairs? Be sure to submit
warranty claims for all
Recall, Factory Directed
Modifications (FDM), and
Factory Authorized
Repairs (FAR). If you
don’t, you are losing
money you could be
getting from
reimbursement by
submitting the claims. But
what is even
worse,
Kawasaki
will continue
to send your
customers
notification
letters to have
the repairs
completed,
which can
make for very
unhappy
customers.
Refer to the
Warranty Policies and
Procedures Manual (P/N
99969-0210-02) claim type
FALL 1996
three information for
detailed instructions on
submitting a warranty
7
K-TECH NEWS
claim.
It is critical that all
recall repairs be performed
during assembly and
preparation of affected
units, before delivery to
the customer! Failure to do
so is negligence, and your
dealership can be held
liable for any vehicle
damage or personal injury
resulting from work not
performed. Be sure to
check your bulletins or
microfiche for any recall or
repair campaigns that may
affect a unit before it is
sold.
w
VN1500-D1 Balancer Timing
by Shannon Beeson
Product Support Specialist
Among dealers who
have had the opportunity
to remove the flywheel
from a VN1500-Dl
(Classic), there has been
some confusion regarding
timing the balancer on
reassembly. The Service
Manual supplement for
the 1500 Classic refers to
the (VN1500-A) Base
Manual for this procedure.
The confusion comes
when the technician looks
at the instructions and
pictures in the base
manual and then at the
flywheel he’s trying to
install. The “D” model
flywheel has been changed
quite a lot and it actually
has two extra marks (not
present on the “A, B, or C”
VN1500-D1
TDC marks for the pistons,
and you’ll see that they
align with "TR" and "IT"
marks on the face of the
flywheel.
When timing the
balancer on a VN1500-D
Classic, make sure you
align the balancer gear
mark with the correct
mark on the flywheel.
model flywheels) that
could mistakenly be used
for timing the balancer.
So there are a total of
three marks on the outer
edge of the “D” model
flywheel. One of these
marks is shorter than the
other two. The shorter one
is the balancer mark. The
two longer marks are the
w
"Backfire"
by Shannon Beeson
Product Support Specialist
Shortly after the release of the
new VN1 500-D1 “Classic” to our
dealers, we began to get reports
that some units would occasionally
backfire (through the exhaust)
very loudly. Often it was described
by the customer as a "shotgunlike blast."
After testing several of our
own units, we found one with the
problem. Every once in a while
during a long period of
deceleration, the exhaust would
let off one big boom that would
make your hair stand on end!
Note: While a backfire
like this is considered
abnormal, remember that
some small popping and
rumbling from the exhaust is
normal on this model as well
as all our V-twins.
KCAS
AIR CUTOFF
VALVE
KVF400-A1 (Prairie) Frame VIN Location
It has come to our
attention that the stamped
frame number on the new
KVF400 Prairie is not
located where
the owners
manual says it
is. According to
the owners
manual, it
should be
found on the
horizontal
frame tube just
below the left
hand engine
cover. That’s
probably where most of us
would look for it.
You will find the VIN on
the left hand lower frame
tube between the two
mounting points for the left
front A-arm as shown in
this illustration. – Ed.
w
The problem turned out to be
the Air Cutoff Valve for the
Kawasaki Clean Air System
(KCAS). As the vehicle slowed and
the vacuum decreased, the cutoff
valve would open too soon. The
fresh air entering the exhaust port
prematurely would ignite
unburned gases in the exhaust
pipe.
Even though this is not an
emissions related problem, if you
encounter this condition, simply
replace the valve with a new one:
P/N 16126-l309.
w
F ALL 1996
8
K-T ECH N EWS
Graphics
Removal
Disc No
Longer
Available
Reasonably
Priced Precision
Measuring
Tools
by Rob Taylor
Instructional Designer/Instructor
Many technicians have asked for an alternative to
the Mitutoyo precision instruments we now sell. Since
Mitutoyo is an excellent choice for precision
instruments, we will continue to carry them.
Unfortunately for some technicians, they may be too
costly to buy. After much research, I have found a
Regrettably, the
Graphics Removal Disc is
no longer available from
KMC due to circumstances
beyond our control. This
tool was first made
available through
Kawasaki in early 1993. It
is an excellent tool for
removing large decals
without damaging the
paint under them. It’s
manufactured by 3M
Corporation and sold
under the Scotch-Brite
trademark. The tool is still
made and sold by 3M. If
you’ve gotten used to
using this tool, you should
still be able to get it
through your local
automotive paint supply
store. If you’ve never heard
of the tool, take a look at
the “Decal Eraser” story in
the Spring 1993 issue of KTech News.
-Ed.
w
These instruments are not
yet listed, but can be ordered
using the following part
numbers:
Telescoping gage set
P/N T57001-027
(DLR cost $35.39)
Small hole gage set
P/N T57001-028
(DLR cost $46.25)
Outside micrometer set
0-25mm, 25-50mm, 5075mm, 75-100mm
P/N T57001-020
(DLR cost $137.26)
Outside micrometer
0-25mm
P/N T57001-021
(DLR cost $24.21)
Outside micrometer
25-50mm
P/N T57001-022
(DLR cost $34.62)
Outside micrometer
50-75mm
P / N T57001-023
(DLR cost $40.79)
Outside micrometer
75-100mm
P/N T57001-024
(DLR cost $44.57)
quality line of instruments at a very
reasonable price.
The micrometers include a ratchet stop, carbidetipped anvils, locking lever, adjustable barrel, satin
chrome finish, and a standard-all neatly housed in a
carrying case. The dial caliper’s main beam is stainless
steel and has a measuring range from 0 to 150mm.
These calipers can measure inside, outside, and depth
measurements. To measure a cylinder or valve guide, a
telescoping gauge set and a small hole gauge set have
also been made available.
w
F ALL 1996
9
K-T ECH N EWS
Outside micrometer
100-125mm
P/N T57001-025
(DLR cost $48.50)
Dial caliper
0-150mm
P/N T57001-026
(DLR cost $66.24)
Excessive Brake Lever
Travel on New Vehicles
by Keith Pestotnik
Senior Product Quality
Engineer
It is possible for the
hydraulic disc brakes on a
new vehicle to have a very
soft brake lever feel, even
when all air has been bled
from the system. Actually,
the symptom is that the
lever (or pedal) has
excessive travel before
becoming firm as the pads
contact the disc. The
firmness of the lever will
feel normal, the travel of
the lever will not. If you
encounter this condition
on a new vehicle, try the
following technique to
reduce the lever travel:
Take the caliper off its
mount (or remove the
wheel). Stick a thin flat blade screwdriver
between the brake pads
and pump the lever or
pedal until the pads grip
the flat part of the
actually did was break the
caliper piston seal loose
from the caliper bore.
After sitting in the crate
for months, the piston seal
can become stuck to the
caliper bore. When the
brake is applied, the seal
flexes as the piston moves,
but stays stuck to the bore.
When the brake is
released, the seal acts like
a return spring and pulls
screwdriver blade. Watch
the fluid in the master
cylinder, taking care that it
doesn’t get too low. Now
force the movable pad(s)
back into the caliper past
its normal position. This
time, watch carefully that
the brake fluid doesn’t
overflow the master
cylinder reservoir. If you
push the piston(s) too far
into the caliper, the master
cylinder reservoir will
overflow. You don’t want
to spill brake fluid on the
tank or fairing. Reinstall
the caliper (or wheel) and
pump the lever until firm
Now roll the bike and
the piston back from the
disc, creating an abnormal
gap. The next time the
brake is applied, it has to
take up that gap before the
lever becomes firm, thus
the excessive lever travel.
Even if you don’t
perform this procedure,
the condition will cure
itself as usage of the brake
and pad wear will
eventually free the piston
seal. But this is a simple
procedure and it’s better to
deliver the vehicle with
the best possible brake
action.
apply the brake to check
the lever feel. Better? Don’t
forget to check the brake
fluid level one more time.
If the brake lever feel
was improved by this
procedure, what you
FALL 1996
w
10
K-TECH NEWS
Stubborn
Shifting
KLF/KEF
300s
by Keith Pestotnik
Senior Product Quality
Engineer
Some customers may
complain of occasional
poor shifting on their 300
Bayou or Lakota. The
type of complaints may
range from false neutrals
and missed shifts to
excessive effort required
to move the shift pedal.
Your technician may
have difficulty
duplicating the condition.
Most dealership
technicians tend to ride
more aggressively than
most utility ATV owners,
and aggressive riding
may obscure the
symptoms. Try riding the
unit slowly and shifting it
quickly.
One cause of poor
shifting on these models
has been identified as an
incorrect bushing
installed (at the factory)
in the secondary (multiplate) clutch housing. The
incorrect bushing is too
short and causes the
clutch housing to bind on
the transmission shaft.
Although we have only
confirmed a few of these
cases, it’s worth keeping
in mind. Testing for this
possible assembly error is
easy. Simply start the
vehicle’s engine, lift up on
the shifter pedal to put it in
first gear, and hold the
pedal up. Now
CAREFULLY raise the
engine rpm and see if the
vehicle begins to pull
forward. If everything is
assembled correctly,
holding the shifter pedal
up will keep the multiplate clutch disengaged.
The vehicle should not
move. If the vehicle does
move forward, it may have
the wrong bushing
installed in the clutch
housing. If the wrong
bushing was installed at
the factory, the new one
you order (P/N 920281371) will be longer than
the one you take out.
Also, you should check
the clutch release
adjustment (in the righthand engine cover). On
2WD models, follow the
procedure in the service
manual. On 4WD models,
don’t turn the lower
adjuster screw.
Just turn the
upper adjuster
screw
counterclockwise
until it becomes
harder to turn,
then turn it
clockwise 1/8
turn and tighten
the lock nut. Do
this with the
engine at room
temperature.
Following this
procedure on 4WD models
will prevent clutch slippage
on cold mornings and
enhance all-around shifting
quality.
w
JT750-B2 Overheated Exhaust Hoses
by Gregg Thompson
Product Support Supervisor
We’ve had some reports
of JT750-B2s ('96 STS) that
have had trouble with the
rubber exhaust connectors
between the expansion
chamber and the muffler,
and between the muffler
and the hull outlet
overheating and blowing
out. It’s obvious from the
failures that there wasn’t
enough water passing
through the muffler (water
box), but the rest of the
exhaust showed no signs of
overheating. None of the
dealers with this problem
has ever found any
blockages or any other
defects in the cooling
system.
If you have one of these
failures, what you want to
do is encourage a little
more water to enter the
exhaust stream at the
muffler and outlet hoses.
From the factory, that hole
should be about 5mm in
diameter. Drill it out to
6mm.
reverse cone of the
expansion chamber. To do
this, we suggest you follow
these steps:
1 Remove the brass plug
on top of the stinger at the
end of the expansion
chamber. Underneath that
plug is the hole that allows
water to pass from the
water jacket into the
exhaust stream to cool the
FALL 1996
2 Find the water bypass
hose that comes from the
reverse cone portion of the
expansion chamber and
goes to the outlet fitting at
the right rear corner of the
engine compartment. Make
11
K-TECH NEWS
sure this hose is routed as
high as possible where it is
zip-tied to the exhaust
outlet hose. (Be careful you
don’t pull it so tight that
the hose becomes collapsed
or kinked anywhere.) The
idea behind routing it as
high as possible is to create
the best possible head of
pressure at the water inlet
hole that you just enlarged
to 6mm.
w
1100 STX
and
900 STX
Continued from page 3
features a heat
compensating function
and programming to
enhance rough water
throttle response (see
sidebar).
The RTM and Gelcoat
hull has a few changes
from the STS. It features a
splash deflector and a
longer engine mount area
to cradle the larger motor
and stiffen the hull. The
shorter drive shaft has
crowned splines at the
pump end to absorb
misalignment and
vibration. There are two
bilge pumps to push water
out of the hull quickly
while riding, and two
drain plugs in the hull for
quick draining after the
ride. The nozzle trim now
features Kawasaki’s level
limit function which
makes it easy to find
“level” trim adjustment
while riding (see sidebar).
The 900 STX features an
access hatch in the
starboard (right) side
below the seat, allowing
inspection of the fuel filter,
throttle and choke cables,
as well as idle adjustment.
A longer and higher grab
rail helps in reboarding
and allows the spotter a
The 1100 STX has the power to pull a full load of fun.
The 900 STX features a new compact exhaust system and
airbox.
The 900 STX offers the family three-cylinder performance with
excellent value.
secure grip. An analog
speedometer reading to
70mph and an electric trim
indicator are provided.
There is 14.2 gallons of
storage space for your
equipment. A large one
gallon oil tank and 12.2
FALL 1996
gallon fuel tank allow long
trips before refueling is
necessary.
The 900 STX offers doit-all capabilities, strong
performance, and
exceptional handling. It’s
an excellent value!
w
12
K-TECH NEWS
The digital igniters on all
Kawasaki three-cylinder
watercraft feature a special
timing map that allows the
ignition to remain at full
advance for a slightly longer
period when the crank speed
changes at over 500rpm per
second (i.e. when boat gets
airborne). This improves
throttle response when the
boat re-enters the water.
These models also have a
heat sensor that signals the
igniter to advance ignition
timing when engine
compartment temperature
exceeds 95°. This reduces
power fade on hot summer
days.
It is easy to find level on
the trim adjustment of all
'97 Kawasaki trimquipped
watercraft. When the trim is
adjusted from the FULL UP
or FULL DOWN positions, it
automatically stops (won’t
go past) the level position.
To continue trim movement,
just release the direction
switch and push it again.
An all-new three-blade,
stainless steel impeller
offers peak performance
with a new oval shape at
the leading edge for more
efficiency, less cavitation,
and longer wear. The 1100
STX impeller is 148mm in
diameter and the 900 STX is
140mm. The new shape and
thicker blades help prevent
cavitation erosion when the
leading edge of the impeller
is damaged. A streamlined
rubber seal is located where
the impeller joins the
propeller shaft, reducing
flow resistance.w