1
CHRYSLER SERVICE MANUAL
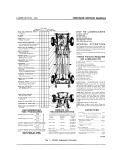
12—FRONT WHEEL SUSPENSION
are marked (L) and (R) in manufacture and
are not interchangeable.
EXHAUST PIPE
CROSSMEMBER
ATTACHING
ADJUSTING C A M
INSULATOR ASSEMBLY
BOLTS
ADJUSTING BOLT
LOWER CONTROL
ARM S T R U T
FRONT SWAY BAR SHAFT
BUSHING ASSEMBLY-
SWAY BAR S H A F T
Fig. 10—Front S w a y Bar to Frame Attachment
r
r"
ENGINE R E A R
C R O S S MEMBER
Jf
/
/
/ / / '
„;
/'/'RIGHT
/FRAME
"
Fig. 11—Torsion
HAND
CROSSMEMBER
ADJUSTING
ANCHOR 3 R A C K E T
E?ACKE~
SIDE T O R S . O N
Ba.;
C2CSS.V.EM3ER
'CROSSMEMBER
•TORSION B A R
ANCHOR
l o c ; ?:\'G
ATTACHING
ATTACHING
BOLT
„
K
BOLT
BOLTS
k
ADJUSTING C A M
I'
/
FRAME
5 7 x 1 9 6
.
CROSSMEMBER
Bar Spring C a m a n d Height
Adjustment Bolt Assembly
to frame and the lower control arm. (Figs. 6
and 10.)
The front end of the torsion bars are indexed
with lower control arms at frame front crossmember pivot points (Figs. 1 and 2). The rear
end of torsion bars are indexed in anchors
which are supported by brackets welded to
frame side-rails and crossmember, as shown in
Figure 11. The torsion bar springs (Fig. 12)
A N C H O R BRACKET
j
LOCK R I N G
.EFT
HAND
SIDE T O R S I O N
CROSSMEMBER
\
BAR
ATTACHING
BOLT
57x78
Fig. 12—Torsion Bar Spring (Rear Mounting)
SERVICE PROCEDURES
2. CHECKING FRONT SUSPENSION HEIGHT
Front suspension height should be checked and
if necessary, reset whenever service work has
been done on the torsion bars. The vehicle
should be placed on a level floor with weight of
vehicle on the torsion bars. (No passenger load,
full gas tank). Using a steel rule, measure from
the lowest point of the ball joint to floor, as
shown in Figure 13. Again using steel rule,
measure from the underside of lower control
arm bushing housing, (at center line of lower
control arm), as shown in Figure 14. Under
car weight, the bushing housing will always be
higher than the ball joint housing. The difference between these two points should be held to
2%e inches plus or minus % inches. Check
measurements on the opposite side of car in
same manner. After the differential measurements have been established for each side, they
should be compared. The results must be held
within % inch of each other.
6
N O T E : Jounce front of car and allow it to find
its free height before checking.