1
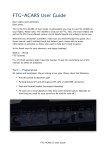
® INNOVATION IN MOBILITY ™ PSL-10 STEP ELEVATOR and WHEELCHAIR LIFT PRINT OPERATOR MANUAL ® 07/02/01 32DSL101.B 95-2002 RICON CORPORATION All Rights Reserved U.S. Patent no. 4,606,433 Other U.S and Foreign Patents Pending Printed in the United States of America ONLY AUTHORIZED RICON SERVICE TECHNICIANS MAY SERVICE THIS RICON PRODUCT. PRODUCT USERS MUST REFER TO THIS MANUAL FOR OPERATING AND GENERAL MAINTENANCE INSTRUCTIONS. RETAIN THIS MANUAL IN THE VEHICLE FOR FUTURE REFERENCE. 32DSL101.B -i- REVISION RECORD REVISION PAGES 32DSL101. B All 07/02/01 - ii - DESCRIPTION OF CHANGE Changed to curved arms on iso throughout manual. Changed “dealer” to “service technician”. 1-3 Changed “dealer” to “shipment”. 2-1 & 2-5 Added “UNLOCK” function to pendant. 2-2 & 2-3 Updated drawings, deleted item 3, added “stow lock manual release cable”. 2-5, 3-3, 3-7 & 3-8 Rewrote “stow lock release” references to current configuration. 3-7 & 3-10 Added Figure “Close Release Valve” 4-1 Updated Daily Safety Check Table 4-2 Deleted decal 17736, changed decal 17631 to 19552 32DSL101.B ECR/ECO 3740/4773 TABLE OF CONTENTS Chapter: I. Page I. INTRODUCTION .............................................................................1-1 A. RICON PRODUCT SUPPORT ................................................................................... 1-1 B. STEP-LIFT WARRANTY............................................................................................ 1-2 C. SHIPMENT INFORMATION....................................................................................... 1-3 D. GENERAL SAFETY PRECAUTIONS.......................................................................................1-3 II. II. DESCRIPTION................................................................................2-1 A. STEP-LIFT FUNCTIONS AND POSITIONS................................................................ 2-1 B. MAJOR STEP-LIFT COMPONENTS ......................................................................... 2-2 C. CONTROLS................................................................................................................................2-5 1. CONTROL PENDANT .......................................................................................................2-5 2. EMERGENCY OVERRIDE SWITCH..................................................................................2-5 3. manual STOW-LOCK release cable .................................................................................2-5 4. PLATFORM SECTION RELEASE HANDLE.......................................................................2-6 5. front section handle and rollstop handle ..........................................................................2-6 6. MANUAL BACK-UP PUMP...............................................................................................2-6 III. III. OPERATING INSTRUCTIONS..........................................................3-1 A. SAFETY PRECAUTIONS........................................................................................... 3-1 B. DAILY SAFETY CHECK............................................................................................. 3-2 C. STEP-LIFT OPERATION............................................................................................ 3-2 1. NORMAL STEP OPERATION............................................................................................3-3 2. NORMAL WHEELCHAIR LIFT OPERATION.....................................................................3-4 3. MANUAL OPERATION......................................................................................................3-7 IV. IV. MAINTENANCE ..............................................................................4-1 A. DAILY SAFETY CHECK............................................................................................. 4-1 B. STEP-LIFT DECALS.................................................................................................. 4-2 32DSL101.B - iii - LIST OF FIGURES Figure Page 2-1 CONTROL PENDANT ............................................................................................... 2-1 2-2 STEP/PLATFORM POSITIONS ................................................................................. 2-1 2-3 STEP ELEVATOR COMPONENTS ............................................................................. 2-2 2-4 WHEELCHAIR LIFT COMPONENTS.......................................................................... 2-3 2-5 CONTROL PENDANT ............................................................................................... 2-5 2-6 LEFT HAND TOWER WITH EMERGENCY OVERRIDE SWITCH .................................. 2-5 2-7 STOW-LOCK RELEASE CABLE LOCATION ............................................................... 2-5 2-8 MIDDLE SECTION RELEASE T-HANDLE .................................................................. 2-6 2-9 FRONT SECTION HANDLE AND ROLLSTOP HANDLE............................................... 2-6 2-10 MANUAL BACK-UP PUMP....................................................................................... 2-6 3-1 DO NOT USE STEP-LIFT WHEN VEHICLE IS ON SLOPED GROUND.......................... 3-1 3-2 UNFOLD STEP WITH PALM UP............................................................................... 3-4 3-3 UNLATCH FRONT PLATFORM SECTION .................................................................. 3-4 3-4 UNFOLD FRONT PLATFORM SECTION .................................................................... 3-5 3-5 RAISE OUTER ROLLSTOP ....................................................................................... 3-5 3-6 LOWER OUTER ROLLSTOP ..................................................................................... 3-5 3-7 LOWER OUTER ROLLSTOP ..................................................................................... 3-6 3-8 RAISE OUTER ROLLSTOP ....................................................................................... 3-6 3-9 STORE OUTER ROLLSTOP ...................................................................................... 3-6 3-10 RAISE STEP-LIFT ABOUT 4” ................................................................................... 3-7 3-11 CLOSE RELEASE VALVE ......................................................................................... 3-7 3-12 UNFOLD STEP WITH PALM UP............................................................................... 3-7 3-13 UNLATCH FRONT PLATFORM SECTION .................................................................. 3-8 3-14 UNFOLD FRONT PLATFORM SECTION .................................................................... 3-8 3-15 RAISE OUTER ROLLSTOP ....................................................................................... 3-8 3-16 RELEASE STOW-LOCK............................................................................................ 3-9 3-17 OPEN RELEASE VALVE ........................................................................................... 3-9 3-18 LOWER OUTER ROLLSTOP ..................................................................................... 3-9 3-19 RAISE STEP-LIFT ABOUT 4” ................................................................................. 3-10 3-20 CLOSE RELEASE VALVE ....................................................................................... 3-10 3-21 UNFOLD STEP WITH PALM UP............................................................................. 3-10 3-22 UNLATCH FRONT PLATFORM SECTION ................................................................ 3-11 3-23 UNFOLD FRONT PLATFORM SECTION .................................................................. 3-11 3-24 RAISE OUTER ROLLSTOP ..................................................................................... 3-11 3-25 PULL MANUAL RELEASE CABLE........................................................................... 3-12 3-26 OPEN RELEASE VALVE ......................................................................................... 3-12 3-27 RAISE OUTER ROLLSTOP ..................................................................................... 3-12 4-1 - iv - DECAL LOCATIONS................................................................................................. 4-2 32DSL101.B LIST OF TABLES Table Page 2-1 STEP-LIFT FUNCTIONS........................................................................................... 2-1 2-2 STEP-LIFT COMPONENTS....................................................................................... 2-4 4-1 DAILY SAFETY CHECK ............................................................................................ 4-1 32DSL101.B -v- This page intentionally left blank. - vi - 32DSL101.B I. INTRODUCTION T his manual provides operating instructions for the Ricon PSL-10 Personal Step Elevator and Wheelchair Lift as installed in transit vehicles. The step-lift is semi-automatic and is operated by a trained attendant. It does not block the vehicle doorway when stowed, thus allowing normal boarding and deboarding at this point. Step-lift capacity is 600lbs (272kg). The vehicle interlock conditions must be met and the vehicle doors must be open prior to deploying the step-lift. The platform is then manually unfolded to accommodate a wheelchair passenger, or left folded in its step configuration to accommodate a standing passenger. The step-lift lifts the passenger from the ground to the vehicle floor, or lowers the passenger from floor to ground. Lifting power is provided by an electro-hydraulic pump. After use the platform is refolded and then returned to its stowed position. The step-lift has a manual backup pump that is used if normal power is lost. It is important to user safety that these operating instructions be read and understood by the step-lift operator. It is also important that the Ricon recommendations for cleaning, inspecting and lubricating the step-lift be followed. A. RICON PRODUCT SUPPORT If there are questions about this manual, or you need copies, please contact the Ricon Product Support Department at the following location: Ricon Corporation 7900 Nelson Road Panorama City, CA 91402 Telephone: (818) 267-3000 (800) 322-2884 World Wide Website: www.riconcorp.com 32DSL101.B 1-1 B. STEP-LIFT WARRANTY RICON CORPORATION ONE-YEAR LIMITED WARRANTY Ricon Corporation (Ricon) warrants to the original purchaser of this product that Ricon will repair or replace, at its option, any parts that fail because of defective material or workmanship as follows: • Repair or replace parts for a period of one year starting from the date of purchase. A complete list of parts covered by this warranty can be obtained from Ricon Product Support. • Labor costs for specified parts replaced under this warranty for a period of one year from the date put into service. A Ricon rate schedule determines parts covered and labor allowed. If You Need to Return a Product: Return this product to Ricon Corporation, following the Ricon RMA procedure. Please give as much advance notice as possible, and allow a reasonable amount of time for repair. This Warranty Does Not Cover: • Labor or service charges, except as noted above. • Malfunction or damage to product parts caused by accident, misuse, lack of proper maintenance, neglect, improper adjustment, modification, alteration, the mechanical condition of the vehicle, road hazards, overloading, failure to follow operating instructions, or acts of Nature (i.e., weather, lightning, flood). NOTE: Ricon recommends that this product be inspected by an authorized Ricon service technician at least once every six months, or sooner if necessary. Any required maintenance should be performed at that time. WARNING! THIS PRODUCT HAS BEEN DESIGNED AND MANUFACTURED TO EXACT SPECIFICATIONS. ~ ANY MODIFICATION OF THIS PRODUCT CAN BE DANGEROUS ~ This Warranty is Void If: • The product has been installed or maintained by someone other than an authorized Ricon service technician. • The product has been modified or altered in any respect from its original design without written authorization by Ricon. Ricon disclaims liability for any personal injury or property damage that results from operation of a Ricon product that has been modified from the original Ricon design. No person or company is authorized to change the design of this Ricon product without written authorization by Ricon. Ricon's obligation under this warranty is exclusively limited to the repair or exchange of parts that fail within the applicable warranty period. Ricon assumes no responsibility for expenses or damages, including incidental or consequential damages. Some states do not allow the exclusion or limitation of incidental or consequential damages, so the above limitation or exclusion may not apply. Important: The warranty registration card must be completed and returned to Ricon within 20 days after installation of this Ricon product for the warranty to be valid. The warranty is not transferable. The warranty gives specific legal rights. There may be other rights that vary in each state. 1-2 32DSL101.B C. SHIPMENT INFORMATION Check the received product for freight damage. Claims for damage should be made to the freight carrier immediately. Be sure the installation kit contains all items listed on the included bill-of-material. Please report any missing items immediately to the Ricon Product Support Department. The warranty and owner's registration cards must be completed and returned to Ricon within 20 days for the warranty to be valid. D. GENERAL SAFETY PRECAUTIONS The following safety precautions must be adhered to during installation, operation, service and maintenance: § § § § § § § § § § Under no circumstances are installation, maintenance, repairs or adjustments to be attempted without the presence of a person capable of rendering aid. An injury, no matter how slight, should always be attended to. Always administer first aid or seek medical attention immediately. Protective eye shields and appropriate clothing should be worn at all times. To avoid injury, always exercise caution when operating step-lift and be certain that hands, feet, legs and clothing are not in the path of the step-platform as it moves. Be cautious when using metallic (conductive) tools near heavy-current power supplies. Check under vehicle before drilling or cutting to avoid damage to the frame, subframe members, wiring, hydraulic lines, etc. Read and thoroughly understand operating instructions before attempting to operate step-lift. Inspect product before each use. If an unsafe condition exists, or there are unusual noises or movements, do not use it until the problem is corrected. Keep others clear during step-lift operation. The product requires regular maintenance. A thorough inspection is recommended at least once every six months. The product should always be maintained at its highest level of performance. 32DSL101.B 1-3 This page intentionally left blank. 1-4 32DSL101.B II. DESCRIPTION A. STEP-LIFT FUNCTIONS AND POSITIONS Refer to Table 2-1 for descriptions of steplift functions. Refer to Figure 2-1. These functions are controlled with two rocker switches on the control pendant. Refer to Figure 2-2 for illustrations of the step-lift in its stowed, floor level, and ground level positions. FIGURE 2-1: CONTROL PENDANT TABLE 2-1: STEP-LIFT FUNCTIONS FUNCTION UP DOWN UNLOCK DESCRIPTION Raises step/platform from either stow level or ground level. Releasing switch during upward motion halts movement. Lowers step/platform from either stow level or floor level. Releasing switch during downward motion halts movement. Releases the stow lock that secures the lift in the stow position. (The step-lift must be raised about four inches above the stow position to allow release of the stow lock. FIGURE 2-2: STEP/PLATFORM POSITIONS 32DSL101.B 2-1 B. MAJOR STEP-LIFT COMPONENTS FIGURE 2-3: STEP-ELEVATOR COMPONENTS Major components referred to throughout this manual are illustrated in Figures 2-3 and 2-4, and defined in Table 2-2. 2-2 32DSL101.B 32DSL101.B 2-3 FIGURE 2-4: WHEELCHAIR LIFT COMPONENTS TABLE 2-2: STEP-LIFT COMPONENTS REF NAME DESCRIPTION 1 Step Small, non-skid surface that supports a standing passenger; unfolds into a platform. 2 Handrails Provide a brace for standing passengers. 3 Stow-lock Manual Release Cable Cable used to manually unlock platform from its stowed position. 4 Emergency Override Switch Push-button switch used to enable pendant switch when platform interlock switch is inoperative; bypasses platform interlock switches. 5 Recessed Handle Provides a handgrip for unfolding and refolding platform sections. 6 Hydraulic Pump Assembly Electro-hydraulic power source that raises and lowers step-lift. 7 Manual Pump Handle Socket Socket on hydraulic pump assembly that manual pump handle is inserted into; used for manual lift operation. 8 Manual Pump Release Valve User accessible valve in hydraulic pump that is opened to lower step-lift; used for manual lift operation. 9 Platform Large, non-skid surface that supports a wheelchair; can be folded into a step. 10 Rear Platform Section Folding section of platform that is adjacent to inner rollstop. 11 Middle Platform Section Center section of folding platform. 12 Front Platform Section Folding section of platform that is adjacent to outer rollstop; outer rollstop is attached to its front edge. 13 Outer Rollstop Vertical barrier that helps to confine a wheelchair to platform; can be pivoted down for entry and exit. 14 Inner Rollstop Fixed vertical barrier that confines wheelchair to platform when platform is between floor level and ground. 15 Side Barrier Fixed barriers on left and right side of platform that help confine a wheelchair to platform. 16 Platform Section Release Handle T-handle locks front platform section to middle section; pulling it allows front section to be unfolded. 17 Front Section Handle Provides a handgrip for unfolding front platform section. 18 Rollstop Handle Provides a handgrip for outer rollstop. Used to lift rollstop out of its locking slots before moving it to open or stowed positions. 19 Vehicle Floor Interior floor area adjacent to fully raised step-lift. 20 Control Pendant Controls raising and lowering of step-lift. 2-4 32DSL101.B C. CONTROLS 1. CONTROL PENDANT Refer to Figure 2-5. The step-lift is raised and lowered with two rocker switches mounted in a small box, or pendant. The pendant is hard-wired to the step-lift with a cable. The pendant is usually stowed near the step-lift on a clip mounted to a vehicle interior wall. A lift function is initiated by pushing the end of the appropriate switch. Push and hold the end labeled UP to raise the step platform; releasing the rocker switch will immediately halt movement. Push and hold the end labeled DOWN to lower the step platform; releasing FIGURE 2-5: CONTROL PENDANT the rocker switch will immediately halt movement. Push and hold the end of the switch with the unlock symbol to release the stow lock (lock secures lift in stow position). NOTE: The step-lift must be raised about four inches above the stow position to allow release of the stow lock. 2. EMERGENCY OVERRIDE SWITCH Refer to Figure 2-6. There are three interlock switches, two sets of contacts, and a connector in the platform. All of these switches and contacts must be working properly to enable operation of the platform. If one of these components fails, the platform can be re-enabled with the override switch. This red switch is mounted on the left side of the left-hand column. Press and hold the override switch while using the pendant. FIGURE 2-6: OVERRIDE SWITCH 3. MANUAL STOW-LOCK RELEASE CABLE Refer to Figure 2-7. The stow lock secures the step/platform in the stow position. The cable is used to manually releases the step/platform and allow it to be lowered when normal power is not available to the step-lift. The cable is connected to a latch mechanism near the base of the right hand column. The step must be raised about four inches above the stow position to allow release of the latch. FIGURE 2-7: STOW-LOCK RELEASE 32DSL101.B 2-5 4. MIDDLE PLATFORM SECTION RELEASE HANDLE Refer to Figure 2-8. This T-handle is located at the right side of the platform, and secures the front platform section to the middle section. It is accessible after the middle section is unfolded from its step configuration. The T-handle is spring loaded to the lock position and is disengaged by pulling to the left. When the front section is refolded back onto the middle section, the spring will force the shaft of the T-handle into a hole in the platform right side barrier. 5. FIGURE 2-8: MIDDLE SECTION RELEASE T-HANDLE FRONT PLATFORM SECTION HANDLE AND ROLLSTOP HANDLE Refer to Figures 2-9. The front section handle is used to unfold the front platform section, or to grip the outer rollstop. When the platform is fully unfolded the handle is at the left end of the rollstop, as shown. When the rollstop is folded back against the front section the handle drops through a slot and protrudes out the back. This figure also shows the rollstop handle that is used to lift the rollstop out of its locking slots. The locking slots hold the rollstop in a vertical position. FIGURE 2-9: FRONT SECTION HANDLE AND ROLLSTOP HANDLE 6. MANUAL BACK-UP PUMP Refer to Figure 2-10. This pump is located on the right side of the right-hand column. When normal power is not available, the step-lift can be raised or lowered by using this manual back-up pump. The pump handle is stored near the pump. The handle is used to open and close the release valve or to pump the back-up pump. FIGURE 2-10: MANUAL BACK-UP PUMP -GO TO NEXT CHAPTER2-6 32DSL101.B III. OPERATING INSTRUCTIONS Safe and efficient use of the RICON PSL-10 Step Elevator and Wheelchair Lift requires a thorough understanding of its operation. Please read and understand all operating instructions before using step-lift. A. SAFETY PRECAUTIONS The following safety precautions must be observed at all times: • Refer to Figure 3-1. It is dangerous to use the step-lift when the vehicle is on sloped ground or a steeply crowned road. Always attempt to park vehicle on a level, or near level, surface before using step-lift. FIGURE 3-1: DO NOT USE STEP-LIFT WHEN VEHICLE IS ON SLOPED GROUND. • Vehicle must have the parking brake applied, the transmission in neutral/park, and the doors open before using step-lift. • Before deploying or stowing step-lift, check area around step-lift for objects that could interfere with step-lift operation. • • Do not change step-lift position unless operator can clearly see that it is safe to do so. • • Keep others clear while operating step-lift. • Wheelchair and scooter brakes are less effective when the platform is wet or the mobility equipment wheels are wet. Be cautious in wet conditions. • The step-lift is designed for one user at a time. Do not overload step-lift. Be certain mobility aid equipment fits safely on platform before entering or exiting vehicle. • • • • Never leave step-lift outside of vehicle; return step-lift to its stowed position after use. Inspect step-lift before loading passengers. Do not use step-lift if unsafe to do so, or if unusual noises or movements are present. Persons using mobility equipment (e.g., wheelchairs, scooters, etc.) must enter or exit vehicle slowly and carefully, and must always face OUTWARD. Do not allow children or others to play on step-lift, as this may be dangerous. Close supervision is necessary if step-lift is used near children. Do not allow arms or legs in or near any moving parts of step-lift. 32DSL101.B 3-1 B. DAILY SAFETY CHECK Inspect the step-lift each day, preferably just prior to use, and be certain that the following conditions are met: • All functions operate properly. DO NOT use if irregular noises or movements exist; contact an authorized Ricon service technician for repair. • • • No objects are present that may interfere with step-lift operation. C. General appearance and lubrication are satisfactory. All fasteners are tight. STEP-LIFT OPERATION WARNING IMPROPER USE OF THE STEP-LIFT CAN RESULT IN PERSONAL INJURY. OPERATORS MUST READ AND FOLLOW THE OPERATING INSTRUCTIONS IN THIS MANUAL. COPIES OF THIS MANUAL ARE AVAILABLE FROM: RICON CORPORATION 7900 NELSON ROAD PANORAMA CITY, CA 91402 (800) 322-2884 OR (818) 267-3000 q PRIOR TO USE, INSPECT STEP-LIFT COMPONENTS FOR PROPER FUNCTION, REQUIRED MAINTENANCE OR DAMAGE. DO NOT USE IF A PROBLEM EXISTS, AND SEEK AN AUTHORIZED RICON SERVICE TECHNICIAN FOR REPAIR. q DO NOT EXCEED STEP-LIFT LOAD CAPACITY OF 600 POUNDS (272 KILOGRAMS). q THE STEP-LIFT IS DESIGNED FOR USE BY PEOPLE WHO CANNOT CLIMB STEPS, OR WHO MUST USE MOBILITY-AID EQUIPMENT (I.E., WHEELCHAIRS & WALKERS). RICON CORPORATION DISCLAIMS LIABILITY FOR DAMAGE OR PERSONAL INJURY RESULTING FROM IMPROPER INSTALLATION, MODIFICATION TO THE STEP-LIFT OR OTHER COMPONENTS, LACK OF MAINTENANCE OR REPAIR, NEGLIGENCE, ABUSE OR FAILURE TO FOLLOW THE OPERATING INSTRUCTIONS. • Be certain that vehicle is safely parked on near level ground and is away from traffic, before operating the step-lift. Provide space for step-lift operation, and the entering and exiting of passengers. Be certain that the touch down area for the step-lift is unobstructed. • The step-lift will deploy only when the transmission is in neutral/park, and the door adjacent to the step-lift is open. • • Observe the Safety Precautions section at the beginning of this chapter. • 3-2 Use of the vehicles transmission will be restored when the step-lift is fully stowed and the door closed. Refer to Figures 2-3 and 2-4 in Chapter 2 for the locations of the handles, latches, etc, used to operate the step-lift. 32DSL101.B 1. NORMAL STEP OPERATION a. b. Prepare Vehicle: 1) Stop vehicle. 2) Turn the step-lift main power switch ON, if present. Some vehicles may not be equipped with a separate power switch for the step-lift. 3) Apply the vehicle parking brake, place transmission in neutral/park and open door at step-lift. 4) Caution people in vicinity that step-lift is about to deploy. Vehicle beeper alert will sound at this time, if so equipped. RAISE Step-Lift to floor level. 1) c. d. Press and hold UP button on control pendant; step-lift will stop at floor level. LOWER Step-Lift to ground level. 1) Press and hold UP button until step is 4-5 inches above stow level. 2) Press and hold the UNLOCK button on the control pendant. 3) Press and hold DOWN button (while holding UNLOCK button); step will stop at ground level. ENTER vehicle from GROUND level: 1) Passenger must stand on step facing INWARD and hold handrails. 2) Press and hold UP button; step-lift will stop at floor level. CAUTION Headroom will DECREASE as step-lift approaches interior floor level. 3) e. f. Passenger enters vehicle. EXIT vehicle from floor level: 1) Passenger must stand on step facing OUTWARD and hold handrails. 2) Press and hold UNLOCK button. 3) Press and hold DOWN button (while holding UNLOCK button); step will stop at ground level. 4) Passenger deboards. STOW step 1) From FLOOR level: 2) Press and hold DOWN button; step-lift will stop at STOW level. 3) From GROUND level: • Press and hold UP button; step-lift will stop at floor level. • Press and hold DOWN button; step-lift will stop at STOW level. 32DSL101.B 3-3 2. NORMAL WHEELCHAIR LIFT OPERATION a. b. Prepare Vehicle: 1) Stop vehicle. 2) Turn the step-lift main power switch ON, if present. Some vehicles may not be equipped with a separate power switch for the step-lift. 3) Apply vehicle parking brake, place transmission in neutral/park and open door at step-lift. 4) Caution people in vicinity that step-lift is about to deploy. Vehicle alert beeper will sound at this time, if so equipped. DEPLOY wheelchair lift from STOW position: 1) Press and hold UP button; step-lift will stop at floor level. CAUTION Recessed Handle may pinch fingertips when step is near end of its unfolding movement. 2) Refer to Figure 3-2. Grasp the recessed handle (located at left side of step) with palm UP and unfold middle FIGURE 3-2: UNFOLD STEP WITH platform section. PALM UP 3) Refer to Figure 3-3. Unlatch front platform section by pulling platform release T-handle (located at right side of platform) to the left. FIGURE 3-3: UNLATCH FRONT PLATFORM SECTION 3-4 32DSL101.B 4) Refer to Figure 3-4. Grasp front section handle (located at left side of front platform section) with left hand and begin to unfold. When this section is vertical, release left hand and grasp top edge with right hand. Finish unfolding. FIGURE 3-4: UNFOLD FRONT PLATFORM SECTION 5) Refer to Figure 3-5. Grasp rollstop handle and raise outer rollstop to vertical position. Drop it into locking slots, and then test rollstop to be certain it is locked in place. FIGURE 3-5: RAISE OUTER ROLLSTOP c. LOWER occupied platform from FLOOR level for deboarding: 1) Test the outer rollstop to be certain it is locked in the RAISED position. 2) Place passenger (on mobility-aid equipment) on platform facing OUTWARD. 3) Release stow-lock by pressing and holding the UNLOCK button. 4) Press and hold DOWN button (while holding UNLOCK button); platform will stop at ground level. 5) Refer to Figure 3-6. Grasp rollstop handle and lift outer rollstop out of locking slots (about an inch). Lower to ground. 6) FIGURE 3-6: LOWER OUTER ROLLSTOP Deboard passenger. 32DSL101.B 3-5 d. e. RAISE occupied platform from GROUND level for boarding: 1) Refer to Figure 3-7. Grasp rollstop handle and lift outer rollstop out of locking slots (about an inch). Lower to ground. 2) Place passenger (on mobility-aid equipment) on platform facing OUTWARD. 3) Refer to Figure 3-8. Grasp rollstop handle and raise outer rollstop to vertical position, then drop it into locking slots. Test rollstop to be certain it is locked in place. 4) Press and hold UP button; step-lift will stop at floor level. 5) Board passenger into vehicle. FIGURE 3-7: LOWER OUTER ROLLSTOP STOW Platform: From FLOOR level or GROUND level: 1) 2) Press and hold UP button until platform is at floor level, if it is not already there. FIGURE 3-8: RAISE OUTER ROLLSTOP Refer to Figure 3-9. Store outer rollstop by lifting and folding it rearward from either its vertical or open position. FIGURE 3-9: STORE OUTER ROLLSTOP CAUTION Keep fingertips away from folding platform sections. 3-6 3) Refer to Figures 3-3 and 3-4. Grasp front edge of outer platform section and lift to vertical position. Shift grasp to front section handle (protruding through left side of section) and finish folding section rearward. Observe that platform section release T-handle (located at right side of platform) has securely engaged hole in right side barrier. 4) Carefully fold remaining platform section. 5) Press and hold DOWN button; step-lift will stop at STOW position. 32DSL101.B 3. MANUAL OPERATION The step lift can be operated manually if normal lift power is not present. This procedure describes manual operation of the step-lift in its platform configuration. Omit steps that describe unfolding of platform sections when using step-lift in its step configuration. a. Prepare Vehicle: Be certain vehicle is on a level area and away from traffic. Provide adequate space for safe lift operation and passenger boarding. If vehicle has broken down and the parking situation is unsafe then operator must summon emergency assistance to move vehicle before operating lift. ♦ Check for obstacles that may be in path of step-lift as it deploys. ♦ Open door(s) completely. ♦ Caution people in vicinity that step-lift will deploy; vehicle beeper alert may sound at this time, if so equipped. WARNING FOLLOW SAFETY PRECAUTIONS AT BEGINNING OF THIS CHAPTER WHEN USING MANUAL BACK-UP SYSTEM TO ENTER OR EXIT VEHICLE. b. Deboard Passengers 1) Refer to Figure 3-10. Locate manual back-up pump on right side of right column. Insert pump handle into socket on manual pump and pump until step-lift is about four inches above stow level. If step-lift does not rise refer to Figure 3-11 and check that release valve is closed. FIGURE 3-10: RAISE STEP-LIFT ABOUT 4" 32DSL101.B FIGURE 3-11: CLOSE RELEASE VALVE 3-7 CAUTION Recessed handle may pinch fingertips when step nears end of unfolding movement. 2) Refer to Figure 3-12. Grasp the recessed handle (located at left side of step) with palm UP and unfold middle platform section. FIGURE 3-12: UNFOLD STEP WITH PALM UP 3) Refer to Figure 3-13. Unlatch front platform section by pulling platform release T-handle (located at right side of platform) to the left. FIGURE 3-13: UNLATCH FRONT PLATFORM SECTION 4) Refer to Figure 3-14. Grasp front section handle (located at left side of front platform section) with left hand and begin to unfold front section. When it is vertical, release left hand and grasp top edge with right hand. Finish unfolding. FIGURE 3-14: UNFOLD FRONT PLATFORM SECTION 3-8 5) Refer to Figure 3-15. Grasp rollstop handle and raise outer rollstop to vertical position, then drop it into locking slots. Test rollstop to be certain it is locked in place. 6) Resume pumping until platform is at floor level. 7) Place passenger (on mobility-aid equipment) on platform facing OUTWARD. 32DSL101.B FIGURE 3-15: RAISE OUTER ROLLSTOP 8) Refer to Figure 3-16. Pull and hold the manual release cable (located below the pump on the side of right column). FIGURE 3-16: RELEASE STOW-LOCK 9) Refer to Figure 3-17. Engage pump release valve with notched end of pump handle. Turn valve 1/4 turn COUNTERCLOCKWISE to begin lowering platform. Hold valve open until platform settles at ground level. Turn handle CLOCKWISE to close valve; DO NOT OVERTIGHTEN VALVE. FIGURE 3-17: OPEN RELEASE VALVE 10) Refer to Figure 3-18. Grasp rollstop handle and lift outer rollstop out of locking slots (about an inch). Lower to ground. 11) Deboard passenger. 12) The platform can be refolded back into its step arrangement, and the manual pump used to return step lift to its stowed position. Refer to “STOW Platform” paragraph in previous “Normal Step-Lift Operation” section for details. FIGURE 3-18: LOWER OUTER ROLLSTOP 32DSL101.B 3-9 c. Board Passengers WARNING FOLLOW "SAFETY PRECAUTIONS" AT BEGINNING OF THIS CHAPTER WHEN USING MANUAL BACK-UP SYSTEM TO ENTER OR EXIT VEHICLE. 1) Refer to Figure 3-19. Locate manual back-up pump on right side of right column. Insert pump handle into socket on manual pump and pump until step lift is about four inches above stow level. If step-lift does not rise, refer to Figure 3-20 and be certain release valve is closed. FIGURE 3-20: CLOSE RELEASE VALVE FIGURE 3-19: RAISE STEP-LIFT ABOUT 4" CAUTION Recessed handle may pinch fingertips when step nears end of its unfolding movement. 2) Refer to Figure 3-21. Grasp the recessed handle (located at left side of step) with palm UP and unfold middle platform section. FIGURE 3-21: UNFOLD STEP WITH PALM UP 3 - 10 32DSL101.B 3) Refer to Figure 3-22. Unlatch front platform section by pulling platform release T-handle (located at right side of platform) to the left. FIGURE 3-22: UNLATCH FRONT PLATFORM SECTION 4) Refer to Figure 3-23. Grasp hoop handle (located at left side of front platform section) with left hand and begin to unfold front section. When it is vertical, release left hand and grasp top edge with right hand. Finish unfolding. FIGURE 3-23: UNFOLD FRONT PLATFORM SECTION 5) Refer to Figure 3-24. Grasp rollstop handle and raise outer rollstop to vertical position, then drop it into locking slots. Test rollstop to be certain it is locked in place. FIGURE 3-24: RAISE OUTER ROLLSTOP 32DSL101.B 3 - 11 6) Refer to Figure 3-25. Pull and hold manual release cable (located below the pump on side of right column). FIGURE 3-25: PULL MANUAL RELEASE CABLE 3 - 12 7) Refer to Figure 3-26. Engage pump release valve with notched end of pump handle. Turn valve 1/4 turn COUNTERCLOCKWISE to begin lowering platform. Hold valve open until platform settles at ground level. Turn handle CLOCKWISE to close valve; DO NOT OVERTIGHTEN VALVE. 8) Place passenger (on mobilityaid equipment) on platform facing OUTWARD. 9) Refer to Figure 3-27. Grasp rollstop handle and raise outer rollstop to vertical position, then drop it into locking slots. Test rollstop to be certain it is locked in place. 10) Pump platform up to floor level. 11) Board passenger into vehicle. 12) The platform can be refolded back into its step arrangement FIGURE 3-27: RAISE OUTER ROLLSTOP and the release valve used to return step lift to its stowed position. Refer to “STOW Platform” paragraph in previous “Normal Step-Lift Operation” section for detailed instructions. 32DSL101.B FIGURE 3-26: OPEN RELEASE VALVE IV. MAINTENANCE Regular maintenance and safety inspections of the RICON PSL-10 Step Elevator and Wheelchair Lift can provide optimum performance and reduce the need for repairs. Refer to the PSL-10 Service Manual for complete maintenance and troubleshooting instructions. CAUTION This Ricon product is highly specialized. Maintenance must be performed by a Ricon authorized service technician using Ricon replacement parts. Modification or improper maintenance of this product will void the warranty and may result in unsafe step-lift operating conditions. A. DAILY SAFETY CHECK Daily Safety inspections should be performed according to Table 4-1. Maintenance should be performed more frequently under conditions of heavy use (in excess of 20 cycles per day). TABLE 4-1: DAILY SAFETY CHECK SERVICE POINT CHECK STEP LIFT STOWED Control Pendant Hydraulic Power Unit Vehicle Interlock System Control pendant for damage and cable connectors for tightness. 1. Visible hydraulic fluid leakage. 2. Backup pump manual release valve is closed (lightly-seated). CAUTION One person must be in driver seat to maintain vehicle control during following check. One operator sets parking brake, depresses vehicle brake pedal, turns on ignition and places transmission in gear. The second operator opens vehicle side door(s) and verifies that lift DOES NOT operate. Handrails Handrail mounting bolts are tight. Platform Platform unfolds smoothly (no grinding noise or binding) and all joints are secure. Decals are securely attached, clearly visible and legible. Rollstop can be locked in upright position. RAISE PLATFORM TO FLOOR LEVEL Listen for abnormal noises as step-lift operates (i.e. grinding or binding noises). Step-lift rises fully to floor level Lift stops at step level when Stow Lock is engaged. LOWER PLATFORM TO GROUND LEVEL Listen for abnormal noises as lift operates (i.e. grinding or binding noises). Lift travels completely to ground level. PLATFORM DEPLOYED Decals Outer Rollstop Step-Lift Operation Step-Lift Travel Platform Level Step-Lift Operation Step-Lift Travel 32DSL101.B 4-1 Outer Rollstop Hydraulic Power Unit Outer Rollstop Platform Stow Lock (continued) Rollstop opens fully and locks in upright position. Hydraulic fluid level in reservoir. STOW LIFT Rollstop pivots down flush against platform. Platform folds completely into step configuration. Stow Lock securely engages lift at stow level. END OF TABLE B. STEP-LIFT DECALS Refer to Figure 4-1. Check the condition of all decals for chipping, peeling, fading and illegibility. Check at the intervals listed in Table 4-1, and replace decals as necessary. The decals should be located and orientated as shown. Part numbers for individual decals are given here, with the exception of the serial number decal, which can only be replaced by Ricon. 1 RICON PSL-10 STEP ELEVATOR and WHEELCHAIR LIFT OPERATING INSTRUCTIONS FIGURE 4-1: DECAL LOCATIONS 4-2 32DSL101.B