1
Service Manual
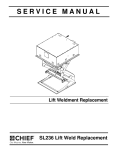
SL236 Lifting Link Replacement
REMOVING LIFTING LINKS
NOTE: As soon as the bolt is removed, that side of lift will shift,
placing weight of mechanism on wire ties installed in
Steps 2 and 3.
1.
Lower lift.
2.
Attach 18ga wire tie or something of equivalent strength to
the joist mounting tabs on the SL236.
3.
Connect these wires to the front of hinge assembly. (See
Figure 1)
IMPORTANT ! : Wires should be connected in minimum
of two places to prevent the hinge assembly from
dropping.
5.
Remove lifting link. (See Figure 2)
6.
Repeat for other side of lift.
REPLACING LIFTING LINKS
1.
Insert appropriate lifting link--right (A) or left (B).
2.
Fasten lifting link in place using one 1/4-20 x 3/8" button
head cap screw (C) in bottom of lifting link, and one 1/4-20
locknut (D) in top of lifting link. (See Figure 3)
Joist Mounting Tabs
(A) or (B)
1
2
(C)
(D)
Figure 1
4.
Remove one allen head bolt from bottom of lifting link, and
one locknut from top of lifting link. (See Figure 2)
Figure 3
3.
Repeat for other side of lift.
4.
Remove wire ties installed at beginning of process.
Locknut
4
5
Lifting link
Figure 2
3