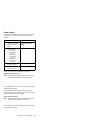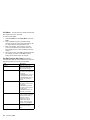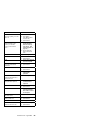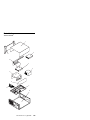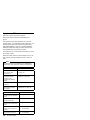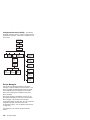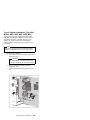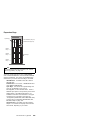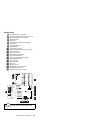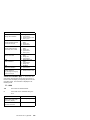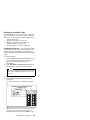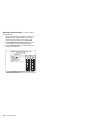
1
IBM PC Servers S30H-2501-01 Hardware Maintenance Manual March 1996 Use this manual with the PS/2 Hardware Maintenance Manual IBM Note Before using this information and the product it supports, be sure to read the general information under “Notices” in your manual. Second Edition (March 1996) The following paragraph does not apply to the United Kingdom or any country where such provisions are inconsistent with local law: INTERNATIONAL BUSINESS MACHINES CORPORATION PROVIDES THIS PUBLICATION “AS IS” WITHOUT WARRANTY OF ANY KIND, EITHER EXPRESS OR IMPLIED, INCLUDING, BUT NOT LIMITED TO, THE IMPLIED WARRANTIES OF MERCHANTABILITY OR FITNESS FOR A PARTICULAR PURPOSE. Some states do not allow disclaimer of express or implied warranties in certain transactions, therefore, this statement may not apply to you. This publication could include technical inaccuracies or typographical errors. Changes are periodically made to the information herein; these changes will be incorporated in new editions of the publication. IBM may make improvements and/or changes in the product(s) and/or the program(s) described in this publication at any time. It is possible that this publication may contain reference to, or information about, IBM products (machines and programs), programming, or services that are not announced in your country. Such references or information must not be construed to mean that IBM intends to announce such IBM products, programming, or services in your country. Requests for technical information about IBM products should be made to your IBM reseller or IBM marketing representative. Copyright International Business Machines Corporation 1995, 1996. All rights reserved. Note to U.S. Government users–Documentation related to Restricted rights–Use, duplication, or disclosure is subject to restrictions set forth in GSA ADP Schedule Contract with IBM Corp. ii PC Server HMM About This Supplement This supplement contains diagnostic information, Symptom-to-FRU Indexes, service information, error codes, error messages, and configuration information for the following PC Servers and Expansion Enclosures. 300 Type 8640 310 Type 8639 320 Type 8640 500 Type 8641 500 System/390 Type 8641 520 Type 8641 720 Type 8642 SCSI Multi-Storage Enclosure Type 3517 Enterprise Expansion Enclosure Type 3518 This supplement should be used with the advanced diagnostic tests and the information in the IBM Personal System/2 Hardware Maintenance Manual (part number 83G8990, form number S52G-9971) to troubleshoot problems effectively. Important This manual is intended for trained servicers who are familiar with IBM PC Server products. Before servicing an IBM product, be sure to review “Safety Information” on page 456. iii Related Publications The following publications are available for IBM products. For more information, contact IBM or an IBM Authorized Dealer. iv For Information About See Publication PS/2 Computers IBM Personal System/2 Hardware Maintenance Manual (S52G-9971) PS/ValuePoint Computers IBM PS/ValuePoint Hardware Maintenance Service and Reference (S61G-1423) Laptop, Notebook, Portable, and ThinkPad Computers (L40, CL57, N45, N51, P70/P75, ThinkPad 300, 350, 500, 510, 710T, Expansion Unit, Dock I, Dock II) IBM Mobile Systems Hardware Maintenance Manual Volume 1 (S82G-1501) ThinkPad Computers (ThinkPad 340, 355, 360, 370, 700, 701, 720, 750, 755) IBM Mobile Systems Hardware Maintenance Manual Volume 2 (S82G-1502) ThinkPad Computers (ThinkPad 365, 760) IBM Mobile Systems Hardware Maintenance Manual Volume 3 (S82G-1503) Monitors (Displays) (February 1993) IBM PS/2 Display HMM Volume 1 (SA38-0053) Monitors (December 1993) IBM Color Monitor HMM Volume 2 (S71G-4197) IBM Monitors (P Series) (February 1996) IBM Monitor HMM Volume 3 (S52H-3679) IBM 2248 Monitor (February 1996) IBM Monitor HMM Volume 4 (S52H-3739) Disk Array technology overview and using the IBM RAID Configuration Program Configuring Your Disk Array booklet (S82G-1506) Installation Planning for Personal System/2 computers Personal System/2 Installation Planning and Beyond (G41G-2927) Installation Planning for Advanced Personal System/2 Servers Advanced PS/2 Servers Planning and Selection Guide (GG24-3927) PC Server HMM Contents About This Supplement . . . . . . . . . . . . . . Related Publications . . . . . . . . . . . . . . . iii iv General Checkout/Diagnostics QAPlus/PRO . . . General Checkout (QAPlus/PRO) . . . . . . . . . Diagnostics (QAPlus/PRO) . . . . . . . . . . . . 3 4 5 PC Server 300 - Type 8640 . . . Features . . . . . . . . . . . . Diagnostics and Test Information Additional Service Information . . Locations (486DX2 System Board) Locations (Pentium System Board) Symptom-to-FRU Index . . . . . Parts Listing . . . . . . . . . . . . . . . . . . . . . . . . . . . . . . . . . . . . . . . . . . . . . . . . . . . . . . . . . . . . . . . . . . . . . . . . . . . . . . . . . . 15 17 18 18 25 29 32 47 PC Server 310 - Type 8639 . . . Features . . . . . . . . . . . . Diagnostics and Test Information Additional Service Information . . Locations . . . . . . . . . . . . Symptom-to-FRU Index Supplement Parts Listings . . . . . . . . . . . . . . . . . . . . . . . . . . . . . . . . . . . . . . . . . . . . . . . . . . . . . . . . . . . . . . . . . . . . . . . 53 55 56 67 89 95 119 PC Server 320 - Type 8640 . . Features . . . . . . . . . . . Diagnostics and Test Information Additional Service Information . Locations . . . . . . . . . . . Symptom-to-FRU Index . . . . Parts Listings . . . . . . . . . . . . . . . . . . . . . . . . . . . . . . . . . . . . . . . . . . . . . . . . . . . . . . . . . . . . . . . . . . . . . . . 127 128 129 130 155 164 169 PC Server 500 - Type 8641 . . Features . . . . . . . . . . . Diagnostics and Test Information Additional Service Information . Locations (System Board) . . . Symptom-to-FRU Index . . . . Parts Listing . . . . . . . . . . . . . . . . . . . . . . . . . . . . . . . . . . . . . . . . . . . . . . . . . . . . . . . . . . . . . . . . . . . . . . . 177 178 178 179 208 209 218 8641 . . . . . . . . . . . . . . . . . . . . . . . . . . . . . . . . 221 222 223 223 241 241 PC Server 520 - Type 8641 . . . . . . . . . . . Features . . . . . . . . . . . . . . . . . . . . Diagnostics and Test Information (Models EZO, EZV, EZL, EZS, EZE) . . . . . . . . . . . . . . . . 243 245 IBM PC Server 500 System/390 - Type Features . . . . . . . . . . . . . . Diagnostics and Test Information . . Additional Service Information . . . . Locations . . . . . . . . . . . . . . Parts Listing . . . . . . . . . . . . Copyright IBM Corp. 1996 248 v Diagnostics and Test Information (Models MZO, MZV, MZS, MZE, MZL) . . . . . . . . . . . . . . . Additional Service Information . . . . . . . . . . Locations (Models EZO, EZV, EZL, EZS, EZE) . . Locations (Models MZO, MZV, MZS, MZE, MZL) . Symptom-to-FRU Index . . . . . . . . . . . . . Parts Listings . . . . . . . . . . . . . . . . . . 251 256 294 301 308 318 PC Server 720 - Type 8642 Features . . . . . . . . . Diagnostic Information . . . Additional Service Information Locations . . . . . . . . . Symptom-to-FRU Index . . Parts Listing . . . . . . . . . . . . . . . . . . . . . . . . . . . . . . . . . . . . . . . . . . . . . . . . . . . . . . . . . . . . . . . . . . . . . . . . . . . . . . . . . . . 325 327 328 330 370 376 399 SCSI Multi-Storage Enclosure - Type 3517 Features . . . . . . . . . . . . . . . . Diagnostics and Test Information . . . . Additional Service Information . . . . . . Locations . . . . . . . . . . . . . . . . Symptom-to-FRU Index Supplement . . . Parts Listing . . . . . . . . . . . . . . . . . . . . . . . . . . . . . . . . . . . . . . . . . 405 406 407 407 412 416 420 PC Server Enterprise Expansion Enclosure - Type 3518 . . . . . . . . . . . . . . . . . . . . . Features . . . . . . . . . . . . . . . . . . . . Diagnostics and Test Information . . . . . . . . Additional Service Information . . . . . . . . . . Locations . . . . . . . . . . . . . . . . . . . . Symptom-to-FRU Index . . . . . . . . . . . . . Parts Listings . . . . . . . . . . . . . . . . . . Related Service Information . . . . . . . . . . Safety Information . . . . . . . . . . . . . . . Battery Notice . . . . . . . . . . . . . . . . . Disk Array Configuration . . . . . . . . . . . . . Drive Maintenance . . . . . . . . . . . . . . . Display . . . . . . . . . . . . . . . . . . . . . Ethernet Quad-BT and -B2 PeerMaster Micro Channel Adapters . . . . . . . . . . . . . . . External SCSI Devices . . . . . . . . . . . . . Hot-Swap Backplane (FRU No. 06H8388) . . . . IDE Controllers . . . . . . . . . . . . . . . . . Installing an Uninterruptible Power Supply . . . . Keyboard . . . . . . . . . . . . . . . . . . . . Multiple Fixed Disk Drive Replacement (RAID Array) Network Adapters Supported (Dual Processor Servers) . . . . . . . . . . . . . . . . . . . OS/2 Trap Errors . . . . . . . . . . . . . . . . PC Server Flash/Diagnostics/CMOS Access Information . . . . . . . . . . . . . . . . . . Printer . . . . . . . . . . . . . . . . . . . . . vi PC Server HMM 423 424 425 426 434 446 448 453 456 461 461 479 490 490 508 512 513 514 515 515 518 519 522 524 SCSI Fast/Wide PCI Adaptec Adapters (AHA-2940/2940W) . . . . . . . . SCSISelect Utility Program . . . . . Setting the Motor-Start Jumper . . . ServerGuide . . . . . . . . . . . . Software/Hardware Mismatch Problems Undetermined Problems . . . . . . . Problem Determination Tips . . . . . Phone Numbers, U.S. and Canada . . Trademarks . . . . . . . . . . . . . . . . . . . . . . . . . . . . . . . . . . . . . . . . . . . . . . . 525 547 549 550 550 552 553 555 . . . . . . . . . . . . . . . . . . 557 Contents vii General Checkout/Diagnostics QAPlus/PRO The following Maintenance Analysis Procedure (MAP) and diagnostic information should be used to isolate problems on servers that are supported by the QAPLus/PRO Diagnostics test. Copyright IBM Corp. 1996 3 General Checkout (QAPlus/PRO) This general checkout procedure is for computers that are supported by the QAPlus/PRO Diagnostics test. Diagnostic error messages appear when a test program finds a problem with a hardware option. For the test programs to properly determine if a test Passed, Failed, or Aborted, the test programs check the error-return code at test completion. (See “Return Codes” on page 7.) General error messages appear if a problem or conflict is found by an application program, the operating system, or both. For an explanation of these messages, refer to the information supplied with that software package. Notes 1. If multiple error codes are displayed, diagnose the first error code displayed. 2. If the computer hangs with a POST error, go to the "Symptom-to-FRU Index" for the system you are servicing. 3. If the computer hangs and no error is displayed, go to “Undetermined Problems” on page 552. 4. If a device cannot be select from the Module Test menu, that device may be defective. 001 – – – – – – – Power-off the computer and all external devices. Check all cables and power cords. Set all display controls to the middle position. Insert the QAPlus/PRO Diagnostics diskette into drive A. Power-on all external devices. Power-on the computer. Check for the following responses: 1. One beep. 2. Readable instructions or the Main Menu. DID YOU RECEIVE THE CORRECT RESPONSES? Yes No 002 Find the failure symptom in the "Symptom-to-FRU Index" for the system you are servicing. 003 Run the Advanced Diagnostics Test. If necessary, refer to “Diagnostics (QAPlus/PRO)” on page 5. If you receive an error, go to the "Symptom-to-FRU Index" for the system you are servicing. 4 PC Server HMM Diagnostics (QAPlus/PRO) The following tools are available to help identify and resolve hardware-related problems: Power-on self-test (POST) POST Beep Codes Test programs Error messages Diagnostics Diskette Power-On Self-Test (POST) Each time you turn on the system, it performs a series of tests that check the operation of the system and some options. This series of tests is called the power-on self-test, or POST. POST does the following: Checks some basic system-board operations Checks the memory operation Starts the video operation Verifies that the diskette drives are working Verifies that the hard disk drive is working If the POST finishes without detecting any problems, a single beep sounds and the first screen of your operating system or application program appears. If the POST detects a problem, an error message appears on your screen. A single problem can cause several error messages to appear. When you correct the cause of the first error message, the other error messages probably will not appear on the screen the next time you turn on the system. POST Beep Codes The Power On Self-Test generates a beeping sound to indicate successful completion of POST or to indicate that the tests detect an error. One beep and the appearance of text on the display indicates successful completion of the POST. More than one beep indicates that the POST detects an error. Test Programs The QAPlus/PRO test programs, developed by DiagSoft for IBM, are the primary method of testing the PC Server. You can use them to test the IBM components of the system and some external devices. The amount of time required to test all components depends on the number of components. The more optional adapters and devices you have attached to your system, the longer the testing takes. The test programs on the Diagnostic Diskette include the following features: General Checkout/Diagnostics QAPlus/PRO 5 Feature Description Advanced Diagnostic Tests Identifies most problems associated with the following major components: Flexible Test Control Allows you to: System board Hard disk drives Diskette drives CD-ROM drives RAM Serial and parallel ports Video adapter Printer Keyboard Mouse Run groups of tests in batch Specify parameters to use for each test (for example, video modes, disk cylinders, port addresses, and so on) Specify the number of passes you want to run (one to continuous) Log the test results to a text dBase (DBF) format file Save all test settings for future use View System Information View the server's configuration information. (For example, you can view the IRQ/DMA assignments, memory usage, device drivers, and so on.) Select System Utilities Run a low-level format also contains system utilities. Format a diskette Error Messages Messages generated by the software—the operating system or application programs—generally are text messages, but they also can be numeric. Basically, there are five types of error messages. 6 POST error messages Diagnostic error messages POST beep codes Software generated messages. Multiple messages Error Message Description POST Error Messages Displayed when POST finds problems with the hardware or detects a change in the hardware configuration. POST Beep Codes Sounds emitted from the speaker if POST finds a problem. One beep indicates POST completed successfully. Multiple beeps indicate a problem was found by the POST. PC Server HMM Error Message Description Diagnostic Error Messages Displayed when a test program finds a problem with a hardware option. Software Generated Error Messages Displayed if a problem or conflict is found by an application program, the operating system, or both. For an explanation of these messages, refer to the information supplied with that software package. Multiple Messages The first error that occurs can causes additional errors. Follow the suggested action of the first error displayed. In this case, the system displays more than one error message. Always follow the suggested action instructions for the first error message displayed. Return Codes For the test programs to properly determine if a test Passed, Failed, or Aborted, the test programs check the error-return code at test completion. To register the test properly in the test log, the test programs must generate one of the following return codes: Return Code Description 0 Indicates that the device passed its test. 1 Indicated that the device failed its test. 2 or greater Indicates that the test stopped or was aborted. General Checkout/Diagnostics QAPlus/PRO 7 Using the Test Programs The test programs provide advanced functions and utilities for power users and service or support professionals to troubleshoot even the most difficult problems. Program Navigation: You can maneuver within the test programs by typing the first letter of a menu choice, using the function keys, or using command-line options. Using the First Letter of a Menu Choice Throughout the test programs, pressing the first letter of an option on a menu is the same as moving to that item with the cursor and pressing Enter; however, this function is not enabled on Test Group Screens. Using the Function Keys Use the following keys to maneuver throughout the test programs: Keys Action Enter Select an item, run the test module, or run the test Down Arrow (↓) Moves the cursor down Up Arrow (↑) Moves the cursor up F1 Calls up the appropriate Help information. Use the up arrow key (↑) or the down arrow key (↓) to scroll through the information. Pressing F1 from within a Help screen provides a help index from which you can select different categories. One of the important help categories is function key usage. Pressing Esc exits Help and returns to where you left off. Esc Go back to the previous menu Additional functions are available in the Test Module Selection screen and the Test Group screen using the following keys: 8 Keys Action Tab Move to test group (or move to parameters) Spacebar Toggle modules on/off (or toggle tests on/off) F2 View test results log F10 Local menu + Next logical unit number (for example, LUN 1, LUN 2, and so on) − Previous logical unit number PC Server HMM Command Line Options The following Command Line Options are available when initially starting the diagnostic program from within its directory. Type QAPLPRO/XXX (where /XXX represents one of the following from the list below) then press Enter. Command Action /B&W The /B&W command line option forces the program to load in Black and White (Monochrome) mode, which is often more readable on laptop computers. /LOG=file The /LOG=file command line option directs the test programs to start using a specified Error Log file. /INT10 The /INT10 command line option forces the test programs to use the BIOS for screen writes. /OXXX The /OXXX command line option, where XXX=test group (for example, MBD/MEM/VID/HDU/FDU/KBD/COM/LPT, and so on), omits the designated test group from testing. /USRCONFIG =file The /USERCONFIG=file command line option tells the test programs to look for a user diagnostic configuration file other than the default USERDIAG.CFG. /SCRIPT =file[,R] The /SCRIPT=file[,R] command line option with the “,R” runs the selected script. Please see “Scripting” on page 10 for a description of scripting. Note: You can use a “–” instead of a “/” as the command line switch. Viewing the Test Groups: As you move the cursor bar up or down in the Test Module Selection window, the right hand screen changes to show the attributes, parameters, and the selected tests of the corresponding Test Group. The diamond “♦” mark indicates a module selected for testing. The indicated attributes are characteristics of the selected test module that are used by the test programs to determine which tests to run or how to run selected tests. Attributes are also used to limit the allowable range of parameters (for example, – ending cylinder). Parameters are values you select to establish the scope of tests. For example, you can select Extended Memory testing parameters and limit the testing to a specific range of test blocks by specifying the starting and ending memory block. This might be appropriate if prior experience indicates that problems are likely to exist in a General Checkout/Diagnostics QAPlus/PRO 9 specific area of memory. By selecting these limiting parameters, you reduce memory testing time. Scripting: Scripting allows you to select specific groups of tests, testing parameters, and options. Your selection is saved for later use as a test Script. To set up a test script, first select all the appropriate test groups and specific tests you want to run from the Module Testing section under Diagnostics. You should also select appropriate testing parameters and options. See “Program Navigation” on page 8, for instructions to save a test script. Changing Logical Unit Numbers: In some instances, you can have more than one logical unit number (LUN) for a particular module. LUNs represent individual devices within a test group or module. For example, you might have two diskette drives or two hard disk drives; or, you might have base, extended, shadow, and cache memory installed in the computer. This configuration might result in as many as four or five different LUNs in the Memory Test Group. Or you might have base, extended, shadow, and cache memory installed in the system which might result in as many as four or five different LUNs in the Memory Test Group. From either the Module Test Menu or the Test Group window, you can change to a different LUN (where applicable) by pressing the plus (+) key (next LUN), or the minus (−) key (previous LUN). Test Group Specifications: In the upper-right-hand portion of the testing screen (or just the upper portion if you switched to an individual test group screen) are the specifications for the related test group. Note: In the Hard Disk Test Group specification area, if a software program was to compress your drive, the indicated size is the compressed size of the logical drive. Starting the QAPlus/PRO Diagnostics Diskette 1. Insert the QAPlus/PRO Diagnostics Diskette into drive A. 2. Power-on the computer. 3. When the QAPlus/PRO Diagnostics Main Menu is displayed, press Ctrl+A. 4. Select Diagnostics; then, press Enter. 5. Follow the instructions that appear on your screen. If an error is displayed, go to the "Symptom-to-FRU Index" for the system you are servicing. 10 PC Server HMM Module Testing Mode If the test programs do not find a problem, or you want to perform in-depth testing, the Module Testing mode provides a method to run individual tests on a single module. For example, you can run an individual test for the diskette drive, or you can run groups of tests for several modules. In the Module Testing mode, you can define how many times each test should run and how the test program should log the errors. To start the Module Testing mode: 1. Start the diagnostics diskette. See “Starting the QAPlus/PRO Diagnostics Diskette” on page 10. 2. Select Diagnostic from the Main Menu. 3. Select Module Tests from the next menu. 4. Use the up and down arrow keys (↑ and ↓) to move the highlight bar from one selection to the next. 5. Follow the instructions on the screen. Note: As you scroll down the selection menu, the Test Group window to the right changes to correspond to the highlighted Module. Running Selected Module Tests To run all selected tests for a test group: 1. Use the up and down arrow keys (↑ and ↓) to move the cursor to your selection. 2. Press Enter. Note: A “♦” appears next to your selection. Running All Selected Modules To run all selected test modules: 1. Use the down arrow key (↓) to move the cursor to the last choice, Run All Selected Modules. 2. Press Enter. Note: A “♦” appears next to your selection. Changing Selected Tests in Test Groups To change selected tests in a Test Group: 1. In the Module Tests Menu, use the up and down arrow keys (↑ and ↓) to move the cursor to your selection. 2. Press Tab to move into the expanded Test Group window. 3. Scroll to the test you want to select or deselect. Warning: Items indicated by a directly adjacent “*” (red text on color screens) are destructive tests. 4. Press the spacebar at the highlighted test to toggle between select (indicated by a “♦”) and deselect. General Checkout/Diagnostics QAPlus/PRO 11 Note: Pressing the first letter of a test does not activate the test, unlike menu operation. 5. Press Enter. Running an Individual Test To run an individual test: 1. Use the up and down arrow keys (↑ and ↓) to move to the highlighted bar to the test you want to run. 2. Press Enter to run the test. Note: The results of the test appear in the lower-right-hand Test Log window. Also, if you enabled Test Logging, the results are recorded in the Test Log. 3. When the test completes, press Esc to return to the Test Group Menu. Stopping the Tests: To stop running a specific test or stop testing after you have started a test, press Esc while the test is running. The test pauses at the first possible opportunity, and the Skip/Abort Test Menu appears with the following options: Option Action Continue The test program begins testing where it left off. Skip to next test The test program skips the current test, but remaining tests for the selected Test Module continue. Skip to next group The test program skips the remaining tests in the current test group. Abort all tests The test program stops and returns to the previous menu. QAPlus/PRO Diagnostics Control Keys: The following is a list of the QAPlus/PRO Diagnostics Control Keys, when used and a description of the diagnostics response. Control Keys When Used Diagnostics Response Ctrl+A Main Menu Allows you to select test from the sub menus that are highlighted with red letters. Attention If selected, these tests will erase the information stored on the diskette or hard disk drive. 12 PC Server HMM Control Keys When Used Diagnostics Response Up and Down Arrow Keys Main Menu Module Test Menu Test Group Menu Highlights an item you want to select. Space Bar Module Test Menu Test Group Menu Adds a diamond to the left of the highlighted test. The test will run when Run All Selected is highlighted and the Enter key is pressed. Also removes the diamond to the left of the item. The test will not run when Run All Selected is highlighted and the Enter key is pressed. Tab Key Main Menu Module Test Menu Selects the additional test for the menu you are in. +/− Keys Test Group Menu Selects additional test. The LUN displayed on the top right Test Group Menu shows which test is selected and how and remain (example LUN 1 of 2). General Checkout/Diagnostics QAPlus/PRO 13 PC Server 300 - Type 8640 Features . . . . . . . . . . . . . . . . . . . . . Diagnostics and Test Information . . . . . . . . . Additional Service Information . . . . . . . . . . . Adapters Supported . . . . . . . . . . . . . . Memory . . . . . . . . . . . . . . . . . . . . Power Supply Voltages . . . . . . . . . . . . Setup (BIOS Utility) . . . . . . . . . . . . . . Starting Setup During the POST . . . . . . . System Utilities . . . . . . . . . . . . . . . . Formatting Diskettes . . . . . . . . . . . . Using the Low-Level Format Program . . . . When To Use the Low-Level Format Program Hard Disk Drive Preparation . . . . . . . . . File Editor . . . . . . . . . . . . . . . . . File Edit Function Key Usage . . . . . . . . System Board Replacement . . . . . . . . . . Locations (486DX2 System Board) . . . . . . . . . Jumper Settings (486DX2 System Board) . . . . Jumper Settings (Central Processing Unit (CPU) Selection) . . . . . . . . . . . . . . . . ISA IDE Selection . . . . . . . . . . . . . Keyboard Selection . . . . . . . . . . . . . Tag Selection . . . . . . . . . . . . . . . BIOS Mode Selection . . . . . . . . . . . . DPU Selection . . . . . . . . . . . . . . . PCI Port Selection . . . . . . . . . . . . . PCI Compilant IRQ Jumper Header . . . . . Cache Selections . . . . . . . . . . . . . . PCI IDE Selection . . . . . . . . . . . . . Reserved Jumpers . . . . . . . . . . . . . Locations (Pentium System Board) . . . . . . . . . Jumper Settings (Pentium System Board) . . . . Parity Check Selections . . . . . . . . . . . DRQ Selection . . . . . . . . . . . . . . . Secondary Cache Selection . . . . . . . . . Default Settings . . . . . . . . . . . . . . Cache Selections . . . . . . . . . . . . . . DACK Selection . . . . . . . . . . . . . . Keyboard Selection . . . . . . . . . . . . . Clock Selection . . . . . . . . . . . . . . . Pentium Clock Selection . . . . . . . . . . BIOS Mode Selection . . . . . . . . . . . . Secondary Cache Selection . . . . . . . . . W17 IRQ Selection . . . . . . . . . . . . . Reserved Jumpers . . . . . . . . . . . . . Symptom-to-FRU Index . . . . . . . . . . . . . . No Beep Symptoms . . . . . . . . . . . . . . Beep Symptoms . . . . . . . . . . . . . . . . Error Codes . . . . . . . . . . . . . . . . . . Error Messages . . . . . . . . . . . . . . . . Miscellaneous Error Messages . . . . . . . . . 17 18 18 18 19 20 21 21 21 21 22 22 22 22 23 24 25 26 Copyright IBM Corp. 1996 15 26 26 26 26 27 27 27 27 27 28 28 29 29 29 29 29 30 30 30 30 30 30 31 31 31 31 32 33 34 36 39 46 Parts Listing . . . . System . . . . . Keyboards (101/102 Power Cords . . 16 PC Server HMM . . . . . . . . . . . . . . Key) . . . . . . . . . . . . . . . . . . . . . . . . . . . . . . . . . . . . . . . . . . 47 48 50 51 Features The following table contains the features for PC Server 300 - Type 8640 computers. Machine Type Feature Description 8640-0N0, 1N0 Processor Video Slots/Bays Memory Selectable Startup Hard Disk Drive 486DX2-66MHz VGA/SVGA 1 8/9 8/128MB Yes Shipped to order or without a drive 8640-0NJ, 1NJ Processor Video Slots/Bays Memory Selectable Startup Hard Disk Drive 486DX2-66MHz VGA/SVGA 1 8/9 8/128MB Yes 728MB IDE 8640-0P0, 1P0 Processor Video Slots/Bays Memory Selectable Startup Hard Disk Drive Pentium-60MHz VGA/SVGA 1 8/9 16/192MB Yes Shipped to order or without a drive 8640-0PT, 1PT Processor Video Slots/Bays Memory Selectable Startup Hard Disk Drive Pentium-60MHz VGA/SVGA 1 8/9 16/192MB Yes 1GB SCSI 1 SVGA for AP and EMEA only. PC Server 300 - Type 8640 17 Diagnostics and Test Information The following list contains problems and references for diagnosing a PC Server 300 Type 8640. Notes The QAPlus/PRO diagnostic program recognizes the primary processor as LUN 1 and the secondary processor as LUN 2. During testing the program automatically tests LUN 1. You must select LUN 2 if you want the program to test the secondary processor. The type of DASD diagnostics required to test the hard disk controller (adapter) and drives is determined by the type of hard disk adapter installed in the computer. Always start with “General Checkout (QAPlus/PRO)” on page 4. Problem Reference Error Codes/Error Messages “Symptom-to-FRU Index” on page 32. DASD Adapter Problems For non-disk-array models, see “SCSISelect Utility Program” on page 547. SCSI-2 Fast/Wide PCI-Bus RAID Adapter, see “Disk Array Configuration” on page 461. Memory “Symptom-to-FRU Index” on page 32. Power Supply Voltages “Power Supply Voltages” on page 20. Miscellaneous “Symptom-to-FRU Index” on page 32. Additional Service Information The following additional service information is for the PC Server 300 Type 8640. “Adapters Supported” “Memory” on page 19 “Power Supply Voltages” on page 20 “Setup (BIOS Utility)” on page 21 “System Utilities” on page 21 “System Board Replacement” on page 24 Adapters Supported The PC Server 300 - Type 8640 supports Industry Standard Architecture (ISA), Extended Industry Standard Architecture (EISA), and Peripheral Component Interconnect (PCI) adapters. 18 PC Server HMM The connectors and the location of the components on the supported adapters are shown below. Memory The PC Server 300 - Type 8640 has four, 36-bit (72-pin) SIMM sockets on the system board. The system board can accommodate memory from 8MB up to 128MB (192MB on some models). The following are the memory requirements for the PC Server 300 - Type 8640 computer: At least two SIMM sockets must be filled. Start with bank 0, then work your way up. The SIMMs must be rated at 70NS or better. Recommended that the SIMMs have tin-lead contacts. Banks 0 and 1 must have the same size memory installed. If memory is installed in banks 2 and 3, the memory for Banks 2 and 3 be the same size. PC Server 300 - Type 8640 19 Power Supply Voltages Note: Verify that the voltage-select switch (if applicable) is set for the correct voltage. If the power-on indicator is not on, and if the power-supply fan is not running, check the power cord for proper installation and continuity. If the power cord is OK, either the power supply is defective or a defective device is causing the power supply to shut off. Check the power supply voltages. If the voltages are incorrect, replace the power supply. If the voltages are correct, and the Symptom-to-FRU index does not solve the problem, go to “Undetermined Problems” on page 552. P1 −Lead Pin 5, 5, 5, 5, 6 6 6 6 +Lead Pin 1 2 3 4 V dc Minimum V dc Maximum Power Good +4.8V +11.52V −10.8V +5.25V +12.60V −13.2V V dc Minimum V dc Maximum −4.5V +4.8V +4.8V +4.8V −5.5V +5.25V +5.25V +5.25V V dc Minimum V dc Maximum +4.8V +5.25V P2 −Lead Pin 1, 1, 1, 1, 2 2 2 2 +Lead Pin 3 4 5 6 P3 −Lead Pin 4, 5, 6 20 +Lead Pin 1, 2, 3 PC Server HMM P4 and P6 1 −Lead Pin 2, 3 2, 3 +Lead Pin 1 4 4 V dc Minimum V dc Maximum +4.8V +11.52V +5.25V +12.6V V dc Minimum V dc Maximum +11.52V +4.8V +12.6V +5.25V P5, P7, and P8 −Lead Pin 2, 3 2, 3 +Lead Pin 1 4 Setup (BIOS Utility) You can start the Setup Utility program during the POST or in any DOS Full Screen. However, the procedure for starting the Setup Utility program during the POST depends on the machine type of the computer you are servicing. Notes: 1. If a configuration error occurs during POST, press F1 to bypass the error. (A configuration error message appears before the operating system loads.) 2. Do not start the Setup Utility while using the EISA Configuration diskette. 3. The EISA Configuration diskette must be used to configure computers that have a EISA configuration. For information on how to use the EISA Configuration diskette, refer to the documentation shipped with the system. 4. The procedure for starting the Set Utility will not work in an OS/2 DOS Window. Starting Setup During the POST: To start the program during the POST do the following. 1. Power-On the computer. 2. During the POST memory test, press and then release the Spacebar; then press and release the CTR+ALT+S keys simultaneously. System Utilities The Diagnostic Diskette contains utilities for formatting diskettes, performing a low-level format on a hard disk, and editing. Formatting Diskettes: To format a diskette within the Diagnostic programs, select one of the following options: PC Server 300 - Type 8640 21 Format A: high density — 1.44MB Format A: low density — 720KB Format B: high density — 1.44MB Format B: low density — 720KB After selecting one of the above options to format a diskette, follow the instructions that appear on the screen. Using the Low-Level Format Program: Depending on the hard disk capacity, the Low-Level Format program could take up to two hours. When To Use the Low-Level Format Program Use the Low-Level Format program: When you are installing software that requires a low-level format When you get recurring messages from the test programs directing you to run the Low-Level Format program on the hard disk As a last resort before replacing a failing hard disk drive Hard Disk Drive Preparation: When the Low-Level Format program is finished, restore to the hard disk all the files that you previously backed up. 1. Partition the remainder of the hard disk for your operating system. (The commands vary with the operating system. Refer to your operating-system manual for instructions.) 2. Format the hard disk using your operating system. (The commands vary with the operating system. Refer to your operating-system manual for instructions.) 3. Install the operating system. You are now ready to restore the files. File Editor: The File Editor is an ASCII text editor that uses simple function key commands. To access the File Editor: 1. Select File Editor from the Utility Menu; then press Enter. 2. Insert a diskette into Drive A or Drive B before selecting the file you want to edit, then select the file you want to edit from the Files selection box. 3. Make your changes. The arrow keys move the cursor, and the function keys perform search and block editing functions. (See “File Edit Function Key Usage” on page 23.) 22 PC Server HMM 4. When you are done, press F10 to update the file with the changes you made, or press Esc to quit the editing process without saving the changes. File Edit Function Key Usage The following information describes the function of the function keys and keyboard keys when you are using the File Editor. Key Description Arrows Move the cursor to the place in the text where you want to make changes. Home Press Home once, to move the cursor to the start of the current line. Press Home twice, to move to the beginning of the file. Press Home three times, to move to the beginning of the file. End Press End once, to move the cursor to the end of the current line. Press End twice, to move the cursor to the end of the current screen. Press End three times, to move the end of the file. F2 Press F2. to be in search mode, You are prompted to enter the search word or words on a reverse highlighted line at the bottom of the File Edit Screen. After typing in the search word, press Enter. F3 Press F3, to find the next occurrence of a search word. F4 Press F4, to mark the start of a block of text (if you have not previously marked it). If you previously marked the block of text, pressing this key unmarks the text block. F5 Press F5, to complete the block marking (started with F4). If you did not previously press F4 to start marking a block of text, F5 is ignored. F6 Press F6 while the cursor is within the active block to move an active (marked) block of text. Move the cursor to the new location where the active block is to be moved, then press F6 again. If there is no active block of text, F6 is ignored. F7 To copy an active (marked) block of text to a new location, move the cursor to the new location and then press F7. If there is no active block of text F7 is ignored. F8 To delete an active (marked) block of text, move the cursor within the active block and press F8. If there is no active block of text, F8 is ignored. PC Server 300 - Type 8640 23 Key Description F10 Press F10, to save all changes and exit the file. Notes: 1. Always make a backup copy on a self-starting diskette of the AUTOEXEC.BAT and CONFIG.SYS files before making any changes. 2. The default text editing mode of the File Editor is the insert mode. To toggle between overtype and insert modes, press Insert. System Board Replacement Type 8640 computers have one or two processors, and other components installed on the system board. When replacing the system board, remove all of the installed components from the old system board and install them on the new system board. If the problem remains, check the following: The primary processor is installed and seated correctly in socket U2 on the system board. If installed, the secondary processor is seated correctly in socket U3 on the system board. All other components removed from the old system board are installed and seated correctly on the new system board. Note If the processor(s) are not seated correctly, intermittent problems can occur. 24 PC Server HMM Locations (486DX2 System Board) .1/ .2/ .3/ .4/ .5/ .6/ .7/ .8/ .9/ .1ð/ .11/ .12/ .13/ .14/ .15/ .16/ .17/ .18/ .19/ Memory connectors (U31, U32, U33, and U34) Processor socket ISA-IDE hard disk drive LED jumper (W46) PCI-IDE hard disk drive LED jumper (W39) Power LED pins 1-3 (W12) Speaker connector (J5) EISA slots (J12, J13, J14, 15, and J16) PCI slots (J18, J19, and J20) Mouse port (J2) PCI-IDE hard disk drive connector (J21) Keyboard port (J1) Serial port, COM1 (J11) Power supply connector, P2 (J7) Power supply connector, P1 (J6) Serial port, COM2 (J10) Parallel port (J8) Diskette drive connector (J9) Real-time clock socket IDE 2 hard disk drive connector (J22) PC Server 300 - Type 8640 25 Jumper Settings (486DX2 System Board) A label (diagram) showing the following jumper locations is located on the top of the base frame assembly inside the system unit. Jumper Settings (Central Processing Unit (CPU) Selection) Jumper Configuration Setting W2 486SX All other CPUs (Default) Pins 2-3 1-2 & 3-4 W3 P24T CPU All others CPUs (Default) Not installed Installed W16 25MHz 33MHz (Default) Not installed Installed W20 25MHz 33MHz (Default) Installed Not installed W33 DX4 DX4 internal double clock 468SX, DX2, DX, and DX4 internal clock tripler (Default) Pins 1-2 Pins 2-3 Not installed ISA IDE Selection Jumper Configuration Setting W42 ISA IDE uses ISA IRQ 14 ISA IDE uses ISA IRQ 15 Pins 1-2 Pins 2-3 W43 ISA IDE uses DMA channel 6 ISA IDE uses DMA channel 7 ISA IDE uses P10 transfer (Default) Pins 1-2 Pins 2-3 Not installed Keyboard Selection Jumper Configuration Setting W10 PS/2 Mouse installed (Default) PS/2 Mouse not installed Installed Not installed Tag Selection Jumper Configuration Setting W24 7-Bit Tag 8-Bit Tag 9-Bit Tag (Default) Illegal Not installed Installed Installed Not installed W26 7-Bit Tag 8-Bit Tag 9-Bit Tag (Default) Illegal Installed Installed Not Installed Not installed 26 PC Server HMM BIOS Mode Selection Jumper Configuration Setting W6 BIOS in normal mode (Default) BIOS in boot recovery mode Pins 2-3 Pins 1-2 DPU Selection Jumper Configuration Setting W17 DPU generate parity CPU generate parity Pins 1-2 Pins 2-3 W18 DPU forces parity error DPU does not force parity error (Default) Pins 1-2 Pins 2-3 PCI Port Selection Jumper Configuration J20 PCI #1 (master/slave shared with EISA slot J17) J19 PCI #2 (master/slave) J18 PCI #3 (master/slave) PCI Compilant IRQ Jumper Header Jumper Setting J101 Open (Default) Pin 2: Route to ISA IRQ1 Pin 3: Route to ISA IRQ3 Pin 4: Route to ISA IRQ4 Pin 5: Route to ISA IRQ5 Pin 6: Route to ISA IRQ6 Pin 7: Route to ISA IRQ7 Pin 8: Route to ISA IRQ8 Pin 9: Route to ISA IRQ9 Pin 10: Route to ISA IRQ10 Pin 11: Route to ISA IRQ11 Pin 12: Route to ISA IRQ12 Pin 13: Route to ISA IRQ14 Pin 14: Route to ISA IRQ15 Cache Selections Jumper Configuration Setting W1 Secondary cache in write-through mode Secondary cache in write-back mode (Default) Pins 1-2 Pins 2-3 W4 Internal cache in write-through mode (Default) Internal cache in write-back mode Not installed Installed W5 128KB of secondary cache 256KB of secondary cache (Default) Not installed Installed PC Server 300 - Type 8640 27 Jumper Configuration Setting W21 Secondary cache not installed Secondary cache installed (Default) Installed Not installed W22 128KB of secondary cache 256KB of secondary cache (Default) Installed Not installed W23 128KB of secondary cache 256KB of secondary cache (Default) Not installed Installed PCI IDE Selection Jumper Configuration Setting W35 PCI IDE uses ISA IRQ 14 (Default) PCI IDE does not use ISA IRQ 14 Installed Not Installed W37 PCI IDE uses PCI INTR_A (Default) PCI IDE does not use PCI INTR_A (Default) Installed Not Installed W38 PCI uses ISA IRQ 15 PCI does not use ISA IRQ 15 (Default) Installed Not Installed Reserved Jumpers Jumper Setting W8 Installed 28 PC Server HMM Locations (Pentium System Board) .1/ .2/ .3/ .4/ .5/ .6/ .7/ .8/ .9/ .1ð/ .11/ .12/ .13/ .14/ .15/ .16/ .17/ .18/ Memory connectors (J7, J8, J9, J10, J33, and J34) IDE hard disk drive LED connector (W10) IDE hard disk drive adapter connector Power LED connector (W9) Speaker connector (J11) Processor socket EISA slots (J23, J24, J25, J26, J27, J28) PCI slots (J30, J31, and J32) Mouse port (J15) Keyboard port (J14) Serial port, COM1 (J20) Power supply connector P1 (J12) Power supply connector, P2 (J17) Serial port, COM2 (J21) Parallel port (J18) Real-time clock socket Diskette drive connector (J19) Power supply connector, P3 (J37) IDE 2 hard disk drive connector (J22) IDE hard disk drive adapter connector Jumper Settings (Pentium System Board) A label (diagram) showing the following jumper locations is located on the top of the base frame assembly inside the system unit. Parity Check Selections Jumper Configuration Setting J1 Pentium parity check enabled (Default) Pentium parity check disabled Installed Not installed DRQ Selection Jumper Configuration Setting W14 DRQ6 DRQ7 Pins 1-2 Pins 2-3 Secondary Cache Selection Jumper Configuration Setting J40 5 volts for the Pentium 5.3 volts for the Pentium Installed: Jumper blocks (all pins) Installed: Power module PC Server 300 - Type 8640 29 Jumper Configuration Setting J41 5.3 volts for ground Installed: Power module (ground) J42 5.3 volts for ground Installed: Power module (ground) Default Settings Jumper Default Setting J3 Pins 2-3 J4 Pins 1-2 J35 Pins 1-2 Cache Selections Jumper Configuration Setting J2 Pentium write-through cache Pentium write-back cache (Default) Installed Not installed DACK Selection Jumper Configuration Setting W16 DACK 6 DACK 7 Pins 1-2 Pins 2-3 Keyboard Selection Jumper Configuration Setting W6 PS/2 Mouse installed (Default) PS/2 Mouse not installed Installed Not installed Clock Selection Jumper Configuration Setting J5 66MHz clock speed (Default) 50MHz clock speed Installed Not installed Pentium Clock Selection Jumper Configuration Setting J6 Oscillator for U15 (Default) Clock synthesizer Pins 1-2 Pins 2-3 30 PC Server HMM BIOS Mode Selection Jumper Configuration Setting W2 BIOS in boot recovery mode BIOS in normal mode (Default) Pins 1-2 Pins 2-3 Secondary Cache Selection Configuration J3 J4 J35 No secondary cache Pins 1-2 Pins 1-2 — Reserved Pins 1-2 Pins 2-3 — 256KB secondary cache Pins 2-3 Pins 1-2 Pins 1-2 512KB secondary cache Pins 2-3 Pins 2-3 Pins 2-3 W17 IRQ Selection Selection Redirect Redirect Redirect Redirect Redirect Redirect Setting modified modified modified modified modified modified PCI PCI PCI PCI PCI PCI interrupt interrupt interrupt interrupt interrupt interrupt to to to to to to IRQ IRQ IRQ IRQ IRQ IRQ 5 9 10 11 15 14 Pins Pins Pins Pins Pins Pins 1-2 3-4 5-6 7-8 9-10 11-12 Reserved Jumpers Jumper Setting W20 Pins 2-3 J5 Installed J6 Pins 1-2 PC Server 300 - Type 8640 31 Symptom-to-FRU Index This index supports the PC Server 300. Always start with “General Checkout (QAPlus/PRO)” on page 4. The Symptom-to-FRU Index lists symptoms, errors, and the possible causes. The most likely cause is listed first. Use this index to help you decide which FRUs to have available when servicing the computer. In the following error codes, X can be any number or letter. Note For IBM devices not supported by the QAPlus/PRO diagnostics code, refer to the manual for that device. For information on: Go to: Additional service help. (For example 0S/2 Trap errors) “Related Service Information” on page 453) Possible software and hardware mismatch problems. (Not repairable by replacing FRUs). “Software/Hardware Mismatch Problems” on page 550 Power supply problems. “Power Supply Voltages” on page 20 32 PC Server HMM No Beep Symptoms No Beep/Symptom FRU/Action No beep, fan runs, and 000215XX is displayed. (Check memory) 1. System Board Memory 2. Processor 3. System Board No beep, fan runs, and 000258XX is displayed. (Check memory) 1. System Board No beep and the computer is otherwise functional. 1. Speaker Assembly 2. Processor 3. System Board No beep and the computer is not functional See “Undetermined Problems” on page 552. 1. System Board 2. Power Supply No beep, fan runs, power-on LED lights, memory may or may not count, and blinking cursor continuously loops. 1. Processor 2. System Board No beep, power-on indicator does not come on, and fan does not run. 1. 2. 3. 4. 5. No beep, fan runs, power-on indicator is on, and computer hangs during POST. (See “Undetermined Problems” on page 552.) 1. System Board 2. Processor 3. Power Supply Switch Assembly Power Supply Processor System Board Any Device or Adapter PC Server 300 - Type 8640 33 Beep Symptoms Beeps symptoms are short tones or a series of short tones separated by pauses (intervals without sound). (X can be any number.) Examples: Beeps Description 4 Four continuous beeps 1-2-X One beep A pause (or break) Two beeps A pause (or break) Any number of beeps Beep/Symptom FRU/Action 4 1. Video Adapter 2. System Board 1-1-3 CMOS read/write error 1. Run Setup. (See, “Setup (BIOS Utility)” on page 21) 2. System Board 1-1-4 ROM BIOS check error 1. System Board 1-2-X DMA error 1. System Board 1-3-1 RAM refresh verification error 1. System Board 1-3-X (not listed above) The first 64KB RAM module failed. 1. Memory Module 2. System Board 1-4-X An error was detected in the first 64KB of RAM. 1. Memory Module 2. System Board 2-1-X The first 64KB of RAM failed. 1. Memory Module 2. System Board 2-2-X The first 64KB of RAM failed. 1. Memory Module 2. System Board 2-3-X The first 64KB of RAM failed. 1. Memory Module 2. System Board 2-4-X The first 64KB of RAM failed. 1. Memory Module 2. System Board 3-1-X The DMA register failed. 1. System Board 34 PC Server HMM Beep/Symptom FRU/Action 3-2-4 The keyboard controller failed. 1. System Board 2. Keyboard 3-3-4 Screen initialization failed. 1. Video Adapter 2. System Board 3. Display 3-4-1 The screen retrace test detected an error. 1. Video Adapter 2. System Board 3. Display 3-4-2 POST is searching for video ROM. 1. Video Adapter 2. System Board PC Server 300 - Type 8640 35 Error Codes Error Code/Symptom FRU/Action 0000 SCSI Adapter not enabled. 1. Be sure the adapter Device and Bus Master fields are enabled in the PCI configuration program. Refer to the documentation that was shipped with the computer. 002X 1. SCSI Adapter 008X Check for proper installation of SCSI terminators. 1. Check SCSI terminators for proper installation 2. SCSI Cable 3. SCSI Terminator 4. SCSI Device 5. SCSI Adapter 0115 Protected mode cannot be enabled. 1. System Board 0164 POST detected a base memory or expansion memory size mismatch. 1. Run Setup and ensure the memory size is correct. (See, “Setup (BIOS Utility)” on page 21) 2. Run the Expanded Memory Diagnostic tests. 0601 Diskette configuration error 1. Set Configuration 0610 Cannot find diskette controller for drive A. 1. Diskette Drive 2. Diskette Drive Cable 3. Diskette Drive Adapter, if installed 4. System Board 0612 Cannot find diskette controller for drive B. 1. Diskette Drive 2. Diskette Drive Cable 3. Diskette Drive Adapter, if installed 4. System Board 0616 Diskette drive reset failed. 1. Diskette Drive Adapter 0632 Diskette drive 0 seek failure 1. Diskette Drive A 0642 Diskette drive 1 seek failure 1. Diskette Drive B 0653 Diskette not formatted or defective 1. Format diskette 2. Diskette 36 PC Server HMM Error Code/Symptom FRU/Action 0655 Diskette drive controller failed. 1. Diskette Drive 2. Diskette Drive Cable 3. Diskette Drive Adapter, if installed 4. System Board 107X Check for proper installation of SCSI terminators. 1. Check SCSI terminators for proper installation 2. SCSI Cable 3. SCSI Terminator 4. SCSI Device 5. SCSI Adapter 1701 Hard disk drive failed. Press F1 to restart the system. 1. Hard Disk Drive 1702 Hard disk drive controller error. 1. Hard Disk Drive Adapter, if installed 2. System Board 1704 Hard disk drive configuration error, controller failed. 1. Hard Disk Drive Adapter, if installed 2. System Board 1715 The Hard Disk Drive Configuration information is not correct. 1. Run Setup and enter the correct hard disk drive information.. (See, “Setup (BIOS Utility)” on page 21 1726 Hard disk drive read error Press F1 to restart the system. 1. Hard Disk Drive 182X 1. SCSI Adapter 190X Ensure that each SCSI device is properly installed and powered-on. 1. 2. 3. 4. 1XXX (not listed above) 1. SCSI Adapter 221X Ensure that each SCSI device is properly installed and powered-on. 1. 2. 3. 4. 222X, 224X 1. SCSI Adapter 2401 The monochrome/color switch is not set correctly. 1. Correct the switch setting 2. Display Adapter 3XXX Check for proper installation of SCSI terminators. 1. Check SCSI terminators for proper installation 2. SCSI Cable 3. SCSI Terminator 4. SCSI Device 5. SCSI Adapter SCSI SCSI SCSI SCSI SCSI SCSI SCSI SCSI Cable Terminator Device Adapter Cable Terminator Device Adapter PC Server 300 - Type 8640 37 Error Code/Symptom FRU/Action 4XXX Ensure that each SCSI device is properly installed and powered-on. 1. 2. 3. 4. 6XXX 1. SCSI Device GP_COM The serial port test detected an error. 1. System Board GP_FDU The diskette drive test detected an error. 1. 2. 3. 4. GP_HDU The hard disk drive test detected an error. 1. Hard Disk Drive 2. Hard Disk Drive Cable 3. Hard Disk Drive Adapter (if installed) 4. System Board GP_KBD The keyboard test detected an error. 1. Keyboard 2. System Board GP_MBD The system board test detected an error. 1. System Board 2. Processor 3. Real-Time Clock Assembly GP_MEM The memory test detected an error. 1. Memory Module Kit 2. System Board GP_PDV The mouse test failed. 1. Mouse 2. System Board GP_PRT The printer test detected an error. 1. Printer 2. System Board 3. Printer Cable GP_VID The video test detected an error. 1. Video Adapter 2. System Board 3. Color Display GRPCDR The CD-ROM test detected an error. 1. CD-ROM 38 PC Server HMM SCSI SCSI SCSI SCSI Cable Terminator Device Adapter Diskette Drive System Board Diskette Drive Cable Diskette Error Messages Error Message/Symptom FRU/Action Arithmetic Functions Failed An error was detected during the CPU Test. 1. Microprocessor 2. System Board Base Memory Test Failed An error was detected in base memory. 1. Memory Module 2. System Board Battery Error 1. Replace the battery and run Setup. 2. System Board Boot Sector Unreadable A boot sector read error was detected on the hard disk drive. 1. Hard Disk Drive 2. Hard Disk Drive Cable 3. Hard Disk Drive Adapter (if installed) 4. System Board Bus Noise Test Failed The RAM Test detected an error in the memory bus. 1. Memory Module 2. System Board Butterfly Cylinder Access Test Failed The Hard Disk Drive Test detected mismatch between the data read and the data stored on the drive. 1. Hard Disk Drive 2. Hard Disk Drive Cable 3. Hard Disk Drive Adapter (if installed) 4. System Board Clock Stopped The real-time clock has stopped working. 1. Real-Time Clock Assembly 2. System Board CMOS Clock Test Failed The Time and Date Settings for CMOS and DOS do not Match. 1. Real-Time Clock Assembly 2. System Board COM Port Tests Failed Test failed with wrap plug attached. 1. Serial Cable 2. System Board Controller Diagnostic Test Failed An error was detected while testing the Hard Disk Controller (Adapter). 1. Hard Disk Drive Adapter (if installed) 2. Hard Disk Drive 3. System Board Cylinder 0 errors The test detected an error reading the first cylinder of the hard disk drive. 1. Hard Disk Drive 2. Hard Disk Drive Adapter (if installed) 3. System Board Device is Not Ready Ready the Device... or Press Any Key 1. Ensure the device is powered-on 2. Replace failing device 3. Device Adapter (if installed) 4. System Board PC Server 300 - Type 8640 39 Error Message/Symptom FRU/Action Disk Error Encountered Opening Output File Press Any Key To Continue. 1. Hard Disk Drive 2. Hard Disk Drive Adapter (if installed) 3. System Board DMA #X Failed The Main Components Test detected an error while testing the DMA controller. 1. System Board DMA Page Register Failed An error was detected while outputting all possible values to the DMA Page Register. 1. System Board Door Is Open 1. Close door on device being tested. 2. Device being tested 3. System Board Drive (x) Media (y) Mismatch The capacity listed for the drive in the File Allocation Table ID does not match the calculated capacity of the drive. 1. Check diskette and diskette drive capacity. 2. Diskette Drive 3. System Board EISA Configuration NVRAM Bad 1. Replace battery, then run Setup. 2. System Board Error in video buffer. Bad bits The video memory test failed. 1. Video Adapter 2. System Board 3. Display Exception Interrupt In Protected Mode Diags Cannot Continue Server error, all system tests will stop. Remove one adapter at a time until the symptom goes away. 1. Any Adapter 2. System Board 3. Processor Extended Memory Test Failed An error was detected in Extended Memory. 1. Memory Module 2. System Board FF Stuck Key Keyboard error 1. Keyboard 2. System Board Floppy Drive Failed One or more diskette drives failed. 1. Diskette Drive 2. System Board 3. Diskette Drive Cable General Function Failed Remove one adapter at a time until the symptom goes away. 1. Any Adapter 2. System Board 3. Processor 40 PC Server HMM Error Message/Symptom FRU/Action Hard Drives Failed One or more of the Hard Disk Drive tests detected an error. 1. Hard Disk Drive 2. Hard Disk Drive Adapter (if installed) 3. System Board Incorrect DOS version 1. Ensure you are using DOS version 3.0 or higher. Insert A Data Disk 1. Insert a known good data disk into the CD-ROM. 2. CD-ROM Drive 3. System Board 4. CD-ROM Cable INT Mask Register Failed The INT Mask Register tests detected an error. 1. Microprocessor 2. System Board Invalid Date The back-up clock and DOS dates do not match. 1. Real-Time Clock Assembly 2. System Board Invalid Time The back-up clock and DOS time of day settings do not match. 1. Real-Time Clock Assembly 2. System Board Keyboard Error One or more keys do not operate correctly. 1. Keyboard 2. System Board Linear Cylinder Access Test Failed Hard disk drive error. The redundancy check of the sectors read does not match the information on the drive. 1. Hard Disk Drive 2. Hard Disk Drive Cable 3. Hard Disk Drive Adapter (if installed) 4. System Board Logic Function Failed The CPU Logic Test has detected an error. 1. Microprocessor 2. System Board Loopback Error An error occurred during the COM Port Test or Parallel Port Test. 1. System Board 2. Wrap Plug Note: A wrap plug must be installed to successfully complete these tests. Main Components Failed A component failure was detected on the system board. 1. System Board 2. Processor Memory test cannot run at this location in memory Not enough free memory available to start the memory test. 1. Memory Module 2. System Board PC Server 300 - Type 8640 41 Error Message/Symptom FRU/Action Missing QAPlus/PRO Files(s) One or more Diagnostic support files are missing. 1. Diagnostic Diskette NO LOOP-BACK PLUG. Skipping External loopback test No wrap plug installed. 1. Install wrap plug on the serial port, rerun test. 2. System Board Not ready Printer not on-line or not ready. 1. 2. 3. 4. Not ready error, ready drive A DMA Transfer test error 1. Ensure that a known good formatted diskette is in drive a, then rerun the test. 2. System Board No 'type-amatic' repeat 1. Keyboard 2. System Board Note: At least one repeat key must be tested during this test or an error will occur. Ready Printer Printer Printer Cable System Board The Type-amatic test detected an error. Not used by any standard device The IRQ is not currently being used by a non-standard device. 1. System Board Numeric Proc Failed The NPU TEST detected an error. 1. Microprocessor 2. System Board Parallel Ports Failed Test Report Summary message. 1. System Board Pass (N): ** Errors ** Drive (X) Failed The read/write test failed on the diskette drive. 1. Diskette Drive 2. System Board 3. Diskette Drive Cable Pass (N) Drive Not Ready The diskette drive door is open or defective. 1. Ensure diskette drive is ready. 2. Diskette Drive 3. System Board 4. Diskette Drive Cable Pass (N): Drive (X) Write Protected or Unformatted 1. Insert a non-write protected, formatted diskette into the diskette drive; the rerun the test 2. Diskette Drive 3. System Board 4. Diskette Drive Cable 42 PC Server HMM Error Message/Symptom FRU/Action Pass (N): Unknown Media Drive (X) Diskette Drive Test error. The File Allocation Table ID on the diskette is invalid. 1. 2. 3. 4. Diskette Diskette Drive System Board Diskette Drive Cable Place Hi-density Media in Drive The capacity of the diskette installed in the diskette drive is less then the capacity of the drive. 1. 2. 3. 4. Diskette Diskette Drive System Board Diskette Drive Cable Printer Failed Ensure the printer is powered-on and ready. 1. Printer 2. Printer Cable 3. System Board Printer Fault Ensure the printer is powered-on and ready. 1. Printer 2. Printer Cable 3. System Board Printer Not Selected Ensure the printer is powered-on and ready. 1. Printer 2. Printer Cable 3. System Board Program or File Not Found Press Any Key The diagnostics cannot find the USER(N).COM file. 1. Diagnostic Diskette 2. Diskette Drive 3. System Board Program Too Big To Fit In Memory Too many Terminate and Stay Resident programs in memory while loading diagnostics. 1. Reboot the system from the Diagnostic Diskette QAPlus/PRO Cannot Be Re-run Because Of Error In Relocating Program Diagnostics failed to relocate the Diagnostics Test programs so the memory space it resides in was not tested. 1. Diagnostic Diskette 2. Memory Module 3. System Board RAM Memory Error in Block n. Bad bits n An error was detected in RAM. 1. Memory Module 2. System Board RAM Test Failed Test Result Summary message, Memory Test failed. 1. Memory Module 2. System Board Read error on cylinder n Hard disk drive physical format error. 1. Hard Disk Drive 2. Hard Disk Drive Adapter (if installed) 3. System Board PC Server 300 - Type 8640 43 Error Message/Symptom FRU/Action Read Errors Diskette drive read error. 1. 2. 3. 4. Receive Error Serial Port loopback test error. 1. Serial Port Cable 2. System Board Refresh Failure The Diagnostics Test detected an error while testing the DMA controller's RAM refresh cycle. 1. Memory Module 2. System Board RTC Interrupt Failure The Diagnostics Test cannot detect the Real-Time clock interrupt. 1. Real-Time Clock Assembly 2. System Board Serial Chip Error COM Port error, general. 1. Serial Port Cable 2. System Board Serial Compare Error COM Port error, information transmitted is not the same as information received. 1. Serial Port Cable 2. System Board Serial Time-out Error COM Port error, time interval is too long between transmitted and received data. 1. Serial Port Cable 2. System Board Serious Memory Error — Diags Cannot Continue Memory Test error. 1. Memory Module 2. System Board Sorry You Need A Mouse The mouse or mouse driver was not detected. 1. Mouse 2. System Board System Hangs (while loading a diagnostic test) 1. System Board System Hangs Go to “Undetermined Problems” on page 552. 1. Any device 2. Any adapter 3. System Board Too Many Errors — Test Aborted Too many errors, the Diagnostics Test cannot continue. 1. Microprocessor 2. System Board Transmit Error Internal or external serial port loopback test failure. 1. Serial Port Cable 2. System Board Unable To Detect CD-ROM 1. CD-ROM Drive 2. System Board 3. CD-ROM Cable 44 PC Server HMM Diskette Diskette Drive System Board Diskette Drive Cable Error Message/Symptom FRU/Action Video Adapter Failed Test Result Summary, displayed if "Fail" was at the Quit/Fail/Pass menu of any video test. 1. Video Adapter 2. System Board 3. Display Write error on cylinder n Hard disk drive write error. 1. Hard Disk Drive 2. Hard Disk Drive Adapter (if installed) Write Errors Diskette drive write error. 1. 2. 3. 4. Write Protected or Unformatted The diskette is Write Protected or not formatted. 1. Insert a non-write protected, formatted diskette into the diskette drive; then rerun the test 2. Diskette Drive 3. System Board 4. Diskette Drive Cable Diskette Diskette Drive System Board Diskette Drive Cable PC Server 300 - Type 8640 45 Miscellaneous Error Messages Message/Symptom FRU/Action The Address Exceeds The Size Of Your Memory An invalid memory address was entered. The Diagnostics Tests display this message during the Locate Bad Chips option under the interact menu if an invalid memory address was entered at the at the "Enter Memory Address Of Bad Chip" prompt. 1. Enter correct address 2. Memory Module 3. System Board That Number is Out Of Range An invalid bit number was entered. The Diagnostics Tests display this message during the Locate Bad Chips option under the interact menu if an invalid bit number was entered at the "Enter the Bad Bit" prompt. 1. Enter correct number 2. Memory Module 3. System Board You Cannot Delete the Motherboard The "Remove Board" option was selected. The Diagnostics Tests display this message during the Locate Bad Chips option under the interact menu if the "Remove Board" option was selected while the system board was displayed. 1. Make the correct selection 2. Memory Module 3. System Board 4. Processor 46 PC Server HMM Parts Listing 1 2 3 16 4 15 14 5 13 7 12 6 11 10 17 9 8 18 21 19 20 PC Server 300 - Type 8640 47 System Index System Unit (PC Server 300 - Type 8640) 1 Access Cover 2 3.5" Hard Disk Drive Tray(s) (1 each) 3 Base Frame Assembly 4 Front Bezel/Door Assembly PC Server 300 Label 5 Power Button (with spring) 6 Keylock Assembly (with keys) 7 Bezel (5.25" Blank) 8 Bezel (3.5" Blank) 9 Speaker 10 Fan Assembly (with Connector) 11 Card Guide 12 Pedestal 13 DASD 3-Drive Cage 14 Diskette Drive (see DASD) 15 Hard Disk Drive (see DASD) 16 300W Power Supply with Switch 06H8930 06H2652 06H8933 06H8935 06H6003 06H2191 33F8433 71G0771 71G0770 06H2649 06H2647 71G0757 96G2412 06H8938 71G0044 System Board, Pentium without Memory 71G0747 and Processor (Models 0P0, 0PT, 1P0, 1PT) Processor Chip, Pentium 60MHz (Models 0P0, 06H2680 0PT, 1P0, 1PT) System Board, 486DX2-66 71G0033 without Memory and Processor (Models 0N0, 0NJ, 1N0, 1NJ) Processor Chip, 486DX2-66 (Models 0N0, 06H2679 0NJ, 1N0, 1NJ) 4MB Memory SIMM, Parity (Models 0N0, 0NJ, 1N0, 1NJ) 8MB Memory SIMM, Parity (Models 0P0, 0PT, 1P0, 1PT) 16MB Memory SIMM (Parity) 32MB Memory SIMM (Parity) 486 Real-Time Clock with an internal battery (Models 0N0, 0NJ, 1N0, 1NJ), see “Battery Notice” on page 461 Pentium Real-Time Clock with internal battery (Models 0P0, 0PT, 1P0, 1PT), see “Battery Notice” on page 461 486 Heat Sink with Clip (Models 0N0, 0NJ, 1N0, 1NJ) Pentium Heat Sink with Clip (Models 0P0, 0PT, 1P0, 1PT) Keyboard with Cable, see “Keyboards (101/102 Key)” on page 50 Key/Lock Cable 48 PC Server HMM 73G3233 73G3234 60G2950 73G3235 06H3397 06H3398 06H2179 06H2180 06H8766 Index System Unit (PC Server 300 - Type 8640) Power Cord (see Power cords) SCSI-2 Fast PCI-Bus Adapter (Models 0PT, 1PT) SVGA Card (Models 0P0, 0PT, 1P0, 1PT, 1N0, 1NJ) VGA Card Miscellaneous Parts Kit EMC Ground Contacts (4 each) Screws 6X32X5/16" (6 each) I/O Blank (1 each) Nut Screws 4-40 (2 each) Power Switch Bracket (1 each) Screws 3x8mm Plastite (3 each) Screws 3mm Diskette Drive (2 each) Screws 6-32 Hard Disk Drive (2 each) System Board Edge Support (1 each) Shadow Box Cable Cover with Lock 53G0382 71G0031 71G0030 06H8940 96G2411 06H5072 Index Cables/Indicators (PC Server 300 - Type 8640) 17 LED Cables 06H8936 Activity, with Amber LED) 18 Serial Cable 06H2165 19 Parallel Cable 06H2166 20 IDE Hard Disk Drive Cable - 2X (Models 0N0, 92F0424 0NJ, 0P0, 1P0, 1N0, 1NJ) 21 SCSI Cable Assembly - 4X (Models 0PT, 1PT) 82G3626 SCSI Cable Assembly - 7X (Models 0P0, 0PT, 06H2181 1P0, 1PT) Diskette Drive Signal Cable (with power) 92F0423 C2 Cable Assembly 06H8767 Index DASD (PC Server 300 - Type 8640) 14 1.44MB Diskette Drive Assembly 14 1.2MB 5.25-Inch Diskette Drive Assembly 15 270MB Hard Disk Drive (IDE) 15 364MB Hard Disk Drive (IDE) 15 527MB Hard Disk Drive (IDE) 15 540MB Hard Disk Drive (SCSI) 15 728MB Hard Disk Drive (IDE) 15 1GB Hard Disk Drive (SCSI) 15 2GB Hard Disk Drive (SCSI) Enhanced Internal CD-ROM II Drive 93F2361 64F4102 82G5926 82G5927 92F0405 92F0406 82G5929 92F0428 92F0407 92F0084 PC Server 300 - Type 8640 49 Keyboards (101/102 Key) Keyboards (101/102 Key) Arabic Belgium-Dutch Belgium-French Bulgarian Czech Danish Dutch Finnish French German Greek Hebrew Hungarian Iceland Italy Latvia Norwegian Polish Portuguese Romanian Russian-Cyrillic Serbian-Cyrillic Slovak Slovenia/Croatia/Bosnia South Africa Spanish Swedish Swiss-French Swiss-German Turkish 179 Turkish 440 U.K. English U.S. English U.S. English (E/ME/A use only) 50 PC Server HMM 1391490 1391414 1391526 1399583 1399570 1391407 1391511 1391411 1391402 1391403 1399046 1391408 1399581 1391495 1393395 1391406 1391409 1399580 1391410 1399582 1399579 1399578 1399571 1393669 1396790 1391405 1391411 1391412 1391412 8125409 1393286 1391406 71G4646 1396790 Power Cords Power Cords Arabic Belgium Bulgaria Czech Republic Denmark Finland France Germany Hungary Israel Italy Latvia Netherlands Norway Poland Portugal Serbia Slovakia South Africa Spain Switzerland Switzerland (French/German) U.S. English U.K./Ireland Yugoslavia 14F0033 1339520 1339520 1339520 13F9997 1339520 1339520 1339520 1339520 14F0087 14F0069 1339520 1339520 1339520 1339520 1339520 1339520 1339520 14F0015 1339520 1339520 14F0051 62X1045 14F0033 1339520 PC Server 300 - Type 8640 51 PC Server 310 - Type 8639 Features . . . . . . . . . . . . . . . . . . . . Diagnostics and Test Information . . . . . . . . General Checkout (Models 0XT, 0Z0, 0ZT, 0D0, 0DT) . . . . . . . . . . . . . . . . . . . General Checkout (Models MDT, MXT, MZT) . From the Reference Diskette . . . . . . . To Test Options . . . . . . . . . . . . To Test the Base System . . . . . . . From the Diagnostics Diskette . . . . . . . From the System Partition . . . . . . . . . To Test Options . . . . . . . . . . . . To Test the Base System . . . . . . . System Programs . . . . . . . . . . . . Starting the System Programs . . . . . . . From the Hard Disk Drive . . . . . . . From the Reference Diskette . . . . . . System Programs Main Menu . . . . . . . Module Test Menu . . . . . . . . . . . . Additional Service Information . . . . . . . . . . BIOS Levels . . . . . . . . . . . . . . . . . Error Messages . . . . . . . . . . . . . . . Flash (BIOS/VPD) Update Procedure . . . . . POST Beep Codes . . . . . . . . . . . . . Power-on Password . . . . . . . . . . . . . Power-On Self-Test (POST) . . . . . . . . . Power Supply . . . . . . . . . . . . . . . . Processor Replacement . . . . . . . . . . . Return Codes . . . . . . . . . . . . . . . . Setup Program . . . . . . . . . . . . . . . Rapid Resume Manager . . . . . . . . . Rapid Resume . . . . . . . . . . . . Running Rapid Resume Manager . . . . . Standby . . . . . . . . . . . . . . . Scheduler . . . . . . . . . . . . . . . Wake Up on Ring . . . . . . . . . . . Formatting Diskettes . . . . . . . . . . . Hard Disk Drive Boot Error . . . . . . . . When To Use the Low-Level Format Program Preparing the Hard Disk Drive for Use . . . . File Editor . . . . . . . . . . . . . . . . File Edit Function Key Usage . . . . . . . Diagnostics Control Keys . . . . . . . . . System Board Memory . . . . . . . . . . Specifications . . . . . . . . . . . . . . . . System Board Replacement . . . . . . . . . Test Programs . . . . . . . . . . . . . . . . Undetermined Problem . . . . . . . . . . . . Using the Test Programs . . . . . . . . . . . Program Navigation . . . . . . . . . . . . Using the First Letter of a Menu Choice . Using the Function Keys . . . . . . . . Copyright IBM Corp. 1996 . 55 . 56 . . . . . . . . . . . . . . . . . . . . . . . . . . . . . . . . . . . . . . . . . . . . . . . 57 59 59 59 60 61 61 61 61 62 63 63 63 63 67 67 68 68 69 70 70 70 71 72 72 73 73 73 73 74 74 74 74 74 75 75 76 76 77 79 80 81 81 83 84 84 84 84 53 Command Line Options . . . . . . . Viewing the Test Groups . . . . . . . . Scripting . . . . . . . . . . . . . . . . Changing Logical Unit Numbers . . . . . Test Group Specifications . . . . . . . . Starting the Diagnostics Diskette . . . . Module Testing Mode . . . . . . . . Running Selected Module Tests . . . Running All Selected Modules . . . . Changing Selected Tests in Test Groups Running an Individual Test . . . . . . Stopping the Tests . . . . . . . . . . . Vital Product Data . . . . . . . . . . . . . Locations . . . . . . . . . . . . . . . . . . . Expansion Slots/Riser Cards . . . . . . . . PCI/Micro Channel Models . . . . . . . PCI/ISA Models . . . . . . . . . . . . Riser Card (ISA) Administrator Password Keylock Assembly Exploded View . . . . . System Board . . . . . . . . . . . . . . . System Board (Continued) . . . . . . . Jumper Settings . . . . . . . . . . . . Bus/CPU Speed MHz Settings . . . . . Symptom-to-FRU Index Supplement . . . . . . Beep Symptoms . . . . . . . . . . . . . . No Beep Symptoms . . . . . . . . . . . . Numeric Error Codes . . . . . . . . . . . . Error Messages . . . . . . . . . . . . . . Miscellaneous Error Messages . . . . . . . Parts Listings . . . . . . . . . . . . . . . . . System . . . . . . . . . . . . . . . . . . Keyboards (101/102 Key - RD) . . . . . . . Enhanced Keyboards (101/102 Key - BS) . . Power Cords . . . . . . . . . . . . . . . 54 PC Server HMM . . . . . . . . . . . . . . . . . . . . . . . . . . . . . . . . . . . . . . . . . . . . . . . . . . . . . . . . . . . . 85 86 86 86 86 87 87 87 87 88 88 88 89 89 89 89 90 90 91 92 93 94 94 95 96 97 98 111 117 119 120 123 124 125 Features Note All PC Server computers have Selectable Startup. Microprocessor Pentium microprocessor with 16KB of internal cache; clock rate varies by model Cache Memory 256KB of level-2 cache Memory Standard: 16MB (min.), expandable to 192MB 70 ns, parity Six single inline memory-module sockets in three banks Diskette Drives Standard: One 3.5-inch, 1.44MB Optional (internal): – 3.5-inch, 2.88MB – 3.5-inch, 1.44MB Hard Disk Drives Number and capacities of hard disk drives varies by model Supports up to three internal hard disk drives CD-ROM Drive Standard: SCSI-2 Keyboard and Auxiliary Device 101-key keyboard Mouse Expansion Slots Two 32-bit PCI slots; five 32-bit Micro Channel slots or five 16-bit ISA slots, depending on model. (The PCI slots and adjacent Micro Channel or ISA slots are shared slots.) The number of slots available for expansion varies by model. Expansion Bays Two 5.25-inch drive bays Three 3.5-inch drive bays The number of bays available for expansion varies by model. Video Super video graphics array (SVGA) controller Compatibility: – Video graphics adapter (VGA) – Color graphics adapter (CGA) Security Features Bolt-down capability Door lock LogicLock security feature set Power-on and administrator passwords Selectable drive-startup Upgradable POST and BIOS Upgradable EEPROM on the system board POST/BIOS upgrades (when available) PC Server 310 - Type 8639 55 Input/Output Connectors Video port Two serial ports Parallel port Auxiliary device port Keyboard port SCSI-2 Fast/Wide PCI Adapter – One external port (8-bit) – One internal port (8-bit) Ethernet Adapter – 10Base-T – 10Base2 – 10Base5 Power Supply 200 W with voltage switch (115–230 V ac) +3.3 V, ±5 V, and ±12 V outputs Built-in overload and surge protection Diagnostics and Test Information The diagnostic procedure required for servicing a PC Server 310 Type 8639 is determined by the architecture of the server. 56 For ISA Models 0D0, 0DT, OXT, 0Z0, and OZT go to “General Checkout (Models 0XT, 0Z0, 0ZT, 0D0, 0DT)” on page 57. For Micro Channel Models MDT, MXT, and MZT to “General Checkout (Models MDT, MXT, MZT)” on page 59. PC Server HMM General Checkout (Models 0XT, 0Z0, 0ZT, 0D0, 0DT) This general checkout procedure is for Type 8639 (Model 0XT, 0Z0, 0ZT, 0D0, 0DT) servers. If you are servicing a Type 8639 (Models MDT, MXT, MZT) server, see “General Checkout (Models MDT, MXT, MZT)” on page 59. Attention The drives in the computer you are servicing might have been rearranged or the drive startup sequence changed. Be extremely careful during write operations such as copying, saving, or formatting. Data or programs can be overwritten if you select an incorrect drive. Diagnostic error messages appear when a test program finds a problem with a hardware option. For the test programs to properly determine if a test Passed, Failed, or Aborted, the test programs check the error-return code at test completion. See “Return Codes” on page 72. General error messages appear if a problem or conflict is found by an application program, the operating system, or both. For an explanation of these messages, refer to the information supplied with that software package. Notes 1. Before replacing any FRUs, ensure the latest level of BIOS is installed on the system. A down-level BIOS may cause false errors and unnecessary replacement of the system board. For more information on how to determine and obtain the latest level BIOS, see “BIOS Levels” on page 68. 2. If multiple error codes are displayed, diagnose the first error code displayed. 3. If the computer hangs with a POST error, go to “Symptom-to-FRU Index Supplement” on page 95. 4. If the computer hangs and no error is displayed, go to “Undetermined Problem” on page 83. 5. If a device is not highlighted on the Module Test menu, that device may be defective. 001 – Power-off the computer and all external devices. – Check all cables and power cords. – Set all display controls to the middle position. – Insert the Diagnostics diskette into drive A. – Power-on all external devices. (Step 001 continues) PC Server 310 - Type 8639 57 (CONTINUED) 001 (continued) – Power-on the computer. – Check for the following responses: 1. One beep. 2. Readable instructions or the Main Menu. DID YOU RECEIVE THE CORRECT RESPONSES? Yes No 002 If Rapid Resume is displayed, do the following: 1. Disable Rapid Resume, See “Running Rapid Resume Manager” on page 73. 2. Run the Diagnostics tests. 3. Enable Rapid Resume after service is complete. – or – If the computer hangs during Rapid Resume, do the following: 1. Power-off; then, power-on the computer. 2. When the hard-disk drive activity light comes on, press Ctrl+Alt+Del to exit Rapid Resume and restart the computer. (Rapid Resume is now turned off.) – or – Go to the “Symptom-to-FRU Index Supplement” on page 95. 003 ARE ALL ADAPTERS AND DEVICES INSTALLED IN THE COMPUTER HIGHLIGHTED ON THE MODULE TEST MENU? Yes No 004 Go to “Module Test Menu” on page 67. 005 Run the Advanced Diagnostics test. If necessary, refer to “Additional Service Information” on page 67. 58 If you receive an error, go to “Symptom-to-FRU Index Supplement” on page 95. If the test stops and you cannot continue, replace the last device tested. If the computer has incorrect keyboard responses, go to “Keyboard” on page 515. If the printer has incorrect responses, go to “Printer” on page 524. If the display has problems such as jittering, rolling, shifting, or being out of focus, go to “Display” on page 490. PC Server HMM General Checkout (Models MDT, MXT, MZT) This general checkout procedure is for Type 8639 (Models MDT, MXT, MZT) servers. On Type 8639 (Models MDT, MXT, MZT) Micro Channel computers, you can start the advanced diagnostics programs in one of three ways: 1. From the PC Server 310 (Models MDT, MXT, MZT) Reference Diskette 2. From the PC Server 310 (Models MDT, MXT, MZT) Diagnostics Diskette 3. From the System Partition. From the Reference Diskette: The Reference Diskette is bootable. Starting the diagnostic programs from the Reference Diskette allows you to test the options installed in the computer or test the base system. To Test Options Notes 1. Ensure that Rapid Resume is disabled before starting this procedure. 2. If Rapid Resume is displayed during this procedure, see “Running Rapid Resume Manager” on page 73. 3. Re-run the Diagnostics tests. To test the options installed in the computer, do the following. 1. 2. 3. 4. 5. 6. 7. Power-off the computer and all external devices. Check all cables and power cords. Set all display controls to the middle position. Insert the Reference Diskette into drive A. Power-on all external devices. Power-on the computer. Check for the following responses: a. One beep b. IBM Logo c. Readable instructions or the Main Menu 8. If you received the correct responses, press Ctrl+A (Test the Computer screen appears). Select Options diagnostics and follow the instructions on the screen. 9. If you did not receive the correct responses, go to “Symptom-to-FRU Index Supplement” on page 95. PC Server 310 - Type 8639 59 To Test the Base System Notes 1. Ensure that Rapid Resume is disabled before starting this procedure. 2. If Rapid Resume is displayed during this procedure, see “Running Rapid Resume Manager” on page 73. 3. Re-run the Diagnostics tests. To test the base system, do the following: 1. 2. 3. 4. 5. 6. 7. Power-off the computer and all external devices. Check all cables and power cords. Set all display controls to the middle position. Insert the Reference Diskette into drive A. Power-on all external devices. Power-on the computer. Check for the following responses: a. One beep b. IBM Logo c. Readable instructions or the Main Menu 8. If you received the correct responses, do the following. a. Press Ctrl+A (Test the Computer screen appears). b. Select System board diagnostics and follow the instructions on the screen. c. When the QAPlus/Pro Main Menu appears, press Ctrl+A. d. Select Diagnostics. e. Select Module Test. If the Module Test Menu is correct, run diagnostics. If the Module Test Menu is not correct, go to “Module Test Menu” on page 67. 9. If you did not receive the correct responses, go to “Symptom-to-FRU Index Supplement” on page 95. 60 PC Server HMM From the Diagnostics Diskette Important If the diagnostic program is started from the diagnostics diskette, you will not have the option to test the Micro Channel options installed in the computer. The Diagnostics Diskette is bootable. The procedure for starting the Diagnostics Diskette when servicing a Type 8639 server is the same for all models. See “General Checkout (Models 0XT, 0Z0, 0ZT, 0D0, 0DT)” on page 57. From the System Partition: Starting the diagnostic programs from the System Partition gives you the option of testing the options installed in the computer or testing the base system. To Test Options Notes 1. Ensure that Rapid Resume is disabled before starting this procedure. 2. If Rapid Resume is displayed during this procedure, see “Running Rapid Resume Manager” on page 73. 3. Re-run the Diagnostics tests. To test the options installed in the computer, do the following. 1. 2. 3. 4. 5. 6. 7. 8. 9. 10. 11. Power-off the computer and all external devices. Check all cables and power cords. Set all display controls to the middle position. Remove all media from the drives. Power-on all external devices. Power-on the computer. Check for the following responses: a. One Beep b. IBM Logo When the F1 prompt appears in the lower left-hand corner of the screen, press F1 (the IBM logo appears, then the System Programs Main Menu). Press Ctrl+A (Test the Computer screen appears). If you received the correct responses, select Options and follow the instructions on the screen. If you did not receive the correct responses, reinstall the System Partition on the hard disk drive from the Reference Diskette. To Test the Base System PC Server 310 - Type 8639 61 Notes 1. Ensure that Rapid Resume is disabled before starting this procedure. 2. If Rapid Resume is displayed during this procedure, see “Running Rapid Resume Manager” on page 73. 3. Re-run the Diagnostics tests. To test the base system, do the following. 1. 2. 3. 4. 5. 6. 7. Power-off the computer and all external devices. Check all cables and power cords. Set all display controls to the middle position. Remove all media from the drives. Power-on all external devices. Power-on the computer. Check for the following responses: a. One Beep b. IBM Logo 8. When the F1 prompt appears in the lower left-hand corner of the screen, press F1 (a second IBM logo appears followed by the System Programs Main Menu). 9. If you received the correct responses, do the following: a. Press Ctrl+A (Test the Computer screen appears). b. Select System board diagnostics and follow the instructions on the screen. c. When the QAPlus/Pro Main Menu appears, press Ctrl+A d. Select Diagnostics. e. Select Module Test. f. If the Module Test Menu is correct, run diagnostics. g. If the Module Test Menu is not correct, go to “Module Test Menu” on page 67. 10. If you did not receive the correct responses, reinstall the System Partition on the hard disk drive from the Reference Diskette. System Programs: The system programs are utility programs for Micro Channel computers that allow you to: Change the system configuration Set passwords Change the date and time Set power management features Test the computer The programs are installed in a special protected area of the hard disk drive called the System Partition. The System Partition appears on the FDISK and FDISKPM screens for DOS and OS/2, so that the partition can be 62 PC Server HMM deleted and the disk space (about 6MB) can be used for other programs. Before you delete the System Partition, you must first use the Back up/Restore system programs option on the system programs Main Menu to make current copies of the Reference, Diagnostic, and QAPlus/Pro diskettes. Without the System Partition, you must use these diskettes to configure and diagnose the computer. If the computer was manufactured without a hard disk drive, the system programs were provided on three diskettes: Reference Diskette Diagnostics Diskette QAPlus/PRO for IBM Diskette Starting the System Programs: You can start the system programs from the hard disk drive or from the Reference Diskette. If an error occurs during startup, the computer automatically starts the system programs to help you isolate and correct the problem. If you do not want the system programs to automatically start when an error occurs, change the Bypass System Programs on error setting in the system programs. From the Hard Disk Drive: To start the system programs from the hard disk drive, do the following: 1. Remove all media from all the drives. 2. Power-off the computer; then, power it back on. (The IBM logo appears on the screen.) 3. When the F1 prompt appears, press F1. (A second IBM logo appears, followed by the system programs main menu. From the Reference Diskette: To start the system programs from the Reference Diskette, do the following: 1. Power-off the computer. 2. Remove all media from the drives. 3. Insert the Reference Diskette into the primary diskette drive. 4. Power-on the computer. After a few seconds, the IBM logo appears on the screen; then a second IBM logo screen appears, followed by the system programs main menu. System Programs Main Menu: The following tables contain a listing of the System Programs Main Menu items followed by a description of the item. PC Server 310 - Type 8639 63 64 PC Server HMM Makes a backup copy of the Reference, Diagnostic, and QAPlus/PRO diskettes. Copies the system programs from the System Partition to the backup diskettes. Also creates backup Reference, Diagnostic, and QAPlus/PRO diskettes. You need at least three 2MB diskettes for the backup procedure. Reinstalls the system programs from backup diskettes to the System Partition. Use this program to rebuild the System Partition in case of accidental loss or damage. Copies a new version of the system programs to the System Partition from an updated set of system diskettes. Views, changes, backs up, or restores the configuration information stored in the battery-backed memory. The configuration information consist of: Back up/Restore system programs: Back up the system diskettes Back up the System Partition Restore the System Partition Update System Programs Set Configuration Displays the present configuration information for Micro Channel adapters and built-in features. Allows you to change the configuration of the Micro Channel adapters. You can also change the Bypass System Programs setting from this menu. Copies the configuration information from the battery-backed memory to the hard disk drive. View configuration Change configuration Back up configuration The amount of memory installed The built-in features and their assignments The installed options with their location and assignments Exits from the system programs and loads the operating system. Start operating system Description Item PC Server 310 - Type 8639 65 Description Retrieves the Micro Channel configuration copied by the Back up Configuration program and restores that information to the battery-backed memory. Verifies and updates the configuration information for the Micro Channel adapters and built-in features. Displays the memory address assigned to the adapters. Displays the existing Micro Channel device settings and allows you to make limited modification to some devices. Only the information enclosed in brackets ([...]) can be changed. Displays the current configuration of Peripheral Component Interconnect devices and adapters. Because PCI components are automatically configured each time the computer starts up, you cannot change these settings. Changes the date and time in battery-backed memory. Helps prevent the use of the computer by unauthorized persons. Two types of passwords are available from this program: a power-on password and a privileged-access password. Changes the speed at which a character repeats when a key is held down. Select this choice if the computer is going to be used as a server, without a keyboard. Allows you to specify the sequence of the drives that the computer will attempt to start from when you power it on. Item Restore Configuration Run Automatic Configuration Display memory map Set and View Micro Channel SCSI devices View PCI configuration Set Features Set date and time Set password and security features Set keyboard speed Set console Set startup sequence 66 PC Server HMM Copies configuration and diagnostic files from a diskette that comes with an optional device. Allows you to test the base computer by selecting System board diagnostics, or test the Micro Channel options by selecting Option diagnostics. Displays updates and changes. Displays entries in the error log. Any memory and privileged-access password errors are recorded in this log. Describes how to use the UINSTALL program to get information about additional utility programs available on the Diagnostics Diskette. Some of these programs can be used only with specific operating systems. Make sure you read all of the information before installing any of these utility programs. Records the computer serial number and displays the identification numbers for the system unit, processor board, and system board. This information is also know as the vital product data (VPD). Allows you to choose the display type and set a horizontal frequency and refresh rate. Test the Computer More Utilities Display revision levels Display system error log Stand alone utility information Set and view system identification Set video display information Rapid Resume Standby Timeout Wake Up on Ring Wake Up on Alarm Copy an option diskette Allows you to change the settings for the following: Set power management features Note: If similar power management features are set in the operating system, they will override these settings. Description Item Module Test Menu Attention A customized setup configuration (other than default settings) might exist on the computer you are servicing. Running the Setup Utility program might alter those settings. Note the current configuration settings and verify that the settings are in place when service is complete. To start the Setup Utility program see “Setup Program” on page 73. At the start of the diagnostic tests, the Module Test Menu is displayed. Normally, all adapters and devices installed in the computer are highlighted on the menu. If an adapter or device that is not installed in the computer is highlighted on the menu, use the procedure in “Undetermined Problem” on page 83 to find the problem. If an adapter or device is installed in the computer and is not highlighted on the menu, you have one of the following conditions: – The diagnostic code for the adapter or device is not on the diagnostic diskette. Run the diagnostics provided with that device. – The SCSI controller failed (on the system board or SCSI adapter). – An unrecognizable adapter is installed. – The missing device is defective or it requires an additional diskette or service manual. – A defective adapter caused the device not to be highlighted on the menu. If a device is missing from the list, replace it. If this does not correct the problem, use the procedure in “Undetermined Problem” on page 83. Additional Service Information The following information and tools are available to help identify and resolve hardware-related problems: “BIOS Levels” on page 68. “Error Messages” on page 68. “Flash (BIOS/VPD) Update Procedure” on page 69. “Power-on Password” on page 70. “Power-On Self-Test (POST)” on page 70. “Power Supply” on page 71. “Processor Replacement” on page 72. “Return Codes” on page 72. “Setup Program” on page 73. “Specifications” on page 80. “System Board Replacement” on page 81. “Test Programs” on page 81. “Undetermined Problem” on page 83. PC Server 310 - Type 8639 67 “Using the Test Programs” on page 84. “Vital Product Data” on page 89. BIOS Levels An incorrect level of BIOS can cause false error and unnecessary FRU replacement. Use the following information to determine the current level of BIOS installed in the computer, the latest BIOS available for the computer, and where to obtain the latest level of BIOS. Current Level BIOS information. – Run the Configuration Utility to determine the level of BIOS installed. Sources for determining the latest level BIOS available. 1. RETAIN 2. Bulletin board system (BBS) 3. HelpCenter 4. Levels 1 and 2 Support. Sources for obtaining the latest level BIOS available. 1. Bulletin board system (BBS) 2. HelpCenter 3. Levels 1 and 2 Support To update (flash) the BIOS, see “Flash (BIOS/VPD) Update Procedure” on page 69. Error Messages Messages generated by the software—the operating system or application programs—generally are text messages, but they also can be numeric. Basically, there are five types of error messages. POST error messages POST beep codes Diagnostic error messages Software generated messages Multiple messages Error Message Description POST Error Messages Displayed when POST finds problems with the hardware or detects a change in the hardware configuration. POST Beep Codes Sounds emitted from the speaker if POST finds a problem. One beep indicates POST completed successfully. Multiple beeps indicate a problem was found by the POST. Diagnostic Error Messages Displayed when a test program finds a problem with a hardware option. 68 PC Server HMM Error Message Description Software Generated Error Messages Displayed if a problem or conflict is found by an application program, the operating system, or both. For an explanation of these messages, refer to the information supplied with that software package. Multiple Messages The first error that occurs can cause additional errors. Follow the suggested action of the first error displayed. In this case, the system displays more than one error message. Always follow the suggested action instructions for the first error message displayed. Flash (BIOS/VPD) Update Procedure 1. Power-off the computer and all external devices. 2. Insert the Flash/VPD diskette into diskette drive A. 3. Power-on all external devices, then power-on the computer. 4. When the POST/BIOS Update Utility appears; type the number for your country/language, then press Enter. 5. If the computer serial number was previously recorded, the serial number is displayed with the option to update it. Press Y to update the serial number. 6. Type the 7 digit serial number of the computer you are servicing; then, press Enter. 7. Follow the instructions on the screen to complete the flash (BIOS/VPD) update procedure. PC Server 310 - Type 8639 69 POST Beep Codes The Power On Self-Test generates a beeping sound to indicate successful completion of POST or to indicate that the tests detect an error. One beep and the appearance of text on the display indicates successful completion of the POST. More than one beep indicates that the POST detects an error. Power-on Password To service Type 8639 computers with an active and unknown power-on password, power-off the computer and do the following: Note This procedure will not remove the Administrator Password. 1. Unplug the power cord and remove the top cover. 2. Refer to “System Board” on page 92 for the jumper location. 3. Move the password jumper to connect the center pin and the pin on the opposite end of the connector. 4. Power-on the computer. The system senses the change in the position and erases the password. It is not necessary to move the jumper back to the previous position. 5. Remind the user to enter a new password when service is complete. Power-On Self-Test (POST) Each time you power-on the system, it performs a series of tests that check the operation of the system and some options. This series of tests is called the power-on self-test, or POST. POST does the following: Checks some basic system-board operations Checks the memory operation Starts the video operation Verifies that the diskette drive is working Verifies that the hard disk drive is working If the POST finishes without detecting any problems, a single beep sounds and the first screen of your operating system or application program appears. If the POST detects a problem, an error message appears on your screen. A single problem can cause several error messages to appear. When you correct the cause of the first error message, the other error messages probably will not appear on the screen the next time you turn on the system. 70 PC Server HMM Power Supply If the power-on indicator is not on, the power-supply fan is not running, or the computer will not power-off, do the following. Check/Verify FRU/Action 1. Verify that the voltage-selector switch is set for the correct voltage. Correct the voltage-selector switch setting. 2. Check the following for proper installation. Power Cord On/Off Switch connector On/Off Switch Power Supply connector System Board Power Supply connectors Reseat 3. Check the power cord for proper continuity. Power Cord 4. Check the power-on switch for continuity. Power-on Switch If these are correct, check the following voltages. System Board Connections Note: These voltages must be checked with the power supply cables connected to the system board. If the voltages are not correct, and the power cord is good, replace the power supply. If the voltages are correct, and the computer you are servicing has a power supply connector on the riser card, check the following riser card voltages. Riser Card Connections Note: These voltages must be checked with the power supply cable connected to the riser card. If the voltages are not correct, and the power cord is good, replace the power supply. PC Server 310 - Type 8639 71 Processor Replacement Looking from the front of the computer, install all processors with the beveled corner located at the right-rear corner of the processor socket. Important If the processor is not installed correctly, the system board and the processor can be damaged. Return Codes For the test programs to properly determine if a test Passed, Failed, or Aborted, the test programs check the error-return code at test completion. To register the test properly in the test log, the test programs must generate one of the following return codes: Return Code Description 0 Indicates the device passed its test. 1 Indicated the device failed its test. 2 or greater Indicates the test stopped or was aborted. 72 PC Server HMM Setup Program The Setup Utility (configuration) program is stored in the permanent memory of the computer. This program includes setting for the following: Devices and I/O Ports Date and Time Security Start Options Advanced Setup ISA Legacy Resources Rapid Resume Manager To run the Setup Utility program, do the following: 1. Power-off the computer and wail for a few seconds until all in-use lights go off. 2. Power-on the computer. 3. When the Setup Utility prompt appears on the screen during start-up, press F1. The Setup Utility menu appears. 4. Follow the instructions on the screen. Rapid Resume Manager Personal computers come with built-in energy-saving capabilities. If the computer you are servicing was shipped with DOS and Windows preinstalled, Rapid Resume Manager is available. Rapid Resume Manager reduces the power consumption of the computer. The following are features of Rapid Resume Manager: Rapid Resume Standby Scheduler Wake Up on Ring Rapid Resume: With Rapid Resume activated, the computer saves its current state when you power it off with the power switch. Rapid Resume retains all current settings, remembers which programs were active, and saves the position and size of windows and other objects on the screen. When the computer is restarted (with the power-on switch, the Scheduler, or Wake-Up on Ring), it quickly returns to full-power operation in exactly the same state. The programs that were being used will reappear in the state they were in when you suspended operation of the computer. Running Rapid Resume Manager: To select and activate, deactivate, or change Rapid Resume Manager do the following. 1. From the Windows Program Manager, select IBM Management Plus. 2. Select Rapid Resume Manager. 3. View or change settings. 4. Follow the instructions on the screen. PC Server 310 - Type 8639 73 Standby: When the Standby feature is enabled, it initiates reduced power modes for the display, microprocessor, and hard disk drive after a specified period of inactivity. The default setting for automatically initiating standby is 20 minutes. The display is blanked and the hard disk drive "spins down' (enters a reduced-power state). Any use of the keyboard, mouse, or hard disk drive causes the computer to exit standby and return to full-power operation. For example, if 40 minutes is selected as the specified period, the computer goes into standby state if the mouse, keyboard, or microprocessor is not active for more than 40 minutes. To select and activate, deactivate, or change the Standby feature, see “Running Rapid Resume Manager” on page 73. Scheduler: Use the Scheduler to set a time for the computer to do the following: Start a program Display a message Power-off the computer If the computer will not already be power-on when it is time to start a program or display a message, a setting can be selected to power-on the computer at the appropriate time. To select and activate, deactivate, or change the Scheduler feature, see “Running Rapid Resume Manager” on page 73. Wake Up on Ring: You can select settings so that, if the modems receives a call the computer is in the suspend state, the computer "wakes up" on the first ring; that is, it returns to full-power. To select the Wake Up on Ring settings, feature, see “Running Rapid Resume Manager” on page 73. Formatting Diskettes: To format a diskette within the Diagnostic programs, select one of the following options: Format A: high density — 1.44MB Format A: low density — 720KB Format B: high density — 1.44MB Format B: low density — 720KB After selecting a diskette format option, follow the instructions that appear on the screen. Hard Disk Drive Boot Error: A hard disk drive boot error (error codes 1996 and I999030X) can be caused by the following: 74 PC Server HMM Cause Actions The start-up drive is not in the boot sequence in configuration. Check the configuration and ensure the start-up drive is in the boot sequence. No operating system installed on the boot drive. In stall an operating system on the boot drive. The boot sector on the start-up drive is corrupted. The drive must be formatted, do the following: 1. Attempt to access and recover (back-up) the failing hard disk drive. 2. Using the operating systems programs, format the hard disk drive. 3. Go to “Preparing the Hard Disk Drive for Use” on page 75. The drive is defective. Replace the hard disk drive. When To Use the Low-Level Format Program Note Before formatting the hard disk drive, make a back-up copy of the files on the drive to be formatted. Use the Low-Level Format program: When you are installing software that requires a low-level format When you get recurring messages from the test programs directing you to run the Low-Level Format program on the hard disk As a last resort before replacing a hard disk drive Preparing the Hard Disk Drive for Use When the Low-Level Format program is finished, restore to the hard disk all the files that you previously backed up. 1. Partition the remainder of the hard disk for your operating system. (The commands vary with the operating system. Refer to your operating-system manual for instructions.) 2. Format the hard disk using your operating system. (The commands vary with the operating system. Refer to your operating-system manual for instructions.) 3. Install the operating system. You are now ready to restore the files. PC Server 310 - Type 8639 75 File Editor: The File Editor is an ASCII text editor that uses simple function key commands. To access the File Editor: 1. Select File Editor from the Utility Menu; then press Enter. 2. Insert a diskette into Drive A or Drive B before selecting the file you want to edit, then select the file you want to edit from the Files selection box. 3. Make your changes. The arrow keys move the cursor, and the function keys perform search and block editing functions. (See “File Edit Function Key Usage.”) 4. When you are done, press F10 to update the file with the changes you made, or press Esc to quit the editing process without saving the changes. File Edit Function Key Usage The following information describes the function of the function keys and keyboard keys when you are using the File Editor. Key Description Arrows Move the cursor to the place in the text where you want to make changes. Home Press Home once, to move the cursor to the start of the current line. Press Home twice, to move to the beginning of the file. Press Home three times, to move to the beginning of the file. End Press End once, to move the cursor to the end of the current line. Press End twice, to move the cursor to the end of the current screen. Press End three times, to move the end of the file. F2 Press F2 to be in search mode, You are prompted to enter the search word or words on a reverse highlighted line at the bottom of the File Edit Screen. After typing in the search word, press Enter. F3 Press F3 to find the next occurrence of a search word. 76 PC Server HMM Key Description F4 Press F4 to mark the start of a block of text (if you have not previously marked it). If you previously marked the block of text, pressing this key unmarks the text block. F5 Press F5 to complete the block marking (started with F4). If you did not previously press F4 to start marking a block of text, F5 is ignored. F6 Press F6 while the cursor is within the active block to move an active (marked) block of text. Move the cursor to the new location where the active block is to be moved, then press F6 again. If there is no active block of text, F6 is ignored. F7 To copy an active (marked) block of text to a new location, move the cursor to the new location and then press F7. If there is no active block of text F7 is ignored. F8 To delete an active (marked) block of text, move the cursor within the active block and press F8. If there is no active block of text, F8 is ignored. F10 Press F10, to save all changes and exit the file. Notes: 1. Always make a backup copy on a self-starting diskette of the AUTOEXEC.BAT and CONFIG.SYS files before making any changes. 2. The default text editing mode of the File Editor is the insert mode. To toggle between overtype and insert modes, press Insert. Diagnostics Control Keys: The following is a list of the Diagnostics Control Keys, when used and a description of the Diagnostics response. PC Server 310 - Type 8639 77 Control Keys When Used Diagnostics Response Ctrl+A Main Menu Allows you to select test from the sub menus that are highlighted with red letters. Attention: If selected, these test will erase the information stored on the diskette or hard disk drive. Up and Down Arrow Keys Main Menu Module Test Menu Test Group Menu Highlights an item you want to select. Space Bar Module Test Menu Test Group Menu Adds a diamond to the left of the highlighted test. The test will run when Run All Selected is highlighted and the Enter key is pressed. Also removes the diamond to the left of the item. The test will not run when Run All Selected is highlighted and the Enter key is pressed. Tab Key Main Menu Module Test Menu Selects the additional test for the menu you are in. +/− Keys Test Group Menu Selects additional test. The LUN displayed on the top right Test Group Menu shows which test is selected and how and remain (example LUN 1 of 2). 78 PC Server HMM System Board Memory: The following matrix cross-references the name of the computer (printed on the logo) and the size, speed, and type of memory modules supported in the computer. Computer Name Type 8639 SIMMs must be installed in matched pairs. Memory Module Size Speed Type 4MB 8MB 16MB 32MB 70ns Parity Note: Use only 70ns memory-module kits in your computer. PC Server 310 - Type 8639 79 Specifications Size Depth: 448 mm (17.6 in.) Height: 160 mm (6.3 in.) Width: 420 mm (16.5 in.) Weight Min. configuration: 12.7 kg (28.0 lb) Max. configuration: 14.1 kg (31.0 lb)1 Environment Air temperature: – System on: 10° to 32°C (50° to 90°F) – System off: 10° to 43°C (50° to 110°F) Humidity: – System on: 8% to 80% – System off: 8% to 80% – Maximum altitude: 2134 m (7000 ft) Heat Output Approximate heat output in BTUs per hour: – Min. configuration: 120 BTU (35 watts) – Max. configuration: 1060 BTU (310 watts) 2 – Deep sleep: 15 BTU (4 watts) Electrical Input Sine-wave input (50 to 60 Hz) required. Low range input voltage: – Min.: 110 V ac – Max.: 125 V ac High range input voltage: – Min.: 200 V ac – Max.: 240 V ac Input kVA (approximately): – Min. configuration as shipped: 0.08 kVA – Max. configuration: 0.52 kVA Airflow Approximately 0.56 cubic meters/minute (20 CFM) Acoustical Noise Emission Values Average sound pressure levels: – At operator position: - 43 dB operating - 43 dB idle – At bystander position (1 meter): - 40 dB operating - 40 dB idle Declared (upper limit) sound power levels: – 5.0 bels operating – 4.8 bels idle 1 Maximum configuration weight depends on options installed. Figures above are a system fully populated with options. 2 Maximum power and heat specifications are based on the 200-watt maximum capacity of the system power supply. 3 For additional information, see the ISO Supplier's Declaration available from IBM. 80 PC Server HMM System Board Replacement Notes 1. The BIOS and Vital Product Data (VPD) for the computer you are servicing must be installed on the new system board (FRU) after it is installed in the computer. To do this, you must run the Flash Update program using the Flash Update diskette shipped with the new system board FRU. See “BIOS Levels” on page 68 “Vital Product Data” on page 89, and “Flash (BIOS/VPD) Update Procedure” on page 69. 2. Always ensure the latest level of BIOS is installed on the computer. A down level BIOS may cause false errors and unnecessary replacement of the system board. 3. The processor is a separate FRU from the system board and is not included with the system board FRU. If you are instructed to replace the system board, do the following. 4. Install the processor from the old system board on the new system board. 5. If any of the following options are on the old system board, install them on the new system board. External cache memory and cache tag RAM Memory modules Extended video memory 6. Ensure that the new system board jumper settings match the old system board jumper settings. 7. If the new system board does not correct the problem, reinstall the options on the old system board, reinstall the old system board, then replace the processor. Test Programs The Diagnostics test programs, developed by DiagSoft for IBM, are the primary method of testing the computer. You can use them to test the IBM components of the system and some external devices. The amount of time required to test all components depends on the number of components. The more optional adapters and devices you have attached to your system, the longer the testing takes. The test programs on the Diagnostic Diskette include the following features: PC Server 310 - Type 8639 81 Feature Description Advanced Diagnostic Tests Identifies most problems associated with the following major components: Flexible Test Control Allows you to: 82 PC Server HMM System board Hard disk drives Diskette drives CD-ROM drives RAM Serial and parallel ports Video adapter Printer Keyboard Mouse Run groups of tests in batch Specify parameters to use for each test (for example, video modes, disk cylinders, and port addresses) Specify the number of passes you want to run (one to continuous) Log the test results to a text dBase (DBF) format file Save all test settings for future use View System Information View the server's configuration information. (For example, you can view the IRQ/DMA assignments, memory usage, and device drivers) Select System Utilities Run a low-level format also contains system utilities. Format a diskette Undetermined Problem Check the power supply voltages. See “Power Supply” on page 71. If the voltages are correct, return here and continue with the following steps. 1. Power-off the computer. 2. Remove or disconnect the following, one at a time: a. Non-IBM devices b. External devices (modem, printer, or mouse) c. Math coprocessor d. Any adapters e. Riser card f. Memory modules Before removing or replacing memory modules, see “System Board Memory” on page 79. g. Extended video memory h. External Cache i. External Cache RAM j. Hard disk drive k. Diskette drive 3. Power-on the computer to re-test the system. 4. Repeat steps 1 through 3 until you find the failing device or adapter. If all devices and adapters have been removed, and the problem continues, replace the system board. See “System Board Replacement” on page 81. PC Server 310 - Type 8639 83 Using the Test Programs The test programs provide advanced functions and utilities for users and service or support professionals to troubleshoot even the most difficult problems. Program Navigation: You can maneuver within the test programs by typing the first letter of a menu choice, using the function keys, or using command-line options. Using the First Letter of a Menu Choice Throughout the test programs, pressing the first letter of an option on a menu is the same as moving to that item with the cursor and pressing Enter; however, this function is not enabled on Test Group Screens. Using the Function Keys Use the following keys to maneuver throughout the test programs: Keys Action Enter Select an item, run the test module, or run the test Down Arrow (↓) Moves the cursor down Up Arrow (↑) Moves the cursor up F1 Calls up the appropriate Help information. Use the up arrow key (↑) or the down arrow key (↓) to scroll through the information. Pressing F1 from within a Help screen provides a help index from which you can select different categories. One of the important help categories is function key usage. Pressing Esc exits Help and returns to where you left off. Esc Go back to the previous menu Additional functions are available in the Test Module Selection screen and the Test Group screen using the following keys: Keys Action Tab Move to test group (or move to parameters) Spacebar Toggle modules on/off (or toggle tests on/off) F2 View test results log 84 PC Server HMM Keys Action F10 Local menu + Next logical unit number (for example, LUN 1, LUN 2, and so on) − Previous logical unit number Command Line Options The following Command Line Options are available when initially starting the diagnostic program from within its directory. Type QAPLPRO/XXX (where /XXX represents one of the following from the list below) then press Enter. Command Action /B&W The /B&W command line option forces the program to load in Black and White (Monochrome) mode, which is often more readable on laptop computers. /LOG=file The /LOG=file command line option directs the test programs to start using a specified Error Log file. /INT10 The /INT10 command line option forces the test programs to use the BIOS for screen writes. /OXXX The /OXXX command line option, where XXX=test group (for example, MBD/MEM/VID/HDU/ FDU/KBD/COM/LPT, and so on), omits the designated test group from testing. /USRCONFIG =file The /USERCONFIG=file command line option tells the test programs to look for a user diagnostic configuration file other than the default USERDIAG.CFG. /SCRIPT =file[,R] The /SCRIPT=file[,R] command line option with the “,R” runs the selected script. Please see “Scripting” on page 86 for a description of scripting. Note: You can use a “–” instead of a “/” as the command line switch. PC Server 310 - Type 8639 85 Viewing the Test Groups: As you move the cursor bar up or down in the Test Module Selection window, the right hand screen changes to show the attributes, parameters, and the selected tests of the corresponding Test Group. The ◊ mark indicates a module selected for testing. The indicated attributes are characteristics of the selected test module that are used by the test programs to determine which tests to run or how to run selected tests. Attributes are also used to limit the allowable range of parameters (for example, – ending cylinder). Parameters are values you select to establish the scope of tests. For example, you can select Extended Memory testing parameters and limit the testing to a specific range of test blocks by specifying the starting and ending memory block. This might be appropriate if prior experience indicates that problems are likely to exist in a specific area of memory. By selecting these limiting parameters, you reduce memory testing time. Scripting: Scripting allows you to select specific groups of tests, testing parameters, and options. Your selection is saved for later use as a test Script. To set up a test script, first select all the appropriate test groups and specific tests you want to run from the Module Testing section under Diagnostics. You should also select appropriate testing parameters and options. See “Program Navigation” on page 84, for instructions to save a test script. Changing Logical Unit Numbers: In some instances, you can have more than one logical unit number (LUN) for a particular module. LUNs represent individual devices within a test group or module. For example, you might have two diskette drives or two hard disk drives; or, you might have base, extended, shadow, and cache memory installed in the computer. This configuration might result in as many as four or five different LUNs in the Memory Test Group. Or you might have base, extended, shadow, and cache memory installed in the system which might result in as many as four or five different LUNs in the Memory Test Group. From either the Module Test Menu or the Test Group window, you can change to a different LUN (where applicable) by pressing the plus (+) key (next LUN), or the minus (−) key (previous LUN). Test Group Specifications: In the upper-right-hand portion of the testing screen (or just the upper portion if you switched to an individual test group screen) are the specifications for the related test group. Note: In the Hard Disk Test Group specification area, if a 86 PC Server HMM software program was to compress your drive, the indicated size is the compressed size of the logical drive. Starting the Diagnostics Diskette 1. Insert the Diagnostics diskette into drive A. 2. Power-on the computer. 3. When the Diagnostics Main Menu is displayed, press Ctrl+A. (The screen will not change.) 4. Select Diagnostics; then, press Enter. 5. Follow the instructions that appear on your screen. If an error is displayed, go to “Symptom-to-FRU Index Supplement” on page 95. Module Testing Mode If the test programs do not find a problem, or you want to perform in-depth testing, the Module Testing mode provides a method to run individual tests on a single module. For example, you can run an individual test for the diskette drive, or you can run groups of tests for several modules. In the Module Testing mode, you can define how many times each test should run and how the test program should log the errors. To start the Module Testing mode: 1. Start the Diagnostics diskette. See “Starting the Diagnostics Diskette.” 2. Select Diagnostic from the Main Menu. 3. Select Module Tests from the next menu. 4. Use the up and down arrow keys (↑ and ↓) to move the highlight bar from one selection to the next. 5. Follow the instructions on the screen. Note: As you scroll down the selection menu, the Test Group window to the right changes to correspond to the highlighted Module. Running Selected Module Tests To run all selected tests for a test group: 1. Use the up and down arrow keys (↑ and ↓) to move the cursor to your selection. 2. Press Enter. Note: A ◊ appears next to your selection. Running All Selected Modules To run all selected test modules: 1. Use the down arrow key (↓) to move the cursor to the last choice, Run All Selected Modules. 2. Press Enter. Note: A ◊ appears next to your selection. PC Server 310 - Type 8639 87 Changing Selected Tests in Test Groups To change selected tests in a Test Group: 1. In the Module Tests Menu, use the up and down arrow keys (↑ and ↓) to move the cursor to your selection. 2. Press Tab to move into the expanded Test Group window. 3. Scroll to the test you want to select or deselect. Attention Items indicated by a directly adjacent “*” (red text on color screens) are destructive tests. 4. Press the spacebar at the highlighted test to toggle between select (indicated by a ◊) and deselect. Note: Pressing the first letter of a test does not activate the test, unlike menu operation. 5. Press Enter. Running an Individual Test To run an individual test: 1. Use the up and down arrow keys (↑ and ↓) to move to the highlighted bar to the test you want to run. 2. Press Enter to run the test. Note: The results of the test appear in the lower-right-hand Test Log window. Also, if you enabled Test Logging, the results are recorded in the Test Log. 3. When the test completes, press Esc to return to the Test Group Menu. Stopping the Tests: To stop running a specific test or stop testing after you have started a test, press Esc while the test is running. The test pauses at the first possible opportunity, and the Skip/Abort Test Menu appears with the following options: Option Action Continue The test program begins testing where it left off. Skip to next test The test program skips the current test, but remaining tests for the selected Test Module continue. Skip to next group The test program skips the remaining tests in the current test group. Abort all tests The test program stops and returns to the previous menu. 88 PC Server HMM Vital Product Data Each computer has a unique vital product data (VPD) code stored in the nonvolatile memory on the system board. After you replace the system board the VPD must be updated. To update the VDP, see “Flash (BIOS/VPD) Update Procedure” on page 69. Locations The following location information is for the PC Server 310 Type 8639. “Expansion Slots/Riser Cards.” “Keylock Assembly Exploded View” on page 91. “System Board” on page 92. Expansion Slots/Riser Cards All Type 8639 computers have seven expansion slots, two of which are PCI expansion slots. The other five expansion slots are either Micro Channel or ISA, depending on model. The PCI slots and their adjacent Micro Channel or ISA expansion slots are shared expansion slots. This means that an adapter can be installed in either the PCI expansion slot or the adjacent Micro Channel or ISA expansion slot, but not in both. A SCSI-2 Fast/Wide PCI Adapter is installed in one of the PCI expansion slots. An Ethernet adapter is installed in one of the Micro Channel or ISA slots. This leaves one PCI slot and three Micro Channel or ISA slots available for future expansion. For example, you can add adapters to provide communications, specialized graphics, and sound. PCI/Micro Channel Models: The following illustration shows the location and numbering of the PCI and Micro Channel expansion slots. Note the location of the shared expansion slots. * Micro Channel Architecture ( ( ) ( ) ( ) * * * * * ) (On other side) Riser Share PCI Slot ( ) Share PCI Slot ( ) PC Server 310 - Type 8639 89 PCI/ISA Models: The following illustration shows the location and numbering of the PCI and ISA expansion slots. Note the location of the shared expansion slots. ISA (On other side) ISA Riser ISA PCI Share Slot ISA PCI Share Slot ISA Riser Card (ISA) Administrator Password: ISA Riser cards have an administrator password jumper located to the left of the battery. Note: This jumper will not remove the password. The setting of this jumper determines if an Administrator Password can or cannot be set on the computer. Important If the Administrator Password is lost or forgotten, the password cannot be changed or removed. If this occurs, the system board must be replaced. 90 Jumper Position Results 1-2 (pins closest to the battery) Administrator Password can be set 2-3 (pins farthest from the battery) Administrator password cannot be set PC Server HMM Keylock Assembly Exploded View PC Server 310 - Type 8639 91 System Board 27 29 92 PC Server HMM System Board (Continued) .1/ .2/ MRD .3/ WP .4/ .5/ .6/ J38 .7/ J37 .8/ .9/ J26, J27 .1ð/ .11/ .12/ J101 .13/ .14/ .15/ .16/ .17/ .18/ PWD .19/ .2ð/ .21/ .22/ .23/ .24/ .25/ .26/ .27/ .28/ .29/ J28 Riser connector Modem Ring Detect jumper Diskette drive write protect jumper Diskette drive connector Hard disk drive connectors On/Off Switch Power Supply Connector On/Off Switch Connector Power supply connectors Bus/CPU Speed (MHz) 256KB/1MB Cache jumpers Processor connector Bus/Core Ratio Cache connectors Memory connectors (Bank 2) Memory connectors (Bank 1) Memory connectors (Bank 3) Video memory modules Power-on password jumper Battery Display connector Parallel connector Serial connector Serial connector Keyboard connector Mouse connector Audio (input jack) Audio (output jack) IDE CD-ROM Audio connector Mouse jumper PC Server 310 - Type 8639 93 Jumper Settings The following tables contain the jumper setting information. (D) indicates the default setting. Jumper Setting Description MRD 2-3 (D) 1-2 Modem answer on ring. Modem no answer on ring. WP 2-3 (D) 1-2 Enable writing to a diskette Disable writing to a diskette. Cache 1-2 (D) 2-3 256KB Cache 1MB Cache J101 1-2 (D) 2-3 2/3 Bus/Core Ratio 1/2 Bus/Core Ratio PWD 1-2 (D) 2-3 Password enabled. Password reset. Bus/CPU Speed MHz Settings: The following table contains the Bus/CPU Speed Settings 94 Jumper 50/75 60/90 60/120 66/100 66/133 J26 J27 2-3 2-3 2-3 1-2 1-2 1-2 PC Server HMM Symptom-to-FRU Index Supplement The Symptom-to-FRU Index lists error symptoms and possible causes. The most likely cause is listed first. Always begin with “General Checkout (Models 0XT, 0Z0, 0ZT, 0D0, 0DT)” on page 57. This index can also be used to help you decide which FRUs to have available when servicing a computer. If you are unable to correct the problem using this index, go to “Undetermined Problem” on page 83. Notes If you have both an error message and an incorrect audio response, diagnose the error message first. If you cannot run the diagnostic tests, but did receive a POST error message, diagnose the POST error message. If you did not receive any error message, look for a description of your error symptoms in the first part of this index. Check all power supply voltages before you replace the system board. (See “Power Supply” on page 71.) Important 1. Some errors are indicated with a series of beep codes. (See “Beep Symptoms” on page 96.) 2. The processor is a separate FRU from the system board; the processor is not included with the system board FRU. (See “System Board Replacement” on page 81.) PC Server 310 - Type 8639 95 Beep Symptoms Beeps symptoms are short tones or a series of short tones separated by pauses (intervals without sound). See the following examples. Beeps 1-2-X Description One beep A pause (or break) Two beeps A pause (or break) Any number of beeps 4 Four continuous beeps Beep Symptom FRU/Action 1-1-3 CMOS read/write error 1. Run Setup 2. System Board 1-1-4 ROM BIOS check error 1. System Board 1-2-X DMA error 1. System Board 1-3-X 1. Memory Module 2. System Board 1-4-4 1. Keyboard 2. System Board 1-4-X Error detected in first 64KB of RAM. 1. Memory Module 2. System Board 2-1-1, 2-1-2 1. Run Setup 2. System Board 2-1-X First 64KB of RAM failed. 1. Memory Module 2. System Board 2-2-2 1. Video Card 2. System Board 2-2-X First 64KB of RAM failed. 1. Memory Module 2. System Board 2-3-X 1. Memory Module 2. System Board 2-4-X 1. Run Setup 2. Memory Module 3. System Board 3-1-X DMA register failed. 1. System Board 3-2-4 Keyboard controller failed. 1. System Board 2. Keyboard 3-3-4 Screen initialization failed. 1. Video Adapter 2. System Board 3. Display 3-4-1 Screen retrace test detected an error. 1. Video Adapter 2. System Board 3. Display 96 PC Server HMM Beep Symptom FRU/Action 3-4-2 POST is searching for video ROM. 1. Video Adapter 2. System Board 4 1. Video Adapter 2. System Board All other beep code sequences. 1. System Board One long and one short beep during POST. Base 640KB memory error or shadow RAM error. 1. Memory Module 2. System Board One long beep and two or three short beeps during POST. (Video error) 1. Display Adapter, if installed. 2. System Board Three short beeps during POST. 1. See “System Board Memory” on page 79. 2. System Board Continuous beep. 1. System Board Repeating short beeps. 1. Keyboard stuck key? 2. Keyboard Cable 3. System Board No Beep Symptoms Symptom/Error FRU/Action No beep during POST but computer works correctly. 1. System Board No beep during POST. 1. See “Undetermined Problem” on page 83. 2. System Board 3. Memory Module 4. Any Adapter or Device 5. Riser Card 6. Power Cord 7. Power Supply PC Server 310 - Type 8639 97 Numeric Error Codes In the following index, “X” can represent any number. Error Code FRU/Action 000 SCSI Adapter not enabled. 1. Be sure adapter device and Bus Master fields are enabled in PCI configuration program. See documentation shipped with computer. 02X 1. SCSI Adapter 08X Check SCSI terminator installation. 1. 2. 3. 4. 101 Interrupt failure. 1. System Board 102 Timer error. 1. System Board 106 1. System Board 110 System board parity error. 1. Memory Module 2. System Board 111 I/O channel parity error. 1. Reseat adapters 2. Any Adapter 3. System Board 114 External ROM checksum error. 1. Memory Module 2. System Board 129 Internal cache test error. 1. Processor 2. L2 Cache Memory 3. System Board 151 Real-time clock failure. 1. System Board 161 Bad CMOS battery. 1. Run Setup 2. Clock Battery (See “Battery Notice” on page 461) 3. System Board 162 And unable to run diagnostics. 1. Diskette Drive 2. System Board 3. Diskette Drive Cable 162 1. Run Setup 2. Clock Battery (See “Battery Notice” on page 461) 3. System Board 98 PC Server HMM SCSI SCSI SCSI SCSI Cable Terminator Device Adapter Error Code FRU/Action 163 Clock not updating or invalid time set. 1. Time and Date Set? 2. Clock Battery (See “Battery Notice” on page 461) 3. System Board 164 POST detected a base memory or extended memory size mismatch error. 1. Run Setup. Check System Summary menu for memory size change. (See “Setup Program” on page 73.) 2. Run the Extended Memory Diagnostic tests. 17X, 18X 1. C2 Security 175 1. Riser Card 2. System Board 176 1. Covers were removed from the computer. 177 Corrupted Administrator Password. 1. Riser Card 2. System Board 178 1. Riser Card 2. System Board 183 1. Enter the administrator password 184 Password removed due to check-sum error. 1. Enter new password 185 Corrupted boot sequence. 1. Set configuration and reinstall the boot sequence. 186 1. Riser Card 2. System Board 189 1. More than three password attempts were made to access the computer. 1XX Not listed above. 1. System Board 201 Memory data error. 1. Memory Module 2. System Board 225 1. Unsupported Memory 229 External cache test error. 1. L2 Cache Memory 2. System Board PC Server 310 - Type 8639 99 Error Code FRU/Action 262 POST detected a base memory or extended memory type error. 1. Run Setup. Check System Summary menu for memory type change. (See “Setup Program” on page 73.) 2. Run the Extended Memory Diagnostic tests. 301 1. Keyboard 2. Keyboard Cable 3. System Board 303 With an 8603 error. 1. 2. 3. 4. 303 With no 8603 error. 1. Keyboard 2. Keyboard Cable 3. System Board 3XX Not listed above. 1. Keyboard 2. Keyboard Cable 3. System Board 5XX 1. Display Adapter (if installed) 601 1. Diskette Drive A 2. Diskette Drive Cable 3. System Board 604 And unable to run diagnostics. 1. Diskette Drive A 2. Diskette Drive Cable 3. System Board 604 And able to run diagnostics. 1. Diskette Drive B 2. Diskette Drive Cable 3. System Board 605 POST cannot unlock the diskette drive. 1. Diskette Drive 2. Diskette Drive Cable 3. System Board 662 1. Diskette drive configuration error or wrong diskette drive type, run Set Configuration. 6XX Not listed above. 1. 2. 3. 4. 5. 762 Math coprocessor configuration error. 1. Run Setup 2. Math Coprocessor 3. System Board 7XX Not listed above. 1. Math Coprocessor 2. System Board Mouse Keyboard Keyboard Cable System Board 2. System Board 100 PC Server HMM Diskette Drive System Board External Drive Adapter Diskette Drive Cable Power Supply Error Code FRU/Action 962 Parallel port configuration error. 1. Run Configuration 2. Parallel Adapter (if installed) 3. System Board 9XX 1. Printer 2. System Board 1047 1. 16-Bit AT Fast SCSI Adapter 107X Check SCSI terminator installation. 1. Check SCSI terminator installation. 2. SCSI Cable 3. SCSI Terminator 4. SCSI Device 5. SCSI Adapter 1101 Serial connector error, possible system board failure. 1. Run Advanced Diagnostics 1101, 1102, 1106, 1108, 1109 1. System Board 2. Any Serial Device 1107 1. Communications Cable 2. System Board 1102 Card selected feedback error. 1. Run Advanced Diagnostics 1103 Port fails register check. 1. Run Advanced Diagnostics 2. System Board 1106 Serial option cannot be turned off. 1. Run Advanced Diagnostics 2. System Board 1107 1. Serial Device Cable 2. System Board 1110 Register test failed. 1. Run Advanced Diagnostics 2. System Board 1116 Interrupt error. 1. Run Advanced Diagnostics 1117 Failed baud rate test. 1. Run Advanced Diagnostics 1162 Serial port configuration error. 1. Run Configuration 2. Serial Adapter (if installed) 3. System Board 11XX Not listed above. 1. System Board 1201 1. System Board 2. Any Serial Device PC Server 310 - Type 8639 101 Error Code FRU/Action 1202, 1206, 1208, 1209, 12XX 1. Dual Async Adapter/A 2. System Board 3. Any Serial Device 1207 1. Communications Cable 2. Dual Async Adapter/A 13XX 1. Game Adapter 1402 Printer not ready. Information only 1403 No paper error, or interrupt failure. Information only 1404 System board timeout failure. 1. Run Advanced Diagnostics 1405 Parallel adapter error. 1. Run Advanced Diagnostics 1406 Presence test error. 1. Run Advanced Diagnostics 14XX Not listed above. Check printer before replacing system board. 1. Printer 2. System Board 15XX 1. SDLC Adapter 1692 Boot sequence error. 1. Run FDISK to ensure at least one active partition is set active. 16XX 1. 36/38 Workstation Adapter 1762 Hard disk drive configuration error. 1. Run Configuration (See “Setup Program” on page 73.) 1780 1781 1782 1783 1. See “Power Supply” on page 71. 2. Hard Disk Drive 3. System Board 4. Hard Disk Cable 5. Power Supply (Disk (Disk (Disk (Disk Drive Drive Drive Drive 0) 1) 2) 3) 1962 Boot sequence error. 1. Possible hard disk drive problem, see “Hard Disk Drive Boot Error” on page 74. 209X 1. Diskette Drive 2. Diskette Cable 3. 16-bit AT Fast SCSI Adapter 20XX Not listed above 1. BSC Adapter 2. Riser Card 102 PC Server HMM Error Code FRU/Action 21XX 1. SCSI Device 2. 16-bit AT Fast SCSI Adapter 3. Alternate BSC Adapter 4. Riser Card 2401, 2402 If screen colors change. 1. Display 2401, 2402 If screen colors are OK. 1. System Board 2. Display 2409 1. Display 2410 1. System Board 2. Display 2462 Video memory configuration error. 1. Run Configuration 2. Video Memory Modules 3. Video Adapter (if installed) 4. System Board 3015, 3040 Check for missing wrap or terminator plug on the adapter. 1. 2. 3. 4. 5. Network Attached? LF Translator Cable Problem PC Network Adapter Riser Card 30XX 1. 2. 3. 4. PC Network Adapter LF Translator Cable Problem? Riser Card 3115, 3140 1. Network Attached? 2. LF Translator 3. Alternate PC Network-Adapter 4. Cable Problem 5. Riser Card 31XX 1. Alternate PC Network Adapter 2. LF Translator 3. Cable Problem? 4. Riser Card 36XX 1. GPIB Adapter 2. Riser Card 38XX 1. DAC Adapter 2. Riser Card 4611, 4630 1. Multiport/2 Interface Board 2. Multiport/2 Adapter 4612, 4613 4640, 4641 1. Memory Module Package 2. Multiport/2 Adapter 4650 1. Multiport Interface Cable PC Server 310 - Type 8639 103 Error Code FRU/Action 46XX Not listed above. 1. Multiport/2 Adapter 2. Multiport/2 Interface Board 3. Memory Module 5600 1. Financial System 2. Controller Adapter 5962 CD-ROM configuration error. 1. 2. 3. 4. 62XX 1. 1st Store Loop Adapter 2. Adapter Cable 63XX 1. 2nd Store Loop Adapter 2. Adapter Cable 64XX 1. Network Adapter 71XX 1. Voice Adapter 74XX 1. Display Adapter (if installed) 2. Riser Card 76XX 1. Page Printer Adapter 78XX 1. High Speed Adapter 79XX 1. 3117 Adapter 80XX 1. PCMCIA Adapter 84XX 1. Speech Adapter 2. Speech Control Assembly 3. Riser Card 8601, 8602 1. Pointing Device (Mouse) 2. System Board 8603, 8604 1. System Board 2. Pointing Device (Mouse) 86XX Not listed above 1. Mouse 2. System Board 89XX 1. PC Music Adapter 2. MIDI Adapter Unit 3. Riser Card 91XX 1. Optical Drive 2. Adapter 96XX 1. SCSI Adapter 2. Any SCSI Device 3. System Board 104 PC Server HMM Run Configuration CD-ROM Drive CD-ROM Adapter System Board Error Code 10101, 10105, 10108, 10112, 10115, 10102, 10106, 10109, 10113, 10116 FRU/Action 10104 10107 10111 10114 1. Have customer verify correct operating system device drivers are installed and operational. 2. Modem 10103, 10110, 101171 1. System Board 2. Data/Fax Modem 10117 Not listed above. 1. Check system speaker 2. Check PSTN cable 3. External DAA (if installed) 4. Modem 10118 1. Run Diagnostics and verify the correct operation of the modem slot 2. Modem 10119 1. Diagnostics detected a non-IBM modem 2. Modem 10120 1. Check PSTN Cable 2. External DAA (if installed) 3. Modem 10132, 10135, 10138, 10141, 10144, 10147, 10150, 10133, 10136, 10139, 10142, 10145, 10148, 10151, 10134 10137 10140 10143 10146 10149 10152 1. Modem 10153 1. Data/Fax Modem 2. System Board 101XX Not listed above. 1. Modem Adapter/A 2. Data/Fax Modem 3. System Board 10450, 10451, 10490 10491, 10492, 10499 Read/write error. 1. Run Advanced Diagnostics 2. Riser Card 3. Hard Disk Drive 4. System Board 10452 Seek test error. 1. Run Advanced Diagnostics 10453 Wrong drive type? Information only 10454 Sector buffer test error. 1. Run Advanced Diagnostics 10455, 10456 Controller error. 1. Run Advanced Diagnostics PC Server 310 - Type 8639 105 Error Code 10459 Drive diagnostic command error. FRU/Action Information only 10461 Drive format error 1. Run Advanced Diagnostics 10462 Controller seek error. 1. Run Advanced Diagnostics 10464 Hard Drive read error. 1. Run Advanced Diagnostics 10467 Drive non fatal seek error. 1. Run Advanced Diagnostics 10468 Drive fatal seek error. 1. Run Advanced Diagnostics 10469 Drive soft error count exceeded. 1. Run Advanced Diagnostics 10470, 10471, 10472 Controller wrap error. 1. Run Advanced Diagnostics 10473 Corrupt data. Low level format might be required. Information only 10480 1. Hard Disk Drive (ESDI) 2. Drive Cable 3. System Board 10481 ESDI drive D seek error. 1. Run Advanced Diagnostics 10482 Drive select acknowledgement bad. 1. Run Advanced Diagnostics 106X1 1. Check Configuration 2. Ethernet Adapter 10635 1. Power-off computer, wait ten seconds; then power-on the computer. 2. Ethernet Adapter 10651, 10660 1. Check Cables 2. Ethernet Adapter 106XX Not listed above. 1. Ethernet Adapter 107XX 1. 5.25-inch External Diskette Drive 2. 5.25-inch Diskette Drive Adapter/A 109XX Check the adapter cables. 1. ActionMedia Adapter/A 2. System Board 112XX This adapter does not have cache. 1. SCSI Adapter 2. Any SCSI Device 3. System Board 106 PC Server HMM Error Code FRU/Action 119XX 1. 3119 Adapter 121XX 1. Modem Adapter 2. Any Serial Device 3. System Board 136XX 1. ISDN Primary Rate Adapter 2. System Board 137XX 1. System Board 141XX 1. Realtime Interface Coprocessor Portmaster Adapter/A 143XX 1. Japanese Display Adapter 2. System Board 14710, 14711 1. System Board Display Adapter 2. Adapter Video Memory 148XX 1. Display Adapter 14901, 14902 1491X, 14922 1. Display Adapter 2. System Board 3. Display (any type) 14932 1. External Display 2. Display Adapter 16101 1. Riser Card Battery (See “Battery Notice” on page 461) (See “Battery Notice” on page 461) 161XX 1. FaxConcentrator Adapter 164XX 1. 120MB Internal Tape Drive 2. Diskette Cable 3. System Board 16500 1. 6157 Tape Attachment Adapter 16520, 16540 1. 6157 Streaming Tape Drive 2. 6157 Tape Attachment Adapter 166XX, 167XX 1. Token Ring Adapter 2. System Board 3. Riser Card 18001 to 18029 1. Wizard Adapter 2. Wizard Adapter Memory 18031 to 18039 1. Wizard Adapter Cable 185XXXX 1. DBCS Japanese Display Adapter/A 2. System Board PC Server 310 - Type 8639 107 Error Code FRU/Action 20001 to 20003 1. Image Adapter/A Image-I Adapter/A 2. Memory Module DRAM, VRAM 20004 1. Memory Module DRAM, VRAM 2. Image Adapter/A Image-I Adapter/A 20005 to 20010 1. Image Adapter/A Image-I Adapter/A 2. Memory Module DRAM, VRAM 200XX Not listed above. 1. Image Adapter/A Image-I Adapter/A 2. Memory Module DRAM, VRAM 3. System Board 20101 to 20103 1. Printer/Scanner Option 2. Image Adapter/A 3. Memory Module DRAM, VRAM 20104 1. Memory Module DRAM, VRAM 2. Printer/Scanner Option 3. Image Adapter/A 20105 to 20110 1. Printer/Scanner Option 2. Image Adapter/A 3. Memory Module DRAM, VRAM Image Adapter/A Memory Test failure indicated by graphic of adapter. 1. Replace memory module (shown in graphic.) 206XX 1. SCSI-2 Adapter 2. Any SCSI Device 3. System Board 208XX Verify there are no duplicate SCSI ID settings on the same bus. 1. Any SCSI Device 210XXXX Internal bus, size unknown. 1. SCSI Hard Disk Drive 2. SCSI Adapter or System Board 3. SCSI Cable 4. SCSI ID Switch (on some models) 210XXX1 External bus, size unknown. Tape Drive amber LED remains on. 108 PC Server HMM 1. Tape Drive 2. SCSI Cable (internal) 3. SCSI Adapter or System Board Error Code FRU/Action Tape Drive green “in use” LED fails to come on. 1. Tape Drive 2. SCSI Adapter or System Board 3. SCSI Cable (internal) SCSI Cable (external) Tape automatically ejected from drive. 1. Tape Cassette 2. Drive SCSI ID on rotary switch does not match SCSI ID set in configuration. Verify drive switches inside cover are set to zero. 1. Rotary Switch Circuit Board 2. Circuit Board Cable 3. Tape Drive Tape sticks/breaks in drive. Verify that the tapes used meet ANSI standard X3B5. 1. Tape Cassette 212XX 1. SCSI Printer 2. Printer Cable 213XX 1. SCSI Processor 214XX 1. WORM Drive 215XXXC 215XXXD 215XXXE 215XXXU If an external device, and power-on LED is off, check external voltages. 1. CD-ROM Drive I CD-ROM Drive II Enhanced CD-ROM Drive II Any CD-ROM Drive 2. SCSI Cable 3. SCSI Adapter or System Board 216XX 1. Scanner 217XX If an external device, and power-on LED is off, check external voltages. 1. Rewritable Optical Drive 2. SCSI Adapter or System Board 3. SCSI Cable 218XX Check for multi CD tray, or juke box. 1. Changer 219XX 1. SCSI Communications Device 24201Y0, 24210Y0 Be sure wrap plug is attached. 1. ISDN/2 Adapter 2. ISDN/2 Wrap Plug 3. ISDN/2 Communications Cable 273XX 1. 1Mbps Micro Channel Infrared LAN Adapter 27501, 27503 27506, 27507 1. ServerGuard Adapter 2. System Board PC Server 310 - Type 8639 109 Error Code FRU/Action 27502, 27504, 27510 27511, 27533, 27534 27536, 27537 1. ServerGuard Adapter 27509 1. Remove redundant adapters, run Auto Configuration program, then retest. 27512 1. WMSELF.DGS diagnostics file missing. 2. WMSELF.DGS diagnostics file incorrect. 27535 1. 3V Lithium Backup Battery 2. ServerGuard Adapter 27554 1. Internal Temperature out of range 2. ServerGuard Adapter 27555, 27556 1. ServerGuard Adapter 2. Power Supply 27557 1. 7.2V NiCad Main Battery Pack 2. ServerGuard Adapter 27558, 27559 27560, 27561 1. PCMCIA Type II Modem 2. ServerGuard Adapter 27562 1. External Power Control not connected 2. External Power Control 3. ServerGuard Adapter 27563, 27564 1. External Power Control 2. ServerGuard Adapter 275XX 1. Update Diagnostic Software 27801 to 27879 1. Personal Dictation System Adapter 2. System Board 27880 to 27889 1. External FRU (Speaker, Microphone) I999030X Hard disk reset failure. 110 PC Server HMM Possible hard disk drive problem, see “Hard Disk Drive Boot Error” on page 74. Error Messages Error Message/Symptom FRU/Action Address Exceeds the Size of Your Memory An invalid memory address was entered. Diagnostics Tests display this message during the Locate Bad Chips option. 1. Enter the correct address. 2. Memory Module 3. System Board Arithmetic Functions Failed An error was detected during the CPU Test. 1. Microprocessor 2. System Board Base Memory Test Failed An error was detected in base memory. 1. Memory Module 2. System Board Boot Sector Unreadable A boot sector read error was detected on the hard disk drive. 1. Hard Disk Drive 2. Hard Disk Drive Cable 3. Hard Disk Drive Adapter (if installed) 4. System Board Bus Noise Test Failed RAM Test detected an error in the memory bus. 1. Memory Module 2. System Board Butterfly Cylinder Access Test Failed Hard Disk Drive Test detected mismatch between the data read and the data stored on the drive. 1. Hard Disk Drive 2. Hard Disk Drive Cable 3. Hard Disk Drive Adapter (if installed) 4. System Board Clock Stopped Real-time clock has stopped working. 1. Real-Time Clock Assembly 2. System Board CMOS Clock Test Failed Time and Date Settings for CMOS and DOS do not Match. 1. Real-Time Clock Assembly 2. System Board Controller Diagnostic Test Failed An error was detected while testing the Hard Disk Controller (Adapter). 1. Hard Disk Drive Adapter (if installed) 2. Hard Disk Drive 3. System Board Cylinder 0 errors Test detected an error reading the first cylinder of the hard disk drive. 1. Hard Disk Drive 2. Hard Disk Drive Adapter (if installed) 3. System Board Device is Not Ready Ready the Device... or Press Any Key 1. Ensure the device is powered-on. 2. Replace failing device 3. Device Adapter (if installed) 4. System Board PC Server 310 - Type 8639 111 Error Message/Symptom FRU/Action Disk Error Encountered Opening Output File Press Any Key To Continue. 1. Hard Disk Drive 2. Hard Disk Drive Adapter (if installed) 3. System Board DMA #X Failed Main Components Test detected an error while testing the DMA controller. 1. System Board DMA Page Register Failed DMA page register error 1. System Board Drive (x) Media (y) Mismatch FAT ID mismatch with installed drive. 1. Check diskette and diskette drive capacity. 2. Diskette Drive 3. System Board Error in video buffer. Bad bits. Video memory test error. 1. Video Adapter 2. System Board 3. Display Exception Interrupt In Protected Mode Diags Cannot Continue Server error, remove one adapter at a time until the symptom goes away. 1. Any Adapter 2. System Board 3. Processor Extended Memory Test Failed Extended memory error. 1. Memory Module 2. System Board Floppy Drive Failed Diskette drive(s) failed. 1. Diskette Drive 2. System Board 3. Diskette Drive Cable General Function Failed Remove one adapter at a time until the symptom goes away. 1. Any Adapter 2. System Board 3. Processor Hard Drives Failed Hard Disk Drive test error. 1. Hard Disk Drive 2. Hard Disk Drive Adapter (if installed) 3. System Board Incorrect DOS version 1. Ensure you are using DOS version 3.0 or higher. INT Mask Register Failed INT Mask Register error. 1. Microprocessor 2. System Board Invalid Date Clock/DOS date mismatch. 1. Real-Time Clock Assembly 2. System Board Invalid Time Clock/DOS time mismatch. Back-up clock and DOS time of day settings do not match. 1. Real-Time Clock Assembly 2. System Board 112 PC Server HMM Error Message/Symptom FRU/Action Linear Cylinder Access Test Failed Hard disk drive error. 1. Hard Disk Drive 2. Hard Disk Drive Cable 3. Hard Disk Drive Adapter (if installed) 4. System Board Logic Function Failed CPU Logic test error. 1. Microprocessor 2. System Board Loopback Error COM Port Test or Parallel Port error. 1. System Board 2. Wrap Plug A wrap plug must be installed to successfully complete these tests. Main Components Failed System board error. 1. System Board 2. Processor Memory test cannot run at this location in memory Not enough free memory available to start the memory test. 1. Memory Module 2. System Board Missing QAPlus/PRO Files(s) One or more diagnostic support files are missing. 1. Diagnostic Diskette NO LOOP-BACK PLUG. Skipping External loopback test No wrap plug installed. 1. Install wrap plug on the serial port, rerun test. 2. System Board Not ready Printer not on-line or not ready. 1. 2. 3. 4. No 'type-amatic' repeat At least one repeat key must be tested during this test or an error will occur. Type-amatic test error. 1. Keyboard 2. System Board Not used by any standard device IRQ is not currently being used by a non-standard device. 1. System Board Numeric Proc Failed NPU test error. 1. Microprocessor 2. System Board Parallel Ports Failed Test Report Summary message. 1. System Board Pass (N): ** Errors ** Drive (X) Failed Diskette drive read/write test error. 1. Diskette Drive 2. System Board 3. Diskette Drive Cable Ready Printer Printer Printer Cable System Board PC Server 310 - Type 8639 113 Error Message/Symptom FRU/Action Pass (N) Drive Not Ready Diskette drive door is open or defective. 1. Ensure diskette drive is ready. 2. Diskette Drive 3. System Board 4. Diskette Drive Cable Pass (N): Drive (X) Write Protected or Unformatted 1. Insert a non-write protected, formatted diskette into the diskette drive; then rerun the test. 2. Diskette Drive 3. System Board 4. Diskette Drive Cable Pass (N): Unknown Media Drive (X) Diskette Drive Test error. 1. 2. 3. 4. Diskette Diskette Drive System Board Diskette Drive Cable Place Hi-density Media in Drive Media/drive mismatch. 1. 2. 3. 4. Diskette Diskette Drive System Board Diskette Drive Cable Printer Failed Printer powered-on and ready? 1. Printer 2. Printer Cable 3. System Board Printer Fault Printer powered-on and ready? 1. Printer 2. Printer Cable 3. System Board Printer Not Selected Ensure the printer is powered-on and ready. 1. Printer 2. Printer Cable 3. System Board Program or File Not Found Press Any Key Diagnostics cannot find the USER(N).COM file. 1. Diagnostic Diskette 2. Diskette Drive 3. System Board Program Too Big To Fit In Memory Too many Terminate and Stay Resident programs in memory. 1. Reboot the system from the Diagnostic Diskette. QAPlus/PRO Cannot Be Re-run Because Of Error In Relocating Program Diagnostics failed to relocate the Diagnostics Test programs so the memory space it resides in was not tested. 1. Diagnostic Diskette 2. Memory Module 3. System Board RAM Memory Error in Block n. Bad bits n Memory error. 1. Memory Module 2. System Board RAM Test Failed Memory error. 1. Memory Module 2. System Board 114 PC Server HMM Error Message/Symptom FRU/Action Read error on cylinder n Hard disk drive format error. 1. Hard Disk Drive 2. Hard Disk Drive Adapter (if installed) 3. System Board Read Errors Diskette drive read error. 1. 2. 3. 4. Receive Error Serial Port loopback test error. 1. Serial Port Cable 2. System Board Refresh Failure Diagnostics Test detected an error while testing the DMA controller's RAM refresh cycle. 1. Memory Module 2. System Board RTC Interrupt Failure Diagnostics Test cannot detect the Real-Time clock interrupt. 1. Real-Time Clock Assembly 2. System Board Serial Chip Error COM Port error, general. 1. Serial Port Cable 2. System Board Serial Compare Error COM Port error, information transmitted is not the same as information received. 1. Serial Port Cable 2. System Board Serial Time-out Error COM Port error, time interval is too long between transmitted and received data. 1. Serial Port Cable 2. System Board Serious Memory Error — Diags Cannot Continue Memory Test error. 1. Memory Module 2. System Board Sorry You Need A Mouse Mouse or mouse driver was not detected. 1. Mouse 2. System Board System Hangs Go to “Undetermined Problem” on page 83. 1. Any device 2. Any adapter 3. System Board The Address Exceeds The Size Of Your Memory An invalid memory address was entered. The Diagnostics Tests display this message during the Locate Bad Chips option under the interact menu if an invalid memory address was entered at the "Enter Memory Address Of Bad Chip" prompt. 1. Enter correct address 2. Memory Module 3. System Board Diskette Diskette Drive System Board Diskette Drive Cable PC Server 310 - Type 8639 115 Error Message/Symptom FRU/Action That Number is Out Of Range An invalid bit number was entered. Diagnostics Tests display this message during the Locate Bad Chips option. 1. Enter the correct number. 2. Memory Module 3. System Board Too Many Errors — Test Aborted Too many errors, the Diagnostics Test cannot continue. 1. Microprocessor 2. System Board Transmit Error Internal or external serial port loopback test failure. 1. Serial Port Cable 2. System Board Video Adapter Failed Test Result Summary, displayed if "Fail" was at the Quit/Fail/Pass menu of any video test. 1. Video Adapter 2. System Board 3. Display Write error on cylinder n Hard disk drive write error. 1. Hard Disk Drive 2. Hard Disk Drive Adapter (if installed) Write Errors Diskette drive write error. 1. 2. 3. 4. Write Protected or Unformatted Diskette is Write Protected or not formatted. 1. Insert a non-write protected, formatted diskette into the diskette drive; then rerun the test. 2. Diskette Drive 3. System Board 4. Diskette Drive Cable You Cannot Delete the Motherboard "Remove Board" option was selected. The Diagnostics Tests display this message during the Locate Bad Chips option. 1. Make the correct selection. 2. Memory Module 3. System Board 4. Processor 116 PC Server HMM Diskette Diskette Drive System Board Diskette Drive Cable Miscellaneous Error Messages Message/Symptom FRU/Action Changing colors. 1. Display Computer will not power-off. See “Power Supply” on page 71. 1. Power Switch 2. System Board Dead computer. See “Power Supply” on page 71. 1. Power Switch 2. Power Supply 3. System Board Diskette drive in-use light remains on or does not light when drive is active. 1. Diskette Drive 2. System Board 3. Diskette Drive Cable Flashing cursor with an otherwise blank display. 1. System Board 2. Primary Hard Disk Drive 3. Hard Disk Drive Cable Incorrect memory size during POST. 1. Run the Memory tests. 2. Memory Module 3. System Board “Insert a Diskette” icon appears with a known-good diagnostics diskette in the first 3.5-inch diskette drive. 1. 2. 3. 4. Intensity or color varies from left to right of characters and color bars. 1. Display 2. System Board No power, or fan not running. 1. See “Power Supply” on page 71. Nonsystem disk or disk error-type message with a known-good diagnostic diskette. 1. Diskette Drive 2. System Board 3. Diskette Drive Cable Other display symptoms not listed above (including blank or illegible display). 1. See “Display” on page 490. 2. System Board 3. Display Power-on indicator or hard disk drive in-use light not on, but computer works correctly. 1. Power Supply 2. System Board 3. LED Cables Printer problems. 1. See “Printer” on page 524. Program loads from the hard disk with a known-good diagnostics diskette in the first 3.5-inch diskette drive. 1. 2. 3. 4. 5. Serial or parallel port device failure (system board port). 1. External Device Self-Test OK? 2. External Device 3. Cable 4. System Board Diskette Drive System Board Diskette Drive Cable Network Adapter Run Setup Diskette Drive Diskette Drive Cable System Board Power Supply PC Server 310 - Type 8639 117 Message/Symptom FRU/Action Serial or parallel port device failure (adapter port). 1. External Device Self-Test OK? 2. External Device 3. Cable 4. Alternate Adapter 5. System Board 6. Riser Card Some or all keys on the keyboard do not work. 1. Keyboard 2. Keyboard Cable 3. System Board Clock Battery inaccurate. 1. Clock Battery (See “Battery Notice” on page 461) 2. System Board 118 PC Server HMM Parts Listings Service Position. 1 2 11 10 3 4 9 8 5 7 6 PC Server 310 - Type 8639 119 System Index System Unit (PC Server 310 - Type 8639) ISA Models 0D0, 0DT, 0XT, 0Z0, 0ZT Micro Channel Models MDT, MXT, MZT 1 Cover (Top) 06H1771 (Models 0D0, 0DT, 0Z0, 0ZT, 0XT, MDT, MXT, MZT) 2 Diskette Drive, see DASD (PC Server 310 - Type 8639) 3 Hard Disk Drive, see DASD (PC Server 310 - Type 8639) 4 Power Supply Assembly (210W, 3.3V), 06H2968 (Models 0D0, 0DT, 0Z0, 0ZT, 0XT, MDT, MXT, MZT) 5 System Board see System Board (PC Server 310 - Type 8639) 6 Base Frame 06H9405 (Models 0D0, 0DT, 0Z0, 0ZT, 0XT, MDT, MXT, MZT) 7 Card Guide 06H1779 (Models 0D0, 0DT, 0XT, 0Z0, 0ZT) 7 Card Guide 06H1778 (Models MDT, MXT, MZT) 9 DASD Tray (Removal) 06H1780 (Models 0D0, 0DT, 0Z0, 0ZT, 0XT, MDT, MXT, MZT) 10 DASD Tray (Non-Removal) 06H1781 (Models 0D0, 0DT, 0Z0, 0ZT, 0XT, MDT, MXT, MZT) 11 Floor Stand Assembly 07H0516 (Models 0D0, 0DT, 0Z0, 0ZT, 0XT, MDT, MXT, MZT) 5.25-Inch Blank Bezel 96G2484 (Models 0D0, 0DT, 0Z0, 0ZT, 0XT, MDT, MXT, MZT) Blank Bezels 06H1784 (Models MDT, MXT, MZT) Bottom Cover 06H1791 (Models 0D0, 0DT, 0Z0, 0ZT, 0XT, MDT, MXT, MZT) C2 Switch Assembly 06H1788 (Models 0D0, 0DT, 0Z0, 0ZT, 0XT, MDT, MXT, MZT) Cover Latch 06H1783 (Models 0D0, 0DT, 0Z0, 0ZT, 0XT, MDT, MXT, MZT) Door Assembly 96G2446 (Models 0D0, 0DT, 0Z0, 0ZT, 0XT, MDT, MXT, MZT) Door Hinge 96G2447 (Models 0D0, 0DT, 0Z0, 0ZT, 0XT, MDT, MXT, MZT) EMC Clip 06H5734 (Models 0D0, 0DT, 0Z0, 0ZT, 0XT, MDT, MXT, MZT) EMC Shield 06H1782 (Models 0D0, 0DT, 0Z0, 0ZT, 0XT, MDT, MXT, MZT) Fan Assembly 06H1796 (Models 0D0, 0DT, 0Z0, 0ZT, 0XT, MDT, MXT, MZT) Front Bezel 96G2445 (Models 0D0, 0DT, 0Z0, 0ZT, 0XT, MDT, MXT, MZT) Keyboard with Cable, see “Keyboards (101/102 Key - RD)” on page 123, “Enhanced Keyboards (101/102 Key - BS)” on page 124 Keylock with Keys 33F8433 (Models 0D0, 0DT, 0Z0, 0ZT, 0XT, MDT, MXT, MZT) LED and Cable Power 93F2389 (Models 0D0, 0DT, 0Z0, 0ZT, 0XT, MDT, MXT, MZT) Mouse 06H4595 (Models 0D0, 0DT, 0Z0, 0ZT, 0XT, MDT, MXT, MZT) Power Button 06H1777 (Models 0D0, 0DT, 0Z0, 0ZT, 0XT, MDT, MXT, MZT) 120 PC Server HMM Index System Board (PC Server 310 - Type 8639) ISA Models 0XT, 0Z0, 0ZT, 0D0, 0DT Micro Channel Models MDT, MXT, MZT Power Switch with Cable 60G2258 (Models 0D0, 0DT, 0Z0, 0ZT, 0XT, MDT, MXT, MZT) Rear I/O Panel Assembly 06H1786 (Models 0D0, 0DT, 0Z0, 0ZT, 0XT) Rear I/O Panel Assembly 06H1787 (Models MDT, MZT, MXT) Rear Panel 06H1785 (Models 0D0, 0DT, 0Z0, 0ZT, 0XT, MDT, MXT, MZT) Jumper Kit 93F0067 (Models 0D0, 0DT, 0Z0, 0ZT, 0XT, MDT, MXT, MZ) Miscellaneous Mounting Screws 93F0041 (Models 0D0, 0DT, 0Z0, 0ZT, 0XT, MDT, MXT, MZT) Speaker 92F0421 (Models 0D0, 0DT, 0Z0, 0ZT, 0XT, MDT, MXT, MZT) 1MB Video DRAM (60ns) 92G7432 (Models 0D0, 0DT, 0Z0, 0ZT, 0XT, MDT, MXT, MZT) 256KB L2 Cache - 12ns 60H7416 (Models 0D0, 0DT, 0Z0, 0ZT, MDT, MZT) 256KB L2 Cache - 15ns 06H6052 (Models 0XT, MXT) 8MB Memory SIMM (Parity) 92G7521 (Models 0D0, 0DT, 0Z0, 0ZT, 0XT, MDT, MXT, MZT) Battery, 33F8354 (Models 0D0, 0DT, 0Z0, 0ZT, 0XT, MDT, MXT, MZT) see “Battery Notice” on page 461 Ethernet Card Assembly 48G7170 (Models 0D0, 0DT, 0XT, 0Z0, 0ZT) Ethernet Card Assembly 48G7172 (Models MDT, MXT, MZT) I/O Riser Card 5X5 06H4008 (Models 0D0, 0DT, 0XT, 0Z0, 0ZT) I/O Riser Card 5X5 06H4023 (Models MDT, MXT, MZT) Power Cord see “Power Cords” on page 125. SCSI PCI Card Assembly 60H5715 (Models 0D0, 0DT, 0Z0, 0ZT, 0XT, MDT, MXT, MZT) 5 System Board without Memory 88G4270 and Processor (Model 0XT) 5 System Board without Memory 11H5545 and Processor (Model MXT) P54C 50/75MHz Processor Chip 06H5210 with Heat Sink (Model 0XT, MXT) P54C 66/100 Chip with Heat Sink 06H6063 (Models 0Z0, 0ZT MZT) P54C 66/133 Chip with Heat Sink 06H9891 (Models 0D0, 0DT, MDT) 5 System Board without Memory 60H7198 and Processor (Models 0D0, 0DT, 0Z0, 0ZT) 5 System Board without Memory 60H7197 and Processor (Models MZT, MDT) PC Server 310 - Type 8639 121 Index DASD (PC Server 310 - Type 8639) ISA Models 0XT, 0Z0, 0ZT, 0D0, 0DT Micro Channel Models MDT, MXT, MZT 1.44MB Diskette Drive (Models 0D0, 0DT, 0Z0, 0ZT, 0XT, MDT, 1GB Fast/Wide Hard Disk Drive (Models 0D0, 0DT, 0Z0, 0ZT, 0XT, MDT, Diskette Drive Cable (Models 0D0, 0DT, 0Z0, 0ZT, 0XT, MDT, Hard Disk Drive Cable (Models 0D0, 0DT, 0Z0, 0ZT, 0XT, MDT, LED & Cable (Hard Disk Drive) (Models 0D0, 0DT, 0Z0, 0ZT, 0XT, MDT, MKE CR-504 4X CD-ROM DR (Models 0D0, 0DT, 0Z0, 0ZT, 0XT, MDT, SCSI Hard Disk Drive Cable (PCI-5X5) (Models 0D0, 0DT, 0Z0, 0ZT, 0XT, MDT, 122 PC Server HMM 93F2361 MXT, MZT) 06H9079 MXT, MZT) 06H6325 MXT, MZT) 06H6326 MXT, MZT) 93F2388 MXT, MZT) 88G4921 MXT, MZT) 06H6062 MXT, MZT) Keyboards (101/102 Key - RD) Keyboards (101/102 Key - RD) Arabic Belgium-French Belgium-Dutch Bulgarian Czech Danish Dutch French French/Canadian German Greek Hebrew Hungarian Iceland Italy Latin/Spanish Norwegian Polish Portuguese Romanian Russian/Cyrillic Serbian/Cyrillic Slovak Spanish Swedish/Finnish Swiss-French/German Turkish Turkish UK English US English US English (E/ME/A use only) Yugoslavian/Latin American 71G4617 71G4618 71G4639 71G4619 71G4620 71G4621 71G4622 71G4624 06H2963 71G4625 71G4626 71G4627 71G4628 71G4629 71G4630 82G3291 71G4631 71G4632 71G4633 71G4634 71G4635 71G4636 71G4637 71G4638 71G4623 71G4640 71G4642 82G3255 71G4643 71G4646 71G4644 71G4647 PC Server 310 - Type 8639 123 Enhanced Keyboards (101/102 Key BS) Enhanced Keyboards (101/102 Key - BS) Arabic Belgium-French Belgium-Dutch Bulgarian Czech Danish Dutch Finnish French French/Canadian German Greek Hebrew Hungarian Iceland Italy Latin/Spanish Norwegian Polish Portuguese Romanian Russian/Cyrillic Serbian/Cyrillic Slovak South African Spanish Swedish Swiss - French/German Turkish UK English US English US English (E/ME/A use only) Yugoslavian/Latin American 124 PC Server HMM 8125417 8125418 8125439 8125419 8125420 81G5421 8125422 8125423 8125424 82G3280 8125425 8125426 8125427 8125428 8125429 8125430 82G3294 8125431 8125432 8125433 8125434 8125435 8125436 8125437 8125441 8125438 8125423 8125440 8125442 8125443 82G3278 1396790 8125447 Power Cords Power Cords Arabic Belgium Bulgaria Czech Republic Denmark Finland France Germany Hungary Israel Italy Latvia Netherlands Norway Poland Portugal Serbia Slovakia South Africa Spain Switzerland Switzerland (French/German) U.S. English U.K./Ireland Yugoslavia 14F0033 1339520 1339520 1339520 13F9997 1339520 1339520 1339520 1339520 14F0087 14F0069 1339520 1339520 1339520 1339520 1339520 1339520 1339520 14F0015 1339520 1339520 14F0051 62X1045 14F0033 1339520 PC Server 310 - Type 8639 125 PC Server 320 - Type 8640 Features . . . . . . . . . . . . . . . . . . . . Diagnostics and Test Information . . . . . . . . Additional Service Information . . . . . . . . . . Checkpoint Codes . . . . . . . . . . . . . . Configuration . . . . . . . . . . . . . . . . Assigning Interrupt Levels . . . . . . . . . EISA Configuration Diskette . . . . . . . . Backing Up the EISA Configuration Diskette Making Menu Selections . . . . . . . . Recording EISA Configuration Settings . Starting the EISA Configuration Diskette Using EISA Configuration Diskette Advanced Function . . . . . . . . . EISA, ISA, and PCI Adapters . . . . . . . EISA or ISA Features and Options . . . . . Files . . . . . . . . . . . . . . . . . Device Drivers . . . . . . . . . . . . Sample Applications . . . . . . . . . . Memory . . . . . . . . . . . . . . . . . PCI Features and Options . . . . . . . . . Configuration Conflicts . . . . . . . . . . . . Changing the Software Configuration . . . Resolving Hardware Configuration Conflicts Resolving Software Configuration Conflicts . Diagnostic Programs . . . . . . . . . . . . . Installing Additional Test Programs . . . . USERDIAG.CFG Example . . . . . . . . Internal SCSI Drives . . . . . . . . . . . . . Setting SCSI IDs for Internal Devices . . . Termination (Internal SCSI Devices) . . . . Power Supply . . . . . . . . . . . . . . . . Setup Program . . . . . . . . . . . . . . . Specifications . . . . . . . . . . . . . . . . System Board Replacement . . . . . . . . . Symmetric Multiprocessors/Multiprocessing . . Locations . . . . . . . . . . . . . . . . . . . . Input/Output Connectors . . . . . . . . . . . Internal Drive Bays (Disk-Array Models) . . . . Internal Drive Bays (Non-Disk-Array Models) . System Board . . . . . . . . . . . . . . . . Connections . . . . . . . . . . . . . . . Jumpers . . . . . . . . . . . . . . . . . Symptom-to-FRU Index . . . . . . . . . . . . . Parts Listings . . . . . . . . . . . . . . . . . . System . . . . . . . . . . . . . . . . . . . Keyboards (101/102 Key) . . . . . . . . . . Power Cords . . . . . . . . . . . . . . . . 128 129 130 130 135 135 136 136 136 137 137 Copyright IBM Corp. 1996 127 138 138 139 139 141 141 141 142 142 143 143 144 145 145 147 147 148 150 152 153 154 155 155 155 156 157 159 161 162 162 164 169 170 175 176 Features Note All PC Server computers have Selectable Startup. Microprocessor Pentium with 16KB of internal cache Expandable to two microprocessors Cache Memory 256KB of level-2 cache, upgradable to 512KB Memory Standard: 16MB (min.), expandable to 256MB 70 ns, parity 8 single inline memory-module sockets Diskette Drives Standard: one 3.5-inch, 1.44MB Optional (internal): Hard Disk Drive Number of drives and drive capacities are model dependent Supports up to 7 internal hard disk drives CD-ROM Drive Standard: SCSI-2 Keyboard and Mouse 101-key keyboard Mouse Expansion 6 EISA/ISA slots, 3 PCI slots (1 shared slot) Up to 10 drive bays Video SVGA Adapter Compatibility: – Video graphics adapter (VGA) – Enhanced graphics adapter (EGA) – Color graphics adapter (CGA) – Multicolor graphics array (MCGA) Security Features Bolt-down capability Door lock Supervisor and user passwords Selectable drive-startup Security cover (optional) Upgradable POST and BIOS Upgradable EEPROM on the system board BIOS upgrades (when available) Integrated Functions 128 Video port on an adapter 2 serial ports 1 parallel port Mouse port Keyboard port Battery-backed clock and calendar SCSI-2 connectors on an adapter PC Server HMM – – 2 internal connectors 1 external connector Power Supply 300 watt with voltage switch (115–230 V ac) Built-in overload and surge protection SCSI-2 Controller (varies by model) IBM – – IBM – – SCSI-2 Fast/Wide PCI Adapter 2 internal connectors (one 8-bit and one 16-bit) One 16-bit external connector SCSI-2 Fast/Wide PCI-Bus RAID Adapter Two 16-bit internal connectors One 16-bit external connector Diagnostics and Test Information The following list contains problems and references for diagnosing a PC Server 320. Notes The QAPlus/PRO diagnostic program recognizes the primary processor as LUN 1 and the secondary processor as LUN 2. During testing the program automatically tests LUN 1. You must select LUN 2 if you want the program to test the secondary processor. The type of DASD diagnostics required to test the hard disk controller (adapter) and drives is determined by the type of hard disk adapter installed in the computer. Always start with “General Checkout (QAPlus/PRO)” on page 4. Problem Reference Error Codes/Error Messages “General Checkout (QAPlus/PRO)” on page 4 and the Symptom-to-FRU Index (QAPlus/PRO) on page 61 in the PS/2 Hardware Maintenance Manual. DASD Adapter Problems For non-disk-array models, see “SCSISelect Utility Program” on page 547. SCSI-2 Fast/Wide PCI-Bus RAID Adapter, see “Disk Array Configuration” on page 461. Memory “General Checkout (QAPlus/PRO)” on page 4. Power Supply Voltages “Power Supply” on page 152. Miscellaneous “General Checkout (QAPlus/PRO)” on page 4. PC Server 320 - Type 8640 129 Additional Service Information The following additional service information is for the PC Server 320 Type 8640. “Checkpoint Codes.” “Configuration” on page 135. “Configuration Conflicts” on page 142. “Diagnostic Programs” on page 145. “Internal SCSI Drives” on page 147. “Power Supply” on page 152. “Setup Program” on page 153. “Specifications” on page 154.. “System Board Replacement” on page 155. “Symmetric Multiprocessors/Multiprocessing” on page 155. Checkpoint Codes During POST, the computer displays the status of the components being tested in the form of Checkpoint (CP) codes in the lower left-hand corner of the screen. The following is a list of the CP codes followed by the routine in process and the boot mode. CP Code Routine Boot Mode 01 Its_A_Reset Cold+Warm+Restore+Mfg+SAD 0D Init Chip_NS Cold+Warm+Restore+Mfg+SAD 12 Periph Init Cold+Warm+Restore+Mfg+SAD 03 Disable Video Cold+Warm+Restore+Mfg+SAD 05 Phase 1 Enter Big Real Cold+Warm+Restore+Mfg+SAD B0 Enable Local APIC Cold+Warm+Restore+Mfg+SAD 06 Cache Init Cold+Warm+Restore+Mfg+SAD 07 Init Refresh Cold+Restore+Mfg 08 Wait For RTC Cold+Restore+Mfg 0A Std CMOS Checksum NS Cold+Warm+Restore+Mfg 0B Mid CMOS Checksum NS Cold+Warm+Restore+Mfg 0C Ext CMOS Checksum NS Cold+Warm+Restore+Mfg 0E C SET_INIT Cold+Warm+Restore+Mfg+SAD 10 Check Parity NonParity Cold+Warm+Restore+Mfg 11 Disable Parity Cold+Warm+Restore+Mfg+SAD B1 Init Seattle Cold+Restore+Mfg+SAD 13 Test CPU Regs Cold+Restore+Mfg 14 Init RTC Cold+Warm+Restore+Mfg+SAD 16 Init Timer 0 Cold+Warm+Restore+Mfg+SAD 17 Init Timer 2 Cold+Warm+Restore+Mfg+SAD 18 Test DMA Cold+Warm+Restore+Mfg+SAD 19 Test Page Regs Cold+Warm+Restore+Mfg+SAD 130 PC Server HMM CP Code Routine Boot Mode 1A Verify Refresh Cold+Restore+Mfg 1B Enable Parity Cold+Warm+Restore+Mfg+SAD 1C Save ID Warm SAD 1D Test First 64k Cold+Restore+Mfg 1E Clear First 64k Cold+Warm+Restore+Mfg 1F POST with Stack Cold+Warm+Restore+Mfg+SAD 20 Enable BIOSE000 SAD 21 BIOS Shadow Cold+Warm+Restore+Mfg B2 Shadow SCSI Cold+Warm+Restore+Mfg 23 Phase 2 POST Cold+Warm+Restore+Mfg+SAD 24 Enable BIOS F000 SAD 24 Shadow VPD Cold+Warm+Restore+Mfg 25 Init Key Board Data Cold+Warm+Restore+Mfg+SAD 26 Save ID Cold+Warm+Restore+Mfg+SAD B3 Check P54C Cold+Mfg 27 Init Q Boot Cold+Warm+Restore+Mfg 28 Periph Config Cold+Warm+Restore+Mfg+SAD 2A Init Timeout Tables Cold+Warm+Restore+Mfg+SAD 2B Pos_Setup Cold+Warm+Restore+Mfg 2F Test DMA Locations Cold+Warm+Restore+Mfg+SAD B4 Init DMA Regs Cold+Warm+Restore+Mfg+SAD 30 Test PICs Cold+Warm+Restore+Mfg+SAD 31 Init Vector Table Cold+Warm+Restore+Mfg+SAD 32 Enable Timer Int Cold+Warm+Restore+Mfg+SAD 33 Init Keyboard Cold+Warm+Restore+Mfg+SAD 34 Clear Memory Size Error Cold+Restore+Mfg 35 Check Configuration Cold+Warm+Restore+Mfg 36 Mfg Boot Fork Cold+Restore+Mfg 37 PCI Reset Cold+Warm+Restore+Mfg B5 NVRAM check Cold+Warm+Restore+Mfg 38 PCI Video Cold+Warm+Restore+Mfg 3B Sign On Cold+Warm+Restore+Mfg 3C Test Timer Tick Cold+Restore+Mfg 3F Enable Video SAD 40 CSET BFR SIZMEM Cold+Warm+Restore+Mfg+SAD 41 Size Memory Above 64k Cold+Warm+Restore+Mfg 42 CSET AFT SIZ MEM Cold+Warm+Restore+Mfg 43 Test Timer 2 Cold+Warm+Restore+Mfg 44 Password Not Entered Cold+Restore PC Server 320 - Type 8640 131 CP Code Routine Boot Mode 45 Test PS/2 Mouse Cold+Warm+Restore+Mfg 46 Check For Mouse Buttons Cold+Restore 47 Init Key Board Flags Cold+Warm+Restore+Mfg+SAD 48 Test Key Board Cold+Warm+Restore 4B Memory Test Prompt Cold+Warm+Mfg 4C Test Memory Cold+Restore+Mfg 4D Clear EBDA Warm 4E CSET AFT M TEST Cold+Warm+Restore+Mfg 4F Allocate EBDA Cold+Warm+Restore+Mfg B6 Set Planar Info Cold+Restore+ 50 xfer ebda vars Cold+Warm+Restore+Mfg B7 Init P54M Cold+Warm+Restore+Mfg B8 Init MP Structures Cold+Warm+Restore+Mfg B9 CPU Speed Cold+Warm+Restore+Mfg+SAD 51 Set Warm Boot Flag Warm 52 Clear Speed Bits Cold+Warm+Mfg+SAD 53 E FLOB Cold+Warm+Restore+Mfg+SAD 54 Enable System Interrupts Cold+Warm+Restore+Mfg+SAD 55 C2 Security Check Restore 56 Init Key Board Cold+Warm+Restore+SAD 57 Test RTC Cold+Warm+Restore+SAD 58 Check For NPX Cold+Warm+Restore+Mfg+SAD 59 reset hdctl Cold+Warm+Restore+Mfg+SAD 5A FD INIT Cold+Warm+Restore+Mfg+SAD 5B Set Floppy Config Cold+Warm+Restore+Mfg+SAD BA Unlock Early Cold+Restore 5C Init A20 Cold+Warm+Restore+Mfg+SAD 5D Cache Config Cold+Warm+Restore+Mfg+SAD 5E HD SETUP Cold+Warm+Restore+Mfg+SAD 62 Verify CMOS Config Cold+Warm+Restore+Mfg 70 Check For Setup Hot Key Cold+Warm 63 Clear Screen Cold+Warm+Restore+SAD BB Init IRQ Levels Cold+Restore 65 IBM Cirrus DDC Cold BC PACP Arbitration Cold+Warm+Restore+Mfg+SAD BD Enable Planar SCSI Cold+Warm+Restore+Mfg+SAD 66 CSET BFR OPROM Cold+Warm+Restore+Mfg 132 PC Server HMM CP Code Routine Boot Mode BE Do ROM Scan Cold+Warm+Restore 2C TCPC Cold+Warm+Restore+Mfg 49 TCPC Errors Cold+Warm+Restore 2D Find Serial Ports Cold+Warm+Restore+Mfg 2E Find Parallel Ports Cold+Warm+Restore+Mfg 68 CSET AFT OPROM Cold+Warm+Restore+Mfg BF Get MC Data Cold+Warm+Restore 69 PCI Configure Cold+Warm+Restore+Mfg 6A MFG Hook 65 MFG 6B Init Time Of Day Cold+Warm+Restore+Mfg+SAD 6C Check For Locked Key Board Cold+Warm+Restore+SAD 6D Init Enable NMI Cold+Warm+Restore+Mfg+SAD 6E Set Boot Speed Cold+Warm+Restore+Mfg 6F Set Key Board LEDs Cold+Warm+SAD 71 Init Flush Key Board Cold+Warm+Restore+SAD 72 Move Error Log To EBDA Cold+Warm+Restore+Mfg 73 Init Disable Mouse Cold+Warm+Restore+Mfg+SAD 74 Sys Reset MFG 75 Phase 2 Exit Big Real Cold+Warm+Restore+Mfg+SAD 76 BOOT STRAP 1 Cold+Warm+MFG+SAD 78 SAD BOOT PROC SAD 79 Start Boot Sequence N/A 7A Read Boot Sector N/A 7B Boot Sector Read Complete N/A 7C Check for CE Boot Override N/A 7F Xfer to boot code N/A The following codes also produce a series of beeps. The series of beeps are listed for each code followed by an explanation of the code. CP Code Beeps Definition 82 1-1-3 CMOS write/read failure 83 1-1-4 BIOS ROM checksum failure 84 1-2-1 Programmable Interval Timer test failure 85 1-2-2 DMA initialization failure PC Server 320 - Type 8640 133 CP Code Beeps Definition 86 1-2-3 DMA page register write/read test failure 87 1-2-4 RAM refresh verification failure 88 1-3-1 1st 64K RAM test failure 89 1-3-2 1st 64K RAM parity test failure 90 2-1-1 Slave DMA register test in-progress or failure 91 2-1-2 Master DMA register test in-progress or failure 92 2-1-3 Master interrupt mask register test failure 93 2-1-4 Slave interrupt mask register test failure 95 2-2-2 Key-board controller test failure 99 2-3-2 Screen memory test in-progress or failure 9A 2-3-3 Screen retrace tests in-progress or failure 9B N/A Search for video ROM in-progress 9C N/A Screen believed operable - mode in low two bits 9D N/A Screen believed operable - mode in low two bits 9E N/A Screen believed operable - mode in low two bits 9F N/A Screen believed operable - mode in low two bits A0 3-1-1 Timer tick interrupt test failure A1 3-1-2 Interval timer channel 2 test failure A3 3-1-4 Time-Of-Day clock test failure A7 3-2-4 Comparing CMOS memory size against actual A8 3-3-1 Memory size mismatch occurred D0 N/A Cache State D1 N/A Cache Init D2 N/A Cache Restore D3 N/A Cache Config D4 N/A Cache Flush D5 N/A Cache Enable D6 N/A Cache Disable D7 N/A Cache Custom e1h N/A CSET BFR VIDROM e5h N/A CSET AFT CMCFG 134 PC Server HMM Configuration Note DASD and other adapters may require additional configuration information. Configuration is the allocation of the server resources to organize and interconnect hardware devices and software programs. The steps required to configure the above named severs depend on the number and variety of devices and programs installed. For information about configuring the IBM SCSI-2 Fast/Wide PCI-Bus RAID Adapter, see “Starting the RAID Configuration Program” on page 465. These servers support the following types of adapters. Peripheral Component Interconnect (PCI) Extended Industry Standard Architecture (EISA) Industry Standard Architecture (ISA) The following hardware configuration utility programs are supplied with the server. Built-in Setup program Configures system board functions, such as the integrated drive electronics (IDE) controller and serial and parallel port assignments that you install. It also allows you to set passwords for starting up and accessing the Setup program. PC Server 520 EISA Configuration Diskette Configures EISA and ISA adapters (boards). Built-in SCSI-2 adapter utility program (SCSISelect Utility program) Configures SCSI devices installed in non-disk-array models Configuration Option Diskette Configures SCSI devices in disk-array models Assigning Interrupt Levels: A rotational interrupt technique to is used to configure PCI adapters. This technique enables you to install a variety of PCI adapters that currently do not support sharing of PCI interrupts. Always use the IBM PC Server EISA Configuration Diskette for the system you are servicing when assigning interrupts for EISA and ISA adapters. You cannot assign an EISA or ISA adapter the same interrupt that you have assigned to a PCI adapter. This is because the server does not support interrupt sharing among PCI, EISA, and ISA adapters. If a situation occurs where you need an additional interrupt, you can use an interrupt from another function that you might not need, such as the IDE controller (Interrupt 14) or COM2 (Interrupt 3). PC Server 320 - Type 8640 135 EISA Configuration Diskette: You must use the EISA Configuration Diskette anytime you want to change resource allocations, such as: Adding or removing devices Moving devices Changing device function Resolving conflicts Adding or removing PCI adapters Each time you use the EISA Configuration Diskette to configure the server, the configuration information is saved in a System Configuration Information (SCI) file and in the NVRAM configuration. Only devices that you install and configure correctly appear on the EISA Configuration screens. Backing Up the EISA Configuration Diskette: Use an operating system command, such as the DOS DISKCOPY command, to make a complete backup copy of the EISA Configuration Diskette. Using the backup copy can prevent damage to the original diskette. The operating system documentation provides information on backing up diskettes. Making Menu Selections: When you start the EISA Configuration Diskette, an introductory screen appears. Type CF at the prompt. After you press Enter, the main menu, Steps in configuring the computer, appears. The EISA Configuration program main menu contains five steps: Step 1 Important EISA configuration information: This step provides information about the differences between the ISA configuration process and the EISA configuration process. Step 2 Add or remove boards: If the server is configured correctly, this step provides a list of the devices installed in the EISA expansion slots. The Add choice allows you to add ISA devices to the configuration. If EISA adapters are installed in the server, and you have not copied the .CFG file to the EISA Configuration Diskette, you are prompted to insert the adapter's configuration diskette into the diskette drive. The .CFG file is copied to your diskette. If the adapter's .CFG file is copied to the EISA Configuration Diskette before starting the diskette, and the adapter is installed in the server, EISA devices are added automatically. Step 3 View or edit details: After adding EISA or ISA adapters in Step 2, use the Edit selection of this step to configure them. Use the Edit Resources selection of this step for 136 PC Server HMM complex configurations. If you change a setting in this step, you might have to change a switch or jumper setting on the system board or on a device. Step 4 Examine switches or print report: After Steps 1 and 2 have been completed correctly, this step displays the correct switch and jumper settings for the installed devices that have switches and jumpers. Also, you can choose to print a system configuration report. Step 5 Save and exit: This step allows you to save the configuration or to discard the changes before exiting the program. Use the Up Arrow (↑) or Down Arrow (↓) key to highlight your selection; then press Enter to make your selection. To help you track your progress, a checkmark (√) appears on the main menu next to the completed steps. You can access help information through: Help windows, which remain active. Information windows, which appear automatically as a result of some configuration activities. The Help=F1 prompt, which allows you to access the Help Menu for screens displaying the prompt. To remove the Help Menu, press Esc. Recording EISA Configuration Settings: Record the configuration settings you made in Step 3, View or edit details and Step 4, Examine switches or print report on a separate sheet and store it in a safe place for future reference. If a printer is attached to the server, you can use the Print Screen key to print these settings. The settings are helpful when you install additional options. Also, record the new settings each time you make changes. Be sure to record the current configuration settings for the user. Starting the EISA Configuration Diskette: Using a backup copy of the EISA Configuration Diskette can prevent damage to the original diskette (see “Backing Up the EISA Configuration Diskette” on page 136). To start the EISA Configuration Diskette, do the following: 1. Insert the EISA Configuration Diskette into the diskette drive. 2. Power-on the computer, or if it is already on, shut down the operating system and restart the computer. 3. When the first screen appears, type CF and press Enter. Follow the instructions on the screen until the main menu, Steps in configuring the computer, appears. PC Server 320 - Type 8640 137 4. Use the Up Arrow (↑) or Down Arrow (↓) key to advance through the items on the screen. Use the Tab key to select choices on the bottom of the screen. Press the Esc key to return to a previous menu. 5. Press Enter to make a selection. 6. Follow the instructions on the screen to view or change (edit) the configuration information. Note Adapters installed in the server appear automatically on the EISA Configuration screens after you copy the adapter's configuration file (file with an extension of .CFG) to the EISA Configuration Diskette. If you want to manually add an adapter that you have not yet installed in the server, add it using Step 2 from the menu. To configure ISA adapters, follow the instructions on the screen. Using EISA Configuration Diskette Advanced Function: Locking an ISA adapter reserves the selected resources and prevents the system from using them to resolve resource conflicts. Use the Advanced function to lock ISA boards. An exclamation mark (!) appears next to locked adapters. To use the Advanced functions, do the following: 1. Start the EISA Configuration Diskette (see “Starting the EISA Configuration Diskette” on page 137). 2. At the main menu, select Step 3, The View or edit details screen appears. 3. Press F7. The Advanced functions screen appears. 4. Follow the instructions on the screen to: a. Lock or unlock boards b. View additional system information c. Set verification mode d. Maintain SCI files EISA, ISA, and PCI Adapters: Before installing a new device or program, read the documentation supplied with it. Reading the instructions helps you determine the steps required for installation and configuration. The following list provides a preview of the actions that might be required to configure the server. When installing different types of adapters at the same time, install and configure them in the following sequence: 1. ISA 2. EISA 3. PCI 138 PC Server HMM Note During POST, the server automatically configures ISA Plug and Play and PCI devices. 1. Run the Setup program and record the current configuration settings. 2. Backup the EISA Configuration Diskette. See “Backing Up the EISA Configuration Diskette” on page 136. 3. Start the EISA Configuration Diskette and: a. Record the current settings. b. Install configuration files (.CFG). Note If the .CFG files were not supplied with the adapter, see “Files.” See “Recording EISA Configuration Settings” on page 137 and “Starting the EISA Configuration Diskette” on page 137. 4. Set jumpers or switches on the server system board. See “Jumpers” on page 162. 5. Set jumpers or switches on the device. See the instructions supplied with the adapter. 6. Install the adapter in the server. 7. Install software programs. See the installation instructions supplied with the software. 8. Resolve configuration conflicts. See “Configuration Conflicts” on page 142. EISA or ISA Features and Options: Some ISA and most EISA devices are supplied with option diskettes. These diskettes can contain any or all of the following types of information: Configuration files (.CFG) Diagnostic files (.DGS) Device drivers Sample applications (mini-applications) Files: A configuration file is required to configure the server for ISA or EISA adapters. You must copy this configuration file, which has a file-name extension of .CFG, from the device diskette to the EISA Configuration Diskette before installing the device in the server. The configuration file reserves the system resources that the adapter needs to function properly. Some ISA adapters are supplied with a diskette that contains the CFG file for the adapter. If ISA adapters are installed that were not supplied with their own CFG files, you must use the PC Server EISA Configuration Diskette PC Server 320 - Type 8640 139 for the system you are servicing to create a unique CFG file for each adapter. Note The unique .CFG files are slot sensitive. That is, they should not be used to configure identical adapters in multiple systems unless you install the adapters in the same expansion slots within each system. To create a unique CFG file for an ISA adapter, do the following: 1. Insert the IBM PC Server EISA Configuration Diskette for the system you are servicing into diskette drive A. 2. Start the configuration utility program. 3. At the main menu, select Step 2, Add or remove boards. 4. At the next menu, select the slot in which you installed the adapter. 5. At the next screen, select OK. 6. At the next screen, press F5; then select Create .CFG file. 7. Press Enter. 8. At the Create a board CFG file screen, type in the adapter manufacturer and description (for example IBM Token Ring); then press Enter. 9. Refer to the adapter documentation for information about specific configuration parameters (such as IRQ or DMA channel) required for the adapter. Then, follow the instructions on the screen to enter the appropriate parameters on the menu. Notes: a. Normally, ISA adapters do not use every parameter. Most adapters require only a PORT address. b. The SVGA video adapter in the server requires specific memory and I/O address assignments to function properly. To avoid configuration conflicts, do not assign the following SVGA memory and I/O addresses to other adapters or options in the server: Memory address space: I/O address spaces: AðððH – C7FFH ð2Eðh – ð2EFh ð3Bðh – ð3DFh 46E8h 10. After you type in all of the appropriate parameters, press F10. 11. At the next screen, carefully verify that the information is correct; then press Enter. 12. At the Add Confirmation window, press Enter again. 140 PC Server HMM 13. In the next window (add), press Enter. The adapter description appears in the selected slot. 14. Verify the installation; then press F10. 15. At the next menu, select Save and exit the configuration utility. Note PCI devices do not require .CFG files. Device Drivers: Device drivers are programs designed to support a specific type of hardware device. They provide instructions that enable the computer to interact with the device, or to take advantage of a device's special feature. The device driver might ship with the operating system, the application program, or on the option diskette. Not all devices require device drivers. Refer to the documentation supplied with the option for additional information. Sample Applications: Some optional devices provide small applications or sampler files. These applications demonstrate the capabilities of the device and serve as software examples for programming the device. Refer to the documentation supplied with the option for additional information. To configure the server for an ISA or EISA adapter: 1. Read the documentation supplied with the adapter. 2. Copy any files with the extension of .CFG from the option diskette to the EISA Configuration Diskette. See “Files” on page 139 for important information about configuring ISA adapters. 3. Start the EISA Configuration Diskette (see “Starting the EISA Configuration Diskette” on page 137). 4. Record the new configuration information (see “Recording EISA Configuration Settings” on page 137). 5. Save the new configuration settings to the EISA Configuration Diskette and to the nonvolatile random access memory (NVRAM) (see “Starting the EISA Configuration Diskette” on page 137). 6. Set any jumpers or switches on the adapter. 7. Install the adapter in the server. Memory: After you add (or remove) extended memory, you must update the EISA Configuration Diskette. Note Not performing the following procedure could result in memory errors, and in the operating system not recognizing the added (or removed) memory. PC Server 320 - Type 8640 141 1. Start the EISA Configuration Diskette (see “Starting the EISA Configuration Diskette” on page 137). 2. Select Step 3: View or edit details. The system information appears. 3. Under Advanced System Feature Setup, select Total System Memory. 4. Select the correct amount of memory, then press F10. Note It is possible to install single-inline-memory-modules (SIMMs) in combinations where the total amount of memory installed does not appear on the memory configuration screen. In the unlikely event that this occurs, select the next lower setting on the memory configuration menu, and all of the installed memory will be supported on the server. 5. Return to the Main Menu, save the configuration, and exit from the utility program. PCI Features and Options: PCI devices automatically communicate with the server's configuration information. This usually results in automatic configuration of a PCI device. If a conflict does occur, refer to “Configuration Conflicts.” Configuration Conflicts The resources used by a server consist of interrupt request levels (IRQs), direct memory access channels (DMAs), I/O ports (for example, serial and parallel), and memory. This information is useful when a resource configuration conflict occurs. Conflicts in the configuration occur if: A device is installed that requires the same resource as another device. (For example, if you install an ISA network adapter and an EISA network adapter, both requesting IRQ 5, only one of the adapters can be configured.) A device resource is changed (for example, changing jumper settings). A device function is changed (for example, assigning COM 1 to two different serial ports). An installed software program requires the same resource as a hardware device (for example, an expanded memory specification (EMS) device driver that uses the address required by the SVGA video adapter). The steps required to resolve a configuration error are determined by the number and variety of hardware devices and software programs install in the system. 142 PC Server HMM If a hardware configuration error is detected, a configuration error message appears after the server completes POST, but before the operating system starts. You can bypass the error or start one of the configuration utility programs. Press F1 to bypass the error and load the operating system. Press F2 to start the Setup program. To start the EISA Configuration Diskette, insert the diskette in the diskette drive and press F1. The Setup program and the EISA Configuration program configure only the system hardware. These programs do not consider the requirements of the operating system or the application programs. Changing the Software Configuration: The best way to resolve memory-address conflicts is to change the addresses used by the application program or the device driver. To do this, use the EISA Configuration program. If a device driver is causing a memory-address conflict, refer to the operating-system documentation or the documentation supplied with the device drivers. Resolving Hardware Configuration Conflicts: Use the following information to help resolve hardware configuration conflicts: 1. Run the Setup program to view and change resources used by the system board functions. Record the current settings before making any changes. (See “Setup Program” on page 153 for instructions.) 2. Determine which adapter or device is causing the error. The EISA Configuration program specifies how the server checks for resource conflicts. Initially, this verification mode is set to automatic. When the mode is set to automatic, the EISA Configuration program tries to resolve configuration conflicts for you. Use the Advanced selection of the EISA Configuration Diskette's View or edit details screen to change the setting (see “Using EISA Configuration Diskette Advanced Function” on page 138). If the automatic verification mode is set, the configuration program attempts to resolve conflicts for you. However, this might disable adapters or system board features. For example, if you choose IRQ 4 for an adapter, the program disables Serial Port 1, which uses IRQ 4. If this happens, and you do not want this feature disabled, choose another IRQ for the adapter. If you set the verification mode to manual, the configuration utility program does not try to resolve a conflict. Instead, you have to determine if a resource conflict has occurred and then resolve the conflict. PC Server 320 - Type 8640 143 When the verification mode is set to manual, an asterisk (*) appears on the View or edit details screen next to adapters in conflict. 3. 4. 5. 6. If the EISA Configuration program cannot resolve a configuration error, it deactivates the adapter and displays the deactivated status (<>) on the View or edit details screen. Use the Advanced selection of the EISA Configuration Diskette's View or edit details screen to update or copy the server's system configuration information file (see “Using EISA Configuration Diskette Advanced Function” on page 138). Change configuration resource allocations. Use the built-in Setup program to view or change system board resource allocations. Use the Advanced selection of the EISA Configuration Diskette's View or edit details screen to view the available or the used system resources (see “Using EISA Configuration Diskette Advanced Function” on page 138). Use the Edit Changes selection to change resource allocations for complex configurations. Change adapter jumpers or switches. Jumpers and switches define the system resources that a device can use. If the settings are incorrect or set to use a resource that cannot be shared, a conflict occurs and the device remains deactivated by the configuration program. Use the EISA Configuration Diskette's Step 4, Examine switches or print report screen to verify switches (see “Making Menu Selections” on page 261). Read the documentation supplied with the device. Change system board jumpers or switches. Remove the cover; then, refer to the system-board diagram inside the server. Remove the device or adapter. Some configurations are not supported (for example, you cannot operate the server with two ISA SVGA adapters installed). Resolving Software Configuration Conflicts: The memory-address space and interrupt levels (IRQs) used by some hardware options might conflict with addresses defined for use through application programs or the EMS. (EMS is used only with DOS.) If there is a conflict, one or more of the following conditions might exist: The system cannot load the operating system. The system does not work. An application program does not operate, or it returns an error. Screen messages indicate a conflict exists. You can resolve conflicts by changing either the software or the hardware configuration. 144 PC Server HMM Note Start the EISA Configuration Diskette to view the addresses used by the system board functions. Use the Advanced function of Step 3, View or edit details to view the addresses used by the adapters. (See “Using EISA Configuration Diskette Advanced Function” on page 138 for instructions.) Diagnostic Programs The Diagnostic program supplied with the server is the primary method of testing the server. Option-specific diagnostic files are supplied with some optional devices and adapters. These files provide a more specialized test of the option. “Installing Additional Test Programs” provides additional information about installing and using diagnostic files. Also, refer to the documentation supplied with the option for information on installing and running option-specific diagnostics. Installing Additional Test Programs: You can add other test programs to the Diagnostic Diskette. These other programs are usually provided on the diskette supplied with a device. After you add the programs to the Diagnostic Diskette, you can include information from the programs in the Test Log. Before the test programs can find these programs to run as the User Diags test group, information about them must be included in a file called USERDIAG.CFG. This is an ASCII text file. It must include the following three items for each test to run: Program Name (.COM and .EXE files only) Test Description of the test to be run Command-line parameters to be passed to the program identified in the first item of this list PC Server 320 - Type 8640 145 Notes 1. All of the information for a given test must be on a single line, and a semicolon (;) must separate the items on the line. 2. Make sure you press Enter at the end of each line of text in the USERDIAG.CFG file. This creates a carriage return line feed (CR LF) which is necessary for the User Diagnostics to be found and executed. 3. If the program executable file is in a directory other than the QA directory (or other directory you have designated to contain the QA files), that directory must be listed in the PATH= section of the AUTOEXEC.BAT. 4. You can use a .CFG file other than USERDIAG.CFG if you use the command line “USRCONFIG=filename,” when running the diagnostic programs. For example, you might use: QAPLPRO /USRCONFIG=MYTESTS.CFG. 146 PC Server HMM USERDIAG.CFG Example: An example USERDIAG.CFG file might look like the following: Program Name BBSMODEM.EXE; TEST1.EXE; TEST2.EXE; TESTALL.EXE; TESTALL.EXE; TESTALL.EXE; Test Description 9600 Baud 5 Line Modem; Generic 1; Generic 2; CMD 1; CMD 2; CMD 3; Command-Line Parameter 5 1 2 3 Note You can have more than one command-line parameter for any given test. When you view these tests on the Test Group window for the User Diag test group, they appear as follows: (♦) (♦) (♦) (♦) (♦) (♦) 9600 Baud 5 Line Modem Generic 1 Generic 2 CMD 1 CMD 2 CMD 3 The diagnostic program automatically assigns a test number to each test. The test numbers start at 201 and continue upward as needed. The numbers for the tests listed above are as follows: 202 203 204 205 206 207 9600 Baud 5 Line Modem Generic 1 Generic 2 CMD 1 CMD 2 CMD 3 Internal SCSI Drives The server supports small computer system interface (SCSI) drives. You can attach multiple SCSI drives to the preinstalled SCSI-2 adapter. If you install additional SCSI devices in a non-disk-array model, you must set a unique identification (ID) for each SCSI device that you connect to the SCSI-2 Fast/Wide PCI-Bus adapter, so that the SCSI-2 adapter can identify the devices and ensure that different devices do not attempt to transfer data at the same time. The SCSI IDs in disk-array models with the SCSI-2 Fast/Wide PCI-Bus Adapter are hard-coded in the backplane of the hot-swap bay and preset for the CD-ROM drive. Do not attempt to change the SCSI IDs for internal SCSI devices on disk-array models. PC Server 320 - Type 8640 147 Refer to Table 1 on page 148 before setting SCSI IDs. Do not set the SCSI IDs for other devices to these values. Note Any information about SCSI drives also applies to other SCSI devices, such as scanners and printers. Setting SCSI IDs for Internal Devices: For non-disk-array models, Fast/Wide (16-bit) devices support SCSI IDs 0 to 15; narrow (8-bit) devices support SCSI IDs 0 to 7. For disk-array models, the external channel connector supports SCSI IDs 0 to 7; the internal channel connector (only one of the two internal channel connectors can be used at one time) also supports SCSI IDs 0 to 7. Note For disk-array models, devices attached to the external connector and internal connector are accessed independently. A SCSI ID of 0 assigned to an internal device and a SCSI ID of 0 assigned to an external device does not create a conflict. Table 1. SCSI IDs for Preinstalled SCSI Devices SCSI ID Bay Device Non-Disk-Array Models 6 1 Hard Disk Drive1 3 4 CD-ROM Drive 7 N/A SCSI-2 Fast/Wide PCI Adapter 0–53 1–6 Hot-Swappable Hard Disk Drives4 6 7 CD-ROM Drive 7 N/A SCSI-2 Fast/Wide PCI-Bus RAID Adapter Disk-Array Models2 Note: 1. This only applies to models with a hard disk drive preinstalled in bay 1. 2. Or non-disk-array models with the hot-swap bay option installed. 3. SCSI IDs are hard-coded into the hot-swap bay backplane. 4. Two hard disk drives are preinstalled in some disk-array models in bays 1 and 2. The SCSI IDs for the two hard disk drives are 0 and 1. 148 PC Server HMM The drive from which you will start the non-disk-array server (also known as the boot or startup drive) should have a SCSI ID of 6. Therefore, if the server was not supplied with a preinstalled hard disk drive and you install hard disk drives, set the SCSI ID of the first drive (the boot drive) to 6. Note If the BIOS is version M54PE_08 or earlier and you have two PCI SCSI adapters installed in the PCI slots, the system will start from the hard disk drive attached to the SCSI adapter with the least amount of Read-only memory (ROM) and the lowest ROM address space. (In the case of equal ROM size, the system scans from slot 1 to 3 and assigns slot 1 as the lowest ROM address.) Therefore, in order for the system to load the operating system correctly, connect the startup drive to the SCSI adapter with the lowest ROM address space. If the version of BIOS is later than M54PE_08, and you have two PCI SCSI adapters installed in the PCI slots, the system will start from the hard disk drive attached to the SCSI adapter in descending order from slot 3 to slot 1. If the disk-array model was supplied with a preinstalled hard disk drive in bay 1, this drive is the startup drive, and it already has a SCSI ID of 0. The SCSI ID of the preinstalled hard disk drive in bay 1 of non-disk-array models is set to 6. Refer to the instructions supplied with the SCSI devices for information about setting a SCSI ID. The SCSI-2 adapter in the server has two internal connectors and one external connector: On non-disk-array models, the SCSI-2 adapter has one internal connector for an 8-bit cable, and one internal connector for a 16-bit cable. Non-disk-array models that are supplied with a preinstalled wide hard disk drive use a 16-bit internal connector. Non-disk-array models that are not supplied with a preinstalled hard disk drive or supplied with a narrow hard disk drive use an 8-bit internal connector. On the disk-array models, the SCSI-2 adapter has two internal connectors for 16-bit cables. Note To keep the external channel available for use on the preinstalled RAID adapter, use Channel 2 for connecting internal SCSI devices. PC Server 320 - Type 8640 149 Internal Channel 1 Internal Channel 2 External Channel 1 On all models, the external connector is for 16-bit cable. The SCSI-2 Fast/Wide PCI Adapter supports a total of seven 8-bit or fifteen 16-bit SCSI devices. The SCSI-2 Fast/Wide PCI-Bus Adapter supports a total of fourteen 16-bit SCSI devices. Note If you plan to install both internal and external SCSI devices, you must follow the instructions given in “External SCSI Devices” on page 508 in addition to the instructions in this section. Termination (Internal SCSI Devices): The devices at both ends of the SCSI bus must be terminated. If you attach SCSI devices (internal or external), you must terminate the last device in the chain. You must remove the termination from the other devices within the chain. If you attach external devices to a non-disk-array model with internal devices attached, you must also change the termination setting of the SCSI-2 adapter from the default in the SCSISelect utility program, as described in “SCSISelect Utility Program” on page 547. Note Read the README file on the SCSI-2 Fast/Wide PCI-Bus Adapter Configuration Option Diskette for updated information. Select Option Diskette from the first menu. Termination on disk-array models is automatically set. The requirements for terminating internal SCSI devices on non-disk-array models are: 150 If you attach internal SCSI devices to only one of the SCSI-2 adapter internal connectors, you must terminate the last internal device on the bus (cable) and disable the termination on the other devices connected to the internal SCSI connector. The SCSI-2 adapter is already terminated. If you attach internal SCSI devices to both of the SCSI-2 adapter internal connectors, you must PC Server HMM terminate the last internal device on each internal cable and disable the termination on the other devices connected to the internal SCSI connectors. You must also change the termination setting of the SCSI-2 adapter from the default in the SCSISelect utility program, as described in “SCSISelect Utility Program” on page 547. Note You can use only one of the two internal SCSI connectors on the SCSI-2 adapter if you connect both internal and external devices. A CD-ROM drive is installed in bay 4 of non-disk-array models and bay 7 of disk-array models. In non-disk-array models that are supplied with a narrow hard disk drive a narrow (8-bit) cable is provided. In non-disk-array models that are not supplied with a hard disk drive: The CD-ROM drive is terminated. A narrow (8-bit) cable is provided in these models. If you install 8-bit drives above the CD-ROM drive in bays 5–9, remove the termination from those drives. If you install a drive in bay 1, you must terminate that drive and remove the termination from the CD-ROM drive If you install a 16-bit device, you must purchase a 16-bit cable and a 16-bit to 8-bit SCSI Internal Converter to connect the CD-ROM drive to the 16-bit cable. Refer to the instructions supplied with the SCSI device for more information about termination. PC Server 320 - Type 8640 151 Power Supply Note: Verify that the voltage-select switch (if applicable) is set for the correct voltage. If the power-on indicator is not on, and if the power-supply fan is not running, check the power cord for proper installation and continuity. If the power cord is OK, either the power supply is defective or a defective device is causing the power supply to shut off. Check the power supply voltages. If the voltages are incorrect, replace the power supply. If the voltages are correct, and the Symptom-to-FRU index does not solve the problem, go to “Undetermined Problems” on page 552. P1 −Lead Pin 5, 5, 5, 5, +Lead Pin 6 6 6 6 1 2 3 4 V dc Minimum V dc Maximum Power Good +4.8V +11.52V −10.8V +5.25V +12.60V −13.2V V dc Minimum V dc Maximum −4.5V +4.8V +4.8V +4.8V −5.5V +5.25V +5.25V +5.25V V dc Minimum V dc Maximum +4.8V +5.25V P2 −Lead Pin 1, 1, 1, 1, +Lead Pin 2 2 2 2 3 4 5 6 P3 −Lead Pin +Lead Pin 4, 5, 6 152 1, 2, 3 PC Server HMM P4 and P6 1 −Lead Pin +Lead Pin 2, 3 2, 3 1 4 4 V dc Minimum V dc Maximum +4.8V +11.52V +5.25V +12.6V V dc Minimum V dc Maximum +11.52V +4.8V +12.6V +5.25V P5, P7, and P8 −Lead Pin +Lead Pin 2, 3 2, 3 1 4 Setup Program To access the Setup program: 1. Remove all diskettes from the server. Note Never start the Setup program while using the EISA Configuration program. 2. Power-on the server and watch the screen. Be ready to act quickly. 3. After the IBM logo screen appears and then quickly disappears, you are prompted to Press <F1> or <F2> to enter SETUP. As soon as you see that prompt, press the correct F-key (F1 or F2). If the Setup program screen doesn't appear, restart the system and try again. Note If a configuration error occurs, a prompt appears before the operating system starts (see “Configuration Conflicts” on page 274). 4. Follow the instructions on the screen to view or change the configuration. You must correctly exit from the Setup program to save the configuration information. 5. Press Esc or move the cursor to the Exit menu option on the menu bar. 6. Select Exit menu from the menu bar. 7. Select Save changes and exit. PC Server 320 - Type 8640 153 Specifications Size With pedestal: – Depth: 473 mm (18.6 in.) 585 mm (23.0 in.) with cable cover – Height: 651 mm (25.6 in.) – Width: 315 mm (12.4 in.) Without pedestal: – Depth: 473 mm (18.6 in.) 585 mm (23.0 in.) with cable cover Height: 622 mm (24.5 in.) Width: 195 mm (7.7 in.) – – Weight Minimum configuration as shipped: 19.0 kg (42 lb) Maximum configuration as shipped: 19.5 kg (43 lb) Environment Air temperature: – System on: 10° to 35° C (50° to 95° F) Altitude: 0 to 914 m (3000 ft.) – System on: 10° to 32° C (50° to 90° F) Altitude: 914 m (3000 ft.) to 2133 m (7000 ft.) – System off: 10° to 43° C (50° to 110° F) Maximum Altitude: 2133 m (7000 ft.) Humidity: – System on: 8% to 80% – System off: 8% to 80% Maximum altitude: 2133 m (7000 ft) Electrical Input Sine-wave input (50 to 60 Hz) is required Input voltage: – Low range: - Minimum: 90 V ac - Maximum: 137 V ac – High range: - Minimum: 180 V ac - Maximum: 265 V ac – Input kilovolt-amperes (kVA) approximately: - Minimum configuration as shipped: 0.07 kVA - Maximum configuration: 0.64 kVA Total Power Available for Drives Nominal Operating Current allowed: – +5 V dc line: 9.3 A – +12 V dc line: 6.0 A Heat Output 154 Approximate heat output in British Thermal Units (BTU) per hour: – Minimum configuration: 150 BTU (44 watts) – Maximum configuration: 1434 BTU (420 watts) PC Server HMM System Board Replacement Type 8640 computers have one or two processors, and other components installed on the system board. When replacing the system board, remove all of the installed components from the old system board and install them on the new system board. If the problem remains, check the following: The primary processor is installed and seated correctly in socket U2 on the system board. If installed, the secondary processor is seated correctly in socket U3 on the system board. All other components removed from the old system board are installed and seated correctly on the new system board. Note If the processor(s) are not seated correctly, intermittent problems can occur. Symmetric Multiprocessors/Multiprocessing Some PC Server computers incorporate a 90MHz Pentium processor and a second upgradeability processor socket on the system board to support Symmetric Multiprocessors/Multiprocessing (SMP). The SMP capability extends processing performance by allowing tasks to be dispatched to the next available processor rather then being queued until the busy processor has completed its task. The SMP capability also provides a level of high availability in that with some operating systems, such as OS/2 SMP, run in a uni-processor mode if one of the processors should experience a failure. This function will allow the LAN to continue operation so that service can be scheduled at a non-critical time. Locations “Input/Output Connectors” on page 156 “Internal Drive Bays (Disk-Array Models)” on page 157 “Internal Drive Bays (Non-Disk-Array Models)” on page 159 “System Board” on page 161 “Connections” on page 162 “Jumpers” on page 162 PC Server 320 - Type 8640 155 Input/Output Connectors 115 Power Connector Keyboard Connector Mouse Connector Serial Connectors Parallel Connector SCSI Connector Expansion Slots Display Connector Keyboard Connector: The cable from the keyboard connects here. Mouse Connector: This is where the mouse cable connects to the server. This connector sometimes is called an auxiliary-device or pointing-device port. Serial Connectors: Two 9-pin serial connectors, A (COM1) and B (COM2), are provided. The serial signal cable for a modem or other serial device usually connects here. If you are using a 25-pin signal cable, you need a 9-pin to 25-pin adapter cable. Parallel Connector: One 25-pin parallel port is provided. This is where the signal cable for a parallel printer, or other parallel device, connects to the server. SCSI Connector: Attach external SCSI devices here. Display Connector: The display signal cable attaches to the connector on this adapter. 156 PC Server HMM Internal Drive Bays (Disk-Array Models) Internal drives are installed in bays. The bays are numbered 1 through 10. 1 2 3 4 5 6 7 8 9 10 Cover plates (sometimes called bezels) cover the front of some installed drives. If you install a drive that uses removable media (diskette, optical disc, or tape), you might need to remove or change the cover plate. Bays 1–6 are for 3.5-inch hot-swappable hard disk drives. Bay 7 has a preinstalled SCSI CD-ROM drive. Bays 8 and 9 are for 3.5-inch diskette interface devices, such as a diskette drive or a tape backup unit that uses the diskette cable. The system board in the server supports a maximum of two diskette interface devices. You can install a second 3.5-inch diskette interface device in bay 9. Bay 10 is for a 3.5-inch hard disk drive only. Be sure the screw holes in the device line up with the screw holes in bay. Disk-array models are supplied with a 2-drop SCSI cable. PC Server 320 - Type 8640 157 The following table shows the widths, types, and maximum heights for the drives that you can install in each bay. Bay Drive Width Drive Type Maximum Drive Height 1–6 3.5-inch Hard disk 41.3 mm (1.6 inches) 7 5.25-inch CD-ROM 41.3 mm (1.6 inches) 8, 9 3.5-inch Diskette1 25.4 mm (1 inch) 10 3.5-inch Hard disk 25.4 mm (1 inch), with a drive in bay 9 41.3 mm (1.6 inches), with no drive in bay 9 Note: 1 Or a drive that connects to the diskette cable. Be sure the holes in the drive align with the drive housing. Table 2. Maximum Allowable Drive Sizes (Disk-Array Models) 158 PC Server HMM Internal Drive Bays (Non-Disk-Array Models) Internal drives are installed in bays. The bays are numbered 1 through 9. 9 8 7 6 5 4 3 2 1 Note If you install a drive that uses removable media (diskette, optical disc, or tape), you might need to remove or change the cover plate. Bay 1 is for 3.5-inch hard disk drives only. Some models are supplied with a hard disk drive preinstalled in bay 1. Bays 2 and 3 are for 3.5-inch diskette interface devices, such as a diskette drive or tape backup unit that uses the diskette cable. All models are supplied with a diskette drive preinstalled in bay 3. Bay 4 has a preinstalled SCSI CD-ROM drive. Bays 5–9 are for 3.5-inch or 5.25-inch drives. The system board supports a maximum of two diskette interface devices. You can install a second 3.5-inch diskette interface device in bay 2. Be sure the screw holes in the device line up with the screw holes in bay. Bays 5–9 contain trays for housing 3.5-inch drives. If you want to install a 5.25-inch drive in one of these bays, you must remove screws and the tray before attempting to install the drive. PC Server 320 - Type 8640 159 You can install a full-high drive between bays 6 and 7 by removing the trays from these bays. You cannot install full-high drives between bays 4 and 5, or between bays 8 and 9. If you are installing one or two integrated drive electronics (IDE) drives, you must purchase an IDE cable, such as in the PC Server Cable Kit. If you are connecting two hard disk drives to the IDE controller, you must reset the jumpers on one of the drives, as specified in the documentation supplied with the drive. If a preinstalled hard disk drive was not supplied with the server and you plan to have more than four 8-bit internal SCSI drives (including the CD-ROM drive), you must use an optional 7-drop SCSI cable in place of the 4-drop SCSI cable supplied with the server. To install 16-bit devices, you need a 16-bit cable (and a 16-bit to 8-bit SCSI Internal Converter if you want to connect the CD-ROM drive to the 16-bit cable). See “Internal SCSI Drives” on page 147 for additional information. The IBM 3.5-inch rewritable optical disc drive requires a special mounting bracket. The following table shows the widths, types, and maximum heights for the drives that you can install in each bay. Bay Drive Width Drive Type Maximum Drive Height 1 3.5-inch Hard disk 25.4 mm (1 inch), with a drive in bay 2 41.3 mm (1.6 inches), with no drive in bay 2 2, 3 3.5-inch Diskette1 25.4 mm (1 inch) 4 5.25-inch CD-ROM 41.3 mm (1.6 inches) 5–9 3.5-inch or 5.25-inch Hard disk, removable media2 41.3 mm (1.6 inches) Notes: 1. Or a drive that connects to the diskette cable. Be sure the holes in the drive align with the drive housing. 2. Removable media include CDs, optical discs, and tapes. Table 3. Maximum Allowable Drive Sizes (Non-Disk-Array Models) 160 PC Server HMM J9 J10 U39 U43 U44 U46 U47 Bank 2 W17 W21 Bank 1 FLASH BIOS W16 U38 Bank 0 W38 W31 W37 U36 J8 W33 W34 W32 J26 J11 J12 U35 J1 REAL TIME CLOCK W11 W10 J2 W23 W22 W25 W30 W20 System Board Bank 3 W6 J13 J23 PCI 3 J22 PCI 2 J21 PCI 1 W1 Shared PCI/EISA Slot MAIN UPGRADE J20 EISA Slot 6 J19 EISA Slot 5 J17 EISA Slot 3 J16 EISA Slot 2 J15 EISA Slot 1 W35 W5 U28 U27 U26 U25 CPU W36 U29 U30 U31 U32 Secondary Cache Memory Upgrade Sockets PC Server 320 - Type 8640 W2 W14 W13 W24 W18 CPU J18 EISA Slot 4 W15 J6 W12 161 Connections Header Configuration Connect To W12/W31 Speaker Speaker W18/W37 Power LED Pins 1-3 W24/W38 IDE Hard Drive LED IDE Hard Drive W35 CPU Fan Connector Fan W36 CPU Fan Connector Fan J1/J2/J26 Power Supply Connector P1 to J1 P2 to J2 P3 to J26 J6 Mouse Connector Mouse J8 Keyboard Connector Keyboard J9 Parallel Port Connector Parallel Device J10 Floppy Drive Connector Diskette Drive J11 Serial Port COMM A Connector Serial Device J12 Serial Port COMM B Connector Serial Device J13 ISA IDE Connector IDE Hard Drive N/A SCSI LED SCSI Option Card N/A SCSI Device Connector SCSI Option Card Jumpers Jumper Description Setting W1 L1 Cache Mode Open - L1 Write-Back (Default) Closed - L1 Write-Through W2 Reserved Open W5 L2 Cache Size Pins 1-2 - L2 Cache Size = 256K (Default) Pins 2-3 - L2 Cache Size = 512K W6 CPU Clock Pins 1-2 Pentium 60/90MHz Pins 2-3 Pentium 66/100MHz 162 PC Server HMM Jumper Description Setting W10 L2 Cache Size Pins 1-2 - L2 Cache Size = 256K (Default) Pins 2-3 - L2 Cache Size = 512K W16 Reserved Pins 1-2 (Default) W17 Reserved Closed (Default) W20 Monitor Selection Open - Monochrome Monitor Setting Closed - Color Monitor Setting (Default) W21 Reserved Open - AT Style Keyboard Closed - PS/2 Style Keyboard and Mouse (Default) W22 Reserved Open (Default) W23 Reserved Open (Default) W25 ISQ IDE IRQ Select Pins 1-2 - ISA IDE using IRQ 14 Primary IDE Controller (Default) Pins 2-3 - ISA IDE using IRQ 15 Secondary Controller W30 Reserved Open (Default) PC Server 320 - Type 8640 163 Symptom-to-FRU Index This index supports Type 8640 computers. Always start “General Checkout (QAPlus/PRO)” on page 4. The Symptom-to-FRU lists symptoms, errors, and the possible causes. The most likely cause is listed first. Use this Symptom-to-FRU Index and the Symptom-to-FRU Index (QAPlus/PRO) on page 61 in the PS/2 Hardware Maintenance Manual to help you decide which FRUs to have available when servicing the computer. In the following error codes and model numbers, X can be any number or letter. Where the model number is used to identify an error, XX used in place of the last 2 digits can be any number or letter. Note For IBM devices not supported by the QAPlus/PRO diagnostics code, refer to the manual for that device. For information on: Go to: Additional service help. (For example, 0S/2 Trap)errors, or “Related Service Information” on page 453. Possible software and hardware mismatch problems. (Not repairable by replacing FRUs) “Software/Hardware Mismatch Problems” on page 550. Memory Configuration Problems “Memory” on page 141. Replacing the system board does not correct the problem. See “System Board Replacement” on page 155. Error Code/Symptom FRU/Action 101, 102 (System and microprocessor error) 1. System Board 0103 (System Timer error) 1. System Board 106 (System and microprocessor error) 1. System Board 0110 (Parity Check 1 XXXX, run Setup) 1. Memory SIMM 2. System Board 111 (I/O channel check error) 1. Memory SIMM 2. System Board 164 PC Server HMM Error Code/Symptom FRU/Action 114 (Adapter read-only memory error) 1. Run Diagnostics 2. Failing Adapter 0115 (Parity Check 1 XXXX, run Setup) 1. Memory SIMM 2. System Board 0120 (Previous boot incomplete, default configuration used) 1. Run Setup 2. Battery/CMOS Chip 3. System Board 0130 (Invalid NVRAM media type) 1. Battery/CMOS Chip 2. System Board 151 (Real time clock error) 1. Run Diagnostics 2. System Board 161 (Real time clock battery error) 1. Battery 0162 (Models EXX) (Configuration error for slot XX, run Setup; then, run the EISA Configuration Utility) 1. Battery/CMOS Chip 2. System Board 162 (Configuration error) 1. Run Configuration/Setup 0163 (Real-Time Clock error) 1. Battery/CMOS Chip 2. System Board 164 (Memory configuration changed) 1. Run Configuration 165 (Micro Channel adapter configuration changed) 1. Run Configuration, insert Reference diskette 0171 (System battery is dead) 1. Battery/CMOS Chip 2. System Board 0173 (System CMOS checksum bad) 1. Run Setup 2. Battery/CMOS Chip 3. System Board 0174 (Invalid ISA Configuration) 1. Run Setup 2. Look for configuration conflicts. 3. Battery/CMOS Chip 0175 (EISA Configuration Error, run the configuration utility) 1. Run Setup 2. Run EISA Configuration Utility 3. Battery/CMOS Chip 4. System Board 176 (Computer cover or cable cover was removed without a key being used) 1. Run Configuration/Setup 177, 178 (Hardware error) 1. Run Diagnostics 2. System Board PC Server 320 - Type 8640 165 Error Code/Symptom FRU/Action 184 (Power-on password corrupted) 1. Run Configuration/Setup 185 (Drive startup sequence information corrupted) 1. Run Configuration/Setup 186 (System board or security hardware error) 1. Run Configuration/Setup 2. System Board 189 (An attempt was made to access the computer with an invalid password) 1. Run Configuration, enter the administrator password 201 (Memory test error) 1. Memory SIMM 2. System Board 0214 (System RAM failed at offset XXXX) 1. Memory SIMM 2. System Board 0215 (Failing Bits XXXX) 1. Memory SIMM 2. System Board 0216 (Extended RAM failed at offset XXXX) 1. Memory SIMM 2. System Board 0221 (Shadow RAM failed at offset) 1. Memory SIMM 2. System Board 0254 (System board Cache error, Cache disabled) 1. System Board Cache 2. System Board 229 (Cache memory test error. Be sure the cache memory is enabled.) 1. Cache memory 2. System Board 0301 (Keyboard or keyboard controller error) 1. Keyboard 2. System Board 0302 (Keyboard locked) 1. Unlock the keyboard 2. Keyboard 3. System Board 0303 (Keyboard Error, stuck key) 1. Keyboard 2. System Board 604 (Diskette drive error) 1. Diskette Drive 2. Drive Cable 3. System Board 0610 (Incorrect drive A type) 1. 2. 3. 4. 166 PC Server HMM Run Setup Diskette Drive System Board Diskette Drive Cable Error Code/Symptom FRU/Action 0612 (Incorrect drive B type) 1. 2. 3. 4. Run Setup Diskette Drive System Board Diskette Drive Cable 0632 (Diskette drive A error) 1. 2. 3. 4. Run Setup Diskette Drive System Board Diskette Drive Cable 0642 (Diskette drive B error) 1. 2. 3. 4. Run Setup Diskette Drive System Board Diskette Drive Cable 662 (Diskette drive configuration error) 1. Run Configuration/Setup 762 (Processor configuration error) 1. Run Configuration/Setup 2. Run Diagnostics 962 (Parallel port error) 1. Disconnect external cable on parallel port. 2. Internal Cable 3. System Board 1162 (System-board serial port 1 or 2 error) 1. Disconnect external cable on serial port. 2. Run Configuration 1300 (Operating system not found) 1. Run Setup with known good diskette 2. Fixed Disk Drive 3. Fixed Disk Adapter 4. Diskette Drive 5. System Board 1701 (Fixed Disk X failed) 1. 2. 3. 4. Run Setup Fixed Disk Drive Fixed Disk Adapter System Board 1702 (Fixed Disk Drive Controller failed) 1. 2. 3. 4. Run Setup Fixed Disk Adapter Fixed Disk Drive System Board 1801 (No room for PCI option ROM) 1. Run Reference Diskette 2. Failing Adapter 3. System Board 1802 (No more I/O space available for PCI adapter) 1. Run Reference Diskette 2. Failing Card 3. System Board 1803 (No more memory (above 1MB for PCI adapter) 1. Run Reference Diskette 2. Failing Card 3. System Board PC Server 320 - Type 8640 167 Error Code/Symptom FRU/Action 1804 (No more memory (below 1MB for PCI adapter) 1. Run Reference Diskette 2. Failing Card 3. System Board 1805 (PCI option ROM checksum error) 1. Remove Failing PCI Card 2. System Board 1962 (No valid boot device found, be sure the drive you want to start from is the boot sequence) 1. Run Configuration/Setup 2. Run Diagnostics 3. Drive Cable 4. Hard Disk Drive 5. System Board 2401 (Monitor type does not match CMOS) 1. Run Setup and enter correct monitor type 2. Video Display 3. Video Adapter 4. System Board 2462 (Video controller error) 1. Display 2. System Board 000247100 (Type 8641) 1. L2 processor cache was disabled, do the following Boot the system diagnostics. Run the processor tests. When asked if you want to turn on the processor cache, reply, "yes," and the error will be cleared. I9990301 (Fixed boot sector error, no operating system installed) 1. Install operating system to hard disk drive. 8601, 8603 (Pointing Device Error) 1. Pointing Device 2. System Board 168 PC Server HMM Parts Listings 3 1 2 5 6 4 7 8 24 23 22 9 21 10 20 11 15 19 14 12 18 17 16 13 PC Server 320 - Type 8640 169 System Note The model(s) listed for the following FRUs indicates FRUs that the models may contain at the time of shipping. However, other FRUs are supported in each model as options. Index System Unit (PC Server 320 - Type 8640) 1 Access Cover 2 DASD Hot Swap Backplane (Models 1Y0, 1YT, MZ1, MY0, MYT, MYR, MD0, MDV, MDS, MZ0, MZV, 1D0, 1DS) 3 Hot Swap Shell (Models 1D0, 1DS, 1Y0, 1YT, MYT, MYR, MD0, MDV, MDS, MZ1, MZ0, MZV,) 4 Hot Swap Door Assembly (Models 1Y0, 1YT, MY0, MYT, MYR, MD0, MDV, MDS, MZ1, MZ0, MZV, 1D0, 1DS) 5 1/2-Inch Hard Disk Drive Adapter Tray (Models 0D0, 0DV, 0T0, 0XT, 0Y0, 0YT) MD0, MDS, MDV, MX0, MXT, MY0, MYR, MYT, MZ0, MZ1, MZV) 6 Hard Disk Drtive, see DASD (PC Server 300/320 - Type 8640) 7 DASD Tray - Hot Swap (Wide) (Models 1D0, 1DS, 1Y0, 1YT, MD0, MDS, MDV, MY0, MYR, MYT, MZ0, MZ1, MZV) 7 DASD Tray - Hot Swap Option (Models 1D0, 1DS, 1Y0, 1YT, 1Z0) 8 Base Frame (Models 0D0, 0DV, 0T0, 0XT, 0Y0, 0YT, 1D0, 1DS, 1Y0, 1YT, 1Z0) 8 Base Frame (Models MD0, MDS, MDV, MX0, MXT, MY0, MYR, MYT, MZ0, MZ1, MZV) 9 Front Bezel/Door Assembly 10 Keylock with Keys 11 Keylock with Keys 12 1/2-Inch Blank Bezel 13 1/4-Inch Blank Bezel 14 CD-ROM Drive, see DASD (PC Server 300/320 - Type 8640) 15 16/8 BIT SCSI Converter (Models 0T0, 0XT, 0YT, MX0, MXT, MY0, MYT, MYR, MD0, MDV, MDS, MZ0, MZ1, MZV, 0D0, 0DV) 16 Speaker 18 Card Guide (Models 0D0, 0DV, 0T0, 0XT, 0Y0, 0YT, 1D0, 1DS, 1Y0, 1YT) 18 Card Guide (Models MD0, MDS, MDV, MX0, MXT, MY0, MYR, MYT, MZ0, MZ1, MZV) 17 Fan Assembly with Connector (Models 0D0, 0DV, 0T0, 0XT, 0Y0, 0YT, 1D0, 1DS, 1Y0, 1YT) 17 Fan Assembly with Connector (Models MD0, MDS, MDV, MX0, MXT, MY0, MYR, MYT, MZ0, MZ1, MZV) 19 Pedestal 170 PC Server HMM 06H8930 06H7669 06H5068 06H5070 06H2652 06H3956 71G6292 06H8933 06H8934 06H8935 33F8433 33F8433 71G0770 71G0771 92F0324 06H2649 71G0757 96G2111 06H2647 96G2112 07H0516 Index System Unit (PC Server 300/320 - Type 8640) 20 DASD 2-Drive Cage (Models MD0, MDS, MDV, MX0, MXT, MY0, MYR, MYT, MZ0, MZ1, MZV) 20 DASD 3-Drive Cage (Models 0D0, 0DV, 0T0, 0XT, 0Y0, 0YT, 1D0, 1DS, 1Y0, 1YT) 21 Diskette Drive, see DASD (PC Server 300/320 - Type 8640) 22 Hard Disk Drive, see DASD (PC Server 300/320 - Type 8640) 23 Casting I/O Back Panel (Models MX0, MXT, MY0, MYT, MYR, MD0, MDV, MDS, MZ0, MZ1, MZV) 24 300 Watt Power Supply Assembly with Switch Keyboard with Cable, see “Keyboards (101/102 Key)” on page 175 Memory Riser Card (Models MX0, MXT, MY0, MYT, MYR, MD0, MDV, MDS, MZ0, MZ1, MZV) Miscellaneous Parts Kit 32X5/16-Inch Screws (6 each) Captive Screws (2 each) Diskette Drive M3 Screws (2 each) EMC Ground Contacts (4 each) EMC I/O Spring EMC Keyboard/Mouse Clip FEM-Nut 4-40 Screws (2 each) FEM-Nut 2-56 Screws (2 each) Hard Drive 6-32 Screws (2 each) I/O EISA Blank I/O Micro Channel Blank Memory Card Standoff System Board Edge Support System Board M3X8 Hex Screws (3 each) System Board Standoff Thumb Screw Video Gasket Mouse PC Server 300 Label PC Server 320 Label Pressing I/O Back Panel - Old Models only (Models MX0, MXT, MY0, MYT, MYR) SCSI-2 Fast/Wide Card (Models 0T0, 0XT, 0Y0, 0YT, 0D0, 0DV MDS, MZ1) SCSI Fast/Wide ARRAY Card (Models MDS, MZ1, 1D0, 1DS) Shadow Box SVGA Card (Models 0T0, 0XT, 0Y0, 0YT, 1Y0, 1YT) SVGA Card (Models 0D0, 0DV, 0Z0, 0ZV, 1D0, 1DS, 1Z0) continued 06H8937 06H8938 96G2107 71G0044 96G3692 06H8940 06H4595 06H6003 06H6004 96G2411 06H8574 06H5078 96G2411 71G0031 06H9114 PC Server 320 - Type 8640 171 Index Power (PC Server 300/320 - Type 8640) Battery (Models MX0, MXT, MY0, MYT, MYR, MD0, MDV, MDS, MZ0, MZ1, MZV) see “Battery Notice” on page 461 Power Button with Spring Power Cord, see “Power Cords” on page 176. Real-Time Clock with Battery (Models 0D0, 0DV, 0T0, 0XT, 0Y0, 0YT, 1D0, 1DS, 1Y0, 1YT) see “Battery Notice” on page 461 Index System Boards (PC Server 320 - Type 8640) 4MB Memory SIMM - Parity (Models MX0, MXT) 8MB Memory SIMM - Parity (Models 0D0, 0DV, 0T0, 0XT, 0Y0, 0YT, 1D0, 1DS, 1Y0, 1YT, MY0, MYT, MYR, MD0, MDV, MDS, MZ0, MZ1, MZV, 256KB Cache (Models MD0, MDV, MDS, MX0, MXT, MY0, MYT, MYR, MZ0, MZ1, MZV) 512KB Cache (Models MD0, MDV, MDS, MX0, MXT, MY0, MYT, MYR, MZ0, MZ1, MZV) P54C 50/75 Processor with Heat Sink (Models 0T0, 0XT, MX0, MXT) P54C 60/90 Processor with Heat Sink (Models 0Y0, 0YT, 1Y0, 1YT) P54C 60/90 Processor with Heat Sink (Models MY0, MYT, MYR) P54C 100/66 Processor with Heat Sink (Models 0Z0, 0ZV, 1Z0) P54C 100/66 Processor with Heat Sink (Models MZ0, MZ1, MZV) P54C 133/66 Processor with Heat Sink (Models MD0, MDV, MDS) P54C 133/66 Processor with Heat Sink (Models 0D0, 0DV, 1D0, 1DS) Heat Sink with Clip (Models 0T0, 0XT, 0Y0, 0YT, 1Y0, 1YT) Heat Sink with Clip (Models MX0, MXT, MY0, MYT, MYR) System Board without Memory and Processor (Models 0T0, 0XT, 0Y0, 0YT, 1Y0, 1YT, 0D0, 0DV, 1D0, 1DS) System Board with SVGA and SCSI Fast/Wide (Models MX0, MXT, MY0, MYT, MYR, MD0, MDV, MDS, MZ0, MZ1, MZV) 172 PC Server HMM 33F8354 06H2191 06H3398 73G3233 73G3234 96G2121 96G2413 95G9613 06H6142 95G9614 75H8846 96G2415 96G2423 06H9492 06H6137 95G9612 06H2173 96G3694 Index DASD (PC Server 320 - Type 8640) 6 1GB Hard Disk Drive - Fast (Models 0T0, 0XT, MX0, MXT) 6 1GB Hard Disk Drive - Fast/Wide (Models 0YT, MY0, MYT, MYR) 6 2GB Hard Disk Drive - Fast/Wide (Models MDV, MDS, MZ1, MZV, 0DV, 0ZV, 1DS) 15 2X SCSI CD-ROM Drive (Models 1Y0, 1YT, 0Y0, 0YT, MX0, MXT, MY0, MYT, MYR) 15 4X SCSI CD-ROM Drive (Models 0D0, 0DV, 0T0, 0XT, 1D0, 1DS, MD0, MDV, MDS, MZ0, MZ1, MZV) 23 1.44MB Diskette Drive 06H6416 06H3371 06H8561 06H3847 88G4921 93F2361 PC Server 320 - Type 8640 173 Cables 1 8 6 7 5 4 2 3 Index Cables (PC Server 320 - Type 8640) 1 Cable Cover with Lock 2 SCSI Hard Disk Drive Fast Cable - 4X (Models 0T0, 0XT, 0Y0, MX0, MXT) SCSI Hard Disk Drive Fast Cable - 7X (Models 0T0, 0XT, 0YT, MX0, MXT, 0D0, 0DV, 1D0, 1DS, 1Z0) 3 SCSI Hard Disk Drive Fast Cable - 2X (Models 1D0, 1DS, 1Y0, 1YT, 1Z0, MY0, MYT, MYR, MD0, MDV, MDS, MZ0, MZ1, MZV) 4 Diskette Drive Cable with power 5 Parallel DATA Cable 6 Serial DATA Cable 7 SCSI Fast/Wide Internal/External Port Cable (Models 1D0, 1DS, 1Y0, 1YT, 1Z0) 8 LED Cable Assembly C2 Cable Assembly DASD Status Cable (Models 1Y0, 1YT, MDS, MZ1, 1D0, 1DS) Keylock Cable SCSI Short Cable to I/O Casting (Models MD0, MDV, MDS, MX0, MXT, MY0, MYT, MYR, MZ0, MZ1, MZV) 174 PC Server HMM 06H5072 82G3626 06H6440 06H5065 92F0423 06H2166 06H2165 06H6864 06H8936 06H8767 06H7766 06H8766 96G2102 Keyboards (101/102 Key) Keyboards (101/102 Key) Arabic Belgium-Dutch Belgium-French Bulgarian Czech Danish Dutch Finnish French German Greek Hebrew Hungarian Iceland Italy Latvia Norwegian Polish Portuguese Romanian Russian-Cyrillic Serbian-Cyrillic Slovak Slovenia/Croatia/Bosnia South Africa Spanish Swedish Swiss-French Swiss-German Turkish 179 Turkish 440 U.K. English U.S. English (Models 0X0, 0XT, 0Y0, 0YT, 1Y0, 1YT, MX0, MXT, MY0, MYT) U.S. English (Models MD0, MDV, MZ0, MZV, MDS, MZ1, 0D0, 0DV, 0Z0, 0ZV, 1D0, 1DS, 1Z0) U.S. English (E/ME/A use only) 1391490 1391414 1391526 1399583 1399570 1391407 1391511 1391411 1391402 1391403 1399046 1391408 1399581 1391495 1393395 1391406 1391409 1399580 1391410 1399582 1399579 1399578 1399571 1393669 1396790 1391405 1391411 1391412 1391412 8125409 1393286 1391406 71G4646 06H9743 1396790 PC Server 320 - Type 8640 175 Power Cords Power Cords Arabic Belgium Bulgaria Czech Republic Denmark Finland France Germany Hungary Israel Italy Latvia Netherlands Norway Poland Portugal Serbia Slovakia South Africa Spain Switzerland Switzerland (French/German) U.S. English U.K./Ireland Yugoslavia 176 PC Server HMM 14F0033 1339520 1339520 1339520 13F9997 1339520 1339520 1339520 1339520 14F0087 14F0069 1339520 1339520 1339520 1339520 1339520 1339520 1339520 14F0015 1339520 1339520 14F0051 62X1045 14F0033 1339520 PC Server 500 - Type 8641 Features . . . . . . . . . . . . . . . . . . . . Diagnostics and Test Information . . . . . . . . Additional Service Information . . . . . . . . . . Administration Monitoring Utilities . . . . . . . Advanced Functions . . . . . . . . . . . . . Backing Up Your Disk-Array Configuration . Restoring the Disk-Array Configuration . . . Using the Advanced Functions . . . . . . Changing the Write Policy . . . . . . . Formatting Drives . . . . . . . . . . . Changing the RAID Parameters . . . . Configuring the Disk Array . . . . . . . . . . RAID Technology . . . . . . . . . . . . . Hard Disk Drive Capacities . . . . . . . . Additional Storage Capacity . . . . . . . . The RAID Configuration Program Screens . Drive Maintenance . . . . . . . . . . . . . . Obtaining Drive Status . . . . . . . . . . Bay/Array Selection List . . . . . . . . Results of a Hard Disk Drive Failure . . . . Logical and Hard Disk Drive Status Indications Replacing a Faulty Drive . . . . . . . . . Drivers . . . . . . . . . . . . . . . . . . . Installing Internal Drives . . . . . . . . . . . Considerations . . . . . . . . . . . . . . Performing Common Tasks . . . . . . . . . . Defining a Hot-Spare Drive . . . . . . . . Deleting a Disk Array . . . . . . . . . . . Creating a Disk Array . . . . . . . . . . . Adding Drives to Create an Additional Array Defining Logical Drives . . . . . . . . . . Power Supplies . . . . . . . . . . . . . . . Primary Power Supply Voltages . . . . . . Optional Power Supply Drive Connector Voltages . . . . . . . . . . . . . . . . RAID Recovery Procedure Not Effective . . . . Redefining Space in an Array . . . . . . . . . Removing a Drive from Bank C, D, or E . . . . Starting the RAID Configuration Program . . . RAID Program Keys . . . . . . . . . . . Main Menu Selections . . . . . . . . . . Viewing the RAID Configuration . . . . . . . Locations (System Board) . . . . . . . . . . . . Symptom-to-FRU Index . . . . . . . . . . . . . Beep Symptoms . . . . . . . . . . . . . . . No Beep Symptoms . . . . . . . . . . . . . Error Codes . . . . . . . . . . . . . . . . . Error Messages . . . . . . . . . . . . . . . SCSI Error Code Format . . . . . . . . . . . Parts Listing . . . . . . . . . . . . . . . . . . 178 178 179 179 180 180 181 181 181 183 183 185 185 186 186 186 187 188 188 189 190 190 191 191 192 193 193 194 195 196 196 199 199 Copyright IBM Corp. 1996 177 200 200 202 204 205 205 205 206 208 209 209 209 209 210 210 218 Features In addition to the following features, the PC Server 500 is shipped with a ServerGuide package that contains a set of ServerGuide Compact Discs (CDs). The easiest and most efficient way to set up the server, install an operating system, and take advantage of the latest software for the network environment is to use the ServerGuide compact discs. Refer to the "User's Guide" that is shipped with the ServerGuide Compact Discs. Microprocessor P54C 90/60MHz Processor Complex Memory Standard: 16 or 32 MB (Varies by model) 70 ns, ECC Diskette Drives Standard: one 3.5-inch Hard Disk Drives Number of drives and drive capacities varies by model Keyboard and Mouse 101-key Keyboard Mouse Expansion 6 Micro Channel slots, 6 Standard slots Up to 20 bays Video SVGA Adapter Compatibility – Video graphics adapter (VGA) – Enhanced graphics adapter (EGA) – Color graphics adapter (CGA) – Multicolor graphics ARRAY (MCGA) Integrated Functions Video port on an adapter 2 serial ports 1 parallel port Mouse port Keyboard port Battery-backed clock and calendar Power Supply Power Supply: – Standard Primary: 434 watt – Optional Secondary: 220 watt SCSI Controller (varies by model) IBM SCSI-2 Fast/Wide Adapter IBM Enhanced SCSI-2 RAID Adapter Diagnostics and Test Information The following list contains problems and references for diagnosing a PC Server 500 Type 8641. 178 PC Server HMM Notes Always start with "General Checkout (Micro Channel)" on page 19 in the PS/2 Hardware Maintenance Manual Problem Reference Error Codes/Error Messages “Symptom-to-FRU Index” on page 209. DASD Adapter Problems For non-disk-array models, see “SCSISelect Utility Program” on page 547. SCSI-2 Fast/Wide PCI-Bus RAID Adapter, see “Disk Array Configuration” on page 461. Memory "General Checkout (Micro Channel)" on page 19 in the PS/2 Hardware Maintenance Manual Power Supply Voltages “Power Supplies” on page 199. Miscellaneous "General Checkout (Micro Channel)" on page 19 in the PS/2 Hardware Maintenance Manual Additional Service Information The following information is for the PC Server 500 Type 8641. “Administration Monitoring Utilities.” “Advanced Functions” on page 180. “Configuring the Disk Array” on page 185. “Drive Maintenance” on page 187. “Drivers” on page 191. “Installing Internal Drives” on page 191. “Performing Common Tasks” on page 193. “Power Supplies” on page 199. “RAID Recovery Procedure Not Effective” on page 200. “Redefining Space in an Array” on page 202. “Removing a Drive from Bank C, D, or E” on page 204. “Starting the RAID Configuration Program” on page 205. “Viewing the RAID Configuration” on page 206. Administration Monitoring Utilities Several of the operating systems that your server supports also support (for disk-array models) RAID monitoring programs. The monitoring programs are: OS/2 RAID Controller Administration and Monitor OS/2 RAID NetFinity/Alert Manager PC Server 500 - Type 8641 179 OS/2 RAID Controller Administration for NetWare IBM RAID Controller Administration for Banyan Vines These programs include many of the functions contained in the IBM RAID configuration program, but unlike that program, they reside on top of your operating system and do not require you to start the program from a startable diskette or from a startable compact disc. You can start these programs from your active operating system desktop. Each of these monitoring programs allow you view the RAID configuration, reconfigure the array when replacing a defective drive, and perform tuning tasks such as changing the write policy. To monitor the drive status with OS/2, Novell NetWare, Microsoft Windows, and Banyan Vines, you must run the administration programs. The RAID controller diskette contains files that must be installed when you use OS/2, NetWare, or Banyan Vines. See the README file on the RAID controller diskette for installation and usage instructions for OS/2 RAID Controller Administration and Monitor, OS/2 RAID Controller Administration for Netware, and IBM RAID Controller Administration for Banyan Vines. For OS/2 RAID NetFinity Alert Manager, see the ServerGuide CD documentation. Advanced Functions You can select several utilities from the Advanced Functions menu. They include: Backup configuration to diskette Restore configuration to diskette Change the write policy Change the RAID parameters Format a drive Backing Up Your Disk-Array Configuration: The RAID adapter maintains a record of the disk-array configuration information in its EEPROM (electronically erasable programmable read-only memory) module. The disk-array configuration is vital information. To protect this information, back up the information to diskette as soon as you have completed your tasks. You need a blank, formatted, 3.5-inch diskette. To back up the disk-array configuration information to diskette: 1. Label the blank diskette “Disk Array Configuration Backup,” and date it. 2. Start the RAID configuration program. See “Starting the RAID Configuration Program” on page 205. 3. Select Advanced functions from the Main Menu. 180 PC Server HMM 4. Select Backup config. to diskette. 5. Remove the RAID controller diskette from the drive and insert the blank diskette. 6. Follow the instructions on the screen. Restoring the Disk-Array Configuration: To restore the disk-array configuration information in the RAID adapter EEPROM module, use the RAID controller diskette and an up-to-date Disk Array Configuration Backup diskette. Note Because dynamic changes in the configuration of your disk array occur due to hot-spare drive replacement or other drive maintenance activity, the configuration backup information on the diskette might be different from that in the adapter. It is important that you back up the disk-array configuration information frequently, to keep the backup information on the diskette current. To restore the RAID configuration information: 1. Insert the IBM RAID controller diskette into the primary drive and power-on the system. If the system already is on, press Ctrl+Alt+Del. 2. Select Advanced functions from the Main Menu. 3. Select Restore config. from diskette. 4. Follow the instructions on the screen. Using the Advanced Functions: This section gives the procedures for using the advanced functions, such as changing the write policy, changing the RAID parameters, and formatting a drive. Warnings appear throughout this section to alert you to potential loss of data and should be heeded before answering yes to the confirmations requested by the RAID configuration program. Changing the Write Policy: When you configure a logical drive, the RAID adapter automatically sets the write policy to write-through (WT) mode, where the completion status is sent after the data is written to the hard disk drive. To improve performance, you can change this write policy to write-back (WB) mode, where the completion status is sent after the data is copied to cache memory, but before the data is actually written to the storage device. Although you gain performance with write-back mode, it creates a greater risk of losing data due to a power failure. This is because the system gets a completion status message when the data reaches cache memory, but before data is actually written to the storage device. To change the write policy: PC Server 500 - Type 8641 181 1. Start the RAID configuration program. See “Starting the RAID Configuration Program” on page 205. 2. Select Advanced functions from the Main Menu. 3. Select Change write policy from the Advanced Functions menu. The cursor will be active in the Logical Drive list. 4. Select the logical drive whose write policy you want to change. The Advanced Functions screen appears. Note Your information might be different from that shown in this screen. The Logical Drive list shows you the logical drive ID, the size in megabytes of each logical drive, the RAID level you assigned to that logical drive, and the date you created it. The status of the logical drive is also shown. Good means that all is well with the drive; Critical means that you must replace the hard disk drive and rebuild the logical drive. (You will have received a message telling you what has happened to the drive.) Offline means that the logical drive is unrecoverable; the data in that drive is lost. 5. Locate the Wrt pol (Write Policy) field in the Logical Drive list. The write policy is shown as either WT (write-through, which is the default setting) or WB (write-back). 6. Use the Up Arrow (↑) key or the Down Arrow (↓) key to select the logical drive whose write policy you want to change. Warning If you change the write policy to write-back, wait at least 10 seconds after your last operation before you power-off the server. It takes that long for the system to move the data from the cache memory to the storage device. Failure to follow this practice can result in lost data. 7. Press Enter to change the write policy. 8. 9. 10. 11. 182 Notice that WT changes to WB. You can press Enter to alternate between WT and WB. When you have made your choice, press Esc to return to the Advanced Functions menu. Select Exit. The Confirm pop-up window appears asking you to confirm your action. To return the setting to its original state, select No. To save your changes, select Yes. Back up the disk-array configuration information to diskette. Refer to “Backing Up Your Disk-Array Configuration” on page 180 for more information. PC Server HMM Formatting Drives: You can perform a low-level format on drives with RDY (ready), OFL (offline), or UNF (unformatted) status. Note The Format drive choice on the Advanced Functions menu provides a low-level format. If you install a new hard disk drive that requires a standard format, use the Format command provided by your operating system. The Format program works like the low-level format program in the advanced diagnostics portion of the system programs. It is provided in the IBM RAID configuration program so that you can perform a low-level format on a drive controlled by the RAID adapter. To perform a low-level format: 1. Start the RAID configuration program. See “Starting the RAID Configuration Program” on page 205. 2. Select Advanced functions from the Main Menu. Warning A low-level format erases all data and programs from the drive. 3. Select Format drive. The low-level format program starts. 4. Follow the instructions on the screen. You can perform a low-level format on more than one drive at a time. Changing the RAID Parameters: You can change the RAID parameters using the advanced functions by selecting Change RAID parameters. The default settings are: Stripe unit size — 8K The stripe unit size is the amount of data written on a given disk before writing on the next disk. To maximize the overall performance, this stripe unit should be chosen such that the stripe-unit size is close to the size of the system I/O request. The default is set to 8K data bytes. Warning Once the stripe unit is chosen and data is stored in the logical drives, the stripe unit cannot be changed without destroying data in the logical drives. Rebuild priority — Equal. PC Server 500 - Type 8641 183 Rebuild priority can be set to equal, high, or low. When set to equal, the rebuild I/O request and system I/O request get equal priority in the execution order. When set to high, the rebuild I/O request will get a higher priority than a system I/O request. In a heavily loaded system (with a high rate of system I/O requests), the high-priority rebuild can significantly reduce the disk rebuild time at the expense of degraded handling of I/O requests. When the rebuild priority is set to low, the rebuild I/O requests can execute only if there is no pending system I/O requests. In a moderate to heavily loaded system, low rebuild priority will increase the disk rebuild time significantly and provide better system performance. Note Rebuild priority can be changed without affecting data in the logical drives. Parity placement — RA. Warning Once a parity placement scheme is chosen and data stored, it cannot be changed without destroying data. Parity placement defines how parity is placed in the disk array with respect to data. The following illustration shows both the Left Symmetric (LS) and Right Asymmetric (RA) parity placement in a four-drive disk array. Here AAA, BBB, and CCC are the data stripe units, and PP0 is the corresponding parity. Similarly DDD, EEE, and FFF are the data stripe units, and PP1 is the corresponding parity. Right Asymmetric (RA) Disk 1 PPð DDD GGG JJJ Disk 2 AAA PP1 HHH KKK Disk 3 BBB EEE PP2 LLL Disk 4 CCC FFF III PP3 Left Symmetric (LS) Disk 1 AAA EEE III PP3 Disk 2 BBB FFF PP2 JJJ Disk 3 CCC PP1 GGG KKK Disk 4 PPð DDD HHH LLL In some situations you may want to try LS parity placement to improve performance. The default parity placement is RA. Read ahead — On. Normally the IBM SCSI-2 Fast/Wide PCI-Bus RAID Adapter transfers data from disk to its local cache in steps of stripe-unit size. This provides excellent overall performance when workloads tend to be sequential. However, if the workload is random and 184 PC Server HMM system I/O requests are smaller than stripe-unit size, reading ahead to the end of the stripe unit will result in a wasted SCSI bus bandwidth and wasted disk utilization. When read-ahead is set to Off, the size of data transfer from the disk to local cache is equal to the system I/O request size, and no read-ahead to the end of the stripe unit is performed. Notes 1. The Read-ahead setting can be changed without destroying data in a logical drive. 2. When the configuration is saved on a diskette, the RAID parameters are saved also. Configuring the Disk Array The following information applies only to disk array models. Use this information to perform the tasks necessary to configure, add, change, or delete one or more disk arrays. If you need to create an IBM RAID controller diskette, refer to the ServerGuide User's Guide that was shipped with the system. Familiarize yourself with the information contained in this manual and the RAID (redundant array of inexpensive disks) information in the User's Reference shipped with the server. Verify the disk-array configuration. The disk-array model comes configured as one logical drive. – To view the disk-array configuration, go to “Viewing the RAID Configuration” on page 206 and select View Configuration from the Main Menu. – To create a disk array, go to“Creating a Disk Array” on page 195. Backup the disk-array configuration. See “Backing Up Your Disk-Array Configuration” on page 180. After you configure the disk array, you can complete setup by installing an operating system (from the ServerGuide compact disc that was shipped with the server or from the diskettes that came with the operating system). To install an operating system from the ServerGuide CD, refer to the ServerGuide User's Guide. RAID Technology: RAID is the technology of grouping several hard disk drives in a server into an array that can be defined as a single logical drive. This logical drive then appears to the operating system as a single physical drive. This grouping technique greatly enhances logical-drive capacity and performance. In addition, if one of the hard-disk drives fails (becomes defective the server continues to run, with no operator intervention required, at reduced performance. The defective drive can be replaced without powering off the server (hot-swap). For more PC Server 500 - Type 8641 185 information about hot-swappable hard disk drives, see “Installing Internal Drives” on page 191. Hard Disk Drive Capacities: With a server, it is important to understand the implications of hard disk drive capacities and how they influence the way you create disk arrays. Drives in the disk array can be of different capacities. For example, if the model came with two 1GB hard disk drives and you install a 2GB hard disk drive to create a RAID 5 disk array, the total capacity of the array is 3GB instead of 4GB. Therefore, when creating arrays it is wise to add drives of equal capacity. Additional Storage Capacity: When you add hard disk drives to the server, you must configure a new disk array before the drives can be used. You can either reconfigure the existing disk array to include the capacity offered with the added drives, or group the added drives into their own array (see “Adding Drives to Create an Additional Array” on page 196). You also can create an array with only one drive. The RAID Configuration Program Screens: When you configure the disk array, or even just view its configuration, you will be using the IBM RAID configuration program on the IBM SCSI-2 Fast/Wide Streaming-RAID Adapter/A Option Diskette (also called the IBM RAID controller diskette). The following figure is a compilation of many of the IBM RAID Controller Disk Array Configuration (also called the IBM RAID configuration program) screens. The list below the figure gives explanations of the numbered areas of the figure. 1. This pop-up allows you to select the RAID level you want to assign to the logical drive you are defining, and it allows you to select the logical drive size. You can enter the size, in megabytes, or you can accept the default value shown. When you need to confirm an action, the Confirm pop-up appears in this area. 2. You can select any of the choices that appear on the menus. 3. The Bay/Array selection list shows each bay in the server (for each channel) numbered 1 through 7. The abbreviation in the bay indicates the status of the drive installed in the bay. Selections are made from this list to determine which bays (hard disk drives) are in the arrays. The letter to the right of the bay, identifies the array in which the hard disk drive in that bay is grouped. 186 PC Server HMM Note The Channel/Bay/Array area on the screen does not reflect the physical configuration of the server. The hard disk drives are installed in horizontal banks of bays (in banks C, D, and E there are 6 bays, numbered 1 through 6 from left to right). See “Installing Internal Drives” on page 191 to see the physical location of the hard disk drives. 4. The Array list shows you the array ID and the size (in megabytes) of the array. Note The capacity (size) is shown in binary equivalent. When a drive is being rebuilt, this area, along with the Logical Drive list area, shows the progression of the rebuilding process. 5. The Logical Drive list identifies the logical drive (for example, A1), the size of the logical drive, the RAID level assigned to the logical drive, the date it was created, and the write policy. The status of the logical drive also is shown. Good means that all is well with the drive; Critical means that you must replace the drive or do a rebuild operation. (You will have received a message telling you the drive is in a Critical state.) Offline means that the logical drive is unrecoverable; the data in that drive is lost. When a drive is being rebuilt, this area, along with the Array list area, shows the progression of the rebuilding process. Note The capacity (size) is shown in binary equivalent. During an initialization process, the Write Policy area displays the percent initialized; during a synchronization process, it displays the percent synchronized. 6. The information area tells you the action you can perform on this screen or pop-up. Drive Maintenance The following section provides information about status indicators for logical and hard disk drives, and the results of a hard disk drive failure. It also contains procedures for replacing defective drives and for redefining the space in an array by replacing logical drives. PC Server 500 - Type 8641 187 Obtaining Drive Status: To see the ID, capacity, and other information about each of the hard disk drives attached to the RAID adapter: 1. Start the RAID configuration program. See “Starting the RAID Configuration Program” on page 205. 2. Select Drive information. 3. Use the Up Arrow (↑) key or the Down Arrow (↓) key to highlight each of the drives shown in the Bay/Array selection list. As a drive is highlighted, the information for that drive is shown at the bottom of the screen. 4. Press Esc to return to the Main Menu. Note The status of the hard disk drive determines the status of the logical drives in the array in which the hard disk is grouped. Bay/Array Selection List: The status of the drives in the Bay/Array selection list is defined as follows: Status Meaning CDR CD-ROM drive installed. DDD Defective. The drive is an online or hot-spare drive that does not respond to commands. (If a RDY drive is defective or powered down, it shows an empty bay (a blank status), not a DDD status). FMT Format. The drive is being reformatted. HSP Hot spare. The drive will replace a similar drive that becomes defective in real time. At that time, its status changes to ONL, and its array association is displayed. OFL Offline. The drive is a good drive that has replaced a defective drive in a RAID level 1 or level 5 array. It is associated with an array, but does not contain any valid data. The drive state remains OFL during the rebuild phase. ONL Online. The drive is part of an array. If this drive fails, logical drives defined in the array in which this drive is grouped will have a status of offline (if the logical drive is assigned RAID level 0 with a good status) or Critical (if the logical drive is assigned RAID level 1 or level 5 with a good status). RDY Ready. The drive is recognized by the adapter and is available for definition. TAP Tape drive installed. 188 PC Server HMM Status Meaning UFM Unformatted. The drive requires a low-level format before it can be used in an array. Blank Status Any of the following circumstances can cause the status area to be blank: No hard disk drive is installed in that bay. The bay contains a hard disk drive, but the drive is not inserted correctly. An array was deleted and a defective drive is still in the bay. A new drive was installed and the configuration program has not been restarted. (The status will change to RDY when the RAID configuration program is restarted.) Results of a Hard Disk Drive Failure: Depending on the circumstances, there can be several possible results from a drive failure. Example 1: Only one hard disk drive fails. A hot-spare drive is defined that is the same or greater size than the failed drive. The logical drives in the array are assigned RAID level 1, level 5, or a combination of these two levels. Then the hot spare will take over immediately. Note Data for logical drives assigned RAID levels 1 and 5 is maintained; however, system performance will be reduced. Hot-spare drive capability does not apply to logical drives assigned RAID level 0. Example 2: Only one hard disk drive fails. A hot-spare drive is not defined. The logical drives in the array are assigned RAID levels 1, 5, or a combination of these two levels. Then no data will be lost, but the system will operate at reduced performance until the defective drive is replaced and rebuilt. Example 3: If more than one drive fails, all data is lost. Therefore, it is important that you replace and rebuild a defective drive as soon as possible. PC Server 500 - Type 8641 189 Logical and Hard Disk Drive Status Indications: The status of the hard disk drive determines the status of the logical drives in the array in which the hard disk is grouped. A single hard disk drive failure (indicated by a DDD status in the Bay/Array selection list) causes logical drives in that array that are assigned levels 1 and 5 to have a Critical status. Data remains in logical drives with a Critical status, but you must replace the one defective hard disk drive promptly, because if two hard disk drives were to fail, all of the data in the array would be lost. After you install a new hard disk drive, the Replace process changes the drive status from DDD to OFL if there is a Critical logical drive. After the Rebuild process, the hard disk drive status changes from OFL to ONL. A single or multiple hard disk drive failure causes logical drives in that array that are assigned level 0 to have an offline status. Data in logical drives with an offline status is lost. However, with a multiple disk drive failure, when the defective drives are part of the same array, logical drives in that array will have an offline status. This means that data is lost in all the logical drives in that array, regardless of which RAID level is assigned. Replacing a Faulty Drive Note The hard disk drive indicator light will blink when the drive has failed and needs to be replaced (DDD state only). To replace a faulty drive: 1. Start the RAID configuration program. See “Starting the RAID Configuration Program” on page 205. If the drive failed while the system was powered down, a screen appears the next time the system is powered on showing you which drive is defective. 2. If the drive is not damaged (for example, it is not inserted correctly): a. Power-off the system. b. Correct the problem. c. Remove the diskette. d. Restart the system. 3. If the drive is defective: a. Press Y (Yes) to reconfigure the system. b. Press Ctrl+Alt+Del when instructed to restart the system. The Main Menu appears. c. Select Rebuild device. 190 PC Server HMM At this point, the drive status shows DDD. Warning Removing the wrong hard disk drive can cause loss of all data in the array. d. Replace the defective drive. Refer to “Removing a Drive from Bank C, D, or E” on page 204. e. After you have replaced the drive, press Enter. The system will reconfigure to include the drive, and the drive's status will change to OFL. f. Allow the system to complete the configuration (the screen displays a completion message); then select Rebuild drive. g. Use the Up Arrow (↑) key or the Down Arrow (↓) key to highlight the OFL (offline) drive you want to rebuild; then press Enter. h. i. j. k. The progress of the rebuilding process appears on the screen. When the rebuilding process completes, press Esc to return to the Main Menu. The new configuration will be saved automatically. Backup the new configuration (see “Backing Up Your Disk-Array Configuration” on page 180). Select Exit to end the RAID configuration program. Remove the diskette and press Ctrl+Alt+Del to restart the system. Drivers The RAID adapter requires the installation of device drivers. See the README file on the RAID controller diskette for detailed instructions. If you install OS/2 from the ServerGuide CD, the device drivers will be installed automatically. If, however, you install OS/2 from diskette, you will need to install the device drivers. See the README file on the RAID controller diskette. Installing Internal Drives The Type 8641 server supports the following drive types: Diskette Hard disk Rewritable optical disc Tape The server has hardware that lets you replace a failed hard disk drive without powering-off the server. Therefore, you have the advantage of continuing to operate your system while a hard disk drive is removed or installed. These drives are also known as hot-swappable drives. PC Server 500 - Type 8641 191 Hot-swappable drives have a green LED that shines through the knob on the tray containing the drive. If the drive has a good electrical connection upon installation, the LED illuminates. The LED blinks briefly during power-up, and also blinks if the drive malfunctions. Internal drives are installed in bays. A diskette drive and a CD-ROM. drive are preinstalled in bay A in all models. A removable CD storage compartment is shipped in bay B1. You can install two drives in bay B. You can install hot-swappable hard disk drives in banks C, D, and E only. Banks C, D, and E each contain six bays. Bank C supports up to six drives. However, the total number of SCSI drives that you can install in bay B and bank C is six. The number of preinstalled hard disk drives in bank C varies according to the model you purchased. You can install up to six drives in bank D and up to six drives in bank E. Note The bank letter-designations are located on both vertical rails on the front of the server. The bay-slot numbers are located on the top of bank C and the bottom of bank E. A cover plate (sometimes called a bezel or face plate) covers the front of bay B2 only. If you install a drive that uses removable media (diskette, optical disc, tape), you might install and adjust the cover plate after you install the drive in bay B2. Considerations Bay A comes with one SCSI CD-ROM drive and one 3.5-inch, 2.88MB diskette drive. Bay B supports: – One 5.25-inch, full-high, removable-media or non-removable-media device, or – One 5.25-inch, half-high, removable-media device and one 3.5-inch, half-high, removable-media device, or – Two 3.5-inch or two 5.25-inch, slim-high or half-high, removable-media devices. Note Only one of the devices installed in bay B can be a SCSI device. 192 You cannot install hot-swappable drives in bay B. PC Server 500 supports eighteen 3.5-inch, slim-high, hot-swappable hard disk drives, or nine 3.5-inch, half-high hard disk drives in the bottom three banks (C, D, and E). PC Server HMM Banks C, D, and E can accommodate six slim-high drives or three half-high drives, or a combination of both drive sizes. If you use a combination, remember that one half-high drive uses the equivalent space of two slim-high drives. If you install drives in bank D or E, you will remove the fan assembly on the rear of the server, install a direct access storage device (DASD) backplane in banks D and E, and install an optional 220-watt power supply. Each backplane has six connectors, to support up to six hard disk drives. Performing Common Tasks The Create/Delete Array menu of the RAID configuration program contains the more common tasks for configuring disk arrays. Procedures to complete these tasks are contained in this section as follows: “Defining a Hot-Spare Drive” “Deleting a Disk Array” on page 194 “Creating a Disk Array” on page 195 “Defining Logical Drives” on page 196 Defining a Hot-Spare Drive: To define a drive as a hot-spare drive: 1. Start the RAID configuration program. See “Starting the RAID Configuration Program” on page 205. 2. Select Create/delete array from the Main Menu. The Create/Delete Array screen appears. 3. Select Define hot-spare drive. The cursor will become active in the Bay/Array selection list. Note Only SCSI hard disk drives are shown as RDY, ONL, DDD, OFL, or HSP state. SCSI tape and CD-ROM drives are not shown. They appear when you select drive information. Refer to “Bay/Array Selection List” on page 188 for the drive status meanings. 4. 5. 6. 7. The numbers shown on the left are the bay IDs. See “Installing Internal Drives” on page 191 for an explanation of the bay IDs. Use the Up Arrow (↑) key or the Down Arrow (↓) key to highlight the RDY (ready) drive you want to define as the hot spare; then press Enter. The RDY changes to HSP (hot spare). You can press Enter again to toggle between HSP and RDY. Press Esc when you have finished. The cursor will become active in the Create/Delete Array menu. If you want to create a disk array, go to “Creating a Disk Array” on page 195. If you are finished: PC Server 500 - Type 8641 193 a. Select Exit or press Esc. A pop-up window will appear asking you to confirm your change. Note The changes you make are not saved until you confirm them by selecting Yes in the Confirm pop-up window. b. Select No if you do not want the drive you selected to be a hot spare; select Yes to define it as a hot-spare drive. c. Back up the disk-array configuration information to diskette. Refer to “Backing Up Your Disk-Array Configuration” on page 180 for instructions. Deleting a Disk Array: The last array created must be the first deleted. Warning All the data and programs in the array are lost during this procedure. Before proceeding, back up any data and programs that you want to save. To delete a disk array: 1. Start the RAID configuration program. See “Starting the RAID Configuration Program” on page 205. 2. Select Create/delete array from the Main Menu. 3. Select Delete disk array from the Create/Delete Array menu. The cursor will be active in the Array list. 4. Review the Date Created column in the Logical Drive list; then press the Up Arrow (↑) key or the Down Arrow (↓) key to highlight the most recently defined array. 5. Press Del. The Confirm pop-up window appears. 6. If you do not want to delete the array, select No. To delete the array, select Yes. Note To use hard disks from the existing array when creating a new array, you must confirm the deletion of the existing array. If a defective drive is still in a bay, the status shows a blank bay, as though there is no drive in that bay. When you replace the drive, the status will show RDY after you reconfigure and select Yes in the Confirm pop-up window. 194 PC Server HMM Note In some operating systems, deleting an array and associated logical drives might change the drive letters assigned to the existing drives. Creating a Disk Array: To create a disk array: 1. Start the RAID configuration program. See “Starting the RAID Configuration Program” on page 205. Note To create an array using hard disks in an existing array, refer to “Redefining Space in an Array” on page 202. 2. Select Create/delete array from the Main Menu. 3. Select Create disk array from the Create/Delete Array menu. The cursor will be active in the Bay/Array selection list. Important In the following step, when you press Enter to select a drive for an array, you cannot deselect it by pressing Enter again, as you can with the hot-spare selection process. Carefully determine which drives you want to include in the array before beginning the selection process. If you change your mind after selecting the drives for an array, you can delete the array (by selecting Delete disk array from the Create/Delete Array menu) and begin again. 4. Select each drive you want in the array by using the Up Arrow (↑) key or the Down Arrow (↓) key to highlight the drive and then pressing Enter. As you select each drive, the status will change from RDY (Ready) to ONL (Online). 5. When you have selected all the drives you want to include in the array, press Esc. The cursor will become active in the menu. 6. If you have drives you did not use in this array and you want to create another array, you can do one of the following: Define the logical drive or drives for this array; then create another array and its logical drives. See “Defining Logical Drives” on page 196. Create another array now by repeating steps 2 through 5 in this procedure; then define logical drives for both arrays. PC Server 500 - Type 8641 195 Note You must define at least one logical drive for each created array before you can exit the configuration program. Continue with “Defining Logical Drives.” Adding Drives to Create an Additional Array: To add storage capacity to your server without disturbing existing data: 1. Install the additional hard disk drive or drives. (See “Installing Internal Drives” on page 191.) 2. Start the RAID configuration program. See “Starting the RAID Configuration Program” on page 205. 3. Create a new disk array and define logical drives (see “Creating a Disk Array” on page 195 for additional information. Defining Logical Drives: After you have created an array, you must define a logical drive. (You cannot leave the RAID configuration program until you define the logical drives for any created arrays.) To define a logical drive: 1. Select Define Logical drive from the Create/Delete Array menu. The Create/Delete Array menu screen appears; the cursor is active in the Array list. 2. Use the Up Arrow (↑) key or the Down Arrow (↓) key to highlight the array you want to define; then press Enter. The Select RAID Level pop-up window appears, and the cursor is active in the window. Note The system automatically assigns RAID level 0 to any logical drives defined in an array containing only one hard disk drive. When this is the case, the Select RAID Level pop-up window will not appear. If you have only two hard disk drives in the array, the Select RAID Level pop-up window appears, but RAID level 5 is not selectable because you need at least three hard disk drives in an array to assign RAID level 5 to one of the logical drives. You can define more than one logical drive for your array. The only restriction is that the maximum number of logical drives you can define is eight. 3. Use the Up Arrow (↑) key or the Down Arrow (↓) key to highlight the RAID level you want to assign to these logical drives, then press Enter. 196 PC Server HMM Note Because the level you assign can influence the space needed for the drive, you must assign a RAID level before you enter the size of the logical drive. The Logical Drive list shows you the logical drive ID, the size of each logical drive, the RAID level you assigned to that logical drive, and the date that the logical drive was created. The status of the logical drive also is shown. Good means that all is well with the drive. Critical means that you must replace the hard disk drive or do a rebuild operation. (You will have received a message telling you what has happened to the drive.) Offline means that the logical drive is unrecoverable; the data on that drive is lost. The Logical Drive Size pop-up window shows the space in this array that is available for logical drives. 4. Type the size, in megabytes, that you want for the logical drive; then press Enter. A pop-up window appears asking you to confirm your action. Information about the new logical drive appears in the Logical Drive list. Note The size appearing in the Logical Drive list might be different from the size you typed because it appears in binary equivalent. The size of a logical drive is determined by a number of factors, but basically the size must be divisible by the number of drives in the array. Consider the following examples: Example 1: There are three 1GB drives in the array. You assign RAID level 0 (which uses all the drives in the array with no parity storage), and type “1000MB.” The “Size (MB)” will be 999, which is the number closest to and lower than 1000 that is divisible by 3. Example 2: There are three 1GB drives in the array, and you assign RAID level 5. Data is striped across all three drives in the array, but the space equivalent to that of one drive is used for redundant storage. Therefore, if you type “1000MB,” the “Size (MB)” remains 1000 because it is divisible by 2 (drives), which is the space available for data. If you do not use the entire array for this logical drive, you can create another by assigning either the same PC Server 500 - Type 8641 197 5. 6. 7. 8. or a different RAID level for an additional logical drive. You can have as many as eight logical drives among four disk arrays. To return to the Create/Delete Array menu, press Esc. To define more logical drives, repeat steps 1 through 5 of this procedure. To leave this screen, select Exit or press Esc. A pop-up window appears asking you to confirm your action. To save your changes, select Yes. To maintain the disk-array configuration that was in place before you made changes, select No. If you are using RAID level 1 or RAID level 5, you must select Initialize logical drive for proper operation. This sets the drive to a predetermined state. Any data existing on the drive is overwritten with zeros, and corresponding parity is initialized to the correct value. a. Select Initialize/synchronize array from the Main Menu; then select Initialize logical drive. b. Select the logical drives you want to initialize from the Logical Drive list by pressing the Spacebar (the selected drives will appear highlighted). To start the initialization, press Enter. A pop-up window appears asking you to confirm your action. Warning If you select Yes in the Confirm pop-up window, information in the logical drive will be overwritten with zeros. c. Select Yes to confirm that you want to initialize this logical drive. The initialization process begins, and you can see its progress in the Pct. Int. (Percent Initialized) column of the Logical Drive list. d. To stop the initialization at any time, press Esc. Then press Esc again to return to the menu, or press Enter to continue initializing the drive. 9. To back up the disk-array configuration to diskette, you will need a 3.5-inch formatted diskette. To back up the disk-array configuration: a. Select Advanced functions from the Main Menu. b. Select Backup config. to diskette. Follow the instructions on the screen. A pop-up window shows the default file name of CONFIG. You can change the file name by typing over the default. The Backup program will assign a file-name extension of .dmc. 198 PC Server HMM Power Supplies The Type 8641 computers is shipped with a primary power supply. An additional or optional power supply can be added to the computer. Connectors are used to transfer the primary power supply voltages and signals from the primary power supply to the optional power supply. The following illustrations show how the two power supplies are connected. Attention When replacing the primary power supply cover plate, rotate the plate 180°. (This will leave an opening for the primary power supply connector cable that connects to the optional power supply.) Failure to do so will cause the power supply connector cable to be crimped when the plate is replaced. Note Tabs are located on the side of each power supply to secure them together. Primary Power Supply Voltages: If the voltages are correct, and the power supply fan runs, the power supply is OK. 2 3 5 A B C D Drive Connector 1 4 7 Power-Supply Connector −Lead Pin +Lead Pin 5 5 5 B B 3 4 7 D A V dc Minimum V dc Maximum +4.8 +11.52 −10.8 +4.8 +11.52 + 5.25 +12.6 −15.0 + 5.25 +12.6 Connectors P11, P12, and P13 −Lead Pin +Lead Pin 2 1 V dc Minimum V dc Maximum +11.5 +12.6 PC Server 500 - Type 8641 199 Optional Power Supply Drive Connector Voltages: If the voltages are correct, and the power supply fan runs, the power supply is OK. A −Lead Pin +Lead Pin B B D A B C D V dc Minimum V dc Maximum + 4.8 + 11.52 + 5.25 +12.60 If the power supply shuts down, or appears to fail at power-on, you might have one of the following problems: Too many devices are set to start instantly, see “Setting the Motor-Start Jumper” on page 549. There are too many large-capacity devices installed. The nominal operating current of the devices installed collectively exceeds the available current of the power supply. See the “Personal System/2 Installation Planning” guide (form number G41G-2927) for more information. Attention Unplug the power cord and wait two minutes before checking voltages to give the power supply capacitors time to discharge. On some models, there is an access-cover fan (to cool the processor). If that fan does not work, you have one of the following problems: No power to the fan: 12 V dc (±1.4 V dc) required at the two fan cable pins on the base. Defective J28 cable (check cable continuity) Defective fan. (To test the fan, use a two-wire jumper to connect the fan terminals to the cable pins on the base.) Defective system board. Note Verify that the voltage-select switch (if applicable) is set for the correct voltage. If the voltages are correct, and the Symptom-to-FRU index does not solve the problem, go to “Undetermined Problems” on page 552. RAID Recovery Procedure Not Effective Symptom: A single drive failed, but 2 RAID fixed disk drives appear as DDD (Defunct, the drive is not responding to 200 PC Server HMM commands). Routine recovery procedures are ineffective in bringing the DDD drive(s) back on-line. Note The system may have run without problems for some time. Problem Isolation Aids: The system is a Server 500 RAID Array (8641). The system diagnostics do not fail. The RAID Administration program appears normal. More than one DASD backplane is installed. Fix:/Background: The RAID controller requires two cables to be attached to the DASD backplane in order to maintain control of the RAID subsystem, the SCSI signal cable (wide), and a much smaller Status cable. The backplane in Bank C must be attached to SCSI Connector Channel 1. If installed, DASD backplane in Bank D would be attached to SCSI Connector Channel 2. The same is true of the Status cables. Status connector 1 must be attached to DASD backplane C and Status connector 2 must be attached to DASD backplane D, if installed. The signal cable and status cables for each channel may not be connected to the same backplane. (For example: The Status cable for the backplane in Bank C is mistakenly connected to Bank D, and vice-versa). In this case, the RAID adapter is not communicating with the correct backplane (but has no way of knowing this), so erroneous status information is being presented to the RAID adapter. Attempting to rebuild a fixed disk with the cables connected in this manner will probably result in customer data loss. PC Server 500 - Type 8641 201 In systems which have more than one DASD backplane installed, make certain that the RAID Channel 1 (SCSI) signal cable and the RAID Channel 1 Status cable are both attached to the same backplane (are not crossed). SCSI-2 Fast/Wide Streaming RAID Controller, FRU P/N06H3059 ┌┬────DASD STATUS CONN.───────┐┌─────────┐┌──┐┌─────────┐┌──────┬┐ ││ ┌───┐ ┌───┐ └┘Channel 1└┘ └┘Channel 2└┘ ││ ││ └───┘ └───┘ ┌──────┐ ┌───────┐ ││ ││ Chan1 Chan2 ┌─────┐ ┌──────┐ │ │ │ │ ││ ││ ┌────┐ │ │ │ │ │ │ │ │ ││ ││ │ │ │ │ │ │ │ │ │ │ ││ ││ │ │ │ │ │ │ │ │ │ │ ││ ││ │ │ │ │ │ │ └──────┘ └───────┘ ││ ││ └────┘ └─────┘ └──────┘ ││ ││ ___________________________ ││ └┴───────────────────────│││││││││││││││ │││││││││││────────┐ ││ └───┴┘ Redefining Space in an Array You can redefine space in a disk array in a number of ways. For example, you can combine a number of small logical drives to create a larger one or you can redefine the existing logical drive into several smaller drives. Also, you can install additional hard disk drives to create a larger logical drive than was possible with the existing storage capacity. One method to redefine space in an array is to change the RAID level assigned to a logical drive. For example, if you assigned RAID level 1 to a logical drive and then decided you needed the capacity offered with RAID level 5, you can use this procedure to replace the existing logical drive with a logical drive assigned the new RAID level. To redefine the space in a disk array, first you must delete the array. The last disk array defined must be the first deleted. Warning In all cases, when you delete an array, all the data and programs in the array are lost. If you have data and programs that you want to save, they must be backed up and then restored. It is suggested you use a high-speed backup device, such as a tape drive. To redefine the space in an array: 1. Back up all data and programs in the array. 2. If needed, install additional hard disk drives. Refer to the User's Reference for information about selecting drive sizes. 3. Insert the IBM RAID controller diskette; then press Ctrl+Alt+Del to start the RAID configuration program. 4. Delete the existing array: a. Select Create/delete array from the Main Menu. The Create/Delete Array menu will disappear. 202 PC Server HMM b. Select Delete disk array. The cursor will be active in the Bay/Array list. c. Review the Logical Drive List Date Created column; then press the Up Arrow (↑) key or the Down Arrow (↓) key to highlight the most recently defined array. Note You must delete disk arrays in descending order; the last one created must be the first one deleted. d. Press Del. The Confirm pop-up window appears. Warning All the data in the array will be lost during this procedure. Be sure to back up all data and programs that you want to save. e. If you do not want to delete the array, select No. To delete the array select, Yes. Note To use the hard disks from the existing array when creating a new array, you must confirm the deletion of the existing array. After you make your selection, the Confirm pop-up window will disappear, and the cursor will be active in the menu. 5. If you want a drive defined as a hot spare, refer to “Defining a Hot-Spare Drive” on page 193 for step-by-step instructions. 6. Create a new disk array and define logical drives. See “Creating a Disk Array” on page 195 for instructions on creating a disk array and defining logical drives. 7. After you have established the new array and logical drive or drives, select Initialize/synchronize array from the Main Menu; then select Initialize logical drive to prepare the drives in the array to receive data. This sets the drive to a predetermined state. Any data existing in the drive is overwritten with zeros, and corresponding parity is initialized to the proper value. 8. Insert a 3.5-inch formatted diskette in the primary drive, select Advanced functions from the Main Menu; then select Backup config. to diskette. Follow the instructions on the screen. 9. Exit the RAID configuration program by pressing Esc or selecting Exit while on the Main Menu. A pop-up window will appear asking you to confirm your action. PC Server 500 - Type 8641 203 10. Reinstall your operating system and device drivers, then restore your data and programs. Removing a Drive from Bank C, D, or E Locate the drive you are removing. You do not have to power-off the server to remove a drive from banks C, D, and E. Warning If you are removing a failed hard disk drive that is part of a disk array in bank C, D, or E, you must not accidentally remove a good drive. Before you attempt to remove a defective drive, thoroughly review the information displayed on your server's screen to determine the location of the failed drive. “Logical and Hard Disk Drive Status Indications” on page 190 explains the codes that your server uses to indicate a defective drive. When a hard disk drive fails, a blinking green indicator light illuminates on the knob of the drive tray. When a hard disk drive is good, a solid green indicator light illuminates on the knob of the drive tray. If you partially or completely remove a good drive instead of the defective one, your server might lose valuable data. This situation is especially relevant if you assigned RAID level 1 or 5 to the logical drives in your disk array. However, the RAID controller can rebuild the data you need, provided that certain conditions are met. See “Starting the RAID Configuration Program” on page 205 for more details. If you have a non-disk-array model, an illuminated drive tray knob means the drive is a good one. An unilluminated drive tray knob means the drive is defective, or no power is being supplied to the drive. To remove a drive from bank C, D, or E, do the following steps: 1. Find the drive you plan to remove. 2. If you have a disk-array model and a drive has failed, ensure that you have selected the correct drive for removal by verifying that the light on the tray's knob is blinking. 3. Unlock the drive by turning the knob directly above it 90 degrees. 4. Disconnect the drive from the connector on the backplane, by grasping the handle on the drive tray and pulling the drive out of the server. Store the drive in a safe place. 204 PC Server HMM Note If you have a disk-array model, you must reconfigure your disk arrays after removing hard disk drives. See “Starting the RAID Configuration Program” on page 205 for details. Starting the RAID Configuration Program To start the RAID configuration program. 1. Insert the IBM RAID controller diskette into the primary drive and power-on the server. If the server is already on, press Ctrl+Alt+Del. If you have more than one RAID adapter, you will get an adapter selection screen. Otherwise, the Main Menu appears. RAID Program Keys Key Program Response F1 Selects Help from any menu Esc Return to the previous screen or to the previous work area of a screen Up (↑) and Down (↓) Arrows Highlights the item to be selected Enter Selects the highlighted item Main Menu Selections Note Whenever you make changes to the disk-array configuration and select Exit, the Confirm pop-up window will appear. You must select Yes to save and activate the changes. Selection Program Response Help Provides additional information View configuration: Displays the existing disk array configuration Create/delete array: Selects the drives, defines a hot-spare drive for an array you want to create, or to deletes an existing array. This selection also has choices for defining a logical drive and formatting a drive. PC Server 500 - Type 8641 205 Selection Program Response Initialize/synchronize array: Select this choice after creating an array to: Set the drive to a predetermined value. For proper operation of RAID levels 1 and 5. Note: Any data existing on the drive is overwritten with zeros, and the corresponding parity information is initialized to the correct value. Initialize more than one logical drive at a time. Interrupt the initialization process at any time by pressing Esc. Restart the initialization process by pressing Enter End the process by pressing Esc again. Synchronize logical drive Recomputes and rewrites the parity data on the drive. You can select this choice to recompute parity data for RAID levels 1 and 5. This selection does not alter data on the drive. The synchronization process can be done on multiple logical drives. Rebuild device: Rebuilds logical drives. The rebuild operation is supported only for RAID levels 1 and 5. Advanced functions: Changes the write policy (the way data is written to the drive), to saves your configuration information to a diskette, restores it from a diskette, or changes RAID parameters. This choice also allows you to do a low-level format. Drive information: Displays information about the SCSI devices (hard disk, CD-ROM, tape, and so on) connected to the RAID adapter. Exit: Leaves the Main Menu. Viewing the RAID Configuration Before creating or changing a disk array, you can look at the current configuration by selecting View Configuration from the Main Menu of the RAID configuration program. To view the disk-array configuration: 206 PC Server HMM 1. Start the RAID configuration program. See “Starting the RAID Configuration Program” on page 205. 2. Select View configuration. The current disk-array configuration information appears on the screen. 3. Press Enter to see the stripe order in the Bays Occupied (Ch:Bay) field. 4. Press any key to continue. 5. Press Esc to return to the Main Menu. PC Server 500 - Type 8641 207 Locations (System Board) .1/ 32-bit expansion slots (video extensions J25, J27) .2/ Processor slot .3/ Parallel ports .4/ Serial ports .5/ Keyboard/Pointing-device connectors .6/ Power-on Features jumper .7/ Privilege-access password jumper .8/ Memory-module connectors .9/ Tamper-evident cable connector .1ð/ Power Supply connector .11/ Override jumper connector (JMP1) .12/ Battery .13/ Diskette-drive cable connector .14/ Reserved (Pins 1 and 2 must be connected.) .15/ Operator-panel cable connector 208 PC Server HMM Symptom-to-FRU Index Always start with “General Checkout (Micro Channel)” on page 18 in the PS/2 Hardware Maintenance Manual The Symptom-to-FRU Index lists symptoms, errors, and the possible causes. The most likely cause is listed first. Use this index along with the “Symptom-to-FRU Index (Micro Channel)” on page 19 in the PS/2 Hardware Maintenance Manual to help you decide which FRUs to have available when servicing the computer. In the following error codes, X can be any number or letter. Note For IBM devices not supported by the Micro Channel diagnostics code, refer to the manual for that device. Beep Symptoms Beep/Symptom FRU/Action Continuous beep and a blank display (Run he Display Self Test) 1. Display Adapter 2. Video Memory (if used) 3. System Board One long and three short beeps. (Run the Display Self Test) 1. Display Adapter 2. Video Memory (if used) 3. System Board RAID drives DDD, recovery procedure not effective. See“RAID Recovery Procedure Not Effective” on page 200 . N/A No Beep Symptoms No Beep/Symptom FRU/Action Memory count hangs during POST. 1. System Board Memory 2. Memory Option (if installed) 3. System Board 4. Processor Error Codes Error Code FRU/Action 0210XXXX (Internal bus, size unknown) 0210XXX1 (External bus, size unknown) 1. SCSI Hard Disk Drive 2. SCSI Adapter or the SCSI controller built into the system board. 3. SCSI Cable 4. SCSI ID Switch (on some models) PC Server 500 - Type 8641 209 Error Code FRU/Action 02790XXX, 02791XXX 0 2792XXX, 02793XXX 0 27906XX, 027907XX (Eithernet adapter POST error) 1. Check power and reseat adapter. 2. Ethernet PeerMaster Server Adapter 02799XXX (Communications to the Ethernet PeerMaster Server Adapter failed or the adapter failed.) 1. Run Setup and verify the Ethernet PeerMaster Server Adapter configuration. 2. Ethernet PeerMaster Server Adapter 0279XXXX 1. Fast/Wide Streaming RAID Adapter/A (FRU No. 06H3059) 2. System Board 3. Signal Pass Through Card (if installed) Error Messages Error Message FRU/Action Drive in channel X bay X does not respond. Installation stopped. 1. Replace the drive in the bay indicated. Controller does not respond to commands; no logical drive installed. 1. RAID Adapter 2. System Board SCSI Error Code Format This section provides an explanation of the encoded SCSI and non-SCSI Post error codes and detailed information about each code. Error messages are displayed on the screen as three, four, five, eight, twelve or, thirteen digits. An “X” in an error message can be any number. The shorter POST errors are highlighted in the Symptom-to-FRU Index. Some digits will represent different information for SCSI errors versus non-SCSI errors. The following figure shows which digits display the shorter POST errors. The figure also defines additional SCSI information. Notes: 1. Non-IBM device error codes and documentation supersede this list. 2. Duplicate SCSI ID settings will cause misleading error symptoms or messages. 210 PC Server HMM RDDDPLSCB QEET │└┬┘│││││ │└┤└─ │ │ │││││ │ └── │ │ │││││ └──── │ │ │││││ │ │ ││││└───── │ │ │││└────── │ │ ││└─────── │ │ │└──────── │ │ └───────── │ │ │ └─────────── └───────────── Test state Error code Extension Qualifier Bus (ð=internal 1=external) Capacity of the device Slot number of the device LUN (usually ð) PUN (SCSI ID #) Device Number Reserved Digit (usually ð) As an example, if you have SCSI error code 021050A0, each digit decodes as follows: Digit Information 0 Reserved digit (usually 0) 210 Device number 210 indicates hard disk 5 SCSI ID assigned is 5 0 Logical Unit Number (not used, usually 0) A The device capacity is 60MB (A = 60MB) 0 The device is connected to the internal bus RDDD Codes for Adapters RDDD Device Type or Information 0037 SCSI on the system board 0096 SCSI adapter with cache 0112 SCSI adapter without cache 0206 SCSI-2 adapter RDDD Codes for Devices RDDD Device Type or Information 0208 Unknown device type 0209 Direct access - removable media, and/or other than 512 byte blocks 0210 Direct access - hard disk, 512 byte blocks 0211 Sequential access (tape) 0212 Printer 0213 Processor 0214 Write Once, Read Multiple (W.O.R.M.) 0215 Read only (CD-ROM) 0216 Scanner 0217 Optical memory (read/write optical disk) 0218 Changer (multiple tray CD-ROM) 0219 Communications PC Server 500 - Type 8641 211 B Codes B Device Type or Information 0 Dual SCSI adapter (internal bus) 1 Dual SCSI adapter (external bus) QEET 0000 Codes Refer to this list if the “DDD” indicates an adapter, followed by a QEET of 0000. For example, 01120100 0000. PLSC QEET Information 0100 0000 On systems with NVRAM, SCSI setup data not located, or the checksum did not verify. On systems without NVRAM (Model 50 for example), setup data must be on the 1st hard disk. 0200 0000 Configuration error. No hard disk found at PUN 6, LUN 0 for 161,162,165 system error path. Might be an unsupported configuration. 0300 0000 No space available in extended BIOS data area for SCSI data table (possibly too many adapters installed). 0400 0000 ROM modules not found on adapter (IML based systems only). Running setup might correct it. 0500 0000 ROM checksum error on 2nd 16K portion of 32K ROM 0600 0000 ROM access control port error QEET Errors (other than 0000) These are specific “QEET” error codes (preceded by a “DDD” indicating an adapter). Note: A number in slot “S” indicates an error on the adapter, (or device attached to the adapter) in slot "S." If "S" is 0, suspect the system board. QEET Information 001x 8032/80188/80C186 ROM test failure 002x Local RAM test failure 003x Bad fuse, or bad termination, or local RAM address failure on SCSI adapter if “RDDD” is 0112. 004x Internal peripheral test failure 005x Buffer control chip test failure, or LTB failed, (or system-board SCSI failed if “RDDD” is 0037) 006x Undefined error condition, or buffer RAM test failure on SCSI adapter if “RDDD” is 0096 007x System interface control chip test failure 008x SCSI internal interface test failed 212 PC Server HMM QEET Information 00Ax SCSI external interface test failed 107x Adapter hardware failure 10Cx Command failed 10Ex Command error (invalid command or parameter) 10Fx Sequencing error 110x Adapter internal error log contains entries. (Reported if no other errors on adapter exist.) 180x Time out 181x Adapter busy error 182x Unexpected interrupt presented by adapter 183x Adapter register test failure 184x Adapter reset failure 185x Adapter buffer test failure (on cached adapters) 186x Adapter reset count expired 187x Adapter registers not cleared on reset 188x Card ID in adapter microcode did not match ID in POS registers 190x Expected device did not respond 19Yx DMA arbitration level conflict (Y = assigned arbitration level) 220x Adapter hardware error 221x Global timeout on adapter (device did not respond) 222x Adapter DMA error 223x Adapter buffer defective 224x Command aborted by adapter 301x Invalid parameter in SCB 303x Command not supported 304x Command aborted by system 305x Command rejected (buffer not disabled) 306x Command rejected (Adapter diagnostic failure) 307x Format rejected 308x Assign rejected (command in progress) 309x Assign rejected (device already assigned) 30Ax Command rejected (device not assigned) 30Bx Command rejected (maximum LBA exceeded) 30Cx Command rejected (16 bit card slot address range exceeded) 313x Invalid device for command 3FFx Status not returned by adapter 401x Recovered error (not an error condition) 402x Device not ready PC Server 500 - Type 8641 213 QEET Information 403x Device medium error 404x Device hardware error 405x Illegal request for device 406x Device unit attention would not clear 407x Device data protect error 409x Device vendor unique error 40Ax Copy operation aborted by device 40Bx Device command aborted 40Cx Device search data command satisfied 40Dx Device volume overview (residual data remains in buffer) 40Ex Device mismatch (source data did not match medium data) 500x Check condition on device, no sense data returned 501x No index or sector 502x Seek incomplete 503x Write fault 504x Drive not ready 505x Drive not selected 506x No track zero found 507x Multiple drives selected 508x Logical unit communication failure 509x Head positioning error (track following error) 510x CRC or ECC error on ID field 511x Unrecoverable read error 512x No address mark (ID field) 513x No address mark (data field) 514x Record not found 515x Seek error 516x Data synchronization error 517x Recoverable read (without ECC) error 518x ECC recovered read error 519x Defect list error 51Ax Parameter overrun 51Bx Synchronous transfer error 51Cx Primary defect list not found 51Dx Compare error 520x Invalid command 521x Illegal logical block address (LBA) 522x Illegal function for device type 524x Illegal command block field 214 PC Server HMM QEET Information 525x Invalid LUN 526x Illegal field in parameter list 528x Media changed 529x Power-on or bus device reset occurred (not an error) 52Ax Mode select parameters changed (not an error) 531x Medium format corrupted 532x Defect spare location unavailable 540x Device RAM failure 541x Data path diagnostic failure 542x Power-on diagnostic failure 543x Message rejected 544x Internal controller error 545x Device was unable to reconnect 547x Interface parity error 548x Initiator detected error 549x Illegal command or command out of sequence error 5F0x Format in progress (not an error) 5F1x Spinup in progress 601x SCSI bus reset occurred 602x SCSI interface fault 610x Selection timeout error (device not available) 611x Unexpected bus free 612x Mandatory SCSI message rejected 613x Invalid SCSI phase sequence 620x Short length record error 702x Device not ready (removable media devices) 704x Device not ready (non-removable media devices) 728x Media changed error would not clear 731x Medium format corrupted (format unit interrupted format must be issued again) 7F0x Format in progress (prior format unit issued being completed) 7F1x Spinup in progress PC Server 500 - Type 8641 215 Q Codes All error codes with "Q" = 1 are developed using information returned by either an adapter or device. The "Q" value defines the origin of the "EE" code that is reported. Error codes (EE) with "Q" = 4 or 5 may be reported that are not listed here or can actually have a definition other than that given, depending on the device. “Q” Information 2 Command error field of command complete status block returned by the adapter 3 SCSI Status field of the command complete status block or command error field values indicating software problems (< 20H) 4 Sense key value returned by a device 5 Additional sense byte (byte 12) of sense information from device 6 Device error code field of command complete status block 7 Device errors not normally considered an error, but considered an error based on when the code was returned (medium corrupted error on device with non-removable media) 216 PC Server HMM Test Status Codes “T” Information O Not applicable for error code A Adapter initialization error) B Adapter reset C Adapter register test D Adapter buffer test phase 1 (on cached adapters) E Adapter buffer test phase 2 (on cached adapters) F Adapter buffer test phase 3 (on cached adapters) G Adapter buffer test phase 4 (on cached adapters) H Adapter (buffer enable, buffer size, retry, enable) I Device assignment sequence J Device not ready (initial unit attention clearing) K Device reset L Device starting phase M Device in process of starting N Device block size determination O Device self-test P Device single block read (LBA) Q Device double block read (LBA) S Error occurred after device testing completed PC Server 500 - Type 8641 217 218 PC Server HMM 22 23 25 26 24 27 28 19 21 17 18 20 16 1 15 2 14 3 4 13 7 5 6 11 12 8 9 10 Parts Listing Index System Unit (Type 8641) 1 Base Frame 2 LED Information Display Assembly 3 System Board (without Memory and Processor) I/O Spring (bracket on system board) Pentium 90MHz Processor Card 16MB ECC Memory SIMM 4 I/O Panel Die Cast 5 SCSI RAID Hard Disk Drive Adapter 5 SCSI Fast Wide Hard Disk Drive Adapter 6 Video Adapter 7 Fan Assembly 8 Fan Mounting Support (without Fans) 9 I/O Flex Plate 10 Right Side Door Right Side Door Hinges 11 Pedestal Wheel (with Axle) 12 434 Watt Power Supply 13 Card Guide 14 Processor Card Support 15 Card Guide Support 16 Pedestal 17 Slim-Line CD ROM Drive 18 2.88MB Diskette Drive 19 1GB SCSI Hard Disk Drive 19 2GB SCSI Hard Disk Drive 20 DASD Hot Swap Tray Assembly (Wide) DASD Hot Swap Backplane Assembly DASD Hot Swap Cam Spring (Shaft and Knob) DASD Mounting Plate 21 CD Storage Tray 22 Front Bezel (with Shield) 23 Keylock (with Keys) 24 DASD Door 25 IBM Logo (R) 26 5.25-Inch Drive Bezel (with Spacer) 27 Control Panel Bezel 28 Control Panel Card Assembly Ethernet Quad-BT PeerMaster Server Adapter Ethernet Quad-B2 PeerMaster Server Adapter Battery See “Battery Notice” on page 461. Keyboard (with Cable) Miscellaneous Parts Kit C2 Spring (1 each) EMI Ground Clips (4 each) Hinge Screws 2 each) Lock Pawl (1 each) Planar Mounting Boss (2 each) Screws (4 each) Mouse Power Cord Speaker (with Bracket) 82G3593 06H3766 92F2623 06H3796 06H3739 96F9100 06H3593 06H3059 92F0160 71G0650 06H3407 82G3618 06H3594 82G3594 82G3600 82G3609 06H3596 82G3604 82G3959 82G3603 82G3608 06H2150 82G1888 06H3371 06H3372 06H3956 71G6291 06H5059 82G3602 06H5060 82G3595 82G3606 82G3596 82G3601 82G3599 06H3595 06H3755 06H4220 06H6042 33F8354 71G4646 82G3611 96F9258 62X1045 33F8444 PC Server 500 - Type 8641 219 Cables (Type 8641) Index Cables (Type 8641) 1 DASD Status Cable 2 Planar/Control Panel Cable 3 System Status Cable (1X4) 4 Diskette Drive Signal Cable(with power) 5 CD ROM SCSI Cable (for 2 drives) 6 SCSI-Fast/Wide Cable (for 1 drive) 7 Hard Disk Drive Power Cable (for 1 drive) C2 Cable (with Switch) LED Display Cable POS ID Select Cable (Wide) 06H5081 06H3406 06H3404 06H3405 06H3751 82G3613 82G3610 82G3612 06H6138 06H3957 Index Options (Type 8641) DASD Hot Swap Tray Assembly (Narrow) POS ID Select Cable (Narrow) 220 Watt Power Supply Assembly 71G6292 06H3592 06H3237 220 PC Server HMM IBM PC Server 500 System/390 Type 8641 Features . . . . . . . . . . . . . . . . . . . . Diagnostics and Test Information . . . . . . . . Additional Service Information . . . . . . . . . . CMS Commands and Utility Programs . . . . CMS Commands . . . . . . . . . . . . . OS/2 Utilities . . . . . . . . . . . . . . . VSE/ESA TMOUNT Utility . . . . . . . . . Configuration . . . . . . . . . . . . . . . . Configuration (Server 500) . . . . . . . . Microprocessor Complex Configuration (S/390) Configurator Structure (S/390) . . . . . . . Device Managers . . . . . . . . . . . . . . Device Map . . . . . . . . . . . . . . . . . Diagnostic Flow Chart (S/390) . . . . . . . . Documentation and Related IBM Manuals (390) Error Reporting (P/390) . . . . . . . . . . . Icons (System/390) . . . . . . . . . . . . . Initialization (S/390) . . . . . . . . . . . . . Machine Check Error Messages . . . . . . . Power-On Self Test (POST) . . . . . . . . . Product Overview . . . . . . . . . . . . . . Software Facilities (Server System/390) . . . . Microprocessor Complex Diagnostics (S/390) Advanced Diagnostics and Options Diskette (S/390) . . . . . . . . . . . . . . . . . Locations . . . . . . . . . . . . . . . . . . . . Parts Listing . . . . . . . . . . . . . . . . . . 222 223 223 223 223 224 226 226 226 226 228 228 230 231 232 234 235 235 235 237 237 238 239 239 241 241 Copyright IBM Corp. 1996 221 Features The following is a list of models of the IBM PC Server 500 System/390 - Type 8641. Note All PC Server computers have Selectable Startup. Microprocessor Pentium-90 MHz (PC Server Complex) 390PC (390 Processor Complex) Memory Standard: 32 MB 70 ns, ECC Diskette Drives Standard: one 3.5-inch Hard Disk Drive Number of drives and drive capacities are model dependent Keyboard and Mouse 101-key keyboard Mouse Expansion 6 Micro Channel slots, 6 Standard slots (1 shared slot) Up to 10 drive bays Video SVGA Adapter Compatibility: – Video graphics adapter (VGA) – Enhanced graphics adapter (EGA) – Color graphics adapter (CGA) – Multicolor graphics array (MCGA) Integrated Functions Video port on an adapter 2 serial ports 1 parallel port Mouse port Keyboard port Battery-backed clock and calendar Power Supply Standard Primary: 434 watt Optional Secondary: 220 watt SCSI Controller (varies by model) 222 SCSI RAID Hard Disk Drive Adapter SCSI Fast/Wide hard Disk Drive Adapter PC Server HMM Diagnostics and Test Information In addition to the error reporting capability of the S/390 Microprocessor Complex, the PC Server System/390 has two sets of diagnostics to help locate hardware problems. See, “Error Reporting (P/390)” on page 234. PC Server 500 Reference and Diagnostics Diskettes. (See the diagnostic information for the Server 500 in your manual.) S/390 Microprocessor Complex Diagnostics and Option Diskette. (See “Microprocessor Complex Diagnostics (S/390)” on page 239.) A diskette containing diagnostics and hard disk recovery programs is also provided for the RAID controller that comes with the Array model of the PC Server System/390. Additional Service Information The following information is for the PC Server 500 System/390 - Type 8641. “CMS Commands and Utility Programs.” “Configuration” on page 226. “Device Managers” on page 228. “Device Map” on page 230. “Diagnostic Flow Chart (S/390)” on page 231. “Documentation and Related IBM Manuals (390)” on page 232. “Error Reporting (P/390)” on page 234. “Icons (System/390)” on page 235. “Initialization (S/390)” on page 235. “Machine Check Error Messages” on page 235 “Power-On Self Test (POST)” on page 237. “Product Overview” on page 237. “Software Facilities (Server System/390)” on page 238. CMS Commands and Utility Programs Several conversational monitor system (CMS) commands and utility programs are supplied with the PC Server System/390 software in addition to those provided by the OS/2, VM/ESA, and VSE/ESA operating systems. These are essential to the operation of the 370 functions on the PC Server System/500. CMS Commands: CMS commands are included with the VM Starter System supplied with the PC Server System/390 software. These commands can be invoked from VM sessions running on the PC Server System/390 to access host VM data and OS/2 files and to interact with the OS/2 environment. These are included with the VM Starter System supplied with the PC Server. The following is a list of commands and their functions. IBM PC Server 500 System/390 - Type 8641 223 Command Function CACHE Install and control CMS minidisk cache in the PC Server System/390 virtual machines HDETACH Detach a host VM minidisk HLINK Establish a link from a PC Server/390 VM session to the host VM minidisk HQUERY Display information about host minidisks LTRENAME Rename the title bar for a 3270 session MOUNT Associate an OS/2 file specification with a PC Server System/390 emulated tape drive OS2 Execute an OS/2 command from a PC Server System/390 virtual machine PCOPY Copy (import/export) files between OS/2 and VM PIPE OS2 Uses the OS2FILE stage command in a pipeline running under CMS to read or write an OS/2 file on an associated OS/2 system TFA Activates the Transparent File Access functions in a PC Server System/390 virtual machine OS/2 Utilities: Several OS/2 utilities are provided with the S/390 Microprocessor Complex programs to help control and operate the PC Server System/390. The interactive functions invoked by the PC Server System/390 icons use some of these utilities to perform their tasks. See “Icons (System/390)” on page 235. The utilities can be invoked from an OS/2 command prompt without using one of the PC Server System/390 interactive interfaces. Some of the utilities can also be used to implement user-written device managers. 224 PC Server HMM The OS/2 utilities and their functions are. Utility Function ALC.EXE Allocate files as FBA DASD, display volume information and change volume labels AWSCFG.CMD Invoke the PC Server System/390 Configurator AWSCMLT.EXE Configure logical terminal sessions on PC Server System/390s and OS/2 workstations AWSMOUNT.EXE Change the DASD or tape configuration dynamically AWSPROF.EXE Record the name and location of the DEVMAP to use as the default for the Configurator and initial program load (IPL) AWSSTART.EXE Start PC Server System/390 device managers AWSSTAT.EXE Display or change the status of the 370 I/O subsystem and device managers BLDLIST.CMD Build a file containing a list of SEND/RECEIVE or COPY commands for all the files in a specified subdirectory CLRIO.EXE Issue a CLEAR I/O instruction to devices attached to the S/370 Channel Emulator/A C370TRC.EXE Take low level trace of the S/370 Channel Emulator/A DEV2NAME.CMD Create an American National Standard Code for Information Interchange (ASCII) file from a DEVMAP file IPL.CMD Start the channel processor and IPL the 370 processor LTRENAME.EXE Rename the title bar of a CM/2 3270 session RDEVMAP.CMD Reconfigure directory and path names in a DEVMAP SYSSOWN.CMD Avoid rebuilding the VM central processor (CP) nucleus when you want to add a new volume 9346CMD.EXE Issue tape positioning commands to the 1/4" tape drive IBM PC Server 500 System/390 - Type 8641 225 VSE/ESA TMOUNT Utility: A PC Server System/390 utility program called TMOUNT.JCL is also provided for VSE/ESA. This program runs in a VSE/ESA batch partition and performs the same functions for VM/ESA and OS/2 respectively. Configuration In addition to the configuration program for the Server 500 (see “Configuration (Server 500)”), a configuration program is provided for configuring the S/390 Microprocessor complex (see “Microprocessor Complex Configuration (S/390)”). Configuration (Server 500): The Server 500 Configuration Program requires the following information for each card (adapter) and device installed in the computer. .ADF) and .DGF files. (Normally found on the option diskette for the card or device and must be installed on the default drive.) A device driver statement in the config.sys file. (Required for the computer to load the necessary files required to support the card or device.) Note The device driver statement for the P/390 card should be the last statement (last line) in the config.sys file. Microprocessor Complex Configuration (S/390): After the S/390 Microprocessor Complex has been successfully initialized, the S/390 Configuration program can be accessed by clicking on the 390 (370) Configuration Icon in the System/390 (System 370) Group on the OS/2 Desktop. See “Icons (System/390)” on page 235. The Configuration program is a menu driven program that provides two main functions. It allows you to describe the mapping between the input/output (I/O) devices available on the PC Server System/390 and the System/370 I/O devices they emulate. See “Device Map” on page 230. It provides an easy way for Virtual Machine/Enterprise Systems Architecture (VM/ESA) users to create and maintain new VM userids on the PC Server System/390 and minidisks associated with these userids. Changes are made to the system configuration by changing the values in the data menus. 226 PC Server HMM The following example of reading a 9336 DASD summarizes how the 370 I/O subsystem emulates I/O operations on the PC Server System/390. 1. The 390 operating system does a system I/O instruction to real device 100. 2. The 390 Licensed Internal Code (LIC) passes all I/O instructions to the 370 I/O subsystem running on the PC Server Processor Complex. 3. The 370 channel emulator executes the 370 channel program and passes the request to the device manager that claims that range of devices in DEVMAP. In this example, it would be an fixed block architecture (FBA) device manager. 4. The FBA device manager gets the request for device 100. It looks in the DEVMAP entry for device 100 to fill out the OS/2 file name for 9336 device 100. The device map points to the OS/2 file that emulates the 370 disk drive, for example, D:\VM\MAINT.191 for a VM system or D:\VSDISRES.140 for a virtual storage extended (VSE) system. 5. A request is issued to OS/2 to read the data from the OS/2 file name MAINT.191 in the \VM directory of disk drive D: or from the OS/2 file name DOSRES.140 in the \VSE directory of disk drive D:/ 6. OS/2 issues the request for the data to the PC Server device containing disk drive D: 7. The data is passed back up the line until it is presented to the requesting VM or VSE program. The Configurator requires the following four files to operator correctly. (For information on the content of these files, refer to the Introducing the PC Server 500 System/390L manual (Form Number GC24-5717-00) supplied with the computer. DEVMAP.xxx DMKRIO.ASM DMKSYS.ASM USER.DIR IBM PC Server 500 System/390 - Type 8641 227 Configurator Structure (S/390): The following illustration shows the hierarchy of menus in the PC Server System/390 Configurator. Online help is available for most of the menus. Configurator Logo Configurator Password Functions Main Menu F1 F2 F3 Help Update Update System User Devices Data F2 Update System Environment F4 Update System Envioronment F5 Change Configurator Password Select Userid F6 End Save All Then Exit User Function Selection F7 Update All 370 IT Sessions F3 Update User Minidisks F4 Update User Links F8 Save All Do Not Exit F9 Display Not Found F10 Quit Do Not Save Anything Device Managers The PC Server System/390 supplies several device managers to support emulation of 370 I/O devices. The device managers are OS/2 applications that are started when S/390 Microprocessor Complex is IPL'ed with a device map containing device definitions that use the device managers. Each device manager is identified by name on the PC Server/390 Configuration screen that is used to perform device mapping. See “Microprocessor Complex Configuration (S/390)” on page 226. (Do not confuse this configuration program with the PC Server 500 Configuration program. See “Configuration (Server 500)” on page 226.) The following is a list of device managers and their function. 228 PC Server HMM Note For detailed information about device drivers, refer to the Introducing the PC Server 500 System/390L manual (Form Number GC24-5717-00) supplied with the computer. Device Managers Name Function AWSCDK Count, Key, Data (CKD) DASD Emulator AWSDEV General interface for device drive emulation of 370 AWSFBA Fixed Block Architecture (FBA) DASD Emulator AWSICA Integrated Communications Adapter (ICA) support AWSOMA Optical Media Attach AWSPCSRV Allows communication directly between 390PC and OS/2 AWSPOSDD Supports dynamic POS mode of AWSICADD AWSSTART Starts 7432 managers under OS/2 AWSSTOP Stops 7432 managers under OS/2 AWSTAPE 3803/3420 Emulator AWSTFA Transparent File Access (VM) AWSWAIT Waits for 7437 managers to start under OS/2 AWS2540 2540 Card Reader Emulator AWS2703 2703 Emulator AWS2821 Printer Manager AWS3172 3172 Local Area Network (LAN) Gateway (SNA)der OS/2 AWS3215 OS/2 Typewriter Keyboard Emulator AWS3274 3274 Control Unit Emulator (non-SNA) AWS5080 5080 Driver AWS9346 SCSI Quarter Inch Tape Drive Manager AWSC370 S/370 Channel Emulator Device Manager LAN3088 3088 Emulation over a LAN LAN3274 LAN 3270 sessions (non-SNA) LAN3172 3172 LAN channel Station for transmission control protocol/internet protocol (TCP/IP) (VM) IBM PC Server 500 System/390 - Type 8641 229 Device Managers Name Function LAN3172 3172 LAN channel Station for transmission control protocol/internet protocol (TCP/IP) (VM) Device Map The PC Server/390 I/O subsystem uses resources available on the PC Server System/390 to emulate the devices available on larger System/390 systems. The following device mapping is used. Host Device (System/390 and System/370) PC Server Equivalent Device) 3270 Information Display Monochrome or Color Display CKD and FBA DASD OS/2 File 5088 Graphics Control Unit 5080 PC Server Adapter 3215 OS/2 Presentation Manager session 2703 Serial (COM) Ports 2540 Card Reader OS/2 File 1403 Printer OS/2 Print Spooler 3088 (CTC) Token Ring 3420 Tape OS/2 File Special (VM) Host Transparent File Access Special (VM) Import/Export PC Data ICA SDLC/VTAM Connection 3172 LAN/VTAM Connection 3172 LAN/VM TCP/IP Connection 9346 1/4 inch tape 230 PC Server HMM Diagnostic Flow Chart (S/390) Customer’s Responsibility User Gets Message Alert Box No Refer to the P/390 Software manuals1 shipped with the computer Yes Disabled Yes Wait State Refer to the P/390 Software manuals1 shipped with the computer No Servicer’s Responsibility Machine Yes Check Error Run the P/390 Diagnostics Program No 1. Configuration Problem 2. OS/2 Software Programming Errors 3. If you suspect a hardware problem, go to "General Checkout in your manual for the system you are servicing 1 Falling FRU Identified Yes Replace Failing FRU No Contact Support Possible Problems : 1. Configuration (AWSERROR.LOG) 2. Programming Error Virtual Machine/Enterprise Systems Architecture (VM/ESA) . Virtual Storage Extended/Enterprise Systems Architecture (VES/ESA) or, Multiple Virtual Storage/Enterprise Systems Architecture (MVS/ESA) manuals IBM PC Server 500 System/390 - Type 8641 231 Documentation and Related IBM Manuals (390) 232 PC Server System/390 Booklets and Manuals – The PC Server System Library (form number S19H-1252) contains two manuals: - User's Guide - User's Reference – IBM PC Server 500 System/390 Introduction (form number GC24-5717 – IBM PC Server 500 System/390 Installation, Configuration, and User's Guide for VM/ESA (form number SC24-5718) – IBM PC Server 500 System/390 Installation, Configuration, and User's Guide for VSE/ESA (form number SC24-5719) – IBM PC Server 500 System/390 Installation, Configuration, and User's Guide for MVS/ESA (form number SA22-7210) OS/2 Manual – User's Guide to OS/2 Warp (part number 83G8300) VM/ESA Manuals – The Virtual Machine/Enterprise Systems Architecture Library Guide and Master Index for VM/ESA Release 2.2 (form number GC24-5518) VM/ESA Product Overview – VM/ESA General Information (form number GC24-5651) – VM/ESA Introduction and Feature Summary (form number SC24-5651) VM/ESA Planning, Administration, Installation and Service – VM/ESA Installation (form number SC24-5526) – VM/ESA Service Guide (SC24-557) – VM/ESA Introduction and Feature Summary (form number SC24-5651) – VM/ESA Planning and Administration (form number SC24-5519 – VM/ESA Connectivity Planning, Administration, and Operation (form number SC24-5448) – VM/ESA Group Control System Reference for 370 (form number SC24-5531) – VM/ESA Running Guest Operating Systems (form number SC24-5522) VM/ESA Operation and End Use – VM/ESA System Operation (form number SC24-5528) – VM/ESA CMS User's Guide (form number SC24-5460) – VM/ESA CMS Command Reference (form number SC24-5461) – VM/ESA Command and Utility Reference (form number SC24-5519) PC Server HMM VM/ESA Diagnosis – VM/ESA System Messages and Codes (form number SC24-5529) – VM/ESA Diagnosis Guide (form number LY24-5250) – VM/ESA CP Diagnosis Reference (form number LY24-5251) – VM/ESA Dump Viewing Facility (form number SC24-5530) VSE/ESA Manuals – The VSE/Enterprise Systems Architecture Library Guide (form number GC33-6519) VSE/ESA Product Overview – VSE/ESA General Information (form number GC33-6501) VSE/ESA Planning and Installation – IBM VSE/Enterprise System Architecture Planning (form number SC33-6503) – IBM VSE/Enterprise System Architecture Installation and Service (form number SC33-6504) – VSE/Enterprise Unattended Node Support (form number SC33-6512) VSE/ESA Administration and Operation – VSE/ESA Administration (form number SC33-6505) – IBM VSE/Enterprise System Architecture Operation (form number SC33-6506) – VM/ESA Messages and Codes (form number SC33-6507) – VM/ESA Networking Support (form number SC33-6508) – VM/ESA Programming and Workstation Guide (form number SC33-6509) – VM/ESA Guide for Solving Problems (form number SC33-6510) – VM/ESA Guide to Systems Functions (form number SC33-6511) – VM/ESA System Control Statements (form number SC33-6513) – VM/ESA Diagnosis Tools (form number SC33-6514) MVS/ESA manuals – One of the following: MVS/ESA SP V4 Library Guide (form number GC28-1601) MVS/ESA SP V5 Library Guide with JES2 (form number GC28-1423) MVS/ESA SP V5 Library Guide with JES3 (form number GC28-1424) – One of the following: DFSM/MVS V1R2 General Information—Library Guide (form number GC26-4902) IBM PC Server 500 System/390 - Type 8641 233 MVS/DFP V3R3 Guide and Master Index (form number GC26-4553) – One of the following: VTAM V3R4.1 for MVS/ESA Release Guide (form number LY43-0054) VTAM V3R4.2 for MVS/ESA Release Guide (form number LY43-0062) VTAM V4R1 for MVS/ESA Release Guide (form number GC31-6441) VTAM V4R2 for MVS/ESA Release Guide (form number GC31-6492) – One of the following: ISPF and ISPF/DPF V3r5 Getting Started (form number SC34-4256) ISPF Version 4 Getting Started (form number SC34-4440) – Both of the following: TSO/E Version 2 Library Guide (form number CG28-1866) TCP/IP for MVS V3R1 Planning and Migration Guide (form number SC31-7189) Operating System Architecture References – IBM System/370 Principles of Operation (form number GA22-7000) – Enterprise Systems Architecture/390 Principles of Operation (form number SA22-7201) – Enterprise Systems Architecture/390 Data Compression (form number SA22-7208) Softcopy – The IBM Online Library Omnibus Edition: VM Collection (form number SK2T-2067) – The IBM Online Library Omnibus Edition: VSE Collection (form number SK2T-0060) – The IBM Online Library Omnibus Edition: MVS Collection (form number SK2T-0710) Error Reporting (P/390) The S/390 Microprocessor Complex uses the following methods of error reporting. 234 POST Error 165 (configuration) If this error is displayed and the P/390 card does not appear on the installed devices list, it is an indication that one or more of the following problems exist: – Missing or bad .ADF or .DGS files – Missing or incorrect statement in the config.sys file. (The statement for the P/390 should be the last line in the config.sys file.) Dialog Box (Machine Check Errors) If an error is detected during or after initialization of the P390 card, a Dialog Box with a Machine Check error is displayed. If this occurs, run the P/390 Diagnostic and Option diskette. For a list of common PC Server HMM Machine Check errors, see “Machine Check Error Messages” on page 235. AWS Error Log Contains ASKI test information about failures that occurred during operation. Located in the P390 subdirectory on the hard disk drive (path = C:\P390\AWSERROR.LOG), this file can be edited with a text editor. Icons (System/390) The System/390 (System/370) Group located on the OS/2 Desktop contains the following icons. IPL 390 (370) Processor Starts the S/390 Microprocessor Complex programs End 390 (370) Processor Stops the S/390 Microprocessor Complex programs 390 (370) Configuration Starts the 390 (370) Configurator Program 390 Manual Operations Debugging tool, see “Software Facilities (Server System/390)” on page 238. 370 I/O Trace Debugging tool, see “Software Facilities (Server System/390)” on page 238. 370 Snap Shot Dump Debugging tool, see “Software Facilities (Server System/390)” on page 238. Initialization (S/390) To Initialize (start) the S/390 Complex, click on the IPL 390 (370) Processor icon in the System/390 (System/370) Group on the OS/2 Desktop. See “Icons (System/390).” Machine Check Error Messages Note The diagnostic and error reporting programs may refer to the P/390 as a P/370. If an error is detected during or after the P/390 card is initialized, a dialog box containing a Machine Check error is displayed on the screen. This error may be caused by one or more of the following: Missing or bad .ADF or .DGS files Missing or incorrect statement in the congif.sys file (The statement for the P/390 should be the last line in the config.sys file.) Missing or incorrect code on the P/390 card Defective hardware The following is a list of common machine check errors. IBM PC Server 500 System/390 - Type 8641 235 236 Can't open/find $s file. RC=$d2 Control Store Parity Error. Try END P/370 and IPL again. Uncorrectable memory error at ' $s'x (daughter card) code= $s No status available. PS/2 used invalid S/370 address code= $s fic= $s addr= $s Internal use of invalid S/370 address. code= $s fic= $s addr= $s code = ' $s'x, fic= $s addr=' $s'x PC Server HMM Power-On Self Test (POST) When you power-on or re-boot the computer, the computer runs the following two power-on self tests (POSTs). Note These tests are run consecutively without intervention. BIOS Code (resides on the system board) Checks the memory, system board, direct access storage device (DASD), configuration, etc.. If you receive a POST error from the BIOS code, refer to the "Symptom-to-FRU Index (Micro Channel)" on page 26 in the PS/2 Hardware Maintenance Manual Licensed Internal Code (LIC) (written to files on the hard disk drive) Checks the P/390 processor card and attached memory card. If you receive a POST error (165) from the P/390 LIC code, see “Error Reporting (P/390)” on page 234. Product Overview The IBM PC Server 500 System/390 is a PC Server 500 (see “PC Server 500 - Type 8641” on page 177) with an IBM S/390 Microprocessor Complex (see “Locations” on page 241) installed. The S/390 Microprocessor Complex and S/390 programs provide the hardware and software required to run 390-based applications on the PC Server 500 System/390. PC Server Processor Complex OS/2 390 Processor Complex 390 Operating System D OS/2 Application 390 Application E V I Communications Manager/2 390 LIC OS/2 Device Drivers C E 370 I/O Subsystem Communication Buffer S Shared memory windows PC Server Memory 390 Memory IBM PC Server 500 System/390 - Type 8641 237 Software Facilities (Server System/390) Note Knowledge of System/390 and CP/390 architecture is essential to the proper use of these processor control functions. Information about System architecture is found in IBM Principles of Operation, GA22-7201. VM/ESA and VSE/ESA use the same problem determination tools on the PC Server/390 for debugging 390 operating system and applications problems as they do on 390 mainframe systems. Standard OS/2 debugging tools can be used to assist with problems with the 390 environment on the PC Server/390 since many of the functions use OS/2 facilities and PC Server devices. The 390 Processor Complex Programs also have the following tools for controlling and debugging the system. 390 Manual Operations Provides the function of the 390 hardware console as on mainframe systems. 390 Status Window Displays the processor status word (PSW) and current status of the 390 processor. 390 I/O Trace Used to trace I/O request between the 390 processor and its I/O subsystem. The trace can be selected by device and can be written to an OS/2 file. It can also be displayed in a Presentation Manager window by selecting the 390 I/O trace icon. (See “Icons (System/390)” on page 235.) Snap Shot Dump Creates a binary file of the I/O subsystem to be used by IBM support personnel during problem determination. This program is selected by clicking on the Snap Shot Dump icon. 238 PC Server HMM Microprocessor Complex Diagnostics (S/390): The IBM P/390 Advanced Diagnostics and Options Diskette contains the programs used to test the S/390 Microprocessor Complex installed in the computer, and the ADF and DGF files required for configuration. To run the S/390 Microprocessor Complex Diagnostics programs, see “Advanced Diagnostics and Options Diskette (S/390).” Advanced Diagnostics and Options Diskette (S/390): The Advanced Diagnostics and Options Diskette is a self-booting diskette that contains the P/390 diagnostic programs. The diagnostic programs are designed to be used with the diagnostic diskette and diagnostic information in the IBM PS/2 Hardware Maintenance manual for the computer you are servicing. The results of the diagnostic tests are reported as a success or failure. To run the P/390 diagnostic programs, do the following. Note First run the diagnostics program for the computer you are servicing. If the P/390 card is recognized by the configuration program (the P/390 appears on the installed devices list), the diagnostics program will instruct you to run the P/390 Diagnostics and Option diskette. If the P/390 card is not recognized by the configuration program (does not appear on the installed devices list), go to “Error Reporting (P/390)” on page 234. 1. Power-off the computer; then power-off all external devices. 2. Insert the P/390 Diagnostics and Option diskette into drive A. 3. Power-on all external devices; then power-on the computer. 4. When the Main Menu appears, a. Select 2 b. After the information message, press Enter. c. Select E to run the diagnostic programs with expanded messages. The diagnostic program will test the adapter and terminate with the message "P/390 in slot X successfully passed all tests, or a failure message that includes an error message and error code. The error message will identify the failing FRU. d. If a failure message is displayed, it identifies the failing FRU(s) as: 1) The adapter card, excluding the memory card IBM PC Server 500 System/390 - Type 8641 239 2) The memory card 3) Both the adapter card and the memory daughter card (when the failure cannot be isolated). e. Record the error code and replace the identified FRU. 240 PC Server HMM Locations The S/390 Microprocessor Complex consists of a P/390 Processor Card and an optional P/390 32MB, or P/390 96MB Memory Card attached to the P/390 Processor Card. When the processor card is installed with a memory card attached, the voltages for the memory card are provided by the system-board slot adjacent to the slot occupied by the processor card. Together the P/390 Processor Card and a P/390 32MB, or P/390 96MB Memory Card occupy two adjacent slots on the system board. Snap Spacer Memory Connector Bulkhead End dapter ssor A Proce Heat Sink apter ry Ad Connector End 32 emo MB M Mounting Holes Parts Listing System Unit - Type 8641 P/390 Microprocessor Complex P/390 32MB Memory Card P/390 96MB Memory Card S/370 Channel Emul./A Adapter S/370 Channel Emul./A Cable 4/10GB DDS2 4mm Drive 17H5372 26H2931 26H2978 06F3160 80F1939 16G8454 IBM PC Server 500 System/390 - Type 8641 241 PC Server 520 - Type 8641 Features . . . . . . . . . . . . . . . . . . . . Models EZO, EZV, EZL, EZS, EZE . . . . . . Models MZO, MZV, MZS, MZE, MZL . . . . . Diagnostics and Test Information (Models EZO, EZV, EZL, EZS, EZE) . . . . . . . . . . . . . . . . Diagnostic Files . . . . . . . . . . . . . . . Installing Additional Test Programs . . . . . . USERDIAG.CFG Example . . . . . . . . . . Diagnostics and Test Information (Models MZO, MZV, MZS, MZE, MZL) . . . . . . . . . . . . . . . Reference and Diagnostic Diskettes . . . . . . Using the System Diskettes . . . . . . . . . Starting the Operating System . . . . . . . . Backing Up System Diskettes . . . . . . . . Setting Micro Channel Configuration . . . . . Copy an Option Diskette . . . . . . . . . . . Testing the Computer . . . . . . . . . . . . System Board Diagnostics . . . . . . . . . . Additional Service Information . . . . . . . . . . Configuration (Models EZO, EZV, EZL, EZS, EZE) EISA, ISA, and PCI Adapters . . . . . . . ISA or EISA Features and Options . . . . . Files . . . . . . . . . . . . . . . . . Device Drivers . . . . . . . . . . . . Sample Applications . . . . . . . . . . PCI Features and Options . . . . . . . . . Assigning Interrupt Levels . . . . . . . . . Memory . . . . . . . . . . . . . . . . . EISA Configuration Diskette . . . . . . . . Backing Up the EISA Configuration Diskette Making Menu Selections . . . . . . . . Recording EISA Configuration Settings . Starting the EISA Configuration Diskette Using EISA Configuration Diskette Advanced Function . . . . . . . . . Configuration (Models MZO, MZV, MZS, MZE, MZL) . . . . . . . . . . . . . . . . . . . Using the Configuration/Setup Utility . . . . Changing Settings . . . . . . . . . . . . Starting the Configuration/Setup Utility Program System Summary . . . . . . . . . . . . . Micro Channel Configuration . . . . . . . Product Data . . . . . . . . . . . . . . . Configuring Devices and I/O Ports . . . . . Assigning Serial Ports . . . . . . . . . . Configuring Video Options . . . . . . . . Date and Time . . . . . . . . . . . . . . Defining System Security . . . . . . . . . Setting an Administrator Password . . . . . Setting a Power-on Password . . . . . . . Defining a System Owners Name . . . . . 245 245 246 Copyright IBM Corp. 1996 243 248 248 249 250 251 252 252 253 253 253 254 254 255 256 256 257 258 258 259 259 260 260 260 261 261 261 262 263 263 264 265 266 267 267 267 268 268 269 269 269 269 270 271 272 Restricting Access to Diskette Drives . . . Defining the Start Options . . . . . . . . . Advanced Setup . . . . . . . . . . . . . Configuration Conflicts . . . . . . . . . . . . Type 8641 (Models EZO, EZV, EZL, EZS, EZE) . . . . . . . . . . . . . . . . . . Resolving Hardware Configuration Conflicts Resolving Software Configuration Conflicts Type 8641 (Models EZO, EZV, EZL, EZS, EZE) . . . . . . . . . . . . . . . . . . Resolving Hardware Configuration Conflicts Resolving Software Configuration Conflicts Changing the Software Configuration . . Internal Drives (Type 8641) . . . . . . . . . . Considerations . . . . . . . . . . . . . . SCSI Drives . . . . . . . . . . . . . . . Power Supplies (Type 8641) . . . . . . . . . Power Supply LED and Button . . . . . . Primary Power Supply Voltages . . . . . . Optional Power Supply Drive Connector Voltages . . . . . . . . . . . . . . . . Power Supply Shutdowns . . . . . . . . . Setup Program (Type 8641) . . . . . . . . . Setup Program Default Settings Type 8641 (Models EZO, EZV, EZL, EZS, EZE) . . . . Setup Program Default Settings (Models MZO, MZV, MZS, MZE, MZL) . . . . . . . . . . . Specifications (Type 8641) . . . . . . . . . . Symmetric Multiprocessors/Multiprocessing . . System Board Replacement (Type 8641) . . . Type 5 Adapter Installation (Type 8641, Models MZO, MZV, MZS, MZE, MZL) . . . . . . . . Locations (Models EZO, EZV, EZL, EZS, EZE) . . Controls/Indicators . . . . . . . . . . . . . . Expansion Bays . . . . . . . . . . . . . . . Input/Output Connectors . . . . . . . . . . . Memory Module Connectors . . . . . . . . . System Board Locations . . . . . . . . . . . System Board Connections . . . . . . . . . . System Board Jumpers . . . . . . . . . . . Locations (Models MZO, MZV, MZS, MZE, MZL) . Controls/Indicators . . . . . . . . . . . . . . Expansion Bays . . . . . . . . . . . . . . . Input/Output Connectors . . . . . . . . . . . Memory Module Connectors . . . . . . . . . System Board Locations . . . . . . . . . . . System Board Connections . . . . . . . . . . System Board Jumpers . . . . . . . . . . . Symptom-to-FRU Index . . . . . . . . . . . . . Checkpoint Codes . . . . . . . . . . . . . . Parts Listings . . . . . . . . . . . . . . . . . . System . . . . . . . . . . . . . . . . . . . Keyboards (101/102 Key) . . . . . . . . . . Power Cords . . . . . . . . . . . . . . . . 244 PC Server HMM 272 273 273 274 274 274 276 276 277 277 277 278 280 280 283 283 284 284 285 286 287 288 289 290 290 291 294 294 295 296 297 298 299 299 301 301 302 303 304 305 306 307 308 313 318 319 323 324 Features The following features of the PC Server 520 Type 8641 are divided into the following two categories. “Models EZO, EZV, EZL, EZS, EZE” “Models MZO, MZV, MZS, MZE, MZL” on page 246 Note All PC Server computers have Selectable Startup. Models EZO, EZV, EZL, EZS, EZE Microprocessor Pentium with 16KB of internal cache Expandable to two microprocessors Cache Memory On each processor: 16KB of level-1 cache 512KB of level-2 write-back cache Memory 32MB EOS 70ns expandable to 256MB Note Parity memory module kits are supported but must not be installed in combination with EOS memory. Diskette Drive Standard: One 3.5-inch, 1.44MB Optional (internal): – 3.5-inch, 1.44MB – 3.5-inch, 2.88MB – 5.25-inch, 1.2MB CD-ROM Drive: Standard: SCSI-2 4X CD-ROM Keyboard Standard: 101-key Mouse Standard: IBM Mouse Expansion Bays and Slots Three 32-bit PCI slots Six 32-bit combination EISA/ISA slots 22 drive bays, 18 of them hot-swap Video SVGA controller Compatibility: – Video graphics array (VGA) – Enhanced graphics adapter (EGA) – Color graphics adapter (CGA) – Multicolor graphics array (MCGA) Hard Disk Drive Number of drives and drive capacities are model dependent Can support up to 20 hard disk drives, 18 of them hot-swap Security Features Door lock U-bolt enabled PC Server 520 - Type 8641 245 Selectable drive-startup Cable cover (optional) Integrated Functions Vital product data (VPD) LED usability support Video connector Two serial connectors Parallel connector Mouse connector Keyboard connector Battery-backed clock and time/date calendar Power Supply 434 watt with automatic range voltage selection (115–230 V ac) Built-in overload and surge protection Power supply upgrade expansion option – 220 watt automatic range voltage selection add-on – Built-in overload and surge protection SCSI-2 Controller IBM PC Server SCSI-2 Fast/Wide PCI Adapter on non-disk-array models IBM PC Server SCSI-2 Fast/Wide PCI RAID Adapter on disk-array models Upgradable POST and BIOS Two 256KB flash ROMs Models MZO, MZV, MZS, MZE, MZL The features for the PC Server 520 Type 86451 Micro Channel Models MZO, MZV, MZS, MZE, and MZL are: Microprocessor Pentium with 16KB of internal cache; clock rate varies by model Expandable to two microprocessors Cache Memory 512KB of level-2 cache Memory 32MB EOS 70ns expandable to 256MB Note Parity memory module kits are supported but must not be installed in combination with EOS memory. Diskette Drives Standard: One 3.5-inch, 1.44MB Optional (internal): – 3.5-inch, 2.88MB – 3.5-inch, 1.44MB – 5.25-inch, 1.2MB Hard Disk Drive Number and capacity of standard drives varies by model Supports up to 18 internal hard disk drives Hot swap bays standard on some models; available on all models CD-ROM Drive 246 Standard: SCSI-2 PC Server HMM Keyboard and Mouse 101-key keyboard Mouse Expansion Bays and Slots Six 32-bit Micro Channel slots, two 32-bit PCI slots 22 drive bays, 18 of them hot-swap Video Super video graphics (SVGA) connector Compatibility: – Video graphics adapter (VGA) – Color graphics adapter (CGA) – Multicolor graphics array (MCGA) Security Features Bolt-down capability Door lock Administrator and power-on passwords Selectable startup drive Security cover (optional) C2 security (optional) Upgradable POST and BIOS Upgradable EEPROM on the system board POST/BIOS upgrades (when available) Integrated Functions LED usability support Video port Two serial ports Parallel port Auxiliary device port Keyboard port Battery-backed clock and calendar SCSI-2 – 1 16-bit external connector – 2 internal connectors (one 8-bit and one 16-bit) IBM SCSI-2 Fast/Wide PCI-Bus RAID Adapter (disk-array system) Two 16-bit internal connectors One 16-bit external connector Power Supply 430 watt with voltage switch (115–230 V ac) Built-in overload and surge protection Power supply upgrade expansion option – 220 watt automatic range voltage selection add-on – Built-in overload and surge protection PC Server 520 - Type 8641 247 Diagnostics and Test Information (Models EZO, EZV, EZL, EZS, EZE) The following is a list of problems and references for diagnosing the above named computers. Notes The QAPlus/PRO diagnostic program recognizes the primary processor as LUN 1 and the secondary processor as LUN 2. During testing the program automatically tests LUN 1. You must select LUN 2 if you want the program to test the secondary processor. The type of DASD diagnostics required to test the hard disk controller (adapter) and drives is determined by the type of hard disk adapter installed in the computer. Always start “General Checkout (QAPlus/PRO)” on page 4. Problem Reference DASD, CD-ROM or SCSI Problems For non-disk-array models, see “SCSISelect Utility Program” on page 547. For array models, see “Disk Array Configuration” on page 461. Error Codes/Error Messages “Symptom-to-FRU Index” on page 308. “General Checkout (QAPlus/PRO)” on page 4. Power Supply Voltages See “Power Supplies (Type 8641)” on page 283. Miscellaneous “General Checkout (QAPlus/PRO)” on page 4. The Diagnostic program supplied with the server is the primary method of testing the server. Option-specific diagnostic files are supplied with some optional devices and adapters. These files provide a more specialized test of the option. “Installing Additional Test Programs” on page 249 provides additional information about installing and using diagnostic files. Also, refer to the documentation supplied with the option for information on installing and running option-specific diagnostics. Diagnostic Files The Diagnostic program supplied with the server is the primary method of testing the server. Option-specific diagnostic files are supplied with some optional devices and adapters. These files provide a more specialized test 248 PC Server HMM of the option. “Installing Additional Test Programs” on page 145 provides additional information about installing and using diagnostic files. Also, refer to the documentation supplied with the option for information on installing and running option-specific diagnostics. Installing Additional Test Programs You can add other test programs to the Diagnostic Diskette. These other programs are usually provided on the diskette supplied with a device. After you add the programs to the Diagnostic Diskette, you can include information from the programs in the Test Log. Before the test programs can find these programs to run as the User Diags test group, information about them must be included in a file called USERDIAG.CFG. This is an ASCII text file. It must include the following three items for each test to run: Program Name (.COM and .EXE files only) Test Description of the test to be run Command-line parameters to be passed to the program identified in the first item of this list Notes 1. All of the information for a given test must be on a single line, and a semicolon (;) must separate the items on the line. 2. Make sure you press Enter at the end of each line of text in the USERDIAG.CFG file. This creates a carriage return line feed (CR LF) which is necessary for the User Diagnostics to be found and executed. 3. If the program executable file is in a directory other than the QA directory (or other directory you have designated to contain the QA files), that directory must be listed in the PATH= section of the AUTOEXEC.BAT. 4. You can use a .CFG file other than USERDIAG.CFG if you use the command line “USRCONFIG=filename,” when running the diagnostic programs. For example, you might use: QAPLPRO /USRCONFIG=MYTESTS.CFG. PC Server 520 - Type 8641 249 USERDIAG.CFG Example An example USERDIAG.CFG file might look like the following: Program Name BBSMODEM.EXE; TEST1.EXE; TEST2.EXE; TESTALL.EXE; TESTALL.EXE; TESTALL.EXE; Test Description 9600 Baud 5 Line Modem; Generic 1; Generic 2; CMD 1; CMD 2; CMD 3; Command-Line Parameter 5 1 2 3 Note You can have more than one command-line parameter for any given test. When you view these tests on the Test Group window for the User Diag test group, they appear as follows: (♦) (♦) (♦) (♦) (♦) (♦) 9600 Baud 5 Line Modem Generic 1 Generic 2 CMD 1 CMD 2 CMD 3 The diagnostic program automatically assigns a test number to each test. The test numbers start at 201 and continue upward as needed. The numbers for the tests listed above are as follows: 202 203 204 205 206 207 250 9600 Baud 5 Line Modem Generic 1 Generic 2 CMD 1 CMD 2 CMD 3 PC Server HMM Diagnostics and Test Information (Models MZO, MZV, MZS, MZE, MZL) The following is a list of problems and references for diagnosing the above named computers. Notes The System Board Diagnostics tests are the primary method for testing the computer. See “System Board Diagnostics” on page 255. The QAPlus/PRO diagnostic program recognizes the primary processor as LUN 1 and the secondary processor as LUN 2. During testing the program automatically tests LUN 1. You must select LUN 2 if you want the program to test the secondary processor. The type of DASD diagnostics required to test the hard disk controller (adapter) and drives is determined by the type of hard disk adapter installed in the computer. Always start with “General Checkout (QAPlus/PRO)” on page 4. Problem Reference DASD, CD-ROM or SCSI Problems For non-disk-array models, see “SCSISelect Utility Program” on page 547. For array models, see “Disk Array Configuration” on page 461. Error Codes/Error Messages “Symptom-to-FRU Index” on page 308 Symptom-to-FRU Index (Micro Channel) on page 26 in the PS/2 Hardware Maintenance Manual. Symptom-to-FRU Index (QAPlus/PRO) on page 61 in the PS/2 Hardware Maintenance Manual. Power Supply Voltages See “Power Supplies (Type 8641)” on page 283. Miscellaneous “General Checkout (QAPlus/PRO)” on page 4. PC Server 520 - Type 8641 251 Reference and Diagnostic Diskettes The Reference Diskette and Diagnostic Diskettes, supplied with the server, contain a copy of the system programs. Collectively, these diskettes are referred to as the System Diskettes. The System Diskettes normally are used under the following conditions: To configure and test Micro Channel adapters To test computer hardware Using the System Diskettes Note Always use the backup copy of the system diskettes when configuring and troubleshooting the server. To start the System Diskettes: 1. Insert the backup copy of the Reference Diskette into the primary diskette drive. 2. Power-on the system. Or, if the system is powered-on, insert the Reference Diskette and press Ctrl+Alt+Del. The system begins the power-on self test. If a power-on or administrator password is set, the system prompts you to enter it. Note If an administrator password is set, you must enter it to access the Reference and Diagnostic Diskettes. After a few moments, the system programs Main Menu appears, and displays the following choices. a. Start operating system b. Backup of system diskettes c. Set/View Micro Channel Configuration d. Copy an option diskette e. Test the computer 3. Use the Up Arrow (↑) key or the Down Arrow (↓) key to highlight a choice; then press Enter. You can get help about any selection by highlighting it and pressing F1. The active keys are shown at the bottom of the screen. When you finish making changes: 1. Press F3 to exit without saving the changes. 2. Press Enter to save the changes. You are prompted to restart the computer so that the changes will take effect. You can get online help for each task by pressing F1. 252 PC Server HMM Starting the Operating System To start the operating system: 1. Select Start operating system from the Main Menu, and then follow the instructions on the screen. 2. When prompted, remove the Reference Diskette, then press Enter to restart the computer from a diskette or hard disk drive. The server restarts. Backing Up System Diskettes Select Backup of system diskettes from the Main Menu to backup the system diskettes or to restore the configuration information from the system diskettes. This is useful in case the battery fails or a change that you made to the configuration information causes a problem and you need to change it back to its previous setting. Note Store the original system diskettes in a safe place. Always use the backup copies when configuring and troubleshooting the server. The system prompts you to switch the diskettes and label the diskette. Note You will need to have a formatted diskette for each system diskette that you copy. Setting Micro Channel Configuration Select Set/View Micro Channel Configuration from the Main Menu to view, change, backup, or restore system configuration of Micro Channel adapters. Follow the instructions on the screen. The following figure shows a Micro Channel configuration screen. PC Server 520 - Type 8641 253 Change Configuration Slot 1 - IBM Ethernet Adapter/A Adapter Media Type Selection . . . . . . . . . . . . . . . .[Autosense] .................... System Interrupt Level . . . . . . . . . . . . . . . . . . . . . . .[Interrupt] ....... Micro Channel I/O Address. . . . . . . . . . . . . . . . . . . [IC00-ICFF] ......... Streaming Date Select . . . . . . . . . . . . . . . . . . . . . . . [Enabled] ........ Fairness . . . . . . . . . . . . . . . . . . . . . . . . . . . . . . . . . . . . .[Fairness ...... ON] Arbitration Level . . . . . . . . . . . . . . . . . . . . . . . . . . . . . [Level . . . . . . .5] . Parity Enable/Monitor Feedback . . . . . . . . . . . . . [Parity . . . . . . . OFF/Monitor ... OFF] Slot 2 . . . . . . . . . . . . . . . . . . . . . . . . . . . . . . . . . . . . . . . . . [Empty] ....... Slot 3 . . . . . . . . . . . . . . . . . . . . . . . . . . . . . . . . . . . . . . . . . [Empty] ....... Slot 4 . . . . . . . . . . . . . . . . . . . . . . . . . . . . . . . . . . . . . . . . . [Empty] ....... Slot 5 . . . . . . . . . . . . . . . . . . . . . . . . . . . . . . . . . . . . . . . . . [Empty] ....... F1=Help F3=Exit F5=Previous F6=Next F7=Bkwd F8=Fwd F10=Save Press F3 to return to the Main Menu. Copy an Option Diskette Some options come with a diskette that includes test and configuration information. Select Copy an option diskette from the Main Menu to copy this information to the system diskettes. To copy an option diskette: 1. Select Copy an option diskette from the Main Menu, and follow the instructions on the screen. 2. Remove the option diskette from the diskette drive. 3. Repeat the preceding steps until all option diskettes have been copied. 4. Press Esc to return to the Main Menu. Testing the Computer The Test the computer utility program tests the system board and installed options. To verify that your server is working correctly: 1. Select Test the computer from the Main Menu. 2. To test the system board, disk drives, video, and other system components, select System board diagnostics; then, press Enter. When prompted, remove the Reference Diskette and insert the System Board Diagnostic Diskette. Follow the instructions on the screen. 3. To test Micro Channel adapters, select Micro Channel diagnostics; then press Enter. When prompted, remove the Reference Diskette and insert the Micro Channel Diagnostic Diskette. 4. When all tests are completed, the system prompts you to remove the Diagnostic Diskette and press Enter to restart the system. 254 PC Server HMM To get help information about any of the diagnostic tests, then press F1. System Board Diagnostics To run the system board diagnostics, the system should first be booted from the reference diskette. Then, select either option 5 Test the computer or press Ctrl+A to bring up the test menu options in customer or advanced diagnostic mode respectively. To run the system board diagnostic select option 1 from this menu and insert the system board diagnostic diskette when prompted. For additional information see “Diagnostics and Test Information (Models MZO, MZV, MZS, MZE, MZL)” on page 251. The following is the step by step procedure for running the diagnostic diskette to test the system board. This procedure can also be used with the Module Tests option from the Diagnostics Menu. 1. Boot the Reference Diskette. 2. From the Main Menu, select option 5 Test Computer. 3. From the Test the Computer menu, select option 1 System Board Diagnostics. 4. Remove the Reference Diskette and insert the QAPlus/PRO Diagnostics Diskette. 5. Follow prompts. (Initialization takes approximately 4 minutes.) 6. At the QAPlus/PRO Main Menu, select Diagnostics. 7. Select Quick Check. 8. At the System Board Group, look for LUN 1 of 2 or LUN 2 of 2. This indicates which CPU the diagnostics are actually testing. Use the + and − keys to change the CPU selected. (The LUN message is at the top right of the display.) 9. Use the Spacebar and Cursor keys to select or de-select groups. PC Server 520 - Type 8641 255 Additional Service Information The following information is for the PC Server 520 - Type 8641. “Configuration (Models EZO, EZV, EZL, EZS, EZE).” “Configuration (Models MZO, MZV, MZS, MZE, MZL)” on page 264. “Configuration Conflicts” on page 274. “Internal Drives (Type 8641)” on page 278. “Power Supplies (Type 8641)” on page 283. “Setup Program (Type 8641)” on page 286. “Setup Program Default Settings Type 8641 (Models EZO, EZV, EZL, EZS, EZE)” on page 287. “Setup Program Default Settings (Models MZO, MZV, MZS, MZE, MZL)” on page 288. “Specifications (Type 8641)” on page 289. “Symmetric Multiprocessors/Multiprocessing” on page 290. “System Board Replacement (Type 8641)” on page 290. “Type 5 Adapter Installation (Type 8641, Models MZO, MZV, MZS, MZE, MZL)” on page 291. Configuration (Models EZO, EZV, EZL, EZS, EZE) Note DASD and other adapters may require additional configuration information. Configuration is the allocation of the server resources to organize and interconnect hardware devices and software programs. The steps required to configure the above named servers depend on the number and variety of devices and programs installed. For information about configuring the IBM SCSI-2 Fast/Wide PCI-Bus RAID Adapter, see “Starting the RAID Configuration Program” on page 465. These servers support the following types of adapters. Peripheral Component Interconnect (PCI) Extended Industry Standard Architecture (EISA) Industry Standard Architecture (ISA) The following hardware configuration utility programs are supplied with the server. 256 Built-in Setup program Configures system board functions, such as the integrated drive electronics (IDE) controller and serial and parallel port assignments that you install. It also allows you to set passwords for starting up and accessing the Setup program. PC Server 520 EISA Configuration Diskette PC Server HMM Configures EISA and ISA adapters (boards). Built-in SCSI-2 adapter utility program (SCSISelect Utility program) Configures SCSI devices installed in non-disk-array models Configuration Option Diskette Configures SCSI devices in disk-array models EISA, ISA, and PCI Adapters: Before installing a new device or program, read the documentation supplied with it. Reading the instructions helps you determine the steps required for installation and configuration. The following list provides a preview of the actions that might be required to configure the server. When installing different types of adapters at the same time, install and configure them in the following sequence: 1. ISA 2. EISA 3. PCI Note During POST, the server automatically configures ISA Plug and Play and PCI devices. 1. Run the Setup program and record the current configuration settings. 2. Backup the EISA Configuration Diskette. See “Backing Up the EISA Configuration Diskette” on page 261. 3. Start the EISA Configuration Diskette and: a. Record the current settings. b. Install configuration files (.CFG). Note If the .CFG files were not supplied with the adapter, see “Files” on page 258. See “Recording EISA Configuration Settings” on page 262 and “Starting the EISA Configuration Diskette” on page 263. 4. Set jumpers or switches on the server system board. See “System Board Jumpers” on page 299. 5. Set jumpers or switches on the device. See the instructions supplied with the adapter. 6. Install the adapter in the server. 7. Install software programs. See the installation instructions supplied with the software. 8. Resolve configuration conflicts. See “Configuration Conflicts” on page 274. PC Server 520 - Type 8641 257 ISA or EISA Features and Options: Some ISA and most EISA devices are supplied with option diskettes. These diskettes can contain any or all of the following types of information: Configuration files (.CFG) Diagnostic files (.DGS) Device drivers Sample applications (mini-applications) Files: A configuration file is required to configure the server for ISA or EISA adapters. You must copy this configuration file, which has a file-name extension of .CFG, from the device diskette to the EISA Configuration Diskette before installing the device in the server. The configuration file reserves the system resources that the adapter needs to function properly. Some ISA adapters are supplied with a diskette that contains the CFG file for the adapter. If ISA adapters are installed that were not supplied with their own CFG files, you must use the PC Server EISA Configuration Diskette for the system you are servicing to create a unique CFG file for each adapter. Note The unique .CFG files are slot sensitive. That is, they should not be used to configure identical adapters in multiple systems unless you install the adapters in the same expansion slots within each system. To create a unique CFG file for an ISA adapter, do the following: 1. Insert the IBM PC Server EISA Configuration Diskette for the system you are servicing into diskette drive A. 2. Start the configuration utility program. 3. At the main menu, select Step 2, Add or remove boards. 4. At the next menu, select the slot in which you installed the adapter. 5. At the next screen, select OK. 6. At the next screen, press F5; then select Create .CFG file. 7. Press Enter. 8. At the Create a board CFG file screen, type in the adapter manufacturer and description (for example IBM Token Ring); then press Enter. 9. Refer to the adapter documentation for information about specific configuration parameters (such as IRQ or DMA channel) required for the adapter. Then, follow the instructions on the screen to enter the appropriate parameters on the menu. 258 PC Server HMM Notes: a. Normally, ISA adapters do not use every parameter. Most adapters require only a PORT address. b. The SVGA video adapter in the server requires specific memory and I/O address assignments to function properly. To avoid configuration conflicts, do not assign the following SVGA memory and I/O addresses to other adapters or options in the server: Memory address space: AðððH – C7FFH I/O address spaces: ð2Eðh – ð2EFh ð3Bðh – ð3DFh 46E8h 10. After you type in all of the appropriate parameters, press F10. 11. At the next screen, carefully verify that the information is correct; then press Enter. 12. At the Add Confirmation window, press Enter again. 13. In the next window (add), press Enter. The adapter description appears in the selected slot. 14. Verify the installation; then press F10. 15. At the next menu, select Save and exit the configuration utility. Note PCI devices do not require .CFG files. Device Drivers: Device drivers are programs designed to support a specific type of hardware device. They provide instructions that enable the computer to interact with the device, or to take advantage of a device's special feature. The device driver might ship with the operating system, the application program, or on the option diskette. Not all devices require device drivers. Refer to the documentation supplied with the option for additional information. Sample Applications: Some optional devices provide small applications or sampler files. These applications demonstrate the capabilities of the device and serve as software examples for programming the device. Refer to the documentation supplied with the option for additional information. To configure the server for an ISA or EISA adapter: 1. Read the documentation supplied with the adapter. 2. Copy any files with the extension of .CFG from the option diskette to the EISA Configuration Diskette. PC Server 520 - Type 8641 259 3. 4. 5. 6. 7. See “Files” on page 258 for important information about configuring ISA adapters. Start the EISA Configuration Diskette (see “Starting the EISA Configuration Diskette” on page 263). Record the new configuration information (see “Recording EISA Configuration Settings” on page 262). Save the new configuration settings to the EISA Configuration Diskette and to the nonvolatile random access memory (NVRAM) (see “Starting the EISA Configuration Diskette” on page 263). Set any jumpers or switches on the adapter. Install the adapter in the server. PCI Features and Options: PCI devices automatically communicate with the server's configuration information. This usually results in automatic configuration of a PCI device. If a conflict does occur, refer to “Configuration Conflicts” on page 274. Assigning Interrupt Levels: A rotational interrupt technique to is used to configure PCI adapters. This technique enables you to install a variety of PCI adapters that currently do not support sharing of PCI interrupts. Always use the IBM PC Server EISA Configuration Diskette for the system you are servicing when assigning interrupts for EISA and ISA adapters. You cannot assign an EISA or ISA adapter the same interrupt that you have assigned to a PCI adapter. This is because the server does not support interrupt sharing among PCI, EISA, and ISA adapters. If a situation occurs where you need an additional interrupt, you can use an interrupt from another function that you might not need, such as the IDE controller (Interrupt 14) or COM2 (Interrupt 3). Memory: After you add (or remove) extended memory, you must update the EISA Configuration Diskette. Note Not performing the following procedure could result in memory errors, and in the operating system not recognizing the added (or removed) memory. 1. Start the EISA Configuration Diskette (see “Starting the EISA Configuration Diskette” on page 263). 2. Select Step 3: View or edit details. The system information appears. 3. Under Advanced System Feature Setup, select Total System Memory. 4. Select the correct amount of memory, then press F10. 260 PC Server HMM Note It is possible to install single-inline-memory-modules (SIMMs) in combinations where the total amount of memory installed does not appear on the memory configuration screen. In the unlikely event that this occurs, select the next lower setting on the memory configuration menu, and all of the installed memory will be supported on the server. 5. Return to the Main Menu, save the configuration, and exit from the utility program. EISA Configuration Diskette: You must use the EISA Configuration Diskette anytime you want to change resource allocations, such as: Adding or removing devices Moving devices Changing device function Resolving conflicts Adding or removing PCI adapters Each time you use the EISA Configuration Diskette to configure the server, the configuration information is saved in a System Configuration Information (SCI) file and in the NVRAM configuration. Only devices that you install and configure correctly appear on the EISA Configuration screens. Backing Up the EISA Configuration Diskette: Use an operating system command, such as the DOS DISKCOPY command, to make a complete backup copy of the EISA Configuration Diskette. Using the backup copy can prevent damage to the original diskette. The operating system documentation provides information on backing up diskettes. Making Menu Selections: When you start the EISA Configuration Diskette, an introductory screen appears. Type CF at the prompt. After you press Enter, the main menu, Steps in configuring the computer, appears. The EISA Configuration program main menu contains five steps: Step 1 Important EISA configuration information: This step provides information about the differences between the ISA configuration process and the EISA configuration process. Step 2 Add or remove boards: If the server is configured correctly, this step provides a list of the devices installed in the EISA expansion slots. The Add choice allows you to add ISA devices to the configuration. If EISA adapters are PC Server 520 - Type 8641 261 installed in the server, and you have not copied the .CFG file to the EISA Configuration Diskette, you are prompted to insert the adapter's configuration diskette into the diskette drive. The .CFG file is copied to your diskette. If the adapter's .CFG file is copied to the EISA Configuration Diskette before starting the diskette, and the adapter is installed in the server, EISA devices are added automatically. Step 3 View or edit details: After adding EISA or ISA adapters in Step 2, use the Edit selection of this step to configure them. Use the Edit Resources selection of this step for complex configurations. If you change a setting in this step, you might have to change a switch or jumper setting on the system board or on a device. Step 4 Examine switches or print report: After Steps 1 and 2 have been completed correctly, this step displays the correct switch and jumper settings for the installed devices that have switches and jumpers. Also, you can choose to print a system configuration report. Step 5 Save and exit: This step allows you to save the configuration or to discard the changes before exiting the program. Use the Up Arrow (↑) or Down Arrow (↓) key to highlight your selection; then press Enter to make your selection. To help you track your progress, a checkmark (√) appears on the main menu next to the completed steps. You can access help information through: Help windows, which remain active. Information windows, which appear automatically as a result of some configuration activities. The Help=F1 prompt, which allows you to access the Help Menu for screens displaying the prompt. To remove the Help Menu, press Esc. Recording EISA Configuration Settings: Record the configuration settings you made in Step 3, View or edit details and Step 4, Examine switches or print report on a separate sheet and store it in a safe place for future reference. If a printer is attached to the server, you can use the Print Screen key to print these settings. The settings are helpful when you install additional options. Also, record the new settings each time you make changes. Be sure to record the current configuration settings for the user. 262 PC Server HMM Starting the EISA Configuration Diskette: Using a backup copy of the EISA Configuration Diskette can prevent damage to the original diskette (see “Backing Up the EISA Configuration Diskette” on page 261). To start the EISA Configuration Diskette, do the following: 1. Insert the EISA Configuration Diskette into the diskette drive. 2. Power-on the computer, or if it is already on, shut down the operating system and restart the computer. 3. When the first screen appears, type CF and press Enter. Follow the instructions on the screen until the main menu, Steps in configuring the computer, appears. 4. Use the Up Arrow (↑) or Down Arrow (↓) key to advance through the items on the screen. Use the Tab key to select choices on the bottom of the screen. Press the Esc key to return to a previous menu. 5. Press Enter to make a selection. 6. Follow the instructions on the screen to view or change (edit) the configuration information. Note Adapters installed in the server appear automatically on the EISA Configuration screens after you copy the adapter's configuration file (file with an extension of .CFG) to the EISA Configuration Diskette. If you want to manually add an adapter that you have not yet installed in the server, add it using Step 2 from the menu. To configure ISA adapters, follow the instructions on the screen. Using EISA Configuration Diskette Advanced Function: Locking an ISA adapter reserves the selected resources and prevents the system from using them to resolve resource conflicts. Use the Advanced function to lock ISA boards. An exclamation mark (!) appears next to locked adapters. To use the Advanced functions, do the following: 1. Start the EISA Configuration Diskette (see “Starting the EISA Configuration Diskette”). 2. At the main menu, select Step 3, The View or edit details screen appears. 3. Press F7. The Advanced functions screen appears. 4. Follow the instructions on the screen to: a. Lock or unlock boards b. View additional system information c. Set verification mode d. Maintain SCI files PC Server 520 - Type 8641 263 Configuration (Models MZO, MZV, MZS, MZE, MZL) The Configuration/Setup utility programs are stored in CMOS. These programs allow you to do the following. Set the system date and time Define input and output device parameters Define system security The PC Server 520 Reference Diskette and the PC Server 520 Diagnostic Diskettes, supplied with the server, provide additional configuration and diagnostic support for the system board, disk drives, and other system components. The PC Server 520 Micro Channel Diagnostic Diskette supports the Micro Channel adapters. The PC Server 520 (Models MXO, MXT, MYO, MYT, MYR) supports the following types of adapters. Peripheral Component Interconnect (PCI) Micro Channel Architecture Three hardware configuration utility programs are supplied with the server. Configuration/Setup SCSISelect System programs on the Reference and Diagnostic Diskettes The built-in Configuration/Setup utility program configures system board functions, such as serial and parallel port assignments and the startup sequence for drives installed in the server. It also allows you to set passwords for starting up and accessing the Configuration/Setup utility program. The built-in SCSI-2 utility program (SCSISelect Utility program) allows you to configure the SCSI devices that you install in the server. Use SCSISelect to change default values, resolve configuration conflicts, and perform a low-level format on a SCSI hard disk drive in a non-array model. See, “SCSISelect Utility Program” on page 547. 264 PC Server HMM The Reference and Diagnostic diskettes provide additional support for configuration and diagnostic activities. The Reference Diskette provides options for backing up and restoring the system diskettes, copying option diskettes, configuring Micro Channel adapters, and testing the computer. The PC Server 520 System Board Diagnostic Diskette provides diagnostic tests for the system board, disk drives, and other system components. The PC Server 520 Micro Channel Diagnostic Diskette provides diagnostic tests for Micro Channel adapters. Note Before installing a new device or program, read the documentation supplied with it. Reading the instructions helps you determine the steps required for installation and configuration. The following is a preview of the actions that might be required to configure the server. 1. Run the Configuration/Setup utility program and record the current configuration settings. 2. Set jumpers or switches on the server's system board. See “System Board Jumpers” on page 307. 3. Set jumpers or switches on the device. See the device installation instructions. 4. Install the device in the server. 5. Start the Reference Diskette and: a. Record the current settings. b. Install the configuration files (.CFG). 6. Install software programs. See the installation instructions supplied with the software. 7. Resolve configuration conflicts. See “Configuration Conflicts” on page 274. Using the Configuration/Setup Utility: The built-in Configuration/Setup utility program provides a convenient method to configure various system settings. The configuration information is stored in CMOS. In most cases, the server will operate using the default settings. Always run the Configuration/Setup utility program if you have added or removed any hardware option, or if you receive an error message instructing you to do so. Review the following information and the information supplied with the device before making changes. Note Record the current settings before making any changes. PC Server 520 - Type 8641 265 The following menu appears when you start the Configuration/Setup utility program. Included with each selection is a short description of its purpose. Note When a power-on password is entered and an administrator password also is set, a limited version of the menu appears. To change the settings, the administrator password must be entered. System Summary: Displays the current settings for all system functions, such as processor type, speed, and memory. You cannot change any information from this screen. Micro Channel Configuration: Displays the status of adapters in the Micro Channel expansion slots. For additional information, or to change the information displayed, you are prompted to insert the Reference Diskette. Product Data: Displays specific information about the server. Devices and I/O Ports: Displays a menu from which you can view or change the current settings for the serial and parallel ports, mouse, diskette drives, and video. Date and Time: Allows you to change the current date and time in the battery-backed memory. System Security: Allows you to set a power-on password, or to set an administrator (or supervisor-level) password. You also use this option to control access to a diskette drive, and to define a system owners name that displays on startup. Start Options: Allows you to select startup options such as the keyboard speed. You can also set the startup sequence of diskette and hard disk drives. Advanced Setup: Allows you to change system functions such as cache control and ROM shadowing. Changing Settings: In most cases, the server will operate using the default settings, and you need to change the settings only to resolve configuration conflicts or to enable or change device function (for example, defining diskette types). You can advance through the screens by pressing the Page Up (PgUp) or Page Down (PgDn) key. Use the Up Arrow (↑) or Down Arrow (↓) key to advance through the items on the screen. Change selections by first advancing to the item you want to change, then use the Right Arrow (→) or Left Arrow keys (←) to make the change. Press F1 for on-line Help information on for each selection. 266 PC Server HMM Starting the Configuration/Setup Utility Program Note If a configuration error occurs, a prompt appears before the operating system starts (see “Configuration Conflicts” on page 274). To access the Configuration/Setup utility program: 1. Power-on the server and watch the screen. 2. When the message Press F1 to enter Configuration/Setup appears, press F1. 3. Follow the instructions on the screen to view or change the configuration. 4. Select Exit Setup and press Enter. If you changed any settings, the utility program prompts you to confirm the changes. When you press Enter, the system restarts. Note You must correctly exit from the Configuration/Setup utility program to save the configuration information. Press Esc or move the cursor to the Exit Setup option on the menu bar, and then select Save changes and exit. System Summary: Select System Summary to view information about the system, including the type and speed of the microprocessor, amount of memory, and the number of disk drives connected to the server. Changes that you make on other menus are reflected on this summary screen. You cannot edit any of the fields. The System Summary choice appears on the full Configuration/Setup menu, and also on the limited Configuration/Setup user's menu. Micro Channel Configuration: Select Micro Channel Configuration to view or change the configuration of Micro Channel devices. The Micro Channel Configuration screen appears, displaying the status of adapters in the Micro Channel slots. To configure a Micro Channel adapter, or to change configuration settings on a Micro Channel adapter, the system prompts you to insert the Reference Diskette. The system programs Main Menu appears, and displays the following choices. 1. Start operating system PC Server 520 - Type 8641 267 2. 3. 4. 5. Backup of system diskettes Set/View Micro Channel Configuration Copy an option diskette Test the computer The Set/View Micro Channel Configuration utility program allows you to work with the configuration information for Micro Channel adapters. See “Using the System Diskettes” on page 252 for additional instructions. Press F3 to return to the Configuration/Setup menu without changing the Micro Channel adapter configuration. Micro Channel adapters and some other options are supplied with an Option Diskette. This diskette has files that the server uses to recognize the new option and set it up to operate correctly. The Micro Channel Configuration choice appears only on the full Configuration/Setup menu. Product Data: Select Product Data to view specific information about the PC Server 520, such as the machine type and model, the system serial number, the system board identifier, and the revision level or issue date of the flash EEPROM and BIOS. Changes that you make on other menus are reflected on this summary screen. You cannot edit any of the fields. The Product Data choice appears on the full Configuration/Setup menu, and also on the limited Configuration/Setup user's menu. Configuring Devices and I/O Ports: You can view or change the assignments for devices and ports. Some programs and devices require specific assignments. Review the documentation that comes with the device for more information. To view or change the assignments for devices, video, or serial or parallel ports: 1. Power-on the system. When the F1 prompt appears, press F1. The Configuration/Setup Utility menu appears. 2. Select Devices and I/O Ports. 3. Use the Up Arrow (↑) key or the Down Arrow (↓) key to highlight the assignment that you want to change. Use the Left Arrow (←) and Right Arrow (→) keys to scroll through the list of available choices and make a selection. If the assignment conflicts with another assignment, an asterisk appears next to the conflicting setting. You must change one of the conflicting settings to a value that does not conflict. 4. When you complete all changes to the menu, press Esc to return to the Configuration/Setup menu. 268 PC Server HMM Assigning Serial Ports: The system comes with two 9-pin serial ports. You can add serial ports by installing a serial adapter in one of the expansion slots. Software recognizes serial ports from their serial-port assignments. No two serial ports can have the same serial-port assignment. This normally is handled by the Configuration/Setup utility program, but you might have special hardware or software that requires you to change these assignments. You can set either serial port as Serial 1 through Serial 4. Configuring Video Options: The server supports a wide assortment of displays. Because characteristics of display types vary, you should review the documentation that came with the display to determine the display type and refresh rate. Select Video Setup, then use the Left Arrow (←) and Right Arrow (→) keys to advance through the list of available choices and make your selection. Date and Time: Select Date and Time to change or set values for the system date and time. You use this option to set the real-time clock in the server. The system time is in a 24-hour format: hour/minute/second. The system date is in standard format for your country, for example, in the United States, the format is Month/Day/Year. Select Date and Time, then use the Left Arrow (←) and Right Arrow (→) keys to advance through each data field. Type the new information; the system saves the information as you type it. The Date and Time choice appears only on the full Configuration/Setup menu. Defining System Security: To control access to the server, you can implement several of the security measures described in the User's Reference, including defining two levels of password protection, securing diskette access, and a system owners name that displays during startup. PC Server 520 - Type 8641 269 Notes 1. The default values for all security-related data fields are given in “Setup Program Default Settings Type 8641 (Models EZO, EZV, EZL, EZS, EZE)” on page 287 and “Setup Program Default Settings (Models MZO, MZV, MZS, MZE, MZL)” on page 288. 2. The System Security choice appears only on the full Configuration/Setup menu. After you set the power-on or administrator password, Enter password appears on the screen each time you power-on the server. (The passwords do not appear on the screen as you type them.) When you enter the correct password, OK appears on the screen. If you enter the wrong password, Incorrect password appears on the screen, and Enter password is again displayed. After three incorrect attempts, you must power-off the server and start again. Setting an Administrator Password: The administrator password (sometimes called the supervisor password) allows the administrator to control who has access to some features of the server, including the Configuration/Setup utility program. If an administrator password is set, the password must be entered to display the complete menu for the Configuration/Setup utility program. Otherwise, a limited version of the Configuration/Setup utility program menu appears; the user cannot change any settings. Notes 1. If an administrator password is set and then forgotten, it cannot be overridden or removed. 2. Before you set an administrator password, you must set the administrator password jumper to the change position. To set an administrator password: 1. Select Administrator Password on the System Security screen; then press Enter. The Administrator Password screen appears. 2. Type the password in the Enter Administrator Password data field. 3. Verify that you typed the correct password. If you did not type the correct password, press Esc, and type the correct password. 270 PC Server HMM 4. Repeat steps 2 on page 270 through 3 on page 270 for the Enter Administrator Password Again data field. 5. Select Set or Change Administrator Password to save the new password; then press Enter. The system prompts you to change the administrator password jumper to the locked position after changing the password. The password becomes effective immediately after you select Set or Change Administrator Password. You can use any combination of up to seven characters (A–Z, a–z, and 0–9) for the administrator password. Keep a record of the password in a secure place. To delete an administrator password: 1. Select Administrator Password on the System Security menu; then press Enter. The Administrator Password screen appears. 2. Select Delete Administrator Password; then press Enter. 3. A confirmation window appears. Press Enter to delete the administrator password. Press Esc to cancel the request and return to the System Security menu. Setting a Power-on Password: When a power-on password is set, you must enter a password each time you start the system. If you forget the power-on password, and an administrator password has been set, use the administrator password at the power-on prompt; then start the Configuration/Setup utility program and change the power-on password. If no administrator password has been set, you must remove the battery before you can set a new password. To set a power-on password: 1. Select Power-on Password on the System Security menu; then press Enter. The Power-on Password screen appears. 2. Type the password in the Enter Power-on password data field. 3. Verify that you typed the correct password. If you did not type the correct password, press Esc, and type the correct password. 4. Repeat steps 2 through 3 for the Enter Power-on Password Again data field. 5. Select Set or Change Power-on Password to save the new password. You can use any combination of up to seven characters (A–Z, a–z, and 0–9) for the power-on password. Keep a record of the password in a secure place. PC Server 520 - Type 8641 271 To delete a power-on password: 1. Select Power-on Password on the System Security menu; then press Enter. The Power-on Password menu appears. 2. Select Delete Power-on Password; then press Enter. 3. A confirmation window appears. Press Enter to delete the power-on password. Press Esc to cancel the request and return to the System Security menu. Defining a System Owners Name: When you specify a system owners name, that name will be displayed each time that your server is started. If the administrator password is enabled, the password must be entered before you can set, change, or delete the system owners name. 1. Select System Owners Name on the System Security screen, and press Enter. The System Owners Name screen appears. 2. Type the name in the Enter System Owners Name String data field. 3. Press the Down Arrow (↓) key to select the Set or Change System Owners Name data field. 4. Press Enter to set the name or change a previously defined name. You can use any combination of up to 15 characters and spaces in your system owners name. To delete the system owners name, select Delete Stored System Owners Name and press Enter. Restricting Access to Diskette Drives: The setting for the Secure Diskette Drives option controls who has access to the diskettes (user and administrator, or administrator only). Your server comes with this feature set to Enable, so that both the user and administrator have access to diskette drives. To change this setting so that the access to the diskette drives is disabled, select the System Security menu option and then select Secure Diskette Drives. Press the Left Arrow (←) or Right Arrow (→) key to toggle the entry to Disable in the Diskette Drive Access data field. If the administrator password is enabled, the password must be before you can change this setting. 272 PC Server HMM Defining the Start Options: Start options take effect when you start the server. You can select keyboard operating characteristics, such as the keyboard speed. You can also specify whether the keyboard number lock starts on or off. The server uses a startup sequence to determine the diskette drive, hard disk drive, or network adapter from which the operating system will be loaded. You can specify up to four devices in the Startup Device data fields. For example, you can define a startup sequence that checks for a startable diskette in the primary diskette drive, then checks the hard disk drive in bay 1. You can enable the server to run without checking for the presence or state of a monitor, keyboard, or diskette drive. The devices are disabled after the power-on self test (POST) completes and the operating system has loaded. This allows you to enter a password and update the Configuration/Setup utility program in keyboardless operation, and to start the system programs from the Reference Diskette in disketteless operation. You can select the tests that the server runs at startup. This includes the SureTest BIOS test tool and a virus detection test. In addition, you can also choose whether to run the power-on self test (POST) in enhanced or quick mode. Select Start Options, then use the Left Arrow (←) and Right Arrow (→) keys to advance through each data field. The Start Options choice appears only on the full Configuration/Setup menu. Advanced Setup: Select Advanced Setup to change values for advanced hardware features such as cache control and ROM shadowing. A warning message appears when you select this choice, to alert you that the system may malfunction if these options are configured incorrectly. Follow the instructions on the screen carefully. Select Advanced Setup, then use the Left Arrow (←) and Right Arrow (→) keys to advance through each data field. When you restart the server after adding or replacing an &cash., you must enable the cache. Use the following procedure: 1. 2. 3. 4. 5. Start the Configuration/Setup utility program. Select Advanced Setup. Select Cache Control. Select Cache State. Press the Left Arrow (←) or Right Arrow (→) key to change the cache state to Enabled. PC Server 520 - Type 8641 273 The Advanced Setup choice appears only on the full Configuration/Setup menu. Configuration Conflicts The resources used by a server consist of interrupt request levels (IRQs), direct memory access channels (DMAs), I/O ports (for example, serial and parallel), and memory. This information is useful when a resource configuration conflict occurs. Conflicts in the configuration occur if: A device is installed that requires the same resource as another device. (For example, if you install an ISA network adapter and an EISA network adapter, both requesting IRQ 5, only one of the adapters can be configured.) A device resource is changed (for example, changing jumper settings). A device function is changed (for example, assigning COM 1 to two different serial ports). An installed software program requires the same resource as a hardware device (for example, an expanded memory specification (EMS) device driver that uses the address required by the SVGA video adapter). The steps required to resolve a configuration error are determined by the number and variety of hardware devices and software programs install in the system. The following information for resolving these types of conflicts are divided by machine type and model number. General type and model information Resolving Hardware Configuration Conflicts Resolving Software Configuration Conflicts Changing the Software Configuration Type 8641 (Models EZO, EZV, EZL, EZS, EZE): If a hardware configuration error is detected, a configuration error message appears after the server completes POST, but before the operating system starts. You can bypass the error or start one of the configuration utility programs. Press F1 to bypass the error and load the operating system. Press F2 to start the Setup program. To start the EISA Configuration Diskette, insert the diskette in the diskette drive and press F1. The Setup program and the EISA Configuration program configure only the system hardware. These programs do not consider the requirements of the operating system or the application programs. Resolving Hardware Configuration Conflicts: Use the following information to help resolve hardware configuration conflicts: 274 PC Server HMM 1. Run the Setup program to view and change resources used by the system board functions. Record the current settings before making any changes. (See “Setup Program (Type 8641)” on page 286 for instructions.) 2. Determine which adapter or device is causing the error. The EISA Configuration program specifies how the server checks for resource conflicts. Initially, this verification mode is set to automatic. When the mode is set to automatic, the EISA Configuration program tries to resolve configuration conflicts for you. Use the Advanced selection of the EISA Configuration Diskette's View or edit details screen to change the setting (see “Using EISA Configuration Diskette Advanced Function” on page 263). If the automatic verification mode is set, the configuration program attempts to resolve conflicts for you. However, this might disable adapters or system board features. For example, if you choose IRQ 4 for an adapter, the program disables Serial Port 1, which uses IRQ 4. If this happens, and you do not want this feature disabled, choose another IRQ for the adapter. If you set the verification mode to manual, the configuration utility program does not try to resolve a conflict. Instead, you have to determine if a resource conflict has occurred and then resolve the conflict. When the verification mode is set to manual, an asterisk (*) appears on the View or edit details screen next to adapters in conflict. If the EISA Configuration program cannot resolve a configuration error, it deactivates the adapter and displays the deactivated status (<>) on the View or edit details screen. Use the Advanced selection of the EISA Configuration Diskette's View or edit details screen to update or copy the server's system configuration information file (see “Using EISA Configuration Diskette Advanced Function” on page 263). 3. Change configuration resource allocations. Use the built-in Setup program to view or change system board resource allocations. Use the Advanced selection of the EISA Configuration Diskette's View or edit details screen to view the available or the used system resources (see “Using EISA Configuration Diskette Advanced Function” on page 263). Use the Edit Changes selection to change resource allocations for complex configurations. 4. Change adapter jumpers or switches. Jumpers and switches define the system resources that a device can use. If the settings are incorrect or set to use a resource that cannot be shared, a conflict occurs and the device remains deactivated by the configuration PC Server 520 - Type 8641 275 program. Use the EISA Configuration Diskette's Step 4, Examine switches or print report screen to verify switches (see “Making Menu Selections” on page 136). Read the documentation supplied with the device. 5. Change system board jumpers or switches. Remove the cover; then, refer to the system-board diagram inside the server. 6. Remove the device or adapter. Some configurations are not supported (for example, you cannot operate the server with two ISA SVGA adapters installed). Resolving Software Configuration Conflicts: The memory-address space and interrupt levels (IRQs) used by some hardware options might conflict with addresses defined for use through application programs or the EMS. (EMS is used only with DOS.) If there is a conflict, one or more of the following conditions might exist: The system cannot load the operating system. The system does not work. An application program does not operate, or it returns an error. Screen messages indicate a conflict exists. You can resolve conflicts by changing either the software or the hardware configuration. Note Start the EISA Configuration Diskette to view the addresses used by the system board functions. Use the Advanced function of Step 3, View or edit details to view the addresses used by the adapters. (See “Using EISA Configuration Diskette Advanced Function” on page 263 for instructions.) The best way to resolve memory-address conflicts is to change the addresses used by the application program or the device driver. To do this, use the EISA Configuration program. If a device driver is causing a memory-address conflict, refer to the operating-system documentation or the documentation supplied with the device drivers. Type 8641 (Models EZO, EZV, EZL, EZS, EZE): If a hardware configuration error is detected, a configuration error message appears after the server completes POST and before the operating system is loaded. You can bypass the error by pressing Esc while the error message is displayed. The Configuration/Setup utility program configures only the system hardware. The program does not consider the 276 PC Server HMM requirements of the operating system or the application programs. Resolving Hardware Configuration Conflicts: Use the following information to help resolve hardware configuration conflicts: 1. Run the Configuration/Setup utility program to view and change resources used by the system board functions. Record the current settings before making any changes. (See “Setup Program (Type 8641)” on page 286 for instructions.) 2. Determine which adapter or device is causing the error. 3. Change configuration resource allocations. Use the built-in Configuration/Setup utility program to view or change system board resource allocations. Jumpers and switches define the system resources a device uses. If the settings are incorrect or set to use a resource that cannot be shared, a conflict occurs and the device will remain deactivated by the configuration program. 4. Change system board jumpers or switches. Refer to the system-board diagram inside the server or “System Board Jumpers” on page 307. 5. Remove the device or adapter. Some configurations are not supported (for example, you cannot operate the server with two PCI SVGA adapters installed). Resolving Software Configuration Conflicts: The memory-address space and interrupt levels (IRQs) used by some hardware options might conflict with addresses defined for use through application programs or the EMS. (EMS is used only with DOS.) If a conflict exists, one or more of the following conditions might exist: The system cannot load the operating system. The system does not work. An application program does not operate, or it returns an error. Screen messages indicate a conflict exists. You can resolve conflicts by changing either the software or the hardware configuration. Note Start the Configuration/Setup utility program to view the addresses used by the system board functions. Changing the Software Configuration: The best way to resolve memory-address conflicts is to change the addresses used by the application program or the device driver. This can be done by using the Configuration/Setup utility program. PC Server 520 - Type 8641 277 If a device driver is causing a memory-address conflict, refer to the operating-system documentation or the documentation supplied with the device drivers. Internal Drives (Type 8641) Adding different types of drives allows the server to read different types of media and store more data. Several types of drives are available, such as: Diskette Hard disk Rewritable optical disc Tape The server has hardware that allows you to replace a failed hard disk drive without powering off the server. Therefore, you have the advantage of continuing to operate your system while a hard disk drive is removed or installed. These drives are known as hot-swap drives. Hot-swap drives have a green light on the knob of the tray that contains the drive. If the drive has a good electrical connection upon installation, the light illuminates. The light blinks briefly during power-on. For disk-array models, the light also blinks if the drive malfunctions. For non-disk-array models, the light turns off if the drive malfunctions. Each hot-swappable drive that you plan to install must have a hot-swap drive-tray attached. Trays are available for two drive types: narrow and wide. The narrow tray has a 50-pin drive connector. The wide tray has a 68-pin drive connector. Internal drives are installed in bays. A diskette drive and a CD-ROM drive are preinstalled in bay A in all models. A removable CD storage compartment is shipped in bay B1. You can install two drives in bay B. You can install hot-swappable hard disk drives in banks C, D, and E only. Banks C, D, and E each contain six bays. Bank C supports up to six drives. However, the total number of SCSI drives that you can install in bay B and bank C combined is six, on a single SCSI cable. The number of preinstalled hard disk drives in bank C varies according to the model. You can install up to six drives in bank D and up to six drives in bank E. Note The bank letter-designations are located on both vertical rails on the front of the server. The bay-slot numbers are located on the top of bank C and the bottom of bank E. 278 PC Server HMM Open Bays CD-ROM Drive (Bay A1) Diskette Drive (Bay A2) B1 B2 Bank C Bays 1 - 6 Bank D Bays 1 - 6 Open Bays Bank E Bays 1 - 6 A bezel (sometimes called a cover plate or face plate) covers the front of bay B2 only. If you install a drive that uses removable media, such as diskettes, optical discs, or tapes, you might have to change this bezel. PC Server 520 - Type 8641 279 Considerations Bay A comes with one SCSI CD-ROM drive and one 3.5-inch, 1.44MB diskette drive. Bay A supports one 5.25-inch and one 3.5-inch, half-high diskette-interface device. Bay B supports: – One 5.25-inch, full-high, removable-media or non-removable-media device, or – One 5.25-inch, half-high, removable-media device and one 3.5-inch, half-high or one-inch high, removable-media device, or – Two 3.5-inch or two 5.25-inch, slim-high or half-high, removable-media devices Note Unless you install an additional SCSI cable, only one of the devices that is installed in bay B can be a SCSI device. You cannot install hot-swappable drives in bay B. The PC Server 520 supports eighteen 3.5-inch, slim-high, hot-swap hard disk drives, or nine 3.5-inch, half-high hard disk drives in the bottom three banks (C, D, and E). Banks C, D, and E can accommodate six slim-high drives or three half-high drives, or a combination of both drive sizes. If you use a combination, remember that one half-high drive uses the equivalent space of two slim-high drives. If you install drives in bank D or E, you must remove the fan assembly on the rear of the server, install a direct access storage device (DASD) backplane in bank D or E, and install an optional 220-watt power supply. For non-disk-array models, you might need to install an additional SCSI-2 adapter. An address jumper is located on the rear of each backplane. You must set the jumpers on these backplanes as described in “Hot-Swap Backplane (FRU No. 06H8388)” on page 512. SCSI Drives: Some drives have a special design called small computer system interface, or “SCSI.” This design allows you to attach multiple drives to a single SCSI-2 adapter. Note Any information about SCSI drives also applies to other SCSI devices, such as scanners and printers. The server comes with a SCSI-2 adapter. The number of preinstalled SCSI hard disk drives varies according to model. If you install additional SCSI devices, each SCSI 280 PC Server HMM device that is connected to the adapter needs a unique identification (ID) so that the SCSI-2 adapter can identify the devices and ensure that different devices do not attempt to transfer data at the same time. If you need to set IDs for SCSI devices, refer to the instructions that came with those devices. The server automatically sets SCSI IDs for hot-swap drives. These IDs are determined by the drive locations in the bays. The SCSI ID for the preinstalled 4X CD-ROM drive in bay A is set to 6, and the SCSI ID for the SCSI-2 adapter is set to 7. The processing sequence for SCSI devices is set according to their IDs. Through the SCSISelect utility program, you can specify the scanning order for these devices. That is, you can specify whether the scanning sequence proceeds from 0 to the highest-numbered SCSI ID, or whether it proceeds in descending order. The standard scanning sequence proceeds from 0 to 6, then 8 to 15. However, this convention does not apply if you use the reverse scan feature of the SCSISelect Utility program. Use the processing sequence that best suits the system configuration. See “Configure/View Host Adapter Settings” on page 547 for information about setting the scanning order. The SCSI-2 adapter has both internal and external ports. Depending on the server configuration, you can attach additional SCSI drives by chaining them (connecting them together with cables). Depending on the type of SCSI-2 adapter installed in the server, the adapter supports a total of 14 or 15 SCSI drives (internal and external). To configure the SCSI devices that you install in a non-disk-array model, use the built-in SCSI-2 adapter utility program, SCSISelect. See “SCSISelect Utility Program” on page 547. For disk-array models use the RAID configuration program. See “Disk Array Configuration” on page 461. There are two types of SCSI devices: wide and narrow. You must use 16-bit cables to attach wide devices. Use 8-bit cables to attach narrow devices. Wide device IDs can be set to any number from 0 to 15. Narrow devices can only have their IDs set from 0 to 7. The preinstalled 4X CD-ROM drive in bay A is a narrow device. Two devices connected to the same bus (internal or external) cannot have the same ID; however, you can use the same ID for an internal device and an external device. The primary partitions on SCSI drives that are connected to the internal bus on a given adapter are assigned drive letters before the external drives that are connected to the same adapter are assigned drive letters. If multiple adapters are installed in the server, the drives that are PC Server 520 - Type 8641 281 connected to the adapter in the lowest number expansion slot are assigned drive letters first. When SCSI devices are chained, both ends of the chain (cable) require a terminator. The purpose of these terminators is to ensure that the quality of the signal is maintained throughout the SCSI chain. If you attach SCSI devices (internal or external), you must terminate the last device in the chain, or the end of the cable must be terminated. Note The backplanes automatically set termination for all the drives in the hot-swap bays. ID 6 ID 5 ID 4 Terminator The SCSI-2 adapter automatically adjusts for termination. 282 PC Server HMM Power Supplies (Type 8641) The 520 computer is shipped with a primary power supply. An additional or optional power supply can be added to the computer. Connectors are used to transfer the primary power supply voltages and signals from the primary power supply to the optional power supply. The following illustrations show how the two power supplies are connected. Attention When replacing the primary power supply cover plate, rotate the plate 180°. (This will leave an opening for the primary power supply connector cable that connects to the optional power supply.) Failure to do so will cause the power supply connector cable to be crimped when the plate is replaced. Note Tabs are located on the side of each power supply to secure them together. Power Supply LED and Button: The power-good LED and button are located on the side of the primary power supply button. The LED (when lit) indicates that the power supply is good. If the LED fails to come on when the computer is powered-on, do the following: While observing the LED on the power supply, press the power supply button. If the LED fails to light (while you are holding the button in), you may have a defective power supply. If the LED lights when the button is pressed, go to “Power Supply Shutdowns” on page 285. PC Server 520 - Type 8641 283 Primary Power Supply Voltages: If the voltages are correct and the power supply fan runs, the power supply is OK. 2 3 5 A B C D Drive Connector 1 4 7 Power-Supply Connector −Lead Pin +Lead Pin 5 5 5 B B 3 4 7 D A V dc Minimum V dc Maximum +4.8 +11.52 −10.8 +4.8 +11.52 + 5.25 +12.6 −13.2 + 5.25 +12.6 Connectors P11, P12, and P13 −Lead Pin +Lead Pin 2 1 V dc Minimum V dc Maximum +11.52 +12.6 Optional Power Supply Drive Connector Voltages: If the voltages are correct and the power supply fan runs, the power supply is OK. A −Lead Pin +Lead Pin B B D A 284 PC Server HMM B C D V dc Minimum V dc Maximum + 4.8 + 11.52 + 5.25 +12.6 Power Supply Shutdowns: If the power supply shuts down, or appears to fail at power-on, you might have one of the following problems: Too many devices are set to start instantly. See “Setting the Motor-Start Jumper” on page 549. There are too many large-capacity devices installed (such as hard disk drives). The nominal operating current of the devices installed collectively exceeds the available current of the power supply. See the “Personal System/2 Installation Planning” guide (form number G41G-2927) for more information. Attention Unplug the power cord and wait two minutes before checking voltages to give the power supply capacitors time to discharge. Note Verify that the voltage-select switch (if applicable) is set for the correct voltage. If the voltages are correct and the Symptom-to-FRU index does not solve the problem, go to “Undetermined Problems” on page 552. PC Server 520 - Type 8641 285 Setup Program (Type 8641) To access the Setup program: 1. Remove all diskettes from the server. Note Never start the Setup program while using the EISA Configuration program. 2. Power-on the server and watch the screen. Be ready to act quickly. 3. After the IBM logo screen appears and then quickly disappears, you are prompted to Press <F1> or <F2> to enter SETUP. As soon as you see that prompt, press the correct F-key (F1 or F2). If the Setup program screen doesn't appear, restart the system and try again. Note If a configuration error occurs, a prompt appears before the operating system starts (see “Configuration Conflicts” on page 274). 4. Follow the instructions on the screen to view or change the configuration. You must correctly exit from the Setup program to save the configuration information. 5. Press Esc or move the cursor to the Exit menu option on the menu bar. 6. Select Exit menu from the menu bar. 7. Select Save changes and exit. 286 PC Server HMM Setup Program Default Settings Type 8641 (Models EZO, EZV, EZL, EZS, EZE) Option Default Value Boot sequence Cache State COM1 Port COM2 Port Diskette access Diskette check Diskette controller Diskette Drive A Diskette Drive B Hard disk boot sector Large disk DOS compatibility LPT Port LPT mode Memory gap Memory (Extended) Bank 0 Socket 1 Bank 0 Socket 2 Bank 1 Socket 3 Bank 1 Socket 4 Bank 2 Socket 5 Bank 2 Socket 6 Bank 3 Socket 7 Bank 3 Socket 8 Total Memory Memory (System) Password on boot Post errors Set supervisor password Set user password Setup prompt Supervisor Password is Swap diskettes User password is Video BIOS Video System A: then C: Enabled 3F8, IRQ 4 2F8, IRQ 3 User Disabled Enabled 1.44MB, 3.5 in. Not installed Normal DOS 378, IRQ 7 Output only Disabled 15MB 8MB Kit 8MB Kit 16MB 640MB Disabled Enabled Press Enter Press Enter Enabled Disabled Normal Disabled Shadowed SVGA PC Server 520 - Type 8641 287 Setup Program Default Settings (Models MZO, MZV, MZS, MZE, MZL) Option Default Value Cache State Cache Size Diskette Drive A: Diskette Drive B: Disketteless Operation Keyboard Numlock State Keyboard Speed Keyboardless Operation Mode Machine Type/Model Memory (Extended) Bank 0 socket Bank 0 socket Bank 1 socket Bank 1 socket Bank 2 socket Bank 2 socket Bank 3 Socket Bank 3 Socket Total Memory Memory (System) Memory (Type) Microprocessor Microprocessor Speed Monitor Horizontal Frequency Refresh Rate For (640x480) Refresh Rate For (800x600) Refresh Rate For (1024x768) Refresh Rate For (1280x1024) Refresh Rate For (1600x1200) Monitorless Operation Mouse Parallel Port Parallel Port Mode Parallel Port Mode (Extended) Power On Self Test ROM Shadowing F0000h – FFFFFh (System BIOS) E8000h – EFFFFh E0000h – E7FFFh DC000h – DFFFFh D8000h – DBFFFh D4000h – D7FFFh D0000h – D3FFFh CC000h – CFFFFh C8000h – CBFFFh C0000h – C7FFFh (Adapter Video BIOS) Secure Diskette Drives Serial Port A Address Serial Port B Address Shadow RAM Startup Drive (First) Startup Drive (Second) Startup Drive (Third) Startup Drive (Fourth) SureTest System ROM Video Controller Video Display Type Video Memory Virus Detection Enabled 256KB 1.44MB 3.5 in not installed Disabled On Fast Disabled 8641 360KB 16MB Kit 16MB Kit 288 PC Server HMM 32MB 640KB EOS Pentium 100 MHz Not Used 60 Hz Undefined Undefined Undefined Undefined Disabled Installed 3BCh – IRQ 7 Standard Enhanced Enabled Enabled Enabled Disabled Disabled Disabled Disabled Disabled Disabled Enabled Disabled 3F8h – IRQ 4 2F8h – IRQ 3 384KB Diskette Drive 0 Hard Disk 0 Disabled Disabled Disabled F000h — FFFFh SVGA User Defined 1024KB Enabled Specifications (Type 8641) Size With pedestal: – Depth: 755 mm (29.7 in.) 835 mm (32.8 in.) with cable cover – Height: 622 mm (24.5 in.) – Width: 353 mm (13.9 in.) Weight Minimum configuration as shipped: 31.29 kg (69 lb) Environment Air temperature – System on: 10° to 35° C (50° to 95° F) Altitude: 0 to 914 mm (3000 ft.) – System on: 10° to 32° C (50° to 90° F) Altitude: 914m (3000 ft.) to 2133 m (7000 ft.) – System off: 10° to 43° C (50° 110° F) Maximum Altitude: 2133 m (7000 ft.) Humidity – System on: 8% to 80% – System off 8% to 80% Maximum altitude: 2133 m (7000 ft.) Heat Output Approximate heat output in British Thermal Units (BTU) per hour – Minimum configuration: 150 BTU (44 watts) – Maximum configuration: 3600 BTU (1055 watts) Electrical Input Sine-wave input (50 to 60 Hz is required Input voltage – Low range - Minimum: 90 V ac - Maximum: 137 V ac – High range - Minimum: 180 V ac - Maximum: 265 V ac – Input kilovolt-amperes (kVA) approximately - Minimum configuration as shipped: 0.16 kVA - Maximum configuration: 1.0 kVA Total Power Available for Drives Nominal operating current allowed&: – +5 V dc line: 10 A base; 23 A with upgrade – +12 V dc line: 10 A base; 23 A with upgrade PC Server 520 - Type 8641 289 Symmetric Multiprocessors/Multiprocessing Some PC Server computers incorporate a 100MHz Pentium processor and a second upgradeability processor socket on the system board to support Symmetric Multiprocessors/Multiprocessing (SMP). The SMP capability extends processing performance by allowing tasks to be dispatched to the next available processor rather then being queued until the busy processor has completed its task. The SMP capability also provides a level of high availability in that with some operating systems, such as OS/2 SMP, run in a uni-processor mode if one of the processors should experience a failure. This function will allow the LAN to continue operation so that service can be scheduled at a non-critical time. System Board Replacement (Type 8641) Notes The clock speed jumper must be set to match the speed of the processor(s) installed on the system board. For system board socket and jumper locations, see: – “Locations (Models EZO, EZV, EZL, EZS, EZE)” on page 294 nopage., “System Board Locations” on page 298 for PCI/EISA models – “Locations (Models MZO, MZV, MZS, MZE, MZL)” on page 301 nopage., “System Board Locations” on page 305 for micro-channel models. Type 8641 computers have one or two processors, and other components installed on the system board. When replacing the system board, remove all of the installed components from the old system board and install them on the new system board. If the problem remains, check the following: The primary processor is installed and seated correctly in the primary processor socket on the system board If installed, the secondary processor is seated correctly in the secondary processor socket on the system board. All other components removed from the old system board are installed and seated correctly on the new system board. Note If the processor(s) are not seated correctly, intermittent problems can occur. 290 PC Server HMM Type 5 Adapter Installation (Type 8641, Models MZO, MZV, MZS, MZE, MZL) The PC Server Type 8641 (Models MZO, MZV, MZS, MZE, MZL) supports type 5 Adapters in Micro Channel expansion slots 5 and 6. However, because Type 5 adapters are longer and wider than standard Micro Channel adapters, the adapter support bracket must be repositioned. Note If the server was shipped with a PeerMaster adapter installed, the bracket has already been repositioned. 1. Remove the fan assembly: a. Disconnect the three fan assembly cables from the power supply. Attention To avoid damage and ensure proper server operation, handle the fan assembly carefully. b. Remove the two screws that hold the fan assembly in place. c. Remove the fan assembly by pulling it up and out. PC Server 520 - Type 8641 291 2. Press the raised area in the middle of the bracket; then, press the bracket toward the rear of the server and lift out. You might need a screwdriver to release the bracket from the server. 3. Reposition the card guides on the adapter support bracket: a. Lift the tabs on the top of the top card guide to release it from the bracket. b. Align the card guide tabs with the slots closest to the front of the bracket. The card guide will extend beyond the bracket. c. Hook the tabs on the bottom edge of the card guide on the flange on the back of the bracket; then press the card guide forward until it snaps into place. 4. Holding the bracket at an angle, insert the tabs on the back of the card guide into the slots closer to the front of the server. 5. Press the bracket to the right until it snaps into place. 6. Carefully reinstall the fan assembly with the two screws that you removed in step 1b on page 291. 292 PC Server HMM 7. Reconnect the fan assembly cables. PC Server 520 - Type 8641 293 Locations (Models EZO, EZV, EZL, EZS, EZE) “Controls/Indicators.” “Expansion Bays” on page 295. “Input/Output Connectors” on page 296 “Memory Module Connectors” on page 297. “System Board Locations” on page 298. “System Board Connections” on page 299. “System Board Jumpers” on page 299. Controls/Indicators Power OK Indicator Hard Disk Drive Activity Indicator Power On/Off Switch 294 PC Server HMM Expansion Bays Open Bays CD-ROM Drive (Bay A1) Diskette Drive (Bay A2) B1 B2 Bank C Bays 1 - 6 Bank D Bays 1 - 6 Open Bays Bank E Bays 1 - 6 Not For additional internal drive information, see “Internal Drives (Type 8641)” on page 278. The server comes with one 3.5-inch, 1.44MB diskette drive, a SCSI CD-ROM drive, and a removable CD-ROM storage compartment. The number of preinstalled hard disk drives in your server varies according to the model. CD-ROM Drive: All models come with a SCSI-2 CD-ROM drive. Diskette Drive: The 3.5-inch, 1.44MB diskette drive uses 1MB and 2MB diskettes. Open Bays: Your server has a special design that gives you the flexibility to use up to 18 hot-swappable, 3.5-inch hard disk drives. There is additional open space in the top left bay for two more diskette drives or an additional SCSI drive. For installation instructions and information on the types of drives that you can install in each bay, see “Configuration (Models MZO, MZV, MZS, MZE, MZL)” on page 264 or “Configuration (Models EZO, EZV, EZL, EZS, EZE)” on page 256. Hard Disk Drive: All models come with a SCSI-2 adapter. The number and capacity of the hard disk drives varies, depending on your model. PC Server 520 - Type 8641 295 Input/Output Connectors Display Connector Expansion Slots SCSI Connector (Non-Disk-Array Models) SCSI Connector (Disk-Array Models) Mouse Connector Keyboard Connector Serial Connectors Parallel Connector SCSI Connector Knockout Power Connector Power Connector: The power cable connects here. Keyboard Connector: The keyboard cable connects here. Mouse Connector: The mouse cable connects here. This port also is called an auxiliary-device or pointing-device port. Parallel Connector: One 25-pin parallel connector is provided. This is where the signal cable for a parallel printer or other parallel device connects to your server. SCSI Connector Knockout: This knockout allows access to the internal connector on a second SCSI-2 adapter. Serial Connectors: Two 9-pin serial connectors (A and B) are provided. The serial signal cable for a modem or other serial device usually connects here. If you are using a 25-pin signal cable, you need a 9-pin-to-25-pin adapter cable. SCSI Connector: External small computer system interface (SCSI) devices attach here. Display Connector: The display signal cable attaches to the connector on this adapter. 296 PC Server HMM Memory Module Connectors Bank 3 Bank 2 Bank 1 Bank 0 PC Server 520 - Type 8641 297 System Board Locations Note J9 J10 U39 U43 U44 U46 U47 Bank 2 W17 W21 Bank 1 FLASH BIOS W16 U38 Bank 0 W38 W31 W37 U36 J8 W33 W34 W32 J26 J11 J12 U35 J1 REAL TIME CLOCK W11 W10 J2 W23 W22 W25 W30 W20 A black square (■) indicates pin 1. Bank 3 J6 W6 J13 J23 PCI 3 J22 PCI 2 J21 PCI 1 W1 Shared PCI/EISA Slot MAIN UPGRADE J20 EISA Slot 6 J19 EISA Slot 5 J16 EISA Slot 2 J15 EISA Slot 1 298 PC Server HMM W5 U28 U27 U26 U25 CPU W36 U29 U30 U31 U32 Secondary Cache Memory Upgrade Sockets W2 W14 W13 W24 W18 J17 EISA Slot 3 W35 W15 CPU J18 EISA Slot 4 W12 System Board Connections Header Configuration Connect To W12/W31 Speaker Speaker W18/W37 Power LED Pins 1-3 W24/W38 IDE Hard Drive LED IDE Hard Drive W35 CPU Fan Connector Fan W36 CPU Fan Connector Fan J1/J2/J26 Power Supply Connector P1 to J1 P2 to J2 P3 to J26 J6 Mouse Connector Mouse J8 Keyboard Connector Keyboard J9 Parallel Port Connector Parallel Device J10 Floppy Drive Connector Diskette Drive J11 Serial Port COMM A Connector Serial Device J12 Serial Port COMM B Connector Serial Device J13 ISA IDE Connector IDE Hard Drive N/A SCSI LED SCSI Option Card N/A SCSI Device Connector SCSI Option Card System Board Jumpers Jumper Description Setting W1 L1 Cache Mode Open - L1 Write-Back (Default) Closed - L1 Write-Through W2 Reserved Open W5 L2 Cache Size Pins 1-2 - L2 Cache Size = 256K (Default) Pins 2-3 - L2 Cache Size = 512K W6 CPU Clock Pins 1-2 Pentium 60/90MHz Pins 2-3 Pentium 66/100MHz W10 Reserved Pins 2-3 (Default) W16 Reserved Pins 1-2 (Default) W17 Reserved Closed (Default) PC Server 520 - Type 8641 299 Jumper Description Setting W20 Monitor Selection Open - Monochrome Monitor Setting Closed - Color Monitor Setting (Default) W21 Reserved Open - AT Style Keyboard Closed - PS/2 Style Keyboard and Mouse (Default) W22 Reserved Open (Default) W23 Reserved Open (Default) W25 ISQ IDE IRQ Select Pins 1-2 - ISA IDE using IRQ 14 Primary IDE Controller (Default) Pins 2-3 - ISA IDE using IRQ 15 Secondary Controller W30 300 Reserved PC Server HMM Open (Default) Locations (Models MZO, MZV, MZS, MZE, MZL) “Controls/Indicators.” “Expansion Bays” on page 302. “Input/Output Connectors” on page 303 “Memory Module Connectors” on page 304 “System Board Locations” on page 305 “System Board Connections” on page 306 “System Board Jumpers” on page 307 Controls/Indicators Power OK Indicator Hard Disk Drive Activity Indicator Power On/Off Switch PC Server 520 - Type 8641 301 Expansion Bays Open Bays CD-ROM Drive (Bay A1) Diskette Drive (Bay A2) B1 B2 Bank C Bays 1 - 6 Bank D Bays 1 - 6 Open Bays Bank E Bays 1 - 6 Note For additional internal drive information, see “Internal Drives (Type 8641)” on page 278. Open Bays: Your server's special design gives you the flexibility to use combinations of 3.5-inch or 5.25-inch hard disk, tape, and rewritable optical disk drives. Your server can use up to 18 hot-swappable 3.5-inch hard disk drives. For additional internal drive information, see “Internal Drives (Type 8641)” on page 278. CD-ROM Drive: All models come with a SCSI 4X CD-ROM drive. Diskette Drive: The 3.5-inch, 1.44MB diskette drive uses 1MB or 2MB diskettes. Hard Disk Drive: The number and capacities of the hard disk drives vary, depending on your model. 302 PC Server HMM Input/Output Connectors Monitor Connector SCSI Connector (Disk-Array Model) Expansion Slots Mouse Connector Keyboard Connector SCSI Connector (Non-Disk-Array Model) Serial Connectors Parallel Connector Power Connector Display Connector: The display signal cable attaches to this connector. Mouse Connector: The mouse cable attaches to the server through this connector. The mouse connector sometimes is called an auxiliary-device or pointing-device port. Keyboard Connector: The cable from your keyboard connects here. SCSI Connector: External SCSI devices attach here. Serial Connectors: The server has two 9-pin serial connectors (A and B). The serial signal cable for a modem or other serial device usually connects here. If you are using a 25-pin signal cable, you need a 9-pin-to-25-pin adapter cable. For port assignments, see “Configuring Devices and I/O Ports” on page 268. Parallel Connector: The server has one 25-pin parallel port. This is where the signal cable for a parallel printer or other parallel device connects to your server. Power Connector: The server power cable connects here. PC Server 520 - Type 8641 303 Memory Module Connectors Bank 1 Bank 3 Bank 0 Bank 2 304 PC Server HMM System Board Locations Note A black square (■) indicates pin 1. J38 J21 J19 J24 J41 J25 J42 J28 J20 J39 J35 MCA SLOT 6 J29 MCA SLOT 5 J30 MCA SLOT 4 J31 J17 J15 MCA SLOT 3 J32 J10 MCA SLOT 2 J33 J2 MCA SLOT 1 J34 J16 PCI SLOT 2 J36 PCI SLOT 1 J37 J6 J8 J3 J4 J43 J12 J9 J27 Secondary CPU U26 J26 Primary CPU U1 J40 BTY J14 J5 PC Server 520 - Type 8641 305 System Board Connections Header Configuration Connect To J2 SCSI LED connector Yellow SCSI LED J3 IDE Hard Drive connector IDE hard drive J4 System Fan connector System fan J5 Cache Card Slot Cache Card J6 Speaker connector Speaker J8 Primary CPU Fan connector Fan J9 Secondary CPU Fan connector Fan J10 Power LED connector Pins 1-3 J13 IDE Hard Drive connector IDE hard drive J19 Parallel Port connector Parallel device J20 Diskette Drive connector Diskette drive J21 Serial Port COM 'B' connector Serial device J24 Serial Port COM 'A' connector Serial device J28 SCSI Standard connector SCSI device J35 SCSI Fast/Wide internal connector Internal SCSI Fast/Wide device J38 Power supply connector P1 and P2 J39 SCSI Fast/Wide external connector External SCSI Fast/Wide J40 Video connector Video J41 Keyboard connector Keyboard J42 Mouse connector Mouse 306 PC Server HMM System Board Jumpers Jumpers Description Setting J12 Spare Jumper Parked = Pin 1 only Default J15 Password Write Disabled = Pins 1-2 Enabled = Pins 2-3 Default J16 C2 Cover Open J17 C2 Key Lock J25 Reset switch J26 SCSI Select System Board = Pins 1-2 Default Adapter = Pins 2-3 J27 Video Select System Board = Pins 1-2 Default J43 Clock Select Adapter = 2-3 60MHz = Pins 1-2 50Mhz = Pins 2-3 PC Server 520 - Type 8641 307 Symptom-to-FRU Index This index supports Type 8641 computers. Always start with “General Checkout (QAPlus/PRO)” on page 4. The Symptom-to-FRU Index (QAPlus/PRO) Supplement lists symptoms, errors, and the possible causes. The most likely cause is listed first. Use this Symptom-to-FRU Index and the Symptom-to-FRU Index (QAPlus/PRO) in the PS/2 Hardware Maintenance Manual to help you decide which FRUs to have available when servicing the computer. In the following error codes and model numbers, X can be any number or letter. Where the model number is used to identify an error, XX used in place of the last 2 digits can be any number or letter. Note For IBM devices not supported by the QAPlus/PRO diagnostics code, refer to the manual for that device. For information on: Go to: Additional service help. (For example, voltage checks, 0S/2 Trap errors, or processor board errors) “Related Service Information” on page 107 in the PS/2 Hardware Maintenance Manual. Possible software and hardware mismatch problems. (Not repairable by replacing FRUs) “Software/Hardware Mismatch Problems” on page 181 in the PS/2 Hardware Maintenance Manual. Memory Configuration Problems “Memory” on page 260. “Resolving Memory-Address Conflicts” on page 408 in the PS/2 Hardware Maintenance Manual. Replacing the system board does not correct the problem. Error Code/Symptom See “System Board Replacement (Type 8641)” on page 290. FRU/Action 101, 102 (System and microprocessor error) 1. System Board 0103 (System Timer error) 1. System Board 106 (System and microprocessor error) 1. System Board 308 PC Server HMM Error Code/Symptom FRU/Action 0110 (Parity Check 1 XXXX, run Setup) 1. Memory SIMM 2. System Board 111 (I/O channel check error) 1. Memory SIMM 2. System Board 114 (Adapter read-only memory error) 1. Run Diagnostics 2. Failing Adapter 0115 (Parity Check 1 XXXX, run Setup) 1. Memory SIMM 2. System Board 0120 (Previous boot incomplete, default configuration used) 1. Run Setup 2. Battery/CMOS Chip 3. System Board 0130 (Invalid NVRAM media type) 1. Battery/CMOS Chip 2. System Board 151 (Real time clock error) 1. Run Diagnostics 2. System Board 161 (Real time clock battery error) 1. Battery 0162 (Models EXX) (Configuration error for slot XX, run Setup; then, run the EISA Configuration Utility) 1. Battery/CMOS Chip 2. System Board 162 (Type 8641 Models MXX) (Configuration error) 1. Run Configuration/Setup 0163 (Models EXX) (Real-Time Clock error) 1. Battery/CMOS Chip 2. System Board 163 (Type 8641 Models MXX) (Time of day not set) 1. Run Configuration, set time and date 164 (Memory configuration changed) 1. Run Configuration 165 (Micro Channel adapter configuration changed) 1. Run Configuration, insert Reference diskette 0171 (System battery is dead) 1. Battery/CMOS Chip 2. System Board 0173 (System CMOS checksum bad) 1. Run Setup 2. Battery/CMOS Chip 3. System Board 0174 (Invalid ISA Configuration) 1. Run Setup 2. Look for configuration conflicts. 3. Battery/CMOS Chip PC Server 520 - Type 8641 309 Error Code/Symptom FRU/Action 0175 (Models EXX) (EISA Configuration Error, run the configuration utility) 1. Run Setup 2. Run EISA Configuration Utility 3. Battery/CMOS Chip 4. System Board 175 (Type 8641 Models MXX) (Hardware error) 1. Run Diagnostics 2. System Board 176 (Computer cover or cable cover was removed without a key being used) 1. Run Configuration/Setup 177, 178 (Hardware error) 1. Run Diagnostics 2. System Board 184 (Power-on password corrupted) 1. Run Configuration/Setup 185 (Drive startup sequence information corrupted) 1. Run Configuration/Setup 186 (System board or security hardware error) 1. Run Configuration/Setup 2. System Board 189 (An attempt was made to access the computer with an invalid password) 1. Run Configuration, enter the administrator password 201 (Memory test error) 1. Memory SIMM 2. System Board 0214 (System RAM failed at offset XXXX) 1. Memory SIMM 2. System Board 0215 (Failing Bits XXXX) 1. Memory SIMM 2. System Board 0216 (Extended RAM failed at offset XXXX) 1. Memory SIMM 2. System Board 0221 (Shadow RAM failed at offset) 1. Memory SIMM 2. System Board 0254 (System board Cache error, Cache disabled) 1. System Board Cache 2. System Board 229 (Cache memory test error. Be sure the cache memory is enabled.) 1. Cache memory 2. System Board 0301 (Keyboard or keyboard controller error) 1. Keyboard 2. System Board 310 PC Server HMM Error Code/Symptom FRU/Action 0302 (Keyboard locked) 1. Unlock the keyboard 2. Keyboard 3. System Board 0303 (Keyboard Error, stuck key) 1. Keyboard 2. System Board 604 (Diskette drive error) 1. Diskette Drive 2. Drive Cable 3. System Board 0610 (Incorrect drive A type) 1. 2. 3. 4. Run Setup Diskette Drive System Board Diskette Drive Cable 0612 (Incorrect drive B type) 1. 2. 3. 4. Run Setup Diskette Drive System Board Diskette Drive Cable 0632 (Diskette drive A error) 1. 2. 3. 4. Run Setup Diskette Drive System Board Diskette Drive Cable 0642 (Diskette drive B error) 1. 2. 3. 4. Run Setup Diskette Drive System Board Diskette Drive Cable 662 (Diskette drive configuration error) 1. Run Configuration/Setup 762 (Processor configuration error) 1. Run Configuration/Setup 2. Run Diagnostics 962 (Parallel port error) 1. Disconnect external cable on parallel port. 2. Internal Cable 3. System Board 1162 (System-board serial port 1 or 2 error) 1. Disconnect external cable on serial port. 2. Run Configuration 1300 (Operating system not found) 1. Run Setup with known good diskette 2. Fixed Disk Drive 3. Fixed Disk Adapter 4. Diskette Drive 5. System Board 1701 (Fixed Disk X failed) 1. 2. 3. 4. Run Setup Fixed Disk Drive Fixed Disk Adapter System Board 1702 (Fixed Disk Drive Controller failed) 1. 2. 3. 4. Run Setup Fixed Disk Adapter Fixed Disk Drive System Board PC Server 520 - Type 8641 311 Error Code/Symptom FRU/Action 1801 (No room for PCI option ROM) 1. Run Reference Diskette 2. Failing Adapter 3. System Board 1802 (No more I/O space available for PCI adapter) 1. Run Reference Diskette 2. Failing Card 3. System Board 1803 (No more memory (above 1MB for PCI adapter) 1. Run Reference Diskette 2. Failing Card 3. System Board 1804 (No more memory (below 1MB for PCI adapter) 1. Run Reference Diskette 2. Failing Card 3. System Board 1805 (PCI option ROM checksum error) 1. Remove Failing PCI Card 2. System Board 1962 (No valid boot device found, be sure the drive you want to start from is the boot sequence) 1. Run Configuration/Setup 2. Run Diagnostics 3. Drive Cable 4. Hard Disk Drive 5. System Board 2401 (Monitor type does not match CMOS) 1. Run Setup and enter correct monitor type 2. Video Display 3. Video Adapter 4. System Board 2462 (Video controller error) 1. Display 2. System Board 000247100 (Type 8641) L2 processor cache was disabled, do the following 1. N/A Boot the system diagnostics. Run the processor tests. When asked if you want to turn on the processor cache, reply, "yes," and the error will be cleared. I9990301 (Fixed boot sector error, no operating system installed) 1. Install operating system to hard disk drive. 8601, 8603 (Pointing Device Error) 1. Pointing Device 2. System Board 312 PC Server HMM Checkpoint Codes During POST, the computer displays the status of the components being tested in the form of Checkpoint (CP) codes in the lower left-hand corner of the screen. The following is a list of the CP codes followed by the routine in process and the boot mode. CP Code Routine Boot Mode 01 Its_A_Reset Cold+Warm+Restore+Mfg+SAD 0D Init Chip_NS Cold+Warm+Restore+Mfg+SAD 12 Periph Init Cold+Warm+Restore+Mfg+SAD 03 Disable Video Cold+Warm+Restore+Mfg+SAD 05 Phase 1 Enter Big Real Cold+Warm+Restore+Mfg+SAD B0 Enable Local APIC Cold+Warm+Restore+Mfg+SAD 06 Cache Init Cold+Warm+Restore+Mfg+SAD 07 Init Refresh Cold+Restore+Mfg 08 Wait For RTC Cold+Restore+Mfg 0A Std CMOS Checksum NS Cold+Warm+Restore+Mfg 0B Mid CMOS Checksum NS Cold+Warm+Restore+Mfg 0C Ext CMOS Checksum NS Cold+Warm+Restore+Mfg 0E C SET_INIT Cold+Warm+Restore+Mfg+SAD 10 Check Parity NonParity Cold+Warm+Restore+Mfg 11 Disable Parity Cold+Warm+Restore+Mfg+SAD B1 Init Seattle Cold+Restore+Mfg+SAD 13 Test CPU Regs Cold+Restore+Mfg 14 Init RTC Cold+Warm+Restore+Mfg+SAD 16 Init Timer 0 Cold+Warm+Restore+Mfg+SAD 17 Init Timer 2 Cold+Warm+Restore+Mfg+SAD 18 Test DMA Cold+Warm+Restore+Mfg+SAD 19 Test Page Regs Cold+Warm+Restore+Mfg+SAD 1A Verify Refresh Cold+Restore+Mfg 1B Enable Parity Cold+Warm+Restore+Mfg+SAD 1C Save ID Warm SAD 1D Test First 64k Cold+Restore+Mfg 1E Clear First 64k Cold+Warm+Restore+Mfg 1F POST with Stack Cold+Warm+Restore+Mfg+SAD 20 Enable BIOSE000 SAD 21 BIOS Shadow Cold+Warm+Restore+Mfg B2 Shadow SCSI Cold+Warm+Restore+Mfg 23 Phase 2 POST Cold+Warm+Restore+Mfg+SAD 24 Enable BIOS F000 SAD 24 Shadow VPD Cold+Warm+Restore+Mfg PC Server 520 - Type 8641 313 CP Code Routine Boot Mode 25 Init Key Board Data Cold+Warm+Restore+Mfg+SAD 26 Save ID Cold+Warm+Restore+Mfg+SAD B3 Check P54C Cold+Mfg 27 Init Q Boot Cold+Warm+Restore+Mfg 28 Periph Config Cold+Warm+Restore+Mfg+SAD 2A Init Timeout Tables Cold+Warm+Restore+Mfg+SAD 2B Pos_Setup Cold+Warm+Restore+Mfg 2F Test DMA Locations Cold+Warm+Restore+Mfg+SAD B4 Init DMA Regs Cold+Warm+Restore+Mfg+SAD 30 Test PICs Cold+Warm+Restore+Mfg+SAD 31 Init Vector Table Cold+Warm+Restore+Mfg+SAD 32 Enable Timer Int Cold+Warm+Restore+Mfg+SAD 33 Init Keyboard Cold+Warm+Restore+Mfg+SAD 34 Clear Memory Size Error Cold+Restore+Mfg 35 Check Configuration Cold+Warm+Restore+Mfg 36 Mfg Boot Fork Cold+Restore+Mfg 37 PCI Reset Cold+Warm+Restore+Mfg B5 NVRAM check Cold+Warm+Restore+Mfg 38 PCI Video Cold+Warm+Restore+Mfg 3B Sign On Cold+Warm+Restore+Mfg 3C Test Timer Tick Cold+Restore+Mfg 3F Enable Video SAD 40 CSET BFR SIZMEM Cold+Warm+Restore+Mfg+SAD 41 Size Memory Above 64k Cold+Warm+Restore+Mfg 42 CSET AFT SIZ MEM Cold+Warm+Restore+Mfg 43 Test Timer 2 Cold+Warm+Restore+Mfg 44 Password Not Entered Cold+Restore 45 Test PS/2 Mouse Cold+Warm+Restore+Mfg 46 Check For Mouse Buttons Cold+Restore 47 Init Key Board Flags Cold+Warm+Restore+Mfg+SAD 48 Test Key Board Cold+Warm+Restore 4B Memory Test Prompt Cold+Warm+Mfg 4C Test Memory Cold+Restore+Mfg 4D Clear EBDA Warm 4E CSET AFT M TEST Cold+Warm+Restore+Mfg 4F Allocate EBDA Cold+Warm+Restore+Mfg B6 Set Planar Info Cold+Restore+ 314 PC Server HMM CP Code Routine Boot Mode 50 xfer ebda vars Cold+Warm+Restore+Mfg B7 Init P54M Cold+Warm+Restore+Mfg B8 Init MP Structures Cold+Warm+Restore+Mfg B9 CPU Speed Cold+Warm+Restore+Mfg+SAD 51 Set Warm Boot Flag Warm 52 Clear Speed Bits Cold+Warm+Mfg+SAD 53 E FLOB Cold+Warm+Restore+Mfg+SAD 54 Enable System Interrupts Cold+Warm+Restore+Mfg+SAD 55 C2 Security Check Restore 56 Init Key Board Cold+Warm+Restore+SAD 57 Test RTC Cold+Warm+Restore+SAD 58 Check For NPX Cold+Warm+Restore+Mfg+SAD 59 reset hdctl Cold+Warm+Restore+Mfg+SAD 5A FD INIT Cold+Warm+Restore+Mfg+SAD 5B Set Floppy Config Cold+Warm+Restore+Mfg+SAD BA Unlock Early Cold+Restore 5C Init A20 Cold+Warm+Restore+Mfg+SAD 5D Cache Config Cold+Warm+Restore+Mfg+SAD 5E HD SETUP Cold+Warm+Restore+Mfg+SAD 62 Verify CMOS Config Cold+Warm+Restore+Mfg 70 Check For Setup Hot Key Cold+Warm 63 Clear Screen Cold+Warm+Restore+SAD BB Init IRQ Levels Cold+Restore 65 IBM Cirrus DDC Cold BC PACP Arbitration Cold+Warm+Restore+Mfg+SAD BD Enable Planar SCSI Cold+Warm+Restore+Mfg+SAD 66 CSET BFR OPROM Cold+Warm+Restore+Mfg BE Do ROM Scan Cold+Warm+Restore 2C TCPC Cold+Warm+Restore+Mfg 49 TCPC Errors Cold+Warm+Restore 2D Find Serial Ports Cold+Warm+Restore+Mfg 2E Find Parallel Ports Cold+Warm+Restore+Mfg 68 CSET AFT OPROM Cold+Warm+Restore+Mfg BF Get MC Data Cold+Warm+Restore 69 PCI Configure Cold+Warm+Restore+Mfg 6A MFG Hook 65 MFG 6B Init Time Of Day Cold+Warm+Restore+Mfg+SAD PC Server 520 - Type 8641 315 CP Code Routine Boot Mode 6C Check For Locked Key Board Cold+Warm+Restore+SAD 6D Init Enable NMI Cold+Warm+Restore+Mfg+SAD 6E Set Boot Speed Cold+Warm+Restore+Mfg 6F Set Key Board LEDs Cold+Warm+SAD 71 Init Flush Key Board Cold+Warm+Restore+SAD 72 Move Error Log To EBDA Cold+Warm+Restore+Mfg 73 Init Disable Mouse Cold+Warm+Restore+Mfg+SAD 74 Sys Reset MFG 75 Phase 2 Exit Big Real Cold+Warm+Restore+Mfg+SAD 76 BOOT STRAP 1 Cold+Warm+MFG+SAD 78 SAD BOOT PROC SAD 79 Start Boot Sequence N/A 7A Read Boot Sector N.A 7B Boot Sector Read Complete N.A 7C Check for CE Boot Override N.A 7F Xfer to boot code N.A The following codes also produce a series of beeps. The series of beeps are listed for each code followed by an explanation of the code. CP Code Beeps Definition 82 1-1-3 CMOS write/read failure 83 1-1-4 BIOS ROM checksum failure 84 1-2-1 Programmable Interval Timer test failure 85 1-2-2 DMA initialization failure 86 1-2-3 DMA page register write/read test failure 87 1-2-4 RAM refresh verification failure 88 1-3-1 1st 64K RAM test failure 89 1-3-2 1st 64K RAM parity test failure 90 2-1-1 Slave DMA register test in-progress or failure 91 2-1-2 Master DMA register test in-progress or failure 92 2-1-3 Master interrupt mask register test failure 93 2-1-4 Slave interrupt mask register test failure 95 2-2-2 Key-board controller test failure 316 PC Server HMM CP Code Beeps Definition 99 2-3-2 Screen memory test in-progress or failure 9A 2-3-3 Screen retrace tests in-progress or failure 9B N/A Search for video ROM in-progress 9C N/A Screen believed operable - mode in low two bits 9D N/A Screen believed operable - mode in low two bits 9E N/A Screen believed operable - mode in low two bits 9F N/A Screen believed operable - mode in low two bits A0 3-1-1 Timer tick interrupt test failure A1 3-1-2 Interval timer channel 2 test failure A3 3-1-4 Time-Of-Day clock test failure A7 3-2-4 Comparing CMOS memory size against actual A8 3-3-1 Memory size mismatch occurred D0 N/A Cache State D1 N/A Cache Init D2 N/A Cache Restore D3 N/A Cache Config D4 N/A Cache Flush D5 N/A Cache Enable D6 N/A Cache Disable D7 N/A Cache Custom e1h N/A CSET BFR VIDROM e5h N/A CSET AFT CMCFG PC Server 520 - Type 8641 317 318 PC Server HMM 19 17 18 20 21 22 15 23 13 14 16 12 1 11 2 3 4 10 8 7 9 5 4A 6 Parts Listings System Note The model(s) listed for the following FRUs indicates FRUs that the models may contain at the time of shipping. However, other FRUs are supported in each model as options. Index System Unit (PC Server 520 - Type 8641) 1 2 3 3 4 4A 5 6 7 8 9 10 11 12 13 14 15 16 16 17 18 19 20 21 22 23 Base Frame LED Panel Assembly System Board with 512K Cache, without SVGA, SCSI (Models ED1, EDE, EDL, EZ1, EZS, EZE, EZL, ED0, EDV, EZ0, EZV) System Board with SVGA & SCSI, without Cache (Models MDE, MDL, MZS, MZE, MZL, MD0, MDV, MZO, MZV) Die Cast Assembly (Models ED1, EDE, EDL, EZ1, EZS, EZE, EZL, ED0, EDV, EZ0, EZV) Die Cast Assembly (Models MDE, MDL, MZS, MZE, MZL, MD0, MDV, MZO, MZV) Fan Mounting Support Right Side Door 3-Fan Assembly Pedestal Wheel with Axle 434W Power Supply Assembly 8-Card Guide 4-Card Guide Support (Models MDE, MDL, MZS, MZE, MZL, MD0, MDV, MZO, MZV) Pedestal CD-ROM Drive, see DASD (PC Server 520 - Type 8641) Diskette Drive see DASD (PC Server 520 - Type 8641) Hard Disk Drive, see DASD (PC Server 520 - Type 8641) DASD Tray Assembly - Hot Swap with Cable (Models ED1, EDE, EDL, ED0, EDV, MDE, MDL, MD0, MDV) DASD Tray Assembly - Hot Swap Wide (Models EZ1, EZS, EZE, EZL, EZ0, EZV, MZS, MZE, MZL, MZO, MZV) Front Bezel with Shield Keylock with Key DASD Door IBM Logo (restricted) 5.25-Inch Hard Disk Drive Bezels with Spacer Control Panel Bezel CD Storage Tray 06H8028 06H8031 06H9989 96G2648 06H9360 06H9361 82G3618 82G3594 06H3407 82G3609 06H3596 06H8057 82G3603 82G3608 06H8631 06H3956 06H8973 82G3606 82G3596 82G3601 06H8684 06H3595 06H5060 PC Server 520 - Type 8641 319 Index System Unit (PC Server 520 - Type 8641 continued) 16/8 Bit SCSI Converter 92F0324 512K Cache (Models MDE, MDL, MZS, 96G2413 MZE, MZL, MD0, MDV, MZO, MZV) 16MB EOS Memory SIMM (Models ED1, 11H0634 EDE, EDL, EZ1, EZS, EZE, EZL, ED0, EDV, EZ0, EZV) 16MB EOS Memory SIMM (Models MDE, 11H0646 MDL, MZS, MZE, MZL, MD0, MDV, MZO, MZV) DASD Hot Swap Backplane Assembly 06H8629 (Models ED1, EDE, EDL, ED0, EDV, MDE, MDL, MD0, MDV) DASD Hot Swap Backplane Assembly 06H8388 Models EZ1, EZS, EZE, EZL, EZ0, EZV, MZS, MZE, MZL, MZO, MZV) DASD Mounting Plate 82G3602 Ethernet PCI Card 82G3602 (Models EDL, EZL, MDL, MZL) Hinges (2 each) 82G3600 Hot Swap Cam Spring, Shaft & Knob 06H5059 Keyboard with Cable, see “Keyboards (101/102 Key)” on page 323) LED/Speaker, Power Switch 06H8037 Cable Assembly Memory High Rise Card 96G3692 (Models MDE, MDL, MD0, MDV) Memory High Rise Card 96G1339 (Models MZS, MZE, MZL, MZ0, MZV) Miscellaneous Parts Kit 82G3611 C2 Spring EMI Ground Clips (4 each) Lock Pawl Screws (4 each) System Board Mounting Boss (2 each) Mouse 06H4595 P54C 66/100MHz Processor Chip 75H8846 with Heat Sink (Models EZ1, EZS, EZE, EZL, EZ0, EZV) P54C 66/100MHz Processor Chip 96G2415 with Heat Sink (Models MZS, MZE, MZL, MZO, MZV) P54C 66/133MHz Processor Chip 96G2423 with Heat Sink (Models ED1, EDE, EDL, ED0, EDV) P54C 66/133MHz Processor Chip 06H9492 Models MDE, MDL, MD0, MDV) Power Supply Adapter Board 06H8977 SCSI-2 Hard File Card 06H5078 (Models ED1, EDE, EDL) SCSI-2 RAID PCI Card 06H5078 (Models EZ1, EZS, EZE, EZL) SCSI Fast/Wide Card 06H8574 (Models ED0, EDV, EZ0, EZV) Speaker with Bracket 33F8444 SVGA Card 06H9114 (Models ED1, EDE, EDL, ED0, EDV) SVGA Card 71G0031 (Models EZ1, EZS, EZE, EZL, EZ0, EZV) 320 PC Server HMM Index Power (PC Server 520 - Type 8641) Battery (Models MDE, MDL, MZS, MZE, MZL, MD0, MDV, MZO, MZV) see “Battery Notice” on page 461 Power Cord, see “Power Cords” on page 324. Real-Time Clock with Battery (Models ED1, EDE, EDL, EZ1, EZS, EZE, EZL, ED0, EDV, EZ0, EZV) see “Battery Notice” on page 461 Index DASD (PC Server 520 - Type 8641) 13 4X CD-ROM Drive 14 1.44MB Diskette Drive 15 2GB Hard Disk Drive Index Options (PC Server 520 - Type 8641) 220W Power Supply Assembly P54C 66/100MHz Processor Chip with Heat Sink 33F8354 06H3398 88G4921 93F2361 06H3372 06H3237 06H6063 PC Server 520 - Type 8641 321 Cables (PC Server 520 - Type 8641) 1 2 3 4 5 Index Cables (PC Server 520 - Type 8641) 1 System Status Cable (1X4) 06H3404 2 Diskette Drive Signal Cable 06H9345 Diskette Drive Power Cable 06H8982 3 SCSI-Fast/Wide Cable (1X) 06H6876 3 SCSI-Fast/Wide Cable (2X) 06H3751 3 SCSI-Fast/Wide Cable (3X) 06H6675 (Models ED0, EDV, MD0, MDV SCSI-Fast/Wide Cable (3X) 06H6661 (Models ED1, EDE, EDL, MDE, MDL) 4 Hard Disk Drive Power Cable (1X) 82G3610 5 SCSI Fast/Wide Flex Cable (1X) 06H6145 DASD Status Cable 06H9343 C2 Cable 82G3612 (Models MDE, MDL, MD0, MDV) C2 Cable 06H8059 (Models MZS, MZE, MZL, MZ0, MZV) Parallel Data Cable (Models ED1, EDE, EDL, 06H2166 EZ1, EZS, EZE, EZL, ED0, EDV, EZ0, EZV) POS ID Select Cable (Narrow) 06H3592 SCSI Fast/Wide ID Select Cable 06H3957 Serial Data Cable 2x (Models ED1, EDE, 06H2165 EDL, EZ1, EZS, EZE, EZL, ED0, EDV, EZ0, EZV) 322 PC Server HMM Keyboards (101/102 Key) Keyboards (101/102 Key) Arabic Belgium-Dutch Belgium-French Bulgarian Czech Danish Dutch Finnish French German Greek Hebrew Hungarian Iceland Italy Latvia Norwegian Polish Portuguese Romanian Russian-Cyrillic Serbian-Cyrillic Slovak Slovenia/Croatia/Bosnia South Africa Spanish Swedish Swiss-French Swiss-German Turkish 179 Turkish 440 U.K. English U.S. English U.S. English (E/ME/A use only) 1391490 1391414 1391526 1399583 1399570 1391407 1391511 1391411 1391402 1391403 1399046 1391408 1399581 1391495 1393395 1391406 1391409 1399580 1391410 1399582 1399579 1399578 1399571 1393669 1396790 1391405 1391411 1391412 1391412 8125409 1393286 1391406 06H9743 1396790 PC Server 520 - Type 8641 323 Power Cords Power Cords Arabic Belgium Bulgaria Czech Republic Denmark Finland France Germany Hungary Israel Italy Latvia Netherlands Norway Poland Portugal Serbia Slovakia South Africa Spain Switzerland Switzerland (French/German) U.S. English U.K./Ireland Yugoslavia 324 PC Server HMM 14F0033 1339520 1339520 1339520 13F9997 1339520 1339520 1339520 1339520 14F0087 14F0069 1339520 1339520 1339520 1339520 1339520 1339520 1339520 14F0015 1339520 1339520 14F0051 62X1045 14F0033 1339520 PC Server 720 - Type 8642 Features . . . . . . . . . . . . . . . . . . . . Diagnostic Information . . . . . . . . . . . . . . Additional Service Information . . . . . . . . . . Administration Monitoring Utilities . . . . . . . Advanced Functions . . . . . . . . . . . . . Backing Up Your Disk-Array Configuration . Restoring the Disk-Array Configuration . . . Using the Advanced Functions . . . . . . Changing the Write Policy . . . . . . . Formatting Drives . . . . . . . . . . . Changing the RAID Parameters . . . . Configuring the Disk Array . . . . . . . . . . RAID Technology . . . . . . . . . . . . . Hard Disk Drive Capacities . . . . . . . . Additional Storage Capacity . . . . . . . . The RAID Configuration Program Screens . DASD Tray SCSI IDs/LED (Hot-Swap) . . . . Drive Maintenance . . . . . . . . . . . . . . Obtaining Drive Status . . . . . . . . . . Bay/Array Selection List . . . . . . . . Results of a Hard Disk Drive Failure . . . . Logical and Hard Disk Drive Status Indications Replacing a Faulty Drive . . . . . . . . . Drivers . . . . . . . . . . . . . . . . . . . Front Operator Panel . . . . . . . . . . . . Front Panel Buttons . . . . . . . . . . . Menu Buttons and Enter Button . . . . Power Enable Button . . . . . . . . . Start/Stop Button . . . . . . . . . . . Installing Internal Drives (Type 8642) . . . . . Considerations . . . . . . . . . . . . . . LEDs—System Board and Adapter . . . . . . Light Emitting Diodes/Liquid Crystal Display . . Light Emitting Diodes . . . . . . . . . . . Liquid Crystal Display . . . . . . . . . . . Performing Common Tasks (RAID Configuration) Defining a Hot-Spare Drive . . . . . . . . Deleting a Disk Array . . . . . . . . . . . Creating a Disk Array . . . . . . . . . . . Adding Drives to Create an Additional Array Defining Logical Drives . . . . . . . . . . Power Supplies . . . . . . . . . . . . . . . Power Supply LED and Button . . . . . . Primary Power Supply Voltages . . . . . . Optional Power Supply Drive Connector Voltages . . . . . . . . . . . . . . . . Power Supply Shutdowns . . . . . . . . . Redefining Space in an Array . . . . . . . . . Removing a Drive from Bank C, D, or E . . . . Service Processor Requirements . . . . . . . Specifications . . . . . . . . . . . . . . . . 327 328 330 331 331 331 332 332 332 334 334 336 337 337 337 337 339 340 340 340 341 342 342 343 344 344 344 344 345 345 346 346 349 349 349 349 350 350 351 352 353 356 356 357 Copyright IBM Corp. 1996 325 357 358 359 361 362 363 Starting or Stopping the System . . . . . Starting or Powering-On the System . . Stopping or Powering-Off the System . Power-On/Off Scenarios . . . . . . . Starting the RAID Configuration Program . RAID Program Keys . . . . . . . . . Main Menu Selections . . . . . . . . Undetermined Failing Processor Diagnostics Viewing the RAID Configuration . . . . . Locations . . . . . . . . . . . . . . . . . . Bays . . . . . . . . . . . . . . . . . Connectors (Rear View) . . . . . . . . Controls/Indicators (Front View) . . . . Hot-Swap Backplane . . . . . . . . . SCSI ID Jumper . . . . . . . . . . ROM Address Jumper Setting . . . Termination (Hot-Swap Back Plane) SCSI-2 Fast/Wide RAID Adapter/A . . SCSI Fast/Wide Adaptec Adapter . . . System Board . . . . . . . . . . . . Symptom-to-FRU Index . . . . . . . . . . . Corollary Error Codes . . . . . . . . . . Checkpoint Codes (CP) . . . . . . . . Test Error Indication (EP) . . . . . . . Test Point Codes (TP) . . . . . . . . Multiprocessor Error Indication (IP and FP Codes) . . . . . . . . . . . . . . . Halt Indications (HALT) . . . . . . . . Micro Channel Error Symptoms/Codes . . No Beep Symptoms . . . . . . . . . Beep Symptoms . . . . . . . . . . . Error Codes . . . . . . . . . . . . . Error Messages . . . . . . . . . . . SCSI/Non-SCSI Error Code Format . . . . PCI Error Format and Error Codes/Messages Testing PCI Adapter Cards . . . . . . . . Accessing/Checking the PCI Device List . Parts Listing . . . . . . . . . . . . . . . . Keyboards (101/102 Key) . . . . . . . . Power Cords . . . . . . . . . . . . . . 326 PC Server HMM . . . . . . . . . . . . . . . . . . . . . . . . . . . . . . . . . . . . . . . . . . . . . . . . . . . . . . . . . . . . . . 365 365 365 366 366 366 367 369 369 370 370 371 372 373 373 373 373 374 374 375 376 376 377 379 380 . . . . . . . . . . . . . . 382 383 384 384 385 386 387 388 395 398 398 399 402 403 Features In addition to the following features, the Type 8642 Server is shipped with a ServerGuide package that contains a set of ServerGuide Compact Discs (CDs). The easiest and most efficient way to set up the Type 8642 server, install an operating system, and take advantage of the latest software for the network environment is to use the ServerGuide compact discs. See the ServerGuide CD documentation. Type → ———— Feature ↓ 8642-0Z0 8642-1Z0 8642-2ZS 8642-4ZS Processor Pentium Pentium Pentium Pentium Speed 66/100MHz 66/100MHz 66/100MHz 66/100MHz Processor Qty 1 1 2 4 Memory (60ns ECC) 64MB 64MB 64MB 64MB Video SVGA SVGA SVGA SVGA Hard Disk Drive Open Open 2x2 25GB 4x2 25GB RAID No Yes Yes Yes CD-ROM Drive Yes Yes Yes Yes Diskette Drive 2.88MB 2.88MB 2.88MB 2.88MB PC Server 720 computers incorporate additional processor slots on the system board for installing up-to six 66/100MHz Pentium processor cards to support Symmetric Multiprocessors/Multiprocessing (SMP). The SMP capability extends processing performance by allowing tasks to be dispatched to the next available processor rather then being queued until the busy processor has completed its task. The SMP capability also provides a level of high availability in that with some operating systems, such as OS/2 SMP, the system will run in a uni-processor mode if one of the processors should experience a failure. This function will allow the LAN to continue operation so that service can be scheduled at a non-critical time. Note The following is a list of minimal requirements for the Type 8642 computer to successfully complete POST: Bridge Card (1 each) Memory Card 64MB (1 each) Processor Card (1 each) PC Server 720 - Type 8642 327 Diagnostic Information The Server 720 is supported by the following diagnostic information and procedures. Additional information may be required for optional features not originally shipped with the computer. Important “General Checkout (Micro Channel)” on page 19 in the PS/2 Hardware Maintenance Manual. “Symptom-to-FRU Index (Micro Channel)” on page 26 in the PS/2 Hardware Maintenance Manual. “Related Service Information” on page 107 in the PS/2 Hardware Maintenance Manual. “Symptom-to-FRU Index” on page 376. “Additional Service Information” on page 330. “Self Diagnostics (AHA-2940/2940W Adapters)” on page 543. The following list contains problems and references for diagnosing a PC Server 720. Problem Reference Adapter LEDs “LEDs—System Board and Adapter” on page 346. Adaptec adapter LED stays on. “LED (AHA-2940/2940W Adapters)” on page 531. Hot-Swap Tray LED fails to light or blinks continuously “DASD Tray SCSI IDs/LED (Hot-Swap)” on page 339. Diagnostic errors Display problems Check point codes 328 PC Server HMM “Symptom-to-FRU Index” on page 376. “Symptom-to-FRU Index (Micro Channel)” on page 26 in the PS/2 Hardware Maintenance Manual. “Micro Channel Error Symptoms/Codes” on page 384. “Symptom-to-FRU Index (Micro Channel)” in the PS/2 Hardware Maintenance Manual. “Related Service Information” on page 107 in the PS/2 Hardware Maintenance Manual. “Corollary Error Codes” on page 376. Problem Reference Memory “General Checkout (Micro Channel)” on page 19 in the PS/2 Hardware Maintenance Manual. (Run the memory tests.) Micro Channel adapter problems/errors “Micro Channel Error Symptoms/Codes” on page 384. “Symptom-to-FRU Index (Micro Channel)” in the PS/2 Hardware Maintenance Manual. Miscellaneous “General Checkout (Micro Channel)” on page 19 in the PS/2 Hardware Maintenance Manual. PCI error “PCI Error Format and Error Codes/Messages” on page 395. POST error codes/messages “Corollary Error Codes” on page 376. Power supply shuts down, or appears to fail, at power-on. “Power Supply Shutdowns” on page 358. Power supply light goes out while the computer is powered-on. “Corollary Error Codes” on page 376. Power supply voltages “Power Supplies” on page 356. SCSI Fast/Wide Adaptec Adapter (AHA-2940W, FRU No. 06H6431) problems “Self Diagnostics (AHA-2940/2940W Adapters)” on page 543. SCSI-2 Fast/Wide RAID Adapter (FRU No. 06H3059) problems “SCSI/Non-SCSI Error Code Format” on page 388. System board LEDs “LEDs—System Board and Adapter” on page 346. System slows down or boots slowly. See “Undetermined Failing Processor Diagnostics” on page 369. Check the processors and the system board. PC Server 720 - Type 8642 329 Additional Service Information The following information is for the PC Server 720 Type 8642. 330 “Administration Monitoring Utilities” on page 331. “Advanced Functions” on page 331. “Configuring the Disk Array” on page 336. “DASD Tray SCSI IDs/LED (Hot-Swap)” on page 339. “Drive Maintenance” on page 340. “Drivers” on page 343. “Front Operator Panel” on page 344. “Installing Internal Drives (Type 8642)” on page 345. “LEDs—System Board and Adapter” on page 346. “Light Emitting Diodes/Liquid Crystal Display” on page 349. “Performing Common Tasks (RAID Configuration)” on page 349. “Power Supplies” on page 356. “Redefining Space in an Array” on page 359. “Removing a Drive from Bank C, D, or E” on page 361. “Service Processor Requirements” on page 362. “Specifications” on page 363. “Starting or Stopping the System” on page 365. “Starting the RAID Configuration Program” on page 366. “Undetermined Failing Processor Diagnostics” on page 369. “Viewing the RAID Configuration” on page 369. PC Server HMM Administration Monitoring Utilities Several of the operating systems that your server supports also support (for disk-array models) RAID monitoring programs. The monitoring programs are: OS/2 RAID Controller Administration and Monitor OS/2 RAID NetFinity/Alert Manager OS/2 RAID Controller Administration for NetWare IBM RAID Controller Administration for Banyan Vines These programs include many of the functions contained in the IBM RAID configuration program, but unlike that program, they reside on top of your operating system and do not require you to start the program from a startable diskette or from a startable compact disc. You can start these programs from your active operating system desktop. Each of these monitoring programs allow you view the RAID configuration, reconfigure the array when replacing a defective drive, and perform tuning tasks such as changing the write policy. To monitor the drive status with OS/2, Novell NetWare, Microsoft Windows, and Banyan Vines, you must run the administration programs. The RAID controller diskette contains files that must be installed when you use OS/2, NetWare, or Banyan Vines. See the README file on the RAID controller diskette for installation and usage instructions for OS/2 RAID Controller Administration and Monitor, OS/2 RAID Controller Administration for NetWare, and IBM RAID Controller Administration for Banyan Vines. For OS/2 RAID NetFinity Alert Manager, see the ServerGuide CD documentation. Advanced Functions You can select several utilities from the Advanced Functions menu. They include: Backup configuration to diskette Restore configuration to diskette Change the write policy Change the RAID parameters Format a drive Backing Up Your Disk-Array Configuration: The RAID adapter maintains a record of the disk-array configuration information in its EEPROM (electronically erasable programmable read-only memory) module. The disk-array configuration is vital information. To protect this information, back up the information to diskette as soon as you have completed your tasks. You need a blank, formatted, 3.5-inch diskette. PC Server 720 - Type 8642 331 To back up the disk-array configuration information to diskette: 1. Label the blank diskette “Disk Array Configuration Backup,” and date it. 2. Start the RAID configuration program. See “Starting the RAID Configuration Program” on page 366. 3. Select Advanced functions from the Main Menu. 4. Select Backup config. to diskette. 5. Remove the RAID controller diskette from the drive and insert the blank diskette. 6. Follow the instructions on the screen. Restoring the Disk-Array Configuration: To restore the disk-array configuration information in the RAID adapter EEPROM module, use the RAID controller diskette and an up-to-date Disk Array Configuration Backup diskette. Note Because dynamic changes in the configuration of your disk array occur due to hot-spare drive replacement or other drive maintenance activity, the configuration backup information on the diskette might be different from that in the adapter. It is important that you back up the disk-array configuration information frequently, to keep the backup information on the diskette current. To restore the RAID configuration information: 1. Insert the IBM RAID controller diskette into the primary drive and power-on the system. If the system is already on, press Ctrl+Alt+Del. 2. Select Advanced functions from the Main Menu. 3. Select Restore config. from diskette. 4. Follow the instructions on the screen. Using the Advanced Functions: This section gives the procedures for using the advanced functions, such as changing the write policy, changing the RAID parameters, and formatting a drive. Warnings appear throughout this section to alert you to potential loss of data and should be heeded before answering yes to the confirmations requested by the RAID configuration program. Changing the Write Policy: When you configure a logical drive, the RAID adapter automatically sets the write policy to write-through (WT) mode, where the completion status is sent after the data is written to the hard disk drive. To improve performance, you can change this write policy to write-back (WB) mode, where the completion status is sent after the data is copied to cache memory, but before the data is actually written to the storage device. 332 PC Server HMM Although you gain performance with write-back mode, it creates a greater risk of losing data due to a power failure. This is because the system gets a completion status message when the data reaches cache memory, but before data is actually written to the storage device. To change the write policy: 1. Start the RAID configuration program. See “Starting the RAID Configuration Program” on page 366. 2. Select Advanced functions from the Main Menu. 3. Select Change write policy from the Advanced Functions menu. The cursor will be active in the Logical Drive list. 4. Select the logical drive for which you want to change the write policy. The Advanced Functions screen appears. Note Your information might be different from that shown in this screen. The Logical Drive list shows you the logical drive ID, the size in megabytes of each logical drive, the RAID level you assigned to that logical drive, and the date you created it. The status of the logical drive is also shown. Good All is well with the drive. Critical Replace the hard disk drive and rebuild the logical drive. (You will have received a message telling you what has happened to the drive.) Offline The logical drive is unrecoverable; the data in that drive is lost. 5. Locate the Wrt pol (Write Policy) field in the Logical Drive list. The write policy is shown as either WT (write-through, which is the default setting) or WB (write-back). 6. Use the Up Arrow (↑) key or the Down Arrow (↓) key to select the logical drive for which you want to change the write policy. Warning If you change the write policy to write-back, wait at least 10 seconds after your last operation before you power-off the server. It takes that long for the system to move the data from the cache memory to the storage device. Failure to follow this practice can result in lost data. 7. Press Enter to change the write policy. Notice that WT changes to WB. You can press Enter to alternate between WT and WB. 8. When you have made your choice, press Esc to return to the Advanced Functions menu. PC Server 720 - Type 8642 333 9. Select Exit. The Confirm pop-up window appears asking you to confirm your action. 10. To return the setting to its original state, select No. To save your changes, select Yes. 11. Back up the disk-array configuration information to diskette. Refer to “Backing Up Your Disk-Array Configuration” on page 331 for more information. Formatting Drives: You can perform a low-level format on drives with RDY (ready), OFL (offline), or UNF (unformatted) status. Note The Format drive choice on the Advanced Functions menu provides a low-level format. If you install a new hard disk drive that requires a standard format, use the Format command provided by your operating system. The Format program works like the low-level format program in the advanced diagnostics portion of the system programs. It is provided in the IBM RAID configuration program so that you can perform a low-level format on a drive controlled by the RAID adapter. To perform a low-level format: 1. Start the RAID configuration program. See “Starting the RAID Configuration Program” on page 366. 2. Select Advanced functions from the Main Menu. Warning A low-level format erases all data and programs from the drive. 3. Select Format drive. The low-level format program starts. 4. Follow the instructions on the screen. You can perform a low-level format on more than one drive at a time. Changing the RAID Parameters: You can change the RAID parameters using the advanced functions by selecting Change RAID parameters. The default settings are: Stripe unit size — 8K The stripe unit size is the amount of data written on a given disk before writing on the next disk. To maximize the overall performance, this stripe unit should be chosen such that the stripe-unit size is close to the size of the system I/O request. The default is set to 8K data bytes. 334 PC Server HMM Warning Once the stripe unit is chosen and data is stored in the logical drives, the stripe unit cannot be changed without destroying data in the logical drives. Rebuild priority — Equal. Rebuild priority can be set to equal, high, or low. When set to equal, the rebuild I/O request and system I/O request get equal priority in the execution order. When set to high, the rebuild I/O request will get a higher priority than a system I/O request. In a heavily loaded system (with a high rate of system I/O requests), the high-priority rebuild can significantly reduce the disk rebuild time at the expense of degraded handling of I/O requests. When the rebuild priority is set to low, the rebuild I/O requests can execute only if there is no pending system I/O requests. In a moderate to heavily loaded system, low rebuild priority will increase the disk rebuild time significantly and provide better system performance. Note Rebuild priority can be changed without affecting data in the logical drives. Parity placement — RA. Warning Once a parity placement scheme is chosen and data stored, it cannot be changed without destroying data. Parity placement defines how parity is placed in the disk array with respect to data. The following illustration shows both the Left Symmetric (LS) and Right Asymmetric (RA) parity placement in a four-drive disk array. Here AAA, BBB, and CCC are the data stripe units, and PP0 is the corresponding parity. Similarly DDD, EEE, and FFF are the data stripe units, and PP1 is the corresponding parity. Right Asymmetric (RA) Disk 1 PPð DDD GGG JJJ Disk 2 AAA PP1 HHH KKK Disk 3 BBB EEE PP2 LLL Disk 4 CCC FFF III PP3 Left Symmetric (LS) Disk 1 AAA EEE III PP3 Disk 2 BBB FFF PP2 JJJ Disk 3 CCC PP1 GGG KKK PC Server 720 - Type 8642 Disk 4 PPð DDD HHH LLL 335 In some situations you may want to try LS parity placement to improve performance. The default parity placement is RA. Read ahead — On. Normally the IBM SCSI-2 Fast/Wide PCI-Bus RAID Adapter transfers data from disk to its local cache in steps of stripe-unit size. This provides excellent overall performance when workloads tend to be sequential. However, if the workload is random and system I/O requests are smaller than stripe-unit size, reading ahead to the end of the stripe unit will result in a wasted SCSI bus bandwidth and wasted disk utilization. When read-ahead is set to Off, the size of data transfer from the disk to local cache is equal to the system I/O request size, and no read-ahead to the end of the stripe unit is performed. Notes 1. The Read-ahead setting can be changed without destroying data in a logical drive. 2. When the configuration is saved on a diskette, the RAID parameters are saved also. Configuring the Disk Array The following information applies only to disk array models. Use this information to perform the tasks necessary to configure, add, change, or delete one or more disk arrays. If you did not create an IBM RAID controller diskette, see the ServerGuide CD documentation. Familiarize yourself with the information contained in this manual and the RAID (redundant array of independent disks) information in the User's Reference shipped with the server. Verify the disk-array configuration. The disk-array model comes configured as one logical drive. – To view the disk-array configuration, go to “Viewing the RAID Configuration” on page 369 and select View Configuration from the Main Menu. – To create a disk array, go to“Creating a Disk Array” on page 351. Back up the disk-array configuration. See “Backing Up Your Disk-Array Configuration” on page 331. After you configure the disk array, you can complete setup by installing an operating system (from the ServerGuide compact disc that was shipped with the server or from the diskettes that came with the operating system). To install an operating system from the ServerGuide CD, see the ServerGuide CD documentation. 336 PC Server HMM RAID Technology: RAID is the technology of grouping several hard disk drives in a server into an array that can be defined as a single logical drive. This logical drive then appears to the operating system as a single physical drive. This grouping technique greatly enhances logical-drive capacity and performance. In addition, if one of the hard disk drives fails (becomes defective), the server continues to run (with no operator intervention required) at reduced performance. The defective drive can be replaced without powering off the server (hot-swap). For more information about hot-swappable hard disk drives, see “Installing Internal Drives (Type 8642)” on page 345. Hard Disk Drive Capacities: With a server, it is important to understand the implications of hard disk drive capacities and how they influence the way you create disk arrays. Drives in the disk array can be of different capacities. For example, if the model came with two 1GB hard disk drives and you install a 2GB hard disk drive to create a RAID 5 disk array, the total capacity of the array is 3GB instead of 4GB. Therefore, when creating arrays it is wise to add drives of equal capacity. Additional Storage Capacity: When you add hard disk drives to the server, you must configure a new disk array before the drives can be used. You can either reconfigure the existing disk array to include the capacity offered with the added drives, or group the added drives into their own array (see “Adding Drives to Create an Additional Array” on page 352). You also can create an array with only one drive. The RAID Configuration Program Screens: When you configure the disk array, or even just view its configuration, you will be using the IBM RAID configuration program on the IBM SCSI-2 Fast/Wide Streaming-RAID Adapter/A Option Diskette (also called the IBM RAID controller diskette). The following figure is a compilation of many of the IBM RAID Controller Disk Array Configuration (also called the IBM RAID configuration program) screens. The list below the figure gives explanations of the numbered areas of the figure. 1. This pop-up allows you to select the RAID level you want to assign to the logical drive you are defining, and it allows you to select the logical drive size. You can enter the size, in megabytes, or you can accept the default value shown. When you need to confirm an action, the Confirm pop-up appears in this area. 2. You can select any of the choices that appear on the menus. PC Server 720 - Type 8642 337 3. The Bay/Array selection list shows each bay in the server (for each channel) numbered 1 through 7. The abbreviation in the bay indicates the status of the drive installed in the bay. Selections are made from this list to determine which bays (hard disk drives) are in the arrays. The letter to the right of the bay, identifies the array in which the hard disk drive in that bay is grouped. Note The Channel/Bay/Array area on the screen does not reflect the physical configuration of the server. The hard disk drives are installed in horizontal banks of bays (in banks C, D, and E there are 6 bays, numbered 1 through 6 from left to right). See “Installing Internal Drives (Type 8642)” on page 345 to see the physical location of the hard disk drives. 4. The Array list shows you the array ID and the size (in megabytes) of the array. Note The capacity (size) is shown in binary equivalent. When a drive is being rebuilt, this area, along with the Logical Drive list area, shows the progression of the rebuilding process. 5. The Logical Drive list identifies the logical drive (for example, A1), the size of the logical drive, the RAID level assigned to the logical drive, the date it was created, and the write policy. The status of the logical drive also is shown. Good All is well with the drive. Critical You must replace the drive or do a rebuild operation. (You will have received a message telling you the drive is in a Critical state.) Offline The logical drive is unrecoverable; the data in that drive is lost. When a drive is being rebuilt, this area, along with the Array list area, shows the progression of the rebuilding process. Note The capacity (size) is shown in binary equivalent. During an initialization process, the Write Policy area displays the percent initialized; during a synchronization process, it displays the percent synchronized. 6. The information area tells you the action you can perform on this screen or pop-up. 338 PC Server HMM DASD Tray SCSI IDs/LED (Hot-Swap) The SCSI IDs for DASD installed in the DASD Hot-Swap Tray Assembly (FRU number 06H3956) are set by the automatic configuration program for the computer. When a drive is initialized, the LED (mounted on the back of the tray in which the drive is installed) should blink a few times and then stay on. Continuous blinking or failure of the LED to stay on might be caused by one of the following. Note Always run the diagnostic programs for the computer you are servicing before replacing a FRU. The tray is not seated properly The computer is not configured properly The tray, backplane, or drive is defective PC Server 720 - Type 8642 339 Drive Maintenance The following section provides information about status indicators for logical and hard disk drives, and the results of a hard disk drive failure. It also contains procedures for replacing defective drives and for redefining the space in an array by replacing logical drives. Obtaining Drive Status: To see the ID, capacity, and other information about each of the hard disk drives attached to the RAID adapter: 1. Start the RAID configuration program. See “Starting the RAID Configuration Program” on page 366. 2. Select Drive information. 3. Use the Up Arrow (↑) key or the Down Arrow (↓) key to highlight each of the drives shown in the Bay/Array selection list. As a drive is highlighted, the information for that drive is shown at the bottom of the screen. 4. Press Esc to return to the Main Menu. Note The status of the hard disk drive determines the status of the logical drives in the array in which the hard disk is grouped. Bay/Array Selection List: The status of the drives in the Bay/Array selection list is defined as follows: Status Meaning CDR CD-ROM drive installed. DDD Disk Drive Defunct. The drive is an online or hot-spare drive that does not respond to commands. If a RDY drive is defective or powered down, it shows an empty bay (a blank status), not a DDD status. FMT Format. The drive is being reformatted. HSP Hot spare. The drive will replace a similar drive that becomes defective in real time. At that time, its status changes to ONL, and its array association is displayed. OFL Offline. The drive is a good drive that has replaced a defective drive in a RAID level 1 or level 5 array. It is associated with an array, but does not contain any valid data. The drive state remains OFL during the rebuild phase. 340 PC Server HMM Status Meaning ONL Online. The drive is part of an array. If this drive fails, logical drives defined in the array in which this drive is grouped will have a status of offline (if the logical drive is assigned RAID level 0 with a good status) or Critical (if the logical drive is assigned RAID level 1 or level 5 with a good status). RDY Ready. The drive is recognized by the adapter and is available for definition. TAP Tape drive installed. UFM Unformatted. The drive requires a low-level format before it can be used in an array. Blank Status Any of the following circumstances can cause the status area to be blank: No hard disk drive is installed in that bay. The bay contains a hard disk drive, but the drive is not inserted correctly. An array was deleted and a defective drive is still in the bay. A new drive was installed and the configuration program has not been restarted. (The status will change to RDY when the RAID configuration program is restarted.) Results of a Hard Disk Drive Failure: Depending on the circumstances, there can be several possible results from a drive failure. Example 1: Only one hard disk drive fails. A hot-spare drive is defined that is the same or greater size than the failed drive. The logical drives in the array are assigned RAID level 1, level 5, or a combination of these two levels. Then the hot spare will take over immediately. Note Data for logical drives assigned RAID levels 1 and 5 is maintained; however, system performance will be reduced. Hot-spare drive capability does not apply to logical drives assigned RAID level 0. Example 2: Only one hard disk drive fails. A hot-spare drive is not defined. The logical drives in the array are assigned RAID levels 1, 5, or a combination of these two levels. PC Server 720 - Type 8642 341 Then no data will be lost, but the system will operate at reduced performance until the defective drive is replaced and rebuilt. Example 3: If more than one drive fails, all data is lost. Therefore, it is important that you replace and rebuild a defective drive as soon as possible. Logical and Hard Disk Drive Status Indications: The status of the hard disk drive determines the status of the logical drives in the array in which the hard disk is grouped. A single hard disk drive failure (indicated by a DDD status in the Bay/Array selection list) causes logical drives in that array that are assigned levels 1 and 5 to have a Critical status. Data remains in logical drives with a Critical status, but you must replace the one defective hard disk drive promptly, because if two hard disk drives were to fail, all of the data in the array would be lost. After you install a new hard disk drive, the Replace process changes the drive status from DDD to OFL if there is a Critical logical drive. After the Rebuild process, the hard disk drive status changes from OFL to ONL. A single or multiple hard disk drive failure causes logical drives in that array that are assigned level 0 to have an offline status. Data in logical drives with an offline status is lost. However, with a multiple disk drive failure, when the defective drives are part of the same array, logical drives in that array will have an offline status. This means that data is lost in all the logical drives in that array, regardless of which RAID level is assigned. Replacing a Faulty Drive Note The hard disk drive indicator light will blink when the drive has failed and needs to be replaced (DDD state only). To replace a faulty drive: 1. Start the RAID configuration program. See “Starting the RAID Configuration Program” on page 366. If the drive failed while the system was powered down, a screen appears the next time the system is powered on showing you which drive is defective. 2. If the drive is not damaged (for example, it is not inserted correctly): a. Power-off the system. 342 PC Server HMM b. Correct the problem. c. Remove the diskette from the drive. d. Restart the system. 3. If the drive is defective: a. Press Y (Yes) to reconfigure the system. b. Press Ctrl+Alt+Del when instructed to restart the system. The Main Menu appears. c. Select Rebuild device. At this point, the drive status shows DDD. Warning Removing the wrong hard disk drive can cause loss of all data in the array. d. Replace the defective drive. Refer to “Removing a Drive from Bank C, D, or E” on page 361. e. After you have replaced the drive, press Enter. The system will reconfigure to include the drive, and the status of the drive will change to OFL. f. Allow the system to complete the configuration (the screen displays a completion message); then select Rebuild drive. g. Use the Up Arrow (↑) key or the Down Arrow (↓) key to highlight the OFL (offline) drive you want to rebuild; then press Enter. h. i. j. k. The progress of the rebuilding process appears on the screen. When the rebuilding process completes, press Esc to return to the Main Menu. The new configuration will be saved automatically. Back up the new configuration (see “Backing Up Your Disk-Array Configuration” on page 331). Select Exit to end the RAID configuration program. Remove the diskette and press Ctrl+Alt+Del to restart the system. Drivers The RAID adapter requires the installation of device drivers. See the README file on the RAID controller diskette for detailed instructions. If you install OS/2 from the ServerGuide CD, the device drivers will be installed automatically. If, however, you install OS/2 from diskette, you will need to install the device drivers. See the README file on the RAID controller diskette. PC Server 720 - Type 8642 343 Front Operator Panel The front panel (front operator panel) incorporates the standard function for System Maintenance Adapter Reporting Trouble (SMART). This panel consist of the following: “Light Emitting Diodes” on page 349. A 2-line by 16-character LCD display “Menu Buttons and Enter Button.” “Power Enable Button.” “Start/Stop Button” on page 345. Front Panel Buttons: The front operator panel contains seven buttons. Menu Buttons Enter Start/Stop Power Enable Menu Buttons and Enter Button: These buttons are currently non-functional. Power Enable Button: The power enable button acts as a logical emergency power-off switch. When pressed (set to off), the computer's power is immediately removed, all automatic and remote power-on functions are disabled, and the computer will not power-on until the power enable button is pressed again. Note This power enable button does not remove AC power from the power supply or the service processor logic on the system board. (See also “Starting or Stopping the System” on page 365.) 344 PC Server HMM Start/Stop Button: The start/stop button implements manual power-on/off functions under software control. (See also “Starting or Stopping the System” on page 365.) Installing Internal Drives (Type 8642) The Type 8642 server supports the following drive types: Diskette Hard disk Rewritable optical disc Tape The server has hardware that lets you replace a failed hard disk drive without powering-off the server. Therefore, you have the advantage of continuing to operate your system while a hard disk drive is removed or installed. These drives are also known as hot-swappable drives. Hot-swappable drives have a green LED that shines through the knob on the tray containing the drive. If the drive has a good electrical connection upon installation, the LED illuminates. The LED blinks briefly during power-up, and also blinks if the drive malfunctions. Internal drives are installed in bays. A diskette drive and a CD-ROM drive are preinstalled in bay A in all models. A removable CD storage compartment is shipped in bay B1. You can install two drives in bay B. You can install hot-swappable hard disk drives in banks C, D, and E only. Banks C, D, and E each contain six bays. Bank C supports up to six drives. However, the total number of SCSI drives that you can install in bay B and bank C is six. The number of preinstalled hard disk drives in bank C varies according to the model you purchased. You can install up to six drives in bank D and up to six drives in bank E. Note The bank letter-designations are located on both vertical rails on the front of the server. The bay-slot numbers are located on the top of bank C and the bottom of bank E. A cover plate (sometimes called a bezel or face plate) covers the front of bay B2 only. If you install a drive that uses removable media (diskette, optical disc, tape), you might install and adjust the cover plate after you install the drive in bay B2. PC Server 720 - Type 8642 345 Considerations Bay A comes with one SCSI CD-ROM drive and one 3.5-inch, 2.88MB diskette drive. Bay B supports: – One 5.25-inch, full-high, removable-media or non-removable-media device, or – One 5.25-inch, half-high, removable-media device and one 3.5-inch, half-high, removable-media device, or – Two 3.5-inch or two 5.25-inch, slim-high or half-high, removable-media devices. Note Only one of the devices installed in bay B can be a SCSI device. You cannot install hot-swappable drives in bay B. Supports eighteen 3.5-inch, slim-high, hot-swappable hard disk drives, or nine 3.5-inch, half-high hard disk drives in the bottom three banks (C, D, and E). Banks C, D, and E can accommodate six slim-high drives or three half-high drives, or a combination of both drive sizes. If you use a combination, remember that one half-high drive uses the equivalent space of two slim-high drives. If you install drives in bank D or E, you will remove the fan assembly on the rear of the server, install a direct access storage device (DASD) backplane in banks D and E, and install an optional 220-watt power supply. Each backplane has six connectors, to support up to six hard disk drives. LEDs—System Board and Adapter LED(s) are located on the system board, bridge card, processor card, and memory card. The LEDs indicate conditions listed on the following pages. 346 PC Server HMM PC Server 720 - Type 8642 347 LED On During and after normal initialization of the bridge card During initialization of the memory card During initialization of the memory card During initialization and when there is activity on the processor During initialization and when there is activity on the processor When the computer is powered-off Component System Board Slot LEDs: B1 (bridge card slot) M1 (memory card slot) M2/P1 (with memory card installed) M2/P1 (with processor card installed) P2 thru P6 (with processor card installed) Micro Channel slots When the computer is powered-on No activity on the processor Software problem preventing initialization of the card Defective LED Defective processor card No activity on the processor Software problem preventing initialization of the card Defective LED Defective processor card Successful initialization of the memory card complete Successful initialization of the memory card complete Software problem preventing initialization of the card Defective LED Defective bridge card LED Off 348 PC Server HMM LED On During and after normal initialization of the bridge card During initialization of the memory card During initialization and when there is activity on the processor Component Bridge card LED Memory card LED(s) Processor card LED(s) No activity on the processor Software problem preventing initialization of the card Defective LED Defective processor card Successful initialization of the memory card complete Software problem preventing initialization of the card Defective LED Defective bridge card LED Off Light Emitting Diodes/Liquid Crystal Display 4 1 5 2 6 3 Light Emitting Diodes: The following is a list of the front operator panel light emitting diodes (LEDs) followed by the definition for each LED. Color Indications Green = proper operation Yellow = alert condition LED Number Definition 1 Hard disk drive activity 2 DASD error 3 Processor Complex Error 4 Color green (POWER GOOD) 5 Color green (POWER Enabled) 6 Color green (All subsystems good) Liquid Crystal Display: The Liquid Crystal Display (LCD) on the front operator panel contains a 2-line by 16-character LCD (front panel display) driven by the 80C752 microprocessor. The front panel display receives and transmits ASCII characters. The LCD supports the upper- and lower-case ASCII character set. Errors detected by the computer might be displayed on the LCD and/or on the standard display attached to the computer. This is helpful when a display is not attached to the computer or the attached display is inoperative. Performing Common Tasks (RAID Configuration) The Create/Delete Array menu of the RAID configuration program contains the more common tasks for configuring disk arrays. Procedures to complete these tasks are contained in this section as follows: “Defining a Hot-Spare Drive” on page 350 “Deleting a Disk Array” on page 350 “Creating a Disk Array” on page 351 “Defining Logical Drives” on page 353 PC Server 720 - Type 8642 349 Defining a Hot-Spare Drive: To define a drive as a hot-spare drive: 1. Start the RAID configuration program. See “Starting the RAID Configuration Program” on page 366. 2. Select Create/delete array from the Main Menu. The Create/Delete Array screen appears. 3. Select Define hot-spare drive. The cursor will become active in the Bay/Array selection list. Note Only SCSI hard disk drives are shown as RDY, ONL, DDD, OFL, or HSP state. SCSI tape and CD-ROM drives are not shown. They appear when you select drive information. Refer to “Bay/Array Selection List” on page 340 for the drive status meanings. 4. 5. 6. 7. The numbers shown on the left are the bay IDs. See “Installing Internal Drives (Type 8642)” on page 345 for an explanation of the bay IDs. Use the Up Arrow (↑) key or the Down Arrow (↓) key to highlight the RDY (ready) drive you want to define as the hot spare; then press Enter. The RDY changes to HSP (hot spare). You can press Enter again to toggle between HSP and RDY. Press Esc when you have finished. The cursor will become active in the Create/Delete Array menu. If you want to create a disk array, go to “Creating a Disk Array” on page 351. If you are finished: a. Select Exit or press Esc. A pop-up window will appear asking you to confirm your change. Note The changes you make are not saved until you confirm them by selecting Yes in the Confirm pop-up window. b. Select No if you do not want the drive you selected to be a hot spare; select Yes to define it as a hot-spare drive. c. Back up the disk-array configuration information to diskette. Refer to “Backing Up Your Disk-Array Configuration” on page 331 for instructions. Deleting a Disk Array: The last array created must be the first deleted. Warning All the data and programs in the array are lost during this procedure. Before proceeding, back up any data and programs that you want to save. 350 PC Server HMM To delete a disk array: 1. Start the RAID configuration program. See “Starting the RAID Configuration Program” on page 366. 2. Select Create/delete array from the Main Menu. 3. Select Delete disk array from the Create/Delete Array menu. The cursor will be active in the Array list. 4. Review the Date Created column in the Logical Drive list; then press the Up Arrow (↑) key or the Down Arrow (↓) key to highlight the most recently defined array. 5. Press Del. The Confirm pop-up window appears. 6. If you do not want to delete the array, select No. To delete the array, select Yes. Note To use hard disks from the existing array when creating a new array, you must confirm the deletion of the existing array. If a defective drive is still in a bay, the status shows a blank bay, as though there is no drive in that bay. When you replace the drive, the status will show RDY after you reconfigure and select Yes in the Confirm pop-up window. Note In some operating systems, deleting an array and associated logical drives might change the drive letters assigned to the existing drives. Creating a Disk Array: To create a disk array: 1. Start the RAID configuration program. See “Starting the RAID Configuration Program” on page 366. Note To create an array using hard disks in an existing array, refer to “Redefining Space in an Array” on page 359. 2. Select Create/delete array from the Main Menu. 3. Select Create disk array from the Create/Delete Array menu. The cursor will be active in the Bay/Array selection list. PC Server 720 - Type 8642 351 Important In the following step, when you press Enter to select a drive for an array, you cannot deselect it by pressing Enter again, as you can with the hot-spare selection process. Carefully determine which drives you want to include in the array before beginning the selection process. If you change your mind after selecting the drives for an array, you can delete the array (by selecting Delete disk array from the Create/Delete Array menu) and begin again. 4. Select each drive you want in the array by using the Up Arrow (↑) key or the Down Arrow (↓) key to highlight the drive and then pressing Enter. As you select each drive, the status will change from RDY (Ready) to ONL (Online). 5. When you have selected all the drives you want to include in the array, press Esc. The cursor will become active in the menu. 6. If you have drives you did not use in this array and you want to create another array, you can do one of the following: Define the logical drive or drives for this array; then create another array and its logical drives. See “Defining Logical Drives” on page 353. Create another array now by repeating steps 2 through 5 in this procedure; then define logical drives for both arrays. Note You must define at least one logical drive for each created array before you can exit the configuration program. Continue with “Defining Logical Drives” on page 353. Adding Drives to Create an Additional Array: To add storage capacity to your server without disturbing existing data: 1. Install the additional hard disk drive or drives. (See “Installing Internal Drives (Type 8642)” on page 345.) 2. Start the RAID configuration program. (See “Starting the RAID Configuration Program” on page 366.) 3. Create a new disk array and define logical drives. (See “Creating a Disk Array” on page 351 for additional information.) 352 PC Server HMM Defining Logical Drives: After you have created an array, you must define a logical drive. (You cannot leave the RAID configuration program until you define the logical drives for any created arrays.) To define a logical drive: 1. Select Define Logical drive from the Create/Delete Array menu. The Create/Delete Array menu screen appears; the cursor is active in the Array list. 2. Use the Up Arrow (↑) key or the Down Arrow (↓) key to highlight the array you want to define; then press Enter. The Select RAID Level pop-up window appears, and the cursor is active in the window. Note The system automatically assigns RAID level 0 to any logical drives defined in an array containing only one hard disk drive. When this is the case, the Select RAID Level pop-up window will not appear. If you have only two hard disk drives in the array, the Select RAID Level pop-up window appears, but RAID level 5 is not selectable because you need at least three hard disk drives in an array to assign RAID level 5 to one of the logical drives. You can define more than one logical drive for your array. The only restriction is that the maximum number of logical drives you can define is eight. 3. Use the Up Arrow (↑) key or the Down Arrow (↓) key to highlight the RAID level you want to assign to these logical drives, then press Enter. Note Because the level you assign can influence the space needed for the drive, you must assign a RAID level before you enter the size of the logical drive. The Logical Drive list shows you the logical drive ID, the size of each logical drive, the RAID level you assigned to that logical drive, and the date that the logical drive was created. The status of the logical drive also is shown. Good All is well with the drive. Critical You must replace the hard disk drive or do a rebuild operation. (You will have received a message telling you what has happened to the drive.) Offline The logical drive is unrecoverable; the data on that drive is lost. The Logical Drive Size pop-up window shows the space in this array that is available for logical drives. PC Server 720 - Type 8642 353 4. Type the size, in megabytes, that you want for the logical drive; then press Enter. A pop-up window appears asking you to confirm your action. Information about the new logical drive appears in the Logical Drive list. Note The size appearing in the Logical Drive list might be different from the size you typed because it appears in binary equivalent. The size of a logical drive is determined by a number of factors, but basically the size must be divisible by the number of drives in the array. Consider the following examples: Example 1: There are three 1GB drives in the array. You assign RAID level 0 (which uses all the drives in the array with no parity storage), and type “1000MB.” The “Size (MB)” will be 999, which is the number closest to and lower than 1000 that is divisible by 3. Example 2: There are three 1GB drives in the array, and you assign RAID level 5. Data is striped across all three drives in the array, but the space equivalent to that of one drive is used for redundant storage. Therefore, if you type “1000MB,” the “Size (MB)” remains 1000 because it is divisible by 2 (drives), which is the space available for data. 5. 6. 7. 8. 354 If you do not use the entire array for this logical drive, you can create another by assigning either the same or a different RAID level for an additional logical drive. You can have as many as eight logical drives among four disk arrays. To return to the Create/Delete Array menu, press Esc. To define more logical drives, repeat steps 1 through 5 of this procedure. To leave this screen, select Exit or press Esc. A pop-up window appears asking you to confirm your action. To save your changes, select Yes. To maintain the disk-array configuration that was in place before you made changes, select No. If you are using RAID level 1 or RAID level 5, you must select Initialize logical drive for proper operation. This sets the drive to a predetermined state. Any data existing on the drive is overwritten with zeros, and corresponding parity is initialized to the correct value. a. Select Initialize/synchronize array from the Main Menu; then select Initialize logical drive. PC Server HMM b. Select the logical drives you want to initialize from the Logical Drive list by pressing the Spacebar (the selected drives will appear highlighted). To start the initialization, press Enter. A pop-up window appears asking you to confirm your action. Warning If you select Yes in the Confirm pop-up window, information in the logical drive will be overwritten with zeros. c. Select Yes to confirm that you want to initialize this logical drive. The initialization process begins, and you can see its progress in the Pct. Int. (Percent Initialized) column of the Logical Drive list. d. To stop the initialization at any time, press Esc. Then press Esc again to return to the menu, or press Enter to continue initializing the drive. 9. To back up the disk-array configuration to diskette, you will need a 3.5-inch formatted diskette. To back up the disk-array configuration: a. Select Advanced functions from the Main Menu. b. Select Backup config. to diskette. Follow the instructions on the screen. A pop-up window shows the default file name of CONFIG. You can change the file name by typing over the default. PC Server 720 - Type 8642 355 Power Supplies Caution Always unplug the power cord and wait two minutes before replacing the power supply to give the power supply capacitors time to discharge. The Type 8642 computer is shipped with a primary power supply. An additional or optional power supply can be added to the computer. Connectors are used to transfer the primary power supply voltages and signals from the primary power supply to the optional power supply. The following illustrations show how the two power supplies are connected. Caution When replacing the primary power supply cover plate, rotate the plate 180°. (This will leave an opening for the primary power supply connector cable that connects to the optional power supply.) Failure to do so will cause the power supply connector cable to be crimped when the plate is replaced. Note Tabs are located on the side of each power supply to secure them together. Power Supply LED and Button: The power-good LED and button are located on the side of the primary power supply button. The LED (when lit) indicates that the power supply is good. If the LED fails to come on when the computer is powered-on, do the following: 356 While observing the LED on the power supply, press the power supply button. If the LED fails to light (while you are holding the button in), you may have a defective power supply. If the LED lights when the button is pressed, go to “Power Supply Shutdowns” on page 358. PC Server HMM Primary Power Supply Voltages: If the voltages are correct and the power supply fan runs, the power supply is OK. 2 3 5 A B C D Drive Connector 1 4 7 Power-Supply Connector −Lead Pin +Lead Pin 5 5 5 B B 3 4 7 D A V dc Minimum V dc Maximum +4.8 +11.5 −10.8 +4.8 +11.5 + 5.25 +12.6 −13.2 + 5.25 +12.6 Connectors P11, P12, and P13 −Lead Pin +Lead Pin 2 1 V dc Minimum V dc Maximum +11.5 +12.6 Optional Power Supply Drive Connector Voltages: If the voltages are correct and the power supply fan runs, the power supply is OK. A −Lead Pin +Lead Pin B B D A B C D V dc Minimum V dc Maximum + 4.8 + 11.5 + 5.25 +12.6 PC Server 720 - Type 8642 357 Power Supply Shutdowns: If the power supply shuts down, or appears to fail at power-on, you might have one of the following problems: Too many devices are set to start instantly. See “Setting the Motor-Start Jumper” on page 549. There are too many large-capacity devices installed (such as hard disk drives). The nominal operating current of the devices installed collectively exceeds the available current of the power supply. See the “Personal System/2 Installation Planning” guide (form number G41G-2927) for more information. Also ensure that the fans operate when the machine is powered on. Note Verify that the voltage-select switch (if applicable) is set for the correct voltage. If the voltages are correct and the Symptom-to-FRU index does not solve the problem, go to “Undetermined Problems” on page 552. 358 PC Server HMM Redefining Space in an Array You can redefine space in a disk array in a number of ways. For example, you can combine a number of small logical drives to create a larger one or you can redefine the existing logical drive into several smaller drives. Also, you can install additional hard disk drives to create a larger logical drive than was possible with the existing storage capacity. One method to redefine space in an array is to change the RAID level assigned to a logical drive. For example, if you assigned RAID level 1 to a logical drive and then decided you needed the capacity offered with RAID level 5, you can use this procedure to replace the existing logical drive with a logical drive assigned the new RAID level. To redefine the space in a disk array, first you must delete the array. The last disk array defined must be the first deleted. Warning In all cases, when you delete an array, all the data and programs in the array are lost. If you have data and programs that you want to save, they must be backed up and then restored. It is suggested you use a high-speed backup device, such as a tape drive. To redefine the space in an array: 1. Back up all data and programs in the array. 2. If needed, install additional hard disk drives. Refer to the User's Reference for information about selecting drive sizes. 3. Insert the IBM RAID controller diskette; then press Ctrl+Alt+Del to start the RAID configuration program. 4. Delete the existing array: a. Select Create/delete array from the Main Menu. The Create/Delete Array menu will disappear. b. Select Delete disk array. The cursor will be active in the Bay/Array list. c. Review the Logical Drive List Date Created column; then press the Up Arrow (↑) key or the Down Arrow (↓) key to highlight the most recently defined array. Note You must delete disk arrays in descending order; the last one created must be the first one deleted. d. Press Del. The Confirm pop-up window appears. PC Server 720 - Type 8642 359 Warning All the data in the array will be lost during this procedure. Be sure to back up all data and programs that you want to save. e. If you do not want to delete the array, select No. To delete the array select, Yes. Note To use the hard disks from the existing array when creating a new array, you must confirm the deletion of the existing array. After you make your selection, the Confirm pop-up window will disappear, and the cursor will be active in the menu. 5. If you want a drive defined as a hot spare, refer to “Defining a Hot-Spare Drive” on page 350 for step-by-step instructions. 6. Create a new disk array and define logical drives. 7. 8. 9. 10. 360 See “Creating a Disk Array” on page 351 for instructions on creating a disk array and defining logical drives. After you have established the new array and logical drive or drives, select Initialize/synchronize array from the Main Menu; then select Initialize logical drive to prepare the drives in the array to receive data. This sets the drive to a predetermined state. Any data existing in the drive is overwritten with zeros, and corresponding parity is initialized to the proper value. Insert a 3.5-inch formatted diskette in the primary drive, select Advanced functions from the Main Menu; then select Backup config. to diskette. Follow the instructions on the screen. Exit the RAID configuration program by pressing Esc or selecting Exit while on the Main Menu. A pop-up window will appear asking you to confirm your action. Reinstall your operating system and device drivers, then restore your data and programs. PC Server HMM Removing a Drive from Bank C, D, or E Locate the drive you are removing. You do not have to power-off the server to remove a drive from banks C, D, or E. Warning If you are removing a failed hard disk drive that is part of a disk array in bank C, D, or E, you must not accidentally remove a good drive. Before you attempt to remove a defective drive, thoroughly review the information displayed on your server's screen to determine the location of the failed drive. “Logical and Hard Disk Drive Status Indications” on page 342 explains the codes that your server uses to indicate a defective drive. When a hard disk drive fails, a blinking green indicator light illuminates on the knob of the drive tray. When a hard disk drive is good, a solid green indicator light illuminates on the knob of the drive tray. If you partially or completely remove a good drive instead of the defective one, your server might lose valuable data. This situation is especially relevant if you assigned RAID level 1 or 5 to the logical drives in your disk array. However, the RAID controller can rebuild the data you need, provided that certain conditions are met. See “Starting the RAID Configuration Program” on page 366 for more details. If you have a non-disk-array model, an illuminated drive tray knob means the drive is a good one. An unilluminated drive tray knob means the drive is defective, or no power is being supplied to the drive. To remove a drive from bank C, D, or E, do the following: 1. Find the drive you plan to remove. 2. If you have a disk-array model and a drive has failed, ensure that you have selected the correct drive for removal by verifying that the light on the tray's knob is blinking. 3. Unlock the drive by turning the knob directly above it 90 degrees. 4. Disconnect the drive from the connector on the backplane, by grasping the handle on the drive tray and pulling the drive out of the server. Store the drive in a safe place. Note If you have a disk-array model, you must reconfigure your disk arrays after removing hard disk drives. See “Starting the RAID Configuration Program” on page 366 for details. PC Server 720 - Type 8642 361 Service Processor Requirements The service processor (SP) follows the following rules for each power-on and -off cycle. The following functions are complete at power-up. (See also “Starting or Stopping the System” on page 365.) 362 Because the SP runs continuously in this version, an internal interrupt is generated each time the Start/Stop button is pressed. This interrupt will set the Power-State bit in the RTC's SRAM and set the PAB bit to zero (0) turning on the power supply. At SP power-on, the RTC's Power-State bit is checked to determine if the system should stay powered-on after an AC power failure. PC Server HMM Specifications Size Depth: 755 mm (29.7 in.) Height: 622 mm (24.5 in.) Width: 353 mm (13.9 in.) Depth with cable cover: 807 mm (31.8 in.) Weight Configured with one hard disk drive: 31.3 kg (69 lb) Environment Air temperature – System on: 10° to 35° C (50° to 95° F) Altitude: 0 to 914 mm (3000 ft.) – System on: 10° to 32° C (50° to 90° F) Altitude: 914m (3000 ft.) to 2133 m (7000 ft.) – System off: 10° to 43° C (50° 110° F) Maximum Altitude: 2133 m (7000 ft.) – Storage: 1° to 60° C (34° to 140° F) Humidity – System on: 8% to 80% – System off: 8% to 80% Maximum altitude: 2133 m (7000 ft.) Heat Output Approximate heat output in British Thermal Units (BTU) per hour – Minimum configuration: 155 BTU (44 watts) – Maximum configuration: 3.600 BTU (1055 watts) Electrical Input Sine-wave input (50 to 60 Hz is required Input voltage – Low range - Minimum: 90 V ac - Maximum: 137 V ac – High range - Minimum: 180 V ac - Maximum: 265 V ac – Input kilovolt-amperes (kVA) approximately - Minimum configuration as shipped: 0.16 kVA - Maximum configuration: 1.0 kVA Total Power Available for Drives Nominal operating current allowed (base with expansion upgrade) – +5 V dc line: 10 A base/23 A with upgrade – +12 V dc line: 10 A base/23 with upgrade PC Server 720 - Type 8642 363 Acoustical Noise Emission Values 364 Average sound pressure levels at operator position – 1 hard disk drive (low fan speed) - 40 dB operating - 38 dB idle – 1 hard disk drive (high fan speed) - 42 dB operating - 41 dB idle – 3 hard disk drives (low fan speed) - 40 dB operating - 38 dB idle – 3 hard disk drives (high fan speed) - 42 dB operating - 42 dB idle Average sound pressure at bystander position (1 meter) – 1 hard disk drive (low fan speed) - 36 dB operating - 35 dB idle – 1 hard disk drive (high fan speed) - 38 dB operating - 38 dB idle – 3 hard disk drives (low fan speed) - 36 dB operating - 35 dB idle – 3 hard disk drives (high fan speed) - 38 dB operating - 38 dB idle Declared (upper limit) sound power levels – 1 hard disk drive (low fan speed) - 5.5 bels operating - 5.4 bels idle – 1 hard disk drive (high fan speed) - 5.7 bels operating - 5.6 bels idle – 3 hard disk drives (low fan speed) - 5.5 bels operating - 5.4 bels idle – 3 hard disk drives (high speed) - 5.7 bels operating - 5.7 bels idle PC Server HMM Starting or Stopping the System See the following topics: “Starting or Powering-On the System” “Stopping or Powering-Off the System” “Power-On/Off Scenarios” on page 366 (See also “Service Processor Requirements” on page 362.) Starting or Powering-On the System: To power-on the computer under normal conditions, you must have the power enable button active and push the start/stop button. When the computer is powered-on, it may be shut down by pressing the start/stop button. This causes one of the following scenarios to occur in the service processor (SP): A non-maskable interrupt (NMI) is generated and sent to the host processor and a count-down timer to power-off the computer is started. When the timer reaches zero (0) the system is powered-off. This option requires a NMI device driver to flush cache and close the file system before the time out. An SP interrupt is generated and sent to the host processor and a count-down timer to power-off the computer is started. When the timer reaches zero, the computer is powered-off. This option requires an SP device driver to interface to the operating system to close the file system before the timeout. No interrupt is generated and the computer is powered-off after the count-down timer times out. The default value for the count down timer is zero or power-off immediately. A message is displayed requesting that the enter button be pressed to power-off the computer. Note When changing the Real-Time Clock module or resetting the CMOS RAM, you must press and hold the start/stop button in until a message is displayed saying the real-time clock (RTC) has been updated or reset. Stopping or Powering-Off the System: When the Start/Stop button is pressed, the service processor (SP) sends an interrupt causing the count-down timer to start. When the timer reaches zero (0), the computer is powered-off. The default value for this timer is zero (0) seconds. The SP also interrupts the host system through the SP or NMI interrupts if these features are enabled. The SP will display a message on the LCD indicating that the computer will power-off in XX seconds. If enabled, this feature can be canceled by pressing the Enter button. PC Server 720 - Type 8642 365 Power-On/Off Scenarios: The computer is designed with a soft power-on and -off function. This function requires the following changes in how the computer is powered on and off. The SMART function looks at the hardware at power-on and takes control of the power-off function. The first change is a Power Enable button. This button is a logical emergency power off (EPO) switch that does not remove all power from the computer; it continues power to the bus as long as AC is connected, but it will power-off all other components of the computer immediately and prevent it from being powered-on until the Power Enable button is pressed again. The second change is that after any AC power interruption to the computer, the computer will power-on to determine what state it should be in (on or off). If the computer was powered-off before the AC power interruption, it will power-off when power is restored. If the computer was powered-on before the AC power interruption, it will power-on when power is restored. Note If the Power Enable button is not on and the AC is interrupted, the system will not power-on and check to see if it should be on until the next time the Power Enable button is pressed. The white power-on button is used to power-on or -off the computer. You must press and hold this button for about two seconds on some models. Starting the RAID Configuration Program If you have not yet created the SCSI-2 Fast/Wide PCI-Bus Adapter Configuration Option Diskette (RAID controller diskette), see the ServerGuide CD documentation. To start the RAID configuration program: Insert the IBM RAID controller diskette into the primary drive and power-on the server. If the server is already on, press Ctrl+Alt+Del. If you have more than one RAID adapter, you will get an adapter selection screen. Otherwise, the Main Menu appears. RAID Program Keys Key Program Response F1 Selects Help from any menu 366 PC Server HMM Key Program Response Esc Returns to the previous screen or to the previous work area of a screen Up (↑) and Down (↓) Arrows Highlights the item to be selected Enter Selects the highlighted item Main Menu Selections Note Whenever you make changes to the disk-array configuration and select Exit, the Confirm pop-up window will appear. You must select Yes to save and activate the changes. Selection Program Response Help Provides additional information. View configuration: Displays the existing disk array configuration. Create/delete array: Selects the drives, defines a hot-spare drive for an array you want to create, or deletes an existing array. This selection also has choices for defining a logical drive and formatting a drive. Initialize/synchronize array: Select this choice after creating an array to: Set the drive to a predetermined value. For proper operation of RAID levels 1 and 5. Note: Any data existing on the drive is overwritten with zeros, and the corresponding parity information is initialized to the correct value. Initialize more than one logical drive at a time. Interrupt the initialization process at any time by pressing Esc. Restart the initialization process by pressing Enter. End the process by pressing Esc again. PC Server 720 - Type 8642 367 Selection Program Response Synchronize logical drive: Recomputes and rewrites the parity data on the drive. You can select this choice to recompute parity data for RAID levels 1 and 5. This selection does not alter data on the drive. The synchronization process can be done on multiple logical drives. Rebuild device: Rebuilds logical drives. The rebuild operation is supported only for RAID levels 1 and 5. Advanced functions: Changes the write policy (the way data is written to the drive), saves your configuration information to a diskette, restores it from a diskette, or changes RAID parameters. This choice also allows you to do a low-level format. Drive information: Displays information about the SCSI devices (hard disk, CD-ROM, tape, and so on) connected to the RAID adapter. Exit: Leaves the Main Menu. 368 PC Server HMM Undetermined Failing Processor Diagnostics If the diagnostics identified a processor failure on a multiprocessor computer but could not identify which processor is failing (the FRU replacement is any processor in the “Symptom-to-FRU Index”), do the following: 1. Power-off the computer and remove all of the installed processors. 2. Reinstall one of the processors and run the diagnostics. 3. If the processor is good, remove the good processor and follow this procedure for each processor previously removed from the computer, until you locate the defective processor. 4. When you locate the defective processor, replace it and reinstall the remaining processors you removed from the computer. Viewing the RAID Configuration Before creating or changing a disk array, you can look at the current configuration by selecting View Configuration from the Main Menu of the RAID configuration program. To view the disk-array configuration: 1. Start the RAID configuration program. See “Starting the RAID Configuration Program” on page 366. 2. Select View configuration. The current disk-array configuration information appears on the screen. 3. Press Enter to see the stripe order in the Bays Occupied (Ch:Bay) field. 4. Press any key to continue. 5. Press Esc to return to the Main Menu. PC Server 720 - Type 8642 369 Locations Bays 370 PC Server HMM Connectors (Rear View) SCSI 2 Connector either/or Expansion Slots Serial Connectors Display Connector Parallel Connector Mouse Connector Keyboard Connector Power Connector PC Server 720 - Type 8642 371 Controls/Indicators (Front View) Power OK Indicator Power Enable Indicator Hard Disk Drive Activity Indicator DASD Error Indicator Processor Complex Error Indicator All Subsystems Good Indicator Information Panel Keypad (4 Menu Buttons) Enter Button Power On/Off Button Power Enable Switch 372 PC Server HMM Hot-Swap Backplane: Front View HI LO SCSI ID Jumper: If two backplanes are connected to the same adapter, one backplane must be set to high and the other one to low. SCSI ROM Address ID Jumper Setting Description HI = High Assigns SCSI IDs 8 to D to the backplane LO = Low Assigns SCSI IDs 0 to 5 to the backplane Rear View E D C Address Jumper ROM Address Jumper Setting Notes The following settings are for PC Server 720 computers only. If more than one backplane is installed in the computer, each backplane must have a different ROM address setting. Do not install a ROM address jumper on backplanes installed in PC Server 320 computers. Jumper Position Description C Address for a backplane installed in Bank C (location shown on page 370) D Address for a backplane installed in Bank D (location shown on page 370) E Address for a backplane installed in Bank E (location shown on page 370) Termination (Hot-Swap Back Plane): The hot-swap back plane is automatically terminated. Drives connected to the hot-swap back plane should not be terminated. PC Server 720 - Type 8642 373 SCSI-2 Fast/Wide RAID Adapter/A Channel 1 System Status Connectors Channel 2 Channel 2 SCSI Fast/Wide Adaptec Adapter 50-pin Internal SCSI Connector 68-pin Wide Internal SCSI Connector External LED Connector J4 J4 374 PC Server HMM System Board .1/ .2/ .3/ .4/ .5/ .6/ .7/ .8/ .9/ .1ð/ .11/ .12/ .13/ .14/ .15/ .16/ .17/ .18/ .19/ .2ð/ .21/ .22/ .23/ .24/ PCI/Micro Channel connectors PCI-speed-select jumper (J24, CE use only) Power-on-features jumper (JMP4) Serial connector Video port Password-write-enable jumper (JMP2) Parallel port Pointing-device port Keyboard port 3.3V power connector Remote-update jumper (J25, CE use only) Power connector 5V power connector Bank-select jumper (JMP5) Processor board slots Power-on-password jumper (JMP1) Memory/processor slot Fan connector Memory card slot Bus slots Bridge card slot Diskette-drive cable connector Bad-CMOS jumper (J42) Operator-panel cable connector Slot 1 Slot 2 Slot 3 Slot 4 Slot 5 Slot 6 Slot 7 Slot 0 Slot 0 Slot 1 Slot 2 Slot 3 Slot 4 Slot 5 Slot 6 Slot 7 Note For default settings, refer to the label located inside the system. PC Server 720 - Type 8642 375 Symptom-to-FRU Index The information in this index should be used with the “Symptom-to-FRU Index (Micro Channel)” on page 26 in the PS/2 Hardware Maintenance Manual. This index contains the following information: Corollary error codes (CP, EP, TP, IP, FP and HALT), pages 376 through 384. “Micro Channel Error Symptoms/Codes” on page 384. (See also the additional error symptoms and codes for the Symptom-to-FRU Index (Micro Channel) in the PS/2 Hardware Maintenance Manual.) SCSI/non-SCSI error codes (“SCSI/Non-SCSI Error Code Format” on page 388) PCI error codes/messages (“PCI Error Format and Error Codes/Messages” on page 395) “Testing PCI Adapter Cards” on page 398 “Accessing/Checking the PCI Device List” on page 398 Always start with “General Checkout (Micro Channel)” on page 19 in the PS/2 Hardware Maintenance Manual. The Symptom-to-FRU Index lists symptoms, errors, and the possible causes. The most likely cause is listed first. Use this index to help you decide which FRUs to have available when servicing the computer. In the following error codes, X can be any number or letter. See Symptom-to-FRU Index (Micro Channel) on page 19 in the PS/2 Hardware Maintenance Manual for additional error codes. Note For IBM devices not supported by this supplement or the PS/2 Hardware Maintenance Manual, refer to the manual for that device. Corollary Error Codes Corollary error codes can be displayed on the information panel during early portions of the Power-On Self-Test (POST) code. If the system hangs with one of these checkpoints displayed, a Halt code may also be displayed, see “Halt Indications (HALT)” on page 383. FRU replacement is listed with the first FRU being the first item replaced and so on. The types of Corollary Error Codes are: 376 “Checkpoint Codes (CP)” on page 377 “Test Error Indication (EP)” on page 379 “Test Point Codes (TP)” on page 380 “Multiprocessor Error Indication (IP and FP Codes)” on page 382 PC Server HMM “Halt Indications (HALT)” on page 383 Checkpoint Codes (CP): The following checkpoints can be displayed on the information panel during early portions of the Power-On Self-Test (POST) code. If the system hangs with one of these checkpoints displayed, the FRU replacement should be as listed with the first FRU being the first item and so on. The checkpoint code information is displayed on the information panel in the following format: CP: 1XX 1XX Checkpoint values as described below. Notes 1. The checkpoint code will only be displayed by the default (lowest slot number) processor card. Therefore, only the default processor card is being tested during this time. 2. If a 2 digit checkpoint code (CP: XX) is displayed without a beep symptom, go to “No Beep Symptoms” on page 384 and diagnose the no beep symptom. 3. If a 2 digit checkpoint code (CP: XX) is displayed with a beep symptom, go to “Beep Symptoms” on page 385 and diagnose the beep symptom. CP Code FRU 141 Start of COM 1 Test 1. System Board 2. Bridge Card 3. Default Processor Card 142 Start of SRAM Test 1. 2. 3. 4. 143 SRAM Test 1. Memory Card 2. Default Processor Card 3. System Board 144 SRAM Test 1. Memory Card 2. Default Processor Card 3. System Board 145 SRAM Test 1. Memory Card 2. Default Processor Card 3. System Board 146 Transition to Protected Mode 1. Default Processor Card 2. Bridge Card 3. System Board Memory Card Bridge Card Default Processor Card System Board PC Server 720 - Type 8642 377 CP Code FRU 147 Port Initialization 1. Default Processor Card 2. Bridge Card 3. System Board 148 Jump to 32-Bit Assembly Code 1. Default Processor Card 2. Bridge Card 3. Memory Card 4. System Board 149 Execution of 32-Bit Protected Mode 1. Default Processor Card 2. Bridge Card 3. Memory Card 4. System Board 14A Transition to 'C' Code 1. Default Processor Card 2. Bridge Card 3. System Board 14C Default Processor Card Setup Routines 1. Default Processor Card 2. Bridge Card 3. System Board 14D Additional Default Processor Card Setup Routines 1. Default Processor Card 2. Bridge Card 3. System Board 14E Additional Default Processor Card Setup Routines 1. Default Processor Card 2. Bridge Card 3. System Board 14F Additional Default Processor Card Setup Routines 1. Default Processor Card 2. Bridge Card 3. System Board 150 ROM Checksum 1. System Board 2. Bridge Card 3. Default Processor Card 151 L2 Cache Flush on Default Processor Card 1. Default Processor Card 2. Bridge Card 3. Memory Card 4. System Board 152 Default Processor Card Configuration 1. Default Processor Card 2. Bridge Card 3. System Board 153 Default Processor Card and Bridge Card Initialization 1. Default Processor Card 2. Bridge Card 3. System Board 378 PC Server HMM CP Code FRU 154 Bridge DMA Initialization 1. 2. 3. 4. Bridge Card System Board Default Processor Card Memory Card 155 Enable Fault/Error Detection and Enable Interrupts 1. Default Processor Card 2. Bridge Card 3. System Board 156 Enable Default Processor Card Parity and L1 Cache 1. Default Processor Card 2. Bridge Card 3. System Board 4. Memory Card 157 Start of Test Cases 1. Default Processor Card 2. Bridge Card 3. System Board 158 Video Initialization 1. Default Processor Card 2. System Board 3. Bridge Card 159 Keyboard Initialization 1. Keyboard 2. System Board 15A Global Initialization. Try removing the wrap plug from the serial port. 1. System Board 2. Default Processor Card Test Error Indication (EP): In some cases, the early POST code will detect errors during the running of the test cases and display corresponding test errors to the information panel. The information is displayed in the following format: EP: 1XXS 1XX Error values as described below. S Slot number of the card/board issuing the error. EP Code FRU 1043 (104X) Memory Error (First reseat the memory adapter.) 1. Memory Adapter 106s Processor Card Error 1. Processor Card PC Server 720 - Type 8642 379 Test Point Codes (TP): The following list contains test points that can be displayed on the information panel during early portions of the POST code. If the system hangs with one of these test points displayed, replace the FRU(s) in the order listed. Test point information is displayed on the information panel as follows: TP: 1XXS 1XX Test point values as described below. S Slot number of the card/board issuing the error. TP Code FRU 101s Reset All 1. Current Processor Card 2. Bridge Card 3. System Board 102s Interrupt Initialization 1. Current Processor Card 2. Bridge Card 3. System Board 103s Cache Flush 1. Next Processor Card 2. Bridge Card 3. System Board 104s Memory Sizing 1. Memory Card 2. Bridge Card 3. Current Processor Card 4. System Board 105s Memory Testing 1. Memory Card 2. Bridge Card 3. Current Processor Card 4. System Board 106s Memory Testing 1. Memory Card 2. Bridge Card 3. Current Processor Card 4. System Board 107s Multiprocessor Cache Test. See “Undetermined Failing Processor Diagnostics” on page 369. 1. 2. 3. 4. 108s Memory Testing 1. Memory Card 2. Bridge Card 3. Current Processor Card 4. System Board 380 PC Server HMM Any Processor Card System Board Memory Card Bridge Card TP Code FRU 109s LED Blink Test 1. System Board 2. Current Processor Card 3. Bridge Card 10As Interrupt Testing. See “Undetermined Failing Processor Diagnostics” on page 369. 1. Current Processor Card 2. Bridge Card 3. System Board 4. Any Processor Card 10Bs Bridge Interrupt Testing 1. Bridge Card 2. Current Processor Card 3. System Board 10Cs Multiprocessor Test. See “Undetermined Failing Processor Diagnostics” on page 369. 1. Any Processor Card 2. System Board 3. Bridge Card 10Ds Multiprocessor Memory Test. See “Undetermined Failing Processor Diagnostics” on page 369. 1. 2. 3. 4. Memory Card Any Processor Card System Board Bridge Card 10Es Multiprocessor Memory Test 1. 2. 3. 4. Memory Card Any Processor Card System Board Bridge Card 10Fs Multiprocessor Memory Test. See “Undetermined Failing Processor Diagnostics” on page 369. 1. 2. 3. 4. Memory Card Any Processor Card System Board Bridge Card 110s Multiprocessor Memory Test. See “Undetermined Failing Processor Diagnostics” on page 369. 1. 2. 3. 4. Memory Card Any Processor Card System Board Bridge Card 111s Multiprocessor Memory Test. See “Undetermined Failing Processor Diagnostics” on page 369. 1. 2. 3. 4. Memory Card Any Processor Card System Board Bridge Card PC Server 720 - Type 8642 381 Multiprocessor Error Indication (IP and FP Codes): During the early POST code, various multiprocessor bus errors might occur; if they do, the early POST code will display error information to the information panel in one of the following formats: IP: 1xx D S xx FP: 1xx D S xx D Character denoting the type of board/card issuing the error as follows. C for Processor Card M for Memory Card B for Bridge Card S Slot number of the board/card issuing the error. If you receive an IP or FP error, do the following. 1. Replace the board/card issuing the error. 2. If replacing a FRU does not correct the problem, reinstall the FRU you removed from the computer; then, continue with the next step. 3. Remove all cards/boards of the same type identified by the error code one at a time until you locate the failing card/board. (Example, if the error code identified a memory card and replacing the memory card in the slot identified by the error code does not correct the problem, remove all memory cards one at a time until you locate the failing board) If the problem remains, replace the FRUs in the following order. a. Memory Card b. Processor Card c. Bridge Card d. System Board 382 PC Server HMM Halt Indications (HALT): If during the early POST code, a fatal error is detected, the system will display a “halting” message with a corresponding error code to indicate the reason for the halt condition. The message will be displayed on the information panel in the following format: HALT: XXXxxx Where “XXX” is the following code number, replace the FRU(s) in the order listed. If present, ignore the last three digits (xxx). Note The exceptions to the above three or six digit error code format are the following error codes. HALT: 02 HALT: 107C Halt Code FRU 02 COM 1 failure 1. System Board 2. Bridge Card 101 COM 1 failure 1. System Board 2. Bridge Card 3. Default Processor Card 102 Memory failure 1. Memory Card 2. System Board 3. Default Processor Card 103 Bridge failure 1. Bridge Card 2. Default Processor Card 3. System Board 104 Processor card failure. See “Undetermined Failing Processor Diagnostics” on page 369. 1. Any Processor Card 2. System Board 3. Bridge Card 105 Memory failure 1. Memory Card 2. System Board 3. Default Processor Card 106 Unknown POST path. Note: This is a software error and the system should be re-flashed with the latest level of the POST code. If the error persists, a faulty processor card may be the cause. 1. Processor Card 2. System Board PC Server 720 - Type 8642 383 Halt Code FRU 107 Unexpected interrupt or trap. See “Undetermined Failing Processor Diagnostics” on page 369. 1. 2. 3. 4. Bridge Card System Board Any Processor Card Memory Card 107C NMI error 1. Processor Card 2. Bridge Card 3. Any remaining Processor Cards 4. System Board 108 Not enough memory found 1. Memory Card 2. Default Processor Card 3. System Board 109 Memory error 1. Memory Card 2. System Board 3. Default Processor Card 1FF Miscellaneous fatal error. See “Undetermined Failing Processor Diagnostics” on page 369. 1. 2. 3. 4. Memory Card Any Processor Card Bridge Card System Board Micro Channel Error Symptoms/Codes No Beep Symptoms No Beep Symptom FRU/Action The computer hangs while loading the operating system, the CD-ROM doesn't install during the Adaptec BIOS routines, or the CD-ROM is not available to the operating system. 1. CD-ROM Drive 2. SCSI Cable Blank display, otherwise computer operates normally. (Run the Display Self Test) 1. Display Adapter 2. Video Memory (if used) 3. System Board Memory count hangs during POST. 1. System Board Memory 2. Memory Option (if installed) 3. System Board 4. Processor 5. Bridge Card No beep, fan runs, power-on indicator is on, and computer hangs during POST without message on the display. See “Undetermined Problems” on page 552. 1. 2. 3. 4. 384 PC Server HMM System Board Processor Card Bridge Card Memory Card No Beep Symptom FRU/Action No beep, fan runs, power-on indicator is on, and computer hangs during POST with a message on the display. See “Undetermined Problems” on page 552. 1. 2. 3. 4. System Board Processor Card Bridge Card Power Supply System slows down 1. Check the processors 2. System Board Beep Symptoms Beep/Symptom FRU/Action One beep and the computer hangs. See “Undetermined Problems” on page 552. 1. Any Device or Adapter One beep and the displayed memory size is incorrect. 1. Memory Card Continuous beep and a blank display. (Run the Display Self Test) 1. Display Adapter 2. Video Memory (if used) 3. System Board One long and three short beeps. (Run the Display Self Test) 1. Display Adapter 2. Video Memory (if used) 3. System Board PC Server 720 - Type 8642 385 Error Codes: The following codes might appear on the display and/or the information panel. Error Code FRU/Action 000095XX (System complex failure) 1. 2. 3. 4. 000113XX (The first memory card is missing or not operational.) 1. Memory Card 000114XX 1. Any Adapter 2. System Board 00016400 (Memory size changed) 1. Memory Card 00021700 (Multi-bit ECC error) 1. Memory Card 00024000 000297XX 1. Memory Card 009503XX 009505XX 009506XX 1. 2. 3. 4. System Board Processor Card Bridge Card Memory Card 01290050, 01290051 01290052, 01290053 01290054, 01290055 01290056 1. 2. 3. 4. 5. System Board Bridge Card Processor Card Memory Card Any PCI Card 01296000 (Processor not supported) 1. Replace the Processor Card 0129910X (Adapter in slot X has an invalid serial number) 1. Replace the adapter in the slot indicated 013010XX (I2C failed to respond) 1. System Board 01300AXX (Slot LED problem) 1. System Board 01300BXX (Display panel problem) 1. Display Panel 2. Power Switch Panel 3. System Board 0210XXXX (Internal bus, size unknown) 1. SCSI Hard Disk Drive 2. SCSI Adapter or the SCSI controller built into the system board. 3. SCSI Cable 4. SCSI ID Switch (on some models) 0210XXX1 (External bus, size unknown) Memory Card Bridge Card Processor Card System Board 026109XX (Display problem) 1. Display 026111XX (Video adapter problem) 1. Video Adapter 386 PC Server HMM Error Code FRU/Action 02790XXX, 02791XXX 02792XXX, 02793XXX 027906XX, 027907XX (Ethernet adapter POST error) 1. Check power and reseat adapter. 2. Ethernet PeerMaster Server Adapter 02799XXX (Communications to the Ethernet PeerMaster Server Adapter failed or the adapter failed.) 1. Run Setup and verify the Ethernet PeerMaster Server Adapter configuration. 2. Ethernet PeerMaster Server Adapter 0279XXXX 1. Fast/Wide Streaming RAID Adapter/A (FRU No. 06H3059) 2. System Board 3. Signal Pass Through Card (if installed) 028309XX (Display problem) 1. Display 028310XX (System board video problem) 1. System Board 028331XX (System board video) 1. System Board Error Messages Error Message FRU/Action Drive in channel X bay X does not respond. Installation stopped. See “Undetermined Problems” on page 552. 1. Replace the drive in the bay indicated. 2. Any PCI Adapter 3. System Board Controller does not respond to commands; no logical drive installed. 1. RAID Adapter 2. System Board PC Server 720 - Type 8642 387 SCSI/Non-SCSI Error Code Format This section contains an explanation of the encoded SCSI and non-SCSI POST error codes and detailed information about each code. Error messages are displayed on the screen as three, four, five, eight, twelve, or thirteen digits. An “X” in an error message can be any number. The shorter POST errors are highlighted in the Symptom-to-FRU Index. Some digits will represent different information for SCSI errors versus non-SCSI errors. The following figure shows which digits display the shorter POST errors. The figure also defines additional SCSI information. RDDDPLSCB QEET │└┬┘│││││ │└┤└─ Test state │ │ │││││ │ └── Error code Extension │ │ │││││ └──── Qualifier │ │ │││││ │ │ ││││└───── Bus (ð=internal 1=external) │ │ │││└────── Capacity of the device │ │ ││└─────── Slot number of the device │ │ │└──────── LUN (usually ð) │ │ └───────── PUN (SCSI ID #) │ │ │ └─────────── Device Number └───────────── Reserved Digit (usually ð) Notes 1. Non-IBM device error codes and documentation supersede this list. 2. Duplicate SCSI ID settings will cause misleading error symptoms or messages. For example, SCSI error code 0210501A0 decodes as follows: Digit Information 0 Reserved digit (usually 0) 210 Device number 210 indicates hard disk 5 SCSI ID assigned is 5 0 Logical Unit Number (not used, usually 0) 1 The adapter is installed in slot 1 A The device capacity is 60MB (A = 60MB) 0 The device is connected to the internal bus RDDD Codes for Adapters RDDD Device Type or Information 0037 SCSI on the system board 0096 SCSI adapter with cache 388 PC Server HMM RDDD Device Type or Information 0112 SCSI adapter without cache 0206 SCSI-2 adapter RDDD Codes for Devices RDDD Device Type or Information 0208 Unknown device type 0209 Direct access - removable media, and/or other than 512 byte blocks 0210 Direct access - hard disk, 512 byte blocks 0211 Sequential access (tape) 0212 Printer 0213 Processor 0214 Write Once, Read Multiple (W.O.R.M.) 0215 Read only (CD-ROM) 0216 Scanner 0217 Optical memory (read/write optical disk) 0218 Changer (multiple tray CD-ROM) 0219 Communications B Codes B Device Type or Information 0 Dual SCSI adapter (internal bus) 1 Dual SCSI adapter (external bus) QEET 0000 Codes Refer to this list if the “DDD” indicates an adapter, followed by a QEET of 0000. For example, 01120100 0000. PLSC QEET Information 0100 0000 On systems with NVRAM, SCSI setup data not located, or the checksum did not verify. On systems without NVRAM (Model 50 for example), setup data must be on the 1st hard disk. 0200 0000 Configuration error. No hard disk found at PUN 6, LUN 0 for 161,162,165 system error path. Might be an unsupported configuration. 0300 0000 No space available in extended BIOS data area for SCSI data table (possibly too many adapters installed). 0400 0000 ROM modules not found on adapter (IML-based systems only). Running setup might correct it. PC Server 720 - Type 8642 389 PLSC QEET Information 0500 0000 ROM checksum error on second 16K portion of 32K ROM 0600 0000 ROM access control port error QEET Errors (other than 0000) These are specific “QEET” error codes (preceded by a “DDD” indicating an adapter). Note: A number in slot “S” indicates an error on the adapter, (or device attached to the adapter) in slot “S.” If “S” is 0, suspect the system board. QEET Information 001x 8032/80188/80C186 ROM test failure 002x Local RAM test failure 003x Bad fuse, or bad termination, or local RAM address failure on SCSI adapter if “RDDD” is 0112 004x Internal peripheral test failure 005x Buffer control chip test failure, or LTB failed, (or system-board SCSI failed if “RDDD” is 0037) 006x Undefined error condition, or buffer RAM test failure on SCSI adapter if “RDDD” is 0096 007x System interface control chip test failure 008x SCSI internal interface test failed 00Ax SCSI external interface test failed 107x Adapter hardware failure 10Cx Command failed 10Ex Command error (invalid command or parameter) 10Fx Sequencing error 110x Adapter internal error log contains entries. (Reported if no other errors on adapter exist.) 180x Time out 181x Adapter busy error 182x Unexpected interrupt presented by adapter 183x Adapter register test failure 184x Adapter reset failure 185x Adapter buffer test failure (on cached adapters) 186x Adapter reset count expired 187x Adapter registers not cleared on reset 188x Card ID in adapter microcode did not match ID in POS registers 190x Expected device did not respond 19Yx DMA arbitration level conflict (Y = assigned arbitration level) 220x Adapter hardware error 390 PC Server HMM QEET Information 221x Global timeout on adapter (device did not respond) 222x Adapter DMA error 223x Adapter buffer defective 224x Command aborted by adapter 301x Invalid parameter in SCB 303x Command not supported 304x Command aborted by system 305x Command rejected (buffer not disabled) 306x Command rejected (Adapter diagnostic failure) 307x Format rejected 308x Assign rejected (command in progress) 309x Assign rejected (device already assigned) 30Ax Command rejected (device not assigned) 30Bx Command rejected (maximum logical block address, LBA, exceeded) 30Cx Command rejected (16-bit card slot address range exceeded) 313x Invalid device for command 3FFx Status not returned by adapter 401x Recovered error (not an error condition) 402x Device not ready 403x Device medium error 404x Device hardware error 405x Illegal request for device 406x Device unit attention would not clear 407x Device data protect error 409x Device vendor unique error 40Ax Copy operation aborted by device 40Bx Device command aborted 40Cx Device search data command satisfied 40Dx Device volume overview (residual data remains in buffer) 40Ex Device mismatch (source data did not match medium data) 500x Check condition on device, no sense data returned 501x No index or sector 502x Seek incomplete 503x Write fault 504x Drive not ready 505x Drive not selected 506x No track zero found PC Server 720 - Type 8642 391 QEET Information 507x Multiple drives selected 508x Logical unit communication failure 509x Head positioning error (track following error) 510x CRC or ECC error on ID field 511x Unrecoverable read error 512x No address mark (ID field) 513x No address mark (data field) 514x Record not found 515x Seek error 516x Data synchronization error 517x Recoverable read (without ECC) error 518x ECC recovered read error 519x Defect list error 51Ax Parameter overrun 51Bx Synchronous transfer error 51Cx Primary defect list not found 51Dx Compare error 520x Invalid command 521x Illegal logical block address (LBA) 522x Illegal function for device type 524x Illegal command block field 525x Invalid LUN 526x Illegal field in parameter list 528x Media changed 529x Power-on or bus device reset occurred (not an error) 52Ax Mode select parameters changed (not an error) 531x Medium format corrupted 532x Defect spare location unavailable 540x Device RAM failure 541x Data path diagnostic failure 542x Power-on diagnostic failure 543x Message rejected 544x Internal controller error 545x Device was unable to reconnect 547x Interface parity error 548x Initiator detected error 549x Illegal command or command out of sequence error 5F0x Format in progress (not an error) 5F1x Spinup in progress 601x SCSI bus reset occurred 392 PC Server HMM QEET Information 602x SCSI interface fault 610x Selection timeout error (device not available) 611x Unexpected bus free 612x Mandatory SCSI message rejected 613x Invalid SCSI phase sequence 620x Short length record error 702x Device not ready (removable media devices) 704x Device not ready (non-removable media devices) 728x Media changed error would not clear 731x Medium format corrupted (format unit interrupted format must be issued again) 7F0x Format in progress (prior format unit issued being completed) 7F1x Spinup in progress Q Codes All error codes with “Q” = 1 are developed using information returned by either an adapter or device. The “Q” value defines the origin of the “EE” code that is reported. Error codes (EE) with “Q” = 4 or 5 might be reported that are not listed here or can actually have a definition other than that given, depending on the device. “Q” Information 2 Command error field of command complete status block returned by the adapter 3 SCSI Status field of the command complete status block or command error field values indicating software problems (< 20H) 4 Sense key value returned by a device 5 Additional sense byte (byte 12) of sense information from device 6 Device error code field of command complete status block 7 Device errors not normally considered an error, but considered an error based on when the code was returned (medium corrupted error on device with non-removable media) PC Server 720 - Type 8642 393 Test Status Codes “T” Information O Not applicable for error code A Adapter initialization error) B Adapter reset C Adapter register test D Adapter buffer test phase 1 (on cached adapters) E Adapter buffer test phase 2 (on cached adapters) F Adapter buffer test phase 3 (on cached adapters) G Adapter buffer test phase 4 (on cached adapters) H Adapter (buffer enable, buffer size, retry, enable) I Device assignment sequence J Device not ready (initial unit attention clearing) K Device reset L Device starting phase M Device in process of starting N Device block size determination O Device self-test P Device single block read (LBA) Q Device double block read (LBA) S Error occurred after device testing completed 394 PC Server HMM PCI Error Format and Error Codes/Messages PCI Error Code Format The following is an explanation of the encoded PCI error codes. Error codes are displayed on the screen as eight or sixteen digits as follows: DDDD DDSð VVVVIIII │ │││ │ ││ │ └──┬──┘││ └┬─┘└┬─┘ │ ││ │ └─PCI Device ID │ ││ └─PCI Vendor Number │ │└──Reserved (usually ð) │ └─PCI Slot Number (ð = System board) └─PCI Device Error For example, PCI error code 005A0210vvvviiii decodes as follows: Digit(s) Information 005A 02 PCI device disabled due to Built-in Self Test failure. 1 The device is in PCI slot number one. 0 Reserved. vvvv Could be any number (PCI vendor ID). iiii Could be any number (PCI device ID). PCI Error Codes Error Code FRU/Action 00900100vvvviiii (System board PCI device does not respond) 1. System Board 009002s0vvvviiii (PCI device Built-in Self Test failure) 1. If S <> 0, replace the PCI adapter. Or If S = 0, replace the system board. 009003s0vvvviiii (PCI device resource allocation failure. No resource available for the requested memory, I/O, or C0000-DFFFF ROM address space.) 1. Run the PCI Utility or the Micro Channel Change Configuration Utility to change system resource allocation. 009004s0vvvviiii (PCI device ROM checksum failure) 1. If S <> 0, replace the PCI adapter. Or If S = 0, replace the system board. PC Server 720 - Type 8642 395 Error Code FRU/Action 009005s0vvvviiii (Unsupported PCI device) 1. Remove the unsupported PCI adapter 009010s0vvvviiii (PCI data parity error) 1. If S <> 0, replace the PCI adapter. Or If S = 0, replace the system board. 009011s0vvvviiii (PCI data parity error) 1. If S <> 0, replace the PCI adapter. Or If S = 0, replace the system board. 009020s0vvvviiii (PCI address parity error) 1. If S <> 0, replace the PCI adapter. Or If S = 0, replace the system board. 009030s0vvvviiii (PCI system error) 1. If S <> 0, replace the PCI adapter. Or If S = 0, replace the system board. PCI Error Messages Error Message FRU/Action PCI device(s) removed since last power up: PCI vendor ID=xxxx, device ID=xxxx previously in slot x 1. One or more PCI add-in devices appears to have been removed since the last execution of POST. This could be due to a catastrophic failure of the PCI device rather than its actual physical removal. PCI device(s) added since last power up: PCI vendor ID=xxxx, device ID=xxxx in slot x 1. One or more PCI add-in devices has been added since the last execution of POST. It may have been moved from another slot. This is not an error. The device was enabled and had resources assigned. 396 PC Server HMM Error Message FRU/Action Unable to assign requested resources: PCI vendor ID=xxxx, device ID=xxxx in slot x 1. A requested PCI resource (from the PCI Device Configuration Block) could not be assigned as requested due to a conflict with a non-PCI device or to a conflict with another requested PCI resource. PC Server 720 - Type 8642 397 Testing PCI Adapter Cards Some, but not all, adapter cards are supplied with diagnostic tests. If diagnostics are available: Run the appropriate diagnostics for the adapter suspected of failing. If the test fails, or is unable to locate the adapter, the adapter is defective. Replace the adapter and retest. If diagnostics are not available: Use the customer's reported symptom(s) to locate the failing PCI adapter; then replace it. Also see “Accessing/Checking the PCI Device List.” If multiple PCI adapters are failing: Remove all PCI adapters. Install the adapters one at a time to isolate the failing adapter. If isolation to a single adapter is not possible, replace: 1. Bridge Card 2. System Board Note: Failing PCI adapters may cause the system to “hang” when loading the operating system or diagnostics. If this symptom occurs, remove all non-essential PCI adapters and retest the system to diagnose this type of failure. Accessing/Checking the PCI Device List To access and check the PCI device list, do the following: 1. Access the list: a. Restart the system from the Reference Diskette. b. From the Main Menu, select Set Configuration. c. From the Set Configuration menu, select View PCI Device Configuration. 2. Compare the devices listed for each PCI slot with what is physically installed in the system. If an installed device does not appear on the list, you may have one of the following conditions: a. The missing device may be defective or require an additional diagnostic diskette or service manual. b. A defect may have caused the PCI adapter to disappear from the list. 398 PC Server HMM 26 24 25 27 28 29 30 23 31 20 21 22 19 1 18 2 3 4 PC Server 720 - Type 8642 17 13 14 15 16 6 5 7 12 11 8 10 9 Parts Listing 399 Index System Unit (Type 8642) 1 Base Frame (2X CD-ROM) Base Frame (4X CD-ROM) 2 Information Display Assembly (LED) Display Panel Support 3 System Board (without Memory and Processor) 8MB ECC (X36) Memory SIMM 4 I/O Panel Die Cast 5 SCSI Fast/Wide Adaptec Adapter (0Z0 Only) (AHA-2940W) 6 SCSI-2 Fast/Wide RAID Adapter (1Z0, 2ZS and 4ZS) 7 Fan 8 Fan Mounting Support (without Fans) 9 I/O Flex Plate 10 Right Side Door Right Side Door Hinges (with Screws) 11 Pedestal Wheel (with Axle) 12 470-Watt Power Supply Assembly 13 Processor Card Support 14 PCI Bridge Card 15 512MB Memory Card 16 P54C-100/66MHz Processor Card 17 3-Cards Guide Support 4-Cards Guide Support 18 Card Guide Adjustable Card Guide Arm 19 Pedestal 20 Slim-Line CD-ROM Drive (2X) CD-ROM Drive (4X) 21 2.88MB Diskette Drive 22 DASD Hot-Swap Tray Assembly (Wide) DASD Hot-Swap Backplane Assembly DASD Hot-Swap Cam Spring (Shaft and Knob) SCSI-Fast/Wide Cable Flex (for 1 drive) DASD Mounting Plate 23 2GB SCSI Hard Disk Drive (2ZS and 4ZS) 24 Front Bezel (with Shield - 2X CD-ROM) Front Bezel (with Shield - 4X CD-ROM) 25 Keylock (with Keys) 26 DASD Door 27 IBM Logo (R) 28 5.25-Inch Drive Bezel with Spacer 2X CD-ROM 28 5.25-Inch Drive Bezel with Spacer 4X CD-ROM 29 Control Panel Bezel Slim Bezel (4X CD-ROM) 30 Control Panel Card Speaker (with Bracket) Rubber Dome Switch Pad 31 CD Storage Tray Keyboard (with Cable) Mouse Power Cord Real-Time Clock (with Battery) (See “Battery Notice” on page 461.) 400 PC Server HMM 82G3593 06H8685 82G3614 06H7961 06H1810 06H7760 06H3573 06H6431 06H3059 82G3616 82G3618 06H3574 82G3594 82G3600 82G3609 06H3589 06H8683 71G0694 71G0696 71G0692 06H8524 06H8523 82G3604 06H8525 82G3608 06H2150 88G4921 82G1888 06H3956 71G8388 06H5059 06H6145 82G3602 06H3372 06H7874 06H8686 82G3606 82G3596 82G3601 82G3599 06H8684 82G3607 06H8684 06H7097 33F8444 06H7873 06H5060 71G4646 06H4595 62X1045 82G3620 Miscellaneous Parts Kit C2 Spring (1) EMI Ground Clips (4) EMI Ground Springs (4) Lock Pawl (1) System Board Mounting Clips (2) Screws (4) Side Cover Foam Gasket (1) 82G3611 Cables (Type 8642) 1 2 3 4 5 Index Cables (Type 8642) 1 System Status Cable (1X4) 2 Diskette Drive (3X) Signal Cable (with power) 3 SCSI-Fast/Wide Cable (for 3 drives) (1Z0, 2ZS, and 4ZS) SCSI-Fast/Wide Cable (for 3 drives) (0Z0 Only) 4 Hard Disk Drive Power Cable (for 1 drive) SCSI-Fast/Wide ID Select Cable 5 SCSI-Fast/Wide Cable Flex (for 1 drive) C2 Cable (with Switch) Fan Cable Assembly Information Display Cable (2X13) Dual Serial Cable Assembly Options (Type 8642) 4mm DAT Autoloader 16MB ECC Memory SIMM 32MB ECC Memory SIMM 220-Watt Power Supply Assembly C2 Cable Cover Cable Cover Thumbscrew DASD Hot-Swap Tray Assembly (Narrow) P54C-100/66MHz Processor Card Eithernet PeerMaster Quad-BT Adapter (with coax cable connector) Eithernet PeerMaster Quad-B2 Adapter (with twisted-pair cable connector) SCSI PCI Option CD-to-Backplane Cable SCSI Backplane to CD-ROM Terminator Cable RAID Controller to Backplane Cable 82G3617 06H3405 06H6661 06H6675 82G3610 06H3957 06H6145 82G3612 06H7870 06H8679 06H7868 06H7541 06H7761 06H7762 06H3237 71G6290 61G3842 71G6292 71G0692 06H4220 06H6042 06H6876 06H3751 83G3613 PC Server 720 - Type 8642 401 Keyboards (101/102 Key) Keyboards (101/102 Key) Arabic Belgium-Dutch Belgium-French Bulgarian Czech Danish Dutch Finnish French German Greek Hebrew Hungarian Iceland Italy Latvia Norwegian Polish Portuguese Romanian Russian-Cyrillic Serbian-Cyrillic Slovak Slovenia/Croatia/Bosnia South Africa Spanish Swedish Swiss-French Swiss-German Turkish 179 Turkish 440 U.K. English U.S. English U.S. English (E/ME/A use only) 402 PC Server HMM 1391490 1391414 1391526 1399583 1399570 1391407 1391511 1391411 1391402 1391403 1399046 1391408 1399581 1391495 1393395 1391406 1391409 1399580 1391410 1399582 1399579 1399578 1399571 1393669 1396790 1391405 1391411 1391412 1391412 8125409 1393286 1391406 06H9743 1396790 Power Cords Power Cords Arabic Belgium Bulgaria Czech Republic Denmark Finland France Germany Hungary Israel Italy Latvia Netherlands Norway Poland Portugal Serbia Slovakia South Africa Spain Switzerland Switzerland (French/German) U.S. English U.K./Ireland Yugoslavia 14F0033 1339520 1339520 1339520 13F9997 1339520 1339520 1339520 1339520 14F0087 14F0069 1339520 1339520 1339520 1339520 1339520 1339520 1339520 14F0015 1339520 1339520 14F0051 62X1045 14F0033 1339520 PC Server 720 - Type 8642 403 SCSI Multi-Storage Enclosure - Type 3517 Features . . . . . . . . . . . . . . . . Diagnostics and Test Information . . . . Additional Service Information . . . . . . Address Settings . . . . . . . . . . Manual-Plug Tape Drive (8-Bit, 4-mm) Type 1 . . . . . . . . . . . . Type 2 . . . . . . . . . . . . Devices . . . . . . . . . . . . . Specifications . . . . . . . . . . . . Locations . . . . . . . . . . . . . . . . Front View . . . . . . . . . . . . . Rear View . . . . . . . . . . . . . . Internal View . . . . . . . . . . . . Backplane . . . . . . . . . . . . . . Power Supply . . . . . . . . . . . . Symptom-to-FRU Index Supplement . . . Parts Listing . . . . . . . . . . . . . . Copyright IBM Corp. 1996 . . . . . . . . . . . . . . . . . . . . . . . . . . . . . . . . . . . . . . . . . . . . . . . . . . . . . . . . . . . . . . . . . . . 406 407 407 407 407 408 409 410 411 412 412 413 414 415 416 416 420 405 Features Important For additional information about the 3517, refer to the 3517 Model 001 SCSI Multi-Storage Enclosure Service Guide, SY32-0400. Media Bays Two media bays support 8-bit, 4-mm tape drives. Hot-Swap Bays Five hot-swap bays support 1.1 gigabyte (GB), 2.2GB, and 4.5GB single-ended SCSI-2 disk drives mounted on easily removable carriers. Hot-Swap Carriers Each carrier contains the following features, as shown at the bottom of the illustration on page 412. A pushbutton power switch that allows power to be removed from and returned to the disk drive. A green light to indicate that power is being supplied to the disk drive. (The green light will flash if the power switch on the carrier is pushed off or if the cooling fan is malfunctioning.) A yellow light to indicate that the 3517 is connected to the system and the disk drive is available. A latch to lock the disk drive into the hot-swap bay to maintain connection with the bus. (The carrier is locked into the bus when the latch is in the horizontal position.) Power Supply Non-autoranging (see Attention on page 416) Low voltage (115 volts setting) 90–137 V ac 6.3 Amps 0.76 kVA 378 Watts High voltage (230 volts setting) 180–265 V ac 4.0 Amps 0.96 kVA 480 Watts Servers Supported The 3517 can be attached to any PC Server that supports a SCSI-2 adapter. 406 PC Server HMM Diagnostics and Test Information If a problems occurs with the 3517, see “Symptom-to-FRU Index Supplement” on page 416. Additional Service Information The following information is for the SCSI Multi-Storage Enclosure - Type 3517. “Address Settings.” “Specifications” on page 411. Address Settings Manual-Plug Tape Drive (8-Bit, 4-mm): Two types of manual-plug tape drives (8-bit, 4-mm) can be used in the 3517: type 1 and type 2. They can be identified by the location of the SCSI signal cable connector on the rear of the drive assembly, as shown under “Type 1” on page 408 and “Type 2” on page 409. (When viewing the rear of a type-1 tape drive, the SCSI signal cable connector is located on the top-half of the rear of the drive assembly. When viewing the rear of a type-2 tape drive, the SCSI signal cable connector is located on the bottom-half of the rear of the drive assembly.) Set the address switches or pins (as applicable) on the manual-plug tape drives before installing the drives in the media bays. See pages 408 and 409. Encolsure - Type 3517 407 Type 1 To set the address on a type-1 tape drive: 1. Remove the SCSI bus terminators if they are installed. 2. Move the switches on the switch bank, as illustrated. SCSI Connector (50 to 68 Pin Interposer) Manual-Plug Tape Drive Switch Bank Off 8 7 6 5 4 3 2 1 On SCSI Bus Terminators On On Off <---6 <--- Upper Media Bay Position On Off On <---5 <--- Lower Media Bay Position 408 PC Server HMM Type 2 To set the address on a type-2 tape drive: 1. Remove the SCSI bus terminator jumpers (pins 6 and 8). 2. Use the address pin jumpers provided with the tape drive to connect the upper and lower pins that correspond to the SCSI ID you want to use, as illustrated. SCSI ID Jumpers (Pins 1-3) } .... ... ........ ......................... ......................... 1 1 1 Address Pins Address 6 On On Off Address Pins Address 5 On Off On Upper Media Bay Position Lower Media Bay Position Encolsure - Type 3517 409 Devices: The following illustration shows the seven device addresses for the 3517 storage unit. Device Address 6 Media Bays 5 4 3 2 Hot Swap Bays 1 0 410 PC Server HMM Specifications Note If more than one 3517 is installed, you must leave a minimum space of 2.5 cm (1 in.) between them, and 15 cm (6 in.) in the back, to meet cooling requirements. Size Depth: 483 mm (19 in.) Height: 407 mm (16 in.) Width: 197 mm (7.75 in.) Weight Minimum configuration (2 devices): 20 kg (44 lb.) Note The weight of the 3517 is between 18 and 32 kg (39.7 and 70.5 lb.). It takes two persons to safely lift the unit. Operating Environment Air temperature: 16° to 32° C (60.8° to 89.6°F) Relative Humidity: 20% to 80% Wet Bulb: 23.0° C (73.4°F) maximum Voltage: 115/230 Maximum altitude: 2135 m (7000 ft) Electrical Input Input voltage – Low range - Minimum: 90 V ac - Maximum: 137 V ac – High range - Minimum: 180 V ac - Maximum: 265 V ac – Input kilovolt-amperes (kVA) approximately - Low range input: 0.76 kVA - High range input: 0.96 kVA Encolsure - Type 3517 411 Locations Front View Top Cover Green Light Control Panel Power Switch Front Cover Media Bay 6 Media Bay 5 Lock 4 3 Hot Swap 2 Bays 1 0 Latch Hot Swap Hard Drive Latch 412 PC Server HMM Handle Power Switch Green Light Yellow Light Rear View Voltage Selection Switch Power Cord System SCSI Cable Blank SCSI Panel Encolsure - Type 3517 413 Internal View Chassis Backplane Manual-Plug Devices To Manual-Plug Devices Cable Tie To Backplane Screwlock (2X) Internal SCSI Cable 414 PC Server HMM Backplane SCSI Connector 12 V Power Connector 5 V Power Connector Hot-Swap Drive Connector (5X) Fan Connector Backplane Encolsure - Type 3517 415 Power Supply The power supply is mounted at the top back of the 3517. Power Switch Screws (2X) LED Cable To ManualPlug Devices To Backplane Mounting & Grounding Screw Holes (4X) Voltage Selection Switch Power Cord Connector Attention The Voltage Selection Switch is a two-position switch on the power supply. The switch can be set to 115 V ac (in USA) or 230 V ac (in some other countries). The switch must be set to match the input voltage at the wall outlet before connecting the power cord. If the 3517 is connected to the wrong level of voltage input, the 3517 will not operate and the power supply can be damaged. The power supply is not autoranging. Symptom-to-FRU Index Supplement The information in this supplemental index supports the SCSI Multi-Storage Enclosure (Type 3517). The index lists symptoms and the possible causes. The most likely cause is listed first. Use the index to help you decide which FRUs to have available when servicing this unit. 416 PC Server HMM Important The information in this manual is intended for service representatives who are trained to repair the IBM 3517 SCSI Multi-Storage Enclosure. Before servicing an IBM product, be sure to review “Safety Information” on page 456. For additional information, refer to the 3517 Model 001 SCSI Multi-Storage Enclosure Service Guide, SY32-0400. Symptom The green light for the power switch is not on, and/or the power supply fan is not running. FRU/Action 1. Verify that the power cord to the 3517 has continuity. 2. Verify that the power source has been wired correctly and has the correct voltage. 3. Verify that the voltage selection switch is set to match the power source. 4. Verify that the power cord is plugged into the 3517 and the power source. 5. Verify that the power switch is on. 6. If the problem still exists, replace the power supply. The green light is flashing, and the yellow light is off for all hot-swap hard disk drives. 1. Press the power switch on the hot-swap hard disk drive in hot-swap bay 0. 2. If the green light on the hot-swap hard disk drive continues to flash, replace the cooling fan. 3. If the green light on the hot-swap hard disk drive is on and not flashing, press the power switch on the remaining hot-swap hard disk drives to turn their green lights on. The green light should not be flashing. Encolsure - Type 3517 417 Symptom The green light for the power switch is on, and the green light on all hot-swap hard disk drives is not flashing, but no devices are available to the system. FRU/Action 1. Verify that the system SCSI cable. is correctly connected to the 3517 storage unit and the system. 2. Verify that the internal SCSI cable and all power cables to the backplane are correctly connected. 3. Send the command from the system to spin-up the drives. Refer to the system publications for more information. Remove the following FRUs; then run the system diagnostics after each FRU is replaced. a. System SCSI Cable. b. Internal SCSI cable. c. Backplane. 4. If there is still a problem after all the FRUs have been replaced, one of the hot-swap hard disk drives may be defective. a. Unseat all of the hot-swap hard disk drives except the one in hot-swap bay 0. b. Disconnect the internal SCSI cable, if installed, from the manual-plug devices. c. Send the command from the system to spin-up the drives. Refer to the system publications for more information. 5. If the command is successful, reseat the next hot-swap hard disk drive and send the command from the system to spin-up the drive. 6. Repeat step 5 on page 418 until the failure symptom returns. Then remove and replace the FRUs in the following order, and run the system diagnostics after each FRU is replaced. a. Hot-swap hard disk drive carrier. b. Hot-swap hard disk drive. 418 PC Server HMM Symptom One hot-swap hard disk drive is not available to the system. FRU/Action 1. Verify that the hot-swap hard disk drive carrier cables are correctly connected. 2. If the green light on the hot-swap hard disk drive is flashing, press the power switch on the drive. 3. Send the command from the system to spin-up the drive. Refer to the system publications for more information. 4. If the hot-swap hard disk drive is still not available to the system, remove and replace the FRUs in the following order, and run the system diagnostics after each FRU is replaced. a. Hot-swap hard disk drive carrier address cable. b. Hot-swap hard disk drive carrier. c. Hot-swap hard disk drive. d. Backplane. One manual-plug device is not available to the system. 1. Verify that all cables are properly connected. 2. Send the command from the system to start the drive. 3. If the manual-plug device is still not available to the system, exchange the FRUs in the following order; then run the system diagnostics after each FRU is replaced. a. Interposer on the manual-plug tape drives. b. Manual-plug device. c. Internal SCSI cable. Encolsure - Type 3517 419 Parts Listing 1 19 18 2 17 16 3 4 15 5 6 14 13 12 11 420 PC Server HMM 10 7 9 8 Index SCSI Multi-Storage Enclosure (Type 3517) 1 Top Cover Assembly 05H4680 Screws, Top Cover Assembly (4 each) 27H2338 2 4GB/8GB 4-mm Tape Drive 16G8454 Screws, 4-mm Tape Drive (4 each) 27H2338 3 SCSI Cable Assembly, Internal 05H4827 Screw-locks, SCSI Cable (2 each) 27H0863 Cable Tie 1159519 4 Backplane Assembly (with 5-bay, 26H9180 hot-swap cage) Screws, Backplane Assembly (8 each) 27H0840 5 Control Panel Assembly 26H9191 6 Blank Media-Bay Panel 06H2187 7 IBM Logo 44H7627 8 Front Cover Assembly 26H9206 9 16-Bit Power Carrier, Hot-Swap Hard Disk 06H8631 Drive Screws, Hot-Swap Hard Disk Drive to 1147429 Carrier (4 each) 10 16-Bit 1.1GB Hot-Swap Hard Disk Drive 06H8560 16-Bit 2.2GB Hot-Swap Hard Disk Drive 06H8561 16-Bit 4.5GB Hot-Swap Hard Disk Drive 06H8563 11 Cable, 16-Bit Address, Disk Drive to Carrier 06H8631 12 Latch 26H9207 13 Feet (4 each) 26H9234 Screws, Feet (4 each) 49G5445 14 Blank SCSI Panel 27H0862 Screws, Blank SCSI Panel (2 each) 27H2338 15 Fan Assembly, includes Isolators and 27H0922 Finger Guard Cable Tie 1159519 16 SCSI Fast/Wide 1X Cable 06H3231 SCSI Wide 1X Cable 70G9857 17 Interposer, 2 x 25 to 68 Pin 92F0324 18 Power Cord (See page 422.) 19 Power Supply 26H9205 Screws, Power Supply (4 each) 34H8186 Screws, Power Switch (2 each) 34H8186 Cable Tie 1159519 Media Kit, 4GB/8GB 4-mm Tape Drive 8191149 4GB/8GB 4-mm Tape Drive Data Cartridge (8191160) 4GB 4-mm Tape Drive Diagnostic Cartridge (8191146) 4-mm Tape Drive Cleaning Cartridge (21F8763) Encolsure - Type 3517 421 Power Cords Arabic Belgium Bulgaria Czechoslovakia Denmark Finland France Germany Hungary Israel Italy Latvia Netherlands Norway Poland Portugal Serbia Slovakia South Africa Spain Switzerland Switzerland (French/German) U.S. English U.K./Ireland Yugoslavia 422 PC Server HMM 14F0033 13F9979 13F9979 13F9979 13F9979 13F9979 13F9979 13F9979 13F9979 14F0087 14F0069 13F9979 13F9979 13F9979 13F9979 13F9979 13F9979 13F9979 14F0015 13F9979 13F9979 14F0051 6952301 14F0033 13F9979 PC Server Enterprise Expansion Enclosure - Type 3518 Features . . . . . . . . . . . . . . . . . . . Diagnostics and Test Information . . . . . . . Additional Service Information . . . . . . . . . Power-on Self-Test (POST . . . . . . . . . Power-on Sequence . . . . . . . . . . . . Power Supplies . . . . . . . . . . . . . . Power Supply LED and Button . . . . . Primary Power Supply Voltages . . . . . Optional Power Supply Drive Connector Voltages . . . . . . . . . . . . . . . Power Supply Shutdowns . . . . . . . . Specifications . . . . . . . . . . . . . . . Systems Supported . . . . . . . . . . . . Locations . . . . . . . . . . . . . . . . . . . DASD Door . . . . . . . . . . . . . . . . Expansion Bays . . . . . . . . . . . . . . Front Cover . . . . . . . . . . . . . . . . Front Panel Controls . . . . . . . . . . . . Identification Numbers . . . . . . . . . . . Input/Output Connectors . . . . . . . . . . Hot Swap Backplane (FRU No. 06H8629) . . J12 Backplane SCSI ID Jumper Settings . Hot Swap Tray (FRU No. 06H8631, 07H0774) Front Panel LED Status Indicators . . . . . Side Cover . . . . . . . . . . . . . . . . System Board . . . . . . . . . . . . . . . System Board Connections . . . . . . . U-Bolt Security (Optional) . . . . . . . . . Symptom-to-FRU Index . . . . . . . . . . . . Parts Listings . . . . . . . . . . . . . . . . . Cables (Type 3518) . . . . . . . . . . . . Power Cords . . . . . . . . . . . . . . . Copyright IBM Corp. 1996 . . . . . . . . 424 425 426 426 426 428 428 429 . . . . . . . . . . . . . . . . . . . . . . . 430 431 432 433 434 435 436 437 437 438 438 439 440 441 442 443 444 444 445 446 448 450 451 423 Features Expansion Bays 20 drive bays, 18 of which are hot-swap bays Options Supported Up to 18 slim-high or 9 half-high hot-swap hard disk drives (1 GB, 2 GB, and 4 GB) Tape autoloader 4/10 GB 3.5 Inch DAT tape drive CD-ROM drive Security Features Bolt-down capability DASD Door lock Security cover (optional) Information Panel Two 16-character lines LCD display of diagnostic and status information Integrated Functions LED usability support Power Supply 424 470-watt with automatic range voltage selection (115-230 V ac) Built-in overload and surge protection Power supply upgrade expansion option – 220-watt automatic range voltage selection – Built-in overload and surge protection PC Server HMM Diagnostics and Test Information The following is a list of problems and references for diagnosing the Type 3518 Expansion Enclosure. Problem Reference Error Codes/Error Messages “Symptom-to-FRU Index” on page 446 Hot Swap Drives “Hot Swap Tray (FRU No. 06H8631, 07H0774)” on page 441 Hot Swap Tray LED indications “Hot Swap Tray (FRU No. 06H8631, 07H0774)” on page 441 Power Supply Voltages See “Power Supplies” on page 428 PC Server Type 3518 425 Additional Service Information The following information is for the PC Server Enterprise Expansion Enclosure - Type 3518 “Power-on Self-Test (POST.” “Power-on Sequence.” “Power Supplies” on page 428. “Specifications” on page 432. “Systems Supported” on page 433. Power-on Self-Test (POST Each time the expansion enclosure is powered on, it performs a series of tests called the power-on self-test, or POST. If the tests detect a problem, an error/message appears on the information panel. If you suspect a problem or an error/message appears, refer to “Symptom-to-FRU Index” on page 446. Power-on Sequence Note The expansion enclosure can be powered on without connecting it to a server. However, the expansion enclosure must be connected to a server before the drives installed in the enclosure can be used. To power-on the expansion enclosure, do the following. 1. Locate the keys; then unlock and open the door on the front of the expansion enclosure. 2. If the server is powered-on, power it off. 3. Lift the transparent Power Enable Switch cover on the front panel and press the Power Enable Switch; the Power OK indicator will illuminate. 4. Then, press the Power On/Off switch (located just above the Power Enable Switch). The information panel will display IBM 3518. 5. Power-on the server. The power-on self-test (POST) begins. 6. Check the monitor connected to the server. The screen displays the IBM logo and a number that represents the amount of available server memory. The server beeps once to indicate that it is working properly. 426 PC Server HMM Notes 1. If you hear more than one beep or no beep, check the monitor and the information panel. 2. If an error message appears on the information panel or the expansion enclosure stops running during testing or normal operation, see “Symptom-to-FRU Index” on page 446. 3. If an error message appears on the monitor screen, the monitor screen is blank, or the server stops during normal operation, refer to the diagnostic information for the server. PC Server Type 3518 427 Power Supplies Attention Always unplug the power cord and wait two minutes before replacing the power supply to give the power supply capacitors time to discharge. The expansion tower is shipped with a primary power supply. An additional or optional power supply can be added to the computer. Connectors are used to transfer the primary power supply voltages and signals from the primary power supply to the optional power supply. The following illustrations show how the two power supplies are connected. Attention When replacing the primary power supply cover plate, rotate the plate 180°. (This will leave an opening for the primary power supply connector cable that connects to the optional power supply.) Failure to do so will cause the power supply connector cable to be crimped when the plate is replaced. Note Tabs are located on the side of each power supply to secure them together. Power Supply LED and Button: The power-good LED and button are located on the side of the primary power supply button. The LED (when lit) indicates that the power supply is good. If the LED fails to come on when the computer is powered-on, do the following: 428 While observing the LED on the power supply, press the power supply button. If the LED fails to light (while you are holding the button in), you may have a defective power supply. If the LED lights when the button is pressed, go to “Power Supply Shutdowns” on page 431. PC Server HMM Primary Power Supply Voltages: If the voltages are correct and the power supply fan runs, the power supply is OK. Connector P1 1 4 Key −Lead Pin +Lead Pin 4 4 1 2 V dc Minimum V dc Maximum + 4.8 + 4.8 + 5.25 + 5.25 Connector P2, P2A 1 4 Key −Lead Pin +Lead Pin 4 4 1 2 V dc Minimum V dc Maximum + 3.3 + 3.3 + 3.5 + 3.5 PC Server Type 3518 429 Connector P3 1 12 −Lead Pin +Lead Pin 2 2 2 2 4 5 8 10 V dc Minimum V dc Maximum + 11.52 + 11.52 - 10.8 + 4.8 + 12.6 + 12.6 - 13.2 + 5.25 Connector P4, P5, P6, P7, P8, P9, P10 A −Lead Pin +Lead Pin B B A D B C D V dc Minimum V dc Maximum + 4.8 + 11.52 + 5.25 +12.6 Optional Power Supply Drive Connector Voltages: If the voltages are correct and the power supply fan runs, the power supply is OK. A −Lead Pin +Lead Pin B B A D 430 PC Server HMM B C D V dc Minimum V dc Maximum + 4.8 + 11.52 + 5.25 +12.6 Power Supply Shutdowns: If the power supply shuts down, or appears to fail at power-on, you might have one of the following problems: Too many devices are set to start instantly. See “Setting the Motor-Start Jumper” on page 549. There are too many large-capacity devices installed (such as hard disk drives). The nominal operating current of the devices installed collectively exceeds the available current of the power supply. See the “Personal System/2 Installation Planning” guide (form number S41G-2927) for more information. Also ensure that the fans operate when the machine is powered on. Note Verify that the voltage-select switch (if applicable) is set for the correct voltage. If the voltages are correct and the Symptom-to-FRU index does not solve the problem, go to “Undetermined Problems” on page 552 PC Server Type 3518 431 Specifications Size With pedestal: – Depth: 635 mm (25 in.) 835 mm (32.8 in.) with cable cover – Height: 635 mm (25 in.) – Width: 247 mm (9.75 in.) Weight Minimum configuration as shipped: 29.1 kg (64 lb) Environment Air temperature – System on: 10° to 35° C (50° to 95° F) Altitude: 0 to 914 mm (3000 ft.) – System on: 10° to 32° C (50° to 90° F) Altitude: 914m (3000 ft.) to 2133 m (7000 ft.) – System off: 10° to 43° C (50° 110° F) Maximum Altitude: 2133 m (7000 ft.) Humidity – System on: 8% to 80% – System off: 8% to 80% Maximum altitude: 2133 m (7000 ft.) Heat Output Approximate heat output in British Thermal Units (BTU) per hour – Minimum configuration: 150 BTU (44 watts) – Maximum configuration: 3600 BTU (1055 watts) Electrical Input Sine-wave input (50 to 60 Hz is required) Input voltage – Low range - Minimum: 90 V ac - Maximum: 137 V ac – High range - Minimum: 180 V ac - Maximum: 265 V ac – Input kilovolt-amperes (kVA) approximately - Minimum configuration as shipped: 0.16 kVA - Maximum configuration: 1.0 kVA Total Power Available for Drives 432 Nominal operating current allowed: – +5 V dc line: 7.5 A base; 20.5 A with upgrade – +12 V dc line: 4.7 A base; 17.7 A with upgrade PC Server HMM Systems Supported There are two requirements for system units to support the PC Server Enterprise Expansion Enclosure (Type 3518). The requirements are: 1. Code to support up to 4 or more SCSI adapters 2. Already support 68 pin SCSI-2 adapters The systems currently supported are: Model 85 Model 95 Server 300 Server 320 Server 500 Server 520 Server 720 Any future servers that meet the above requirements. PC Server Type 3518 433 Locations 434 “DASD Door” on page 435 “Expansion Bays” on page 436 “Front Cover” on page 437 “Front Panel Controls” on page 437 “Identification Numbers” on page 438 “Input/Output Connectors” on page 438 “Hot Swap Backplane (FRU No. 06H8629)” on page 439 “Hot Swap Tray (FRU No. 06H8631, 07H0774)” on page 441 “Front Panel LED Status Indicators” on page 442 “Side Cover” on page 443 “System Board” on page 444 “U-Bolt Security (Optional)” on page 445 PC Server HMM DASD Door PC Server Type 3518 435 Expansion Bays Open Bays B1 B2 Bank C Bays 1 - 6 Open Bays Bank D Bays 1 - 6 Bank E Bays 1 - 6 Bays/Banks Supported Devices Bays B1 and B2 CD-ROM drives, internal SCSI hard disk drives, or tape drives Banks C, D, and E Up to 18 SCA, hot-swap, 3.5-inch hard disk drives 436 PC Server HMM Front Cover Front Panel Controls Enter Button Power On/Off Button Power Enable Switch PC Server Type 3518 437 Identification Numbers Serial Number Machine Type/Model Handle Key Tag Input/Output Connectors Note The following illustration shows the rear view of the Type 3518 Expansion Enclosure. SCSI Connector Knockouts SCSI Connector Power Connector 438 PC Server HMM Hot Swap Backplane (FRU No. 06H8629) Chaining Connector Hot-Swap Drive Connectors System Status Connector SCSI-2 Connector Power Connectors ID 0 ID 1 ID 2 ID 3 ID 4 ID 5 SCSI ID SCSI-2 Input Connector J1 J9 J2 J12 Power Connectors SCSI-2 Output (Daisy-Chain) Connector PC Server Type 3518 439 J12 Backplane SCSI ID Jumper Settings: The Backplane SCSI ID Address Jumper, a pin block with four pairs of pins (J12), is located on the rear of the backplanes in banks C, D, and E. When two backplanes are daisy-chained in the enclosure, the first backplane address jumper (for example, Bank C) must be set to LO, defining the SCSI IDs as 0 through 5. The second backplane (in this example, bank D), must be set to either Reverse, defining the SCSI IDs as 5 through 0, or HI, defining the SCSI IDs as 8 through D. The default, no jumper installed, is to set the addresses to LO. If the SCSI adapter supports more than eight SCSI devices per SCSI channel, the second backplane can be set either HI or Reverse. However, if the SCSI adapter supports eight or less SCSI devices per channel, the second backplane must be set to Reverse. The following jumper settings are for SCSI ID jumper J12. Jumper Position Description 2 4 6 8 J12 LO Sets SCSI IDs to low, starting from 0 (bay 1) to 5 (bay 6) 1 3 5 7 2 4 6 8 J12 LO Sets SCSI IDs to reverse, starting from 5 (bay 1) to 0 (bay 6) 1 3 5 7 2 4 6 8 J12 Sets SCSI IDs to high (SCSI IDs 8 to D) HI 1 3 5 7 440 PC Server HMM Hot Swap Tray (FRU No. 06H8631, 07H0774) Notes 1. The following trays are shown with drives installed. 2. Each hot-swap drive installed must have a Hot Swap Drive Tray attached. Amber Light Unlocked Position Green Light Power-Off Switch Locked Position The Hot Swap Drive Tray for the expansion enclosure has a small switch that stops the movement of the disk drive. The tray also provides two LEDs (one green and one amber) to indicate the current state of the drive and tray. The following table summarizes the LED states on the hot-swap tray and their meanings. Green Amber Description On Off The Drive tray is powered on; the hard disk drive is inactive; and the drive should not be removed. Blinking Off The hard disk drive is inactive. The hot-swap drive can be removed safely. On On or Blinking The hard disk drive is in use, and should not be removed. Off Off The drive is defective, or no power is being supplied to the drive. The hot-swap drive can be removed safely. PC Server Type 3518 441 Front Panel LED Status Indicators Power OK Indicator Power Enable Indicator All Subsystems Good Indicator Processor Complex Error Indicator Information Panel 442 PC Server HMM Side Cover PC Server Type 3518 443 System Board J7 0 1 2 PCI Slots 3 4 1 ISA Slots J11 J4 J3 J6 J12 J13 System Board Connections Connector Description Connect To J3 Power Supply Connector P1 J6 Power Supply Connector P3 J7 Operator Panel Connector Operator Panel J12 Power Supply Connector P2 J13 Power Supply Connector P2A Note The following slots/connectors on the system board are not currently supported. Slots/Connectors Description PCI Slot 0 64 Bit PCI connector PCI Slots 1 to 4 32 Bit PCI connectors ISA Slot 1 System Maintenance Adapter for Reporting Trouble (SMART) ISA Card J11 C2 Security Connector 444 PC Server HMM U-Bolt Security (Optional) PC Server Type 3518 445 Symptom-to-FRU Index This index supports the PC Server Enterprise Expansion Enclosure (Type 3518). The system management subsystem consists of a main processor that acts as the controller. The controller monitors the system temperature, the power supply, the fan rotation, and the system voltages. If a non-fatal error is detected, an error code or error message is displayed on the information panel. Fatal errors are logged to the system EEPROM and displayed at the next power-on. Use this Symptom-to-FRU Index to help you decide which FRUs to have available when servicing the expansion enclosure. For information on: Go to: Power supply problems “Power Supplies” on page 428 Error Code/Symptom FRU/Action E700 AC Failure (Power lost while the enclosure was running. The error is displayed the next power-on.) 1. Power Cord 2. Power Supply E701 Power Supply (Redundant power supply indicates a bad condition. Error is non-fatal and can be cleared by pressing the front panel Enter button.) 1. Power Supply E702 5V Failure (Enclosure 5V input is low or too high. If too low, non-fatal error is written to the information panel. If to high, enclosure is shutdown and the error is displayed the next power-on.) 1. Power Supply 2. System Board (Planar) 703 12V Failure (Enclosure 12V input is low or too high. If too low, non-fatal error is written to the information panel. If to high, enclosure is shutdowns and the error is displayed the next power-on.) 1. Power Supply 2. System Board (Planar) 446 PC Server HMM Error Code/Symptom FRU/Action E704 Fan Failure (In a non-fatal situation , a fan has failed. If multiple fans fail, the enclosure is shutdown and the enclosure will not run until the failure is corrected.) 1. Fan 2. System Board (Planar) E705 Overheat (Power supply overheated and the enclosure was shutdown.) 1. Power Supply 2. Fan 3. System Board (Planar) Blank information panel (If the Power OK indicator is on and the fans are running, operation will probably not be affected. However, no diagnostic errors/messages will be displayed.) 1. Information Display Cable 2. Information Display Assembly 3. System Board (Planar) No power (Be sure the power cords and cables are properly plugged in, the expansion enclosure is properly enabled and powered on, and the electrical power source is active.) 1. Power Cord 2. Power Supply PC Server Type 3518 447 17 448 PC Server HMM 15 18 14 16 19 20 21 13 22 12 1 11 2 10 4 3 8 7 9 5 6 Parts Listings Index System Unit (Type 3518) 1 Base Frame (4X CD-ROM) 2 Information Display Assembly Display Panel Support 3 I/O Panel Die Cast (Additional Micro Channel Blanks) 4 I/O Flex Plate 5 Fan Mounting Support 6 Right Side Door 7 Fan Assembly 8 Pedestal Wheel 9 470 Watt Power Supply 220 Watt Power Supply Upgrade 10 System Board (Planar) 11 Pedestal 12 DASD Tray - Hot Swap (Wide) 12 DASD Tray - Hot Swap (Narrow) - Optional (for Option 70G8492) 13 Hard Disk Drive - Optional 14 Front Bezel with Shield (4X CD-ROM) 15 Keylock with Keys 16 DASD Door 17 IBM Logo (Restricted) 18 5.25-Inch Blank Bezel (4X CD-ROM) 19 Diskette Drive Bezel 20 Rubber Dome Switch Pad 21 Control Panel Bezel 22 Control Panel Card Assembly 4 mm DAT Autoloader - Optional Control Panel Cable Jumper DASD Mounting Plate Hinges with Screws Hot Swap Back Plane Assembly Hot Swap Cam Spring, Shaft/Knob Miscellaneous Parts Kit Screws (4 each) Lock Pawl (1 each) EMI Ground Clip (4 each) System Board Mounting Clip (2 each) C2 Spring (1 each) Miscellaneous Parts Kit (Blackplane) Jumpers (4 each) Screws (4 each) Standoff (4 each) Power Cord (see “Power Cords” on page 451) 06H8685 82G3614 06H7961 06H8657 06H8627 82G3618 82G3594 82G3616 82G3609 06H3589 06H3237 06H8625 82G3608 06H8631 07H0744 06H9379 82G3606 82G3596 82G3601 06H8684 06H8670 06H7873 82G3607 75H7652 06H7514 06H8663 82G3602 82G3600 06H8629 07H0498 82G3611 07H0745 PC Server Type 3518 449 Cables (Type 3518) 1 2 3 4 Index Cables (Type 3518) 1 System Status Cable 1X4 (with 4 connectors) 2 Hard Disk Drive Power Cable 2X (with 2 connector) 3 Hard Disk Drive Power Cable 2X Short (with 2 connectors) 4 SCSI-Fast/Wide Cable 1X Short (with 1 connector) C2 Cable with Switch Fan Cable Assembly Information Display Cable Hot Swap Back Plane Chaining - Optional DASD ID Cable - Optional (for Option No. 96G3055, 94G3057, 94G3052) DASD ID Cable (for Option No. 71G9743) 4X Non-Hot Swap SCSI Cable - Optional 450 PC Server HMM 82G3617 06H8640 06H8641 06H7957 82G3612 06H7870 06H8679 06H8644 07H1696 06H8664 06H8647 Power Cords Power Cords Arabic Belgium Bulgaria Czech Republic Denmark Finland France Germany Hungary Israel Italy Latvia Netherlands Norway Poland Portugal Serbia Slovakia South Africa Spain Switzerland Switzerland (French/German) U.S. English U.K./Ireland Yugoslavia 14F0033 13F9979 13F9979 13F9979 13F9997 13F9979 13F9979 13F9979 13F9979 14F0087 14F0069 13F9979 13F9979 13F9979 13F9979 13F9979 13F9979 13F9979 14F0015 13F9979 13F9979 14F0051 62X1045 14F0033 13F9979 PC Server Type 3518 451 Related Service Information Important The service procedures are designed to help you isolate problems. They are written with the assumption that you have model-specific training on all computers, or that are familiar with the computers, functions, terminology, and service information provided in this supplement and the PS/2 Hardware Maintenance Manual (part number 83G8990, form number S52G-9971-02). Safety Information . . . . . . . . . . . . . . . General Safety . . . . . . . . . . . . . . . Electrical Safety . . . . . . . . . . . . . . . Safety Inspection Guide . . . . . . . . . . . Handling Electrostatic Discharge-Sensitive Devices . . . . . . . . . . . . . . . . . . Grounding Requirements . . . . . . . . . . . Battery Notice . . . . . . . . . . . . . . . . . Disk Array Configuration . . . . . . . . . . . . . Device Drivers . . . . . . . . . . . . . . . . Administration Monitoring Utilities . . . . . . . RAID Technology . . . . . . . . . . . . . Hard Disk Drive Capacities . . . . . . . . Additional Storage Capacity . . . . . . . . The RAID Configuration Program Screens . Starting the RAID Configuration Program . . . Viewing the RAID Configuration . . . . . . . Performing Common Tasks . . . . . . . . . . Creating a Disk Array . . . . . . . . . . . Defining Logical Drives . . . . . . . . . . Defining a Hot-Spare Drive . . . . . . . . Deleting a Disk Array . . . . . . . . . . . Redefining Space in an Array . . . . . . . Drive Maintenance . . . . . . . . . . . . . . . Obtaining Drive Status . . . . . . . . . . Bay/Array Selection List . . . . . . . . . . Blank Status . . . . . . . . . . . . . . . Results of a Hard Disk Drive Failure . . . . Logical and Hard Disk Drive Status Indications Replacing a Faulty Drive . . . . . . . . . Advanced Functions . . . . . . . . . . . . . Backing Up the Disk-Array Configuration . . Restoring the Disk-Array Configuration . . . Using the Advanced Functions . . . . . . Changing the Write Policy . . . . . . . . . . Formatting Drives . . . . . . . . . . . . . . Changing the RAID Parameters . . . . . . . Display . . . . . . . . . . . . . . . . . . . . . Ethernet Quad-BT and -B2 PeerMaster Micro Channel Adapters . . . . . . . . . . . . . . . Copyright IBM Corp. 1996 456 456 457 458 460 460 461 461 462 462 462 463 463 463 465 468 469 469 470 474 476 477 479 479 480 481 481 482 482 483 483 484 485 485 487 488 490 490 453 Features . . . . . . . . . . . . . . . . . . Supported Systems . . . . . . . . . . . . . Network Operating System Requirements . . . IBM PeerMaster Server Adapter Option Diskette Operation Modes . . . . . . . . . . . . . . Traditional Adapter Mode . . . . . . . . . VNET Switch Mode . . . . . . . . . . . . Configuration Examples . . . . . . . . . . . Traditional Adapter Mode . . . . . . . . . VNET Switch Mode Configurations . . . . VNET Switch Mode: Single VNET . . . VNET Switch Mode: Multiple VNETs . . VNET Switch Mode: Combined VNETs and Traditional Nets . . . . . . . . . . . Locations . . . . . . . . . . . . . . . . . . 10Base-T Adapter . . . . . . . . . . . . 10Base2 Adapter . . . . . . . . . . . . . Cabling for 10Base-T Networks . . . . . . . . Straight-Through . . . . . . . . . . . . . Crossover . . . . . . . . . . . . . . . . Cabling for 10Base2 Networks . . . . . . . . Symptom-to-FRU Index . . . . . . . . . . . LED Indications . . . . . . . . . . . . . Error Codes . . . . . . . . . . . . . . . NetWare Load-Time Error Messages . . . NetWare Run-Time Messages . . . . . . . Parts Listing . . . . . . . . . . . . . . . . . External SCSI Devices . . . . . . . . . . . . . Termination Requirements . . . . . . . . . . Cabling Requirements . . . . . . . . . . . . Setting SCSI IDs for External Devices . . . . . Hot-Swap Backplane (FRU No. 06H8388) . . . . SCSI ID Jumper . . . . . . . . . . . . . . . ROM Address Jumper Setting . . . . . . . . Termination (Hot-Swap Back Plane) . . . . . IDE Controllers . . . . . . . . . . . . . . . . . Installing an Uninterruptible Power Supply . . . . Keyboard . . . . . . . . . . . . . . . . . . . . Multiple Fixed Disk Drive Replacement (RAID Array) Network Adapters Supported (Dual Processor Servers) . . . . . . . . . . . . . . . . . . . OS/2 Trap Errors . . . . . . . . . . . . . . . . OS/2 Problems during a New Installation . . . OS/2 Version Level Check . . . . . . . . . . PC Server Flash/Diagnostics/CMOS Access Information . . . . . . . . . . . . . . . . . . Printer . . . . . . . . . . . . . . . . . . . . . SCSI Fast/Wide PCI Adaptec Adapters (AHA-2940/2940W) . . . . . . . . . . . . . . Adapter Locations . . . . . . . . . . . . . . BIOS Startup Messages . . . . . . . . . . . Booting the Computer from a SCSI Drive . . . Computer Hangs, or HOST Adapter Cannot Always Find the Drives . . . . . . . . . . . 454 PC Server HMM 492 492 492 492 492 493 493 494 495 496 496 498 499 500 500 500 501 501 501 502 502 502 503 504 507 508 508 508 509 511 512 513 513 513 513 514 515 515 518 519 521 521 522 524 525 526 527 528 529 Connectivity (Cables/Devices) . . . . . . . . Disk Drive Configuration Problems . . . . . . LED (AHA-2940/2940W Adapters) . . . . . . Other Problems and Solutions . . . . . . . . Problems Detected During Installation . . . . . SCSISelect Configuration Utility . . . . . . . . SCSISelect Configuration Utility Control Keys Starting the SCSISelect Configuration Utility From the BIOS Banner . . . . . . . . From the SCSISelect Configuration Utility Diskette . . . . . . . . . . . . . . . SCSISelect Configuration Utility Menus/Options Configuration/View Host Adapter Settings Menu/Options . . . . . . . . . . . . . . Self Diagnostics (AHA-2940/2940W Adapters) . Termination (Devices) . . . . . . . . . . . . Termination (AHA-2940/2940W Adapters) . . . Termination (for Multiple-Computer Configurations) Troubleshooting Checklist — SCSI (AHA-2940/2940W Adapters) . . . . . . . . Using a SCSI Drive as C and Another SCSI Drive as D . . . . . . . . . . . . . . . . . . . . Using a Standard Drive as C and a SCSI Drive as D . . . . . . . . . . . . . . . . . . . . . SCSISelect Utility Program . . . . . . . . . . . Starting the SCSISelect Utility Program . . . . SCSISelect Utility Program Options . . . . . . Configure/View Host Adapter Settings . . . SCSI Controller Settings/Description . . . . SCSI Disk Utilities . . . . . . . . . . . . Using the Low-Level Format Program . . . When To Use the Low-Level Format Program Starting the Low-Level Format Program . . Setting the Motor-Start Jumper . . . . . . . . . ServerGuide . . . . . . . . . . . . . . . . . . Software/Hardware Mismatch Problems . . . . . Undetermined Problems . . . . . . . . . . . . . Problem Determination Tips . . . . . . . . . . . Phone Numbers, U.S. and Canada . . . . . . . . Related Service Information 530 531 531 532 533 534 535 535 535 535 536 536 543 544 544 545 545 546 546 547 547 547 547 548 548 549 549 549 549 550 550 552 553 555 455 Safety Information The following section contains the safety information that you need to be familiar with before servicing an IBM mobile computer. General Safety Follow these rules to ensure general safety: 456 Observe good housekeeping in the area of the machines during and after maintenance. When lifting any heavy object: 1. Ensure you can stand safely without slipping. 2. Distribute the weight of the object equally between your feet. 3. Use a slow lifting force. Never move suddenly or twist when you attempt to lift. 4. Lift by standing or by pushing up with your leg muscles; this action removes the strain from the muscles in your back. Do not attempt to lift any objects that weigh more than 16 kg (35 lb) or objects that you think are too heavy for you. Do not perform any action that causes hazards to the customer, or that makes the equipment unsafe. Before you start the machine, ensure that other service representatives and the customer's personnel are not in a hazardous position. Place removed covers and other parts in a safe place, away from all personnel, while you are servicing the machine. Keep your tool case away from walk areas so that other people will not trip over it. Do not wear loose clothing that can be trapped in the moving parts of a machine. Ensure that your sleeves are fastened or rolled up above your elbows. If your hair is long, fasten it. Insert the ends of your necktie or scarf inside clothing or fasten it with a nonconductive clip, approximately 8 centimeters (3 inches) from the end. Do not wear jewelry, chains, metal-frame eyeglasses, or metal fasteners for your clothing. Remember: Metal objects are good electrical conductors. Wear safety glasses when you are: hammering, drilling soldering, cutting wire, attaching springs, using solvents, or working in any other conditions that might be hazardous to your eyes. After service, reinstall all safety shields, guards, labels, and ground wires. Replace any safety device that is worn or defective. Reinstall all covers correctly before returning the machine to the customer. PC Server HMM Electrical Safety Observe the following rules when working on electrical equipment. Important Use only approved tools and test equipment. Some hand tools have handles covered with a soft material that does not insulate you when working with live electrical currents. Many customers have, near their equipment, rubber floor mats that contain small conductive fibers to decrease electrostatic discharges. Do not use this type of mat to protect yourself from electrical shock. Find the room emergency power-off (EPO) switch, disconnecting switch, or electrical outlet. If an electrical accident occurs, you can then operate the switch or unplug the power cord quickly. Do not work alone under hazardous conditions or near equipment that has hazardous voltages. Disconnect all power before: – Performing a mechanical inspection – Working near power supplies – Removing or installing main units Before you start to work on the machine, unplug the power cord. If you cannot unplug it, ask the customer to power-off the wall box that supplies power to the machine and to lock the wall box in the off position. If you need to work on a machine that has exposed electrical circuits, observe the following precautions: – Ensure that another person, familiar with the power-off controls, is near you. – – – Remember: Another person must be there to switch off the power, if necessary. Use only one hand when working with powered-on electrical equipment; keep the other hand in your pocket or behind your back. Remember: There must be a complete circuit to cause electrical shock. By observing the above rule, you may prevent a current from passing through your body. When using testers, set the controls correctly and use the approved probe leads and accessories for that tester. Stand on suitable rubber mats (obtained locally, if necessary) to insulate you from grounds such as metal floor strips and machine frames. Observe the special safety precautions when you work with very high voltages; these instructions are in the safety sections of maintenance information. Use extreme care when measuring high voltages. Related Service Information 457 Regularly inspect and maintain your electrical hand tools for safe operational condition. Do not use worn or broken tools and testers. Never assume that power has been disconnected from a circuit. First, check that it has been powered-off. Always look carefully for possible hazards in your work area. Examples of these hazards are moist floors, nongrounded power extension cables, power surges, and missing safety grounds. Do not touch live electrical circuits with the reflective surface of a plastic dental mirror. The surface is conductive; such touching can cause personal injury and machine damage. Do not service the following parts with the power on when they are removed from their normal operating places in a machine: – Power supply units – Pumps – Blowers and fans – Motor generators and similar units. (This practice ensures correct grounding of the units.) If an electrical accident occurs: – Use caution; do not become a victim yourself. – Switch off power. – Send another person to get medical aid. Safety Inspection Guide The intent of this inspection guide is to assist you in identifying potentially unsafe conditions on these products. Each machine, as it was designed and built, had required safety items installed to protect users and service personnel from injury. This guide addresses only those items. However, good judgment should be used to identify potential safety hazards due to attachment of non-IBM features or options not covered by this inspection guide. If any unsafe conditions are present, you must determine how serious the apparent hazard could be and whether you can continue without first correcting the problem. Consider these conditions and the safety hazards they present: 458 Electrical hazards, especially primary power (primary voltage on the frame can cause serious or fatal electrical shock). Explosive hazards, such as a damaged CRT face or bulging capacitor Mechanical hazards, such as loose or missing hardware PC Server HMM The guide consists of a series of steps presented in a checklist. Begin the checks with the power off, and the power cord disconnected. Checklist: 1. Check exterior covers for damage (loose, broken, or sharp edges). 2. Power-off the computer. Disconnect the power cord. 3. Check the power cord for: a. A third-wire ground connector in good condition. Use a meter to measure third-wire ground continuity for 0.1 ohm or less between the external ground pin and frame ground. b. The power cord should be the appropriate type as specified in the parts listings. c. Insulation must not be frayed or worn. 4. Remove the cover. 5. Check for any obvious non-IBM alterations. Use good judgment as to the safety of any non-IBM alterations. 6. Check inside the unit for any obvious unsafe conditions, such as metal filings, contamination, water or other liquids, or signs of fire or smoke damage. 7. Check for worn, frayed, or pinched cables. 8. Check that the power-supply cover fasteners (screws or rivets) have not been removed or tampered with. Related Service Information 459 Handling Electrostatic Discharge-Sensitive Devices Any computer part containing transistors or integrated circuits (ICs) should be considered sensitive to electrostatic discharge (ESD). ESD damage can occur when there is a difference in charge between objects. Protect against ESD damage by equalizing the charge so that the machine, the part, the work mat, and the person handling the part are all at the same charge. Notes: 1. Use product-specific ESD procedures when they exceed the requirements noted here. 2. Make sure that the ESD protective devices you use have been certified (ISO 9000) as fully effective. When handling ESD-sensitive parts: Keep the parts in protective packages until they are inserted into the product. Avoid contact with other people. Wear a grounded wrist strap against your skin to eliminate static on your body. Prevent the part from touching your clothing. Most clothing is insulative and retains a charge even when you are wearing a wrist strap. Use the black side of a grounded work mat to provide a static-free work surface. The mat is especially useful when handling ESD-sensitive devices. Select a grounding system, such as those listed below, to provide protection that meets the specific service requirement. Note: The use of a grounding system is desirable but not required to protect against ESD damage. – – – Attach the ESD ground clip to any frame ground, ground braid, or green-wire ground. Use an ESD common ground or reference point when working on a double-insulated or battery-operated system. You can use coax or connector-outside shells on these systems. Use the round ground-prong of the AC plug on AC-operated computers. Grounding Requirements Electrical grounding of the computer is required for operator safety and correct system function. Proper grounding of the electrical outlet can be verified by a certified electrician. 460 PC Server HMM Battery Notice CAUTION Pour éviter tout risque d'explosion, remplacez la pile selon les instructions du fabricant qui en définit les équivalences. Ne cherchez pas à la démonter ou à la recharger. Ne l'exposez ni au feu, ni à l'eau. Ne la mettez pas en court-circuit. Pour le reyclage ou la mise au rebut des piles usagées, conformez-vous à la réglementation en vigueur. Die Batterie kann bei unsachgemäßem Austauschen explodieren. Eine verbrauchte Batterie nur durch eine gleichwertige, vom Hersteller empfohlene Batterie ersetzen. Die Batterie nicht zerlegen, wiederaufladen oder kurzschließen. Die Batterie vor Feuer und Nässe schützen. Bei der Entsorgung der aufladbaren Batterie die örtlichen Richtlinien für Sondermüll sowie die allgemeinen Sicherheitsbestimmungen beachten. Se la batteria è sostituita in modo non corretto potrebbe esserci pericolo di esplosione. Si raccomanda di sostituirla con una batteria dello stesso tipo o equivalente. Non smontarla, ricaricarla, gettarla nell'acqua o nel fuoco, o cortocircuitarla. Smaltire la batteria secondo la normativa in vigore (DPR 915/82, successive disposizioni e disposizioni locali). Hay peligro de explosión si la batería se sustituye incorrectamente. No la desmonte, recargue, eche al fuego o al agua, ni la cortocircuite. Deseche la batería tal y como disponga la normativa local. Danger of explosion if battery is incorrectly replaced. Replace only with the same or equivalent type recommended by the manufacturer's instructions. Do not disassemble it, recharge it, throw it into fire or water, or short-circuit it. Dispose of the battery as required by local ordinances or regulations. Disk Array Configuration The following information contains step-by-step procedures to perform the tasks necessary to configure, add, change, or delete one or more disk arrays. The hard disk drive in disk-array model comes configured as one logical drive. To view the disk-array configuration, go to “Viewing the RAID Configuration” on page 468. To create a disk array, go to “Creating a Disk Array” on page 469. To backup the disk-array configuration, see “Backing Up the Disk-Array Configuration” on page 483. Related Service Information 461 Device Drivers The RAID adapter requires the installation of device drivers. See the README file on the SCSI-2 Fast/Wide PCI-Bus Adapter Configuration Option Diskette for detailed instructions. If you install an operating system from the ServerGuide CD, the device drivers will be installed automatically. If, however, you install an operating system from diskettes, you will need to install the device drivers. See the README file on the RAID Adapter Option Diskette for installation instructions. Administration Monitoring Utilities The RAID Adapter Option Diskette contains RAID monitoring utility programs for several operating systems that the disk-array system supports. The monitoring programs are: OS/2 RAID Controller Administration and Monitor OS/2 RAID NetFinity Alert Manager OS/2 RAID Controller Administration for Novell NetWare IBM RAID Controller Administration for Banyan VINES These programs include many of the functions contained in the IBM RAID configuration program, but unlike that program, they reside on top of the operating system and do not require you to start the program from a startable diskette or from a startable compact disc. You can start these programs from the active operating system desktop. Each of these monitoring programs allows you to view the RAID configuration, reconfigure the array when replacing a defunct drive, and perform tuning tasks such as changing the write policy. To monitor the drive status with OS/2, NetWare, Microsoft Windows, and VINES, you must be running the administration programs. The RAID Adapter Option Diskette contains files that you must install when you run OS/2, NetWare, or VINES. See the README file on the RAID Adapter Option Diskette for installation and use instructions for these monitoring utilities. For OS/2 RAID NetFinity Alert Manager, also see the ServerGuide CD documentation supplied with the server. RAID Technology: RAID is the technology of grouping several hard disk drives in a server into an array that can be defined as a single logical drive. This logical drive then appears to the operating system as a single physical drive. This grouping technique greatly enhances logical-drive capacity and performance. In addition, if one 462 PC Server HMM of the hard-disk drives fails (becomes defunct) the system continues to run, with no operator intervention required, at reduced performance. Hard Disk Drive Capacities: With a server, it is important to understand the implications of hard disk drive capacities and how they influence the way you create disk arrays. Different capacity drives are treated as if they all have the capacity of the smallest disk drive. Therefore, if you have four drives of 1GB, 1GB, 1GB, and 2GB grouped in one disk array, the total capacity of the array is 1GB times 4, or 4GB (instead of the 5GB physically available). Note The total capacity of the array without protection would be 4GB. With RAID level 5, the usable data capacity would be 3GB. Additional Storage Capacity: When hard disk drives are added to the server, you must configure a new disk array before the drives can be used. Either reconfigure the existing disk array to include the capacity offered with the added drives, or group the added drives into their own array (see “Creating a Disk Array” on page 469). You also can create an array with only one drive. The RAID Configuration Program Screens: When you configure or view the disk array you will be using the IBM RAID configuration program on the SCSI-2 Fast/Wide PCI-Bus Adapter Configuration Option Diskette (also called the IBM RAID Adapter Option Diskette). The following figure is a compilation of many of the IBM RAID Controller Disk Array Configuration (also called the IBM RAID configuration program) screens followed by an explanations of the numbered areas of the figure. Related Service Information 463 2 1 4 5 3 6 1. This pop-up allows you to select the RAID level you want to assign to the logical drive you are defining, and it allows you to select the logical drive size. You can enter the size, in megabytes, or you can accept the default value shown. When you need to confirm an action, the Confirm pop-up appears in this area. 2. You can select any of the choices that appear on the menus. 3. The Bay/Array selection list shows each bay in the server (for each channel) numbered 1 through 7. The abbreviation in the bay indicates the status of the drive installed in the bay. Selections are made from this list to determine which bays (hard disk drives) are in the arrays. The letter to the right of the bay identifies the array in which the hard disk drive in that bay is grouped. Note The Channel/Bay/Array area on the screen does not reflect the physical configuration of the server. The hot-swappable hard disk drives are numbered 1 through 6 (from top to bottom). 4. The Array list indicates the array ID and the size (in megabytes) of the array. When a drive is being rebuilt, this area, along with the Logical Drive list area, shows the progression of the rebuilding process. 5. The Logical Drive list identifies the logical drive (for example, A1), the size of the logical drive, the RAID level assigned to the logical drive, the date it was created, and the write policy. The status of the logical drive is also shown. 464 PC Server HMM Good means that all is well with the drive. Critical means that you must replace the drive or do a rebuild operation. (You will have received a message telling you the drive is in a Critical state.) Offline means that the logical drive is unrecoverable; the data in that drive is lost. When a drive is being rebuilt, this area, along with the Array list area, shows the progression of the rebuilding process. During an initialization process, the Write Policy area displays the percent initialized; during a synchronization process, it displays the percent synchronized. 6. The information area tells you the action you can perform on this screen or pop-up. Starting the RAID Configuration Program To start the RAID configuration program, insert the IBM RAID Adapter Option Diskette into the primary diskette drive and power-on the system. If the system already is powered-on, press Ctrl+Alt+Del. From the PC DOS start-up menu, select Start RAID Configuration Program, then press Enter. If you have more than one RAID adapter installed, you will get an adapter selection screen similar to the following; otherwise, the Main Menu appears. Notes 1. The version numbers and slot numbers on the screens might be different. 2. The primary diskette drive is the first diskette drive that the system tries to start from. Vendor ID : IBM Model : DFHSS2W 17170014 Version : 6728 Capacity : 2150 MB Soft Error : 229 Hard Error : 62 Misc : 91 You can select Help from any menu. To return to the previous screen or to the previous work area of a screen, press Esc. To select a menu item, press the number of the item or use the Up Arrow (↑) key or Down Arrow (↓) key to highlight the item, then press Enter. Related Service Information 465 IBM PC ServeRaid Adapter Disk Array Configuration Ver. 1.XX Adapter Bus: 0 Host: 2 ID = Null Configuration Select Configuration Source 1. 2. 3. 4. 5. 6. 7. Flash EEprom as Source NVRAM as Source NVRAM+POCL as Source Hard Disk Drive-HDD as Source HDD as Source with Rearrange Specific HDD as Source Exit Select a choice using the Up Arrow ( ) and Down Arrow ( ) keys and press Enter. Press escape to return to previous menu. The Main Menu contains the following choices: Help: Select this choice when you need additional information. View configuration: Select this choice to see the existing disk array configuration. Create/delete array: Select this choice to define a hot-spare drive, to select the drives for an array you want to create, or to delete an existing array. The Create/delete array screen also has choices for defining a logical drive and formatting a drive. Whenever you make changes to the disk-array configuration and select Exit, the Confirm pop-up window will appear. You must select Yes to save and activate the changes. 466 PC Server HMM Initialize/synchronize array: Select this choice after creating an array to: – Set the drive to a predetermined value. For proper operation of RAID levels 1 and 5, you must select Initialize/synchronize array. Any data existing on the drive is overwritten with zeros, and the corresponding parity information is initialized to the correct value. You can choose to initialize more than one logical drive at a time. Also, you can interrupt the initialization process at any time by pressing Esc. Then, you can either restart the initialization process by pressing Enter, or you can end the process by pressing Esc again. – Synchronize logical drive: Select this choice to recompute and rewrite the parity data on the drive for RAID levels 1 and 5. This selection does not alter data on the drive. The synchronization process can be done on multiple logical drives. Rebuild device: Select this choice to rebuild logical drives. The rebuild operation is supported only for RAID levels 1 and 5. Advanced functions: Select this choice to change the write policy (the way data is written to the drive), to save the configuration information to a diskette, to restore it from a diskette, or to change RAID parameters. This choice also allows you to do a low-level format. Drive information: Select this choice to view information about the SCSI devices (hard disk, CD-ROM, tape, and so on) connected to the RAID adapter. Exit: Select this choice to leave the Main Menu. Related Service Information 467 Viewing the RAID Configuration Before creating or changing a disk array, you can look at the current configuration by selecting View Configuration from the Main Menu of the RAID configuration program. To view the disk-array configuration: 1. Start the RAID configuration program by inserting the IBM RAID Adapter Option Diskette into the primary diskette drive and powering-on the system. If the system already is powered-on, press Ctrl+Alt+Del. 2. Select Start RAID Configuration Program from the PC DOS start-up menu; the Main Menu appears. 3. Select View configuration. The current disk-array configuration information appears on the screen. 4. Press Enter to see the stripe order in the Bays Occupied (Ch:Bay) field. In the following example, data for the B array is striped across Channel 1 bay 4, Channel 1 bay 5, and Channel 2 bay 1. 5. Press any key to return to the View Configuration screen. 6. Press Esc to return to the Main Menu. 468 PC Server HMM Performing Common Tasks The Create/Delete Array menu of the RAID configuration program contains the more common tasks for configuring disk arrays. The procedures to complete these tasks are. “Creating a Disk Array” “Defining Logical Drives” on page 470 “Defining a Hot-Spare Drive” on page 474 “Deleting a Disk Array” on page 476 “Redefining Space in an Array” on page 477 Creating a Disk Array: You can create disk arrays from the existing drives. Later, storage capacity can be added to the server without disturbing existing data by installing additional hard disk drives and creating additional arrays. To create a disk array: 1. Insert the IBM RAID Adapter Option Diskette into the primary diskette drive and power-on the system. If the system already is powered-on, press Ctrl+Alt+Del. 2. Select Start RAID Configuration Program from the PC DOS start-up menu; the Main Menu appears. Note To create an array using hard disks in an existing array, refer to “Redefining Space in an Array” on page 477. 3. Select Create/delete array from the Main Menu. 4. Select Create disk array from the Create/Delete Array menu. The cursor will be active in the Bay/Array selection list. 5. Select each drive you want in the array by using the Up Arrow (↑) key or the Down Arrow (↓) key to highlight the drive and then pressing Enter. As you Related Service Information 469 select each drive, the status will change from RDY (Ready) to ONL (Online). If you change your mind after selecting the drives for an array, you can delete the array (by selecting Delete disk array from the Create/Delete Array menu) and then begin again. 6. When you have selected all the drives you want to include in the array, press Esc. The cursor will become active in the menu. 7. If you have drives you did not use in this array and you want to create another array, you can do one of the following: Define the logical drive or drives for this array; then create another array and its logical drives. See “Defining Logical Drives.” Create another array now by repeating steps 2 through 5 in this procedure; then define logical drives for both arrays. Note You must define at least one logical drive for each created array before you can exit from the configuration program. Defining Logical Drives: After you have created an array, you must define a logical drive. (You cannot leave the RAID configuration program until you define the logical drives for any created arrays.) To define a logical drive: 1. Select Define Logical drive from the Create/Delete Array menu. The following screen appears; the cursor is active in the Array list. 2. Use the Up Arrow (↑) key or the Down Arrow (↓) key to highlight the array you want to define; then press 470 PC Server HMM Enter. The Select RAID Level pop-up window appears, and the cursor is active in the window. Note The system automatically assigns RAID level 0 to any logical drives defined in an array containing only one hard disk drive. When this is the case, the Select RAID Level pop-up window will not appear. If you have only two hard disk drives in the array, the Select RAID Level pop-up window appears, but RAID level 5 is not selectable because you need at least three hard disk drives in an array to assign RAID level 5 to one of the logical drives. You can define more than one logical drive for the array. The only restriction is that the maximum number of logical drives you can define is eight. 3. Use the Up Arrow (↑) key or the Down Arrow (↓) key to highlight the RAID level you want to assign to these logical drives; then press Enter. Note Because the level you assign can influence the space needed for the drive, you must assign a RAID level before you enter the size of the logical drive. The Logical Drive list contains the logical drive ID, the size of each logical drive, the RAID level you assigned to that logical drive, and the date that the logical drive was created. The status of the logical drive also is shown. Good means that all is well with the drive. Critical means that you must replace the hard disk drive or do a rebuild operation. (You will have received a message telling you what has happened to the drive.) Offline Related Service Information 471 means that the logical drive is unrecoverable; the data on that drive is lost. The Logical Drive Size pop-up window shows the space in the array that is available for logical drives. 4. Type the size, in megabytes, that you want for the logical drive; then press Enter. A pop-up window appears asking you to confirm your action. Information about the new logical drive appears in the Logical Drive list. Note The size appearing in the Logical Drive list might be different from the size you typed. The size of a logical drive is determined by a number of factors, but basically the size must be divisible by the number of drives in the array. Consider the following scenarios: Scenario 1: The array consists of three 1GB drives. You assign RAID level 0 (which uses all the drives in the array with no parity storage), and type 1ðððMB. The number in the Size (MB) field will be 999, which is the number closest to and lower than 1000 that is divisible by 3. Scenario 2: The array consists of three 1GB drives, and you assign RAID level 5. Data is striped across all three drives in the array, but the space equivalent to that of one drive is used for parity storage. Therefore, if you type 1ðððMB, the number in the Size (MB) field remains 1000 because it is divisible by 2 (drives), which is the space available for data. If you do not use the entire array for this logical drive, you can create another by assigning either the same 472 PC Server HMM 5. 6. 7. 8. or a different RAID level for an additional logical drive. You can have as many as eight logical drives among four disk arrays. To return to the Create/Delete Array menu, press Esc. To define more logical drives, repeat steps 1 through 5 of this procedure. To leave this screen, select Exit or press Esc. A pop-up window appears asking you to confirm your action. To save the changes, select Yes. To maintain the disk-array configuration that was in place before you made changes, select No. If you are using RAID level 1 or RAID level 5, you must select Initialize logical drive for proper operation. This sets the drive to a predetermined state. Any data existing on the drive is overwritten with zeros, and corresponding parity is initialized to the correct value. a. Select Initialize/synchronize array from the Main Menu; then select Initialize logical drive. b. Select the logical drives you want to initialize from the Logical Drive list by pressing the Spacebar (the selected drives will appear highlighted). To start the initialization, press Enter. A pop-up window appears asking you to confirm your action. Attention If you select Yes in the Confirm pop-up window, information in the logical drive will be overwritten with zeros. c. Select Yes to confirm that you want to initialize this logical drive. The initialization process begins, and you can see its progress in the Pct. Int. (Percent Initialized) column of the Logical Drive list. d. To stop the initialization at any time, press Esc. Then press Esc again to return to the menu, or press Enter to continue initializing the drive. 9. To back up the disk-array configuration to diskette, you will need a 3.5-inch formatted diskette. To back up the disk-array configuration: a. Select Advanced functions from the Main Menu. b. Select Backup config. to diskette. Follow the instructions on the screen. A pop-up window shows the default file name of CONFIG. You can change the file name by typing over the default. The Backup program will assign a file-name extension of .dmc. Related Service Information 473 Defining a Hot-Spare Drive: To define a drive as a hot-spare drive: 1. Start the RAID configuration program by inserting the IBM RAID Adapter Option Diskette into the primary diskette drive and powering-on the system. If the system already is powered-on, press Ctrl+Alt+Del. 2. Select Start RAID Configuration Program from the PC DOS start-up menu; the Main Menu appears. 3. Select Create/delete array from the Main Menu. The following screen appears. 474 PC Server HMM 4. Select Define hot-spare drive. The cursor will become active in the Bay/Array selection list. Note Only SCSI hard disk drives are shown as RDY, ONL, DDD, OFL, or HSP state. SCSI tape and CD-ROM drives are not shown. They appear when you select drive information. Refer to “Bay/Array Selection List” on page 480 for the drive status meanings. The numbers shown on the left in the Bay/Array selection list area in the previous figure are the bay IDs. 5. Use the Up Arrow (↑) key or the Down Arrow (↓) key to highlight the RDY (ready) drive you want to define as the hot spare; then press Enter. The RDY changes to HSP (hot spare). You can press Enter again to toggle between HSP and RDY. 6. Press Esc when you have finished. The cursor will become active in the Create/Delete Array menu. Related Service Information 475 7. If you want to create a disk array, go to “Creating a Disk Array” on page 469. 8. If you are finished: a. Select Exit or press Esc. A pop-up window will appear asking you to confirm your change. Note The changes you make are not saved until you confirm them by selecting Yes in the Confirm pop-up window. b. Select No if you do not want the drive you selected to be a hot spare; select Yes to define it as a hot-spare drive. c. Back up the disk-array configuration information to diskette. Refer to “Backing Up the Disk-Array Configuration” on page 483 for instructions. Deleting a Disk Array: The last array created must be the first deleted. Attention All the data and programs in the array are lost during this procedure. Before proceeding, back up any data and programs that you want to save. To delete a disk array: 1. Start the RAID configuration program by inserting the IBM RAID Adapter Option Diskette into the primary diskette drive and turning on the system. If the system already is turned on, press Ctrl+Alt+Del. 2. Select Start RAID Configuration program from the PC DOS start-up menu; the Main Menu appears. 3. Select Create/delete array from the Main Menu. 4. Select Delete disk array from the Create/Delete Array menu. The cursor will be active in the Array list. 5. Review the Date Created column in the Logical Drive list; then press the Up Arrow (↑) key or the Down Arrow (↓) key to highlight the most recently defined array. Attention All the data and programs in the array will be lost during this procedure. 6. Press Del. The Confirm pop-up window appears. 476 PC Server HMM 7. If you do not want to delete the array, select No. To delete the array, select Yes. Note To use hard disks from the existing array when creating a new array, you must confirm the deletion of the existing array. If a defunct drive is still in a bay, the status shows a blank bay, as though there is no drive in that bay. When you replace the drive, the status will show RDY after you reconfigure and select Yes in the Confirm pop-up window. Note In some operating systems, deleting an array and associated logical drives might change the drive letters assigned to the existing drives. Redefining Space in an Array: You can redefine space in a disk array in a number of ways. For example, you can combine a number of small logical drives to create a larger one, or you can redefine the existing logical drive into several smaller drives. Also, you can install additional hard disk drives and create a larger logical drive than was possible with the existing storage capacity. One method to redefine space in an array is to change the RAID level assigned to a logical drive. For example, if you assigned RAID level 1 to a logical drive and then decided you needed the capacity offered with RAID level 5, you can use this procedure to replace the existing logical drive with a logical drive assigned the new RAID level. To redefine the space in a disk array, first you must delete the array. The last disk array defined must be the first deleted. In all cases, when you delete an array, all the data and programs in the array are lost. Related Service Information 477 If you have data and programs that you want to save, they must be backed up and then restored. You might want to use a high-speed backup device, such as a tape drive, to backup large amounts of data. To redefine the space in an array: 1. Back up all data and programs in the array. 2. If needed, install additional hard disk drives. Refer to the User's Reference for information about selecting drive sizes. Attention In all cases, when you delete an array, all the data and programs in the array are lost. 3. Insert the IBM RAID Adapter Option Diskette into the primary diskette drive; then press Ctrl+Alt+Del to start the RAID configuration program. 4. Select Start RAID Configuration Program from the PC DOS start-up menu; the Main Menu appears. 5. Delete the existing array: a. Select Create/delete array from the Main Menu. The Create/Delete Array menu will disappear. b. Select Delete disk array. The cursor will be active in the Bay/Array list. c. Review the Logical Drive List Date Created column; then press the Up Arrow (↑) key or the Down Arrow (↓) key to highlight the most recently defined array. Note You must delete disk arrays in descending order; the last one created must be the first one deleted. d. Press Del. The Confirm pop-up window appears. Attention All the data in the array will be lost during this procedure. Be sure to back up all data and programs that you want to save. e. If you do not want to delete the array, select No. To delete the array, select Yes. Note To use the hard disks from the existing array when creating a new array, you must confirm the deletion of the existing array. After you make your selection, the Confirm pop-up window will disappear, and the cursor will be active in the menu. 478 PC Server HMM 6. If you want to define a hot spare drive, refer to “Defining a Hot-Spare Drive” on page 474 for step-by-step instructions. 7. Create a new disk array and define logical drives. 8. 9. 10. 11. See “Creating a Disk Array” on page 469 for instructions on creating a disk array and defining logical drives. After you have established the new array and logical drive or drives, select Initialize/synchronize array from the Main Menu; then select Initialize logical drive to prepare the drives in the array to receive data. This sets the drive to a predetermined state. Any data existing in the drive is overwritten with zeros, and corresponding parity is initialized to the proper value. Insert a 3.5-inch formatted diskette in the primary diskette drive, select Advanced functions from the Main Menu; then select Backup config. to diskette. Follow the instructions on the screen. Exit the RAID configuration program by pressing Esc or selecting Exit from the Main Menu. A pop-up window will appear asking you to confirm your action. Reinstall the operating system and device drivers, then restore the data and programs. Drive Maintenance Drive maintenance consists of the following. How to obtain drive status information Results of a hard disk drive failure Procedure for replacing defunct drives Procedure for redefining the space in an array by replacing logical drives Obtaining Drive Status: To see the ID, capacity, and other information about each of the hard disk drives attached to the RAID adapter: 1. Start the RAID configuration program by inserting the IBM RAID option diskette into the primary diskette drive and turning on the system. If the system already is turned on, press Ctrl+Alt+Del. 2. Select Start RAID Configuration Program from the PC DOS start-up menu; then press Enter. 3. Select Drive information from the Main Menu. Related Service Information 479 4. Use the Up Arrow (↑) key or the Down Arrow (↓) key to highlight each of the drives shown in the Bay/Array selection list. As a drive is highlighted, the information for that drive appears at the bottom of the screen. 5. Press Esc to return to the Main Menu. Note The status of the hard disk drive determines the status of the logical drives in the array in which the hard disk is grouped. Bay/Array Selection List: The status of the drives in the Bay/Array selection list is defined as follows: Status Meaning CDR CD-ROM drive installed. DDD Defunct. The drive is an online or hot-spare drive that does not respond to commands. (If a RDY drive is defunct or powered down, it shows as an empty bay (a blank status), not a DDD status). FMT Format. The drive is being reformatted. HSP Hot spare. The drive will replace a similar drive that becomes defunct in real time. At that time, its status changes to ONL, and its array association appears. OFL Offline. The drive is a good drive that has replaced a defunct drive in a RAID level 1 or level 5 array. It is associated with an array, but does not contain any valid data. The drive state remains OFL during the rebuild phase. ONL Online. The drive is part of an array. If this drive fails, logical drives defined in the array in which this drive is grouped will have a status of Offline (if the logical drive is assigned RAID level 0 with a good status) or Critical (if the 480 PC Server HMM logical drive is assigned RAID level 1 or level 5 with a good status). RDY Ready. The drive is recognized by the adapter and is available for definition. TAP Tape drive installed. UFM Unformatted. The drive requires a low-level format before it can be used in an array. Blank Status: Any of the following circumstances can cause the status area to be blank: No hard disk drive is installed in that bay. The bay contains a hard disk drive, but the drive is not inserted correctly. An array was deleted and a defunct drive is still in the bay. A new drive was installed and the configuration program has not been restarted. (The status will change to RDY when the RAID configuration program is restarted.) Results of a Hard Disk Drive Failure: Depending on the circumstances, there can be several possible results from a drive failure. Scenario 1: Only one hard disk drive fails. A hot-spare drive is defined that is the same size as the failed drive. The logical drives in the array are assigned RAID level 1, level 5, or a combination of these two levels. The hot spare will take over immediately. Note Hot-spare drive capability does not apply to logical drives assigned RAID level 0. Data for logical drives assigned RAID levels 1 and 5 is not lost, even though the drives function with reduced performance. Scenario 2: Only one hard disk drive fails. A hot-spare drive is not defined or is a different size from the failed drive. The logical drives in the array are assigned RAID levels 1, 5, or a combination of these two levels. No data will be lost, but the system will operate at reduced performance until the defunct drive is replaced and rebuilt. Related Service Information 481 Scenario 3: If more than one drive in an array fails, all the data is lost in all of the logical drives of the array. For this reason, it is important that you replace and rebuild a defunct drive as soon as possible. Logical and Hard Disk Drive Status Indications: The status of the hard disk drive determines the status of the logical drives in the array in which the hard disk is grouped. A single hard disk drive failure (indicated by a DDD status in the Bay/Array selection list) causes logical drives in that array that are assigned levels 1 and 5 to have a Critical status. Data remains in logical drives with a Critical status, but you must replace the one defunct hard disk drive promptly, because if two hard disk drives were to fail, all of the data in the array would be lost. After you install a new hard disk drive, the Replace process changes the drive status from DDD to OFL if there is a Critical logical drive. After the Rebuild process, the hard disk drive status changes from OFL to ONL. A single or multiple hard disk drive failure causes logical drives in that array that are assigned level 0 to have an Offline status. Data in logical drives with an Offline status is lost. However, with a multiple disk drive failure, when the defunct drives are part of the same array, logical drives in that array will have an Offline status. This means that data is lost in all the logical drives in that array, regardless of which RAID level is assigned. Replacing a Faulty Drive: To replace a faulty drive: Note The hard disk drive indicator light blinks when the drive has failed and needs to be replaced (DDD status only). 1. Start the RAID configuration program by inserting the IBM RAID Adapter Option Diskette into the primary diskette drive and powering-on the system. If the system already is powered-on, press Ctrl+Alt+Del. 2. Select Start RAID Configuration Program from the PC DOS start-up menu. If the drive failed while the system was powered down, a screen appears the next time the system is powered on showing you which drive is defunct. 3. If the drive is not damaged (for example, it is not inserted correctly): 482 PC Server HMM a. Power-off the system. b. Correct the problem. Make sure that the cables to the power supply and the SCSI-2 controller are connected correctly. Check the SCSI-2 controller, and the SCSI-2 connector on the RAID Adapter. c. Restart the system. 4. If the drive is defunct: a. Press Y (Yes) to reconfigure the system. b. Press Ctrl+Alt+Del when instructed to restart the system. The Main Menu appears. At this point, the drive status indicates DDD. Attention Removing the wrong hard disk drive can cause loss of all data in the array. c. Replace the defunct drive. d. After you have replaced the drive, press Enter. The system will be reconfigured to include the drive, and the drive's status will change to OFL. e. When you see the configuration completion message, select Rebuild drive. f. Use the Up Arrow (↑) key or the Down Arrow (↓) key to highlight the OFL (offline) drive you want to rebuild; then press Enter. g. h. i. j. Information and status messages about each stage of the rebuilding process appears on the screen. When the rebuilding process is completed, press Esc to return to the Main Menu. The new configuration will be saved automatically. Backup the new configuration (see “Backing Up the Disk-Array Configuration”). Select Exit to end the RAID configuration program. Remove the diskette and press Ctrl+Alt+Del to restart the system. Advanced Functions You can select several utility programs from the Advanced Functions menu. These include: Back up configuration to diskette Restore configuration to diskette Change the write policy Change the RAID parameters Format a drive Backing Up the Disk-Array Configuration: The RAID adapter maintains a record of the disk-array configuration information in its electronically erasable programmable read-only memory (EEPROM) module. The Related Service Information 483 disk-array configuration is vital information. To protect this information, back up the information to diskette as soon as you have completed the tasks. You need a blank, formatted, 3.5-inch diskette. To back up the disk-array configuration information to diskette: 1. Label a blank diskette “Disk Array Configuration Backup,” and date it. 2. Start the RAID configuration program by inserting the IBM RAID Adapter Option Diskette into the primary diskette drive and powering-on the system. If the system already is powered-on, press Ctrl+Alt+Del. 3. Select Start RAID Configuration Program from the PC DOS start-up menu and press Enter. 4. Select Advanced functions from the Main Menu. 5. Select Backup config. to diskette. 6. Remove the RAID Adapter Option Diskette from the drive and insert the blank diskette. 7. Follow the instructions on the screen. Restoring the Disk-Array Configuration: To restore the disk-array configuration information in the RAID adapter EEPROM module, use the RAID Adapter Option Diskette and an up-to-date Disk Array Configuration Backup diskette. Note Because dynamic changes in the configuration of the disk array occur due to hot-spare drive replacement or other drive maintenance activity, the configuration backup information on the diskette might be different from that in the adapter. It is important that you back up the disk-array configuration information frequently, to keep the backup information on the diskette current. To restore the RAID configuration information: 1. Start the RAID configuration program by inserting the IBM RAID Adapter Option Diskette into the primary diskette drive and powering-on the system. If the system already is powered-on, press Ctrl+Alt+Del. 2. Select Start RAID Configuration Program from the PC DOS start-up menu and press Enter. 3. Select Advanced functions from the Main Menu. 4. Select Restore config. from diskette. 5. Follow the instructions on the screen. 484 PC Server HMM Using the Advanced Functions: This section gives the procedures for using the advanced functions, such as changing the write policy, changing the RAID parameters, and formatting a drive. Warnings appear throughout this section to alert you to potential loss of data. Read these warnings carefully before answering yes to the confirmations requested by the RAID configuration program. Changing the Write Policy When you configure a logical drive, the RAID adapter automatically sets the write policy to write-through (WT) mode, where the completion status is sent after the data is written to the hard disk drive. To improve performance, you can change this write policy to write-back (WB) mode, where the completion status is sent after the data is copied to cache memory, but before the data is actually written to the storage device. Although you gain performance with write-back mode, it creates a greater risk of losing data due to a power failure. This is because the system gets a completion status message when the data reaches cache memory, but before data is actually written to the storage device. Attention If you change the write policy to write-back, wait at least 10 seconds after the last operation before you power-off the server. It takes that long for the system to move the data from the cache memory to the storage device. Failure to follow this practice can result in lost data. To change the write policy: 1. Start the RAID configuration program by inserting the IBM RAID Adapter Option Diskette into the primary diskette drive and turning on the system. If the system already is turned on, press Ctrl+Alt+Del. 2. Select Start RAID Configuration Program from the PC DOS start-up menu and press Enter. 3. Select Advanced functions from the Main Menu. 4. Select Change write policy from the Advanced Functions menu. The cursor will be active in the Logical Drive list. 5. Select the logical drive whose write policy you want to change. A screen similar to the following appears: Related Service Information 485 Note The information might be different from that shown in this screen. The Logical Drive list contains the logical drive ID, the size in megabytes of each logical drive, the RAID level you assigned to that logical drive, and the date you created it. The status of the logical drive is also shown. Good means that all is well with the drive; Critical means that you must replace the hard disk drive and rebuild the logical drive. (You will have received a message telling you what has happened to the drive.) Offline means that the logical drive is unrecoverable; the data in that drive is lost. 6. Locate the Wrt pol (Write Policy) field in the Logical Drive list. The write policy is shown as either WT (write-through, which is the default setting) or WB (write-back). 7. Use the Up Arrow (↑) key or the Down Arrow (↓) key to select the logical drive whose write policy you want to change. Attention If you change the write policy to write-back, wait at least 10 seconds after the last operation before you power-off the server. It takes that long for the system to move the data from the cache memory to the storage device. Failure to follow this practice can result in lost data. 8. Press Enter to change the write policy. Notice that WT changes to WB. You can press Enter to alternate between WT and WB. 9. When you have made your choice, press Esc to return to the Advanced Functions menu. 486 PC Server HMM 10. Select Exit. The Confirm pop-up window appears asking you to confirm your action. 11. To return the setting to its original state, select No. To save the changes, select Yes. 12. Back up the disk-array configuration information to diskette. Refer to “Backing Up the Disk-Array Configuration” on page 483 for more information. Formatting Drives You can perform a low-level format on drives with RDY (ready), OFL (offline), or UNF (unformatted) status. Note The Format drive choice on the Advanced Functions menu provides a low-level format. If you install a new hard disk drive that requires a standard format, use the Format command provided by the operating system. The Format program is provided in the IBM RAID configuration program so that you can perform a low-level format on a drive controlled by the RAID adapter. To perform a low-level format: 1. Start the RAID configuration program by inserting the IBM RAID Adapter Option Diskette into the primary diskette drive and powering-on the system. If the system already is turned on, press Ctrl+Alt+Del. 2. Select Start RAID Configuration Program from the PC DOS start-up menu; the Main Menu appears. 3. Select Advanced functions from the Main Menu. Note A low-level format erases all data and programs from the hard disk drive. Before proceeding, back up any data and programs that you want to save. 4. Select Format drive. The low-level format program starts. 5. Follow the instructions on the screen. You can perform a low-level format on more than one drive at a time. Related Service Information 487 Changing the RAID Parameters You can change the RAID parameters using the advanced functions by selecting Change RAID parameters. The default settings are: Stripe unit size — 8K Attention Once the stripe unit is chosen and data is stored in the logical drives, the stripe unit cannot be changed without destroying data in the logical drives. The stripe unit size is the amount of data written on a given disk before writing on the next disk. To maximize the overall performance, choose the stripe unit such that the stripe-unit size is close to the size of the system I/O request. The default is set to 8K data bytes. Rebuild priority — Equal Rebuild priority can be set to equal, high, or low. When the rebuild request is set to equal, the rebuild I/O request and system I/O request get equal priority in the execution order. When the rebuild request is set to high, the rebuild I/O request will get a higher priority than a system I/O request. In a heavily loaded system (with a high rate of system I/O requests), the high-priority rebuild can significantly reduce the disk rebuild time at the expense of degraded handling of I/O requests. When the rebuild priority is set to low, the rebuild I/O requests can execute only if no pending system I/O requests are pending. In a moderate to heavily loaded system, low rebuild priority will increase the disk rebuild time significantly and provide better system performance. 488 PC Server HMM Note Rebuild priority can be changed without affecting data in the logical drives. Parity placement — RA Attention Once a parity placement scheme is chosen and data stored, it cannot be changed without destroying data. Parity placement defines how parity is placed in the disk array with respect to data. The following illustration shows both the Left Symmetric (LS) and Right Asymmetric (RA) parity placement in a four-drive disk array. Here AAA, BBB, and CCC are the data stripe units, and PP0 is the corresponding parity. Similarly DDD, EEE, and FFF are the data stripe units, and PP1 is the corresponding parity. Right Asymmetric (RA) Left Symmetric (LS) Disk 1 PPð DDD GGG JJJ Disk 1 AAA EEE III PP3 Disk 2 AAA PP1 HHH KKK Disk 3 BBB EEE PP2 LLL Disk 4 CCC FFF III PP3 Disk 2 BBB FFF PP2 JJJ Disk 3 CCC PP1 GGG KKK Disk 4 PPð DDD HHH LLL In some situations you may want to try LS parity placement to improve performance. The default parity placement is RA. Read ahead — On Normally the IBM SCSI-2 Fast/Wide PCI-Bus RAID Adapter transfers data from disk to its local cache in steps of stripe-unit size. This provides excellent overall performance when workloads tend to be sequential. However, if the workload is random and system I/O requests are smaller than stripe-unit size, reading ahead to the end of the stripe unit will result in a wasted SCSI bus bandwidth and wasted disk utilization. When read-ahead is set to Off, the size of data transfer from the disk to local cache is equal to the system I/O request size, and no read-ahead to the end of the stripe unit is performed. Notes 1. The read-ahead setting can be changed without destroying data in a logical drive. 2. When the configuration is saved on a diskette, the RAID parameters are saved also. Related Service Information 489 Display If the screen is rolling, replace the display assembly. If that does not correct the problem, replace the system board. If the screen is not rolling, do the following to run the display self-test: 1. 2. 3. 4. Power-off the computer and display. Disconnect the display signal cable. Power-on the display. Turn the brightness and contrast controls clockwise to their maximum setting. 5. Check for the following conditions: You should be able to vary the screen intensity by adjusting the contrast and brightness controls. The screen should be white or light gray, with a black margin (test margin) on the screen. Note The location of the test margin varies with the type of display. The test margin might be on the top, bottom, or one or both sides. If you do not see any test margin on the screen, replace the display. If there is a test margin on the screen, replace the system board. Note During the first two or three seconds after the display is powered on, the following might occur while the display synchronizes with the computer. Unusual patterns or characters Static, crackling, or clicking sounds A “power-on hum” on larger displays A noticeable odor might occur on new displays or displays recently removed from storage. These sounds, display patterns, and odors are normal; do not replace any parts. If you are unable to correct the problem, go to “Undetermined Problems” on page 552. Ethernet Quad-BT and -B2 PeerMaster Micro Channel Adapters The following service information supports the IBM Eithernet Quad-BT (10Base-T) and -B2 (10Base2) PeerMaster Micro Channel adapters. 490 PC Server HMM Warning Do not install a PeerMaster adapter in slot 4 of an IBM PS/2 Model 85 or 95 server. Pressure resulting from contact with foam mounted to the side panel might result in damage to the adapter or computer. “Features” on page 492 “Supported Systems” on page 492 “IBM PeerMaster Server Adapter Option Diskette” on page 492 “Operation Modes” on page 492 “Configuration Examples” on page 494 “Locations” on page 500 “Cabling for 10Base-T Networks” on page 501 “Cabling for 10Base2 Networks” on page 502 “Symptom-to-FRU Index” on page 502 “Parts Listing” on page 508 Related Service Information 491 Features The IBM Quad-BT or -B2 PeerMaster Micro Channel Adapters provide the ability to connect your PS/2 Micro Channel server to four separate 10Mbps Ethernet LAN segments. Quad-BT refers to a 10Base-T adapter; Quad-B2 refers to a 10Base2 adapter. These adapters: Perform high performance data transfers between the host PC and adapter Provide high performance data transfers among ports on an adapter Provide high performance data transfers among ports across multiple adapters with no host processor intervention Provide a cost efficient, high performance means to forward cross-segment traffic without impacting server performance Perform 64-bit data transfers across the Micro Channel at burst rates of 640Mbps, which equals the total bandwidth of 64 Ethernet ports Supported Systems These adapters are type 5 Micro Channel adapters. You can install them only in type 5 adapter system-bus slots. (You can install type 5 adapters in IBM PS/2 Models 85 and 95 and later-version PS/2 Micro Channel servers.) Network Operating System Requirements Use one of the following network operating systems: OS/2 LAN Server 2.x or 3.x Novell NetWare 3.1x or 4.0x IBM PeerMaster Server Adapter Option Diskette The PeerMaster Server Adapter Option Diskette is shipped with the PeerMaster Server Adapter options. The diskette contains the following: Device drivers Setup programs NetFinity enablers Diagnostic programs Operation Modes Mode Description Traditional Adapter Used when you expect little or no cross-subnetwork traffic. VNET Switch Used when you need to build subnets to provide cross-segment traffic. 492 PC Server HMM Traditional Adapter Mode: When the adapter is operating in this mode, the drivers for the adapter register each individual LAN segment with the network operating system (NOS) as a unique subnet. The NOS views the adapter as four separate adapters. Each network segment must be configured with a unique network number. Notes Do not externally join (using bridges, switches, or concentrators) ports of adapters. You can configure as many nodes as you need; the adapter places no limit on the number of nodes per port. Ensure that each port is bound to the protocol with a unique network number. VNET Switch Mode Notes Do not externally join (using bridges, switches, or concentrators) ports of adapters that comprise a VNET. Nodes can be configured as needed; the adapter places no limit on the number of nodes per port. Ensure that all ports in a VNET are bound to the protocol (by way of VNET) with a common network number. When the adapter is operating in this mode, multiple LAN segments are registered with the NOS as a single subnet, called a VNET. VNETs are multisegment virtual subnets. VNETs are made possible by a layer of virtual network software that binds to multiple instances of the adapter LAN driver and registers them with the NOS as a single subnet. Multiple PeerMaster adapters may be configured to interoperate in various ways, such as: Traditional subnets One large VNET Multiple independent VNETs Any combination of VNETs and traditional subnets All physical segments within a VNET are configured to the same network number. Cross-segment traffic within a VNET is switched by the adapter instead of by the server, allowing the server to be more productive. External internetworking devices are not required to provide communication between segments with a VNET. Related Service Information 493 Configuration Examples Configuration Examples Description(s) Traditional Adapter mode An 8-port network with two PeerMaster adapters configured in the Traditional Adapter mode, see “Traditional Adapter Mode” on page 495. VNET Switch mode An 8-port network with two PeerMaster adapters configured in the VNET Switch mode, see “VNET Switch Mode: Single VNET” on page 496. An 8-port network with two PeerMaster adapters each configured as an independent VNET, see “VNET Switch Mode: Multiple VNETs” on page 498. An 8-port network with two PeerMaster adapters, one configured in the VNET Switch mode and the other in the Traditional Adapter mode, see “VNET Switch Mode: Combined VNETs and Traditional Nets” on page 499. You can use PeerMaster adapters to create a variety of network configurations. The following examples illustrate some basic network configurations that you can create. Use these examples as guidelines to determine the best configuration for your needs. 494 PC Server HMM Traditional Adapter Mode This illustration shows: A server with two Quad-BT PeerMaster adapters configured in the Traditional Adapter mode. The network protocol views each LAN segment as a separate subnet with its own network number. Clients on all ports have direct access to the server. Note The same principles apply to Quad-B2 configurations; however, concentrator hubs are not required for 10Base2 operation. A configuration of eight separate network numbers. Curved arrows illustrating the basic flow of cross-subnet traffic. The server-based router accepts and forwards all frames that require routing between subnets. Software layers illustrated above the adapters indicating software that is required to route traffic internally, running on the server. Cross-subnet traffic, such as traffic from Net 1 to Net 2, must be forwarded by a router. The router can be internal to the server or an external stand-alone device. The advantage of the Traditional Adapter mode is that a router restricts cross-subnet traffic to only those data packets that are uniquely addressed to the target network. The disadvantage of this mode is that server responsiveness might be heavily impaired due to the burden of packet routing. This mode should be used only when little or no cross-subnet traffic is expected. Related Service Information 495 VNET Switch Mode Configurations: The following information describes three configurations using the VNET switch mode. VNET Switch Mode: Single VNET This illustration above shows two Quad-BT PeerMaster adapters (Card 1 and Card 2) forming a single VNET. The adapter provides the functions of a high-performance network adapter combined with the power of an Ethernet switching hub. Note The same principles apply to Quad-B2 configurations; however, concentrator hubs are not required for 10Base2 operation. 496 All segments configured as Network number 1 (Net 1). Curved arrows indicating the flow of data across ports connected by the VNET switch. PC Server HMM The VNET switch performs all cross-segment traffic and, therefore, server responsiveness is not impaired by heavy cross-segment traffic. The adapters perform two types of frame switching: port-to-port and peer-to-peer. Port-to-port Occurs when the source and destination ports both reside on the same adapter. (The adapter forwards data packets between ports 1 and 2 of adapter 1 (Card 1)). Note Port-to-port switching is completely transparent to the server microprocessor. Peer-to-peer Occurs when the source and destination ports reside on separate adapters. Peer-to-peer switching is accomplished through peer data transfers across the Micro Channel bus. (The adapters forward data packets between port 1 of adapter 1 (Card 1) and port 1 of adapter 2 (Card 2)). Related Service Information 497 VNET Switch Mode: Multiple VNETs This illustration above shows: A configuration of two network numbers (Net 1 and Net 2). An 8-port network with two Quad-BT PeerMaster adapters (Card 1 and Card 2), each configured as an independent VNET (two VNETs). Note: The same principles apply to Quad-B2 configurations; however, concentrator hubs are not required for 10Base2 operation. The curved arrow that passes through the LAN drivers, protocol stacks, and router in the server represents the connection between the two subnets (Net 1 and Net 2). Cross-subnet traffic, such as traffic from Net 1 to Net 2, must be forwarded by a router. The router can be internal to the server or an external stand-alone device. Each VNET may represent a separate department or workgroup. The four switched ports within each VNET provide a multisegment workgroup environment. Isolating the two VNETs by way of the server-based router allows you to create a separation between the two departments. You can configure the router to permit restricted traffic to pass between the departments. 498 PC Server HMM VNET Switch Mode: Combined VNETs and Traditional Nets Note Use this configuration only when you expect little or no cross-VNET traffic. This illustration above shows: A five-subnet network (Net 1, Net 2, Net 3, Net 4, and Net 5) configured as one four-segment VNET (VNET1) on Card 1 and four traditional networks on Card 2. A network using PeerMaster adapters. Note: The same principles apply to Quad-B2 configurations; however, hubs are not required for 10Base2 operation. Cross-subnet traffic, such as traffic from Net 1 to Net 2, must be forwarded by a router. The router can be internal to the server or an external stand-alone device. This VNET may represent a large department while the traditional networks may represent small workgroups. You can configure the router to restrict traffic between departments. Related Service Information 499 Locations 10Base-T Adapter 10Base2 Adapter 500 PC Server HMM Cabling for 10Base-T Networks Two types of network cables may be connected to the Quad-BT PeerMaster adapter: straight-through and crossover. Note Use straight-through cables when connecting your adapter to an external 10Base-T concentrator hub. Straight-Through Use crossover cables to directly connect your adapter to another 10Base-T device, such as a workstation, server, or another adapter. Crossover cables create dedicated segments. A dedicated segment is two point-to-point devices connected to a dedicated link. Crossover Attention Ensure that you do not externally join ports of adapters (using bridges, switches, or concentrators). Related Service Information 501 Cabling for 10Base2 Networks To connect any port of the Quad-B2 PeerMaster adapter to a 10Base2 thin Ethernet cable segment. (A thin Ethernet cable segment is the length of the cable between the repeaters.), do the following. Notes 1. Avoid severe bending of the cable. 2. Do not exceed 185 meters (600 feet) of interconnection without using a signal repeater to attach another network segment. 3. Do not attach more than one Quad-B2 PeerMaster 10Base2 port to the same 10Base2 network segment. 1. Attach a bayonet connector (BNC) T-connector to the BNC network port at the rear of the computer. 2. Attach the end of the coaxial cable to an open end of the T-connector. 3. Attach the other end of the cable to an open end of the T-connector at the rear of the next workstation in which a 10Base2 is installed; then, continue making connections to the rest of the workstations. 4. Attach a 50-ohm cable terminator at each end of every segment. Symptom-to-FRU Index The Symptom-to-FRU index contains the following diagnostic information: LED Indications Error Codes NetWare load-time error messages NetWare run-time messages LED Indications Notes The PeerMaster adapter LED is normally off prior to adapter download, and is normally on after successful download. LED Indication FRU/Action .5 seconds ON then .5 seconds OFF. Repeats continuously. DRAM Failure. DRAM memory stick may be missing or loose. Insert or reseat memory and try again. .5 seconds ON then .5 seconds OFF. LED flashes 3 times, then stays off. POST Failure Run the adapter diagnostics to get the exact error and recommended action. 502 PC Server HMM LED Indication FRU/Action .5 second ON then .5 second OFF. Flashes 5 times, then stays off. Flash Checksum Failure Replace Flash with programmed part. Error Codes Error Code FRU/Action 027601S0, 027602S0, 027603S0, 027604S0 POST Flash Main Sector Checksum Failure 1. 10Base-T Adapter 027605S0, 027606S0, 027607S0, 027608S0, 027609S0, 027610S0, 027611S0, 027612S0 Verify proper seating of the DRAM SIMM on the adapter. 1. 10Base-T Adapter 027613S0, 027614S0, 027615S0, 027616S0, 027617S0, 027618S0, 027619S0, 027620S0 POST SRAM failure 1. 10Base-T Adapter 027621S0, 027622S0, 027623S0, 027624S0, 027625S0 1. 10Base-T Adapter 027626S0 POST Ethernet Port 1 External Loopback Failure 1. Verify correct cabling of Port 1. 2. 10Base-T Adapter 027627S0 POST Ethernet Port 2 External Loopback Failure 1. Verify correct cabling of Port 2. 2. 10Base-T Adapter 027628S0 POST Ethernet Port 3 External Loopback Failure 1. Verify correct cabling of Port 3. 2. 10Base-T Adapter 027629S0 POST Ethernet Port 4 External Loopback Failure 1. Verify correct cabling of Port 4. 2. 10Base-T Adapter 027630S0, 027631S0, 027632S0, 027633S0 1. 10Base-T Adapter 027691S0, 027692S0, 027693S0, 027699S0 1. Run Setup and verify the adapter configuration. 2. 10Base-T Adapter 027701S0, 027702S0, 027703S0, 027704S0 POST Flash Main Sector Checksum Failure 1. 10Base2 Adapter Related Service Information 503 Error Code FRU/Action 027705S0, 027706S0, 027707S0, 027708S0, 027709S0, 027710S0, 027711S0, 027712S0 Verify proper seating of the DRAM SIMM on the adapter. 1. 10Base2 Adapter 027713S0, 027714S0, 027715S0, 027716S0, 027717S0, 027718S0, 027719S0, 027720S0 POST SRAM failure 1. 10Base2 Adapter 027721S0, 027722S0, 027723S0, 027724S0, 027725S0 1. 10Base2 Adapter 027726S0 POST Ethernet Port 1 External Loopback Failure 1. Verify correct cabling of Port 1. 2. 10Base2 Adapter 027727S0 POST Ethernet Port 2 External Loopback Failure 1. Verify correct cabling of Port 2. 2. 10Base2 Adapter 027728S0 POST Ethernet Port 3 External Loopback Failure 1. Verify correct cabling of Port 3. 2. 10Base2 Adapter 027729S0 POST Ethernet Port 4 External Loopback Failure 1. Verify correct cabling of Port 4. 2. 10Base2 Adapter 027730S0, 027731S0, 027732S0, 027733S0 1. 10Base2 Adapter 027791S0, 027792S0, 027793S0, 027799S0 1. Run Setup and verify the adapter configuration. 2. 10Base2 Adapter NetWare Load-Time Error Messages Error Message FRU/Action 050: The board cannot be found The driver assumes that the adapter has not been installed. 1. Verify that the adapter is properly installed. 2. 10Base-T or 10Base2 Adapter 058: The board does not respond, 070: The board has failed The driver cannot communicate with the adapter. 1. Restart the computer or run your system configuration program to check for possible system conflicts. 2. 10Base-T or 10Base2 Adapter 504 PC Server HMM Error Message FRU/Action 073: Unable to allocate memory The driver was not able to allocate sufficient memory to perform its functions. 1. Unload the driver and unnecessary NLMs and try again. 2. Reload the server and try again. 3. Install additional memory into the server. 110: Unable to download the firmware The driver is not able to communicate with the adapter. 1. Restart your computer or run the system configuration program to check for possible system conflicts. 2. 10Base-T or 10Base2 Adapter 203: Board diags failed to complete The driver is not able to communicate with the adapter. 1. Restart your computer or run the system configuration program to check for possible system conflicts. 2. 10Base-T or 10Base2 Adapter 301: POST Flash Main Sector Checksum Failure, 302: POST was not performed - board 303: POST Test Sequencer Internal Failure 304: POST Flash Boot Sector Checksum 1. 10Base-T or 10Base2 Adapter 305: POST DRAM Size Detection Failure The power unit is down. 1. Verify proper seating of the DRAM SIMM on the adapter. 2. 10Base-T or 10Base2 Adapter 306: POST DRAM Byte (8-bit) Wide Failure 307: POST DRAM Short (16-bit) Wide Failure 308: POST DRAM Word (32-bit) Wide Failure 309: POST DRAM Long (64-bit) Wide Failure 310: POST DRAM Trip (96-bit) Wide Failure 311: POST DRAM Quad (128-bit) Wide Failure 312: POST DRAM Addressability Failure The power unit is down. 1. Verify proper seating of the DRAM SIMM on the adapter. 2. 10Base-T or 10Base2 Adapter Related Service Information 505 Error Message FRU/Action 313: SRAM Size Detection Failure, 314: SRAM Byte (8-bit) Wide Failure, 315: SRAM Short (16 bit) Wide Failure, 316: SRAM Word (32-bit) Wide Failure, 317: SRAM Long (64 bit) Wide Failure, 318: SRAM Trip (96-bit) Wide Failure, 319: SRAM Quad (128-bit) Wide Failure, 320: SRAM Addressability Failure, 321: Timer Failure, 322: Port 1 Internal Loopback Failure, 323: Port 2 Internal Loopback Failure, 324: Port 3 Internal Loopback Failure, 325: Port 4 Internal Loopback Failure 1. 10Base-T or 10Base2 Adapter 326: Ethernet Port 1 External Loopback Failure, 327: POST Ethernet Port 2 External Loopback Failure, 328: POST Ethernet Port 3 External Loopback Failure, 329: POST Ethernet Port 4 External Loopback Failure 1. Verify correct cabling of the port. 2. 10Base-T or 10Base2 Adapter 330: Port 1 Device Verification Failure, 331: Port 2 Device Verification Failure, 332: Port 3 Device Verification Failure, 333: Port 4 Device Verification Failure 1. 10Base-T or 10Base2 Adapter 506 PC Server HMM NetWare Run-Time Messages: It is possible that an Unrecoverable, or recoverable, error might occur during normal operation of the adapter. The following table describes the run-time errors that might be displayed. Recoverable Errors and Warnings Error Message FRU/Action 58: The board does not respond, 110: Unable to download the firmware, 111: Invalid Pipe Command, 112: The board watchdog failed, 113: Adapter resetting... please wait These messages indicate that errors have occurred during the recovery process. The driver will attempt to recover control of the adapter at periodic intervals. 1. If the driver is not able to recover from any of these errors after several minutes, replace the 10Base-T or 10Base2 adapter. 229: The adapter alert condition has been corrected This message indicates the successful recovery from one of the above run-time error conditions. 1. N/A 388: Ethernet Media Port 1 Tx Carrier Sense Errors, check your cable, 389: Ethernet Media Port 2 Tx Carrier Sense Errors, check your cable, 390: Ethernet Media Port 3 Tx Carrier Sense Errors, check your cable, 391: Ethernet Media Port 4 Tx Carrier Sense Errors, check your cable 1. Check cables, adapter cables, or concentrator. 395: Ethernet Media Port 1 Tx Carrier Sense Errors corrected, 396: Ethernet Media Port 2 Tx Carrier Sense Errors corrected, 397: Ethernet Media Port 3 Tx Carrier Sense Errors corrected, 398: Ethernet Media Port 4 Tx Carrier Sense Errors corrected Problem is solved. 1. N/A Related Service Information 507 Unrecoverable Errors If you receive an error that is not described in the preceding error-message lists, you might have an Unrecoverable (fatal) error. The error message indicates that the adapter has experienced an Unrecoverable run-time error. To make the adapter functional, unload the drivers, then reload them. If unloading and reloading the drivers does not make the adapter functional, restart the computer and try again. If the above procedures do not correct the problem, replace the 10Base-T or 10Base2 adapter. Parts Listing Quad-BT (10Base-T) PeerMaster Micro Channel Adapter Quad-B2 (10Base2) PeerMaster Micro Channel Adapter Quad-BT and Quad-B2 Option Diskette 06H4220 06H6042 06H6380 External SCSI Devices Note You cannot use both internal connectors on the SCSI-2 adapter and also use the external connector. For disk-array models with the SCSI-2 Fast/Wide PCI-Bus Adapter, you cannot use the internal channel 1 connector and the external connector at the same time. If you intend to use the external connector, connect internal SCSI-2 devices to the internal channel 2 connector. See the following figure. Internal Channel 1 Internal Channel 2 External Channel 1 Termination Requirements The requirements for terminating external SCSI devices are: 508 If you attach both internal and external SCSI devices, you must terminate the last internal device and the last external device. For non-disk-array models, you must also change the termination setting of the PC Server HMM SCSI-2 adapter in the SCSISelect utility program, as described in “SCSISelect Utility Program” on page 547, so that the SCSI-2 adapter is no longer terminated. If you attach only external devices to the SCSI-2 adapter, you must terminate the last device on the cable. If you install only one external device, it must be terminated. Since the SCSI-2 adapter is already terminated, do not change the termination setting. Cabling Requirements Before you install external SCSI devices, you must have the correct external SCSI cables. See Table 4 on page 510 for information on cable lengths. The cables must have the proper connector for the SCSI-2 adapter on one end, and the proper connector for the first external device on the other end. The SCSI-2 Fast/Wide PCI-Bus adapter can support a total of 15 devices and the SCSI-2 PCI-Bus RAID adapter can support a total of 14 devices, provided that you do not exceed the maximum cable lengths listed in Table 4 on page 510. If you are using a SCSI data transfer rate greater than 5MB per second, the maximum length of the SCSI bus (cable) must not exceed 3 meters (9.8 feet). If you are using a SCSI data transfer rate of 5MB per second or slower, the maximum length of the SCSI bus cable must not exceed 6 meters (19.7 feet). These lengths apply to the combined lengths of the internal and external cables. Adhering to these standards ensures that the server operates properly. Related Service Information 509 The following table shows the maximum cable lengths for connecting SCSI devices, based on data-transmission rates. Note The maximum cable length for an external cable is determined by subtracting the length of the internal cable being used from the maximum length of SCSI cable that can be used based on the speed of the data transfer. 5MB Per Second or Slower Data Transmission Rates Note Maximum cable length − internal cable length = external cable length. Maximum Length of SCSI cable = 6 meters (19.7 ft.) Length of 4-drop, SCSI narrow cable = 1 meter (3.3 ft.) Length of 7-drop, SCSI Fast/Wide cable = 1.5 meters (4.9 ft.) When a narrow internal cable is used, the maximum length of the SCSI external cable = 5 meters (16.4 ft.) 6 meters − 1 meter = 5 meters, or 19.7 ft. − 3.3 ft. = 16.4 ft. When a Fast/Wide internal cable is used, the maximum length of the SCSI external cable = 4.5 meters (14.8 ft.) 6 meters − 1.5 meter = 4.5 meters, or 19.7 ft. − 4.9 ft. = 14.8 ft. Greater Than 5MB Per Second Data Transmission Rate Note Maximum cable length − internal cable length = external cable length. Maximum Length of SCSI cable = 3 meters (9.8 ft.) Length of 4-drop, SCSI narrow cable = 1 meter (3.3 ft.) Length of 7-drop, SCSI Fast/Wide cable = 1.5 meters (4.9 ft.) When a narrow internal cable is used, the maximum length of the SCSI external cable = 2 meters (6.5 ft.) 3 meters − 1 meter = 2 meters, or 9.8 ft. − 3.3 ft. = 6.5 ft. When a Fast/Wide internal cable is used, the maximum length of the SCSI external cable = 1.5 meters (4.9 ft.) 3 meters − 1.5 meter = 1.5 meters, or 9.8 ft. − 4.9 ft. = 4.9 ft. Table 4. Maximum External SCSI Cable Lengths 510 PC Server HMM Setting SCSI IDs for External Devices The internal channel connector (you can only use one of the two internal channel connectors) and the external channel connector on the SCSI-2 Fast/Wide PCI-Bus Adapter accept SCSI IDs from 0 through 7. Each device attached to the external channel connector must have a unique SCSI ID and each device attached to the internal channel connector must have a unique SCSI ID. For example, you can have a SCSI ID of 0 on a device attached to the channel 1 connector and a SCSI ID of 0 on a device attached to the channel 2 connector of the same SCSI-2 Fast/Wide PCI-Bus Adapter. However, you cannot have a SCSI ID of 0 on two devices attached to the same channel connector. Note Read the README file on the SCSI-2 Fast/Wide PCI-Bus Adapter Configuration Option Diskette for updated information. Select Option Diskette from the first menu screen. Related Service Information 511 The following table shows an example of using one internal and one external channel on the RAID adapter. Channel 2 is connected to bank A and Channel 1 is attached to an external DASD storage enclosure. Refer to the documentation supplied with the storage enclosure for physical locations. Displayed Channel Number 1 1 1 1 1 1 2 2 2 2 2 2 2 Displayed Bay Number 1 2 3 4 5 6 1 2 3 4 5 6 7 Bank and Bay Physical Location External External External External External External A1 A2 A3 A4 A5 A6 (CD-ROM) SCSI ID 0 1 2 3 4 5 0 1 2 3 4 5 6 Table 5. One Internal and One External Channel Mapping You must set a unique SCSI ID for each external SCSI device connected to the SCSI-2 Fast/Wide PCI Adapter. Therefore, do not set the SCSI IDs for external devices to the values that you use for internal devices. Refer to the instructions supplied with the SCSI devices for more information about setting a SCSI ID. The default ID for the SCSI-2 adapter is 7. The ID for the preinstalled CD-ROM drive is 3 on non-disk-array models, and 6 on disk-array models. If the disk-array server was supplied with a preinstalled hard disk drive in bay 1, the ID is 0. Note If you install a second SCSI-2 adapter, you can use the same SCSI IDs that you use for the preinstalled SCSI-2 adapter. Hot-Swap Backplane (FRU No. 06H8388) Front View HI LO 512 PC Server HMM SCSI ID Jumper If two backplanes are connected to the same adapter, one backplane must be set to high and the other one to low. SCSI ROM Address ID Jumper Setting Description HI = High Assigns SCSI IDs 8 to D to the backplane LO = Low Assigns SCSI IDs 0 to 5 to the backplane Rear View E D C Address Jumper ROM Address Jumper Setting Notes If more than one backplane is installed in the computer, each backplane must have a different ROM address setting. Do not install a ROM address jumper on backplanes installed in PC Server 320 computers. To identify the location for the backplane jumper, see “Hot-Swap Backplane (FRU No. 06H8388)” on page 512. Jumper Position Description C Address for a backplane installed in Bank C. D Address for a backplane installed in Bank D. E Address for a backplane installed in Bank E Termination (Hot-Swap Back Plane) The hot-swap back plane is automatically terminated. Drives connected to the hot-swap back plane should not be terminated. IDE Controllers Note This information applies to non-Micro Channel computers. Related Service Information 513 Some severs have an IDE controller on the system board. You can connect two drives to the IDE controller on non-disk-array models, and one drive to the IDE controller on disk-array models. If you plan to do this, you must purchase an IDE cable. The IDE controller is for low-speed devices, such as tape drives, but you can connect hard disk drives. When you connect two drives to the IDE controller, one drive is the primary (master), and the other is the secondary or alternate (subordinate). To set the jumpers to the secondary mode, follow the instructions in the documentation supplied with the drives. Installing an Uninterruptible Power Supply A 9-pin, serial-port cable is supplied with the server. You can use this cable to attach an American Power Conversion (APC) uninterruptible power supply (UPS). After the UPS is installed, the software support must be loaded on the server. To do this refer to the ServerGuide CD documentation. 514 PC Server HMM Keyboard Note If a mouse or other pointing device is attached, remove it to see if the error symptom goes away. If the symptom goes away, the mouse or pointing device is defective. 001 – Power-off the computer. – Disconnect the keyboard cable from the system unit. – Power-on the computer and check the keyboard cable connector on the system unit for the voltages shown. All voltages are ± 5%. Voltage (Vdc) +5.0 Not Used 6 Ground 4 +5.0 +5.0 5 6 2 Not Used ARE THE VOLTAGES CORRECT? Yes No Pin 1 2 3 4 5 3 1 002 Replace the system board. 003 On keyboards with a detachable cable, replace the cable. If the problem remains or if the cable is permanently attached to the keyboard, replace the keyboard. If the problem remains, replace the system board. Multiple Fixed Disk Drive Replacement (RAID Array) Use the following procedure for fixed disk replacement under 8641 ECA002, which provides for the replacement of specific 2.25 GB fixed disk drives. Refer to RETAIN record # H13646 for important additional information. This process may also be used any time multiple fixed disks are being replaced in a RAID Array. Related Service Information 515 Important 1. Keeping track of which drives are located in which bays. 2. Have a backup copy of the current RAID configuration. 3. The drives might have been swapped multiple times. Always inspect the connectors for damage. 4. If the fixed disks are being replaced due to suspected STICTION problems (the drive head is bound to the drive disk), the main Idea is not to power-off the server. If the IBM F/W Streaming RAID Adapter Option Diskette is at version 2.3, it is strongly recommended that version 2.22. be obtained and used during this procedure. Version 2.3 turns off all the fixed disks the array during the rebuild process. This will expose the remaining drives to possible stiction. Use version 2.3 after all drives have been replaced. 1. Make a Chart of Bays 1 through 6 and write in each bay the original disk drive Serial Number and the New disk drive serial number for that particular bay. 2. While still installed in the system, place stickers on the drives indicating what bays they are in. Do the same to the new drives once they are installed. 3. Insert the IBM F/W Streaming RAID Adapter Option Diskette Version 2.22 into the default diskette drive (Do not use Version 2.3) 4. Press Ctrl+Alt+Del to soft boot the system; then, select “Advanced Options.” 5. Select “Backup Configuration to Diskette” from this menu. 6. Insert a blank diskette into drive A and put in a filename for this backup. The default filename is “config.” If you use the same backup diskette for more than one system, be sure to give each system a different filename and keep track of the specific filenames. 7. Exit the “Advanced Options” menu; then, select “View Configuration” from the “Main Menu.” 8. If applicable, identify which bay contains the hot spare drive. 9. Pull the Hot Spare drive out of its bay; then, exit out of “View Configuration” and the “Main Menu.” 10. Press Ctrl+Alt+Del When prompted, press Y to update the configuration with the HSP bay as “DDD.” 11. You are now ready to pull out the first drive to be replaced. The first drive to replace should be the drive suspected of having the highest probability of stiction. If there is not a SUSPECT drive, then choose an order you would like to replace them in, 516 PC Server HMM such as Bays 1, 2, 3, 4,etc. Just remember the replacement order. Check off the bays on your chart after each drive has been successfully replaced. Note Remember, the hot spare drive is pulled out first and is left out during replacement/rebuilding of the other drives. It then becomes the last drive replaced and its status turns to HSP. The hot spare doesn't require rebuilding (it's a spare). 12. In the order you have chosen, do the following for each drive being replaced. a. Pull out the drive and reboot the RAID Support Diskette. "Press Y to update configuration as DDD. b. Press Ctrl+Alt+Del to reboot the system. c. Install the new drive into the bay. d. Select “Rebuild Drive” from the “Main Menu”; then, select “Replace Drive.” e. Highlight the correct DDD Drive in the bay you are replacing. The system will start the drive. After starting successfully, the drive status will change from DDD to OFL. f. Select “Rebuild Drive” from the “Rebuild Menu” (The “Rebuild Menu” is a selection on the “Main Menu.”) g. Highlight the correct OFL Drive in the bay you are rebuilding. The system will rebuild the drive from 0 to 100%. After the system has successfully rebuilt the drive it will change the drive from OFL to ONL and save the configuration. 13. If a fatal error occurs during the above procedure, replace only the original drive back into the system that has not been rebuilt successfully yet. Then, do the following to restore the configuration from diskette. a. Insert the Option Diskette into the default diskette drive; then, press Ctrl+Alt+Del b. Select “Restore Configuration” from diskette on the “Advanced Options Menu” from the “Main Menu.” c. Remove the “Option Diskette” and insert the diskette with the backup configuration into the default diskette drive and type in the file name for that particular system. Then, proceed replacing and rebuilding drives wherever you left off. 14. If during the restoring from diskette an “Adapter Is Not Responding To Controller Commands” message appears, do the following: a. Press Ctrl+Alt+Del and restore the configuration from the backup copy of the “RAID Support Related Service Information 517 Diskette” again until it comes back and says restoration completed successfully. 15. After all drives are replaced and rebuilt successfully, power-off, then power-on the server. Network Adapters Supported (Dual Processor Servers) If you are having trouble with the installation or operation of a network adapter using OS/2 for SMP 2.11 and OS/2 LAN Server 4.0, ensure that the network adapter device driver supports dual processors. The following list of network adapters and device drivers, which support dual processors, have been verified to work with IBM PC Servers with dual processors, OS/2 for SMP 2.11, and OS/2 LAN Server 4.0. Important The architecture of the adapter and the architecture of the slot the adapter is installed in must be the same. (Examples: An EISA adapter must be installed in a EISA slot, and a Micro Channel adapter must be installed in a Micro Channel slot. Network Adapter Device Driver LAN Server 4.0 MPTS 3Com Token-Link III EISA IBMTOKMP.OS2 IBM SMP Token-Ring Network Adapter 3Com EtherLink II 3C503-16 ISA ELNKII.OS2 3Com 3C503 EtherLink II Adapter 3Com EtherLink III EISA ELNK3.OS2 3Com Etherlink III Family OS/2 3Com EtherLink III ISA ELNK3.OS2 3Com Etherlink III Family OS/2 IBM Token-Ring Network 16/4 ISA IBMTOKMP.OS2 IBM SMP Token-Ring Network Adapter IBM Token-Ring 16/4 ISA-16 IBMTOKMP.OS2 IBM SMP Token-Ring Network Adapter IBM LAN Adapter for Ethernet ISA IBMENI.OS2 IBM LAN Adapter for Ethernet Intel TokenExpress 16S ISA OLITOK16.OS2 Use the NDIS driver on the adapter diskette Intel EtherExpress 16C ISA EXP16.OS2 Intel EtherExpress 16 Family SMC EtherCard Elite 16 Ultra ISA SMC8000.OS2 Use the NDIS driver on the adapter diskette If OS/2 LAN Server provides a device driver for the network adapter, use the table above to determine the 518 PC Server HMM appropriate device driver to select during the installation process. If OS/2 LAN Server does not provide the device driver, use the NDIS device driver located on the diskettes supplied with the adapter. (Check the adapter documentation for installation instructions.) OS/2 Trap Errors The following information will be helpful in diagnosing trap errors. Error Code Information 0000 0001 See note 7 (Application software error, contact the software vendor's support). 0002 See notes 4, 6, 8, and 9. Install CSDs, run CHKDSK. Replace the defective memory. 0003 0004 0005 See note 7 (Application software error, contact the software vendor's support). 0006 0007 0008 Check the memory. Run CHKDSK. Contact the application software vendor's support. 0009 000A 000B See note 7 (Application software error, contact the software vendor's support). 000C If “SYS1942” appears, contact the software vendor's support. If “Exception in Device...” appears, refer to note 4. Run CHKDSK. All other messages: Run CHKDSK and check the memory. If a 113 error appears, see ECA024. 000D If “SYS1943 A Prog...” appears, contact the software vendor's support. If “Int Proc Error at 0220:3557” appears, set the Token Ring to 16K RAM window, install CSD's. If “double trap 000D” appears, install the latest CSDs. For all other messages or conditions, contact the software vendor's support. 000E See note 7 (Application software error, contact the software vendor's support). 0010 Hardware of software error. Run diagnostics to check math coprocessor. If diagnostics find no problem, see note 7 (contact the software vendor's support). Related Service Information 519 Notes: 1. Memory intensive operating systems such as OS/2, AIX*, or UNIX based operating systems are capable of revealing highly intermittent errors not detected by diagnostics. 2. Highly intermittent errors might go undetected by diagnostics tests. If no error occurs during the test, multiple replacements of memory might be required to resolve the problem. 3. Install all software updates. This applies to applications and operating systems. 4. The enhanced memory adapter (FRU 34F2825) might experience Trap 0002 errors if it does not have diagonal resistors across U21-U24. See ECA042. (The enhanced memory adapter has been redesigned without resistors, so this note might not apply to the computer you are servicing.) 5. Intermittent errors can be caused by outside sources of static, noise, or power. 6. Trap 0002 can be caused by a memory or adapter failure. Read the message details. It might be the system board, system-board memory, or adapter. 7. Trap 000D errors are software errors. The customer should contact the software vendor for possible patches. 8. For 8570 systems, refer to ECA059, ECA051. 9. For 8580-AXX Models, see ECA051 for possible system board replacement to correct Trap 002, NMI, or DOS parity errors. System Aid Diskette A system aid diskette is now available for Trap 0002 errors. Dealers can download it from the Technical Advisors Bulletin Board as file “TRAP2LOG.” The diskette will read NVRAM and indicate which of four possible sources caused the error. The four possible errors and their causes are listed below. Error Code Information 110 Usually a system-board memory error. If replacing the memory does not fix the problem, suspect the system board. 111 I/O Channel Check. Any adapter could cause this error, but usually a memory adapter is the cause. 112 Watchdog Timeout. Could be hardware or software. If replacing the system board does not fix the problem, suspect the software. 520 PC Server HMM Error Code Information 113 DMA Timeout. Usually a software error, but possibly a hardware failure (system board). If it is a 70-A21 with a 113 error, see ECA056, run CHKDSK. Contact the software vendor for more information. If it is any other system with a 113 error, refer to ECA023. Check the hardware. OS/2 Problems during a New Installation If you have determined that you do not have a hardware failure, and you cannot get the operating system to work, assist the customer in recopying the OS/2 software to the hard disk. If this is not a new installation, have the customer order the replacement diskettes. If this is a new installation and the customer does not have the diskettes, order replacement diskettes by doing the following: 1. Write down the machine type and serial number. 2. Call 1-800-342-6672 (weekdays 9 a.m to 9 p.m eastern time). 3. Identify yourself as an IBM service representative or IBM authorized servicer. 4. For OS/2 Version 2.0, request diskette package P/N 41G3329. For OS/2 Version 2.00.1, request diskette package P/N 52G9973. The IBM telephone operator will supply the correct package part number for later versions of OS/2. (Supply the machine information and shipping address for either package.) After you receive the OS/2 diskettes, refer to the pamphlet supplied with the diskettes for OS/2 installation instructions. The PS/2 diagnostic tests are intended to test only IBM-marketed products. Products not marketed by IBM, prototype cards, or modified options can give false errors and invalid system responses. Refer to the PS/2 Hardware Maintenance manual Reference section related PS/2 reference information. OS/2 Version Level Check To determine the OS/2 level on the computer you are servicing, type SYSLEVEL at the OS/2 prompt, then press Enter. Related Service Information 521 PC Server Flash/Diagnostics/CMOS Access Information The following table provides the access information for Flash/BIOS, Diagnostics, CMOS, and Setup programs for PC Servers. 522 PC Server HMM Related Service Information 523 Model 310 310 300 320 320 500 520 720 Type 8639 8639 8640 8640 8640 8641 8641 8642 MC/A EISA MC/A MC/A EISA EISA MC/A ISA Bus Diskette Diskette Diskette Diskette Diskette Diskette IML Diskette Diags Program Diskette/IML Boot Diskette Boot Diskette Boot Diskette Boot Diskette Boot Diskette Boot Diskette F1 - Ctrl+Alt Boot Diskette Access Diags Program No Yes No Yes Yes Yes Yes Yes CMOS/Setup N/A F2 N/A F1 F2 Ctrl+Alt+S F1 F1 Access CMOS/Setup Yes Yes Yes Yes Yes Yes Yes Yes Flash Printer 1. Make sure the printer is properly connected and powered on. 2. Run the printer self-test. If the printer self-test does not run correctly, the problem is in the printer. Refer to the printer service manual. If the printer self-test runs correctly, install a wrap plug in the parallel port and run the diagnostic tests to determine which FRU failed. If the diagnostic tests (with the wrap plug installed) do not detect a failure, replace the printer cable. If that does not correct the problem, replace the system board or adapter connected to the printer cable. 524 PC Server HMM SCSI Fast/Wide PCI Adaptec Adapters (AHA-2940/2940W) The AHA-2940 and AHA-2940 Wide are PCI Fast and PCI/Wide SCSI adapters. These adapters are supported on computers with a PCI 5v bus master slot. Note The Type 8642 computer is shipped with the AHA-2940 Wide SCSI adapter only. The adapters support the following: Adapter Connectors Devices Supported AHA-2940 Adapter 1 each internal 8-bit SCSI connector, 1 each external 8-bit SCSI connector. Supports a maximum of seven 8-bit single-ended SCSI devices. AHA-2940W Adapter 1 each internal 8-bit SCSI connector, 1 each internal 16-bit SCSI connector, 1 each external 16-bit SCSI connector. Supports a maximum of fifteen 8-bit and 16-bit single-ended SCSI devices. Related Service Information 525 Adapter Locations 50-pin Internal SCSI Connector 68-pin Wide Internal SCSI Connector External LED Connector J4 J4 .J4/ Termination jumper for multiple-computer configurations. See “Termination (for Multiple-Computer Configurations)” on page 545. 526 PC Server HMM BIOS Startup Messages After you have installed the host adapter, BIOS displays a message when you boot the computer. Normally, this message lists the SCSI ID, manufacturer, model number and other information for each SCSI device that the BIOS detects. If an initialization failure occurs, the host BIOS displays a specific error message followed by a BIOS Installation Failure message. The following are some of the installation failure messages and their meaning: A drive larger than 1 gigabyte has been detected with 64 head / 32 sector partitioning. This drive is not compatible with the 255 head / 63 sector translation which has been enabled on this adapter. Data could be corrupted! Please check your system setup. Press any key to continue. This message occurs only if Extended BIOS Translation is enabled in the SCSISelect utility. It means that the BIOS detected a large-capacity drive invalid partition in the master boot record. Extended BIOS Translation is used only with MS-DOS 5.0 or above. You do not need to enable this option if you are using another operating system such as OS/2 or UNIX. If you are using a driver larger than 1GB under MS-DOS 5.0 or above and this message appears, do the following: 1. Run the SCSISelect utility and set Extended BIOS Translation to Disabled. 2. Exit from the SCSISelect utility and back up the data on the disk drive, if you want to save it. 3. Perform a SCSI low-level format with the Format Disk utility under SCSI Disk Utilities in the SCSISelect utility. Note All data on the target drive will be lost when you run the Format Disk utility. Back up your data before you run it. 4. In the SCSISelect Advanced Configuration Options menu, set Extended BIOS Translation to Enabled. 5. Partition the drive again. 6. Restore data to the drive, if necessary. Device connected, but not ready. This message appears if the host adapter receives no answer when it requests data from an installed SCSI device. The host adapter skips this device and moves to the next device on the bus. Related Service Information 527 Do the following if you see this message when you request data from the SCSI drive: 1. Run the SCSISelect utility and access SCSI Device Configuration. Locate the SCSI ID of the host adapter and set Send Unit Commands to yes. 2. Exit the SCSISelect utility and request data from the drive again. 3. If the message still appears, follow the drive manufacturer's instructions to make sure the drive is set to spin-up when the power is switched on. Start unit request failed. The BIOS was unable to send a Start Unit Command to the device. Run the SCSISelect utility and disable Send Start Unit Command for the device. Time-out failure during SCSI Inquiry command! or Time-out failure during SCSI Test Unit Ready command! or Time-out failure during Start Unit command! An unexpected time-out occurred. Try disconnecting the SCSI device cables from the host adapter and then starting the computer. If the computer successfully restarts check the following. SCSI bus termination (See, “Termination (Devices)” on page 544, “Termination (AHA-2940/2940W Adapters)” on page 544, and “Termination (for Multiple-Computer Configurations)” on page 545), Cable connections. One of the devices on the SCSI bus may be defective. Booting the Computer from a SCSI Drive Be sure the standard hard disk drives are not configured in the system, using the Setup program. Note Standard hard disk drive means the disk drives(s) attached to the system by a standard ISA/EISA, non-SCSI disk adapter (example, IDE drives). Standard hard disk drives can be set to the installed or not installed state by the Setup program supplied with the computer. The Setup program allows you to select a number of standard hard disk drives that are recognized by the system, regardless of whether they are physically installed. SCSI drives are not controlled through the Setup program. 528 PC Server HMM Be sure the SCSI boot drive address is set to SCSI ID 0 and that there are no SCSI ID conflicts. You can use the Adaptec SCSISelect Configuration Utility to determine the SCSI address of the devices attached to the SCSI bus. Be sure that SCSI parity is consistently enabled or disabled on all devices on the SCSI bus. Note All SCSI devices currently supported on PC Servers support parity checking. To check the parity setting(s) of the devices on the SCSI bus, do the following: 1. Start the SCSISelect utility. 2. Select the Configure/View Host Adapter Settings menu. 3. Set SCSI Parity Checking to Enable for all the devices connected to the SCSI bus. Note Some early developed SCSI devices may not support parity checking. If one or more of the devices connected to SCSI bus do not support parity checking, set SCSI Parity Checking to Disabled for all of the SCSI devices connected to the SCSI bus. Try enabling Include in BIOS Scan in the SCSI Device Configuration option of the SCSISelect utility. Be sure to power-off; then, power-on the computer after changing any value on a host adapter, in a Setup program, or on a SCSI device. Be sure the SCSI bus is properly terminated. See, “Termination (Devices)” on page 544, “Termination (AHA-2940/2940W Adapters)” on page 544, and “Termination (for Multiple-Computer Configurations)” on page 545. Be sure the intended boot disk has an active DOS partition and has been formatted. Check cable connections. Computer Hangs, or HOST Adapter Cannot Always Find the Drives Check SCSI parity for consistency and be sure SCSI termination is set correctly. See, “Termination (Devices)” on page 544, “Termination (AHA-2940/2940W Adapters)” on page 544, and “Termination (for Multiple-Computer Configurations)” on page 545. Check cable length and integrity. If the host adapter LED remains on when the computer hangs, the host adapter may be interfering with the operation of the computer. It may not Related Service Information 529 support First-Parity DMA (that is, Bus Master) data transfers. Connectivity (Cables/Devices) If you attach both internal and external SCSI devices to the host adapter, you must terminate the last external device and the last internal device. (This applies to both the AHA-2940 and AHA-2940W adapters.) Important If you connect external devices to the AHA-2940W adapter, you can only attach devices to one of the internal SCSI connectors. If you connect both internal and external SCSI devices, you must also change the host adapter termination settings from the default, because the host adapter is now in the middle of the SCSI bus. See “Termination (AHA-2940/2940W Adapters)” on page 544. . Component Requirement Maximum external cable length 3 m (9.8 ft.) Maximum combined length of all cables connected internally and externally to each adapter 6 m (19.7 ft.) SCSI Devices Supports single-ended devices only CD-ROM Drive The CD-ROM drive has a 50-pin connector. If it is connected to the 68-pin connector on the adapter using a 68-pin to 68-pin cable, a 16/8 Bit Converter must be used to connect the CD-ROM drive to the 68-pin cable. AHA-2940 and AHA-2940W 50-pin internal connector 50-pin to 50-pin SCSI ribbon cable AHA-2940W 68-pin internal connector 68-pin to 68-pin SCSI ribbon cable AHA-2940 50-pin external connector 50-pin to 50-pin SCSI shielded cable AHA-2940W 68-pin external connector 68-pin to 68-pin SCSI shielded cable 530 PC Server HMM Disk Drive Configuration Problems Problems may occur if a combination of standard and SCSI drives are installed in the computer. Standard hard disk drives can be set to the installed or not installed state by the Setup program supplied with computer. SCSI drives are not controlled through the Setup program. If SCSI and non-SCSI drives are installed, the non-SCSI disk drive is always the boot drive. Note If too many large-capacity drives are set to start instantly at system power-on, this could cause the power supply to shut down. See “Power Supply Shutdowns” on page 285. LED (AHA-2940/2940W Adapters) The red light emitting diode (LED) on the AHA-2940/2940W adapter lights up when the host adapter is performing activity on the SCSI interface or when other SCSI devices are using the SCSI bus. An external LED connector is provided on the adapter so you can attach a cable to an externally visible LED. Note If the light stays on when there is no activity on the SCSI bus, one of the following failures may be indicated: The bus is hung. The processor(s) failed. Unexpected activity is occurring or the SCSI cables are incorrectly installed. (If the SCSI cables are installed in reversed position, the host adapter is forced into a solid SCSI reset state, which halts normal operation.) Related Service Information 531 Other Problems and Solutions The screen is difficult to read when running the SCSISelect utility. Press F5 to toggle the display between color and monochrome modes. This may make the screen easier to read. Important When the format/verify utility is attempted on a disk device, an Unexpected SCSI Command Failure pop-up box containing error information is displayed. This probably means that the utility encountered a problem with the disk device or the media and cannot run. The following information is displayed in the pop-up window: SCSI Target ID of the device SCSI CDB Sent (for example, 2F 00 00 00 00 00 00 08 00 00) Host Adapter Status (for example, 11h - Selection Timeout) Target Status (for example, 00h - Good Status) Sense Key (for example, 06h - Unit Attention) Additional Sense Code Additional Sense Code Qualifier You can probably determine from the Sense Key information both the cause of the problem and its solution. The following are more common Sense Key values and their meanings: 532 02h - Not ready The media is not ready to format. Be sure that media is inserted in the drive. 03h - Medium error The disk media may be defective. If it is a removable-media drive, try using a different media disk. If it is a hard disk drive, the disk may be physically damaged. Verify and format the media with SCSISelect. 04h - Hardware error The disk drive may be defective. Consult the hardware documentation and contact the manufacturer. 05h - Illegal request The Adaptec formatting utility does not support a low-level format of this device; however, the device may already be low-level formatted by the manufacturer. 06h - Unit attention The removable media may be write-protected. Disable write protection and run the utility again. PC Server HMM The Additional Sense Code field provides more information about the error. The computer locks up when the Esc key is pressed to exit SCSISelect. If this happens, power-off; then, power-on the computer. Any settings you changed before you tried to exit the program were recorded in the EEPROM and will not be lost. One of the SCSI devices in the computer will not allow you to disable termination. How can it be attached to the SCSI bus? Attach the device on the end of the SCSI bus so that you do not need to disable termination. After connecting the LED cable to the host adapter, the light stays on all the time and the computer hangs. The red LED on the AHA2940/2940W normally lights when there is activity in the SCSI bus. If the light stays on when there is no activity on the SCSI bus, the SCSI cables might be installed in a reverse position. Problems Detected During Installation If the system will not boot from the standard hard disk drive or a boot program on the diskette drive (after the initial hardware installation), check the following: If the AHA-2940/2940W LED and the SCSI drive LED are always on, the SCSI cables might be installed in a reverse position between the host adapter and the drive. If the AHA-2940/2940W BIOS message is not displayed on the screen during system boot, the system does not recognize the host adapter BIOS. Be sure that host adapter BIOS is enabled. Be sure there are no address conflicts between a PCI device and an EISA or ISA device. If you see the message Host adapter not found, the host adapter has detected an internal failure. Be sure the host adapter is firmly seated in the PCI slot. If you see the message Host adapter found but not configured, run the SCSISelect utility to configure the host adapter. See “SCSISelect Configuration Utility” on page 534. Related Service Information 533 SCSISelect Configuration Utility The SCSISelect Configuration Utility program, located on the ROM of the AHA-2940 and AHA-2940W adapters, allows you to change the default settings for the adapter and the devices connected to the adapter. The following are the default settings for the AHA2940 and AHA2940W adapters. The following settings are for the adapter and the devices connected to the adapter: Setting Default Value Host Adapter SCSI ID 7 SCSI Parity Checking Enabled Host Adapter SCSI Termination AHA-2940 AHA-2940W Enabled Low On / High On Reset SCSI Bus at Host Adapter Initialization Enabled Host Adapter BIOS1 Enabled Support Removable Disks Under BIOS as Fixed Disks1 Boot only Extended BIOS Translation for DOS, 1GB1 Enabled BIOS Support for More Than 2 Drives1 Enabled 1 Settings are valid only if the adapter BIOS is enabled. Individual Settings The following settings are for each SCSI device connected to the adapter: Setting Default Value Initiate Sync Negotiation Yes Maximum Sync Transfer Rate 10MB per second2 Enable Disconnection Yes Send Start Unit SCSI Command1 No Include In BIOS Scan1 Yes Initiate Wide Negotiations3 Enabled 1 Settings are invalid only if the adapter BIOS is enabled. 2 20MB per second maximum synchronous transfer on AHA-2940W. 3 AHA-2940W adapters only. 534 PC Server HMM SCSISelect Configuration Utility Control Keys Keys Action/Response ↓ and ↑ Moves the highlighted bar from one adapter selection to another. If more than one adapter is displayed, the PCI bus number and the PCI device number that correspond to the highlighted adapter are also highlighted. Enter Selects the highlighted item. Esc Returns to the previous menu. F5 Switches between color and monochrome display modes. F6 Resets all settings to the host adapter default settings. Starting the SCSISelect Configuration Utility: You can start the SCSISelect utility program from the BIOS banner if the adapter BIOS is enabled, or from the SCSISelect Configuration Utility diskette shipped with the computer. From the BIOS Banner: The BIOS banner is displayed when you power-on or reboot the computer. The banner lists the model number and SCSI ID of the SCSI devices connected to the adapter. To start the utility, do the following: 1. Power-off; then, power-on the computer (or reboot the computer). 2. When the BIOS banner is displayed on the screen, press Ctrl+A. From the SCSISelect Configuration Utility Diskette: To start the utility from the SCSISelect Configuration Utility diskette, do the following: 1. Insert the SCSISelect Configuration Utility diskette into diskette drive A. 2. At the DOS prompt type, A:2940cfg.exe 3. Press Enter. Related Service Information 535 SCSISelect Configuration Utility Menus/Options: If the SCSISelect utility detects only one AHA-2940/2940W host adapter in your system, it displays the following Options menu: à ð AHA-294ð/294ðW at Bus:Device xx:xxh Would you like to configure the host adapter or run the SCSI disk utilities? Select the option and press <Enter>. Press <F5> to switch between color and monochrome modes. Options Configure/View Host Adapter Settings SCSI Disk Utilities Arrow keys to move cursor, <Enter> to select option, <Esc> to exit (\=default) á ñ Note If the SCSISelect utility finds multiple AHA-2940/2940W host adapters in your system, the PCI Bus and PCI device number of each adapter is displayed. As you move the highlighted bar to different host adapters (using the up and down arrow keys), the red light on the corresponding adapter installed in the system lights to allow you to identify the correct adapter. The Option menu is displayed after you select a host adapter. Configuration/View Host Adapter Settings Menu/Options à ð AHA-294ð/294ðW at Bus:Device xx:xxh Configuration SCSI Channel Interface Definitions Host Adapter SCSI ID .................... SCSI Parity Checking .................... Host Adapter SCSI Termination ........... Additional Options SCSI Device Configuration ............... Advanced configuration Options .......... 7 Enabled Enabled Press <Enter> Press <Enter> <F6> - Reset to Host Adapter Defaults Arrow keys to move cursor, <Enter> to select option, <Esc> to exit (\=default) á 536 ñ PC Server HMM Host Adapter SCSI ID: changes the host adapter SCSI ID from its default value of 7. à ð AHA-294ð/294ðW at Bus:Device xx:xxh \ ð 1 2 3 4 5 6 7 Arrow keys to move cursor, <Enter> to select option, <Esc> to exit (\=default) á ñ Note The menu for the A-2940W adapter displays SCSI IDs #0 to #15. SCSI Parity Checking: enables or disables host adapter SCSI parity checking. à ð AHA-294ð/294ðW at Bus:Device xx:xxh \ Enabled Disabled Arrow keys to move cursor, <Enter> to select option, <Esc> to exit (\=default) á ñ Host Adapter SCSI Termination: configures host adapter SCSI termination. The following menu is displayed if an AHA-2940 adapter is installed: à ð AHA-294ð/294ðW at Bus:Device xx:xxh \ Enabled Disabled Both ends of the SCSI bus should be terminated. Host Adapter termination should be disabled if you attach SCSI devices to both internal and external connectors, since the host adapter would then be in the middle of the SCSI bus. Device Connection | Termination _______________________________|__________________ Internal devices only | Enabled External devices only | Enabled Internal and External devices | Disabled Arrow keys to move cursor, <Enter> to select option, <Esc> to exit (\=default) á ñ Related Service Information 537 The following menu is displayed if an AHA-2940W adapter is installed: à AHA-294ð/294ðW at Bus:Device xx:xxh \ ð Low ON / High ON Low OFF / High OFF Low OFF / High ON Both ends of the SCSI bus should be terminated. Host Adapter termination should be disabled if you attach SCSI devices to both internal and external connectors, since the host adapter would then be in the middle of the SCSI bus. Device Connection | Termination _______________________________|__________________ Internal devices only | Enabled External devices only | Enabled Internal and External devices | Disabled Arrow keys to move cursor, <Enter> to select option, <Esc> to exit (\=default) á ñ SCSI Device Configuration: allows you to configure certain parameters of each SCSI device on the SCSI bus. If selected, the following information for each SCSI ID is displayed even if some SCSI IDs are not assigned to a device: à ð SCSI Device Configuration SCSI Device ID #ð #1 #2 #3 #4 #5 #6 #7 ______________________________________________________________________________ Initiate Sync Negotiation yes yes yes yes yes yes yes yes Maximum Sync Transfer Rate 1ð.ð 1ð.ð 1ð.ð 1ð.ð 1ð.ð 1ð.ð 1ð.ð 1ð.ð Enable Disconnection yes yes yes yes yes yes yes yes ------ Options Listed Below Have NO EFFECT if BIOS is Disabled -----------Send Start Unit Command no no no no no no no no Include in BIOS Scan yes yes yes yes yes yes yes yes Arrow keys to move cursor, <Enter> to select option, <Esc> to exit (\=default) á ñ Note The menu for the AHA-2940W adapter displays SCSI IDs #0 to #15 Initiate Sync Negotiation: determines whether the host adapter initiates synchronous negotiation with the SCSI device. However, the host adapter always responds to synchronous negotiation if the SCSI device initiates it. Note If Initiate Sync Negotiation is set to yes and the attached SCSI devices do not support synchronous negotiation, the system may operate erratically or hang. 538 PC Server HMM Maximum Sync Transfer Rate: determines the maximum synchronous data transfer rate that the host adapter can support. The host adapter supports rates up to the FAST SCSI maximum of 10MB per second. The default value is 10.0. The AHA-2940W has a 16-bit (2-byte) channel that provides an effective maximum synchronous transfer rate of 20.0MB per second (10MB per 8-bit channel). The valid settings are: SCSISelect Transfer Rate AHA-2940 Effective Transfer Rate AHA-2940W Effective Transfer Rate 10.0 10MB per second 20MB per second 8.0 8MB per second 16MB per second 6.7 6.7MB per second 13.4MB per second 5.0 5MB per second 10MB per second Notes 1. In most cases, you can use the maximum value of 10.0. If the host adapter is set not to negotiate for synchronous data transfer (Initiate Sync Negotiation is set to no), the value selected here is the maximum rate that the host adapter accepts from the device during negotiation. 2. Some older SCSI devices do not support Fast SCSI data transfer rates (10.0, 8.0, and 6.7). This might cause the computer to operate erratically or hang if the transfer rate is set to high. Select a Maximum Sync Transfer Rate of 5.0 for these devices. If Initiate Sync Negotiation is set to yes and the attached SCSI devices do not support synchronous negotiation, the system may operate erratically or hang. Enable Disconnection: determines whether the host adapter allows a SCSI device to disconnect from the SCSI bus (sometimes called Disconnect/Reconnect). Disconnect/Reconnect allows the host adapter to perform other operations on the SCSI bus while the SCSI device is temporarily disconnected. Note You should leave Enable Disconnection set to yes if two or more SCSI devices are connected to the host adapter. This optimizes SCSI bus performance. If only one SCSI device is connected to the SCSI adapter, set Enable Disconnection to no for optimum performance. Related Service Information 539 Send Start Unit Command: is supported by some SCSI devices and determines whether the Start Unit command (SCSI command 1B) is sent to the SCSI device (most devices do not require this). Enabling this option reduces the load on the power supply by allowing the host adapter to power-on SCSI devices one at a time when you boot the computer. Otherwise, the devices all power-on at the same time. Most devices require that you set a jumper before they can respond to this command. If this option is enabled for more than one SCSI device, the Start Unit Command is sent first to the SCSI device with the lowest SCSI ID. After this device responds to the host adapter, the Start Unit Command is sent to the next highest SCSI ID with a setting of yes. The default setting is no. Note The Send Start Unit command setting is valid only if the host adapter BIOS is enabled. Include in BIOS Scan: determines whether the host adapter BIOS supports devices attached to the SCSI bus without the need for device driver software. When set to yes, the host adapter BIOS controls the SCSI device. When set to no, the host adapter BIOS does not search the SCSI ID for devices to control and device driver software is needed to control the SCSI device. The default setting is yes. Note The host adapter BIOS must be enabled for this setting to be valid. Advanced Configuration Options Menu à ð Advanced Configuration Options Reset Bus at HOST Adapter Initialization......................... Enabled -------Options Listed Below Have NO EFFECT if the BIOS is Disabled--------Host Adapter BIOS (Configuration Utility Reserves BIOS).......... Support Removable Disk Under BIOS as Fixed Disks................. Extended BIOS Translation for DOS Drives > 1 GByte............... BIOS Support for More Than 2 Drives (MS-DOS (R) 5.ð and above)... Enabled Enabled Enabled Enabled Arrow keys to move cursor, <Enter> to select option, <Esc> to exit (\=default) á ñ Note Do not change these file options unless absolutely necessary. 540 PC Server HMM Reset SCSI Bus at Host Adapter Initialization: allows you to enable or disable a SCSI bus reset generated by the host adapter during its power-on initialization and after a hard reset. If enabled, the SCSI bus resets the first time the host adapter is initialized. If the host adapter BIOS is enabled, the BIOS resets the SCSI bus, then waits two seconds before scanning the bus for SCSI devices. If Reset SCSI Bus at Host Adapter Initialization is disabled, there is no two-second delay. The default setting is enabled. Note Normally, SCSI Bus Reset at Host Adapter Initialization should always be enabled. Host Adapter BIOS: enables or disables the host adapter BIOS. The default setting is Enabled. Note The host adapter must be enabled for the computer to boot from a SCSI hard disk drive connected to the host adapter. The following SCSISelect options cannot be used unless the host adapter BIOS is enabled: – Support Removable Disks Under BIOS as Fixed Disks – Extended BIOS Translation for DOS Drivers > 1 GByte – BIOS Support for More Than 2 Drives – Send Start Unit SCSI Commands – Include In BIOS Scan Support Removable Disk Under BIOS as Fixed Disk: allows you to control which removable-media drives are supported by the host adapter BIOS. It is only valid if the host adapter BIOS is enabled. The default setting is Boot Only. The following choices are available: – Boot only: Only the removable-media drive designated as the boot device is treated as a hard disk drive. – All Disks: All removable-media drives supported by the BIOS are treated as hard disk drives. Related Service Information 541 – Disabled: Removable-media drives are not treated as hard disk drives. In this situation, software drivers are needed because the drivers are not controlled by the BIOS. Note Support for removable-media drives means only that the host adapter BIOS allows you to use a removable-media drive as if it were a hard disk drive. If you remove the media while the drive is powered-on, data may be lost. If you want to be able to remove the media while the drive is powered-on, install the removable-media device driver and set this option to Disabled. Extended BIOS Translation for DOS Drives more than 1GB: allows you to enable or disable extended translation for SCSI hard disk drives with a capacity greater than 1GB. It is only valid if the BIOS is enabled. The default setting is Enable. If this option is enabled, the following translation schemes are used: – SCSI hard disk drives with a capacity of 1GB or less use a translation scheme of 64 heads, 32 sectors per track. – SCSI hard disk drives with a capacity greater than 1GB use a translation scheme of 255 heads, 63 sectors per track. BIOS Support for more than 2 Drives: allows you to enable or disable BIOS support for more than two and up to eight SCSI hard disk drives. The host adapter BIOS must be enabled. This feature is supported by DOS 5.0 and above. The default setting is Enable. SCSI Disk Utility à ð AHA-294ð/294ðW at Bus:Device xx:xxh Select SCSI Disk and press <Enter> SCSI SCSI SCSI SCSI SCSI SCSI SCSI ID# ID# ID# ID# ID# ID# ID# 1 2 3 4 5 6 7 : : : : : : : Quantum P14ðS 94ð-4ð-94xx No Device SyQuest SQ 511ð No Device No Device No Device AHA-294ð/294ðW Arrow keys to move cursor, <Enter> to select option, <Esc> to exit (\=default) á ñ Note The menu for the AHA-2940W adapter displays SCSI IDs #0 to #15 542 PC Server HMM When you select SCSI Disk Utilities from the Options menu, the SCSISelect utility scans the SCSI bus and lists all SCSI devices installed on the SCSI bus. When you highlight a device by moving to it with the cursor keys and pressing Enter, a small window appears. You can select Format Disk or Verify Media from this menu. Format Disk: performs a low-level format on disk devices. Note A low-level format destroys all data on the drive. Be sure to back up all data before performing this operation. You cannot abort a low-level format once it is started. Most SCSI disk devices are pre-formatted and do not need to be formatted again. The Adaptec Format Disk utility is compatible with most SCSI disk drives. Run it on hard disk drives or removable-media drives that were previously used with non-Adaptec host adapters. Verify Disk Media: scans the selected device's media for defects. Note Press Esc at any time to abort the Verify Disk Media utility. If this utility finds bad blocks, it prompts you to reassign them. If you select yes, the blocks will no longer be used. Self Diagnostics (AHA-2940/2940W Adapters) AHA-2940/2940W host adapters execute a self-diagnostics Power-On Self-Test (POST) during BIOS initialization. If the diagnostics fails, the BIOS displays the message Initialization failed and halts any further operation of the adapter. If this occurs, remove the adapter and check for the following: Components that are not correctly installed or properly seated Broken wires Missing or damaged components Conductive debris on the adapter. If you see any physical damage, replace the adapter. Related Service Information 543 Termination (Devices) Note Hot-Swap Back Planes are automatically terminated. Do not terminate devices connect to a Hot-Swap Back Plane. Each connector on the adapter and the devices attached to the connector make up a separate daisy-chain. Termination is required on the last device in each chain. If only one device is attached, termination is required for that device. Termination (AHA-2940/2940W Adapters) Use the following information to determine the termination required for the adapter; then, run the SCSISelect Utility Configuration program if required. (To run the SCSISelect Configuration Utility program, see “SCSISelect Configuration Utility” on page 534 and “Starting the SCSISelect Configuration Utility” on page 535.) AHA-2940 Adapter Adapter Termination Devices Connected To Enabled Internal connector only Enabled External connector only Disabled Internal and external connectors AHA-2940W Adapter Adapter Termination Devices Connected To Low On / High On 68-pin internal connector only Low On / High On 68-pin external connector only Low On / High On 50-pin internal connector only Low Off / High Off 68-pin internal and 68-pin external connectors Low Off / High On 50-pin and 68-pin internal connectors Low Off / High On 50-pin internal and 68-pin external connectors Invalid 50-pin and 68-pin internal connectors, and 68-pin external connector 544 PC Server HMM Termination (for Multiple-Computer Configurations) If more than one computer is attached to the SCSI bus, you can configure the adapter to provide termination when the adapter host computer is powered off. The termination is applied only when the computer containing the adapter is powered off and another computer connected to the SCSI bus accesses the device. To activate this termination, install a jumper on J4 on the adapter. Troubleshooting Checklist — SCSI (AHA-2940/2940W Adapters) Most problems that occur during installation result from errors in preparing and connecting devices on the SCSI bus. Answer these questions first if a problem occurs during installation: 1. Are the power cables and SCSI cables properly connected? 2. Is the Host adapter firmly seated and secure in a 5-volt PCI slot that is capable of bus mastering? 3. Is the SCSI cable installed correctly throughout the SCSI bus? 4. Are the PCI bus slot parameters set correctly in the computer's Setup program? Note The PCI bus is designed to assign the IRQ port address, and BIOS address settings. You may need to assign some of these values manually in the Setup program. 5. Is each adapter, including the host adapter, set to a unique SCSI ID (0-7 for the AHA-2940 and 0-15 for the AHA2940W)? 6. Is the termination set correctly? Related Service Information 545 Using a SCSI Drive as C and Another SCSI Drive as D 1. Be sure the computer's CMOS Setup is set to No Drives Installed, as required for SCSI host adapters. 2. Be sure the SCSI drive to be used as drive C is set to SCSI ID 0. See “SCSI Disk Utility” on page 542. 3. Set the SCSI drive to be used as drive D to SCSI ID 1. 4. Try enabling Include in BIOS Scan in the SCSI Device Configuration option of the SCSISelect utility. See “SCSI Device Configuration” on page 538. 5. Be sure to power-off, then power-on the computer after changing any values on the host adapter, in Setup, or on a SCSI device. 6. Be sure that SCSI parity checking is consistently enabled or disabled on the SCSI bus. 7. Verify that the host adapter and the SCSI devices are properly configured and installed. 8. Be sure the SCSI bus is properly terminated. 9. Be sure the disk is formatted and has a DOS partition. Run the Format Disk utility accessible through SCSISelect. See “SCSI Disk Utility” on page 542. Using a Standard Drive as C and a SCSI Drive as D 1. If a second hard disk drive is installed, use the Setup program to map the second hard disk drive out of the configuration. 2. Be sure the SCSI drive to be used as drive D is set to SCSI ID 0. You can use the SCSISelect utility to determine the SCSI address of the peripherals on the SCSI bus. 3. Be sure the SCSI parity checking is consistently enabled or disabled on all devices on the SCSI bus. 4. Verify that the host adapter and the SCSI devices are properly configured and installed. 5. Be sure to power-off, then power-on the computer after changing any values on the host adapter, in Setup, or on a SCSI device. 6. Be sure the SCSI bus is properly terminated. 7. Be sure the disk is formatted and has a DOS partition. Run the Format Disk utility accessible through SCSISelect. See “SCSI Disk Utility” on page 542. 8. Check cable connections. 546 PC Server HMM SCSISelect Utility Program The SCSI-2 controller has a built-in menu-driven configuration utility program that allows you to view and change SCSI settings. You can use the SCSISelect Utility program to: Change the default values Verify and change configuration conflicts Format a new SCSI hard disk Starting the SCSISelect Utility Program You can access this program when you start the server. The SCSISelect prompt appears after the IBM PC Server screen appears briefly and then disappears. Press Ctrl+A immediately after the SCSISelect prompt appears. Use the Up Arrow (↑) or Down Arrow (↓) key to move the highlight bar to the various menu choices. Press Esc to return to the previous menu. Also, you can press F5 to switch between color and monochrome modes (if your display permits). To change the current settings of the items displayed in the menus, follow the directions on the screen. SCSISelect Utility Program Options The following options are displayed on the SCSISelect Utility program menu: Configure/View Host Adapter Settings SCSI Disk Utilities Configure/View Host Adapter Settings: To view or change the SCSI-2 controller settings, select Configure/View Host Adapter Settings and follow the directions on the screen. Refer to the following table for information on the choices on this menu. Host Adapter SCSI ID Select this choice to change the SCSI ID of the SCSI-2 controller from its default value of 7. SCSI Parity Checking Select this choice to enable or disable SCSI-2 adapter parity checking. The default value is Enabled. Host Adapter SCSI Termination Select this choice to configure SCSI-2 controller termination. The default value is Low On / High On. SCSI Device Configuration Select this choice to configure SCSI device parameters. Before you can make updates, you must know the ID of the device whose parameters you want to configure. Advanced Configuration Options Related Service Information 547 Select this choice to view or change the settings for advanced configuration options. These options include setting the SCSI ID scanning order, and enabling support for a startable CD-ROM and for Int13Extensions. SCSI Controller Settings/Description: The following is a list of the Configuration/View Host Adapter Settings and descriptions. SCSI Controller Settings Description Host Adapter SCSI ID Change the SCSI ID of the SCSI-2 controller from its default value of 7. SCSI Parity Checking Enable or disable parity checking on the SCSI-2 adapter or controller. The default value is Enabled. Host Adapter SCSI Termination Configure SCSI-2 adapter or controller termination. The default value is Low On / High On. SCSI Device Configuration Configure SCSI device parameters. Before you can make updates, you must know the ID of the device whose parameters you want to configure. Advanced Configuration Options View or change the settings for advanced configuration options. These include: Startable CD-ROM drive. When set to On, the CD-ROM drive can be included as a startup device For this option to take effect, you must insert a startable CD in the CD-ROM drive. Init13Extensions. When set to On, these BIOS extensions are enabled. Reverse Scan. When Reverse Scan is set to Off and the SCSI controller is set to the default value of 7, scanning order proceeds from 0 to 6, then 8 to 15. When this choice is set to On, the scanning order proceeds from SCSI ID 6 to 0, then 15 to 8. SCSI Disk Utilities: To see the IDs that are assigned to each SCSI device or format a drive, select SCSI Disk Utilities from the SCSISelect Utility program menu. To use the utility program, select a drive from the list. Read the screens carefully before making a selection. 548 PC Server HMM Using the Low-Level Format Program: On non-disk array models, you have the option of formatting your hard disk using the Low-Level Format feature of the SCSISelect Utility program. Depending on the hard disk capacity, the Low-Level Format program could take up to two hours. Note: For disk-array models, you must use the programs provided on the RAID Configuration diskette to format your hard disk drives. Refer to “Disk Array Configuration” on page 461 for instructions. When To Use the Low-Level Format Program: Use the Low-Level Format program: When you are installing software that requires a low-level format When you get recurring messages from the diagnostic tests directing you to run the Low-Level Format program on the hard disk As a last resort before replacing a failing hard disk drive Note For information about backing up all of the files, see the operating-system documentation for the system you are servicing. Starting the Low-Level Format Program Attention The Low-Level Format program erases all data and programs. 1. If the hard disk is working, make a backup copy of all the files and programs on the hard disk. 2. Select Format disk from the SCSISelect Disk Utilities menu; then follow the instructions on the screen. 3. To install an operating system, refer to the ServerGuide CD documenation. Setting the Motor-Start Jumper The jumper in position .5/ (illustrated above) is the motor-start jumper. If the jumper is installed, all hard disk drive motors start instantly at power-on. If the jumper is removed, POST starts the drives sequentially. Some drives are shipped with the motor-start jumper installed (to reduce POST time). If many large-capacity drives are added to the computer, and they are set to start at power-on, the power supply might shut down. If this happens, it means that the total motor-start surge current of a multiple drive startup exceeds the reserve-current Related Service Information 549 capacity of the power supply. You might have to remove one or more motor-start jumpers. Note: Non-IBM drives use either a jumper or a switch to set the motor-start mode. To set the SCSI ID on a Rewritable Optical Drive, do the following: 1. Position the device so that the three position jumper is at the lower-right corner. 2. Refer to the table below to position the Rewritable Optical Drive jumpers for IDs 6 through 0. SCSI ID Jumpers 1 2 3 SCSI ID Jumpers 1 2 3 6 J J : 2 : J : 5 J : J 1 : : J 4 J : : 0 : : : 3 : J J ServerGuide It is important that you read and understand the following information, whether you choose to install an operating system that is available in the ServerGuide package or you choose to install your own operating system. One of the easiest and most efficient ways to install an operating system and take advantage of a wide variety of the latest software for the network environment is to use ServerGuide. You can install an operating system from ServerGuide or you can install your own operating system and still use many of the features available on ServerGuide. (For example: you can install NetFinity, which is a LAN systems-management program; run demonstration programs; use the performance-tuning feature; and do much more.) Refer to the ServerGuide CD documentation. Software/Hardware Mismatch Problems If a failure appears to be the result of a defective FRU, but the diagnostic tests run error-free, there might be a software and hardware mismatch. These problems might be intermittent, and they are usually difficult to diagnose. If you are experiencing this type of problem, and the operating system is of the “direct driver” variety, which bypasses the BIOS interface, such as: 550 AIX Netware SCO XENIX Some “windowing” interfaces PC Server HMM Other Unix-based software the most-likely cause of the problem is a mismatch between the software and the hardware. Applications that use the Multiprotocol Adapter/A, magnetic tape drives, and some SCSI devices such as CD-ROM, require direct software drivers. There is no BIOS interface for these devices in PS/2 products. The following information is provided to help you resolve these problems: Software Can Be Sensitive to the Hardware Direct-driver software is sensitive to variations in hardware design. The resulting incompatibilities are usually addressed with a revision (sometimes referred to as a patch), to the direct-driver software. Make certain the software is current and that all known revisions are installed. The IBM on-line bulletin board (sometimes referred to as PCPROD), and other software tools sources, such as Novell Netware, should be referenced by the software support personnel for any revisions provided by the appropriate software vendor. The most-likely cause of these types of problems, when direct-driver software is involved, is the failure to obtain the latest revisions from the software vendor. Software Installation It is very important to follow the vendor's installation procedures. The software should not be migrated from another system, unless the installation instructions indicate that migration is supported (especially from a different model in the product line). Related Service Information 551 Important Migrating adapters from slower systems to faster systems might cause problems. This is due to device-specific, system-specific, or time-dependent software code, that controls these devices. Adapter and Software Compatibility Hardware adapters for some operating systems must be approved by the software vendor to be compatible with that software. The approval is specific to the system, adapter E.C. level, and the software version. Contact the software vendor to confirm that system and adapter configuration is supported by their software level. The compatibility support is especially important for, (but not limited to), all LAN adapters and RIPL applications. Software Failures After a Hardware Change After the initial installation, any changes in the hardware configuration (addition or changes of adapters or features), might result in computer failures and require the reinstallation of the operating system or the software revisions. Specific hardware configuration changes (such as memory address, interrupt level, or programmable option select), might result in a computer failure if the software has unique operating requirements. Undetermined Problems You are here because the diagnostic tests did not identify the failure, the Devices List is incorrect, or the system is inoperative. Note: If you suspect a software mismatch is causing failures (solid or intermittent), be sure to see “Software/Hardware Mismatch Problems” on page 550. Check the power supply voltages. If the voltages are not correct, replace the power supply. If the voltages are correct, return here and do the following: 1. Power-off the computer. 2. Remove or disconnect the following (one at a time) until you find the failure (power-on the computer and reconfigure each time). Any external devices Surge suppressor device (on the computer) Modem, printer, mouse, or non-IBM devices Each adapter Drives Memory-Module Kits Bus adapter 552 PC Server HMM Math coprocessor (if installed) Note: Minimum operating requirements vary for each computer. For example: AT Bus computers require 256KB of memory. Micro Channel computers require 1MB of memory. IML drive in the drive startup sequence (IML systems only). If the computer is a workstation, (no drives), a default hard disk drive is not required. 3. Power-on the computer. If the problem remains, suspect the system board, then the processor board in that order. Note: If the problem goes away when you remove an adapter from the bus adapter, and replacing that adapter does not correct the problem, suspect the system board, processor board, then the bus adapter in that order. Problem Determination Tips Due to the variety of hardware and software combinations that can be encountered, use the following information to assist you in problem determination. If possible, have this information available when requesting assistance from Service Support and Engineering functions. Machine type and model Processor or hard disk upgrades Failure symptom – Do diagnostics fail? – What, when, where, single, or multiple systems? – Is the failure repeatable? – Has this configuration ever worked? – If it has been working, what changes were made prior to it failing? – Is this the original reported failure? Reference/Diagnostics Diskette Version – Type and version level Hardware configuration – Print (print screen) configuration currently in use – BIOS level Operating system software – Type and version level Related Service Information 553 Important To eliminate confusion, identical systems are considered identical only if they: 1. Are the exact machine type and models 2. Have the same BIOS level 3. Have the same adapters/attachments in the same locations 4. Have the same address jumpers/terminators/cabling 5. Have the same software versions and levels 6. Have the same Reference/Diagnostics Diskette (version) 7. Have the same configuration options set in the system 8. Have the same setup for the operation system control files Comparing the configuration and software set-up between “working and non-working” systems will often lead to problem resolution. 554 PC Server HMM Phone Numbers, U.S. and Canada Note EMEA customers should contact their Dealer or IBM Service organization. Before you place a call to the Support Center, refer to “Problem Determination Tips” on page 553. Authorized Dealers or Servicers Number Information 919-517-0001 800-528-7705 800-937-3737 800-426-2472 Bulletin Board Service - PC Company Bulletin Board Service - TSS Only IBM Business Partner Education IBM Customer Engineer Technical Support IBM Dealer Support Center IBM Direct Desktop Software Sales IBM Part Number ID and Look Up IBM PC HelpCenter IBM Software Defect Support (CSDs) IBM Software Ordering (Publications) IBM Supplies Technical Hotline IBM Warranty Parts Claims Center 800-IBM-DEAL 800-342-6672 303-924-4015 800-426-7763 800-237-5511 800-327-5711 800-426-1484 800-388-7080 U.S. Customers and Helpware Subscribers Number Information 919-517-0001 800-426-8322 800-999-0052 800-237-4824 800-964-8523 800-742-2493 800-447-4700 800-426-2468 800-426-3333 800-IBM-SERV 800-772-2227 800-426-7282 800-426-9402 (Ext. 150) 800-241-1620 800-342-6672 800-237-5511 800-284-5933 914-962-0310 800-547-1283 Bulletin Board Service - PC Company Customer Education Business Unit Customized Operational Services EduQuest (Educational Computers) End User HelpDesk Support IBM Anti-Virus Services IBM Authorized Dealer Referrals IBM Dealer Referral IBM Information Referral Service IBM Service IBM PC HelpCenter and HelpDesk IBM Technical Manuals Multimedia Information Center 800-551-2832 Multimedia HelpCenter OS/2 Information Line OS/2 Support Services Prodigy Prodigy User Questions Technical Coordinator Program SystemXtra for Personal Systems LAN Automated Distribution/2 OS/2 Bulletin Board OS/2 Application Assistance Center Technical Solutions Magazine Related Service Information 555 IBM Canada Customer and Servicer Support Number Information 800-661-PSMT 905-316-5556 Business Partner Marketing Support Business Partner Marketing Support Toronto Business Partner Marketing Support French Customer Relations Customer Relations - Toronto Customer Service Dispatch Customer Service Parts Customer Support Center (ISC) Customer Service Repair Centre HelpClub Registration IBM Direct IBM Certification Administrator IBM Certification Coordinator Mail to: 50 Acadia Drive Markham, Ontario L3R 0B3 IBM HelpFax IBM HelpFax - Toronto IBM HelpPC IBM Information Network Support IBM Information Network Support Toronto IBM PC Service Partners Lexmark Product Information Parts Orders, Exchange or Emergency Parts Regular Orders, Exchange 514-938-6048 800-465-6600 905-316-6666 800-465-6666 800-263-2769 800-465-2222 416-443-5701 800-465-7999 800-465-7999 905-513-3367 905-316-2683 800-465-3299 905-316-3299 800-565-3344 800-268-3100 800-268-3100 800-387-8343 800-663-7662 800-263-2769 416-443-5808 (Fax) 416-443-5755 514-938-3022 905-316-4255 604-664-6464 204-934-2735 800-661-7768 800-465-1234 905-316-4148 905-316-4100 (Fax) 905-316-4150 905-316-4100 (Fax) 905-316-4872 905-316-4100 (Fax) 800-661-2131 800-565-3344 800-387-8483 416-443-5835 (Fax) 905-316-2445 905-316-3515 (Fax) 416-443-5778 800-505-1855 800-267-7472 556 Parts Orders, Inquiries PC Co Bulletin Board - Montreal PC Co Bulletin Board - Toronto PC Co Bulletin Board - Vancouver PC Co Bulletin Board - Winnepeg PS Marketing Support (PSMT) Publications Ordering Service Management Support Service Management Support Service Manager Service Manager Service Quality Programs Service Quality Programs Skill Dynamics (Education) PS/1 Warranty Customer Helpline PS/1 Warranty Service (DOAs) Warranty Claim Fulfillment Warranty Claim Reimbursement Warranty Claim Reimbursement Warranty Claim Parts Inquiry Warranty Provider Support Hotline Warranty Service, ThinkPad PC Server HMM Trademarks The following terms are trademarks of the IBM Corporation in the United States or other countries: AIX AT Enterprise Systems Architecture/390 FaxConcentrator HelpCenter IBM Micro Channel MVS/ESA MVS/DFP NetFinity OS/2 Personal System/2 Portmaster Presentation Manager PS/2 PS/ValuePoint RETAIN S/370 S/390 System/370 System/390 ThinkPad VM/ESA VoiceType VSE/ESA VTAM Virtual Machine/Enterprise Systems Architecture The following terms are trademarks of other companies: 3Com ActionMedia Adaptec AHA APC Banyan Cirrus EtherCard Elite EtherExpress EtherLink Gateway Intel Microsoft MS-DOS NetWare Novell PCMCIA Pentium QAPlus QAPlus/PRO Quantum RIPL SCSISelect SMC SCO TokenExpress VINES XENIX 3Com Corporation Intel Corporation Adaptec, Inc. Adaptec, Inc. American Power Conversion Corporation Banyan Systems Incorporated Cirrus Logic, Inc. Standard Microsystems Corporation Intel Corporation 3Com Corporation Gateway Systems Corporation Intel Corporation Microsoft Corporation Microsoft Corporation Novell, Inc. Novell, Inc. Personal Computer Memory Card International Association Intel Corporation DiagSoft, Inc. DiagSoft, Inc. Quantum Corporation) CTA Incorporated Adaptec, Inc. Standard Microsystems Corporation The Santa Cruz Operation, Inc. Intel Corporation Banyan Systems Incorporated Microsoft Corporation UNIX is a registered trademark in the United States and other countries licensed exclusively through X/Open Company Limited. Windows is a trademark of Microsoft Corporation. Copyright IBM Corp. 1996 557 IBM Part Number: 70H0751 Printed in U.S.A. S3ðH-25ð1-ð1