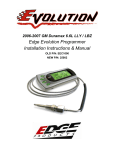
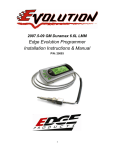
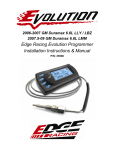
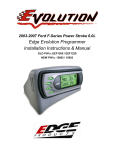
1
2006-2007 GM Duramax 6.6L LLY / LBZ
Edge Evolution Programmer
Installation Instructions & Manual
OLD P/N: EEC1000
NEW P/N: 25002
Evolution
06 LBZ & LLY Duramax
TABLE OF CONTENTS
DISCLAIMER OF LIABILITY ____________________________________________ 3
LIMITATION OF WARRANTY ___________________________________________ 3
About the Evolution _____________________________________________________ 6
Stock Program ______________________________________________________________ 6
Economy Program___________________________________________________________ 6
Towing Program ____________________________________________________________ 6
Performance Program _______________________________________________________ 6
Extreme Program ___________________________________________________________ 7
Power Levels _______________________________________________________________ 7
PIDs ______________________________________________________________________ 7
Diagnostics _________________________________________________________________ 8
0-60 and Quarter Mile time ___________________________________________________ 8
Alerts _____________________________________________________________________ 9
Records ____________________________________________________________________ 9
Custom Options _____________________________________________________________ 9
Display and Keypad_____________________________________________________ 10
Installing the Thermocouple______________________________________________ 11
Installing the Evolution _________________________________________________ 15
Power Programming ____________________________________________________ 20
Custom Options ________________________________________________________ 22
Tire Size __________________________________________________________________ 22
Speed Limiter______________________________________________________________ 24
Diagnostics ___________________________________________________________ 25
Retrieving Codes ___________________________________________________________ 25
Clearing Codes_____________________________________________________________ 26
Performance Testing ____________________________________________________ 27
Setup ________________________________________________________________ 30
Changing the Display View __________________________________________________ 30
Two Function Bar Graph Display Sample ______________________________________ 31
Two Function Digital Display Sample __________________________________________ 31
Three Function Digital Display Sample ________________________________________ 31
Four Function Digital Display Sample _________________________________________ 32
1
06 LBZ & LLY Duramax
Evolution
Changing the Variables on the Screen__________________________________________ 32
Changing the Backlighting_______________________________________________ 34
Adjusting the Backlight Color ________________________________________________ 34
Adjusting the Backlight Brightness ____________________________________________ 35
Adjusting the Contrast ______________________________________________________ 36
Alerts ________________________________________________________________ 37
Records ______________________________________________________________ 39
Restore Defaults _______________________________________________________ 40
Fusion® PC Software Overview___________________________________________ 41
Checking for Updates _______________________________________________________ 41
Troubleshooting/Tips ___________________________________________________ 42
Commonly Used Acronyms_______________________________________________ 43
©2007, Edge Products
All rights reserved.
Manual Version 10
2
Evolution
06 LBZ & LLY Duramax
THIS IS A HIGH PERFORMANCE PRODUCT. USE AT YOUR OWN RISK.
Do not use this product until you have carefully read the following agreement.
This sets forth the terms and conditions for the use of this product. The installation of this product
indicates that the BUYER has read and understands this agreement and accepts its terms and
conditions
DISCLAIMER OF LIABILITY
Edge Products, LLC and its successors, distributors, jobbers, and dealers (hereafter SELLER) shall in no way be
responsible for the product's proper use and service. THE BUYER HEREBY WAIVES ALL LIABILITY CLAIMS.
The BUYER acknowledges that he/she is not relying on the SELLER’s skill or judgment to select or furnish goods suitable
for any particular purpose and that there are no liabilities which extend beyond the description on the face hereof and the
BUYER hereby waives all remedies or liabilities, expressed or implied, arising by law or otherwise, (including without any
obligations of the SELLER with respect to fitness, merchantability and consequential damages) or whether or not
occasioned by the SELLER's negligence.
The SELLER disclaims any warranty and expressly disclaims any liability for personal injury or damages. The BUYER
acknowledges and agrees that the disclaimer of any liability for personal injury is a material term for this agreement and
the BUYER agrees to indemnify the SELLER and to hold the SELLER harmless from any claim related to the item of the
equipment purchased. Under no circumstances will the SELLER be liable for any damages or expenses by reason of use
or sale of any such equipment.
The SELLER assumes no liability regarding the improper installation or misapplication of its products.
It is the installer's responsibility to check for proper installation and if in doubt, contact the manufacturer.
LIMITATION OF WARRANTY
Edge Products, LLC (hereafter "SELLER") gives Limited Warranty as to description, quality, merchantability, fitness for any
product’s purpose, productiveness, or any other matter of SELLER's product sold herewith. The SELLER shall be in no
way responsible for the product’s open use and service and the BUYER hereby waives all rights other than those
expressly written herein. This Warranty shall not be extended or varied except by a written instrument signed by SELLER
and BUYER.
The Warranty is Limited to one (1) year from the date of sale and limited solely to the parts contained within the product's
kit. All products that are in question of Warranty must be returned shipping prepaid to the SELLER and must be
accompanied by a dated proof of purchase receipt. All Warranty claims are subject to approval by Edge Products, LLC.
If the BUYER sends back a failed unit that is out of warranty and chooses to buy a refurbished unit, the refurbished
unit will only carry a 60 day warranty. If the BUYER purchases a new unit at a predetermined discounted rate, it will
have the standard 1 year warranty.
Under no circumstances shall the SELLER be liable for any labor charged or travel time incurred in diagnosis for defects,
removal, or reinstallation of this product, or any other contingent expenses.
Under no circumstances will the SELLER be liable for any damage or expenses insured by reason of the use or sale of
any such equipment.
IN THE EVENT THAT THE BUYER DOES NOT AGREE WITH THIS AGREEMENT: THE BUYER MAY
PROMPTLY RETURN THIS PRODUCT, IN A NEW AND UNUSED CONDITION, WITH A DATED PROOF OF
PURCHASE, TO THE PLACE OF PURCHASE WITHIN SIXTY (60) DAYS FROM DATE OF PURCHASE FOR
A FULL REFUND.
THE INSTALLATION OF THIS PRODUCT INDICATES THAT THE BUYER HAS READ AND
UNDERSTANDS THIS AGREEMENT AND ACCEPTS ITS TERMS AND CONDITIONS.
3
06 LBZ & LLY Duramax
Evolution
IMPORTANT INFORMATION ABOUT YOUR VEHICLE’S
WARRANTY — PLEASE READ!
Many of our customers ask, “Will your product void my vehicle’s manufacturer’s
warranty?” While the answer is straightforward from a legal standpoint, it’s
important to educate our customers (and all after-market consumers) on some
industry realities and offer some common sense precautions to minimize your
risk.
Consumers of aftermarket products are protected by the Federal MagnussonMoss Warranty Act. The Act states that if something breaks on your vehicle and
you take it in for warranty repair, the dealer must honor your warranty unless
whatever modifications you have added to your vehicle actually caused the
problem in question.
Edge is committed to providing quality products that are safe to use. Our products
do not cause damage to a vehicle when used as intended. Please keep in mind
that towing in anything higher than level two and hard driving in levels four and
five are not recommended. However, the reality is that many dealerships have
been known to void warranties on vehicles that use aftermarket products as a
matter of policy. This applies in particular to those aftermarket products that
produce horsepower, such as performance enhancement “chips,” modified intake
manifolds, or aftermarket exhaust systems, regardless of product brand. Any
aftermarket company that does not acknowledge this is misleading you.
Although you have strong legal protection as a consumer in regard to your
vehicle’s warranty, the practical reality is that taking legal action against a dealer
or manufacturer to fight a voided warranty is a costly and time-intensive process.
For this reason, Edge strongly recommends you always disconnect and
remove your module/programmer and monitor when you take your vehicle
to a dealer for warranty work. It is also for this reason that Edge focuses the
bulk of their product development efforts on producing modules and digital
monitors that can be easily removed. Even if you remove your unit, you should
note that dealers can detect the use of ANY programmer — Evolution or
otherwise — even if the unit has been removed.
4
Evolution
06 LBZ & LLY Duramax
All Edge modules and programmers are built to operate with OEM calibrations.
When you take your vehicle to a service center they may, by your request or
otherwise, update your vehicles calibrations. Therefore it is important that you
return your vehicle to stock before taking it in for service. Edge updates its active
products (i.e. those currently being manufactured) to work effectively with updated
OEM calibrations. However, this process can take some time as Edge is not always
made aware of calibration changes made by the OEM. In the case of discontinued
products, Edge cannot ensure that your unit will work effectively if you take your
vehicle to a dealership and you are given, by your request or otherwise, a new
calibration.
Programming your vehicle may expose existing defects in your vehicle’s
PCM that could disable your vehicle. It is advised that you do not
program your vehicle in remote locations in case of vehicle failure.
If you have used another tuner/programmer on your truck, you will need to
program your truck back to stock before using the Evolution.
Failure to return to stock may result in PCM failure or engine damage.
5
06 LBZ & LLY Duramax
Evolution
About the Evolution
Congratulations on purchasing the Evolution by Edge Products, LLC, the
leader in truck performance and power gain technology. The following
manual contains information and instructions on the proper use of the
Evolution. Please read carefully before proceeding to program your vehicle.
Note: Read the product disclaimer and the Getting Connected section
before programming your vehicle.
Note: At the back of this manual, we have included commonly used
acronyms. This should help while using the Evolution.
Stock Program
The Evolution automatically makes a backup of your stock program from
your PCM before writing a new program onto your PCM. This assures that
you will have the stock program if/when you desire to reprogram your
vehicle to its original stock program.
It is strongly recommended prior to returning your vehicle to a service center
or emissions check that you return your vehicle’s computer to the stock
program. In the event that the service center re-flashes your vehicle’s
computer (a common practice) and you have NOT returned it to stock, your
Evolution programmer will be rendered useless.
Follow the steps included in this manual for returning your program to stock.
Economy Program
This setting is the lowest level setting. It has been specifically tuned for
optimum fuel economy, we recommend using this level for daily driving.
Towing Program
This setting is tuned specifically for towing. When towing a heavy load, we
recommend you using this setting.
Performance Program
This setting is a high performance level, not recommended for towing.
6
Evolution
06 LBZ & LLY Duramax
Extreme Program
This is the highest setting for the Evolution. The fuel injection and timing
strategies are aggressively tuned to extract the maximum performance from
your vehicle without sacrificing drivability or durability.
DO NOT TOW IN THE EXTREME PERFORMANCE PROGRAM.
DOING SO MAY CAUSE DAMAGE TO YOUR VEHICLE.
Power Levels
The following power gains are representative of an actual test vehicle. These
gains were measured on a Super Flow Dyno at an altitude of 4400 Ft. above
sea level, and represent power delivered to the rear wheels of the test truck.
The only modification made to the test truck was the addition of the
Evolution. Power gains may vary somewhat on a different vehicle or in
different geographic settings.
Economy –
30hp
60tq
Towing -
60hp
135tq
Performance - 85hp
185tq
Extreme -
220tq
100hp
PIDs
The Evolution allows the user to view up to 4 PIDs at one time. There are 22
different PIDs to choose from. Below is a list and description of each:
• RPM (Revolutions Per Minute) – Engine speed.
• MPH (Miles Per Hour) – Note: Dash display may be +/-3 MPH off
from the digital display due to mechanical differences in the spring,
etc. used to control the gauge.
• ECT (Engine Coolant Temperature) – Degrees F.
• LOAD (Engine Load) – Calculated engine Load
• GEAR (Current Gear) – Current gear. A ‘lock’ symbol will appear
next to the gear number once the torque converter locks.
• TFT (Trans Fluid Temperature) – Degrees F.
• BST (Boost Press) – PSI
7
06 LBZ & LLY Duramax
Evolution
• MAF (Mass Air Flow) – Grams Per Second
• IAT (Intake Air Temperature in manifold) – Degrees F.
• DFRP (Desired Fuel Rail Pressure) – PSI – This is what pressure the
PCM would like the fuel rail pressure to be at.
• AFRP (Actual Fuel Rail Pressure) – PSI – This is the actual pressure in
the fuel rail.
• OSS (Output Shaft Speed) - RPM
• MAP (Manifold absolute Pressure) - kPa
• MIT (Main Injection Timing) - Degrees
• BAT (Battery voltage) - Volts
• CFR (Calculated Fuel Rate) – mm3
• VPOS (Turbo Vane Position) - %
• APP (Accelerator Pedal Position) - %
• IATT (Intake Air Temperature in intake tube) – Degrees F
• BARO (Barometric Pressure) - kPa
• FTMP (Fuel Temperature) - Degrees F
• DIDL (Desired Idle) - RPM
• EGT (Exhaust Gas Temperature) – Degrees F
Diagnostics
The Evolution is also a powerful diagnostics tool. You can view any
diagnostic trouble codes (DTCs) your vehicle may have, which in turn allows
you to fix them. It will also allow you to turn off that annoying “Check
Engine” light when the problem has been addressed (no more expensive trips
to the dealer for a diagnostics scan).
0-60 and Quarter Mile time
Another feature of the Evolution is the ability to determine your quarter mile
times as well as your 0-60 times, 60 foot times, and has a unique Christmas
Tree starting sequence. This is very easy to use and not all tuners have this
feature.
8
Evolution
06 LBZ & LLY Duramax
Alerts
A feature that might come in handy is the alerts. If you would like to know
when a certain parameter, such as transmission temperature, reaches a certain
value you can set an alert to that value. As the preset value is reached, the
Evolution’s screen will flash red and display which alert was triggered and
the current value for that particular alert parameter.
Records
While the Evolution is displaying parameters of your truck it will record the
highest value the parameters have reached. These records can be viewed and
reset at any time.
Custom Options
While programming your vehicle, you have the option to change your tire
size value, which can correct your odometer readings that result from
changing tire sizes.
Speed limiter, is also a parameter that you can change while programming
your vehicle.
9
06 LBZ & LLY Duramax
Evolution
Display and Keypad
The following picture is a sample Evolution screen. Great effort has gone
into making the Evolution programmer very simple to use. The [UP] and
[DOWN] arrow keys are used to scroll through options on the screen. The
[ENTER] key is used to select desired options from a menu or move to the
next screen. The [MENU] key is used to enter the Main Menu from the
parameter display or return to the previous screen. This version of the
Evolution also has the option to change the backlighting color of the display
to a wide range of colors.
MENU
UP
DOWN
ENTER
NOTE: The evolution uses a LCD display which has inherent limitations in operating
temperature. If your screen is black, blank, or distorted and the temperature is above 158
degrees F (70 degrees C), please allow the device to cool and then it should work
correctly. At extremely low temperatures the display will update very slowly. Again wait
for the device to warm to normal operating temperatures for the screen to function
properly.
10
Evolution
06 LBZ & LLY Duramax
Installing the Thermocouple
It is necessary to tap a small hole into your exhaust manifold to insert the
EGT sensor. The EGT probe must be mounted in the exhaust manifold
before the turbo to operate properly. Drill the hole using a 5/ 16 or a
21/64” drill bit, then tap it with a 1/8” NPT tap. Once the hole is drilled and
tapped, run the motor at idle for 10 to 15 seconds to clear the few remaining
shavings from the manifold. Once the engine has been run, screw in the
stainless fitting and insert the EGT sensor by sliding it into the hole (see
figure A) and tightening the back end stainless fittings.
Figure A
Figure A-1
11
06 LBZ & LLY Duramax
Evolution
The EGT
thermocouple
installed into
the drilled
and tapped
exhaust
manifold
Figure B
Tip: Pulling
back the
wheel splash
guard
provides easy
access to the
exhaust
manifold for
tapping the
EGT cable.
Figure C
12
Evolution
06 LBZ & LLY Duramax
Run the thermocouple wire along the top of the fire wall. There are three
small black clips on the top of the fire wall, slide a zip tie behind each clip
and secure the Thermocouple cable with the zip ties, this will hold the cable
up and out of the way of moving engine parts. (See Figure D)
Slide the supplied
zip ties behind
these clips and
secure the
thermocouple
wire.
Figure D
13
06 LBZ & LLY Duramax
Evolution
You will need to run the connecter side of the thermocouple through the fire
wall and connect it to the OBDII connecter. Use the main grommet on the
firewall (as shown in figure E)
Run the
thermocouple
plug through
this grommet
to connect it to
your OBDII
connector
Figure E
Run the cable up under the dash and secure it with the supplied Zip ties.
Locate the OBDII connector cable in your kit, and connect the end of the
thermocouple to the port on the right side of the OBDII connector.
Connect
the male
connector
end of the
EGT Probe
to the
OBDII
connector
Figure F
14
Evolution
06 LBZ & LLY Duramax
Installing the Evolution
The Evolution programmer connects to the diagnostic port of your vehicle.
Follow these steps to install the Evolution:
1. Begin by turning your ignition key to the OFF position. Locate the
black diagnostic (OBDII) connector (Figure #1) under located
directly to the left of the E-brake release handle. As you sit in your
vehicle, it could be located to the left of your left knee. Sometimes
the cover to this connector will be labeled “Data Link.”
Figure #1
2. With the driver’s side door open, remove the access panel on the
left side of the dashboard (Figure #2) and pull the end of the ODBII
cable outwards (shown in Figure #3). Remove the two Torx screws
using a #15 torx bit, and snake the cable behind the panel with the
vent up to the A-pillar. Replace the screws, and the access panel.
The cable should be protruding from the dashboard up along the Apillar and be able to move freely when pulled (Figure #4).
Figure #2
Figure #3
15
06 LBZ & LLY Duramax
Evolution
Figure #4
3. With roughly 8 to 10 inches of cable fed through the dashboard, set
the Pod onto the dashboard (shown in Figure #5) with the end of
the cable protruding through the front of the Pod. Remove the
Dash Bezel by sliding your fingers behind it and pulling firmly
toward the steering wheel. Slide the tab on the bottom of the pod
behind the bezel, and snap the bezel back into place.
Figure #5
4. To secure the pod: locate the metal brackets and the pod in your
evolution box. Note that the brackets are numbered and should be
placed in the appropriate numbered locations inside the pod. Use
the permanent double sided tape to secure the brackets to the inside
of the pod, be sure that the numbers match.
NOTE: Be sure to check the position of the brackets while the Pod is resting in
it’s desired location on the dash prior to attaching them to the Pod with the
double sided tape.
16
Evolution
06 LBZ & LLY Duramax
Clean the pod location on the dash with hot soapy water and
rinse, or use 70% Isopropyl alcohol. Make sure dash is completely
dry. Attach the supplied Velcro to the bottom of the mounting
brackets in the pod. Leave the protective backing on the bottom
piece of Velcro, and test fit the pod so you have an idea of where
you want it. Once you have determined the appropriate
positioning, remove the backing paper from the Velcro, place the
pod in it’s desired location, and firmly press down on the brackets
(through the front of the pod) to secure the Velcro in place.
5. Insert the rubber gasket into the Pod, and connect the Evolution to
the cable (Figure #6).
Figure #6
6. Any excess cable may be stuffed behind the Evolution or may be
pulled back through the dash to eliminate slack. The result of the
installation is shown in Figure #7. Be sure to use the supplied cable
ties to secure any excess cable underneath the dash to prevent the
cable interfering with proper pedal operation.
Figure #7
17
06 LBZ & LLY Duramax
Evolution
7. With the Pod and Evolution securely in place, turn the ignition key
ON, and then plug the cable into the OBDII connector (Figure #8).
Figure #8
Note: Unplug the OBDII connector if the truck will be sitting for a long period of time.
This will eliminate unnecessary power draw.
The Evolution logo will display followed by your calibration files. After
you agree to the disclaimer by pressing [ENTER], the following screen
will be displayed:
These are the calibration file names for the truck that the Evolution is
currently connected to.
Note: If no file names are shown, disconnect from the OBDII plug and reconnect
after 5 seconds. When you come to the screen again, the code should be available.
18
Evolution
06 LBZ & LLY Duramax
8. After pressing [ENTER], a disclaimer screen will be displayed,
read this screen carefully and press [ENTER], the main display will
come up.
Note: Parameters and values might vary.
9. There are five boxes that will be displaying information about your
vehicle. The black box in the top right corner displays which level
is currently programmed onto your vehicle.
0 – Vehicle is currently at stock.
1 – Vehicle has been programmed to Economy (Level 1).
2 – Vehicle has been programmed to Towing (Level 2).
3 – Vehicle has been programmed to Performance (Level 3).
4 – Vehicle has been programmed to Extreme (Level 4).
The other four boxes can show up to 4 PIDs (Parameter IDs) of your
vehicle. By default, they are your vehicle’s RPM, BST (boost), TFT
(transmission fluid temperature), and EGT (exhaust gas temperature).
Optional parameters and display formats may be selected in the
Changing Display section of this manual.
10. From this display, press [MENU] to select and use other features of
the Evolution. The display backlight brightness can also be
controlled from this display by using the [UP] and [DOWN] arrow
keys.
19
06 LBZ & LLY Duramax
Evolution
Power Programming
"Caution: Vehicle manufacturers do not recommend vehicle programming in
extreme temperature. Please see the service manual of your vehicle to ensure that
programming is being done in accordance to the original equipment manufacturers
specifications."
From the main screen, press [MENU] to enter the main menu. Then select
Power Programming. The following screen appears:
1. Select the level that best meets your needs. For more information
about each level, read the About the Evolution section in this manual
(pg. 4). Confirm your selection by pressing [ENTER] on the following
screen. After confirming, the evolution will prepare the stock files,
save the stock files, and then the screen below will appear:
2. You have the option to change certain parameters of the level you
chose. If you would like to learn more about what parameters are
available and how to use them, then read the Custom Options sections
20
Evolution
06 LBZ & LLY Duramax
in this manual. To use the standard program without customizing
options, simply press [ENTER] (choose NO).
3. The Evolution will ask you to make sure the engine is off and the key
is on.
4. During the first use, the Evolution will read the original calibration
from your PCM and then build all the necessary programs. This step is
skipped during all further programming operations.
5. The Evolution will erase your PCM and then write the selected
calibration (level) onto the PCM. This process takes approximately 15
seconds to complete. If at any time you receive an error message, refer
to the Troubleshooting section at the back of this manual for further
instructions.
6. When the Evolution is done programming, the following screen will
appear.
21
06 LBZ & LLY Duramax
Evolution
Custom Options
When preparing to program your vehicle, you will have the option to change
certain parameters. Choosing YES when prompted to “Create a custom
program?” will load the Custom Options menu.
Custom Options are provided to allow for flexibility based on driver
preferences. Any option customization done by the user is not warranted by
Edge Products. Please use at your own discretion.
The following customizable options are available:
Tire Size
The Evolution has the ability to correct for changes in tire size. If you have
changed your tires to a different size the PCM will miscalculate vehicle
speed which can affect shifting as well as the speedometer. Correcting the
tire size will allow the PCM to accurately calculate vehicle speed and
odometer readings. You will not need to change the value displayed if you
are running factory size tires. After choosing to set your tire size, the follow
screen appears:
22
Evolution
06 LBZ & LLY Duramax
The numbers on this screen represent the circumference (in mm) of your tire
size. The default value the Evolution displays is the current value stored in
the PCM. Adjust the tire size by pressing the [UP] and [DOWN] arrow keys.
The following table will help you determine your tire circumference by
matching your tire size with the common sizes listed. For example, if your
tire size is 285/ 65-18, the value (circumference) you enter into the Evolution
is 2600. You may also use the formula provided to determine your
approximate tire circumference. Finally, you may also measure your tire’s
circumference by marking your tire and rolling it one complete revolution
and measuring the distance in inches or millimeters. If you measure in
inches, multiply the distance by 25.4 to convert to mm. (ex. 91.3 inches x
25.4 = 2319 mm). The Evolution supports tire sizes ranging from 2000mm to
3500mm in increments of 1mm.
Width
265
275
305
215
245
265
285
295
305
315
325
265
285
315
275
285
285
325
Ratio
70
70
70
75
75
75
75
75
75
75
75
70
75
75
65
65
60
60
Rim
16
16
16
16
16
16
16
16
16
16
16
17
17
17
18
18
18
18
Circumference
2441mm
2485mm
2617mm
2289mm
2430mm
2524mm
2618mm
2666mm
2713mm
2760mm
2807mm
2521mm
2698mm
2840mm
2559mm
2600mm
2510mm
2660mm
Tire Size
33
2632mm
35
2792mm
37
2951mm
38
3031mm
Circumference Equation:
[(width * ratio * 0.02) + (rim * 25.4)] * 3.1415
Steps:
1. Multiply Width, Ratio and 0.02
2. Multiply Rim and 25.4
3. Add Step #1 with Step #2
4. Multiply Step #3 with 3.1416
5. The result will be the circumference of your tire in mm.
Note: if your tire size is not listed use the above formula
23
06 LBZ & LLY Duramax
Evolution
Note: Setting the tire size larger than 2900 mm may result in an ABS
Warning light and the disabling of your ABS System.
Speed Limiter
CAUTION!
Your Evolution programmer has the ability to remove/adjust your vehicle’s
factory speed limiter. Removal/adjustment of the factory speed limiter is
intended for use at a closed circuit, legally sanctioned racing environment.
Even if racing in a legally sanctioned racing environment, it is your
responsibility to ensure your tires and other vehicle components are rated to
travel at increased speeds with the speed limiter removed/adjusted. If you
remove/adjust the speed limiter during highway driving, it is your
responsibility to obey all driving laws, including adhering to posted speed
limits. Removing/adjusting the speed limiter for purposes inconsistent with
the product's intended function, as stated herein, is a violation of the
product’s intended use and invalidates the product's warranty. Edge Products
is not responsible for, or liable for the consequences of improper product use.
The evolution will allow you to raise your speed-limiter in increments of 5
mph starting at 40 mph, and ending at 200 mph.
24
Evolution
06 LBZ & LLY Duramax
Diagnostics
The diagnostics scanner included with your Evolution is a powerful tool that
allows you to view and clear diagnostic trouble codes (DTCs) on your
vehicle. DTCs are the messages your vehicle’s computer stores when it
detects a problem with your vehicle. The “Check Engine” light on your dash
is activated by the presence of most DTCs.
If you selected Diagnostics from the main menu of the Evolution, the screen
displays the following message:
Retrieving Codes
If you want to retrieve and view the DTCs on your vehicle, select the
Retrieve option. Make sure your ignition is in the ON position.
After selecting the Retrieve option, any stored DTCs will appear on the
screen like the following example:
Press [MENU] to exit the DTC list and return to the previous menu.
25
06 LBZ & LLY Duramax
Evolution
If you have no trouble codes, the following screen will appear:
Clearing Codes
If you want to clear the DTCs on your vehicle, select the Clear DTCs option.
After selecting the Clear DTCs option, any current stored DTCs will be
cleared from your vehicle and the “Check Engine” light will go out.
However, if you do not address the issue that originally caused the DTC, the
DTC will set again and the “Check Engine” light will come back on. Once
the DTCs have been cleared, press [ENTER] to return to the previous menu.
26
Evolution
06 LBZ & LLY Duramax
Performance Testing
The Evolution allows you to test the performance of your vehicle by timing
the 0-60 and the quarter mile times. It is helpful to remember these might not
be results you would receive from actual races. Incorrect speedometer
reading and tire slippage can cause slight miscalculations in the displayed
results. To run these tests, perform the following steps:
1. Press [MENU] and the Main Menu screen should appear:
2. Select the Performance Tests option. The following screen appears:
3. Select the desired performance test (0-60 screen is shown below). If
your vehicle is moving at this time, the Evolution will ask you to come
to a stop.
27
06 LBZ & LLY Duramax
Evolution
4. For the 0-60 MPH run, press the accelerator pedal and the test
automatically begins. For the ¼ mile test, you will be asked to press a
key when ready. It will then cycle through a starting light sequence
(Christmas tree) and tells you when to go. As you drive, the screen
should be displaying your current speed. When the test is complete
(the desired distance or speed is reached), the test will automatically
stop and your time will be displayed on the screen as follows (quarter
mile result example):
This will show how long it took you to cover 60 feet, 1/8 mile, and ¼
mile. In addition, your MPH at ¼ mile will also be shown (see the
example above). The best run is stored for later viewing. You may also
use the back of this manual to write down your times.
At the end of a ¼ mile run, you will see a reaction time at the top of
the screen. This time begins when the final yellow light is displayed.
The time between the final yellow and the green is a ½ second, so a
perfect reaction time is a ½ second. The average person will see a
response time of around 1 second. You’ll get an “Illegal Start”
message if you start before the green and you’re screen will turn red.
You can still finish the run, but the screen will let you know that you
started before the green light.
28
Evolution
06 LBZ & LLY Duramax
Note: Along with the best speed and time being recorded for viewing in the
Records section, your most recent run data will also be stored.
5. After the test is complete, press [MENU] to return to the Performance
Menu.
29
06 LBZ & LLY Duramax
Evolution
Setup
The Evolution gives you even more additional features. You can choose from
several different parameters to monitor, how these parameters are displayed,
set parameter alerts, and view the highest value that certain parameters have
reached.
Changing the Display View
The Evolution allows you to view multiple engine parameters on the same
screen. To select a desired view, perform the following steps:
1. From the Main Menu select the Setup option. The Setup screen appears
as follows:
2. Select the Display option. The following screen appears:
30
Evolution
06 LBZ & LLY Duramax
3. Select the desired viewing option by using the [UP] and [DOWN]
arrows and pressing the [ENTER] key on the desired display type.
Below are examples of the display options:
Two Function Bar Graph Display Sample
Two Function Digital Display Sample
Three Function Digital Display Sample
31
06 LBZ & LLY Duramax
Evolution
Four Function Digital Display Sample
Changing the Variables on the Screen
To change the variables on the screen, perform the following steps:
1. From the Main Menu select the Setup option. The Setup screen appears
as follows:
2. Select the Display option. The following screen appears:
32
Evolution
06 LBZ & LLY Duramax
3. Select the style which you would like the parameters to be displayed
on your screen and press [ENTER].
4. Depending on which display you select, a screen similar to the
following appears:
5. This screen lists the current parameters being displayed and their
respective positions on the screen (i.e., TOP LEFT, etc.). Select the
position you would like to change and press [ENTER]. A list of
available parameters will be displayed. Select the parameter you would
like to view and press [ENTER]. (A list of commonly used acronyms
is located in the back of this manual and a in depth list of the PIDs
supported is shown in the “About Evolution” section). Once you have
selected your desired parameters, select the Set as Display option and
press [ENTER]. You will return to the Setup menu with your new
settings saved.
33
06 LBZ & LLY Duramax
Evolution
Changing the Backlighting
Adjusting the Backlight Color
To change the backlighting color, perform the following steps:
1. From the Main Menu select the Setup option. The Setup screen appears
as follows:
2. Select the Display option. The following screen appears:
3. Select the Adjust LCD Settings option. The following screen appears:
4. Select the color you would like to change.
34
Evolution
06 LBZ & LLY Duramax
5. Depending on the color you select, a screen similar to the following
appears (example of Red):
6. As you adjust the percentage shown on the screen, you should notice a
change in the color of the screen. Once the desired color value has
been reached, press [ENTER]. If you would like to return to the
previous screen and abort the current color change, press [MENU].
Adjusting the Backlight Brightness
When viewing engine parameters (like the sample below) press the [UP] and
[DOWN] arrow keys to adjust the brightness of the display. Each time the
button is pressed the backlight will either brighten or dim by 10% of the total
brightness. The default setting is 100% brightness.
35
06 LBZ & LLY Duramax
Evolution
Adjusting the Contrast
To change the contrast, perform the following steps:
7. From the Main Menu select the Setup option. The Setup screen appears
as follows:
8. Select the Display option. The following screen appears:
9. Select the Adjust LCD Settings option. The following screen appears:
10. Select Contrast, and use the up and down arrows to adjust the contrast
to where you’d like.
36
Evolution
06 LBZ & LLY Duramax
Alerts
If you would like to know when a certain parameter reaches a certain value,
you can set an alert for that parameter by following these steps:
1. From the Main Menu select the Setup option. Then select the Alerts
option. The following screen appears:
2. By default, the alerts are off. To turn them on, select the Alerts are Off
option and press [ENTER]. The text line will now read Alerts are On.
To change the value of a certain alert, select the parameter you want to
change and press [ENTER]. The screen similar to the following will
appear:
37
06 LBZ & LLY Duramax
Evolution
3. Press the [UP] and [DOWN] arrow keys until you have reached the
desired value. Pressing [ENTER] will save the current alert value. If
you would like to return to the previous screen and abort the current
value change, press [MENU].
4. When an alert displays, press any button and the alerts are temporarily
disabled. By going back into the Alerts menu, alerts will automatically
re-enable. If multiple alerts are engaged, the Evolution will only
display one. Example: if you set MPH and RPM alerts to both zero,
the first alert the Evolution detects will be the one is displays. Upon
pressing a button, all alerts are temporarily disabled until re-enabled.
38
Evolution
06 LBZ & LLY Duramax
Records
The Evolution automatically records the highest value of some of the
parameters. To view these records and to reset them, do the following:
1. From the Main Menu select the Setup option. The Setup screen appears
as follows:
2. Select the Records option. The following screen appears:
3. This is where you can view all of the current recorded high values. The
arrow located at the bottom right corner of the screen indicates there
are more parameters than the display can show. Use the [UP] and
[DOWN] arrow keys to scroll through the list of records. If you would
like to reset a single parameter, select the desired parameter and press
[ENTER]. If you would like to reset all of the records, select the Clear
All option and press [ENTER]. To exit out of this list press [MENU].
39
06 LBZ & LLY Duramax
Evolution
Restore Defaults
If you would like to revert back to original factory settings, follow these
steps:
1. Enter into the Main Menu. The Main Menu screen appears as follows:
2. Select Restore Defaults. The following screen will be shown:
3. Press [MENU] to return to the Main Menu. Many settings will be set
back to the default settings. Example: LED colors, contrast, alerts,
records, etc. Important programming settings will still remain.
Note: This will NOT program the vehicle back to stock power; this only sets
the Evolution back to the factory presets it comes with when new. To
program the vehicles power level back to stock, you will need to go into
“Power Programming”, and select “Return to Stock”, or power level 0.
40
Evolution
06 LBZ & LLY Duramax
Fusion® PC Software Overview
Fusion® software allows the user to update their Evolution to the latest
version of firmware and calibration files.
Note: Make sure you install both the SOFTWARE and the DRIVERS that it comes with
before hooking up the Evolution to your PC. During the installation you will be given the
chance to install the drivers. Just hit the “Install” button when it asks. If you do not do
this step and want to install the drivers at a later time the Driver installation can be found
in the folder where Fusion was installed. This location is
C:\EdgeProducts\Fusion\USB_Drivers\PreInstaller.exe. Failing to do so will cause the
software to not work properly with the device.
Connecting the Evolution to a PC is as easy as finding an open USB port,
hooking the Evolution to it and running the Fusion® software. Below is an
explanation of the different features available:
Checking for Updates
The Fusion software will check for updates automatically each time it is
started. Install the updates when prompted to keep you current.
In order to update your Evolution it must first be connected to your PC via a
USB port. You will notice when you first connect it that it will try to connect
to the Internet to make sure your stock files are all up to date on your
evolution. If your computer is not connected to the Internet then you will not
have this valuable function.
If your Evolution is not able to program your vehicle because it needs an
update or a stock file does not pass the checksum test, then you must connect
your computer to the Internet and then connect your Evolution to your
computer. This will allow our server to update your unit and allow you to
program your vehicle.
If your vehicle is one that we have not verified the stock files on, you will be
asked if you want to upload those files to our server. This will allow us to
41
06 LBZ & LLY Duramax
Evolution
make sure the Evolution has properly read the files and can program your
vehicle with confidence that it will be done correctly.
If the files read by the Evolution do not match the ones that we expect we can
also download the correct stock files to your Evolution in order to recover
your vehicle if something went wrong.
Troubleshooting/Tips
Tip: Programming your vehicle may expose existing defects in your
vehicle’s PCM that could disable your vehicle. It is advised that you
do not program your vehicle in remote locations in case of failure.
Tip: Keep in mind that the Evolution is a high performance product and that
not all vehicles deliver the exact same power output when
programmed with the Evolution. It is recommended that you select a
program that will best fit your needs. Whether towing, or traveling
long distances at high speeds, choose your power level wisely and
keep in mind the condition and tolerances of your vehicle when
selecting a suitable power level.
• NO DISPLAY WITH KEY ON – If you should get no display when
turning the key on, check all of your fuses and make sure your battery
is fully charged. Disconnect and reconnect the OBD-II cable to ensure
the Evolution restarts properly. If the unit restarts but fails to stay on,
or fails to turn on when the key is on, there is most likely a
communications issue. Contact Edge Products Technical Support for
further assistance.
• NO START – If you experience a “No-Start” condition after
programming your PCM, return to the Power Programming menu and
select Return to Stock. This will allow the Evolution to reprogram the
PCM with the factory calibration and recover the PCM. If, after
reprogramming, you still have a “No-Start” condition, contact Edge
Products Technical Support. A member of our support team can
further instruct you on possible recovery procedures.
• ERROR 40 or 39 – Connect the Evolution to the Fusion Software.
Choose ‘Yes’ to the screens that the Fusion Software immediately
displays. Make sure the Fusion Software can connect to the internet.
42
06 LBZ & LLY Duramax
Evolution
Commonly Used Acronyms
ACT = Air Charge Temp
ACV = Thermactor Air Control Sensor
AOD = Automatic Overdrive Transmission
APP = Accelerator Petal Position
AXOD = Automatic Overdrive Transmission
BAT = Battery Voltage
BCM = Body Control Module
BOO = Brake On/Off Switch
BP = Barometric Pressure Sensor
CCD = Computer Controlled Dwell
CCO = Converter Clutch Override
CDR = Crankcase Depression Regulator
CEL = Check Engine Light
CFI = Central Fuel Injection
CHT = Cylinder Head Temperature
CID = Cylinder Identification Sensor
CKP = Crank Position Sensor
CMP = Cam Position Sensor
CPS = Crankshaft Position Sensor
DTC = Diagnostic Trouble Codes
ECA = Electronic Control Assembly
ECM = Electronic Control Module
ECT = Engine Coolant Temp
EDF = Electric Drive Fan Relay
EDIS = Electronic Distributor
EGO = Exhaust Gas Oxygen Sensor
EGR = Exhaust Gas Recirculation
EGRC = EGR Control Solenoid
EOT = Engine Oil Temperature
EVP = EGR Position Sensor
EVR = EGR Valve Regulator
FDM = Fuel Delivery Module
FPM = Fuel Pump Monitor
FRP = Fuel Rail Pressure
HEGO = Heated Exhaust Gas Sensor
IAT = Intake Air Temperature
ICM = Integrated Controller Module
IDM = Ignition Driver Module
ISC = Idle Speed Control
ITS = Idle Tracking Switch
IVS = Idle Validation Switch (Diesel)
KAM = Keep Alive Memory
EDGE PERFORMANCE CHIPS
KOEO = Key On Engine Off
KOER = Key On Engine Running
KS = Knock Sensor
LOAD = Engine Load
LOS = Limited Operation Strategy
LPD = Line Pressure Desired
LUS = Lock-up Solenoid
MAF = Mass Airflow
MAFV = Mass Airflow Sensor Voltage
MAP = Manifold Absolute Pressure
MAT = Manifold Air Temp
MCU = Microprocessor Control Unit
MIL = Malfunction Indicator Light
MPH = Miles Per Hour
OHC = Over Head Camshaft
OSS = Output Shaft Speed
PCM = Powertrain Control Module
PFE = Pressure Feedback EGR Sensor
PIP = Profile Ignition Pickup
PSPS = Power Steering Pressure Switch
RPM = Revolutions Per Minute
SES = Service Engine Soon
SIL = Shift Indicator Light
SPARK = Spark Advance/Retard
SPOUT = Spark Output Signal (from ECA)
STAR = Self Test Automatic Readout
TAPS = Throttle Angle Position Sensor
TCM = Transmission Control Module
TFI = Thick Film Ignition System
TFT = Transmission Fluid Temperature
TGS = Top Gear Switch
THS = Transmission Temperature Switch
TPS = Throttle Position Sensor
TQC = Torque Control
TSS = Turbine Shaft Speed
TTS = Transmission Temperature Switch
VAF = Vane Air Flow Sensor
VAT = Vane Air Temperature
VCT = Variable Cam Timing
VSS = Vehicle Speed Sensor
WAC = WOT A/C Cut-off Switch
WOT = Wide Open Throttle
PERFORMANCE PROGRAMMERS