1
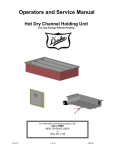
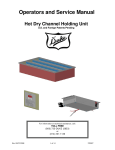
Service Manual ELF SE P SH R VI TO H M SH ELF R VI TTO BOT SE H T EA EA PO W ER ON OFF I PRODUCT HOLDING CABINET MODELS FWM3-22 FWM3-23 FWM3-24 FWM3-42 Please read this manual completely before attempting to install, operate or service this equipment This document is prepared for trained Duke service technicians. It is not to be used by anyone not properly qualified to perform these procedures. This Service Manual is not all encompassing. If you have not been trained on servicing this product, be sure to read the manual completely before attempting servicing. Be sure all necessary tools, test equipment, and skills are available. Those procedures for which you do not have the proper skills and test equipment must be performed only by a qualified Duke trained service technician. Written consent from Duke is required to reproduce any portion of this Manual. Unauthorized reproduction is prohibited. Duke Manufacturing Company 2305 N. Broadway St. Louis, MO 63102 Phone: 314-231-1130 Toll Free: 1-800-735-3853 Fax: 314-231-5074 www.dukemfg.com P/N 156037B Service Manual for FWM3 Product Holding Cabinet IMPORTANT WARNING AND SAFETY INFORMATION WARNING READ THIS MANUAL THOROUGHLY BEFORE OPERATING, INSTALLING, OR PERFORMING MAINTENANCE ON THE EQUIPMENT. WARNING FAILURE TO FOLLOW INSTRUCTIONS IN THIS MANUAL CAN CAUSE PROPERTY DAMAGE, INJURY OR DEATH. WARNING DO NOT STORE OR USE GASOLINE OR OTHER FLAMMABLE VAPORS OR LIQUIDS IN THE VICINITY OF THIS OR ANY OTHER APPLIANCE. WARNING UNLESS ALL COVER AND ACCESS PANELS ARE IN PLACE AND PROPERLY SECURED, DO NOT OPERATE THIS EQUIPMENT. CAUTION Observe the following: • Minimum clearances must be maintained from all walls and combustible materials. • Keep the equipment area free and clear of combustible material. • Adequate clearance for air openings. • Operate equipment only on the type of electricity indicated on the specification plate. • Retain this manual for future reference. 2 Service Manual for FWM3 Product Holding Cabinet TABLE OF CONTENTS SAFETY INFORMATION........................................................................................................................... 4 INTRODUCTION....................................................................................................................................... 5 SPECIFICATION SHEETS................................................................................................................... 6-11 INSTALLATION INFORMATION.............................................................................................................. 12 General.............................................................................................................................................. 13 Stacking Units.................................................................................................................................... 13 Primary Power Connection................................................................................................................ 13 Communications Connection ........................................................................................................... 14 WIRING DIAGRAMS..........................................................................................................................15-18 SEQUENCE OF OPERATION................................................................................................................ 19 Timers................................................................................................................................................ 19 Heating Elements.............................................................................................................................. 19 PROGRAMMING GUIDES...................................................................................................................... 20 FWM3-22 and FWM3-23................................................................................................................... 20 FWM3-24........................................................................................................................................... 20 FWM3-42........................................................................................................................................... 20 CONTROL PROGRAMMING.................................................................................................................. 20 Temperature Programming................................................................................................................ 21 PARTS REPLACEMENT......................................................................................................................... 22 Pan Status Keyboard......................................................................................................................... 22 ICC Timer Control............................................................................................................................. 23 Coupler.............................................................................................................................................. 23 Transformer....................................................................................................................................... 24 Electric Receptacle............................................................................................................................ 25 Terminal Block................................................................................................................................... 26 Lighted Switch................................................................................................................................... 26 Face Plate w/Gasket......................................................................................................................... 27 FWM Controller................................................................................................................................. 27 Heating Element................................................................................................................................ 28 Auxiliary Thermostat.......................................................................................................................... 31 RTD................................................................................................................................................... 32 TESTING AND TROUBLESHOOTING................................................................................................... 33 Electronic Control Fault Indications................................................................................................... 33 Temperature Check Procedure.......................................................................................................... 34 Pan Status Keyboard Check............................................................................................................. 34 Station Interface Unit Power.............................................................................................................. 34 Control Transformer........................................................................................................................... 35 Heating Element................................................................................................................................ 35 Auxiliary Thermostat.......................................................................................................................... 35 RTD................................................................................................................................................... 35 PARTS INFORMATION......................................................................................................................36-38 CUSTOMER ASSISTANCE.............................................................................................................. 39WW 3 Service Manual for FWM3 Product Holding Cabinet IMPORTANT SAFETY INSTRUCTIONS Throughout this manual, you will find the following safety words and symbols that signify important safety issues associated with operating or maintaining the equipment. WARNINGS GENERAL WARNING. Indicates information important to the proper operation of the equipment. Failure to observe may result in damage to the equipment and/or severe bodily injury or death. ELECTRICAL WARNING. Indicates information relating to possible shock hazard. Failure to observe may result in damage to the equipment and/or severe bodily injury or death. HOT SURFACEWARNING.Indicatesinformation important to the handling of equipment and parts. Failure to observe caution could result in personal injury. CAUTION GENERAL CAUTION. Indicates information important to the proper operation of the equipment. Failure to observe may result in damage to the equipment In addition to the warnings and cautions in this manual, use the following guidelines for safe operation and servicing of the unit. • This equipment should be serviced by qualified personnel only. Contact the nearest Duke authorized service facility for adjustment or repair. • Do not block or cover any openings on the unit. • Do not immerse cord or plug in water. • Keep cordset away from heated surfaces. • Do not allow cordset to hang over edge of table or counter The following warnings and cautions appear throughout this manual and should be carefully observed. • Turn the Product Holding Cabinet (Warmer) off, disconnect the power source and allow Warmer to cool down before performing any service or maintenance on the Warmer. • The procedures in this manual may include the use of chemical products. You must read the Material Safety Data Sheets before using any of these products. • The Warmer should be grounded according to local electrical codes to prevent the possibility of electrical shock. It requires a grounded receptacle with separate electrical lines, protected by fuses or circuit breakers of the proper rating. • Disposal of the Warmer must be in accordance with local environmental codes and/or any other applicable codes. Read all instructions before using or servicing equipment. • For your safety, the equipment is furnished with a properly grounded cord connector. Do not attempt to defeat the grounded connector. • Install or locate the equipment only for its intended use as described in this manual. Do not use corrosive chemicals in this equipment. • Do not operate this equipment if it has a damaged cord or plug, if it is not working properly, or if it has been damaged or dropped. Have the equipment serviced immediately. 4 • Service Manual for FWM3 Product Holding Cabinet INTRODUCTION GENERAL The Duke Product Holding Unit (Warmer) was developed in response to the need for extended food-holding capabilities to provide consistently high, “just cooked” food quality. The Duke Warmer utilizes Duke’s patented “heat sink” holding technology that provides even heat distribution to food pans through the bottom and sides. This allows precooked foods to be held for extended periods without noticeable degradation of quality, reducing food scrap/waste. The self contained, individually formed, sealed compartments of the Duke Warmer eliminates food odor and taste transfer. Because the compartments are sealed and formed to the shape of the pan, no disassembly is required for cleaning and product changes. The unique design of the Duke Warmer allows single temperature operation for all existing product groups. This 190°F approved temperature is preset at the factory. This reduces the likelihood of inconsistent performance between restaurant locations. The Duke Warmer was also designed to rethermalize food product. A thermostat setting of 200°F minimum is required for rethermalization. See instructions in PROGRAMMING section for thermostat adjustment. NOTE: Only qualified service persons should modify control temperature presets. 5 Service Manual for FWM3 Product Holding Cabinet MODEL DESIGNATIONS The following chart lists the different model designations and provides information on the weight and electrical requirements. Figures 1 thru 4 provide dimensional information and electrical connector information for the different models. MODEL SPECIFICATION TABLE 6 MODEL NO. FIG NO. SHIPPING WEIGHT ELECTRICAL SPECIFICATIONS FWM3-22-100 1 61 LB. (27.7 Kg) 100 V. 8 A. 800 W. 50/60 Hz FWM3-22-120 1 61 LB. (27.7 Kg) 120 V. 6.7 A. 800 W. 50/60 Hz FWM3-22-208 1 61 LB. (27.7 Kg) 208 V. 5.8 A. 1200 W. 50/60 Hz FWM3-22-230 1 61 LB. (27.7 Kg) 230 V. 5.2 A. 1200 W. 50/60 Hz FWM3-22-240 1 61 LB. (27.7 Kg) 240 V. 5.9 A. 1200 W. 50/60 Hz FWM3-23-120 2 83.5 LB. (37.9 Kg) 120 V 10.0 A. 1200 W. 50/60 Hz FWM3-23-208 2 83.5 LB. (37.9 Kg 208 V. 8.7 A. 1800 W. 50/60 Hz FWM3-23-230 2 83.5 LB. (37.9 Kg 230 V. 7.8 A. 1800 W. 50/60 Hz FWM3-23-240 2 83.5 LB. (37.9 Kg 240 V. 7.5 A. 1800 W. 50/60 Hz FWM3-24-100 3 100 LB. (27.7 Kg) 100 V. 16.0 A. 1600 W. 50/60 Hz FWM3-24-120 3 100 LB. (27.7 Kg) 120 V 13.3 A. 1600 W. 50/60 Hz FWM3-24-208 3 100 LB. (27.7 Kg) 208 V. 11.5 A. 2400 W. 50/60 Hz FWM3-24-230 3 100 LB. (27.7 Kg) 230 V. 10.4 A. 2400W. 50/60 Hz FWM3-24-240 3 61 LB. (27.7 Kg) 240 V. 10.0 A. 2400 W. 50/60 Hz FWM3-42-100 4 61 LB. (27.7 Kg) 100 V. 16.0 A. 1600 W. 50/60 Hz FWM3-42-120 4 61 LB. (27.7 Kg) 120 V 13.3 A. 1600 W. 50/60 Hz FWM3-42-208 4 61 LB. (27.7 Kg) 208 V. 11.5 A. 2400 W. 50/60 Hz FWM3-42-230 4 61 LB. (27.7 Kg) 230 V. 10.4 A. 2400W. 50/60 Hz FWM3-42-240 4 61 LB. (27.7 Kg) 240 V. 10.0 A. 2400 W. 50/60 Hz Service Manual for FWM3 Product Holding Cabinet Model FWM3-22 Shipping Weight: 61 lbs / 27.7 Kg Electrical: FWM3-22-100 FWM3-22-120 FWM3-22-208 FWM3-22-230 FWM3-22-240 1-1/2" (3.5 cm) 100 120 208 230 240 V, V, V, V, V, 8.0 6.7 5.8 5.2 5.0 A, A, A, A, A, 800 W, 50/60 Hz 800 W, 50/60 Hz 1200 W, 50/60 Hz 1800 W, 50/60 Hz 1200 W, 50/60 Hz POWER SUPPLY END G G APPLIANCE END G W NEMA 5-15P 100 VAC 120 VAC 2-3/4" (6.9 cm) NEMA 6-15P 208/240 VAC CEE 7/7 230 VAC IEC 60320-C20 6 FT. POWER CORD DETAIL 1" (2.3 cm) APPLIANCE INLET DETAIL TOP SHELF H SE RVI CE EAT BOTTOM SHELF H SE RVI CE EAT POWER FRONT TOP CONTROL SIDE POWER INLET 11-3/4" (30 cm) 15-3/4" (40 cm) 20-3/4" (53 cm) END REAR 509L LISTED COMMERCIAL COOKING APPLIANCE INDEXER COMMERCIAL APPARIEL DE CUISINE ALSO CLASSIFIED BY UNDERWRITERS LABORATORIES INC. IN ACCORDANCE WITH NSF NO. 4 1999 Figure 1. Model FWM3-22 Outline Dimension Drawing with Connector Information 7 Service Manual for FWM3 Product Holding Cabinet Model FWM3-23 Shipping Weight: 83.4 lbs / 37.9 Kg Electrical: FWM3-23-120 FWM3-23-208 FWM3-23-230 FWM3-23-240 120 208 230 240 V, 10.0 A, 1200 W, V, 8.7 A, 1800 W, V, 7.8 A, 1800 W, V, 7.5 A, 1800 W, 50/60 50/60 50/60 50/60 Hz Hz Hz Hz 1-1/2" (3.5 cm) POWER SUPPLY END G G APPLIANCE END G W 2-3/4" (6.9 cm) NEMA 5-15P 120 VAC NEMA 6-15P 208/240 VAC CEE 7/7 230 VAC IEC 60320-C20 6 FT. POWER CORD DETAIL 1" (2.3 cm) APPLIANCE INLET DETAIL TOP SHELF H SE RVI CE EAT BOTTOM SHELF H SE RVI CE EAT POWER FRONT TOP CONTROL SIDE POWER INLET 11-3/4" (30 cm) 15-3/4" (40 cm) 29" (74 cm) END REAR 509L LISTED COMMERCIAL COOKING APPLIANCE INDEXER COMMERCIAL APPARIEL DE CUISINE ALSO CLASSIFIED BY UNDERWRITERS LABORATORIES INC. IN ACCORDANCE WITH NSF NO. 4 1999 Figure 2. Model FWM3-23 Outline Dimension Drawing with Connector Information 8 Service Manual for FWM3 Product Holding Cabinet Model FWM3-24 Shipping Weight: 100 lbs / 45 Kg Electrical: FWM3-24-100 FWM3-24-120 FWM3-24-208 FWM3-24-230 FWM3-24-240 1-1/2" (3.5 cm) 100 120 208 230 240 V, V, V, V, V, 16.0 A, 13.3 A, 11.5 A, 10.4 A, 10.0 A, 1600 W, 1600 W, 2400 W, 2400 W, 2400 W, POWER SUPPLY END G W W NEMA 5-15P 120 VAC 2-3/4" (6.9 cm) G APPLIANCE END G NEMA 5-20P NEMA 6-15P 100 VAC & 208/240 VAC CANADIAN 120 VAC UNITS 50/60 Hz 50/60 Hz 50/60 Hz 50/60 Hz 50/60 Hz G CEE 7/7 230 VAC IEC 60320-C20 6 FT. POWER CORD DETAIL 1" (2.3 cm) APPLIANCE INLET DETAIL TOP SHELF H SE RVI CE EAT BOTTOM SHELF H SE RVI CE EAT P O W ER FRONT TOP CONTROL SIDE POWER INLET 11-3/4" (30 cm) 15-3/4" (40 cm) 37" (94 cm) END REAR 509L LISTED COMMERCIAL COOKING APPLIANCE INDEXER COMMERCIAL APPARIEL DE CUISINE ALSO CLASSIFIED BY UNDERWRITERS LABORATORIES INC. IN ACCORDANCE WITH NSF NO. 4 1999 Figure 3. Model FWM3-24 Outline Dimension Drawing with Connector Information 9 Service Manual for FWM3 Product Holding Cabinet Model FWM3-42 Shipping Weight: 100 lbs / 45 Kg Electrical: FWM3-42-100 FWM3-42-120 FWM3-42-208 FWM3-42-230 FWM3-42-240 1-1/2" (3.5 cm) 100 120 208 230 240 V, V, V, V, V, 16.0 A, 13.3 A, 11.5 A, 10.4 A, 10.0 A, 1600 W, 1600 W, 2400 W, 2400 W, 2400 W, POWER SUPPLY END 50/60 Hz 50/60 Hz 50/60 Hz 50/60 Hz 50/60 Hz APPLIANCE END PROGRAM G W W G G G NEMA 5-15P NEMA 5-20P NEMA 6-15P CANADIAN 100 VAC 208/240 VAC 120 VAC UNITS 120 VAC 2-3/4" (6.9 cm) IEC 60320-C20 WARMER WARMER 1 1 CEE 7/7 230 VAC 3 3 6 FT. POWER CORD DETAIL TOP SHELF H RVI CE EAT SE 1" (2.3 cm) APPLIANCE INLET DETAIL BOTTOM SHELF H SE RVI CE EAT TOP SHELF H SE RVI CE EAT BOTTOM SHELF H SE RVI CE EAT POWER FRONT TOP 21-3/4" (55 cm) POWER INLET PROGRAM WARMER WARMER 1 1 3 3 15-3/4" (40 cm) 20-3/4" (53 cm) END REAR 509L CONTROL SIDE LISTED COMMERCIAL COOKING APPLIANCE INDEXER COMMERCIAL APPARIEL DE CUISINE ALSO CLASSIFIED BY UNDERWRITERS LABORATORIES INC. IN ACCORDANCE WITH NSF NO. 4 1999 Figure 4. Model FWM3-42 Outline Dimension Drawing with Connector Information 10 Service Manual for FWM3 Product Holding Cabinet MAIN FEATURES The main features of the Duke Warmer are listed in Figure 5. The Main POWER ON/OFF switch is located on the front of the unit. Pan Status Keyboard Controls are located on both the front and the back of the Warmer. Most serviceable components are accessed by removing the right side panel. Service Indicator Heat Indicator Power On/Off Switch Screw Pan Status Keyboard (same on back) Programming Connector for Palm Pilot PROGRAM Input Power Connector Output to Warmer 2 Output to Warmer 3 WARMER 2 2 WARMER 3 3 Figure 5. Product Holding Unit Main Features, FWM3-24 Shown MAIN FEATURE FUNCTIONAL DESCRIPTION POWER ON/OFF SWITCH This ON/OFF switch is located on the lower right side of the cabinet This is a double pole – double throw (DPDT) lighted switch rated at 16 Amperes. The switch controls power to the Warmer. DIGITAL PAN STATUS KEYBOARD This Pan Status Keyboard contains “Up” and “Down” arrows used to enter recipes, perform the setup procedures, and perform the programming instructions Two displays are provide. The left display indicates the number and the right display indicates the present value for the number. Two LED’s are used to indicate status. These LED’s changes from Red to Green to Yellow and to OFF. In edit linking mode the Red LED will be blinking. And indicates the selected pan. The Green LED indicates pans linked to the selected pan. An OFF LED indicates pans not linked to the selected pan.To link additional pans, pressing any OFF LED will turn the LED green indicating the pan is now linked.The keyboards are located on both the front and the back of the unit. PROGRAMMING CONNECTION This is a RJ45 female connector used for programming the ICC Timer Control. The connector is located on the back of the unit above the input power connector. INTERUNIT COMThe RJ12 female connectors are used for interconnecting a Warmer with the ICC timer MUNICATION CABLE to Warmers without the ICC timer. The unit with the ICC timer can control up to two CONNECTORS Warmers without the ICC timer. The connectors are located on the back of the Warmer below the input power connector. INPUT POWER CONNECTOR The Input Power connector is used to connect the Warmer to the external power source. The connector is located on the back of the Warmer. HEAT Light The HEAT Light indicates power is applied to the Heater Element(s). This light is located on the front right side of the Warmer. SERVICE Light The SERVICE Light indicates a failure in the heater circuit that requires immediate servicing. This light is located on the front right side of the Warmer. 11 Service Manual for FWM3 Product Holding Cabinet INSTALLATION UNPACKING UNIT INSPECTION PROCEDURE • Inspect the shipping carton and/or container, carefully noting any exterior damage on the delivery receipt, which was not evident on the outside of the shipping container (concealed damage). Contact the carrier immediately and file a damage claim with them. Save all packing materials when filing a claim. Freight damage claims are the responsibility of the purchaser and are not covered by the warranty. • Inspectt Warmer for damage such as, broken glass, etc. • Report any dents or breakage to source of purchase immediately. • Do not attempt to use Warmer if damaged. • Remove all materials from Warmer interior. • If unit has been stored in extremely cold area, wait a few hours before connecting power. UNIT PLACEMENT • Do not install Warmer next to or above source of heat, such as oven or deep fat fryer. • Install Warmer on level countertop surface. • Outlet should be located so that plug is accessible when Warmer is in place. Proper airflow around Warmer cools electrical components. With restricted airflow, Warmer may not operate properly and life of electrical parts is reduced. 12 GROUNDING INSTRUCTIONS WARNING TO AVOID RISK OF ELECTRICAL SHOCK OR DEATH, THIS UNIT MUST BE GROUNDED AND PLUG MUST NOT BE ALTERED. Grounding reduces risk of electric shock by providing an escape wire for the electric current if an electrical short occurs. This Warmer is equipped with a cordset having a grounding wire with a grounding plug. The plug must be plugged into an outlet that is properly installed and grounded. Consult a qualified electrician or service technician if grounding instructions are not completely understood, or if doubt exists as to whether the Warmer is properly grounded. Do not use an extension cord. If the product power cord is too short, have a qualified electrician install a three-slot receptacle. This unit should be plugged into a separate circuit with the electrical rating as provided in product specifications. Service Manual for FWM3 Product Holding Cabinet INSTALLATION INSTRUCTIONS STACKING UNITS PROCEDURE 1. Place Warmer on a stable surface The FWM3-24 Warmer is designed to allow limited stacking capabilities. To stack cabinets, proceed as follows: CAUTION: Risk of Fire or Electric Shock. Replace Cordset with one of the following Duke cordsets only. 1. Remove the base pan from all Warmers that are to be stacked, except for the bottom Warmer by removing the two screws on the bottom of the Warmer. See Figure 7. CORDSETS WARNING Part No. Cordset 156533 Cordset, NEMA 5-15P, 120 V 156811 Cordset NEMA 5-20P, 120 V 156400 Cordset 230 V CE TIP HAZARD! DO NOT STACK FWM3-42 CABINETS. DO NOT EXCEED 3 HOLDING CABINETS PER STACK. DO NOT PLACE HOLDING CABINET STACK ON SURFACES THAT MAY EASILY TIP OVER. 2. Loosen screw on retainer. See Figure 6. 3. Push the Cordset fully into the retainer. M SH R ELF R VI C E TTO BO T H ELFVI C SE P SH T SE H TO EA E 4. Tighten screw to secure Cordset. EA PO W ER ON OFF I Base Pan Retainer Screw Screw Figure 7. Base Removal on Warmer Figure 6. Attaching Cordset 2. Place the bottom Warmer on a flat horizontal surface. 13 Service Manual for FWM3 Product Holding Cabinet 3. Stack the next Warmer on top. The top of the lower Warmer rests inside of the base of the upper Warmer. See Figure 8. SE ELFVI C R T M ELF R VI C E TTO BO T SH SE H P SH E TO EA H EA PO W ER ON OFF SE ELFVI C R T M SH ELF R H EA PO W ER ON OFF I VI C E TTO BO T SE H P SH E TO EA I UNIT TO UNIT COMMUNICATIONS CONNECTION The communications connection is used to connect a Warmer with an ICC Timer Control to a Warmer without the ICC Timer Control. Up to two additional Warmers (those without the ICC Timer Control) can be controlled by the ICC Timer Control. The field connections for these Warmers is shown in Figure 9. The PROGRAM connector on the Warmer with the ICC Timer Control is used to input information from the Palm Pilot Device. Warmer with ICC Timer Control Warmers without ICC Timer Control (optional) PROGRAM Connection cables WARMER 1 H M W SE SH EA R VI C ELFVI C SE P SH R T M ELF R VI C E TTO BO T SH SE H ELF I E TO H 3 ER ON OFF EA PO W ER ON OFF SE P SH ELFVI C R T M SH ELF R VI C E TTO BO T SE EA I E TO H WARMER 3 EA PO H R E TTO BO T EA PO W ER ON OFF I 3-High Maximum Figure 8. Stacking Warmers 14 1 ELFVI C T SE H P SH E TO EA Figure 9. Communications Connections Service Manual for FWM3 Product Holding Cabinet WIRING DIAGRAMS FWM3-22, FWM3-23, AND FWM3-24 PRODUCT HOLDING CABINET WIRING DIAGRAMS Control and the optional Quality Timer. Figure 11 shows the Interface Cable connections for units with the ICC Timer Control. Figure 12 shows the Interface Cable connections for units without the ICC Timer Control. Wiring diagrams for the FWM3-22, FWM3-23, and FWM3-24 are shown in Figures 10, 11, and 12. Figure 10 shows the primary power distribution for the Heating Elements and also the 12 VAC control voltage for the Temperature TEMPERATURE CONTROL TOP SHELF RTD BOTTOM SHELF RTD TOP SHELF ELEMENTS J5 J6 AUXILIARY THERMOSTAT CHANNEL 2 J8 J7 BOTTOM SHELF ELEMENTS CHANNEL 1 88 89 AUXILIARY THERMOSTAT QUALITY TIMER OPTIONAL 7 7 12 VAC TRANSFORMER* 6 3 IEC 60320-C20 INLET 4 5 L1 1 POWER SWITCH 2 L2 GND * CONNECT WIRE #4 TO 240V TERMINAL FOR 240 VAC AND 230 VAC CE UNITS (SHOWN) CONNECT WIRE #4 TO 208V TERMINAL FOR 208 VAC UNITS 120 VAC UNITS USE A 120V TRANSFORMER Figure 10. FWM3-22, FWM3-23, FWM3-24 Power Distribution Wiring Diagram 15 Service Manual for FWM3 Product Holding Cabinet FWM3-42 PRODUCT HOLDING CABINET WIRING DIAGRAMS. Modified 'T' connector PROGRAM WARMER WARMER 1 Keyboard connection (front) Keyboard connection (rear) Figure 11. Interface Cabling for Units With ICC Timer Control Modified 'T' connector Keyboard connection (front) Keyboard connection (rear) Figure 12. Interface Cabling for Units without ICC Timer Control 16 1 3 3 Wiring diagrams for the FWM3-42 are shown in Figures 13, 14, and 15. Figure 13 shows the primary power distribution for the Heating Elements and also the 12 VAC control voltage for the Temperature Control and the optional Quality Timer. Figure 14 shows the Interface Cable connections for Warmers with the ICC Timer Control. Figure 15 shows the Interface Cable connections for Warmers without the ICC Timer Control. Service Manual for FWM3 Product Holding Cabinet SECOND TEMPERATURE CONTROLLER ON FWM3-42 ONLY TEMPERATURE CONTROL TOP SHELF RTD BOTTOM SHELF RTD TOP SHELF ELEMENTS J5 J6 AUXILIARY THERMOSTAT CHANNEL 2 J8 J7 BOTTOM SHELF ELEMENTS CHANNEL 1 88 89 AUXILIARY THERMOSTAT TEMPERATURE 5 CONTROL TOP SHELF RTD BOTTOM SHELF RTD TOP SHELF ELEMENTS J5 J6 AUXILIARY THERMOSTAT CHANNEL 2 J8 J7 BOTTOM SHELF ELEMENTS CHANNEL 1 88 89 AUXILIARY THERMOSTAT QUALITY TIMER OPTIONAL 7 7 12 VAC TRANSFORMER* 6 3 IEC 60320-C20 INLET 4 5 L1 1 POWER SWITCH 2 L2 GND * CONNECT WIRE #4 TO 240V TERMINAL FOR 240 VAC AND 230 VAC CE UNITS (SHOWN) CONNECT WIRE #4 TO 208V TERMINAL FOR 208 VAC UNITS 120 VAC UNITS USE A 120V TRANSFORMER Figure 13. FWM3-42 Power Distribution Wiring Diagram 17 Service Manual for FWM3 Product Holding Cabinet Connection between keyboards Modified 'T' connector PROGRAM WARMER WARMER 1 Keyboard connection (front) 1 3 3 Keyboard connection (rear) Figure 14. Interface Cabling for Warmers With ICC Timer Control Connection between keyboards Modified 'T' connector Keyboard connection (front) Keyboard connection (rear) Figure 15. Interface Cabling for Warmers without ICC Timer Control 18 Service Manual for FWM3 Product Holding Cabinet SEQUENCE OF OPERATION TIMERS The ICC Timer Control is programmed through the keyboards located on the front and back of each Warmer or may be programmed with a Palm PDA. The Warmer is programmed for HOLD time, COOK time and Linking of pans. The HOLD time is the specified time a cooked product may be held in the Warmer. The COOK time is the specified time it takes to cook a product. The Timer can store and recall up to three Daypart Menus. The Menus are stored in memory in the Timer and are retained even when power is off. The output from the Timer can control up to three Warmers. The Timers must be programmed prior to use. Programming can be performed manually or using a Palm PDA. Some Timers may have an optional alarm. Pans can be linked so that the HOLD and COOK times are the same. 1. Connect primary power to inlet power connection. product has expired and must be discarded. Discard the product and press the appropriate button. The indicator will turn RED indicating no product present in pan. NOTE: If there is NO LIGHT on a pan indicator, no product should be in this pan. If the button on this pan is pressed, the light will turn RED for 2 seconds and go out, indicating no hold time. HEATING ELEMENTS Refer to Figures 10 and 13. 1. Connect primary power to inlet power connection. 2. Voltage is applied through wires 1 and 2 to the input side of the POWER ON/OFF switch. 3. Set POWER ON/OFF switch to the ON position. 2. Set POWER ON/OFF switch to the ON position. 4. Voltage from the POWER ON/OFF switch is applied as follows: 3. 12 VAC operating voltage is applied to the Timer. a. Through wires 4 and 6 to the primary of the step-down transformer. 4. The keyboard lights illuminate YELLOW then RED or go out depending on the programmed HOLD times. On digital timers the LED displays will illuminate also. b. Through wire 3 to the Temperature Control Board for application to the Heater Elements. 5. When freshly cooked product is placed in the Warmer and the corresponding button on the Pan Status Keyboard is pressed, the light will turn GREEN and the HOLD time starts to count down. Use this product first. 5. The step-down transformer lowers the voltage to 12 VAC. 6. When freshly cooked product is placed in the second linked pan and the corresponding button on the Pan Status Keyboard is pressed, the light will turn GREEN then YELLOW. Newer product in pan, use other pan first. 7. When the HOLD time reaches the COOK time the indicator flashes and the optional alarm will sound. When the indicator is flashing GREEN or YELLOW cooking must be started. Product is about to expire. c. Through wire 5 to one side of each Heating Element. 6. The 12 VAC voltage is applied through wire 7 to the Temperature Control Boards and the optional ICC Timer Control (Quality Timer). 7. The Temperature Control Board provides a reference temperature level that is compared to the temperature measured by the RTD Thermocouples that are located at the center of the Heating Element closest to the control panel. This reference is usually 190°F. 8. If the thermocouple temperature measurement is below the reference provided by the 8. If the indicator is flashing RED, it indicates 19 Service Manual for FWM3 Product Holding Cabinet Temperature Control Board, the channel 1 and channel 2 controllers on the Temperature Control Board are turned on. 9. When the controllers are turned on, primary power is applied through wires 8 and 9 to the normally closed Auxiliary Thermostat. The Auxiliary Thermostat is a protection device that opens the Heater circuit if the temperature exceeds 250°F. 10.With the Heater Elements turned on, the temperature rises and the temperature is monitored by the thermocouples. 11.When the monitored temperature exceeds the reference temperature, the channel controller for the top or bottom shelf as applicable, is turned off and opens the heater circuit. 12.When the thermocouples sense a heater temperature below the reference, the channel is turned back on and the heaters again provide heat. 13.If a failure occurs in the Temperature Control circuit and the heater remains on, the temperature will continue to rise. 14.When this temperature exceeds 250°F, the Auxiliary Thermostat will open, removing voltage from wires 8 or 9 as applicable, turning off the heater. When this occurs, the SERVICE light on the front of the unit will turn on. 15.When the SERVICE light is turned on, the Warmer should be shut down until the faulty condition is repaired. Each type of Warmer is programmed differently. The following manuals must be used to properly program the Warmer. FWM3-22 and FWM3-23 Programming Digital Keyboards without Daypart P/N 896195-20i Programming Digital Keyboards with Daypart P/N 156979B Programming Manual Keyboards P/N 156810A FWM3-24 Programming Digital Keyboards without Daypart P/N 157538A Programming Digital Keyboards with Daypart P/N 156683C Programming Manual Keyboards with or without Daypart Function P/N 156683C FWM3-42 Programming Digital Keyboards with Daypart P/N 156891C Programming Manual Keyboards with or without Daypart Function P/N 156683C CONTROL PROGRAMMING PROGRAMMING GUIDES 20 The electronic temperature control is pre-set at the factory to maintain the temperature at the bottom center of the pan well at 190°F ±5°F. This temperature is the result of many hours of laboratory food testing. There are no operator temperature adjustments that can be made. Because the electronic control uses a platinum type RTD thermocouple sensor, routine calibration is not required. Service Manual for FWM3 Product Holding Cabinet DANGER! LIVE ELECTRICAL COMPONENTS. ONLY QUALIFIED SERVICE PERSONS SHOULD MODIFY CONTROL TEMPERATURE PRESETS. S1 S2 Temperature Programming 150 I. Remove cover from control side of the Warmer and set the POWER ON/OFF switch to the ON position. 40 2. Locate the pushbuttons S1 and S2 on the rear of the FWM Control (see Figure 16). 10 3. Press and hold S1 until any LED on the rear of the FWM Control illuminates (approximately 5 seconds). 5 20 5 4. Observe the front of the control (Figure 17). Press and release S1 on the back of the FWM control until the desired light on the front of the control flashes. (See Flashing Lights table.) NOTE: To comply with NSF sanitation requirements, do not set the control preset temperature below 190°F. Figure 16. Rear of FWM Control 5. Press and release S2 until the sum of the LED values illuminated on the rear of the FWM Control match the desired preset temperature. BOTTOM SHELF H X X SE H B B EA RVI CE Bottom Shelf A T Top Shelf RVI SE A EA CE Flashing Lights TOP SHELF T 6. Repeat steps 4 and 5 for each preset temperature then press and hold S1 until no LED on the rear of the FWM Control is illuminated and the lights on the front of the FWM Control no longer flash. POWER Figure 17. Flashing Lights Front 21 Service Manual for FWM3 Product Holding Cabinet PARTS REPLACEMENT REPLACEMENT PROCEDURES 1. Place POWER ON/OFF switch in the OFF position and disconnect power cord from the power source. WARNING BEFORE ANY REPLACEMENT PROCEDURE BEGINS, THE WARMER MUST BE ISOLATED FROM THE POWER SOURCE TO PREVENT POSSIBLE ELECTRICAL SHOCK. TOOLS REQUIRED 2. Remove the four screws securing the right side panel to the Warmer and remove panel. 3. Remove the screws, Figure 18, securing the Pan Status Keyboard that is to be replaced. 4. Label and disconnect the cable from the coupler, Figure 19. No special tools required. 5. Carefully pull the keyboard away from the Warmer allowing the cable to pass through the access hole. NOTE: Number in parentheses after a part refers to the reference number in the parts list. Installation 1. Route the keyboard cable through the access hole on the control panel side of the Warmer. PAN STATUS KEYBOARD The Pan Status Keyboards, Figure 18, are located on both the front and the back of the Warmer. Both keyboards are removed in the same manner. Screw 2. Secure the keyboard to the chassis with the screws. 3. Connect the cable to the coupler. 4. Install the right side panel and secure with the four screws. 5. Reconnect the Warmer to the power source. 6. Place the POWER ON/OFF switch in the ON position. 7. Check Warmer operation. Coupler Pan Status Keyboard (same on back) To Front Keyboard To Timer Figure 18. Pan Status Keyboard Removal WARNING BEFORE ANY REPLACEMENT PROCEDURE BEGINS, THE WARMER MUST BE ISOLATED FROM THE POWER SOURCE TO PREVENT POSSIBLE ELECTRICAL SHOCK. 22 To Back Keyboard Figure 19. Keyboard Cable Connection Service Manual for FWM3 Product Holding Cabinet ICC TIMER CONTROL Installation The ICC Timer Control (timer), Figure 20, is located in the right side of the unit and is accessible by removing the right side panel. 1. Attach the timer to the chassis with the two nuts. Nut PRODUCT MANAGEMENT SYSTEM POWER WARMER 1 COMM SCOREBOARD Power Connector From keyboard coupler STATION INTERFACE CONTROL 2. Reconnect the WARMER 1, WARMER 2, and WARMER 3 cables to the appropriate connectors. 3. Reconnect the PROGRAM connector cable. 4. Reconnect the Power Connector. 5. Reinstall the right side panel with the four screws. WARMER 2 6. Connect the Warmer to the power source. WARMER 3 7. Set the POWER ON/OFF switch to the ON position. Warmer 1 Warmer 2 Warmer 3 Figure 20. ICC Timer Control Removal WARNING BEFORE ANY REPLACEMENT PROCEDURE BEGINS, THE WARMER MUST BE ISOLATED FROM THE POWER SOURCE TO PREVENT POSSIBLE ELECTRICAL SHOCK. 8. Reprogram the new timer for the desired operation settings. 9. Check that all timing functions are working on all interconnected Warmers. COUPLER There are three couplers, Figure 21, mounted on the rear of the Warmers that have the ICC Timer Control. These are the PROGRAM coupler (RJ45) and WARMER 2, and WARMER 3 couplers (RJ12). There is only one coupler, Figure 22, on Warmers without the ICC Timer controls. All couplers are removed in the same manner. PROGRAM 1. Place POWER ON/OFF switch in the OFF position and disconnect power cord from the power source. Program Connector (RJ45) Input from PDA 2. Label and disconnect the PROGRAM connector cable from the timer. 3. Label and disconnect the WARMER 1, WARMER 2, and WARMER 3 cables from the timer. 4. Remove the two nuts securing the timer to the chassis and remove the timer control. Warmer Connectors (RJ12) WARMER 2 2 WARMER 3 3 Figure 21. Couplers on Warmers with ICC Timer Control 23 Service Manual for FWM3 Product Holding Cabinet 5. Set the POWER ON/OFF switch to the ON position. 6. Check that all timing functions are working on all interconnected Warmers. TRANSFORMER The transformer, Figure 23, is located near the center of the electrical compartment. The connections for the secondary winding are closest to the chassis. The connections for the primary winding are away from the chassis. Warmer Connector (RJ12) Figure 22. Couplers on Warmers without ICC Timer Control Removal WARNING BEFORE ANY REPLACEMENT PROCEDURE BEGINS, THE WARMER MUST BE ISOLATED FROM THE POWER SOURCE TO PREVENT POSSIBLE ELECTRICAL SHOCK. 1. Place POWER ON/OFF switch in the OFF position and disconnect power cord from the power source. 2. Remove the four screws securing the right side panel to the Warmer and remove panel. CAUTION: The primary winding on the transformer is a dual voltage winding. The terminals are as follows: Common, 208VAC, and 230/240VAC. When connecting the transformer primary, be sure to connect to the correct terminal that matches the input power source. Nut Common connection Secondary connections 3. Label and disconnect the cable from both the inside and outside the coupler to be replaced. 208V connection 230/240V connection 4. Remove the two screws attaching the coupler to the back panel and remove coupler. Installation Figure 23. Transformer 1. Attach the coupler to the back panel with the two screws. Removal 2. Reconnect the cable to the inside of the coupler. If a cable was connected on the outside reconnect it. 1. Set POWER ON/OFF switch (8) to the OFF position and disconnect Warmer from power source. 3. Reinstall the right side panel with the four screws. 2. Remove the four screws and carefully remove the right side panel. 4. Connect the Warmer to the power source. 3. Label and disconnect the electrical wiring from the transformer being sure to note the primary power source connections. 24 Service Manual for FWM3 Product Holding Cabinet 4. Remove the two nuts securing the transformer to the chassis and remove the transformer. Installation 1. Check that the POWER ON/OFF switch is in the OFF position and Warmer is disconnected from the power source. 2. To install the replacement transformer, align the transformer with the mounting holes in the chassis and the terminals facing toward the front of the Warmer, then secure with the two nuts. 3. Attach the two secondary leads to the terminals closest to the chassis. CAUTION: The primary winding on the transformer is a dual voltage winding. The terminals are as follows: Common, 208VAC, and 230/240VAC. When connecting the transformer primary, be sure to connect to the correct terminal that matches the input power source. 4. Attach the two primary leads to the terminals that match the incoming power source. 5. Connect Warmer to power source and set the POWER ON/OFF switch to the ON position. 6. Check that secondary voltage is 12VAC. 7. Set POWER ON/OFF switch to the OFF position. 8. Secure side panel to Warmer with the four screws. 9. Set POWER ON/OFF switch to the ON position and check Warmer operation. ELECTRIC RECEPTACLE The electrical receptacle, Figure 24, is located on the back panel and connects the Warmer to the power source through the power cord. The receptacle has a retainer that holds the power cord in place. PROGRAM Retaining screw Cord retainer Mounting screws WARMER 2 2 WARMER 3 3 Figure 24. Electrical Receptacle Removal 1. Set power ON/OFF switch (8) to the OFF position and disconnect Warmer from power source. 2. Remove the four screws and carefully remove the right side panel. 3. Label and disconnect the electrical wiring from the inside terminals on the Receptacle. 4. Loosen the screw on the receptacle retainer so that the power cord can be removed. 5. Remove the power cord. 6. Remove the two screws securing the receptacle to the back panel and remove the receptacle. Installation 1. Attach the receptacle to the back panel with the two screws. 2. Reconnect the wires to the back of the receptacle. 3. Reinstall the side panel with the four screws. 4. Connect the power cord to the Warmer. 5. Secure the power cord by tightening the screw on the retainer. 6. Reconnect power cord to power source. 7. Place POWER ON/OFF switch in the ON 25 Service Manual for FWM3 Product Holding Cabinet position. 8. Check that Warmer is operating. TERMINAL BLOCK The Terminal Block, Figure 25, is located on the right side of the unit and is accessible by removing the side panel. It is located in the center of Warmer to the left of the control transformer 5. Place POWER ON/OFF switch in the ON position. 6. Check that Warmer is operating properly. LIGHTED POWER ON/OFF SWITCH The POWER ON/OFF switch, Figure 26, is located at the bottom of the front control panel. POWER ON/OFF Switch Terminal block Wires #5 & 6 Nut Wire #2 Wire #1 Figure 25. Terminal Block Removal 1. Set power ON/OFF switch (8) to the OFF position and disconnect Warmer from power source. 2. Remove the four screws and carefully remove the right side panel. 3. Label and disconnect the electrical wiring from the terminal block. 4. Remove the nuts securing the terminal block to the chassis and remove the terminal block. Installation 1. Attach the terminal block to chassis with the two nuts. 2. Reconnect the wires to terminal block as shown in Figure 25. 3. Reinstall the side panel with the four screws. 4. Connect the power cord to the power source. 26 Wires #3 & 4 Figure 26. POWER ON/OFF Switch Removal 1. Set POWER ON/OFF switch (8) to the OFF position and disconnect Warmer from power source. 2. Remove the four screws securing the right side panel. 3. Label and disconnect wires from the POWER ON/OFF switch. 5. Remove switch from rear of front panel. Installation 1. Position POWER ON/OFF switch in front panel with the ON position facing up and lock in place. 2. Reconnect switch wires and remove labels. 3. Secure side panel to Warmer with the screws. 4. Plug Warmer back into power source. 5. Set POWER ON/OFF switch to the ON position. Service Manual for FWM3 Product Holding Cabinet 6. Check that POWER ON/OFF light illuminates. 7. Check that panels illuminate. FACE PLATE W/GASKET FWM CONTROLLER The Face plate w/Gasket, Figure 27, are located on the front and back of the Warmer. Both face plates are removed and installed in the same manner. The FWM Controller (Control Board), Figure 28, is attached to the inside of the front panel and can be accessed by removing the right side panel. Faceplate w/gasket Pan Status Keyboard (same on back) Nut & Spacer (Qty 3) SW3 SW2 Top Shelf RTD ER VI S TOP SHELF HEAT ER Bottom Shelf RTD VI HEAT S BOTTOM SHELF POWER Attaching Screws Three rows Figure 27. Face Plate w/Gasket Removal 1. Set POWER ON/OFF switch (8) to the OFF position and disconnect Warmer from power source. 2. Remove the Pan Status Keyboards, Figure 27, and lay aside. The keyboard does not need to be disconnected. 3. Remove the fifteen screws securing the face plate to the chassis. 4. Carefully pry the face plate away from the chassis without damaging the gasket. 12VAC Board Power Supply (Two wires #7) Upper Shelf Heater Connection (#8 wire) Upper Relay Supply Connection (#3 wire) Jumper wire Lower Relay Supply Connection (#3 wire) Lower Shelf Heater Connection (#9 wire) Figure 28. Control Board Installation 1. Clean area where face plate will be installed. Removal 2. Press the face plate in place with the gasket toward the chassis. 1. Set POWER ON/OFF switch (8) to the OFF position and disconnect Warmer from power source. 3. Secure the face plate with the fifteen screws. 4. Reinstall the Pan Status Keyboard. 5. Plug Warmer back into power source. 6. Set POWER ON/OFF switch to the ON position. 2. Remove the four (4) screws and carefully remove the right side panel. 3. Label and disconnect the two top wires from the POWER ON/OFF switch. 27 Service Manual for FWM3 Product Holding Cabinet 4. Label and disconnect the electrical wiring from the Control Board. 5. Remove the two nuts that secure the timer to the chassis. Move timer to gain better access to remove Control Board. DO NOT disconnect wires to timer. 6. Remove the three nuts that secure the Control Board to the Warmer. 7. Remove Control Board from Warmer. If necessary use Control Board removal tool (supplied with Control Board) to remove the Control Board. Slide tool along side of Control Board and rotate to pry Control Board loose from studs. NOTE: There are three spacers located behind the Control Board on the three studs. The spacers may fall free when Control Board is removed. programming. HEATING ELEMENT The Heating Elements, Figure 29, are attached by adhesive to the bottom of each Warmer compartment. A separate heater is used for each compartment. These Heater Elements are then connected in series. Auxiliary Thermostat Heater Assembly Interconnecting Wires RTD RTD Wires Installation NOTE: The three spacers must be reinstalled on the studs before installing the Control Board. 1. Install the three spacers on the studs. NOTE: Control Board may be difficult to insert onto studs. Set Control board into housing at right angle to front panel, then rotate into position on studs. Be sure spacers have not fallen off studs. 2. Set Control Board on the three studs and secure with the three nuts. 3. Refer to Figure 28, and reattach all wires to the Control Board. 4. Reattach the two wires to the top terminals on the POWER ON/OFF switch. 5. Reconnect the power cord to the power source. 6. Place the POWER ON/OFF switch in the ON position 7. Program the Control Board for the desired temperature as described in the CONTROL PROGRAMMING section. 8. Secure side panel to Warmer with the four screws. 9. Check Warmer operation to insure proper 28 Heater Wires Figure 29. Heater Elements Removal 1. Set POWER ON/OFF switch (8) to the OFF position and disconnect Warmer from power source. 2. Remove the four screws and carefully remove the right side panel. 3. Remove the four screws and carefully remove the left side panel. 4. Remove any product from the wells. 5. Remove all Lids from the wells. 6. Remove the screws securing the Pan Status Keyboards and lay the keyboard to the side but do not disconnect the keyboard. Service Manual for FWM3 Product Holding Cabinet 7. Remove the screws securing the face plates with gasket from both sides of the Warmer and remove face plates. 8. Disconnect the wires, Figure 30, going to the heater element to be removed, auxiliary thermostat and to the RTD thermocouple from inside the electrical compartment. Screws Wires to upper shelf heater elements, thermostat and RTD Left side Access holes for heater, auxiliary thermostat and RTD wires Wires to lower shelf heater elements, thermostat and RTD Figure 30. Wiring to Heater Elements, Auxiliary Thermostat and RTD Thermocouple 9. Remove the two screws on both the left and right sides that secure the upper or lower heater assembly as applicable. See Figure 31. WARMER 1 WARMER 2 WARMER 3 Right side Screws attaching Well Assembly to left and right sides Figure 31. Screws Attaching Well Assembly to Left and Right Sides NOTE: Heater assemblies have insulation both on top and bottom of the assembly. Check how insulation is applied so that it can be properly reinstalled. NOTE: When removing the pan assembly with the heater elements from the Warmer, the wires disconnected in step 8 must be carefully pushed through the access hole, Figure 32. 29 Service Manual for FWM3 Product Holding Cabinet RTD thermocouple wire Wire #9 lower shelf or Wire #8 upper shelf Wire #5 14.Using an ohmmeter, check each Heater Element for a resistance between 8.1 and 9.91 ohms. 15.If all Heater Elements have the correct resistance, use the ohmmeter to check continuity across the Auxiliary Thermostat. The Auxiliary Thermostat should be closed and the resistance should be 0 ohms. 16.Carefully peel the faulty heater element off the pan assembly. Installation Figure 32. Wires Through Shelf Access Hole NOTE: Before installing a new Heater Element, check the resistance to insure the heater element is OK. 10.Carefully pull the pan assembly out of the Warmer, taking care not to damage the insulation. 1. Peel the protective backing from Heater Element. 11.Remove the three self-tapping screws, Figure 33, on each end of the pan assembly then pull the heater assembly out of the wraparound housing. Heater assembly Wraparound 2. Carefully install the new Heater Element so the opening in the center clears the Auxiliary Thermostat contacts and the RTD Thermocouple wires, then press firmly in place making sure heater makes good contact with the bottom of the pan assembly. 3. Connect a blue wire from the Auxiliary Thermostat to one side of the first heater element. Connect the other blue wire from control board to thermostat. NOTE: Be sure foil from Heater Element is not shorting either terminal of the Auxiliary Thermostat or the RTD Thermocouple. Location of self-tapping screws that attach heater assembly to wraparound housing Figure 33. Screws Attaching Heater Assembly to Wraparound Housing 12.Disconnect the blue wires going to the Auxiliary Thermostat and to the far end of the series of Heater Elements. 13.Remove the insulation then disconnect the Heater Elements from each other. 30 4. Connect the remaining Heater Elements in series. 5. Place the insulation over the Heater Elements. 6. Connect the end of the last Heater Element to wire #5. 7. Route the wires from the RTD thermocouple through the square opening in the center of the Heater Element. 8. Connect wire #8 (upper heater) or wire #9 (lower heater) to the Auxiliary Thermostat. 9. Install the pan assembly with Heater Elements Service Manual for FWM3 Product Holding Cabinet installed into the Wraparound Housing. RTD Thermocouple 10.Attach the pan assembly to the wraparound housing with the six self-tapping screws. Mounting nuts 11.Push the wires from the Heater Elements and the wires from the RTD thermocouple through the access hole in the chassis. Wire to 2nd heater 12.Place the insulation on top of the pan assembly, and carefully slide the pan assembly into the Warmer. While sliding the pan assembly back into the Warmer, carefully pull on the wires to be sure no wires become pinched. 13.Attach the pan assembly to the Warmer with the two screws on each end of the Warmer. 14.Reconnect wires, Figure 30. Thermostat 15.Reinstall the face plates with gaskets and attach with the face plate screws. Wire #8 or #9 16.Reinstall the Pan Lids. 17.Reinstall the Pan Status Keyboards. Figure 34. Auxiliary Thermostat 18.Reinstall the left and right side panels. Removal 19.Connect the power cord to the power source. 1. Perform the Heating Element removal procedure through step 11. 20.Set the POWER ON/OFF switch to the ON position. 21.Check operation of the Warmer. 2. Disconnect the blue wires attached to the Auxiliary Thermostat. 3. Remove the two nuts securing the Auxiliary Thermostat and remove Auxiliary Thermostat. AUXILIARY THERMOSTAT The Auxiliary Thermostat, Figure 34, is located in a cutout area at the center of the heater closest to the control panel. The Auxiliary Thermostat is secured on two studs and is electrically connected in series with the heating elements. Installation 1. Check for continuity of the thermostat to be installed. Thermostat should be closed and show continuity (0 ohms resistance). 2. Clean the contact surfaces of the new Auxiliary Thermostat. 3. Mount the Auxiliary Thermostat on the studs and secure with the two nuts. 4. Reattach the blue wires to the Auxiliary Thermostat. 5. Reinstall the assembly as described in the Heater Element Installation paragraph starting at step 5. 31 Service Manual for FWM3 Product Holding Cabinet RTD THERMOCOUPLE The RTD Thermocouple, Figure 34, is located in a cutout area at the center of the Heater Element closest to the control panel. The RTD Thermocouple is pressed into place and secured by its sticky surface. Removal 1. Perform the Heating Element removal procedure through step 11. 2. Peel the RTD Thermocouple from the bottom of the pan assembly. 3. Remove RTD Thermocouple. Installation 1. Check the resistance of the RTD Thermocouple to be installed. The RTD Thermocouple resistance should be 950 to 1,200 ohm RTD Thermocouple wire. 2. Clean the area where RTD Thermocouple will be mounted. 3. Carefully press adhesive end of RTD Thermocouple onto pan assembly. 4. Reinstall the pan assembly as described in the Heater Element Installation paragraph starting at step 11. 32 Service Manual for FWM3 Product Holding Cabinet TESTING AND TROUBLESHOOTING Most component testing can be performed using a Digital Multimeter. 3. Set the POWER ON/OFF switch to ON and check for source voltage across the switch output terminals. If voltage is not present, replace switch. NOTE: When a continuity test is being performed, the Warmer must be isolated from the power source. 4. Measure voltage across L1 and L2 at the terminal block (22). If input voltage is not present, check wiring between switch and terminal block. COMPONENT TESTING TOOLS REQUIRED Digital Multimeter (D.M.M.) 5. Measure voltage across primary of transformer (3). If voltage is not present, check wiring. If input voltage is present, the primary power check is complete. PRELIMINARY PROCEDURE NOTE: Number in parentheses after a part name refers to the reference number in the parts list. 1. If the light in the POWER ON/OFF switch does not light with the power cord (21) plugged into the power source and the POWER ON/OFF switch (8) set to ON, begin component testing with Primary Power Checks. If the fan operates, begin testing with Control Transformer. 2. Isolate the Warmer from the power source. 3. Remove the four screws securing the right side panel to access the electrical components. PRIMARY POWER CHECK CAUTION: Input voltage source must match voltage indicated on nameplate. Voltage should be either 120 VAC, 208 VAC, 230 VAC or 240 VAC. 1. Check the input voltage source for correct voltage as indicated on the unit nameplate. Voltage should be either 120 VAC, 208VAC, 230 VAC or 240 VAC. If input voltage is not present, check for open circuit breakers or fuses supplying the input power. 2. Measure the voltage across the input terminals on the POWER ON/OFF switch (8). Voltage should be the same as input voltage source. If voltage is not present, check power cord. ELECTRONIC CONTROL FAULT INDICATION The SERVICE Light, Figure 35, is located on the front of the control next to the HEAT light. The SERVICE Light provides an indication to alert the operator to failures in the heater circuit. When a SERVICE Light is on, the affected shelf should not be used until the cause of the fault is corrected by a qualified service technician. The fault conditions that could cause the control to turn the SERVICE light on are as follows: 1. Over-Temperature Fault -An over-temperature fault occurs when the control senses that the shelf temperature is higher than the specified factory preset temperature. This occurs when the power is not removed from the Heater Element after the shelf has achieved the preset temperature causing the control to turn on the SERVICE light. The Auxiliary Thermostat prevents the temperature from exceeding safe levels by regulating the temperature to a maximum of 250° F. 2. Under-Temperature Fault - An undertemperature fault occurs when the control senses that the shelf temperature is lower than the specified factory preset temperature for more than 30 minutes continuously. This occurs when the Heater Element circuit opens or the RTD Thermocouple feedback signal is faulty or the controller is faulty, causing the Control Board to turn on the SERVICE Light. 33 Service Manual for FWM3 Product Holding Cabinet Service Indicator Heat Indicator TOP SHELF CE Power On/Off Switch BOTTOM SHELF ERVI S HEAT CE Figure 35. SERVICE and HEAT Lights ERVI S HEAT POW ER Location of thermocouple for temperature measurement Figure 36. Measurement Location TEMPERATURE CHECK PROCEDURE 1. A digital temperature meter that has been calibrated must be used to get an accurate temperature reading. Use a thermocouple surface temperature probe to measure temperatures. 2. No pans should be in wells during the pre-heat and temperature check. Pre-heat the Warmer for 30 minutes before taking any temperature readings. Do not take readings unless the wells have been empty for 30 minutes. This will allow the temperature to stabilize and will prevent false readings. 3. The Warmer wells should be cleaned and empty before the temperature is checked. Avoid any air drafts that might flow through the well. 4. Locate the surface temperature probe on the bottom of the first well in the geometric center. The first well is the one closest to the control panel (see Figure 36). Make sure the probe is making good contact with the surface while taking readings. 5. All temperature controls exhibit a swing in temperature as the control cycles on and off while regulating to the set point. The correct calibration temperature is the average of several readings taken over a period of 20 minutes after the Warmer has been pre-heated. The average temperature should be ±5°F from the set point. 34 PAN STATUS KEYBOARD CHECK 1. If a keyboard (1) is malfunctioning, remove it from the Warmer and install it in place of another keyboard that is operating correctly. 2. If the malfunction continues in the transferred keyboard, replace the keyboard with a new one. If the transferred keyboard operates correctly in its new location, replace the ICC Timer Control (9). STATION INTERFACE UNIT POWER 1. Power up the Station Interface unit (Warmer with ICC Timer Control). 2. Observe the following: a. On units with digital displays, observe that the keyboard lights illuminate yellow and the displays turn on, then the lights turn red or go out and the displays show 0 or go out, depending on the programmed HOLD times. b. On Warmers without the digital display, observe that the keyboard lights illuminate yellow, then red or go out, depending on the programmed HOLDS times. 3. Check that Warmer control powers up and the Warmer heats up. Service Manual for FWM3 Product Holding Cabinet CONTROL TRANSFORMER AUXILIARY THERMOSTAT The transformer (3) is located near the center of the electrical compartment. The Auxiliary Thermostat is checked for continuity across the terminals at normal ambient temperature. To access the thermostat follow the procedure described in the Auxiliary Thermostat paragraph in the PARTS REPLACEMENT section. 1. With the power cord plugged into the power source and the POWER ON/OFF switch set to ON, measure voltage across the control transformer primary. Voltage should be the same as the input voltage source. If no voltage is present, check wiring to transformer. CAUTION: Check that primary of transformer is correctly connected for input voltage source. 2. If correct voltage is present at primary, measure the secondary voltage. 3. If the secondary voltage is near 12 VAC, transformer is operating properly. If voltage is low or 0 VAC, disconnect wire from transformer secondary and recheck secondary voltage. 4. If voltage is still near 0 VAC, replace transformer. If voltage is now near 12 VAC the Electronic Control Board or optional ICC Timer Control is probably defective and should be replaced. 1. Disconnect the wires to the thermostat. 2. Connect an ohmmeter across the thermostat terminals and verify that the resistance is approximately 0 ohms. 3. Replace thermostat if defective. RTD THERMOCOUPLE The RTD Thermocouple is checked by measuring the resistance between the two lead wires. 1. Disconnect the RTD Thermocouple wires from the control board. 2. Connect an ohmmeter across the RTD Thermocouple leads and verify that the resistance is between 950 and 1200 ohms. 3. Replace thermocouple if defective. HEATING ELEMENT PARTS INFORMATION The Heating Element is checked by measuring the resistance between the two wires from the Heating Element. To access the Heating Element follow the procedure described in the Heating Element paragraph in the PARTS REPLACEMENT section. 1. Disconnect the wires to the Heating Element to be checked. 2. Connect an ohmmeter across the heater leads and verify that the resistance is between 8.1 ohms and 9.91 ohms. 3. Replace Heating Element if defective. 35 Service Manual for FWM3 Product Holding Cabinet 2 20 3 9 8 13 6 4 5 10 12 WAR MER WAR MER WAR MER 18 19 15 1 2 3 14 16 17 6 1 PROGRAM 4 5 WARMER 7 36 2 2 WARMER 3 3 13 Service Manual for FWM3 Product Holding Cabinet QTY PER UNIT (FEM3-) REF NO. PART NO. FWM322 FWM323 FWM324 FWM342 1 156807 PAN STATUS KEYBOARD FWM3-22, DAYPART 1 or 2 1 or 2 1 or 2 1 or 2 156677 PAN STATUS KEYBOARD FWM3-22, DIGITAL 156279 PAN STATUS KEYBOARD FWM3-22, DIGITAL/DAYPART 156806 PAN STATUS KEYBOARD FWM3-23, DAYPART 156676 PAN STATUS KEYBOARD FWM3-23, DIGITAL 156672 PAN STATUS KEYBOARD FWM3-24, DAYPART/TRANSFER 157532 PAN STATUS KEYBOARD FWM3-24, DIGITAL/DAYPART 157539 PAN STATUS KEYBOARD FWM3-24, DIGITAL 156756 PAN STATUS KEYBOARD FWM3-42, DAYPART 156908 PAN STATUS KEYBOARD FWM3-42, DIGITAL/DAYPART 2 600106 3 155749 KIT, FWM CONTROLLER 1 1 1 2 TRANSFORMER 208/240 VAC 1 1 1 1 156838 TRANSFORMER 230 VAC 156316 TRANSFORMER 120 VAC 4 155741 RECEPTACLE, ELECTRIC 1 1 1 1 5 156616 COUPLER, 6X6 RJI2 (MB1 &SB1 UNITS ONLY) 2 2 2 2 6 156617 COUPLER, 8X8 RJ45 (MB1 &SB1 UNITS ONLY) 1 1 1 1 7 156059 CONNECTOR, SPECIAL T (REAR ViEW MB2 & SB2) 1 1 1 1 8 156527 SWITCH, LIGHTED, DPST, 16A 1 1 1 1 *9 156809 CONTROL, ICCTIMER, W/SOUNDER, FWM3-22 & FWM3-23 1 1 1 1 156820 CONTROL, ICC TIMER. W/SOUNDER, FWM3-24 & FWM3-42 156819 CONTROL, ICC TIMER, W/O SOUNDER, FWM3-22 & FWM3-23 156409 CONTROL, ICC TIMER, W/O SOUNDER, FWM3-24 & FWM3-42 156939 CONTROL, ICC TIMER. W/100 06 SOUNDER, FWM3-22 & FWM3-23 156935 CONTROL ICC TIMER, W/100 06 SOUNDER, FWM3-24 & FWM3-42 156610 CONTROL, ICC TIMER, DIGITAL, W/SOUNDER, FWM3-22 & FWM3-23 156280 CONTROL ICC TIMER, DIGITAL/DAYPART, W/SOUNDER, FWM3-22 157533 CONTROL, ICC TIMER, DIGITAL/DAYPART, W/SOUNDER, FWM3-24 156909 CONTROL, ICC TIMER. DIGITAL/DAYPART, W/SOUNDER, FWM3-42 156485 FACE PLATE WITH GASKET, FWM3-22 2 2 2 2 156558 FACE PLATE WITH GASKET, FWM3-23 155849 FACE PLATE WITH GASKET, FWM3-24 156548 FACE PLATE WITH GASKET, FWM3-42 11 156285 LATCH, PAN 4 8 8 8 12 0653638 SCREW 1/4-20 X 3/4 8 8 8 16 10 DESCRIPTION 37 Service Manual for FWM3 Product Holding Cabinet QTY PER UNIT (FEM3-) REF NO. PART NO. 13 156288 14 15 DESCRIPTION FWM322 FWM323 FWM324 FWM342 SCREW, SHOULDER 4 8 8 8 155750 RT, 1K OHM THIN 2 2 2 4 156994 ELEMENT FOIL HEAT FWM3-22-100 & FM3-42-100 4 8 156483 ELEMENT FOIL HEAT PMI3-22-120 & FWM3-42-120 4 8 156539 ELEMENT FOIL HEAT FWM3-22-208 & FWM3-42-208 4 8 156632 ELEMENT FOIL HEAT PM~I3-fl-230CE & RW3-42-230CE 4 8 156540 ELEMENT FOIL HEAT FWM3-22240 & FWM3-42-240 4 8 156584 ELEMENT FOIL HEAT PMii3-23-120 6 158301 ELEMENT FOIL HEAT FWM3-23-208 6 156611 ELEMENT FOIL HEAT FWM3-23-230CE 6 156565 ELEMENT FOIL HEAT F!M43-23-240 6 157520 ELEMENT FOIL HEAT FWM3-24-100 8 156566 ELEMENT FOIL HEAT FWM3-24-120 8 155752 ELEMENT FOIL HEAT FWM3-24-208 8 156318 ELEMENT FOIL HEAT PM.13-24-230CE 8 155155 ELEMENT FOIL HEAT FV~*3-24-240 8 16 155753 THERMOSTAT AUXILIARY 2 2 2 4 17 155680 NUT #8-32 KEPS 4 4 4 8 18 155873 LID, FOODWARMER VENTED (FRIED) (GRAY) AR AR AR AR 19 155876 LID, FOODWARMER SOLID (BROILED) (BLACK) AR AR AR AR 20 158938 TERMINAL BLOCK 1 1 1 1 156491 CABLE, 8 FT, (FOR INTERCONNECTING UNITS) (NOT SHOWN) AR AR AR AR 156533 CORDSET, NEMA 5-15P, 120V (NOT SHOWN) 1 1 1 1 156811 CORDSET, NEMA 5-20P, 120V, CANADIAN FWM3-24,-42 (NOT SHOWN) 156421 CORDSET, NEMA 6-I5P, 208/240V (NOT SHOWN) 156400 CORDSET, 230V CE (NOT SHOWN) *Note: These ICC Timer Controls will need to be manually programmed at the time of installation 38 Service Manual for FWM3 Product Holding Cabinet CUSTOMER ASSISTANCE To aid in reporting this unit in case of loss or theft, please record below the model number and serial number located on the unit. We also suggest you record all the information listed and retain for future reference. MODEL NUMBER_________________________ SERIAL NUMBER_ _______________________ DATE OF PURCHASE_____________________________________________________________ ________________________________________ DEALER_________________________________ TELEPHONE_ ___________________________ SERVICER_______________________________ TELEPHONE_ ___________________________ NORTH AMERICA & LATIN AMERICA UK & IRELAND Duke Manufacturing Company 2305 N. Broadway St. Louis, MO 63102 Phone: 314-231-1130 Toll Free: 1-800-735-3853 Fax: 314-231-5074 Duke Mfg UK Duke House Unit 10, Greendale Business Park Woodbury Salterton Exeter Devon - UK EX5 1EW Tel: 01395 234140 FAX: 01395 234154 CONTINENTAL EUROPE ASIA EU Headquarter Office Duke Manufacturing C.R. s.r.o. Prologis Park D1 West Building 4 Zdebradska 92 Ricany-Jazlovice, 251 01 Czech Republic Phone: 42 (0) 257-741-033 Fax: 42 (0) 257-741-039 Duke Food Service Equipment (shanghai) Company Limited 1F, Building #17-2, 658 Nong Jin Zhong Road Shanghai, China 200335 Tel: +86 21 6876 9272 Fax: +86 21 33600628 TO ACCESS INTERNET: www.dukemfg.com Please provide the following information when you write or call: model number, serial number, date of purchase, your complete mailing address (including zip code), and description of the problem. 39 Service Manual for FWM3 Product Holding Cabinet Duke Manufacturing Company 2305 N. Broadway St. Louis, MO 63102 Phone: 314-231-1130 Toll Free: 1-800-735-3853 Fax: 314-231-5074 www.dukemfg.com EU Headquarter Office Duke Manufacturing C.R. s.r.o. Prologis Park D1 West Building 4 Zdebradska 92 Ricany-Jazlovice, 251 01 Czech Republic Phone: 42 (0) 257-741-033 Fax: 42 (0) 257-741-039 Duke Mfg UK Duke House Unit 10, Greendale Business Park Woodbury Salterton Exeter Devon - UK EX5 1EW Tel: 01395 234140 FAX: 01395 234154 Asia Office Duke Food Service Equipment Company Limited 1F, Building #17-2 658 Nong Jin Zhong Road Shanghai 200335 China Phone: 86 21 6876 9272 FAX: 86 21 33600628 40