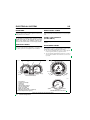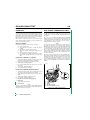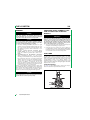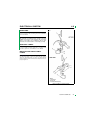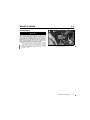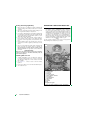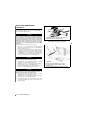
1
2005
HARLEY-DAVIDSON
MOTORCYCLE
PREDELIVERY
AND SETUP
MANUAL
The information in this Manual
applies to all 2005 motorcycle
models manufactured by
Harley-Davidson Motor Company.
GENERAL
I
TOURING
II
DYNA
III
SOFTAIL
IV
SPORTSTER
V
VRSC
VI
CVO
VII
© 2004 H-D
All RIGHTS RESERVED
Printed in the U.S.A.
VISIT THE HARLEY-DAVIDSON WEB SITE
http://www.harley-davidson.com
Binder 99946-88
Contents 99947-05
CMI-4.0M-06/04
FOREWORD
INTRODUCTION
PRODUCT REFERENCES
This PREDELIVERY AND SETUP MANUAL has been prepared by Harley-Davidson Motor Company to provide the
Harley-Davidson dealer with the factory recommended steps
needed to prepare our motorcycles for delivery to the customer.
All tools mentioned in this manual with “HD” or “J” preceding
the part number must be ordered through Kent-Moore.
NOTE
Harley-Davidson Motor Company considers the predelivery
inspections and procedures in this manual necessary to
assure customer safety and satisfaction. None of these
inspections or procedures should ever be left out, and only
qualified technicians should perform them.
HOW TO USE YOUR PREDELIVERY
AND SETUP MANUAL
Your Predelivery and Setup Manual is divided into seven sections:
●
Section I–General Information: All Models
●
Section ll–Predelivery Inspections: Touring Models
●
Section lll–Predelivery Inspections: Dyna Models
●
Section IV–Predelivery Inspections: Softail Models
●
Section V–Predelivery Inspections: Sportster Models
●
Section VI–Predelivery Inspections: VRSC Models
●
Section VII–Predelivery Inspections: CVO Models
Refer to Section I first for general setup instructions pertaining to all current model motorcycles. Then, proceed to the
one Section (either II, III, IV, V, VI or VII) which covers the
inspection procedures for your specific model vehicle.
WARNINGS AND CAUTIONS
1WARNING
Direct all mail orders and general correspondence to the following address:
Kent-Moore
SPX Corporation
28635 Mound Road
Warren, Michigan USA 48092-3499
Telephone: 1-800-345-2233
Sealing and Threadlocking Products
LOCTITE PRODUCTS
Some procedures in this Service Manual call for the use of
Loctite® products. If you have any questions regarding Loctite
product usage or retailer/wholesaler locations, please call
Loctite Corp. at 1-800-323-5106.
CONTENTS
All photographs, illustrations and procedures may not necessarily depict the most current model or component, but are
based on the latest production information available at the
time of publication.
Since product improvement is our continual goal, HarleyDavidson reserves the right to change specifications, equipment or designs at any time without notice and without incurring obligation.
ORDERING INFORMATION
Additional binders or contents may be ordered from Parts &
Accessories. The binder and the contents must be ordered
separately.
●
Binder: Part No. 99946-88
●
Contents: Part No. 99947-05
WARNING indicates a potentially hazardous situation
which, if not avoided, could result in death or serious
injury. (00119a)
1CAUTION
CAUTION indicates a potentially hazardous situation
which, if not avoided, may result in minor or moderate
injury. (00139a)
CAUTION
CAUTION used without the safety alert symbol indicates
a potentially hazardous situation which, if not avoided,
may result in property damage. (00140a)
NOTE
Refers to important information, and is placed in italic type.
It is recommended that you take special notice of these items.
iii
iv
TABLE OF CONTENTS
SECTION
SUBJECT
PAGE NUMBER
I
General Information: All Models
1-1
II
Predelivery Inspections: Touring Models
2-1
III
Predelivery Inspections: Dyna Models
3-1
IV
Predelivery Inspections: Softail Models
4-1
V
Predelivery Inspections: Sportster Models
5-1
VI
Predelivery Inspections: VRSC Models
6-1
VII
Predelivery Inspections: CVO* Models
7-1
*Custom Vehicle Operations
v
I
PREDELIVERY: ALL MODELS
SUBJECT
PAGE NO.
1.1 Uncrating and General Setup: All Models . . . . . . . . . . . . . . . . . . . . . . . . . . . .
Vehicle Crate Inspection . . . . . . . . . . . . . . . . . . . . . . . . . . . . . . . . . . . . . . . .
Uncrating Vehicle . . . . . . . . . . . . . . . . . . . . . . . . . . . . . . . . . . . . . . . . . . . . . .
Removing Cardboard Carton . . . . . . . . . . . . . . . . . . . . . . . . . . . . . . . . . . . . .
Handlebar Installation–FLSTSC, FLSTN and FXDWG Models . . . . . . . . . . .
Adjusting Handlebars–All Models . . . . . . . . . . . . . . . . . . . . . . . . . . . . . . . . . .
Removing Vehicle From Pallet . . . . . . . . . . . . . . . . . . . . . . . . . . . . . . . . . . . .
Clutch Hand Lever . . . . . . . . . . . . . . . . . . . . . . . . . . . . . . . . . . . . . . . . . . . . .
Front Brake Hand Lever . . . . . . . . . . . . . . . . . . . . . . . . . . . . . . . . . . . . . . . . .
Front Brake Master Cylinder Reservoir . . . . . . . . . . . . . . . . . . . . . . . . . . . . .
Vehicle Cleanup . . . . . . . . . . . . . . . . . . . . . . . . . . . . . . . . . . . . . . . . . . . . . . .
Cosmetic Quality . . . . . . . . . . . . . . . . . . . . . . . . . . . . . . . . . . . . . . . . . . . . . .
Returning Steel Pallets . . . . . . . . . . . . . . . . . . . . . . . . . . . . . . . . . . . . . . . . . .
Maintenance-Free Batteries . . . . . . . . . . . . . . . . . . . . . . . . . . . . . . . . . . . . . .
Date Of Manufacture Code . . . . . . . . . . . . . . . . . . . . . . . . . . . . . . . . . . . . . .
Voltmeter Test . . . . . . . . . . . . . . . . . . . . . . . . . . . . . . . . . . . . . . . . . . . . . . . .
Charging Battery . . . . . . . . . . . . . . . . . . . . . . . . . . . . . . . . . . . . . . . . . . . . . .
Warning Label Placement (All Vehicles Sold Outside of the United States) .
1.2 System Problems . . . . . . . . . . . . . . . . . . . . . . . . . . . . . . . . . . . . . . . . . . . . . .
General . . . . . . . . . . . . . . . . . . . . . . . . . . . . . . . . . . . . . . . . . . . . . . . . . . . . . .
1-1
1-1
1-1
1-1
1-2
1-5
1-10
1-12
1-13
1-13
1-14
1-14
1-14
1-15
1-16
1-16
1-16
1-18
1-19
1-19
1
UNCRATING AND GENERAL SETUP: ALL MODELS
VEHICLE CRATE INSPECTION
Inspect each crate for external damage while it is still on
delivery truck. Open crate and inspect motorcycle for damage
before truck leaves your dealership. Refer to HARLEYDAVIDSON/BUELL WARRANTY MANUAL, “SHIPPING
DAMAGE PROCEDURE” for complete information on filing
claims for damaged and over/short freight.
2.
1.1
See Figure 1-2. Using a box cutter, cut one end of the
cardboard carton. Slide carton away from pallet as
shown. Set carton aside for recycling.
10426
UNCRATING VEHICLE
CAUTION
Use caution when removing cardboard carton from pallet. DO NOT remove uprights before removing carton.
Failure to do so can cause damage to motorcycle.
NOTE
All Harley-Davidson motorcycles are shipped in crates using
returnable steel pallets. The steel pallets have fork openings
2x7 in. (5.1x17.8 cm) at the front and sides. Crates have
widths of 29 in. (73.7 cm) and 43 in. (109.2 cm) and all are 50
in. (127 cm) high. The VRSC, SPORTSTER, DYNA and some
SOFTAIL models are shipped with the front wheel turned to
the left or right in a “turn-wheel” crate. Removing the shipping
crate is similar on all models so the procedure given below is
typical for all models. Call your SPOC representative if you
have questions regarding steel pallet return.
Figure 1-2. Remove Cardboard Carton from Pallet.
3.
See Figure 1-3. Remove both uprights (VRSC, FLST and
FLSTC crates have three uprights) by lifting upward. Set
uprights aside for recycling.
8798
REMOVING CARDBOARD CARTON
1.
See Figure 1-1. Use a T-20 bit and an electric or air powdered drill/driver to remove all fasteners from cardboard
carton. Open top carton flaps.
8796
Figure 1-3. Remove Uprights from Pallet
4.
Open plastic bag enclosing motorcycle and push it down
off motorcycle. Remove protective tape and elastic protective netting, if present, from chrome and painted parts
of motorcycle.
Figure 1-1. Removing Screws
2005 PDI: All Models
1-1
NOTE
Always install/adjust handlebars before removing motorcycle
from pallet. See HANDLEBAR INSTALLATION–FLSTSC,
FLSTN AND FXDWG MODELS and ADJUSTING HANDLEBARS– ALL MODELS.
5.
If uninstalled parts are in crate, verify your receipt of all
separate items by comparing with parts list in shipping
crate.
6.
If vehicle has damage which appears to have occurred at
the factory, submit warranty claim form. Accurately
describe damage and cause. (e.g.–“Found nail in tire;
caused tire to go flat.”) Supply proper failure code(s).
HANDLEBAR INSTALLATION–
FLSTSC, FLSTN AND FXDWG
MODELS
FLSTSC
After removing carton and protective plastic wrap:
1.
See Figure 1-5. While holding handlebars, remove the
riser bolts (2) securing handlebar shipping cradle (1) to
risers. Retain the four bolts, discard washers.
2.
While holding the handlebar shipping cradle, cut cable
straps (3). Discard cradle and cable straps. Remove and
discard protective block (4) from left handlebar grip.
3.
Route handlebar switch conduits between and behind
risers.
4.
Position handlebar on top of risers, secure with riser
caps and riser bolts.
5.
See ADJUSTING HANDLEBARS– ALL MODELS and
Figure 1-10. Following the Dyna Glide, Softail, XL 883,
XL 883L and XL 1200R Models procedure, adjust the
handlebars and tighten the riser bolts to 12-15 ft-lbs
(16.3-20.3 Nm) in the sequence given.
6.
Push the four plastic wire retainers on the handlebar
switch conduits into the holes in the handlebars. Replace
any broken wire retainers.
7.
Attach hand control and directional wire harnesses to
handlebar risers with cable straps (Part No. 10039).
8.
Insert the clutch cable into the retaining clip on the left
frame downtube.
1WARNING
Do not alter or disable any device or system to circumvent local, state, or federal regulations. All safety and
environmental devices or systems must be left intact as
designed and built at the factory. Tampering with safety
and environmental devices or systems could result in
death or serious injury.
1WARNING
The automatic-on headlamp feature provides increased
visibility for riders. Be sure headlamp is on at all times.
Low visibility of rider can result in death or serious
injury. (00030a).
1WARNING
Some motorcycles are shipped with the hand brake lever
wrapped tight against the hand grip. Remove plastic
wrap and warning label (see Figure 1-4.) and pump brake
lever 3-4 times before moving motorcycle from pallet.
Failure to pump brake lever could result in an inoperable
front brake which could result in death or serious injury.
10612
1
pd0171
WARNING:
3
2
4
PUMP BRAKE LEVER
3-4 TIMES BEFORE
USING BRAKES
1.
2.
3.
4.
5.
5
Handlebar shipping cradle
Riser bolt (4)
Cable strap (4)
Protective block
Protective pad
Figure 1-4. Warning Label
Figure 1-5. FLSTSC
1-2
2005 PDI: All Models
FLSTN
10614
3
After removing carton and protective plastic wrap:
1.
See Figure 1-6. Remove and discard cloth tie (3) securing handlebar.
2.
Remove the riser bolts (2) and shipping clamp (1) from
handlebar risers. Retain the bolts. Remove and discard
protective block (4) from right handlebar grip.
3.
Route handlebar switch conduits between and behind
risers.
4.
Position handlebar on top of the risers and secure with
riser caps, and bolts removed in step 2.
5.
See ADJUSTING HANDLEBARS– ALL MODELS and
Figure 1-10. Following the Dyna Glide, Softail, XL 883,
XL 883L and XL 1200R Models procedure, adjust the
handlebars and tighten the riser bolts to 12-15 ft-lbs
(16.3-20.3 Nm) in the sequence given.
6.
Push the four plastic wire retainers on the handlebar
switch conduits into the holes in the handlebars. Replace
any broken wire retainers.
7.
Insert the clutch cable into the retaining clip on the left
frame downtube.
4
1
3
2
5
10613
1
6
2
10615
3
4
1.
2.
3.
4.
Shipping clamp
Riser bolts
Cloth tie
Protective block
1.
2.
3.
4.
5.
6.
Front brake line
Clamp (2)
Screw (2)
Fork stem cover
Clamp
Screw
Figure 1-7. Attaching Front Brake Line–FLSTN
Figure 1-6. FLSTN
8.
See Figure 1-7. Install front brake line (1) in clamps (2),
inboard of screws (3) and attach to fork stem cover (4).
Tighten screws to 30-50 in-lbs (3.4-5.7 Nm).
9.
Install brake line in clamp (5) in underside of lower fork
clamp. Tighten screw (6) to 96-120 in-lbs (10.9-13.6
Nm).
2005 PDI: All Models
1-3
FXDWG
After removing carton and protective plastic wrap:
1.
See Figure 1-8. Remove and discard cloth tie (1) securing handlebar.
2.
Remove the four bolts (2) from the riser. Retain the four
bolts.
3.
Reroute the left hand switch wire conduit from between
the riser to a position in front of the riser.
4.
Retrieve riser caps from passenger backrest.
5.
Position the handlebar on top of the risers and fasten the
riser caps in place using the bolts removed in step 2.
6.
See ADJUSTING HANDLEBARS– ALL MODELS and
Figure 1-10. Following the Dyna Glide, Softail, XL 883,
XL 883L and XL 1200R Models procedure, adjust the
handlebars and tighten the riser bolts to 12-18 ft-lbs
(16.3-24.4 Nm) in the sequence given.
7.
See Figure 1-9. Attach brake line (2) and ground wire (3)
on upper triple clamp with clamp (1). Position brake line
inboard from fastener. Tighten fastener to 30-60 in-lbs
(3.4-6.8 Nm).
6052
6062
1
3
2
6059
1
4
2
6053
3
4 1
1.
2.
3.
2
1.
2.
3.
4.
Cloth tie
Riser bolts (4)
Shipping clamps
Protective block
Figure 1-8. FXDWG
1-4
2005 PDI: All Models
Clamp
Brake line
Ground wire
5
4.
5.
Clamp
Screw
Figure 1-9. FXDWG Brake Line and Ground Wire
CAUTION
pd0031d
Tighten
first
See Figure 1-9. Attach brake line as shown before removing motorcycle from pallet. If brake line is not secured, it
could be pinched and damaged in front fork stop.
8.
Attach brake line to bottom of steering stem with clamp
(4) and screw (5). Tighten to 96-120 in-lbs (10.9-13.6
Nm).
9.
See Figure 1-8. Remove shipping clamps (3) from the
handlebar. Remove protective block (4) on throttle. Discard shipping clamps and protective block.
5
3
ADJUSTING HANDLEBARS–
ALL MODELS
6
2
10. Install clutch cable in clip on left downtube.
11. Install the plastic wire retainers on the handlebar switch
conduits and push into the holes in the handlebars.
Replace any broken wire retainers.
4
1
FRONT
1.
2.
3.
4.
5.
6.
Lower clamp (2)
Cast-in spacers (2)
Rear screw (2)
Front screw (2)
Instrument bracket (if equipped)
Upper clamp
General
Figure 1-10. XL 883, XL 883L, XL 1200R,
Dyna Glide and Some Softail Models
CAUTION
Never adjust handlebars using excessive force. Doing so
may result in damage to handlebar or clamp.
NOTE
If handlebars are positioned for a rider of normal size, postpone adjustment until customer has checked their position. If
customer requests changing handlebar position, perform the
adjustment before delivering the motorcycle to the customer.
Always center the handlebar laterally (sideways) in the handlebar clamps.
NOTE
On some models, knurled areas of handlebar will be completely hidden by upper handlebar clamp and will not be visible at all when handlebar is centered properly.
3.
Raise handlebars to normal riding position and hold in
position.
4.
Models with cast-in spacers (2) in upper clamp:
a.
Tighten two rear screws (3) until cast-in spacers
contact handlebar lower clamps (1).
b.
Dyna and Sportster models: tighten front screws (4)
to 12-18 ft-lbs (16.3-24.4 Nm). Softail models:
tighten front screws (4) to 12-15 ft-lbs (16.3-20.3
Nm).
c.
Dyna and Sportster models: final tighten rear
screws to 12-18 ft-lbs (16.3-24.4 Nm). Softail models: final tighten rear screws to 12-15 ft-lbs (16.320.3 Nm). Slight gap between upper and lower
clamps should exist at front.
Before removing motorcycle from pallet, adjust handlebars
according to the following procedures:
Dyna Glide, Softail, XL 883, XL 883L and
XL 1200R Models
1.
See Figure 1-10. Loosen four screws (3 and 4) of handlebar upper clamp (6).
2.
To be sure handlebars are properly centered, verify that
equal amounts of knurled areas on handlebar protrude
from outboard sides of upper handlebar clamp.
5.
Models without cast-in spacers in upper clamps:
a.
Tighten all four screws finger-tight, maintaining
equal gaps between upper and lower clamps front to
back.
b.
Dyna and Sportster models: tighten rear screws to
12-18 ft-lbs (16.3-24.4 Nm). Softail models: tighten
rear screws to 12-15 ft-lbs (16.3-20.3 Nm).
c.
Dyna and Sportster models: tighten front screws to
12-18 ft-lbs (16.3-24.4 Nm). Softail models: tighten
front screws to 12-15 ft-lbs (16.3-20.3 Nm).
2005 PDI: All Models
1-5
XL 883C and XL 1200C Models
FLHT, FLHTC, FLHTCU and FLHTP
1.
1.
Remove ignition switch knob and inner fairing cap
according to appropriate Touring Models Service Manual
instructions.
2.
See Figure 1-12. Loosen two rear screws (3) of handlebar upper clamps (2).
3.
If there is a gap between either handlebar lower clamp
(1) and upper clamp at front, tighten front screw (4) only
enough to close gap. If handlebars do not move up and
down freely, loosen rear screws until they do.
See Figure 1-11. Loosen four screws (1, 2) of handlebar
upper clamp (3).
).
Tighten
first
pd0031f
1
4
2
pd0021a
4
2
3
1
3
1.
2.
3.
4.
Front screw (2)
Rear screw (2)
Upper clamp
Lower clamp
FRONT
Figure 1-11. XL 1200C, XL 883C Custom Models
2.
To be sure handlebars are properly centered, verify that
equal amounts of knurled areas on handlebar protrude
from outboard sides of upper handlebar clamp.
NOTE
On some models, knurled areas of handlebar will be completely hidden by upper handlebar clamp and will not be visible at all when handlebar is centered properly.
3.
4.
1-6
Raise handlebars to normal riding position; hold in position. Tighten two front screws (1) to 12-18 ft-lbs (16.324.4 Nm).
FRONT
1.
2.
3.
4.
Figure 1-12. FLHT/C/U and FLHTP Models
4.
Raise handlebars to normal riding position. To be sure
handlebars are properly centered, verify that equal
amounts of knurled areas on handlebar protrude from
outboard sides of both handlebar clamps.
5.
Tighten rear screws to 12-16 ft-lbs (16.3-21.7 Nm). Slight
gap should exist between upper and lower clamps at
rear.
6.
Check torque on front handlebar clamp screws. Tighten
screws to 12-16 ft-lbs (16.3-21.7 Nm).
7.
Reinstall inner fairing cap and ignition switch knob
according to appropriate Touring Models Service Manual
instructions.
Tighten rear screws (2) to 12-18 ft-lbs (16.3-24.4 Nm).
2005 PDI: All Models
Lower clamp (2)
Upper clamp (2)
Rear screw (2)
Front screw (2)
FLHR/C/S/I Road King, FLHP, FLHPE
1.
See Figure 1-13. Remove screw (12) securing chrome
ring (11) to headlamp nacelle (7). Remove chrome ring.
2.
Remove eight screws (10) securing headlamp assembly
(9). Squeeze two external tabs (if present) to remove
wire connector at back of headlamp bulb. Remove headlamp assembly from vehicle.
3.
Remove nut (1) (inside nacelle) securing nacelle trim (2).
4.
On Police models, disconnect tachometer lead.
5.
Remove nacelle trim. Loosen (but do not remove) front
handlebar clamp shroud screw (3), nut and washer (4).
6.
Gently pry off fork lock plate (5) at rear of handlebar
clamp shroud (8). Remove two screws (6) beneath lock
plate.
pd0226
6
3
7.
Loosen four acorn nuts securing nacelle halves to fork
studs. Spread nacelle halves slightly and remove handlebar clamp shroud.
8.
Adjust handlebars following steps 2.-6. of the FLHT,
FLHTC, FLHTCU and FLHTP procedure given on previous page.
9.
Reinstall handlebar clamp shroud. Tighten acorn nuts
securing nacelle halves to fork studs to 72-108 in-lbs
(8.1-12.2 Nm).
10. Install two screws (6) to handlebar clamp shroud and
tighten to 10-20 in-lbs (1.1-2.3 Nm). Gently press fork
lock plate (5) into place on handlebar clamp shroud.
11. Tighten front handlebar clamp shroud nut (4) to 10-20 inlbs (1.1-2.3 Nm).
12. On police models, connect tachometer lead.
13. Install nacelle trim (2). Install nut (1) (inside nacelle) securing nacelle trim. Tighten to 15-20 in-lbs (1.7-2.3 Nm).
5
14. Connect wire connector to socket on back of headlamp
bulb. Install and secure headlamp assembly to nacelle
with eight fasteners.
8
15. Secure chrome ring (11) to headlamp nacelle with screw
(12).
2
7
9
NOTE
Check clearance between windshield and clutch cable and
handlebar position prior to completing assembly of vehicle.
1
11
4
10
12
1.
2.
3.
4.
5.
6.
7.
8.
9.
10.
11.
12.
Nut
Nacelle trim
Front handlebar clamp shroud screw
Nut and washer
Fork lock plate
Screw (2)
Nacelle
Handlebar clamp shroud
Headlamp assembly
Screw (8)
Chrome headlamp ring
Screw
Figure 1-13. FLHR/C, FLHP, FLHPE Models
2005 PDI: All Models
1-7
FLTR Road Glide
1.
2.
1 PRO
See Figure 1-15. Loosen two front screws securing handlebar upper clamps (Instrument bezel has been
removed in drawing for clarity).
4.
Raise handlebars to normal riding position. Tighten front
handlebar clamp screws to 12-16 ft-lbs (16.3-21.7 Nm).
5.
Verify that left and right sides of instrument nacelle are
properly mated. Pins on left side of nacelle must fully
engage holes on right.
Insert tab at rear of bezel into slot of instrument nacelle
just above ignition switch. Holding left and right sides of
nacelle together, place bezel over instrument nacelle
flange. when properly mated, tabs at front of instrument
nacelle engage lip in slot at front of bezel behind decorative adhesive strip.
2 HRS
4
3 MIN
SE SC
EJECT
HARLEY-DAVIDSON MOTOR COMPANY INC. R
LO/DX
®
POWER
Carefully push tab at rear of instrument bezel from slot
above ignition switch. Gently raise free side of bezel until
tabs at front of instrument nacelle disengage from slot at
front of bezel (concealed behind decorative adhesive
strip). Move instrument bezel to one side.
3.
6.
pd0201
See Figure 1-14. Remove two T25 TORX screws at sides
of instrument bezel.
40
30
20
10
0
H
50 60 70
MPH
80
90
100
110
120
Y
AR
N
LE
PA
M
Y-D CERTIFIED
CO
AVI
DSON MOTOR
30
40
50
60
20
70
10
RPMx100
0
H
AR
LE
Y-D
AVI
DSON MOTOR
80
Y
N
PA
M
CO
Figure 1-14. FLTR Models-Instrument Bezel Screws
pd0195
NOTE
If tabs do not properly engage slot at front of bezel, a loose fit
will result. Remove decorative adhesive strip by gently prying
up outer edges. Using a flat bladed screwdriver, carefully
raise tabs so they engage lip in slot. If damaged, install new
decorative adhesive strip.
Figure 1-15. FLTR Models-Front Handlebar Clamp Screws
1-8
2005 PDI: All Models
VRSCB
10059
NOTE
To gain access to the handlebar adjusting screws, the following steps will be necessary:
1.
Remove Maxi-Fuse.
2.
See Figure 1-16. Remove instrument cluster screw from
location shown and pivot instrument cluster away from
handlebars.
3.
Remove wiring harness connector and remove screw on
bottom side of instrument cluster.
4.
Remove instrument cluster.
5.
To be sure handlebars are properly centered, verify that
equal amounts of knurled areas on handlebar protrude
from outboard sides of upper handlebar clamp.
NOTE
On some models, knurled areas of handlebar will be completely hidden by upper handlebar clamp and will not be visible at all when handlebar is centered properly.
6.
See Figure 1-17. Raise handlebars to normal riding position; hold in position. Tighten two front screws (4) until
cast-in spacers (2) of upper clamp contact handlebar
lower clamp (1).
7.
Tighten rear screws (3) to 16-20 Nm (12-15 ft-lbs).
8.
Final tighten front screws (4) to 16-20 Nm (12-15 ft-lbs).
Slight gap between upper and lower clamps should exist
at rear.
9.
Install instrument cluster.
10. Insert instrument cluster screw and tighten to 2.2-2.8 Nm
(20-24 in-lbs).
11. Install Maxi-Fuse.
Figure 1-16. Instrument Cluster Mounting Screw Location
pd0021b
Tighten
first
3
4
2
1
5
FRONT
1.
2.
3.
4.
5.
Lower clamp
Cast-in spacers (2)
Rear screw (2)
Front screw (2)
Upper clamp
Figure 1-17. VRSCB Models
2005 PDI: All Models
1-9
REMOVING VEHICLE FROM PALLET
b0458xpx
All Models
1WARNING
Always have someone steady motorcycle while each
strap is being removed to prevent tipping. Motorcycle
front suspension is secured in a compressed state by
two nylon straps. Releasing strap tension on one side of
motorcycle could result in the front of motorcycle rising
and leaning abruptly to opposite side, which could result
in death or serious injury.
Figure 1-18. Opening Ratchet Lever
1WARNING
Always wear safety glasses and gloves and keep
bystanders at a safe distance when uncrating the motorcycle. When released, each strap will unwind rapidly from
its ratchet lever, and end of strap could recoil in an outward direction, which could result in death or serious
injury.
1.
pd0051
Remove crating straps.
a.
Have an assistant hold the motorcycle’s handlebars.
b.
See Figure 1-18. Start with the right side crating
strap. Depress (in opposite direction of spool) and
hold down the spring-loaded ratchet release.
c.
See Figure 1-19. Swing open the ratchet lever to the
release position; tensioned nylon strap will rapidly
unwind. remove strap and any protective padding
from pallet.
1CAUTION
On VRSC models, a third strap is located at the left rear.
After this rear strap is removed, unscrew the rear eyebolt to prevent tripping and falling over it. Falling could
result in minor or moderate injury. Also, if eyebolt is not
removed, the left radiator trim or other low-left-side components could be damaged when motorcycle is rolled off
pallet.
1-10
2005 PDI: All Models
Figure 1-19. Strap Ratchet Lever (Release Position)
2.
See Figure 1-20. Place a 2x4 in. (50.8x101.6 mm) board
between steel cross braces (see arrow) behind front tire
to aid rolling motorcycle rearward off pallet.
3.
Carefully roll vehicle off pallet.
1WARNING
Be sure jiffy stand is fully retracted before riding. If jiffy
stand is not fully retracted, it can contact the road surface causing loss of vehicle control, which could result
in death or serious injury. (00007a)
7770
1WARNING
Improperly aligned or adjusted handlebars can contact
fuel tank when turned to left or right fork stops. Contact
with fuel tank while riding can cause loss of vehicle control resulting in death or serious injury.
4.
Slowly turn handlebars back and forth to the full right and
full left fork stops to be sure handlebars (and/or turn signals on some models) do not contact fuel tank. Also be
sure cables and wiring are not pinched or stretched as
handlebars are turned back and forth.
a.
If contact between handlebars and fuel tank occurs
and handlebars are properly centered, perform handlebar adjustment again (see ADJUSTING HANDLEBARS– ALL MODELS), raising handlebars as
necessary to clear fuel tank.
b.
On models with turn signals mounted on handlebar
control housings, if turn signal contacts fuel tank,
adjust turn signals and/or handlebar control housings according to appropriate Service Manual
instructions.
Figure 1-20. Vehicle Pallet
1WARNING
Always park motorcycle on a level, firm surface. An
unbalanced motorcycle can fall over which could result
in death or serious injury. (00039a)
1WARNING
The jiffy stand locks when placed in the full forward
(down) position with vehicle weight on it. If the jiffy stand
is not in the full forward (down) position with vehicle
weight on it, the vehicle can fall over which could cause
death or serious injury. (00006a)
1WARNING
Throttle control must operate freely without binding.
Irregular or sticking throttle cables could cause a loss of
control, leading to an accident which could result in
death or serious injury.
2005 PDI: All Models
1-11
CLUTCH HAND LEVER
10702
2
1
NOTE
See Figure 1-21. All Dyna models have Maxi-Fuse
wrapped in plastic wrapping around clutch hand lever
and left handlebar grip.
●
See Figure 1-22. See Figure 1-23. All Sportster models
have Maxi-Fuse and headlamp snap cap fitted into protective foam on clutch hand lever and left handlebar grip.
Save snap cap for installation after headlamp has been
adjusted. Sportster model XL 883L also has righthand
mirror fitted into protective foam.
●
1.
Remove plastic wrapping or protective foam from clutch
hand lever and left handlebar grip.
2.
If handlebar controls need to be adjusted, perform the
following procedure.
a.
See Figure 1-24. Loosen, but do not remove, clutch
control housing clamp screws (1) and handlebar
switch housing clamp screws (2).
b.
Rotate clutch control housing and handlebar switch
housing as necessary for correct position and rider
comfort.
c.
Beginning with the top screw, tighten clutch control
housing clamp screws. All Sportster models: tighten
to 108-132 in-lbs (12.2-14.9 Nm). All other models:
tighten to 60-80 in-lbs (6.8-9.0 Nm).
d.
Tighten handlebar switch housing clamp screws to
35-45 in-lbs (4.0-5.1 Nm).
3
1.
2.
3.
Clutch lever restraining foam
Headlamp snap cap (XL 883 and XL 1200R only)
30-amp Maxi-Fuse
Figure 1-22. Location of Maxi-Fuse and Snap Cap on
Clutch Hand Lever–All Sportster Models Except XL 883L
10703
5
1
10616
4
3
2
1.
2.
3.
4.
5.
Clutch lever restraining foam
Headlamp snap cap
30-amp Maxi-Fuse
Mirror
Package of mirror mounting hardware
Figure 1-23. Location of Maxi-Fuse and Snap Cap on
Clutch Hand Lever–Sportster XL 883L
Figure 1-21. Location of Maxi-Fuse on Clutch
Hand Lever–Dyna Models
pd0217
2
1
2
1.
2.
Clutch control housing clamp screw (2)
Handlebar switch housing clamp screw (2)
Figure 1-24. Left Hand Controls (Typical)
1-12
2005 PDI: All Models
FRONT BRAKE HAND LEVER
1CAUTION
If handlebar controls need to be adjusted, perform the following procedure.
1.
See Figure 1-25. Loosen, but do not remove, front brake
master cylinder clamp screws (1) and handlebar switch
housing clamp screws (2).
2.
Rotate master cylinder housing and handlebar switch
housing as necessary for correct position and rider comfort.
3.
Beginning with the top screw, tighten front brake master
cylinder clamp screws. All Sportster models: tighten to
108-132 in-lbs (12.2-14.9 Nm). All other models: tighten
to 60-80 in-lbs (6.8-9.0 Nm).
4.
Tighten handlebar switch housing clamp screws to 35-45
in-lbs (4.0-5.1 Nm).
pd0218
4
Direct contact of D.O.T. 5 brake fluid with eyes can cause
eye irritation, swelling, and redness. Avoid eye contact.
In case of eye contact, flush with large amounts of water
and get medical attention. Swallowing large amounts of
D.O.T. 5 brake fluid can cause digestive discomfort. If
swallowed, obtain medical attention. Use in well ventilated area. KEEP OUT OF REACH OF CHILDREN.
(00144a)
1CAUTION
Direct contact of D.O.T. 4 brake fluid with eyes can cause
irritation. Avoid eye contact. In case of eye contact flush
with large amounts of water and get medical attention.
Swallowing large amounts of D.O.T. 4 brake fluid can
cause digestive discomfort. If swallowed, obtain medical
attention. Use in well ventilated area. KEEP OUT OF
REACH OF CHILDREN. (00240a)
3
CAUTION
2
1
CAUTION
2
1.
2.
3.
4.
D.O.T. 4 brake fluid will damage painted and molded-in
color surfaces it comes in contact with. Always use caution and protect surfaces from spills whenever brake
work is performed. Failure to comply can result in cosmetic damage. (00239a)
Front brake master cylinder clamp screw (2)
Handlebar switch housing clamp screw (2)
Reservoir sightglass (XL models)
Reservoir sightglass (all models except XL)
Figure 1-25. Right Hand Controls (Typical)
IMPORTANT NOTE
All Touring model motorcycles use D.O.T. 4 HYDRAULIC
BRAKE FLUID (Part No. 99953-99A). All Dyna, Softail,
VRSC and Sportster models use D.O.T 5 SILICONE
HYDRAULIC BRAKE FLUID (Part No. 99902-77: 12 oz.,
99901-77: 1 gal.). If it is necessary to top off the brake
fluid in the reservoir, make sure you add the correct type.
Cover handlebar switches with a shop towel before adding brake fluid to front master cylinder reservoir. Spilling
brake fluid on handlebar switches may render them inoperative.
NOTE
AUSTRALIAN MODELS ONLY: Measure from tip of clutch
lever to tip of brake lever. Measurement must not exceed 1
meter in length. If it does, re-adjust accordingly.
FRONT BRAKE MASTER CYLINDER
RESERVOIR
See Figure 1-25. View reservoir sightglass (3 or 4) and verify
fluid presence. Sightglass should appear dark if fluid is
present. If sightglass is not dark, add brake fluid. See Service
Manual. Use only D.O.T. 5 SILICONE HYDRAULIC BRAKE
FLUID (Part No. 99902-77: 12 oz., 99901-77: 1 gal.). for all
Dyna, Softail, VRSC and Sportster models. Use only D.O.T. 4
HYDRAULIC BRAKE FLUID (Part No. 99953-99A) for all
Touring models. Wash all residue of D.O.T. 4 brake fluid spills
off vehicle with water.
2005 PDI: All Models
1-13
VEHICLE CLEANUP
1WARNING
Do not let the brakes, engine, mufflers or air cleaner get
wet when washing your motorcycle. Allowing these components to get too wet can adversely affect their performance, which could result in death or serious injury.
Start engine immediately after washing, and make sure
brakes and engine are operating properly before riding in
traffic. (00078b)
RETURNING STEEL PALLETS
NOTE
International Dealers/Distributors should check with their H-D
office to determine whether or not to return pallets.
1.
See Figure 1-26. Remove and discard plastic motor shim
(1).
7770
3
CAUTION
1
2
Avoid spraying water directly on handlebar switches. Wet
handlebar switches may be inoperative.
Remove protective shipping tape from motorcycle. Wash
entire motorcycle before beginning actual predelivery inspection. If vehicle is equipped with frame downtube reflectors,
remove any plastic cable straps wrapped around reflectors
(cable straps are used during assembly at factory for retaining reflectors to downtubes while reflector adhesive cures).
2
COSMETIC QUALITY
Paint Finish Inspection and Repair
Under good lighting conditions, examine all painted parts for
any damage or irregularities in the paint finish. To aid the
dealer network in addressing quality concerns, Harley-Davidson Motor Company has developed a zoning and criteria protocol, which enables us to exceed customer’s expectations. If
you discover any condition requiring repair, use Paint Repair
Kit (Part No. HD-39994); available through Kent-Moore, at the
following address, to correct the condition.
Kent-Moore
28635 Mound Rd
1.
2.
3.
Plastic motor shim
Eye-bolts
Enclosed area
Figure 1-26. Vehicle Pallet
2.
Turn eye-bolts (2) so they are parallel with sides of pallet.
This will allow stacking pallets for shipment.
NOTE
On VRSC pallets place eye-bolt from rear in enclosed area
(3) of pallet.
3.
Place hold-down straps you are returning to factory in
enclosed area (3) of pallets.
Warren, Michigan 48092-3499
(phone) 1-800-345-2233
Instructions covering painted part repair are included with the
Paint repair Kit. Additional paint repair information is available
from Harley-Davidson on the PHD training videotape No. 136.
Additional cosmetic quality information is available in the Harley-Davidson Cosmetic Booklet (Part No. HD-99514-05) and
on-line Cosmetic Training located on HDU On-line.
1-14
2005 PDI: All Models
CAUTION
Do not mix 29 in. (736.6 mm) width pallets with 43 in.
(1.09 m) width pallets on the same 7-pallet stack. Mixing
pallets of different width could result in an unstable bundle and pallet damage.
4.
Stack seven pallets keeping all eye-bolts on same end.
5.
Band pallets by threading hold-down straps through both
end cross members of top and bottom pallets. (If necessary connect two straps together.)
6.
Tighten straps to secure pallet bundles.
7.
Call, Fax, E-mail or use www.h-dnet.com to arrange
pallet return to Harley-Davidson.
MAINTENANCE-FREE BATTERIES
9
DE
OC NO
8
7
SE
AU
6
5
4
JY
L
R UKE IN
HAWMAAD
IL
M
R
PA
1WARNING
3
MA AP MY JU
U S
A
FE
I N
JA
M A
D E
2
arge
LICYt ch
T POthou
MEN wi or
ST ed s
JU ac erialte of
pl at
D AD re in m da date
m
Y AN l be fro m
NT wi ctive s s fro r 6 e ll
RA tte ry defe onthonth . Afte of th ry wi
WARs ba be 12 m 6 m hase ths tte
i to
ba
Th und ship se or purc monthe ged d on
r
,
if forkman rchaunte the 12 se char ba se
ha r
wo cle pue-co thin rc hasershiprn
pu
e
vehi er-thbut wite r purc ne retu of ra bl
ov
e
s
of ths, cound th of owe ofonth nsfe
,
d
mon -the-ed an rio the timof m t tra tors
er
pe
r no
ov replacthe ice at mbe y is juvena e.
us
be forlar pr e nu rra nt of re ab
ly
or
on regu ver this wae use ect
gl
N1
the atedy. Th by the, ne
SO 0
prorrra nt ided rolyt
ID532
wa is vo elect
V
I
d
an oper
DA, W.A.
pr
im
EY-EE U.S
1
All models are equipped with maintenance-free batteries that
are permanently sealed, valve-regulated, lead/calcium and
sulfuric acid electrolyte batteries. The electrolyte is immobilized in a glass fibre separator. Therefore, the batteries are
identified as “Type AGM” which is the acronym for Absorbed
Glass Mat technology. The batteries are shipped pre-charged
and ready to be put into service. Do not attempt to open
these batteries for any reason. These batteries do not have a
vent tube. Perform Voltmeter Test to check if battery requires
charging.
0
f1730x8x
T
.
NO
Figure 1-27. Warning Label
Batteries contain sulfuric acid, which could cause severe
burns to eyes and skin. Wear a protective face shield,
rubberized gloves and protective clothing when working
with batteries. KEEP BATTERIES AWAY FROM CHILDREN. (00063a)
Table 1-1. Battery Electrolyte Antidote
PHYSICAL
LOCATION
PROCEDURE
External
Flush with water
Internal
Drink large quantities of milk or water,
followed by milk of magnesia, vegetable oil
or beaten eggs. Call doctor immediately
Eyes
Flush with water, get immediate
medical attention.
f2180x3x
1
1.
2.
3.
2
Contents are corrosive
Wear safety glasses
Contents are explosive
3
4
4.
5.
6.
5
6
Keep flames away
Read instructions
Keep away from children
Figure 1-28. Battery Warning Label
2005 PDI: All Models
1-15
DATE OF MANUFACTURE CODE
f1742x8x
See Figure 1-29. The battery date code sticker has a number
and two letters. The number signifies the year the battery was
manufactured.
9 – 1999
0 – 2000
1 – 2001
2 – 2002
3 – 2003
4 – 2004
5 – 2005
The letters signify the month the battery was activated.
JA–January
MY–May
SE–September
FE–February
JU–June
OC–October
MA–March
JY–July
NO–November
AP–April
AU–August
DE–December
VOLTMETER TEST
Refer to Table 1-2. The voltmeter test provides a general indicator of battery condition. Check the voltage of the battery to
make sure it is 12.6 V. If the open circuit (disconnected) voltage reading is below 12.6 V, charge battery and recheck voltage after battery has sat 1-2 hours.
Battery date of
manufacture code
CHARGING BATTERY
NOTE
The sealed AGM batteries do not need to be removed for
charging. Only remove battery if cable connection or marking
the Warranty Tag requires it.
1.
Connect the red battery charger lead to the positive terminal of the battery and the black charger lead to the
negative terminal.
2.
Refer to Table 1-2. Charge battery for time specified in
Table 1-2.
3.
If battery gets hot, over 110˚F (44˚C) (warm to the
touch), discontinue charging and let battery cool down.
1WARNING
Unplug or turn OFF battery charger before disconnecting
charger cables from battery. Disconnecting clamps with
charger ON can cause a spark and battery explosion,
which could result in death or serious injury. (00067a)
1-16
2005 PDI: All Models
Figure 1-29. Battery Warranty Tag/Date Code Sticker
4.
After the battery is fully charged, disconnect the black
battery charger lead to the negative (–) terminal of the
battery.
5.
Disconnect the red battery charger lead to the positive
(+) terminal of the battery.
6.
See Figure 1-29. Mark the date on the battery warranty
tag by removing the applicable month and year. If the
date is after the 15th day of the month, advance the date
to the next month. For example, if the battery is put in
use July 22, punch out the month of August, which is
abbreviated on the tag as “AU.” To determine the correct
number to punch out for the year, just reference the last
digit of the current year. Therefore, the number “5” is
punched to signify the year 2005.
Table 1-2. Battery Charging Rates/Times (Approximate)
BATTERY
AMP HOUR
VRSC,
SPORTSTER
12
DYNA,
SOFTAIL
18
TOURING
28
STATE OF CHARGE
3 AMP
CHARGER
6 AMP
CHARGER
10 AMP
CHARGER
20 AMP
CHARGER
VOLTAGE
% OF CHARGE
12.8
100%
-
-
-
-
12.6
75%
70 minutes
34 minutes
20 minutes
10 minutes
12.3
50%
2 hours,
20 minutes
70 minutes
40 minutes
20 minutes
12.0
25%
3 hours,
20 minutes
1 hour,
40 minutes
1 hour
30 minutes
11.8
0%
4 hours,
30 minutes
2 hours,
14 minutes
1 hour,
20 minutes
40 minutes
12.8
100%
-
-
-
-
12.6
75%
1.75 hours
50 minutes
30 minutes
15 minutes
12.3
50%
3.5 hours
1.75 hours
1 hour
30 minutes
12.0
25%
5 hours
2.5 hours
1.5 hours
45 minutes
11.8
0%
6 hours,
40 minutes
3 hours,
20 minutes
2 hours
1 hour
12.8 V
100%
-
-
-
-
12.6 V
75%
2.5 hours
1.25 hours
45 minutes
25 minutes
12.3 V
50%
5 hours
2.5 hours
1.5 hours
50 minutes
12.0 V
25%
7.5 hours
3.75 hours
2.25 hours
70 minutes
11.8 V
0%
10 hours
5 hours
3 hours
1.5 hours
NOTE
The figures listed above assume that the battery is charging
at room temperature. If warmer than room temperature, use a
slightly shorter charging time. If colder, use a slightly longer
charging time.
NOTE
The use of constant current chargers to charge sealed maintenance-free batteries is not recommended. Any overcharge
will cause dry-out and premature battery failure. If a constant
current charger is the only type available, do not exceed the
charge times listed above and do not continue charging the
battery if it gets hot. When charging, never exceed 15 volts for
more than 30 minutes.
2005 PDI: All Models
1-17
WARNING LABEL PLACEMENT
(ALL VEHICLES SOLD OUTSIDE OF
THE UNITED STATES)
All dealers outside of the United States are required to apply
a warning label to the vehicle in the local language of the customer. A sheet of warning labels (Part No. 99942-05) is provided in the Owner’s Kit.
All Sportster Models
See Figure 1-32. Peel appropriate label from sheet. Apply
label on top of air cleaner cover, centered on cover and lined
up with edge of air cleaner back plate.
10685
Apply the appropriate local language version of the warning
label as required to suit your local market. If your local language is not represented on this label sheet, use the English
language label.
All EFI Big Twin Models
See Figure 1-30. Peel appropriate label from sheet. Apply
label on top of air cleaner cover, centered on cover and lined
up with edge of air cleaner back plate.
10683
Figure 1-32. Warning Label Placement–
All Sportster Models (Typical)
All VRSC Models
See Figure 1-33. Open seat. Peel appropriate label from
sheet. Apply label centered on rear end of air cleaner cover
with bottom edge of label 1.0 in. (25.4 mm) from rear edge of
air cleaner cover.
10686
Figure 1-30. Warning Label Placement–
All Big Twin EFI (Typical)
All Carbureted Big Twin Models
See Figure 1-31. Peel appropriate label from sheet. Apply
label on top of air cleaner cover, centered on cover and lined
up with edge of carburetor cutout in air cleaner back plate.
1.0 in
(25.4 mm)
10684
Figure 1-33. Warning Label Placement–
All VRSC Models (Typical)
Figure 1-31. Warning Label Placement–
All Big Twin Carbureted (Typical)
1-18
2005 PDI: All Models
SYSTEM PROBLEMS
1.2
GENERAL
Poor Performance
All system problems fall into at least one of three general categories.
The engine starts but there are performance problems. These
problems may include poor fuel economy, rough idle, engine
misfire, engine hesitation, severe spark knock, etc.
No Start
Check Engine Lamp
The engine cranks over freely, but will not start. This does not
include situations where the engine will not crank, such as a
security disabled starter, dead battery, etc. This condition
assumes that all obvious checks (fuel in tank, etc.) have been
made.
The Check Engine lamp indicates the ECM has determined a
fault condition exists. There may also be starting or performance problems.
In the event that you encounter any system problems during
set-up, see the appropriate Service Manual or Electrical
Diagnostic Manual for your model.
2005 PDI: All Models
1-19
NOTES
1-20
2005 PDI: All Models
PREDELIVERY: TOURING MODELS
SUBJECT
PAGE NO.
2.1 Specifications . . . . . . . . . . . . . . . . . . . . . . . . . . . . . . . . . . . . . . . . . . . . . . . . .
Torque Values . . . . . . . . . . . . . . . . . . . . . . . . . . . . . . . . . . . . . . . . . . . . . . . .
2005 Touring Models Specifications . . . . . . . . . . . . . . . . . . . . . . . . . . . . . . .
2.2 Initial Assembly . . . . . . . . . . . . . . . . . . . . . . . . . . . . . . . . . . . . . . . . . . . . . . . .
Battery Testing And Charging . . . . . . . . . . . . . . . . . . . . . . . . . . . . . . . . . . . .
Installing Maxi-Fuse . . . . . . . . . . . . . . . . . . . . . . . . . . . . . . . . . . . . . . . . . . . .
Installing Fuel Pump Fuse . . . . . . . . . . . . . . . . . . . . . . . . . . . . . . . . . . . . . . .
Installing Data Link Connector . . . . . . . . . . . . . . . . . . . . . . . . . . . . . . . . . . . .
Installing Tour-Pak . . . . . . . . . . . . . . . . . . . . . . . . . . . . . . . . . . . . . . . . . . . . .
Seats And Passenger Strap . . . . . . . . . . . . . . . . . . . . . . . . . . . . . . . . . . . . . .
Installing Sidecovers and Saddlebags . . . . . . . . . . . . . . . . . . . . . . . . . . . . . .
Radio Antenna Mast Installation . . . . . . . . . . . . . . . . . . . . . . . . . . . . . . . . . .
Rear Speaker Harnesses . . . . . . . . . . . . . . . . . . . . . . . . . . . . . . . . . . . . . . . .
Installing Windshield . . . . . . . . . . . . . . . . . . . . . . . . . . . . . . . . . . . . . . . . . . . .
Mirrors . . . . . . . . . . . . . . . . . . . . . . . . . . . . . . . . . . . . . . . . . . . . . . . . . . . . . .
Throttle Control Cables . . . . . . . . . . . . . . . . . . . . . . . . . . . . . . . . . . . . . . . . .
Rear Suspension Air Pressure . . . . . . . . . . . . . . . . . . . . . . . . . . . . . . . . . . . .
2.3 Lubrication System . . . . . . . . . . . . . . . . . . . . . . . . . . . . . . . . . . . . . . . . . . . . .
Engine Oil Level . . . . . . . . . . . . . . . . . . . . . . . . . . . . . . . . . . . . . . . . . . . . . . .
Engine Oil Level (Side Car Equipped Vehicles) . . . . . . . . . . . . . . . . . . . . . . .
Transmission Lubricant . . . . . . . . . . . . . . . . . . . . . . . . . . . . . . . . . . . . . . . . .
Chaincase Lubricant Level and Clutch Operation . . . . . . . . . . . . . . . . . . . . .
2.4 Fuel System . . . . . . . . . . . . . . . . . . . . . . . . . . . . . . . . . . . . . . . . . . . . . . . . . . .
General . . . . . . . . . . . . . . . . . . . . . . . . . . . . . . . . . . . . . . . . . . . . . . . . . . . . . .
Checking Quick Connect Fuel Line Fitting–Fuel Injected Models . . . . . . . . .
Fuel Tank . . . . . . . . . . . . . . . . . . . . . . . . . . . . . . . . . . . . . . . . . . . . . . . . . . . .
Evaporative Emissions Control System–California Models Only . . . . . . . . . .
2.5 Electrical System . . . . . . . . . . . . . . . . . . . . . . . . . . . . . . . . . . . . . . . . . . . . . . .
Headlamp . . . . . . . . . . . . . . . . . . . . . . . . . . . . . . . . . . . . . . . . . . . . . . . . . . . .
Auxiliary Lamps . . . . . . . . . . . . . . . . . . . . . . . . . . . . . . . . . . . . . . . . . . . . . . .
Directional Lamps . . . . . . . . . . . . . . . . . . . . . . . . . . . . . . . . . . . . . . . . . . . . . .
Front Turn Signals (FLHRS Only) . . . . . . . . . . . . . . . . . . . . . . . . . . . . . . . . .
Instrument Panel . . . . . . . . . . . . . . . . . . . . . . . . . . . . . . . . . . . . . . . . . . . . . .
Indicator Lamps/Controls . . . . . . . . . . . . . . . . . . . . . . . . . . . . . . . . . . . . . . . .
2.6 Tires . . . . . . . . . . . . . . . . . . . . . . . . . . . . . . . . . . . . . . . . . . . . . . . . . . . . . . . . .
Front and Rear Tires . . . . . . . . . . . . . . . . . . . . . . . . . . . . . . . . . . . . . . . . . . .
2.7 Brake System . . . . . . . . . . . . . . . . . . . . . . . . . . . . . . . . . . . . . . . . . . . . . . . . .
Brakes . . . . . . . . . . . . . . . . . . . . . . . . . . . . . . . . . . . . . . . . . . . . . . . . . . . . . .
ABS System (Police Vehicles–Optional Equipment) . . . . . . . . . . . . . . . . . . .
2.8 Dealer Road Test . . . . . . . . . . . . . . . . . . . . . . . . . . . . . . . . . . . . . . . . . . . . . .
Road Test . . . . . . . . . . . . . . . . . . . . . . . . . . . . . . . . . . . . . . . . . . . . . . . . . . . .
Idle Speed: Carbureted Only . . . . . . . . . . . . . . . . . . . . . . . . . . . . . . . . . . . . .
2.9 Customer Delivery . . . . . . . . . . . . . . . . . . . . . . . . . . . . . . . . . . . . . . . . . . . . . .
Notice To Dealer . . . . . . . . . . . . . . . . . . . . . . . . . . . . . . . . . . . . . . . . . . . . . .
2.10 Vehicle PDI Checklist . . . . . . . . . . . . . . . . . . . . . . . . . . . . . . . . . . . . . . . . . .
Prior to Customer Delivery . . . . . . . . . . . . . . . . . . . . . . . . . . . . . . . . . . . . . . .
At Point of Customer Delivery . . . . . . . . . . . . . . . . . . . . . . . . . . . . . . . . . . . .
2-1
2-1
2-1
2-2
2-2
2-2
2-2
2-3
2-3
2-4
2-4
2-6
2-6
2-7
2-10
2-10
2-11
2-12
2-12
2-12
2-13
2-13
2-14
2-14
2-14
2-14
2-15
2-16
2-16
2-16
2-16
2-16
2-16
2-17
2-18
2-18
2-19
2-19
2-19
2-20
2-20
2-20
2-21
2-21
2-22
2-22
2-22
II
1
SPECIFICATIONS
2.1
TORQUE VALUES
The following torque values are included for fasteners that
may be loosened and tightened during Predelivery and
Setup. Any fasteners that are not loosened/removed do not
need to be checked during predelivery and setup.
Table 2-1. Torque Values
ITEM
TORQUE
Handlebar clamp screws (front and rear)
12-16 ft-lbs
16.3-21.7 Nm
Clutch inspection cover screws
84-108 in-lbs
9.5-12.2 Nm
FLHT windshield screws
25-30 in-lbs
2.8-3.4 Nm
FLTR windshield screws
6-13 in-lbs
0.7-1.5 Nm
Saddlebag mounting bracket bolts
60-96 in-lbs
6.8-10.8 Nm
Tour-Pak®
96-120 in-lbs
10.8-13.5 Nm
Nacelle acorn nuts
72-108 in-lbs
8.1-12.2 Nm
Handlebar clamp shroud screws
10-20 in-lbs
1.1-2.3 Nm
Handlebar clamp shroud nut
10-20 in-lbs
1.1-2.3 Nm
Nacelle trim nut
15-20 in-lbs
1.7-2.3 Nm
FLHR/
FLHP
mounting bolts
2005 TOURING MODELS
SPECIFICATIONS
Must be checked at set-up.
Idle Speed: 950 RPM at
Operating Temperature
Use 950 RPM during Predelivery and Setup adjustments.
Engine idle speed may increase during engine break-in. Use
idle speed listed in the Touring Models Service Manual at Initial Maintenance check.
Table 2-2. Capacities
Component
NOTES
ENGLISH
METRIC
Oil tank w/filter (Dry)
4 qt.
3.79 liter
Transmission (Wet)
20-24 oz
591-710 ml
Primary Chaincase
32 oz
946 ml
NOTE
The idle speed on electronic fuel injected models can only be
set using a diagnostic tool such as DIGITAL TECHNICIAN
(Part No. HD-44750).
FLHTCSE2
are shipped with
All touring models except
20W50 Harley-Davidson 360 Motor oil. The FLHTCSE2
model ships with Syn-3® lubricant in the engine, primary
and transmission.
2005 PDI: Touring Models
2-1
INITIAL ASSEMBLY
BATTERY TESTING AND CHARGING
1WARNING
Batteries contain sulfuric acid, which could cause severe
burns to eyes and skin. Wear a protective face shield,
rubberized gloves and protective clothing when working
with batteries. KEEP BATTERIES AWAY FROM CHILDREN. (00063a)
1WARNING
Never remove warning label attached to top of battery.
Failure to read and understand all precautions in warning
could result in death or serious injury. (00064a)
1WARNING
Battery posts, terminals and related accessories contain
lead and lead components, chemicals known in the State
of California to cause cancer and birth defects or other
reproductive harm. Wash hands after handling. (00019a)
NOTE
It will be necessary to remove the left saddlebag and left sidecover to gain access to the Maxi-Fuse connector.
1.
Check battery voltage at Maxi-Fuse plug. With fuse
removed, place red voltmeter probe on battery side (terminal A) of Maxi-Fuse plug, and black voltmeter probe on
a suitable ground.
2.
If the open circuit (disconnected) voltage reading is 12.6
VDC or greater the battery is ready for use.
3.
See Section 1. Mark the date on the battery warranty tag
by removing the applicable month and year. Month and
year punches may be removed with the point of a screwdriver without removing battery.
4.
If the open circuit (disconnected) voltage reading is
below 12.6 VDC, refer to Table 1-2, 28 amp-hour battery,
in Section 1 and charge battery at rate and time specified.
5.
Recheck battery voltage by repeating step 1 above. If
voltage now is 12.6 VDC or greater, perform steps 2 and
3 above.
6.
If the open circuit (disconnected) voltage reading is still
below 12.6 VDC, the battery must be replaced.
2-2
2005 PDI: Touring Models
2.2
INSTALLING MAXI-FUSE
The 40 amp Maxi-Fuse provides battery power to the ignition
switch and ECM. The 40 amp Maxi-Fuse is not installed at
the factory. It is shipped in the saddlebag of the motorcycle.
and is to be installed under the left sidecover. Cut the cable
tie securing the Maxi-Fuse wire to the frame. See Service
Manual for Maxi-Fuse installation procedure.
INSTALLING FUEL PUMP FUSE
NOTE
It will be necessary to remove the right saddlebag and right
sidecover to gain access to the fuel pump fuse.
For fuel-injected vehicles, it will be necessary to install the 15amp fuel pump fuse that is located in the spare fuse slot of
the fuse-block located under the right sidecover. See Service
Manual.
INSTALLING TOUR-PAK®
INSTALLING DATA LINK
CONNECTOR
See Figure 2-1. The data link connector [91] (2) mounts in a
clip on the electrical bracket (1) under the right side cover.
Cut the cable tie securing the data link connector harness to
the frame and snap the connector into its clip on the electrical
bracket.
NOTE
The seat screw is not factory installed on models with TourPaks. The seat screw is in the Parts Kit, Part No. 53318-99.
On Ultra models, see Figure 2-2. Remove map pouch and
molded Tour-Pak liner from Tour-Pak prior to performing the
following procedures. Install both after work is completed.
pd0215
5029
1
2
Carbureted
Figure 2-2. Tour-Pak Liner and Map Pouch
pd0216
Five Bolt Mounting
Note that Tour-Pak has seven mounting holes which allow it
to be positioned forward on luggage rack for shipping
only. Mount Tour-Pak in the rearward position (front four
holes and rear center hole) so seat access screw can be
reached.
1
1.
To avoid dropping or scratching the Tour-Pak, disconnect
the radio antenna cable and Tour-Pak lights connectors
and feed wiring out through hole at front of Tour-Pak
(after removing grommet). On Ultra models, repeat the
procedure to release the CB antenna cable and connector.
2.
If not already removed, remove seat.
3.
Place a protective blanket across the frame tubes in the
seat area.
4.
From inside Tour-Pak, remove the nuts and oversized
shipping washers and then lift the Tour-Pak off the
mounting bolts setting it on the blanket. Retain nuts for
use later, discard large shipping washers.
2
Fuel injected
1.
2.
Electrical bracket
Data link connector [91]
Figure 2-1. Data Link Connector
2005 PDI: Touring Models
2-3
5.
See Figure 2-3. Remove and discard the pushnuts (5)
from the mounting bolts (1), and pull the bolts (1) and
washers (2) from the luggage rack (although the spacers
(4) may be left in place between the top support tube (3)
and the license plate bracket).
6.
Locate Parts kit, Part no. 53318-99 in Tour-Pak or saddlebag. The plastic bag contains three spacers, bolts,
nuts and five washers used to mount Tour-Pak. Also in
parts kit is the seat retaining screw.
7.
See Figure 2-4. Move Tour-Pak to rear so five mounting
holes align with five holes in top support tube.
NOTE
Make certain bolts are installed with threaded end down. Bolt
head and washer must be inside Tour-Pak.
8.
From inside Tour-Pak, install right rear bolt (1) and
washer (2) through bottom of Tour-Pak, hole in top support tube (3), luggage rack spacer (4), and hole in
license plate bracket (5).
9.
Install washer (2) and locknut (6) on right rear bolt and
tighten “finger-tight”. (This fastener will keep Tour-Pak in
position while remaining four bolts are installed.)
10. Install antenna ground lead ring terminal under washer
of rear mounting bolt and install rear bolt as shown in
Figure 2-4.
11. Install remaining bolts, washers, spacers and nuts as
shown in Figure 2-4.
12. Tighten five nuts and bolts to 96-120 in-lbs (10.8-13.5
Nm).
pd0188
1
5
3
4
2
1.
2.
3.
4.
5.
Bolt, 1/4-20 x 2-1/4 in. (2)
Washer 1/4 in. inside dia. (2) (under bolt head)
Top support tube
Luggage rack spacer (2)
Pushnuts (2)
Figure 2-3. Tour-Pak Shipping Fasteners
2-4
2005 PDI: Touring Models
SEATS AND PASSENGER STRAP
Refer to Touring Models Owner’s Manual for seat and passenger strap removal and installation instructions. Road Glide
models must have the seat strap installed per the appropriate
Service Manual.
INSTALLING SIDECOVERS AND
SADDLEBAGS
Check that each saddlebag is firmly seated on its saddlebag
bottom support rail. Check that adequate clearance exists
between saddlebags and sidecovers. The front and rear
mounting brackets of each saddlebag have slotted mounting
holes (on the bracket ends which attach to the motorcycle) to
allow for vertical adjustment of the saddlebag. If adjustment is
necessary, loosen the bolts which secure the saddlebag
mounting brackets to the motorcycle. Press down and to the
rear firmly on closed saddlebag, and then tighten the bolts to
60-96 in-lbs (6.8-10.8 Nm) torque.
NOTE
It is essential that the Tour-Pak be installed in the rearward
position or seat removal/installation will not be possible due to
interference with the forward-mounted Tour-Pak.
On Ultra models, see Figure 2-5. Check that AM/FM/WB
antenna (left side) cable is in its two clips on left side of TourPak floor. Also check that CB antenna (right side) cable is in
two clips on right side of Tour-Pak floor. Verify that ground
strap of AM/FM/WB antenna is securely fastened to base
plate in Tour-Pak with rear mounting screw.
pd0187e
1
Bottom view showing
spacer (4) between license
plate bracket (5) and top
support tube (3).
2
4
4
3
3
5
6
5
2
2
6
1.
2.
3.
4.
5.
6.
Bolt, 1/4-20 x 2-1/4 in. (5)
Washer 1/4 in. inside dia. (7)
Top support tube
Luggage rack spacer (5)
License plate bracket
Locknut, Nylon cap, 1/4-20 (5)
Figure 2-4. Tour-Pak Mounting
f1467b2x
Figure 2-5. Antenna Cable Clip
(CB Antenna Cable Shown)
2005 PDI: Touring Models
2-5
RADIO ANTENNA MAST
INSTALLATION
REAR SPEAKER HARNESSES
1.
See Figure 2-6. Cut cable straps securing rear speaker
harnesses to passenger handrail (both right and left
sides). Locate plastic grommets packed in Tour-Pak.
2.
Press down on seat cushion, slide harness and connector into speaker box.
3.
Install split plastic grommet on harness and push grommet into hole in speaker box.
4.
Repeat steps 2 and 3 for left side.
Open the Tour-Pak lid.
FLHTC models are equipped with one antenna mast. Thread
the mast securely over the antenna mounting stud and
tighten the set screw.
FLHTCU models are equipped with two antenna masts —
one with loading coil for CB radio for right side mounting, the
other for AM/FM radio for left side.
On Ultra models only, use soapy water as a lubricant to install
a protective rubber boot (provided with vehicle) over tip of
AM/FM antenna mast; slide boot down mast and over springloaded base. Repeat for CB antenna, but, loosen upper setscrew in base, slide mast from base and slide boot onto mast
below loading coil. Reassemble mast to base and adjust distance between bottom of loading coil to top of base to 1 in.
6712
1
Thread each mast securely over its antenna mounting stud.
Tighten the two (3 on CB) set screws (one for antenna mast,
the other for antenna mounting stud) located in the springloaded base of each antenna and one at top of loading coil.
NOTE
Standing Wave Ratio (SWR) will be checked later in these
procedures.
6711
2
1.
2.
Right speaker harness
Plastic grommet (shown partially installed)
Figure 2-6. Rear Speaker Harness Grommets
(Seat removed for clarity)
2-6
2005 PDI: Touring Models
INSTALLING WINDSHIELD
Windshield Installation: FLTR
1.
See Figure 2-8. Place black plastic washers (4) on the
five mounting screws (3). Position rubber trim along bottom of windshield. Insert screws through windshield
holes and thread loosely into five Wellnuts (5) with rubber
washers (6).
2.
Push Wellnuts with rubber washers into holes in fairing.
3.
Beginning with the center screw and working outward
toward the rear edges of windshield, tighten all screws to
6-13 in-lbs (0.7-1.5 Nm). Make certain that the four outer
screws are located at the upper end of the slots in the
windshield.
2
FLHTC, FLHTCU, FLHTCSE (Wind Deflector) and FLHTP (Fairing)
1.
2.
See Figure 2-7. Loosen the three fasteners along the top
of the outer fairing. It is not necessary to remove the fasteners.
Slide windshield down between the inner and outer fairing over the fasteners. Position on the raised boss on the
inner fairing.
pd0173x
f2280x2x
5
1
6
4
3
Figure 2-7. Windshield Installation–FLHT Models
CAUTION
1.
2.
3.
4.
5.
6.
2
Windshield
Outer fairing
Screw (5)
Flat washer (plastic) (5)
Wellnut (5)
Flat washer (rubber) (5)
Figure 2-8. Windshield Installation–FLTR Models
Overtightening windshield fasteners may crack windshield and/or fairing.
3.
Tighten fasteners to 25-30 in-lbs (2.8-3.4 Nm).
2005 PDI: Touring Models
2-7
Windshield Installation: FLHR/C and
FLHP (Windshield)
pd0227
15
16
6
CAUTION
Be sure you position the windshield bracket between the
rubber grommets. Incorrect mounting could result in
damage to the windshield.
7
3
See Figure 2-9. Insert your fingers into the wireform latch
springs at either side of the windshield and slide the BOTTOM windshield bracket notches onto the bottom grommets.
Slide the TOP bracket notches onto the top grommets.
14
2
8
NOTE
If windshield contacts clutch cable, reposition handlebars.
1
10
5
12
OMF53
4
11
13
Figure 2-9. FLHR/C and FLHP Windshield Installation
Seat Adjustment: FLHTP
Before applying load to the seat, refer to the Police Models
Owner’s Manual for adjustment procedures of the FLHTP airsuspension seat. Confirm that air bladder is inflated to 10-psi
(69 kPa) minimum.
Instrument Mounting Bracket
Installation: FLHP
The FLHP is provided with an instrument mounting bracket.
The bracket relocates the tachometer to allow the addition of
a radio speaker, and control panel.
1.
See Figure 2-10. Remove screw (13) securing chrome
ring (12) to headlamp nacelle (8). Remove chrome ring.
2.
Remove eight fasteners (11) securing headlamp assembly (10). Squeeze two external tabs (if present) to
remove wire connector at back of headlamp bulb.
Remove headlamp assembly from vehicle.
2-8
2005 PDI: Touring Models
9
1.
2.
3.
4.
5.
6.
7.
8.
9.
10.
11.
12.
13.
14.
15.
16.
Nut
Nacelle trim
Screw
Nut
Flat washer
Fork lock plate
Screw (2)
Nacelle
Handlebar clamp shroud
Headlamp assembly
Screw (8)
Chrome headlamp ring
Screw
Stud plate
Acorn nut (2)
Tachometer bracket
Figure 2-10. FLHP Headlamp Nacelle
3.
Remove nut (1) (inside nacelle) securing nacelle trim (2).
4.
Disconnect tachometer connector [108] inside headlamp
nacelle.
5.
Remove nacelle trim. Loosen (but do not remove) front
handlebar clamp shroud screw (3), nut (4) and washer
(5).
6.
Gently pry off fork lock plate (6) at rear of handlebar
clamp shroud. Remove two screws (7) beneath lock
plate.
7.
Loosen four acorn nuts securing nacelle halves to fork
studs. Spread nacelle halves slightly and remove handlebar clamp shroud.
8.
Remove two acorn nuts (15) and flat washers securing
Tachometer and bracket (16) to handlebar clamp shroud.
9.
See Figure 2-11. A peel and stick foam tape holds the
stud plate (4) in place inside the handlebar clamp shroud
(3). Position instrument mounting bracket (2) on studs of
stud plate and secure in position using hardware provided by radio manufacturer (1).
p0044x5x
2
6
10. Using screw (5) and nut (6) provided, secure front tab of
instrument mounting bracket on handlebar clamp
shroud.
13. See Figure 2-10. Install two screws (7) to handlebar
clamp shroud and tighten to 10-20 in-lbs (1.1-2.3 Nm).
Gently press fork lock plate (6) into place on handlebar
clamp shroud.
14. Tighten front handlebar clamp shroud nut (4) to 10-20 inlbs (1.1-2.3 Nm).
5
3
11. Reinstall handlebar clamp shroud. Tighten acorn nuts
securing nacelle halves to fork studs to 72-108 in-lbs
(8.1-12.2 Nm).
12. See Figure 2-12. Mount tachometer on bracket with
acorn nuts and flat washers as shown.
1
4
1.
2.
3.
4.
5.
6.
Nut (2)
Instrument mounting bracket
Handlebar clamp shroud
Stud plate
Screw
Nut
Figure 2-11. FLHP Instrument Bracket
15. Connect tachometer lead [108].
16. Install nacelle trim (2). Install nut (1) (inside nacelle) securing nacelle trim. Tighten to 15-20 in-lbs (1.7-2.3 Nm).
5530
17. Connect wire connector to socket on back of headlamp
bulb. Install and secure headlamp assembly to nacelle
with eight fasteners.
18. Secure chrome ring (12) to headlamp nacelle with screw
(13).
NOTE
Check for adequate clearance between windshield and clutch
cable and handlebar position prior to completing assembly of
vehicle.
Figure 2-12. FLHP Tachometer Mount
2005 PDI: Touring Models
2-9
MIRRORS
THROTTLE CONTROL CABLES
See Figure 2-13. Adjust mirrors for proper rear view. Verify
that mirror fasteners are properly tightened.
All Non-Ultra Models
Check throttle cable adjustment in accordance with procedure given in Section 1 of Touring Models Service Manual.
pdoo72b
Ultra Models
Check throttle cable adjustment in accordance with procedure given in Section 8 of Touring Models Service Manual.
Figure 2-13. Mirror Installation
2-10
2005 PDI: Touring Models
REAR SUSPENSION
AIR PRESSURE
8472
CAUTION
Do not exceed maximum air pressure for rear suspension. Air components fill rapidly. Therefore, use low air
line pressure. Failure to do so may result in possible
damage to components. (00165a)
IMPORTANT NOTE
Maximum air pressure of rear suspension system is 50
psi (345 kPa).
Figure 2-14. Rear Suspension Air Pressure Valve
See Figure 2-14. Check rear suspension air pressure at air
valve located on the left side of the motorcycle below the
frame cover, above the left saddlebag. Refer to Table 2-3.
These are recommended starting points, adjust to suit load
conditions, riding style and comfort desired. Less initial pressure does not necessarily result in a softer ride. Use a no-loss
gauge, add 3-5 psi (20.68-34.48 kPa) to clear line and adjust
for application.
Table 2-3. Rear Suspension Air Pressure (All Models Except FLHRS)
Pressure
Loading
psi
kPa
0
0
0-10
0-69
Solo rider 200-250 lbs (90.7-113.4 kg)
5-15
35-103
Rider and 150 lbs (68.0 kg) passenger
10-15
69-103
Rider and 200 lbs (90.7 kg) passenger
20-25
138-172
Gross vehicle weight rating (GVWR)
20-35
138-241
Solo rider -150 lbs (68.0 kg) maximum
Solo rider 150-200 lbs (68.0-90.7 kg)
Table 2-4. Rear Suspension Air Pressure (FLHRS and FLHTCSE2 Only)
Pressure
Loading
psi
kPa
Solo rider -160 lbs (73.0 kg) maximum
0-5
0-35
Solo rider 160-200 lbs (73.0-90.7 kg)
0-10
0-69
Solo rider 200-250 lbs (90.7-113.4 kg)
5-10
35-69
Rider and 150 lbs (68.0 kg) passenger
20-30
138-207
Rider and Over 150 lbs (68 kg) passenger
25-35
172-241
Gross vehicle weight rating (GVWR)
40-50
276-345
2005 PDI: Touring Models
2-11
LUBRICATION SYSTEM
2.3
ENGINE OIL LEVEL
CAUTION
The FLHTCSE2 model is shipped from the factory with
SYN-3® lubricant exclusively in the engine, primary and
transmission. If there is a need to top off lubricants, DO
NOT use standard lubricants in the FLHTCSE2 model and
do not mix lubricants as damage to the motorcycle can
result.
IMPORTANT NOTE
Oil level cannot be accurately measured on a cold
engine. For preride inspection with motorcycle leaning
on jiffy stand on level ground, oil should register on dipstick between arrows when engine is cold. Do NOT add
oil to bring the level to the FULL mark on a COLD engine.
3.
Remove the dipstick and note the level of the oil. Add
only enough oil to bring the level to the FULL mark on the
dipstick. See Figure 2-15. Do not overfill.
4.
Start engine and carefully check for oil leaks around
drain plug and oil filter.
ENGINE OIL LEVEL (SIDE CAR
EQUIPPED VEHICLES)
NOTE
Since a motorcycle equipped with a sidecar is fixed in an
upright position, the engine oil level reading must be adjusted
in this case; the actual FULL engine oil level will be about 1/2
inch above the original FULL mark on the oil tank dipstick.
Perform engine oil level COLD CHECK as follows:
To insure the correct oil level with sidecar attached perform
the following:
1.
With the vehicle resting on the jiffy stand on level ground,
remove the dipstick, wipe it off and insert it back into the
oil pan with the plug pushed completely into the fill spout.
1.
Without sidecar attached, check engine oil level with
engine at normal operating temperature. See HOT
CHECK procedure above.
2.
Remove the dipstick and note the level of the oil. Oil level
should register on the dipstick. See Figure 2-15. If oil
level is at or below the lower arrow, add only enough oil
to bring the level to the add arrow on the dipstick.
2.
Verify oil level is at FULL mark on dipstick (add oil if
needed).
3.
With sidecar attached, ride until engine is at normal
operating temperature.
NOTE
Once the predelivery inspection procedure is complete and
the vehicle has been road-tested, the engine oil level should
be checked again as described in the following procedure.
4.
On a level surface, note engine oil level on dipstick.
5.
Scribe a line on dipstick at the oil level noted in step 4
above. The scribed line is the FULL mark for sidecar
operation.
Perform engine oil level HOT CHECK as follows:
1.
With the vehicle resting on the jiffy stand on level ground,
allow engine to idle for 1-2 minutes. Turn engine off.
2.
Remove the dipstick, wipe it off and insert it back into the
oil pan with the plug pushed completely into the fill spout.
COLD CHECK
HOT CHECK
f1254b3x
Figure 2-15. Engine Oil Dipstick
2-12
2005 PDI: Touring Models
TRANSMISSION LUBRICANT
pd0206
NOTE
Allow vehicle to stand upright for a moment before checking
transmission lubricant level. This will allow lubricant level to
normalize.
Check the transmission lubricant level with the motorcycle
standing upright in accordance with the procedure given in
the Touring Models Service Manual.
CHAINCASE LUBRICANT LEVEL
AND CLUTCH OPERATION
NOTE
Do not remove the clutch cover on the FLHTCSE2. It is not
necessary to check the primary chaincase lubricant level on
this vehicle. Also, the hydraulic clutch is not adjustable.
1.
2.
Remove five screws, clutch inspection cover and cover
gasket.
See Figure 2-16. The primary chaincase lubricant level is
acceptable when lubricant is visible in bottom of chaincase with motorcycle standing upright (not resting on jiffy
stand).
Figure 2-16. Chaincase Lubricant Level
3.
Check clutch action. Clutch lever should move freely and
smoothly through its entire range of travel.
4.
Check clutch adjustment according to the procedures
given in the Touring Models Service Manual.
NOTE
The clutch inspection cover gasket may be reused ONLY
when checking chaincase lubricant level and reinstalling
clutch inspection cover at PDI.
5.
Reinstall cover gasket and clutch inspection cover, and
secure with five screws. Tighten to 84-108 in-lbs (9.512.2 Nm).
2005 PDI: Touring Models
2-13
FUEL SYSTEM
GENERAL
CAUTION
2.4
CHECKING QUICK CONNECT FUEL
LINE FITTING–FUEL INJECTED
MODELS
Some fuel suppliers sell gasoline which has been
blended with an alcohol or an ether. The type and amount
of alcohol or ether added to the fuel is important.
CAUTION
Do not use gasoline that contains methanol. Doing so
can result in fuel system component failure, engine damage and/or equipment malfunction. (00148a)
●
●
Gasolines containing ETHANOL (ethyl alcohol or grain
alcohol) can be used. Gasoline/ethanol blends are a mixture of 10% ethanol and 90% unleaded gasoline. They
are identified as “gasohol,” “ethanol enhanced,” or “contains ethanol.”
Gasolines containing METHYL TERTIARY BUTYL
ETHER (MTBE) can also be used. Gasoline/MTBE
blends are a mixture of gasoline and as much as 15%
MTBE.
1WARNING
To avoid an uncontrolled discharge or spray of gasoline,
always be sure the quick-connect fitting (under left side
of fuel tank) is properly mated. A slight tug on the fuel
line will verify this condition. Gasoline is extremely flammable and highly explosive. Inadequate safety precautions could result in death or serious injury.
1.
Tug on fuel supply line (under left side of fuel tank) to be
sure quick connect fitting is properly mated.
2.
If fuel line comes free, push up on sleeve of quick-connect fitting and insert neck of fuel supply line fitting. While
pushing up on bottom of fuel supply line fitting, pull down
on sleeve until it “clicks” into the locked position.
FUEL TANK
REFORMULATED OR OXYGENATED GASOLINES
(RFG): “Reformulated gasoline” is a term used to
describe gasoline blends that are specifically designed to
burn cleaner than other types of gasoline, leaving fewer
“tailpipe” emissions. They are also formulated to evaporate less when you are filling your tank. Reformulated
gasolines use additives to “oxygenate” the gas. Your
motorcycle will run normally using this type of gas and
Harley-Davidson recommends you use it when possible,
as an aid to cleaner air in our environment
Make sure engine stop switch on the handlebar is switched to
the OFF position. Turn the ignition/light switch to the IGNITION position. Fuel injected models: verify that Low Fuel
lamp is lit. Partially fill fuel tank with gasoline. Follow FUEL
recommendations found in the Owner’s Manual. Use
unleaded gasoline, 91 octane or higher. Verify function of fuel
gauge as fuel tank is filling, then turn ignition/light switch OFF.
Inspect fuel lines for leaks.
Because of their different chemical properties (which affect
fuel volatility and ignition characteristics), these blends may
adversely affect the starting, drivability, and fuel efficiency of
the motorcycle. If you experience these problems, HarleyDavidson recommends using straight, unleaded gasoline.
See Figure 2-17. After adding gasoline, check for smooth
operation of the fuel valve. Inspect fuel valve for leaks.
●
Carbureted Models
o0046box
CAUTION
Use only unleaded fuel in California model catalytic converter-equipped motorcycles. Using leaded fuel will damage the emission control system. (00150a).
Figure 2-17. Fuel Supply Valve
2-14
2005 PDI: Touring Models
EVAPORATIVE EMISSIONS
CONTROL SYSTEM–CALIFORNIA
MODELS ONLY
See Figure 2-18. See Figure 2-19. Verify correct evaporative
emissions control system hose routing, connections, and fuel
tank venting to canister (if equipped).
1.
Carburetor (induction module on
fuel-injected models)
2. Vacuum tube
3. Fuel valve
4. Filler neck fitting (Top of canopy on
FLHR/C/S)
5. Fuel tank
6. Fuel vapor vent tube
7. Vapor valve
8. Charcoal canister
9. Purge tube
10. Clean air inlet tube (not used on
fuel-injected models)
11. Air cleaner backplate
2
4
1
5
3
7
10
9
6
8
11
f1706x4x
Figure 2-18. Evaporative Emissions Control System Hose Connections
f1884x4x
1
3
4
2
1.
2.
3.
4.
Clean air inlet tube from air cleaner backplate (carbureted models only)
Purge tube to carburetor or induction module
Fuel vapor vent tube from fuel tank
Fuel vapor vent tube from vapor valve
Figure 2-19. Evaporative Emissions Control System Hose Routing
2005 PDI: Touring Models
2-15
ELECTRICAL SYSTEM
2.5
HEADLAMP
DIRECTIONAL LAMPS
Check headlamp beam for proper height and lateral alignment in accordance with procedures given in Section 8 of the
Touring Models Service Manual.
Adjust front directional lamps so lenses are aimed directly forward. Verify that directional lamp fasteners are properly tightened.
1WARNING
FRONT TURN SIGNALS
(FLHRS ONLY)
The automatic-on headlamp feature provides increased
visibility of the rider to other motorists. Be sure headlamp is on at all times. Poor visibility of rider to other
motorists can result in death or serious injury. (00030b)
Adjust and tighten. Ensure that directionals do not contact
fuel tank.
AUXILIARY LAMPS
INSTRUMENT PANEL
On models equipped with auxiliary lamps, check lamp beam
for proper height and lateral alignment in accordance with
procedures given in the Touring Models Service Manual.
See Figure 2-20. The instrument panel has a Low Fuel,
Check Engine, Security (if equipped) Battery, Cruise Control
(if equipped) and ABS (if equipped) warning lamps.
The Low Fuel Warning lamp comes on when approximately 0.9 gallon (3.4 liter) of gasoline remains.
●
The Check Engine lamp illuminates briefly (4 seconds) at
start-up and should then remain off unless an error code
is present.
d0715x8x
f2185xax
1
8
40
30
20
10
0
7
●
50 60 70
MPH
80
90
100
110
120
C
H A E R TIFI E D
R L E Y-D A V I D S O N
1
3
2
30
20
40
50
RPM x100
10
60
70
0
80
HA
7
R L E Y- D A V I D S O N
6
4
5
6
2
4
FLHR Models
FLHT and FLTR Models
8
5
pd0221
1.
2.
3.
4.
5.
6.
7.
8.
9.
10.
Speedometer
Security system lamp
Tachometer
Cruise lamp
Odometer/trip-odometer
Low fuel warning lamp
Engine check lamp
Battery discharge lamp
ABS lamp (optional police equipment)
Pursuit lamp indicator (police)
30
20
2005 PDI: Touring Models
50
RPM x100
10
HA
10
60
70
P
0
80
R L E Y-D A V I D S O N
9
FLHTP/FLHP Models Tachometer
Figure 2-20. Instrument Panel Warning Lamps
2-16
40
INDICATOR LAMPS/CONTROLS
8.
Check operation of all remaining lamps:
●
Headlamp–low and high beams
See Figure 2-21. Turn ignition/light switch to IGNITION
position, and check that Oil pressure indicator lamp turns
on (before engine is started). The Check Engine lamp
and if TSSM EQUIPPED, THE SECURITY LAMP will illuminate for approximately four seconds and then turn off.
●
Headlamp high beam indicator lamp
●
Passing/pursuit lamps
●
Pursuit lamp indicator lamp (FLHTP)
●
Left directional (turn signal) lamps–front and rear
NOTES
For any Systems problems, refer to the appropriate Electrical
Diagnostic manual for your model.
●
Left directional (turn signal) indicator lamp
●
Right directional (turn signal) lamps–front and rear
●
Right directional (turn signal) indicator lamp
●
Left front running lamp
●
Right front running lamp
●
Tail lamp–running lamp and brake lamp filaments
●
Speedometer illumination lamp
●
Tachometer illumination lamp (if equipped)
●
License plate lamp (HDI only)
●
Sound System Operation (if equipped)
1.
2.
Shift transmission to neutral position, and verify that neutral indicator lamp turns on.
3.
Start engine; check operation of starter.
NOTE
On Police models, the clutch lever must be depressed to
operate the starter.
4.
Check that oil pressure indicator lamp turns off when
engine is running above 1000 RPM.
5.
Check operation of tachometer (if equipped).
6.
Disengage clutch (depress clutch lever), and verify that
neutral indicator lamp turns off when transmission is
shifted to any forward gear. Shift transmission to neutral
position, and verify that neutral indicator lamp turns on
again.
7.
9.
After engine has reached normal operating temperature,
turn engine off.
10. Check engine oil level in manner previously specified.
This time, fill oil tank to upper mark on filler cap/dipstick.
Check horn operation.
pd0192
3
1
2
1
1.
2.
3.
2
Ignition switch unlocked
Ignition switch locked
“Key ON” Ignition position
Figure 2-21. Ignition Switches
2005 PDI: Touring Models
2-17
TIRES
2.6
FRONT AND REAR TIRES
Table 2-5. Tire Pressures
Front
1WARNING
Do not inflate tire beyond maximum pressures specified
on sidewall. Over inflated tires can blow out, which could
result in death or serious injury. (00027a).
1WARNING
Harley-Davidson front and rear tires are not the same.
Interchanging front and rear tires can cause tire failure,
which could result in death or serious injury. (00026a)
1.
Check for proper front and rear tire pressures when tires
are cold. Compare results against Table 2-5.
2-18
2005 PDI: Touring Models
Rear
Tires
PSI
kPA
PSI
kPA
Solo rider
36
248
36
248
Rider & passenger
36
248
40
276
BRAKE SYSTEM
BRAKES
2.7
6628
1CAUTION
Direct contact of D.O.T. 4 brake fluid with eyes can cause
irritation. Avoid eye contact. In case of eye contact flush
with large amounts of water and get medical attention.
Swallowing large amounts of D.O.T. 4 brake fluid can
cause digestive discomfort. If swallowed, obtain medical
attention. Use in well ventilated area. KEEP OUT OF
REACH OF CHILDREN. (00240a)
CAUTION
D.O.T. 4 brake fluid will damage painted and molded-in
color surfaces it comes in contact with. Always use caution and protect surfaces from spills whenever brake
work is performed. Failure to comply can result in cosmetic damage. (00239a)
CAUTION
Cover handlebar switches with a shop towel before adding brake fluid to front master cylinder reservoir. Spilling
brake fluid on handlebar switches may render them inoperative.
See Figure 2-22. View reservoir sightglass and verify fluid
presence. Sightglass should appear dark if fluid is present. If
sightglass is not dark, add brake fluid. See Service Manual.
Use only D.O.T. 4 HYDRAULIC BRAKE FLUID (Part No.
99953-99A). Wash all residue of D.O.T. 4 brake fluid spills off
vehicle with water.
Figure 2-22. Rear Brake Reservoir/Master Cylinder Sightglass (typical)
ABS SYSTEM (POLICE VEHICLES–
OPTIONAL EQUIPMENT)
The ABS indicator lamp in the tachometer will flash when the
ignition switch is turned on, and remains flashing until the
motorcycle reaches 6 MPH (9.7 KPH). The lamp will then turn
off.
If the ABS lamp turns on solid at ignition-ON, or does not turn
off when vehicle exceeds 6 MPH (9.7 KPH), it is an indication
of a current fault condition in the ABS system. See the Police
Models Service Manual Supplement for instructions on placing the ABS system into test mode and extracting diagnostic
trouble codes from the ABS system computer.
2005 PDI: Touring Models
2-19
DEALER ROAD TEST
ROAD TEST
After you complete motorcycle inspection, take motorcycle for
a road test. Check all systems and overall operation of motorcycle: engine, transmission, clutch, brakes, handling, etc. On
Ultra models, check Cruise Control, rear speakers and rider/
passenger sound system controls. Refer to Touring Models
Owner’s Manual to check for proper operation.
After road test, return motorcycle to shop and thoroughly
clean off any road dirt. Check and correct any problems you
may have found during road test.
Before You Begin
Check the following items before road test of vehicle:
●
●
●
●
●
●
Lamps and indicators.
Check amount of gasoline in tank and add (if
needed).
Adjust mirrors to proper riding positions.
Check tire condition and pressure (adjust if necessary).
Check controls to verify proper function.
Check all electrical equipment and switches including stop lamp, turn signals and horn for proper operation.
Road Test of Vehicle: Low Speed
1.
Shift from first through third gear, checking clutch operation, throttle control, and transmission operation.
2.
Verify low-speed braking for front and rear brakes.
3.
Handling under braking conditions.
4.
Low speed handling. Verify that vehicle does not pull to
left or right.
5.
Check for any abnormal vibrations.
6.
Check electrical lamps, indicators.
2.8
IDLE SPEED: CARBURETED ONLY
NOTE
The idle speed on fuel injected models can only be set using
a diagnostic tool such as DIGITAL TECHNICIAN (Part No.
HD-44750).
See Figure 2-23. Set engine slow idle speed of 950 RPM with
engine running at normal operating temperature and with
enrichment control knob pushed in fully. Turn carburetor idle
speed adjusting screw (5) clockwise to increase speed, or
counterclockwise to decrease speed.
NOTE
The C.V. carburetor has an enrichment circuit that will cause
the engine to idle above the normal idle range (950-1050
RPM) with the engine at normal operating temperature and
the enrichment knob pulled out fully. The increase in idle
speed is intended to alert the rider that the engine is warmed
up to normal operating temperature and that the enrichment
knob should be pushed in all the way. Continuing to use the
enrichener when the engine is at full operating temperature
will cause fouled plugs.
Be sure the engine is warmed up to normal operating temperature and the enrichment knob is pushed all the way in before
adjusting engine idle speed. Be aware that, because there
are variations in individual components, it is possible for a
properly warmed-up engine to idle above the normal idle
range (950-1050 RPM) with the enrichment knob pulled out
partially.
f1381a2x
5
Road Test of Vehicle: Highway Speed
1.
Shift from first through fifth gear, checking clutch operation, throttle control and transmission operation.
2.
Verify highway-speed braking operation of front and rear
brakes.
3.
Verify proper handling at highway speeds.
4.
Check for any abnormal vibrations.
●
Program Security System (if equipped)
●
Engine Oil:
Check and correct hot level.
●
Clean Vehicle
NOTE
Be sure to submit a Dealer Product Quality Audit (DPQA) on
ANY adjustments and/or warranty work performed required to
deliver the vehicle to the customer.
2-20
2005 PDI: Touring Models
2
3
4
1
1.
2.
3.
4.
5.
Carburetor stop plate
Cable housing
Spring
Throttle cam stop
Idle speed adjusting screw
Figure 2-23. Carburetor Adjustments
CUSTOMER DELIVERY
NOTICE TO DEALER
Before delivering motorcycle to owner, perform the following:
1.
Make sure vehicle owner receives, and is aware of
importance of reading Owner’s Manual, safety booklets
and viewing Welcome To The Family video included with
owner’s kit.
2.
Review warranties with vehicle owner. Make sure owner
understands warranties. California dealers must give
customer a copy of Emissions Control System Warranty.
3.
Give IMPORTANT sheet and other printed material in literature kit to vehicle owner.
4.
Complete and sign warranty registration form. Have vehicle owner sign it.
5.
Explain operation of vehicle controls to vehicle owner.
6.
Explain how turn signals and emergency flashers operate.
7.
If motorcycle is equipped with a Sound System, explain
to customer that the Touring Models Owner’s Manual
contains detailed operating instructions for the system. In
addition, a video has been prepared to give the customer
operating instructions for the Sound System. On Ultra
models, tell customer helmet headset is shipped in saddlebag.
8.
Inform vehicle owner about changing TSM/TSSM to
sidecar or solo configuration as appropriate.
2.9
IMPORTANT NOTE
Make sure vehicle owner understands how to arm and
disarm security system. Explain how to disarm security
system with personal code if key fob is lost or not functioning. Personal code should be written on the tear-out
card in Touring Models Owner’s Manual and kept on the
owner’s person. Also, verify both key fobs operate properly.
9.
Whenever possible, introduce dealer Service Manager to
vehicle owner, and involve Service Manager in delivery
process. Supply owner with name(s) of dealer Service/
Parts Department personnel who should be contacted
regarding vehicle service/parts questions.
10. Inform vehicle owner about checking engine oil level,
checking tire pressure, and performing other basic maintenance functions. Review the Initial Scheduled Maintenance requirement with owner. Depending on owner’s
anticipated frequency of operating motorcycle, you may
wish to schedule the Initial Scheduled Maintenance
service appointment at this time.
2005 PDI: Touring Models
2-21
VEHICLE PDI CHECKLIST
2.10
PRIOR TO CUSTOMER DELIVERY
❒
NOTE
Use this checklist for performing tasks related to this model
motorcycle setup.
Fuel Outlet (valve or quick connect fitting)
and Hoses:
Verify operation and connections.
❒
Evaporative Control System:
Inspect hose routings, connections and fuel tank venting
to canister (if equipped).
❒
Lighting, Gauges, Electrical Systems:
a. Verify correct operation.
❒
Uncrate:
Check for damaged or missing parts.
❒
Handlebars:
Verify proper position; tighten clamps to proper torque.
❒
Jiffy Stand:
Verify proper function.
❒
Note Any Additional Problems
(including cosmetic quality):
Perform Warranty repairs.
❒
b.
Verify adequate directional-to-fuel tank clearance
(FLHRS only).
❒
Tires:
Inspect condition and air pressure.
❒
Brake Systems (front and rear):
a. Correct fluid level (if necessary). Use DOT 4 fluid
only for 2005 FL models.
Battery:
Perform required voltmeter test on Maxi Fuse (main fuse)
and battery.
b.
Verify proper ABS indicator function (Police models
only, if equipped).
❒
❒
❒
❒
Install Maxi Fuse (main fuse).
Position Tour-Pak and Install Seat and Seat Strap:
If equipped
b.
Verify low-speed braking for front and rear brakes.
c.
Verify handling under braking conditions.
❒
Install Saddlebags and Side Covers:
Verify adequate saddlebag/side cover clearance.
d.
Verify low-speed handling. Verify that vehicle does
not pull to left or right.
❒
Install Antenna Mast(s):
If equipped
e.
Check for any abnormal vibrations.
f.
Check electrical lamps, indicators.
❒
❒
❒
❒
❒
Install Fuel Pump Fuse (EFI vehicles only).
❒
Install Data Link Connector.
Position Rear Speaker Harness.
❒
Install Windshield.
Verify Proper Police Seat Air Bladder Pressure
(Police models).
Install Instrument Bracket (FLHP models).
Mirrors:
Inspect and adjust as necessary.
❒
Throttle Control Cables:
Inspect and adjust as necessary.
❒
Rear Air Suspension:
Inspect and adjust pressure as necessary.
❒
Engine Oil:
Verify oil is present (cold level).
❒
Lubrication System:
Inspect condition of oil lines and fittings.
❒
Transmission Lubricant:
Check and verify correct lubricant level.
❒
Primary Chaincase:
Check and verify lubricant is present.
❒
Clutch Operation:
Verify proper adjustment.
❒
Fuel System:
a. Inspect fuel system for leaks.
b.
Fill, verify sender operation.
c.
Verify low fuel light operation (if equipped).
2-22
2005 PDI: Touring Models
Road Test Vehicle: Low Speed.
a. Shift from first through third gear, checking clutch
operation, throttle control and transmission operation.
Road Test Vehicle: Highway Speed.
a. Shift from first through fifth gear, checking clutch
operation, throttle control and transmission operation.
b.
Verify highway speed braking operation of front and
rear brakes.
c.
Verify proper handling at highway speeds.
d.
Check for any abnormal vibrations.
❒
Engine Oil:
Check and correct hot level.
❒
Create Vehicle Birth-Certificate Using
Digital Technician (optional).
❒
❒
Clean Vehicle.
Program Security System.
AT POINT OF CUSTOMER DELIVERY
❒
❒
❒
❒
Suspension Adjustments.
Shift Linkage Adjustment.
Brake Hand Lever Adjustment.
Review Vehicle Care and Maintenance Requirements.
NOTE
Be sure to submit a Dealer Product Quality Audit (DPQA) on
ANY adjustments and/or warranty work performed required to
deliver the vehicle to the customer.
PREDELIVERY: DYNA MODELS
SUBJECT
PAGE NO.
3.1 Specifications . . . . . . . . . . . . . . . . . . . . . . . . . . . . . . . . . . . . . . . . . . . . . . . . .
Torque Values . . . . . . . . . . . . . . . . . . . . . . . . . . . . . . . . . . . . . . . . . . . . . . . .
2005 Dyna Models Specifications . . . . . . . . . . . . . . . . . . . . . . . . . . . . . . . . .
3.2 Initial Assembly . . . . . . . . . . . . . . . . . . . . . . . . . . . . . . . . . . . . . . . . . . . . . . . .
Battery Testing And Charging . . . . . . . . . . . . . . . . . . . . . . . . . . . . . . . . . . . .
Installing Maxi-Fuse . . . . . . . . . . . . . . . . . . . . . . . . . . . . . . . . . . . . . . . . . . . .
Installing Fuel Pump Fuse . . . . . . . . . . . . . . . . . . . . . . . . . . . . . . . . . . . . . . .
Idle Speed: Carbureted Only . . . . . . . . . . . . . . . . . . . . . . . . . . . . . . . . . . . . .
Throttle Cables . . . . . . . . . . . . . . . . . . . . . . . . . . . . . . . . . . . . . . . . . . . . . . . .
Suspension Adjustment for FXDX Model . . . . . . . . . . . . . . . . . . . . . . . . . . . .
Shift Lever . . . . . . . . . . . . . . . . . . . . . . . . . . . . . . . . . . . . . . . . . . . . . . . . . . .
Seats And Passenger Strap . . . . . . . . . . . . . . . . . . . . . . . . . . . . . . . . . . . . . .
3.3 Lubrication System . . . . . . . . . . . . . . . . . . . . . . . . . . . . . . . . . . . . . . . . . . . . .
Engine Oil Level . . . . . . . . . . . . . . . . . . . . . . . . . . . . . . . . . . . . . . . . . . . . . . .
Transmission Lubricant Level . . . . . . . . . . . . . . . . . . . . . . . . . . . . . . . . . . . . .
Chaincase Lubricant Level and Clutch Operation . . . . . . . . . . . . . . . . . . . . .
3.4 Fuel System . . . . . . . . . . . . . . . . . . . . . . . . . . . . . . . . . . . . . . . . . . . . . . . . . . .
General . . . . . . . . . . . . . . . . . . . . . . . . . . . . . . . . . . . . . . . . . . . . . . . . . . . . . .
Checking Quick Connect Fuel Line Fitting–Fuel Injected Models . . . . . . . . .
Fuel Tank . . . . . . . . . . . . . . . . . . . . . . . . . . . . . . . . . . . . . . . . . . . . . . . . . . . .
3.5 Electrical System . . . . . . . . . . . . . . . . . . . . . . . . . . . . . . . . . . . . . . . . . . . . . . .
Headlamp . . . . . . . . . . . . . . . . . . . . . . . . . . . . . . . . . . . . . . . . . . . . . . . . . . . .
Indicator Lamps/Controls . . . . . . . . . . . . . . . . . . . . . . . . . . . . . . . . . . . . . . . .
Mirrors and Directional Lamps . . . . . . . . . . . . . . . . . . . . . . . . . . . . . . . . . . . .
3.6 Tires . . . . . . . . . . . . . . . . . . . . . . . . . . . . . . . . . . . . . . . . . . . . . . . . . . . . . . . . .
Front and Rear Tires . . . . . . . . . . . . . . . . . . . . . . . . . . . . . . . . . . . . . . . . . . .
3.7 Brake System . . . . . . . . . . . . . . . . . . . . . . . . . . . . . . . . . . . . . . . . . . . . . . . . .
Brakes . . . . . . . . . . . . . . . . . . . . . . . . . . . . . . . . . . . . . . . . . . . . . . . . . . . . . .
3.8 Dealer Road Test . . . . . . . . . . . . . . . . . . . . . . . . . . . . . . . . . . . . . . . . . . . . . .
Road Test . . . . . . . . . . . . . . . . . . . . . . . . . . . . . . . . . . . . . . . . . . . . . . . . . . . .
3.9 Customer Delivery . . . . . . . . . . . . . . . . . . . . . . . . . . . . . . . . . . . . . . . . . . . . . .
Notice To Dealer . . . . . . . . . . . . . . . . . . . . . . . . . . . . . . . . . . . . . . . . . . . . . .
3.10 Vehicle PDI Checklist . . . . . . . . . . . . . . . . . . . . . . . . . . . . . . . . . . . . . . . . . .
Prior to Customer Delivery . . . . . . . . . . . . . . . . . . . . . . . . . . . . . . . . . . . . . . .
At Point of Customer Delivery . . . . . . . . . . . . . . . . . . . . . . . . . . . . . . . . . . . .
3-1
3-1
3-1
3-2
3-2
3-2
3-2
3-2
3-3
3-4
3-4
3-4
3-5
3-5
3-5
3-5
3-6
3-6
3-6
3-6
3-7
3-7
3-7
3-8
3-9
3-9
3-10
3-10
3-11
3-11
3-12
3-12
3-13
3-13
3-13
III
1
SPECIFICATIONS
3.1
TORQUE VALUES
The following torque values are included for fasteners that
may be loosened and tightened during Predelivery and
Setup. Any fasteners that are not loosened/removed do not
need to be checked during predelivery and setup.
Table 3-1. Torque Values
ITEM
TORQUE
Battery terminal screws
NOTES
60-96 in-lbs
6.8-10.9 Nm
Front brake master cylinder cover screws
6-8 in-lbs
0.7-0.9 Nm
Handlebar clamp screws (front and rear)
12-18 ft-lbs
16.3-24.4 Nm
12 ft-lbs
16.3 Nm
84-108 in-lbs
9.5-12.2 Nm
Mirror fasteners
Clutch inspection cover screws
2005 DYNA MODELS
SPECIFICATIONS
Table 3-2. Capacities
Component
ENGLISH
METRIC
Oil tank w/filter (Dry)
3 qt.
2.84 liter
Transmission (Wet)
20-24 oz
591-710 ml
Primary Chaincase
26 oz
769 ml
All motorcycles are shipped with 20W50 Harley-Davidson
360 Motor oil
Idle Speed: 950 RPM at
Operating Temperature
Use 950 RPM during Predelivery and Setup adjustments.
Engine idle speed may increase during engine break-in. Use
idle speed listed in the Dyna Models Service Manual at Initial
Maintenance check.
NOTE
The idle speed on electronic fuel injected models can only be
set using a diagnostic tool such as DIGITAL TECHNICIAN
(Part No. HD-44750).
2005 PDI: Dyna Models
3-1
INITIAL ASSEMBLY
BATTERY TESTING AND CHARGING
1WARNING
Batteries contain sulfuric acid, which could cause severe
burns to eyes and skin. Wear a protective face shield,
rubberized gloves and protective clothing when working
with batteries. KEEP BATTERIES AWAY FROM CHILDREN. (00063a)
1WARNING
Never remove warning label attached to top of battery.
Failure to read and understand all precautions in warning
could result in death or serious injury. (00064a)
1WARNING
Battery posts, terminals and related accessories contain
lead and lead components, chemicals known in the State
of California to cause cancer and birth defects or other
reproductive harm. Wash hands after handling. (00019a)
NOTE
It will be necessary to remove the battery sidecover to gain
access to the battery.
1.
Place test probes of voltmeter on battery terminals and
check the voltage of the battery to make sure it is at least
12.6 VDC.
2.
If the open circuit (disconnected) voltage reading is 12.6
VDC or greater the battery is ready for use.
3.
See Section 1. Mark the date on the battery warranty tag
by removing the applicable month and year. Month and
year punches may be removed with the point of a screwdriver without removing battery.
4.
If the open circuit (disconnected) voltage reading is
below 12.6 VDC, refer to Table 1-2, 12 amp-hour battery,
in Section 1 and charge battery at rate and time specified.
5.
Recheck battery voltage by repeating step 1 above. If
voltage now is 12.6 VDC or greater, perform steps 2 and
3 above.
6.
If the open circuit (disconnected) voltage reading is still
below 12.6 VDC, the battery must be replaced.
3-2
2005 PDI: Dyna Models
3.2
INSTALLING MAXI-FUSE
The 40 amp Maxi-Fuse provides battery power to the ignition
switch and ECM. The 40 amp Maxi-Fuse is not installed at
the factory. It is shipped attached to the motorcycle. See Service Manual.
INSTALLING FUEL PUMP FUSE
For non-carbureted vehicles, install the 15-amp fuel pump
fuse that is located in the spare fuse slot in the fuse block per
procedure in the appropriate Service Manual.
IDLE SPEED: CARBURETED ONLY
NOTE
The idle speed on fuel injected models can only be set using
a diagnostic tool such as DIGITAL TECHNICIAN (Part No.
HD-44750).
See Figure 3-1. Set engine slow idle speed of 950 RPM with
engine running at normal operating temperature and with
enrichment control knob pushed in fully. Turn carburetor idle
speed adjusting screw (5) clockwise to increase speed, or
counterclockwise to decrease speed.
NOTE
The C.V. carburetor has an enrichment circuit that will cause
the engine to idle above the normal idle range (950-1050
RPM) with the engine at normal operating temperature and
the enrichment knob pulled out fully. The increase in idle
speed is intended to alert the rider that the engine is warmed
up to normal operating temperature and that the enrichment
knob should be pushed in all the way. Continuing to use the
enrichener when the engine is at full operating temperature
will cause fouled plugs.
Be sure the engine is warmed up to normal operating temperature and the enrichment knob is pushed all the way in before
adjusting engine idle speed. Be aware that, because there
are variations in individual components, it is possible for a
properly warmed-up engine to idle above the normal idle
range (950-1050 RPM) with the enrichment knob pulled out
partially.
5428
f1381a2x
5
1
2
2
4
3
1.
2.
3.
4.
5.
4
1
1.
2.
3.
4.
5.
Carburetor stop plate
Cable housing
Spring
Throttle cam stop
Idle speed adjusting screw
Twist and release throttle control grip a few times to verify
proper operation of throttle control system. With throttle friction screw loosened, carburetor throttle must return to idle
position each time throttle control grip is released.
5.
See Figure 3-1. Turn adjuster on throttle control cable
until throttle cam stop (4) touches carburetor stop plate
(1).
6.
See Figure 3-2. Tighten jam nut (5) on throttle control
cable (2) adjuster (4); release throttle control grip.
7.
See Figure 3-1. Turn handlebars fully to right. Turn
adjuster on idle control cable until end of cable housing
(2) just touches spring (3) within carburetor cable guide.
8.
See Figure 3-2. With throttle friction screw (1) loosened,
twist and release throttle control grip a few times. Carburetor throttle must return to idle position each time throttle grip is released. If this is not the case, turn adjuster
(4) on idle control cable (3) (shortening cable housing)
until throttle control functions properly.
9.
Tighten jam nut (5) on idle control cable (3) adjuster (4).
Recheck operation of throttle control (Step 7).
1WARNING
Throttle cables must not pull tight when handlebars are
turned fully to left or right fork stops. Be sure wires and
throttle cables are clear of fork stops at steering head so
they will not be pinched when fork is turned against
stops. Steering must be smooth and free with no binding
or interference. Interference with steering could cause
loss of vehicle control which could result in death or
serious injury.
Throttle friction screw
Throttle control cable
Idle control cable
Adjuster
Jam nut
Figure 3-2. Throttle Cable Adjustment
Figure 3-1. Carburetor Adjustments
THROTTLE CABLES
3
5
10. Slide rubber boot (if applicable) over each cable adjuster
(4). Recheck engine slow idle speed; adjust if required.
Check throttle cable adjustment. With engine running, turn
handlebars through full range of travel. If engine speed
changes during this maneuver, adjust throttle cables as follows:
1.
See Figure 3-2. Slide rubber boot (if applicable) off each
cable adjuster.
2.
Loosen jam nut (5) on each adjuster (4).
3.
Turn adjusters in direction which will shorten cable housings to minimum length.
4.
Point front wheel straight ahead. Twist throttle control
grip to fully open position; hold in position.
2005 PDI: Dyna Models
3-3
SUSPENSION ADJUSTMENT FOR
FXDX MODEL
Refer to the Dyna Models Owner’s Manual for suspension
adjustment instructions for FXDX model.
SHIFT LEVER
Inspect shift linkage for free movement. Check shift lever
adjustment; rider’s foot must be able to fit easily under shift
lever. Adjust shift lever if required.
3-4
2005 PDI: Dyna Models
SEATS AND PASSENGER STRAP
Refer to the Dyna Models Owner’s Manual for seat and passenger strap removal and installation instructions.
LUBRICATION SYSTEM
ENGINE OIL LEVEL
Check engine oil level with engine turned off and motorcycle
resting on jiffy stand on level surface.
1.
Remove filler cap with attached dipstick. Wipe dipstick
clean.
2.
Install filler cap. Make sure cap is fully seated in oil pan
filler neck.
3.
See Figure 3-3. Remove filler cap, and check oil level on
dipstick. If oil level in pan is below lower mark on dipstick,
add enough Harley-Davidson oil to bring level up
between lower mark (1) and cold check level (2) on dipstick. Refer to the Dyna Models Service Manual for recommended viscosity.
3.3
CHAINCASE LUBRICANT LEVEL
AND CLUTCH OPERATION
1.
Remove five screws, clutch inspection cover and cover
gasket.
2.
See Figure 3-4. The primary chaincase lubricant level is
acceptable when lubricant is visible in bottom of chaincase with motorcycle standing upright (not resting on jiffy
stand).
pd0206
NOTE
Do not fill oil tank to full (upper) mark on filler cap/dipstick at
this time. Ordinarily, you would fill a Dyna oil pan (with warm
engine) to this level. In this situation, however, if any oil has
flowed from oil pan to crankcase during shipping, filling oil
pan to full mark might result in overfilling of oil pan when
engine is started. Final check of oil level must be made with
engine off, after engine has reached normal operating temperature.
d0386x1x
1
NOTE
For cold check level do not exceed
this point when filling with oil.
2
3
Figure 3-4. Chaincase Lubricant Level
1.
2.
3.
Lower arrow (add oil)
Cold check level
Upper arrow (hot check level)
3.
Check clutch action. Clutch lever should move freely and
smoothly through its entire range of travel.
4.
Check clutch adjustment according to the procedures
given in the Dyna Models Service Manual.
Figure 3-3. Engine Oil Dipstick
TRANSMISSION LUBRICANT LEVEL
NOTE
Allow vehicle to stand upright for a moment before checking
transmission lubricant level. This will allow lubricant level to
normalize.
NOTE
The clutch inspection cover gasket may be reused ONLY
when checking chaincase lubricant level and reinstalling
clutch inspection cover at PDI.
5.
Reinstall cover gasket and clutch inspection cover, and
secure with five screws. Tighten to 84-108 in-lbs (9.512.2 Nm).
Check the transmission lubricant level with the motorcycle
standing upright in accordance with the procedure given in
the Dyna Models Service Manual.
2005 PDI: Dyna Models
3-5
FUEL SYSTEM
GENERAL
CAUTION
3.4
CHECKING QUICK CONNECT FUEL
LINE FITTING–FUEL INJECTED
MODELS
Some fuel suppliers sell gasoline which has been
blended with an alcohol or an ether. The type and amount
of alcohol or ether added to the fuel is important.
CAUTION
Do not use gasoline that contains methanol. Doing so
can result in fuel system component failure, engine damage and/or equipment malfunction. (00148a)
●
●
Gasolines containing ETHANOL (ethyl alcohol or grain
alcohol) can be used. Gasoline/ethanol blends are a mixture of 10% ethanol and 90% unleaded gasoline. They
are identified as “gasohol,” “ethanol enhanced,” or “contains ethanol.”
Gasolines containing METHYL TERTIARY BUTYL
ETHER (MTBE) can also be used. Gasoline/MTBE
blends are a mixture of gasoline and as much as 15%
MTBE.
1WARNING
To avoid an uncontrolled discharge or spray of gasoline,
always be sure the quick-connect fitting (under left side
of fuel tank) is properly mated. A slight tug on the fuel
line will verify this condition. Gasoline is extremely flammable and highly explosive. Inadequate safety precautions could result in death or serious injury.
1.
Tug on fuel supply line (under left side of fuel tank) to be
sure quick connect fitting is properly mated.
2.
If fuel line comes free, push up on sleeve of quick-connect fitting and insert neck of fuel supply line fitting. While
pushing up on bottom of fuel supply line fitting, pull down
on sleeve until it “clicks” into the locked position.
FUEL TANK
REFORMULATED OR OXYGENATED GASOLINES
(RFG): “Reformulated gasoline” is a term used to
describe gasoline blends that are specifically designed to
burn cleaner than other types of gasoline, leaving fewer
“tailpipe” emissions. They are also formulated to evaporate less when you are filling your tank. Reformulated
gasolines use additives to “oxygenate” the gas. Your
motorcycle will run normally using this type of gas and
Harley-Davidson recommends you use it when possible,
as an aid to cleaner air in our environment
Make sure engine stop switch on the handlebar is switched to
the OFF position. Turn the ignition/light switch to the IGNITION position. Fuel injected models: verify that Low Fuel
lamp is lit. Partially fill fuel tank with gasoline. Follow FUEL
recommendations found in the Owner’s Manual. Use
unleaded gasoline, 91 octane or higher. Verify function of fuel
gauge as fuel tank is filling, then turn ignition/light switch OFF.
Inspect fuel lines for leaks.
Because of their different chemical properties (which affect
fuel volatility and ignition characteristics), these blends may
adversely affect the starting, drivability, and fuel efficiency of
the motorcycle. If you experience these problems, HarleyDavidson recommends using straight, unleaded gasoline.
See Figure 3-5. After adding gasoline, check for smooth operation of the fuel valve. Inspect fuel valve for leaks.
●
Carbureted Models
o0046b
CAUTION
Use only unleaded fuel in California model catalytic converter-equipped motorcycles. Using leaded fuel will damage the emission control system. (00150a).
Figure 3-5. Fuel Supply Valve
3-6
2005 PDI: Dyna Models
ELECTRICAL SYSTEM
3.5
HEADLAMP
10648
9
8
1
Check headlamp beam for proper height and lateral alignment in accordance with procedures given in the Dyna Models Service Manual
1WARNING
The automatic-on headlamp feature provides increased
visibility of the rider to other motorists. Be sure headlamp is on at all times. Poor visibility of rider to other
motorists can result in death or serious injury. (00030b)
NOTE
All FXDX/I models with a black-painted mounting bracket
above the headlamp have a snap cap taped to right rear turn
signal. Install snap cap after headlamp has been adjusted. All
other models are shipped in position.
INDICATOR LAMPS/CONTROLS
NOTE
See Figure 3-6. This figure shows instruments and indicators
on FXDX models. Instruments and indicators on remaining
Dyna models are located as follows:
2
3
1.
2.
3.
4.
5.
6.
7.
8.
9.
4
5
7
6
Speedometer
Odometer and trip odometer
Left directional (turn signal) indicator lamp
High beam indicator lamp
Neutral indicator lamp
Oil pressure indicator lamp
Right directional (turn signal) indicator lamp
Tachometer
Check engine lamp
●
FXD Speedometer and indicators in handlebar bracket.
Figure 3-6. Instruments & Indicator Lamps FXDX (typical)
●
FXDWG Speedometer and indicators in panel on gas
tank.
7.
Check horn operation.
8.
Check operation of all remaining lamps:
FXDL Speedometer and tachometer in console on gas tank,
indicators in headlamp bracket.
1.
2.
Turn ignition switch to “IGNITION” position, check that oil
pressure indicator lamp turns on (before engine is
started) and check engine lamp illuminates for about four
seconds and goes off.
Shift transmission to neutral position, and verify that neutral indicator lamp turns on.
●
headlamp–low and high beams
●
headlamp high beam indicator lamp
●
left directional (turn signal) lamps–front and rear
●
Ieft directional (turn signal) indicator lamp
●
right directional (turn signal) lamps–front and rear
●
right directional (turn signal) indicator lamp
●
Ieft front running lamp
3.
Start engine; check operation of starter.
4.
Check that oil pressure indicator lamp turns off when
engine is running above 1000 RPM.
●
right front running lamp
●
tail lamp–running lamp and brake lamp filaments
5.
Check operation of tachometer, if equipped.
●
speedometer illumination lamp
6.
Disengage clutch (depress clutch lever), and verify that
neutral indicator lamp turns off when transmission is
shifted to any forward gear. Shift transmission to neutral
position, and verify that neutral indicator lamp turns on
again.
●
9.
tachometer illumination lamp
After engine has reached normal operating temperature,
turn engine off.
10. Check engine oil level in manner previously specified.
This time, fill oil tank to upper mark on filler cap/dipstick.
2005 PDI: Dyna Models
3-7
MIRRORS AND DIRECTIONAL
LAMPS
pd0104c
See Figure 3-7. Adjust mirrors for proper rear view. Adjust
front directional lamps so lenses are aimed directly forward;
adjust rear directional lamps so lenses are aimed directly
rearward. Verify that mirror and directional lamp fasteners are
properly tightened. Tighten mirror fasteners to 12 ft-lbs (16.3
Nm).
1.
2.
3.
4.
Mirror
Star washer
Acorn nut
Front directional lamp
Figure 3-7. Mirror and Directional Lamp Mounting
3-8
2005 PDI: Dyna Models
TIRES
3.6
FRONT AND REAR TIRES
Table 3-3. Tire Pressures
SOLO RIDER
RIDER & ONE
PASSENGER
PSI
kPA
PSI
kPA
Front
30
207
30
207
Rear
36
248
40
276
1WARNING
Do not inflate tire beyond maximum pressure as specified on sidewall. Over inflated tires can blow out, which
could result in death or serious injury. (00027a)
1WARNING
TIRES
Harley-Davidson front and rear tires are not the same.
Interchanging front and rear tires can cause tire failure,
which could result in death or serious injury. (00026a)
1.
Check for proper front and rear tire pressures when tires
are cold. Compare results against Table 3-3.
2005 PDI: Dyna Models
3-9
BRAKE SYSTEM
BRAKES
3.7
4934
1CAUTION
Direct contact with D.O.T. 5 brake fluid can cause eye irritation, swelling, and redness. Avid eye contact. In case of
eye contact flush with large amounts of water and get
medical attention. Swallowing large amounts of D.O.T. 5
brake fluid can cause digestive discomfort. If swallowed,
obtain medical attention. Use in well ventilated area.
KEEP OUT OF REACH OF CHILDREN. (00144a)
See Figure 3-8. View reservoir sightglass and verify fluid
presence. Sightglass should appear dark if fluid is present. If
sightglass is not dark, add brake fluid. See Service Manual.
Use only D.O.T. 5 SILICONE HYDRAULIC BRAKE FLUID.
3-10
2005 PDI: Dyna Models
Figure 3-8. Rear Master Cylinder Shown
DEALER ROAD TEST
ROAD TEST
After you complete motorcycle inspection, take motorcycle for
a road test. Check all systems and overall operation of motorcycle: engine, transmission, clutch, brakes, handling, etc.
After road test, return motorcycle to shop, and thoroughly
clean off any road dirt. Check and correct any problems you
may have found during road test.
Before You Begin
Check the following items before road test of vehicle:
●
●
●
●
●
●
Lamps and indicators.
Check amount of gasoline in tank and add (if
needed).
Adjust mirrors to proper riding positions.
Check tire condition and pressure (adjust if necessary).
Check controls to verify proper function.
Check all electrical equipment and switches including stop lamp, turn signals and horn for proper operation.
3.8
Road Test of Vehicle: Low Speed
1.
Shift from first through third gear, checking clutch operation, throttle control, and transmission operation.
2.
Verify low speed braking for front and rear brakes.
3.
Handling under braking conditions.
4.
Low speed handling. Verify that vehicle does not pull to
left or right.
5.
Check for any abnormal vibrations.
6.
Check electrical lamps, indicators.
Road Test of Vehicle: Highway Speed
1.
Shift from first through fifth gear, checking clutch operation, throttle control, and transmission operation.
2.
Verify highway speed braking operation of front and rear
brakes.
3.
Verify proper handling at highway speeds.
4.
Check for any abnormal vibrations.
●
Program Security System (if equipped)
●
Engine Oil:
Check and correct hot level
●
Clean Vehicle:
NOTE
Be sure to submit a Dealer Product Quality Audit (DPQA) on
ANY adjustments and/or warranty work performed required to
deliver the vehicle to the customer.
2005 PDI: Dyna Models
3-11
CUSTOMER DELIVERY
NOTICE TO DEALER
Before delivering motorcycle to owner, perform the following:
1.
Make sure vehicle owner receives, and is aware of
importance of reading Owner’s Manual, safety booklets
and viewing Welcome To The Family video included with
owner’s kit.
2.
Review warranties with vehicle owner. Make sure owner
understands warranties. California dealers must give
customer a copy of Emissions Control System Warranty.
3.
Give IMPORTANT sheet and other printed material in literature kit to vehicle owner.
4.
Complete and sign warranty registration form. Have vehicle owner sign it.
5.
Explain operation of vehicle controls to vehicle owner.
6.
Explain how turn signals and emergency flashers operate.
3-12
2005 PDI: Dyna Models
3.9
IMPORTANT NOTE
Make sure vehicle owner understands how to arm and
disarm security system. Explain how to disarm security
system with personal code if key fob is lost or not functioning. Personal code should be written on the tear-out
card in the Dyna Models Owner’s Manual and kept on the
owner’s person. Also, verify both key fobs operate properly.
7.
Whenever possible, introduce dealer Service Manager to
vehicle owner, and involve Service Manager in delivery
process. Supply owner with name(s) of dealer Service/
Parts Department personnel who should be contacted
regarding vehicle service/parts questions.
8.
Inform vehicle owner about checking engine oil level,
checking tire pressure, and performing other basic maintenance functions. Review the Initial Scheduled Maintenance requirement with owner. Depending on owner’s
anticipated frequency of operating motorcycle, you may
wish to schedule the Initial Scheduled Maintenance
service appointment at this time.
VEHICLE PDI CHECKLIST
3.10
PRIOR TO CUSTOMER DELIVERY
❒
NOTE
Use this checklist for performing tasks related to this model
motorcycle setup.
❒
❒
Verify operation and connections.
❒
a.
Verify low-speed braking for front and rear brakes.
c.
Verify handling under braking conditions.
Verify proper function.
d.
Note Any Additional Problems
(including cosmetic quality):
Verify low-speed handling. Verify that vehicle does
not pull to left or right.
e.
Check for any abnormal vibrations.
f.
Check electrical lamps, indicators.
Battery:
❒
Perform required voltmeter test on Maxi Fuse (main fuse)
and battery.
❒
❒
Lubrication System:
Engine Oil:
Verify oil is present (cold level).
❒
Inspect fuel system for leaks.
b.
Fill, verify sender operation.
c.
Verify low fuel light operation (if equipped).
Evaporative Control System:
Inspect hose routings, connections and fuel tank venting
to canister (if equipped).
❒
Lighting, Gauges, Electrical Systems:
Verify correct operation.
❒
Tires:
Inspect condition and air pressure.
❒
a.
Shift from first through fifth gear, checking clutch
operation, throttle control, and transmission operation.
b.
Verify highway speed braking operation of front and
rear brakes.
c.
Verify proper handling at highway speeds.
d.
Check for any abnormal vibrations.
Brake Systems (front and rear):
Engine Oil:
Check and correct hot level.
❒
Create Vehicle Birth-Certificate Using
Digital Technician (optional).
❒
Clean Vehicle.
Fuel System:
a.
❒
❒
Primary Chaincase:
Check and verify lubricant is present.
❒
Road Test Vehicle: Highway Speed
Install Maxi Fuse (main fuse).
Inspect condition of oil lines.
❒
Shift from first through third gear, checking clutch
operation, throttle control, and transmission operation.
b.
Jiffy Stand:
Perform Warranty repairs.
❒
Road Test Vehicle: Low Speed
Uncrate:
Check for damaged or missing parts.
❒
Fuel Outlet (valve or quick connect fitting)
and Hoses:
AT POINT OF CUSTOMER DELIVERY
❒
❒
❒
❒
Suspension Adjustments.
Shift Linkage Adjustment.
Brake Hand Lever Adjustment.
Review Vehicle Care and Maintenance Requirements.
NOTE
Be sure to submit a Dealer Product Quality Audit (DPQA) on
ANY adjustments and/or warranty work performed required to
deliver the vehicle to the customer.
Correct fluid level (if necessary).
❒
Headlamps:
Inspect and adjust as necessary.
❒
Mirrors:
Inspect and adjust as necessary.
2005 PDI: Dyna Models
3-13
NOTES
3-14
2005 PDI: Dyna Models
PREDELIVERY: SOFTAIL MODELS
SUBJECT
PAGE NO.
4.1 Specifications . . . . . . . . . . . . . . . . . . . . . . . . . . . . . . . . . . . . . . . . . . . . . . . . .
Torque Values . . . . . . . . . . . . . . . . . . . . . . . . . . . . . . . . . . . . . . . . . . . . . . . .
2005 Softail Models Specifications . . . . . . . . . . . . . . . . . . . . . . . . . . . . . . . . .
4.2 Initial Assembly . . . . . . . . . . . . . . . . . . . . . . . . . . . . . . . . . . . . . . . . . . . . . . . .
Battery Testing And Charging . . . . . . . . . . . . . . . . . . . . . . . . . . . . . . . . . . . .
Installing Fuel Pump Fuse . . . . . . . . . . . . . . . . . . . . . . . . . . . . . . . . . . . . . . .
Indicator Lamps . . . . . . . . . . . . . . . . . . . . . . . . . . . . . . . . . . . . . . . . . . . . . . .
Ignition Timing . . . . . . . . . . . . . . . . . . . . . . . . . . . . . . . . . . . . . . . . . . . . . . . .
Idle Speed: Carbureted Only . . . . . . . . . . . . . . . . . . . . . . . . . . . . . . . . . . . . .
Seats And Passenger Strap . . . . . . . . . . . . . . . . . . . . . . . . . . . . . . . . . . . . . .
4.3 Lubrication System . . . . . . . . . . . . . . . . . . . . . . . . . . . . . . . . . . . . . . . . . . . . .
Engine Oil Level . . . . . . . . . . . . . . . . . . . . . . . . . . . . . . . . . . . . . . . . . . . . . . .
Transmission Lubricant Level . . . . . . . . . . . . . . . . . . . . . . . . . . . . . . . . . . . . .
Chaincase Lubricant Level and Clutch Operation . . . . . . . . . . . . . . . . . . . . .
4.4 Fuel System . . . . . . . . . . . . . . . . . . . . . . . . . . . . . . . . . . . . . . . . . . . . . . . . . . .
General . . . . . . . . . . . . . . . . . . . . . . . . . . . . . . . . . . . . . . . . . . . . . . . . . . . . . .
Checking Quick Connect Fuel Line Fitting–Fuel Injected Models . . . . . . . . .
Fuel Tank . . . . . . . . . . . . . . . . . . . . . . . . . . . . . . . . . . . . . . . . . . . . . . . . . . . .
4.5 Electrical System . . . . . . . . . . . . . . . . . . . . . . . . . . . . . . . . . . . . . . . . . . . . . . .
Headlamp . . . . . . . . . . . . . . . . . . . . . . . . . . . . . . . . . . . . . . . . . . . . . . . . . . . .
Auxiliary Lamps . . . . . . . . . . . . . . . . . . . . . . . . . . . . . . . . . . . . . . . . . . . . . . .
Mirrors and Directional Lamps . . . . . . . . . . . . . . . . . . . . . . . . . . . . . . . . . . . .
4.6 Tires . . . . . . . . . . . . . . . . . . . . . . . . . . . . . . . . . . . . . . . . . . . . . . . . . . . . . . . . .
Front and Rear Tires . . . . . . . . . . . . . . . . . . . . . . . . . . . . . . . . . . . . . . . . . . .
4.7 Brake System . . . . . . . . . . . . . . . . . . . . . . . . . . . . . . . . . . . . . . . . . . . . . . . . .
Brakes . . . . . . . . . . . . . . . . . . . . . . . . . . . . . . . . . . . . . . . . . . . . . . . . . . . . . .
4.8 Dealer Road Test . . . . . . . . . . . . . . . . . . . . . . . . . . . . . . . . . . . . . . . . . . . . . .
Road Test . . . . . . . . . . . . . . . . . . . . . . . . . . . . . . . . . . . . . . . . . . . . . . . . . . . .
4.9 Customer Delivery . . . . . . . . . . . . . . . . . . . . . . . . . . . . . . . . . . . . . . . . . . . . . .
Notice To Dealer . . . . . . . . . . . . . . . . . . . . . . . . . . . . . . . . . . . . . . . . . . . . . .
4.10 Vehicle PDI Checklist . . . . . . . . . . . . . . . . . . . . . . . . . . . . . . . . . . . . . . . . . .
Prior to Customer Delivery . . . . . . . . . . . . . . . . . . . . . . . . . . . . . . . . . . . . . . .
At Point of Customer Delivery . . . . . . . . . . . . . . . . . . . . . . . . . . . . . . . . . . . .
4-1
4-1
4-1
4-2
4-2
4-2
4-2
4-3
4-3
4-4
4-5
4-5
4-5
4-5
4-6
4-6
4-6
4-6
4-7
4-7
4-7
4-7
4-8
4-8
4-9
4-9
4-10
4-10
4-11
4-11
4-12
4-12
4-12
IV
1
SPECIFICATIONS
4.1
TORQUE VALUES
The following torque values are included for fasteners that
may be loosened and tightened during Predelivery and
Setup. Any fasteners that are not loosened/removed do not
need to be checked during predelivery and setup.
Table 4-1. Torque Values
ITEM
TORQUE
Handlebar clamp screws (front and rear)
12-15 ft-lbs
16.3-20.3 Nm
Brake master cylinder cover screws
(front and rear)
6-8 in-lbs
0.7-0.9 Nm
Battery terminal screws
60-96 in-lbs
6.8-10.9 Nm
Mirror fasteners
60-96 in-lbs
6.8-10-9 Nm
Clutch inspection cover screws
84-108 in-lbs
9.5-12.2 Nm
NOTES
2005 SOFTAIL MODELS
SPECIFICATIONS
Table 4-2. Capacities
Component
ENGLISH
METRIC
Oil tank w/filter (Dry)
3.5 qt.
3.31 liter
Transmission (Wet)
20-24 oz
591-710 ml
Primary Chaincase
26 oz
769 ml
All Softail models except FLSTFSE are shipped with
20W50 Harley-Davidson 360 Motor oil. The FLSTFSE
model ships with Syn-3® lubricant in the engine, primary
and transmission.
Idle Speed: 950 RPM at
Operating Temperature
Use 950 RPM during Predelivery and Setup adjustments.
Engine idle speed may increase during engine break-in. Use
idle speed listed in the Softail Models Service Manual at Initial Maintenance check.
NOTE
The idle speed on electronic fuel injected models can only be
set using a diagnostic tool such as DIGITAL TECHNICIAN
(Part No. HD-44750).
2005 PDI: Softail Models
4-1
INITIAL ASSEMBLY
BATTERY TESTING AND CHARGING
1WARNING
Batteries contain sulfuric acid, which could cause severe
burns to eyes and skin. Wear a protective face shield,
rubberized gloves and protective clothing when working
with batteries. KEEP BATTERIES AWAY FROM CHILDREN. (00063a)
4.2
Connecting Battery
NOTE
One battery terminal bolt is attached to red plastic terminal
cover covering positive battery terminal. The second battery
terminal bolt is in negative battery terminal.
1.
Attach positive battery cable first. Orient terminal so
cable is oriented away from oil tank and tighten terminal
bolt to 60-96 in-lbs (6.8-10.9 Nm).
2.
Attach negative battery cable and tighten terminal bolt to
60-96 in-lbs (6.8-10.9 Nm).
1WARNING
Never remove warning label attached to top of battery.
Failure to read and understand all precautions in warning
could result in death or serious injury. (00064a)
1WARNING
Battery posts, terminals and related accessories contain
lead and lead components, chemicals known in the State
of California to cause cancer and birth defects or other
reproductive harm. Wash hands after handling. (00019a)
NOTE
It will be necessary to remove the seat to perform required
battery tests. Remove seat according to procedure in appropriate Service Manual.
INSTALLING FUEL PUMP FUSE
For non-carbureted vehicles, it will also be necessary to
install the fuel pump fuse that is located in the spare fuse slot
of the fuse-block. See Service Manual.
INDICATOR LAMPS
NOTE
All Softail models have an electronic speedometer with selfdiagnostic capabilities. Refer to the Softail Models Service
Manual for service instructions.
1.
Battery Testing and Charging
1.
Place test probes of voltmeter on battery terminals and
check the voltage of the battery to make sure it is at least
12.6 VDC.
2.
If the open circuit (disconnected) voltage reading is 12.6
VDC or greater the battery is ready for use.
3.
See Section 1. Mark the date on the battery warranty tag
by removing the applicable month and year. Month and
year punches may be removed with the point of a screwdriver without removing battery.
4.
If the open circuit (disconnected) voltage reading is
below 12.6 VDC, refer to Table 1-2., 12 amp-hour battery,
in Section 1 and charge battery at rate and time specified.
5.
6.
4-2
Recheck battery voltage by repeating step 1 above. If
voltage now is 12 VDC or greater, perform steps 2 and 3
above.
If the open circuit (disconnected) voltage reading is still
below 12.6 VDC, the battery must be replaced.
2005 PDI: Softail Models
See Figure 4-1. Turn ignition switch to “IGNITION” position, and check that oil pressure indicator lamp turns on
(before engine is started). Speedometer needle will
“vibrate” and speedometer amber backlight will be visible. The Check Engine indicator will illuminate for about
four seconds and then go off. If vehicle is equipped with
optional Security System (TSSM), a key icon (9) (security lamp) will illuminate for about four seconds and then
go off.
NOTE
For any systems problems, please refer to the appropriate
Electrical Diagnostic manual for your model.
2.
Shift transmission to neutral position, and verify that neutral indicator lamp turns on.
NOTE
See 4.3 LUBRICATION SYSTEM and perform initial engine
oil level check prior to starting engine.
3.
Start engine; check operation of starter.
4.
Check that oil pressure indicator lamp turns off when
engine is running above 1000 RPM.
5.
Disengage clutch and verify that neutral indicator lamp
turns off when transmission is shifted to any forward
gear. Shift transmission to neutral position, and verify
that neutral indicator lamp turns on again.
6.
Check horn operation.
7.
IDLE SPEED: CARBURETED ONLY
Check operation of all remaining lamps:
●
headlamp–low and high beams
●
headlamp high beam indicator lamp
●
left directional (turn signal) lamps–front and rear
●
Ieft directional (turn signal) indicator lamp
●
right directional (turn signal) lamps–front and rear
●
right directional (turn signal) indicator lamp
●
Ieft front running lamp
●
right front running lamp
●
tail lamp–running lamp and brake lamp filaments
8.
After engine has reached normal operating temperature,
turn engine off.
9.
Check engine oil level per instructions in 4.3 LUBRICATION SYSTEM. This time, fill oil tank to upper mark on
filler cap/dipstick.
pd0189
1
7
E
F
50 60 70
MPH
See Figure 4-2. Set engine slow idle speed of 950 RPM with
engine running at normal operating temperature and with
enrichener control knob pushed in fully. Turn carburetor idle
speed adjusting screw (5) clockwise to increase speed, or
counterclockwise to decrease speed.
NOTE
The C.V. carburetor has an enrichener circuit that will cause
the engine to idle at approximately 2000 RPM with the engine
at normal operating temperature and the enrichener knob
pulled fully out. The increase in idle speed is intended to alert
the rider that the engine is warmed up to normal operating
temperature and that the enrichener knob should be pushed
in all the way. Continuing to use the enrichener circuit when
the engine is at normal operating temperature will cause
fouled plugs.
Be sure the engine is warmed up to normal operating temperature and the enrichener knob is pushed all the way in before
adjusting engine idle speed. Be aware that, because there
are variations in individual components, it is possible for a
properly warmed-up engine to idle at 2000 RPM with the
enrichener knob pulled out partially.
8
40
30
20
10
0
NOTE
The idle speed on fuel injected models can only be set using
a diagnostic tool such as DIGITAL TECHNICIAN (Part No.
HD-44750).
80
90
100
110
120
C
LE Y -D A V I D S O N
H AR E R T I F I E D
f1381a2x
9
2
1.
2.
3.
4.
5.
6.
7.
8.
9.
3
4
5
5
6
Speedometer
Left turn signal
High beam
Neutral
Oil pressure
Right turn signal
Check engine lamp
Fuel gauge
Security lamp
2
3
4
Figure 4-1. Indicator Lamps
1
IGNITION TIMING
Ignition timing is not adjustable on The Twin Cam 88B™
engine.
1.
2.
3.
4.
5.
Carburetor stop plate
Cable housing
Spring
Throttle cam stop
Idle speed adjusting screw
Figure 4-2. Carburetor Adjustments
2005 PDI: Softail Models
4-3
Windshield Installation: FLSTC
o0138xox
CAUTION
Be sure you position the windshield bracket notches in
the grooves in the mounting bushings. Incorrect mounting could result in damage to the windshield.
1.
See Figure 4-3. Lower the windshield into position carefully inserting the side brackets between the headlamp
and the passing lamp supports until the bottom notches
are seated in the lower bushing grooves.
2.
Standing at the front of the vehicle, gently push the top of
the windshield toward the rear until the upper notches
fully engage the upper bushings.
SEATS AND PASSENGER STRAP
Refer to the Softail Models Owner’s Manual for seat and passenger strap removal and installation instructions.
Figure 4-3. Windshield Mounting
4-4
2005 PDI: Softail Models
LUBRICATION SYSTEM
ENGINE OIL LEVEL
4.3
CHAINCASE LUBRICANT LEVEL
AND CLUTCH OPERATION
CAUTION
The FLSTFSE model is shipped from the factory with
SYN-3® lubricant exclusively in the engine, primary and
transmission. If there is a need to top off lubricants, DO
NOT use standard lubricants in the FLSTFSE model and
do not mix lubricants as damage to the motorcycle can
result.
Check engine oil level with engine turned off and motorcycle
resting on side stand on level surface.
1.
Remove filler cap (with attached dipstick) from oil tank.
Wipe dipstick clean.
2.
Install filler cap onto oil tank. Make sure cap is fully
seated on tank.
3.
See Figure 4-4. Remove filler cap, and check oil level on
dipstick. If oil level in tank is below lower mark on dipstick, add 3/4 quart (0.7 liter) of Harley-Davidson oil to
tank. Refer to the Softail Models Service Manual for recommended viscosity.
NOTE
Do not remove the clutch cover on the FLSTFSE. It is not
necessary to check the primary chaincase lubricant level on
this vehicle. Also, the hydraulic clutch is not adjustable.
1.
Remove five screws, clutch inspection cover and cover
gasket.
2.
See Figure 4-5. The primary chaincase lubricant level is
acceptable when lubricant is visible in bottom of chaincase with motorcycle standing upright (not resting on jiffy
stand).
pd0206
NOTE
Do not fill oil tank to full (upper) mark on filler cap/dipstick at
this time. Ordinarily, you would fill a Softail oil tank (with warm
engine) to this level. In this situation, however, if any oil has
flowed from tank to crankcase during shipping, filling oil tank
to full mark might result in overfilling of oil tank when engine is
started. Final check of oil level must be made with engine off,
after engine has reached normal operating temperature.
pd0219
Full mark with engine
at normal operating
temperature
Figure 4-5. Chaincase Lubricant Level
Add 1 quart mark
Figure 4-4. Engine Oil Dipstick
TRANSMISSION LUBRICANT LEVEL
NOTE
Allow vehicle to stand upright for a moment before checking
transmission lubricant level. This will allow lubricant level to
normalize.
3.
Check clutch action. Clutch lever should move freely and
smoothly through its entire range of travel.
4.
Check clutch adjustment according to the procedures
given in the Softail Models Service Manual.
NOTE
The clutch inspection cover gasket may be reused ONLY
when checking chaincase lubricant level and reinstalling
clutch inspection cover at PDI.
5.
Reinstall cover gasket and clutch inspection cover, and
secure with five screws. Tighten to 84-108 in-lbs (9.512.2 Nm).
Check the transmission lubricant level with the motorcycle
standing upright in accordance with the procedure given in
the Softail Models Service Manual.
2005 PDI: Softail Models
4-5
FUEL SYSTEM
GENERAL
CAUTION
4.4
CHECKING QUICK CONNECT FUEL
LINE FITTING–FUEL INJECTED
MODELS
Some fuel suppliers sell gasoline which has been
blended with an alcohol or an ether. The type and amount
of alcohol or ether added to the fuel is important.
CAUTION
Do not use gasoline that contains methanol. Doing so
can result in fuel system component failure, engine damage and/or equipment malfunction. (00148a)
●
●
Gasolines containing ETHANOL (ethyl alcohol or grain
alcohol) can be used. Gasoline/ethanol blends are a mixture of 10% ethanol and 90% unleaded gasoline. They
are identified as “gasohol,” “ethanol enhanced,” or “contains ethanol.”
Gasolines containing METHYL TERTIARY BUTYL
ETHER (MTBE) can also be used. Gasoline/MTBE
blends are a mixture of gasoline and as much as 15%
MTBE.
1WARNING
To avoid an uncontrolled discharge or spray of gasoline,
always be sure the quick-connect fitting (under left side
of fuel tank) is properly mated. A slight tug on the fuel
line will verify this condition. Gasoline is extremely flammable and highly explosive. Inadequate safety precautions could result in death or serious injury.
1.
Tug on fuel supply line (under left side of fuel tank) to be
sure quick connect fitting is properly mated.
2.
If fuel line comes free, push up on sleeve of quick-connect fitting and insert neck of fuel supply line fitting. While
pushing up on bottom of fuel supply line fitting, pull down
on sleeve until it “clicks” into the locked position.
FUEL TANK
REFORMULATED OR OXYGENATED GASOLINES
(RFG): “Reformulated gasoline” is a term used to
describe gasoline blends that are specifically designed to
burn cleaner than other types of gasoline, leaving fewer
“tailpipe” emissions. They are also formulated to evaporate less when you are filling your tank. Reformulated
gasolines use additives to “oxygenate” the gas. Your
motorcycle will run normally using this type of gas and
Harley-Davidson recommends you use it when possible,
as an aid to cleaner air in our environment
Make sure engine stop switch on the handlebar is switched to
the OFF position. Turn the ignition/light switch to the IGNITION position. Fuel injected models: verify that Low Fuel
lamp is lit. Partially fill fuel tank with gasoline. Follow FUEL
recommendations found in the Owner’s Manual. Use
unleaded gasoline, 91 octane or higher. Verify function of fuel
gauge as fuel tank is filling, then turn ignition/light switch OFF.
Inspect fuel lines for leaks.
Because of their different chemical properties (which affect
fuel volatility and ignition characteristics), these blends may
adversely affect the starting, drivability, and fuel efficiency of
the motorcycle. If you experience these problems, HarleyDavidson recommends using straight, unleaded gasoline.
See Figure 4-6. After adding gasoline, check for smooth operation of the fuel valve. Inspect fuel valve for leaks.
●
Carbureted Models
o0046box
CAUTION
Use only unleaded fuel in California model catalytic converter-equipped motorcycles. Using leaded fuel will damage the emission control system. (00150a).
Figure 4-6. Fuel Supply Valve
4-6
2005 PDI: Softail Models
ELECTRICAL SYSTEM
HEADLAMP
4.5
pd0104c
Check headlamp beam for proper height and lateral alignment in accordance with procedures given in the Softail Models Service Manual.
1WARNING
The automatic-on headlamp feature provides increased
visibility of the rider to other motorists. Be sure headlamp is on at all times. Poor visibility of rider to other
motorists can result in death or serious injury. (00030b)
AUXILIARY LAMPS
On models equipped with auxiliary lamps, check lamp beam
for proper height and lateral alignment in accordance with
procedures given in the Softail Models Service Manual.
MIRRORS AND DIRECTIONAL
LAMPS
See Figure 4-7. Adjust mirrors for proper rear view. Adjust
front directional lamps so lenses are aimed directly forward;
adjust rear directional lamps so lenses are aimed directly
rearward. Verify that mirror and directional lamp fasteners are
properly tightened.
1.
2.
3.
4.
Mirror
Star washer
Acorn nut
Front directional lamp
Figure 4-7. Mirrors And Turn Signals
2005 PDI: Softail Models
4-7
TIRES
4.6
FRONT AND REAR TIRES
Table 4-3. Tire Pressures
TIRES
1WARNING
Do not alter or modify front suspension/fender/tire type
on FXSTS models. The motorcycle handling characteristics and front end structural integrity might be adversely
affected. This may cause loss of control, which could
result in death or serious injury.
1WARNING
Do not inflate tire beyond maximum pressure as specified on sidewall. Over inflated tires can blow out, which
could result in death or serious injury. (00027a)
1WARNING
Harley-Davidson front and rear tires are not the same.
Interchanging front and rear tires can cause tire failure,
which could result in death or serious injury. (00026a)
1.
4-8
Check for proper front and rear tire pressures when tires
are cold. Compare results against Table 4-3.
2005 PDI: Softail Models
SOLO RIDER
RIDER AND
PASSENGER
MODEL
TIRE
PSI
kPA
PSI
kPA
FLSTC/F/N/SC
Front
36
248
36
248
FXST/D/S/B
Front
30
207
30
207
All models
Rear
36
248
40
276
BRAKE SYSTEM
4.7
BRAKES
1CAUTION
Direct contact with D.O.T. 5 brake fluid can cause eye irritation, swelling, and redness. Avid eye contact. In case of
eye contact flush with large amounts of water and get
medical attention. Swallowing large amounts of D.O.T. 5
brake fluid can cause digestive discomfort. If swallowed,
obtain medical attention. Use in well ventilated area.
KEEP OUT OF REACH OF CHILDREN. (00144a)
View reservoir sightglass and verify fluid presence. Sightglass should appear dark if fluid is present. If sightglass is not
dark, add brake fluid. See Softail Models Service Manual.
Use only D.O.T. 5 SILICONE HYDRAULIC BRAKE FLUID
(Part No. 99902-77: 12 oz., 99901-77: 1 gal.).
2005 PDI: Softail Models
4-9
DEALER ROAD TEST
ROAD TEST
After you complete motorcycle inspection, take motorcycle for
a road test. Check all systems and overall operation of motorcycle: engine, transmission, clutch, brakes, handling, etc.
After road test, return motorcycle to shop, and thoroughly
clean off any road dirt. Check and correct any problems you
may have found during road test.
Before You Begin
Check the following items before road test of vehicle:
●
●
●
●
●
●
Lamps and indicators.
Check amount of gasoline in tank and add (if
needed).
Adjust mirrors to proper riding positions.
Check tire condition and pressure (adjust if necessary).
Check controls to verify proper function.
Check all electrical equipment and switches including stop lamp, turn signals and horn for proper operation.
4.8
Road Test of Vehicle: Low Speed
1.
Shift from first through third gear, checking clutch operation, throttle control, and transmission operation.
2.
Verify low speed braking for front and rear brakes.
3.
Handling under braking conditions.
4.
Low speed handling. Verify that vehicle does not pull to
left or right.
5.
Check for any abnormal vibrations.
6.
Check electrical lamps, indicators.
Road Test of Vehicle: Highway Speed
1.
Shift from first through fifth gear, checking clutch operation, throttle control, and transmission operation.
2.
Verify highway speed braking operation of front and rear
brakes.
3.
Verify proper handling at highway speeds.
4.
Check for any abnormal vibrations.
●
Program Security System (if equipped)
●
Engine Oil:
Check and correct hot level.
●
Clean Vehicle:
NOTE
Be sure to submit a Dealer Product Quality Audit (DPQA) on
ANY adjustments and/or warranty work performed required to
deliver the vehicle to the customer.
4-10
2005 PDI: Softail Models
CUSTOMER DELIVERY
NOTICE TO DEALER
Before delivering motorcycle to owner, perform the following:
1.
Make sure vehicle owner receives, and is aware of
importance of reading Owner’s Manual, safety booklets
and viewing Welcome To The Family video included with
owner’s kit.
2.
Review warranties with vehicle owner. Make sure owner
understands warranties. California dealers must give
customer a copy of Emissions Control System Warranty.
3.
Give IMPORTANT sheet and other printed material in literature kit to vehicle owner.
4.
Complete and sign warranty registration form. Have vehicle owner sign it.
5.
Explain operation of vehicle controls to vehicle owner.
6.
Explain how turn signals and emergency flashers operate.
4.9
IMPORTANT NOTE
Make sure vehicle owner understands how to arm and
disarm security system. Explain how to disarm security
system with personal code if key fob is lost or not functioning. Personal code should be written on the tear-out
card in the Softail Models Owner’s Manual and kept on
the owner’s person. Also, verify both key fobs operate
properly.
7.
Whenever possible, introduce dealer Service Manager to
vehicle owner, and involve Service Manager in delivery
process. Supply owner with name(s) of dealer Service/
Parts Department personnel who should be contacted
regarding vehicle service/parts questions.
8.
Inform vehicle owner about checking engine oil level,
checking tire pressure, and performing other basic maintenance functions. Review the Initial Scheduled Maintenance* requirement with owner. Depending on owner’s
anticipated frequency of operating motorcycle, you may
wish to schedule the Initial Scheduled Maintenance*
service appointment at this time.
Initial Scheduled Maintenance is required as follows:
●
●
All Softails, except FLSTSC and FXSTS @ 1000 mi.
(1600 km)
FLSTSC and FXSTS @ 500 mi. (800 km)
2005 PDI: Softail Models
4-11
VEHICLE PDI CHECKLIST
4.10
PRIOR TO CUSTOMER DELIVERY
❒
NOTE
Use this checklist for performing tasks related to this model
motorcycle setup.
❒
❒
Verify operation and connections.
❒
a.
Verify low-speed braking for front and rear brakes.
c.
Verify handling under braking conditions.
Verify proper function.
d.
Note Any Additional Problems
(including cosmetic quality):
Verify low-speed handling. Verify that vehicle does
not pull to left or right.
e.
Check for any abnormal vibrations.
f.
Check electrical lamps, indicators.
Battery:
❒
Perform required voltmeter test on battery.
❒
❒
Road Test Vehicle: Highway Speed
a.
Shift from first through fifth gear, checking clutch
operation, throttle control, and transmission operation.
b.
Verify highway speed braking operation of front and
rear brakes.
Engine Oil:
c.
Verify proper handling at highway speeds.
Verify oil is present (cold level).
d.
Check for any abnormal vibrations.
Connect negative battery cable to battery.
Lubrication System:
Inspect condition of oil lines.
❒
❒
Primary Chaincase:
Check and verify lubricant is present.
❒
❒
Fuel System:
a.
Inspect fuel system for leaks.
b.
Fill, verify sender operation.
c.
Verify low fuel light operation (if equipped).
Evaporative Control System:
Inspect hose routings, connections and fuel tank venting
to canister (if equipped).
❒
Lighting, Gauges, Electrical Systems:
Verify correct operation.
❒
Tires:
Inspect condition and air pressure.
❒
Brake Systems (front and rear):
Correct fluid level (if necessary).
❒
Headlamps:
Inspect and adjust as necessary.
❒
Shift from first through third gear, checking clutch
operation, throttle control, and transmission operation.
b.
Jiffy Stand:
Perform Warranty repairs.
❒
Road Test Vehicle: Low Speed
Uncrate:
Check for damaged or missing parts.
❒
Fuel Outlet (valve or quick connect fitting)
and Hoses:
Mirrors:
Inspect and adjust as necessary.
4-12
2005 PDI: Softail Models
❒
Engine Oil:
Check and correct hot level.
❒
Create Vehicle Birth-Certificate Using
Digital Technician (optional).
❒
Clean Vehicle.
AT POINT OF CUSTOMER DELIVERY
❒
❒
❒
❒
❒
Suspension Adjustments.
Brake Pedal Height Adjustment.
Shift Linkage Adjustment.
Brake Hand Lever Adjustment.
Review Vehicle Care and Maintenance Requirements.
NOTE
Be sure to submit a Dealer Product Quality Audit (DPQA) on
ANY adjustments and/or warranty work performed required to
deliver the vehicle to the customer.
PREDELIVERY: SPORTSTER MODELS
SUBJECT
PAGE NO.
5.1 Specifications . . . . . . . . . . . . . . . . . . . . . . . . . . . . . . . . . . . . . . . . . . . . . . . . .
Torque Values . . . . . . . . . . . . . . . . . . . . . . . . . . . . . . . . . . . . . . . . . . . . . . . .
2005 Sportster Models Specifications . . . . . . . . . . . . . . . . . . . . . . . . . . . . . .
5.2 Initial Assembly . . . . . . . . . . . . . . . . . . . . . . . . . . . . . . . . . . . . . . . . . . . . . . . .
Battery Testing And Charging . . . . . . . . . . . . . . . . . . . . . . . . . . . . . . . . . . . .
Installing Maxi-Fuse . . . . . . . . . . . . . . . . . . . . . . . . . . . . . . . . . . . . . . . . . . . .
Idle Speed . . . . . . . . . . . . . . . . . . . . . . . . . . . . . . . . . . . . . . . . . . . . . . . . . . .
Mirrors . . . . . . . . . . . . . . . . . . . . . . . . . . . . . . . . . . . . . . . . . . . . . . . . . . . . . .
Rear Suspension . . . . . . . . . . . . . . . . . . . . . . . . . . . . . . . . . . . . . . . . . . . . . .
Directional Lamps . . . . . . . . . . . . . . . . . . . . . . . . . . . . . . . . . . . . . . . . . . . . . .
Throttle Control Cables . . . . . . . . . . . . . . . . . . . . . . . . . . . . . . . . . . . . . . . . .
Seats And Passenger Strap . . . . . . . . . . . . . . . . . . . . . . . . . . . . . . . . . . . . . .
5.3 Lubrication System . . . . . . . . . . . . . . . . . . . . . . . . . . . . . . . . . . . . . . . . . . . . .
Engine Oil Level . . . . . . . . . . . . . . . . . . . . . . . . . . . . . . . . . . . . . . . . . . . . . . .
Clutch Operation and Primary Chaincase . . . . . . . . . . . . . . . . . . . . . . . . . . .
5.4 Fuel System . . . . . . . . . . . . . . . . . . . . . . . . . . . . . . . . . . . . . . . . . . . . . . . . . . .
General . . . . . . . . . . . . . . . . . . . . . . . . . . . . . . . . . . . . . . . . . . . . . . . . . . . . . .
Fuel Tank . . . . . . . . . . . . . . . . . . . . . . . . . . . . . . . . . . . . . . . . . . . . . . . . . . . .
5.5 Electrical System . . . . . . . . . . . . . . . . . . . . . . . . . . . . . . . . . . . . . . . . . . . . . . .
Headlamp Alignment . . . . . . . . . . . . . . . . . . . . . . . . . . . . . . . . . . . . . . . . . . .
Indicator Lamps/Controls . . . . . . . . . . . . . . . . . . . . . . . . . . . . . . . . . . . . . . . .
5.6 Tires . . . . . . . . . . . . . . . . . . . . . . . . . . . . . . . . . . . . . . . . . . . . . . . . . . . . . . . . .
Front and Rear Tires . . . . . . . . . . . . . . . . . . . . . . . . . . . . . . . . . . . . . . . . . . .
5.7 Brake System . . . . . . . . . . . . . . . . . . . . . . . . . . . . . . . . . . . . . . . . . . . . . . . . .
Rear Brake . . . . . . . . . . . . . . . . . . . . . . . . . . . . . . . . . . . . . . . . . . . . . . . . . . .
5.8 Dealer Road Test . . . . . . . . . . . . . . . . . . . . . . . . . . . . . . . . . . . . . . . . . . . . . .
Road Test . . . . . . . . . . . . . . . . . . . . . . . . . . . . . . . . . . . . . . . . . . . . . . . . . . . .
5.9 Customer Delivery . . . . . . . . . . . . . . . . . . . . . . . . . . . . . . . . . . . . . . . . . . . . . .
Notice To Dealer . . . . . . . . . . . . . . . . . . . . . . . . . . . . . . . . . . . . . . . . . . . . . .
5.10 Vehicle PDI Checklist . . . . . . . . . . . . . . . . . . . . . . . . . . . . . . . . . . . . . . . . . .
Prior to Customer Delivery . . . . . . . . . . . . . . . . . . . . . . . . . . . . . . . . . . . . . . .
At Point of Customer Delivery . . . . . . . . . . . . . . . . . . . . . . . . . . . . . . . . . . . .
5-1
5-1
5-1
5-2
5-2
5-3
5-3
5-4
5-4
5-4
5-4
5-4
5-5
5-5
5-5
5-6
5-6
5-6
5-7
5-7
5-7
5-8
5-8
5-9
5-9
5-10
5-10
5-11
5-11
5-12
5-12
5-12
V
1
SPECIFICATIONS
5.1
TORQUE VALUES
The following torque values are included for fasteners that
may be loosened and tightened during Predelivery and
Setup. Any fasteners that are not loosened/removed do not
need to be checked during predelivery and setup.
Table 5-1. Torque Values
ITEM
TORQUE
Handlebar clamp screws (front and rear)
12-18 ft-lbs
16.3-24.4 Nm
Front brake master cylinder cover screws
9-17 in-lbs
1.0-2.0 Nm
96-144 in-lbs
10.9-16.3 Nm
40-50 in-lbs
4.5-5.7 Nm
Mirror fasteners
Battery terminal screw (positive and negative)
NOTES
2005 SPORTSTER MODELS
SPECIFICATIONS
Table 5-2. Capacities
Component
ENGLISH
METRIC
Oil tank w/filter (Dry)
3.6 qt.
3.4 liters
Transmission/Primary
Chaincase
32 oz
946 ml
All motorcycles are shipped with 20W50 Harley-Davidson
360 Motor oil
Idle Speed: 950 RPM at
Operating Temperature
Use 950 RPM during Predelivery and Setup adjustments.
Engine idle speed may increase during engine break-in. Use
idle speed listed in the Sportster Models Service Manual at
Initial Maintenance check.
2005 PDI: Sportster Models
5-1
INITIAL ASSEMBLY
5.2
BATTERY TESTING AND CHARGING
3.
Place test probes of voltmeter on battery terminals and
check the voltage of the battery to make sure it is at least
12.6 VDC.
4.
If the open circuit (disconnected) voltage reading is 12.6
VDC or greater the battery is ready for use.
5.
See Section 1. Mark the date on the battery warranty tag
by removing the applicable month and year. Month and
year punches may be removed with the point of a screwdriver without removing battery.
6.
Never remove warning label attached to top of battery.
Failure to read and understand all precautions in warning
could result in death or serious injury. (00064a)
If the open circuit (disconnected) voltage reading is
below 12.6 VDC, refer to Table 1-2, 12 amp-hour battery,
in Section 1 and charge battery at rate and time specified.
7.
Recheck battery voltage by repeating step 2 above. If
voltage now is 12 VDC or greater, perform steps 2 and 3
above.
1WARNING
8.
If the open circuit (disconnected) voltage reading is still
below 12.6 VDC, the battery must be replaced.
Battery posts, terminals and related accessories contain
lead and lead components, chemicals known in the State
of California to cause cancer and birth defects or other
reproductive harm. Wash hands after handling. (00019a)
9.
Place bottom of side cover with grommet onto mounting
tab on battery tray.
1WARNING
Batteries contain sulfuric acid, which could cause severe
burns to eyes and skin. Wear a protective face shield,
rubberized gloves and protective clothing when working
with batteries. KEEP BATTERIES AWAY FROM CHILDREN. (00063a)
1WARNING
1.
Grasp left side cover at upper corners and gently pull
away from plastic mounting clips on frame.
2.
Lift cover up slightly so mounting grommet clears mounting tab on battery tray. Remove cover.
x0628x1x
1
2
1.
2.
Mounting slots (top)
Mounting grommet (bottom)
Figure 5-1. Left Side Cover
5-2
2005 PDI: Sportster Models
10. Line up top of side cover with mounting clips aligning
with front clip first. Press top of side cover into clips until
snug.
INSTALLING MAXI-FUSE
IDLE SPEED
The 30 amp Maxi-Fuse provides battery power to the ignition
switch and ICM. The Maxi-Fuse is not installed at the factory.
It is mounted in protective foam attached to the left handlebar
grip of the motorcycle in the crate.
See Figure 5-3. Set engine slow idle speed of 950 RPM with
engine running at normal operating temperature and with
enrichment control knob pushed in fully. Turn carburetor idle
speed adjusting screw (5) clockwise to increase speed, or
counterclockwise to decrease speed.
See Figure 5-2. The Maxi-Fuse holder is located under the
left side cover, attached to the battery strap. See the Sportster Models Service Manual for the proper installation procedure.
8946
NOTE
The C.V. carburetor has an enrichment circuit that will cause
the engine to idle above the normal idle range (950-1050
RPM) with the engine at normal operating temperature and
the enrichment knob pulled out fully. The increase in idle
speed is intended to alert the rider that the engine is warmed
up to normal operating temperature and that the enrichment
knob should be pushed in all the way. Continuing to use the
enrichener when the engine is at full operating temperature
will cause fouled plugs.
Be sure the engine is warmed up to normal operating temperature and the enrichment knob is pushed all the way in before
adjusting engine idle speed. Be aware that, because there
are variations in individual components, it is possible for a
properly warmed-up engine to idle above the normal idle
range (950-1050 RPM) with the enrichment knob pulled out
partially.
x0505a1x
8948a
5
1
2
3
Figure 5-2. Installing Maxi-Fuse
4
1.
2.
3.
4.
5.
Throttle cam stop
Cable housing
Spring
Throttle cam
Idle speed adjusting screw
Figure 5-3. Carburetor adjustments
2005 PDI: Sportster Models
5-3
MIRRORS
REAR SUSPENSION
NOTE
XL 883L model: righthand mirror is shipped in protective foam
on left hand grip and must be installed.
See Figure 5-5. Check that spring preload is set the same on
both rear shock absorbers. For a solo rider of average weight,
adjust spring preload to softest setting using SPANNER
TOOL (Part No. HD-94820-75A) for all models.
1.
XL 883L models:
a.
See Figure 5-4. Insert mirror (1) stem into hole in
master cylinder assembly (2).
b.
Install lock washer (3) and lock nut (4). Tighten to
96-144 in-lbs (10.9-16.3 Nm).
10628
pd0225
1
2
Figure 5-5. Adjusting Spring Preload
DIRECTIONAL LAMPS
1.
2.
3.
4.
Righthand mirror
Front brake master
cylinder assembly
Lock washer
Lock nut
3
Adjust rear directional lamps so lenses are aimed directly
rearward. Verify that directional lamp fasteners are properly
tightened.
4
Figure 5-4. Installing Righthand Mirror on XL 883L
2.
Adjust mirrors for proper rear view.
3.
Adjust front directional lamps so lenses are aimed
directly forward.
4.
Verify that mirror and directional lamp fasteners are properly tightened.
NOTE
A 4 mm allen wrench will be needed to perform the front
directional adjustments.
THROTTLE CONTROL CABLES
1WARNING
Throttle cables must not pull tight when handlebars are
turned fully to left or right fork stops. Be sure wires and
throttle cables are clear of fork stops at steering head so
they will not be pinched when fork is turned against
stops. Steering must be smooth and free with no binding
or interference. Interference with steering could cause
loss of vehicle control which could result in death or
serious injury.
Check throttle cable adjustment in accordance with procedure given in Section 1 of Sportster Models Service Manual.
SEATS AND PASSENGER STRAP
Refer to Sportster Models Owner’s Manual for seat and passenger strap removal and installation instructions.
5-4
2005 PDI: Sportster Models
LUBRICATION SYSTEM
ENGINE OIL LEVEL
5.3
10100
Check engine oil level in oil tank at least once every 500 miles
(800 km). Check level more frequently if engine uses more oil
than normal or if vehicle is operated under harsh conditions.
Oil tank capacity is 3.6 quarts (U.S.) (3.4 liters). Refer to
Owner’s Manual for recommended engine oil viscosity.
NOTE
It will be necessary to check engine oil with motorcycle leaning on jiffy stand.
1.
2.
3.
Run engine until engine oil is at normal operating temperature. Turn engine off.
Figure 5-6. Filler Cap/Dipstick Slots
Remove filler cap from oil tank on right side of vehicle.
a.
Press straight down on filler cap and release. Cap
will pop up.
b.
Pull up on filler cap while turning counterclockwise
one-quarter turn as if unscrewing filler cap.
10099
Wipe attached dipstick clean.
NOTE
See Figure 5-6. Note that dipstick has a wide slot and a narrow slot and can only be inserted in oil tank one way.
4.
Insert dipstick into tank. Press down on filler cap while
turning clockwise one-quarter turn as if screwing filler
cap into tank. When filler cap “snaps” slightly, it is fully
seated.
5.
See Figure 5-7. Remove filler cap again and check warm
oil level on dipstick. Dipstick has two marks. If oil level in
tank is at or below lower mark, add one quart (0.946 liter)
of Harley-Davidson oil to tank.
6.
Repeat step 4 to replace filler cap.
7.
If you added oil in step 5, remove filler cap and verify correct engine oil level in oil tank. Do not fill oil tank to the
level above upper mark on dipstick. Repeat step 4 to
replace filler cap.
8.
Press down on filler cap until it clicks in place.
Figure 5-7. Oil Level Marks
CLUTCH OPERATION AND
PRIMARY CHAINCASE
1.
Check clutch action. Clutch lever should move freely and
smoothly through its entire range of travel.
2.
Check clutch adjustment and primary chaincase lubricant level according to the procedures in Chapter 1 of
the Sportster Models Service Manual.
2005 PDI: Sportster Models
5-5
FUEL SYSTEM
GENERAL
FUEL TANK
CAUTION
Some fuel suppliers sell gasoline which has been
blended with an alcohol or an ether. The type and amount
of alcohol or ether added to the fuel is important.
CAUTION
Do not use gasoline that contains methanol. Doing so
can result in fuel system component failure, engine damage and/or equipment malfunction. (00148a)
●
Gasolines containing ETHANOL (ethyl alcohol or grain
alcohol) can be used. Gasoline/ethanol blends are a mixture of 10% ethanol and 90% unleaded gasoline. They
are identified as “gasohol,” “ethanol enhanced,” or “contains ethanol.”
●
Gasolines containing METHYL TERTIARY BUTYL
ETHER (MTBE) can also be used. Gasoline/MTBE
blends are a mixture of gasoline and as much as 15%
MTBE.
●
REFORMULATED OR OXYGENATED GASOLINES
(RFG): “Reformulated gasoline” is a term used to
describe gasoline blends that are specifically designed to
burn cleaner than other types of gasoline, leaving fewer
“tailpipe” emissions. They are also formulated to evaporate less when you are filling your tank. Reformulated
gasolines use additives to “oxygenate” the gas. Your
motorcycle will run normally using this type of gas and
Harley-Davidson recommends you use it when possible,
as an aid to cleaner air in our environment
Because of their different chemical properties (which affect
fuel volatility and ignition characteristics), these blends may
adversely affect the starting, drivability, and fuel efficiency of
the motorcycle. If you experience these problems, HarleyDavidson recommends using straight, unleaded gasoline.
CAUTION
Use only unleaded fuel in California model catalytic converter-equipped motorcycles. Using leaded fuel will damage the emission control system. (00150a).
5-6
5.4
2005 PDI: Sportster Models
Partially fill fuel tank with gasoline. Follow FUEL recommendations found in the Owner’s Manual. Use unleaded gasoline,
91 octane or higher on all 1200 Roadster and Custom models, and 87 octane or higher on 883 Standard and Custom
models.
See Figure 5-8. After adding gasoline, check for smooth operation of the fuel valve. Inspect fuel valve and fuel lines for
leaks.
o0046box
Figure 5-8. Fuel Supply Valve
ELECTRICAL SYSTEM
HEADLAMP ALIGNMENT
5.5
4911
1
8
Check headlamp beam for proper height and lateral alignment in accordance with procedures given in Section 1 of the
Sportster Models Service Manual.
1WARNING
The automatic-on headlamp feature provides increased
visibility of the rider to other motorists. Be sure headlamp is on at all times. Poor visibility of rider to other
motorists can result in death or serious injury. (00030b)
2
INDICATOR LAMPS/CONTROLS
1.
See Figure 5-9. Turn ignition switch to IGNITION position, and check that oil pressure indicator lamp (6) turns
on (before engine is started).
2.
Shift transmission to neutral position, and verify that neutral indicator lamp (5) turns on.
3.
Start engine; check operation of starter.
4.
Check that oil pressure indicator lamp (6) turns off when
engine is running above 1000 RPM.
5.
Disengage clutch (depress clutch lever), and verify that
neutral indicator lamp (5) turns off when transmission is
shifted to any forward gear.
6.
Shift transmission to neutral position, and verify that neutral indicator lamp turns on again.
7.
Check operation of tachometer (8) (1200 Roadster only).
8.
Check horn operation.
9.
Check operation of all remaining lamps:
●
Headlamp–low and high beams
●
Headlamp high beam indicator lamp (4)
●
Left directional (turn signal) lamps–front and rear
●
Left directional (turn signal) indicator lamp (3)
●
Right directional (turn signal) lamps–front and rear
●
Right directional (turn signal) indicator lamp (7)
●
Left front running lamp
●
Right front running lamp
●
Tail lamp–running lamp and brake lamp filaments
●
Speedometer (1) illumination lamp
●
Tachometer (8) illumination lamp (1200 Roadster
only)
3
4
5
6
7
1200 Roadster shown, other Sportster models not originally equipped with tachometer.
1.
2.
3.
4.
5.
6.
7.
8.
Speedometer
Odometer and trip odometer
Left directional (turn signal) indicator lamp
High beam indicator lamp
Neutral indicator lamp
Oil pressure indicator lamp
Right directional (turn signal) indicator lamp
Tachometer (1200 Roadster only)
Figure 5-9. Instruments (Typical)
10. After engine has reached normal operating temperature,
turn engine off.
11. Check engine oil level in manner previously specified.
This time, fill oil tank to upper mark on filler cap/dipstick.
2005 PDI: Sportster Models
5-7
TIRES
5.6
FRONT AND REAR TIRES
1WARNING
Do not inflate tire beyond maximum pressure as specified on sidewall. Over inflated tires can blow out, which
could result in death or serious injury. (00027a)
1WARNING
Harley-Davidson front and rear tires are not the same.
Interchanging front and rear tires can cause tire failure,
which could result in death or serious injury. (00026a)
1.
5-8
Check for proper front and rear tire pressures when tires
are cold. Compare results against Table 5-3.
2005 PDI: Sportster Models
Table 5-3. Tire Pressures
TIRES
SOLO RIDER
RIDER &
PASSENGER
MODEL
TIRE
PSI
kPA
PSI
kPA
All models
Front
30
207
30
207
All models
Rear
36
248
40
276
BRAKE SYSTEM
REAR BRAKE
5.7
8967
1CAUTION
Direct contact with D.O.T. 5 brake fluid can cause eye irritation, swelling, and redness. Avid eye contact. In case of
eye contact flush with large amounts of water and get
medical attention. Swallowing large amounts of D.O.T. 5
brake fluid can cause digestive discomfort. If swallowed,
obtain medical attention. Use in well ventilated area.
KEEP OUT OF REACH OF CHILDREN. (00144a)
1.
With vehicle upright (not on sidestand), check that fluid
level is between the upper and lower marks on reservoir.
If brake fluid level is low, add brake fluid. See Sportster
Models Service Manual. Use only D.O.T. 5 SILICONE
HYDRAULIC BRAKE FLUID (Part No. 99902-77: 12 oz.,
99901-77: 1 gal.).
Figure 5-10. Rear Brake Master Cylinder
Remote Reservoir
2005 PDI: Sportster Models
5-9
DEALER ROAD TEST
ROAD TEST
After you complete motorcycle inspection, take motorcycle for
a road test. Check all systems and overall operation of motorcycle: engine, transmission, clutch, brakes, handling, etc.
After road test, return motorcycle to shop, and thoroughly
clean off any road dirt. Check and correct any problems you
may have found during road test.
Before You Begin
Check the following items before road test of vehicle:
●
●
●
●
●
●
Lamps and indicators.
Check amount of gasoline in tank and add (if
needed).
Adjust mirrors to proper riding positions.
Check tire condition and pressure (adjust if necessary).
Check controls to verify proper function.
Check all electrical equipment and switches including stop lamp, turn signals and horn for proper operation.
5.8
Road Test of Vehicle: Low Speed
1.
Shift from first through third gear, checking clutch operation, throttle control, and transmission operation.
2.
Verify low speed braking for front and rear brakes.
3.
Handling under braking conditions.
4.
Low speed handling. Verify that vehicle does not pull to
left or right.
5.
Check for any abnormal vibrations.
6.
Check electrical lamps, indicators.
Road Test of Vehicle: Highway Speed
1.
Shift from first through fifth gear, checking clutch operation, throttle control, and transmission operation.
2.
Verify highway speed braking operation of front and rear
brakes.
3.
Verify proper handling at highway speeds.
4.
Check for any abnormal vibrations.
●
Program Security System (if equipped)
●
Engine Oil:
Check and correct hot level.
●
Clean Vehicle:
NOTE
Be sure to submit a Dealer Product Quality Audit (DPQA) on
ANY adjustments and/or warranty work performed required to
deliver the vehicle to the customer.
5-10
2005 PDI: Sportster Models
CUSTOMER DELIVERY
NOTICE TO DEALER
Before delivering motorcycle to owner, perform the following:
1.
Make sure vehicle owner receives, and is aware of
importance of reading Owner’s Manual, safety booklets
and viewing Welcome To The Family video included with
owner’s kit.
2.
Review warranties with vehicle owner. Make sure owner
understands warranties. California dealers must give
customer a copy of Emissions Control System Warranty.
3.
Give IMPORTANT sheet and other printed material in literature kit to vehicle owner.
4.
Complete and sign warranty registration form. Have vehicle owner sign it.
5.
Explain operation of vehicle controls to vehicle owner.
6.
Explain how turn signals and emergency flashers operate.
5.9
IMPORTANT NOTE
Make sure vehicle owner understands how to arm and
disarm security system. Explain how to disarm security
system with personal code if key fob is lost or not functioning. Personal code should be written on the tear-out
card in the Sportster Models Owner’s Manual and kept on
the owner’s person. Also, verify both key fobs operate
properly.
7.
Whenever possible, introduce dealer Service Manager to
vehicle owner, and involve Service Manager in delivery
process. Supply owner with name(s) of dealer Service/
Parts Department personnel who should be contacted
regarding vehicle service/parts questions.
8.
Inform vehicle owner about checking engine oil level,
checking tire pressure, and performing other basic maintenance functions. Review the Initial Scheduled Maintenance requirement with owner. Depending on owner’s
anticipated frequency of operating motorcycle, you may
wish to schedule the Initial Scheduled Maintenance
service appointment at this time.
2005 PDI: Sportster Models
5-11
VEHICLE PDI CHECKLIST
PRIOR TO CUSTOMER DELIVERY
5.10
❒
Fuel Outlet valve and Hoses:
Verify operation and connections.
NOTE
Use this checklist for performing tasks related to this model
motorcycle setup.
❒
❒
❒
a.
Uncrate:
b.
Verify low-speed braking for front and rear brakes.
Jiffy Stand:
c.
Verify handling under braking conditions.
d.
Verify low-speed handling. Verify that vehicle does
not pull to left or right.
Note Any Additional Problems
(including cosmetic quality):
Perform Warranty repairs.
❒
Battery:
❒
Perform required voltmeter test on Maxi-Fuse (main
fuse) and battery.
❒
❒
❒
Install Maxi Fuse (main fuse).
Lubrication System:
Engine Oil:
Verify oil is present (cold level).
❒
Primary Chaincase:
Check and verify lubricant is present.
❒
Fuel System:
Inspect fuel system for leaks.
❒
Evaporative Control System:
Inspect hose routings, connections and fuel tank venting
to canister (if equipped).
❒
Lighting, Gauges, Electrical Systems:
Verify correct operation.
❒
Tires:
Inspect condition and air pressure.
❒
Brake Systems (front and rear):
Correct fluid level (if necessary).
❒
Headlamps:
Inspect and adjust as necessary.
❒
e.
Check for any abnormal vibrations.
f.
Check electrical lamps, indicators.
Road Test Vehicle: Highway Speed
a.
Shift from first through fifth gear, checking clutch
operation, throttle control, and transmission operation.
b.
Verify highway speed braking operation of front and
rear brakes.
c.
Verify proper handling at highway speeds.
d.
Check for any abnormal vibrations.
Install righthand mirror (XL 883L only).
Inspect condition of oil lines.
❒
Shift from first through third gear, checking clutch
operation, throttle control, and transmission operation.
Check for damaged or missing parts.
Verify proper function.
❒
Road Test Vehicle: Low Speed
Mirrors:
Inspect and adjust as necessary.
5-12
2005 PDI: Sportster Models
❒
Engine Oil:
Check and correct hot level.
❒
Create Vehicle Birth-Certificate Using
Digital Technician (optional).
❒
Clean Vehicle.
AT POINT OF CUSTOMER DELIVERY
❒
❒
❒
❒
Suspension Adjustments.
Shift Linkage Adjustment.
Brake Hand Lever Adjustment.
Review Vehicle Care and Maintenance Requirements.
NOTE
Be sure to submit a Dealer Product Quality Audit (DPQA) on
ANY adjustments and/or warranty work performed required to
deliver t he vehicle to the customer.
PREDELIVERY: VRSC MODELS
SUBJECT
PAGE NO.
6.1 Specifications . . . . . . . . . . . . . . . . . . . . . . . . . . . . . . . . . . . . . . . . . . . . . . . . .
Torque Values . . . . . . . . . . . . . . . . . . . . . . . . . . . . . . . . . . . . . . . . . . . . . . . .
2005 VRSC Models Specifications . . . . . . . . . . . . . . . . . . . . . . . . . . . . . . . . .
6.2 Initial Assembly . . . . . . . . . . . . . . . . . . . . . . . . . . . . . . . . . . . . . . . . . . . . . . . .
Battery Testing And Charging . . . . . . . . . . . . . . . . . . . . . . . . . . . . . . . . . . . .
Installing Maxi-Fuse . . . . . . . . . . . . . . . . . . . . . . . . . . . . . . . . . . . . . . . . . . . .
Seats And Passenger Strap . . . . . . . . . . . . . . . . . . . . . . . . . . . . . . . . . . . . . .
6.3 Lubrication System . . . . . . . . . . . . . . . . . . . . . . . . . . . . . . . . . . . . . . . . . . . . .
Engine Oil Level . . . . . . . . . . . . . . . . . . . . . . . . . . . . . . . . . . . . . . . . . . . . . . .
Clutch Master Cylinder . . . . . . . . . . . . . . . . . . . . . . . . . . . . . . . . . . . . . . . . . .
6.4 Fuel System . . . . . . . . . . . . . . . . . . . . . . . . . . . . . . . . . . . . . . . . . . . . . . . . . . .
General . . . . . . . . . . . . . . . . . . . . . . . . . . . . . . . . . . . . . . . . . . . . . . . . . . . . . .
6.5 Electrical System . . . . . . . . . . . . . . . . . . . . . . . . . . . . . . . . . . . . . . . . . . . . . . .
Headlamp . . . . . . . . . . . . . . . . . . . . . . . . . . . . . . . . . . . . . . . . . . . . . . . . . . . .
Indicator Lamps/Controls . . . . . . . . . . . . . . . . . . . . . . . . . . . . . . . . . . . . . . . .
6.6 Tires . . . . . . . . . . . . . . . . . . . . . . . . . . . . . . . . . . . . . . . . . . . . . . . . . . . . . . . . .
Front and Rear Tires . . . . . . . . . . . . . . . . . . . . . . . . . . . . . . . . . . . . . . . . . . .
6.7 Brake System . . . . . . . . . . . . . . . . . . . . . . . . . . . . . . . . . . . . . . . . . . . . . . . . .
Rear Brake Master Cylinder . . . . . . . . . . . . . . . . . . . . . . . . . . . . . . . . . . . . . .
6.8 Dealer Road Test . . . . . . . . . . . . . . . . . . . . . . . . . . . . . . . . . . . . . . . . . . . . . .
Road Test . . . . . . . . . . . . . . . . . . . . . . . . . . . . . . . . . . . . . . . . . . . . . . . . . . . .
6.9 Customer Delivery . . . . . . . . . . . . . . . . . . . . . . . . . . . . . . . . . . . . . . . . . . . . . .
Notice To Dealer . . . . . . . . . . . . . . . . . . . . . . . . . . . . . . . . . . . . . . . . . . . . . .
6.10 Vehicle PDI Checklist . . . . . . . . . . . . . . . . . . . . . . . . . . . . . . . . . . . . . . . . . .
Prior to Customer Delivery . . . . . . . . . . . . . . . . . . . . . . . . . . . . . . . . . . . . . . .
At Point of Customer Delivery . . . . . . . . . . . . . . . . . . . . . . . . . . . . . . . . . . . .
6-1
6-1
6-1
6-2
6-2
6-3
6-3
6-4
6-4
6-6
6-7
6-7
6-8
6-8
6-9
6-10
6-10
6-11
6-11
6-12
6-12
6-13
6-13
6-14
6-14
6-14
VI
1
SPECIFICATIONS
6.1
TORQUE VALUES
The following torque values are included for fasteners that
may be loosened and tightened during Predelivery and
Setup. Any fasteners that are not loosened/removed do not
need to be checked during Predelivery and Setup.
ITEM
TORQUE
NOTES
Front axle nut
68-75 Nm
50-55 ft-lbs
Rear axle nut
129-142.36 Nm
95-105 ft-lbs
All master cylinder cover screws
0.7-0.90 Nm
6-8 in-lbs
Battery terminal screws
6.8-10.9 Nm
60-96 in-lbs
9-11 Nm
80-97 in-lbs
–
–
Coolant air bleed plug
Radiator drain plug
Hand-tighten
2005 VRSC MODELS
SPECIFICATIONS
Table 6-1. Capacities
Component
Metric
English
Fuel tank total
14.0 liters
3.7 gal.
Oil sump
4.3 liters
4.5 qt.
Coolant
2.4 liters
2.54 qt.
2005 PDI: VRSC Models
6-1
INITIAL ASSEMBLY
BATTERY TESTING AND CHARGING
1WARNING
Batteries contain sulfuric acid, which could cause severe
burns to eyes and skin. Wear a protective face shield,
rubberized gloves and protective clothing when working
with batteries. KEEP BATTERIES AWAY FROM CHILDREN. (00063a)
1WARNING
Never remove warning label attached to top of battery.
Failure to read and understand all precautions in warning
could result in death or serious injury. (00064a)
1WARNING
Battery posts, terminals and related accessories contain
lead and lead components, chemicals known in the State
of California to cause cancer and birth defects or other
reproductive harm. Wash hands after handling. (00019a)
●
NOTES
The engine is equipped with a compression release, so a
smaller (12 amp hour) battery provides adequate starting
current.
●
It will be necessary to remove the airbox cover to gain
access to the battery.
1.
Place test probes of voltmeter on battery terminals and
check the voltage of the battery to make sure it is at least
12.6 VDC.
2.
If the open circuit (disconnected) voltage reading is 12.6
VDC or greater the battery is ready for use.
6-2
2005 PDI: VRSC Models
6.2
3.
See Section 1. Mark the date on the battery warranty tag
by removing the applicable month and year. Month and
year punches may be removed with the point of a screwdriver without removing battery.
4.
If the open circuit (disconnected) voltage reading is
below 12.6 VDC, refer to Table 1-2, 12 amp-hour battery,
in Section 1 and charge battery at rate and time specified.
5.
Recheck battery voltage by repeating step 1 above. If
voltage now is 12 VDC or greater, perform steps 2 and 3
above.
6.
If the open circuit (disconnected) voltage reading is still
below 12.6 VDC, the battery must be replaced. To
remove battery, air cleaner and air cleaner bottom
must be removed. See appropriate Service Manual for
procedure.
IMPORTANT NOTE
Only remove air cleaner and air cleaner bottom if battery
could not be charged to 12.6 VDC and battery must be
removed and replaced.
INSTALLING MAXI-FUSE
●
NOTES
The 40 amp Maxi-Fuse provides battery power to the
ignition switch and ECM. The Maxi-Fuse is not installed
at the factory. It is shipped in the fuse holder boot next to
the socket.
●
It will also be necessary to install the fuel pump fuse that
is located in a spare fuse location. See Service Manual.
1.
See Figure 6-1. Remove fastener at upper corner of louvered cover and remove cover.
2.
See Figure 6-2. The fuse holder and boot is located just
forward of the coolant reservoir. Fold back the flap on the
fuse holder boot and insert the fuse into the fuse holder
socket.
3.
See Figure 6-1. Reinstall sidecover and secure with
screw. Tighten to 4.1-6.8 Nm (30-60 in-lbs).
9020
9010
Figure 6-2. Inserting Maxi-Fuse
SEATS AND PASSENGER STRAP
Figure 6-1. Removing Sidecover
Refer to VRSC Models Owner’s Manual for seat and passenger strap removal and installation instructions.
2005 PDI: VRSC Models
6-3
LUBRICATION SYSTEM
6.3
ENGINE OIL LEVEL
9015
CAUTION
Do NOT operate the engine when the oil level is below
the add mark on the dipstick at operating temperature.
Engine damage will result. (00187a)
CAUTION
To avoid over-filling the oil sump, wait approximately
three minutes after adding oil before checking the oil
level with the dipstick. An over-filled sump can cause
engine damage. (00188a)
NOTE
This engine has a wet sump, an integral transmission, gear
driven primary drive and wet clutch. This design allows
engine oil in the sump to be used to lubricate the engine,
transmission and primary drive. The clutch and primary drive
housing is on the right side of the engine.
Figure 6-3. Oil Filler Cap (Left Side Of Engine)
o0239aox
Midpoint
Cold Engine Oil Level Check
Check engine oil level with engine COLD as follows:
1.
Stand motorcycle upright (not leaning on side stand) on
a level surface.
2.
See Figure 6-3. Unscrew oil filler cap (with attached dipstick) by turning filler cap counterclockwise. Remove filler
cap and dipstick and wipe dipstick clean.
Figure 6-4. Engine Oil Dipstick
3.
Screw filler cap into engine. Make sure cap is fully
seated on crankcase.
Hot Engine Oil Level Check
4.
See Figure 6-4. Remove filler cap and check oil level on
dipstick.
Check engine oil level with engine at normal operating temperature as follows:
5.
If oil level is below midpoint on cross-hatched area on
dipstick, add enough Harley-Davidson oil to bring level
up to the midpoint shown in Figure 6-4.
1.
Stop engine and allow oil to drain into sump for about
three minutes.
2.
Stand motorcycle upright (not leaning on side stand) on
a level surface.
3.
See Figure 6-3. Unscrew filler cap (with attached dipstick) by turning filler cap counterclockwise. Remove filler
cap and dipstick and wipe dipstick clean.
4.
Screw filler cap into engine. Make sure cap is fully
seated on crankcase.
5.
See Figure 6-4. Remove filler cap and check oil level on
dipstick.
6.
If oil level is below FULL mark on dipstick, add enough
Harley-Davidson oil to bring level up to the FULL mark.
Observe “CAUTIONS” stated above.
6-4
2005 PDI: VRSC Models
Pressure Cap Location
●
●
9032
NOTES
See Figure 6-5. The pressure cap is located beneath
seat behind the air box. Normally the pressure cap does
not need to be removed. Coolant level can be checked at
the expansion tank located on right side behind steering
head. Coolant can be added at the expansion tank if
level is low. To verify that the coolant system has been
filled perform the check following these notes.
See Figure 6-6. If the coolant system is drained, remove
the air bleed plug and then fill through filler neck at pressure cap.
Verifying Coolant System Is Filled
1.
See Figure 6-5. Remove pressure cap.
2.
See Figure 6-7. Gently squeeze center of hose (1) while
looking into coolant filler neck. Coolant should rise in
filler neck.
3.
If coolant is not visible in filler neck, remove air bleed
plug shown in Figure 6-6.
4.
Add enough premixed HARLEY-DAVIDSON EXTENDED
LIFE ANTIFREEZE & COOLANT (Part No. 99822-02) so
coolant is visible in filler neck. Replace air bleed plug and
pressure cap. Tighten air bleed plug to 9-11 Nm (80-97
in-lbs).
Figure 6-6. Coolant System Air Bleed Plug
9098
2
3
9030
1
1.
2.
3.
Hose
Hose (To thermostat housing)
Hose clamps (4) (2 on each hose)
Figure 6-7. Coolant Hoses (Engine right side)
Check Hose Clamps For Tightness
Figure 6-5. Pressure Cap
1.
See Figure 6-7. Check the four hose clamps (two each
on hoses) for tightness.
2.
With a long bladed screwdriver check two hose clamps
one at top left and one at top right of radiator.
NOTE
The engine ends of the radiator hoses are secured with a
plastic “shrink” clamp and do not require checking.
2005 PDI: VRSC Models
6-5
Checking Coolant Level In
Expansion Tank
1.
See Figure 6-8. Remove fastener at upper corner of louvered cover and remove cover.
CLUTCH MASTER CYLINDER
1.
9010
●
●
View reservoir sightglass and verify fluid presence.
Sightglass should appear dark if fluid is present. If sightglass is not dark, add D.O.T. 5 SILICONE HYDRAULIC
BRAKE FLUID (Part No. 99902-77). See Service Manual.
NOTES
Use only D.O.T. 5 SILICONE HYDRAULIC BRAKE
FLUID (Part No. 99902-77) in clutch master cylinder reservoir.
Do not overfill clutch master cylinder reservoir. As clutch
friction discs wear, the piston in the clutch cylinder will
force fluid back into the reservoir and this could cause
fluid overflow.
1CAUTION
Figure 6-8. Removing Cover to Check Coolant Level
2.
See Figure 6-9. Check coolant level in expansion tank
with coolant cold and vehicle resting on jiffy stand. If level
is below “COLD FULL” line on tank, remove cap from
tank
and
add
premixed
HARLEY-DAVIDSON
EXTENDED LIFE ANTIFREEZE & COOLANT (Part No.
99822-02) until fluid level reaches “COLD FULL” line.
CAUTION
D.O.T. 5 silicone hydraulic brake fluid is used in the
hydraulic clutch. Do not use other types of fluids as they
are not compatible and could cause equipment damage.
(00204a)
9019
Figure 6-9. Cold Full Line On Expansion Tank
NOTE
Do not reinstall louvered cover now. The 40 amp fuse will be
installed later in the fuse holder located just forward of the
expansion tank.
6-6
Direct contact of D.O.T. 5 brake fluid with eyes can cause
eye irritation, swelling, and redness. Avoid eye contact.
In case of eye contact flush with large amounts of water
and get medical attention. Swallowing large amounts of
D.O.T. 5 brake fluid can cause digestive discomfort. If
swallowed, obtain medical attention. Use in well ventilated area. KEEP OUT OF REACH OF CHILDREN.
(00144a)
2005 PDI: VRSC Models
FUEL SYSTEM
GENERAL
6.4
CAUTION
CAUTION
Some fuel suppliers sell gasoline which has been
blended with an alcohol or an ether. The type and amount
of alcohol or ether added to the fuel is important.
Use only unleaded fuel in California model catalytic converter-equipped motorcycles. Using leaded fuel will damage the emission control system. (00150a).
Partially fill fuel tank with gasoline. Use unleaded gasoline, 91
octane or higher on all VRSC models. Inspect fuel system for
leaks.
CAUTION
Do not use gasoline that contains methanol. Doing so
can result in fuel system component failure, engine damage and/or equipment malfunction. (00148a)
●
Gasolines containing ETHANOL (ethyl alcohol or grain
alcohol) can be used. Gasoline/ethanol blends are a mixture of 10% ethanol and 90% unleaded gasoline. They
are identified as “gasohol,” “ethanol enhanced,” or “contains ethanol.”
●
Gasolines containing METHYL TERTIARY BUTYL
ETHER (MTBE) can also be used. Gasoline/MTBE
blends are a mixture of gasoline and as much as 15%
MTBE.
●
REFORMULATED OR OXYGENATED GASOLINES
(RFG): “Reformulated gasoline” is a term used to
describe gasoline blends that are specifically designed to
burn cleaner than other types of gasoline, leaving fewer
“tailpipe” emissions. They are also formulated to evaporate less when you are filling your tank. Reformulated
gasolines use additives to “oxygenate” the gas. Your
motorcycle will run normally using this type of gas and
Harley-Davidson recommends you use it when possible,
as an aid to cleaner air in our environment
Because of their different chemical properties (which affect
fuel volatility and ignition characteristics), these blends may
adversely affect the starting, drivability, and fuel efficiency of
the motorcycle. If you experience these problems, HarleyDavidson recommends using straight, unleaded gasoline
2005 PDI: VRSC Models
6-7
ELECTRICAL SYSTEM
HEADLAMP
6.5
b0008c7x
1WARNING
The automatic-on headlamp feature provides increased
visibility of the rider to other motorists. Be sure headlamp is on at all times. Poor visibility of rider to other
motorists can result in death or serious injury. (00030b)
Center of headlamp to floor
Inspection
See Figure 6-10. Check headlamp beam for proper height
and lateral alignment. Proceed as follows:
1.
Verify correct front and rear tire inflation pressure.
2.
Place motorcycle on level floor (or pavement) in an area
with minimum light.
3.
Point front of motorcycle toward a screen or wall which is
25 ft. (7.62 m) away from front tire contact patch on floor
(i.e. directly below front axle).
4.
Measure the vertical distance from center of headlamp to
floor and draw a horizontal line, on screen or wall, at
same height above floor.
5.
Have a person, whose weight is roughly the same as that
of the principal rider, sit on motorcycle seat. Weight of
rider will compress vehicle suspension slightly.
7.62 M
(25 ft.)
Figure 6-10. Checking Headlamp Alignment
Adjustment
VRSCA models:
1.
See Figure 6-11. Loosen headlamp adjustment screws,
one on each side of headlamp
2.
Tilt headlamp up or down to properly aim it in relation to
the horizontal line.
Once the headlamp is properly adjusted, tighten both
headlamp adjustment screws to 4.5-7.5 Nm (40-66 inlbs).
6.
Stand motorcycle upright with both tires resting on floor
and with front wheel held in straight alignment (directly
forward).
3.
7.
Turn ignition/light switch to “IGNITION” position. Set handlebar switch to high beam position.
8.
Check light beam for proper height alignment. Main
beam of light (broad, flat pattern of light) should be centered on horizontal line of screen or wall (i.e. equal area
of light above and below line).
NOTE
The lateral headlamp alignment on VRSCA models is established by the headlamp mounting and does not require
adjustment.
9026
Figure 6-11. Headlamp Adjustment–VRSCA Model
6-8
2005 PDI: VRSC Models
VRSCB models:
NOTE
For any systems problems, please refer to the appropriate
Electrical Diagnostic manual for your model.
1.
See Figure 6-12. Loosen headlamp clamp nut (1).
2.
Tilt headlamp (6) up or down to properly aim it in relation
to the horizontal line, and, at the same time, turn it right
or left to direct light beam straight ahead.
3.
Tighten headlamp clamp nut to 13.6-20.3 Nm (120-180
in-lbs) after headlamp is properly positioned.
4.
2.
Shift transmission to neutral position, and verify that neutral indicator lamp turns on.
3.
Start engine; check operation of starter.
4.
Check that oil pressure indicator lamp turns off when
engine is running above 1200 RPM. Check that battery
icon turns off. Engine Coolant temperature icon must not
illuminate.
5.
Check that tachometer is functioning.
6.
Disengage clutch (depress clutch lever), and verify that
neutral indicator lamp turns off when transmission is
shifted to any forward gear. Shift transmission to neutral
position, and verify that neutral indicator lamp turns on
again.
7.
Check horn operation.
Locate headlamp bracket plug (4), packaged in traveler
included with motorcycle in crate. Snap plug into place in
headlamp bracket (5).
pd0223
1
4
2
3
8.
5
6
1.
2.
3.
4.
5.
6.
Headlamp clamp nut
Lock washer
Washer
Headlamp bracket plug
Headlamp bracket
Headlamp assembly
Figure 6-12. Headlamp Adjustment–VRSCB Model
INDICATOR LAMPS/CONTROLS
●
NOTES
All VRSC models have an Instrument Module with selfdiagnostic capabilities. Refer to VRSC Model Electrical
Diagnostic Manual for service instructions.
●
VRSCSE models are equipped with a separate speedometer, tachometer and instrument console. See BATTERY TESTING AND CHARGING under 7.1 VRSCSE
MODEL.
1.
View instrument cluster and turn ignition switch to “IGNITION” position. Check that the oil pressure indicator
lamp turns on (before engine is started). The Check
Engine indicator lamp will illuminate for about four seconds and then go off. If cycle is equipped with optional
Security System (TSSM), a key icon (Security lamp) will
illuminate for about four seconds and then go off. The
Battery icon will illuminate to indicate low voltage. Fuel
gauge should also indicate fuel tank level. Engine Coolant temperature icon will illuminate to verify bulb filament
and then go off.
Check operation of all remaining lamps:
●
headlamp–low and high beams
●
headlamp high beam indicator lamp
●
left directional (turn signal) lamps–front and rear
●
Ieft directional (turn signal) indicator lamp
●
right directional (turn signal) lamps–front and rear
●
right directional (turn signal) indicator lamp
●
Ieft front running lamp
●
right front running lamp
tail lamp–running lamp and brake lamp filaments
After engine has reached normal operating temperature,
turn engine off.
●
9.
10. Check engine oil level in manner previously specified.
This time, fill sump to upper mark on filler cap/dipstick.
CAUTION
To avoid over-filling the oil sump, wait approximately
three minutes after adding oil before checking the oil
level with the dipstick. An over-filled sump can cause
engine damage. (00188a)
2005 PDI: VRSC Models
6-9
TIRES
6.6
FRONT AND REAR TIRES
1WARNING
Do not inflate tire beyond maximum pressure as specified on sidewall. Over inflated tires can blow out, which
could result in death or serious injury. (00027a)
1WARNING
Harley-Davidson front and rear tires are not the same.
Interchanging front and rear tires can cause tire failure,
which could result in death or serious injury. (00026a)
1.
Check for proper front and rear tire pressures when tires
are cold. Compare results against Table 6-2.
6-10
2005 PDI: VRSC Models
Table 6-2. Tire Pressures
TIRES
SOLO RIDER
RIDER &
PASSENGER
MODEL
TIRE
kPA
PSI
kPA
PSI
VRSC
Front
248
36
248
36
Rear
262
38
276
40
BRAKE SYSTEM
6.7
REAR BRAKE MASTER CYLINDER
1CAUTION
Direct contact of D.O.T. 5 brake fluid with eyes can cause
eye irritation, swelling, and redness. Avoid eye contact.
In case of eye contact flush with large amounts of water
and get medical attention. Swallowing large amounts of
D.O.T. 5 brake fluid can cause digestive discomfort. If
swallowed, obtain medical attention. Use in well ventilated area. KEEP OUT OF REACH OF CHILDREN.
(00144a)
1.
See Figure 6-13. Use a flashlight to view rear brake master cylinder located behind radiator cover. Verify that fluid
level in rear brake master cylinder reservoir is 1/2 in.
(12.7 mm) below reservoir top.
1WARNING
See Figure 6-14. If master cylinder or reservoir hose does
not have 1/4 in. clearance, item (1), from exhaust pipe,
loosen and reposition exhaust to obtain the 1/4 in. clearance. Refer to VRSC Model Service Manual for exhaust
system instructions. Contact with the hot exhaust pipe
could cause fluid leakage and reduced braking which
could result in loss of vehicle control and death or serious injury.
3.
See Figure 6-14. Check push rod length (3). Loosen jam
nut and turn push rod with a wrench placed on push rod
wrench flats if adjustment is required.
9022
2
9022
1
Figure 6-13. Rear Brake Master Cylinder
(Radiator Cover Removed for Photo Clarity)
2.
1.
2.
3.
3
6.4 mm (0.25 in.) clearance
Reservoir
Push rod length: 18-22 mm (0.690-0.890 in.)
Figure 6-14. Rear Brake Pedal Adjustments
If level is low, remove cover screws and cover, and add
only D.O.T. 5 SILICONE HYDRAULIC BRAKE FLUID
(Part No. 99902-77: 12 oz., 99901-77: 1 gal.). Replace
cover. Tighten cover screws to 0.68-0.90 Nm (6-8 inlbs).
2005 PDI: VRSC Models
6-11
DEALER ROAD TEST
ROAD TEST
After you complete motorcycle inspection, take motorcycle for
a road test. Check all systems and overall operation of motorcycle: engine, transmission, clutch, brakes, handling, etc.
After road test, return motorcycle to shop, and thoroughly
clean off any road dirt. Check and correct any problems you
may have found during road test.
Before You Begin
Check the following items before road test of vehicle:
●
●
●
●
●
●
Lamps and indicators.
Check amount of gasoline in tank and add (if
needed).
Adjust mirrors to proper riding positions.
Check tire condition and pressure (adjust if necessary).
Check controls to verify proper function.
Check all electrical equipment and switches including stop lamp, turn signals and horn for proper operation.
6.8
Road Test of Vehicle: Low Speed
1.
Shift from first through third gear, checking clutch operation, throttle control, and transmission operation.
2.
Verify low speed braking for front and rear brakes.
3.
Handling under braking conditions.
4.
Low speed handling. Verify that vehicle does not pull to
left or right.
5.
Check for any abnormal vibrations.
6.
Check electrical lamps, indicators.
Road Test of Vehicle: Highway Speed
1.
Shift from first through fifth gear, checking clutch operation, throttle control, and transmission operation.
2.
Verify highway speed braking operation of front and rear
brakes.
3.
Verify proper handling at highway speeds.
4.
Check for any abnormal vibrations.
●
Program Security System (if equipped)
●
Engine Oil:
Check and correct hot level.
●
Clean Vehicle
NOTE
Be sure to submit a Dealer Product Quality Audit (DPQA) on
ANY adjustments and/or warranty work performed required to
deliver the vehicle to the customer.
6-12
2005 PDI: VRSC Models
CUSTOMER DELIVERY
NOTICE TO DEALER
6.9
●
Before delivering motorcycle to owner, perform the following:
1.
Make sure vehicle owner receives, and is aware of
importance of reading Owner’s Manual, safety booklets
and viewing Welcome To The Family video included with
owner’s kit.
2.
Review warranties with vehicle owner. Make sure owner
understands warranties. California dealers must give
customer a copy of Emissions Control System Warranty.
3.
Give IMPORTANT sheet and other printed material in literature kit to vehicle owner.
4.
Complete and sign warranty registration form. Have vehicle owner sign it.
5.
Explain operation of vehicle controls to vehicle owner.
6.
Explain how turn signals and emergency flashers operate.
IMPORTANT NOTES
The bright anodized finish on air box cover and fenders requires special care. Also the wheels, rear fork
(swingarm) and all components painted with a special Silver paint require special care. The painted finish on frame, air box cover and fenders on the
VRSCSE model requires special care. An Instruction
Sheet covering care of this motorcycle has been
added to the Owner’s Kit. Review this Instruction
Sheet with the Customer and answer any questions
he or she may have.
●
If motorcycle is equipped with a TSSM, make sure
key fob (remote control) and personal code have
been assigned to control the Harley-Davidson Factory Security System. If a personal code is not
assigned and key fob is lost or damaged while vehicle is armed, TSSM must be replaced. Make sure
vehicle owner understands how to arm and disarm
security system. Explain how to disarm security system with personal code if key fob is lost or not functioning. Personal code should be written on the tearout card in VRSC Models Owner’s Manual and kept
on the owner’s person. Also, verify both key fobs
operate properly.
7.
Whenever possible, introduce dealer Service Manager to
vehicle owner, and involve Service Manager in delivery
process. Supply owner with name(s) of dealer Service/
Parts Department personnel who should be contacted
regarding vehicle service/parts questions.
8.
Inform vehicle owner about checking engine oil level,
checking tire pressure, and performing other basic maintenance functions. Review the Initial Scheduled Maintenance requirement with owner. Depending on owner’s
anticipated frequency of operating motorcycle, you may
wish to schedule the Initial Scheduled Maintenance
service appointment at this time.
2005 PDI: VRSC Models
6-13
VEHICLE PDI CHECKLIST
PRIOR TO CUSTOMER DELIVERY
NOTE
Use this checklist for performing tasks related to this model
motorcycle setup.
❒
Uncrate:
6.10
❒
❒
Jiffy Stand:
❒
❒
❒
❒
❒
❒
a.
Shift from first through third gear, checking clutch
operation, throttle control, and transmission operation.
Perform Warranty repairs.
b.
Verify low-speed braking for front and rear brakes.
Battery:
c.
Verify handling under braking conditions.
Perform required voltmeter test on Maxi-Fuse (main
fuse) and battery.
d.
Verify low-speed handling. Verify that vehicle does
not pull to left or right.
Install Maxi-Fuse (main fuse).
e.
Check for any abnormal vibrations.
Install Fuel Pump Fuse.
f.
Check electrical lamps, indicators.
Lubrication System:
❒
❒
❒
Fuel System:
a.
Inspect fuel system for leaks.
b.
Fill, verify sender operation.
c.
Verify low fuel light operation.
Cooling System:
a.
Check and correct fluid level (if necessary).
b.
Check radiator hose clamps for tightness.
Evaporative Control System:
Lighting, Gauges, Electrical Systems:
Verify correct operation.
❒
Tires:
Inspect condition and air pressure.
❒
Brake Systems (front and rear):
Correct fluid level (if necessary).
❒
a.
Shift from first through fifth gear, checking clutch
operation, throttle control, and transmission operation.
b.
Verify highway speed braking operation of front and
rear brakes.
c.
Verify proper handling at highway speeds.
d.
Check for any abnormal vibrations.
Primary Chaincase:
Inspect hose routings, connections and fuel tank venting
to canister (if equipped).
❒
Road Test Vehicle: Highway Speed
Engine Oil:
Check and verify lubricant is present.
❒
Road Test Vehicle: Low Speed
Note Any Additional Problems
(including cosmetic quality):
Verify oil is present (cold level).
❒
Mirrors:
Inspect and adjust as necessary.
Inspect condition of oil lines.
❒
Headlamps:
Inspect and adjust as necessary.
Verify proper function.
❒
Handlebars, Controls and Seat Strap:
Adjust and tighten (if necessary).
❒
Check for damaged or missing parts.
❒
Throttle Cable Adjustment (if necessary).
Clutch Fluid:
Correct fluid level (if necessary).
6-14
2005 PDI: VRSC Models
❒
Engine Oil:
Check and correct hot level.
❒
Create Vehicle Birth-Certificate Using
Digital Technician (optional).
❒
Clean Vehicle.
AT POINT OF CUSTOMER DELIVERY
❒
❒
❒
❒
❒
Suspension Adjustments.
Brake Pedal Height Adjustment.
Shift Linkage Adjustment.
Brake Hand Lever Adjustment.
Review Vehicle Care and Maintenance Requirements.
NOTE
Be sure to submit a Dealer Product Quality Audit (DPQA) on
ANY adjustments and/or warranty work performed required to
deliver the vehicle to the customer.
PREDELIVERY: CVO MODELS
SUBJECT
PAGE NO.
7.1 VRSCSE Model . . . . . . . . . . . . . . . . . . . . . . . . . . . . . . . . . . . . . . . . . . . . . . . .
General . . . . . . . . . . . . . . . . . . . . . . . . . . . . . . . . . . . . . . . . . . . . . . . . . . . . . .
Uncrating . . . . . . . . . . . . . . . . . . . . . . . . . . . . . . . . . . . . . . . . . . . . . . . . . . . .
Battery Testing And Charging . . . . . . . . . . . . . . . . . . . . . . . . . . . . . . . . . . . .
Indicator Lamps and Displays . . . . . . . . . . . . . . . . . . . . . . . . . . . . . . . . . . . .
Adjusting Handlebars . . . . . . . . . . . . . . . . . . . . . . . . . . . . . . . . . . . . . . . . . .
Adjusting Handlebar Controls . . . . . . . . . . . . . . . . . . . . . . . . . . . . . . . . . . . .
Checking Clutch Fluid . . . . . . . . . . . . . . . . . . . . . . . . . . . . . . . . . . . . . . . . . .
Mirrors And Turn Signals . . . . . . . . . . . . . . . . . . . . . . . . . . . . . . . . . . . . . . . .
Seats And Passenger Strap . . . . . . . . . . . . . . . . . . . . . . . . . . . . . . . . . . . . . .
Footrest Adjustment . . . . . . . . . . . . . . . . . . . . . . . . . . . . . . . . . . . . . . . . . . . .
Final Predelivery Inspections . . . . . . . . . . . . . . . . . . . . . . . . . . . . . . . . . . . . .
7.2 FLHTCSE2 Model . . . . . . . . . . . . . . . . . . . . . . . . . . . . . . . . . . . . . . . . . . . . . .
General . . . . . . . . . . . . . . . . . . . . . . . . . . . . . . . . . . . . . . . . . . . . . . . . . . . . . .
Uncrating . . . . . . . . . . . . . . . . . . . . . . . . . . . . . . . . . . . . . . . . . . . . . . . . . . . .
Adjusting Handlebar Controls . . . . . . . . . . . . . . . . . . . . . . . . . . . . . . . . . . . . .
Mirrors . . . . . . . . . . . . . . . . . . . . . . . . . . . . . . . . . . . . . . . . . . . . . . . . . . . . . .
Checking Clutch Fluid . . . . . . . . . . . . . . . . . . . . . . . . . . . . . . . . . . . . . . . . . .
Removable Rider Backrest . . . . . . . . . . . . . . . . . . . . . . . . . . . . . . . . . . . . . . .
Wind Deflector . . . . . . . . . . . . . . . . . . . . . . . . . . . . . . . . . . . . . . . . . . . . . . . .
Removable Tour-Pak® . . . . . . . . . . . . . . . . . . . . . . . . . . . . . . . . . . . . . . . . . .
Radio Antenna . . . . . . . . . . . . . . . . . . . . . . . . . . . . . . . . . . . . . . . . . . . . . . . .
Removable Passenger Backrest . . . . . . . . . . . . . . . . . . . . . . . . . . . . . . . . . .
Delivering Vehicle With Removable Passenger Backrest Installed . . . . . . . .
Leather Dressing Application . . . . . . . . . . . . . . . . . . . . . . . . . . . . . . . . . . . . .
Final Predelivery Inspections . . . . . . . . . . . . . . . . . . . . . . . . . . . . . . . . . . . . .
7.3 FLSTFSE Model . . . . . . . . . . . . . . . . . . . . . . . . . . . . . . . . . . . . . . . . . . . . . . .
General . . . . . . . . . . . . . . . . . . . . . . . . . . . . . . . . . . . . . . . . . . . . . . . . . . . . . .
Uncrating . . . . . . . . . . . . . . . . . . . . . . . . . . . . . . . . . . . . . . . . . . . . . . . . . . . .
Adjusting Handlebars . . . . . . . . . . . . . . . . . . . . . . . . . . . . . . . . . . . . . . . . . .
Adjusting Handlebar Controls . . . . . . . . . . . . . . . . . . . . . . . . . . . . . . . . . . . .
Checking Clutch Fluid . . . . . . . . . . . . . . . . . . . . . . . . . . . . . . . . . . . . . . . . . .
Mirrors And Turn Signals . . . . . . . . . . . . . . . . . . . . . . . . . . . . . . . . . . . . . . . .
Fuel Tank Console Extension . . . . . . . . . . . . . . . . . . . . . . . . . . . . . . . . . . . .
Seat . . . . . . . . . . . . . . . . . . . . . . . . . . . . . . . . . . . . . . . . . . . . . . . . . . . . . . . .
Final Predelivery Inspections . . . . . . . . . . . . . . . . . . . . . . . . . . . . . . . . . . . . .
7-1
7-1
7-1
7-1
7-2
7-3
7-3
7-5
7-6
7-6
7-7
7-7
7-8
7-8
7-8
7-8
7-9
7-9
7-10
7-10
7-10
7-14
7-14
7-15
7-16
7-16
7-17
7-17
7-17
7-17
7-18
7-19
7-19
7-20
7-20
7-20
VII
1
VRSCSE MODEL
GENERAL
7.1
BATTERY TESTING AND CHARGING
Follow the instructions in section I (All Models) and Section VI
(VRSC Models) and the following instructions to perform the
predelivery setup procedure on the VRSCSE model.
This motorcycle is equipped with the Harley-Davidson Factory Security System and siren.
UNCRATING
The VRSCSE is shipped in a “turn-wheel” crate which allows
the handlebar to be shipped in position on the handlebar risers.
Remove foam block from left handlebar grip. Remove plastic
end caps from both handlebar grips. Discard foam block and
plastic end caps.
Check Contents of Crate
Check that the following items are in a box in the crate:
●
●
●
●
Motorcycle cover inside a storage bag
Owner’s kit
Two mirror kits
CVO ignition key
NOTE
If any parts are missing, call 1-800-695-2925 or Fax 1-717852-6717. Provide your Dealer name, number, person to contact, part number of missing item, and Motorcycle VIN.
1WARNING
Batteries contain sulfuric acid, which could cause severe
burns to eyes and skin. Wear a protective face shield,
rubberized gloves and protective clothing when working
with batteries. KEEP BATTERIES AWAY FROM CHILDREN. (00063a)
1WARNING
Never remove warning label attached to top of battery.
Failure to read and understand all precautions in warning
could result in death or serious injury. (00064a)
1WARNING
Battery posts, terminals and related accessories contain
lead and lead components, chemicals known in the State
of California to cause cancer and birth defects or other
reproductive harm. Wash hands after handling. (00019a)
●
●
NOTES
The engine is equipped with a compression release, so a
smaller (12 amp hour) battery provides adequate starting
current.
It will be necessary to remove the airbox cover to gain
access to the battery.
Removing Airbox Cover
1.
Unlock and open seat.
2.
See Figure 7-1. Unlatch and lift rear of airbox cover a few
inches.
3.
Disconnect console connector.
4.
Carefully slide airbox cover back to disengage locating
pins at front of cover from mounting tabs on frame.
Remove cover.
10769
Figure 7-1. Console Connector
2005 PDI: CVO Models
7-1
Testing and Charging Battery
1.
Place test probes of voltmeter on battery terminals and
check the voltage of the battery to make sure it is at least
12.6 VDC.
2.
If the open circuit (disconnected) voltage reading is 12.6
VDC or greater the battery is ready for use.
3.
See Section 1. Mark the date on the battery warranty tag
by removing the applicable month and year. Month and
year punches may be removed with the point of a screwdriver without removing battery.
4.
If the open circuit (disconnected) voltage reading is
below 12.6 VDC, refer to Table 1-2, 12 amp-hour battery,
in Section 1 and charge battery at rate and time specified.
5.
Recheck battery voltage by repeating step 1 above. If
voltage now is 12 VDC or greater, perform steps 2 and 3
above.
6.
If the open circuit (disconnected) voltage reading is still
below 12.6 VDC, the battery must be replaced. To
remove battery, air cleaner and air cleaner bottom
must be removed. See appropriate Service Manual for
procedure.
INDICATOR LAMPS AND DISPLAYS
1.
See Figure 7-2. View indicator lamps and displays and
turn ignition switch to “IGNITION” position. Check that
the oil pressure indicator lamp (12) turns on (before
engine is started). The Check Engine indicator lamp (2)
will illuminate for about four seconds and then go off. The
security lamp (5) will illuminate for about four seconds
and then go off. The Battery icon (4) will illuminate to
indicate low voltage. Fuel gauge (7) should also indicate
fuel tank level. Engine Coolant temperature lamp (1) will
illuminate to verify bulb filament and then go off.
NOTE
For any systems problems, please refer to the appropriate
Electrical Diagnostic manual for your model.
10771
3
2
IMPORTANT NOTE
Only remove air cleaner and air cleaner bottom if battery
could not be charged to 12.6 VDC and battery must be
removed and replaced.
4
Installing Airbox Cover
1.
2.
1
Carefully install airbox cover over airbox. Be careful not
to scratch or damage airbox cover, console or speedometer. Engage locating pins on front of airbox cover with
tabs on frame.
5
7
See Figure 7-1. Connect console connector halves
together.
3.
Lower rear of airbox cover onto frame and latch in place.
4.
Close and lock seat.
6
8
1.
2.
3.
4.
5.
6.
7.
8.
9.
10.
11.
12.
13.
9
10
11
12
13
Engine coolant temperature
Check engine
Low fuel
Alternator
Security system
Odometer/trip odometer
Fuel gauge
Left turn signal
High beam
Clock
Neutral
Oil
Right turn signal
Figure 7-2. VRSCSE Indicator Lamps and Displays
7-2
2005 PDI: CVO Models
2.
Shift transmission to neutral position, and verify that neutral indicator lamp turns on.
3.
Start engine; check operation of starter.
4.
Check that oil pressure indicator lamp (12) turns off
when engine is running above 1200 RPM. Check that
battery icon (4) turns off. Engine Coolant temperature
icon (1) must not illuminate.
5.
Check that tachometer is functioning.
6.
Disengage clutch (squeeze clutch lever), and verify that
neutral indicator lamp (11) turns off when transmission is
shifted to any forward gear. Shift transmission to neutral
position, and verify that neutral indicator lamp turns on
again.
ADJUSTING HANDLEBAR
CONTROLS
If handlebar controls and clutch and brake lever assemblies
are incorrectly positioned, they may be rotated slightly for
more comfortable riding position.
CAUTION
●
headlamp–low and high beams
Do not rotate front brake lever assembly too far. Brake
master cylinder fits into a machined relief in handlebar. If
not properly located in the machined relief, master cylinder can be damaged when clamp screws are tightened.
Handlebar surface contains range marks to properly
locate brake and clutch master cylinder and control
assemblies. These assemblies MUST be located within
that range.
●
headlamp high beam indicator lamp (9)
To adjust handlebar controls, proceed as follows:
●
left directional (turn signal) lamps–front and rear
1.
●
Ieft directional (turn signal) indicator lamp (8)
●
right directional (turn signal) lamps–front and rear
●
right directional (turn signal) indicator lamp (13)
●
Ieft front running lamp
●
right front running lamp
7.
Check horn operation.
8.
Check operation of all remaining lamps:
See Figure 7-3. Loosen (but do not remove) brake and
clutch lever assembly clamp screws (1) and handlebar
switch housing screws (2).
d0419x1x
2
tail lamp–running lamp and brake lamp filaments
After engine has reached normal operating temperature,
turn engine off.
●
9.
10. Check engine oil level in manner previously specified.
This time, fill sump to upper mark on filler cap/dipstick.
CAUTION
To avoid over-filling the oil sump, wait approximately
three minutes after adding oil before checking the oil
level with the dipstick. An over-filled sump can cause
engine damage. (00188a)
1
1.
2.
Figure 7-3. Handlebar Lever and Control
Mounting Screws (Right Side Shown)
2.
ADJUSTING HANDLEBARS
The VRSCSE is shipped with the handlebars adjusted to a
standard riding position. If handlebars need to be adjusted for
more comfortable rider position, proceed as follows:
1.
Loosen, but do not remove, all four handlebar riser clamp
screws.
2.
Raise or lower handlebars to desired position. Make certain handlebars are centered side-to-side in risers.
3.
Tighten two front handlebar clamp screws until top and
bottom risers meet (no gap in front). DO NOT tighten
screws to more than 20.3 Nm (15 ft-lbs).
4.
Tighten rear handlebar clamp screws to 16.3-20.3 Nm
(12-15 ft-lbs).
5.
Final tighten front handlebar clamp screws to 16.3-20.3
Nm (12-15 ft-lbs).
Front brake lever assembly clamp screw (2)
Handlebar switch housing screw (2)
See Figure 7-4. Range marks (4) are located on bottom
of handlebar adjacent to brake lever clamp assembly.
Rotate right control and brake master cylinder assembly
(2) slightly for most comfortable position. Make sure
control assembly is positioned so that clamp mating surface (3) is located in area between range marks.
2005 PDI: CVO Models
7-3
Check Hose Clamps For Tightness
CAUTION
Control wiring is routed inside handlebar and may be
pinched or cut if controls are rotated too far.
1.
See Figure 7-5. If necessary, remove four screws (1) and
decorative cover (2) from water pump hose.
2.
3.
Beginning with top screw, tighten right lever assembly
clamp screws to 6.8-9.0 Nm (60-80 in-lbs).
Check the four hose clamps (two each on hoses) for
tightness.
3.
4.
Beginning with lower screw, tighten right handlebar
switch housing screws to 4.0-5.1 Nm (35-45 in-lbs).
If removed, install decorative cover with four screws.
Tighten screws to 1.1-1.4 Nm (10-12 in-lbs).
4.
With a long bladed screwdriver check two hose clamps
one at top left and one at top right of radiator.
pd0214a
2
1
NOTE
The engine ends of the radiator hoses are secured with a
plastic “shrink” clamp and do not require checking.
3
10770
1
4
2
1.
2.
3.
4.
Handlebar
Right control and brake lever assembly
Control assembly clamp mating surface
Range marks
Figure 7-4. Right Handlebar Control Assembly
(Bottom View)
5.
Orient the left handlebar control assembly to match the
position of the right handlebar control assembly.
CAUTION
Control wiring is routed inside handlebar and may be
pinched or cut if controls are rotated too far.
6.
Beginning with top screw, tighten left lever assembly
clamp screws to 6.8-9.0 Nm (60-80 in-lbs).
7.
Beginning with lower screw, tighten left handlebar switch
housing screws to 4.0-5.1 Nm (35-45 in-lbs).
8.
Test handlebar switches to make sure they are functioning properly and wiring has not become pinched or otherwise damaged.
7-4
2005 PDI: CVO Models
1.
2.
Screw (4)
Decorative hose cover
Figure 7-5. Coolant Hose Cover (Engine right side)
CHECKING CLUTCH FLUID
8834
CAUTION
D.O.T. 5 silicone hydraulic brake fluid is used in the
hydraulic clutch. Do not use other types of fluids as they
are not compatible and could cause equipment damage.
(00204a)
CAUTION
Do NOT allow foreign matter to enter the clutch master
cylinder reservoir. dirt or debris in the reservoir may
cause improper operation of the clutch and equipment
damage.
1CAUTION
Direct contact of D.O.T. 5 brake fluid with eyes can cause
eye irritation, swelling, and redness. Avoid eye contact.
In case of eye contact flush with large amounts of water
and get medical attention. Swallowing large amounts of
D.O.T. 5 brake fluid can cause digestive discomfort. If
swallowed, obtain medical attention. Use in well ventilated area. KEEP OUT OF REACH OF CHILDREN.
(00144a)
The clutch is hydraulically actuated. See Figure 7-6. The
clutch master cylinder fluid reservoir is located on the left
handlebar.
Figure 7-6. Clutch Master Cylinder Reservoir
1.
Stand the motorcycle upright (not leaning on the jiffy
stand) on a level surface. Turn the handlebars to the right
if necessary, so the top of the clutch master cylinder reservoir is level.
2.
View reservoir sightglass on reservoir cover and verify
fluid presence. Sightglass should appear dark if fluid is
present. If sightglass is not dark, add brake fluid. See
Service Manual. Use only D.O.T. 5 SILICONE HYDRAULIC BRAKE FLUID (Part No. 99902-77: 12 oz., 9990177: 1 gal.).
2005 PDI: CVO Models
7-5
MIRRORS AND TURN SIGNALS
pd0208
10
The mirrors are enclosed in a box in the crate. Install mirrors
and adjust for proper rear view as follows:
1.
11
See Figure 7-7. Place spacer (10) onto right side mirror
stem, slide mirror stem down through hole in front brake
master cylinder assembly and right turn signal bracket
(5). Install lockwasher (8) and screw on acorn nut (7) finger tight.
2.
In the same fashion, install left side mirror assembly.
3.
Adjust mirrors so a small portion of the rider’s shoulder is
visible in each mirror. This helps establish the relative
distance of vehicles to the rear of the motorcycle.
4.
Tighten acorn nuts to 6.8-9.0 Nm (60-96 in-lbs).
5.
To adjust turn signals:
a.
13
6
9
b.
Position front turn signal housings (1, 2) evenly with
lenses pointing straight ahead.
c.
Tighten each set screw to 5.7-6.8 Nm (50-60 inlbs).
SEATS AND PASSENGER STRAP
Refer to VRSC Models Owner’s Manual for seat and passenger strap removal and installation instructions.
2
4
10
12
3
5
Loosen set screws (9) approximately 1/8 turn.
NOTE
It is not necessary, nor desirable, to completely remove set
screw to re-adjust turn signal housing. It is only necessary to
loosen set screw 1/8 turn, adjust turn signal and re-tighten set
screw. Nylon lock pellet on set screw maintains locking ability
after many loosening/tightening cycles. If set screw is completely removed, it should be replaced.
13
8
7
1
9
8
3
1.
2.
3.
4.
5.
6.
7.
8.
9.
10.
11.
12.
13.
4
7
Right turn signal housing
Left turn signal housing
Jam nut (2)
Ball stud (2)
Right turn signal bracket
Left turn signal bracket
Acorn nut (2)
Lockwasher (2)
Set screw (2)
Spacer (2)
Clutch control housing
Brake control housing
Mirror stem (2)
Figure 7-7. Turn Signals
7-6
2005 PDI: CVO Models
FOOTREST ADJUSTMENT
FINAL PREDELIVERY INSPECTIONS
If it is necessary to rotate rider or passenger footrests for customer comfort, proceed as follows:
1.
See Figure 7-8. Remove screw (2) and footrest rubber
insert (3) from footrest assembly (1).
2.
See Figure 7-9. Loosen footrest adjustment screw.
Rotate footrest assembly to desired angle. Tighten screw
to 25.8 Nm (19 ft-lbs).
3.
See Figure 7-8. Reinstall rubber insert (3) into footrest
assembly (1) and secure with screw (2). Tighten to 4.06.0 Nm (35-53 in-lbs).
10772
3
CAUTION
Do not use sharp objects to peel protective film from
console insert and clutch release cover in the next two
steps. Sharp objects can scratch and damage finished
surfaces.
1.
The airbox console insert is protected during shipment
by a clear plastic film. Carefully peel the film away from
the console insert.
2.
The clutch release cover (righthand side of engine) is
protected during shipment by a clear plastic film. Carefully peel the film away from the clutch release cover.
NOTE
Perform all the remaining Predelivery Inspections given in
Section I (All Models) and Section VI (VRSC Models) that
apply to the VRSCA.
DO NOT REPEAT INSPECTIONS THAT WERE PERFORMED IN THIS SECTION.
1
2
1.
2.
3.
Footrest assembly
Screw
Rubber insert
Figure 7-8. Removing Footrest Rubber Insert
10773
Figure 7-9. Footrest Adjustment Screw
2005 PDI: CVO Models
7-7
FLHTCSE2 MODEL
GENERAL
7.2
ADJUSTING HANDLEBAR
CONTROLS
CAUTION
The FLHTCSE2 model is shipped from the factory with
SYN-3® lubricant exclusively in the engine, primary and
transmission. If there is a need to top off lubricants, DO
NOT use standard lubricants and do not mix lubricants
as damage to the motorcycle can result.
Follow the instructions in section I (All Models) and Section II
(Touring Models) and the following instructions to perform the
predelivery setup procedure on the FLHTCSE2 model.
This motorcycle is equipped with the Harley-Davidson Factory Security System and siren.
NOTE
FLHTCSE2 models sold in the Australian market are not
equipped with a siren.
CAUTION
Control wiring is routed inside handlebar and may be
pinched or cut if controls are rotated too far.
CAUTION
Do not rotate front brake or clutch master cylinder
assemblies too far. If not properly located, master cylinder can be damaged when clamp screws are tightened.
Handlebar surface contains range marks to properly
locate brake and clutch master cylinder and control
assemblies. These assemblies MUST be located within
that range.
If necessary, adjust handlebar controls as follows:
1.
UNCRATING
See Figure 7-10. Loosen (but do not remove) front brake
lever assembly clamp screws (1) and handlebar switch
housing screws (2).
CAUTION
Roll motorcycle rearward off pallet slowly to avoid striking the oil cooler on the skid and causing damage to the
motorcycle.
f1993x8x
2
Check Contents of Crate
Verify that the following items have been included:
NOTE
Keep garage door opener receiver with vehicle for delivery to
customer.
1.
The following items are shipped in the Tour-Pak® and
saddlebags:
Tour-Pak mounting hardware kit
Tour-Pak support tube
●
Garage door opener receiver
●
Wind deflector
●
Tool pouch
●
Maxi-Fuse and cover
●
Data link plug
●
Keys (including CVO key)
●
Motorcycle cover
●
Owner’s kit (including owner’s manual cover for vehicles sold in domestic markets only).
●
Antenna (shipped by right floorboard)
●
Key fobs
●
Leather care
●
Saddlebag liners
●
Tour-Pak liner
●
Passenger backrest (detachable sissy bar)
A rider backrest is mounted on the vehicle.
●
●
2.
NOTE
If any parts are missing, call 1-800-695-2925 or Fax 1-717852-6717. Provide your Dealer name, number, person to contact, part number of missing item, and Motorcycle VIN.
7-8
2005 PDI: CVO Models
1
1.
2.
Front brake lever assembly clamp screw (2)
Handlebar switch housing screw (2)
Figure 7-10. Handlebar Lever and Control
Mounting Screws (Right Side Shown)
2.
See Figure 7-11. Range marks (4) are located on bottom
of handlebar adjacent to front brake lever clamp assembly. Rotate switch housing and front brake master cylinder assembly (2) slightly for most comfortable position.
Make sure control assembly is positioned so that clamp
mating surface (3) is located in area between range
marks.
CHECKING CLUTCH FLUID
CAUTION
3.
Beginning with top screw, tighten assembly clamp
screws to 60-80 in-lbs (6.8-9.0 Nm).
D.O.T. 4 hydraulic brake fluid is the only type of fluid that
should be used in the hydraulic clutch. Do not use other
types of fluid as they are not compatible and could cause
equipment damage.
4.
Beginning with lower screw, tighten handlebar switch
housing screws to 35-45 in-lbs (4-5 Nm).
CAUTION
5.
Repeat steps 1-4 above for clutch master cylinder and
switch housing assemblies on left handlebar.
6.
Test handlebar switches to make sure they are functioning properly and wiring has not become pinched or otherwise damaged.
Do NOT allow foreign matter to enter the clutch master
cylinder reservoir. dirt or debris in the reservoir may
cause improper operation of the clutch and equipment
damage.
CAUTION
pd0224
2
1
3
D.O.T. 4 brake fluid will damage painted and molded-in
color surfaces it comes in contact with. Always use caution and protect surfaces from spills whenever brake
work is performed. Failure to comply can result in cosmetic damage. (00239a)
1CAUTION
Direct contact of D.O.T. 4 brake fluid with eyes can cause
irritation. Avoid eye contact. In case of eye contact flush
with large amounts of water and get medical attention.
Swallowing large amounts of D.O.T. 4 brake fluid can
cause digestive discomfort. If swallowed, obtain medical
attention. Use in well ventilated area. KEEP OUT OF
REACH OF CHILDREN. (00240a)
4
1.
2.
3.
4.
Handlebar
Right control and brake lever assembly
Control assembly clamp mating surface
Range marks
Figure 7-11. Handlebar Control Assembly
(Bottom View, Right Side Shown)
The clutch is hydraulically actuated. See Figure 7-12. The
clutch master cylinder fluid reservoir is located on the left
handlebar.
8834
MIRRORS
Mirrors are installed on motorcycle and are rotated upside
down for shipping. Remove mirrors, re-install in correct orientation and adjust for proper rear view. See Touring Models
Service Manual for mirror installation procedure.
Figure 7-12. Clutch Master Cylinder Reservoir
2005 PDI: CVO Models
7-9
1.
Stand the motorcycle upright (not leaning on the jiffy
stand) on a level surface. Turn the handlebars to the right
if necessary, so the top of the clutch master cylinder reservoir is level.
2.
View reservoir sightglass on reservoir cover and verify
fluid presence. Sightglass should appear dark if fluid is
present. If sightglass is not dark, add brake fluid. See
Service Manual. Use only D.O.T. 4 HYDRAULIC BRAKE
FLUID (Part No. 99953-99A). Wash all residue of D.O.T.
4 brake fluid spills off vehicle with water.
3.
See Figure 7-16. Place Tour-Pak on its front surface on a
clean, soft cloth or mat, being careful not to damage
painted surfaces.
4.
See Figure 7-17. Locate five screws (1), ten washers (2),
five saddle spacers (4), five locknuts (6), removable
mounting bracket (5) and support tube (3).
10681
2
REMOVABLE RIDER BACKREST
Rider backrest is installed on seat at factory. Refer to
FLHTCSE2 Owner’s Manual for backrest and seat removal/
installation instructions.
WIND DEFLECTOR
The wind deflector is shipped in the saddlebag. Unpack and
mount on vehicle following the INSTALLING WINDSHIELD
Section of the Touring section.
1
1.
2.
Tour-Pak bracket mounts
Passenger backrest mounts
Figure 7-13. Passenger Backrest and Tour-Pak
Docking Locations
REMOVABLE TOUR-PAK
See Figure 7-13. The Tour-Pak assembly mounts on the two
rear mounting points (1) on each side of the vehicle.
NOTE
Assembly of the Tour-Pak to its mounting bracket is facilitated
with the help of an assistant.
1.
2.
10692
See Figure 7-14. The FLHTCSE2 is shipped with the
Tour-Pak (1) mounted forward of its normal mounting
position, on the removable mounting bracket (2) with a
cardboard shipping spacer (3) in between Tour-Pak and
mounting bracket. This temporary mounting allows
motorcycle to fit in shipping crate.
1
2
Open Tour-Pak lid and remove three long screws, washers and nuts that secure Tour-Pak to removable mounting bracket. Remove and discard long screws, washers,
nuts and cardboard shipping spacer.
NOTE
See Figure 7-15. Removable mounting bracket has two sets
of holes for mounting Tour-Pak. The rear set of holes will be
used to mount the Tour-Pak.
3
1.
2.
3.
Tour-Pak
Removable mounting bracket
Cardboard shipping spacer
Figure 7-14. Tour-Pak Mounting Assembly as Shipped
CAUTION
When assembling Tour-Pak and mounting bracket, be
careful to avoid damaging painted surfaces.
7-10
2005 PDI: CVO Models
pd0222
10767
Mount Tour-Pak
in rear holes
1
2
Figure 7-15. Removable Mounting Bracket
3
10704
4
5
6
Figure 7-16. Positioning Tour-Pak for Assembly
1.
2.
3.
4.
5.
6.
Screw, 1/4-20 x 2-1/4 in. (5)
Washer 1/4 in. inside dia. (10)
Support tube
Saddle spacer (5)
Removable mounting bracket
Locknut, Nylon cap, 1/4-20 (5)
Figure 7-17. Tour-Pak Mounting
2005 PDI: CVO Models
7-11
5.
See Figure 7-18. Insert one screw with washer through
rear-most hole in Tour-Pak. Slide support tube onto
screw.
6.
Install one saddle spacer onto screw with curved surface
of spacer facing support tube. Install washer and locknut.
Finger-tighten locknut only.
7.
Install screws and washers in other four locations,
through Tour-Pak and support tube. Install saddle spacers on screws with curved surface of each spacer facing
support tube.
8.
See Figure 7-19. Slide removable mounting bracket (1)
onto screws with bracket latches facing rear of Tour-Pak.
9.
Install washers and locknuts (2, 3). Tighten all five
screws and locknuts to 96-120 in-lbs (10.8-13.5 Nm).
10768
2
3
4
10. See Figure 7-13. Install Tour-Pak on Tour-Pak bracket
mounts (1) and lock latches in place.
11. See Figure 7-20. Locate Tour-Pak power connector
between seat and fender strut cover on left side of motorcycle.
1
5
10705
4
1
1.
2.
3.
4.
5.
Removable mounting bracket
Screw and locknut (4)
Washer (4)
Saddle spacer (4)
Tour-Pak (front surface facing down)
Figure 7-19. Removable Mounting Bracket
10688
2
3
5
1.
2.
3.
4.
5.
Support tube
Saddle spacer
Screw and locknut
Washer
Tour-Pak (front surface facing down)
Figure 7-18. Mounting Support Tube
7-12
2005 PDI: CVO Models
Figure 7-20. Tour-Pak Power Connector
12. See Figure 7-21. Plug Tour-Pak harness into power connector and tuck cable assembly between seat and fender
strut cover.
pd0220
10689
Figure 7-22. Coaxial Adapter
10690
10678
1
2
Figure 7-21. Connecting Tour-Pak Power Cable
3
NOTE
See Figure 7-22. With the radio antenna mast mounted on
the Tour-Pak antenna mount, the coaxial adapter shown in
the figure allows connecting the antenna cable to the chassis
antenna mount. With Tour-Pak removed, the adapter may be
removed and antenna mast threaded directly onto the chassis antenna mount.
10679
13. See Figure 7-23. Make certain that coaxial adapter (2) is
securely finger-tightened into the antenna chassis mount
(3).
14. Pull enough coaxial cable from Tour-Pak to reach coaxial
adapter on antenna chassis mount, allowing for a small
amount of slack in cable.
15. Screw coaxial cable connector (1) into coaxial adapter
on antenna chassis mount. Finger-tighten securely.
1.
2.
3.
Coaxial connector
Coaxial adapter
Antenna chassis mount
Figure 7-23. Connecting Antenna Cable
(Tour-Pak Installed)
2005 PDI: CVO Models
7-13
RADIO ANTENNA
10681
1
See Figure 7-24. Screw antenna (1) into antenna mount (2)
on Tour-Pak and tighten set screw with allen wrench (3).
10680
2
1
1.
2.
Passenger backrest mounts
Tour-Pak bracket mount
Figure 7-25. Passenger Backrest and Tour-Pak
Docking Locations
2
10707
3
1.
2.
3.
Antenna
Antenna Tour-Pak mount
Allen wrench
1
Figure 7-24. Installing Antenna on Tour-Pak
REMOVABLE PASSENGER
BACKREST
2
See Figure 7-25. The passenger backrest assembly mounts
on the two forward mounting points (1) on each side of the
vehicle when the Tour-Pak is not installed.
Since the vehicle will ordinarily be delivered to the customer
with the Tour-Pak installed, store the removable passenger
backrest inside the Tour-Pak and deliver to customer with
vehicle.
NOTE
Retain protective cardboard packaging for passenger backrest. Secure backrest in Tour-Pak to prevent damage to backrest assembly and interior of Tour-Pak.
7-14
2005 PDI: CVO Models
1.
2.
Rear latch (2)
“C” bracket guides (2)
Figure 7-26. Passenger Backrest
DELIVERING VEHICLE WITH
REMOVABLE PASSENGER
BACKREST INSTALLED
10675
1
If the customer wishes the vehicle to be delivered with the
removable passenger backrest (see Figure 7-26.) installed on
the vehicle instead of the Tour-Pak, follow the instructions
below.
Passenger Backrest
NOTE
If the Tour-Pak is installed on the vehicle, it must be removed.
See Figure 7-25. Mount the passenger backrest assembly on
the two forward mounting points (1) on each side of the vehicle.
10676
Radio Antenna
NOTE
See Figure 7-27. With the antenna mast mounted on the
Tour-Pak antenna mount, the coaxial adapter shown in the
figure allows connecting the antenna cable to the chassis
antenna mount. With Tour-Pak removed, the adapter may be
removed and antenna mast threaded directly onto the chassis antenna mount.
2
pd0220
10677
Figure 7-27. Coaxial Adapter
1.
See Figure 7-28. Unscrew coaxial adapter (1) from
antenna chassis mount. Place coaxial adapter in TourPak and deliver to customer with vehicle.
2.
Screw antenna (3) onto chassis mount and tighten set
screw with allen wrench (4).
3
4
1.
2.
3.
4.
Coaxial adapter
Antenna chassis mount
Antenna
Allen wrench
Figure 7-28. Installing Antenna (Tour-Pak Removed)
2005 PDI: CVO Models
7-15
LEATHER DRESSING APPLICATION
FINAL PREDELIVERY INSPECTIONS
Apply Harley-Davidson Leather Dressing, Part No. 9826191V to the following:
Perform all the remaining Predelivery Inspections given in
Section I (All Models) and Section II (Touring Models) that
apply to the ELECTRA GLIDE (FLHT).
●
Seat.
●
Rider backrest pad.
●
Passenger backrest pad (mounted on Tour-Pak).
●
Detachable passenger backrest pad.
NOTE
Do not remove the clutch cover. It is not necessary to check
the primary chaincase lubricant level on the FLHTCSE2. Also,
the hydraulic clutch is not adjustable.
DO NOT REPEAT INSPECTIONS THAT WERE PERFORMED IN THIS SECTION.
7-16
2005 PDI: CVO Models
FLSTFSE MODEL
GENERAL
CAUTION
The FLSTFSE model is shipped from the factory with
SYN-3® lubricant exclusively in the engine, primary and
transmission. If there is a need to top off lubricants, DO
NOT use standard lubricants and do not mix lubricants
as damage to the motorcycle can result.
7.3
3.
Tighten two front handlebar clamp screws until top and
bottom risers meet (no gap in front). DO NOT tighten
screws to more than 15 ft-lbs (20.3 Nm).
4.
Tighten rear handlebar clamp screws to 12-15 ft-lbs
(16.3-20.3 Nm).
5.
Final tighten front handlebar clamp screws to 12-15 ft-lbs
(16.3-20.3 Nm).
10762
Follow the instructions in section I (All Models) and Section IV
(Softail Models) and the following instructions to perform the
predelivery setup procedure on the FLSTFSE model.
This motorcycle is equipped with the Harley-Davidson Factory Security System and siren.
UNCRATING
See Figure 7-29. The FLSTFSE is shipped in a “turn-wheel”
crate which allows the handlebar to be shipped in position on
the handlebar risers.
Check Contents of Crate
Check that the following items are in a box in the crate:
●
●
●
●
●
●
Seat
Motorcycle cover
Owner’s kit
Right mirror
NOTES
If any parts are missing, call 1-800-695-2925 or Fax 1717-852-6717. Provide your Dealer name, number, person to contact, part number of missing item, and Motorcycle VIN.
Figure 7-29. FLSTFSE Shipped in Turn-Wheel Crate
10763
See Figure 7-30. After crating straps have been
removed, make sure to remove the plastic crating strap
bracket from the vehicle.
ADJUSTING HANDLEBARS
The FLSTFSE is shipped with the handlebars adjusted to a
standard riding position. If handlebars need to be adjusted for
more comfortable rider position, proceed as follows:
1.
Loosen, but do not remove, all four handlebar riser clamp
screws.
2.
Raise or lower handlebars to desired position. Make certain handlebars are centered side-to-side in risers.
Figure 7-30. Plastic Crating Strap Bracket
2005 PDI: CVO Models
7-17
ADJUSTING HANDLEBAR
CONTROLS
d0419x1x
2
If handlebar controls and clutch and brake lever assemblies
are incorrectly positioned, they may be rotated slightly for
more comfortable riding position.
CAUTION
Do not rotate front brake lever assembly too far. Brake
master cylinder fits into a machined relief in handlebar. If
not properly located in the machined relief, master cylinder can be damaged when clamp screws are tightened.
Handlebar surface contains range marks to properly
locate brake and clutch master cylinders and control
assemblies. These assemblies MUST be located within
that range.
To adjust handlebar controls, proceed as follows:
1.
2.
1
1.
2.
Front brake lever assembly clamp screw (2)
Handlebar switch housing screw (2)
Figure 7-31. Handlebar Lever and Control
Mounting Screws (Right Side Shown)
pd0214a
See Figure 7-31. Loosen (but do not remove) brake and
clutch lever assembly clamp screws (1) and handlebar
switch housing screws (2).
2
1
3
See Figure 7-32. Range marks (4) are located on bottom
of handlebar adjacent to brake lever clamp assembly.
Rotate right control and brake master cylinder assembly
(2) slightly for most comfortable position. Make sure
control assembly is positioned so that clamp mating surface (3) is located in area between range marks.
4
CAUTION
Control wiring is routed inside handlebar and may be
pinched or cut if controls are rotated too far.
3.
Beginning with top screw, tighten right lever assembly
clamp screws to 60-80 in-lbs (6.8-9.0 Nm).
4.
Beginning with lower screw, tighten right handlebar
switch housing screws to 35-45 in-lbs (4-5 Nm).
5.
Orient the left handlebar control assembly to match the
position of the right handlebar control assembly.
CAUTION
Control wiring is routed inside handlebar and may be
pinched or cut if controls are rotated too far.
6.
Beginning with top screw, tighten left lever assembly
clamp screws to 60-80 in-lbs (6.8-9.0 Nm).
7.
Beginning with lower screw, tighten left handlebar switch
housing screws to 35-45 in-lbs (4-5 Nm).
8.
Test handlebar switches to make sure they are functioning properly and wiring has not become pinched or otherwise damaged.
7-18
2005 PDI: CVO Models
1.
2.
3.
4.
Handlebar
Right control and brake lever assembly
Control assembly clamp mating surface
Range marks
Figure 7-32. Right Handlebar Control Assembly
(Bottom View)
CHECKING CLUTCH FLUID
CAUTION
D.O.T. 5 silicone hydraulic brake fluid is used in the
hydraulic clutch. Do not use other types of fluids as they
are not compatible and could cause equipment damage.
(00204a)
CAUTION
Do NOT allow foreign matter to enter the clutch master
cylinder reservoir. dirt or debris in the reservoir may
cause improper operation of the clutch and equipment
damage.
MIRRORS AND TURN SIGNALS
The right mirror is enclosed in a box in the crate. Install mirror
and adjust for proper rear view as follows:
1.
See Figure 7-34. Place spacer (10) onto right side mirror
stem, slide mirror stem down through hole in front brake
master cylinder assembly and right turn signal bracket
(5). Install lockwasher (8) and screw on acorn nut (7) finger tight.
2.
Adjust both mirrors so a small portion of the rider’s shoulder is visible in each mirror. This helps establish the relative distance of vehicles to the rear of the motorcycle.
3.
Tighten acorn nuts to 60-96 in-lbs (6.8-9.0 Nm).
4.
To adjust turn signals:
a.
Loosen set screws (9) approximately 1/8 turn.
1CAUTION
Direct contact of D.O.T. 5 brake fluid with eyes can cause
eye irritation, swelling, and redness. Avoid eye contact.
In case of eye contact flush with large amounts of water
and get medical attention. Swallowing large amounts of
D.O.T. 5 brake fluid can cause digestive discomfort. If
swallowed, obtain medical attention. Use in well ventilated area. KEEP OUT OF REACH OF CHILDREN.
(00144a)
pd0213
10
11
2
4
10
6
9
12
The clutch is hydraulically actuated. See Figure 7-33. The
clutch master cylinder fluid reservoir (1) is located on the left
handlebar.
3
5
8
8834
7
1
9
8
3
Figure 7-33. Clutch Master Cylinder Reservoir
1.
2.
Stand the motorcycle upright (not leaning on the jiffy
stand) on a level surface. Turn the handlebars to the right
if necessary, so the top of the clutch master cylinder reservoir is level.
1.
2.
3.
4.
5.
6.
7.
8.
9.
10.
11.
12.
4
7
Right turn signal housing
Left turn signal housing
Jam nut (2)
Ball stud (2)
Right turn signal bracket
Left turn signal bracket
Acorn nut (2) @ 60-96 in-lbs (6.8-9.0 Nm)
Lockwasher (2)
Set screw (2) @ 50-60 in-lbs (5.7-6.8 Nm)
Spacer (2)
Clutch control housing
Brake control housing
Figure 7-34. Turn Signals
View reservoir sightglass on reservoir cover and verify
fluid presence. Sightglass should appear dark if fluid is
present. If sightglass is not dark, add brake fluid. See
Service Manual. Use only D.O.T. 5 SILICONE HYDRAULIC BRAKE FLUID (Part No. 99902-77: 12 oz., 9990177: 1 gal.).
2005 PDI: CVO Models
7-19
NOTE
It is not necessary, nor desirable, to completely remove setscrew to re-adjust turn signal housing. It is only necessary to
loosen setscrew 1/8 turn, adjust turn signal and re-tighten
setscrew. Nylon lock pellet on setscrew maintains locking
ability after many loosening/tightening cycles. If setscrew is
completely removed, it should be replaced.
b.
Position front turn signal housings (1, 2) evenly with
lenses pointing straight ahead.
c.
Tighten each set screw to 50-60 in-lbs (5.7-6.8
Nm).
10766
1
2
FUEL TANK CONSOLE EXTENSION
See Figure 7-35. Remove screw (2) from fuel tank mounting
tab. Insert screw through hole in rear end of fuel tank console
extension (1) and screw into fuel tank mounting tab. Tighten
securely.
SEAT
Remove seat and mounting screw from carton. See Figure 735. Place tang on front underside of seat into channel in
frame (3). Slide seat forward into place. Secure with mounting
screw into rear fender.
3
1.
2.
3.
Fuel tank console extension
Mounting screw
Seat mounting channel
Figure 7-35. Fuel Tank Console Extension
FINAL PREDELIVERY INSPECTIONS
Perform all the remaining Predelivery Inspections given in
Section I (All Models) and Section IV (Softail Models) that
apply to the FLSTF model.
NOTE
Do not remove the clutch cover. It is not necessary to check
the primary chaincase lubricant level on the FLSTFSE. Also,
the hydraulic clutch is not adjustable.
DO NOT REPEAT INSPECTIONS THAT WERE PERFORMED IN THIS SECTION.
7-20
2005 PDI: CVO Models
2005
General
Touring
Models
Dyna
Models
Softail
Models
Sportster
Models
VRSC
Models
CVO
Models