1
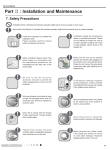
Service Manual
Part Ⅱ : Installation and Maintenance
7. Notes for Installation and Maintenance
Safety Precautions:
Important!
Please read the safety precautions carefully before
installation and maintenance.
The following contents are very important for installation
and maintenance.
Please follow the instructions below.
●The installation or maintenance must accord with the
instructions.
●Comply with all national electrical codes and local
electrical codes.
●Pay attention to the warnings and cautions in this
manual.
●All installation and maintenance shall be performed by
distributor or qualified person.
●All electric work must be performed by a licensed
technician according to local regulations and the
instructions given in this manual.
●Be caution during installation and maintenance. Prohibit
incorrect operation to prevent electric shock, casualty and
other accidents.
Warnings
Electrical Safety Precautions:
1. Cut off the power supply of air conditioner before
checking and maintenance.
2. The air condition must apply specialized circuit and
prohibit share the same circuit with other appliances.
3. The air conditioner should be installed in suitable
location and ensure the power plug is touchable.
4. Make sure each wiring terminal is connected firmly
during installation and maintenance.
5. Have the unit adequately grounded. The grounding
wire can’t be used for other purposes.
6. Must apply protective accessories such as protective
boards, cable-cross loop and wire clip.
7. The live wire, neutral wire and grounding wire of
power supply must be corresponding to the live wire,
neutral wire and grounding wire of the air conditioner.
8. The power cord and power connection wires can’t be
pressed by hard objects.
9. If power cord or connection wire is broken, it must be
replaced by a qualified person.
18
10. If the power cord or connection wire is not long enough,
please get the specialized power cord or connection wire
from the manufacture or distributor. Prohibit prolong the wire
by yourself.
11. For the air conditioner without plug, an air switch must
be installed in the circuit. The air switch should be all-pole
parting and the contact parting distance should be more than
3m.
12. Make sure all wires and pipes are connected properly and
the valves are opened before energizing.
13. Check if there is electric leakage on the unit body. If yes,
please eliminate the electric leakage.
14. Replace the fuse with a new one of the same specification
if it is burnt down; don’t replace it with a cooper wire or
conducting wire.
15. If the unit is to be installed in a humid place, the circuit
breaker must be installed.
Installation Safety Precautions:
1. Select the installation location according to the requirement of this manual.(See the requirements in installation
part)
2. Handle unit transportation with care; the unit should not
be carried by only one person if it is more than 20kg.
3. When installing the indoor unit and outdoor unit, a sufficient fixing bolt must be installed; make sure the installation
support is firm.
4. Ware safety belt if the height of working is above 2m.
5. Use equipped components or appointed components during installation.
6. Make sure no foreign objects are left in the unit after finishing installation.
Refrigerant Safety Precautions:
1. Avoid contact between refrigerant and fire as it generates
poisonous gas; Prohibit prolong the connection pipe by
welding.
2. Apply specified refrigerant only. Never have it mixed with
any other refrigerant. Never have air remain in the refrigerant
line as it may lead to rupture or other hazards.
3. Make sure no refrigerant gas is leaking out when
installation is completed.
4. If there is refrigerant leakage, please take sufficient
measure to minimize the density of refrigerant.
5. Never touch the refrigerant piping or compressor without
wearing glove to avoid scald or frostbite.
Improper installation may lead to fire hazard, explosion,
electric shock or injury.
Installation and Maintenance
Service Manual
Main Tools for Installation and Maintenance
1. Level meter, measuring tape
2. Screw driver
3. Impact drill, drill head, electric drill
4. Electroprobe
5. Universal meter
6. Torque wrench, open-end wrench, inner
hexagon spanner
7. Electronic leakage detector
8. Vacuum pump
9. Pressure meter
10. Pipe pliers, pipe cutter
11. Pipe expander, pipe bender
12. Soldering appliance, refrigerant container
Installation and Maintenance
19
Service Manual
8. Installation Manual
Installation procedures
Start installation
Preparation before installation
Read the requirements
for electric connection
select installation
location
Select indoor unit
installation location
Prepare tools
Select outdoor unit
installation location
Install the support of outdoor unit
(select it according to the actual situation)
Install wall-mounting
frame, drill wall holes
Connect pipes of indoor
unit and drainage pipe
Fix outdoor unit
Connect wires of indoor unit
Install drainage joint of outdoor unit
(only for cooling and heating unit)
Bind up pipes and
hang the indoor unit
Make the bound pipes pass
through the wall hole and then
connect outdoor unit
Connect pipes of outdoor unit
Connect wires of outdoor unit
Neaten the pipes
Vacuum pumping and leakage detection
Check after installation and test operation
Finish installation
Note: this flow is only for reference; please find the more detailed installation steps in this section.
20
Installation and Maintenance
Service Manual
8.1 Electrical Connections
GWHD(18)NK3JO(DRED)
GWHD(18)NK3JO(DRED)
1. Remove the handle at the right side plate of the outdoor
unit (one screw).
2. Remove the cable clamp, connect the power connection
cable with the terminal at the row of connection and fix the
connection. The fitting line distributing must be consistent with
the indoor unit. terminal of line bank. Wiring should meet that of
indoor unit.
3. Fix power connection wire by wire clamp.
4. Ensure wire has been fixed well.
5. Install the handle.
Front Grill
Handle
To unit A
To unit B
L
Including an air switch with suitable capacity,please note
the following table. Air switch should be included magnet
buckle and heating buckle function, it can protect the
circuit-short and overload. (Caution: please do not use the
fuse only for protect the circuit)
Power cord
connecting
cable
connecting
cable
To the power supply
Air-conditioner
GWHD(18)NK3JO(DRED)
Air switch capacity
16A
L
N
L
An all-pole disconnection switch having a contact
separation of at least 3mm in all pole should be connected
in fixed wiring.
Wrong wire connection may cause malfunction of
some electric components.After fixing cable, ensure
that leads between connection to fixed point have
some space.
The connection pipes and the connectiong wirings
of the unit A and unit B must be corresponding to
each other respective.
The appliance shall be installed in accordance with
national wiring regulations.
Note: the above figures are only intended to be a simple
diagram of the appliance and may not correspond to the
appearance of the units that have been purchased.
Installation and Maintenance
21
Service Manual
GWHD(24)NK3JO(DRED)
1. Remove the handle at the right side plate of the outdoor unit
(one screw).
2. Remove the cable clamp, connect the power connection
cable with the terminal at the row of connection and fix the
connection. The fitting line distributing must be consistent with
the indoor unit. terminal of line bank. Wiring should meet that of
indoor unit.
3. Fix power connection wire by wire clamp.
4. Ensure wire has been fixed well.
5. Install the handle.
An all-pole disconnection switch having a contact
separation of at least 3mm in all pole should be connected
in fixed wiring.
Including an air switch with suitable capacity,please note
the following table. Air switch should be included magnet
buckle and heating buckle function, it can protect the
circuit-short and overload. (Caution: please do not use the
fuse only for protect the circuit)
The appliance shall be installed in accordance with
national wiring regulations.
Air-conditioner
GWHD(24)NK3JO(DRED)
Wrong wire connection may cause malfunction of some
electric components.After fixing cable, ensure that leads
between connection to fixed point have some space.
The connection pipes and the connectiong wirings of the
unit A, unit B, unit C and unit D must be corresponding to
each other respective.
Note: The above figures are only intended to be a simple
diagram of the appliance and may not correspond to the
appearance of the units that have been purchased.
Air switch capacity
25A
Handle
To unit A
To unit B
To unit C
L
Power cord
connecting
cable
connecting
cable
connecting
cable
To the power supply
L
Outdoor unit
Indoor unit
22
Installation and Maintenance
Service Manual
GWHD(28)NK3JO(DRED)
1. Remove the handle at the right side plate of the outdoor unit
(one screw).
2. Remove the cable clamp, connect the power connection
cable with the terminal at the row of connection and fix the
connection. The fitting line distributing must be consistent with
the indoor unit. terminal of line bank. Wiring should meet that of
indoor unit.
3. Fix power connection wire by wire clamp.
4. Ensure wire has been fixed well.
5. Install the handle.
An all-pole disconnection switch having a contact
separation of at least 3mm in all pole should be connected
in fixed wiring.
Including an air switch with suitable capacity,please note
the following table. Air switch should be included magnet
buckle and heating buckle function, it can protect the
circuit-short and overload. (Caution: please do not use the
fuse only for protect the circuit)
The appliance shall be installed in accordance with
national wiring regulations.
Wrong wire connection may cause malfunction of some
electric components.After fixing cable, ensure that leads
between connection to fixed point have some space.
The connection pipes and the connectiong wirings of the
unit A, unit B, unit C and unit D must be corresponding to
each other respective.
Note: The above figures are only intended to be a simple
diagram of the appliance and may not correspond to the
appearance of the units that have been purchased.
Air-conditioner
Air switch capacity
GWHD(28)NK3JO(DRED)
25A
Handle
Front
side plate
To unit A
To unit B
To unit C
To unit D
L
Power cord
connecting
cable
connecting
cable
connecting
cable
connecting
cable
To the power supply
L
Outdoor unit
Indoor unit
Installation and Maintenance
23
Service Manual
8.2 Installing the Outdoor Unit
Use bolts to secure the unit to a flat, solid floor.
When mounting the unit on a wall or the roof, make
sure the support is firmly secured so that it cannot
move in the event of intense vibrations or a strong
wind.
Do not install the outdoor unit in pits or air vents
Installing the pipes
Use suitable connecting pipes and equipment for the
refrigerant R410A.
Models(m)
Max. connection
pipe length
Max. connection
pipe length(Simple
one indoor unit)
18K
20
24K
60
28K
Installthedrainfittingandthedrainhose(for
modelwithheatpumponly)
Condensation is produced and flows from the outdoor unit
when the appliance is operating in the heating mode. In order
not to disturb neighbours and to respect the environment,
install a drain fitting and a drain hose to channel the condensate water. Install the drain fitting and rubber washer on the
outdoor unit chassis and connect a drain hose to it as shown
in the figure.
70
18K
10
20
20
24/28K
The refrigerant pipes must not exceed the maximum
heights 10m.
Wrap all the refrigerant pipes and joints.
Tighten the connections using two wrenches working
in opposite directions.
Caution: Installation Must be Performed in Accordance
with the NEC/CEC by Authorized Personnel Only.
Humid air left inside the refrigerant circuit can cause compressor malfunction. After having connected the indoor
and outdoor units, bleed the air and humidity from the
refrigerant circuit using a vacuum pump.
1.Unscrew and remove the caps from the 2-way and 3way valves.
2.Unscrew and remove the cap from the service valve.
3.Connect the vacuum pump hose to the service valve.
4.Operate the vacuum pump for 10-15 minutes until an
absolute vacuum of 10 mm Hg has been reached.
5.With the vacuum pump still in operation, close the
low-pressure knob on the vacuum pump coupling. Stop
the vacuum pump.
6.Open the 2-way valve by 1/4 turn and then close it
after 10 seconds Check
.
all the joints for leaks using
liquid soap or an electronic leak device.
7.Turn the body of the 2-way and 3-way valves. Disconnect the vacuum pump hose.
8.Replace and tighten all the caps on the valves.
Vacuum pump
Diameter (mm)
Twisting moment (N.m)
Φ6
15-20
Φ9.52
35-40
Φ16
60-65
Φ12
45-50
INDOOR
UNIT
Φ19
70-75
Refrigerant fluid direction of flow
Vacuum pump
(8) Secure
2-way valve
3-way valve
18K unit need to be installed the indoor unit
(6) Open by 1/4 turn
18K Model:
(7) Turn to open fully
Service
inlet
conversion joint
24
Vacuum pump
(2) Turn
(8) Secure
(7) Turn to open fully
(2) Turn
Valve cap
Valve cap
(2) Turn
(8) Secure
Connect to the
indoor unit
Installation and Maintenance
Service Manual
8.3 Installation Dimension Diagram
Use suitable instruments for the refrigerant R410A.
● Do not use any other refrigerant than R410A.
Do not use mineral oils to clean the unit.
The installation must be done by trained and qualified service personnel with reliability according to this manual.
Contact service center before installation to avoid the malfunction due to unprofessional installation.
When picking up and moving the units, you must be guidedby trained and qualified person.
Ensure that the recommende dspace is left around the appliance.
50cm or above
Space to the cover
18K
30cm or
ab
Space to ove
the wall
30cm or above
(Air inlet side)
above
200cm or de)
t si
(Air outle
30c
m
Spa or ab
ce t
o
o th ve
ew
all
50cm or above
Space to the cover
24/28K
30cm or
ab
Space to ove
the wall
30cm or above
(Air inlet side)
above
200cm or de)
t si
tle
ou
ir
(A
30c
m
Spa or ab
ce t
o
o th ve
ew
all
Installation and Maintenance
25
Service Manual
8.4 Check after Installation
Check Items
Problems Owing to Improper Installation
Is the installation reliable?
The unit may drop, vibrate or make noises
Has the gas leakage been checked?
May cause unsatisfactory cooling (heating)
effect
Is the thermal insulation of the unit
May cause condensation and water dropping
sufficient?
Is the drainage smooth?
May cause condensation and water dropping
Does the power supply voltage accord
The unit may bread down or the components
with the rated voltage specified on the
may be burned out
nameplate?
Are the lines and pipelines correctly
The unit may bread down or the components
installed?
may be burned out
Has the unit been safely grounded?
Risk of electrical leakage
Are the models of lines in conformity
The unit may bread down or the components
with requirements?
may be burned out
Are there any obstacles near the air
The unit may bread down or the components
inlet and outlet of the indoor and outdoor
may be burned out
units?
Have the length of refrigerating pipe
It is not easy to decide the charge amount
and refrigerant charge amount been
of refrigerant.
recorded?
26
Installation and Maintenance