1
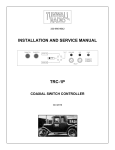
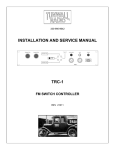
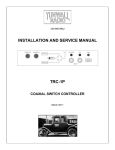
330-995-9642
COMBINED ANT
COMBINED LOAD
ANT
TX 1
SEPARATE TX 1
LOCAL MODE
AUTO
SW 1
SEPARATE TX 2
SW 3
COMBINER
REJECT
LOAD
PLATES ON
POWER
PLATES OFF
TX 2
SW 2
TX 3
DUMMY
LOAD
TRC-3
TRC-3
FM SWITCH CONTROLLER
FOR 3 COAX SWITCHES AND COMBINER
INSTALLATION AND SERVICE MANUAL
Rev Sept 2007
TRC-3 3-Switch FM controller–general ----------------------2
PLC (programmable logic controller) -----------------------2
CONNECTIONS -----------------------------------------------3
Coax switch connections -----------------------------------3
Remote control connections --------------------------------4
Coax switch reverse jumpers -------------------------------4
Transmitter interlock connections -------------------------5
Transmitter 2 analog/digital connections ------------------5
Dummy load connection -------------------------------------6
Plates on/off connections ---------------------------------6
Auto transfer connections ---------------------------------7
Optional connections --------------------------------------7
Reject load interlock connection --------------------------8
OPERATION -------------------------------------------------8
Antenna system modes --------------------------------------9
Illuminated pushbuttons -----------------------------------9
Plates on/off ---------------------------------------------9
Auto transfer key switch ----------------------------------9
Remote control commands ----------------------------------10
Local key switch -----------------------------------------10
Fuses ----------------------------------------------------10
Command polarity -----------------------------------------10
Controller schematic diagram -----------------------------11
Interconnection chart ------------------------------------12
Coax switch wiring charts --------------------------------13
Front panel indicator combinations -----------------------14
Logic tables ---------------------------------------------15
Component layout -----------------------------------------16
Dielectric 50000 series switch manual -------------------1-7
Dielectric 60000 series switch manual ------------------1-10
Appendix A “FM Control system Principles” -----------3 pages
IF THE CONTROLLER WILL NOT ALLOW TRANSMITTERS TO RUN IN
COMBINED MODES, CHECK THAT THE REJECT LOAD INTERLOCK (TB6,
PINS 1 AND 4) HAS A JUMPER OR IS CONNECTED TO THE LOAD.
IF THE CONTROLLER WON’T MOVE THE COAX SWITCHES, CHECK THAT
THE TRANSMITTER OFF TALLIES (TB6, PINS 5 AND 9 TO PIN 1) HAVE
JUMPERS OR ARE CONNECTED TO THE TRANSMITTERS.
TRC-3 3-SWITCH FM CONTROLLER
This is a controller for three coaxial switches, two or three transmitters, one antenna, combiner,
and a dummy load. It was designed for Dielectric 50000 and 60000 series coax switches but
will also work with others. All connections are either made to barrier strip terminals or 9-pin
AMP connectors on the back panel.
The controller has no memory of what the coax switch positions were the last time it was on. It
will not move coax switches when powered on. If the coax switches are in a valid combination
of positions, the controller will enable the appropriate transmitter interlocks. If any coax
switches are between positions when the controller is powered on, it will not do anything, but
any local or remote command will move all switches to the correct positions.
PLC (PROGRAMMABLE LOGIC CONTROLLER)
This is a PLC-based controller. All functions are controlled by a NAIS FP0-C14RS
programmable logic controller, with 3 FP0-C16RS expansion modules. Programmable logic
controllers are not well known to broadcast engineers but have been widely used in the
manufacturing industry for decades. The FP0 is a microprocessor controller, built into a
convenient package that includes input isocouplers, output relays, status indicators, terminals
and connectors, and a programming interface. PLC’s are designed and constructed to survive
and perform in the environments found in industrial facilities, which typically present several
challenges to electronic equipment; heat, dust, vibration, magnetic fields, and power line
transients.
No knowledge of PLC programming is needed to install and use the controller. The PLC uses
EEP-ROM for program memory. No backup battery is required, so program loss should not be
a concern, even if the controller is unplugged for months or years.
The PLC and expansion unit in this controller have opto-isolated electronic logic inputs, and
relay contact outputs. All controller inputs are configured for contact closure equipment (such
as a Burk ARC-16 remote control with IP-8 relay panels).
COAX SWITCHES AND CONTROLLERS
If you’re not familiar with FM control systems, or coax switches and their control and status
signals, Appendix A “FM Transmitter Control Systems General Terms and Principles” may be
of interest.
Tunwall Radio LLC 1312 Suffield Oaks Lane Suffield, OH 44260 [email protected] 330-995-9642
2
CONNECTIONS
Barrier strip terminals are provided for transmitter and remote control connections All barrier strip
terminals are max 24VDC.
Coax switch connections are made to 9-pin AMP connectors, which use the same pins as
Dielectric 60000 switch connectors. The 9-pin connectors can be installed with several types of
pin crimpers commonly used in studio console projects. One suitable tool is Paladin 1645,
Newark part #97B3917. Pin 8 of the AMP connector is 120VAC “hot” and pin 9 is AC neutral,
used for the motors in 50000 switches. 60000 switches get AC power from a separate power
cord.
A wiring chart is provided for convenience of installation. If non-Dielectric switches are to be used,
connections from representative switch manuals are shown on the coax switch connection chart
following the schematic diagram and interconnections pages. Wiring variations in non-Dielectric
coax switches, even of the same model number, have been found. Some have internal control
relays or not, some have 120V neon indicators or not, and any connections may be different. If
the original documentation for your switch is not available, the internal connections should be
verified before connection to the controller.
Power for the controller can be connected to a UPS, at the engineer’s discretion. The PLC is
powered by a switching DC supply that does not usually require protection from transients, or high
line voltage – it is designed to operate from up to 250 volts AC. The need for lightning protection
is a local decision. The auto transfer function includes a 5 minute power-on delay, to avoid
unwanted transfers due to power interruptions. The power-on delay would not work if the
controller is powered by a UPS.
COAX SWITCH CONNECTIONS – POSITION TALLY CLOSURES
The controller needs to know what position the coax switches are in. Pins 1-4 of AMP connectors
P1 to P3 are for the coax switch tallies. Each coax switch cable is identical, and combinations of
switch positions are handled by coax switch reverse jumpers, described in the jumper section
below.
COAX SWITCH CONNECTIONS - MOTOR CONTROL RELAYS
The controller is compatible with coax switches that have 120VAC, 12VDC or 24VDC motor
control inputs/relays. Position change commands are on pins 5-7 of AMP connectors P1 to P3.
With 120VAC motor control relays in a 50000 switch, no connection is needed to pin 6. Two
internal jumpers on the interconnection board change the command output wiring between
12VCD, 24VDC and 120VAC.
For 120VAC relays in 50000 switches only – the Dielectric switch schematic does not
exactly match the TR controller diagram. The controller reverses AC line and neutral
connections, so that neutral is switched through the controller’s output terminals instead
of line. This way, if the controller’s internal voltage select switches are set to 120VAC by
mistake, DC relay coils or inputs will not be destroyed. The AC motor in the 50000 switch
does not know the difference. 7/8” 50000 switches have DC motors but since they are
powered by AC through a transformer and rectifier circuit, this should not matter.
Tunwall Radio LLC 1312 Suffield Oaks Lane Suffield, OH 44260 [email protected] 330-995-9642
3
Solenoid-type switches might be compatible with the controller but they are generally considered
inferior to motorized types, so no consideration for solenoid switches was given to the controller
design.
Some Dielectric 50000 switches were shipped with 110VDC relays. These will not work with the
controller. In this case you would need to get 12 or 24VDC (or 120VAC) relays, either from
Dielectric or from a parts supplier. A (very) few switches may have a 240–120V step-down
transformer, which would have to be removed to use the controller.
The schematic diagram page indicates the 50000 switch terminal letters, in blue. The
interconnection page shows connections for the 60000 switch. The coax switch connection chart
following these two pages shows connections for several other coax switches.
REMOTE COMMAND CONNECTION
Controller terminals TB1-6 to TB1-10 and TB2-1 to TB2-3 are the remote position select and
remote plates on/off connections. Floating relay contacts are best, such as the Burk IP-8, but open
collector equipment may be used if it is compatible with positive common wiring.
REMOTE STATUS CONNECTION
The remote control status outputs are connected through diodes to the front panel illuminated
pushbuttons. Even though there are multiple PLC expansion modules in the controller, there are a
limited number of outputs, not enough for separate local and remote status circuits. The diodes
keep the front panel illuminated pushbutton indicators from lighting through the remote control’s
pull-up resistors. This status circuit has been used in hundreds of controllers so far, without any
reports of a problem.
The remote control status outputs are compatible with most remote control systems, Burk as an
example. The Burk ARC-16 documentation states that the status inputs can be connected to
circuits up to 28 VDC. The only requirement is that one state of the circuit be ground, or near
ground. The PLC output relays cause terminals TB1-2 to TB1-5 (TB1-1 common) to go near
ground when a remote status indication is on.
The remote status outputs follow the 4 system modes; Combined Antenna, Combined Load, etc.,
not the switch position indicators in the front panel flow chart.
COAX SWITCH REVERSE JUMPERS
Coaxial switch ports are usually connected to transmitters, antennas, and load according to the
physical layout of the equipment and building, rather than arbitrary port number assignments. This
can result in different combinations of switch positions for the 4 antenna system modes
(Combined Antenna, etc). Rather than wiring switch cables backward when their ports don’t
match a fixed controller design, the controller can reverse the front panel indicators, transmitter
interlock logic, plate on/off logic, and switch position commands by connecting jumpers on the
controller back panel.
“Normal” (no reverse jumpers needed) is when all 3 coax switches are in their position 1 when the
antenna system is in Combined Antenna mode. If any or all of the coax switches are in their
position 2 for Combined Antenna mode, connect a corresponding jumper(s) to the appropriate
terminals on TB2 terminals 6-10. Refer to the schematic diagram page on the left side to
determine which of these jumpers are needed. TB2-6 and TB2-7 are both +24V common.
Tunwall Radio LLC 1312 Suffield Oaks Lane Suffield, OH 44260 [email protected] 330-995-9642
4
The 4 antenna system modes are:
Combined Antenna
Combined Load
Separate TX 1
Separate TX 2
Each of these modes mean two things. The 4 front panel indications (illuminated pushbuttons)
and remote status closures could be labeled:
Combined Antenna, TX 3 on Load
Combined Load, TX 3 on Antenna
Separate TX 1 on Antenna, TX 2 on Load
Separate TX 2 on Antenna, TX 1 on Load
…but room on the front panel for labeling is limited. The antenna system mode needed for load
testing and TX 3 on antenna can be easily seen with the front panel graphic display.
It doesn’t matter if your system has a third transmitter or not. If #3 is added later, the logic and
control is programmed into the controller.
The 3 coax switches have 8 position combinations (for any combination of reverse jumpers or
none) but only 4 are used or valid. The 4 valid switch position combinations allow all transmitters
to get where they need to go, so there are 4 switch combinations that are ignored, as shown on
the logic table page. If the switches are manually moved to one of the ignored switch
combinations, the controller will not allow any transmitter to run. A valid antenna system mode
can be restored with any local or remote command, no matter what positions the switches have
been moved to.
TRANSMITTER INTERLOCK CONNECTIONS
The controller’s interlock terminals are to be connected to the interlock or mute terminals of the
transmitters. Older transmitters may not have terminals designated for this purpose, but may have
connections for remote plate off. If such a circuit operates with a continuous closure that holds the
plate on, the controller’s interlock terminals may be wired in series with this circuit. The PLC’s
transmitter interlock outputs are floating relay contacts. The transmitter interlock outputs are
normally close-to-run, but jumpers on TB6 can reverse the interlock logic (to open-to-run) for each
transmitter individually.
Transmitter interlock and plate on/off terminal numbers are shown on the Interconnection page,
following the schematic diagram.
The PLC relay contacts are rated for 220 VAC. It is up to the engineer’s judgment whether to
bring high voltage control circuits out of older transmitters. Since the transmitter control
connections are barrier strips, low voltage is better if possible.
TRANSMITTER 2 ANALOG / DIGITAL CONTROL CONNECTION
Whenever the system is in Separate TX 2 mode, the analog/digital control relay is energized, and
terminals TB5-3 (com) and TB5-1 (analog) will be closed. Analog may mean a composite digitaland-analog transmitter mode. When the system is not in Separate TX 2 mode, the relay is not
Tunwall Radio LLC 1312 Suffield Oaks Lane Suffield, OH 44260 [email protected] 330-995-9642
5
energized, and terminals TB5-3 (com) and TB5-2 (digital) will be closed. Although the TX 2
control board may be intended to operate from momentary closures, most transmitter control
circuits will work properly with continuous interface closures, and not be damaged. For a function
like analog/digital, it is usually best to use continuous closures, to lock the function to the antenna
system’s operational mode. If the continuous closures are determined to be a problem, an
external conversion to a momentary signal will have to be devised.
DUMMY LOAD CONNECTION
The tally terminals of your dummy load should be connected to controller terminals TB2-4 and TB2-5.
The PLC has been programmed to operate correctly with a dummy load contact closure when the
blower or water is “on”. This allows the transmitter not on-air to be energized, for testing on the load.
When the load is off, the transmitter(s) switched to it will be muted. Filament and blowers should be
able to operate, with most transmitters.
If the station’s load in a convection type, a switch should be installed in the rack and labeled “Load
Interlock”. This way the off-air transmitter(s) will normally not be allowed to run when no one is at the
transmitter site, but it is easy to use the switch to allow load testing.
A “Load Interlock” switch in series with the load tally contacts might be desirable for Altronic fan loads,
due to the nature of their tally contact operation. Altronic tally contacts close any time the load is
connected to power. Altronic loads turn on their fans when the load heats up, which protects the load
resistors, but the unwanted heat that might result from an accidental plate on command to an off-air
transmitter might be a problem for some transmitter buildings. As an alternative, some engineers
unplug their Altronic loads when finished with load testing.
The controller is able to switch positions when the load interlock is active, but the coax switch is still
protected from “hot” switching – the transmitters will be muted.
There is a front panel load ready indicator, in the flow chart graphic.
PLATE ON / OFF CONNECTIONS
“Plate” is traditional; RF on/off or similar is becoming more common. These are floating relay
contacts, which should work with any transmitter.
There are no separate filament on/off terminals. For most tube transmitters, a cold plate on is not
a problem. If the transmitter’s internal control circuits are working correctly, the plate supply will
not be turned on until the filament delay runs out.
The plate off terminals might be connected to the filament off terminals of a tube transmitter, if you
want the filament and blower to shut down when the transmitter is switched off-air. If the
transmitter’s internal control circuits are working correctly, the plate will turn off immediately, and
the filament time-out will cycle before the blower is turned off. A possible disadvantage to
connecting plate off to the filament off circuit is that a transfer from Combined Antenna to a
separate mode might cause a filament warm-up delay before getting back on-air.
If all of the plate on and plate off closures are connected to your transmitters, the system may be
more automatic than you would like. If you don’t plan to use AUTO transfer, you may not want to
connect any of the plate control closures. Or, connect just the closures you want. Terminals for
plate on/off control are shown on the schematic and interconnection pages.
Tunwall Radio LLC 1312 Suffield Oaks Lane Suffield, OH 44260 [email protected] 330-995-9642
6
AUTO TRANSFER CONNECTIONS
This is an optional function, selected by a front panel key switch, to transfer to a separate
transmitter if a combined transmitter fails. Details on the auto transfer sequence are explained in
the OPERATION section.
Connections related to auto transfer are made to TB3-7 to TB3-10 and TB4-7 to TB4-10. With
auto transfer on, to tell the controller that TX 1 and TX 2 are working, a fail signal for each
transmitter must be provided:
A continuous closure from floating contacts, maintained when the transmitter
is running, or
Continuous 5 volts DC when the transmitter is running, which is not
connected to ground by the controller
The 5 volt option energizes a small single pole relay, whose NO contacts are connected in
parallel with the controller’s transmitter fail closure inputs. The current draw of the 5 volt relay is
38ma. The 5 volt relay coils have “protection” diodes, so polarity matters, and is indicated on the
schematic drawing and interconnection chart. One transmitter (or RF detector, etc.) can provide a
closure and the other can use 5 volts, whichever is available. If a transmitter’s fail closure opens,
or if the 5 volt signal drops, the controller will switch the other to the antenna. If both transmitters’
on signals drop at the same time, the controller won’t do anything.
The closure or 5 volts can come from the transmitter or any other device such as a Bird Wattcher
or suitable modulation monitor.
If you only want one transmitter transfer to be allowed, e.g. only TX 1 can be on the antenna by
itself, then jumper the TX 2 fail terminals, so it can never “fail”.
TRANSMITTER OFF TALLIES
The controller can be configured so that coax switches will not be moved without “off” closures from
transmitters 1 and 2. Most transmitters would require modification or the addition of a relay or
equivalent device. If transmitter off tallies are not used, jumper connections are required between
TB6-1 (common) and TB6-4 and TB6-5 or the coax switches will not move. There is no off tally
connection for transmitter 3.
REMOTE MUTE ALL CONNECTION
TB6-2 (TB6-1 common) is an optional connection for a closure to mute all transmitters at any time.
REMOTE AUTO KILL CONNECTION
Described in more detail in the AUTO transfer operation section. TB6-3 (TB6-1 common) is an
optional connection to get out of Separate TX 1 or 2 after a transmitter failure and automatic
transfer, by remote control.
Tunwall Radio LLC 1312 Suffield Oaks Lane Suffield, OH 44260 [email protected] 330-995-9642
7
REJECT LOAD INTERLOCK CONNECTION
If the reject load has an overheat tally contact that opens on overheat, it can be connected
between TB6-1 (common) and TB6-9, to shut down transmitters 1 and 2 in combined modes. The
reject load interlock has no effect in separate modes. There is no timeout; transmitter interlocks
will close immediately when the reject load interlock is restored. If the reject load interlock is not
used, a jumper is required between TB6-1 (common) and TB6-9, or transmitters 1 and 2 will not
run in combined modes.
OPERATION
From a single local or remote command, the controller operates the transmitter interlocks and
switch motors in a timed sequence such that the switches are never moved with RF power
applied. The transmitters are “interlocked” or muted, before the switch motors are energized.
Other functions include optional automatic transmitter transfer in case of failure, plate on and off
control, and transmitter load testing.
ANTENNA SYSTEM MODES
The first 4 front panel pushbuttons are the local controls for:
Combined Antenna
Combined Load
Separate TX 1
Separate TX 2
Pushing any of these buttons will lock out the other 3 for the duration of the switching sequence.
The switching sequence is: transmitter interlock connections open and plates off; a short delay to
let the transmitters’ plate supplies discharge; coax switch operation (as long as it takes up to 30
seconds); at completion of switch movement, interlock on delay, 0.2 second (to let the coax
switch settle mechanically, in case the coax switch tally signal is slightly ahead of the absolute
end of travel); and transmitter interlock(s) on.
The controller has terminals for remote position change commands. These work exactly as the
front panel pushbuttons unless the controller is in local. In local, only the front panel pushbuttons
are active.
After a switch sequence has been started, if the coax switch “hangs”, the transmitter interlocks will
not be closed. This is the primary purpose of the controller, of course; preventing the coax
switches from being moved under power. If a switch hangs during a transfer and is then manually
moved to either position, the controller will enable the interlock(s) for the correct transmitter(s) if
the combination of switch positions is valid.
This controller is programmed to reset itself after 30 seconds, if a coax switch hangs. After the 30
second time-out, you can try the position change again, or return to the previous position. If the
front panel pushbutton for the antenna system mode presently in use is pushed, nothing will
happen.
If a coaxial switch is moved manually, the transmitter interlocks will open. This doesn’t make it
safe or a good idea to move a switch manually under power. If a switch is moved manually, when
it “makes” either position, there will be a 0.2 second delay before the transmitter interlocks are
restored, if the switch position combination is valid.
Tunwall Radio LLC 1312 Suffield Oaks Lane Suffield, OH 44260 [email protected] 330-995-9642
8
ILLUMINATED PUSHBUTTONS
The first 4 pushbuttons are illuminated, and show the antenna system mode in use:
Combined Antenna
Combined Load
Separate TX 1
Separate TX 2
Only one of these indicators will be on at a given time. During a transfer sequence, the status
indicator for the selected mode will flash. The remote control status outputs flash along with the
illuminated pushbuttons. If a coax switch hangs between positions, the controller will reset after
30 seconds, and none of these 4 indicators will be on. After the reset, the failed mode can be
selected again, or any of the others. All front panel indicators are solid-state.
PLATE ON/OFF
If all plate on and off terminals are connected, the control system is fully automatic – for any
antenna system command, the transmitter plates will all be turned off, and at the end of the
switching sequence, the appropriate transmitters will be turned on. The AUTO key switch has
no effect on the plate on/off command outputs.
In local, plate on/off are front panel-only functions, but plates are still all turned off automatically
by any change sequence. You can connect the plate on or off commands you want to use, or
none at all. The plates on and plates off pushbuttons will turn plates on and off for the
transmitters active in any of the antenna system modes; e.g. in Combined Antenna, TX 1 and
TX 2 will be turned on and off. If the load is running in combined modes, all 3 transmitters will
be turned on. There are remote control terminals for Plates on/off.
AUTO TRANSFER KEY SWITCH
This is a key switch selected option that is only active in Combined Antenna, and it only applies
to transmitters 1 and 2. The key switch illuminates the indicator, so although auto transfer is
inactive in other antenna system modes, the indicator is on whenever the key switch is in the
right position. The AUTO option does not work in local. There are two rear panel indicators, TX
1 and TX 2, that can be verified before turning the AUTO key switch. Auto transfer is not active
for 5 minutes after power-on, to help avoid unwanted transfers due to power interruptions.
When in Combined Antenna, turn the AUTO key switch to the right to engage automatic
transfer. TX 1 and TX 2 transmitter “on” signals have been connected to the transmitter fail
closure terminals, according to the AUTO TRANSFER CONNECTIONS section. If either
transmitter’s on signal fails for 5 seconds, the controller will switch to the separate mode for the
other transmitter. The sequence is the same as if a front panel transmitter change button was
used, except that the separate mode’s front panel pushbutton light and remote control output
will keep flashing. If both transmitters fail at the same time, the controller won’t do anything.
The TX 2 analog/digital relay switches to analog whenever Separate TX 2 mode is active,
whether it was selected manually or automatically.
Following an auto transfer, none of the local or remote mode change commands will do
anything until auto transfer has been reset. Auto transfer can be reset by turning the key switch
Tunwall Radio LLC 1312 Suffield Oaks Lane Suffield, OH 44260 [email protected] 330-995-9642
9
off. Auto transfer can also be reset by remote control. Terminals for this are covered in the auto
transfer connections section. If auto transfer is reset by remote control, the flashing indicator
and corresponding remote control output will stop flashing, and the mode change commands
are ready. If a mode other than Combined Antenna is selected next, the auto transfer key
switch is ignored.
If, after an auto transfer and remote reset, Combined Antenna is selected, you have 60 seconds
after the change, plus the 5 seconds failure time, to get both TX 1 and TX 2 running or the
controller will transfer to a separate mode again. The 60 seconds does not start until you switch
to Combined Antenna mode.
REMOTE CONTROL COMMANDS
Terminals for 6 remote control command inputs are provided, that duplicate the functions of the
6 front panel position pushbutton switches, except when the local key switch is activated. The
front panel pushbuttons operate in local.
LOCAL KEY SWITCH
The local key switch can be used to lock out remote control commands. The front panel
pushbuttons operate in local.
The LOCAL and AUTO switches use the same key, which can be removed from either switch in
either position.
FUSES
The front panel DC fuse is on the output of the 24V power supply. 1A should be a good value for
this. The AC fuse is in series with the “hot” lead for the entire controller, and the AC power for
Dielectric 50000 series coax switches. If no coax switches are powered by the controller, the AC
fuse can be about 1A. If 50000 coax switches are used, the AC fuse should be about 3A per
switch, since all coax switches will move simultaneously sometimes. Although the AC fuse holder
may be labeled 3A, larger or slow-blow fuses can be used at the engineer’s judgment. The
internal AC wiring is 18ga, good for at least 10A. The 50000 switch specifications state that the
motor inrush current is 3.5A, and the running current is 0.5A.
COMMAND POLARITY
The header plug labeled “polarity” on the interconnect board is to reverse DC polarity for
Andrew/ERI coax switches. The Dielectric configuration shown on the schematic diagram is
used for any switch other than Andrew/ERI, as of the time this manual was assembled.
Tunwall Radio LLC 1312 Suffield Oaks Lane Suffield, OH 44260 [email protected] 330-995-9642
10
INPUT AND OUTPUT
CONNECTIONS MARKED
WITH LETTERS ARE TO
DIELECTRIC 50000 SWITCH.
FOR 60000 OR OTHER
SWITCHES, SEE THE
CONNECTIONS PAGE.
TRC-3
3-SWITCH TRANSMITTER AND COAXIAL
SWITCH CONTROLLER
COMBINED ANT
COMBINED LOAD
ILLUMINATED
PUSHBUTTONS
AROMAT BASE
R
11
S
P1-2
INPUT 0
SW 1 POS 1 TALLY
P1-4
L
SEPARATE TX 2
OUTPUT COM 0
34
OUTPUT 0
35
SW 1 POS 2 TALLY
3
INPUT 1
OUTPUT 1
36
4
INPUT 2
OUTPUT 2
37
OUTPUT 3
38
5
INPUT 3
6
INPUT 4
OUTPUT COM 1
39
OUTPUT 4
40
OUTPUT COM 2
41
OUTPUT 5
42
OUTPUT COM
43
P2-1
R
P2-2
S
SW 2 POS 1 TALLY
TB1-1
STATUS COM
TB1-2
COMBINED ANT STATUS
TB1-3
COMBINED LOAD STATUS
TB1-4
SEPARATE TX 1 STATUS
TB1-5
SEPARATE TX 2 STATUS
P2-3
M
P2-4
L
SW 2 POS 2 TALLY
P3-1
R
COAX SWITCH 3
POSITION
INDICATOR
CONTACTS
INPUT COM
2
P1-3
M
COAX SWITCH 2
POSITION
INDICATOR
CONTACTS
1
TO REMOTE CONTROL
COAX SWITCH 1
POSITION
INDICATOR
CONTACTS
P1-1
SEPARATE TX 1
P3-2
S
SW 3 POS 1 TALLY
P3-3
M
P3-4
L
7
SW 3 POS 2 TALLY
INPUT 5
INPUTS 6 AND
7 NOT USED
TB3-1
INTERLOCK TX 1
TB3-2
INTERLOCK TX 1
TB4-1
INTERLOCK TX 2
TB4-2
INTERLOCK TX 2
AROMAT EXPANSION 1
TB2-1
RMT CMD COM
TB1-6
FRONT PANEL
PUSHBUTTONS
COMBINED ANT
TB1-7
COMBINED LOAD
TB1-8
SEPARATE TX 1
TB1-9
REMOTE
CONTROL
SEPARATE TX 2
TB1-10
PLATES ON
TB2-2
PLATE S OFF
TB2-3
T6-2
MUTE ALL
T6-3
T6-1
RMT AUTO KILL
TB2-6/7
INPUT 20
OUTPUT 20
44
S1 P1
10
INPUT 21
OUTPUT 21
45
S1 P2
11
INPUT 22
OUTPUT 22
46
S2 P1
12
INPUT 23
OUTPUT 23
47
S2 P2
13
INPUT 24
OUTPUT 24
48
S3 P1
14
INPUT 25
OUTPUT 25
49
S3 P2
15
INPUT 26
16
INPUT 27
COAX SWITCH STATUS
INDICATORS
EACH INDICATOR
SHOWN IS ACTUALLY
TWO
OUTPUTS 26
AND 27 NOT
USED
DIELECTRIC
OUTPUT COM
50
OUTPUT 40
51
17
INPUT COM
18
INPUT 40
19
INPUT 41
20
INPUT 42
OUTPUT 41
52
P1-7
21
INPUT 43
OUTPUT 42
53
P2-5
22
INPUT 44
23
INPUT 45
ANDREW
SWITCH 3 REVERSE
TB2-9
SWITCH 2 REVERSE
TB2-10
SWITCH 1 REVERSE
TB6-6
TRANSMITTER
INTERLOCK REVERSE
JUMPERS
TB6-1 COM
9
AROMAT EXPANSION 2
TB2-8
COAX SWITCH
POSITION REVERSE
JUMPERS
INPUT COM
NC
FP
SWITCH
SWITCH REVERSE COM
8
INTERLOCK 1 REVERSE
TB6-7
P1-6
POLARITY PLUG
INTERLOCK 2 REVERSE
TB6-8
P1-5
INTERLOCK 3 REVERSE
P2-6
OUTPUT 43
54
P2-7
OUTPUT 44
55
P3-5
P3-6
I/O 46 AND 47
NOT USED
OUTPUT 45
P3-7
56
24V
C
COAX SWITCH 1
RELAY
COILS
N
D
C
COAX SWITCH 2
RELAY
COILS
N
D
C
COAX SWITCH 3
RELAY
COILS
N
D
12V
7812
AROMAT EXPANSION 3
24
INPUT COM
25
INPUT 60
OUTPUT COM
57
DC
TB2-4
LOAD
INTLK
LOCAL MODE
FP
SWITCH
TB2-5
TB3-7
TRANSMITTER
FAIL CLOSURE
MAINTAINED
FOR TX ON
LOAD INTLK
AUTO MODE
FP
SWITCH
26
OUTPUT 60
58
OUTPUT 61
59
TX 1 FAIL CLOSURE
TRANSMITTER
FAIL CLOSURE
MAINTAINED
FOR TX ON
60
5V
14
13
TB4-7
38 MA
MEASURED
@ 5V
TB5-2
K5
TB5-1
TX 2 ANALOG MODE
K9
OUTPUT 63
61
INPUT 64
OUTPUT 64
5V
62
TX 2 ON IND
BACK PANEL
14
13
OUTPUT 65
63
REJECT INTLK
31
INPUT 66
33
INPUT 67
OUTPUT 66
TB4-3
TX 2 PLATE ON
64
TB4-4
TX 2 PLATE ON
TB4-5
TX 2 PLATE OFF
K4
OUTPUT 67
TB3-6
TX 1 PLATE OFF
INPUT 65
K3
TX 2 OFF TALLY
TB3-5
TX 1 PLATE OFF
K10
TX 1 OFF TALLY
TB3-4
TX 1 PLATE ON
K2
30
TB3-3
TX 1 PLATE ON
K1
29
TX 2 FAIL CLOSURE
TB4-10
T6-9
TB5-3
TX 2 DIGITAL / ANALOG COM
TB4-9
T6-5
TB5-5
TX 3 INTERLOCK
INPUT 63
TX 1 ON IND
BACK PANEL
TB3-10
T6-4
TB5-4
TX 2 DIGITAL MODE
TB4-8
TRANSMITTER
FAIL RELAY COIL
5V
TB5-7
TX 3 INTERLOCK
TB3-9
TRANSMITTER
FAIL RELAY COIL
5V
TB5-6
TX 3 PLATE ON
K6
28
TB5-9
TX 3 PLATE ON
INPUT 62
OUTPUT 62
TB3-8
TB5-8
TX 3 PLATE OFF
INPUT 61
K7
27
120V
TX 3 PLATE OFF
K8
65
TB4-6
TX 2 PLATE OFF
P1-8
+
POWER INDICATOR
P1-9
P2-8
24 VOLT
POWER SUPPLY
L
N
G
P2-9
-
A
B
A
B
GROUND
POWER
CORD
NEUTRAL
AC FUSE
LINE
TUNWALL RADIO LLC
P3-8
TRC-3 TRANSMITTER AND COAXIAL SWITCH CONTROLLER
SERIAL 3FM39+
Rev Sept 2007
DRAWN BY
S. TUNWALL
SHEET 1 0F 2
P3-9
A
B
SWITCH AND REMOTE CONTROL CONNECTIONS
50000
12
1
60000
DC
COAX SWITCH 1
CONTROLLER
PLUG 1
60000
AC
R
15
15
1
S
16
16
2
POS 1 TALLY
2
POS 1 TALLY
M
3
11
11
POS 2 TALLY
4
L
12
12
C
3
22
N
13
D
4
POS 2 TALLY
5
POS 1 COMMAND
6
23
POS 2 COMMAND
8
FUSED 120 VAC
9
24
A
B
NEUTRAL
3
4
5
6
COMMAND COM
7
CONTROLLER
TB 2
7
8
9
10
50000
CONTROLLER
PLUG 2
1
60000
DC
COAX SWITCH 2
60000
AC
R
15
15
S
16
16
1
M
11
11
2
L
12
12
3
C
3
22
4
N
13
D
4
POS 1 TALLY
2
POS 1 TALLY
3
POS 2 TALLY
4
POS 2 TALLY
5
POS 1 COMMAND
6
7
23
POS 2 COMMAND
8
A
FUSED 120 VAC
9
24
B
NEUTRAL
6
7
8
9
50000
CONTROLLER
PLUG 3
1
60000
DC
COAX SWITCH 3
60000
AC
R/L CHx
PLATES ON
R/L CHx
PLATES OFF
LOAD INTERLOCK
LOAD INTERLOCK
COAX SWITCH REVERSE COM
COAX SWITCH REVERSE COM
COAX SWITCH 3 REVERSE
COAX SWITCH 2 REVERSE
COAX SWITCH 1 REVERSE
CONTROLLER
TB 3
5
COMMAND COM
REMOTE INPUT COM
10
R
15
15
S
16
16
M
11
11
1
L
12
12
2
C
3
22
N
13
D
4
TRANSMITTER 1
TX 1 INTERLOCK
TX 1 INTERLOCK
TX 1 PLATE ON
TX 1 PLATE ON
TX 1 PLATE OFF
TX 1 PLATE OFF
TX 1 FAIL CLOSURE
TX 1 FAIL CLOSURE
TX 1 FAIL RELAY COIL +
TX 1 FAIL RELAY COIL -
POS 1 TALLY
2
POS 1 TALLY
3
POS 2 TALLY
4
POS 2 TALLY
5
POS 1 COMMAND
6
23
POS 2 COMMAND
8
A
FUSED 120 VAC
9
24
B
NEUTRAL
3
4
COMMAND COM
7
CONTROLLER
TB 4
5
6
7
8
CONTROLLER
TB 1
9
1
TRANSMITTER 2
TX 2 INTERLOCK
TX 2 INTERLOCK
TX 2 PLATE ON
TX 2 PLATE ON
TX 2 PLATE OFF
TX 2 PLATE OFF
TX2 FAIL CLOSURE
TX2 FAIL CLOSURE
TX2 FAIL RELAY COIL +
STATUS COM
10
2
3
STATUS CHx
COMBINED LOAD
4
REMOTE INPUT COM
R/L CHx
7
COMBINED ANT
REMOTE CONTROL
STATUS CHx
SEPARATE TX 2
6
CONTROLLER
TB 5
STATUS CHx
SEPARATE TX 1
5
1
2
3
4
R/L CHx
8
COMBINED LOAD
5
R/L CHx
9
SEPARATE TX 1
10
TX2 FAIL RELAY COIL -
STATUS CHx
COMBINED ANT
6
R/L CHx
SEPARATE TX 2
7
8
GROUND
POWER
CORD
NEUTRAL
9
TRANSMITTER 3
TX 2 ANALOG MODE
TX 2 DIGITAL MODE
TX 2 DIGITAL/ANALOG COM
TX 3 INTERLOCK
TX 3 INTERLOCK
TX 3 PLATE ON
TX 3 PLATE ON
TX 3 PLATE OFF
TX 3 PLATE OFF
LINE
CONTROLLER
TB-6
1
2
3
4
5
6
7
8
TUNWALL RADIO LLC
9
TRC-3 TRANSMITTER AND COAXIAL SWITCH CONTROLLER
SERIAL 3FM39+
Rev Dept 2007
DRAWN BY
S. TUNWALL
SHEET 2 0F 2
AUX
TB6 COM
MUTE ALL
RMT AUTO KILL
TX 1 OFF TALLY
TX 2 OFF TALLY
INTERLOCK 1 REVERSE
INTERLOCK 2 REVERSE
INTERLOCK 3 REVERSE
REJECT LOAD INTLK
COAX SWITCH CONNECTIONS FOR FM CONTROLLERS
DIELECTRIC
50000
DC COMMANDS
DIELECTRIC
60000
DC COMMANDS
DIELECTRIC
50000
AC COMMANDS
DIELECTRIC
60000
AC COMMANDS
DELTA
ANDREW
MCI
CONTROLLER Px
P1-1
P1-2
13
P1-3
P1-4
P1-5
P1-6
P1-7
P1-8
P1-9
SW1 POS 1 TALLY
SW1 POS 1 TALLY
SW 1 POS 2 TALLY
SW 1 POS 2 TALLY
SW1 POS 1 COMMAND
COMMAND COM
SW1 POS 2 COMMAND
FUSED 120 VAC
NEUTRAL
R
15
R
15
1
4
H
S
16
S
16
4
5
J
M
11
M
11
14
L
L
12
L
12
2
15
M
C
3
C
22
6
1
A
N
13
3
C
D
4
2
B
D
23
9
A
A
24
3
B
B
E
D
ANDREW REQUIRES REVERSE POLARITY HEADER
ANDREW 24VDC ONLY
DELTA 120VAC ONLY
MCI MAY HAVE 5V CONTROL RELAY - CHANGE TO 12V OR
24V
TERMINAL NUMBERS FOR DELTA, ANDREW, MCI MAY NOT
BE CORRECT FOR EVERY MODEL
FRONT PANEL INDICATORS
TRC-3
COMBINED ANTENNA
COMBINED LOAD
ANT
TX 1
ANT
TX 1
COMBINER
COMBINER
REJECT
LOAD
TX 2
REJECT
LOAD
DUMMY
LOAD
TX 3
TX 2
SEPARATE TX 1
DUMMY
LOAD
TX 3
SEPARATE TX 2
ANT
TX 1
ANT
TX 1
COMBINER
COMBINER
REJECT
LOAD
TX 2
14
TX 3
REJECT
LOAD
DUMMY
LOAD
TX 2
TX 3
DUMMY
LOAD
LOGIC TABLES TRC-3
TRANSMITTER INTERLOCK LOGIC TABLES FOR ALL COMBINATIONS OF COAX SWITCH REVERSE
JUMPERS ON TB2
15
CAN ALSO BE USED AS COMMAND LOGIC TABLES-
RUN = INTERLOCK TERMINALS CLOSED,
TRANSMITTER ENABLED
MUTE = TRANSMITTER NEVER ENABLED
MUTE L = MUTE, BUT TRANSMITTER
ENABLED WHEN LOAD IS ON
SWITCH CABLES ARE ALL WIRED THE SAME; THE CONTROLLER IS SET
TO WORK WITH COAX SWITCH POSITIONS BY REAR PANEL JUMPERS
TRANSMITTER INTERLOCKS
SYSTEM COMMANDS
SWITCHES
TRANSMITTER INTERLOCKS
TX 1
TX 2
TX 3
SYSTEM COMMANDS
SWITCHES
TX 1
TX 2
TX 3
COMBINED ANTENNA
SW1 POS1
SW2 POS1
SW3 POS1
RUN
RUN
MUTE L
COMBINED ANTENNA
SW1 POS2
SW2 POS1
SW3 POS1
RUN
RUN
MUTE L
COMBINED
LOAD
SW1 POS1
SW2 POS1
SW3 POS2
MUTE L
MUTE L
RUN
COMBINED
LOAD
SW1 POS2
SW2 POS1
SW3 POS2
MUTE L
MUTE L
RUN
SW1 POS1
SW2 POS2
SW3 POS1
SW1 POS1
SW2 POS1
SW3 POS1
SW1 POS1
SW2 POS2
SW3 POS2
SW1 POS1
SW2 POS1
SW3 POS2
NO
JUMPERS
REVERSE
SW1
JUMPER
INVALID
INVALID
SW1 POS2
SW2 POS1
SW3 POS1
SW1 POS2
SW2 POS2
SW3 POS1
SW1 POS2
SW2 POS1
SW3 POS2
SW1 POS2
SW2 POS2
SW3 POS2
SEPARATE
TX 1
SW1 POS2
SW2 POS2
SW3 POS1
RUN
MUTE L
MUTE
SEPARATE
TX 1
SW1 POS1
SW2 POS2
SW3 POS1
RUN
MUTE L
MUTE
SEPARATE
TX 2
SW1 POS2
SW2 POS2
SW3 POS2
MUTE L
RUN
MUTE
SEPARATE
TX 2
SW1 POS1
SW2 POS2
SW3 POS2
MUTE L
RUN
MUTE
TRANSMITTER INTERLOCKS
SYSTEM COMMANDS
SWITCHES
TRANSMITTER INTERLOCKS
TX 1
TX 2
TX 3
SYSTEM COMMANDS
SWITCHES
TX 1
TX 2
TX 3
COMBINED ANTENNA
SW1 POS1
SW2 POS1
SW3 POS2
RUN
RUN
MUTE L
COMBINED ANTENNA
SW1 POS2
SW2 POS1
SW3 POS2
RUN
RUN
MUTE L
COMBINED
LOAD
SW1 POS1
SW2 POS1
SW3 POS1
MUTE L
MUTE L
RUN
COMBINED
LOAD
SW1 POS2
SW2 POS1
SW3 POS1
MUTE L
MUTE L
RUN
SW1 POS1
SW2 POS2
SW3 POS1
SW1 POS1
SW2 POS1
SW3 POS1
SW1 POS1
SW2 POS2
SW3 POS2
SW1 POS1
SW2 POS1
SW3 POS2
REVERSE
SW3
JUMPER
REVERSE
SW1
SW3
JUMPERS
INVALID
INVALID
SW1 POS2
SW2 POS1
SW3 POS1
SW1 POS2
SW2 POS2
SW3 POS1
SW1 POS2
SW2 POS1
SW3 POS2
SW1 POS2
SW2 POS2
SW3 POS2
SEPARATE
TX 1
SW1 POS2
SW2 POS2
SW3 POS2
RUN
MUTE L
MUTE
SEPARATE
TX 1
SW1 POS1
SW2 POS2
SW3 POS2
RUN
MUTE L
MUTE
SEPARATE
TX 2
SW1 POS2
SW2 POS2
SW3 POS1
MUTE L
RUN
MUTE
SEPARATE
TX 2
SW1 POS1
SW2 POS2
SW3 POS1
MUTE L
RUN
MUTE
TRANSMITTER INTERLOCKS
SYSTEM COMMANDS
SWITCHES
TRANSMITTER INTERLOCKS
TX 1
TX 2
TX 3
SYSTEM COMMANDS
SWITCHES
TX 1
TX 2
TX 3
COMBINED ANTENNA
SW1 POS1
SW2 POS2
SW3 POS1
RUN
RUN
MUTE L
COMBINED ANTENNA
SW1 POS2
SW2 POS2
SW3 POS1
RUN
RUN
MUTE L
COMBINED
LOAD
SW1 POS1
SW2 POS2
SW3 POS2
MUTE L
MUTE L
RUN
COMBINED
LOAD
SW1 POS2
SW2 POS2
SW3 POS2
MUTE L
MUTE L
RUN
SW1 POS1
SW2 POS1
SW3 POS1
SW1 POS1
SW2 POS2
SW3 POS1
SW1 POS1
SW2 POS1
SW3 POS2
SW1 POS1
SW2 POS2
SW3 POS2
REVERSE
SW2
JUMPER
REVERSE
SW1
SW2
JUMPERS
INVALID
INVALID
SW1 POS2
SW2 POS2
SW3 POS1
SW1 POS2
SW2 POS1
SW3 POS1
SW1 POS2
SW2 POS2
SW3 POS2
SW1 POS2
SW2 POS1
SW3 POS2
SEPARATE
TX 1
SW1 POS2
SW2 POS1
SW3 POS1
RUN
MUTE L
MUTE
SEPARATE
TX 1
SW1 POS1
SW2 POS1
SW3 POS1
RUN
MUTE L
MUTE
SEPARATE
TX 2
SW1 POS2
SW2 POS1
SW3 POS2
MUTE L
RUN
MUTE
SEPARATE
TX 2
SW1 POS1
SW2 POS1
SW3 POS2
MUTE L
RUN
MUTE
TRANSMITTER INTERLOCKS
SYSTEM COMMANDS
SWITCHES
TX 1
TX 2
TX 3
SYSTEM COMMANDS
COMBINED ANTENNA
SW1 POS2
SW2 POS2
COMBINED
LOAD
SW1 POS2
COMBINED ANTENNA
SW1 POS1
SW2 POS2
SW3 POS2
RUN
RUN
MUTE L
COMBINED
LOAD
SW1 POS1
SW2 POS2
SW3 POS1
MUTE L
MUTE L
RUN
REVERSE
SW2
SW3
JUMPERS
SW1 POS1
SW2 POS1
SW3 POS1
SW1 POS1
SW2 POS1
SW3 POS2
TRANSMITTER INTERLOCKS
REVERSE
SW1
SW2
SW3
JUMPERS
INVALID
SWITCHES
TX 1
TX 2
TX 3
SW3 POS2
RUN
RUN
MUTE L
SW2 POS2
SW3 POS1
MUTE L
MUTE L
RUN
SW1 POS1
SW2 POS2
SW3 POS1
SW1 POS1
SW2 POS2
SW3 POS2
INVALID
SW1 POS2
SW2 POS2
SW3 POS1
SW1 POS2
SW2 POS1
SW3 POS1
SW1 POS2
SW2 POS2
SW3 POS2
SW1 POS2
SW2 POS1
SW3 POS2
SEPARATE
TX 1
SW1 POS2
SW2 POS1
SW3 POS2
RUN
MUTE L
MUTE
SEPARATE
TX 1
SW1 POS1
SW2 POS1
SW3 POS2
RUN
MUTE L
MUTE
SEPARATE
TX 2
SW1 POS2
SW2 POS1
SW3 POS1
MUTE L
RUN
MUTE
SEPARATE
TX 2
SW1 POS1
SW2 POS1
SW3 POS1
MUTE L
RUN
MUTE
5 COIL
4 NC
1 COM
3 NO
2 COIL
5 COIL
2 COIL
1 COM
24V
POWER
SUPPLY
4 NC
3 NO
CPU
EXP
EXP
EXP
TUNWALL RADIO LLC
TRC-3
3-SWITCH FM CONTROLLER
16
DRAWN BY
S. TUNWALL
Sept 2007
Component layout