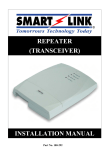
1
QuicKART 2000 Series
Service Manual
QuicKART
Electric Utility Machine
Manufactured by:
Dane Technologies, Inc.
7105 Northland Terrace
Minneapolis, MN 55428
Part No. 970-011
Phone:
763-544-7779
Toll Free:
1-888-544-7779
Fax:
763-544-4234
www.danetechnologies.com
Rev. Date: 3/1/06
Table of Contents
Topic
Section
•
QuicKART 2000 series Operating Instructions
And Diagrams
1
•
QuicKART 2000 series Troubleshooting
2
•
QuicKART 2000 series Service Bulletins
3
•
QuicKART 2000 series Exploded View Diagrams
4
•
QuicKART 2000 series Parts Order Information
5
Note on radio equipment used:
This device complies with part 15 of the FCC Rules. Operation is subject to the following
two conditions: (1) This device may not cause harmful interference, and (2) This device
must accept any interference received, including interference that may cause undesired
operation.
Note: This equipment has been tested and found to comply with the limits for a Class B
digital device, pursuant to part 15 of the FCC Rules. These limits are designed to provide
reasonable protection against harmful interference in a residential installation. This
equipment generates, uses, and can radiate radio frequency energy and, if not installed
and used in accordance with the instructions, may cause harmful interference to radio
communications. However, there is no guarantee that interference will not occur in a
particular installation. If this equipment does cause harmful interference to radio or
television reception, which can be determined by turning the equipment off and on, the
user is encouraged to try to correct the interference by one or more of the following
measures:
−
Reorient or relocate the receiving antenna.
−
Increase the separation between the equipment and receiver.
−
Connect the equipment into an outlet on a circuit different from that which the
receiver is connected.
−
Consult the dealer or an experienced radio/TV technician for help.
The abbreviation IC, before the Canadian Registration Number signifies that registration
was performed based on a Declaration of Conformity indicating that Industry Canada
technical specifications were met. It does not imply that Industry Canada approved the
equipment.
The CE mark, if present, declares that this equipment meets relevant EU Directives and
Standards.
QuicKART 2000 SERIES
Operating Instructions
QuicKART
Electric Utility Machine
Manufactured by:
Dane Technologies, Inc.
7105 Northland Terrace
Minneapolis, MN 55428
Part No. 970-011
Phone:
763-544-7779
Toll Free:
1-888-544-7779
Fax:
763-544-4234
www.danetechnologies.com
Rev. Date: 3/1/06
QuicKART 2000 SERIES
Owner’s Manual
Operating Instructions
Table of Contents
QuicKART 2000 WARNINGS & SAFETY NOTES .................................................................... 5
QuicKART 2000 SERIES LABELS .............................................................................................. 7
QuicKART 2000 LABEL LOCATIONS ....................................................................................... 9
QuicKART 2500 LABEL LOCATIONS ....................................................................................... 9
QuicKART 2000 CART STRAP ACCESSORY ......................................................................... 10
UNPACKING THE QuicKART 2000.......................................................................................... 13
QuicKART 2000 IMPORTANT MAINTENANCE NOTES ...................................................... 14
OVERVIEW OF OPERATION ................................................................................................... 15
QuicKART 2000 – TOP VIEW.................................................................................................... 16
QuicKART 2000 – REAR VIEW................................................................................................. 16
QuicKART 2000 – SIDE VIEW................................................................................................... 17
SYSTEM WIRING DIAGRAM................................................................................................... 18
SYSTEM JUNCTION BOX......................................................................................................... 19
SYSTEM JUNCTION BOX DIAGNOSTIC LIGHTS ................................................................ 20
CART COUPLER & ROLLER GUIDE ASSEMBLY ................................................................ 21
ATTACHING THE COLLECTION CART................................................................................. 22
QuicKART HITCHES AND YOKES .......................................................................................... 24
ORIENTATION TO THE QuicKART 2000................................................................................ 31
REMOTE CONTROL .................................................................................................................. 33
CONTROL PANEL...................................................................................................................... 33
OPERATION OF THE QuicKART 2000 .................................................................................... 34
BATTERY CHARGING .............................................................................................................. 36
REMOTE CONTROL: BATTERY CHANGING ....................................................................... 37
REMOTE CONTROL: BATTERY CHANGING DIAGRAM ................................................... 38
PROGRAMMING THE REMOTE CONTROL.......................................................................... 38
QuicKART 2000-2500 MAINTENANCE NOTES ..................................................................... 39
CHANGING FRONT TIRES ....................................................................................................... 41
CHANGING REAR TIRE............................................................................................................ 42
TECHNICAL SPECIFICATIONS ............................................................................................... 43
QuicKART WARRANTY............................................................................................................ 44
Dane Technologies, Inc.
QuicKART 2000 Series
Service Manual
4
7105 Northland Terrace, Minneapolis, MN 55428 / 888-544-7779 / 763-544-7779 / Fax 763-544-4234
www.danetechnologies.com
970-011 Rev. 3/1/06
QuicKART 2000 WARNINGS & SAFETY NOTES
Please read all the information included in this manual and the service instructions prior
to operating or servicing the QuicKART. In addition, make certain all operators have
been given and passed the certified operators course before using the QuicKART.
IMPORTANT SAFETY NOTE:
THE RED BATTERY PLUG MUST BE DISCONNECTED FROM THE
JUNCTION BOX ANY TIME MAINTENANCE IS BEING PERFORMED
UNDER THE COVER! (See diagram on page 18)
1)
The QuicKART is designed to push shopping carts. Any other use of the
QuicKART is prohibited unless specifically endorsed by the manufacturer.
Improper usage and operation of the QuicKART may void the warranty.
2)
You must be at least 16 years old with a valid driver’s license or vision test to
operate the QuicKART. In certain states, regulations may require operators to be
older. Please check your states regulations regarding operation of motorized
equipment before using the QuicKART.
3)
Never carry passengers on the QuicKART 2000!
4)
The QuicKART is equipped with a brake, which automatically engages when the
machine is turned off or not in motion. To avoid an accident, do not leave the
machine parked or unattended on slopes. When the QuicKART is to be left
unattended or in storage, turn it “OFF” and remove the key.
5)
Do not leave the QuicKART unattended while it is turned “ON”.
6)
Operate the QuicKART at a safe speed; go only as fast as safety considerations
allow. Take into consideration the location of store entrances, sidewalks,
pedestrian and vehicle traffic, driveways, and parking lot layout.
7)
Always operate in slow speed when near store guests. Operating conditions,
such as wet or slippery pavement or slopes can affect the stopping distance of
the QuicKART. Do not push more carts than the individual operator can safely
control when those conditions are present. Do not exceed 30 carts at a time
under any circumstance. Refer to your store policy for the maximum cart
number.
8)
Verify all warning and emergency labels are legible and mounted in correct areas
shown on drawings shown on pages 7 and 8.
9)
Do not drive over curbs or the edges of hardened surfaces higher than one inch.
10)
Always look behind the QuicKART before and while operating in reverse.
11)
Batteries must be fully charged initially before using the QuicKART.
Dane Technologies, Inc.
QuicKART 2000 Series
Service Manual
5
7105 Northland Terrace, Minneapolis, MN 55428 / 888-544-7779 / 763-544-7779 / Fax 763-544-4234
www.danetechnologies.com
970-011 Rev. 3/1/06
12)
The electrolyte in a storage battery is an acid, which can cause severe
burns to the skin and eyes. Wear appropriate protective clothing when
working with batteries. Treat all electrolyte spills with an extended flushing
with clear water. Contact a physician immediately if contact is made with
battery acid.
13)
Standard batteries do require regular maintenance. It may be necessary to add
distilled water to the batteries.
14)
Hydrogen gas is formed when charging the batteries. Use a location with
adequate ventilation when charging QuicKART batteries. Never smoke near
batteries. Do not charge batteries in an area with open flame or where there is
electrical equipment that could cause an electrical arc.
15)
Do not lay metal objects (wrenches, screwdrivers, etc.) on any of the batteries to
prevent electrical short circuits.
16)
Batteries are heavy. Always use care and proper lifting technique to avoid injury
when removing or replacing batteries.
17)
Make sure QuicKART is properly secured when changing tires. (See instructions
on page 41 and 42.)
18)
Two options are available to tether the carts together, a strap or a cart restraint
assembly, these are available as accessories. To view the procedure to strap the
carts see the illustration on pages 10 and 11. The cart restraint assembly also
has a strap and adds a spring to allow some motion of the carts in turns but still
controls them.
Dane Technologies, Inc.
QuicKART 2000 Series
Service Manual
6
7105 Northland Terrace, Minneapolis, MN 55428 / 888-544-7779 / 763-544-7779 / Fax 763-544-4234
www.danetechnologies.com
970-011 Rev. 3/1/06
QuicKART 2000 SERIES LABELS
The QuicKART 2500 uses label 500-105 instead of 500-021
The QuicKART 2500 uses label 500-108 instead of 500-053
Dane Technologies, Inc.
QuicKART 2000 Series
Service Manual
7
7105 Northland Terrace, Minneapolis, MN 55428 / 888-544-7779 / 763-544-7779 / Fax 763-544-4234
www.danetechnologies.com
970-011 Rev. 3/1/06
Dane Technologies, Inc.
QuicKART 2000 Series
Service Manual
8
7105 Northland Terrace, Minneapolis, MN 55428 / 888-544-7779 / 763-544-7779 / Fax 763-544-4234
www.danetechnologies.com
970-011 Rev. 3/1/06
QuicKART 2000 LABEL LOCATIONS
QuicKART 2500 LABEL LOCATIONS
Dane Technologies, Inc.
QuicKART 2000 Series
Service Manual
9
7105 Northland Terrace, Minneapolis, MN 55428 / 888-544-7779 / 763-544-7779 / Fax 763-544-4234
www.danetechnologies.com
970-011 Rev. 3/1/06
QuicKART 2000 CART STRAP ACCESSORY
Dane Technologies, Inc.
QuicKART 2000 Series
Service Manual
10
7105 Northland Terrace, Minneapolis, MN 55428 / 888-544-7779 / 763-544-7779 / Fax 763-544-4234
www.danetechnologies.com
970-011 Rev. 3/1/06
Dane Technologies, Inc.
QuicKART 2000 Series
Service Manual
11
7105 Northland Terrace, Minneapolis, MN 55428 / 888-544-7779 / 763-544-7779 / Fax 763-544-4234
www.danetechnologies.com
970-011 Rev. 3/1/06
Dane Technologies, Inc.
QuicKART 2000 Series
Service Manual
12
7105 Northland Terrace, Minneapolis, MN 55428 / 888-544-7779 / 763-544-7779 / Fax 763-544-4234
www.danetechnologies.com
970-011 Rev. 3/1/06
UNPACKING THE QuicKART 2000
1)
2)
The QuicKART 2000 is typically shipped on a wooden pallet. It comes with
addition individual components that are packaged inside the QuicKART. Care
must be taken not to damage them during the unpacking. The components are:
a) QuicKART, the basic electric machine with two keys,
b) A box including: a Remote Control Transmitter, to remotely control the
QuicKART, and Cart Coupler Hardware (yokes for the cart coupler).
Remove all the plastic film that is wrapped around the system components. Take
care not to bend beacon post components (especially the antennas) when
removing the plastic. Cut banding material, which holds the QuicKART to the
pallet.
3)
Raise the hood to find a small box containing the remote control, beacon post
bolt and nut, and cart coupler hardware. Remove this box and set it aside.
4)
To remove the QuicKART from the pallet, use a sturdy wooden board(s) to
create a ramp. Remove all straps holding the QuicKART to the shipping pallet.
Insert the key and turn on the QuicKART. Turn the twist grip slowly and guide
the QuicKART forward, down the ramp to the floor.
5)
Turn “OFF” the QuicKART
6)
Make sure the machine is OFF, the Beacon post hinges from a center position on
a bolt and nut already installed. Swing it to an 11:00 o’clock position. Remove
the bolt at the bottom of the beacon post bracket. Replace the bolt in the bottom
holes and tighten lightly. Use care not to damage the wires. Take care not to
damage the antenna, lights or the cable connectors at the ends of this beacon
post.
7)
To attach the cart coupler yokes, refer to the diagrams starting on page 21 of the
Owner’s Manual.
8)
Each hand-held remote control transmitter operates on a unique preprogrammed code. For the QuicKART to operate in the Remote Mode, the
receiver, which is in the beacon post, must be programmed to match the hand
held transmitter. See page 38 for directions on how to program the remote
control transmitter.
Dane Technologies, Inc.
QuicKART 2000 Series
Service Manual
13
7105 Northland Terrace, Minneapolis, MN 55428 / 888-544-7779 / 763-544-7779 / Fax 763-544-4234
www.danetechnologies.com
970-011 Rev. 3/1/06
QuicKART 2000 IMPORTANT MAINTENANCE NOTES
Check the QuicKART daily, for safe operation.
Improper use or operation of the QuicKART, or the lack of proper maintenance, may
result in decreased performance or damage to the QuicKART. The following parts of
the QuicKART need regular and routine maintenance.
1.
Batteries - Add distilled water as necessary. Water levels should be checked
monthly.
2.
Tires - Tires are solid (foam filled). Check weekly for wear.
3.
Rear Swivel Wheel Bearing - Grease every 6 months (grease gun compatible).
If at any time the QuicKART does not operate correctly, immediately turn it off
and remove the key to prevent further operation.
Immediately report any
malfunctions to the store manager responsible for the QuicKART and Dane
Technologies at 1-888-544-7779.
WARNING
Do not permit open flame, sparks or smoking
during maintenance.
Adequate ventilation is essential for safety.
Do not lay metal objects on the batteries.
Dane Technologies, Inc.
QuicKART 2000 Series
Service Manual
14
7105 Northland Terrace, Minneapolis, MN 55428 / 888-544-7779 / 763-544-7779 / Fax 763-544-4234
www.danetechnologies.com
970-011 Rev. 3/1/06
OVERVIEW OF OPERATION
The QuicKART is an electrically powered shopping cart collection machine. It has
several unique and patented features, which allow it to be used safely and simply in the
shopping cart collection process.
The QuicKART provides the pushing power for a single employee to safely and easily
move a maximum of 30 shopping carts from the parking lot into the store. Its ability to
operate in remote control mode allows a single employee to steer the chain of carts
from the front of the cart line while controlling the QuicKART as it pushes and follows
from behind.
The QuicKART has proven its ability to work in all types of weather ranging from
extreme heat or cold to rain and snow. The QuicKART has operated dependably in
winter weather as cold as -20 degrees. It will also push carts through loose snow. On
packed snow the QuicKART 2000 will push 10 to 20 carts. Winter operation can be
enhanced with the use of optional snow tires.
The QuicKART operates on a 36-volt battery system. It will operate for up to ten
hours on a single charge. Cold weather will reduce operating time. It will require
eight to ten hours to fully recharge the batteries.
Each hand-held remote control transmitter operates on a unique pre-programmed
code. For the QuicKART to operate in the Remote Mode, the receiver, which is in
the beacon post, must be programmed to match the hand held transmitter, see
page 38 for details. The remote is powered by internal batteries, which should be
changed every two months for dependable operation. The small light on the
remote will cease to operate when the battery needs replacing. After battery
replacement, the remote must be reprogrammed; see page 38 for details.
The QuicKART is a productivity-enhancing tool, which will be most effective when it is
well maintained and used responsibly. Training of employees is very important. Please
read and review this manual. We strongly recommend that a training and operator
certification program be developed and implemented to assure adequate training and
safe operation.
The use of the Dane Technologies’ "Cart Depot" creates an integrated system for cart
collection, which enhances productivity even further. Additional optional accessories
are also available. These include an optional snowplow, snow tires and chains.
Dane Technologies, Inc.
QuicKART 2000 Series
Service Manual
15
7105 Northland Terrace, Minneapolis, MN 55428 / 888-544-7779 / 763-544-7779 / Fax 763-544-4234
www.danetechnologies.com
970-011 Rev. 3/1/06
QuicKART 2000 – TOP VIEW
QuicKART 2000 – REAR VIEW
Dane Technologies, Inc.
QuicKART 2000 Series
Service Manual
16
7105 Northland Terrace, Minneapolis, MN 55428 / 888-544-7779 / 763-544-7779 / Fax 763-544-4234
www.danetechnologies.com
970-011 Rev. 3/1/06
QuicKART 2000 – SIDE VIEW
Dane Technologies, Inc.
QuicKART 2000 Series
Service Manual
17
7105 Northland Terrace, Minneapolis, MN 55428 / 888-544-7779 / 763-544-7779 / Fax 763-544-4234
www.danetechnologies.com
970-011 Rev. 3/1/06
SYSTEM WIRING DIAGRAM
Dane Technologies, Inc.
QuicKART 2000 Series
Service Manual
18
7105 Northland Terrace, Minneapolis, MN 55428 / 888-544-7779 / 763-544-7779 / Fax 763-544-4234
www.danetechnologies.com
970-011 Rev. 3/1/06
SYSTEM JUNCTION BOX
Dane Technologies, Inc.
QuicKART 2000 Series
Service Manual
19
7105 Northland Terrace, Minneapolis, MN 55428 / 888-544-7779 / 763-544-7779 / Fax 763-544-4234
www.danetechnologies.com
970-011 Rev. 3/1/06
SYSTEM JUNCTION BOX DIAGNOSTIC LIGHTS
Supply Fault:
There are two conditions that cause this diagnostic light to come on:
1. When this light remains on (but not flashing) it indicates the
machine was turned off by pushing on the Red emergency button on
the control panel. The machine will not function while the light is on.
To reset, pull out the button, turn the key switch off, then on again.
This condition does not require service. (The key switch is the
correct way to turn off the machine when it is stored or set aside for
periods of time.)
2. When this light is flashing, it indicates that there is a problem in
either the beacon post or the control panel. In a fault condition the
“supply fault” light starts flashing as soon as the machine is turned
on with the key switch. The machine will not function while the light
is flashing. The control panel lights may remain lighted for 3seconds then shut down but the fault light will remain flashing as
long as the fault condition exists.
To determine if the problem is in the beacon post, turn off the
machine with the key switch, unplug the cable leading to the beacon
post then turn the key switch on again. If the problem is in the
beacon post the machine will operate normally but only in the
“manual” mode. If the problem is somewhere in the control panel
circuitry, the fault light will continue to flash and the panel lights will
go off in about 3 seconds.
Remote Brake: LED lights to indicate presence of “Brake” command from receiver.
It has no effect in manual mode.
Remote Slow:
LED lights to indicate presence of “Slow” drive command from
receiver. Must light in conjunction with “Drive” Command LED in
“Remote” mode in order to operate machine. It has no effect in
manual mode.
Remote Fast:
LED lights to indicate presence of “Fast” drive command from
receiver. Must light in conjunction with “Drive” command LED in
“Remote” mode in order to operate machine. It has no effect in
manual mode.
Drive Command: LED lights to indicate drive signal is being sent to motor control.
Low Battery:
LED lights when battery voltage is too low to operate machine
properly (below approximately 27 volts).
Hour Meter:
Hourglass symbol blinks every ten seconds when drive command is
present to indicate that meter is timing machine operation.
Dane Technologies, Inc.
QuicKART 2000 Series
Service Manual
20
7105 Northland Terrace, Minneapolis, MN 55428 / 888-544-7779 / 763-544-7779 / Fax 763-544-4234
www.danetechnologies.com
970-011 Rev. 3/1/06
CART COUPLER & ROLLER GUIDE ASSEMBLY
Dane Technologies, Inc.
QuicKART 2000 Series
Service Manual
21
7105 Northland Terrace, Minneapolis, MN 55428 / 888-544-7779 / 763-544-7779 / Fax 763-544-4234
www.danetechnologies.com
970-011 Rev. 3/1/06
ATTACHING THE COLLECTION CART
Dane Technologies, Inc.
QuicKART 2000 Series
Service Manual
22
7105 Northland Terrace, Minneapolis, MN 55428 / 888-544-7779 / 763-544-7779 / Fax 763-544-4234
www.danetechnologies.com
970-011 Rev. 3/1/06
Dane Technologies, Inc.
QuicKART 2000 Series
Service Manual
23
7105 Northland Terrace, Minneapolis, MN 55428 / 888-544-7779 / 763-544-7779 / Fax 763-544-4234
www.danetechnologies.com
970-011 Rev. 3/1/06
QuicKART HITCHES AND YOKES
Dane Technologies, Inc.
QuicKART 2000 Series
Service Manual
24
7105 Northland Terrace, Minneapolis, MN 55428 / 888-544-7779 / 763-544-7779 / Fax 763-544-4234
www.danetechnologies.com
970-011 Rev. 3/1/06
Dane Technologies, Inc.
QuicKART 2000 Series
Service Manual
25
7105 Northland Terrace, Minneapolis, MN 55428 / 888-544-7779 / 763-544-7779 / Fax 763-544-4234
www.danetechnologies.com
970-011 Rev. 3/1/06
Dane Technologies, Inc.
QuicKART 2000 Series
Service Manual
26
7105 Northland Terrace, Minneapolis, MN 55428 / 888-544-7779 / 763-544-7779 / Fax 763-544-4234
www.danetechnologies.com
970-011 Rev. 3/1/06
Dane Technologies, Inc.
QuicKART 2000 Series
Service Manual
27
7105 Northland Terrace, Minneapolis, MN 55428 / 888-544-7779 / 763-544-7779 / Fax 763-544-4234
www.danetechnologies.com
970-011 Rev. 3/1/06
Dane Technologies, Inc.
QuicKART 2000 Series
Service Manual
28
7105 Northland Terrace, Minneapolis, MN 55428 / 888-544-7779 / 763-544-7779 / Fax 763-544-4234
www.danetechnologies.com
970-011 Rev. 3/1/06
Dane Technologies, Inc.
QuicKART 2000 Series
Service Manual
29
7105 Northland Terrace, Minneapolis, MN 55428 / 888-544-7779 / 763-544-7779 / Fax 763-544-4234
www.danetechnologies.com
970-011 Rev. 3/1/06
Dane Technologies, Inc.
QuicKART 2000 Series
Service Manual
30
7105 Northland Terrace, Minneapolis, MN 55428 / 888-544-7779 / 763-544-7779 / Fax 763-544-4234
www.danetechnologies.com
970-011 Rev. 3/1/06
ORIENTATION TO THE QuicKART 2000
MANUAL MODE: Manual Mode is defined as operating the QuicKART while walking
behind the QuicKART 2000. Direction is controlled by the handle bar. Speed is
controlled by turning the twist grip throttle. Direction is controlled by touching the touch
pad switch located on the control panel. When the switch is pressed, the direction
changes between forward and reverse as indicated by the direction light.
REMOTE MODE: (See diagram on page 33.) Remote Mode is defined as operating
the QuicKART with the remote control while standing or walking alongside the lead cart
of the cart chain coupled to the QuicKART 2000. Steering is controlled by guiding the
lead cart in the desired direction. Forward speed, brakes and horn are operated with
the hand held radio remote control. While in remote mode, the QuicKART will only
move forward.
CONTROL PANEL: (See diagram on page 33.) At the top of the Control Panel are five
lights that show the percent of remaining battery capacity (Battery Charge Level).
When the batteries are fully charged the light at the "100" mark will be lighted. As the
QuicKART is used throughout the day, the lights will slowly change from 100 to 80, 60,
and 40 until the light for 20 is lighted. The charging level is most accurately shown
when the QuicKART is pushing carts. When the 20% capacity light starts to flash on
and off, it means there are approximately 4 minutes of remaining power before the
QuicKART automatically shuts down. If the QuicKART does shut down, turn the key off
for a few minutes, then on again. This may allow time to reach the charging station.
Recharge the batteries for at least 8 to 10 hours or until fully recharged.
The control panel also includes a series of 4 lights and panel button switches with the
following functions:
The light labeled "MANUAL" is for manual operation and "RADIO" is for remote
operation. The push button switch, just below these two lights, will toggle between
manual and remote control. The QuicKART will automatically set to manual operation
and forward whenever it is turned on. It cannot be moved from manual to remote
operation when the QuicKART is moving, only when it is stopped.
The light labeled "FORWARD" is for Forward-Direction operation and "REVERSE" is for
Reverse-Direction operation. The push button switch, just below these two lights, will
toggle between forward and reverse QuicKART direction. The QuicKART will always be
set to forward operation whenever it is turned on. The switch will not change the
operational direction until the QuicKART is stopped. For safety, the remote mode
allows operation only in the forward direction.
Pressing the "HORN" button will sound the horn loudly as long as it is pressed.
Dane Technologies, Inc.
QuicKART 2000 Series
Service Manual
31
7105 Northland Terrace, Minneapolis, MN 55428 / 888-544-7779 / 763-544-7779 / Fax 763-544-4234
www.danetechnologies.com
970-011 Rev. 3/1/06
A large red or blue "EMERGENCY" shut off button is located on the backside of the
control panel. (See top and side views of the QuicKART on pages 16 and 17.) This is
located to provide easy access to stop the machine. To restart the machine after the
"EMERGENCY" shut off button has been activated, pull out the button, turn off the key
switch, wait 2 seconds, then turn it back on.
STEERING: In Manual Mode, the QuicKART 2000 is turned by exerting light pressure
on the handlebars, to the left or right, similar to steering a bicycle. In Remote Mode,
steering is controlled by guiding the lead cart in the desired direction.
ACCELERATION AND BRAKING: Acceleration and braking of the QuicKART are
controlled by the twist grip throttle located on the right handle bar. QuicKART speed is
controlled by twisting the throttle, similar to a motorcycle throttle. Braking action occurs
as pressure is released. Braking force can be controlled for quick or gradual stops.
Twisting the grip slowly brings the QuicKART to a gradual stop. Releasing it rapidly
stops the QuicKART very quickly. Maximum braking force is applied when the throttle is
fully released.
Dane Technologies, Inc.
QuicKART 2000 Series
Service Manual
32
7105 Northland Terrace, Minneapolis, MN 55428 / 888-544-7779 / 763-544-7779 / Fax 763-544-4234
www.danetechnologies.com
970-011 Rev. 3/1/06
REMOTE CONTROL
BATTERY
INDICATOR LIGHT
PRESS TO SOUND
HORN
FAST SPEED
PRESS TO KEEP
IN MOTION
SLOW SPEED
PRESS TO KEEP IN
MOTION
STOP BUTTON
PRESS EITHER
BUTTON TO STOP IN
EMERGENCY. PRESS
AND HOLD UNTIL KEY
IS TURNED OFF.
CONTROL PANEL
FLASHES MOTOR
CONTROL ERROR
CODE
Dane Technologies, Inc.
QuicKART 2000 Series
Service Manual
33
7105 Northland Terrace, Minneapolis, MN 55428 / 888-544-7779 / 763-544-7779 / Fax 763-544-4234
www.danetechnologies.com
970-011 Rev. 3/1/06
OPERATION OF THE QuicKART 2000
MANUAL MODE:
To operate the QuicKART 2000 in the Manual Mode, perform the following steps:
1)
Insert the key into the key-switch located on the control panel. Turn the key
clockwise to turn the QuicKART "on".
2)
Lights on the control panel will show the system status (see illustration on page
33). Confirm that all systems are working properly.
3)
In manual operation, while standing behind the machine, both hands on the
handles, slowly twist the throttle control and the QuicKART will start to move
forward. Slowly release the pressure on the throttle control and the QuicKART
will slow to a stop. When the throttle control is fully released, the electronic
brakes will be applied. When moving forward or backward, a sudden release of
the throttle control will cause the automatic brake to bring the QuicKART to a
sudden halt.
4)
To change the direction of travel, the QuicKART must be stopped. Press the
direction switch on the control panel and the light for the selected direction will be
displayed.
5)
To turn the power off, press the emergency shut off button or turn the key
counter-clockwise. Note: Do not leave the machine "ON" and do not leave
the key in the switch when unattended.
6)
The collection of grocery carts begins by walking the QuicKART into the parking
lot to a location where customers have left carts. To attach the first cart, open
the locking U-pin on the left side of the cart coupler assembly. Position the rear
of the first shopping cart so that its vertical rear frame is aligned with the yoke
openings on the coupler assembly. Lift the cart slightly off the ground and move
it sideways until it engages both coupler yokes. Then, put the locking U-pin back
into place to secure the shopping cart. It is recommended that the first cart be
left permanently in place or if removed at night, identified, so the same cart is
always attached to the cart. The coupler yokes can be adjusted up and down
and from side to side to accommodate various types and sizes of grocery carts.
See illustration on page 22 and 23.
7)
Additional shopping carts can now be collected to form a train of a maximum of
30 carts.
Dane Technologies, Inc.
QuicKART 2000 Series
Service Manual
34
7105 Northland Terrace, Minneapolis, MN 55428 / 888-544-7779 / 763-544-7779 / Fax 763-544-4234
www.danetechnologies.com
970-011 Rev. 3/1/06
REMOTE MODE:
The QuicKART can be operated in the remote mode by pressing the "Radio/Manual"
switch located on the control panel.
1)
While in remote mode, only one person is needed to collect shopping carts. This
person gathers the carts and adds them to the train while using the remote
control to control forward speed, braking and the warning horn.
It is
recommended that carts be formed into a line and then the machine brought up
to the line in the "SLOW" speed to nest the carts. Continue to use the "SLOW"
speed while operating near entrances and near store guests. Never use the
“fast” remote speed near guests, the entrance or within the store.
2)
“NEVER” press on the remote buttons unless you are at the front of the cart
chain and controlling the lead cart. “NEVER” advance additional carts into the
store unless you are at the front of the cart chain. The “SLOW” speed is .70mph.
The “FAST” speed allows movement at a safe walking pace of 2.8mph as carts
are returned to the store.
3)
Only one button of the remote control is usable at a time. Press the "SLOW" or
"FAST" button for the speed desired for the existing conditions. The QuicKART
will briefly coast when the control buttons are released, helping to prevent a
separation of carts. If a sudden stop is required, press the "STOP" button.
Sudden stops will require the operator to hold back the lead cart at the front of
the train to prevent cart separation.
4)
In an emergency, press and hold the stop button until you walk over and
shut off the key.
5)
When the QuicKART 2000 is stopped, the parking brake automatically engages.
This prevents the QuicKART from rolling on slopes or being pushed manually. If
it is necessary to push the QuicKART (i.e. dead battery or machine not working),
the parking brake can be released by pulling the release lever marked "Brake
Release" on the lower right corner at the back of the machine. Once the parking
brake is released, the QuicKART will not operate until the parking brake is
pushed back in. It is recommended that the brake be released only if batteries
are dead and manual pushing is required.
6)
The QuicKART 2000 follows the train of shopping carts as guided by the cart
attendant. The actual turning radius of the cart chain is a function of the design
of the shopping carts being used. The tighter the carts nest together the longer
the turning radius will be. After some experience the QuicKART operator will
become familiar with this and be able to judge what turns will be practical. In
practice the operator places one hand on the cart, at the front of the train,
walking along side and guiding the cart in the desired direction. The other hand
is used to operate the hand held remote control transmitter. When turning the
cart chain it is easier to maintain safe footing by leaning against the lead cart
rather than pulling.
Dane Technologies, Inc.
QuicKART 2000 Series
Service Manual
35
7105 Northland Terrace, Minneapolis, MN 55428 / 888-544-7779 / 763-544-7779 / Fax 763-544-4234
www.danetechnologies.com
970-011 Rev. 3/1/06
BATTERY CHARGING
The QuicKART 2000 is powered by three, 12-volt, Deep Cycle batteries. Under normal
usage they will power the QuicKART for 10 or more hours, when the ambient
temperatures are above approximately 40 degrees F. Colder temperatures will reduce
the operating time of the batteries and increase the charging time. To optimize battery
power, store the QuicKART in a room with a temperature of at least 50 degrees F.
To recharge the batteries, park the QuicKART in a well-ventilated location near an
electrical outlet. The QuicKART must be turned off and the key removed.
FIRST, plug the 10-foot extension cord into the connector located at the lower left rear
of the QuicKART. Use special care to ensure the extension cord is properly seated
inside the connector. Failure to do so can cause improper charging or damage to
the battery charger.
SECOND, connect the charger's 10-foot power extension cord into a wall receptacle.
The battery charger will automatically shut off when the batteries are fully charged. This
takes between eight to ten hours, depending upon initial state of charge and battery
condition. Make sure the power to the wall receptacle is not turned off during the
nightly recharging time.
To put the QuicKART back into service, after the batteries are fully charged, disconnect
the charger's power extension cord from the wall receptacle and from the lower
receptacle at the lower left rear of the QuicKART. Store the extension cord in an
appropriate location.
Lights on the battery charger show the charging rate. Fully discharged batteries will
result in a charging rate of up to 15 amperes. As the batteries become fully charged
this rate will drop to less than 10 amperes. A solid yellow light indicates maximum
charge, a yellow and flashing green indicate partial charge completion. A green light
indicates completion of charge. The red light indicates AC power is connected and on.
WARNING
Do not use long extension cords. Use the 10-foot cord supplied with the
machine. Find a location for re-charging that is close to an electrical outlet
receptacle. If another cord must be used, it must be 16 gauge or larger and no
longer than 10 feet in length.
Dane Technologies, Inc.
QuicKART 2000 Series
Service Manual
36
7105 Northland Terrace, Minneapolis, MN 55428 / 888-544-7779 / 763-544-7779 / Fax 763-544-4234
www.danetechnologies.com
970-011 Rev. 3/1/06
REMOTE CONTROL: BATTERY CHANGING
Refer to Diagrams on page 38.
1.
The remote control is to be taken apart only when the batteries need replacing.
There are no adjustments or switches inside the module. As long as the small light
on the remote panel lights-up the battery does not need replacing.
2.
Before opening the remote turn off the QuicKART that had been using this remote.
If another remote is being used by this QuicKART it is OK to proceed.
3.
To open remote control, place the control panel face down on a table top and use
a medium size Phillips screw driver to remove the two (2) screws from the corners
of the remote’s back cover.
4.
After the screws are removed, leave the remote face down and remove the back
cover.
5.
To replace the batteries, take out the old batteries and replace them with new,
ensuring that the new batteries are inserted as diagramed inside the battery
compartment.
6.
Properly dispose of the old batteries in an environmentally correct depository.
7.
Examine the inside of the remote for any signs of condensation or water. If signs
of moisture are present, allow the compartment to dry fully before replacing the
back.
8.
Before replacing the back, ensure that the gray rectangular gasket around the
edge of the battery compartment is in good condition. If the gasket is damaged,
return the remote to Dane Technologies for repair.
9.
Also, ensure that the red and black wires leading away from the battery terminals
and the black wire at the opposite end of the remote are intact. If they are broken,
return the remote to Dane for repair
10. The QuicKART should be “off”. Before replacing the back, ensure the panel light
comes on when any one of the function buttons is pressed.
11. Replace the back with the two Phillips screws.
12. Reprogram the remote control as described on page 38.
Dane Technologies, Inc.
QuicKART 2000 Series
Service Manual
37
7105 Northland Terrace, Minneapolis, MN 55428 / 888-544-7779 / 763-544-7779 / Fax 763-544-4234
www.danetechnologies.com
970-011 Rev. 3/1/06
REMOTE CONTROL: BATTERY CHANGING DIAGRAM
BACK COVER
PROGRAMMING THE REMOTE CONTROL
Each hand-held remote control transmitter operates on a unique pre-programmed code.
For the QuicKART to operate in the Remote Mode, the receiver, which is in the beacon
tower, must be programmed to match the hand held remote control. Every time the
batteries in the remote control are replaced, the remote control needs to be
reprogrammed to match the receiver code in the beacon tower. If the QuicKART stops
responding to the remote control, check the status of the remote battery by depressing
one of the remote buttons. If the red LED light does not illuminate, change the battery
and reprogram the remote control as follows:
1)
2)
3)
4)
Turn on the QuicKART.
Switch to "RADIO" on the control panel.
Hold remote about arms length from the beacon post.
Simultaneously push these three buttons:
• Rubber button located on the underside of the square box on the beacon post
(see pages 16 and 17)
• Stop button on the hand-held remote (page 33);
• Horn button on the hand-held remote (page 33).
5) The horn should sound indicating the reprogram is complete and the QuicKART is
ready for operation.
6) If the horn did not sound, retry the above steps making sure that the switch on the
control panel is on "RADIO". If the horn still did not sound, you can also determine if
the reprogram was successful by pressing the slow button on the remote to see if
the QuicKART now responds to the remote signal.
38
Dane Technologies, Inc.
QuicKART 2000 Series
Service Manual
7105 Northland Terrace, Minneapolis, MN 55428 / 888-544-7779 / 763-544-7779 / Fax 763-544-4234
www.danetechnologies.com
970-011 Rev. 3/1/06
QuicKART 2000-2500 MAINTENANCE NOTES
Check the QuicKART daily, for safe operation.
Routine maintenance should only be performed by those permitted by federal and state
age regulations. Repairs should only be completed by Dane Technologies or an
authorized service technician. Federal law requires that you must be at least 18 years
old to service the batteries of the QuicKART.
General condition: Keep the QuicKART free from the accumulation of grease, dirt,
and other materials.
If the QuicKART malfunctions in any way, turn it off and remove the key. Immediately
report the malfunction to the appropriate store manager as well as Dane Technologies.
Do not use the QuicKART until it has been repaired by an authorized service technician.
WARNING
Do not permit open flame, sparks or smoking during maintenance. Adequate
ventilation is essential for safety. Do not lay metal objects on the batteries.
Dane Technologies, Inc.
QuicKART 2000 Series
Service Manual
39
7105 Northland Terrace, Minneapolis, MN 55428 / 888-544-7779 / 763-544-7779 / Fax 763-544-4234
www.danetechnologies.com
970-011 Rev. 3/1/06
D= Daily, M= Monthly, S-A = Semi-annually, Y=Yearly >>>
Inspect throttle, turn keyswitch to “On”. The cart should not move.
Check that the RH throttle grip moves freely in a CW direction. The cart
should move forward. Push the reverse button, the cart should move
backward.
Test the brake system. With the keyswitch “Off”, try to move the
machine. The brake should keep the drive wheels from rotating.
Test the Emergency shut-off button. With the cart in “Manual” or
“Remote”, pressing the Emergency shut-off will disable all controls and
stop the machine.
Strobe Light: Check for damage and proper operation.
Remote: Check for damage. With the cart in “Remote”, check
operation with all buttons. The remote should operate up to 100’ from
the machine.
D
Charge batteries overnight, every night.
Check couplers and yokes for unsafe wear, loose or missing fasteners,
and safe connection.
X
X
Batteries: Inspect loose connections, frayed insulation, and corrosion.
Clean away corrosion. Check charger operation
Wiring: Inspect all wiring and electrical connections for loose
connections, frayed or deteriorated insulation, exposed wire, and
broken or missing hardware.
Maintenance Type Batteries: Check water levels, add distilled water
as necessary.
Check the machine for damaged or missing labels.
M
S-A
X
X
X
X
X
X
X
X
X
Check body for damage. Check all bolts, fasteners and connections for
tightness and wear.
Check tires and caster wheel for wear, bent rims and missing or loose
lug nuts.
Check the antennas for damage.
Check tires and caster wheel for wear, bent rims and missing or loose
lug nuts.
Check the AC charger cord for frayed or deteriorated insulation and
exposed wire.
Apply grease to rear swivel wheel using a standard grease gun, two
places.
X
X
X
X
X
X
Have your authorized service center check your QuicKART completely.
Dane Technologies, Inc.
QuicKART 2000 Series
Y
Service Manual
X
40
7105 Northland Terrace, Minneapolis, MN 55428 / 888-544-7779 / 763-544-7779 / Fax 763-544-4234
www.danetechnologies.com
970-011 Rev. 3/1/06
CHANGING FRONT TIRES
FRONT DRIVE TIRES:
Turn QuicKART off and remove key.
QuicKART must be on a flat surface. Make sure the automatic brake is functional and
on.
Use protective eye wear at all times.
1)
Slightly loosen the four (4) lug nuts, about 1/2 turn, from the wheel needing
service. Use a 9/16-inch socket on the QK 2000 12-inch tires. Use a 5/8-inch
socket on the 16-inch tires for the QK 2500. IMPORTANT: Do not remove any of
the nuts; only slightly loosen them while the wheel is still on the ground.
2)
Use a jack to lift the front of the QuicKART off the ground approximately 2 to 3
inches. Insert a sturdy and stable block under the frame to hold it securely in this
elevated position.
3)
Unscrew the four 9/16-inch or 5/8-inch, front wheel lug nuts and place them in a
location where they will not become lost. Remove the wheel. The new or
repaired wheel is placed back on the front hub with the tire stem facing out.
Replace the 4 lug nuts with the beveled side toward the inside and tighten.
Using the jack, lift the QuicKART off the supporting block (see item #2 above). Remove
the block and use the jack to lower the QuicKART to the ground. Tighten the 4 lug nuts
again ensuring that they are tightened to a minimum of 50 foot-pounds torque.
Dane Technologies, Inc.
QuicKART 2000 Series
Service Manual
41
7105 Northland Terrace, Minneapolis, MN 55428 / 888-544-7779 / 763-544-7779 / Fax 763-544-4234
www.danetechnologies.com
970-011 Rev. 3/1/06
CHANGING REAR TIRE
REAR CASTERED TIRE:
Turn QuicKART off and remove key.
QuicKART must be on a flat surface. Make sure the automatic brake is functional and
on.
Use protective eyewear at all times.
1)
Lift the back of the QuicKART so the rear caster wheel is approximately 2 inches
off the ground. This is accomplished by using a jack under the rear frame of the
QuicKART, in the center. Once the QuicKART is lifted, place a sturdy and stable
block in each corner then lower the jack so the weight of the QuicKART is resting
on the blocks. Also place blocks on the front wheels to keep the QuicKART from
rolling.
2)
With two 9/16” wrenches, remove the four bolts holding the caster assembly to
the frame. Save the hardware and use it when replacing the wheel. For the
QuicKART 2500 use two 9/16” wrenches to remove the four bolts holding the
caster assembly to the two caster spacers bolted to the bottom of the frame.
3)
When replacing the caster assembly, reuse the saved hardware. Insert bolts,
apply nuts and tighten.
4)
Using the jack, lift the QuicKART off the supporting blocks (Item #1 above),
remove the blocks then lower the QuicKART to the ground.
Note: Variations in the hardware configuration may occur. Save all hardware
and use it as it was removed when replacing wheel.
Dane Technologies, Inc.
QuicKART 2000 Series
Service Manual
42
7105 Northland Terrace, Minneapolis, MN 55428 / 888-544-7779 / 763-544-7779 / Fax 763-544-4234
www.danetechnologies.com
970-011 Rev. 3/1/06
TECHNICAL SPECIFICATIONS
Weight (with batteries) -----------------------------------510 pounds
525 pounds (QK 2500)
Length --------------------------------------------------------50 inches (4 feet, 2 inches)
Width----------------------------------------------------------27.5 inches (2 feet, 3.5 inches)
Height (to handles)----------------------------------------40.5 inches (3 feet, 4.5 inches)
Height (to top of beacon) --------------------------------54 inches (4 feet, 6 inches)
Front wheel tread -----------------------------------------22 inches
Wheel base ------------------------------------------------19.5 inches forward
14 inches reverse
Turning radius ---------------------------------------------less than 2 feet
Tires, front ---------------------------------------------------12 inches (QK 2000)
16 inches (QK 2500)
Tires, rear----------------------------------------------------8 inches diameter
Chassis-------------------------------------------------------Welded steel with powder coating
Body ----------------------------------------------------------Fiberglass or ABS polymer
Safety---------------------------------------------------------40 amp secondary breaker on QK2000
70 amp fuse (QK 2500)
Automobile type horn
Beacon warning light
Brake light
Emergency stop switch
Automatic brake
Unique remote security code
Brakes --------------------------------------------------------Electronic dynamic
Mechanical
Electrical system-------------------------------------------Three 12-volt batteries
Charger ------------------------------------------------------Input 120 VAC
36 VDC, 15 amperes max.
Speed---------------------------------------------------------Forward
0 – 3.0 MPH max.
Reverse
0 – 1.5 MPH max.
Remote slow
0.70 MPH
(QK2500 Remote slow 1.0 MPH)
Remote fast
2.80 MPH
REMOTE CONTROL:
Power Requirement: 4 Standard 1.5 volt AA radio batteries,
Range: 100 feet
Dane Technologies, Inc.
QuicKART 2000 Series
Service Manual
43
7105 Northland Terrace, Minneapolis, MN 55428 / 888-544-7779 / 763-544-7779 / Fax 763-544-4234
www.danetechnologies.com
970-011 Rev. 3/1/06
QuicKART WARRANTY
1) Parts:
One (1) Year Limited Warranty from date of shipment.
2) Labor:
Ninety (90) Day Limited Warranty from date of shipment.
3) Batteries: Covered by the manufacturer’s warranty.
1) PARTS – Limited Warranty
All parts except batteries (covered by battery manufacturer’s warranty), tires, and
circuit breakers needing resetting are warranted by Dane Technologies to be free of
defects in material and workmanship for a period of one (1) year from date of
shipment. This warranty does not include tire wear or wear and tear caused by
abuse, negligence, freight damage or damage caused by improper use or care, or
by external sources such as fires, floods or other acts of God.
Should any component fail during the first year of ownership except those mentioned
as not under warranty, the component in question is to be returned to Dane
Technologies or to an authorized Dane Technologies representative for inspection.
If the component has failed due to a defect in material or workmanship, it will be
exchanged or repaired at the discretion of Dane Technologies at no charge to the
QuicKART owner.
Dane Technologies, Inc. will cover the costs of shipping parts covered under
warranty to the customer based on UPS standard ground rates.
2) LABOR – Limited Warranty
Dane Technologies will cover labor charges for work performed in the field for ninety
(90) days from the date of shipment as a result of defects in materials or
workmanship. Charges incurred for failure to charge and maintain the batteries in
the QuicKART or change the battery in the hand held remote are exempted. Nonwarranty service performed during the same visit as for warranty service is not
covered by the warranty.
Rev. 3-1-06
Dane Technologies, Inc.
QuicKART 2000 Series
Service Manual
44
7105 Northland Terrace, Minneapolis, MN 55428 / 888-544-7779 / 763-544-7779 / Fax 763-544-4234
www.danetechnologies.com
970-011 Rev. 3/1/06
Dane Technologies, Inc.
QuicKART 2000 Series
Service Manual
45
7105 Northland Terrace, Minneapolis, MN 55428 / 888-544-7779 / 763-544-7779 / Fax 763-544-4234
www.danetechnologies.com
970-011 Rev. 3/1/06
Dane Technologies, Inc.
QuicKART 2000 Series
Service Manual
46
7105 Northland Terrace, Minneapolis, MN 55428 / 888-544-7779 / 763-544-7779 / Fax 763-544-4234
www.danetechnologies.com
970-011 Rev. 3/1/06
Dane Technologies, Inc.
QuicKART 2000 Series
Service Manual
47
7105 Northland Terrace, Minneapolis, MN 55428 / 888-544-7779 / 763-544-7779 / Fax 763-544-4234
www.danetechnologies.com
970-011 Rev. 3/1/06
Dane Technologies, Inc.
QuicKART 2000 Series
Service Manual
48
7105 Northland Terrace, Minneapolis, MN 55428 / 888-544-7779 / 763-544-7779 / Fax 763-544-4234
www.danetechnologies.com
970-011 Rev. 3/1/06
Dane Technologies, Inc.
QuicKART 2000 Series
Service Manual
49
7105 Northland Terrace, Minneapolis, MN 55428 / 888-544-7779 / 763-544-7779 / Fax 763-544-4234
www.danetechnologies.com
970-011 Rev. 3/1/06
Dane Technologies, Inc.
QuicKART 2000 Series
Service Manual
50
7105 Northland Terrace, Minneapolis, MN 55428 / 888-544-7779 / 763-544-7779 / Fax 763-544-4234
www.danetechnologies.com
970-011 Rev. 3/1/06
Dane Technologies, Inc.
QuicKART 2000 Series
Service Manual
51
7105 Northland Terrace, Minneapolis, MN 55428 / 888-544-7779 / 763-544-7779 / Fax 763-544-4234
www.danetechnologies.com
970-011 Rev. 3/1/06
Dane Technologies, Inc.
QuicKART 2000 Series
Service Manual
52
7105 Northland Terrace, Minneapolis, MN 55428 / 888-544-7779 / 763-544-7779 / Fax 763-544-4234
www.danetechnologies.com
970-011 Rev. 3/1/06
Dane Technologies, Inc.
QuicKART 2000 Series
Service Manual
53
7105 Northland Terrace, Minneapolis, MN 55428 / 888-544-7779 / 763-544-7779 / Fax 763-544-4234
www.danetechnologies.com
970-011 Rev. 3/1/06
Dane Technologies, Inc.
QuicKART 2000 Series
Service Manual
54
7105 Northland Terrace, Minneapolis, MN 55428 / 888-544-7779 / 763-544-7779 / Fax 763-544-4234
www.danetechnologies.com
970-011 Rev. 3/1/06
Dane Technologies, Inc.
QuicKART 2000 Series
Service Manual
55
7105 Northland Terrace, Minneapolis, MN 55428 / 888-544-7779 / 763-544-7779 / Fax 763-544-4234
www.danetechnologies.com
970-011 Rev. 3/1/06
Dane Technologies, Inc.
QuicKART 2000 Series
Service Manual
56
7105 Northland Terrace, Minneapolis, MN 55428 / 888-544-7779 / 763-544-7779 / Fax 763-544-4234
www.danetechnologies.com
970-011 Rev. 3/1/06
Dane Technologies, Inc.
QuicKART 2000 Series
Service Manual
57
7105 Northland Terrace, Minneapolis, MN 55428 / 888-544-7779 / 763-544-7779 / Fax 763-544-4234
www.danetechnologies.com
970-011 Rev. 3/1/06
Dane Technologies, Inc.
QuicKART 2000 Series
Service Manual
58
7105 Northland Terrace, Minneapolis, MN 55428 / 888-544-7779 / 763-544-7779 / Fax 763-544-4234
www.danetechnologies.com
970-011 Rev. 3/1/06
DANE TECHNOLOGIES
Service Bulletins — QK-2000
Table of Contents
QK-2000 System Configuration ................................................................................................... 60
QK-2000 Curtis Junction Box Test Voltages ............................................................................... 68
QK-2000 Curtis Motor Control Diagnostic Lights....................................................................... 70
QK-2000 and QK-2500 Drive Wheel Aluminum Hub................................................................. 72
QK-2000 Drive Motor Brake Assembly Test............................................................................... 73
QK-2000 Throttle Grip ................................................................................................................. 74
QK-2000 Battery Pack and Battery Charger ................................................................................ 76
Dane Technologies, Inc.
QuicKART 2000 Series
Service Manual
59
7105 Northland Terrace, Minneapolis, MN 55428 / 888-544-7779 / 763-544-7779 / Fax 763-544-4234
www.danetechnologies.com
970-011 Rev. 3/1/06
QK-2000 System Configuration
Service Bulletin — #985-001
November 1999
The QK-2000 machine is a powerful battery powered machine that uses remote control
to push shopping carts from the parking lot back to the store.
1. The QuicKART is driven by an electric motor through three (3) 12-volt batteries
connected in series (36 volts).
2) There is a single 8-inch castered wheel in back of the machine, which swivels
when the machine turns. This wheel is of solid rubber construction and rides on
journal roller bearings, which should be greased at least once a year.
3) The drive axle is one integrated assembly containing three (3) major
components: the DIFFERENTIAL AND AXLE HOUSING (output shafts), the
MOTOR, and the BRAKE ASSEMBLY. In general any one of these three
components can be replaced separately.
4) The axle output shafts are one-inch in diameter and are driven by a differential
gear box located near the center of the axle housing. The system is sealed with
lifetime lubrication.
5) The drive motor is rated at 36 volts D.C. and is capable of a peak of
approximately 2 horsepower. The motor is rated for continuous duty at 0.972
horsepower. The motor drives the axle shafts with ratio of 30.87:1.
6) A brake is located on the end of the motor, held in place with two 8/32 x 2.1 inch
long, cap screws. The brake assembly contains three major components:
a)
A micro-switch is mounted on the outside of the circular brake
housing which detects the position of the manual release arm. When the
machine is in normal operation, the switch is closed. When manual
release lever, lower right side of back plate, is pulled out, this switch will
open and electronics will shut down, preventing the machine from
operating without the braking feature. Note: Pulling this manual release
lever will keep the brake assembly from locking the motor, allowing the
operator to be able to push the machine manually while the QuicKART is
turned off. While pushing the QuicKART with the brake released, the
motor burns off generated voltage through occasional braking. This can
be avoided by pushing the QuicKART slowly.
b)
The brake is an electro-mechanical design. It consists of an
electro-magnet (63 ohms), a moving metal disk plus a fiber brake disk.
The fiber disk has a hexagon center which mates with a hexagon shaft on
the end of the motor. Two screws hold the brake assembly to the back
bell housing of the motor. This arrangement means the braking action is
through the differential gear box. With the lever in a counter clockwise
rotation, viewed from the end, the brake pad is pressed between a fixed
and movable plate in the brake housing. When 36 volts are applied to the
brake coil, the movable plate releases the brake pad and allows it to turn
with the motor. In the QK-2000, 36 volts is used to release the brake but
after a few seconds it drops to approximately 18 volts to reduce battery
consumption and heat generation.
Dane Technologies, Inc.
QuicKART 2000 Series
Service Manual
60
7105 Northland Terrace, Minneapolis, MN 55428 / 888-544-7779 / 763-544-7779 / Fax 763-544-4234
www.danetechnologies.com
970-011 Rev. 3/1/06
7) The frame is of a one-piece welded construction, using 3/16 is steel. The
welded assembly is black powder coated. Most of the bolt holes in the frame are
tapped so nuts are not required.
8) Attached to the underside of the frame is a "belly pan" held in place with two
bolts near the center and three bolts at the bottom of the back. This belly pan
protects the motor/axle assembly from contamination, driving over curbs or
running over objects. The belly pan must be removed if any of the motor/axle
parts are to be serviced or replaced.
9) The front drive wheels are 12 inches in diameter with four 5/16-18 bolts holding
it to an aluminum hub. The hub is clamped and keyed to the axle. These drive
wheels are available as either pneumatic or foam-filled. Available tread types
include: saw tooth, knobby or snow lugs. Tire chains, for traction in snow, are
also offered.
10) The standard batteries are deep cycle, maintenance free, group 27, rated at 180
minutes of reserve capacity.
11) The beacon post contains three major components: strobe light, brake light and
radio system. It is mounted in a channel on the back of the machine with two
bolts. The beacon tower can be folded down, for shipping or storage, by
removing the bottom bolt, loosening the top bolt (which also acts as a hinge
point). In doing this the cable at the bottom of the beacon post must first be
disconnected from the junction box and its end pulled through the hole in the
back of the frame on older models. Newer models have long cables that do not
have to be disconnected.
12) The strobe light remains flashing whenever the machine's key switch is turned
"on" unless the emergency stop switch has been pressed. Re-cycling the key
will restart the machine. The strobe light will operate when the manual brake
release lever is pulled out. The strobe light bulb can be reached by unscrewing
the colored lens.
13) The brake light comes on whenever the drive motor acts to slow the machine
down, by releasing the hand throttle grip or letting up on one of the two remote
speed control buttons. The brake light uses a 36-volt bulb or LED light.
14) The radio system is one of the more sophisticated aspects of the machine. It
deals with 4 separate commands (control functions) of which only one-at-a-time
is allowed: Brake, Slow, Fast or Horn.
a)
The hand-held remote has a separate button for each of the four
functions. When a button is pressed, an encoded 418 or 433 MHz radio
signal is sent by the remote and picked up by the receiver. The remote
operates on four AA batteries which should have a life of 2 to 3 months
under normal conditions. Each hand held remote has a unique built in
identification code. To "program" a receiver, the stop and horn button are
pressed simultaneously while a small button switch is pressed on the
bottom of the beacon post box. Once the receiver is matched to a specific
remote, no other remote will cause it to operate. If the remote is changed
the receiver must be re-programmed.
Dane Technologies, Inc.
QuicKART 2000 Series
Service Manual
61
7105 Northland Terrace, Minneapolis, MN 55428 / 888-544-7779 / 763-544-7779 / Fax 763-544-4234
www.danetechnologies.com
970-011 Rev. 3/1/06
b)
The receiver is located inside the beacon post box. It consists of
two small printed circuit boards, with the receiver being the smallest,
mounted to the larger "mother" board. The receiver is a superhetrodyne
using two separate antennas. The electronics of the receiver will "lock" on
whichever antenna has the most signal strength. This design is a means
of avoiding interference problems and reducing the effects of signals
bouncing off buildings and cars. The receiver will work with only one
antenna but the dependability will be degraded. The signal from the
radio's circuit board is fed directly to the "mother" board through a
connector. The "mother" board decodes the signal and energizes one of
four output wires, which corresponds to the command being issued by the
remote. The radio receiver should be able to operate with the remote at a
distance of 100 feet.
15) The steering handle is made of heavy gage tubing that is formed, welded and
nickel-plated. It contains not only the means for manually operating the
machine, but is also fitted with the system's control panel and throttle grip.
a)
The throttle-grip is located on the right side of the handle and a
stationary hand-grip is on the left. A protective bar is welded to the handle
to protect the grips from damage should the machine come in contact with
a wall or the edge of a doorframe. The throttle grip turns about 90
degrees, in one direction only. Turning the throttle causes a potentiometer
to change the voltage on its output wire from zero volts, (machine not
moving) to about 5 volts (full speed operation). When the control panel
has selected "remote" operation, the throttle grip is electrically
disconnected.
b)
The control panel is the central operating point for the machine.
The control panel box is mounted at the top of the steering handle with 4
screws. An opening in the bottom of the control panel box matches an
opening in the steering handle and is the means for getting a multi-wire
cable from the push-button controls to the electronic equipment located
under the machine's cover. This box has mounted to it a key switch and
emergency stop switch, both of which are "closed" when in operation. The
connecting leads to both of these items are plugged into the control
panel's printed circuit board. The control panel cover contains a bezel
plate, printed circuit board, membrane and associated hardware. The
printed circuit board contains three push-button switches that are activated
by pressing through the thin sections of the white membrane. These three
switches are labeled on the membrane's top surface with the following
selections:
1. Manual or Remote operation
2. Forward or Reverse operation
3. Stop
Dane Technologies, Inc.
QuicKART 2000 Series
Service Manual
62
7105 Northland Terrace, Minneapolis, MN 55428 / 888-544-7779 / 763-544-7779 / Fax 763-544-4234
www.danetechnologies.com
970-011 Rev. 3/1/06
There are four corresponding lights on the control panel to let the operator know
which selection has been made for manual or remote and forward or reverse. In
"remote" operation the machine will only operate in the forward direction.
The control bezel panel also has a series of five lights across the tops, which
sense the battery voltage. When all five lights are on, the batteries are fully
charged, or nearly so. As the batteries are used over several hours the voltage
will drop and the lights will change accordingly. When the light on the extreme
left starts flashing it means that the battery capacity is expired and should be put
on charge again. It will also flash a motor control error code if present.
16) The junction box is located under the body cover, mounted on the vertical plate
at the back. All electrical connections, from various parts of the machine,
junction in this box: Batteries; Charger; Motor control; Beacon post; Throttle;
Control panel, Horn; Motor; brake assembly. The Junction box contains a
printed circuit board, which takes all the various electrical components and
appropriately ties them together for the machine's operation.
17) The Curtis compatible junction box contains seven (7) indicators on the top
side as it is mounted.
a) Supply fault light. There are two conditions which will cause the supply fault
light to turn on.
1) When this light remains on (without flashing) it indicates the machine had
been turned off by means of pushing on the red emergency button on the
control panel. The machine will not function while the light is on. To reset,
the key switch is turned off, the button pulled out and the key turned on
again. This condition does not require service. (The key switch is the
correct way to turn off the machine when it is stored or set aside for
periods of time.)
2) When this light is flashing, it indicates that there is a problem in either the
beacon post or the control panel. In a fault condition the "supply fault"
light starts flashing immediately when the machine is turned on with the
key switch. The control panel lights may remain lighted for 3-second then
also shut down, but the fault light will remain flashing as long as the fault
condition exists. You can determine if the problem is in the Beacon post
by turning off the machine with the key switch, unplugging the cable
leading to the beacon post, then turn on the key switch. If the problem is
in the beacon post the machine will operate normally but only in the
"manual" mode. If the problem is somewhere in the control panel circuitry,
the fault light will continue to flash and the panel lights will go off in about 3
seconds.
b) Remote brake diagnostic light will come "on" whenever the stop button is
pressed on the remote. This assumes that remote is working and programmed
properly. The machine can be either in manual or remote mode for this test.
Failure of this light to come "on" during this test could be a symptom of either a
bad remote or damaged receiver. Test the other two diagnostic lights to
determine if it is a total radio system failure or not.
Dane Technologies, Inc.
QuicKART 2000 Series
Service Manual
63
7105 Northland Terrace, Minneapolis, MN 55428 / 888-544-7779 / 763-544-7779 / Fax 763-544-4234
www.danetechnologies.com
970-011 Rev. 3/1/06
c) Slow speed diagnostic light will come "on" whenever the slow button is pressed
on the remote. This assumes that remote is working and programmed properly.
The machine can be either in manual or remote mode for this test. Failure of this
light to come "on" during this test could be a symptom of either a bad remote or
damaged receiver
d) Fast speed diagnostic light will come "on" whenever the fast button is pressed
on the remote. This assumes that remote is working and programmed properly.
The machine can be either in manual or remote mode for this test. Failure of this
light to come "on" during this test could be a symptom of either a bad remote or
damaged receiver
e) Note: Possible remote problems
Battery dead - Does the remote indicator light come on when any
button is pushed?
Water intrusion - Bad PCB
Broken wire to battery
Damaged switch.
Possible receiver problems
Antenna missing, one or both
Receiver not programmed to match transmitter
Damaged receiver or motherboard
Wire disconnected
f) Drive command diagnostic light will tell you that the Curtis motor control box is
getting a signal to cause the machine to move. There are four signals that cause
this to be lighted. Note: it takes at least a 0.4-volt signal level to activate the
Curtis motor control box. That is the threshold level for these lights.
1) Throttle grip twisted in forward
2) Throttle grip twisted in reverse
3) Low speed remote button pushed (in remote mode)
4) High speed remote button pushed (in remote mode)
If this light comes on in any of the above four conditions, but the machine does
not operate, review the mechanical and electrical functions of the motor control
box or the motor.
If this light does not come on, review the junction box functions.
g) Low battery diagnostic light. Whenever the battery pack (three 12-volt batteries
in series) drains down to 27 volts, this light comes "on." It is time for a recharge
or to find a reason the charger is not working.
h) Hour meter records the length of time the machine drive command is on.
Dane Technologies, Inc.
QuicKART 2000 Series
Service Manual
64
7105 Northland Terrace, Minneapolis, MN 55428 / 888-544-7779 / 763-544-7779 / Fax 763-544-4234
www.danetechnologies.com
970-011 Rev. 3/1/06
CLIPLIGHT BATTERY CHARGER OPERATION
Battery Charger, 810-037, supplied with the QK-2000E machine, and the 810-036
supplied with the QK-2000 uses a sophisticated charging algorithm that continually tests
the charging process from start to finish. Once the charger’s output leads are properly
connected to the batteries terminals and the charger is plugged into an AC receptacle,
the charger waits 3 seconds before starting its 5-stage charging process. These 5stages are described in the order in which they take place as follows:
PRE-QUALIFICATION TEST - STAGE ONE
The Yellow “ Light Emitting Diode” (L.E.D.) flashes on and off.
The duration of this stage is dependent on the condition of the batteries. If the batteries
have been left in a state of discharge for a long period of time (days to months). The
terminal voltage of the batteries has decayed to less than 1.75V per cell, then the
charger may require up to 3 hours of pre-qualification controlled charging. This is to
determine if the batteries will even accept a charge. The charger will not function if the
total voltage of the three batteries is less than 18 volts. Between 18 and 24 volts the
charger will slowly charge the batteries. During this extended testing stage, the Yellow
L.E.D. will flash at a slow rate.
CONSTANT CURRENT CHARGE - STAGE TWO
Once the Pre-Qualification Test completes successfully, the Yellow L.E.D. illuminates
continuously indicating that the charger is charging the batteries at the full rated output
of 16 amperes. This stage ends when the batteries state of charge is at approximately
50-70%. The voltage during this period will be about 41 volts.
CONSTANT VOLTAGE CHARGE - STAGE THREE
The Green L.E.D. flashes on and off and the Yellow L.E.D. flashes fast.
This stage is also referred to as the Absorption Charge or Equalization Charge, since
the individual cells inside the batteries are forced to become “equalized” in charge. This
stage is exited when the state of charge of the battery has approached near, or is at
100% charge. The voltage will peak at about 43.5 volts when the charger disconnects.
FLOAT CHARGE—STAGE FOUR
This final stage is signaled with the Green “Charged “ L.E.D. on. The Trickle Charge will
begin when the battery voltage slowly decays to about 40 to 40.5 volts. The charger will
now deliver about 300MA which will maintain the charge. If an excessive load is at any
time applied and the Terminal Voltage has been forced below a preset level, the
charger will reinitiate a charge cycle starting with the Constant Current Stage. In this
standby “Float” state the charger can be left connected indefinitely (limited only by the
practical service life of the battery), until disconnected.
Dane Technologies, Inc.
QuicKART 2000 Series
Service Manual
65
7105 Northland Terrace, Minneapolis, MN 55428 / 888-544-7779 / 763-544-7779 / Fax 763-544-4234
www.danetechnologies.com
970-011 Rev. 3/1/06
RECYCLE CHARGE STAGE –FIVE
After completion of the first four stages, the charger will sit in Float Mode. If the charger
is left connected to a battery for many weeks/months to maintain the batteries at full
charge, the charger will automatically reinitiate a charge cycle routine that starts at the
Pre-Qualification Stage, once every 28 days.
This charger cannot repair the damage done to batteries by someone else’s charger.
Detection Fault
The Red L.E.D. illuminates continuously if the charger has not detected the connection
of a battery of proper polarity and voltage on it’s output leads. Once connected, a
waiting period of about 3 seconds elapses before the charger recognizes the battery.
Dane Technologies, Inc.
QuicKART 2000 Series
Service Manual
66
7105 Northland Terrace, Minneapolis, MN 55428 / 888-544-7779 / 763-544-7779 / Fax 763-544-4234
www.danetechnologies.com
970-011 Rev. 3/1/06
Glossary of Terms
Drive axle--Front axle including the motor and brake assembly.
Junction box--Electrical box mounted on the top inside of machine's back panel.
Motor control box--Electronic speed control mounted on the lower inside of the
machine's back panel.
Beacon tower--A metal post at the back of the machine, which contains a strobe light,
brake light and radio receiver system.
Handle--The nickel-plated handle at the back of the machine used to steer when
operating the machine manually.
Control panel--The black metal box mounted on the handle. Contains mode switches
and battery voltage indicator lights as well as the key switch and emergency switch.
Swivel wheel--The 8 inch tire at the rear of the machine which will swivel when the
machine is turned off a straight path.
Strobe light--The light on top of the beacon post. Flashes about once each second
when the machine is turned on and the E-Shut off not pushed in.
Brake light--The brake light goes on whenever the back EMF of the motor is used to
slow down the machine.
Cart coupler--The forks that grip the shopping cart.
Cover--The fiberglass body that protects the components inside the machine. It hinges
from the front of the machine.
Throttle grip--Located on the right side of the steering handle. In manual control it is
twisted to give the required speed, when walking behind the machine, in forward or
reverse.
Hand grip--The rubber grip on the left side of the steering handle.
Brake release--A lever that releases the brake on the end of the motor by hand. This
lever has a black knob, which is on the lower right of the back panel. When it is pushed
"in" it is in normal operating position. Pulled "out" will turn off all the electronic controls
and release the brake so it can be moved by hand.
Hinge--Allows the body to be opened for viewing the insides of the machine. This hinge
is made of stainless steel so it will not rust.
Dane Technologies, Inc.
QuicKART 2000 Series
Service Manual
67
7105 Northland Terrace, Minneapolis, MN 55428 / 888-544-7779 / 763-544-7779 / Fax 763-544-4234
www.danetechnologies.com
970-011 Rev. 3/1/06
QK-2000 Curtis Junction Box Test Voltages
Service Bulletin — #985-002
November 1999
The junction box, part number 100-060, used in conjunction with the Curtis motor
control, is used as standard equipment on all QK-2000 machines with serial numbers
from 119 and higher.
Plugs are left in their sockets and the machine is turned "on" for these tests. Use a thin
probe on the voltmeter to make connections to the pins from the outside of the
connector. The voltage readings are from the Neg.(-) side of the battery to points, listed
below, on side of junction box.
3-cir. Plug (CN-4) to hand grip throttle control
1 (blue)
2 (brown)
3 (black)
About +5volts
Changes from 0 to +5 volts with the hand throttle grip twisted
Zero voltage (ground)
12-cir plug (CN-5) to control panel on steering handle
1 (green)
+12 volts when forward direction is selected, 0 volts in reverse.
(Note: pin 1 and pin 3 should never be 0 volts at the same time.)
2 (black)
0 volts.
3 (white)
+12 volts when manual mode is selected, 0 volts in remote mode.
(Note: pin 1 and pin 2 should never be 0 volts at the same time.)
4 (yellow) +12 volts. When horn is pressed it drops to 0 volts.
5 (brown) High impedence line, not easily measurable. Ignore.
6 (red)
+12 volts whenever key switch is "on" and 0 volts with key switch is
"off."
7 (blue)
+36 volts whenever key switch is "on" and 0 volts with key switch
off.
8 (blue)
+36 volts all the time.
9 (orange) Ignore.
10 (gray)
0 volts normal, goes to 12 volt when emergency stop is pressed in.
11 (none)
No connection
12 (violet)
+9 volts all the time
REV: 8/21/03
9-cir plug (CN-3) to beacon post
1 (yellow)
2 (brown)
3 (green)
+12 volts when remote is selected, 0 volts when horn button is
pressed on remote.
+12 volts when machine is stopped, 0 volts when slow speed is
activated by remote.
+12 volts when machine is stopped, 0 volts when fast speed is
activated by remote.
Dane Technologies, Inc.
QuicKART 2000 Series
Service Manual
68
7105 Northland Terrace, Minneapolis, MN 55428 / 888-544-7779 / 763-544-7779 / Fax 763-544-4234
www.danetechnologies.com
970-011 Rev. 3/1/06
4 (white)
5
6
7
8
9
+12 volts stopped. When the brake is activated, by remote, it drops
to 0 volts.
(red)
+12 volts whenever key switch is on.
(black)
ground, 0 volts.
(blue)
ground, 0 volts.
(violet)
+36 volts, to beacon light, whenever key switch is on.
(orange) 1 volt, goes to 36 volts whenever brake light comes on.
15-cir plug (CN-2) to curtis motor control and contactor plate assembly
1
2
3
4
5
(red)
(none)
(brown)
(orange)
(yellow)
6
7
8
9
(none)
(green)
(none)
(blue)
10 (none)
11 (none)
12 (violet)
13 (gray)
14 (white)
15 (none)
"B+" 36 volts when key switch is on.
Not used.
Forward, 0 volts, reverse 36 volts.
36 volts when key switch is on.
Manual operation: 0 volts, Remote operation:36 volts (voltage
drops to zero when in remote mode and "stop" button is pressed on
the remote-control.)
Not used.
36 volts with key switch on, 0 volts with key switch off.
Not used
0 to 5 volts when handle bar throttle control is operated over its
range while in manual mode
No connection
No connection
1 volt, goes to 36 volts whenever brake light comes on
5 volts all the time except when brake release lever is pulled out
then it drops to 0 volts
Brake voltage. 28 volts when machine first starts to move, drops to
16 volts about 1 second after machine remains in motion.
Not used.
4-cir plug (CN-1) to Motor brake release coil and switch.
QK 2000
1 (black)
2 (black)
3 (white)
4 (white)
connected to CN-2, pin 1, same readings (brake coil).
connected to CN-2, pin 14, same readings (brake coil).
0 volts (ground).
0 volts with brake lever in (normal) 12 volts with lever pulled out.
QK 2500
1 (brown)
2 (blue)
3 (white)
4 (black)
connected to CN-2, pin 1, same readings (brake coil).
connected to CN-2, pin 14, same readings (brake coil).
0 volts (ground).
0 volts with brake lever in (normal) 12 volts with lever pulled out.
Dane Technologies, Inc.
QuicKART 2000 Series
Service Manual
69
7105 Northland Terrace, Minneapolis, MN 55428 / 888-544-7779 / 763-544-7779 / Fax 763-544-4234
www.danetechnologies.com
970-011 Rev. 3/1/06
QK-2000 Curtis Motor Control Diagnostic Lights
Service Bulletin — #985-006
May 1999
rev: 7/16/03
The QK2000 series machines with a 1237-3402 Curtis motor control box have a fault
light as standard equipment. At the left side of the Curtis motor controller’s label is a
3/16-inch window with the word "STATUS" written over it. This window contains a light,
which can be used to help diagnose a problem if a machine fails to operate. The
flashing will be in the form of a code with "dots" and "spaces" to identify the fault. The
"" shown below is a short flash of the fault light, the "--" is a space. The fault code will
be repeated until the fault is corrected or the machine is shut down. These fault codes
are common for the 1227 controller on the QK1000/PP1000 , 1237 controller on the
PP3000, and 1235 controller on the PP3100 and PP3150.
--
Output fault/ Over current fault (hardware failsafe 2 / 4)
1) Short in motor or in motor wiring
2) Controller failure
--
EEPROM fault (hardware failsafe 1)
1) EEPROM failure or fault
Main contactor fault (hardware failsafe 3)
1) Main contactor welded
2) Main contactor driver fault
3) Main contactor coil fault
Precharge fault
1) Internal controller fault
2) Low battery voltage
Motor voltage fault (HW failsafe)
1) Motor voltage does not match throttle request
2) M1 or M2 Output shorted to B- or B+.
3) Internal motor short.
4) Controller failure
--
Not Used
--
Not Used
--
SRO fault (Static Return to Off)
1) Improper sequencing of KSI,Brake,Direction inputs.
2) Wrong SRO Type selected
3) Direction switch circuit open.
--
HPD fault (High Pedal Disconnect)
1) Improper sequencing of KSI, brake, throttle inputs
2) Misadjusted throttle pot
--
HPD fault present >5 seconds (PROC/ Wiring Fault)
1) Maladjusted throttle
2) Broken throttle pot
3) Broken throttle mechanism
--
Dane Technologies, Inc.
Speed Limit Pot Fault (SPD LIMIT POT FAULT)
QuicKART 2000 Series
Service Manual
70
7105 Northland Terrace, Minneapolis, MN 55428 / 888-544-7779 / 763-544-7779 / Fax 763-544-4234
www.danetechnologies.com
970-011 Rev. 3/1/06
1) Speed limit pot wire broken
2) Broken speed limit pot
--
Emergency reverse wiring fault (BB Wiring Check)
1) BB wire open (BB = Belly Button switch or the Emergency Shut-OFF switch
on all models except the PP3000/PP3100/PP3150) (The switch is called the
Emergency Reverse switch on the PP3000/PP3100/PP3150)
2) BB check wire open
--
EM Brake driver fault
1) Electromagnetic brake coil open
2) Electromagnetic brake wiring open
--
Throttle fault (Throttle fault 1)
1) Throttle input wire open
2) Throttle input wire shorted to ground or B+
3) Throttle pot defective
4) Wrong throttle type selected
--
Not Used
--
Low battery voltage
1) Battery voltage below 21 volt cutoff level
2) Corroded or loose battery terminal
3) Loose controller terminal
--
Overvoltage
1) Battery voltage above 48 volt cutoff
2) Vehicle operating with charger attached.
-- Over/under temperature cutback, (Thermal cutback)
1) Temperature more than 95o C, or less than – 25o C
2) Excessive load on vehicle
3) Improper mounting of controller
4) Operation in extreme environment
--
Not Used
Dane Technologies, Inc.
QuicKART 2000 Series
Service Manual
71
7105 Northland Terrace, Minneapolis, MN 55428 / 888-544-7779 / 763-544-7779 / Fax 763-544-4234
www.danetechnologies.com
970-011 Rev. 3/1/06
QK-2000 and QK-2500 Drive Wheel Aluminum Hub
Service Bulletin — #985-007
May 1999
There are two aluminum hubs that clamp on the ends of the two axle shafts, which drive
the wheels that propel the QK-2000 and the QK-2500 machine. These hubs are the
same for both sides of the machine. The drive axle shafts are one inch in diameter (1")
and the hub is held on with a 1/4 square key plus the clamping action of a side bolt/nut
which closes a slot in the depth of the hub.
If the axle shafts spin in the hub’s center hole without moving the machine, the ¼
square key needs to be replaced. This key is a standard hardware store item and has a
length of one-inch.
When replacing the Key use the following procedure:
1. Lift machine off the ground using the same procedure as you would when
changing a rear tire.
2. Remove the four lug nuts and pull the wheel off the four studs in the offending
hub.
3. Loosen the clamping bolt so the hub will be loose on the shaft.
4. Align both 1/4-inch key slots. (Half is in the in hub and the other is in the axle
shaft).
5. To assure the key will not become loose again, give it an almost imperceptible
bend by holding it between two crescent wrenches and apply a small bending
force.
6. With a small hammer, tap the key into the 1/4" square keyway opening.
7. Clamp the hub onto the shaft with the bolt.
If center hole in the aluminum hub is damaged, it must be replaced. If one or more of
the 3/8-24 studs are broken or the threads damaged, it is easiest to replace the entire
hub. However, a stud can be replaced, if necessary, by first removing the bad stud and
pressing in a new one. A hammer can be used for this operation but must have solid
support to drive in the new stud.
Dane Technologies, Inc.
QuicKART 2000 Series
Service Manual
72
7105 Northland Terrace, Minneapolis, MN 55428 / 888-544-7779 / 763-544-7779 / Fax 763-544-4234
www.danetechnologies.com
970-011 Rev. 3/1/06
QK-2000 Drive Motor Brake Assembly Test
Service Bulletin — #985-008
May 1999
There are a pair of white and black wires that connect to the electrical brake assemble
which is mounted to the back side of the drive motor. These four wires are terminated
with a four-pin plug and are inserted into a matching receptacle on the junction box.
The two black wires attach to the magnetic brake release coil and the two white wires
are connected to a micro-switch, which tells the electronics if the brake release lever is
pulled.
Testing either the magnetic brake coil or the micro-switch is as follows:
Pull out the four-pin plug from the junction box. The resistance between pins 1 and 2
should measure about 63 ohms. If the resistance is well above this value (basically no
continuity) or very low (a few ohms) the coil has been damaged.
The brake is released when 36 volts are applied across this coil. Once the brake has
been released the 36 volts is dropped to about 20 volts which is more than enough
voltage to keep the brake coil functional yet not draw as much current. This brake
release, or engagement, can be heard as a clicking sound when the throttle is turned on
or off. To measure the voltage across the coil, lift the QK-2000 off of the drive wheels
and measure DC voltage across pins 1 & 2 with all plugs connected.
The two white wires are connected to a small micro-switch mounted on the motor's
brake assembly. It detects the position of the manual brake release lever. This lever is
a mechanical brake release, which allows the machine to be pushed manually. The
machine will not function electrically if the lever is pulled out. Normal operation requires
this lever to be pushed "in". The white wires will show continuity if the switch is closed
(normal operation) and open if the lever is pulled "out."
Dane Technologies, Inc.
QuicKART 2000 Series
Service Manual
73
7105 Northland Terrace, Minneapolis, MN 55428 / 888-544-7779 / 763-544-7779 / Fax 763-544-4234
www.danetechnologies.com
970-011 Rev. 3/1/06
QK-2000 Throttle Grip
Service Bulletin — #985-009
July, 1999
The right grip, on the steering handle, serves also as the throttle for the QK-2000,
allowing the speed of the machine to be controlled during manual operation. The
throttle has no function while the machine is in the remote mode.
The throttle grip controls the speed of the machine by providing a variable voltage to the
Curtis motor control box fed through the Junction box at CN-4 connector. (See Service
Bulletin 985-002). The three wires to the throttle grip have the following function.
Black = ground
Blue
= 5 volts
Brown = 0- 5 volts (depending on throttle position).
The throttle grip fits over the handle bar. The bar should be wiped clean before
inserting a replacement throttle grip. The wire cable from the throttle grip is fed through
the small hole on the control panel box and the grip is butted up against this box and the
two clamping screws are tightened. After installing a throttle grip, turn it to the full on
position, several times, to assure it is not sticking.
Inside the box are three wires which match the colors of the throttle grip. Attach each of
these wires as shown in the attached drawing.
To test a throttle grip when it is not connected to the machine, in its "off" position, use
an ohmmeter between the wires as shown below:
Brown to Black 0 ohms to 5,000 ohms
Brown to Blue 5,000 ohms to 0 ohms
Blue to Black 5,000 ohms
By twisting the throttle grip, when disconnected from the machine, the following change
in resistance will be noted:
Blue to black will remain at 5,000 ohms
Brown to black will go from zero ohms to about 5,000 ohms
Blue to brown will go from 5,000 ohms to zero ohms
Dane Technologies, Inc.
QuicKART 2000 Series
Service Manual
74
7105 Northland Terrace, Minneapolis, MN 55428 / 888-544-7779 / 763-544-7779 / Fax 763-544-4234
www.danetechnologies.com
970-011 Rev. 3/1/06
By twisting the throttle grip, when the machine is tuned on (manual mode), the following
voltages will be measured:
Black to blue
Brown to blue
Black to brown
5 volts, will not change with throttle position
5 volts, will decrease to zero volts as the throttle is
twisted fully
zero volts, will increase to 5 volts as the throttle is
twisted fully.
In addition to these tests, it will be noted that there are six diagnostic lights on the
topside of the Junction Box, inside the machine, mounted against the back frame plate.
The fifth light, from the left side, is called the "Drive Command." As the throttle grip is
twisted the voltage between the black and brown wire will start to increase. When the
brown wire is about 0.40 volts, this light will turn on, inducting the throttle is sending its
proper command. It does not, however, indicate if the throttle is working properly over
its entire range of travel.
Dane Technologies, Inc.
QuicKART 2000 Series
Service Manual
75
7105 Northland Terrace, Minneapolis, MN 55428 / 888-544-7779 / 763-544-7779 / Fax 763-544-4234
www.danetechnologies.com
970-011 Rev. 3/1/06
QK-2000 Battery Pack and Battery Charger
Service Bulletin — #985-010
July 1999
When the batteries fail to charge, check the following items:
1)
The water/acid level has fallen to a level which may have permanently damaged
the batteries.
Note: As of January 1, 1999, all units are shipped with Delco
Maintenance-Free, M27A batteries. Before January 1999, units were
shipped with Trojan deep cycle, model 30 XHS batteries that require water
level maintenance. At the end of the useful life of the Trojan batteries, the
unit can be fitted with the Delco maintenance–free batteries if the
customer prefers this option.
2)
The machine's retractable cord is plugged into an outlet that is not active.
Note: Test this condition by plugging something into the outlet that can
easily determine if the receptacle is alive. Generally a dead output
receptacle can be traced to a blown fuse or turned-off switch
3)
There is a problem with one of the connectors or a damaged cord de-reeler
(before sn 1603).
Note: The cord de-reeler can be tested by unplugging the battery
charger's cord, from the de-reelers, and plugging the charger directly into
an electrical outlet. If the battery charger starts to work the de-reeler is
defective. If the charger does not work, check the connectors.
The QK-2000 charging circuit starts with the output cord from the charger,
50-amp with a gray housing. This plugs into the same matching gray
connector plug on the side of the junction box. The red 50-amp connector
plug goes to the three batteries and it is tied directly in parallel with the
gray connector plug. A meter test at both the gray and red connector
should show 36 volts nominal if the batteries are charged. (Use thin meter
probes at the back of the connector to make this test. Do not disconnect
the 50 Amp plugs for this test).
4)
The battery voltage has fallen to 24 volts or less (before sn 656).
This charger has a built-in safety feature, which prevents it from being
used with common 12-volt automobile batteries. The charger will not turn
itself "on" if the voltage at the output cable connector is less than 24 volts.
Therefore, if the three batteries are drained to a total series voltage of 24
or less volts, the charger will not become active. Generally the batteries
used on the QK-2000 should yield at least 30 volts in a discharged
condition. If only 24 volts is shown on the meter, it is likely they are
damaged, maybe permanently, or will have a much-shortened life.
Dane Technologies, Inc.
QuicKART 2000 Series
Service Manual
76
7105 Northland Terrace, Minneapolis, MN 55428 / 888-544-7779 / 763-544-7779 / Fax 763-544-4234
www.danetechnologies.com
970-011 Rev. 3/1/06
It is possible to "fool" the battery charger by jumping the machine’s 36 volt
battery pack with another 36 volt source such as used in a floor scrubber.
Once the charger sees more than 24 volts it will turn "on" and should
remain so after the jumper cable has been remove. If it does not remain
on after the jumper source is removed, likely the batteries are beyond their
useful life. Use extreme caution if using this method to recharge batteries.
5)
The battery charger is defective.
Check fuses and replace if necessary. If fuses fail again, the fault lies
within the system.
Special notes on the Charger (before sn 656): When the charger cord is first plugged
into an electrical outlet, there will be a delay of about one or two seconds before the
charger turns "on" and the meter shows a current reading. Once the charger is "on" it
will remain charging until there is no voltage increase across the battery terminals. The
change (increase) in voltage must be at least 15 mv in a 40 minute time period in order
for the charger to remain on. If the charger does not read at least a 15 mv increase
(battery is then fully charged), it will turn off automatically in about 40 minutes. If the
charger has turned itself "off" automatically, unplugging it and then re-plugging it back
into the receptacle will restart the charging cycle. It will therefore remain "on" for at
least another 40 minutes. A fully charged battery pack could read as high as 44 volts
for a period of time after charging.
Dane Technologies, Inc.
QuicKART 2000 Series
Service Manual
77
7105 Northland Terrace, Minneapolis, MN 55428 / 888-544-7779 / 763-544-7779 / Fax 763-544-4234
www.danetechnologies.com
970-011 Rev. 3/1/06
DANE TECHNOLOGIES
QuicKART 2000 and QuicKART 2500
EXPLODED VIEW DIAGRAM
________________________________________________________________
Table of Contents
150-003 QuicKART 2000 - BASIC ASSEMBLY, USA ............................................................. 79
150-005 QuicKART 2000 - BASIC ASSEMBLY, EUROPE - 433 MHz ................................... 81
150-012 QuicKART 2500 - BASIC ASSEMBLY, 16” TIRE ..................................................... 83
150-016 QuicKART 2000 - BASIC ASSEMBLY, UK - 433 MHz............................................. 86
150-017 QuicKART 2500 - 433 MHZ - CE................................................................................. 88
150-036 QuicKART 2000 - BASIC CHASSIS, WALMART ..................................................... 89
100-050 HORN ASSEMBLY....................................................................................................... 91
100-069 QuicKART 2000 - MOTOR CONTROLLER/CONTACTOR ASSY .......................... 92
100-246 QuicKART 2500 - MOTOR CONTROLLER/CONTACTOR ASSY .......................... 93
100-075 QuicKART 2000 - HANDLEBAR ASSEMBLY .......................................................... 94
100-095 BEACON POST ASSEMBLY - QuicKART 2000........................................................ 96
100-096 BEACON POST ASSEMBLY - QuicKART 2000 (EUROPE) .................................... 97
100-248 QuicKART 2000 - BREAKAWAY BEACON.............................................................. 98
100-166 QuicKART 2500 - TRANSAXLE ASSEMBLY ........................................................... 99
100-245 QuicKART 2000 – TRANSAXLE & 4-POLE MOTOR............................................. 100
100-034 QuicKART 2000 – BRAKE ROD ASSEMBLY ......................................................... 101
100-047 QuicKART 2500 – BRAKE ROD ASSEMBLY ......................................................... 102
680-013 QuicKART WIRING DIAGRAM................................................................................ 103
680-027 QuicKART 2500 OVERALL WIRING DIAGRAM................................................... 104
810-036 QuicKART, US CHARGER AND CORD................................................................... 105
810-037 QuicKART EU CHARGER AND CORD ................................................................... 106
110-066 CART RESTRAINT - ASSEMBLY............................................................................ 107
Dane Technologies, Inc.
QuicKART 2000 Series
Service Manual
78
7105 Northland Terrace, Minneapolis, MN 55428 / 888-544-7779 / 763-544-7779 / Fax 763-544-4234
www.danetechnologies.com
970-011 Rev. 3/1/06
150-003 QuicKART 2000 - BASIC ASSEMBLY, USA
Dane Technologies, Inc.
QuicKART 2000 Series
Service Manual
79
7105 Northland Terrace, Minneapolis, MN 55428 / 888-544-7779 / 763-544-7779 / Fax 763-544-4234
www.danetechnologies.com
970-011 Rev. 3/1/06
Dane Technologies, Inc.
QuicKART 2000 Series
Service Manual
80
7105 Northland Terrace, Minneapolis, MN 55428 / 888-544-7779 / 763-544-7779 / Fax 763-544-4234
www.danetechnologies.com
970-011 Rev. 3/1/06
150-005 QuicKART 2000 - BASIC ASSEMBLY, EUROPE - 433
MHz
Dane Technologies, Inc.
QuicKART 2000 Series
Service Manual
81
7105 Northland Terrace, Minneapolis, MN 55428 / 888-544-7779 / 763-544-7779 / Fax 763-544-4234
www.danetechnologies.com
970-011 Rev. 3/1/06
Dane Technologies, Inc.
QuicKART 2000 Series
Service Manual
82
7105 Northland Terrace, Minneapolis, MN 55428 / 888-544-7779 / 763-544-7779 / Fax 763-544-4234
www.danetechnologies.com
970-011 Rev. 3/1/06
150-012 QuicKART 2500 - BASIC ASSEMBLY, 16” TIRE
Dane Technologies, Inc.
QuicKART 2000 Series
Service Manual
83
7105 Northland Terrace, Minneapolis, MN 55428 / 888-544-7779 / 763-544-7779 / Fax 763-544-4234
www.danetechnologies.com
970-011 Rev. 3/1/06
Dane Technologies, Inc.
QuicKART 2000 Series
Service Manual
84
7105 Northland Terrace, Minneapolis, MN 55428 / 888-544-7779 / 763-544-7779 / Fax 763-544-4234
www.danetechnologies.com
970-011 Rev. 3/1/06
Dane Technologies, Inc.
QuicKART 2000 Series
Service Manual
85
7105 Northland Terrace, Minneapolis, MN 55428 / 888-544-7779 / 763-544-7779 / Fax 763-544-4234
www.danetechnologies.com
970-011 Rev. 3/1/06
150-016 QuicKART 2000 - BASIC ASSEMBLY, UK - 433 MHz
Dane Technologies, Inc.
QuicKART 2000 Series
Service Manual
86
7105 Northland Terrace, Minneapolis, MN 55428 / 888-544-7779 / 763-544-7779 / Fax 763-544-4234
www.danetechnologies.com
970-011 Rev. 3/1/06
Dane Technologies, Inc.
QuicKART 2000 Series
Service Manual
87
7105 Northland Terrace, Minneapolis, MN 55428 / 888-544-7779 / 763-544-7779 / Fax 763-544-4234
www.danetechnologies.com
970-011 Rev. 3/1/06
150-017 QuicKART 2500 - 433 MHZ - CE
Dane Technologies, Inc.
QuicKART 2000 Series
Service Manual
88
7105 Northland Terrace, Minneapolis, MN 55428 / 888-544-7779 / 763-544-7779 / Fax 763-544-4234
www.danetechnologies.com
970-011 Rev. 3/1/06
150-036 QuicKART 2000 - BASIC CHASSIS, WALMART
Dane Technologies, Inc.
QuicKART 2000 Series
Service Manual
89
7105 Northland Terrace, Minneapolis, MN 55428 / 888-544-7779 / 763-544-7779 / Fax 763-544-4234
www.danetechnologies.com
970-011 Rev. 3/1/06
Dane Technologies, Inc.
QuicKART 2000 Series
Service Manual
90
7105 Northland Terrace, Minneapolis, MN 55428 / 888-544-7779 / 763-544-7779 / Fax 763-544-4234
www.danetechnologies.com
970-011 Rev. 3/1/06
100-050 HORN ASSEMBLY
Dane Technologies, Inc.
QuicKART 2000 Series
Service Manual
91
7105 Northland Terrace, Minneapolis, MN 55428 / 888-544-7779 / 763-544-7779 / Fax 763-544-4234
www.danetechnologies.com
970-011 Rev. 3/1/06
100-069 QuicKART 2000 - MOTOR
CONTROLLER/CONTACTOR ASSY
Dane Technologies, Inc.
QuicKART 2000 Series
Service Manual
92
7105 Northland Terrace, Minneapolis, MN 55428 / 888-544-7779 / 763-544-7779 / Fax 763-544-4234
www.danetechnologies.com
970-011 Rev. 3/1/06
100-246 QuicKART 2500 - MOTOR
CONTROLLER/CONTACTOR ASSY
Dane Technologies, Inc.
QuicKART 2000 Series
Service Manual
93
7105 Northland Terrace, Minneapolis, MN 55428 / 888-544-7779 / 763-544-7779 / Fax 763-544-4234
www.danetechnologies.com
970-011 Rev. 3/1/06
100-075 QuicKART 2000 - HANDLEBAR ASSEMBLY
Dane Technologies, Inc.
QuicKART 2000 Series
Service Manual
94
7105 Northland Terrace, Minneapolis, MN 55428 / 888-544-7779 / 763-544-7779 / Fax 763-544-4234
www.danetechnologies.com
970-011 Rev. 3/1/06
Dane Technologies, Inc.
QuicKART 2000 Series
Service Manual
95
7105 Northland Terrace, Minneapolis, MN 55428 / 888-544-7779 / 763-544-7779 / Fax 763-544-4234
www.danetechnologies.com
970-011 Rev. 3/1/06
100-095 BEACON POST ASSEMBLY - QuicKART 2000
Dane Technologies, Inc.
QuicKART 2000 Series
Service Manual
96
7105 Northland Terrace, Minneapolis, MN 55428 / 888-544-7779 / 763-544-7779 / Fax 763-544-4234
www.danetechnologies.com
970-011 Rev. 3/1/06
100-096 BEACON POST ASSEMBLY - QuicKART 2000
(EUROPE)
Dane Technologies, Inc.
QuicKART 2000 Series
Service Manual
97
7105 Northland Terrace, Minneapolis, MN 55428 / 888-544-7779 / 763-544-7779 / Fax 763-544-4234
www.danetechnologies.com
970-011 Rev. 3/1/06
100-248 QuicKART 2000 - BREAKAWAY BEACON
Dane Technologies, Inc.
QuicKART 2000 Series
Service Manual
98
7105 Northland Terrace, Minneapolis, MN 55428 / 888-544-7779 / 763-544-7779 / Fax 763-544-4234
www.danetechnologies.com
970-011 Rev. 3/1/06
100-166 QuicKART 2500 - TRANSAXLE ASSEMBLY
Dane Technologies, Inc.
QuicKART 2000 Series
Service Manual
99
7105 Northland Terrace, Minneapolis, MN 55428 / 888-544-7779 / 763-544-7779 / Fax 763-544-4234
www.danetechnologies.com
970-011 Rev. 3/1/06
100-245 QuicKART 2000 – TRANSAXLE & 4-POLE MOTOR
Dane Technologies, Inc.
QuicKART 2000 Series
Service Manual
100
7105 Northland Terrace, Minneapolis, MN 55428 / 888-544-7779 / 763-544-7779 / Fax 763-544-4234
www.danetechnologies.com
970-011 Rev. 3/1/06
100-034 QuicKART 2000 – BRAKE ROD ASSEMBLY
Dane Technologies, Inc.
QuicKART 2000 Series
Service Manual
101
7105 Northland Terrace, Minneapolis, MN 55428 / 888-544-7779 / 763-544-7779 / Fax 763-544-4234
www.danetechnologies.com
970-011 Rev. 3/1/06
100-047 QuicKART 2500 – BRAKE ROD ASSEMBLY
Dane Technologies, Inc.
QuicKART 2000 Series
Service Manual
102
7105 Northland Terrace, Minneapolis, MN 55428 / 888-544-7779 / 763-544-7779 / Fax 763-544-4234
www.danetechnologies.com
970-011 Rev. 3/1/06
680-013 QuicKART WIRING DIAGRAM
Dane Technologies, Inc.
QuicKART 2000 Series
Service Manual
103
7105 Northland Terrace, Minneapolis, MN 55428 / 888-544-7779 / 763-544-7779 / Fax 763-544-4234
www.danetechnologies.com
970-011 Rev. 3/1/06
680-027 QuicKART 2500 OVERALL WIRING DIAGRAM
Dane Technologies, Inc.
QuicKART 2000 Series
Service Manual
104
7105 Northland Terrace, Minneapolis, MN 55428 / 888-544-7779 / 763-544-7779 / Fax 763-544-4234
www.danetechnologies.com
970-011 Rev. 3/1/06
810-036 QuicKART, US CHARGER AND CORD
Dane Technologies, Inc.
QuicKART 2000 Series
Service Manual
105
7105 Northland Terrace, Minneapolis, MN 55428 / 888-544-7779 / 763-544-7779 / Fax 763-544-4234
www.danetechnologies.com
970-011 Rev. 3/1/06
810-037 QuicKART EU CHARGER AND CORD
Dane Technologies, Inc.
QuicKART 2000 Series
Service Manual
106
7105 Northland Terrace, Minneapolis, MN 55428 / 888-544-7779 / 763-544-7779 / Fax 763-544-4234
www.danetechnologies.com
970-011 Rev. 3/1/06
110-066 CART RESTRAINT - ASSEMBLY
Dane Technologies, Inc.
QuicKART 2000 Series
Service Manual
107
7105 Northland Terrace, Minneapolis, MN 55428 / 888-544-7779 / 763-544-7779 / Fax 763-544-4234
www.danetechnologies.com
970-011 Rev. 3/1/06
Dane Technologies, Inc.
QuicKART 2000 Series
Service Manual
108
7105 Northland Terrace, Minneapolis, MN 55428 / 888-544-7779 / 763-544-7779 / Fax 763-544-4234
www.danetechnologies.com
970-011 Rev. 3/1/06
Dear Service Provider:
Thank you for your interest in joining our team of world-class Service Providers. By
doing so, you have demonstrated a commitment to provide excellent service to our joint
customers, on time, every time, professionally. Attached please find some materials
that will help you as you join our team.
The package includes a training video and a folder that includes an owner’s manual, a
set of Service Bulletins, exploded parts drawings and, at the back, find the following
additional materials:
Ordering and invoicing procedures
Recommended parts inventory
QuicKART Warranty
Please share the enclosed information with the appropriate people in your organization.
Thank you again for your interest. I look forward to a long and mutually rewarding
relationship. Please feel free to call or e-mail me at any time with questions or
comments.
Sincerely,
Paul Halvorson
Vice President-Service
888-544-7779, Ext 4436
[email protected]
Dane Technologies, Inc.
QuicKART 2000 Series
Service Manual
109
7105 Northland Terrace, Minneapolis, MN 55428 / 888-544-7779 / 763-544-7779 / Fax 763-544-4234
www.danetechnologies.com
970-011 Rev. 3/1/06
ORDERING AND INVOICING PROCEDURES
ORDERING
PARTS:
Call Dane Technologies at 888-544-7779 then choose the parts or service option
1. Please provide a purchase order # and, if applicable, the location of the
customer store and the serial number of the QuicKART.
TECHNICAL SUPPORT:
Call the same phone number then choose the service option.
SHIPPING / INVOICING
WARRANTY:
1. If you have the part in stock, use it to repair the customer’s QuicKART and
take the defective part back to your shop.
2. Order a replacement part from Dane. Please provide the location of the
customer store where your part was used so that we can verify warranty
coverage.
3. Dane will ship a replacement part and invoice you for it. Along with the part,
you will receive a RMA number, authorizing the return of the item under
warranty.
4. Return the part to Dane along with the RMA number.
5. Upon verifying that the part is defective, Dane will issue a credit, canceling the
invoice.
NON-WARRANTY:
1. Again, use a part from your stock if possible.
2. Invoice the customer for your labor and parts. REMEMBER: Labor warranty is
90 days from purchase date. Parts pricing must agree with the retail price
shown on the Dane price list.
3. Order replacement parts for your inventory as described above.
IF YOU DON’T HAVE THE PART IN STOCK:
1. Order the part from Dane as described above. Please provide a purchase
order number, ship-to address if different from your business address,
customer store location, and information on the part coming back, if applicable.
2. Communicate with customer store management about delivery time and any
other details about when you estimate the QuicKART will be repaired.
Dane Technologies, Inc.
QuicKART 2000 Series
Service Manual
110
7105 Northland Terrace, Minneapolis, MN 55428 / 888-544-7779 / 763-544-7779 / Fax 763-544-4234
www.danetechnologies.com
970-011 Rev. 3/1/06
QuicKART 2000 and 2500 TOOLS
Size or Qty.
Tool
1) 9/16”
2) 1/2”
3) 5/8”
4) 3/4”
5) 6”
6) 12”
7) 1
8) 1/4”
9) 5/16”
10) 7/16”
11) 1/2”
12) 9/16”
13) 1/8”
14) 9/64
15) T25
16) Standard
17) Metric
18) #2
19) #2
20) Medium
21) Medium
22) Medium
23) 1
24) 1/16”
Deep socket and regular socket (3/8” drive)
Regular socket (3/8” drive)
Deep socket and regular socket (3/8” drive)
Deep socket (3/8” drive)
Extension (3/8” drive)
Extension (3/8” drive)
12” – 3/8” drive ratchet
Combination wrench
Combination wrench
Combination wrench
Combination wrench
Combination wrench
Allen wrench
Allen wrench
Torque screw driver
Allen wrench set
Allen wrench set
8” Phillips screw driver
14” Straight screw driver
Needle nose pliers
Wire Cutters
Pliers or channel lock
Programmable Programmer (100-106)
Molex pin extractor (P/N WM 9929-ND)
Dane Technologies, Inc.
QuicKART 2000 Series
Service Manual
111
7105 Northland Terrace, Minneapolis, MN 55428 / 888-544-7779 / 763-544-7779 / Fax 763-544-4234
www.danetechnologies.com
970-011 Rev. 3/1/06
Service Provider Recommended Parts Inventory
Suggested Quantities are for every 10 QuicKARTs in your service area.
Description
Part #
TOTAL/10 QK
QuicKART 2000
100-150
470-017
665-036
665-013
110-026
360-008
110-018
100-069
100-060
* 100-154
100-095
110-065
100-112
100-050
110-053
810-025
700-115
360-016
110-064
430-048
430-052
665-015
665-016
430-014
700-101
110-023
300-013
110-060
* 360-043
* 230-021
Dane Technologies, Inc.
Remote
Strobe bulb
E-stop (red)
E-stop (blue)
Latch pin kit
12" tire knobby foam filled
Hub assy. Kit
Motor control assy.
Junction box (2k)
Junction box (2500)
Beacon tower
Brake light kit
Control panel w/o bezel
Horn assy.
Brake assy.
Battery charger
10' ext. Cord
Swivel wheel
Brake release rod kit
Antenna (new)
Antenna (old)
Key switch
Key
Red boot
Red 13 1/2" cable
Yoke clamping bar kit
Motor
Brush & spring kit
16" tire knobby (2500)
Hub assy. Kit
QuicKART 2000 Series
1
1
1
1
2
6
1
1
1
1
1
1
1
1
1
1
1
3
1
4
2
1
1
2
2
2
1
2
2
1
Service Manual
112
7105 Northland Terrace, Minneapolis, MN 55428 / 888-544-7779 / 763-544-7779 / Fax 763-544-4234
www.danetechnologies.com
970-011 Rev. 3/1/06
* 300-033
Brake assy.
* 300-041
Motor/axle/brake w/o hubs
* 300-042
Gear box w/o hubs
* 300-029
Motor
* 300-030
Motor brush kit (4)
* Only needed if 2500's are being serviced
Dane Technologies, Inc.
QuicKART 2000 Series
1
1
1
1
1
Service Manual
113
7105 Northland Terrace, Minneapolis, MN 55428 / 888-544-7779 / 763-544-7779 / Fax 763-544-4234
www.danetechnologies.com
970-011 Rev. 3/1/06
WARRANTY PARTS REQUIRED TO BE RETURNED
The following parts must be returned to Dane Technologies on all warranty claims.
Returning the Warranty Claim Form with the parts will ensure prompt, accurate
processing. If you have questions, please call 888-544-7779.
QuicKART 2000/2500
Part #
100-112
100-060/100-154
100-069
100-072
100-095/100-096
100-030/100-150
100-035/100-145
Dane Technologies, Inc.
Description
Control Panel Assembly
Junction Box Assembly
Curtis Control Assembly
Beacon Tower (Old Style)
Beacon Head (New Style)
Remote Control
Motor/Brake/Gearbox
QuicKART 2000 Series
Service Manual
114
7105 Northland Terrace, Minneapolis, MN 55428 / 888-544-7779 / 763-544-7779 / Fax 763-544-4234
www.danetechnologies.com
970-011 Rev. 3/1/06
Store: ________________
Location: ____________________
Meter Hours: ________________
Sticker Condition ___________
Date: _________________
Serial Number: __________
QuicKART 2000 and 2500 Preventive Maintenance
PM Checklist
Inspected
OK
Needs
Repair/Replacement
Inspect cord, cord plug, cord reel
Inspect and test brake release system
Inspect, clean battery terminals and cables
Inspect throttle
Check wiring, wiring plugs for damage
Check battery charger operation
Check battery fluid levels
Inspect tires, rims, and lug nuts
Inspect body parts
Inspect and grease rear caster
Inspect for handle bar damage (play in handle)
Inspect beacon tower
Strobe light
Brake light
Antennas
Inspect and test remote
Battery
Range
Inspect control panel
Ignition switch
Emergency stop button
Function test
Inspect rollers and yokes
Operation test
Any other problems:
____________________________________________________________________________________
____________________________________________________________________________________
Comments:
____________________________________________________________________________________
____________________________________________________________________________________
Dane Technologies, Inc.
QuicKART 2000 Series
Service Manual
115
7105 Northland Terrace, Minneapolis, MN 55428 / 888-544-7779 / 763-544-7779 / Fax 763-544-4234
www.danetechnologies.com
970-011 Rev. 3/1/06